Wednesday, October 26, 2011

Autumn Gifties!


Autumn is a perfect time to make things for others with the natural inspiration from the colors all around and the spooky fun of Halloween.  I have been working on treat bags, gift bags, baking, and sewing so far this fall.

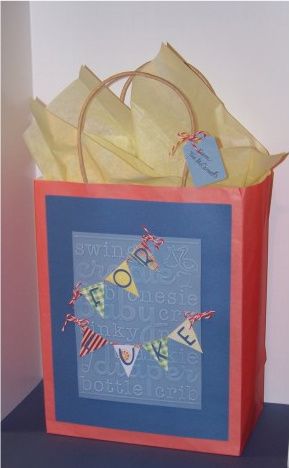
How much fun are the Halloween cartridges!  There are so many great ones available right now-- and some new ones this year too!  I used Chic and Scary to decorate gift bags for my mom and in-laws.


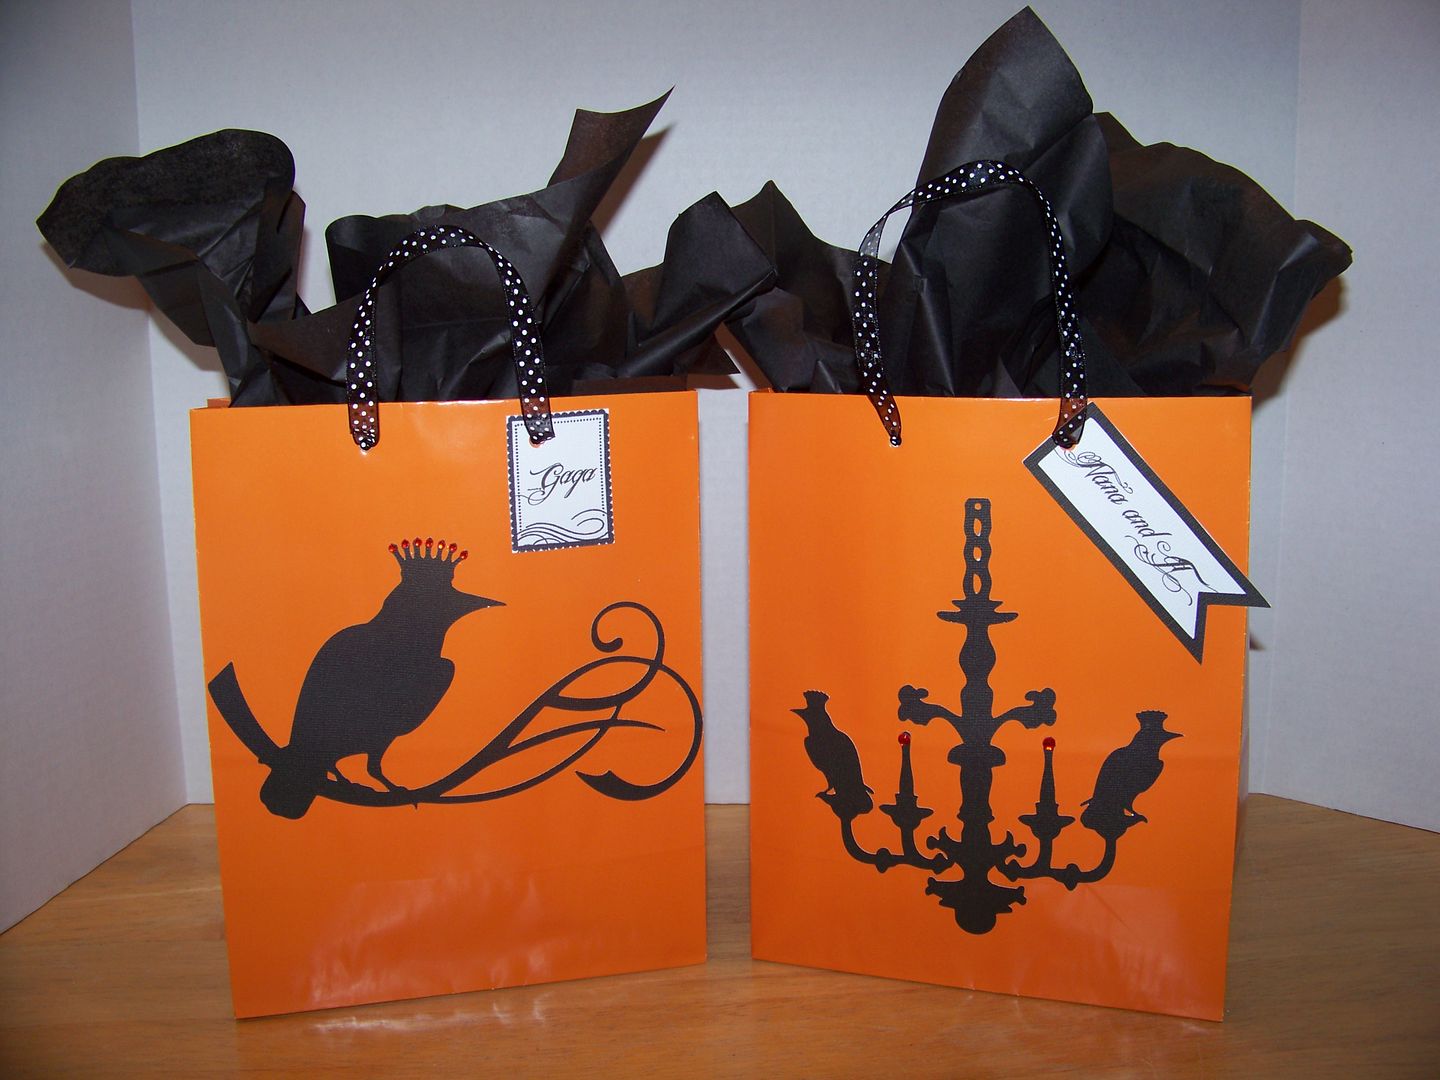
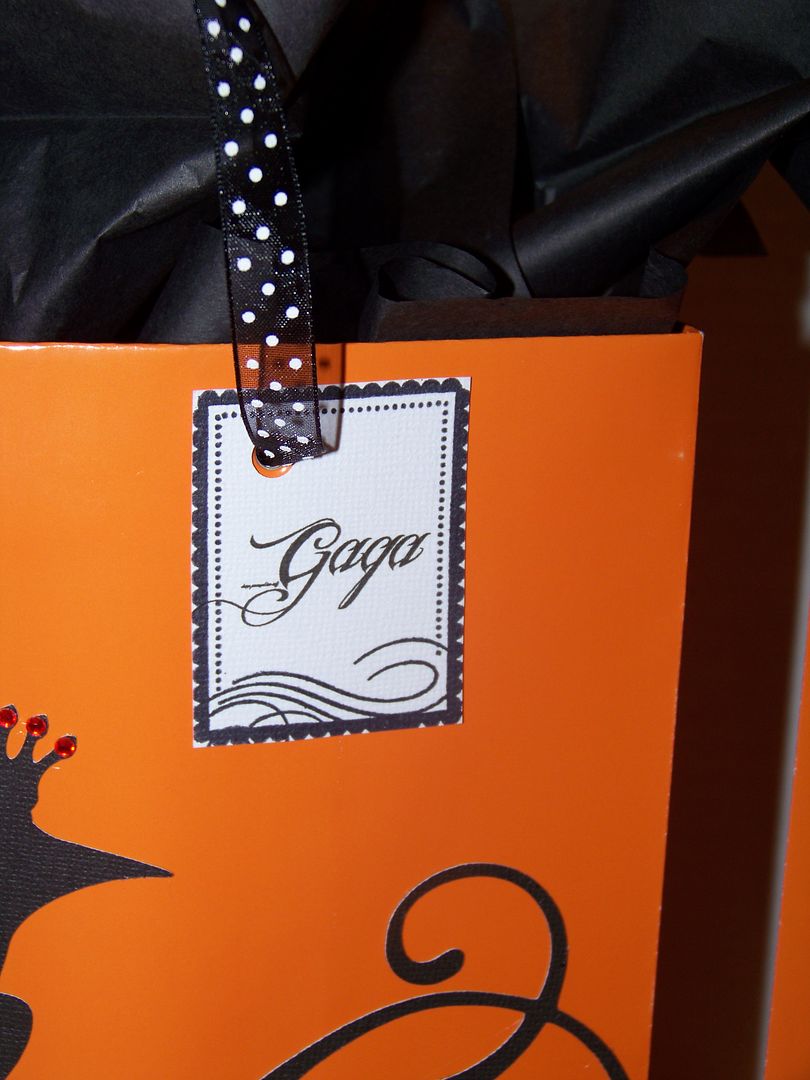
Corn that pops on the cob, fancy and funky Halloween glasses, sugar-free candies, and ghoulish crafty supplies are inside my mom's bag.  I avoid candy due to her diabetes and have so much fun shopping for her.  The kids in the family call my mom "Gaga".   My husband and I even call her that now.

The bird image on the left was cut at 4-1/2" from Chic and Scary.  The tag was made by stamping the outline and printing the text using FontSpace's 'Ink in the Meat' at 50 point.  The chandelier image was also cut from Chic and Scary, but at 7".  The tag was cut from Art Philosophy (page 68) at 4".  Again, the text was printed using the same font and size.  Don't you just love that font?  I used adhesive red rhinestones to add a little bling.


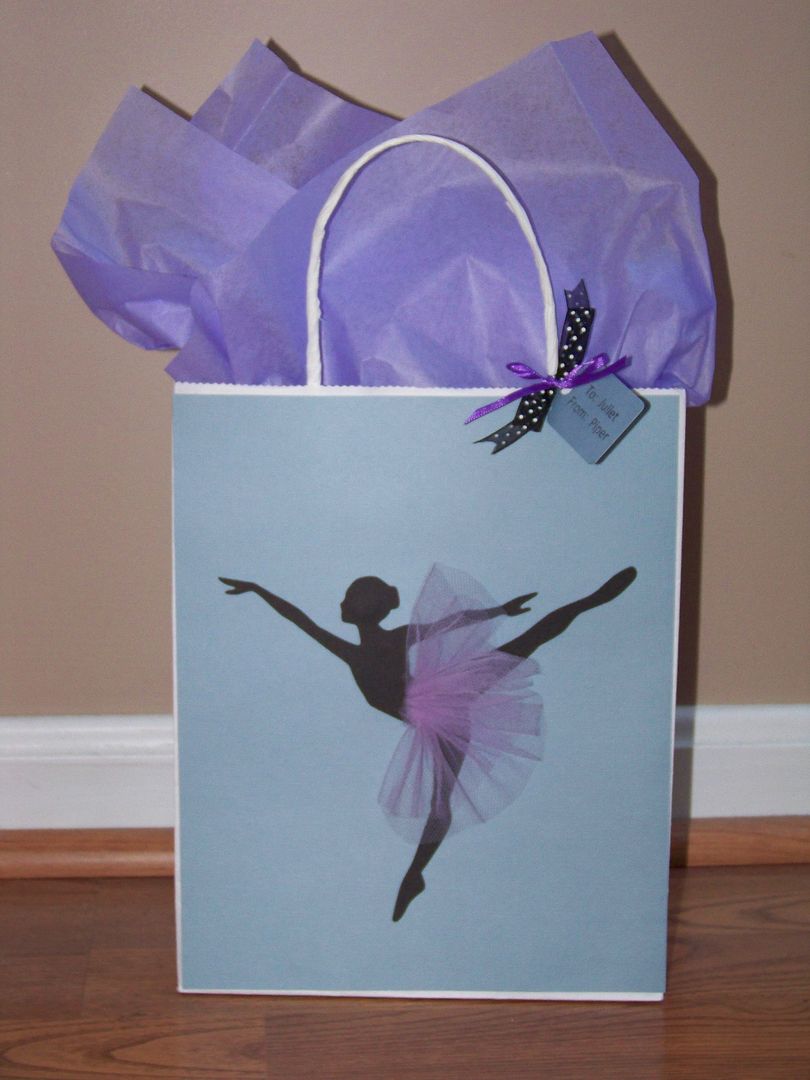
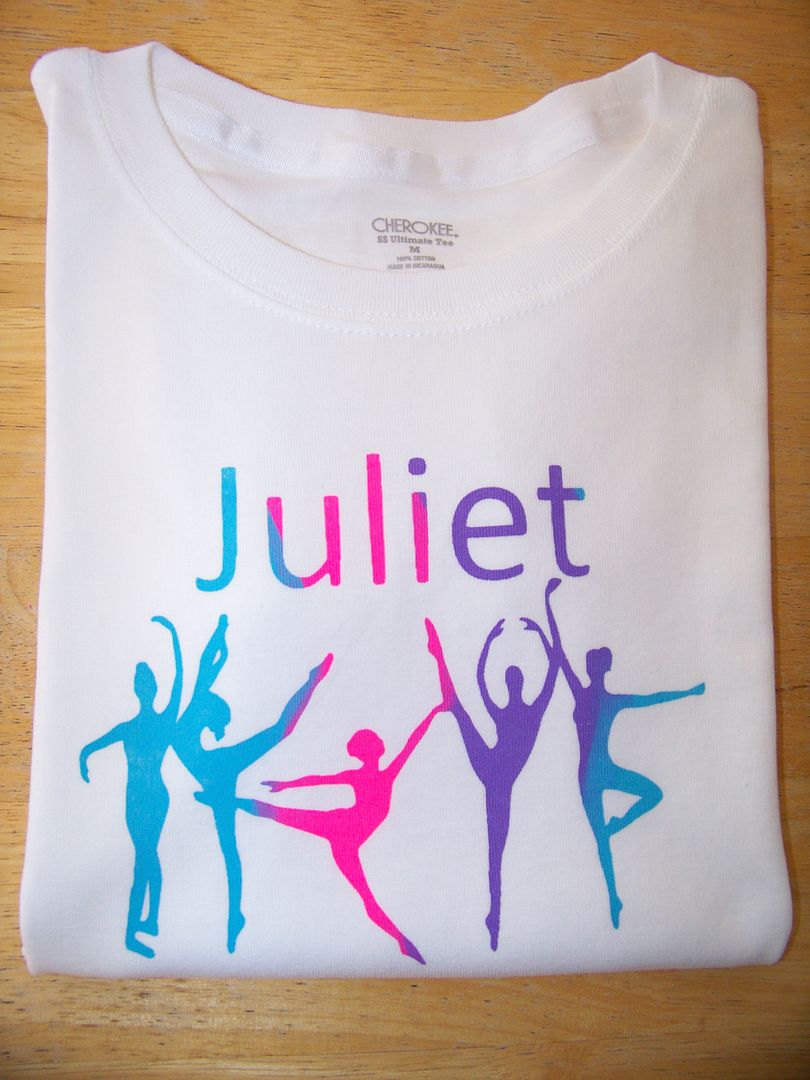
My daugher's school doesn't allow Halloween images or celebrations so we go all out for the ballet school students and teachers instead! 


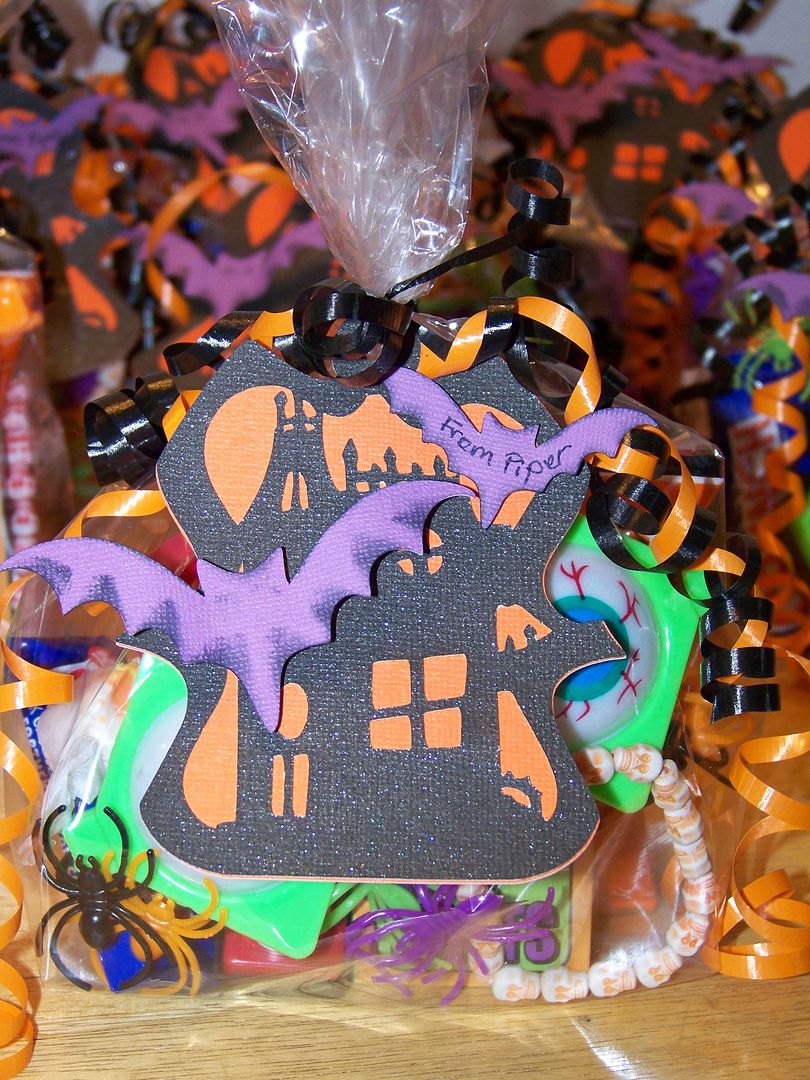
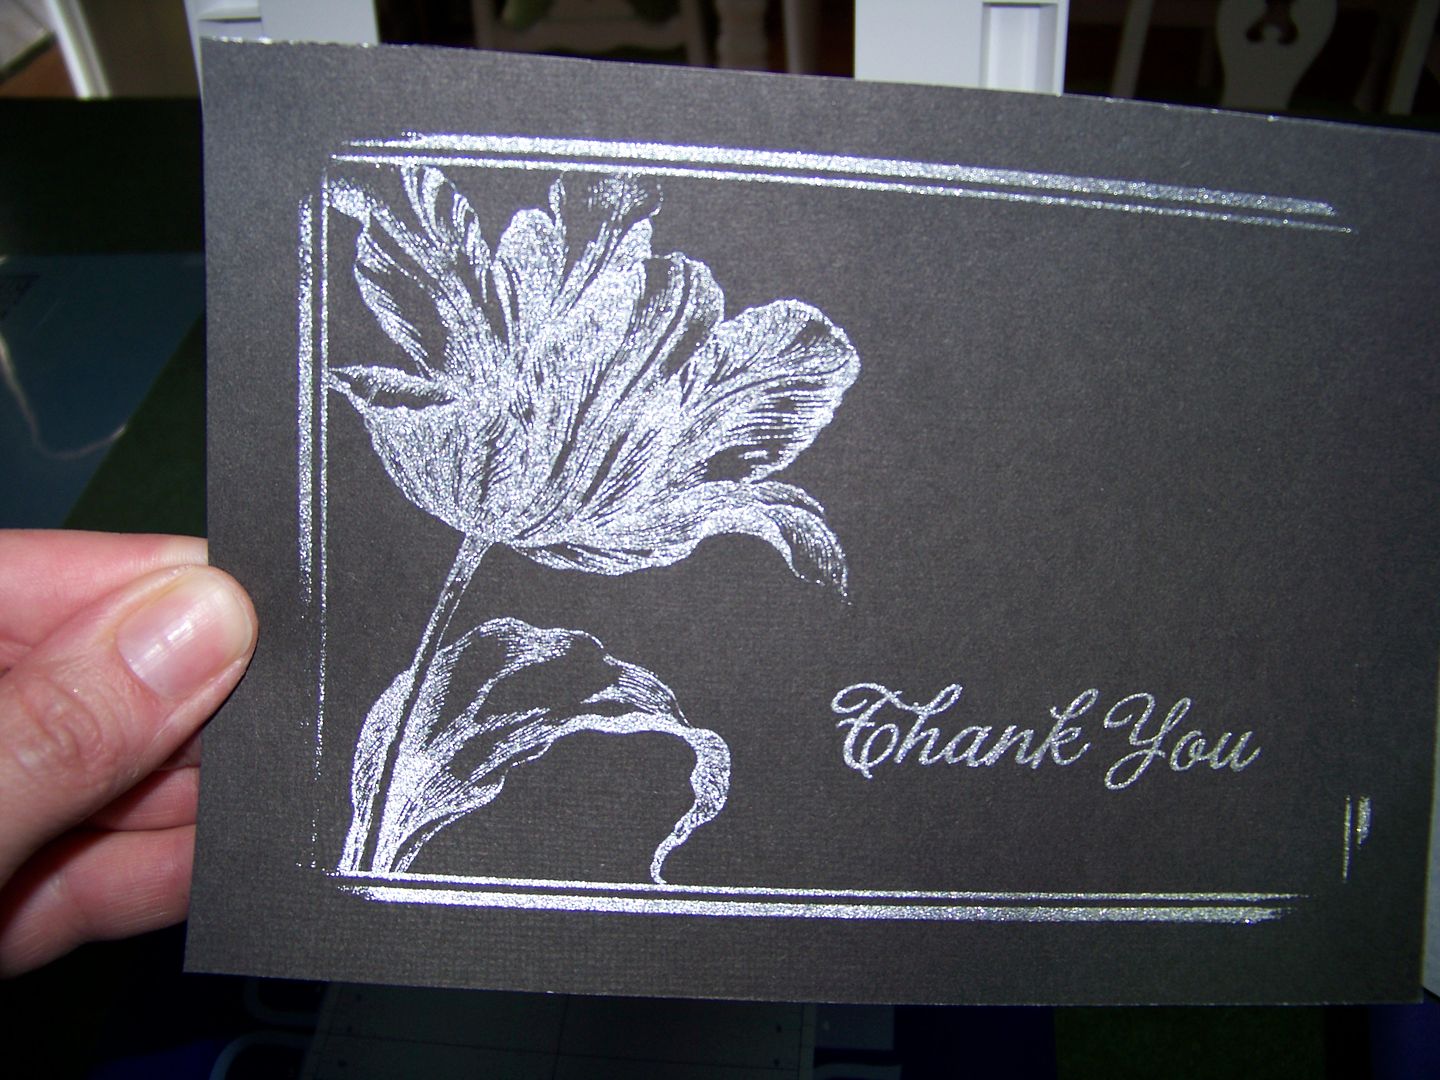
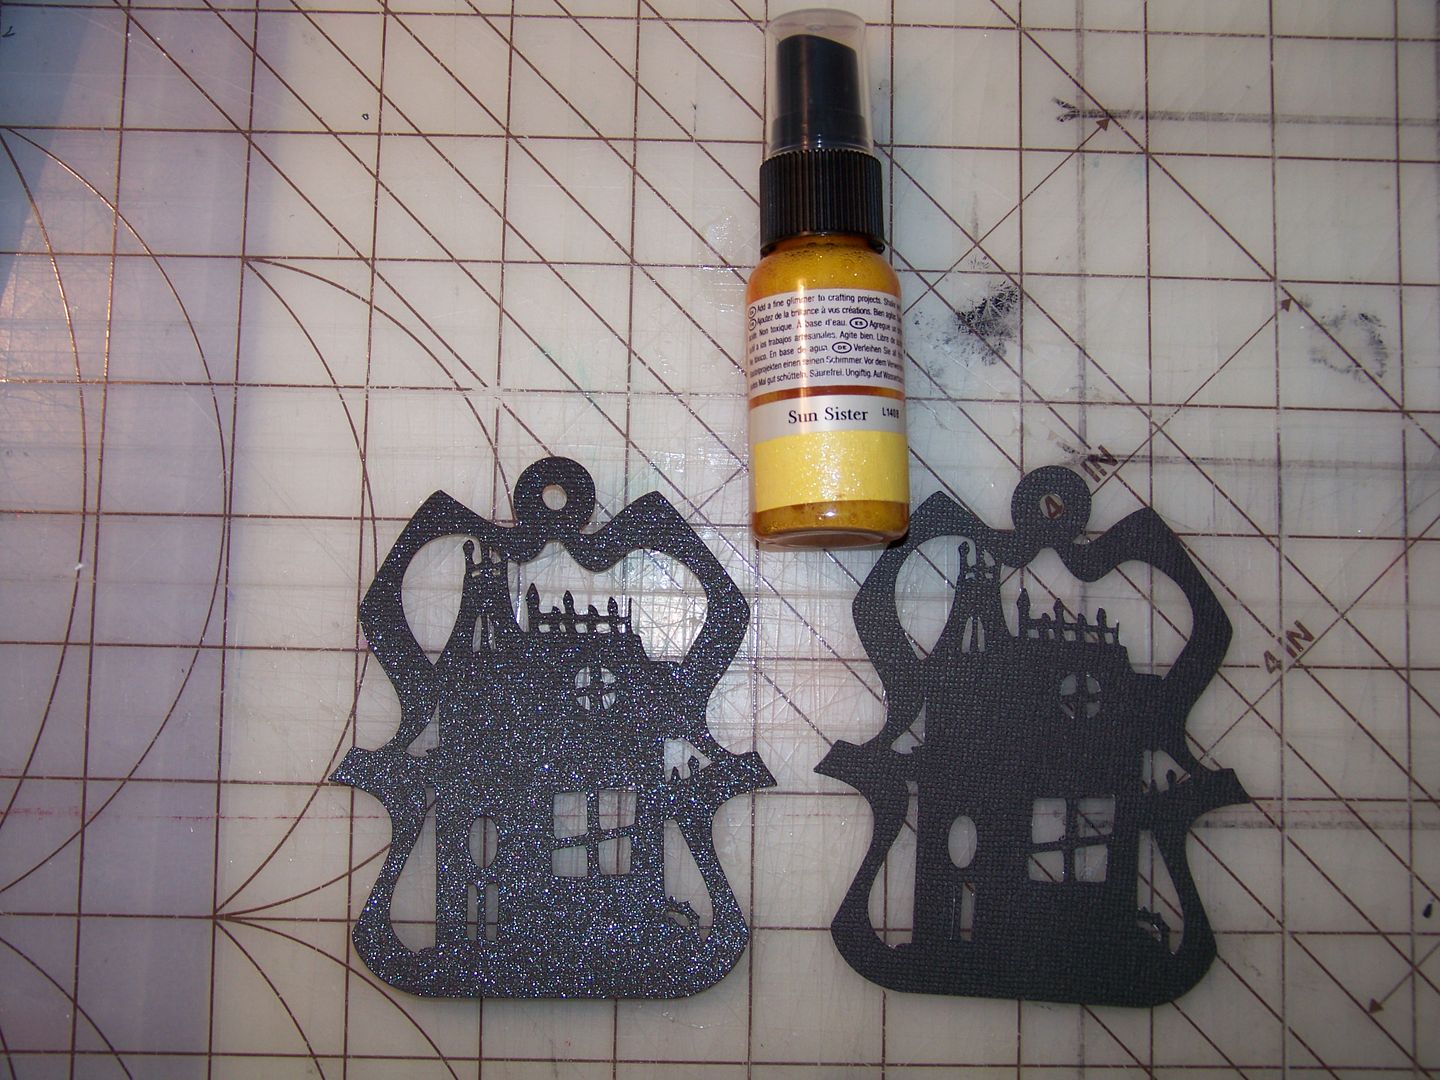
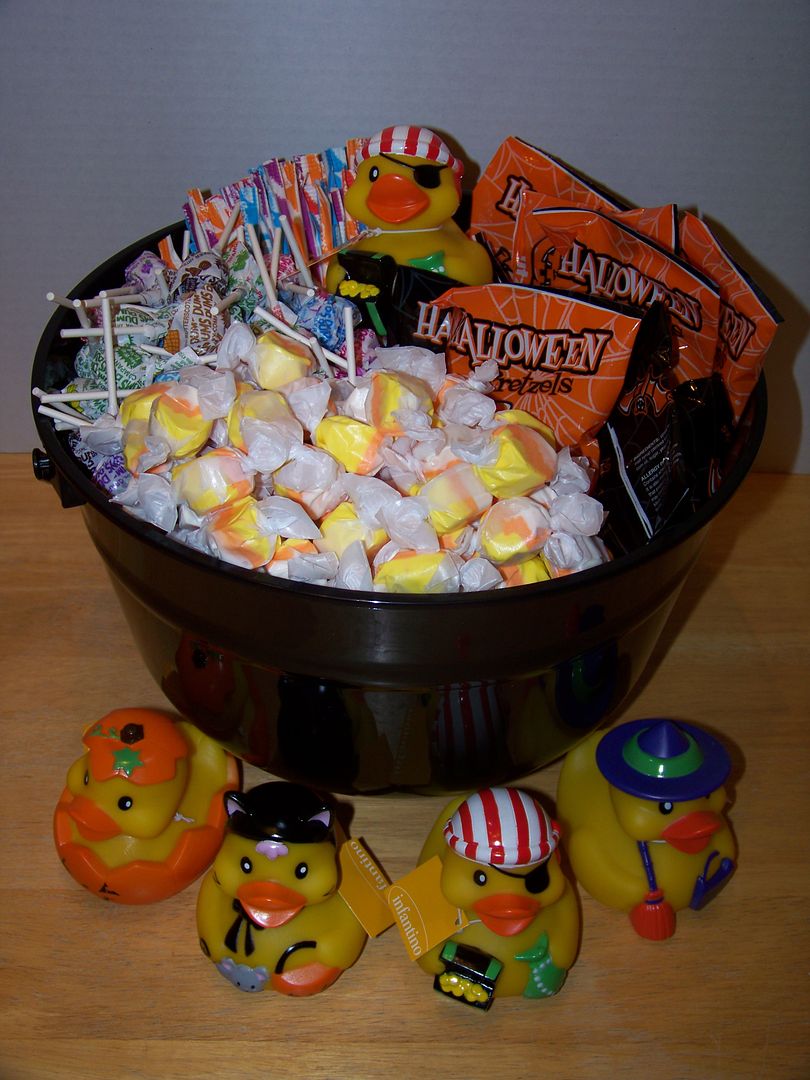
These treat bags were filled with silly glasses, skeleton bracelets, spider rings, card games, fangs, spooky stampers, candy, and pretzels.  The tag was cut from Autumn Celebrations (page 60) at 4".  I sprayed the black cardstock with Glimmer Mist in Sun Sister and LOVED how it sparkled.  Just check out the difference below!


The 1" and 1-1/2" bats were cut from Chic and Scary.  They were inked and their wings were bent to give dimension.  They were attached with pop dots.


We get a pretty good crowd of trick-or-treaters with our neighborhood kids.  Families from outside of our neighborhood drop their kids off by the carload-- I have actually seen that!  So, just to share a bit of pettiness, I will tell you that one of my pet peeves is new parents who roll their infants around to trick-or-treat.  I wouldn't mind handing over candy if the parents were dressed up too---since they are the ones who will be eating it!!!  So, this year, I have Infantino rubber duckies for the babies!!!!  Bwahahahaha...


Don't worry-- I bought plenty of rubber duckies...


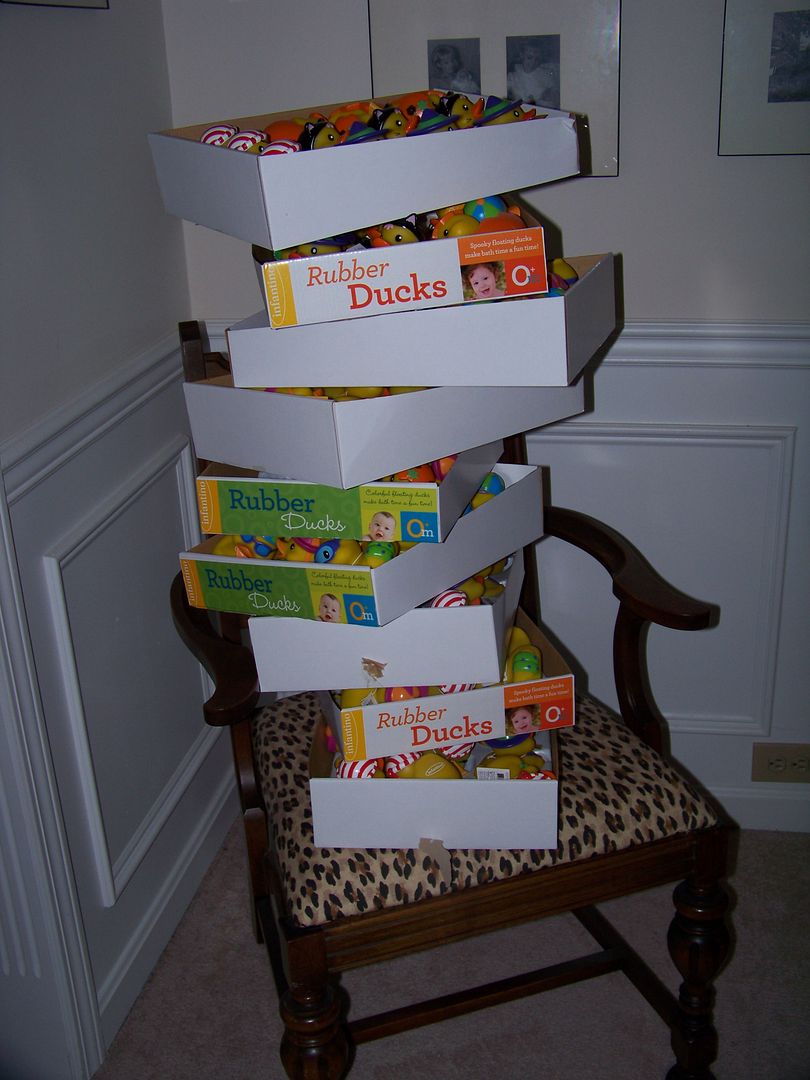
What can I say?  I got a deal.  OK - enough of my confession.  Let's move on to the next project:

I put together a few pumpkin bread gifts using my Simply Scarecrows cartridge to decorate mini loaves.  From this cartridge on the Expression, I cut the scarecrow at 4", the bird at 1-1/2", and the leaves at 1". 


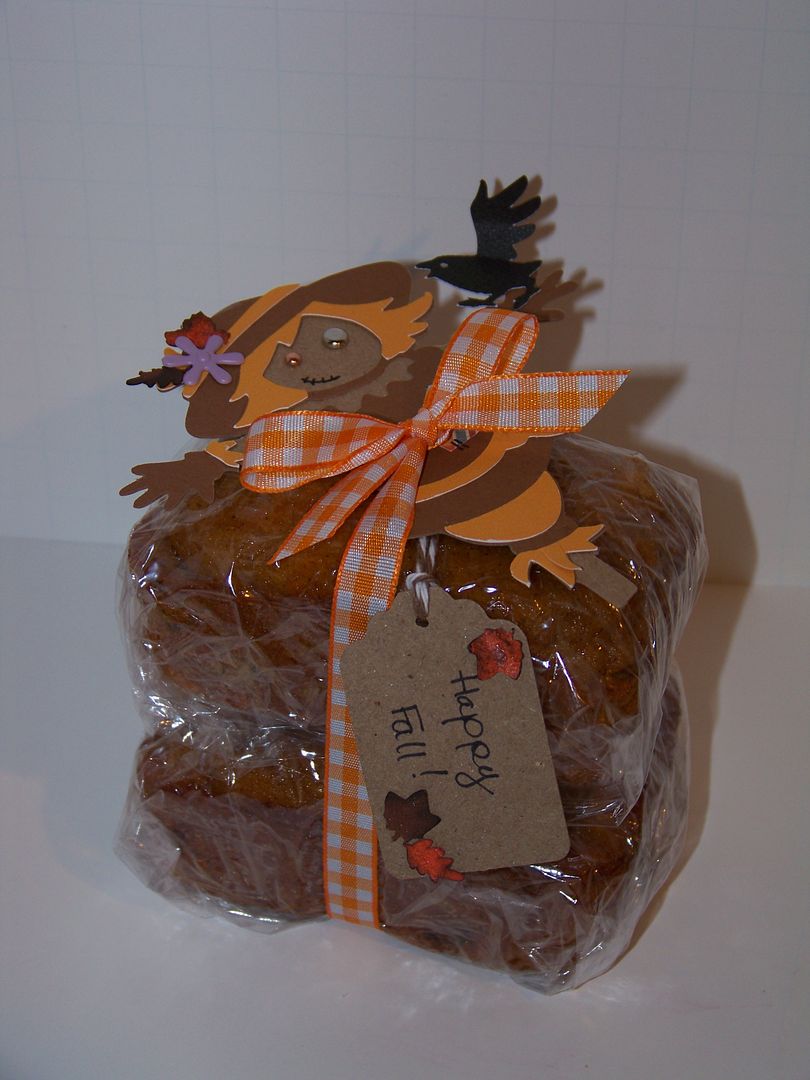
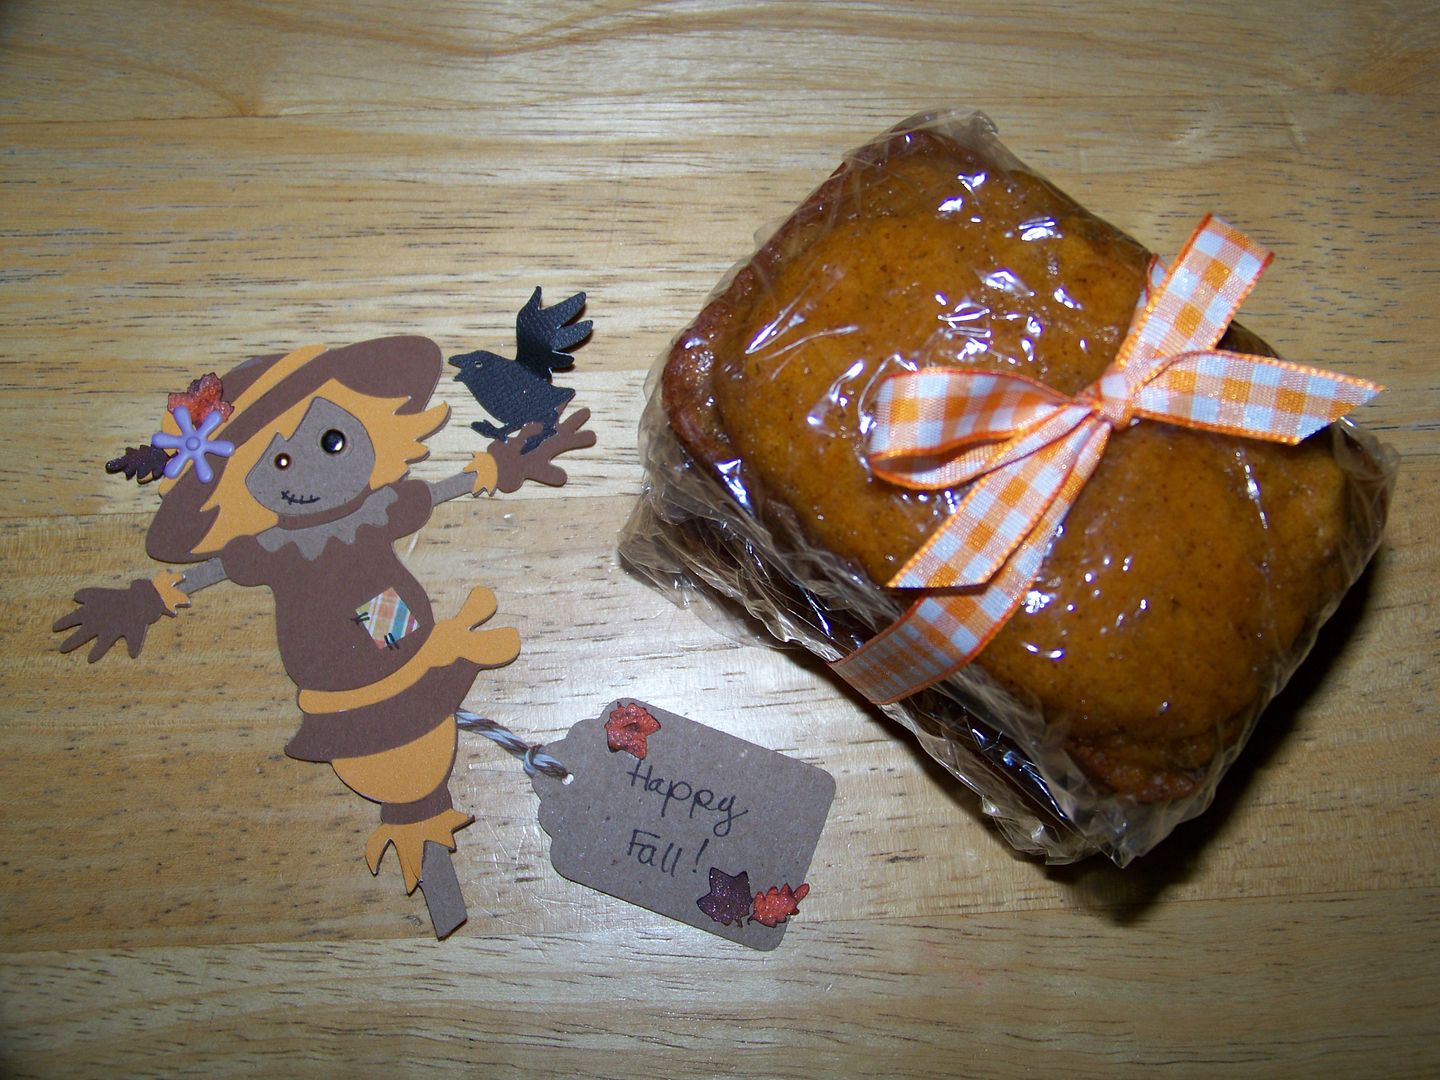
Recently I discovered the most FANTASTIC, tender, flavorful pumpkin bread recipe.  I have been making and giving away mini loaves to everyone!  Click here to find the recipe on the wonderful Zabar's site.  (You can sign up to get their recipes emailed to you, which is how this one found its way to me.)


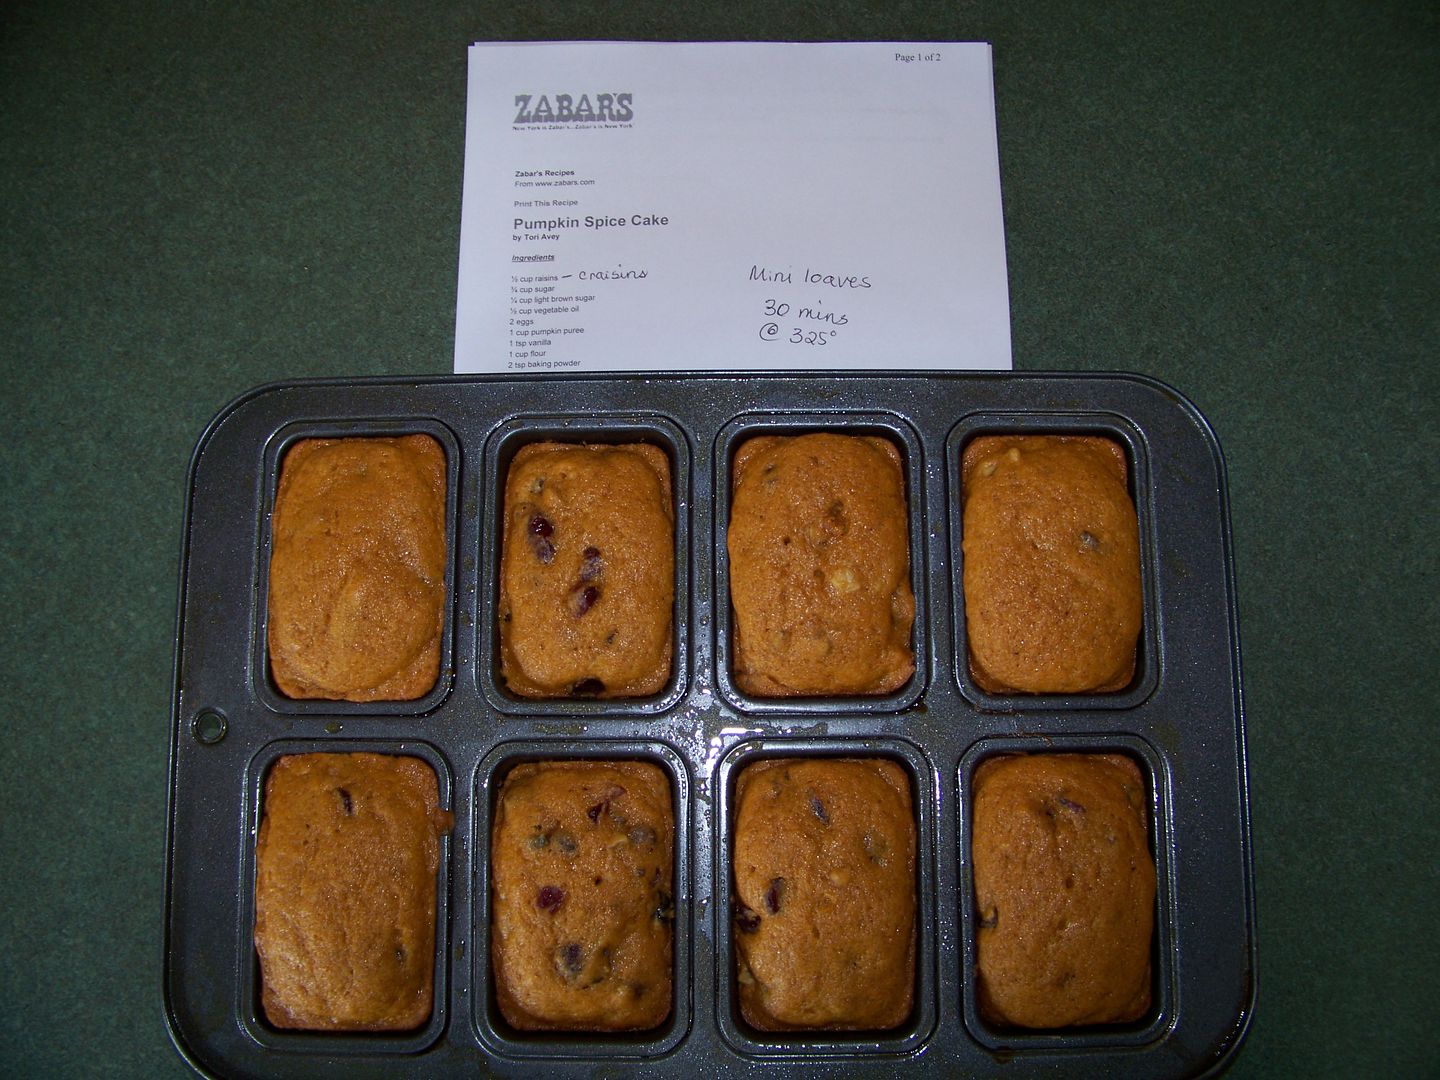
The original recipe calls for baking in a large loaf pan.  I make the recipe in my mini loaf pan, adjusting the baking time to 30 minutes.  I also changed the raisins to dried cranberries.  My very picky daughter loves pumpkin but not nuts.  Baking in a mini loaf pan, I can easily fill one or two mini loaves before folding in the nuts, then filling the remaining mini loaves so that she can have her own without walnuts.  The spices in this recipe are magical!

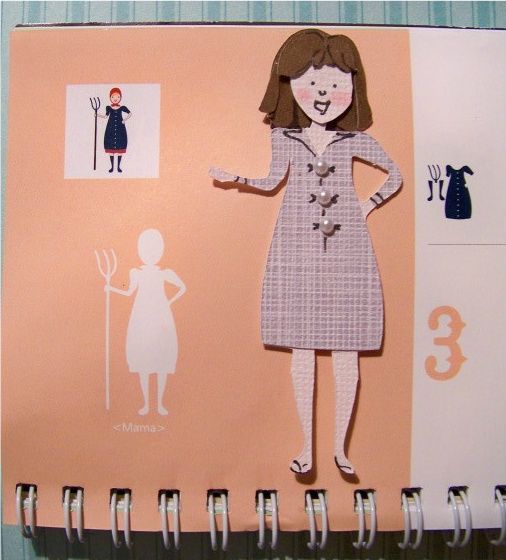
I can't get away with much of this gift-giving without my little helper expecting some fall gifties herself!  This is a dolly-and-me poncho set that I made. 


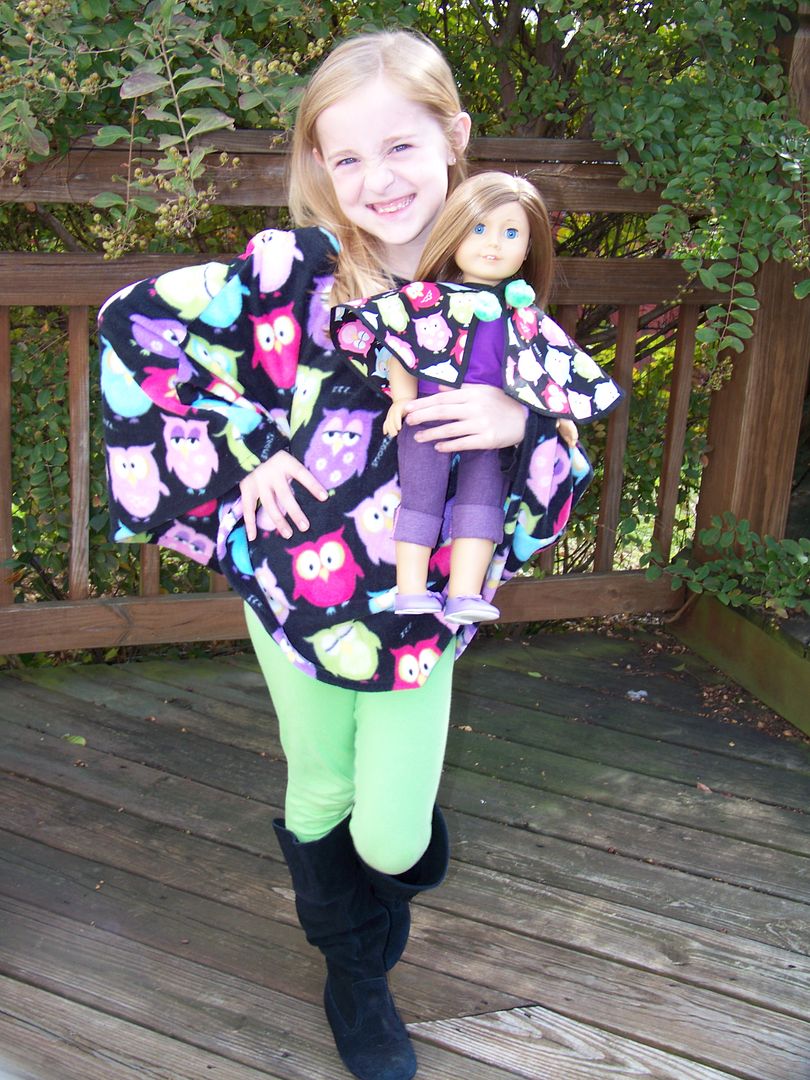
My daughter fell in love with the owl fabrics that we found at our local Hobby Lobby.  The fleece is a larger scale and was made into a poncho for my daughter using McCall's M6196; the broadcloth is the perfect scale for a doll and was altered from Simplicity 3936.  These were so fast to put together!

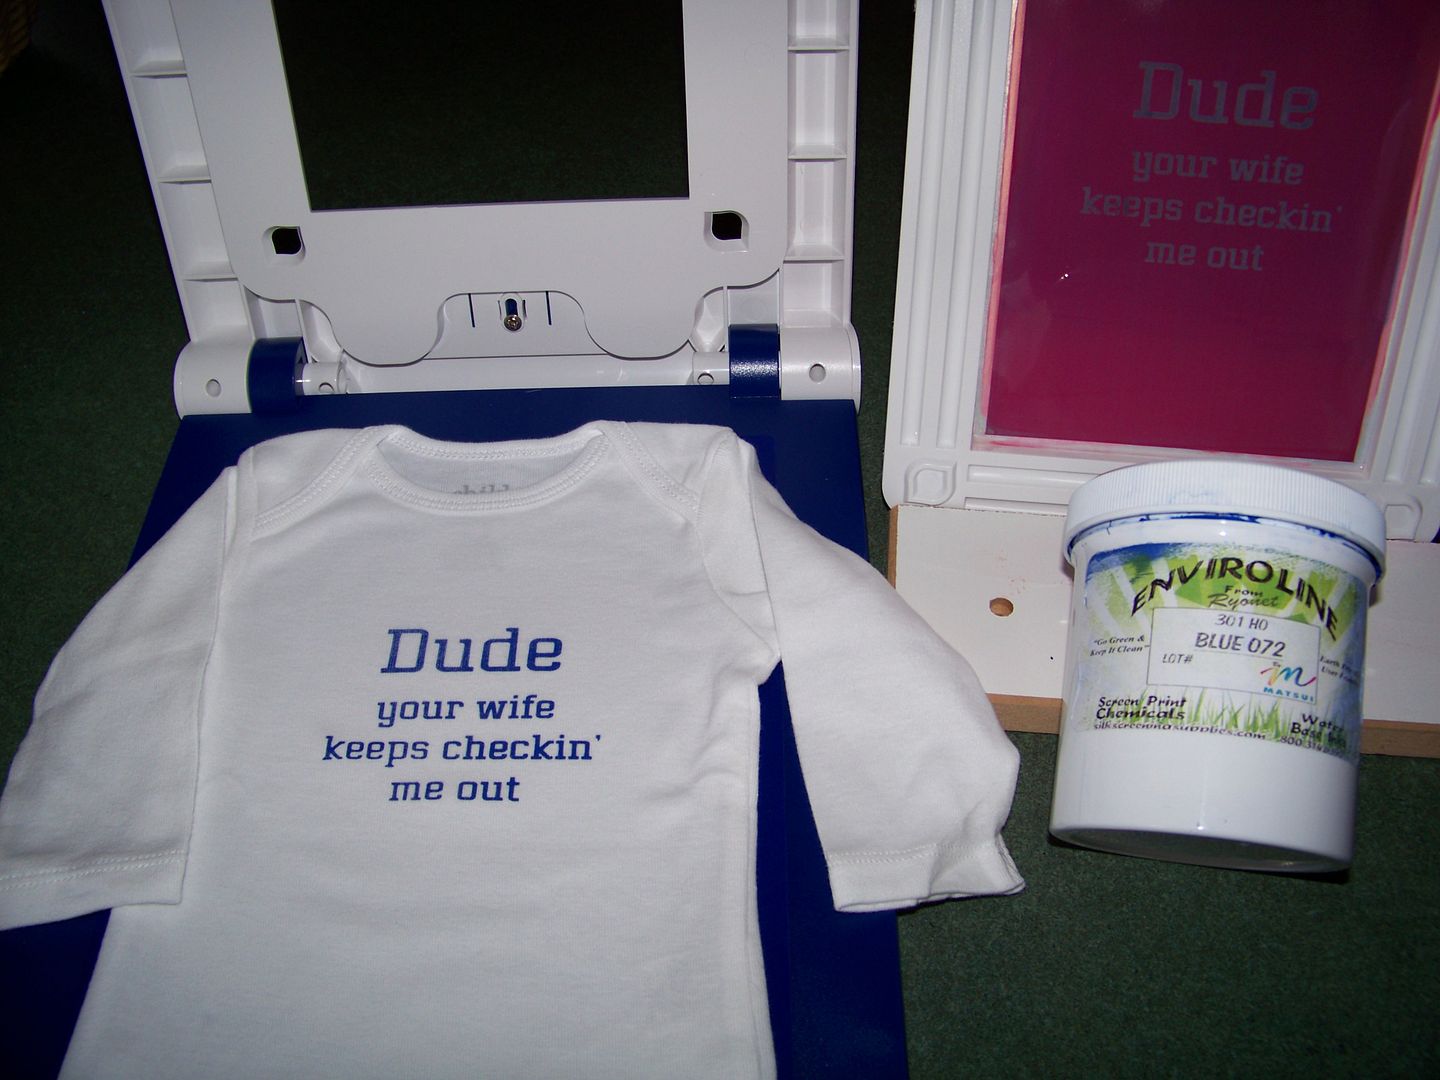
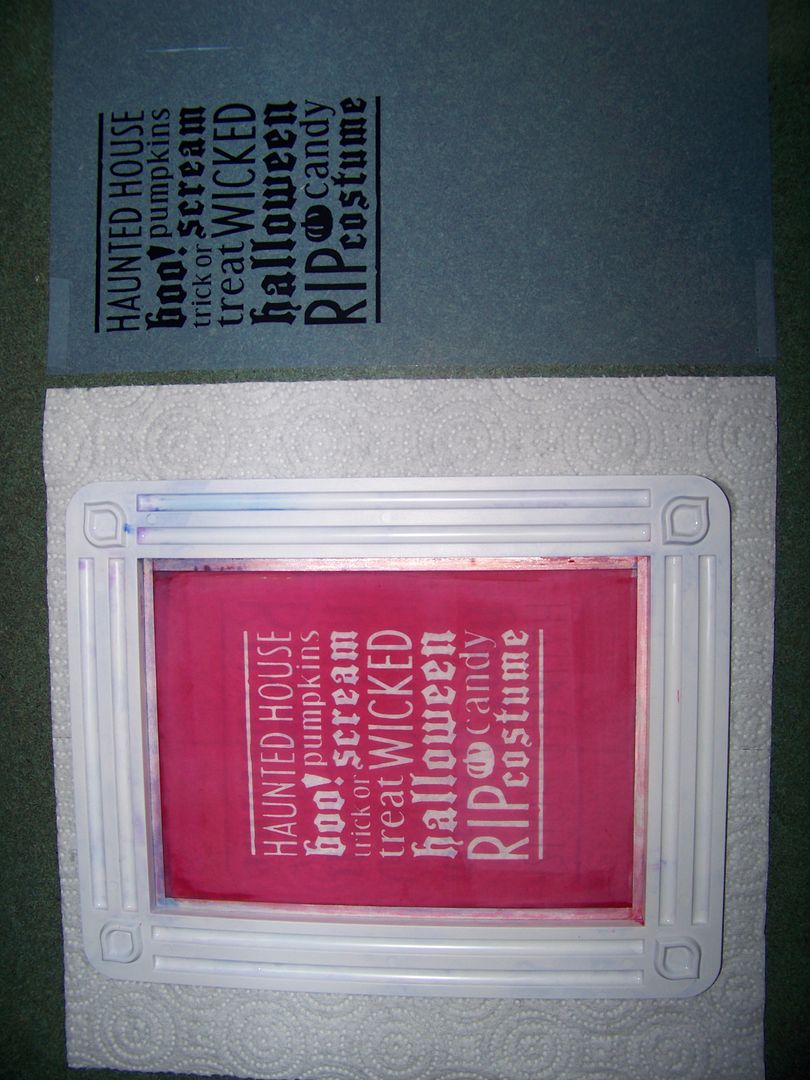
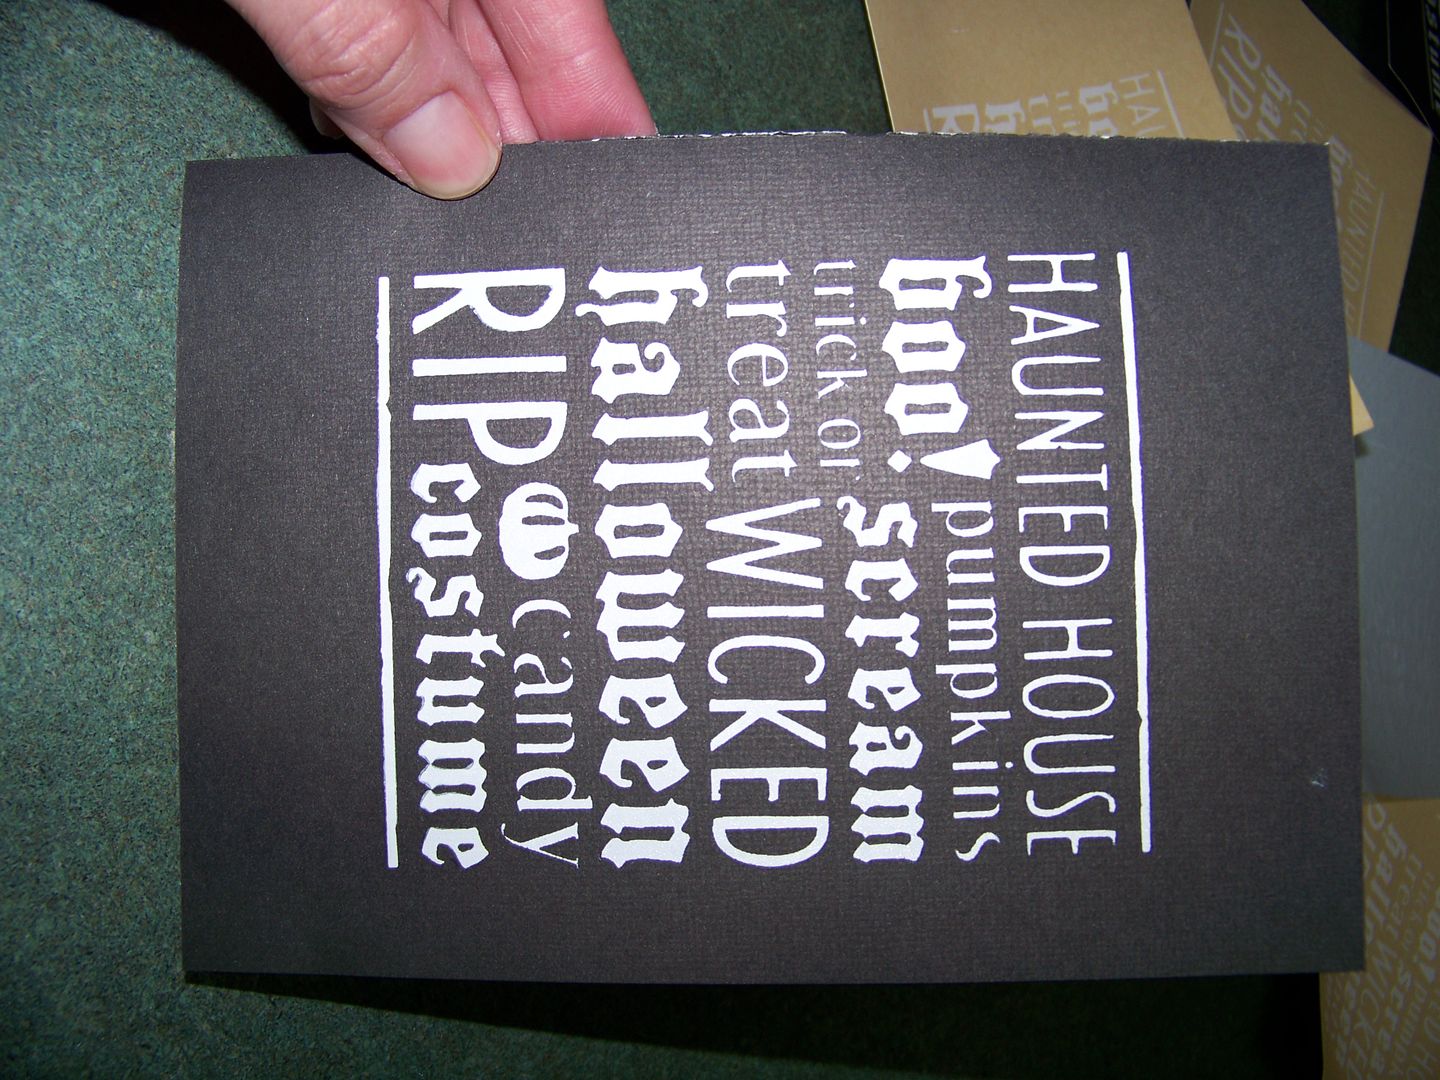
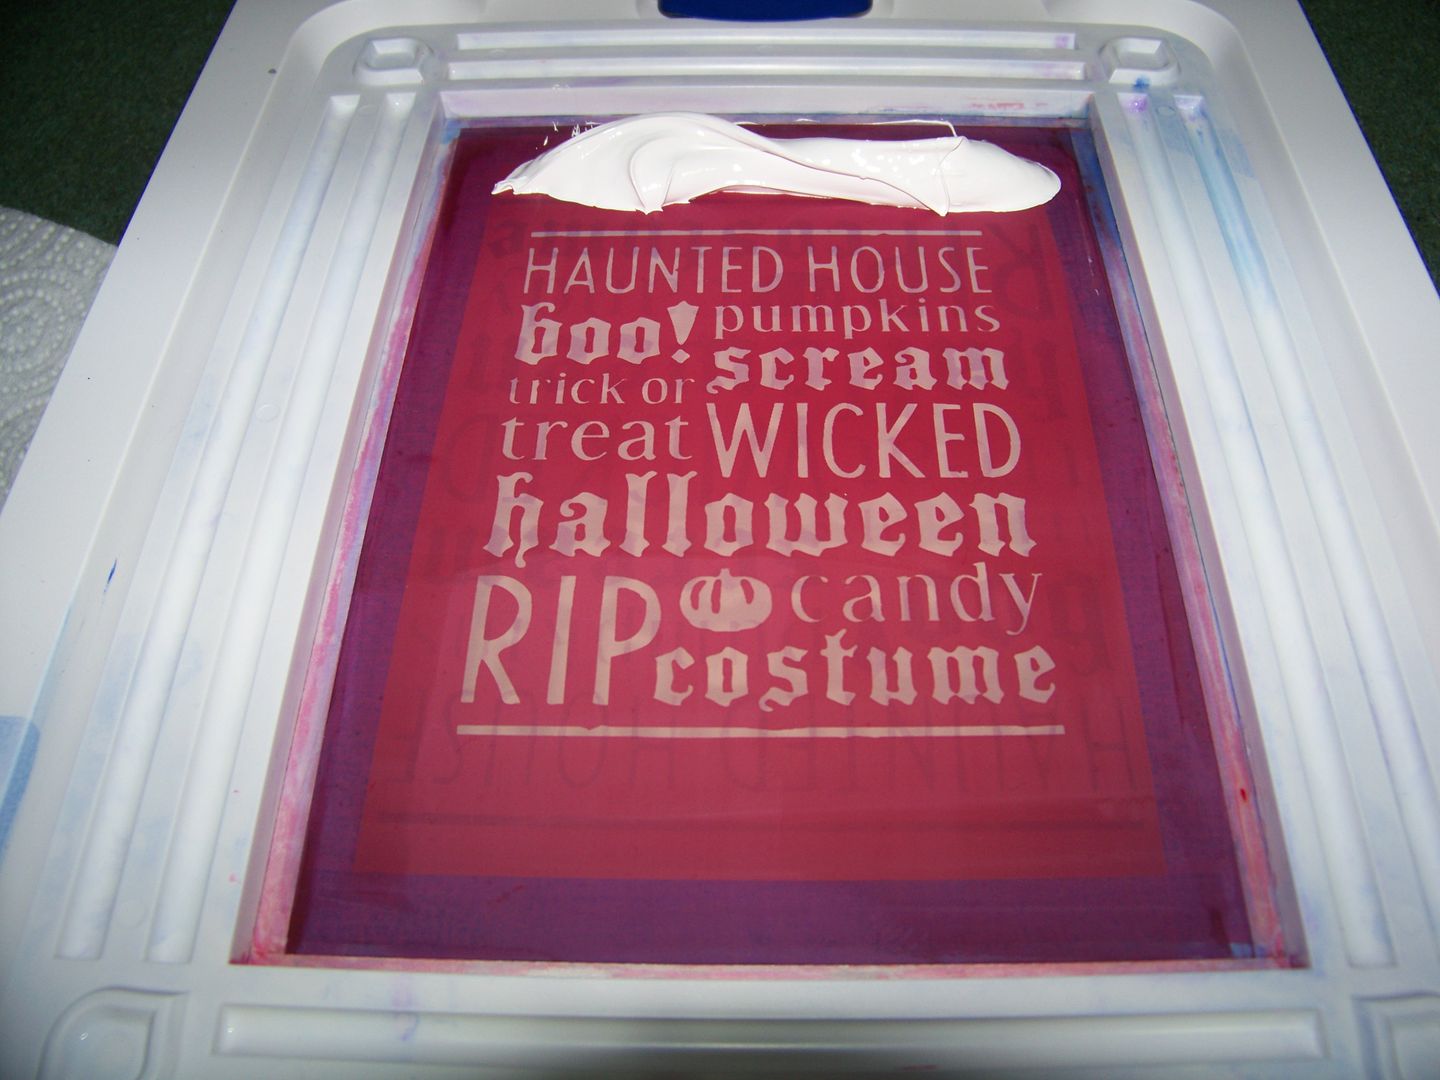
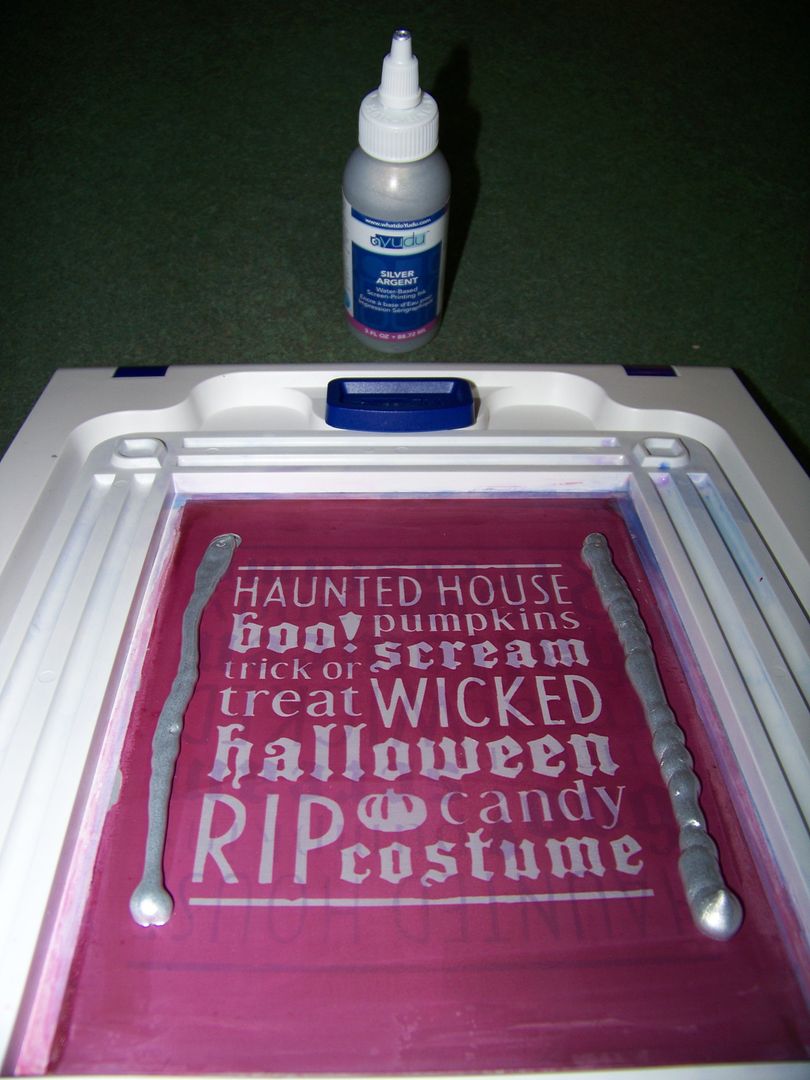
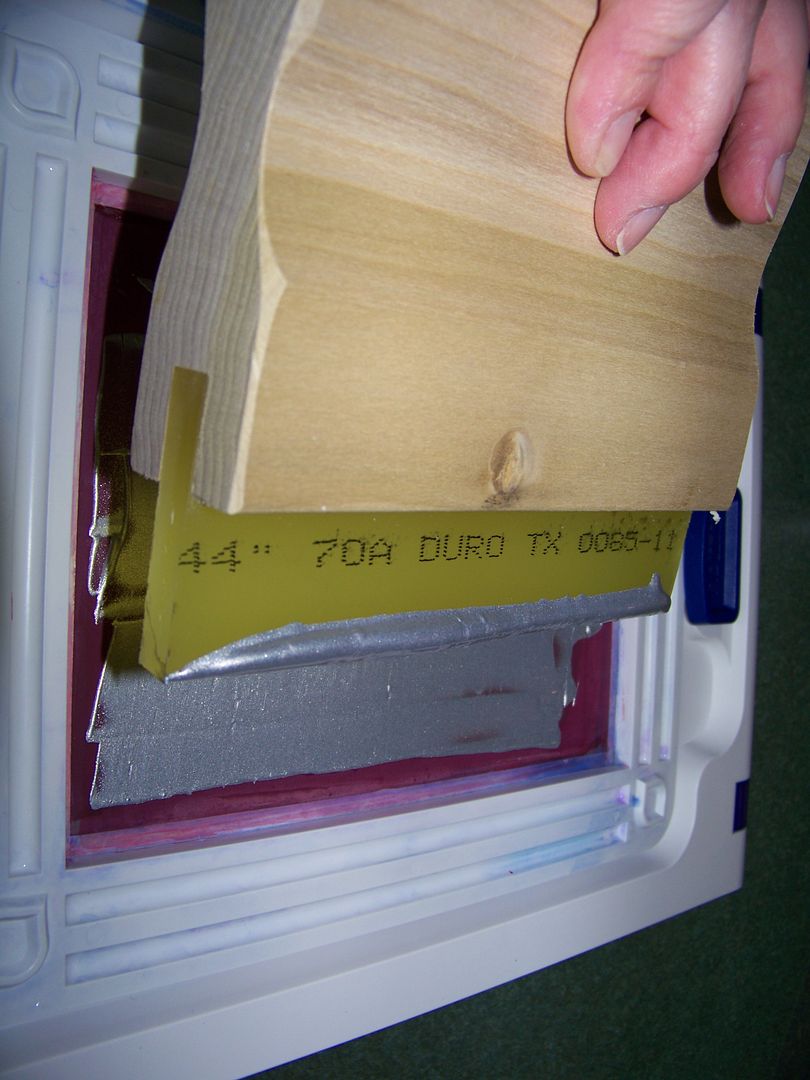
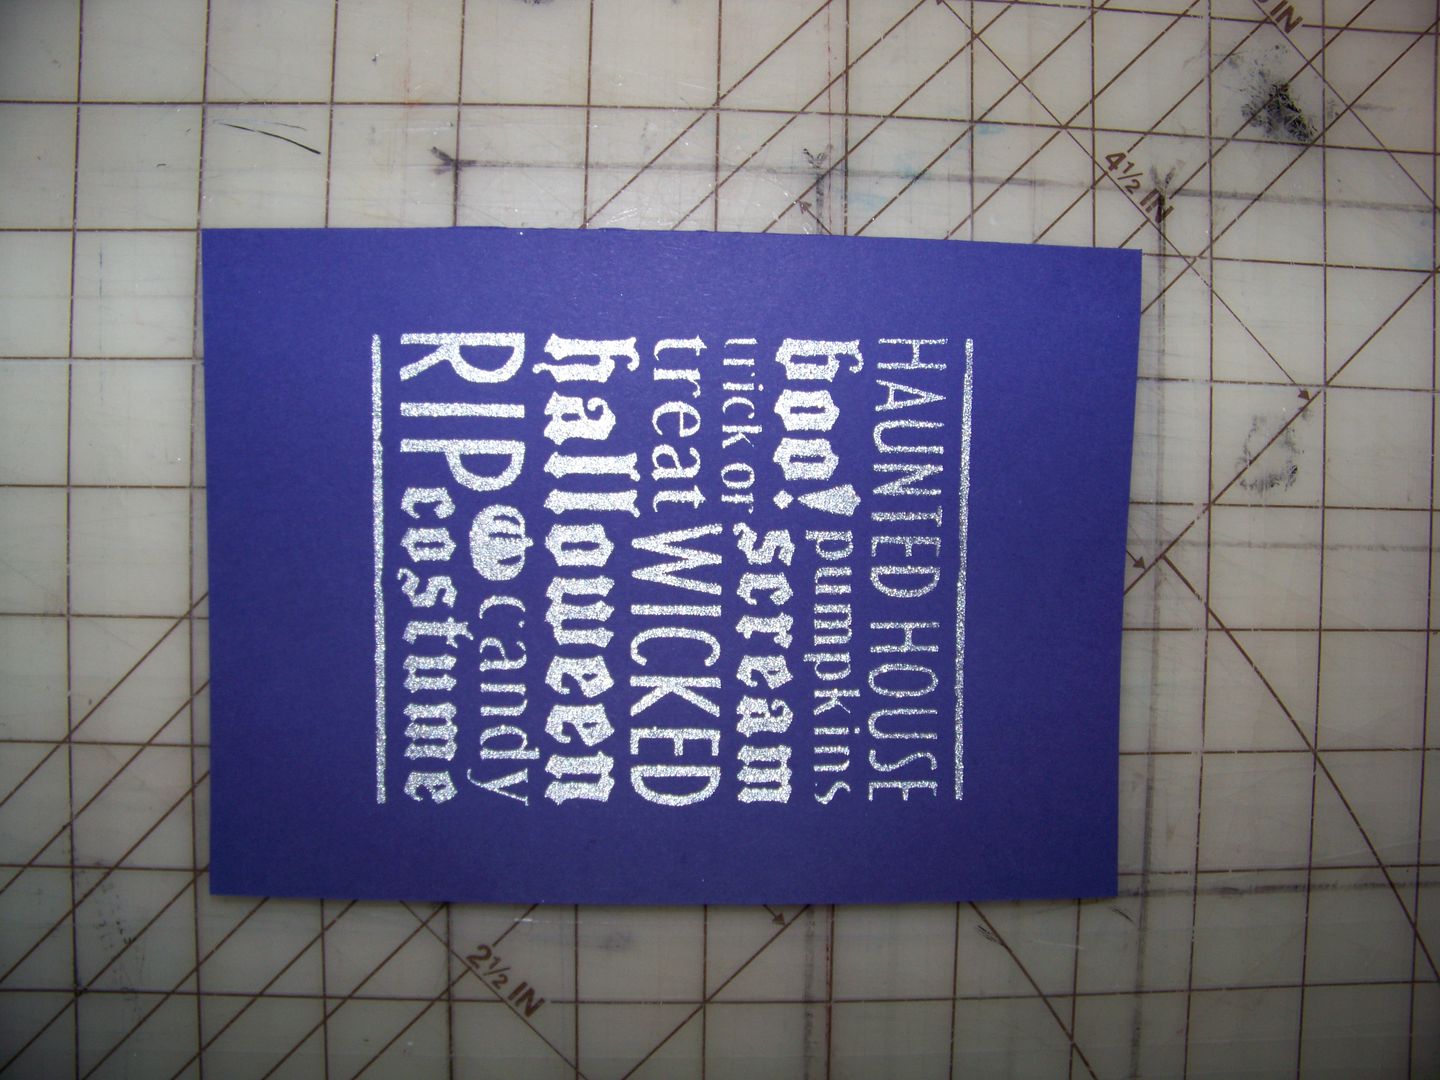
 I have been struggling with flocking and my Yudu.  I cannot seem to get an even coating, but this was the closest I could get... and I kinda like it for Halloween!


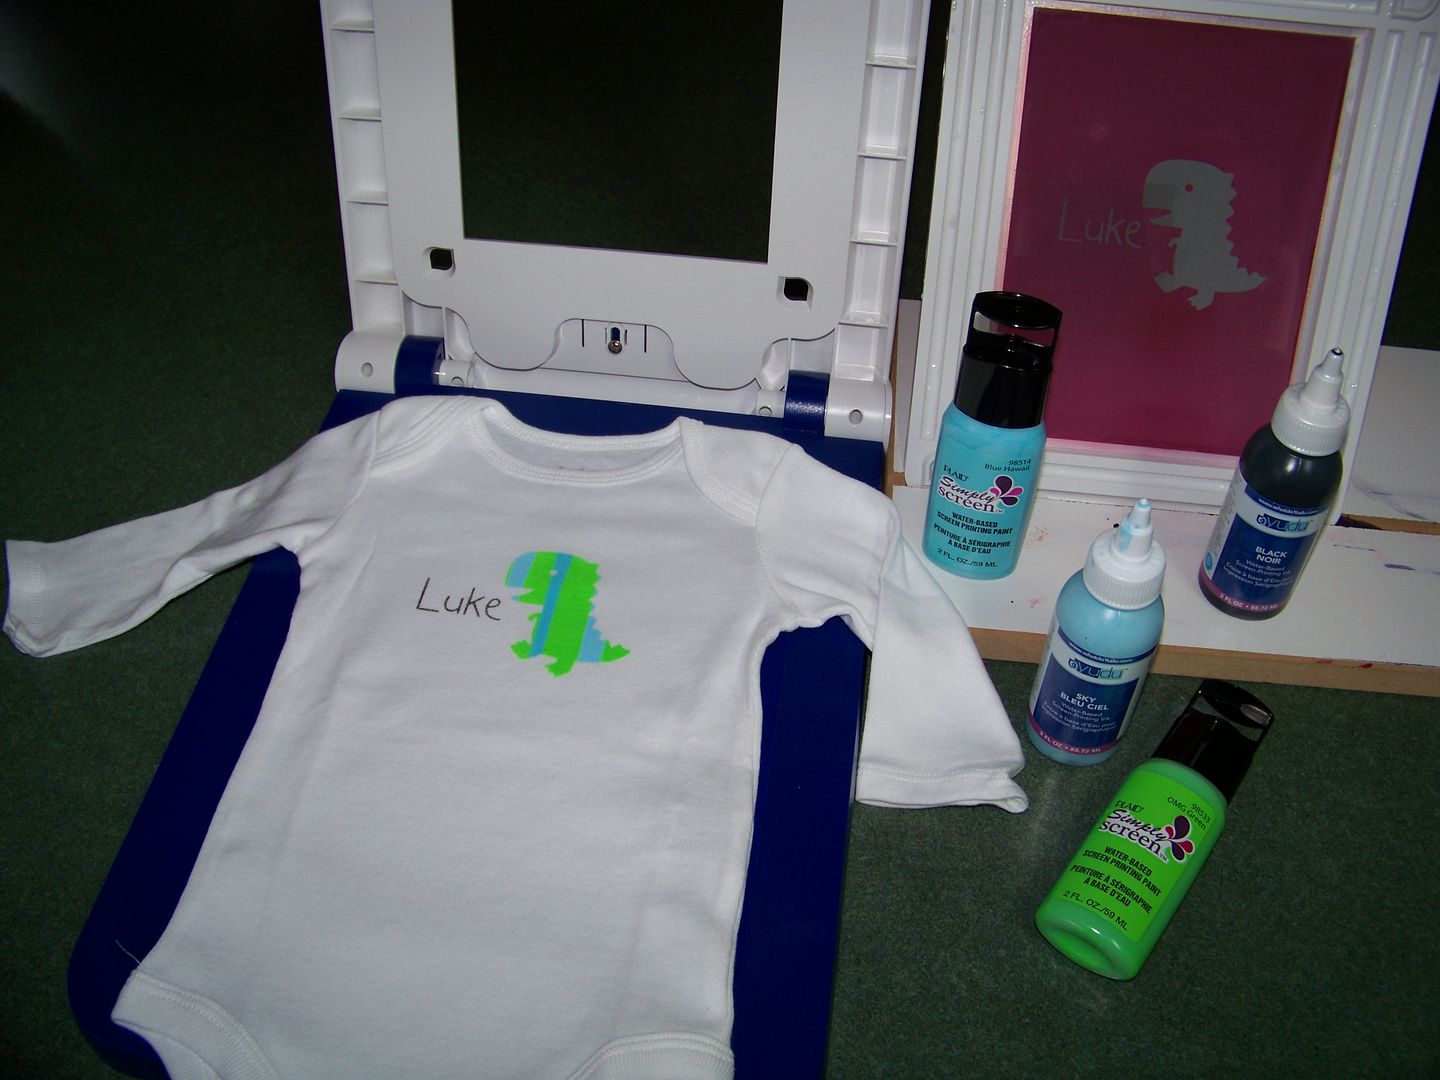
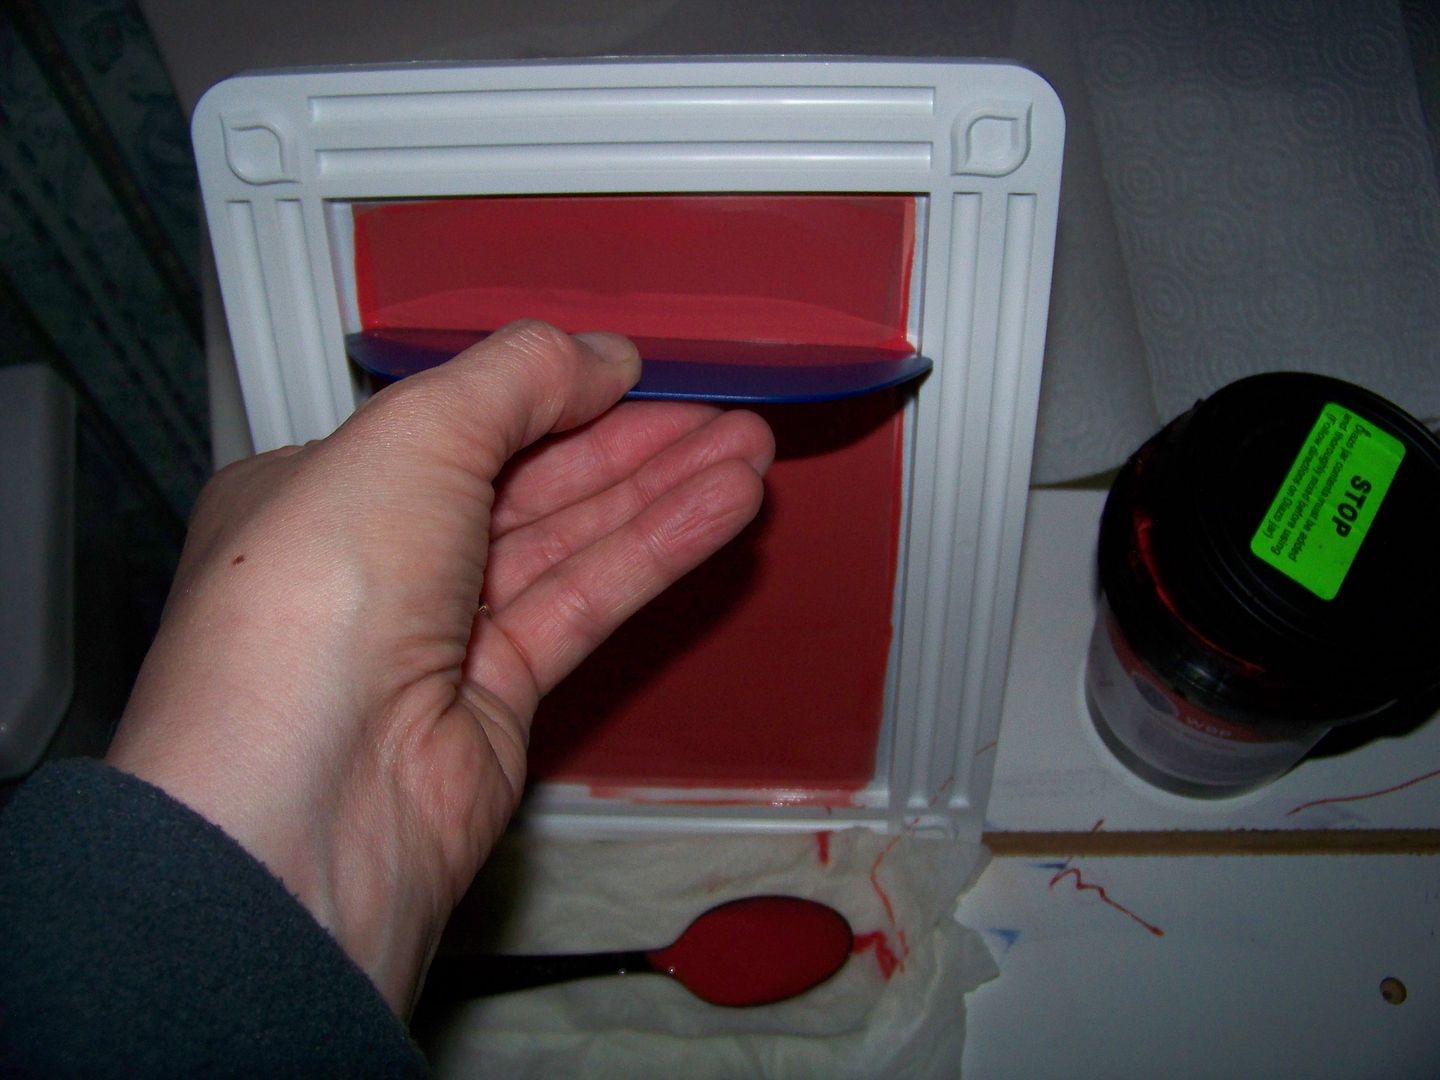
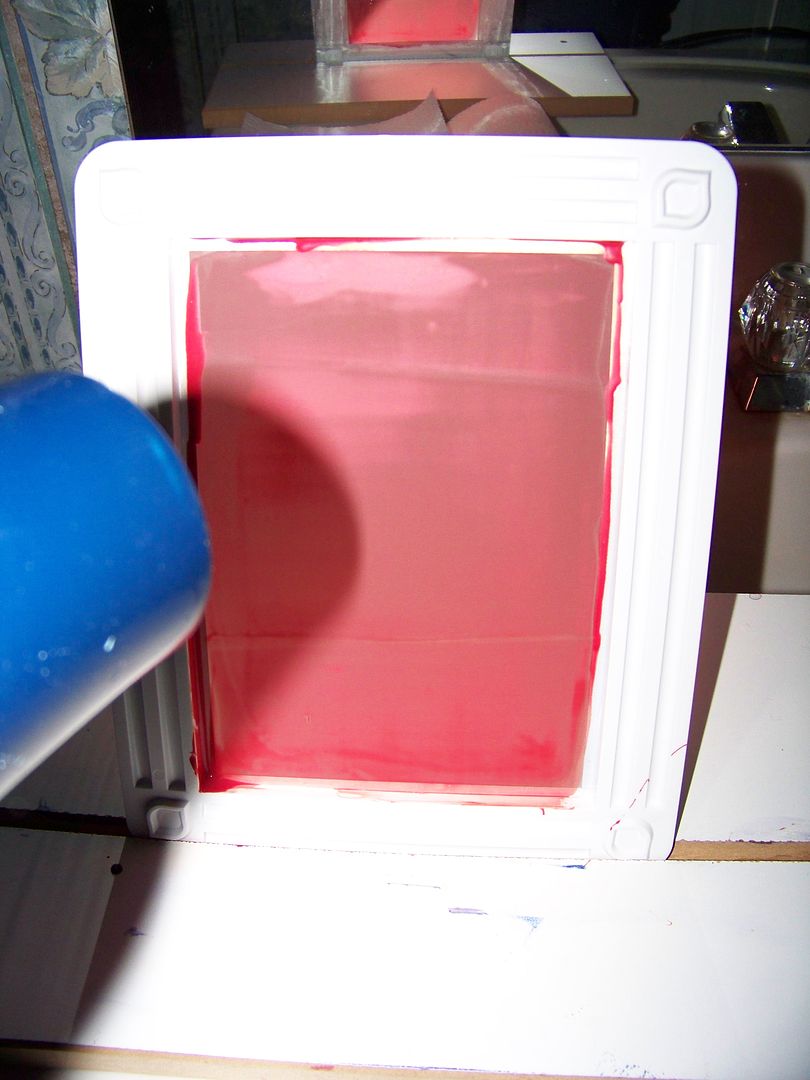
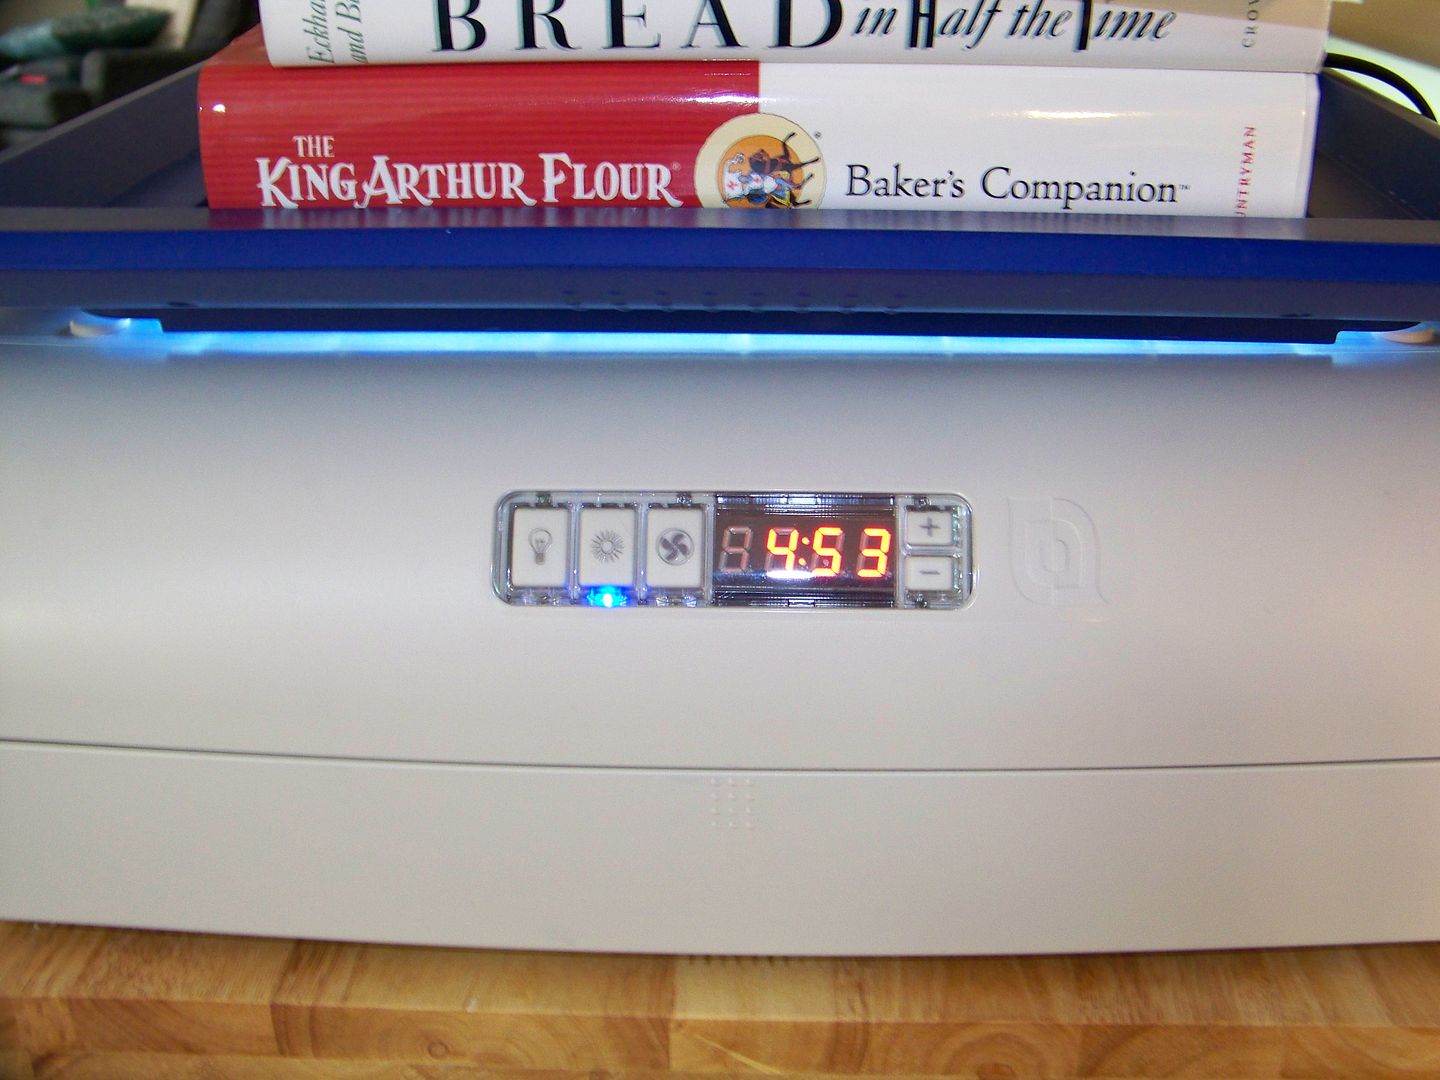
I used adhesive from Plaid Simply Screen after experimenting with that and Yudu brands.  I used Yudu-brand flocking paper.  The design is one that I cut with Chic and Scary.  I cut it from vinyl and applied it to acetate to burn the image into the emulsion on a 70 mesh screen.  I experimented with letting the glue dry before peeling the flocking papers away, weighing down the flocking papers into the glue using heavy books.  I seem to still have areas where the flocking is not as opaque and solid in some areas as in others.  If anyone has perfected this technique, please let me know so I can ask you questions!!! I have flocking in all colors and lots of ideas in mind once I get this perfected!

Thank you for looking at my projects!  I had so much fun with all of these!

Click here to see all of my projects in My Project Gallery.
Click here to see my Yudu instructions, tips, and projects.

Happy Halloween!

Thursday, October 20, 2011

Screening Onesies on Yudu Cardshop

I discovered a great, new use for my Yudu Cardshop!  It is the perfect size for screening onesies!!  If you follow me on Pinterest, you may have noticed my Yudu board has been overwhelmed with onesie ideas lately.  I have a baby gift to make and I thought personalized onesies would be cute to give!  The stork is scheduled to bring Luke (baby brother to one of my daughter's friends) later this month so I went to work!
 
When I say that the Yudu Cardshop is perfect for screening onesies, look at how perfectly the 0-3 months size fit in my unit! It just barely overhangs!  I was worried that the neck stitching would cause me to have problems screening but it worked perfectly!  I burned the mini screens in my big Yudu but actually screened the onesies using Cardshop.
 

The first one was created using the dinosaur from Create-A-Critter at 2-1/2" on on my Expression, cut onto black vinyl.  I used the settings for a KISS cut (blade 3, pressure 3, speed 3) and placed the cut on my transparency using transfer tape.  The text was Microsoft's Cheddar Salad BTN at 72 point, which I printed directly onto the transparency using my regular office printer.  
 
'Luke' and dinosaur screened with Yudu and Plaid inks.
Here's the secret for this multi-color project using only one screen:  I taped over the name Luke, leaving only the dinosaur to screen first.  I squirted ink in alternating colors of light blue, medium blue, and green, floodfilled, then screened.  I left the shirt in place but removed the screen, rinsed and dried it with a hair dryer.  I replaced the tape-- this time over the dinosaur.  I screened the text in black.

The next one has a text idea that I got from my Yudu board on Pinterest (the photo is credited to Zulily, but the link does not work so sadly I cannot link it to the original poster for you).


'My bad- were you sleeping?' screened with Yudu ink.
I only used text straight from my computer-- so easy!  This font is Microsoft Alcohol Licks at 50 point for "MY BAD" and 30 point for the remaining text.  I screened the text in brown because there were little brown stars on this patterned onesie

The next one was also an idea from my Yudu board on Pinterest from an Etsy artist


'Dude your wife keeps checkin' me out' screened with Enviroline ink.

This was also simply text printed onto a transparency.  This text is Microsoft Gasoline Serif BTN at 72 point for "Dude" and 36 point for the remaining text.

For more detailed Yudu directions, check out my Yudu page (see the tab at the top of my blog or click here).  For my tips on using the Yudu Cardshop, click here for my previous post!  I did happily discover that because the designs I used for these projects were placed away from the corners, I was able to successfully screen up to 4" width.

I wanted to create a little gift bag for my baby gift.  I love Word Collage so I was thrilled to see a Word Collage embossing folder collection!  I used the baby one for this project.

The banner was hand-cut.  The letters were cut from Makin the Grade at 3/4" on the Expression.

Thank you for looking at my blog!  I am LOVING using these mini screens!  They are so fast to cover with emulsion and even faster to dry!  Click here to see all of my projects in My Project Gallery.


Thursday, October 13, 2011

Yudu Cardshop Tips..and a project with Word Collage!


As you probably have guessed by now, I love my Yudu.  I never thought I needed the Yudu Cardshop because the Yudu has it all:  the ability to burn images, a place to pull screens, and a light-free area for storing and/or drying unburned emulsion-covered screens.  When I tried screening paper, however, I realized that a smaller, controlled space would be helpful!  I jumped when I was able to get one super cheap.  I like being able to screen my own images, so I also stopped by cricut.com and picked up a couple of boxes of blank screens.


There was a learning curve to using the Yudu Cardshop, which I hadn't expected since I already knew how to apply and burn emulsion.  I wanted to share what I learned with you! 

I must preface this by saying quite honestly that you really need a large Yudu for this purchase to make sense at all.  Currently, I think there are only a few pre-burned screens available and you cannot burn an image with the Cardshop alone.  (In fact, the Yudu Cardshop is not electric-- it is basically a holder to allow you to screen small items only!)  If you do have a large Yudu and have wanted an easy way to screen small papers (up to 5" x 7"), then this might just be perfect for you. 

First, I tried using the pre-burned screen that came with the product.  I was frustrated with this.  It is impossible to pull this screen and have the whole design with decorative frame pull onto paper.  I tried it with an after market [better] squeegee and tried different inks.  After about 12 tries, experimenting with anything I could control, I realized the the bottom line:  the corners of the frame in the design will never pull through!  Why?  The design is too close to the edges so the tension of the screen just prevents it. 


This is something that has not been an issue for me on my big Yudu because I use a 10" screen coater and 8-1/2 x 11" transparencies so I always have tons of space between my images and the frame!  Now, if I had learned this just from using this pre-burned screen, I would have said, "Wow!  I sure am glad they provided this example of what not to do when designing an image to use on this."  Unfortunately,  I am sometimes not too smart and this was one of those times.  [Feel sorry for me at this point!]

I will fast forward to the point just after figuring out how much space a design can actually use of the mesh!  Just know that at this point, I was an expert on coating the mini screen with emulsion because I had done it two times before with images that were too large before this successful one!  If you are taking notes, the prime space is in the middle of the mini screen, no larger than 3-1/2" x 5-1/2"!!!! 

For my successful screening, I printed my image onto a transparency (4.5" Halloween text from Word Collage - select 'print only') and headed downstairs to Yudu!  I found that the mini screens fit perfectly into my screen stand that I always use with the regular Yudu.  The small squeegee that came with my Yudu Cardshop was perfect to apply the emulsion. 


Yes, I made a mess!  I was actually working with the light off, so the only time I could see the mess I was making was when I took a picture!  (A smart person could have allowed a little bit of light in or used a bug light!) 

I basically used a plastic spoon to lay a bead of emulsion about 1/2" from the bottom of the frame.  Then, I used the squeegee to pull the emulsion up.  I went over it a couple of times to remove excess emulsion to get a super thin coating!  (You will hear a zip sound when you do this just like when you coat a large screen!)  I coated the back and then the front in this way.  While the emulsion was still wet, I used a wet paper towel to clean up the frame, and everywhere it dripped.


I dried it with a blow dryer since I could not use the light-proof drier space in the big Yudu.  This was actually a blessing and my screen was ready to burn in just under two minutes.  I used heat, which is something I don't normally do, but it seemed to work perfectly -- and I was able to reclaim it just fine too (remember, I had done that a couple of times by now!!)

I placed the transparency under the screen and burned it using my regular Yudu.  The first time I burned a mini screen, I was worried when I saw lots of light even though I had weighed down the frame...


... but it burned perfectly!  (So now you know too!)


Most of my test papers came out perfect!!!!  I cannot tell you how important changing the size to allow for more space around the design is to ensure perfect pulled designs -especially the corners.


I say "most" because I had a bleeder or two which made me think maybe these mini screens are 110 mesh and not 220.  (220 is what is recommended for use with paper.  I suspect that is the case, but I am not sure since it is not marked on the packaging or individual screens.  I will ask at the next Cricut Circle meetup in November and report back what I am told!)

I tested all kinds of inks.  For the white one above, I used Enviroline Opaque White from Ryonet-- it is as thick as marshmallow cream!!!  Check it out below!  It makes me want to try it on a black t-shirt on my regular Yudu to see how it screens on clothing!


I also tried one of my very favorite inks:  Silver Argent (Yudu brand).  I tried it with a squeegee that I have from Ryonet.  I screened it sideways since this 6" squeegee is too wide to go the other way.


I absolutely loved how this came out!!!


I decided to use it for a card.  From Happy Hauntings, I cut the tombstone (page 60) at 2-3/4" and the pumpkin vine (page 59) also at 2-3/4".  I used Glimmer Mist in Graphite on the tombstone, shielding the bird.  On the vine, which I hand-cut to reposition, I used Graphite and Tattered Leather shades.  I used a Martha Stewart branch punch to add some weeds!


My Tips for Using Yudu Cardshop:
  • Purchase for use with small items.  The inside of the screen is 5"x7".
  • Use a t-shirt to de-sticky the mat (just like Cricut mats), otherwise the project will curl badly upon removal.
  • Design your artwork to be no larger than 3-1/2" x 5-1/2"  (my artwork on this card was 3-1/2"x4-1/2")
  • Center your transparency nearly perfectly under your mesh frame when burning.  This is how it will look on your card!
  • Test before screening onto your final project.
  • Apply liquid emulsion with the mini squeegee that comes with the Yudu Cardshop
  • Use a spoon or squeeze bottle to apply liquid emulsion at the bottom of the screen and pull up.  Emulsion must be applied when the screen is upright, at a slant.  (You can use a capillary sheet of emulsion that you cut down if you prefer; I just always use the liquid stuff!)
  • Dry your screens and emulsion with a hair dryer.
  • Weigh down the frame when you burn your image (just as always); do not worry about light showing under the Yudu frame!
  • Yuduing works great to get white images on darker bases--- something a printer cannot do!
  • I used a screen stand, 6" squeegee, Enviroline white ink, transparencies (waterproof film positives), and WBP Hybrid Emulsion (pint) from Ryonet
  • I used blank Yudu Cardshop screens (two come in each $14 box), black ink, and Silver Argent ink  from Cricut.com.  Yudu Cardshop is also available there!  The squeegee I used to apply the liquid emulsion comes with the Cardshop.
Thank you for looking at my project!  I really did learn a lot and I think I am going to really enjoy my new toy, now that I have figured out the parameters!!  I loved screening artwork from Word Collage!!  I see Word Collage note cards in my future ...and maybe a set of notecards featuring my daughter's drawings!

Click here to see all of my projects in my Project Gallery.
Click here to see my Yudu page for more Yudu tips and instructions.

Monday, October 10, 2011

Yudu Gift for a Tiny Dancer


Just wanted to share a little gift I made last week... it was a birthday gift for one of the little ballerinas in my daughter's dance class.  Juliet turned seven!  She and my daughter are feeling a bit grown up now, having danced in the Wizard of Oz and in the Nutcracker, so I thought a grown up ballerina image was in order!

I love using my Yudu for easy gifts!  Most of the time it takes to Yudu is done while I do other things, like waiting for screens or ink to dry so it is easy to fit it in among lots of other chores and daily tasks!  Using a technique I figured out a couple of months ago, I made a colorful t-shirt for Miss Juliet!  (To see that previous post with technique photos, click here!)


For this shirt, I cut the border of the dancer icon from Wall Decor and More (page 35) at 4" on my Expression in black cardstock.  I printed "JULIET" on my computer onto an inkjet transparency using Microsoft's Calibri at 150 point.  I simply placed the die cut under the name and burned it onto the emulsion to get this design on my screen.  I squirted Plaid Simply Screen inks onto the dried screen, pulling them in a curve to floodfill, and then pulling straight to screen the garment.  The result is a multicolor design.

For the gift bag, I used the same page of Wall Decor and More to find the single dancer, cutting it at 6-1/4".  I cut a piece of tulle and gathered it with a needle and thread and then sewed it to the diecut before adhering the die cut to the bag.  Tape on the back of the die cut secured the thread and kept it from pulling apart when little hands tugged at the tutu (as predicted).

My daughter created a hand-drawn card for her friend to finish the gift!  I am so sorry that I didn't snap a picture of her card to share.  I just love children's artwork so I am sorry to have missed that.

Thank you for looking at my projects today.  I have so much fun making gifts.  You can find a gallery of all my projects, Yudu and otherwise, by clicking my Project Gallery tab at the top of my blog, or by clicking here.  For all of my Yudu information and sources for materials, click here.

I will share one little card I made for a lady on the Cricut message board who requested birthday cards for herself for an upcoming milestone birthday... one that she wasn't looking forward to.  Ever wish we could always look forward to our birthdays like we did when we were little?!  Let's make a pact to do just that!!

Wednesday, October 5, 2011

Driving Down Memory Lane


For me, the Cricut Traveler cartridge has been more about traveling back in my memories than traveling to vacation destinations.  A couple of posts back, I featured the orange cut that reminded me of my grandma's juice glasses.  (If you missed it, you can click here to see it!)  There is another cut that took me back too:  the car cut. 


This cut really reminds me of the VW Bug Super Beetle that was my mom's car through all of the 70s and most of the 80s!  It was sky blue, although I really don't know if that was the official color name!  It wasn't the easiest car to love with its lack of air conditioning, AM-only radio, and that waffle-patterned vinyl that left an imprint on the back of my legs in the summers when I wore shorts.  (I used to say you could always pick out the kids who arrived anywhere in a VW because we all had that same pattern pressed into the backs of our thighs from the seats.)

My mom was a single parent, but she worked hard and used to take us everywhere in that car!  Washington DC, Daytona Beach, Sanibel Island, Detroit, and countless other summer vacations and weekend trips during the 17 years that she had that car.  I can't even imagine taking two small kids on trips in that car... that was before cell phones too!  (She was tough!)

I thought it would be fun to do a 'Just Because' kind of card with that cut and an Erma Bombeck quote that just kind of fit.  This is the second project I am doing as part of the Obsessed with Scrapbooking Design Team!

I started the project by visiting Google Images to look at what that car really looked like-- beyond my patchy memories of it.  (Here's a preview of my finished paper car too!) 


I cut two images of the car in blue at 3" on my Expression.  I cut one shadow of it too in black.  I cut off the luggage rack on the top.  (We always put our luggage in the trunk, which is on the front!  There was also a little cubbie behind the backseat, which we always had stuffed full!)

I used a punch to cut out my hubcaps from metallic paper.  I cut off the end button on the Cuttlebug folder with buttons from the Just My Type set.  *gasp!*  Yes, it was hard to allow myself to do that but I needed an embossed center on my hubcaps just like the old VWs had! 


I used my flower-making pad and tools to create a rounded (convex) form, taking care not to roll over the embossed area.


I colored the tire with a Sharpie pen and then applied embossing ink and powder and heat set it to get my tires!  I outlined the inner edge with a white gel pen to indicate white walls.


I inked the edges of the car and door and adhered acetate to create windows for the car.  (The driver's window is partially rolled down-- remember 'rolling' down a window with a crank?!)  I added silver paper shapes to enhance the bumpers and door handle.  (Remember chrome bumpers?)


From the second car cut, I hand-cut fenders.  I used the flower-making mat and tools again to round them and applied them with pop dots to raise them off the surface.  I hand-cut orange lights and used a white gel pen to indicate the silver detail along the side of the car.

I adhered the car to the shadow, trimming a bit.  I applied the car body flat.  The hubcaps were adhered with pop dots.  I made a paper hinge (just a folded piece of card stock) so that my door would stay open to accommodate the presence of the figure I will be placing behind it!  The benefit of this detail is that it folds down flat for mailing but pops open when it comes out of the envelope!


I added a bit of hand detail using a Sharpie Micro point pen to create the vent over the engine and just behind the rear window.  I added that handle for the engine-- remember the engine is on the rear!  (Was that a handle?  Maybe it was a light over the license plate-- my old memory has forgotten that detail!)

Next, I worked on the 'mom'.  I cut a 3" figure from Country Life on the Imagine, floodfilling it with RGB 250,229,210.  (I also cut a 5" square floodfilled with the same flesh color).  I cut an identical figure, this time floodfilling with a print from Hey Diddle Diddle so that I could create a dress.  I hand-cut to shorten her dress and remove the pitchfork.  On the Expression, I cut her hairstyle from Paper Doll Dress Up (page 67) at 1-1/4" for the bangs and 1-1/2" for the back part of the hairstyle.  I added a few extra locks of hair.


I hand-cut a separate head so that she would have a chin using the 5" floodfilled square, tucking the forehead under her bangs.  I used a Sharpie Micro Fine pen for the details on the face and body-and a little ink for her cheeks.

I used a pop dot to adhere the figure to the open car door.


I hand-cut a couple of little kid faces and applied them to a piece of vellum.  The vellum served to give atmospheric perspective inside the car.  The vellum was attached to the backside of the car. 


Next, I cut  an 8-1/2" square, floodfilling it with the banner pattern from Hopscotch.  I used that paper to make the top ticket cut on the Expression.  I cut the ticket from Traveler (page 61) with the shadow for the mats for the front of the card. 

I typed out the quote I wanted to use, centering and sizing for the ticket cut.  I used a lightbox to center the cut onto the white paper, taping it lightly, and then running it back through the printer.


I adhered the car/lady onto the mat with 1/8" pop dots.  I cut a piece of card stock 9" x 8-1/8" and folded it down to 4-1/2" x 8-1/8". 


Since this was a 'Just Because' kind of card, I wanted a nice area inside for a hand-written note.  For the inside mat, I cut the shadow of the ticket from Traveler just as for the front of the card.  I adhered it to the inside of the card.  The banner was hand-cut from the leftover paper from the 8-1/2" square cut previously. 


Thank you for looking at my little card!  I loved playing around with this cut!  It was so much fun thinking about that old car and giving the cut a bit of dimension!  You can see all of my projects, including my other cards and altered figures by clicking the My Project Gallery tab at the top of my blog, or by clicking here.

If you are interested in the Traveler cartridge, click here for cartridge details on Joy's Creative Memories site! 


But wait! There's more! Click 'older posts' above!

But wait!  There's more!  Click 'older posts' above!