
Happy NSD Weekend! This project is linked to Circleville NSD and the Peach of a Teach Challenge! Scroll down to the end of this post to see links to other Circleville NSD bloggers!
And... I am giving away a prize here on my blog! Details for that are below the list of Circleville NSD bloggers near the end of this post!!

And guess what is also coming this week? It's NEA's National Teacher Day on May 6 and PTA's Teacher Appreciation Week May 5-9! This is a great time to thank the person (or persons) to whom you entrust your favorite kiddos all day long! My daughter's teacher is great this year and has been more accessible than any previous teacher so I have gotten to know a bit about some of her challenges. There are only eight students in her class, so this year has been all about individual attention! To tell her 'thank you' for her efforts, care, kindness, and expertise, I wanted to put together a gift set.
And what better time to make a gift than NSD Weekend?! (Maybe one year, I will actually do a scrapbook page for NSD!)
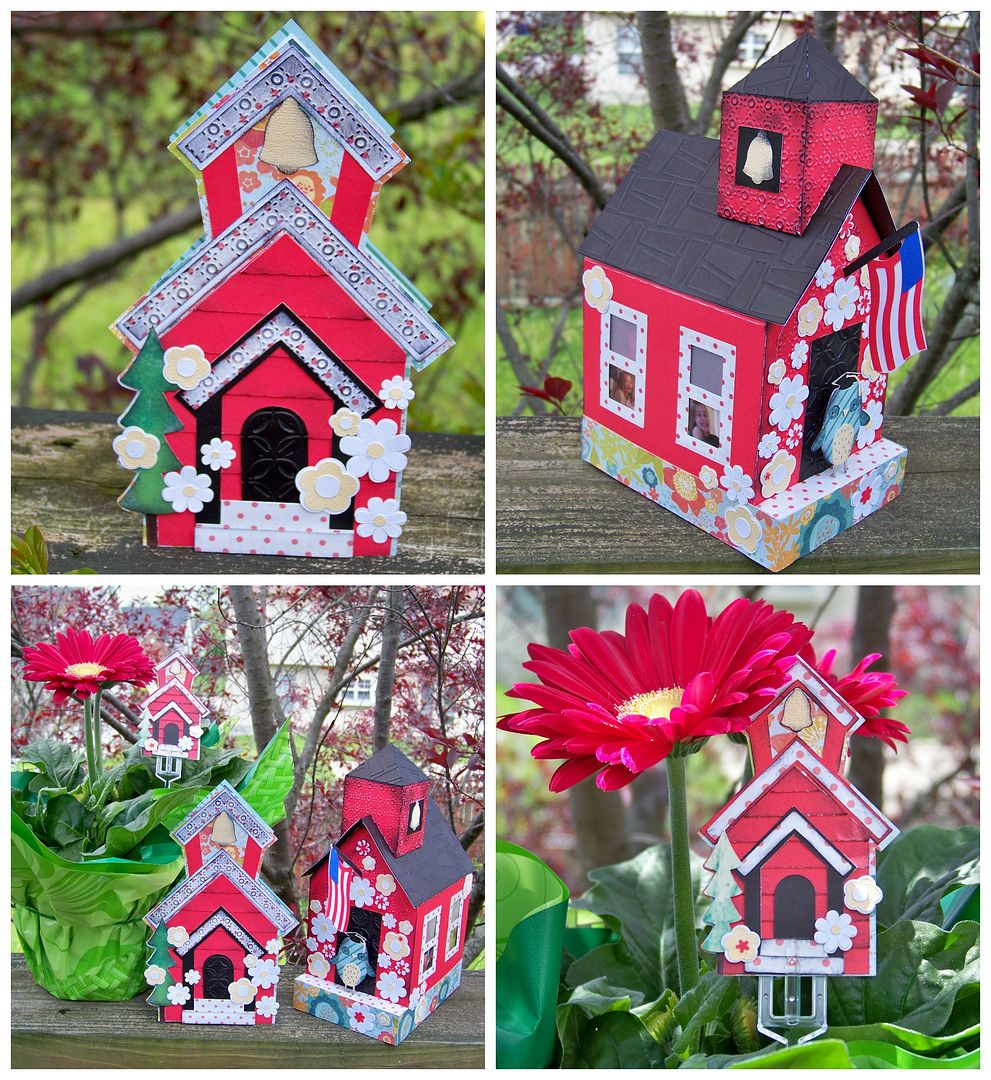
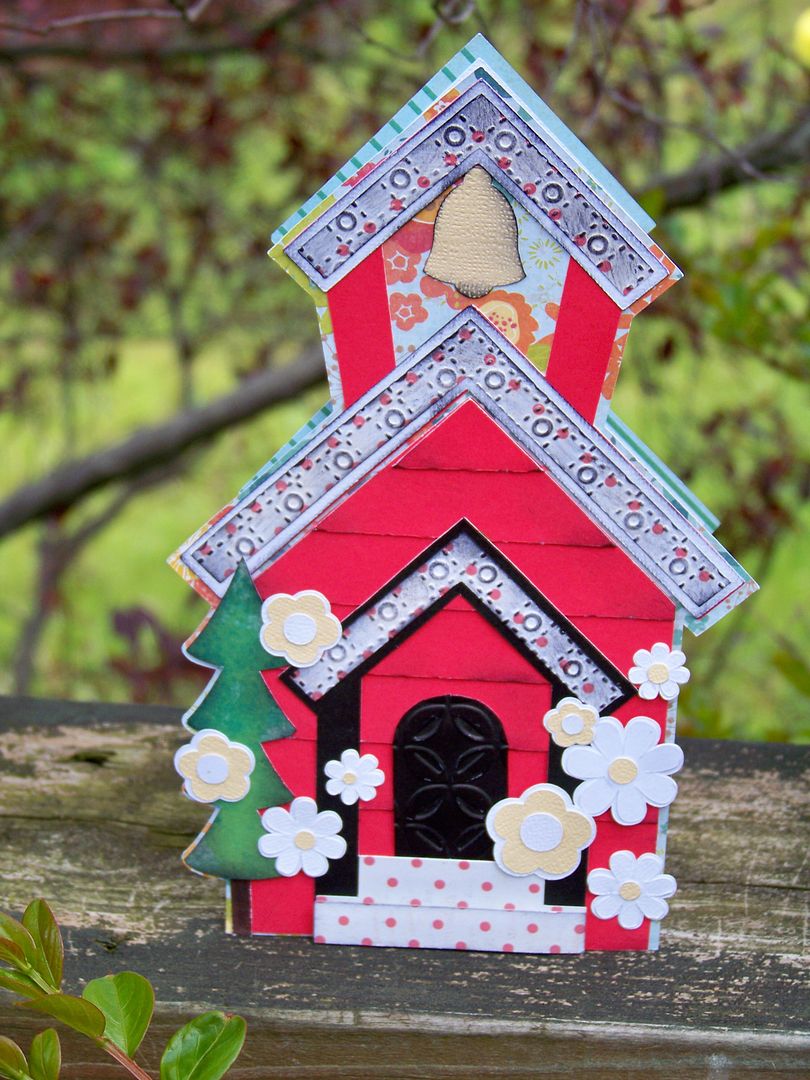
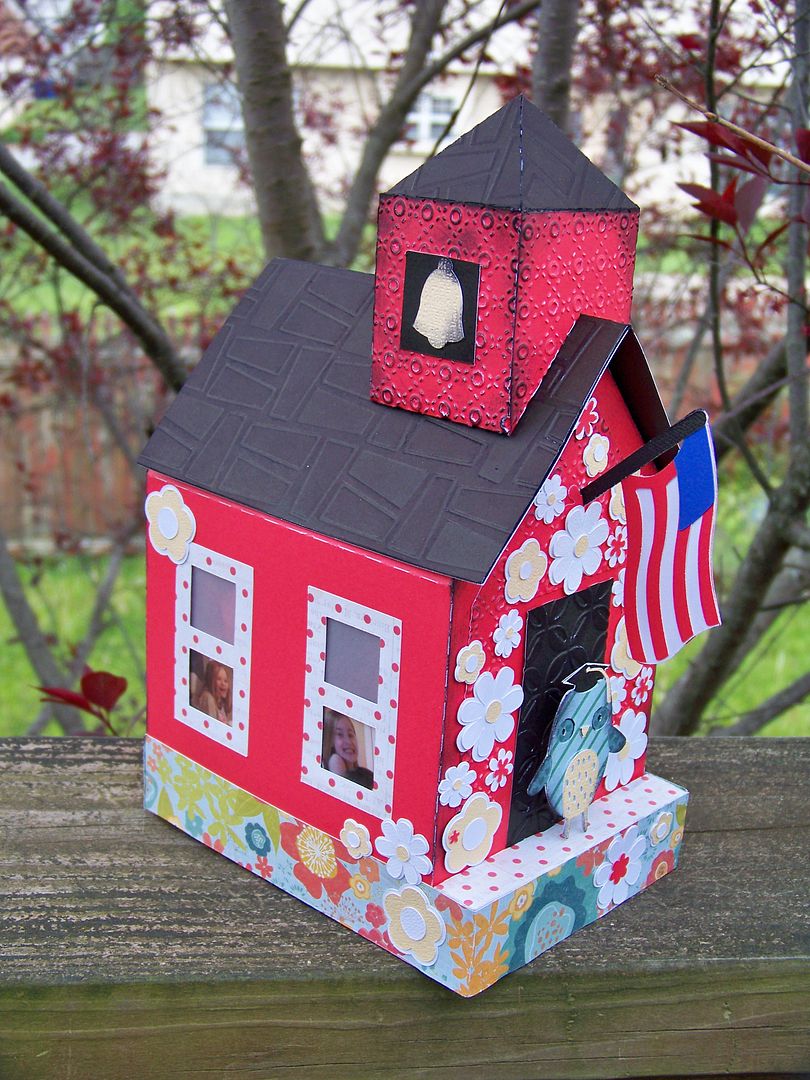
For my project, I used my Cricut Explore with files from SVGcuts: School Days and Miss Baker's Classroom. School Days has an adorable three dimensional schoolhouse gift box and Miss Baker's Classroom has a card that is very similar to the box. From that file, I made a matching card and a tag. SVGcuts has easy-to-put-together projects that are a lot of fun to decorate and customize!
Of course there are other options: If you were wanting to do this project with Cricut cartridges instead of SVG files, there is a great box on Sweet-tooth Boxes. To see an adorable schoolhouse made with this cartridge on the Crazy about Cricut blog, click here. If you wanted to make your own SVG or even hand-cut one, there is a fantastic little free PDF mini schoolhouse gift box by Design Mom -click here.
If you are a Cricut Explore owner and have never downloaded SVG files or have concern about doing that, check out this video by Melody Lane (click here). She shows you how to navigate the site and how to download files from SVGcuts to Design Space.


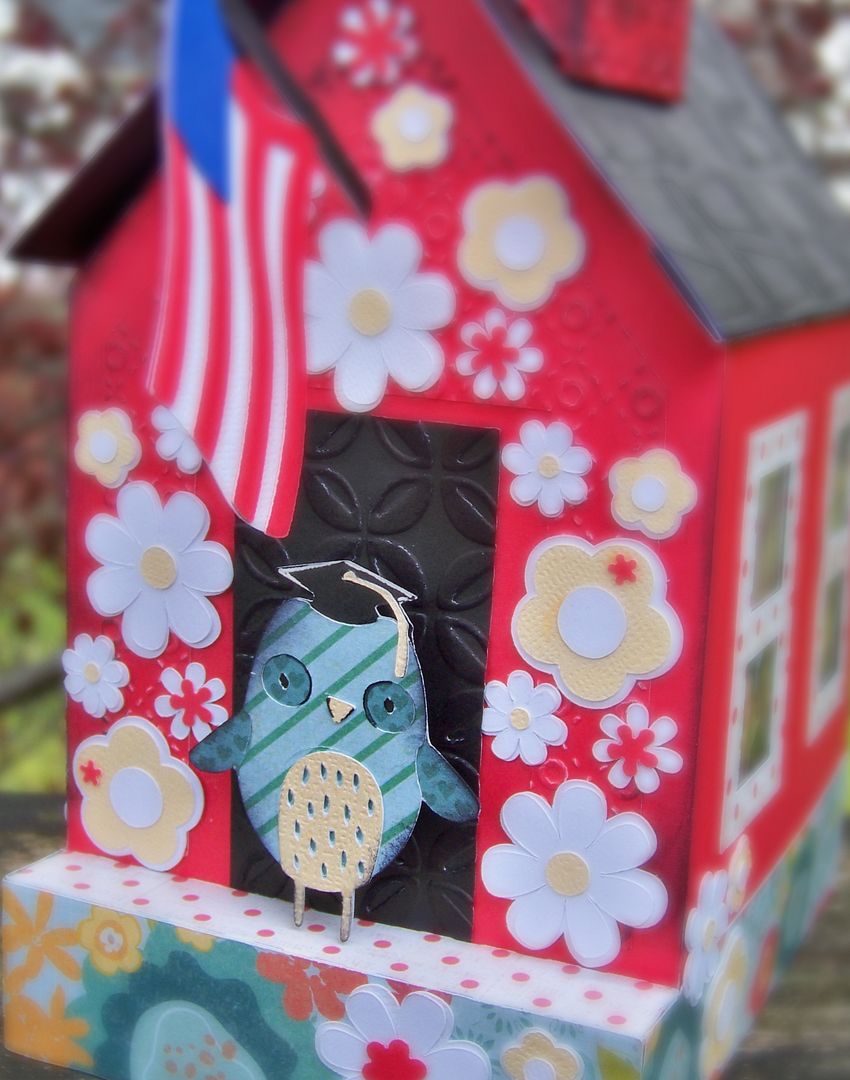
I started with the schoolhouse box on School Days. I followed the SVGcuts construction video, making these changes:
I cut the window 'glass' from recycled clamshell acetate as well as vellum. I set this up as a new material with pressure of 338 and multi-cut 3. To set up a new material, I set the dial to 'custom' and clicked the material settings button at the bottom of the panel, after loading the mat and before pressing the cut button.)

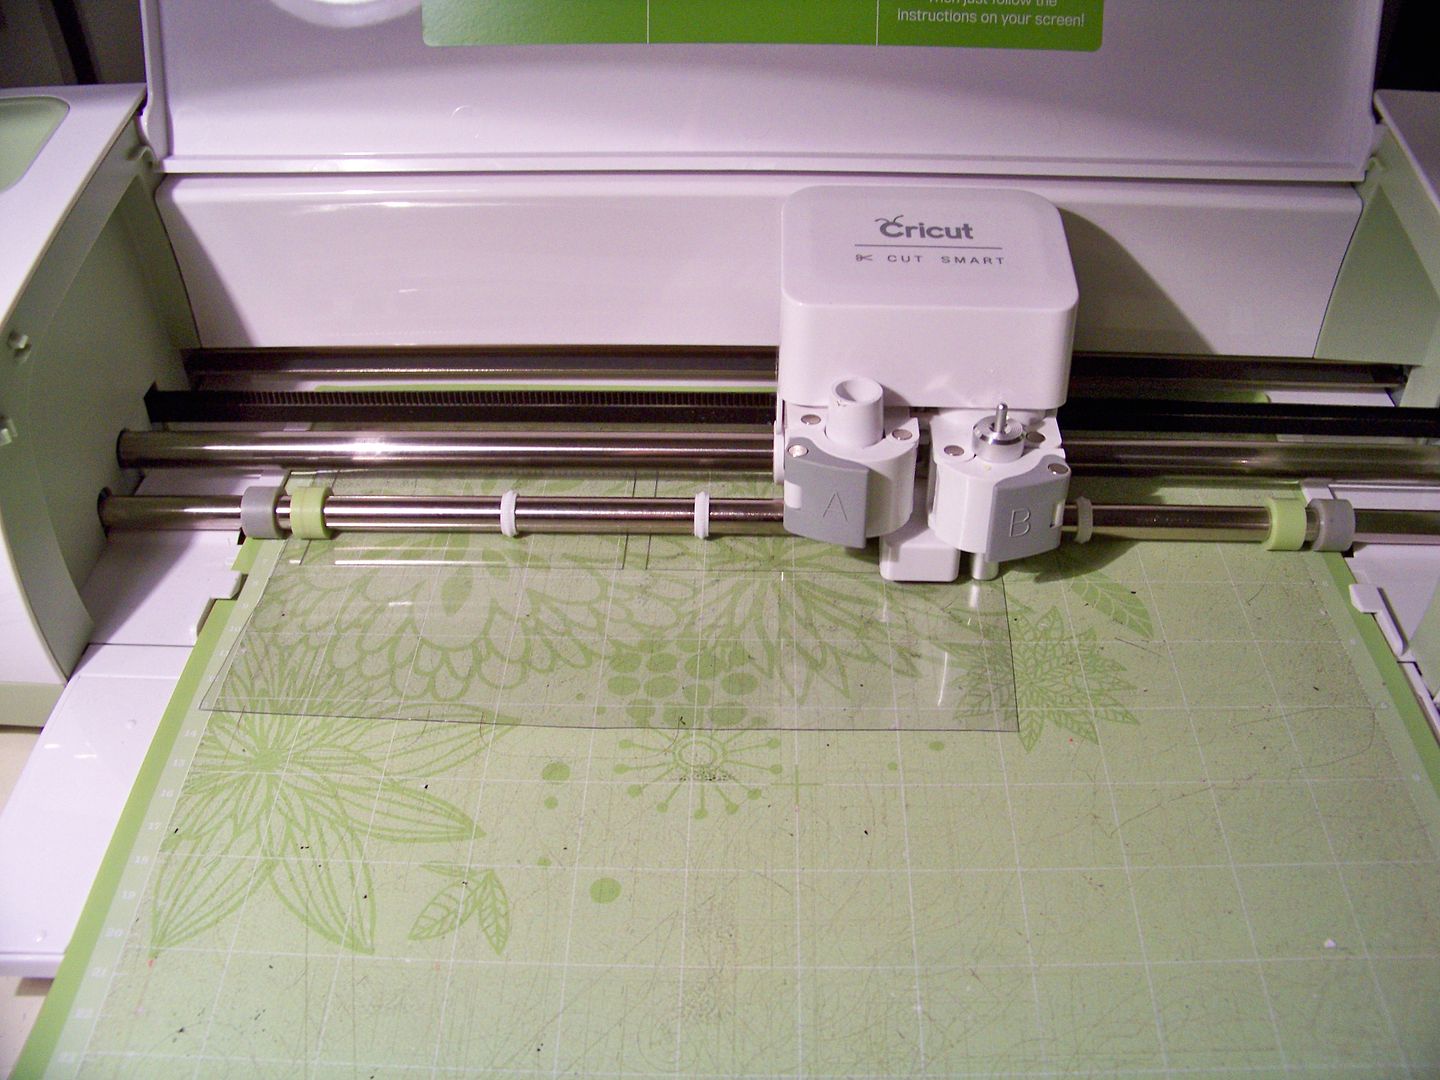
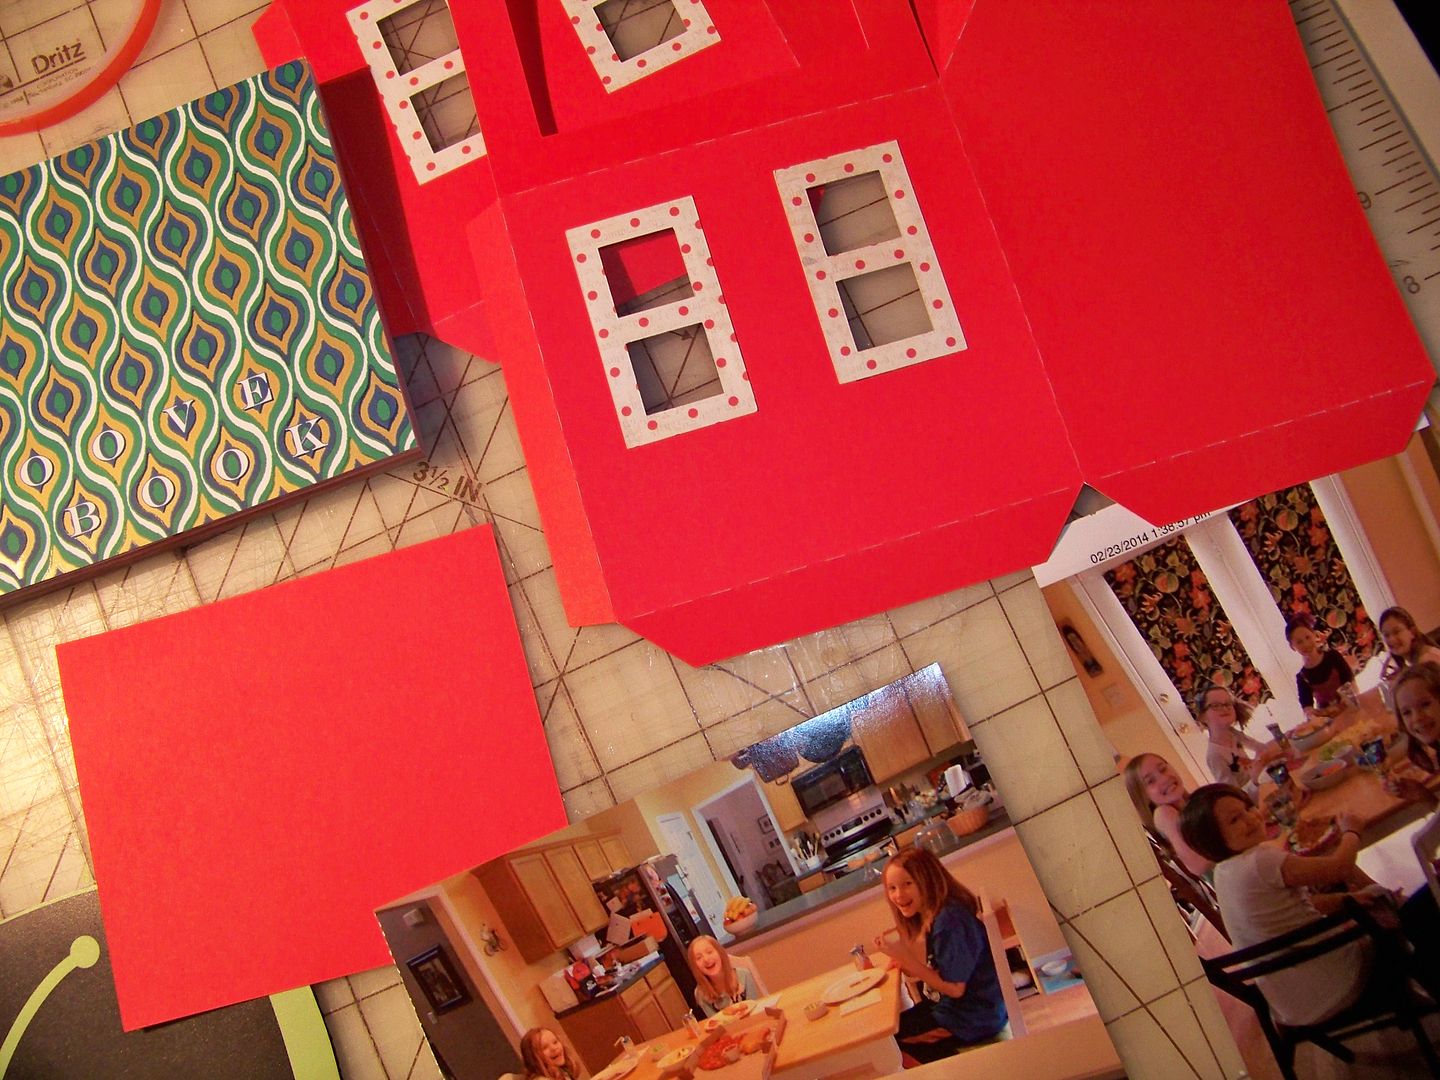
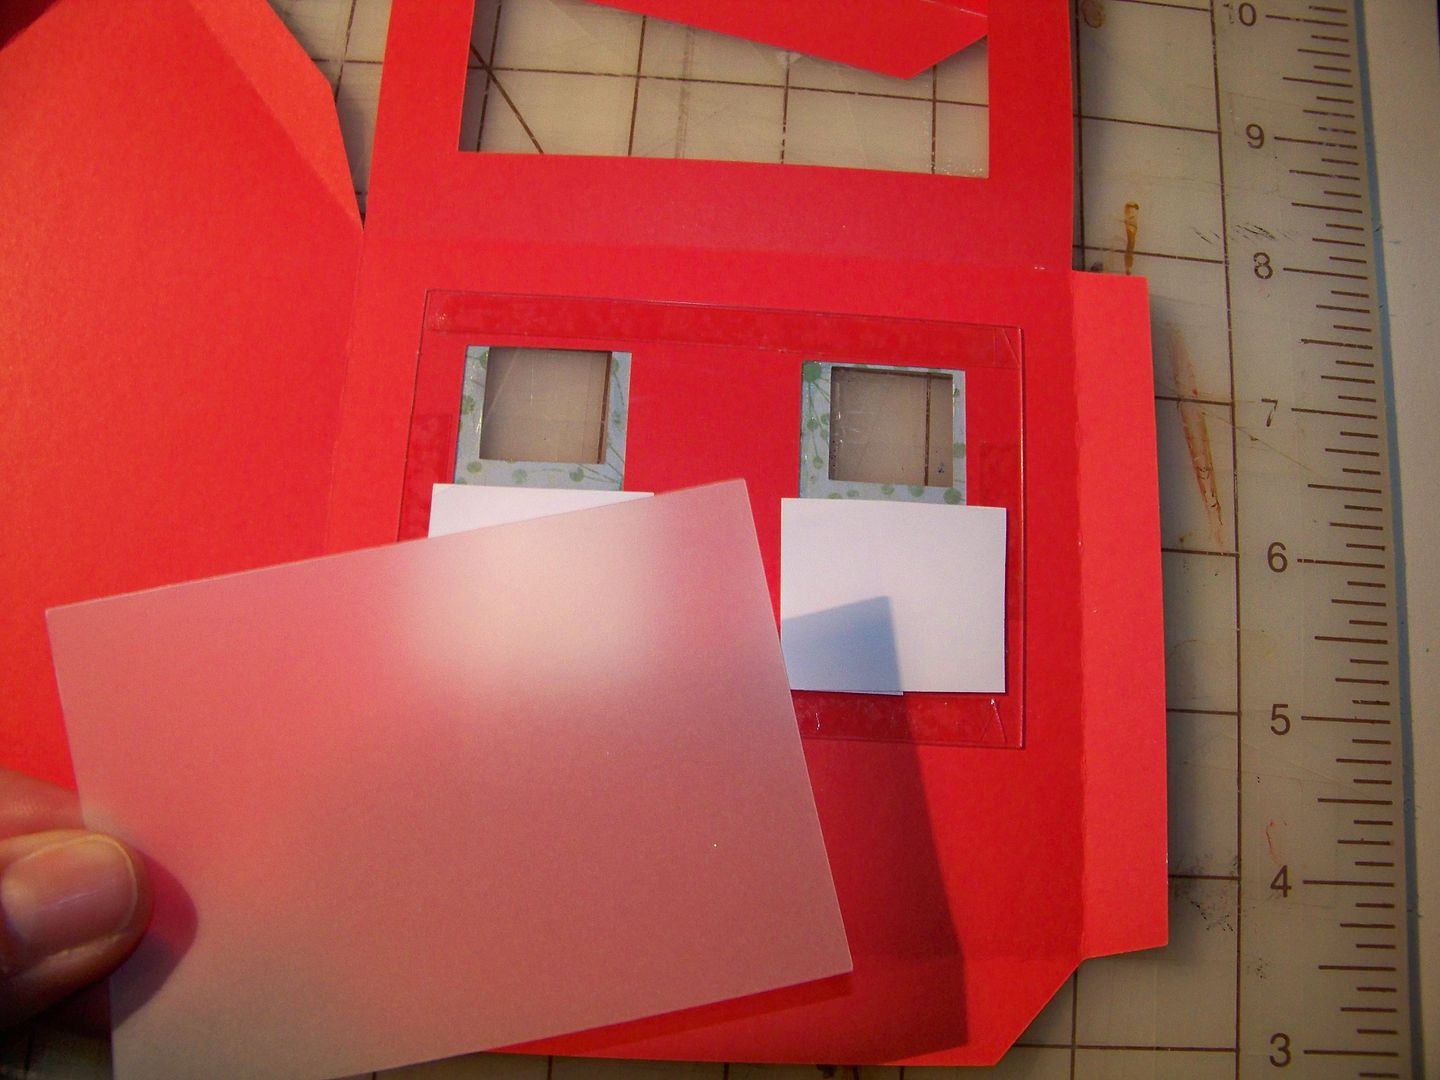
This did not cut the material all the way through, but scored it so that I could peel it along the cut lines, making a clean edge. I wanted a clear window that I could use to frame photos of my daughter and her friends. After the acetate was adhered in place with Terrifically Tacky two-sided tape, I glued in the photos. I backed the windows and photos with the pieces of vellum.

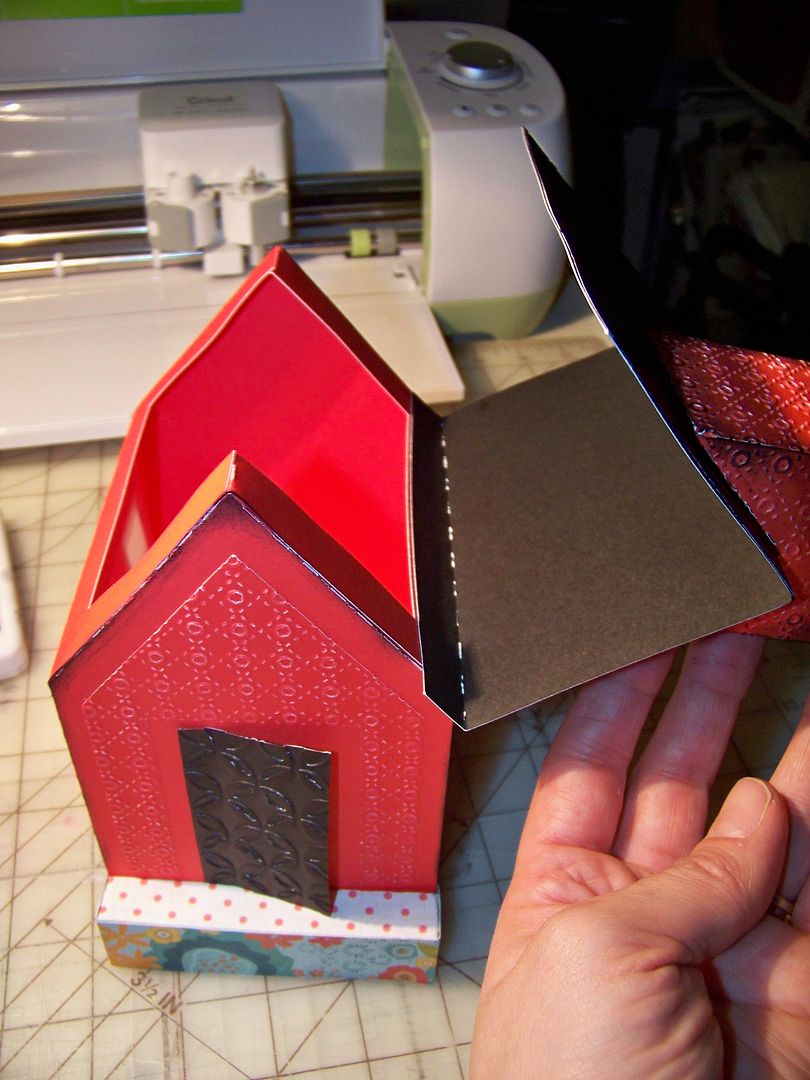
I embossed the roof and tower roof (as well as the door and building front)...

...And, unlike the construction video, I glued the two roof pieces together before gluing the hinge to make it easier.
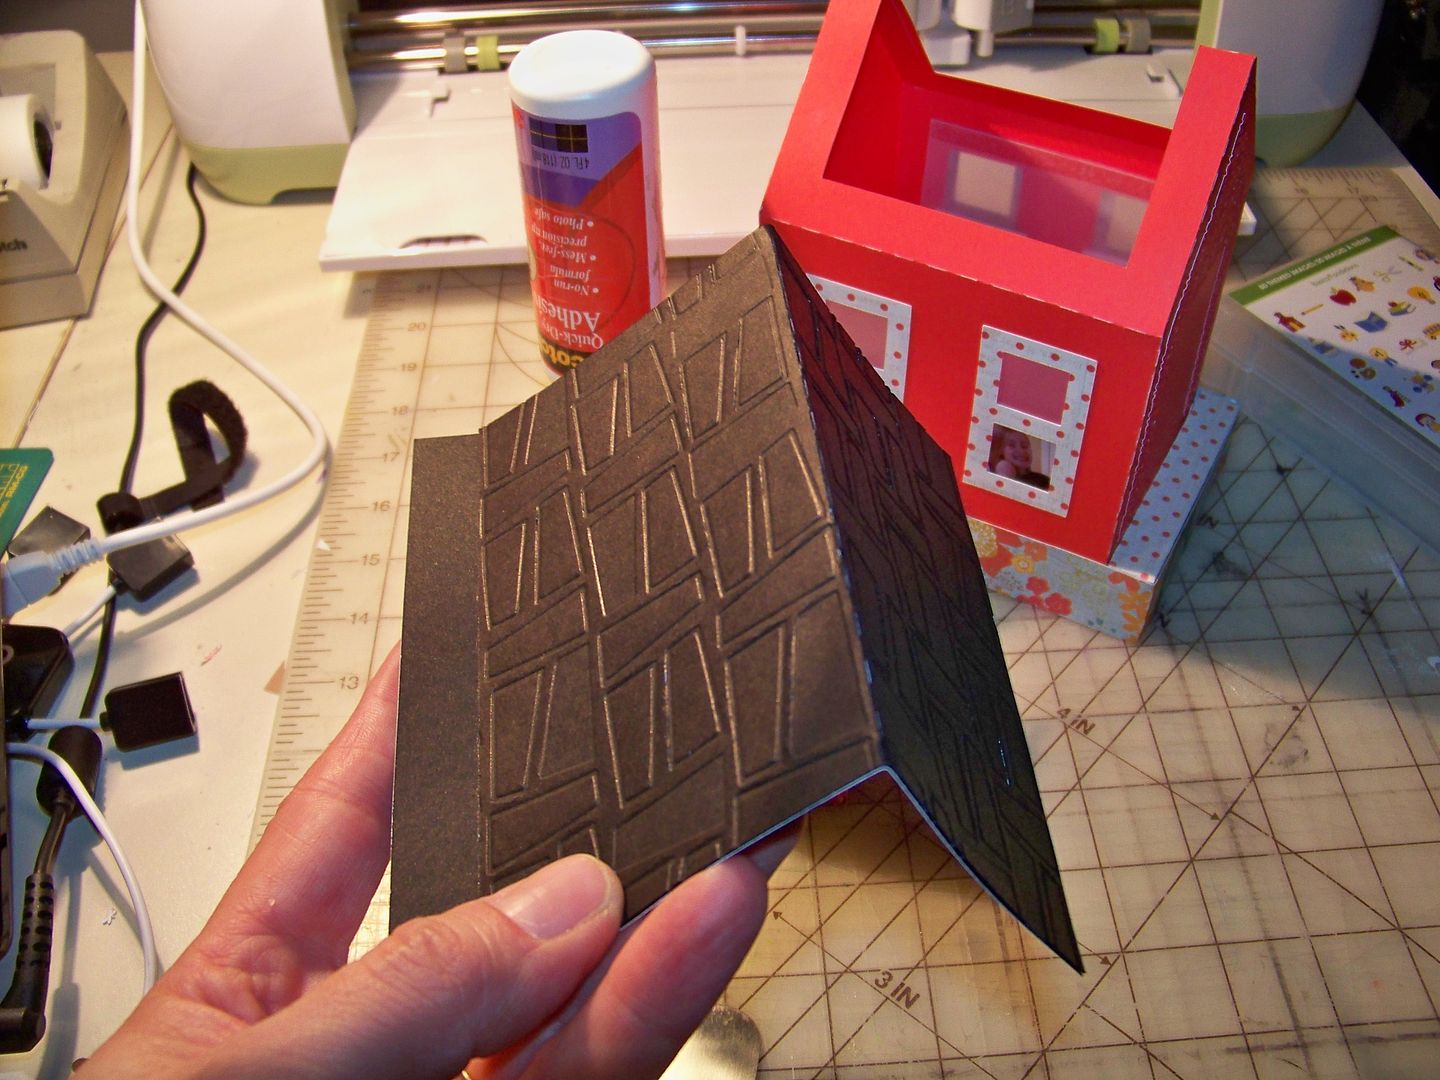
I glued the hinge underneath the roof to hide it.
Next: The fun part! Decorating the schoolhouse!
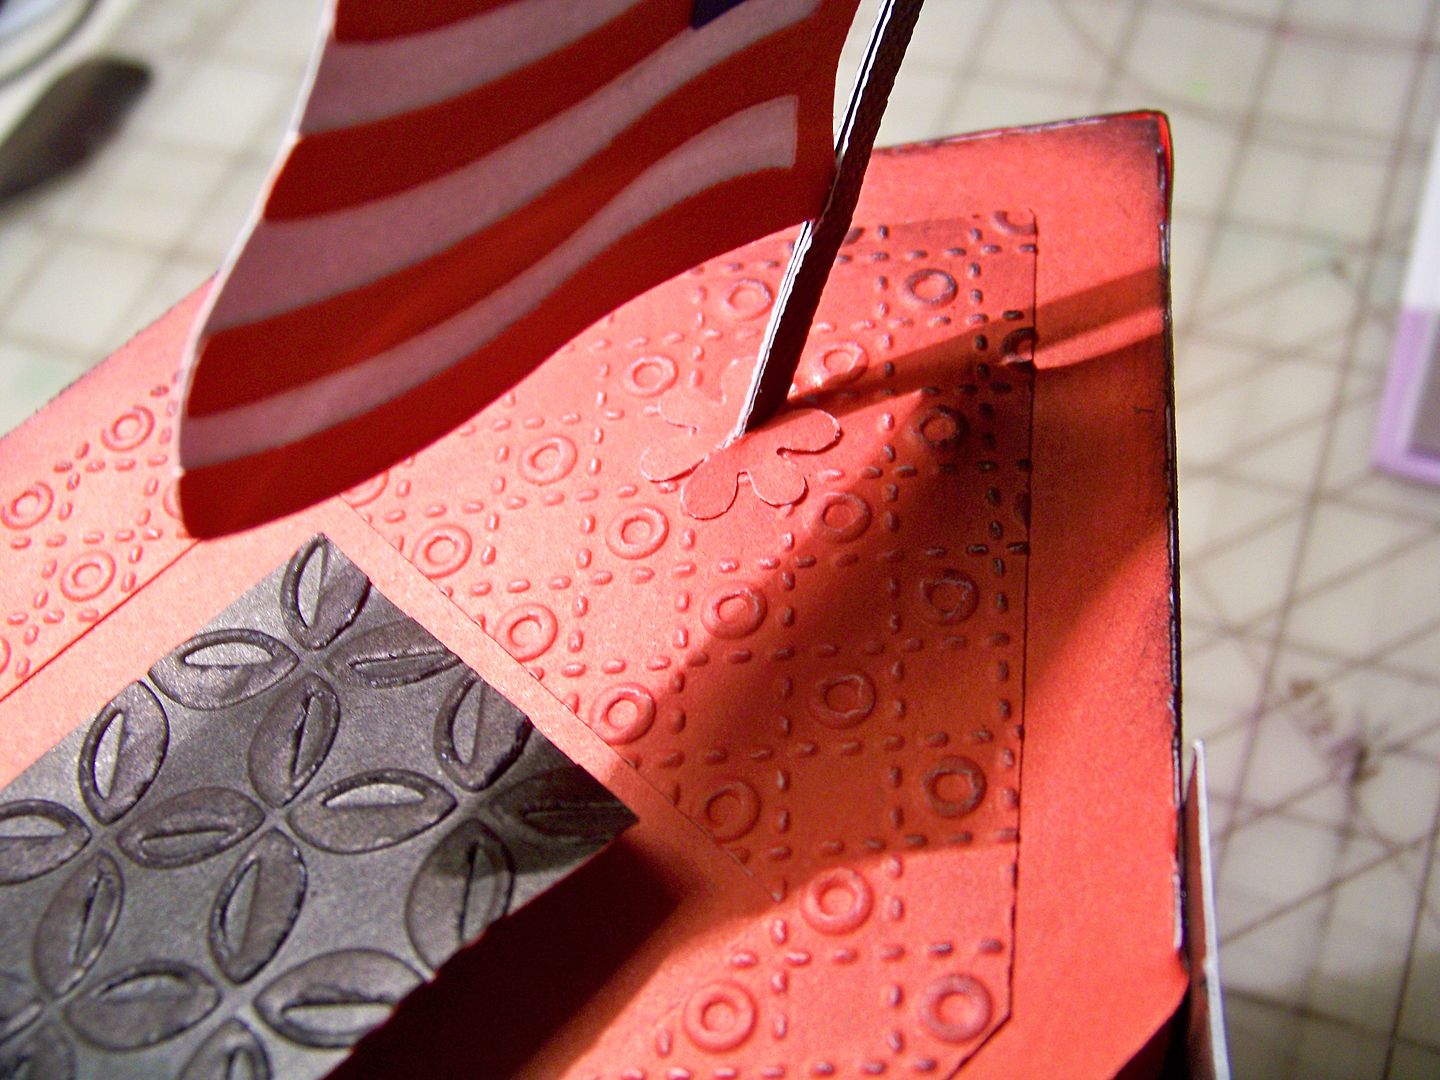
I made a flag from Cricut cartridge Stand and Salute, cut at 2.5". I cut this on my Expression while my Explore cut flowers! I flipped the red and blue pieces so that the flag would be completed on both sides. I used an Xacto knife to cut a small slit over the door. I inserted the flag pole and split open the layers and glued them to the inside of the schoolhouse box. I punched a square and adhered it to hide that construction.


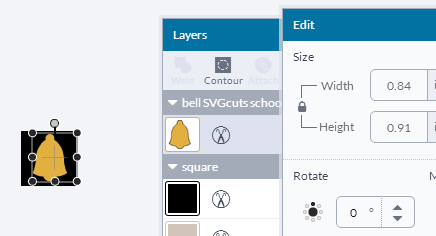
I added a bell by grabbing the one off of SVGcuts Miss Baker's Class that I had downloaded in preparation for my matching card and tag. I grabbed a 1" square from one of my images in Design space.

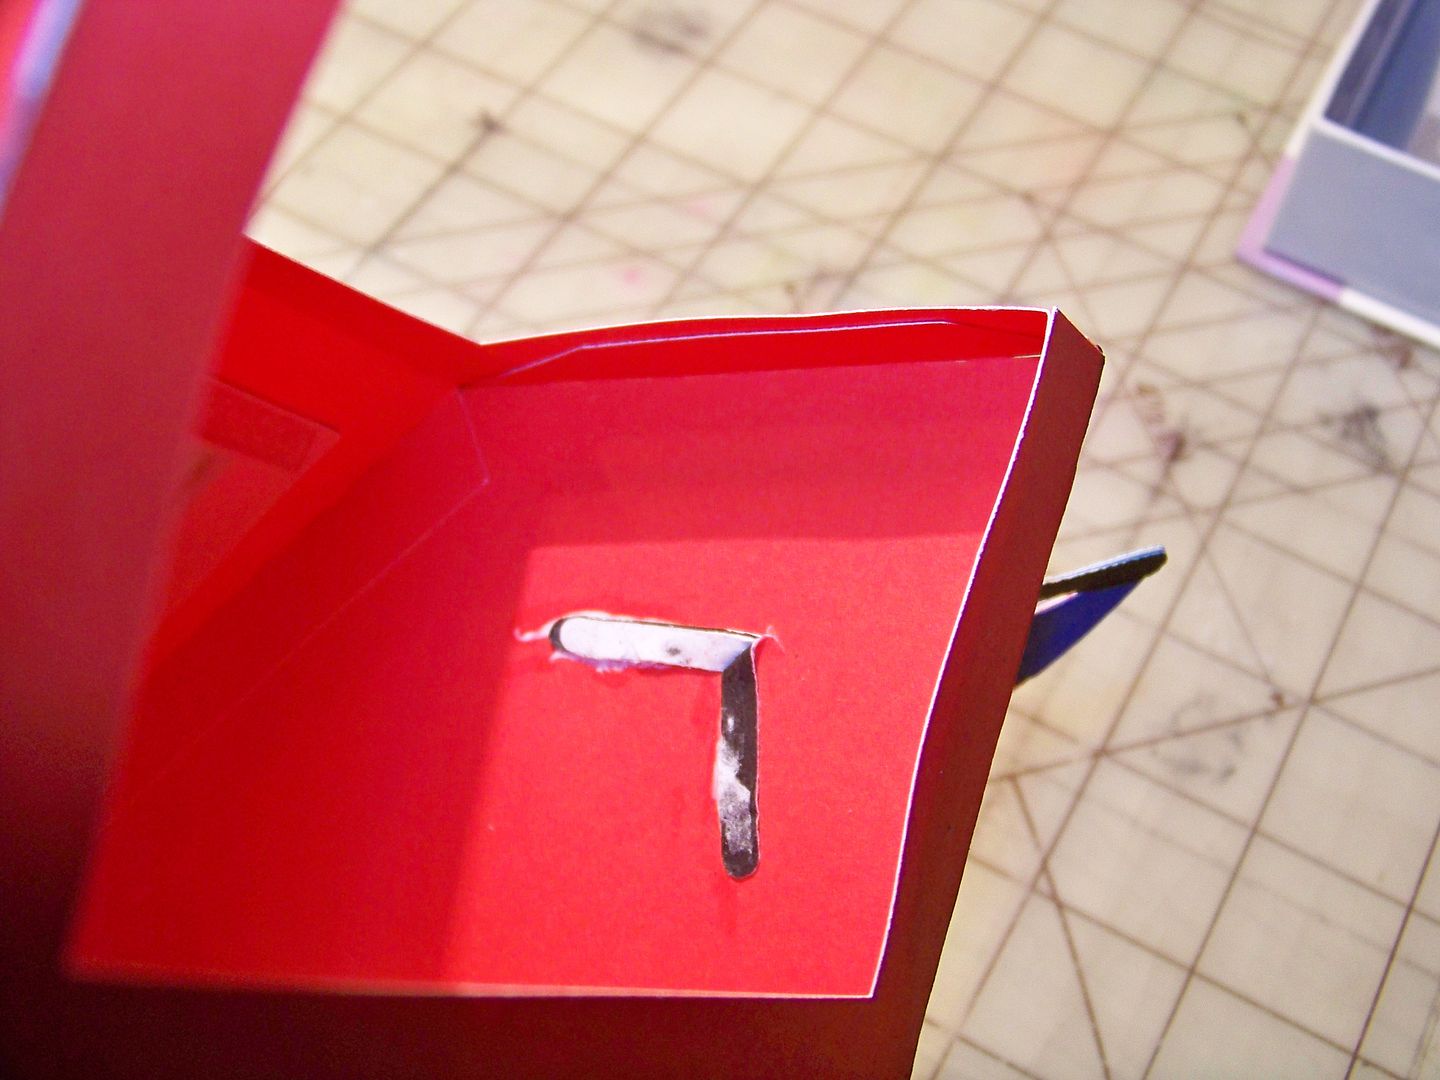
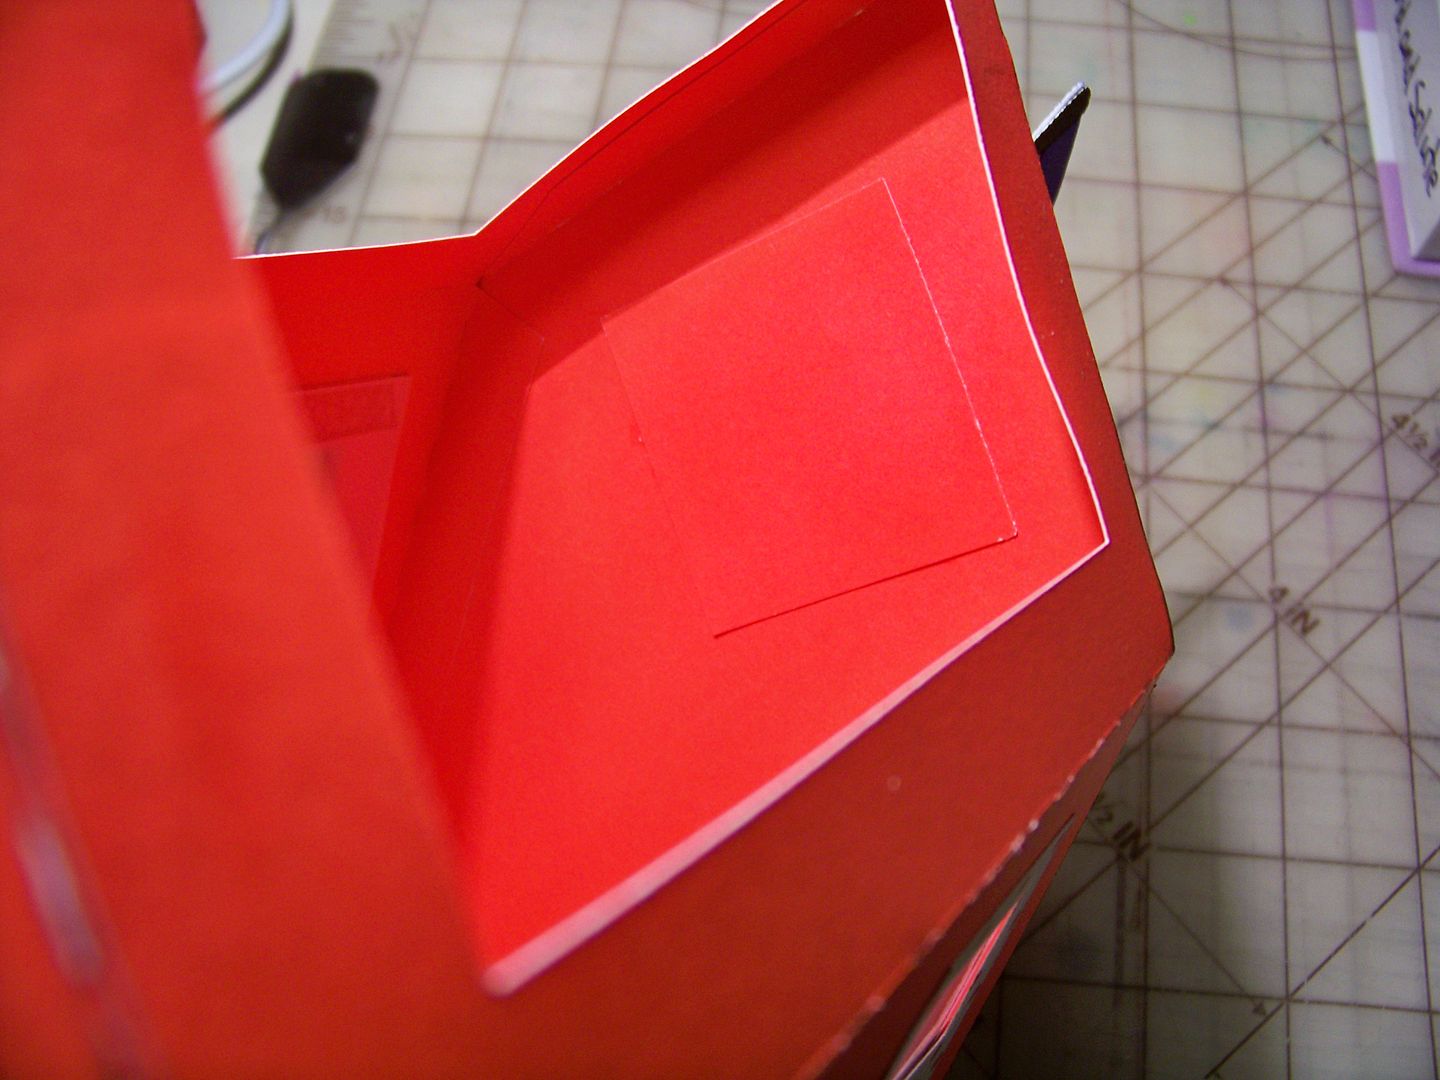
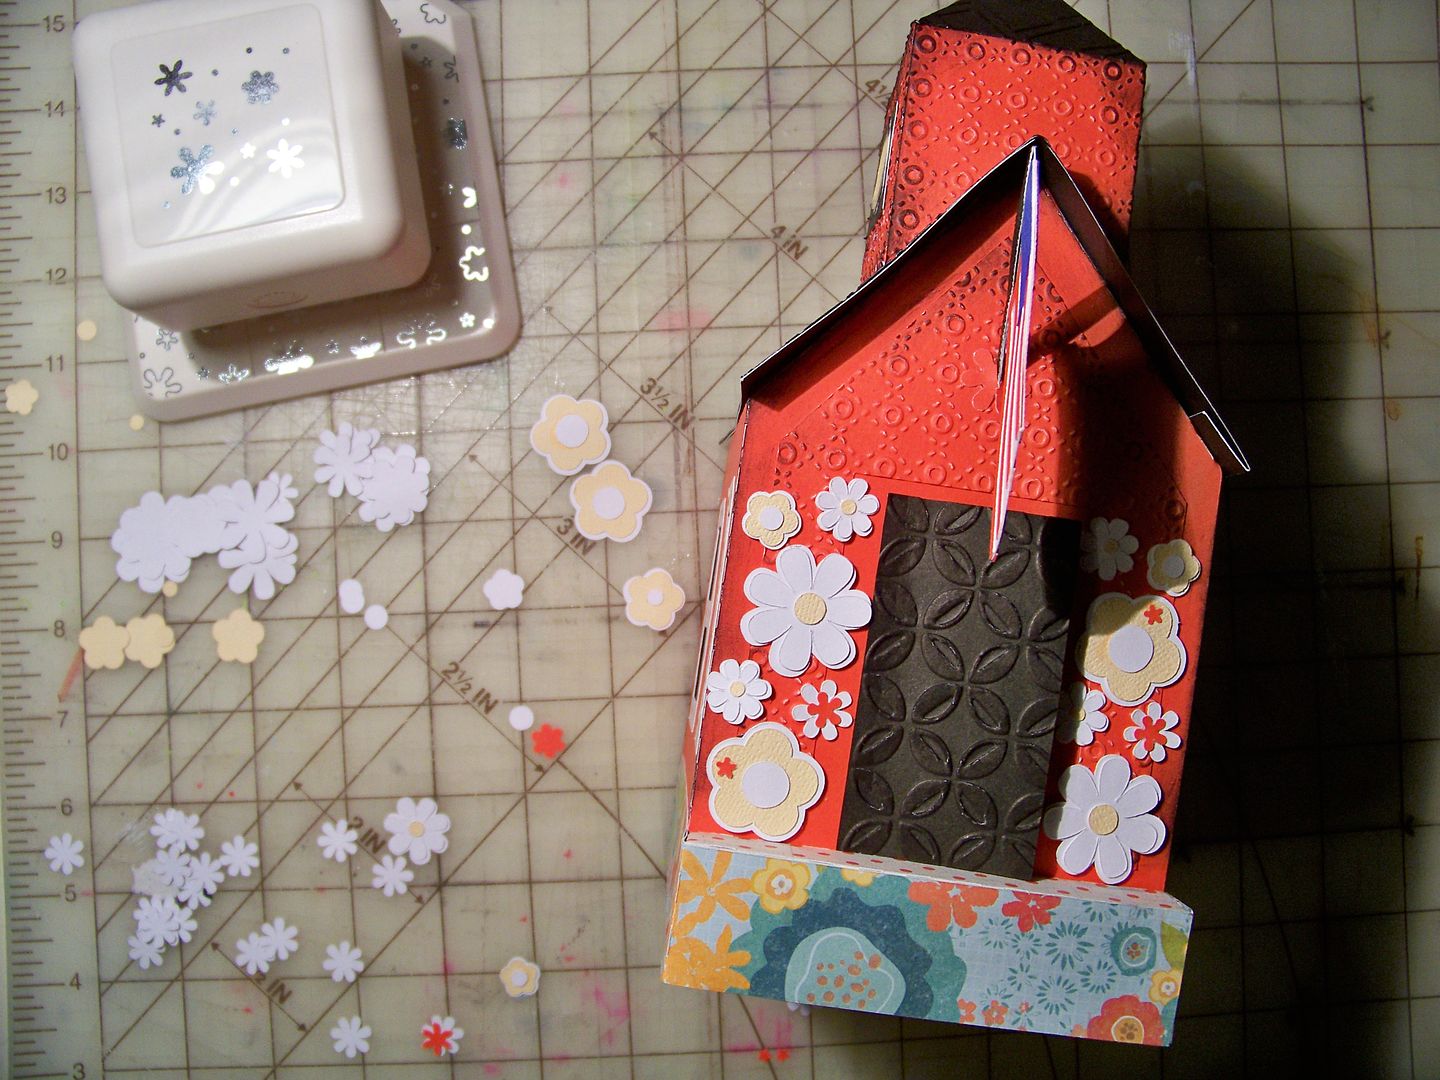
I punched a small flower that I slit and glued in place around the flagpole on the front to hide the cut I made with my Xacto knife.
I downloaded a free flower design from the fabulous Juliana Michaels, of 17 Turtles. You will remember her from the wonderful Circle Design Team! You can find her SVG flower file by clicking here to get to her blog post, where you will be able to download it! I also used a punch for the tiny red flowers.
I added a bell by grabbing the one off of SVGcuts Miss Baker's Class that I had downloaded in preparation for my matching card and tag. I grabbed a 1" square from one of my images in Design space.
The next time I make this box, I think I would like to cut out the space in the tower and add the bell inside! I added an owl that was cut at 2" from the Recess Cricut cartridge.
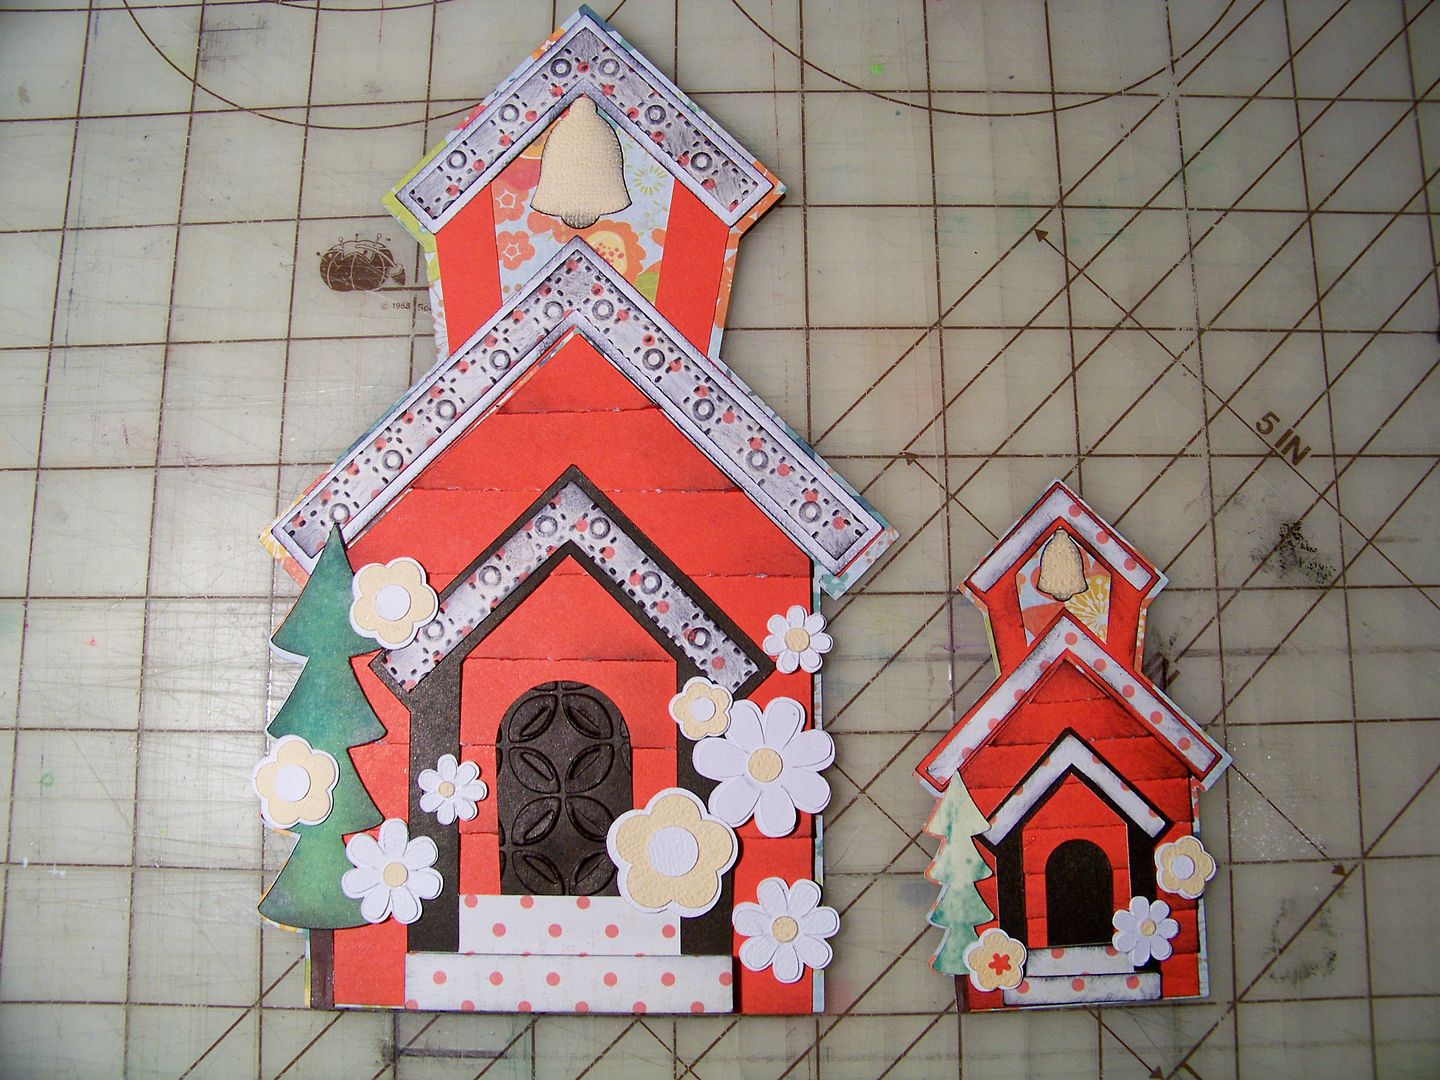
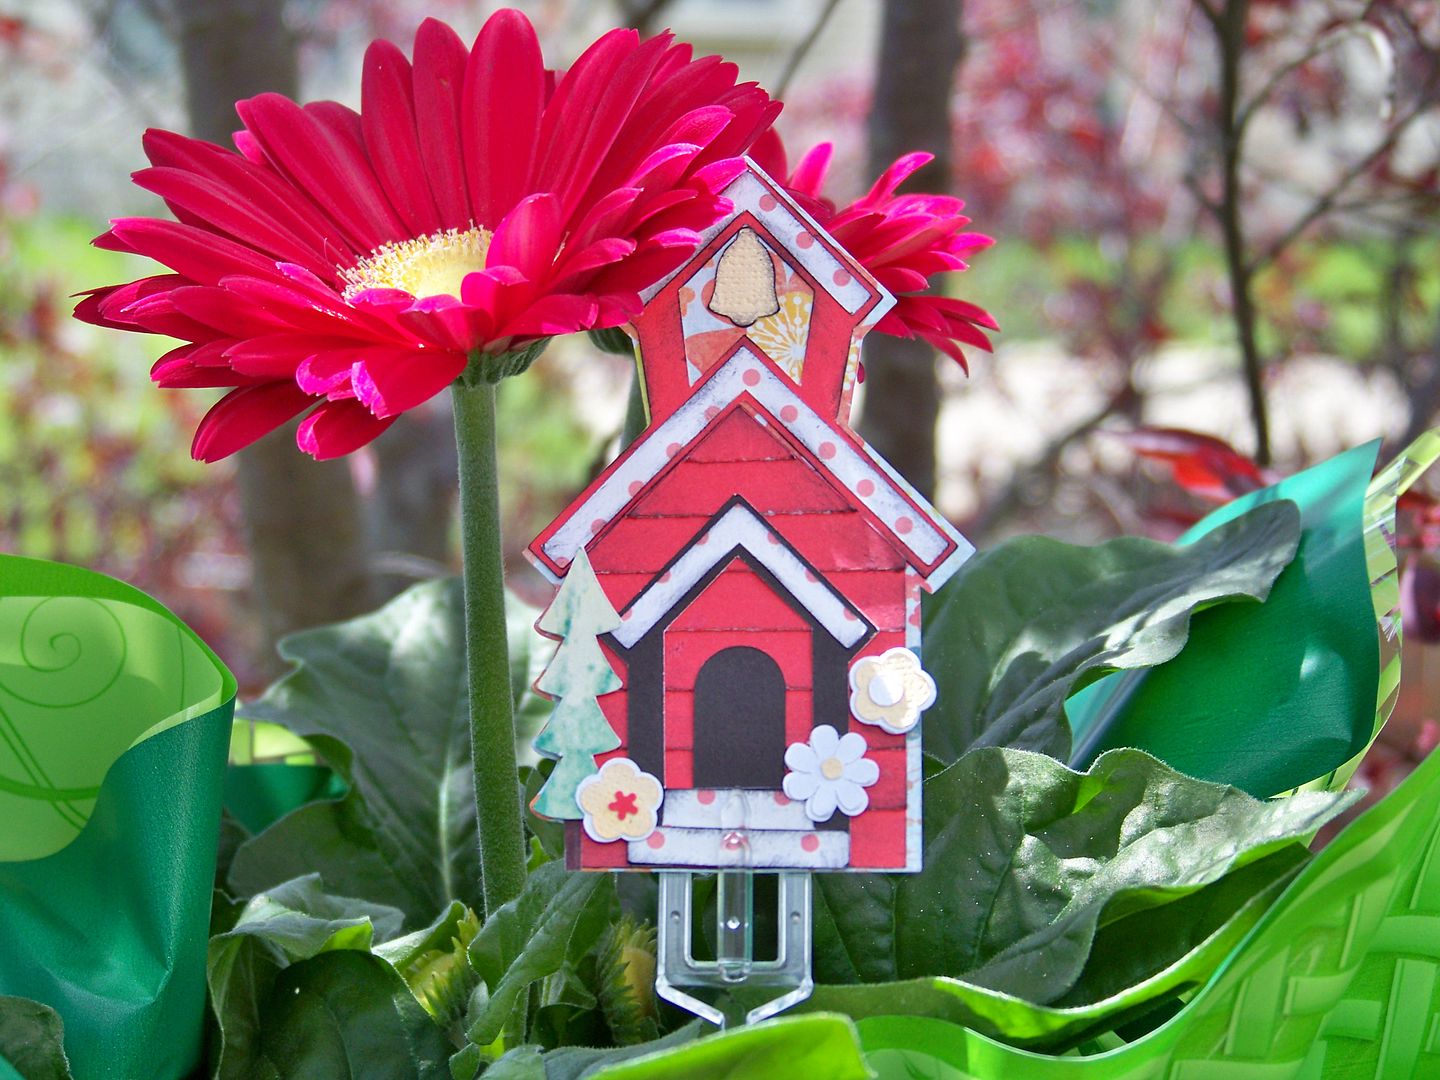
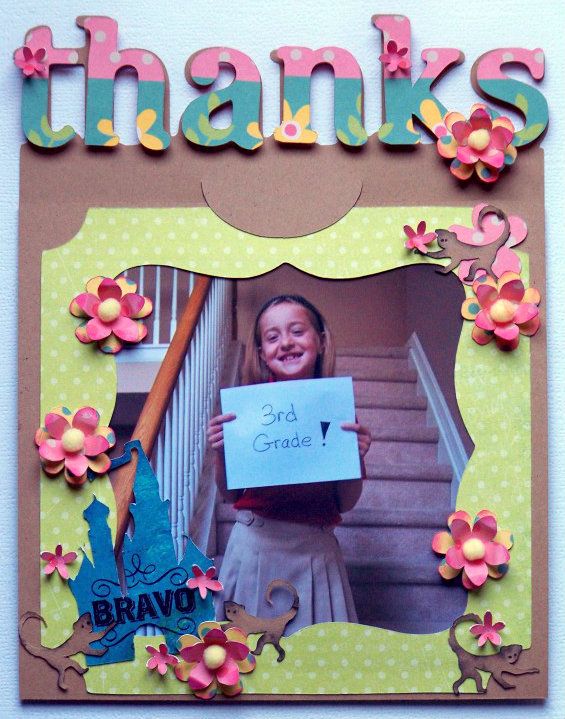
Next, I worked on the tag and card. I wanted them to MATCH one another...

...so I sized the card as instructed on the SVGcuts "menu" (a handy guide for knowing what size the pieces were designed to be). I sized the tag to be 50% of the card. That just means if a width for a card item was sized at 3", I made the size 1.5" for that same item on my tag. I did that sizing adjustment for each piece.

Next, I worked on the tag and card. I wanted them to MATCH one another...
...so I sized the card as instructed on the SVGcuts "menu" (a handy guide for knowing what size the pieces were designed to be). I sized the tag to be 50% of the card. That just means if a width for a card item was sized at 3", I made the size 1.5" for that same item on my tag. I did that sizing adjustment for each piece.
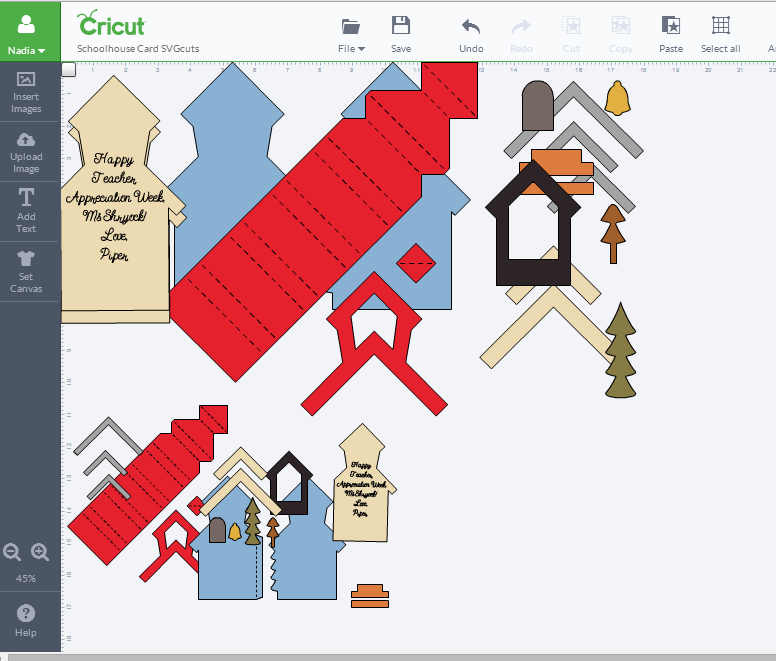
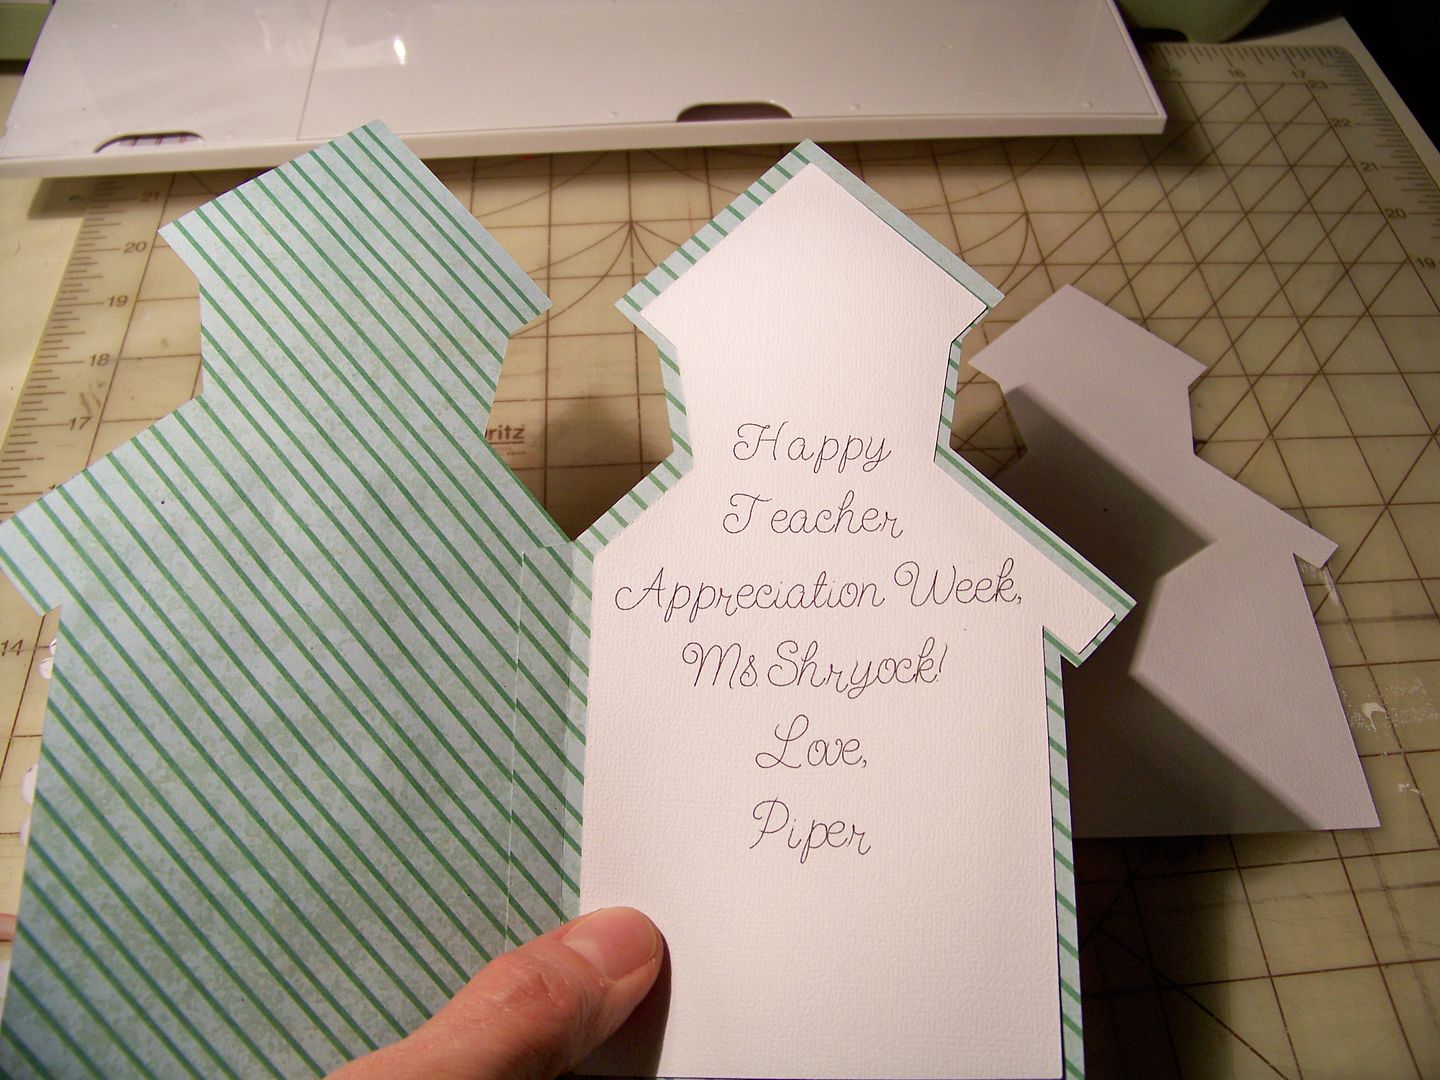
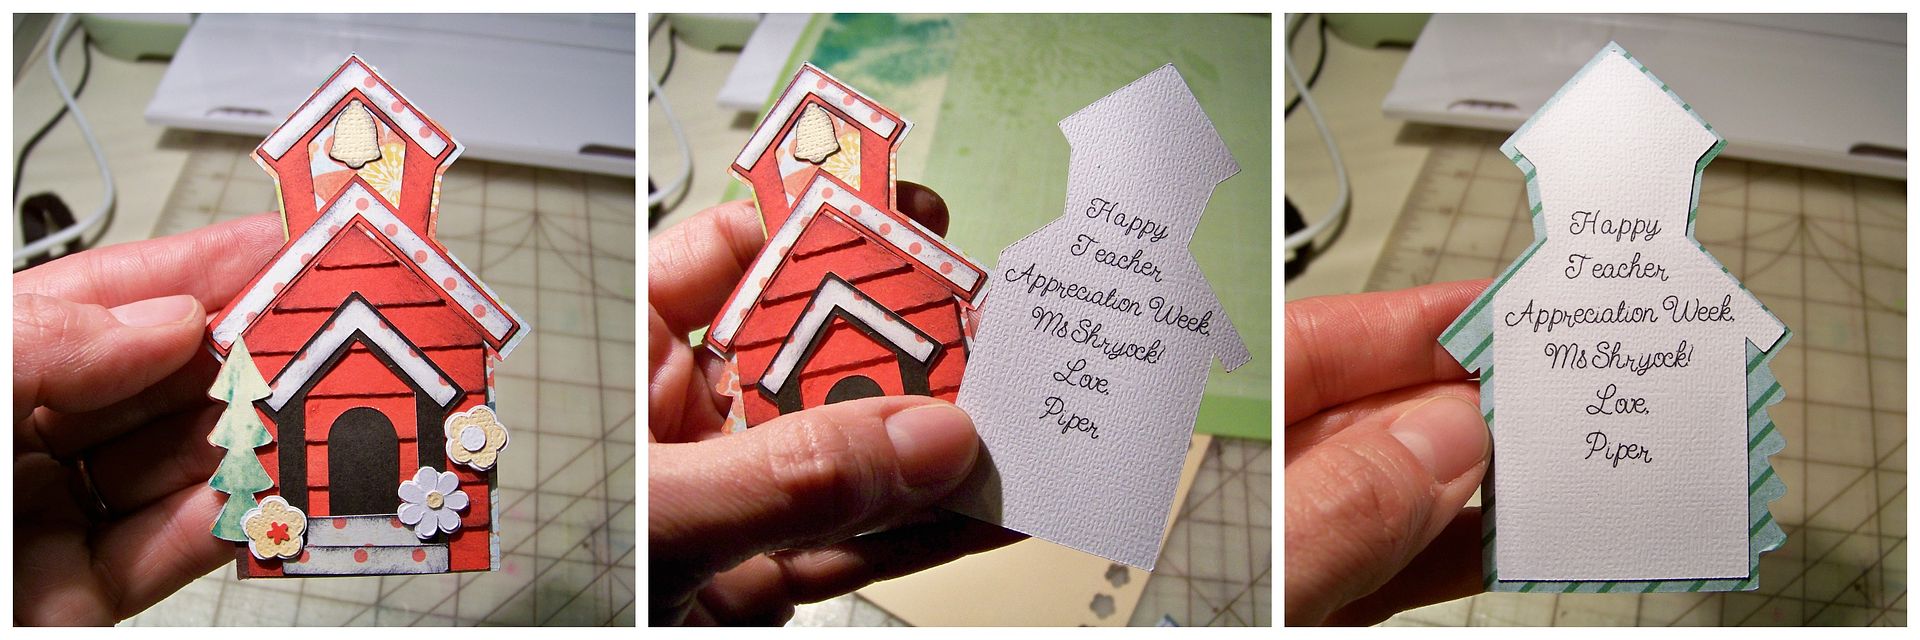
This card is perfect for writing inside with the Explore because there is a separate, shaped, inside mat. I actually cut two and wrote on one, leaving the other one blank because I think I would rather have my kiddo write a personalized message to her teacher. I wasn't sure what she thought about that so I cut both just in case. I'll let my daughter decide!


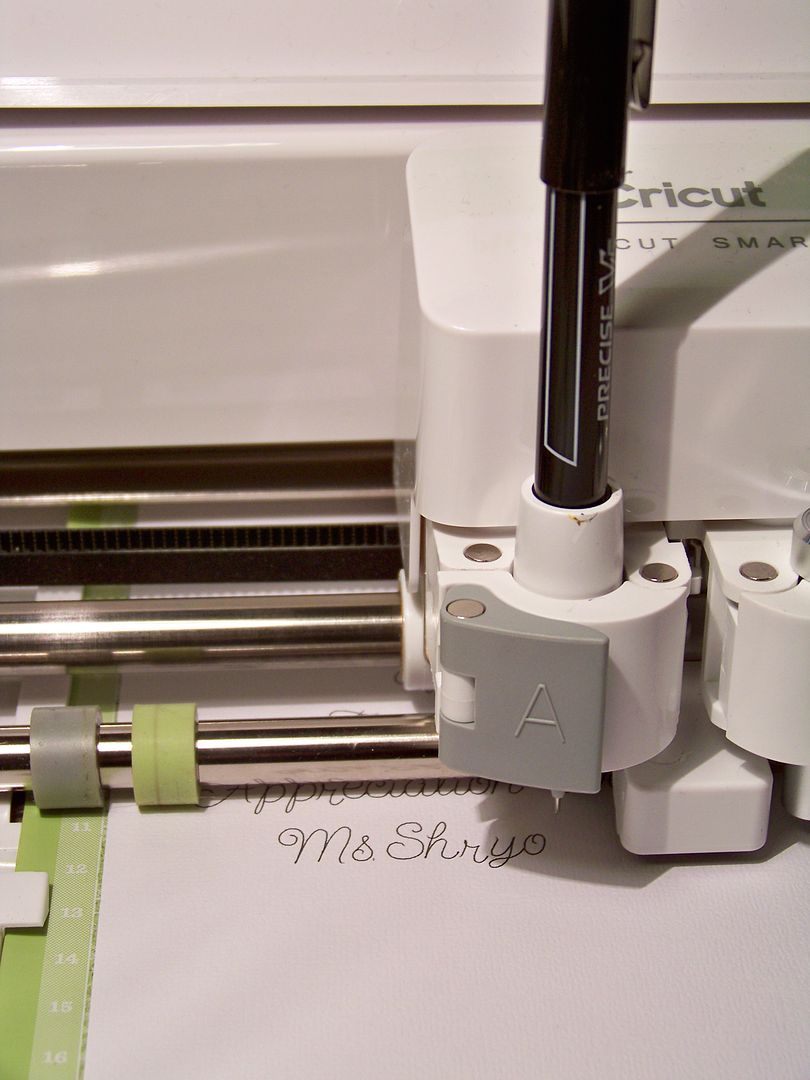
If you have not tried adding a font to your Cricut cuts, check out the OfficialCricut video for attaching text (click here). This is Writing Font: Creative Memories Tiny Treasures Sweet Pea. For a list of pens that work great with the Explore and a photo of all Cricut handwriting fonts, see my Pen Options and Writing Fonts page. I used a Pilot Precise V5 pen for this project.

The card has two pieces that are glued together to make the base. For the tag, I only used the front! That little mat cut is also perfect for a message on the back of the tag I created.

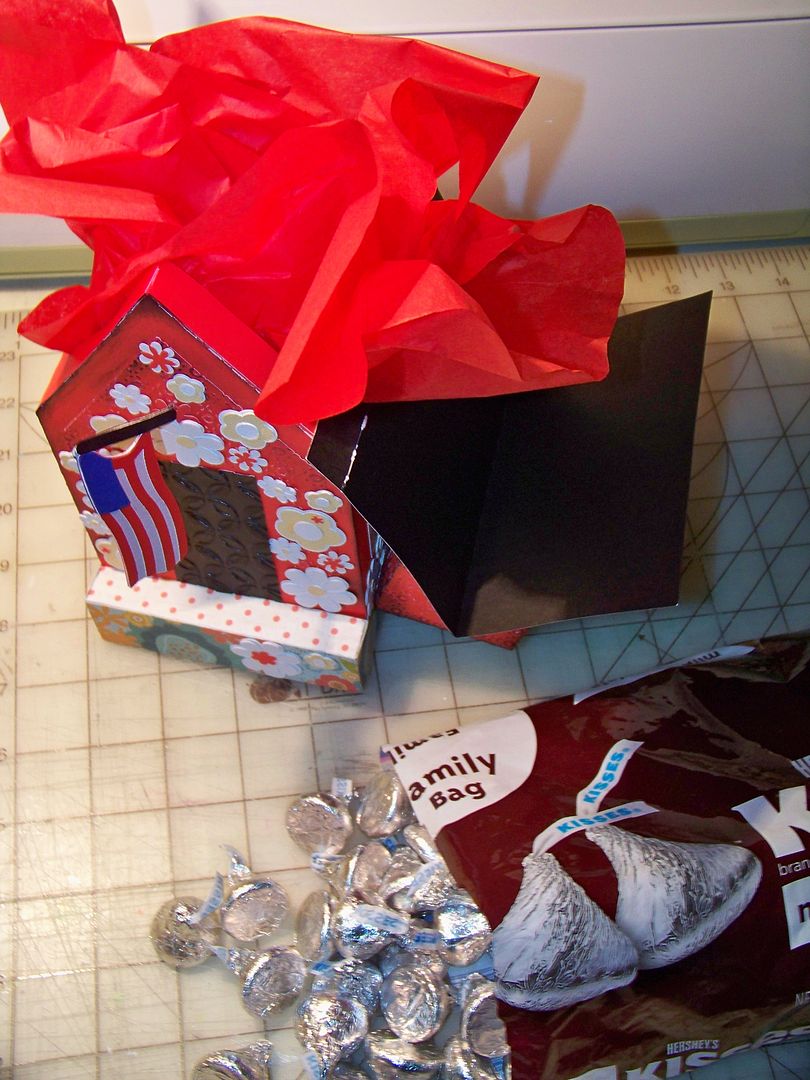
With the card and tag complete, I lined the box with a sheet of tissue paper and filled it with Hershey's Kisses.

A florist's card holder keeps my tag in place in the pot of gerbera daisies. This is the finished gift set:


 I hope you have enjoyed NSD Weekend. If you are a Cricut Circle member and haven't stopped by the Message Board in a while, check it out today to see all of the Circleville NSD challenges and tutorials!

If you are looking for more ideas for teacher gifts, check out my previous years' teacher-related projects or teacher-appropriate gifts (click photo to go to original post on this blog unless otherwise indicated):

If you have not tried adding a font to your Cricut cuts, check out the OfficialCricut video for attaching text (click here). This is Writing Font: Creative Memories Tiny Treasures Sweet Pea. For a list of pens that work great with the Explore and a photo of all Cricut handwriting fonts, see my Pen Options and Writing Fonts page. I used a Pilot Precise V5 pen for this project.
The card has two pieces that are glued together to make the base. For the tag, I only used the front! That little mat cut is also perfect for a message on the back of the tag I created.
With the card and tag complete, I lined the box with a sheet of tissue paper and filled it with Hershey's Kisses.
A florist's card holder keeps my tag in place in the pot of gerbera daisies. This is the finished gift set:
If you are not a Circle Member, no worries! Many of us are putting our Circleville NSD projects, like I did here, on our blogs and we would love you to join us:
A Day in the Life of Horsebunny - http://www.horsebunny.blogspot.com/
All Scrapped Out - http://allscrappedout.com/
Col's Creative Corner - http://www.scrappycol.blogspot.com/
Creating is Like Breathing - http://creatingislikebreathing.blogspot.ca/
Croation Crafter - http://www.croatiancrafter.blogspot.com/
Forever Inspired - http://cowgirl1hh.wordpress.com/
I Came I Saw I Created - http://icameisawicreated.blogspot.com/
Multi Crafter Amy - http://multicrafter-amy.blogspot.com/
Paper, Craft, and Scissors - http://papercraftscissors.com/
Sara Andrews - http://sarawandrews.com/
Scrapping for More Fun - http://scrappingformorefun.blogspot.com/
The Singing Shell - http://www.singingshell.blogspot.com/

The Singing Shell - http://www.singingshell.blogspot.com/

And YES! I do have a prize to give away!! Just leave a comment (only one comment per human, please!) in order to go into a drawing for a $25 Michael's Gift Card! Drawing will be held next Friday, May 9, 2014 and the winner's name will be posted on this blog that day. Let me know how to contact you in your comment in the event that you win! You are welcome to follow this blog if it looks like your cup of tea, but it is NOT mandatory to be in the drawing. I don't have a security code on my comments (because those are just annoying!) but I do moderate the comments so yours won't show up right away because I have to approve it first. (It's just that a male enhancement spammer leaves me nasty notes if I don't moderate... and even though it can be entertaining, it gets old! LOL!!! I hope you will understand. And if you are having a temporary freak out and try to comment repeatedly because it doesn't show up, I will just delete your extras so no one will have to know. It will be our little secret because we all have those days!)
If you are looking for more ideas for teacher gifts, check out my previous years' teacher-related projects or teacher-appropriate gifts (click photo to go to original post on this blog unless otherwise indicated):


 |
| This card is not linked to a post. |


To see many of my previous projects, check out My Project Gallery (click here). Thank you for looking at my post today. Happy Crafting!
I knew whatever you had planned would be fabulous. You didn't disappoint. Absolutely adorable. I love how you added the flowers on the school. Takes it from happy to happiest. So completely perfect.
ReplyDeleteI love all of your projects! You are so creative. rwdedecker@yahoo.com
ReplyDeleteLove you teacher cards. I'm glad I checked out your blog, love it So many things you are busy. Thanks Barb deform PA
ReplyDeleteOh, Nadia, you are simply amazing. As a former teacher, I would have loved to have your daughter in my class... and not just for the pretty gifts I might have received. She seems to be a real joy in your lives.
ReplyDeleteOH WOW! Not that I don't love everything you do but this is just the cutest. Thank you for sharing all your tips and tricks. I appreciate it so!!
ReplyDeleteI just love your creations! You bring inspiration to my life. Thank you so much for sharing!!!! I love that you still use your Imagine. I love mine and use it all the time.
ReplyDeleteAmazing! Love your creations. You are so talented.
ReplyDeleteWonderful job! I hope the teacher appreciates the time you have put into it.
ReplyDeleteLove. Lisacar@comcast.net
ReplyDeleteThis is amazing and you are so generous about sharing so much information. I'm glad you've found time to get on the Circle MB. You've been missed. Hope that someday soon I can afford the Explore so many more possibilities with that machine.
ReplyDeleteThat school house is so awesome! So cute & I know every teacher in this world would love to have one of those. :) Your projects are always great though!
ReplyDeleteTFS janis
Nadia, I love, love, LOVE the creations you make with your amazing talent! I check your site every day, and literally gets chills down my spine when I see that there is a new post to read.
ReplyDeleteYour schoolhouse box and tag did not disappoint!
Thank you for the great tutorials you provide on your site.
It's an amazing and thoughtful gift. I don't know where to begin - all of the details just add up to perfect. The color, the flowers, the flag, the tag (the flower pick is SO smart), the wise owl, the fabulous techniques, all of it is WONDERFUL.
ReplyDeleteThank you for the inspiration and the insights - I feel Svgcuts calling my name now....
What a wonderful teacher gift. The details are amazing! Love it.
ReplyDeleteI'm a preschool teacher and I love getting these kind of gifts...They are so much better than getting one more candle I don't need..lol
ReplyDeleteI love coming to your blog because I'm never disappointed. Love love love the school house and yes, I will be back to try my hand at it later...
ReplyDeleteDi&Co
Nadia, you have one of the most creative minds ever! Once again, you have taken paper crafting to a new level of perfection! I love all the details you add. You are rocking those SVG cuts! You are always an inspiration!
ReplyDeleteLove the school house you made.
ReplyDeleteAbsolutely amazing as always!! Thanks got all the links. I'm slowly getting to play with my Explore!!
ReplyDeleteAwesome Teacher Gift! I am sure she will greatly appreciate the thoughtfulness. I love all the personal details you always add to your projects. Happy Scrapbook Day and thanks as always for sharing your amazing talent with your readers. Have a great day!
ReplyDeleteMichelle
www.scrapngrow.com
Wow. ..will definitely bookmark this page for great ideas!
ReplyDeleteThis a great gift that any teacher would be thrilled to get!
ReplyDeleteGreat project Nadia!
Wonderful and beautiful gift set, Nadia!! I know Piper's teacher will love it!! Thanks for all the step-by-step instructions -- you are always so kind to share how you make your creations. I would be thrilled to receive just the plant -- it's a gorgeous gift in its own right :-)
ReplyDeleteI love the details and inspiration from your beautiful project. I'm just learning to use my Explore but you make this easy to follow and it's so darn cute!
ReplyDeleteSandi Smith
1sassysandi5@gmail.com
What a great idea! It turned out lovely! Thank you for the chance to win some goodies from M's.
ReplyDeletemy email is : mrsmuffet75@yahoo.com if I win.
Love your blog, going to follow!
Very nice teacher gift love it
ReplyDeleteOh my gosh, that school house is nothing short of AMAZING. You never cease to impress me with your incredible creations!
ReplyDelete--Susan
suebella4u at hotmail dot com
Love the school house! Thinking I may have to change my sons Teacher gift. Thanks for the awesome tutorial.
ReplyDeleteYou are so talented! I love following your blog as you are always in to so many different creative things. Thank you for sharing your creativity with us!
ReplyDeleteWOW!! My Explore is coming later this month and I'm excited and nervous LOL I love that you gave such easy to follow instructions for your project, thank you! That lil school house is beyond adorable!!
ReplyDeleteNadia, your projects area always amazing. Thanks for the chance to win.
ReplyDeleteLove your projects!
ReplyDeleteDesiree405@aol.com
You're just amazing! That's all I can say!! You create such wonderful masterpieces!
ReplyDeleteNadia, you are so incredibly talented. Love your project and thanks for the opportunity to win this gift card.
ReplyDeletePeggy T.
ptimmerman1@gmail.com
Great schoolhouse!
ReplyDeleteGreat project with great instructions!
ReplyDeleteAll I can say is wow!
ReplyDeleteThanks for the chance to win. I am posting the layout I did for this challenge over on the messageboard. I'm jscraftylady over there :)
ReplyDeleteYou have an amazing blog! Glad I was able see it!
ReplyDeleteLove your blog. So much creativity goes on here. Thanks for sharing
ReplyDeleteAnother creative masterpiece, for sure! Your DD's teachers are some very lucky recipients of your talent! TFS! :-)
ReplyDeleteLove seeing all the project directions!!!
ReplyDeleteThanks
Absolutely ingenious and beautiful! You are so incredibly talented. I love everything you do. Thanks for sharing with me.
ReplyDeleteThat is an awesome prize. Thanks.
ReplyDeleteVery nice!
ReplyDeleteOh Nadia
ReplyDeleteYou are truly a one of a kind treasure..
Your projects always amaze and delight
Thanks for always sharing...
awesome job as always. I love all the little details you add to your projects :) Thanks for sharing.
ReplyDeleteBeth
cardsbybeth at yahoo dot com
Wowzer. You ALWAYS have AMAZING projects! Thank you for your detailed post and sharing of creative information.
ReplyDeleteNadia, you knocked another one out of the park with this one. I love how you combined an svg with Cricut cuts. Nice job!
ReplyDeleteMargo
Your project came out beautifully! Everyone loves a lil red school house :) Thanks for an amazing project
ReplyDeleteAmazing, as always, Nadia! Thank you so much for sharing your talents. :-)
ReplyDeleteAbsolutely beautiful!
ReplyDeleteAWESOME BIRD HOUSE PROJECT! all your projects are awesome! Thanks for posting them.
ReplyDeleteL♥ve my Cricut Explore, would love to win this Michael's gift card! Thanks for the chance :-)
ReplyDeleteThat is an amazing job you did one the school house. It is so creative. Thanks for sharing!
ReplyDeleteNadia thank you for sharing all your wonderful projects ...you are so talented.
ReplyDeleteCbf210@aol.com
Awesome project! I love all the little details that you put into it.
ReplyDeleteI want to be like you when I grow up! Thanks for sharing your awesome talent. You are an inspiration!
ReplyDeleteEverything is so adorable,I wish I had more time to make fun projects!! You are awesome!! Thanks for the many ideas!!
ReplyDeleteBeautiful projects!
ReplyDeleteYou are such an inspiration to me and I love to see your projects. Thank you for sharing your talent with other crafters!
ReplyDeleteOh Nadia, your projects are adorable! Thanks so much for hosting the challenge on the Circle Board, and for the chance to win here. I can be reached at w8in4godot@gmail.com. Good luck everyone!
ReplyDeleteJust amazing Nadia!! Piper's teacher is one lucky, lucky person. :)
ReplyDeleteGreat projects Nadia,love the little owl in doorway too.Love everyone projects,Joydee1963@yahoo.com aka Cricut joy
ReplyDeleteNadia, you are so talented and I absolutely LOVE your projects! And this one did not disappoint! Not only is it so darn cute but I love all of your step-by-steps and photos. Thank you for that. I also love how you alter so beautifully.
ReplyDeleteThanks for the project!
Angie (AKA TiffysMom)
You have really jumped into using the Explore and the online software at record speed. I was actually shocked when I heard you were linking all your cartridges. I knew then to expect great things from you with this new cutter. This gift set is FABULOUS! Thanks for sharing and your tutorial is wonderful.
ReplyDeleteOK! I am closing comments for this contest! Back soon with a new post and the winner!!
ReplyDelete-Nadia
I just wanted to say how amazing your projects are and how you continue to inspire many of us!
ReplyDeleteI am so glad I found you site! The explore is the first craft machine I have ever owned and the learning curve is tremendous! With your help I am having a blast. Thank you for all your unselfish help! Couldn't have done it without you!
ReplyDeleteNadia, you and SVG Cuts are a team made in heaven!!! :-) What lucky recipients of all of your gifts. (Hey, I was one, w/ your gorgeous BD card!) [[hugz]]
ReplyDelete