"Above all, watch with glittering eyes the whole world around you, because the greatest secrets are always hidden in the most unlikely places. Those who don't believe in magic will never find it." -Roald Dahl
Monday, November 15, 2010
Faster than a speeding bullet...It's not Superman...It's Santa!
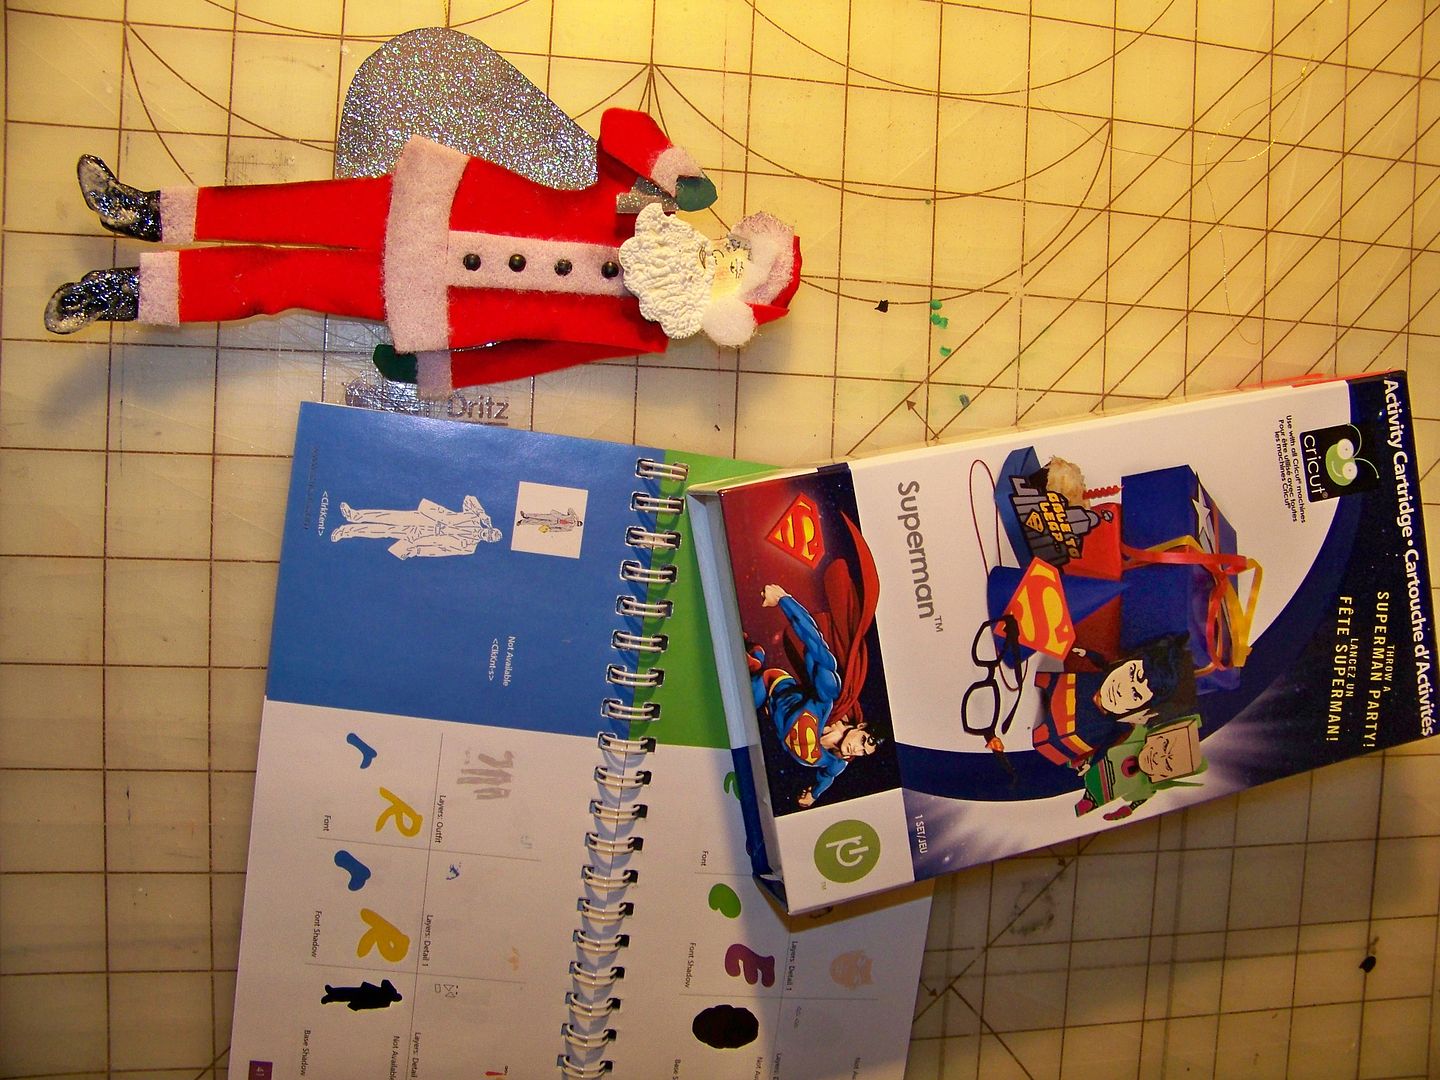
Sometimes I just like to torture myself. I just wanted a better Santa than I have found on the carts I have: Winter Frolic, Paper Doll Dress Up, Joys of the Season... even 3 Birds on Parade has a Santa! I wanted a 1970s Santa from my childhood.... so I looked to the Superman cartridge!
Using the Santa head from the Christmas solutions cart, and the body of Clark Kent on Superman, I created my 'Santy' ornament.
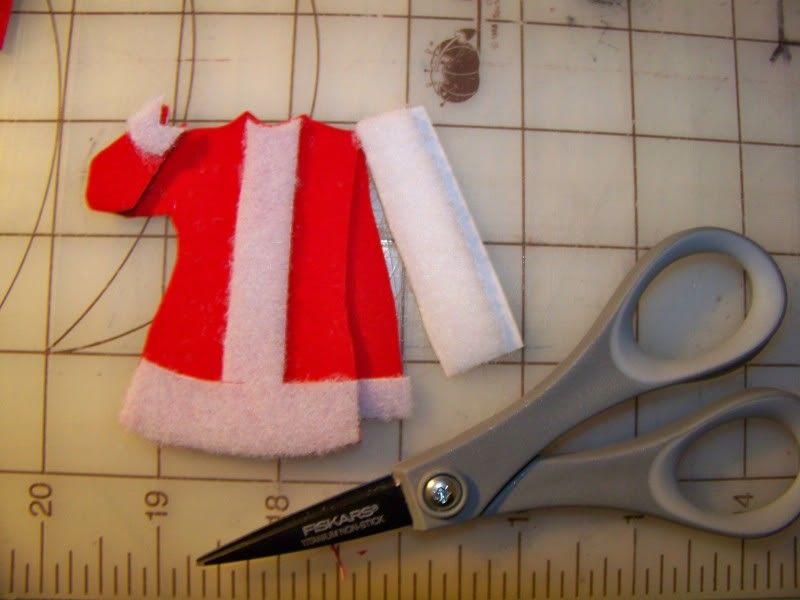
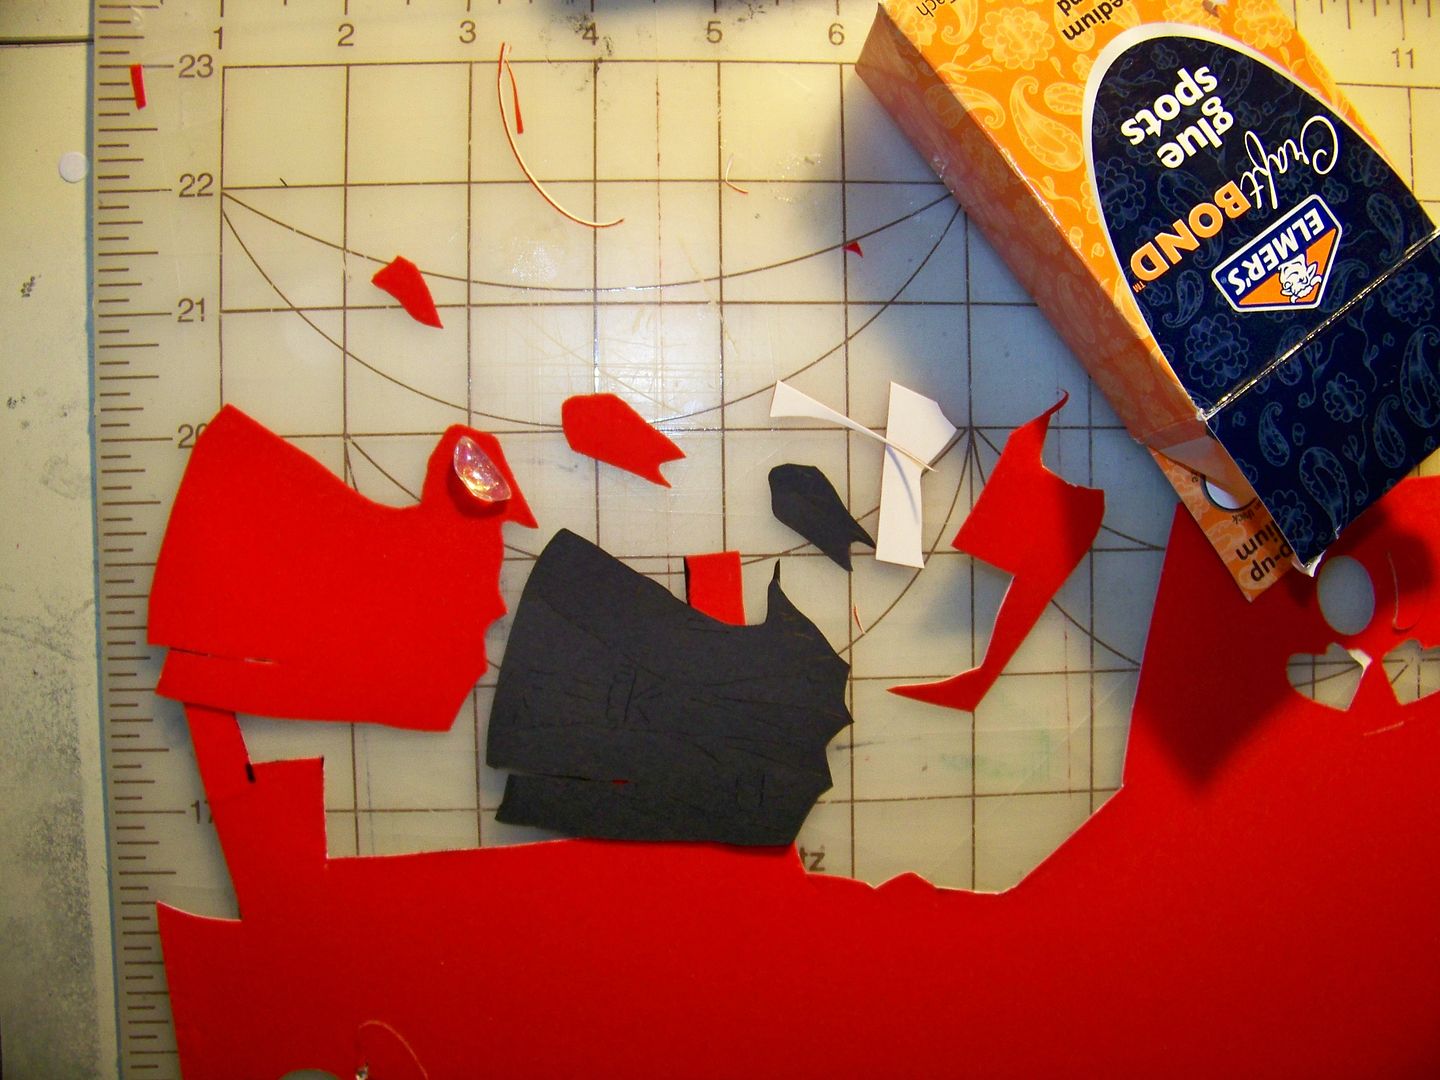
I cut Clark Kent at 7". Then I cut him apart and used the pieces as patterns for his jacket and pants. I used a thick flocked paper that I have had enough trouble cutting on the Cricut that I chose to hand-cut all items from this material. I cut his jacket, an extra arm (so I could pop it up), and pants. I cut off his straight arm and then moved it slightly behind him and re-attached it.
I used adhesive Velcro (loop side) to make his jacket trim. I got to try out my Fiskars Non-Stick scissors.... WOW! Those scissors are amazing. I got them for under $10. They held absolutely no adhesive residue after all those cuts. If you have ever cut through that stuff, you know exactly how quickly the blades gum up. These never once required a cleaning. During the one time that I accidentally picked up my regular shears, and cut through the Velcro, I had to immediately clean them with alcohol... not these!
I used small brads for his buttons and cut little green mittens for his hands. I inked to give him a little shape.
I cut his head from Christmas (solutions cart) at 1-3/4" and flipped it so he would look in the other direction. Liquid Applique gave him his beard and mustache. I used a Zig Millenium 01 pen to draw in his face.
I used the black shoes and pant legs from the original cut for his boots. I applied Ranger Glossy Accents and directed heat on the boots with my embossing gun until the chemical boiled. That is how I got this snowy residue on his boots!
I hand-cut a bag for his bundle of toys from glitter paper. I traced the whole completed figure, cut it out, and glued it in place to finish the back. I used Martha Stewart's tiny little hole punch and threaded the hole with gold metallic narrow cord.
This ornament, finally completed, makes me smile! I love the way Clark has transformed! It is my final challenge project on Doxieluv's Spectacular Circle Online Swarm. Thank you for looking at my project!
Sunday, November 14, 2010
We Have a Winner!!!
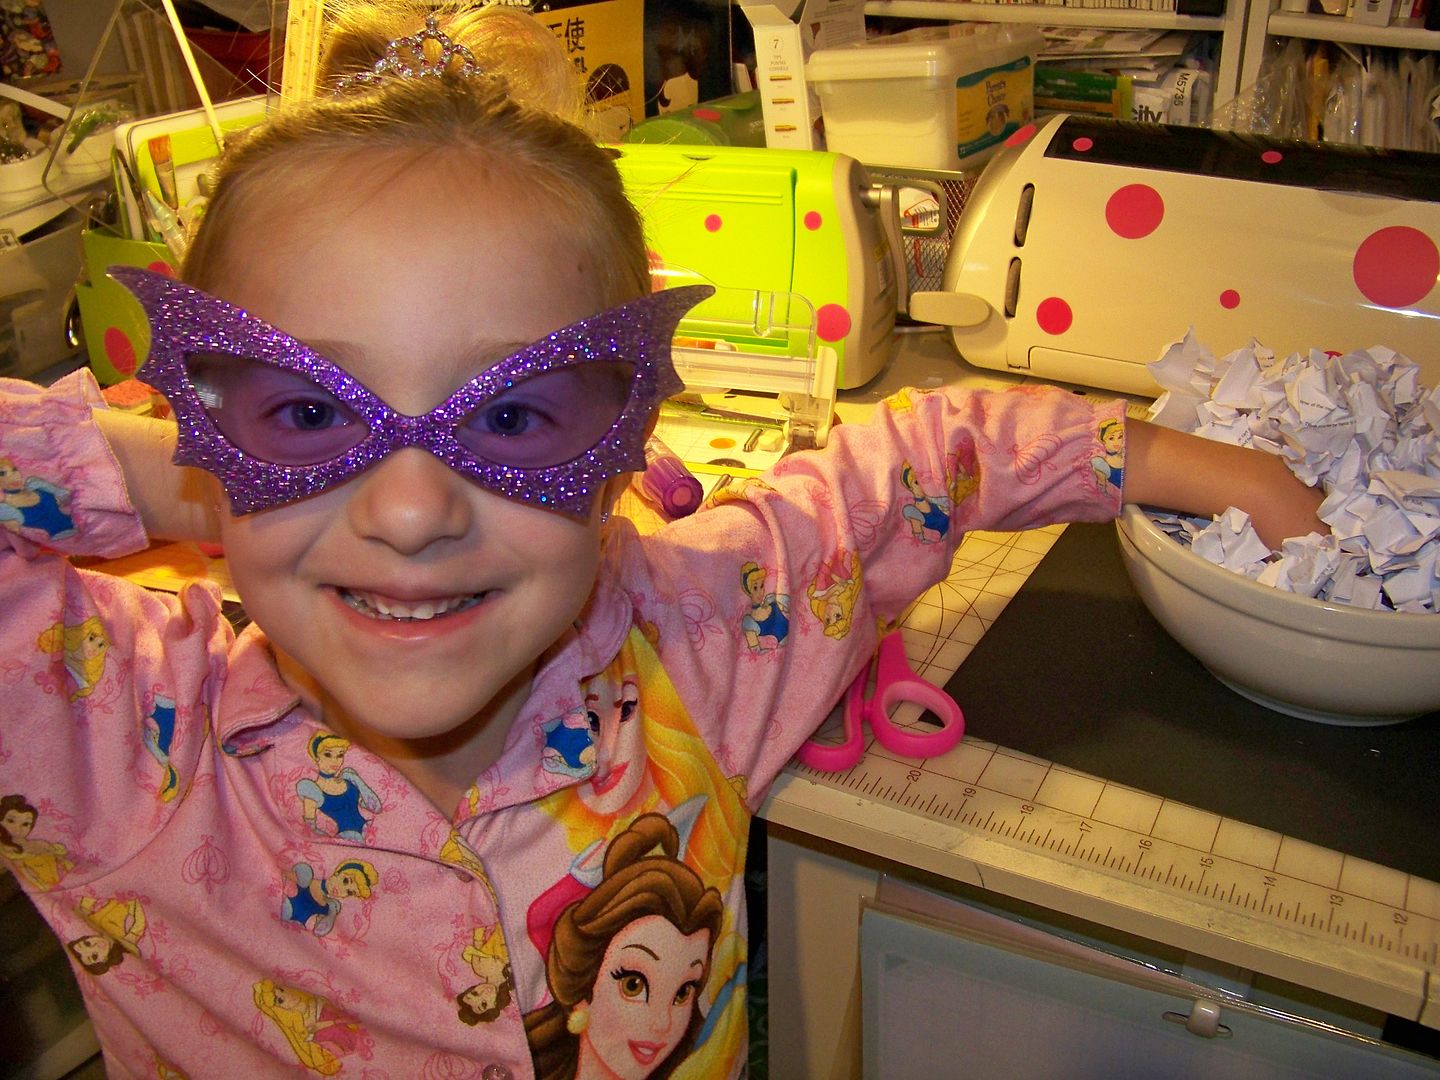
Stealing the idea from AllisonF, I had to wait for my Master of Ceremonies to wake up this morning. Introducing.... Princess Piper!
Yes, that is a bowl of all the comments cut up and placed individually in a bowl for Her Majesty to draw from. Who needs random.org when we have royalty?!
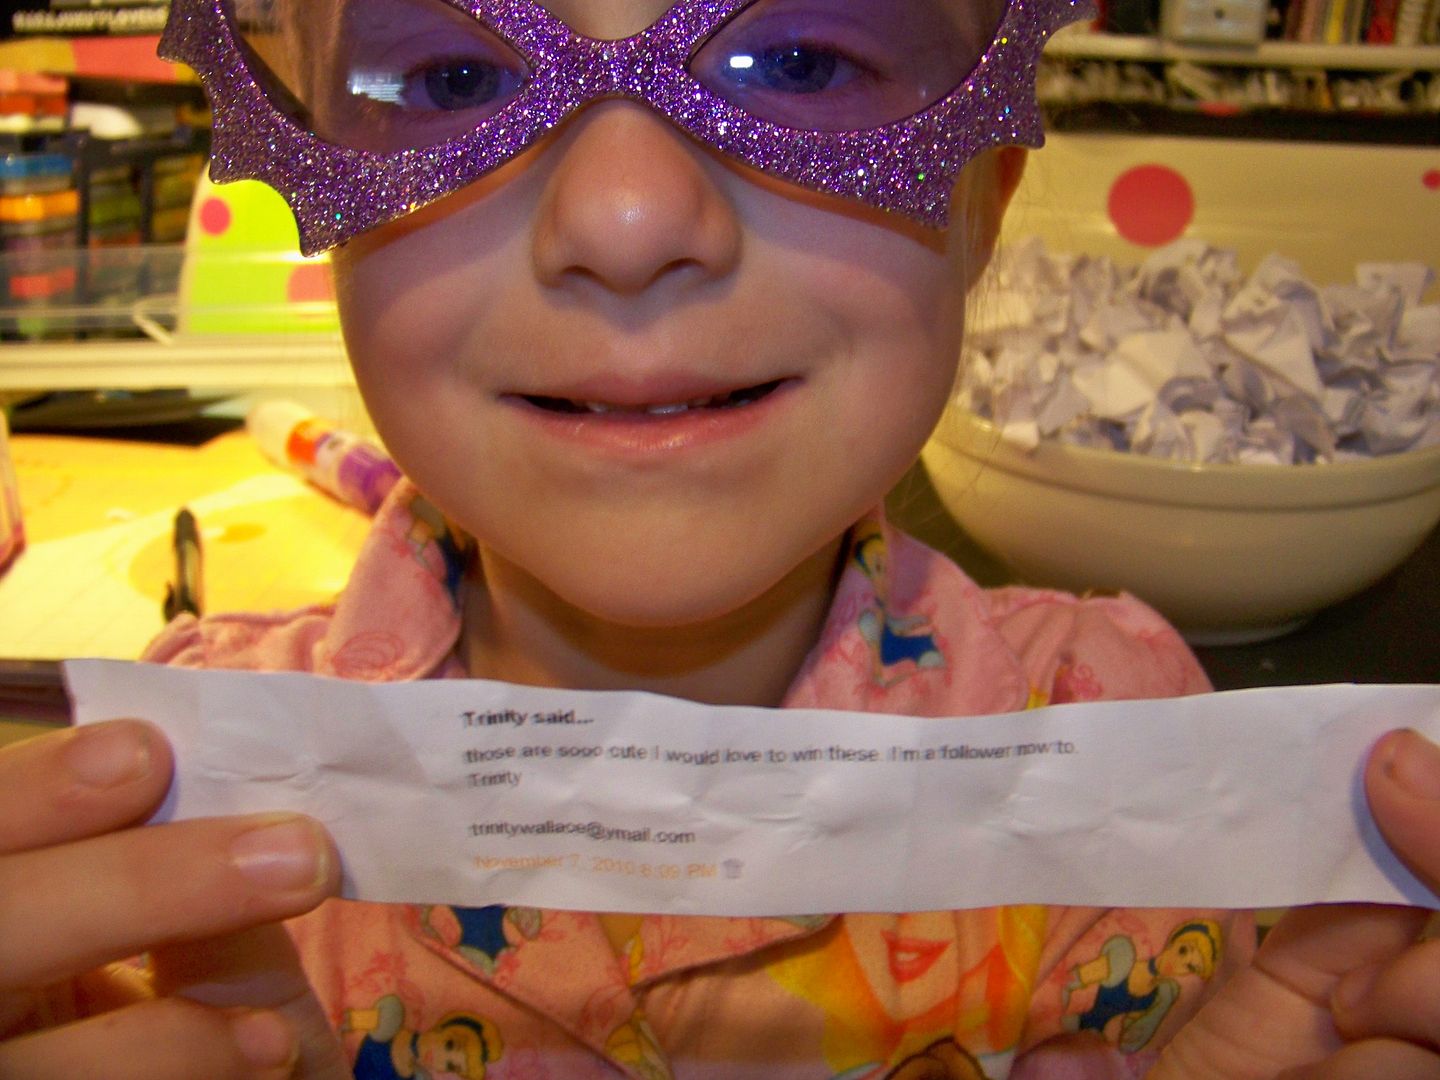
And the winner is....
Trinity said...those are sooo cute I would love to win these. I'm a follower now to. Trinity November 7, 2010 8:09 PM (in case you can't read it!). I just emailed her and will be posting it on the Circle MB to be sure she sees it. Trinity, I will need your mailing address so look for my email so you can email me back!!!!! (or you can PM me on the Circle MB).
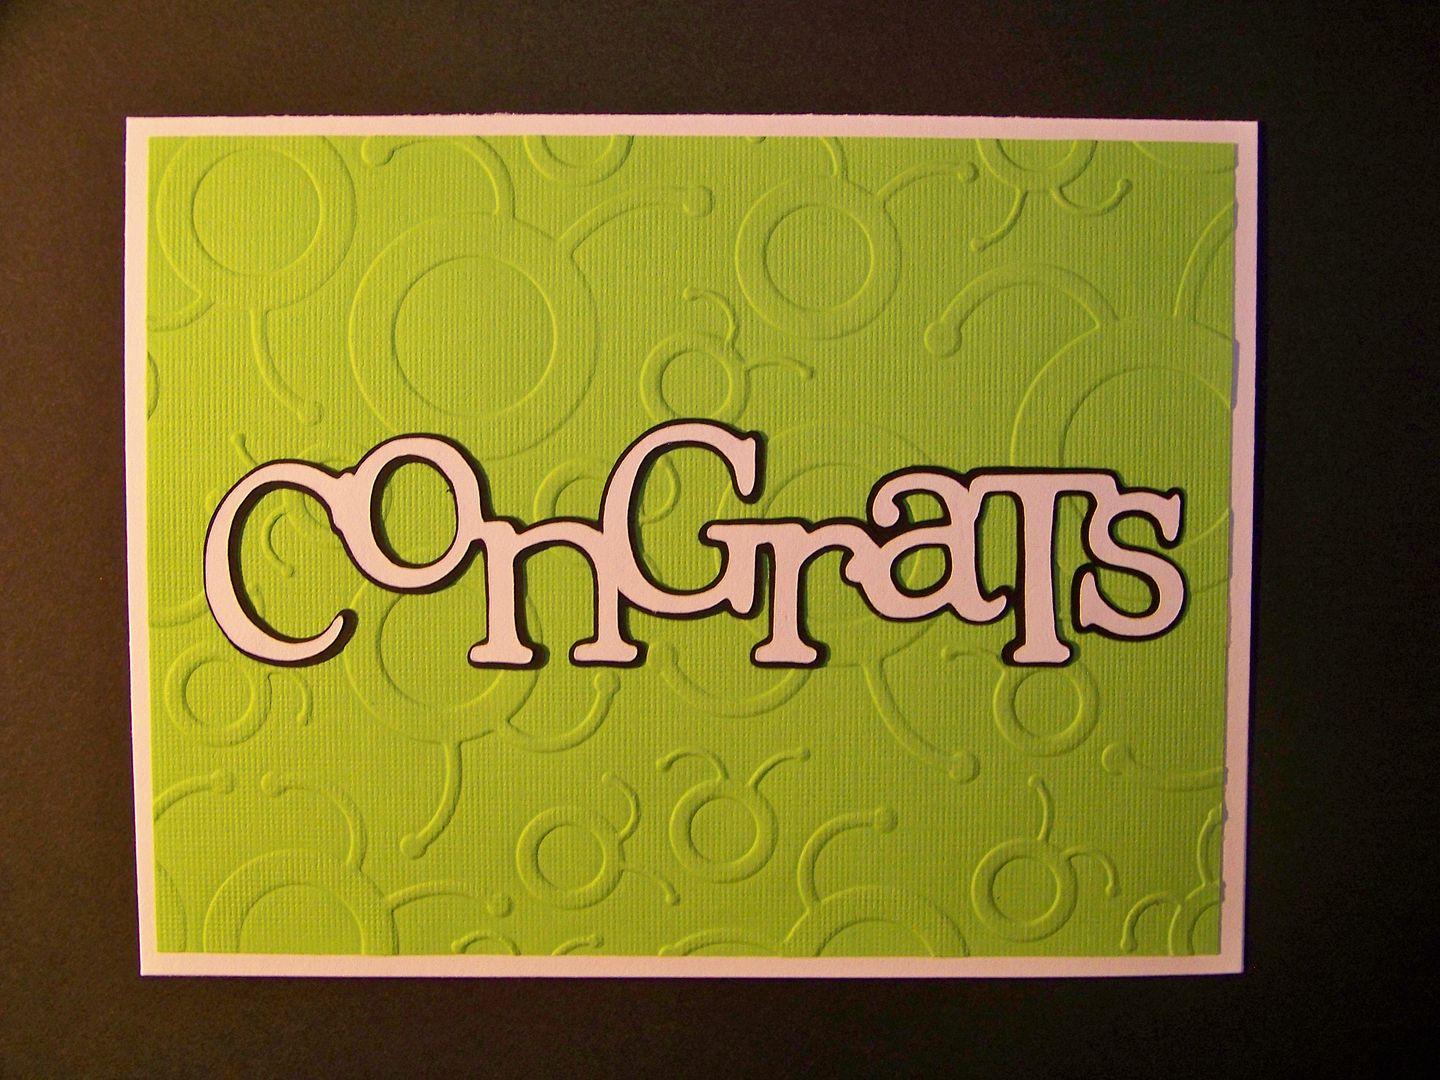
Have fun with your new embossing folders!
Yes, that is a bowl of all the comments cut up and placed individually in a bowl for Her Majesty to draw from. Who needs random.org when we have royalty?!
And the winner is....
Trinity!!!!
Have fun with your new embossing folders!
Saturday, November 13, 2010
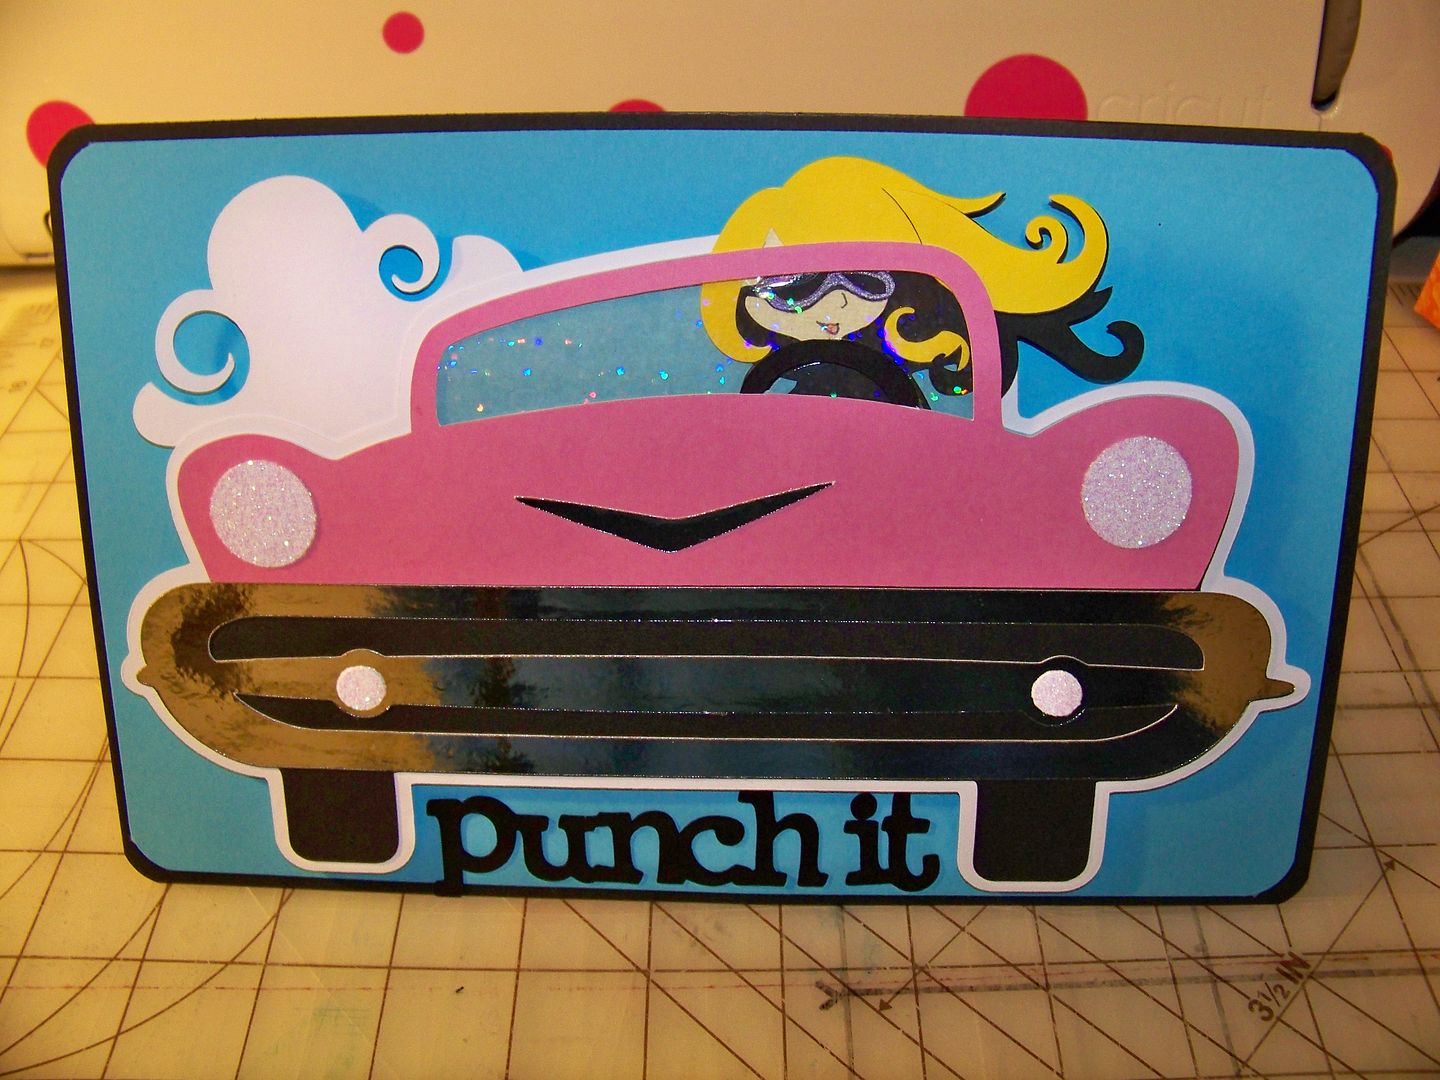
Rock Princess gets a convertible... or Punch It, Martha!
Remember that old commercial with the little old ladies when one of them yells, "Punch it, Martha!" and off they speed? I can't even remember what product was being advertised in the 80s when it aired, but we say that in the car all the time.
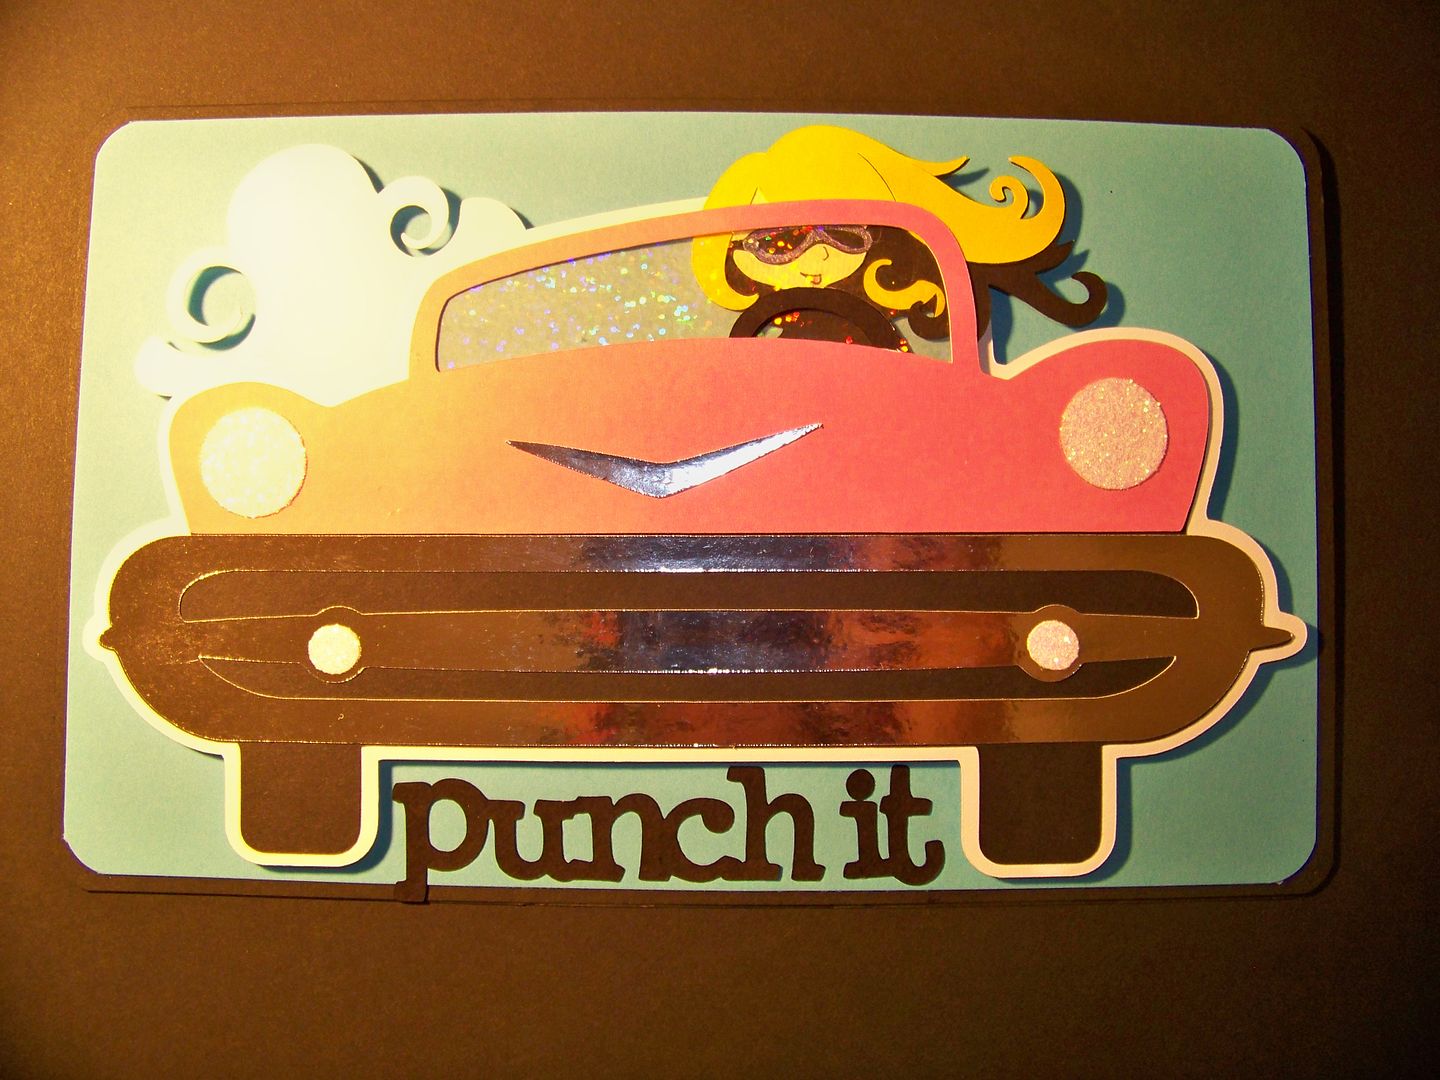
I got my Nifty Fifties cart a week or so ago and just did not know what I was going to do with it... nothing spoke to me! Today's Circle On-Line Swarm project inspired me to use it; we are instructed to use metal and glitter so this car was it! Once I saw the text "Punch it" on there, I had to smile!
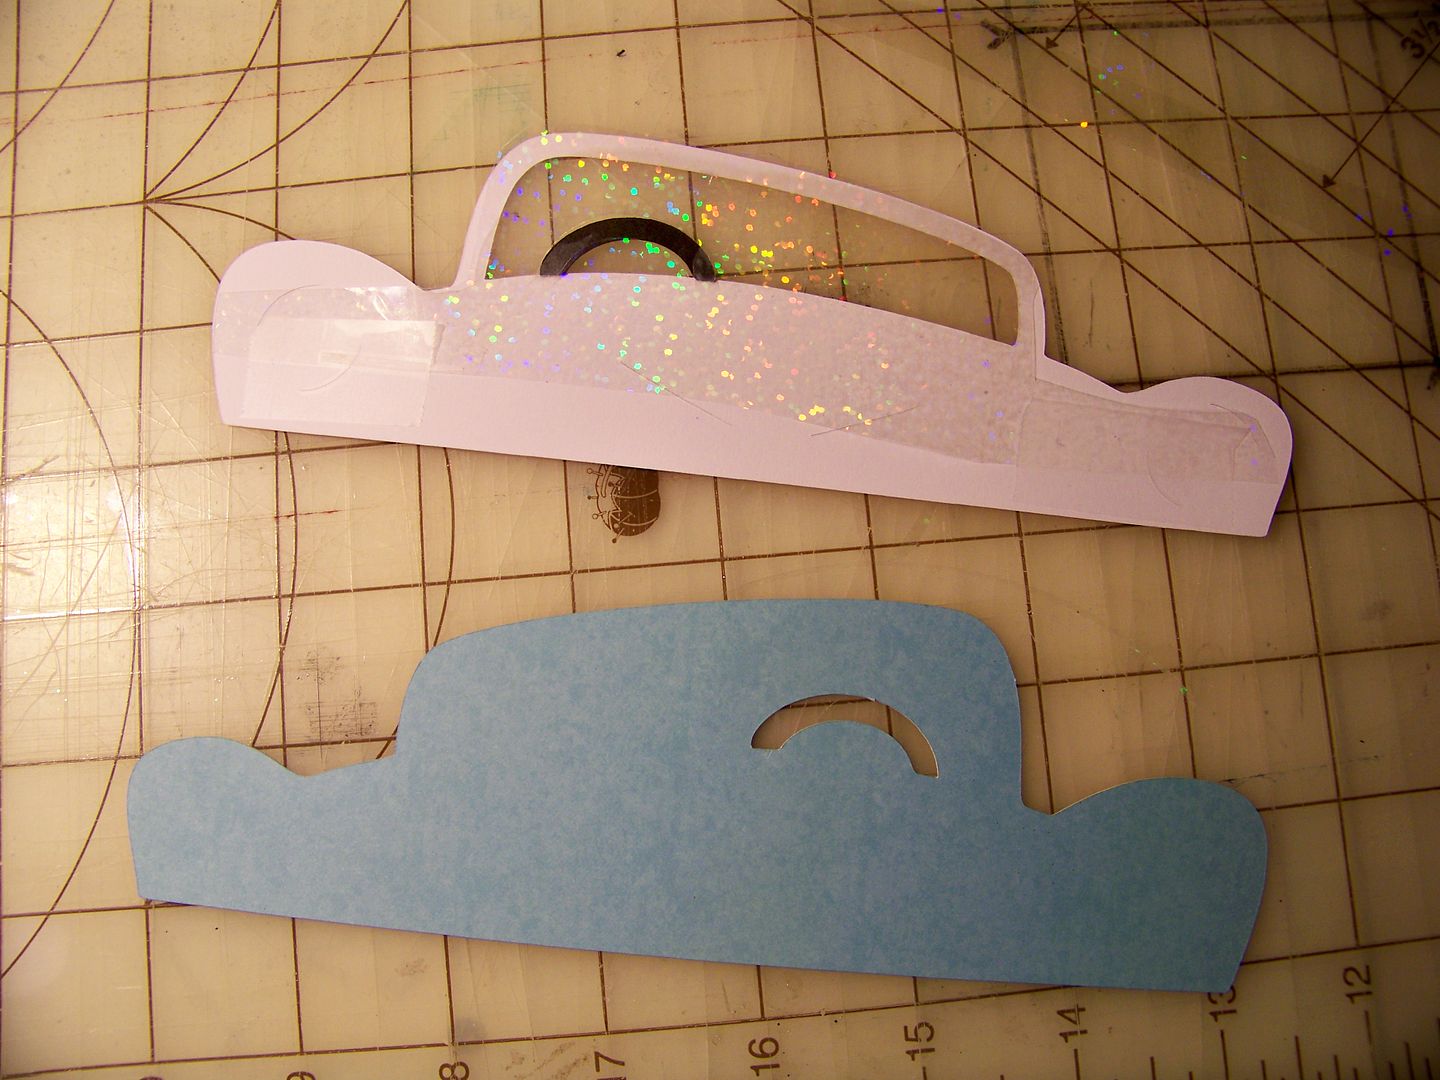
I used car2 on page 46, cut at 4-3/4". I cut the windshield twice: clear hologram glitter paper and blue cardstock. This allowed me to have a "space" to put the character.
I used silver paper for the chrome. The lights are white cardstock covered with glitter (fabulous Ranger Holographic Glitter that I received from a terrific RAK that Lizzieming on the Circle sent to me). I used my Xyron to coat the shapes in adhesive before glittering.
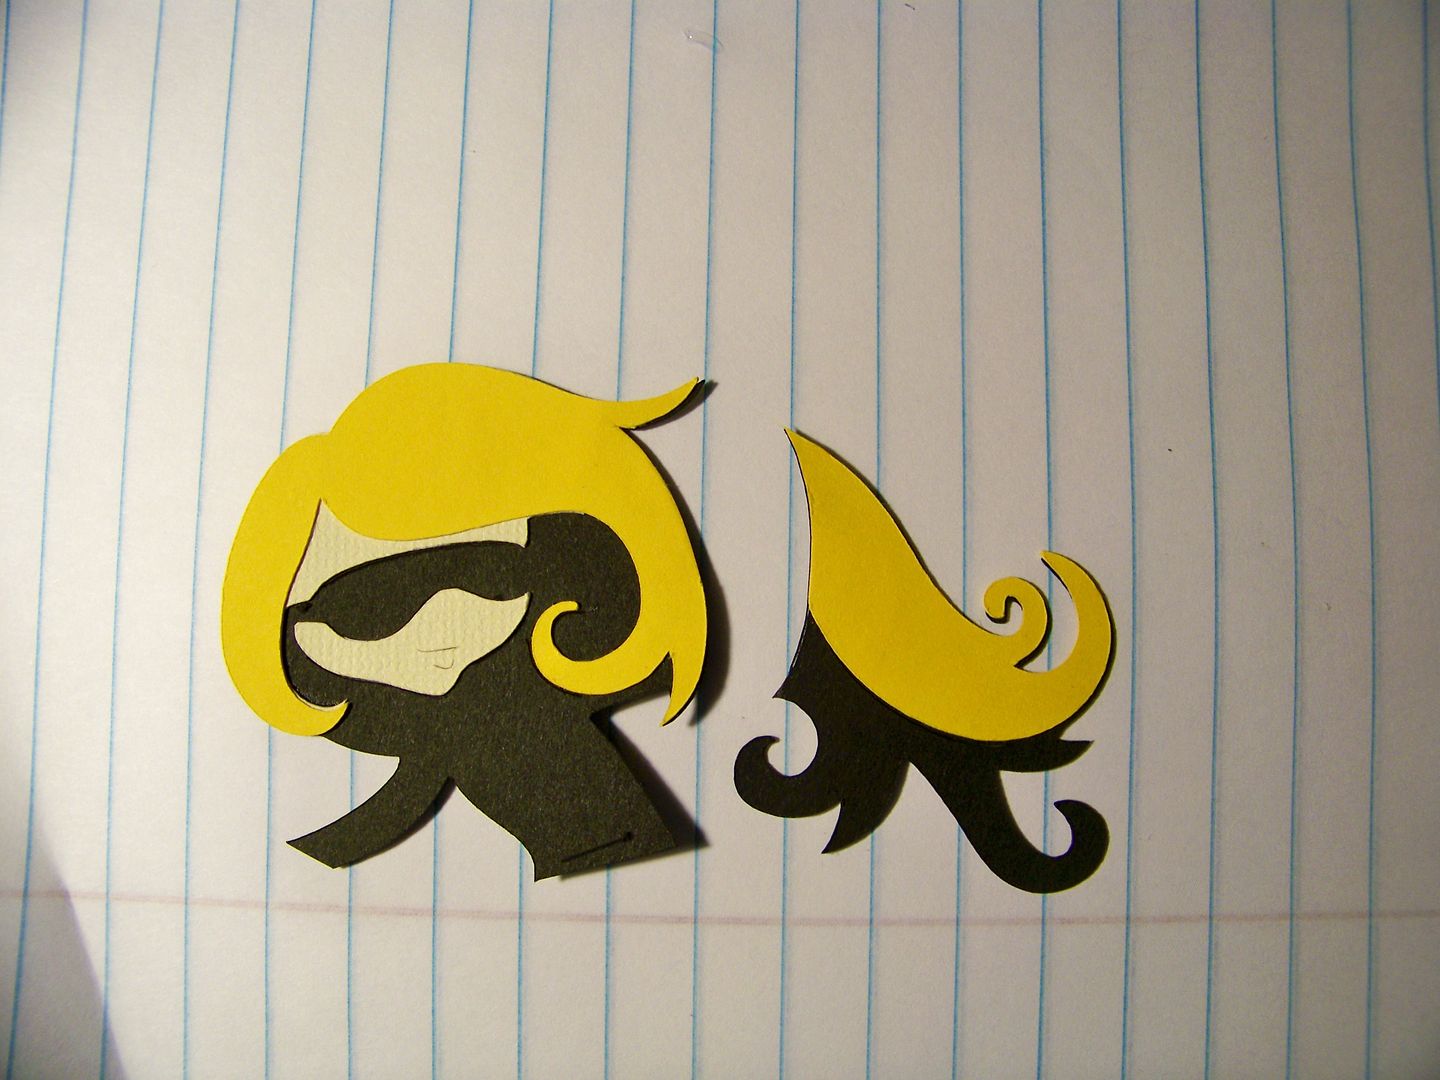
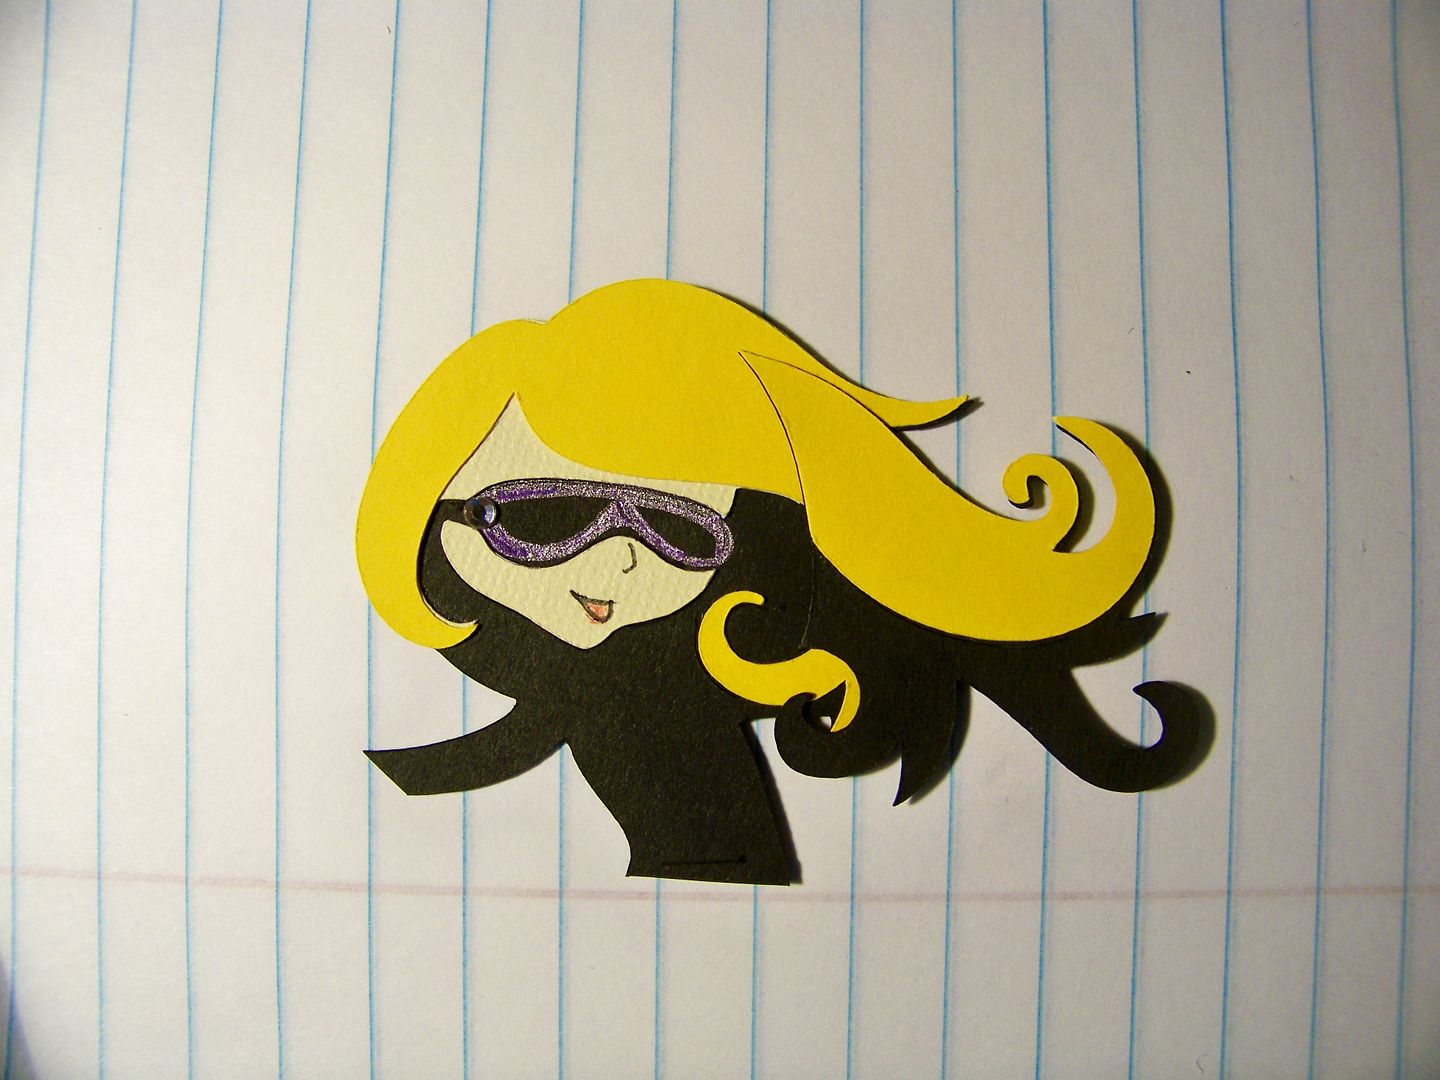
The character is the moped driver from Rock Princess, page 32, cut at 4-1/2". I cut off her body, chopped her hair a bit too, added to her glasses, and gave her a nose!
The "punch it" text that I mentioned, was cut at 1". I added a smoke cloud... which was actually one of the clouds from Serenade, cut at 2-1/4". The car and driver are popped up with pop dots.
Thanks for looking at my project! Tomorrow (Sunday, November 14), my daughter and I will be having our drawing for the embossing folders that I mentioned in an earlier post. You can check it out here.
I got my Nifty Fifties cart a week or so ago and just did not know what I was going to do with it... nothing spoke to me! Today's Circle On-Line Swarm project inspired me to use it; we are instructed to use metal and glitter so this car was it! Once I saw the text "Punch it" on there, I had to smile!
I used car2 on page 46, cut at 4-3/4". I cut the windshield twice: clear hologram glitter paper and blue cardstock. This allowed me to have a "space" to put the character.
| I cut an extra steering wheel since I needed the character to sit behind it. |
The character is the moped driver from Rock Princess, page 32, cut at 4-1/2". I cut off her body, chopped her hair a bit too, added to her glasses, and gave her a nose!
The "punch it" text that I mentioned, was cut at 1". I added a smoke cloud... which was actually one of the clouds from Serenade, cut at 2-1/4". The car and driver are popped up with pop dots.
Thanks for looking at my project! Tomorrow (Sunday, November 14), my daughter and I will be having our drawing for the embossing folders that I mentioned in an earlier post. You can check it out here.
Thursday, November 11, 2010
Happy Veterans Day!
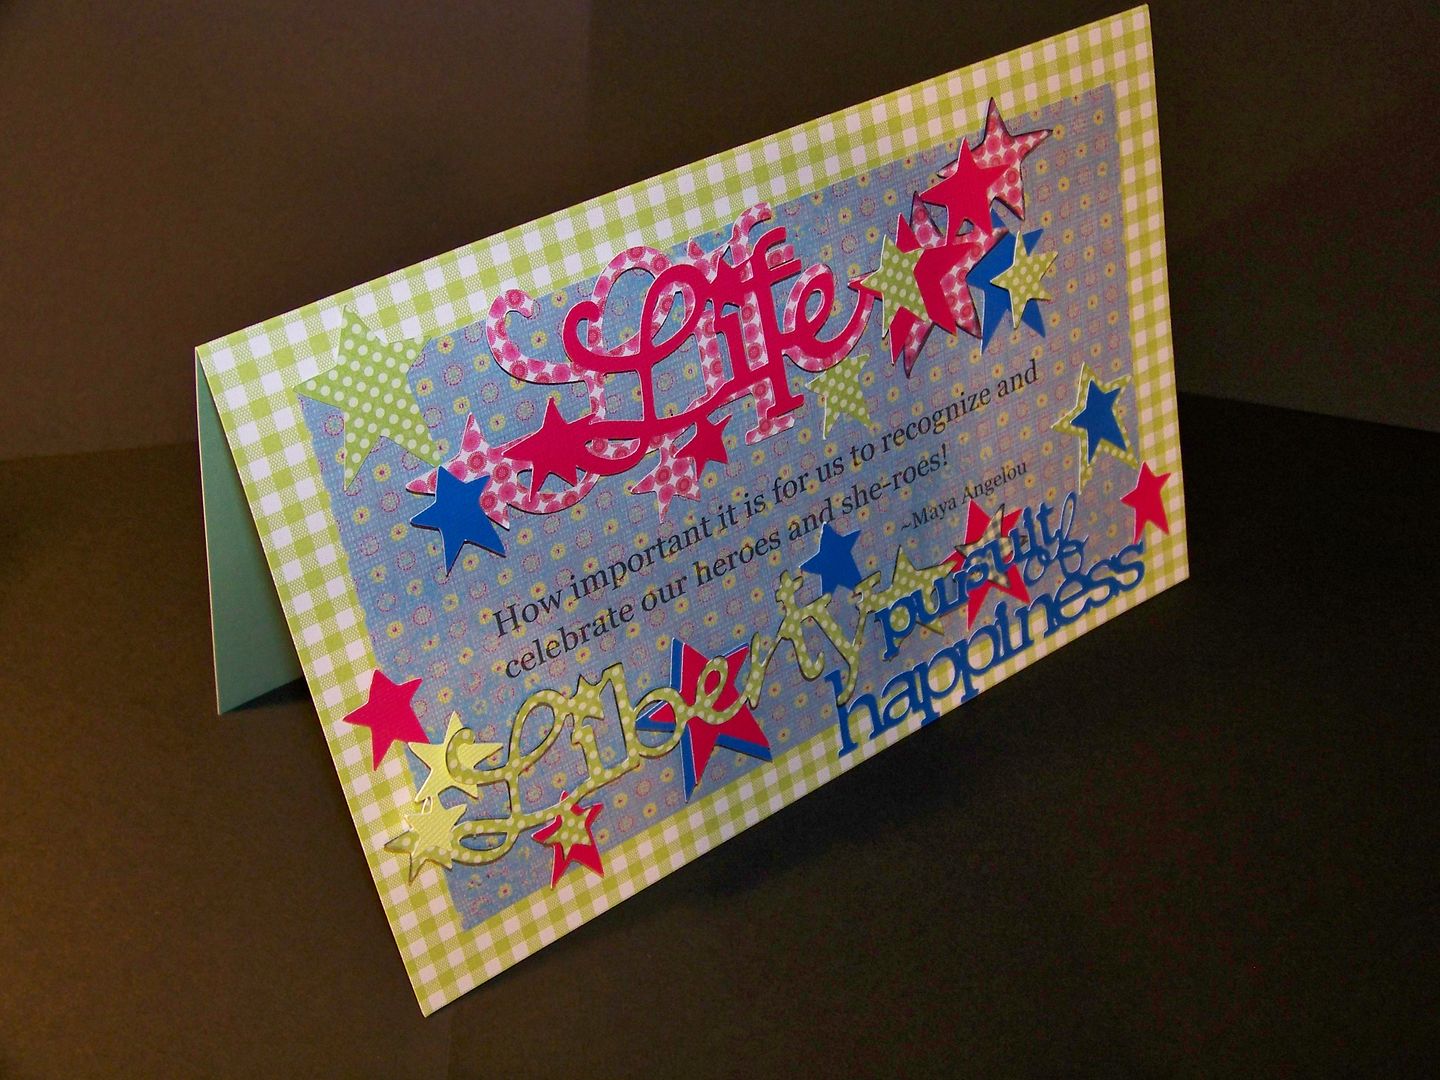
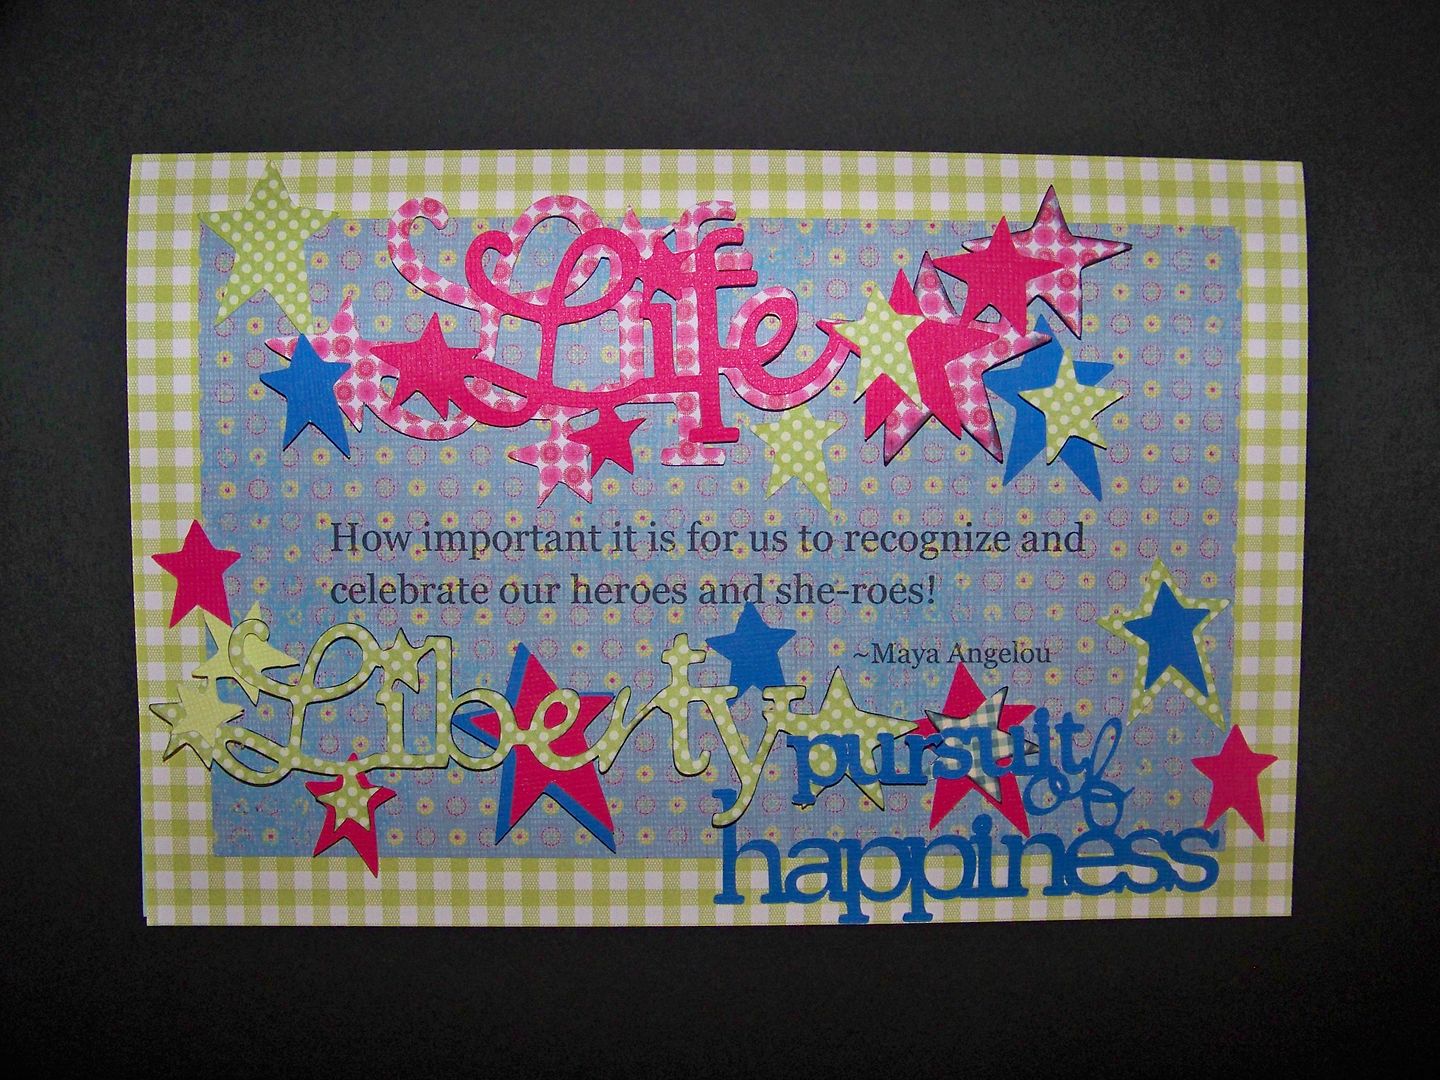
In honor of Veterans Day, I made a little card for Challenge #1 on the Spectacular Circle On-Line Swarm! This was a challenge to use stars on a project.
From Stand And Salute:
"Life" was cut at 2" and 2-1/2" (border cut). "Liberty" was cut at 1-3/4" and 1-1/4" (border cut).
From George And Basic Shapes:
Stars were cut at 1", 1-3/4", and 2".
If you are looking for a way to thank the Vets of our country, you may want to check out The Wounded Warrior Project .
This card was made with images from Cricut Cartridges Stand And Salute and George And Basic Shapes. I had a little fun with some non-traditional colors for this patriotic holiday!
From Stand And Salute:
"Life" was cut at 2" and 2-1/2" (border cut). "Liberty" was cut at 1-3/4" and 1-1/4" (border cut).
From George And Basic Shapes:
Stars were cut at 1", 1-3/4", and 2".
| How important it is for us to recognize and celebrate our heroes and she-roes! ~ Maya Angelou |
If you are looking for a way to thank the Vets of our country, you may want to check out The Wounded Warrior Project .
Tuesday, November 9, 2010
Autumn, Quilts, Pioneer Women, and Apple Crisp... yup, it's November!
I was asked by Bobbi Jo of the Sweet Sassy Diva blog to create a fall project. That started me thinking about quilts! In a Rube Goldberg sort of way where one pin knocks over a pail that scoots a ball that triggers a net, and so on, this is how my thinking started.... First to quilts, then leaves, and the woods...to the pioneer woman that I have been struggling to make, then to her bonnet, then to changing the way I want to incorporate her with the quilt...
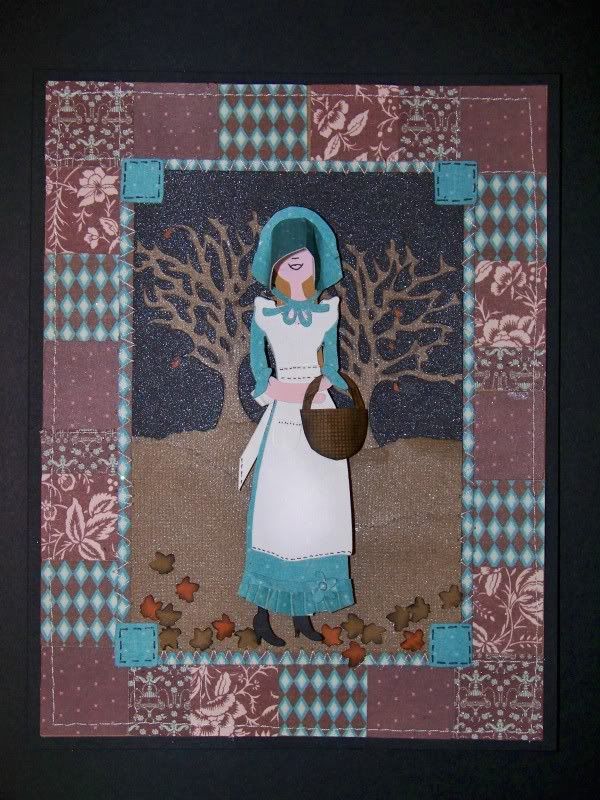
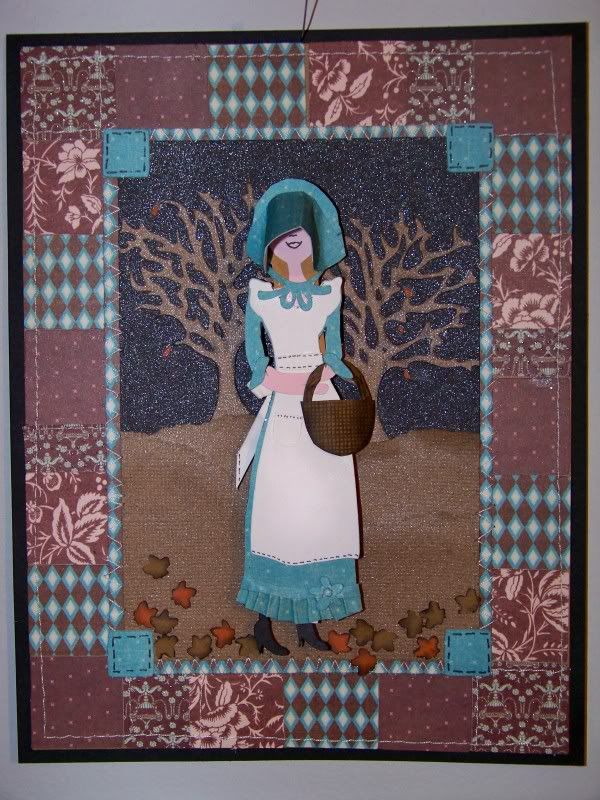
I came up with a 70s-Holly-Hobbie-meets-Ma-Ingalls character, finally figuring out that bonnet, and I even got to do a little stitching on paper!
Since I was a quilter long before I was a papercrafter, stitching on fabric seems like such an obvious direction that I am not sure why I haven't really done it before now except that I don't care for stitching for stitching's sake; I think it needs a purpose for being a part of the project. The quilt motif give it that!
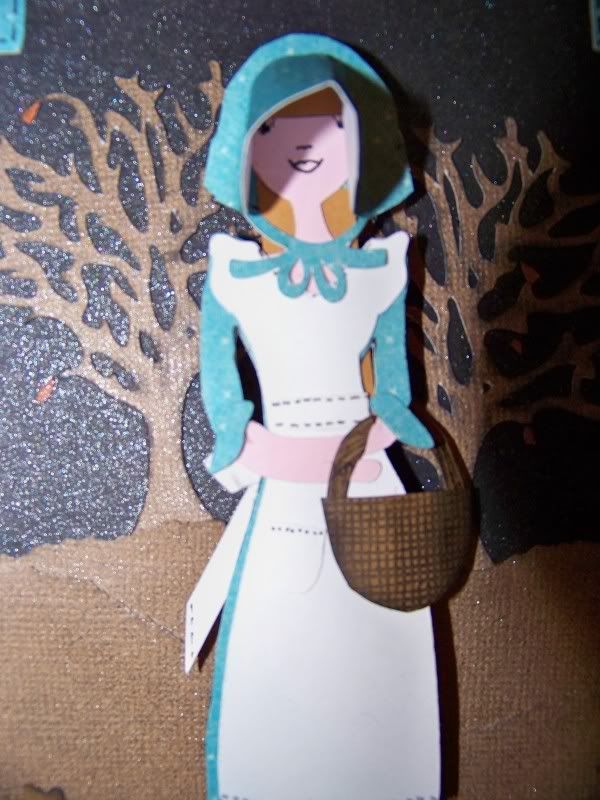
This figure is from Country Life, cut at 5". Here you can see the figure I made as compared to the original Cricut artist's intended finished figure.
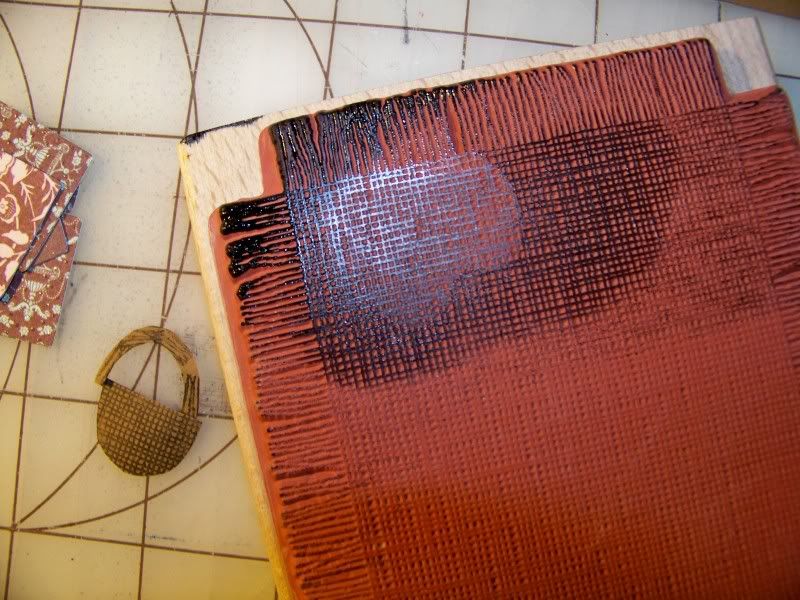
I used the dress on the original cut as the apron and fashioned my own longer version of a dress, adding a pleated hemline detail. The flower at the hem is the flower that is on the original hat on the cart. I used the original tie on her hat and attached it to my hand-cut bonnet. I gave her a new hairdo! I shifted her apron a bit and flipped her feet in the other direction. I made her a little basket to carry, using a mesh texture rubber stamp to imitate the basket weave.
The background was the fun part and kind of had a life of its own. I started with back cardstock and added torn brown cardstock to give her a ground on which to stand. I added trees from the Cricut Heritage cart (page 25), cut at 2-1/2". After gluing everything down, I sprayed it with Glimmer Mist. My goal was to give make a frosty-early-morning scene.
I placed this scene over a small print to create a narrow border. I created the pieced quilt-like border by cutting 1" squares from George & Basic Shapes. I zigzagged the quilt border to the outdoor scene and placed corner squares, cut at 1/2" and glued into place to complete the border.
I finished the project by adding the figure with 1/4" pop dots to bring her up off the surface.
I cut small leaves from Straight From the Nest (page 56), cut at 1". I inked them and glued them in place, completing the project.
A few tips about sewing on paper if you have not tried it... use a 'sharp' rather than a 'ballpoint' needle. Set your machine to make long stitches. The paper is getting perforated with each stitch, and tiny stitches will make it very easy for your project to separate! I used to use paper as a stabilizer on certain fabrics and loved this quality about it; not so much when the paper IS the finished product! If you look at a machine needle under a microscope, it has a tiny bit of a hook. That hook dulls easily -- sewing on paper dulls it even faster so be sure to change to a new needle before sewing on fabric again. I use my regular sewing machine whether I am sewing vellum or denim, so no reason to get sucked into that "crafting" machine if you already have a working sewing machine! Try to avoid gummy adhesives applied where you will be stitching. If your needle does get coated, a bit of rubbing alcohol or Goo Gone cleans it right up!
So, you have read through, checking off autumn...quilts...pioneer woman.... what about the apple crisp, you say? Well, how could it even be November without that???!!!
Food usually makes it into my mind as I craft and this project was no exception. My favorite fall dessert is one from a long-gone Louisville restaurant, the Afro-German Tea Room. Before going out of business, they shared this, the only recipe I will ever again use for apple crisp. It would be cruel and unusual punishment not to share it with you...
Happy crafting and eat extra apple crisp for me!!
I came up with a 70s-Holly-Hobbie-meets-Ma-Ingalls character, finally figuring out that bonnet, and I even got to do a little stitching on paper!
Since I was a quilter long before I was a papercrafter, stitching on fabric seems like such an obvious direction that I am not sure why I haven't really done it before now except that I don't care for stitching for stitching's sake; I think it needs a purpose for being a part of the project. The quilt motif give it that!
This figure is from Country Life, cut at 5". Here you can see the figure I made as compared to the original Cricut artist's intended finished figure.
I used the dress on the original cut as the apron and fashioned my own longer version of a dress, adding a pleated hemline detail. The flower at the hem is the flower that is on the original hat on the cart. I used the original tie on her hat and attached it to my hand-cut bonnet. I gave her a new hairdo! I shifted her apron a bit and flipped her feet in the other direction. I made her a little basket to carry, using a mesh texture rubber stamp to imitate the basket weave.
The background was the fun part and kind of had a life of its own. I started with back cardstock and added torn brown cardstock to give her a ground on which to stand. I added trees from the Cricut Heritage cart (page 25), cut at 2-1/2". After gluing everything down, I sprayed it with Glimmer Mist. My goal was to give make a frosty-early-morning scene.
I placed this scene over a small print to create a narrow border. I created the pieced quilt-like border by cutting 1" squares from George & Basic Shapes. I zigzagged the quilt border to the outdoor scene and placed corner squares, cut at 1/2" and glued into place to complete the border.
I finished the project by adding the figure with 1/4" pop dots to bring her up off the surface.
I cut small leaves from Straight From the Nest (page 56), cut at 1". I inked them and glued them in place, completing the project.
A few tips about sewing on paper if you have not tried it... use a 'sharp' rather than a 'ballpoint' needle. Set your machine to make long stitches. The paper is getting perforated with each stitch, and tiny stitches will make it very easy for your project to separate! I used to use paper as a stabilizer on certain fabrics and loved this quality about it; not so much when the paper IS the finished product! If you look at a machine needle under a microscope, it has a tiny bit of a hook. That hook dulls easily -- sewing on paper dulls it even faster so be sure to change to a new needle before sewing on fabric again. I use my regular sewing machine whether I am sewing vellum or denim, so no reason to get sucked into that "crafting" machine if you already have a working sewing machine! Try to avoid gummy adhesives applied where you will be stitching. If your needle does get coated, a bit of rubbing alcohol or Goo Gone cleans it right up!
So, you have read through, checking off autumn...quilts...pioneer woman.... what about the apple crisp, you say? Well, how could it even be November without that???!!!
Food usually makes it into my mind as I craft and this project was no exception. My favorite fall dessert is one from a long-gone Louisville restaurant, the Afro-German Tea Room. Before going out of business, they shared this, the only recipe I will ever again use for apple crisp. It would be cruel and unusual punishment not to share it with you...
Afro-German Tea Room Apple Crisp
Filling: 8 to 12 Granny Smith apples
1 tablespoon cinnamon
1/2 cup light brown sugar
1/2 cup white sugar
pinch of salt
2 tablespoons dark rum (I sometimes use bourbon instead)
1 teaspoon nutmeg
Topping: 1-1/2 cups flour
1/2 pound unsalted butter
1/2 cup white sugar
1/2 cup light brown sugar
pinch of salt
1-1/2 cups broken walnuts or pecans
Sweetened whipped cream (optional)
Peel and core apples. Slice thin. Combine with remaining filling ingredients.
Pour into a large, heavily buttered casserole.
Cut flour and butter together with pastry cutter. Add sugars, salt & walnuts.
Toss to combine evenly. Spread a thick layer over apples
and bake at 350ยบ for 45 minutes until the top browns nicely
and the apples are syrupy. Serve with whipped cream.
Happy crafting and eat extra apple crisp for me!!
Sunday, November 7, 2010
Christmas Ornaments - Window and Dome
I have been working on Christmas ornaments with the Cricut. I have been wanting to do more with the idea of 'looking through a window' in my scenes. I have two to share!
This one I am submitting for the Circle Magazine ornament contest.

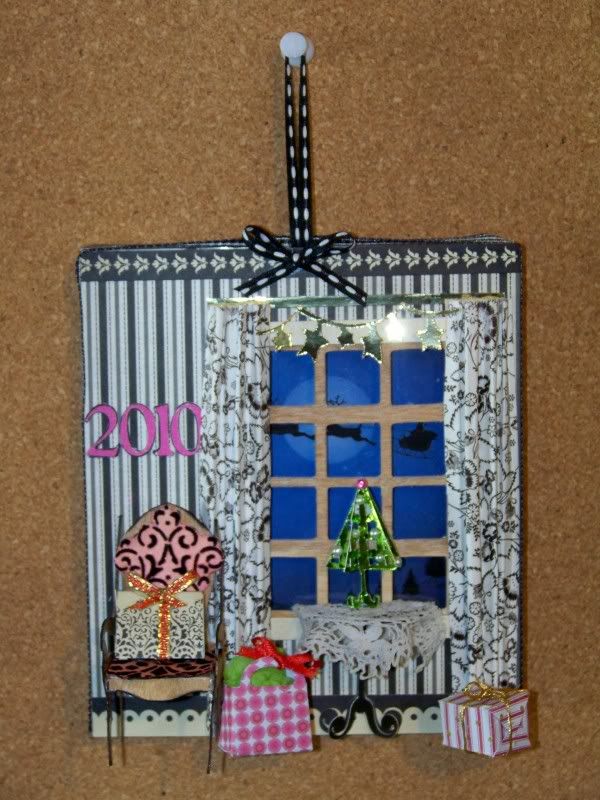
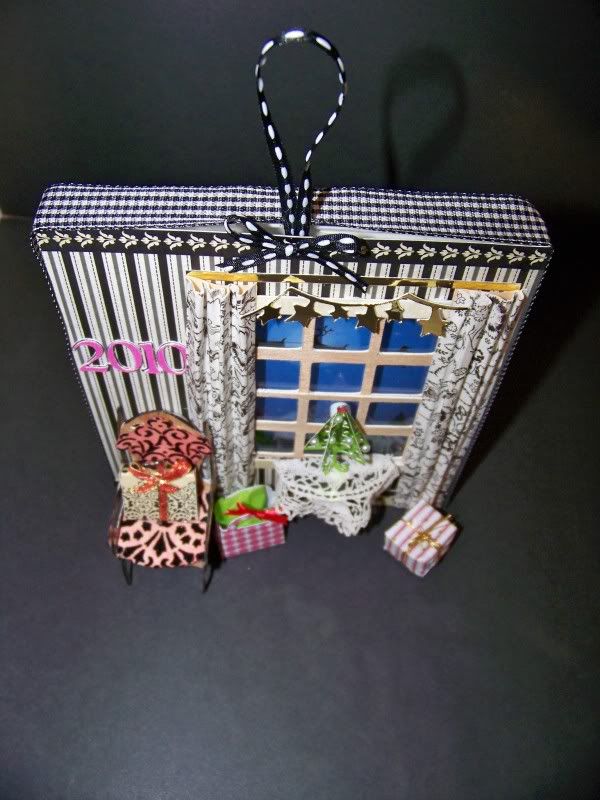
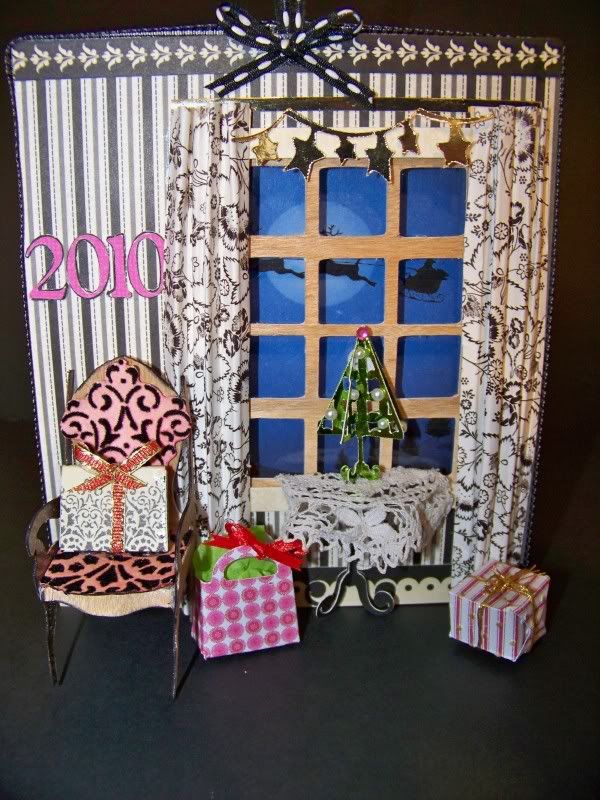
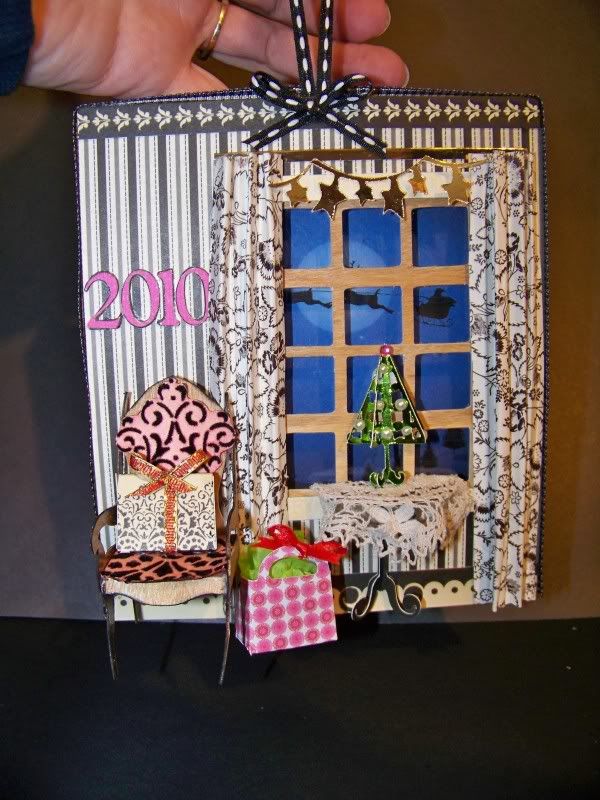
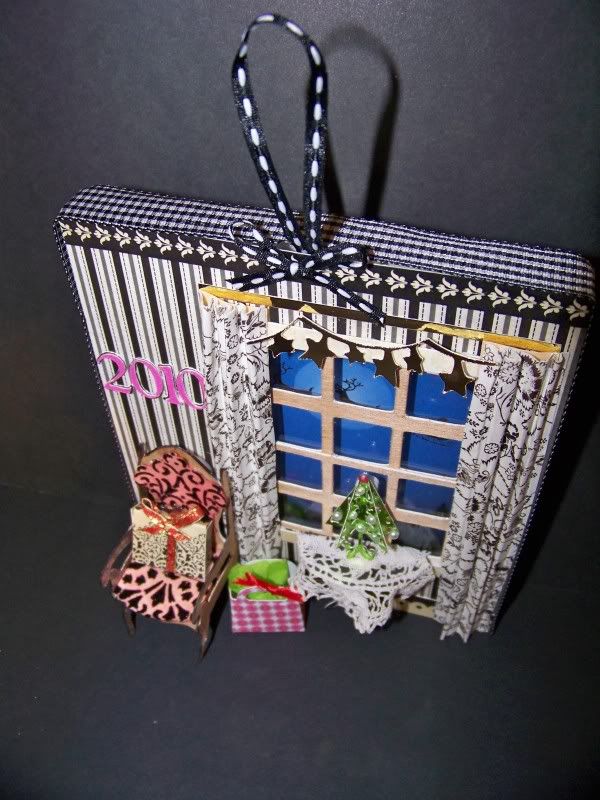
I was really inspired by Therese Leyden's 3D Paris Apartment and decided to incorporate a Cricut 3D die cut chair and to create a couple of 3D items from 2D cuts. This ornament hangs and is free-standing when on a table top.
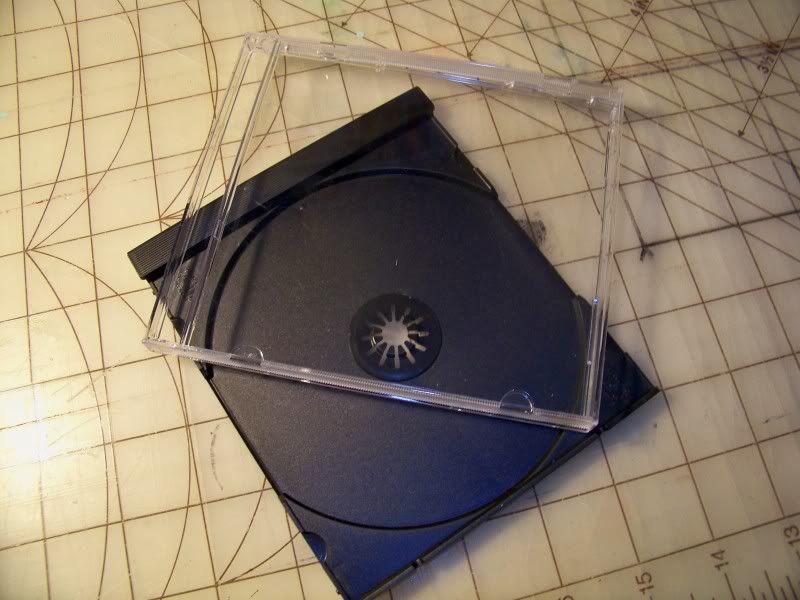
I knew I wanted a window. I had initially thought of a dome window, but started thinking about a flat window after seeing an ornament in a store. I started with a CD jewel case, removing the black CD holder insert.
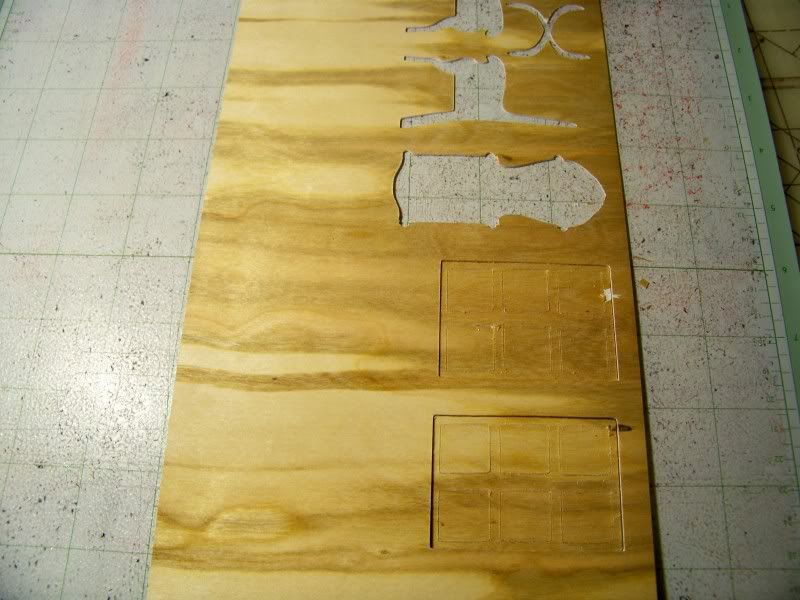
I wanted to use some wood veneer paper that I had purchased when I was experimenting with flowers for the necklace challenge. The wood is a bit of a challenge, requiring a multi-cut of 2, max pressure, speed 3, and blade set at 6 (no need for a deep blade housing). It has a tendency to chip off of the paper backing on small or intricate cuts so I knew I would not be able to use the chair's lacy back and opted for an upholstered look. The chair is from Summer in Paris, cut at 3". I used Glimmer Mist on the white paper side to color it. I assembled the chair, using my scoring tool in order to fold it into shape without breaking up the veneer. I glued flocked paper (that I had misted in pink) to the chair for upholstery.

I also cut the window panes out of the wood. These are are from French Manor (page 36), the layer cut only. I cut two at 4".
I found a Santa flying in front of the moon by finding a Google Image and printing it. I used double-sided tape to attach it to the inside of the jewel case, using the window pane die cuts to determine placement. On the outside of the case, I glued the panes, using E6000 glue (perfect for non-porous materials like plastic).
I cut the paper for the wall, cutting out the window. This was glued on using the same plastic adhesive. I found some coordinating papers for floorboard, top border, and drapes. I attached paper strips for the window sill and upper woodwork.
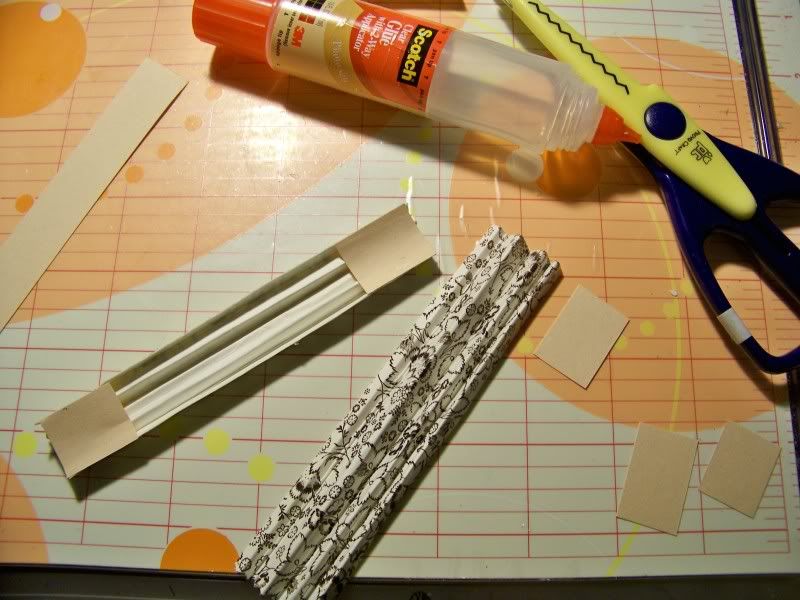
For the drapes, I accordion-folded the papers to simulate the pleats, cut the bottoms with pinking scissors, and anchored the tops and bottoms to squares cut to the finished size to keep the pleats tightly in place.

I cut a strip of metallic paper for the curtain rod. The star garland is from Joys of the Season, page 70, cut at 3/4".
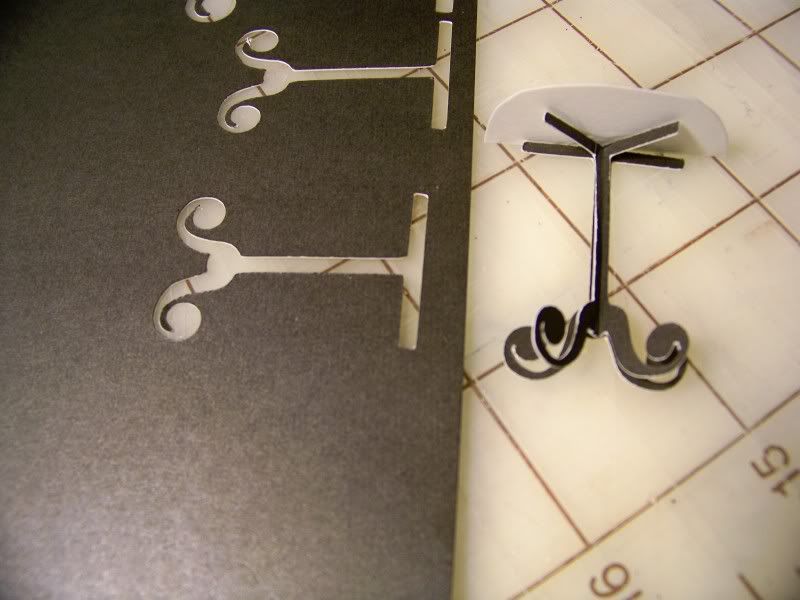
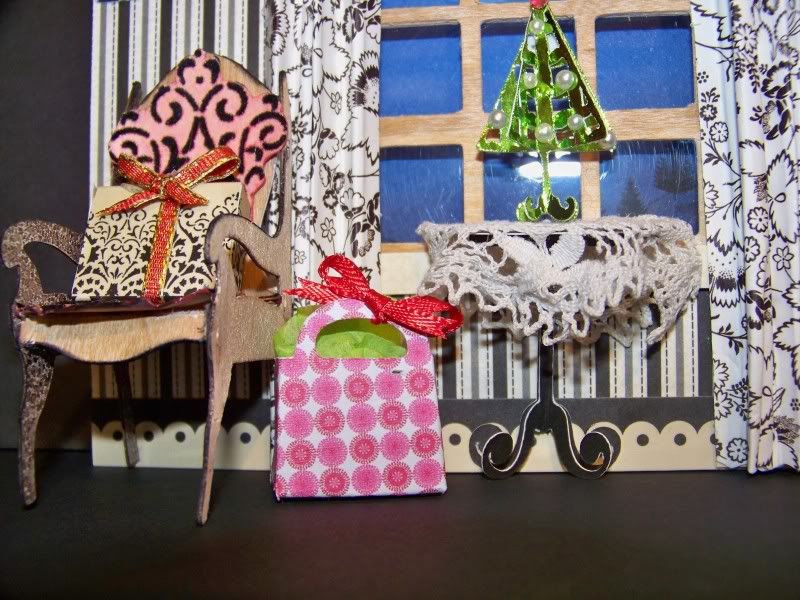
The table is made from a bird cage base from Serenade. I cut it twice at 1-1/2", folding one in half and gluing it on top of the other.
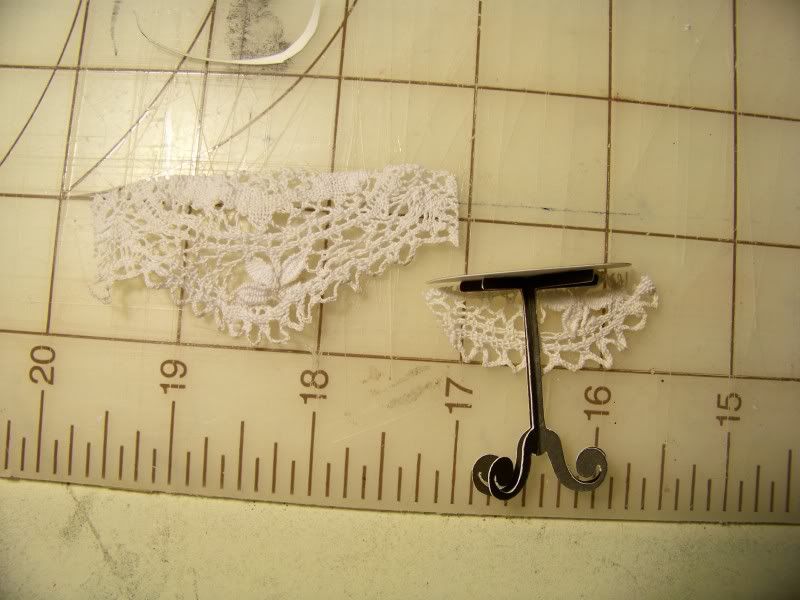
I cut a semi circle top and glued it on. I used a bit of lace trim from my stash for the tablecloth. I cut the back and glued it on, then cut a scallop for the front.
The metal tree centerpiece is cut from Joys of the Season. I cut the tree from page 63 at 1-1/2" twice, folding one and applying it to the center of the other. This is assembled just like I assembled the table! I added pearls and a jewel at the top. It is attached with layered pop dots off the window.

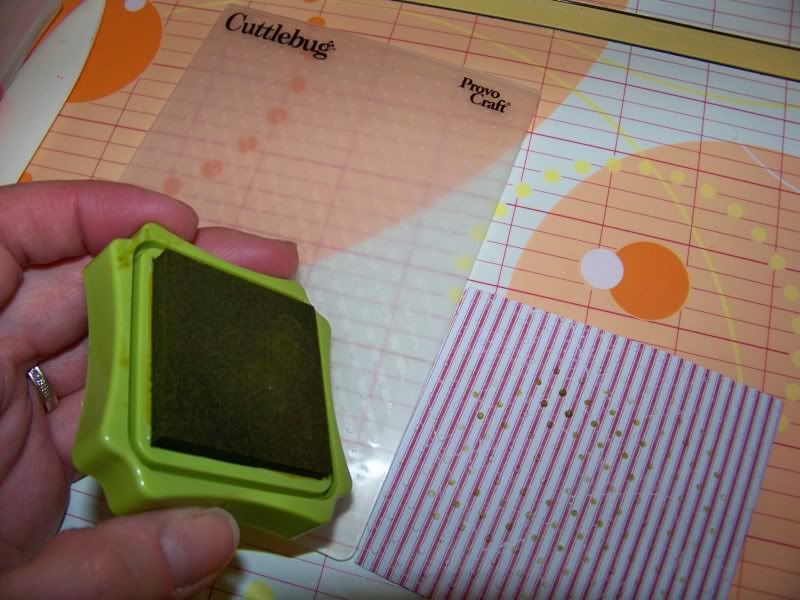
I hand-cut the wrapped gift on the chair and glued it on. The gift bag is from Tags, Bags, Boxes, and More, page 115, cut at 1-1/2". I just added a little tissue paper and a ribbon. I attached it at an angle to the drapes using a pop dot. I created a third package by embossing dots on a striped paper using my Cuttlebug and the Swiss Dots folder, lightly rubbing over it with a stamp pad to accentuate the dots, then folding a box and tying with gold cord.
I like to have at least one or two special ornaments each year. I like them best when they have the year, or some other detail to represent the year. This is something I started doing for my daughter, going to the trouble to write out stories about the ornaments family members have given her. It is part of our tree-trimming and decorating to talk about who an ornament was from or what it represented.
I decided to add the year to this ornament. The numbers are from Plantin Schoolbook, cut at 3/4" with a shadow.
I finished the ornament by cutting a ribbon hanger and gluing it inside the jewel case. I covered the back of the case with paper and the sides with ribbon.


I still wanted to try one using a clear dome in which to create a scene.
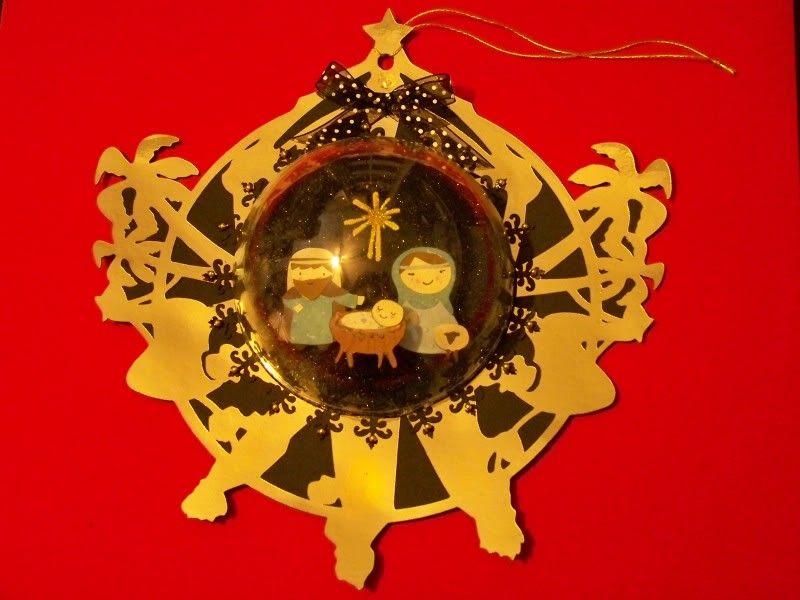
Just for fun, I came up with this...
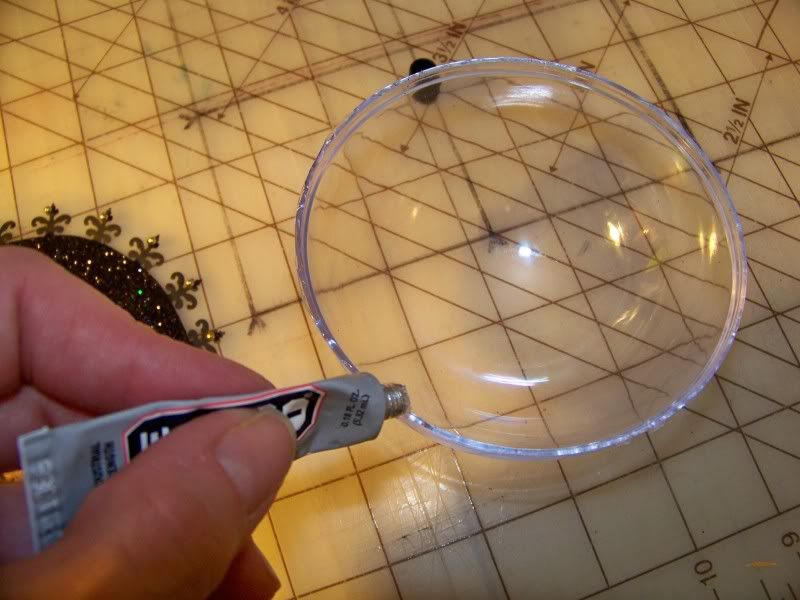
I found plastic ornaments that are sold as two half circles so that you can fill them and snap them together. I am just using one of the halves here. I used wire cutters to remove the plastic loop (intended as a hanger).
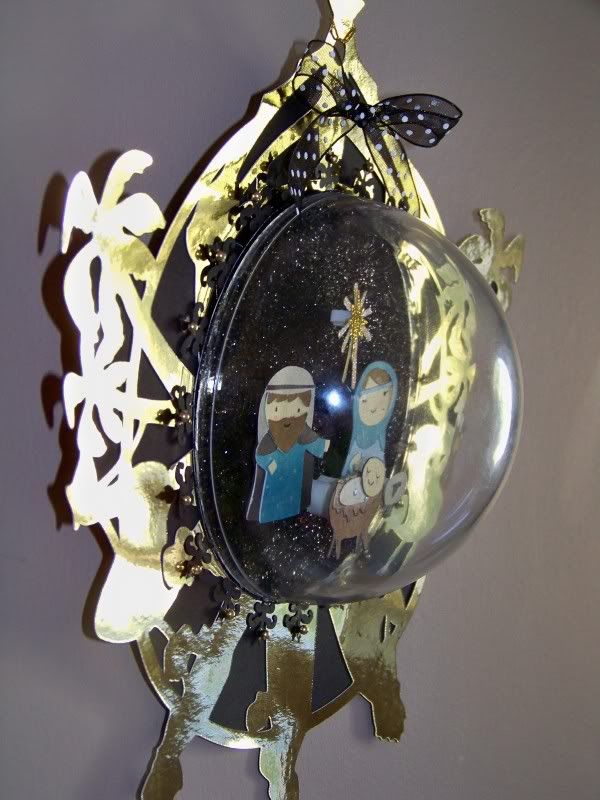
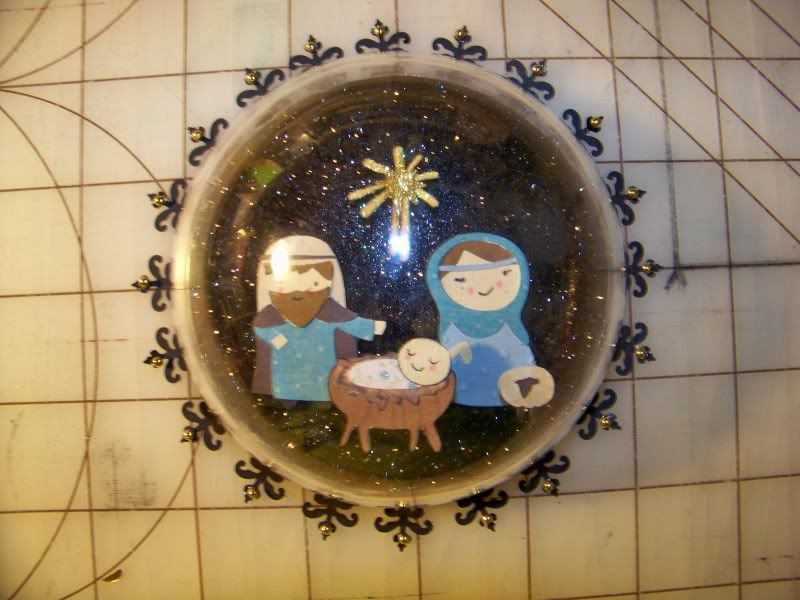
I started with black glitter paper. I created a nativity scene using Cricut Winter Frolic, each cut at 1-1/2". I glittered both layers of the star. Mary's little dress was run through the Cuttlebug to get those little dots. Each piece was applied using glue dots and foam dots, stacked to allow the figures to pop up at different heights.
I used an EK Success edge punch, trimmed close to the decoration, then applied it to the back of the circle, adjusting as needed. I added gold beads to the decorative edge.
I used E6000 glue to adhere the dome to the glitter paper.
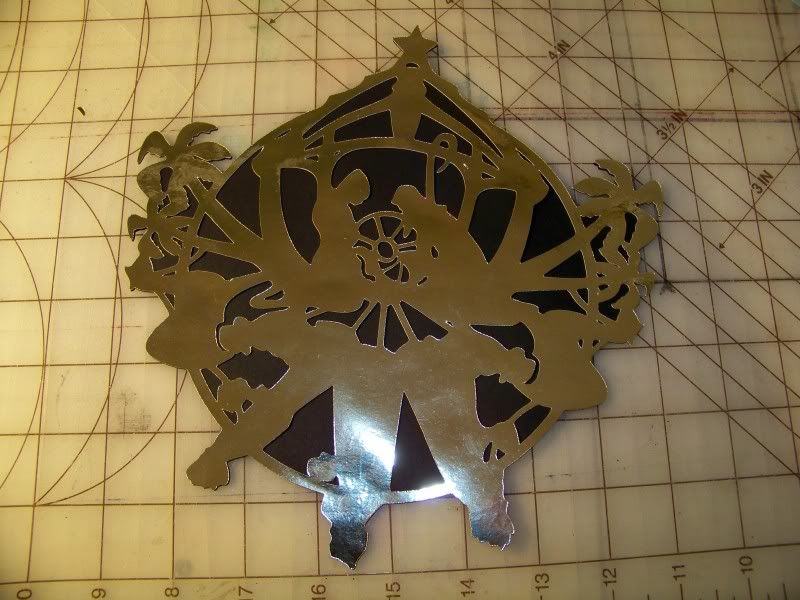
I decided that I wanted something to frame and complete the ornament. I love the beautiful snowflakes on the Cricut Cartridge When It's Cold Outside. The nativity cut is one of my favorites. I cut it at 8-1/2" in gold paper and also cut the backing out of black and adhered them together.
The dome perfectly fit over the Holy Family, allowing my little Winter Frolic nativity to replace it. I added a gold cord for hanging and a sheer black polka dotted ribbon bow at the top.
Thank you for looking at my projects! I would not even be thinking of Christmas yet if not for the ornament contest! Yikes!
This one I am submitting for the Circle Magazine ornament contest.
I was really inspired by Therese Leyden's 3D Paris Apartment and decided to incorporate a Cricut 3D die cut chair and to create a couple of 3D items from 2D cuts. This ornament hangs and is free-standing when on a table top.
I knew I wanted a window. I had initially thought of a dome window, but started thinking about a flat window after seeing an ornament in a store. I started with a CD jewel case, removing the black CD holder insert.
I also cut the window panes out of the wood. These are are from French Manor (page 36), the layer cut only. I cut two at 4".
I found a Santa flying in front of the moon by finding a Google Image and printing it. I used double-sided tape to attach it to the inside of the jewel case, using the window pane die cuts to determine placement. On the outside of the case, I glued the panes, using E6000 glue (perfect for non-porous materials like plastic).
For the drapes, I accordion-folded the papers to simulate the pleats, cut the bottoms with pinking scissors, and anchored the tops and bottoms to squares cut to the finished size to keep the pleats tightly in place.
I cut a strip of metallic paper for the curtain rod. The star garland is from Joys of the Season, page 70, cut at 3/4".
The table is made from a bird cage base from Serenade. I cut it twice at 1-1/2", folding one in half and gluing it on top of the other.
I hand-cut the wrapped gift on the chair and glued it on. The gift bag is from Tags, Bags, Boxes, and More, page 115, cut at 1-1/2". I just added a little tissue paper and a ribbon. I attached it at an angle to the drapes using a pop dot. I created a third package by embossing dots on a striped paper using my Cuttlebug and the Swiss Dots folder, lightly rubbing over it with a stamp pad to accentuate the dots, then folding a box and tying with gold cord.
I like to have at least one or two special ornaments each year. I like them best when they have the year, or some other detail to represent the year. This is something I started doing for my daughter, going to the trouble to write out stories about the ornaments family members have given her. It is part of our tree-trimming and decorating to talk about who an ornament was from or what it represented.
I decided to add the year to this ornament. The numbers are from Plantin Schoolbook, cut at 3/4" with a shadow.
I finished the ornament by cutting a ribbon hanger and gluing it inside the jewel case. I covered the back of the case with paper and the sides with ribbon.
I still wanted to try one using a clear dome in which to create a scene.
Just for fun, I came up with this...
I found plastic ornaments that are sold as two half circles so that you can fill them and snap them together. I am just using one of the halves here. I used wire cutters to remove the plastic loop (intended as a hanger).
I started with black glitter paper. I created a nativity scene using Cricut Winter Frolic, each cut at 1-1/2". I glittered both layers of the star. Mary's little dress was run through the Cuttlebug to get those little dots. Each piece was applied using glue dots and foam dots, stacked to allow the figures to pop up at different heights.
I used an EK Success edge punch, trimmed close to the decoration, then applied it to the back of the circle, adjusting as needed. I added gold beads to the decorative edge.
I used E6000 glue to adhere the dome to the glitter paper.
I decided that I wanted something to frame and complete the ornament. I love the beautiful snowflakes on the Cricut Cartridge When It's Cold Outside. The nativity cut is one of my favorites. I cut it at 8-1/2" in gold paper and also cut the backing out of black and adhered them together.
The dome perfectly fit over the Holy Family, allowing my little Winter Frolic nativity to replace it. I added a gold cord for hanging and a sheer black polka dotted ribbon bow at the top.
Thank you for looking at my projects! I would not even be thinking of Christmas yet if not for the ornament contest! Yikes!
Saturday, November 6, 2010
Wanna know what I learned at the Ohio Meetup? Want to get Circle Logo Embossing Folders?
Today was the Ohio Meetup! What was lacking in ambiance at the location (I mean they did have stains on the ceiling from two decades ago), was more that made up by the funny, quirky Shannon Lerner! I did ask her about how long cricutmachine.com would have the exclusive on Car Decals. She announced that it would be about 60 days on that contract... and that Car Decals 2 would be coming. Afterwards, I went to thank her for hosting this meetup and she told me I might just want to WAIT FOR THE JANUARY CIRCLE EXCLUSIVE CARTRIDGE release! I took that to mean that something in the line of Car Decals would be our next Circle Exclusive Cart. I told her I would like to post this and she didn't say 'no' so that is my scoop!!
She also told us that Walmart would NOT have the exclusive rights to the Cricut Lites forever, as many of us thought, and that more lites will be coming out for Black Friday.
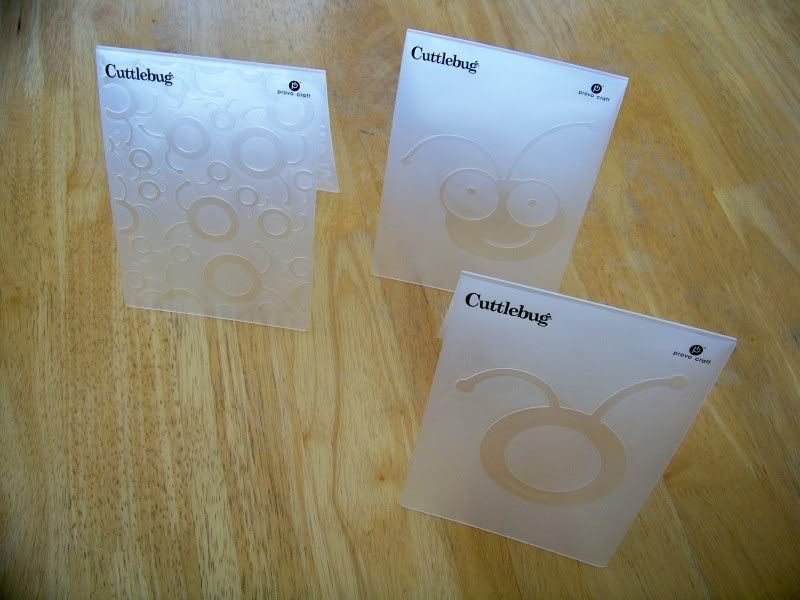
We were also allowed to purchase those fabulous Cuttlebug folders which feature the bug head, Circle logo, and little circle logos. I bought an extra set to give away!!!!
If you would like to have a chance to win this set of three Cuttlebug Embossing Folders, please be a follower of this blog and leave a comment on here. I will announce the winner and contact her/him next Sunday, November 14!
I met some great Circle members today! I had so much fun matching up MB names to real people... and met a bunch of ladies who aren't even on the MB. So many nice comments, great tags and calling cards, and even prizes. No, I didn't win one of the FIVE Yudus, the Cakes, or the Imagine, but I did win a fall packet which I will be using today.
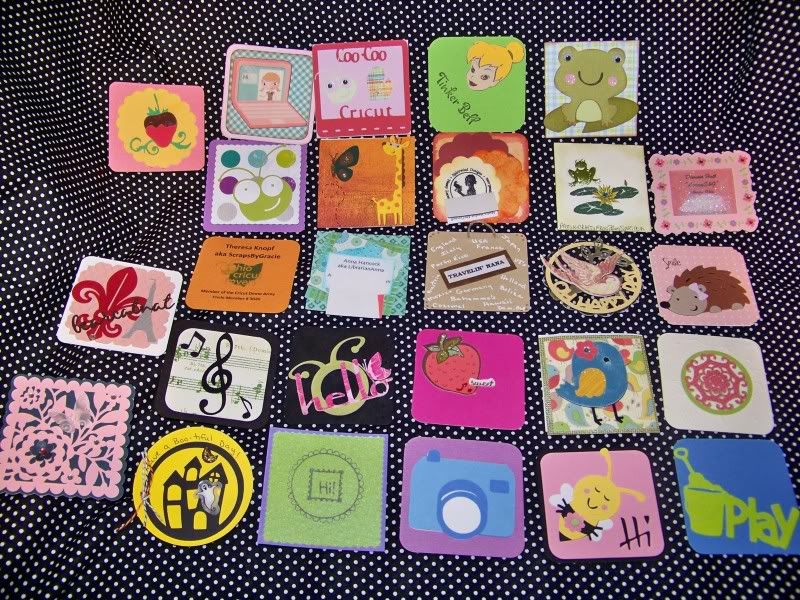
Check out some of the awesome handmade calling cards I received today.
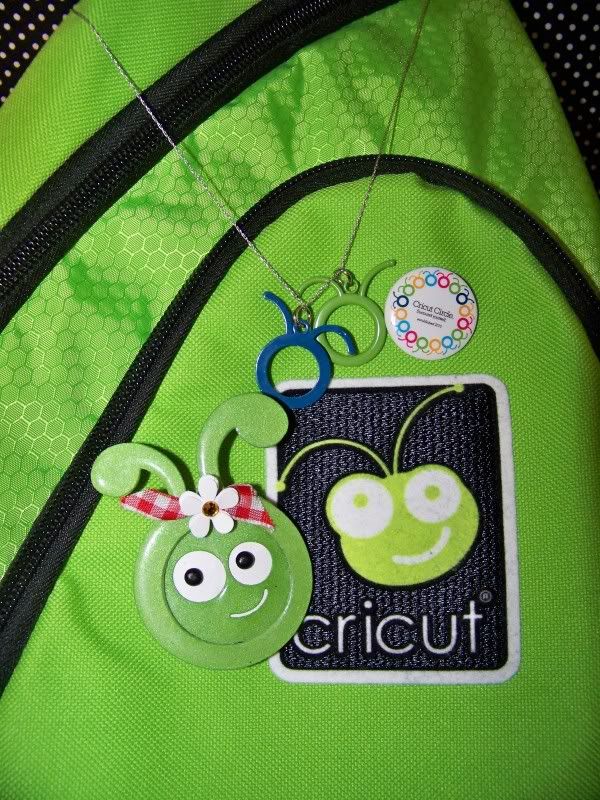
The calling cards are my absolute FAVORITE thing! I love the work and creativity that has gone into these! I also swapped my Christmas tags for some beautiful ones that I will be using this Christmas. We received blue charms and "flair" (the word reminds me of that SNL spoof on TGIFriday's wait staff and the flair they wear on their suspenders). Shannon said the DT will have events and their own flair for those events to give out. I thought I was way too cool for that, but I did pin it on my Cricut bag that I finally got to use today. (I bet you are thinking that when you carry an acid green bag with a Cricut logo on it, you probably shouldn't spend too much time being worried about being cool. So true). I did have one super cool thing -- the pin that CricutFarmer sent to me. I love that thing!!
Thanks for looking and don't forget to leave a comment and become a follower (if you aren't already) for a chance to win the set of three Cricut Circle embossing folders!
She also told us that Walmart would NOT have the exclusive rights to the Cricut Lites forever, as many of us thought, and that more lites will be coming out for Black Friday.
We were also allowed to purchase those fabulous Cuttlebug folders which feature the bug head, Circle logo, and little circle logos. I bought an extra set to give away!!!!
If you would like to have a chance to win this set of three Cuttlebug Embossing Folders, please be a follower of this blog and leave a comment on here. I will announce the winner and contact her/him next Sunday, November 14!
I met some great Circle members today! I had so much fun matching up MB names to real people... and met a bunch of ladies who aren't even on the MB. So many nice comments, great tags and calling cards, and even prizes. No, I didn't win one of the FIVE Yudus, the Cakes, or the Imagine, but I did win a fall packet which I will be using today.
Check out some of the awesome handmade calling cards I received today.
The calling cards are my absolute FAVORITE thing! I love the work and creativity that has gone into these! I also swapped my Christmas tags for some beautiful ones that I will be using this Christmas. We received blue charms and "flair" (the word reminds me of that SNL spoof on TGIFriday's wait staff and the flair they wear on their suspenders). Shannon said the DT will have events and their own flair for those events to give out. I thought I was way too cool for that, but I did pin it on my Cricut bag that I finally got to use today. (I bet you are thinking that when you carry an acid green bag with a Cricut logo on it, you probably shouldn't spend too much time being worried about being cool. So true). I did have one super cool thing -- the pin that CricutFarmer sent to me. I love that thing!!
Thanks for looking and don't forget to leave a comment and become a follower (if you aren't already) for a chance to win the set of three Cricut Circle embossing folders!
Friday, November 5, 2010
Tomorrow is the Ohio Meetup for the Cricut Circle!
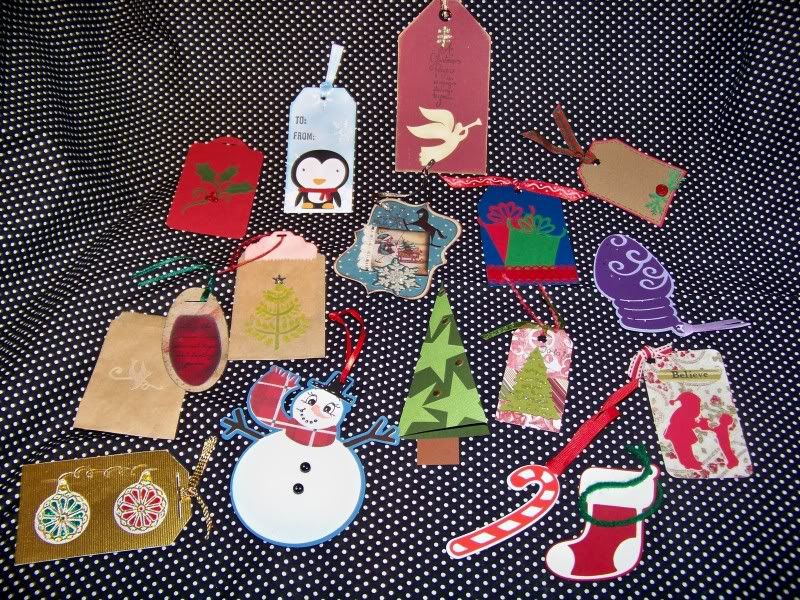
I finally did my tags after flopping back and forth on whether or not I was going. The email that indicated that we might get to purchase the Circle embossing folders sealed it for me!
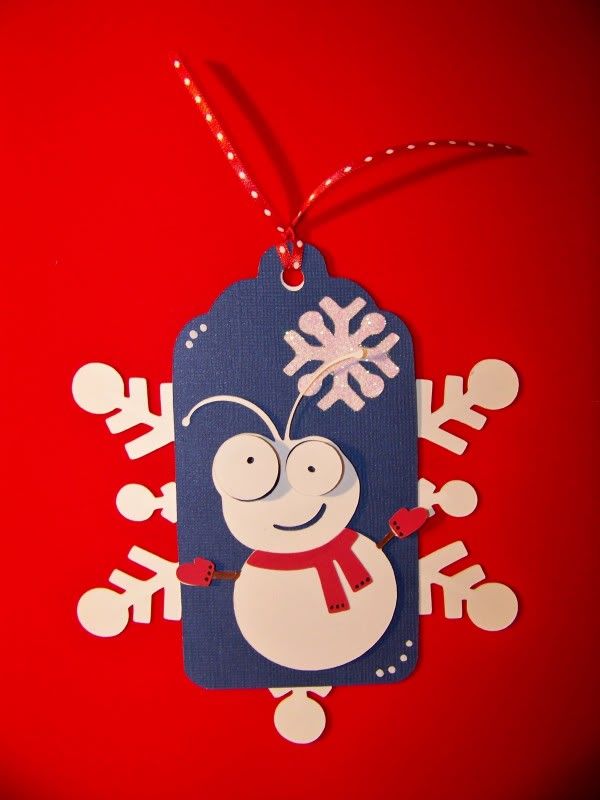
This is my final tag!
I used an idea I had for a pop dot challenge to come up with the tag! Those challenges keep payin' off for me!
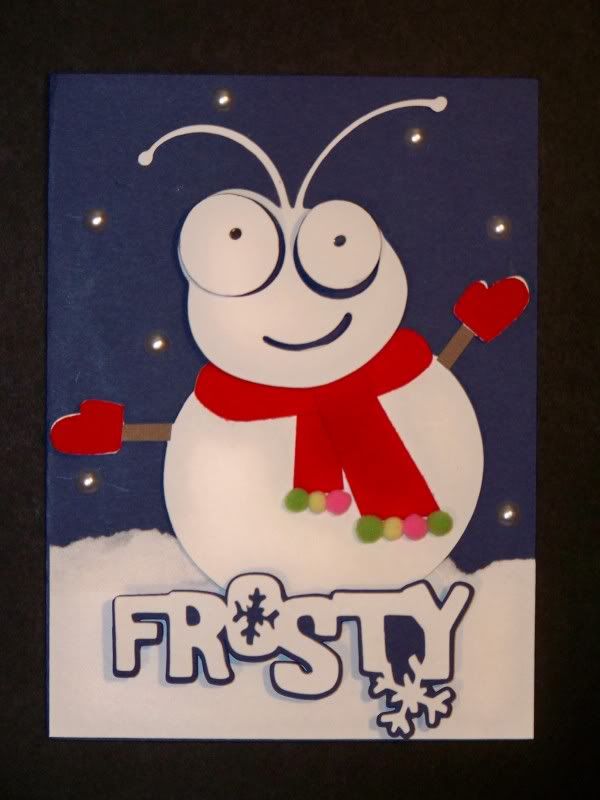
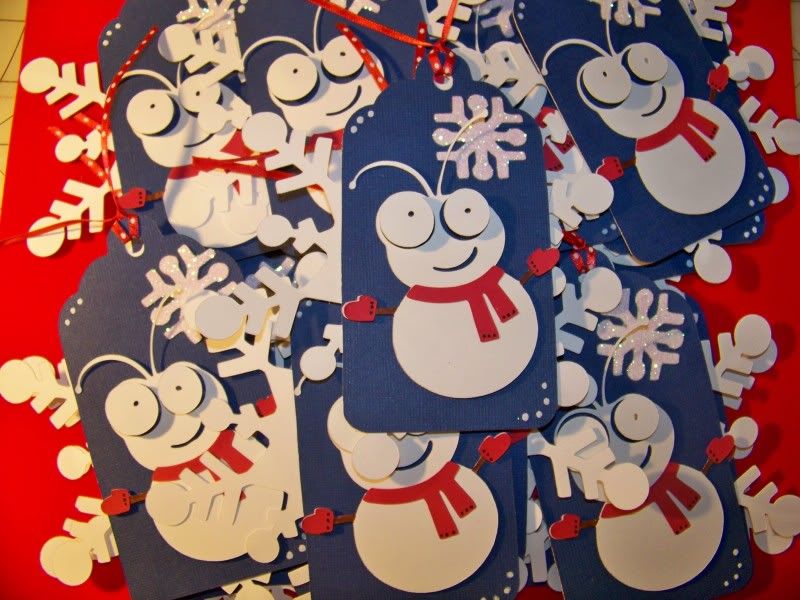
I used the body from Cricut Cart Winter Frolic (page 29, cut at 2-3/4") and the bug head from Cricut Cart Potpourri Basket (cut at 2-1/4") to create the snowman.
The base of the tag is from Cricut Cart George and Basic Shapes, cut at 5". Autofill will cut 6 on 12"x12" paper. I also cut a small snowflake from Joys of the Season, shadow and shift on page 60), cut at 1-1/4". I ran the snowflake, upside-down, through my Xyron Sticker Maker and then applied Ranger Stickles Glitter in Crystal. The snowman is adhered with thin pop dots; the eyes are added with 1/4" Ranger pop dots so they bug out! A large snowflake was cut from When It's Cold Outside, cut at 5".
I added a dotted accent to the tag and 8" of polka dot satin ribbon for ties.
Can't wait for the Meetup tomorrow! Hope to see you there!
This is my final tag!
I used an idea I had for a pop dot challenge to come up with the tag! Those challenges keep payin' off for me!
| This is a card I used for a pop dot challenge. |
| I simply cut off the head of the snowman and glue on the bug head! |
I added a dotted accent to the tag and 8" of polka dot satin ribbon for ties.
| 17 tags for the swap.... still need to make 85 calling cards! |
Can't wait for the Meetup tomorrow! Hope to see you there!
Thursday, November 4, 2010
If the shoe fits...
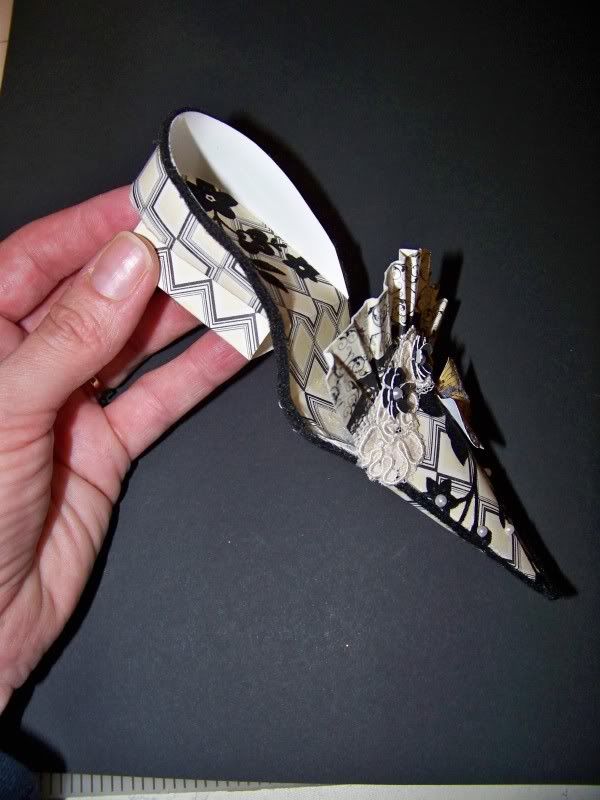
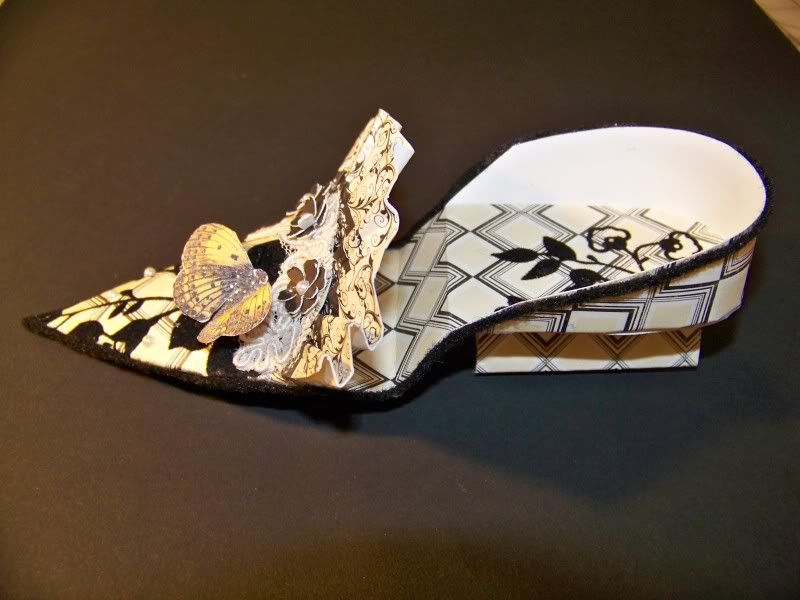
I was introduced by Linda Kaiser's Paper Boutique to the most lovely blogger who gave the instructions for a wonderful "Marie" shoe to use as a gift package. Terri at Artful Affirmations has the most wonderful little shoe on her blog! Using her easy-to-follow directions on her video and template, I made this...
She suggests using it as a 'package' for a bundle of laces or ribbons. I think just a simple note would be sweet!
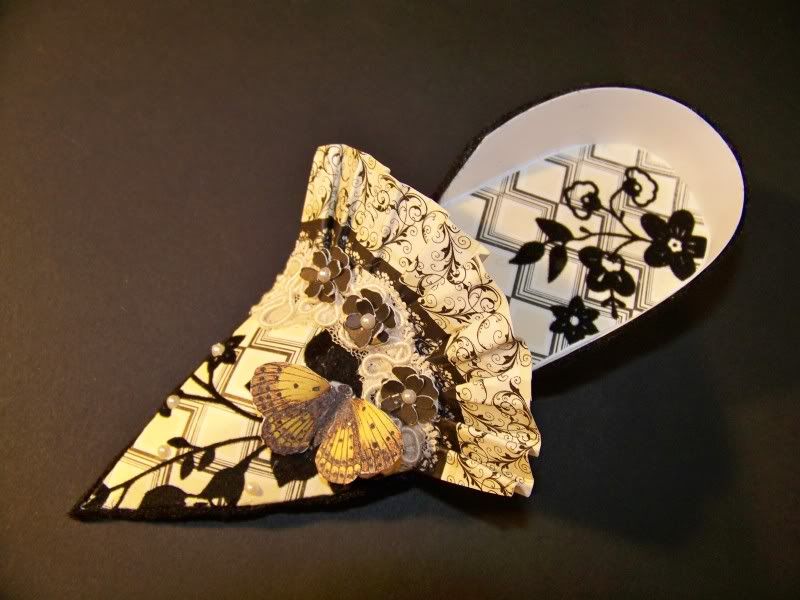
I used a sheet of printed cardstock with a flocked floral corner. I cut the shoe pieces to use this detail! A coordinating paper was used for the ruffle, although now that I look at it, how much better it would have been if I had used the Martha Stewart eyelet edger punch before pleating it!
I did add a couple of things, such as the heel. She used a spool and button, but I wanted a squared heel, more similar to a Louie mule. I added the thin strip of felt all the way around the shoe to hide the cut edges where the upper and lower soles meet and to outline the shoe.
I glued on a bit of alencon lace edging. I decorated that with paper flowers I cut from Pagoda, pages 56 and 57, cut at 1/2". I nested the smaller flower in the larger one and put a pearl in the center of each. I also used pearls to decorate the flocked flower on the toe. A butterfly that I cut directly out of printed paper gives the only color on the shoe.
One little trick when using Terri's template... I click on the image of the template, then highlight and copy. Then I open a Word document and paste it there. That allowed me to get the full template on one sheet of paper. I think the shoe I made is smaller than Terri's but it worked pretty well for me. I was able to cut the pieces out of one 8"x8" piece of decorative paper!
My papers were from DCWV La Creme stack. The butterfly is from a paper in the GCD Studios Melody Ross Artsy Urban #899 stack.
One more fun COMPLETELY non-craft-related bit of news that I want to share...
My aunt has been involved with education for her entire career, including past service as the Director of the National Middle School Association. She will be meeting with Justice Sandra Day O'Connor on Monday. Justice O'Connor has created a game for students that teaches the branches of government designed for middle grade students.... It's free. Check it out at www.iCivics.org .
Thanks for looking at my project! I would love to know if you try it!
She suggests using it as a 'package' for a bundle of laces or ribbons. I think just a simple note would be sweet!
I used a sheet of printed cardstock with a flocked floral corner. I cut the shoe pieces to use this detail! A coordinating paper was used for the ruffle, although now that I look at it, how much better it would have been if I had used the Martha Stewart eyelet edger punch before pleating it!
I did add a couple of things, such as the heel. She used a spool and button, but I wanted a squared heel, more similar to a Louie mule. I added the thin strip of felt all the way around the shoe to hide the cut edges where the upper and lower soles meet and to outline the shoe.
I glued on a bit of alencon lace edging. I decorated that with paper flowers I cut from Pagoda, pages 56
One little trick when using Terri's template... I click on the image of the template, then highlight and copy. Then I open a Word document and paste it there. That allowed me to get the full template on one sheet of paper. I think the shoe I made is smaller than Terri's but it worked pretty well for me. I was able to cut the pieces out of one 8"x8" piece of decorative paper!
My papers were from DCWV La Creme stack. The butterfly is from a paper in the GCD Studios Melody Ross Artsy Urban #899 stack.
One more fun COMPLETELY non-craft-related bit of news that I want to share...
My aunt has been involved with education for her entire career, including past service as the Director of the National Middle School Association. She will be meeting with Justice Sandra Day O'Connor on Monday. Justice O'Connor has created a game for students that teaches the branches of government designed for middle grade students.... It's free. Check it out at www.iCivics.org .
Thanks for looking at my project! I would love to know if you try it!
Subscribe to:
Posts (Atom)