Showing posts with label shrink film. Show all posts

Saturday, October 6, 2012

Falling for Halloween Blog Hop: Frightful Affair to Wear

Welcome to the Falling for Halloween Blog Hop! Thanks for joining us to enjoy all the wonderful crafty inspiration for the fall and Halloween season!  You should have arrived here from Angie's Paper Passion!  If you missed the beginning of the hop, please go to Maria's blog to start so you won't miss any of the projects. 

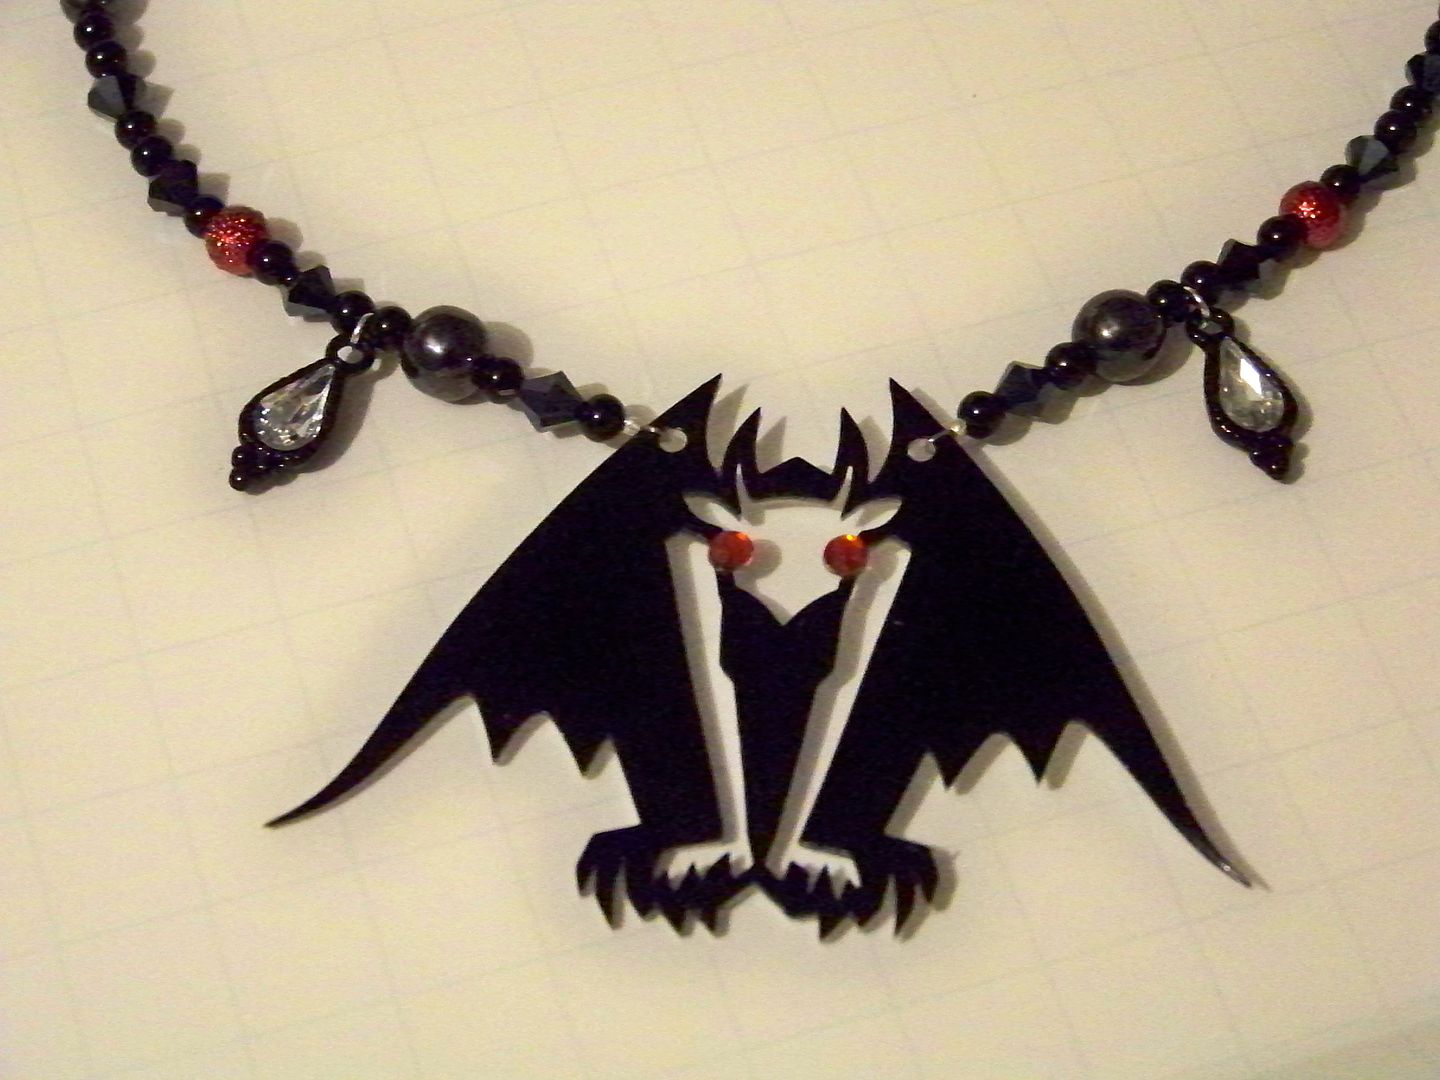
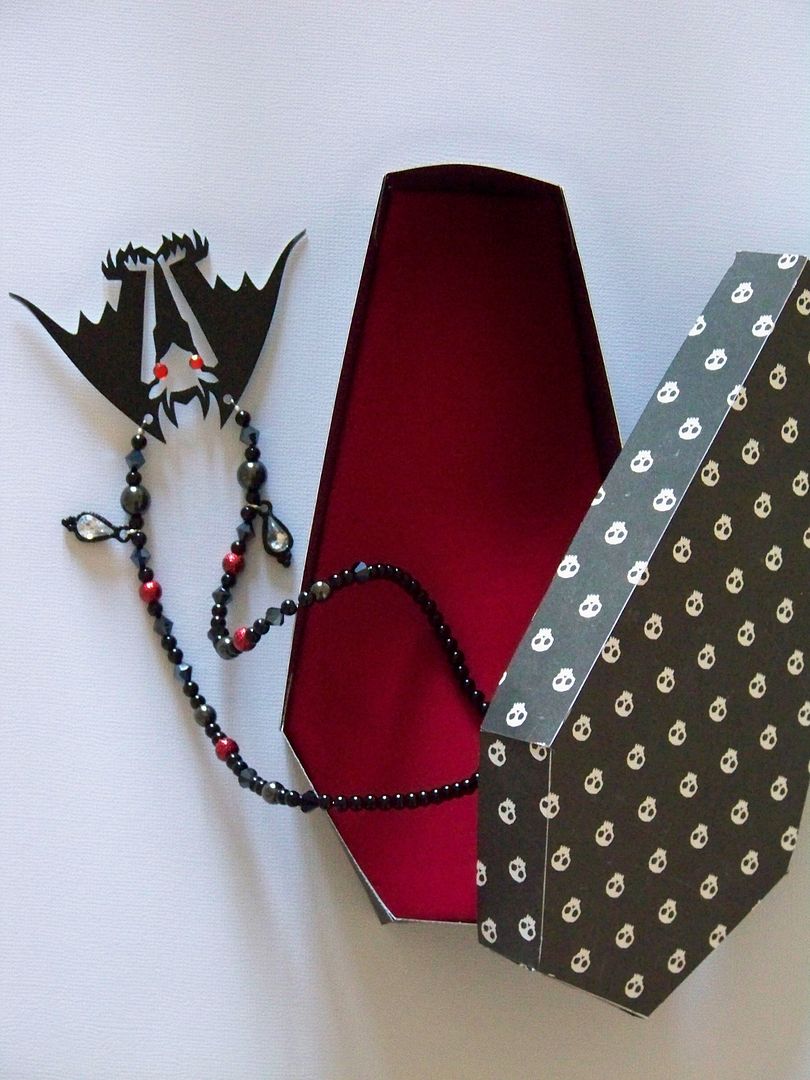
I wanted to share a fun, spooky Halloween necklace with gift box I created.  


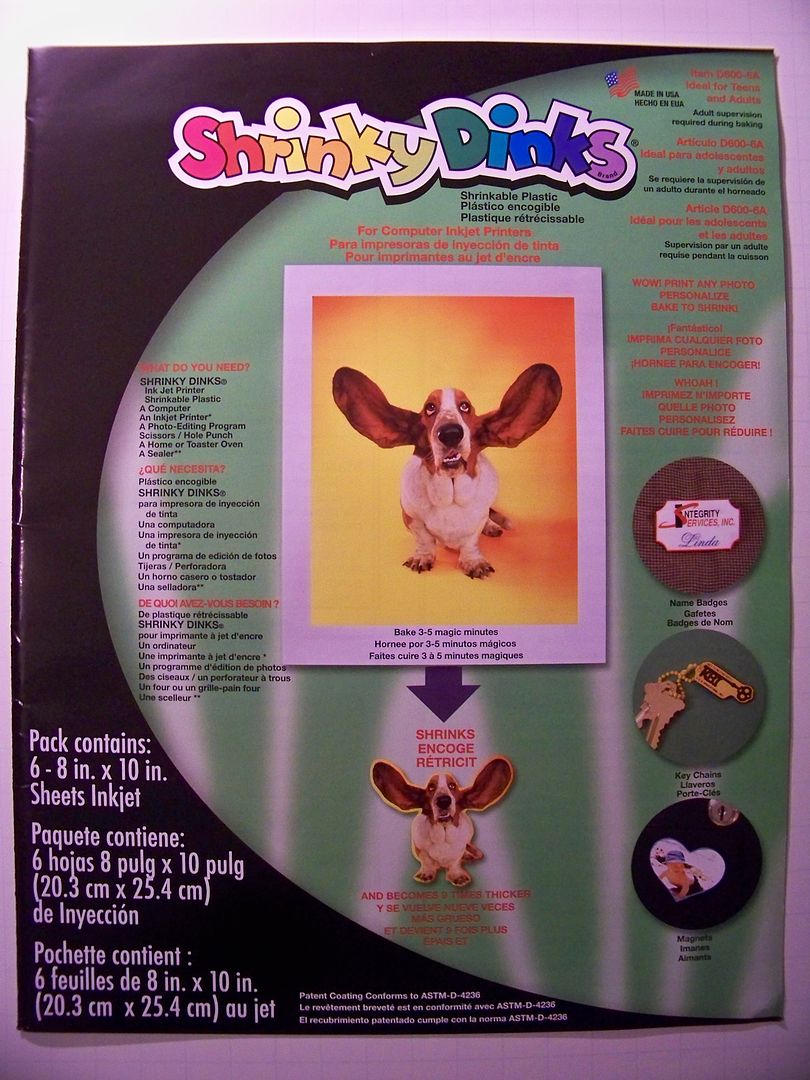
I used shrink film and the Cricut Frightful Affair cartridge to create a pendent for my necklace.  I used this brand of ink jet shrink film:


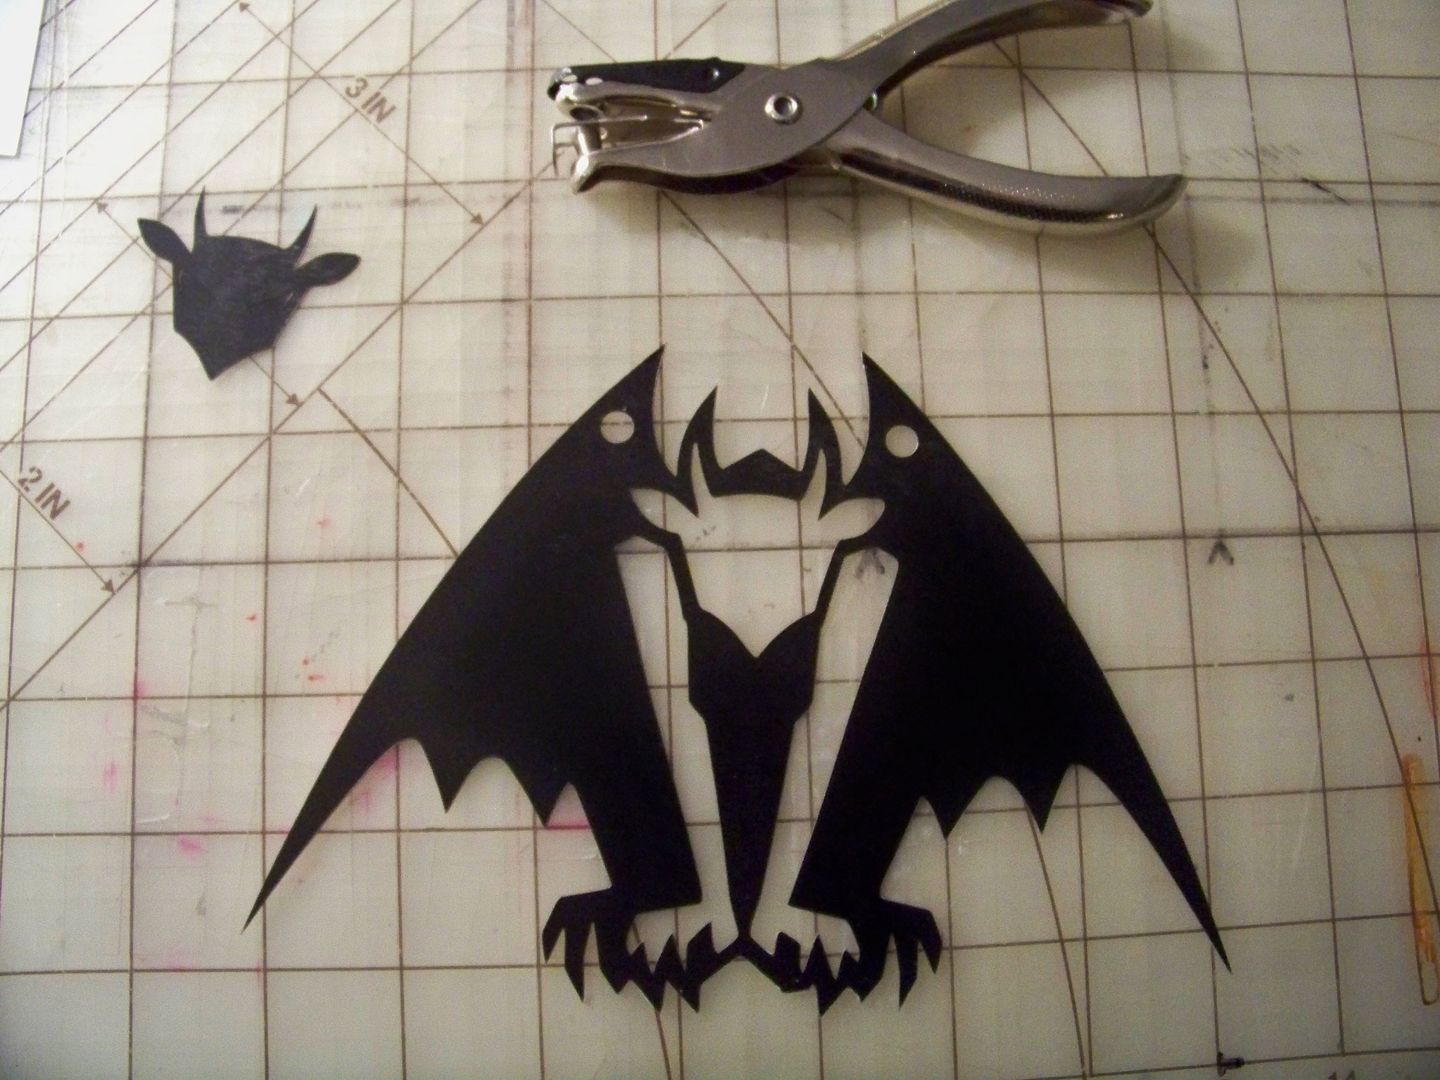
I cut the film on my Expression at 5" from Frightful Affair (page 62) with pressure 5, speed 3, blade 6, multicut 4.  Then, I moved the cut film on my mat and put it through the Imagine to color by spraying a 6"x8" rectangle over the film by setting the machine to 'print only'.  (I was unable to get my Imagine to cut through the film with this intricate cut, something I have never experienced before but sometimes you just move to plan B.   Otherwise, I would have just floodfilled the shape.)  I liked the opaque, even coloring from the Imagine so I was pleased with the results, even with the added step.


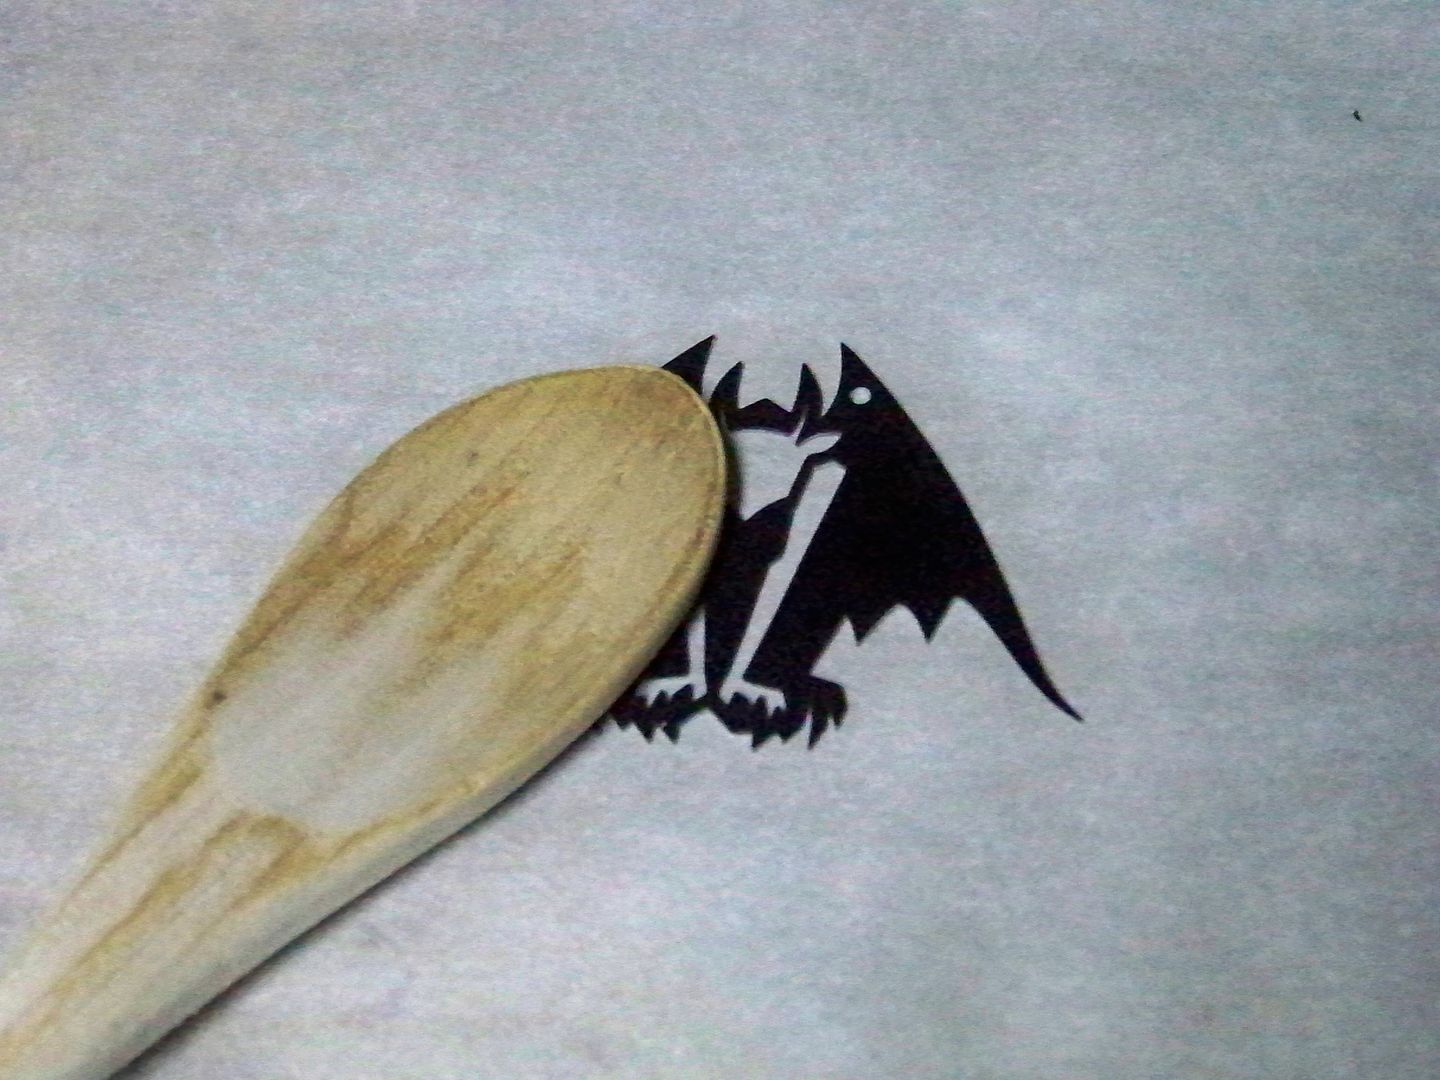
I punched in holes with a regular office punch.  I baked this form in a 300 degree oven on a parchment paper-covered baking sheet for a total of 12 minutes, after checking every three minutes.  While still in the oven but done shrinking and ready to come out, I flattened the shape with the back of an old wooden spoon.


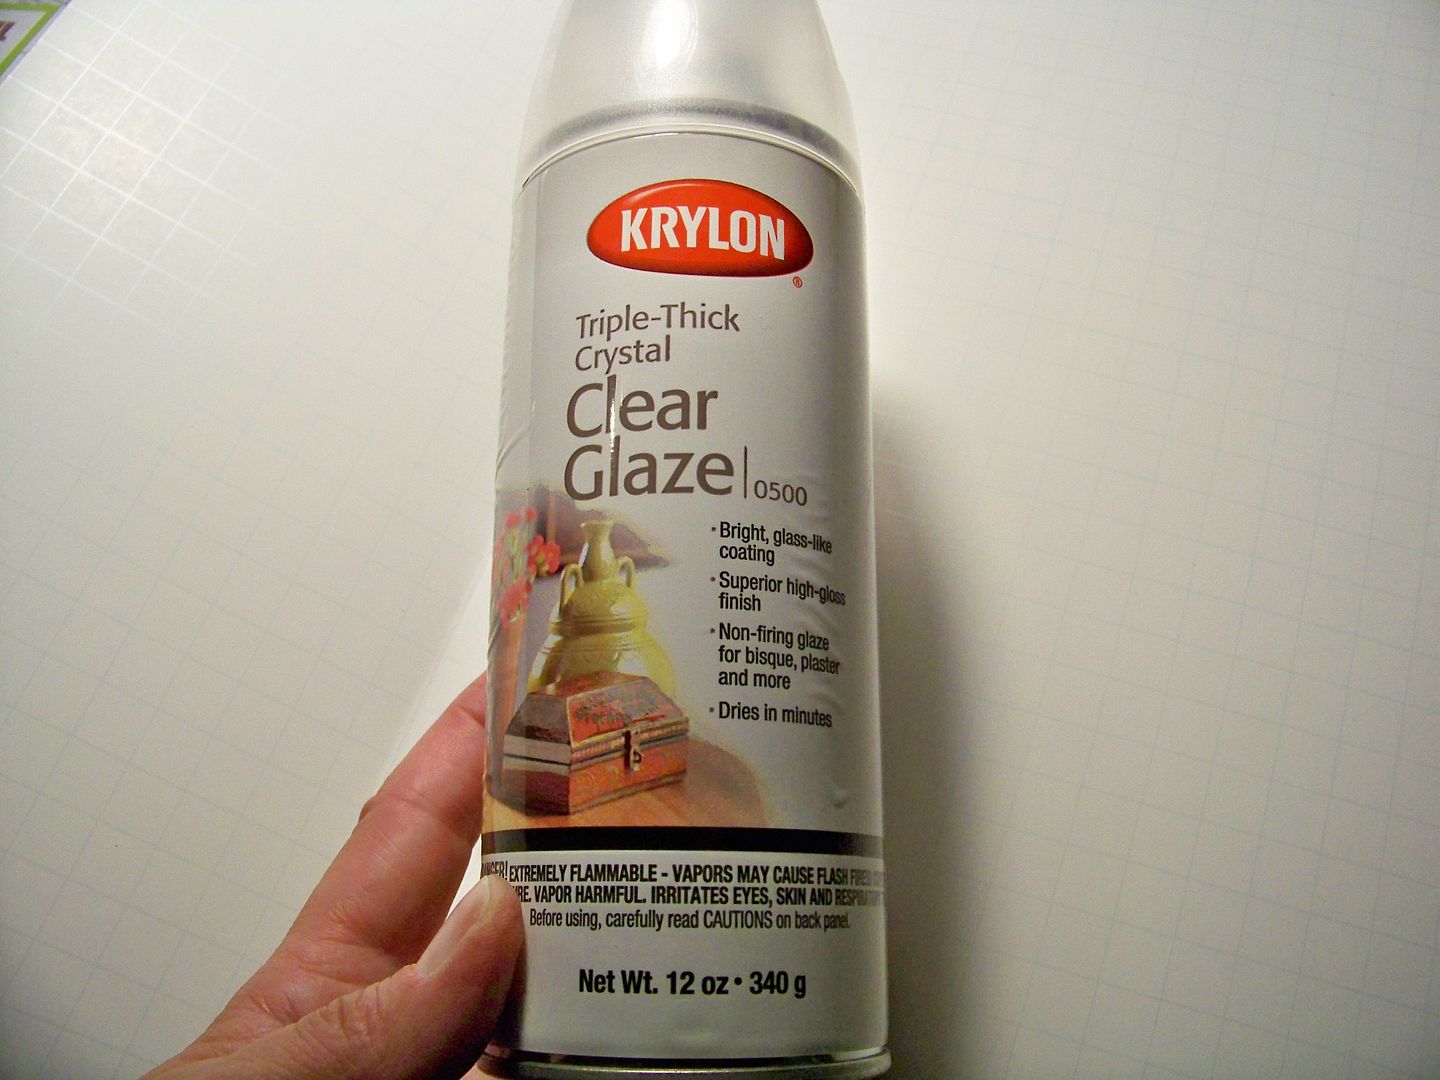
I sprayed the cooled shape with Krylon Triple Thick Crystal Clear Glaze and allowed it to dry.  The Imagine ink is not waterproof.  This step is essential to ensure that you won't end up with a messy neck or blouse if it comes in contact with moisture.


I beaded my necklace and added red stones for the eyes adhered with E6000 glue.


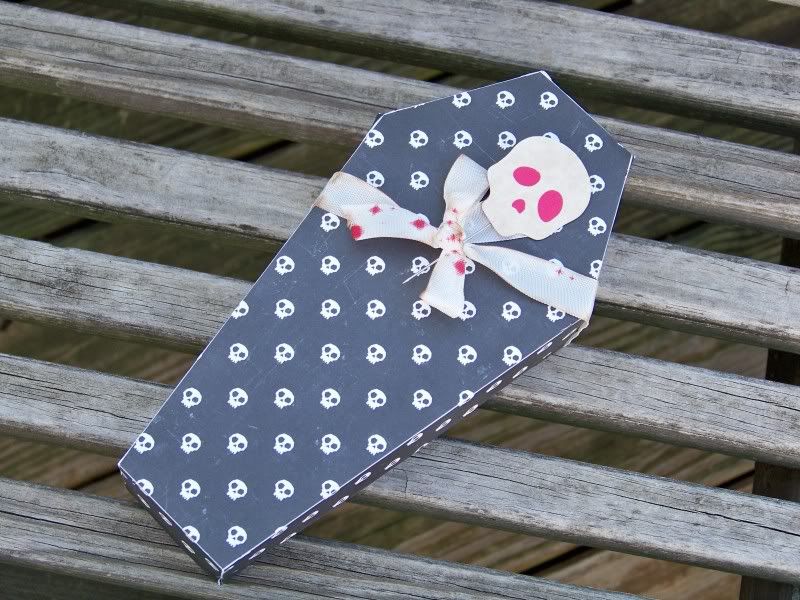
The coffin box was cut from Artiste (page 76) at 7-1/2".


For boxes with tabs cut by the Cricut, I simply score with my Xacto knife instead of a bone folder, making sure to cut through each machine-cut tab.


This keeps the tabs from sticking up on the finished box.  They simply get hidden in the score line!


I hand-cut a piece of artists board for the inside that I covered in red taffeta.  I liked this fun detail and it looked more like a box for jewelry... and a creepy lined coffin to boot.


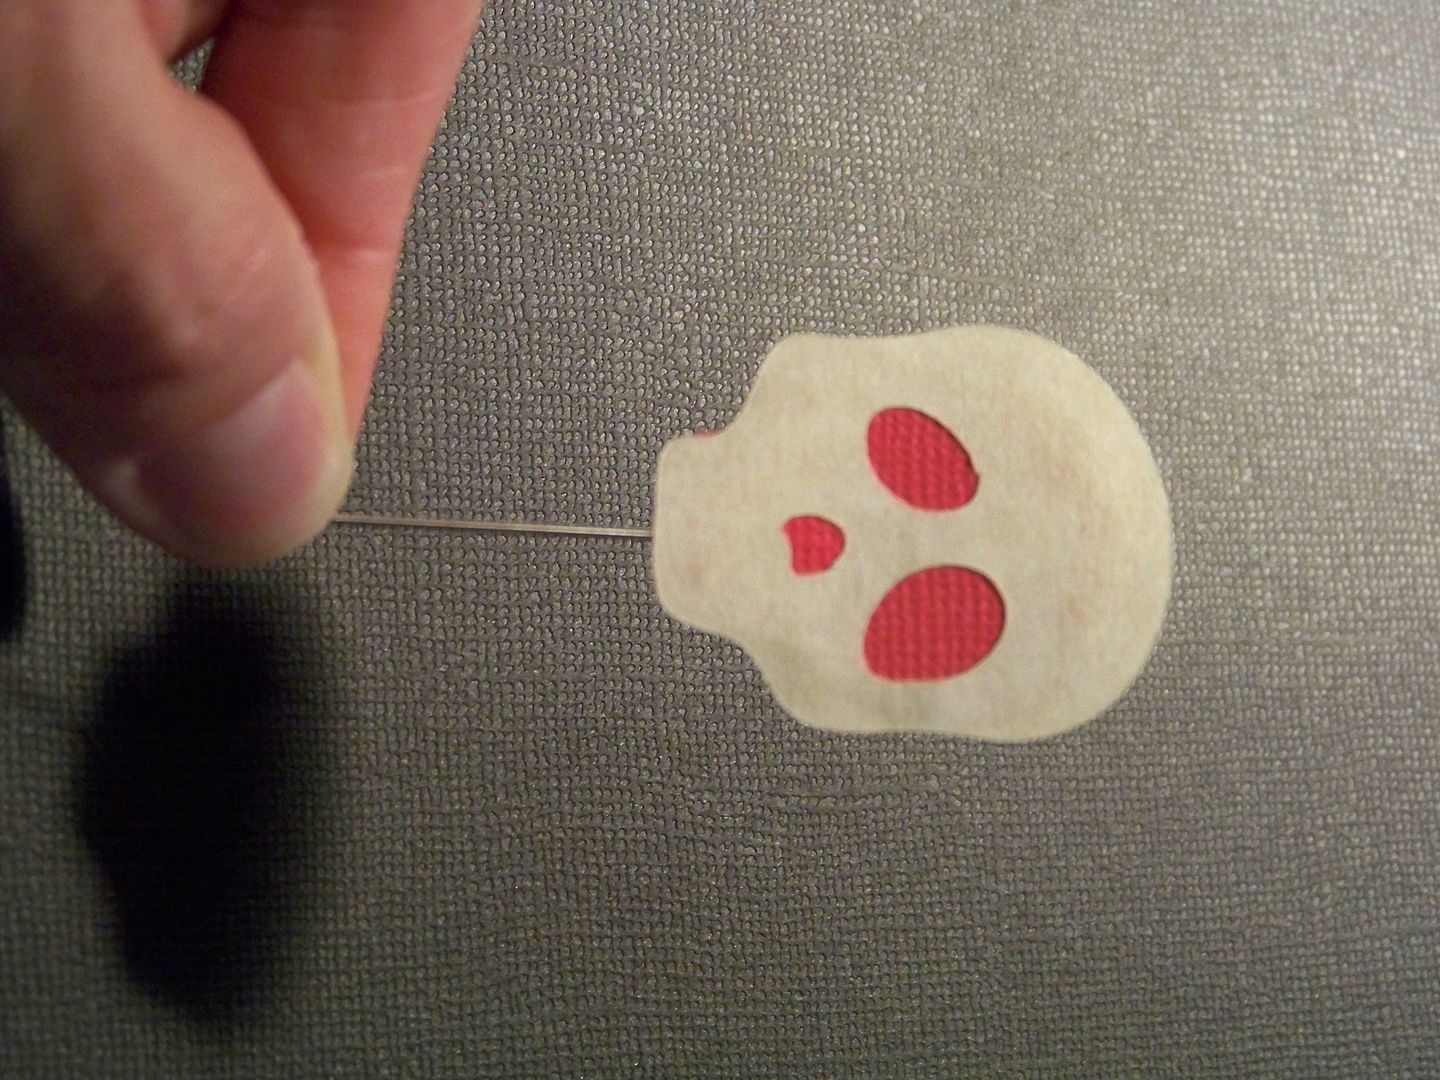
The skull stick pin was simply cut from Artiste (page 76) at real dial size 1-1/2".  Seam binding that I splattered with red ink and edged with brown ink was used for a ribbon accent.


Thanks so much for joining in on the hop today!  Please be sure to check out all of the participants' wonderful projects.  The next blog you will be visiting belongs to the very talented Donna of Carolina's Creative Cropper.  I've posted the links below for everyone in this hop in case you've missed anyone.


To see many of my previous projects, including my previous Halloween projects, check My Project Gallery, or click here.


 I am linking all month to...

Thursday, August 11, 2011

Art Nouveau Necklace

So... last night was date night for the hubs and me.  As usual, I happened to check my messages on my phone when he stepped away from the table only to find that FedEx had just delivered my Art Nouveau cartridge!  After sushi, we took a walk and passed by a few vintage stores.  The window display of one featured jewelry with period pendants. 

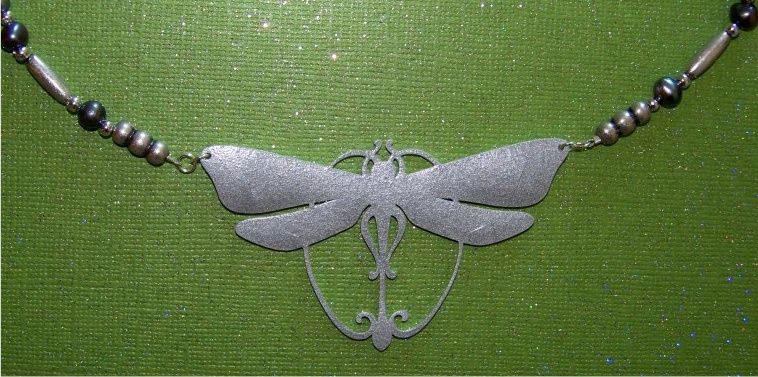
This morning when I tore open my cartridge, I knew just what I would be making first:  a dragonfly necklace!


I cut a 4" dragonfly (the first layer only) out of shrink film, on my Expression, from the Art Nouveau cartridge, using these settings:

Blade:  6
Speed:  3
Pressure:  5
Multicut: 3

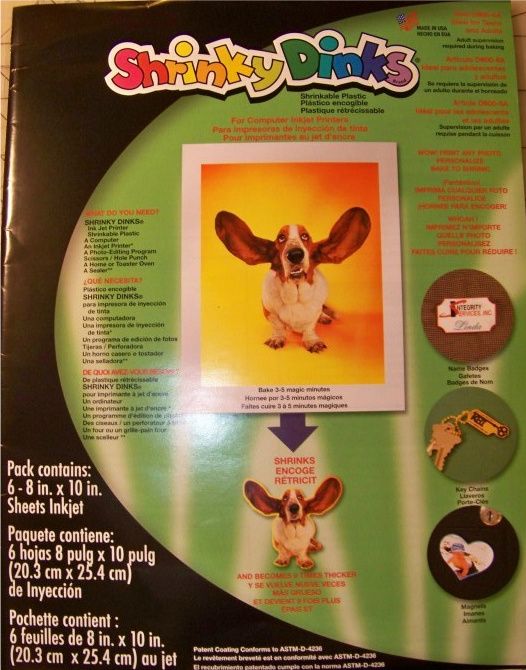
I used this brand and kind of shrink film:  


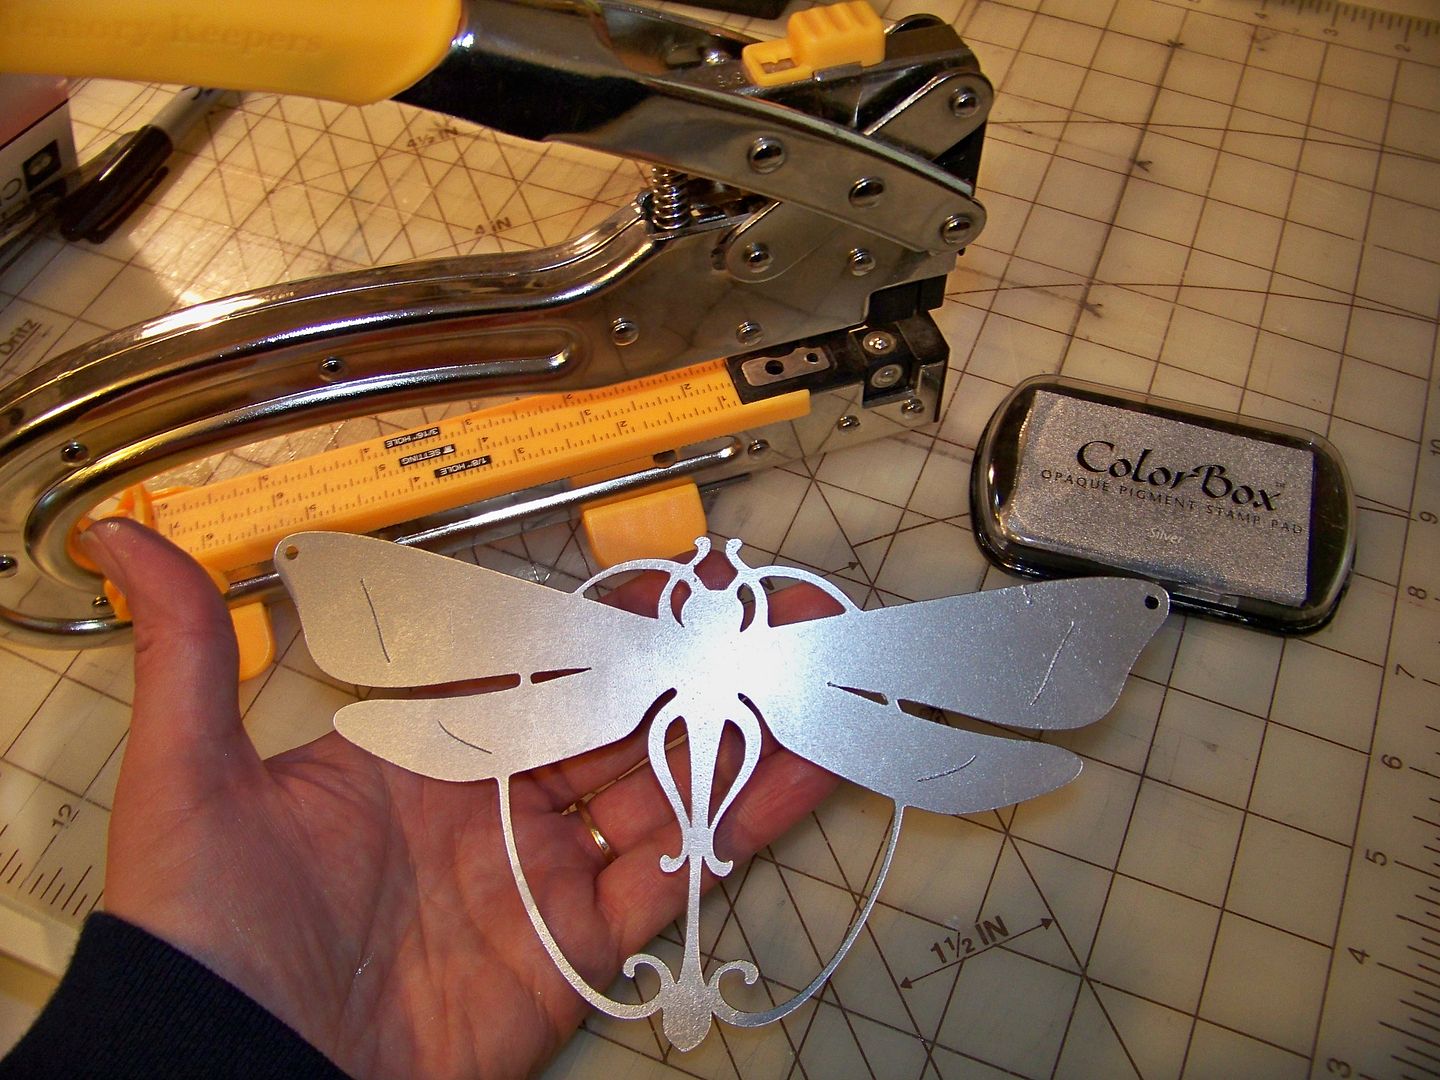
I used an old silver Color Box stamp pad.  When I say "old", I mean old!  I have had this since college (is that possible??) -- the label on the back isn't white any more!  I just pressed onto the die cut until it was covered completely.  Then I used the 1/8" hole on my Crop-A-Dile Big Bite to make small holes on each wing.


I placed it on a parchment paper-covered baking sheet and something weird happened while it baked:  it just shrunk.  It didn't buckle or twist like the other projects I have done with this product.  I guess it was the ink from the stamp pad.  It baked for 6 minutes at 300 degrees.  Honestly, it might have been done when I checked it at 3 minutes, but I was just so surprised that it was flat that I kept baking it! 

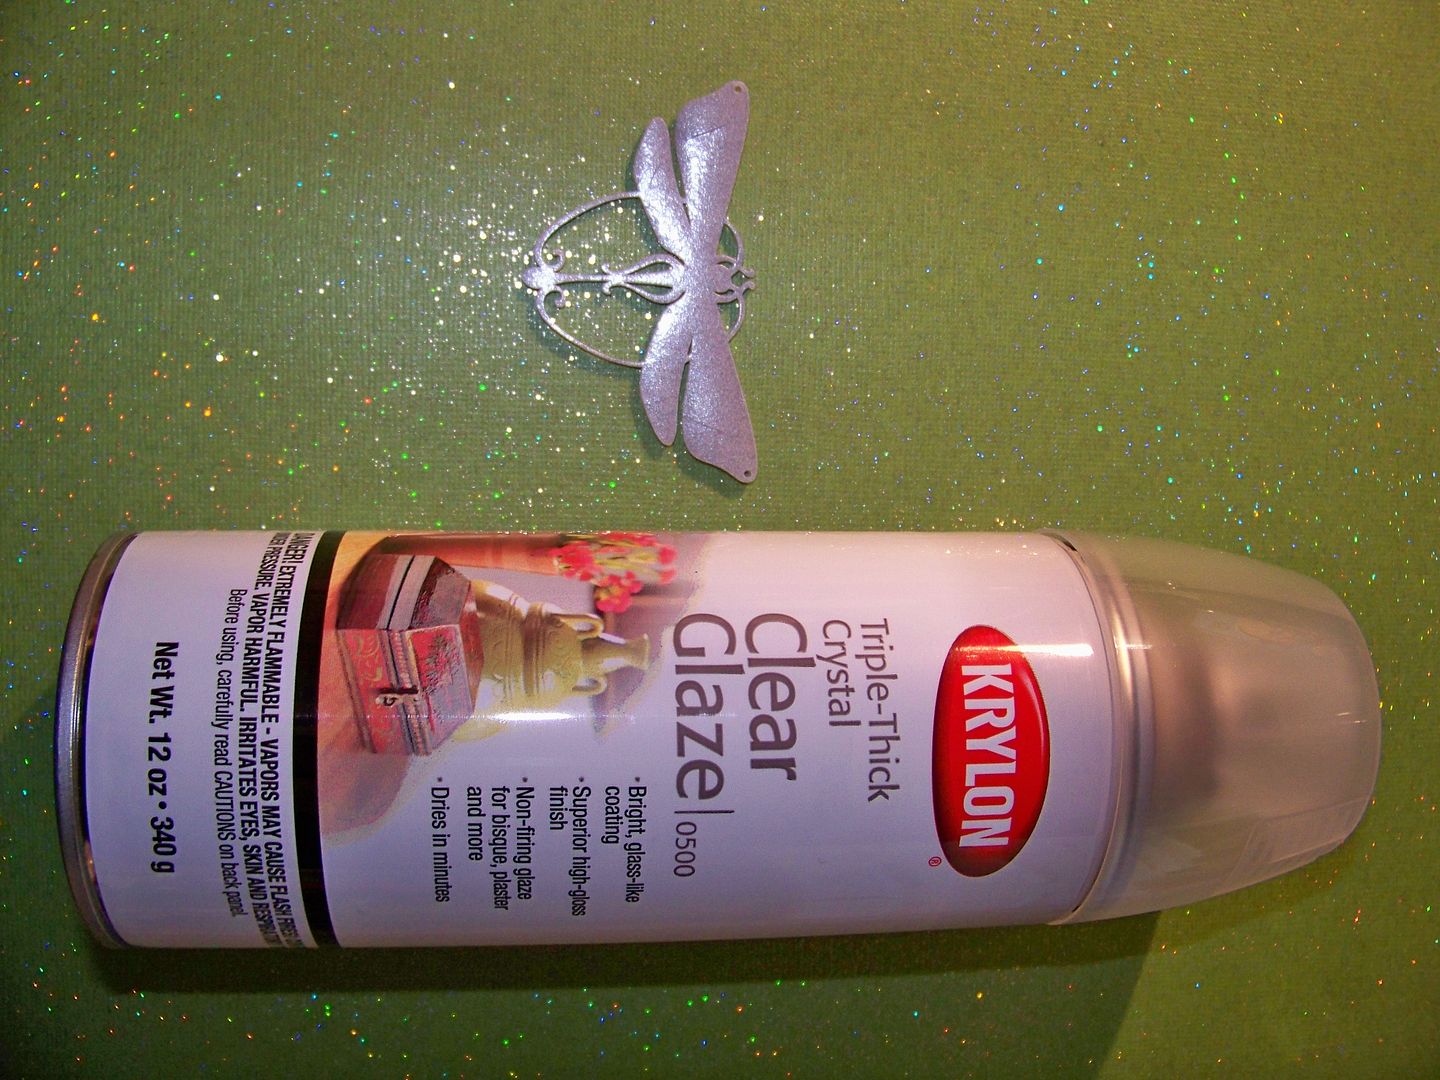
The ink was wet when it came out.  I pressed it with a paper towel to remove the excess.  Once it was completely cool, I sprayed it out-of-doors with Krylon Triple Thick Crystal Clear Glaze (thank you Marcjo for posting about this product). 


After it dried (about 20 minutes), I went over the back and edges with a wet paper towel to be sure all the ink that wasn't on the top surface (and glazed over) was removed so that it wouldn't rub off onto skin or clothing. 

I placed it on my bead board and worked on the necklace strand.


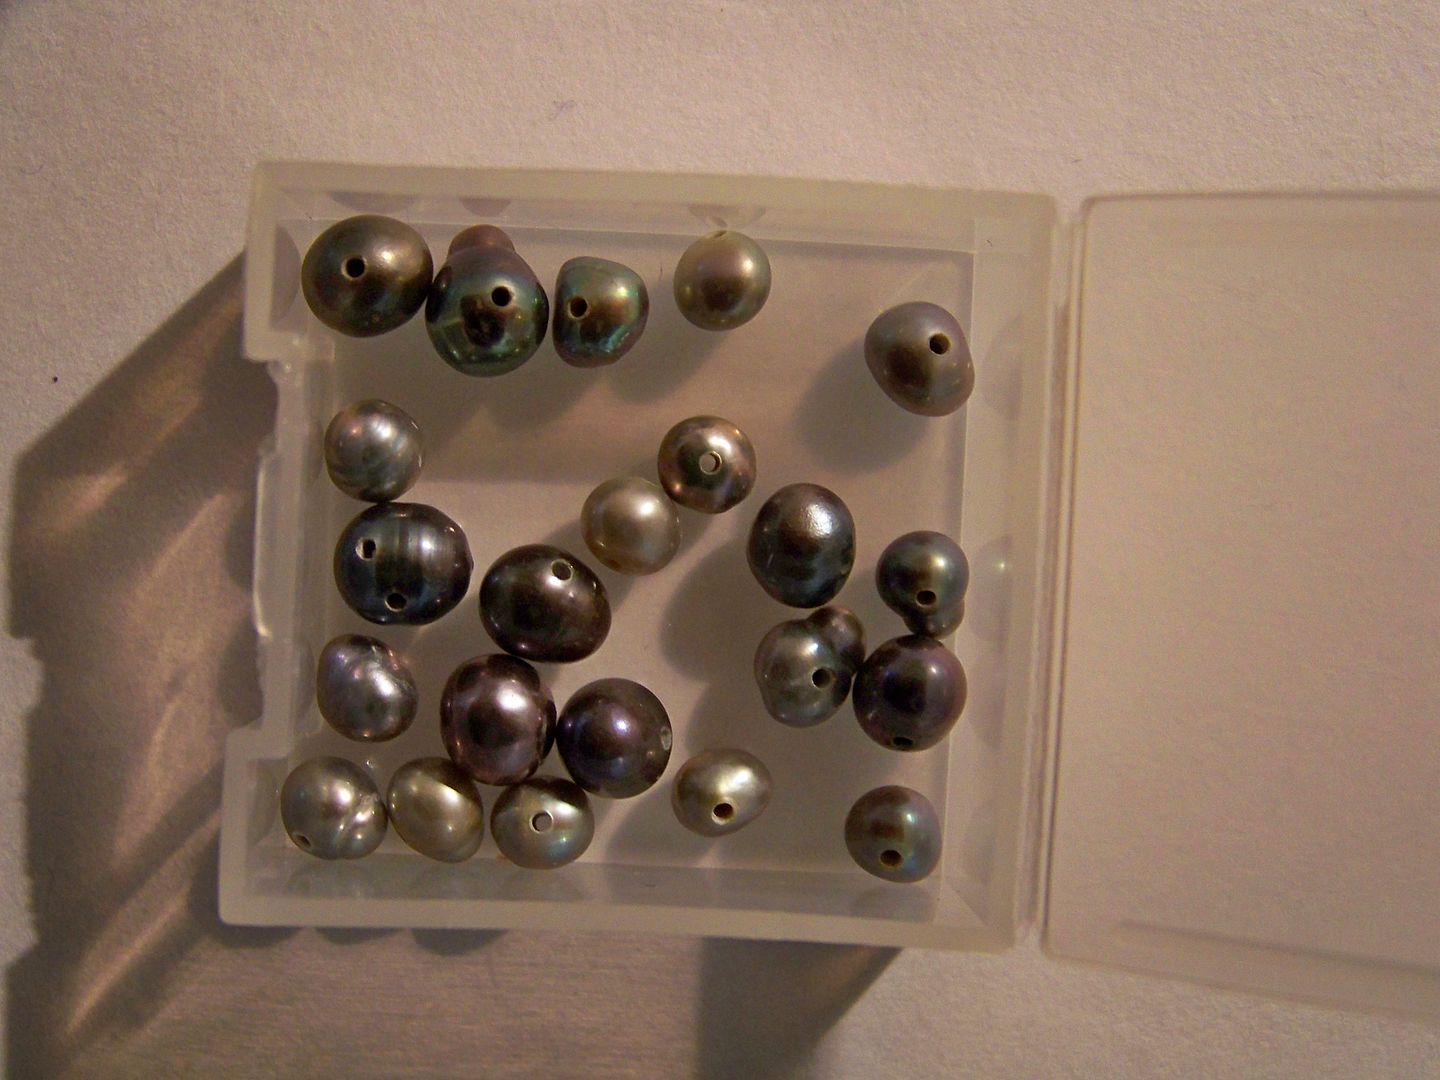
I used sterling silver beads, silver-colored beads, and fresh water pearls.  My natural pearls ranged in color from gunmetal to yellow-silver.  Just like mother-of-pearl buttons, you will know they are real and not plastic because they are cold to the touch.  They are irregularly shaped and colored, which is why I loved them for this project!


I used jump rings and crimp beads to join the beaded strands to the pendant.  To see how to make jewelry with coated wire and crimp beads, click here to see a previous post on this blog.


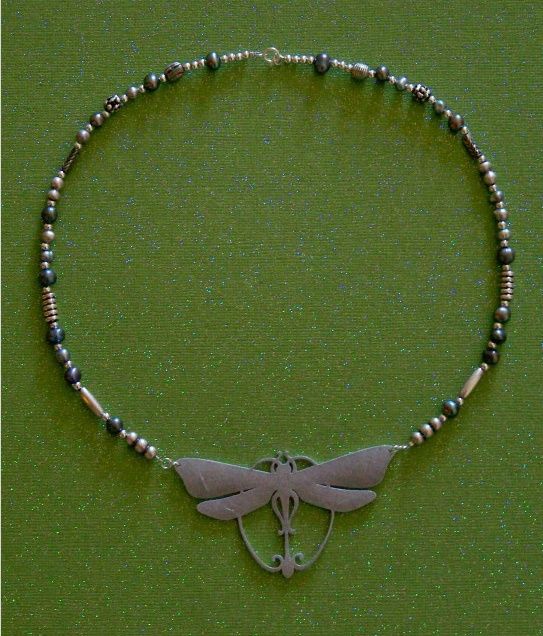
My finished necklace:


Thank you for visiting my blog!  To see my Shrinky Dink charms made on the Imagine and sealed with UTEE, click here.  To see my princess charms colored with markers, click here.  You can find all of my projects by clicking the the tab for "My Project Gallery" at the top of the blog or by clicking here

Monday, August 1, 2011

Shrinky Dink Charms on the Imagine!

Ready for a Christmas project?  Well I am not ahead of the game; I am being prompted by a Christmas Charm swap.

I have wanted to try Shrinky Dinks on my Imagine since before I even owned one.  I have only played briefly in the past with Shrinky Dinks -- using my Expression.  You can see the charms I made for little girls by clicking here from a previous post on this blog. 

I had to make 26 charms and I chose the Imagine Snow Angel cartridge for my design.  Using a layer from the ornament on page 27, I printed it and cut it at 2.7" true size on Shrinky Dink brand film made for inkjet printers.  (Autofill allows for 6 per sheet). 


I found that my Imagine cut this differently than did my Expression (plus I used a different brand on my previous project!).  As I am finding for most projects, I like a barely sticky mat and a sharp blade.  (Use Scotch Magic tape to tape the corners of the material to the Imagine mat).  I used the following cut settings to cut the Shrinky Dink film on my Imagine: 
Blade - 6
Speed - 3
Pressure - 5
Multicut - 2

I punched the cuts with the 1/8" hole with my Crop-a-dile Big Bite.  I wanted a hole that would just allow for the jump ring. 
You can set your printing to 'draft' to get a lighter result, but I did not do this, leaving it instead at 'best quality'.  I liked the more intense coloring!

The baked (shrunken) charm is on the left.  You can compare that to the pre-baked die cut on the right.  Baking changes not just size and color, but also the shape.  My finished charms were not symetrical and not round.  I like this-- it looks like something created --not manufactured!  Since I was using a printed scene, this was a bonus to me!  Yay for happy accidents!

The Shrinky Dink package called for preheating the oven to 300 degrees.  I placed my die cut shrink film on a parchment paper-covered cookie sheet. 

I had to bake my shapes for much longer than the 3-5 minutes noted on the directions; I baked them for 6 minutes (using a timer to keep me reminded of them), then checked on them and baked for 3 minutes more.  Some batches required a bit longer, up to 3 additional minutes!  They will buckle and curl, but you know when they are ready when they are small and mostly flat.  (I kept the oven light on so I could look at them through the door to check on their progress).  I used my oven-mit-covered hand to lightly press down the centers of finished ones, while still in the oven, to make sure they were perfectly flat.

Imagine ink is not waterproof and I wanted to seal them, not knowing their end use.  (The ink will run when it comes in contact with sweat or water).  I have been told that you can use a spray sealant to prevent this (like Krylon or Plaid), but I wanted to try using embossing powder.
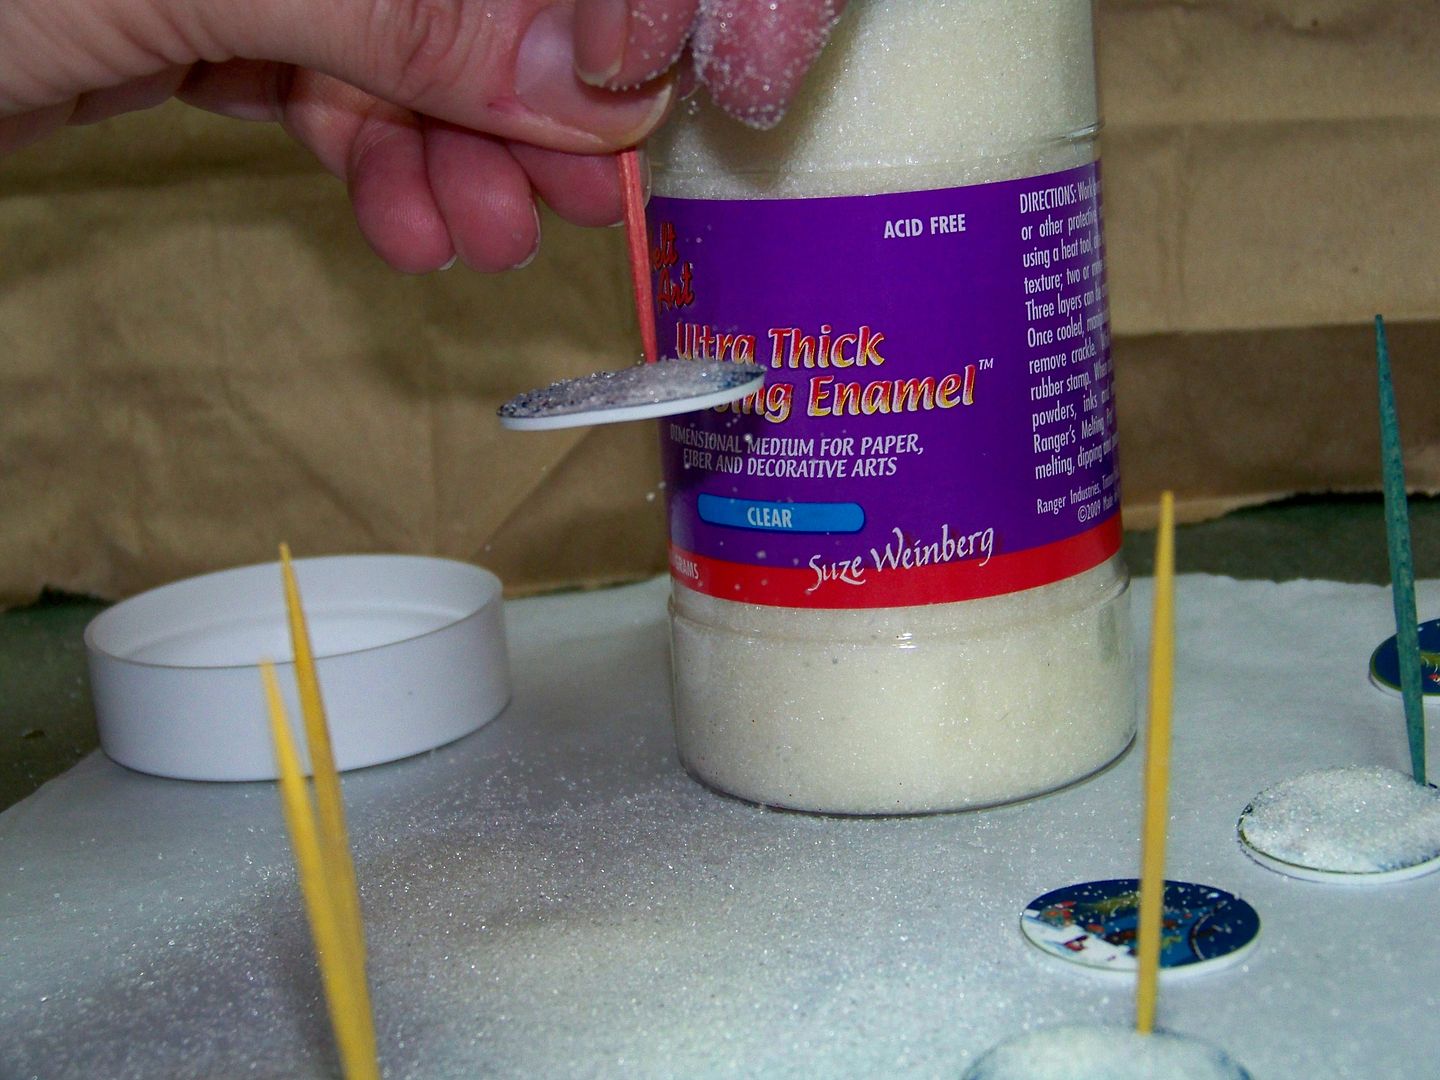
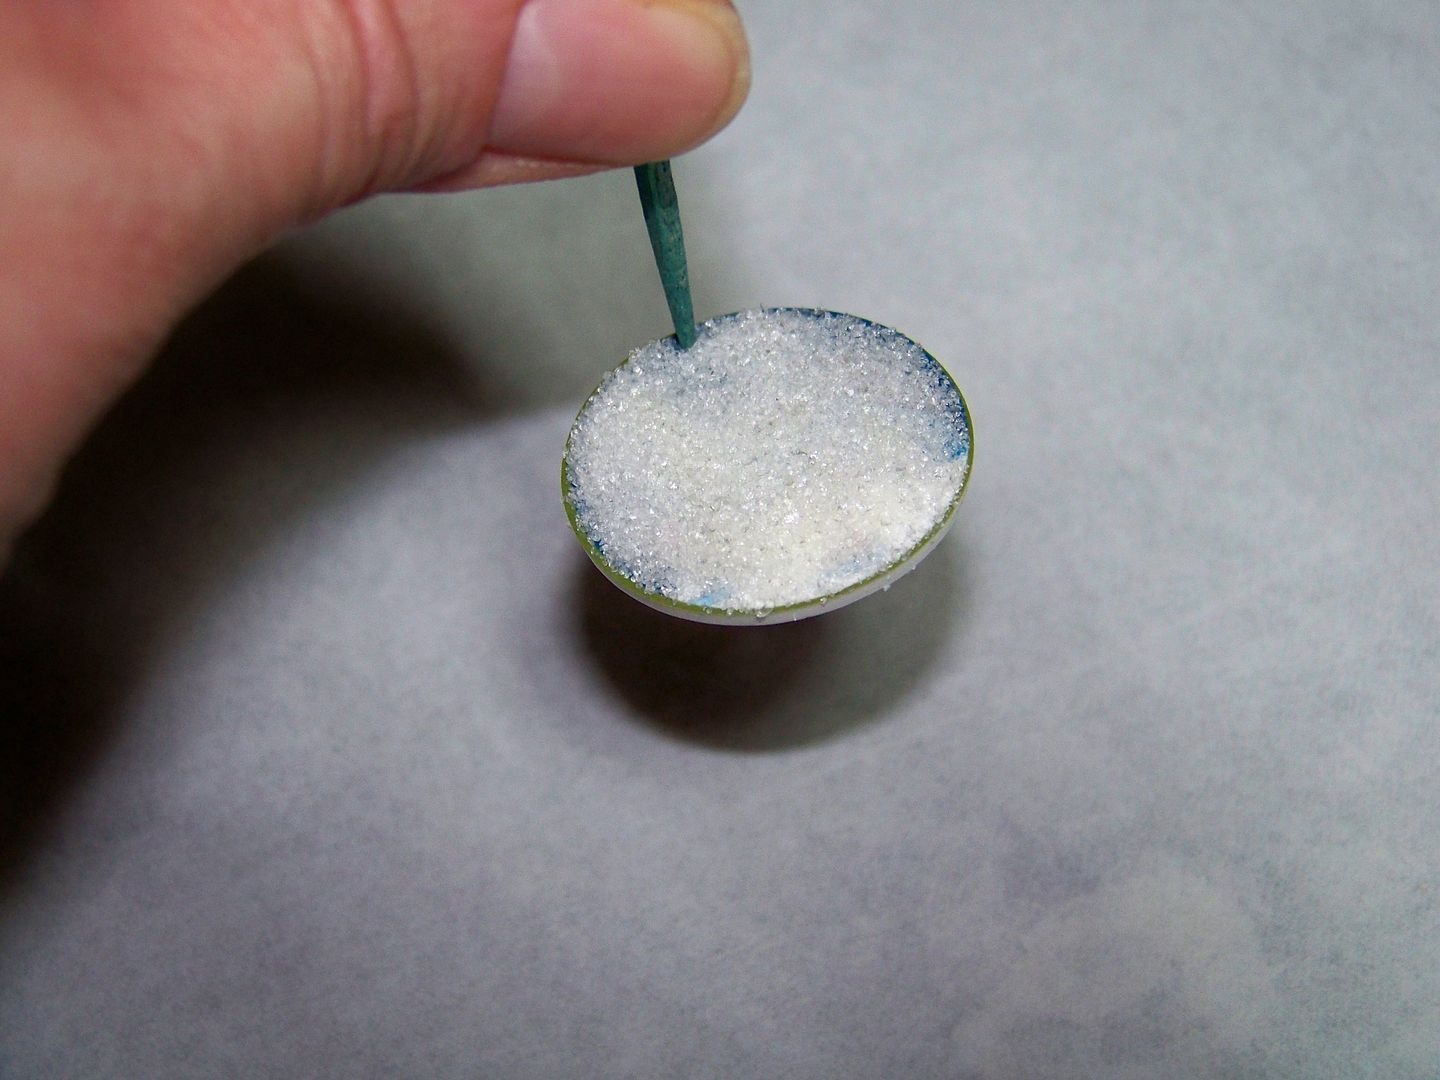
Because you cannot wet the surface of the charms, the Extra Thick Embossing Enamel that I was using flew everywhere when I tried to shoot it with a heat gun so I ended up popping them back in the oven.  I found that I could poke a round-tipped toothpick in the tiny hole of the charm and pile on a layer of the UTEE powder.  The toothpick served as a handle and kept the hole from getting clogged. 


I removed the toothpicks and  placed them back in the oven for 6 minutes (still at 300 degrees).

Once out of the oven but still hot, I moved them off of the parchment paper and onto a paper Chinette plate to cool.  (The charms come out of the oven with a gooey surface.  I accidentally flipped one upside down when removing it from the parchment paper.  This ruined the smooth, perfect surface.  To fix it, I simply placed it on a protected surface and used my heat gun to melt it again.  It smoothed itself out perfectly once again-- you can add more embossing powder or not.  I did this the next day so no worries.)


Glossy and so pretty!  I instantly knew that I would be re-visiting this technique to make sweater buttons this fall -- love the finish!

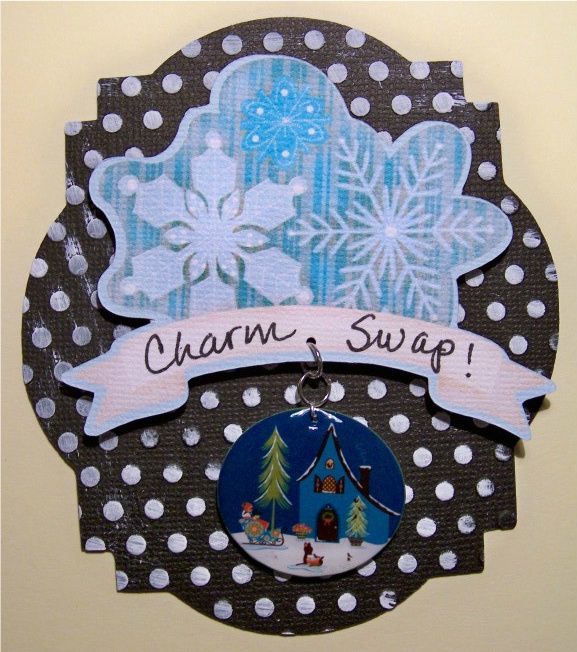
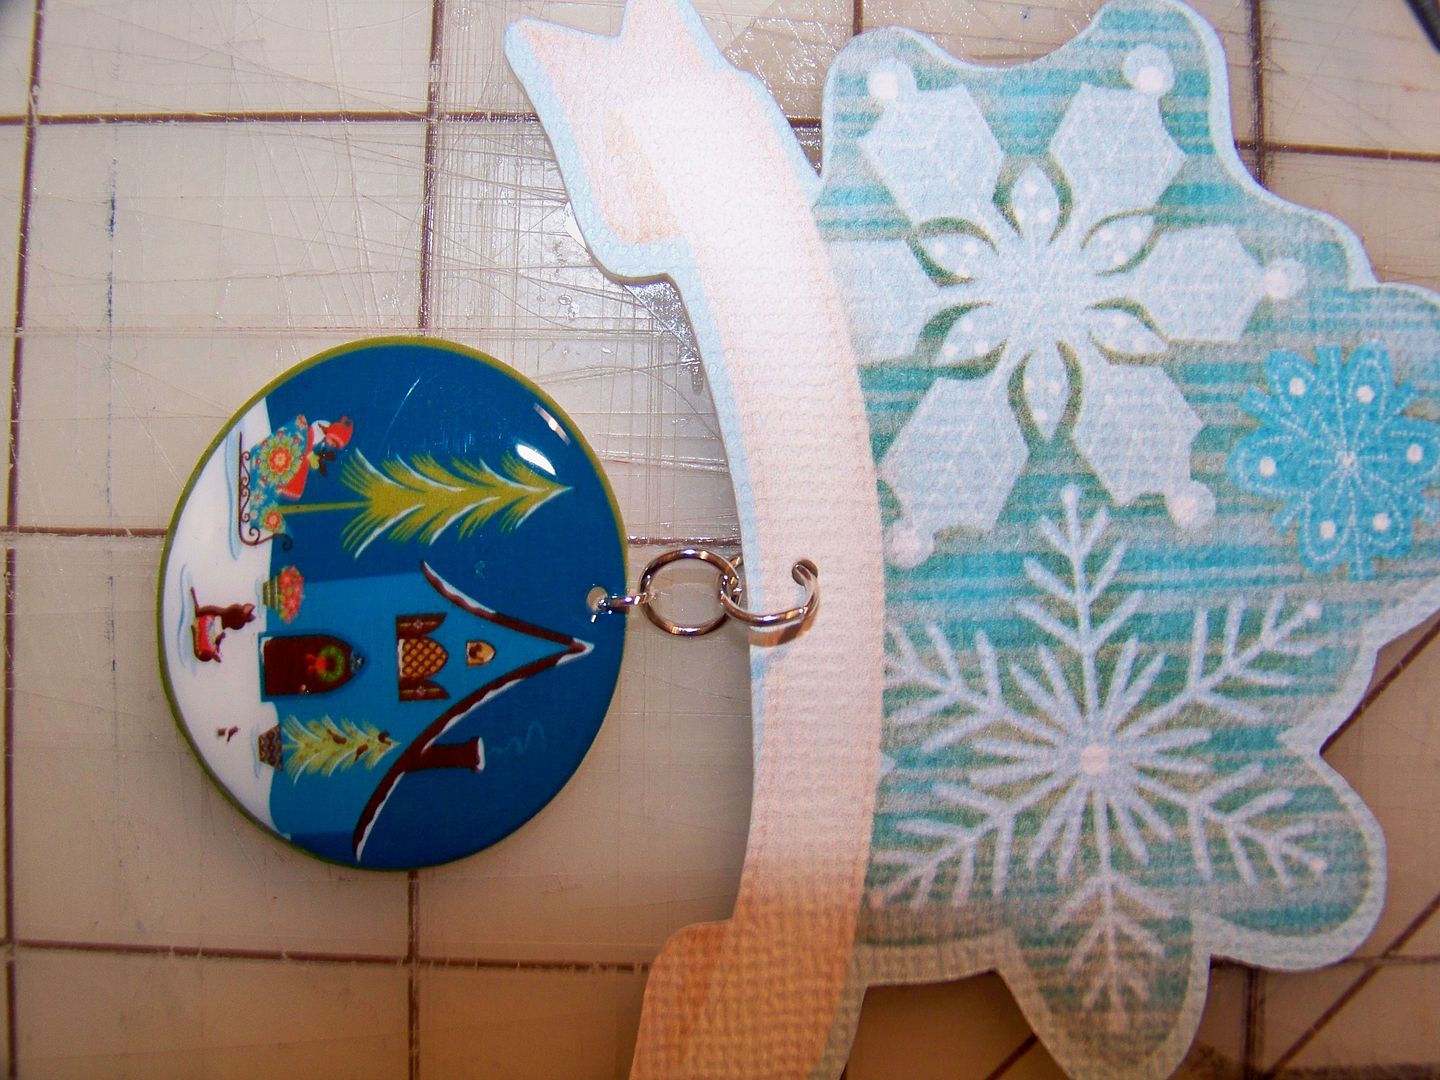
I used 4mm and 6mm jump rings on each and attached them to a snowflake banner cut from Enjoy the seasons cut and printed at relative size 2.4".  I reinforce the back of the banner with a foil sticker and then use the tiny Martha Stewart hole punch.


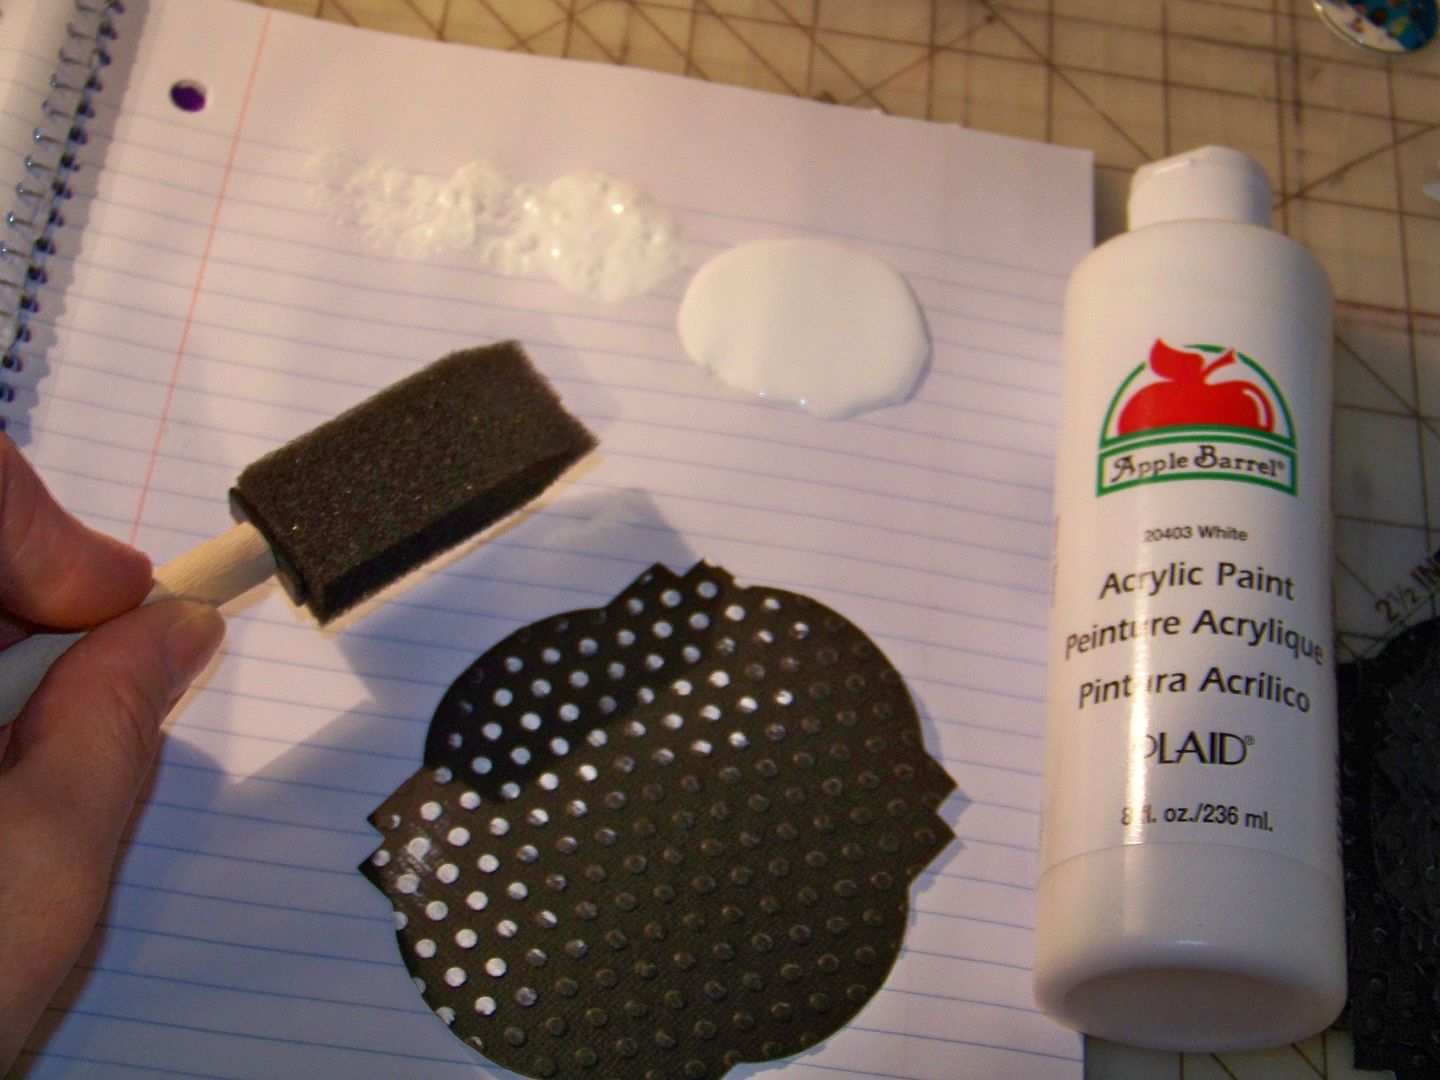
The card base is cut from Lacy Labels (#4) cut at 3.5" on the Imagine.  I used black card stock and then ran each through the Cuttlebug.  I used a dry sponge brush to apply white paint to the raised dots.  The snowflake banners with charms were attached to the cardstock base with pop dots.  I applied my calling card info to the back with double sided tape.

I packaged them in clear bags to protect the charms and they are ready to be mailed! 

Thank you for visiting my blog!  I love the potential of using Shrinky Dinks and the Cricut Imagine--- so many fun ideas coming to mind!

Sunday, October 31, 2010

Weekend Challenge and Halloween Fun Stuff!

I thought you might like to see some fun projects I have been working on.

With the craziness of the Cricut Message Board this weekend, I am actually getting to post my weekend challenge here first and will have to post on the MB once it gets straightened out!

Allison has asked that we use non-traditional materials for our projects so I chose Shrink Film and ... socks!


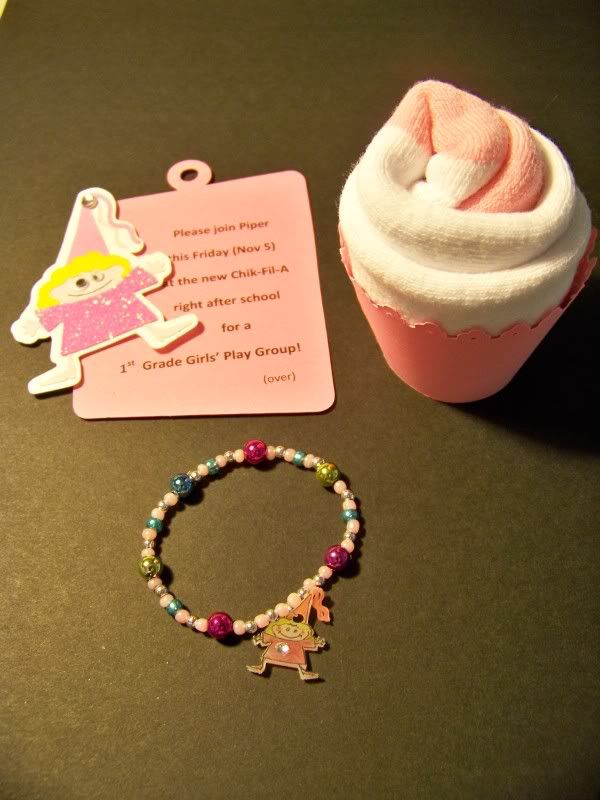
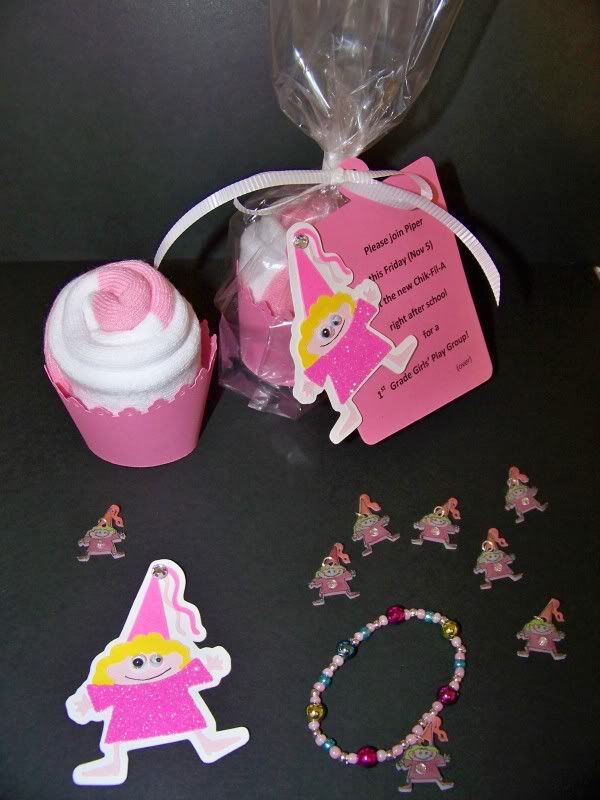
My daughter's school is just down the road from a new Chik-Fil-A (my fast-food weakness) so we are planning a 1st Grade Girls Play Date at their playplace. Of course those climbing, twisty-tube play areas always require socks for Kentucky health code compliance, so my invitations to the little girls include socks just for fun.

This past spring, I found a great craft idea on GreenBean's Crafterole blog for the instructions for rolling socks into the shape of a cupcake and placing it in a cupcake holder. They really look like a frosted cupcake! I love that idea. You can see it here! Carrie is one of my favorite crafters with her seemingly endless string of GREAT ideas!

Cupcake Details:
2-1/2" Cupcake wrapper is cut from Easter cartridge (on 8-1/2x11 paper, Autofill cuts 3).
The socks are from WallyWorld.
Clear bags are from Hobby Lobby and the cheapy ribbon is from the stash.

I placed each "cupcake" in a clear bag with a tag.

Tag Details:
2-1/2" Princess is cut from Mini Monsters (on 8-1/2x11 paper, Autofill cuts 10 shadows).
4" Charm tags are cut from George (charm, shift, H) (on 8-1/2x11 paper, Autofill cuts 6).
I put glitter on the dresses using my Xyron. I learned about using the Xyron 2-1/2" Sticker Machine to apply glitter from the fabulous girls on the Cricut Circle, AllisonF and Caroline (Doxieluv01). Wow is that addictive! Placing the cut shape upside-down in the machine, peeling them off the sticker paper, and applying glitter (I lightly press it in using a piece of the sticker paper) creates a perfect surface and once the glitter is applied, no flaking! So easy and effective!
I printed directly on the tags with my computer after they were cut out on the Cricut. The princesses were applied onto the printed tags with pop dots.

I also made little bracelet favors with a Shrinky Dink charm that matches the Mini Monsters character on the invitation.


Bracelet Details:
2" Princess is cut from Mini Monsters on Shrink Film.
Misc beads, .5mm Stretch Magic jewelry cord, and sterling split jump rings are used to string together the bracelets.

Just a bit of quick info on working with Shrink Film...

I received so much great info from a thread on the Cricut Circle on using this stuff! First, it will curl up. I had not been baking long enough and, on previous failed attempts, did not leave them in long enough to uncurl, which they will eventually do! Once that was pointed out, it changed the game. Second, the Cricut will cut it, but it takes using the Multicut function.

These are my settings: Multicut 3, Blade 6, Pressure 5, Speed 3 and baked 6 minutes at 325. I was able to outline and write on the film best using a Zig 01 fine pen. You have to punch out a hole before it bakes or the force of trying to punch it later will break your charm in two! I used a regular office hole punch. It looked huge but was perfect! My daughter's Crayola Markers colored the shrink film with no problems. Since the colors will darken as they shrink, I found that not coloring in the skin and just adding rosy cheeks worked best for me. You can glue onto the film after it is baked. I use E6000 adhesive. I love that stuff. It is made for non-porous materials.

I cut my character at 2" and it baked down to 3/4".

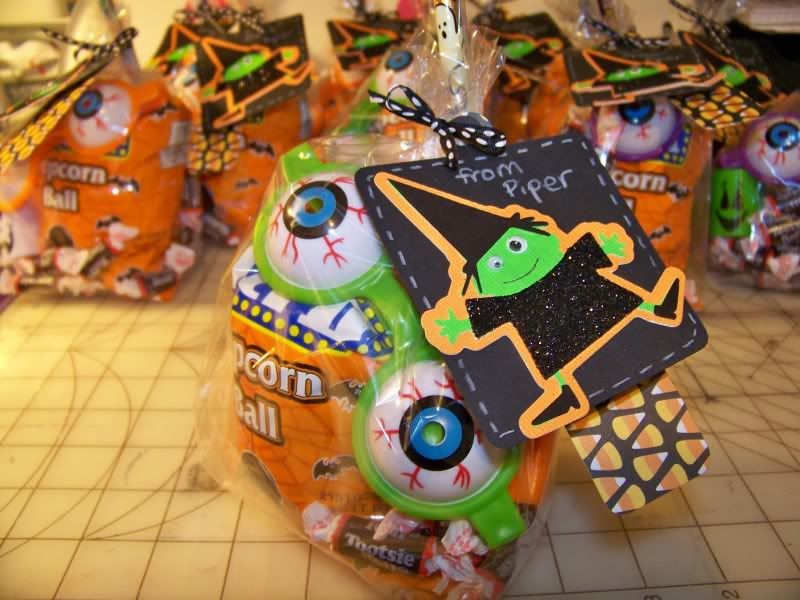
I found the princess on Mini Monsters while doing a different project earlier this week. I made treat bags for my daughter's ballet class. Her ballet school allows the children to wear dance-appropriate costumes and to bring treats for one another the week leading to Halloween. Those different sized googly eyes were first used on that project.

The tags were made with Mini Monsters, page 41. I started with the orange shadow and found that on 12x12 paper, autofill will cut 12 at 3". Two different sizes of googly eyes finished up the characters super quick. That was an idea I found on the Circle Blog. I used a Zig microfine pen to write on her smile.

The black tag behind the witch is a charm on page 99 of George & Basic Shapes cut at 3-3/4". Autofill will cut 9 on 12x12 paper. The candy corn patterned tag behind that is also from George, cut at 4-1/2". Autofill will cut 14 of those on 12x12 paper.

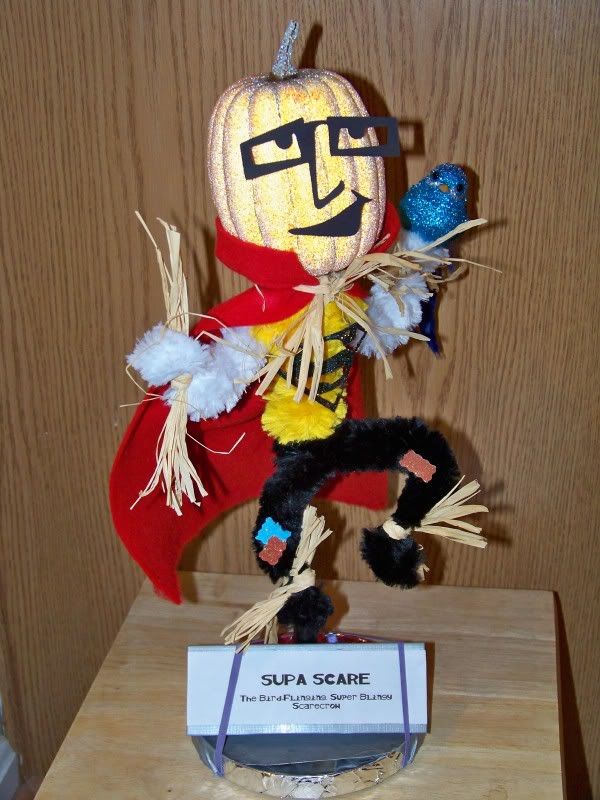
Speaking of Halloween, that is the perfect holiday for the craziness of the challenging challenges at Olive Juice Studio. I adore the funky mind of Kim Du Chene! Her challenge for October is to create a scrappy scarecrow, of course she has a list of requirements (such as including a rubber band, a feather, and items starting with the letter "P") to spice it up and make you think! That is the part I love, naturally!

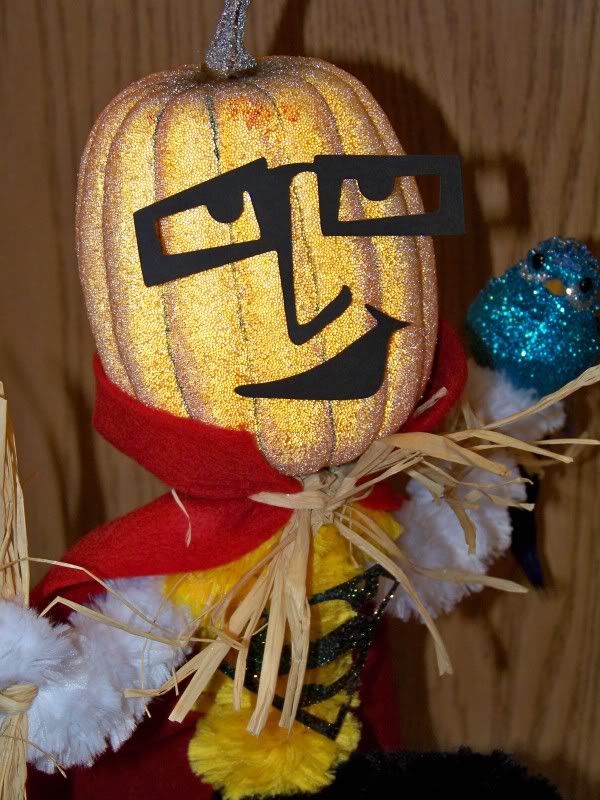
This is Supa Scare. Apologies for that, but part of the challenge was to create an appropriate name for the scarecrow created.

He is made completely from found items at our house (it kinda shows). His glittery head and bird are from leftover items from the church bazaar stuff I donated. His base is a CD holder, wrapped in metal tape (leftover from attaching the dryer hose) and duct tape (that my husband borrowed from a neighbor last night for me). The black and glitter papers on him are from my drawer of little scrap papers, the giant pipe cleaners are ones I raided from my DD's craft stuff (she is 6 so it required trading and begging). The rubber bands are from the asparagus that I cooked last night. (How can a house not have any rubber bands except what shows up from the produce department??!!) The raffia has to be from 1992, leftover a project I did then for school. That is the only time I remember using it and I had quite a time remembering where I put it. The felt is left over stock from when I thought that I needed every color made to create my little 2" acorn fairies. (Note: 2" fairies do not require a case of felt to get completed). The dowel rod inside him is leftover from DD's birthday party in 2007 when the girls made magic wands. The face is from Pumpkin Carving (cut at 3-3/4") and the "S" on his chest is from Superman (cut at 2").

Silliness is par for the course in October! I just heard a great editorial on the radio who praised Halloween as a celebration of creativity. That was not the point of his message, but it was one that made me take note.

My daughter's Christian school (and her previous preschool for that matter) does not allow any mention of Halloween or use of Halloween symbols. Until this year, I really underplayed it for this reason. I have never attended a church that disallows the holiday, in fact, my current church had a Halloween party and a haunted house for the kiddos instead of RE this week. For this reason, I have gone back to my love of Halloween. How could I not love a celebration of creativity?! We continue to respect the rules of the school and wishes of some of the other families, but that is part of being a member of a community. I think it is a better lesson to teach my daughter to be respectful but still true to our family's values and preferences.


Now... I am off to get ready for tonight's family hooha for Halloween! Best wishes for a safe, happy, and creative Halloween! Eat extra treats for me!

But wait! There's more! Click 'older posts' above!

But wait!  There's more!  Click 'older posts' above!