Showing posts with label Shadow Boxes. Show all posts

Friday, September 14, 2012

Ms. Elephant's Third Grade


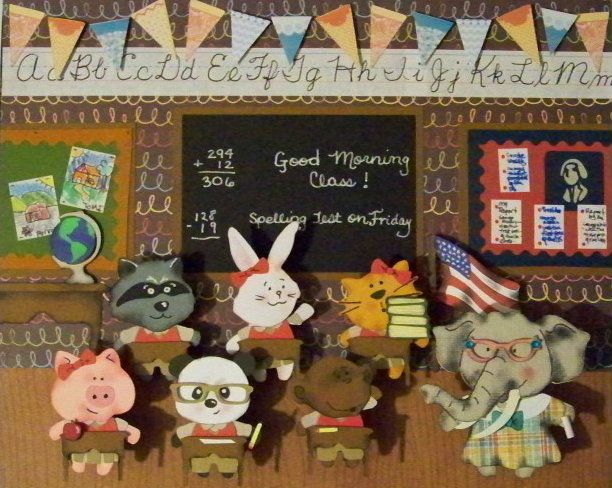
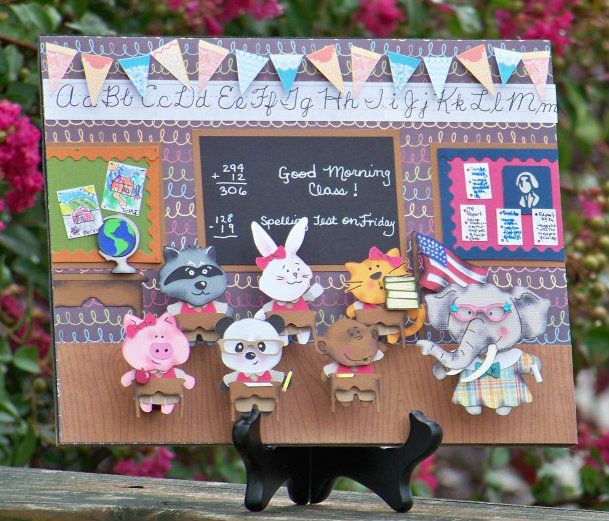
 So, do you remember those Teddy Bear Parade morphs from a previous post?  There, I learned how to put bodies and clothes from Teddy Bear Parade with heads of different critters from different carts-- sometimes even the super oldies-- to make a whole menagerie of fun characters.  Well, I found that Everyday Paper Dolls and Animal Kingdom also have some fantastic 'head only' animal cuts!  I used them on this project:  Ms. Elephant's Third Grade!

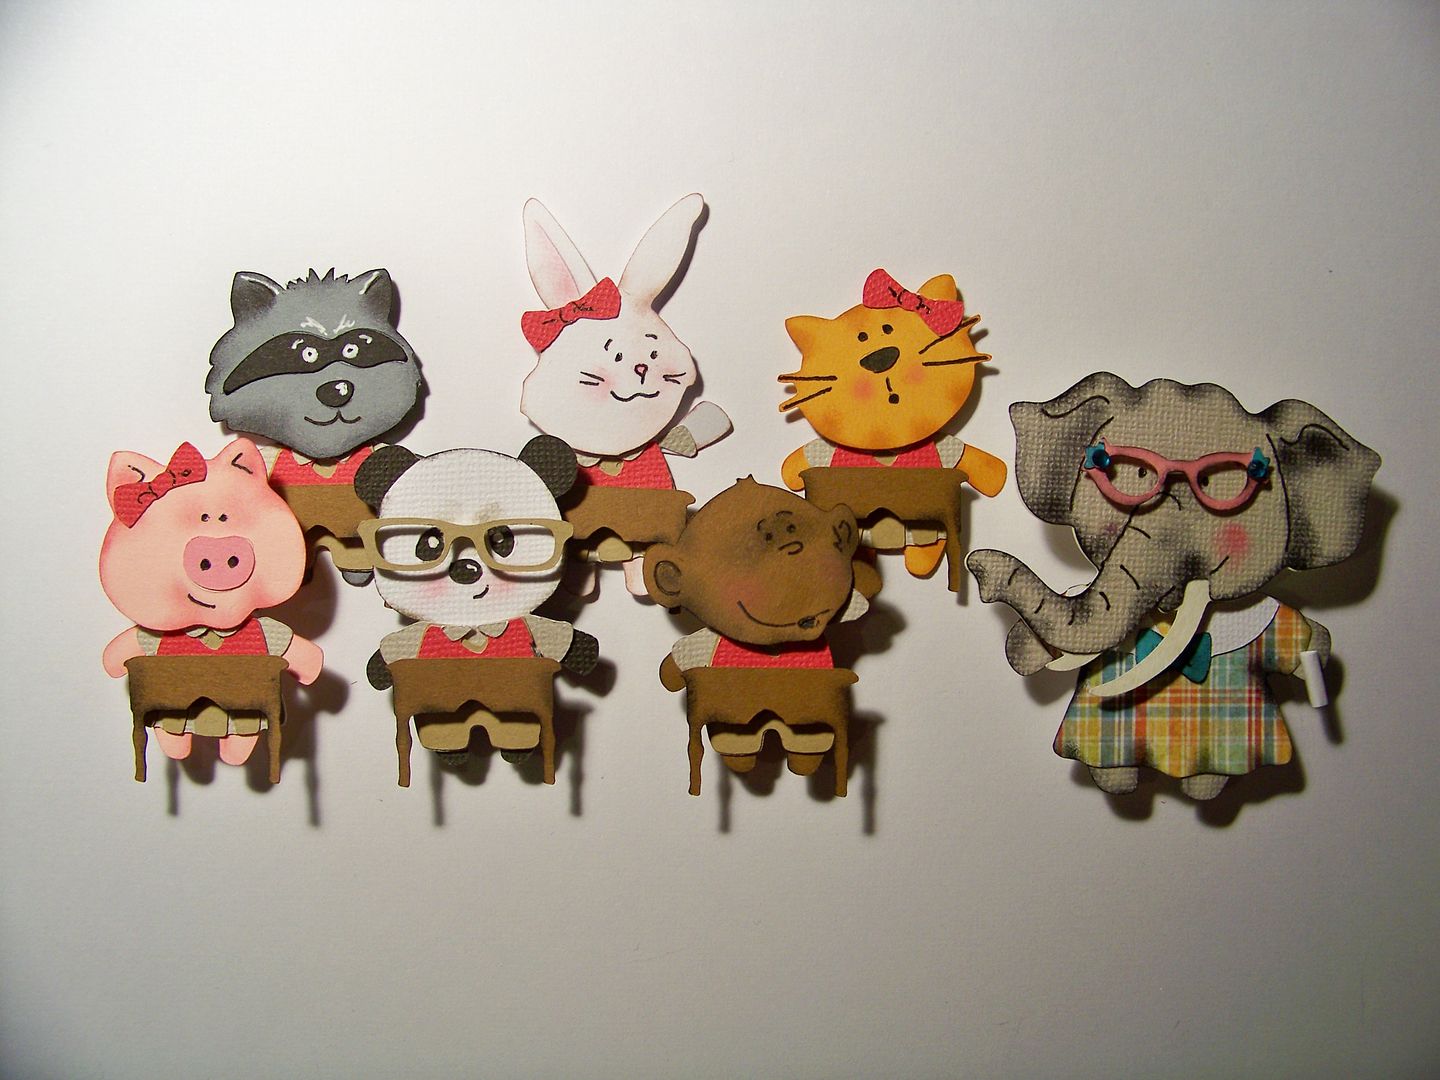
I started this project by making characters!  I stayed with the 2" bear body for the students (3" for the teacher).


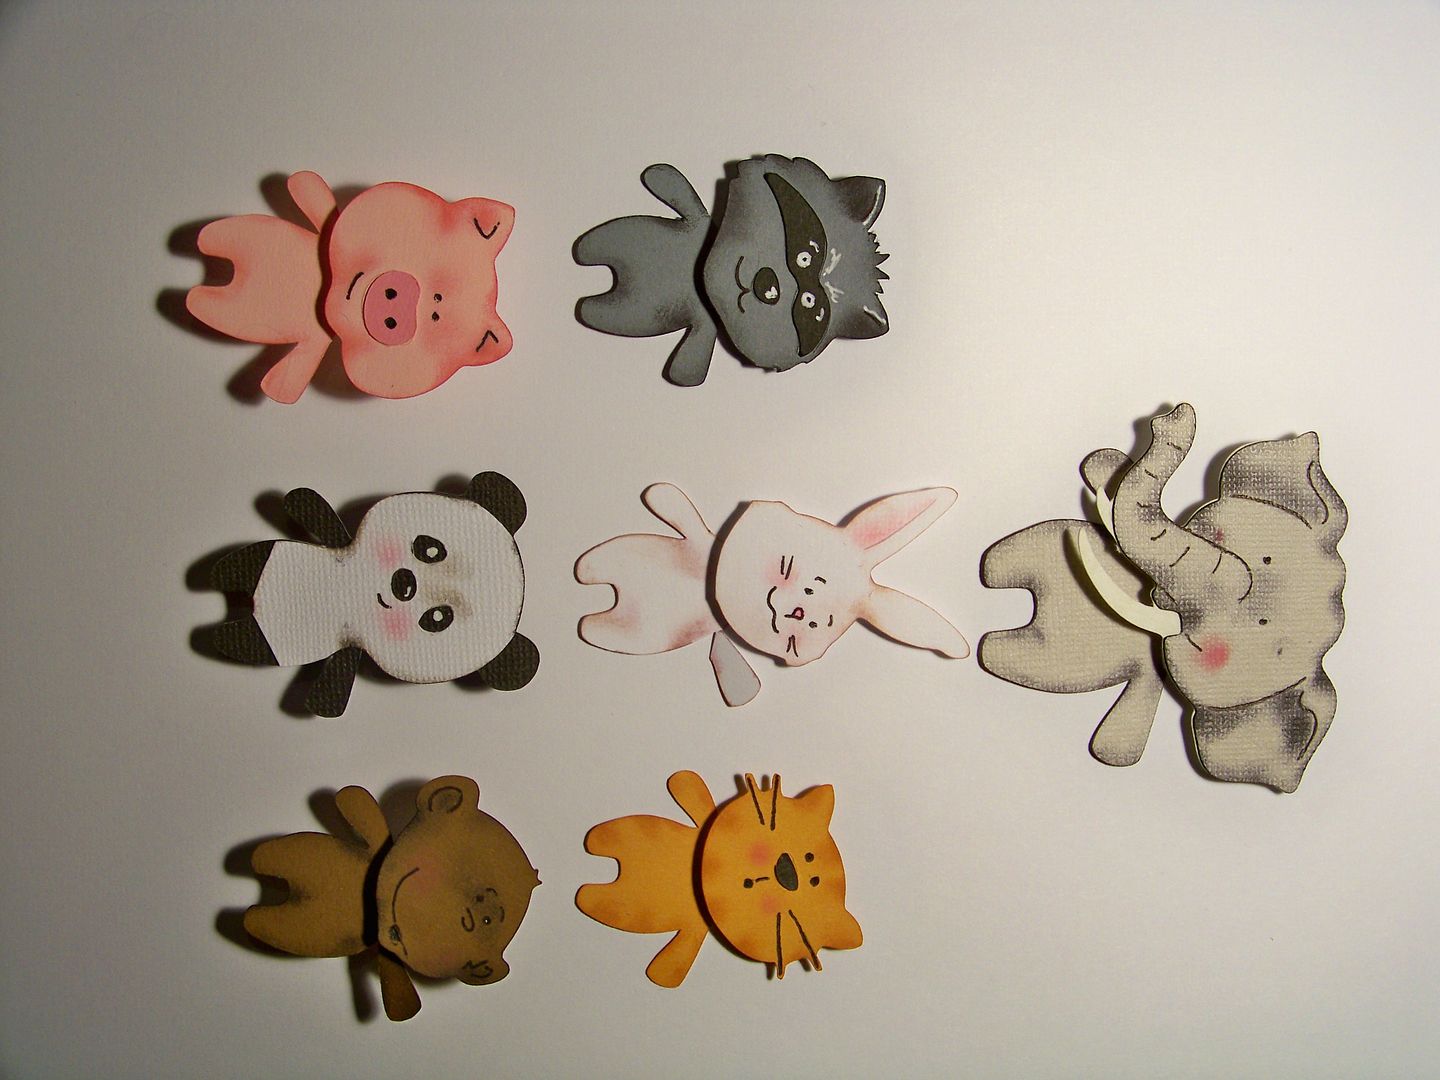
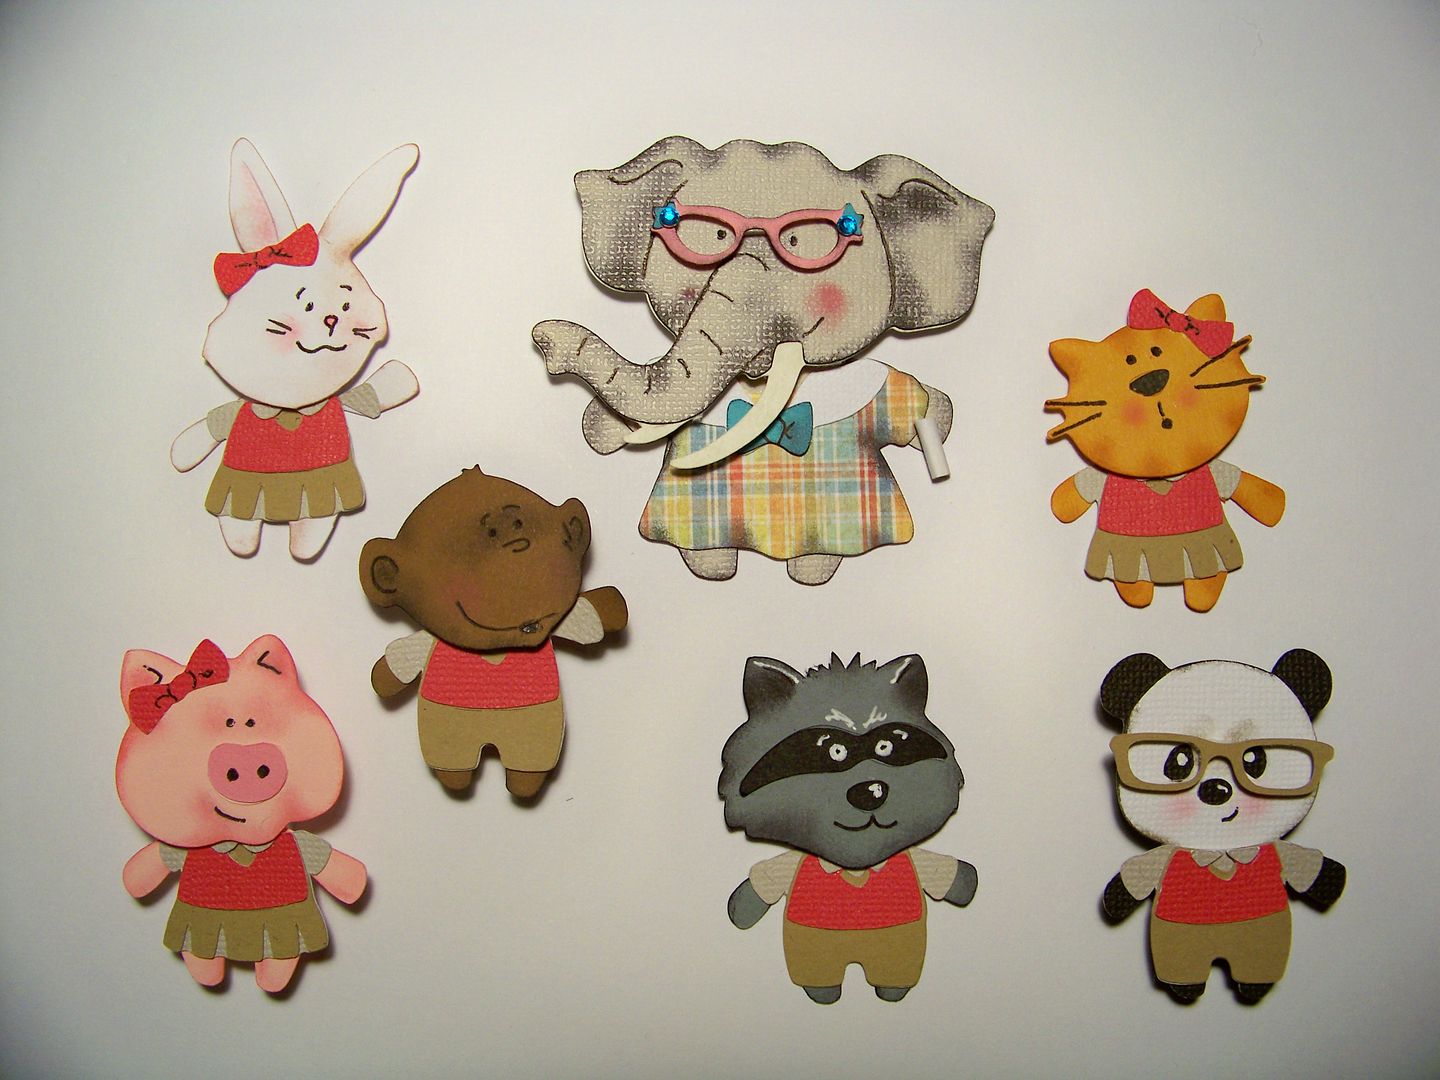
Animals were created as follows.  Uniforms for all the students were a combination of the school girl and school boy on Teddy Bear Parade (keys 28 and 29)!  All clothing was cut (of course) the same size as the bodies.

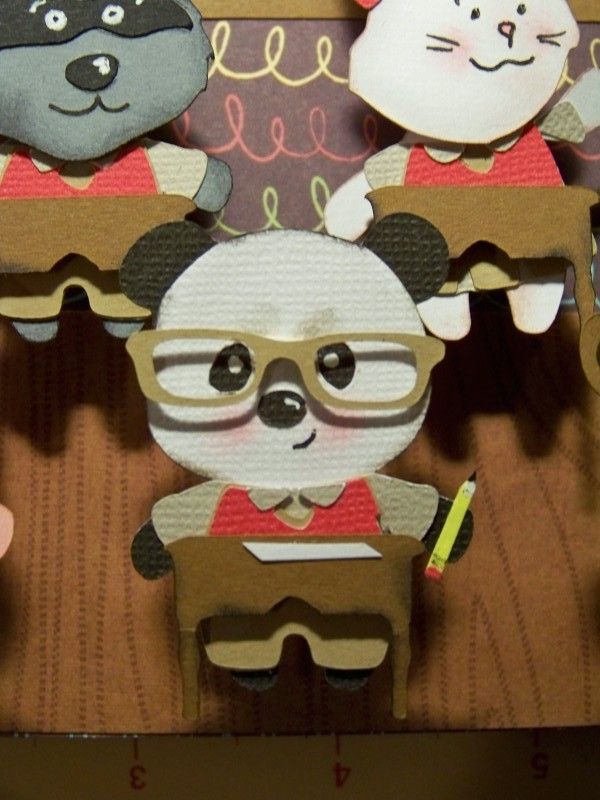
  • Elephant - 3" body from Teddy Bear Parade with a 2" head from Animal Kingdom (head feature, flipped, page 102).  Dress was the sailor dress  (key # 22) on Teddy Bear Parade.  Glasses were cut from Paisley (page 56) at 1/2".  The head was popped up 1/8".  Glasses were popped up 1/8".  The chalk in her hand is just a tiny rolled up piece of paper.

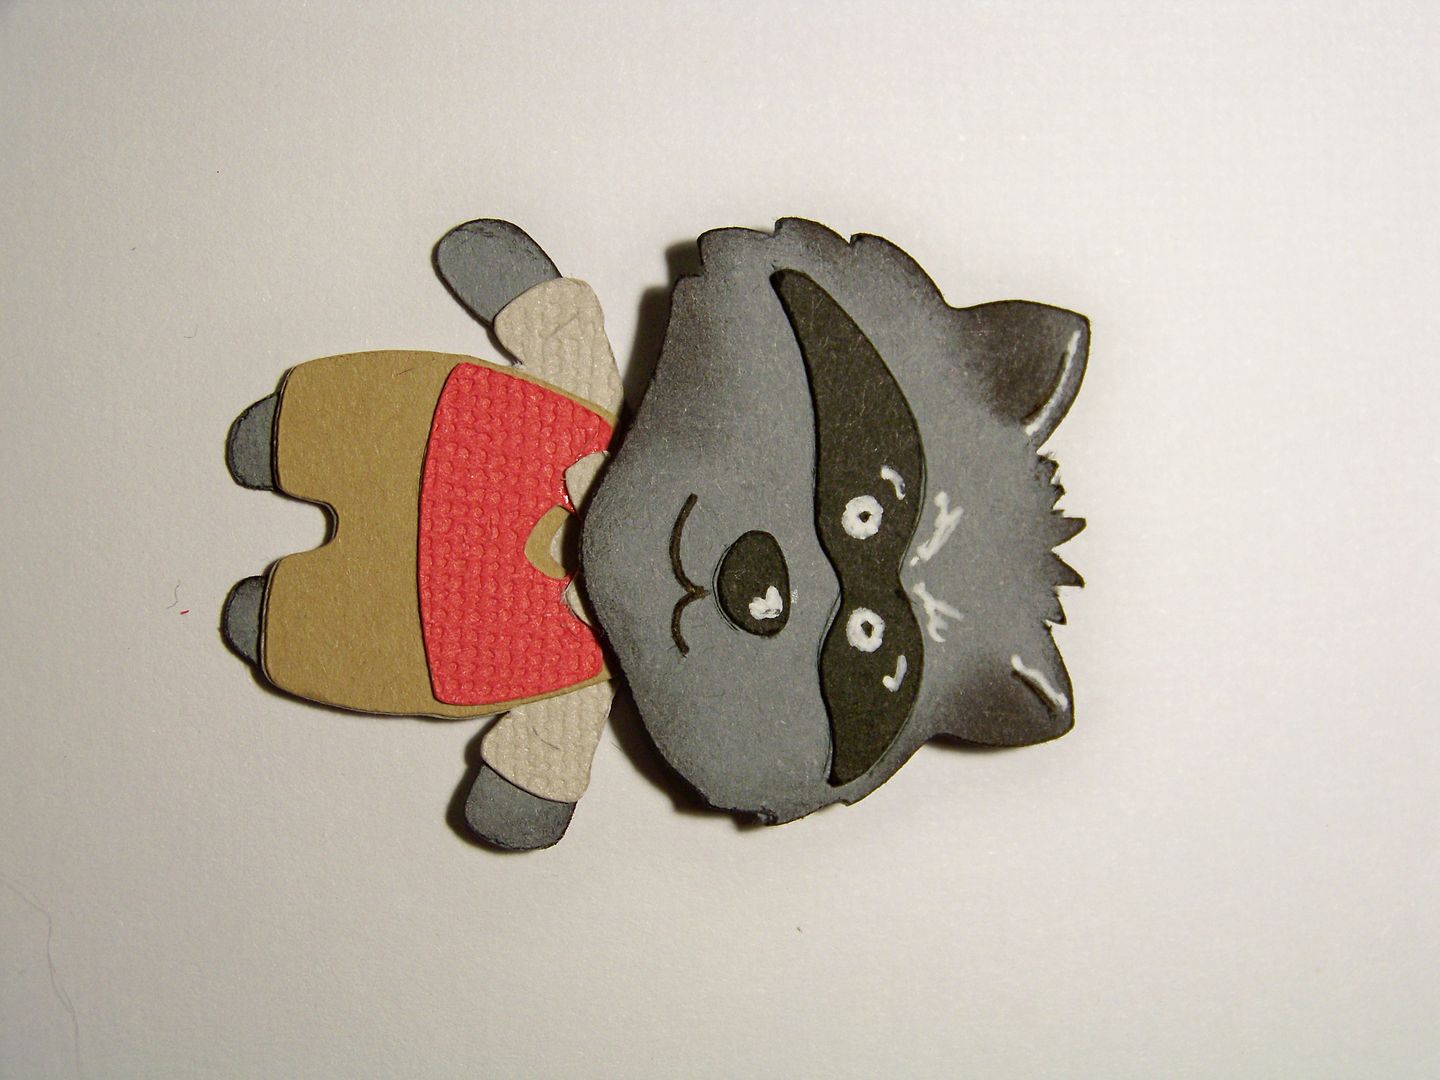
  • Raccoon - 2" body  from Teddy Bear Parade with a 1-1/4" head from Animal Kingdom (flipped, head feature).  

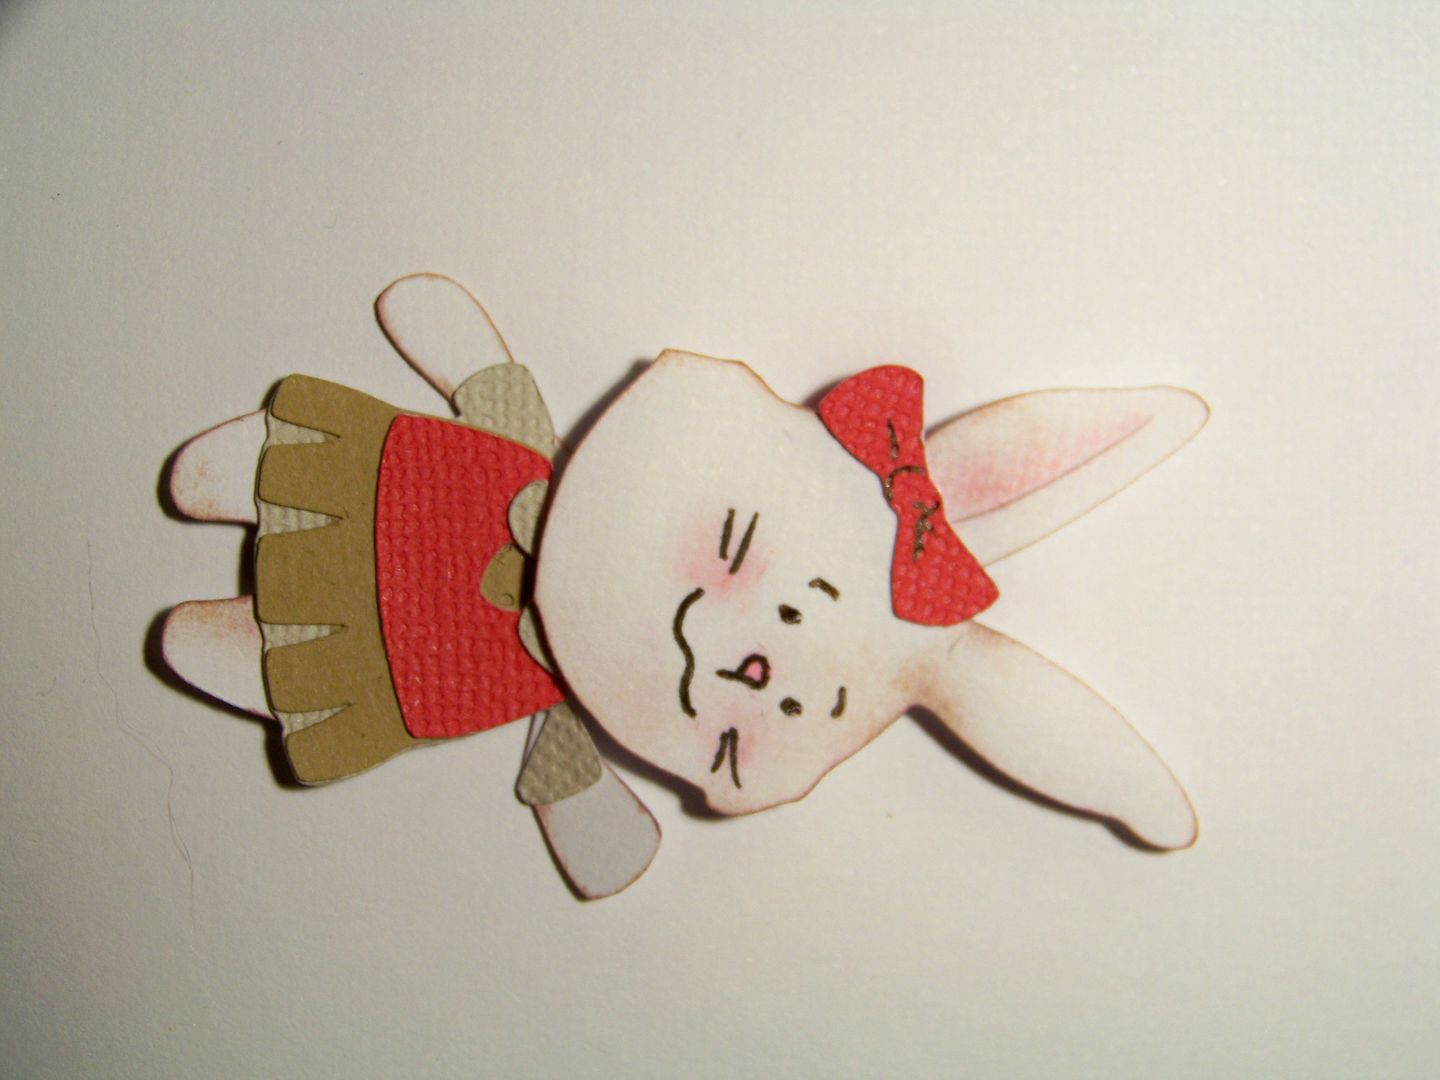
  • Rabbit -  2" body  from Teddy Bear Parade with a 2-3/4" head from Everyday Paper Dolls (page 74, 'head only' cut).  I cut one arm and sleeve so she could 'raise her hand'.  (I just snipped in at her underarm and moved the arm up as if it were on a hinge.)

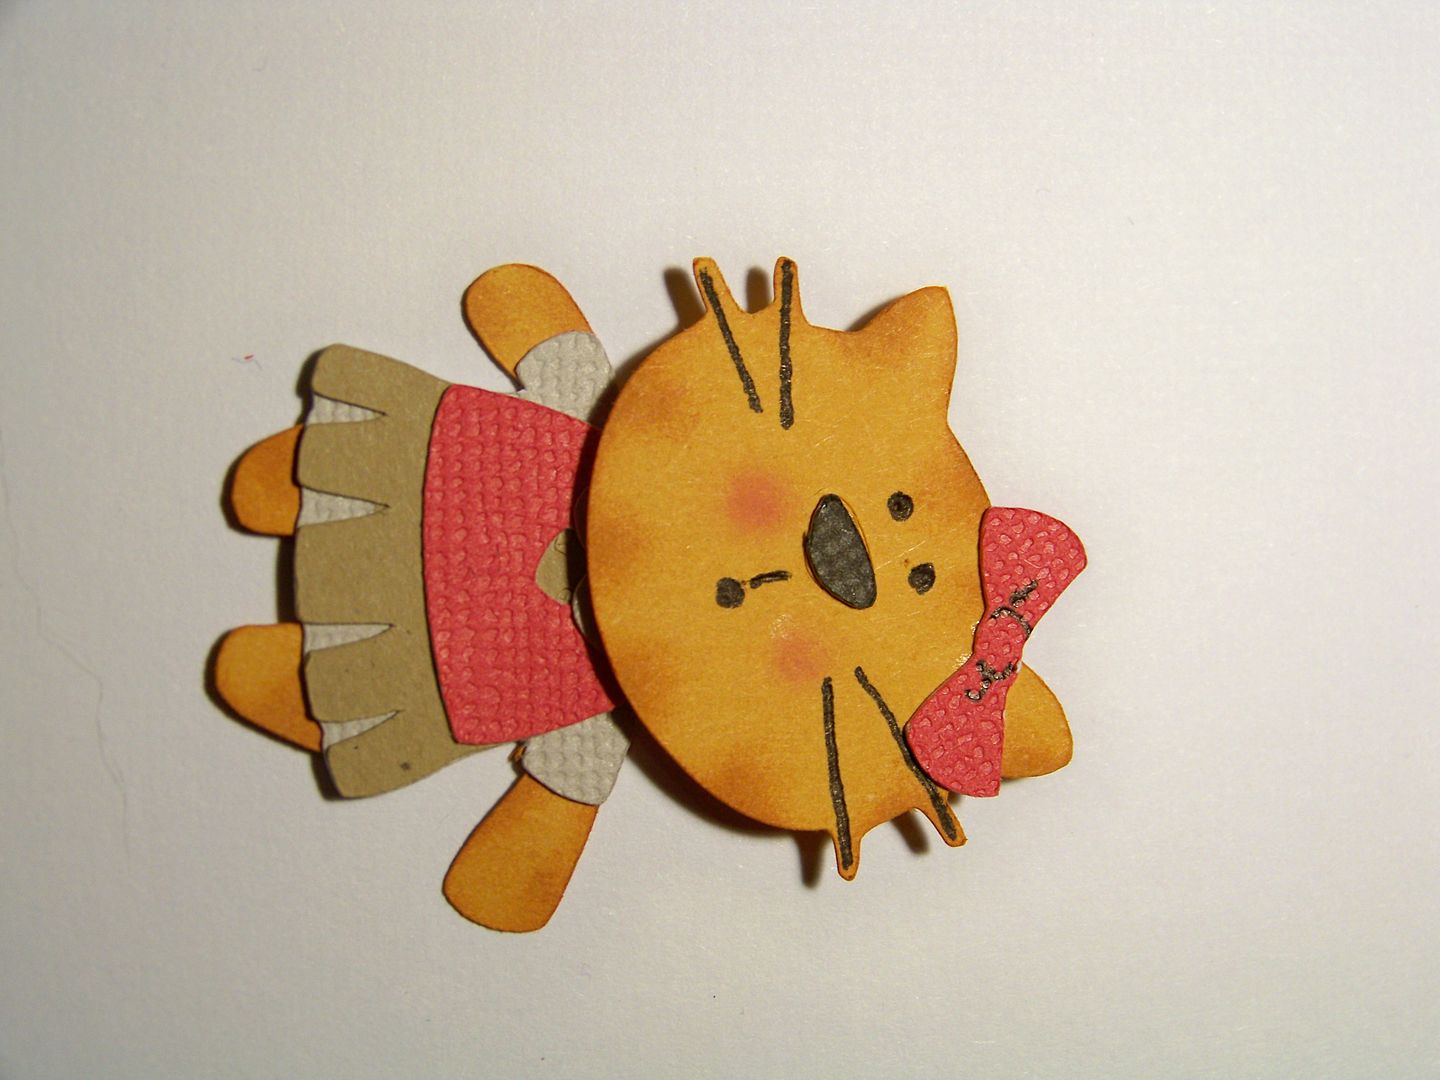
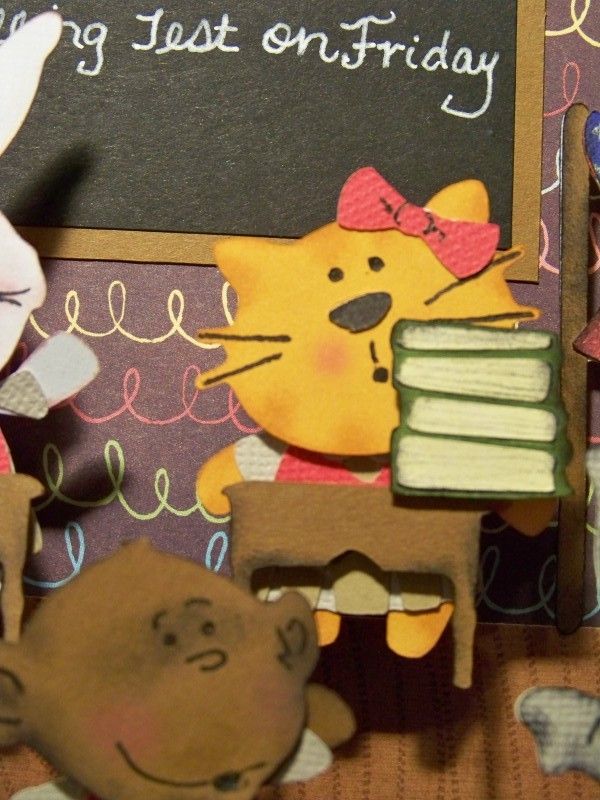
  • Cat - This is the very same cat that I made on my previous post.  Click here for info on making this critter!  

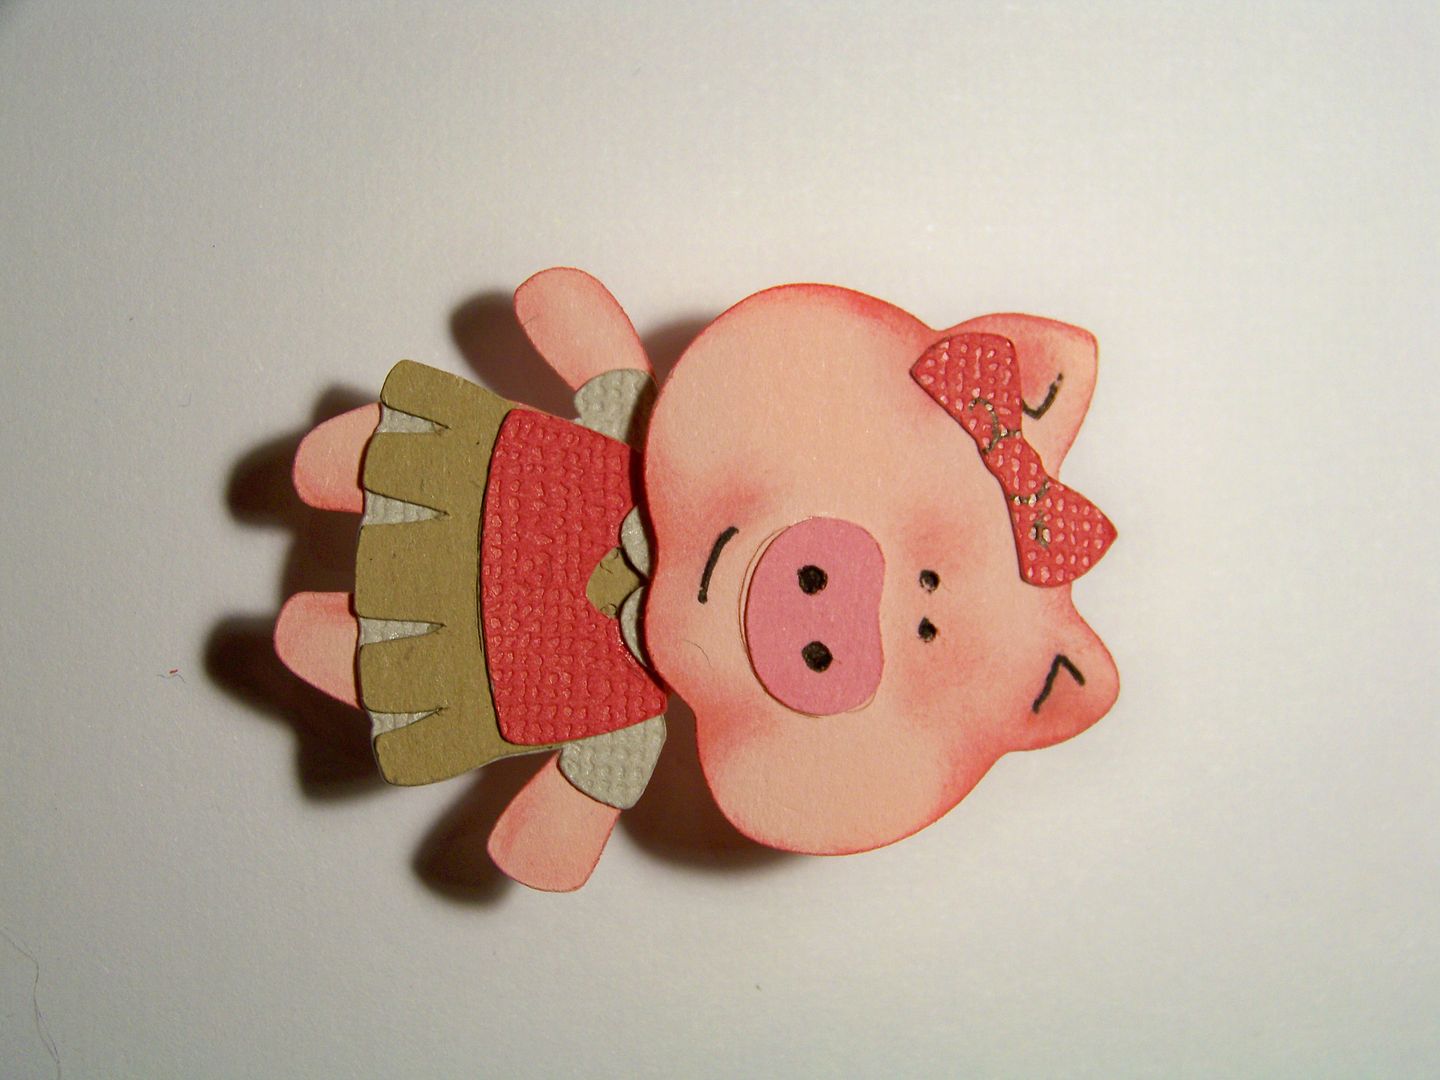
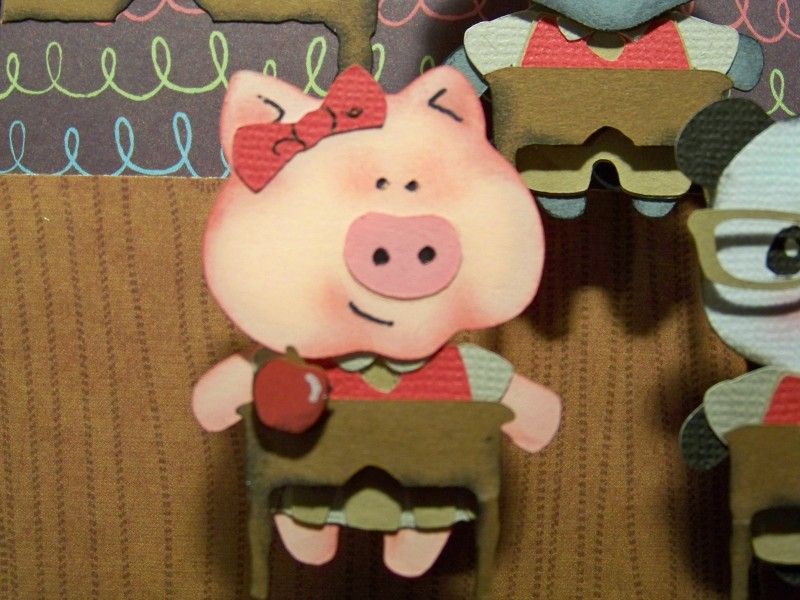
  • Pig -  2" body  from Teddy Bear Parade with a 1-1/4" head from Animal Kingdom (flipped, head feature page 84)  This is a different pig from my last post!  I like this cut because, unlike the one I used  previously, this one is a 'head only' cut!

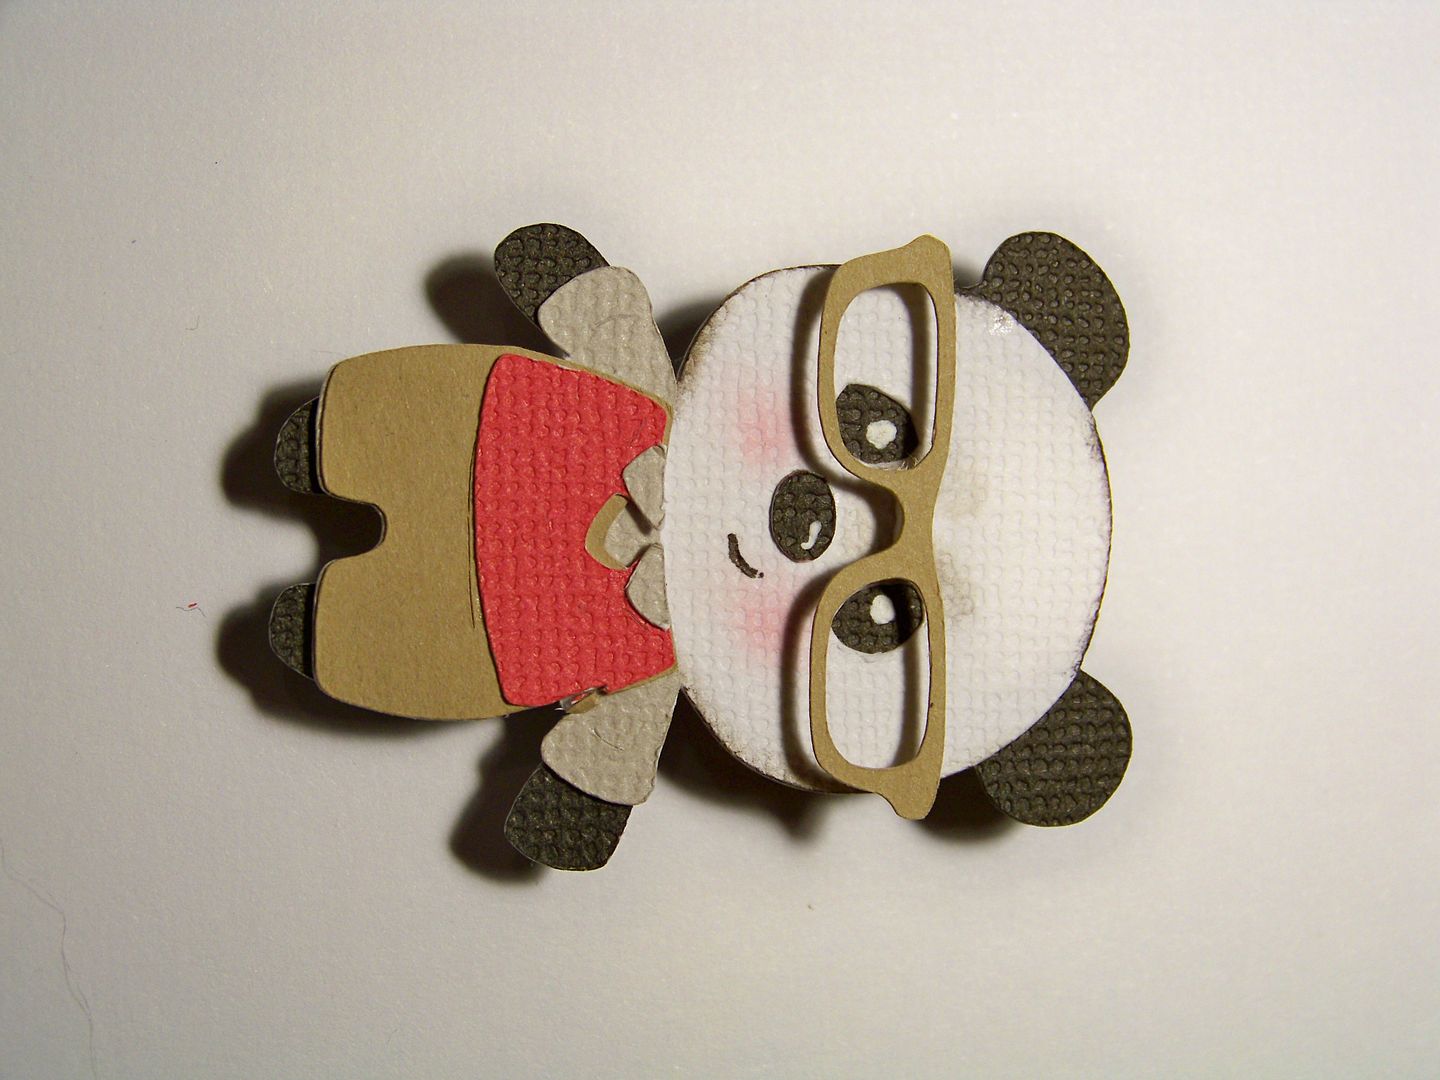
  • Panda -  This is the very same panda that I made on my previous post.  Click here for info on making this critter!  This time, I used the glasses from the school boy costume!

  • Monkey -  2" body  from Teddy Bear Parade with a 2-3/4" head from Everyday Paper Dolls (page 75, 'head only' cut).  I cut one arm and sleeve so he could 'raise his hand'.  This is a different monkey than I used before on my last post.  I like this one because he is looking to the side!


I gave all the students desks from Sentimentals, cut at 3/4" (shadow feature, page 42).  I trimmed off the inside points to make them less decorative.  The desks are popped up 1/8" off of the animals.


I decided on walls and added a floor to anchor them and to give them an environment that I could start to decorate.  The final floor was 2" wide (a change from this version).


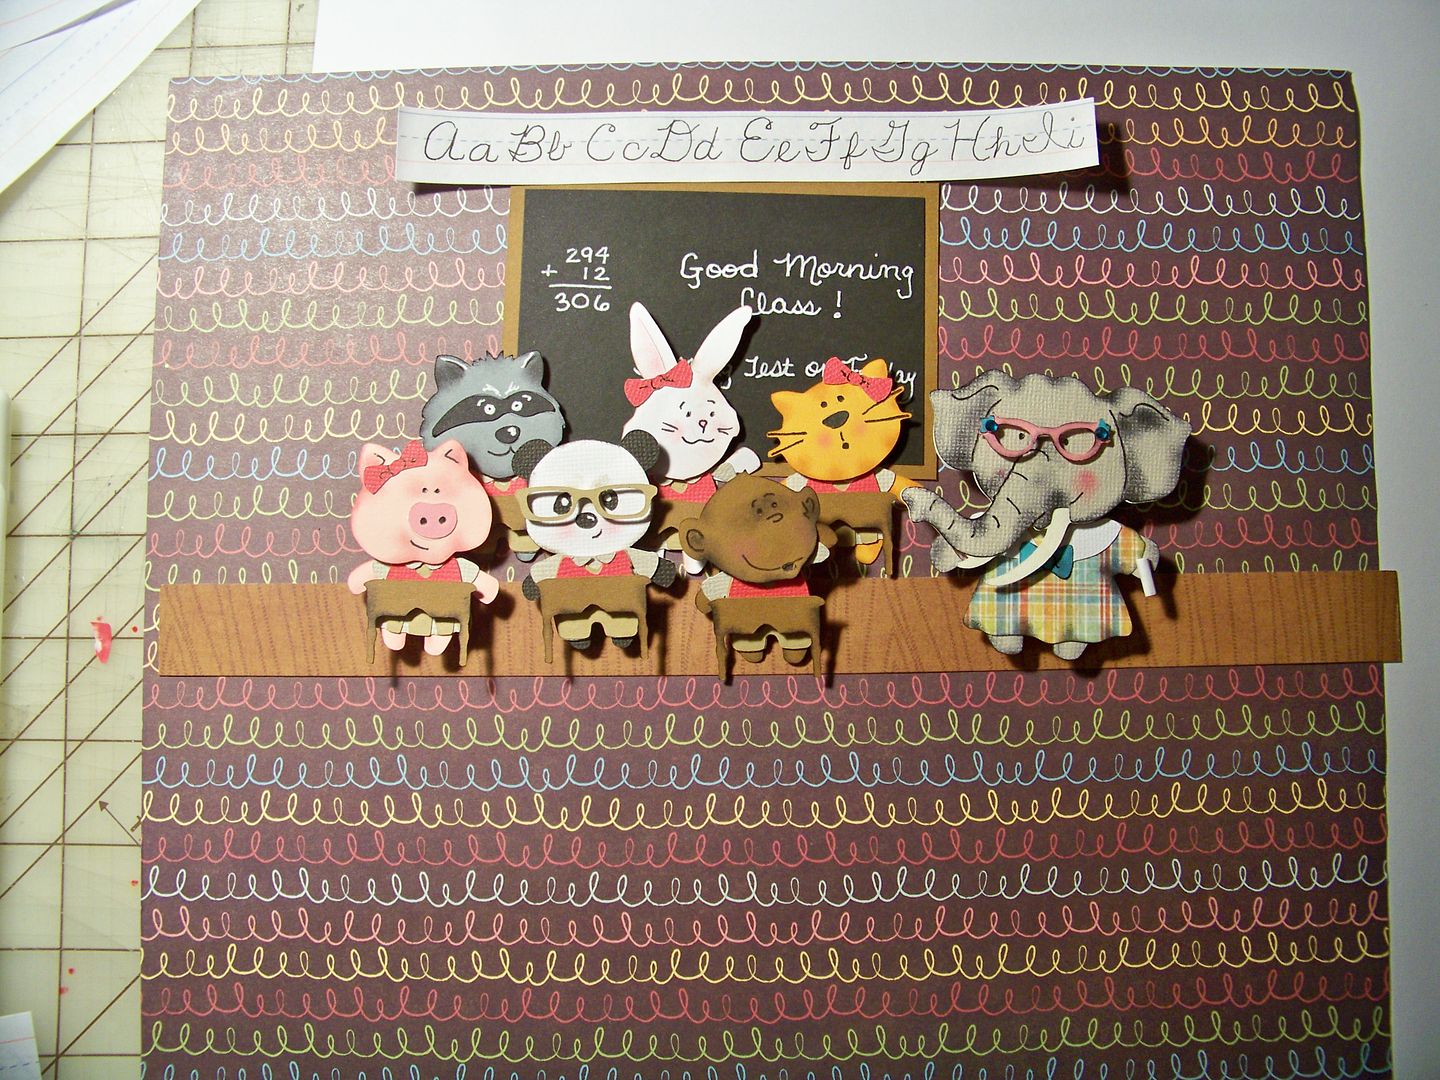
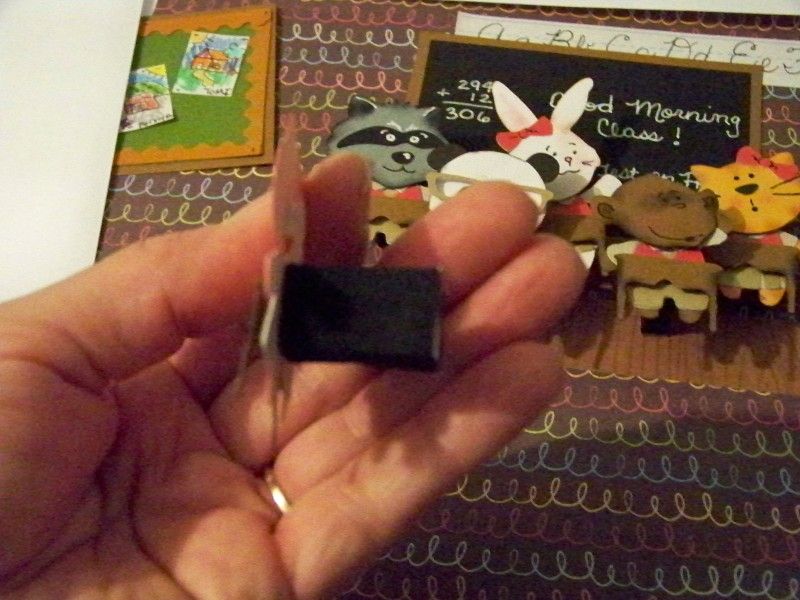
I hand-cut a chalk board (4-1/4" x 2-7/8") and bulletin boards (3-1/2" x 2-5/8", trimmed to 2-1/4").  I made a penmanship border by cutting up a page from my daughter's tablet leftover from the last school year.  (My little girl was shocked that I knew how to do proper letters like she learned to make last year in the 2nd grade.  I guess my regular penmanship leaves something to be desired.  She actually offered to do it for me because she didn't think I could do it!)  The flag was cut at 2" from Stand and Salute (page 22).  It was popped up 1/8".

At this point, I added foam to the characters so that they would be at proper distance from the surface of the page.  1" foam for the teacher and front row; 1/2" for the back row.


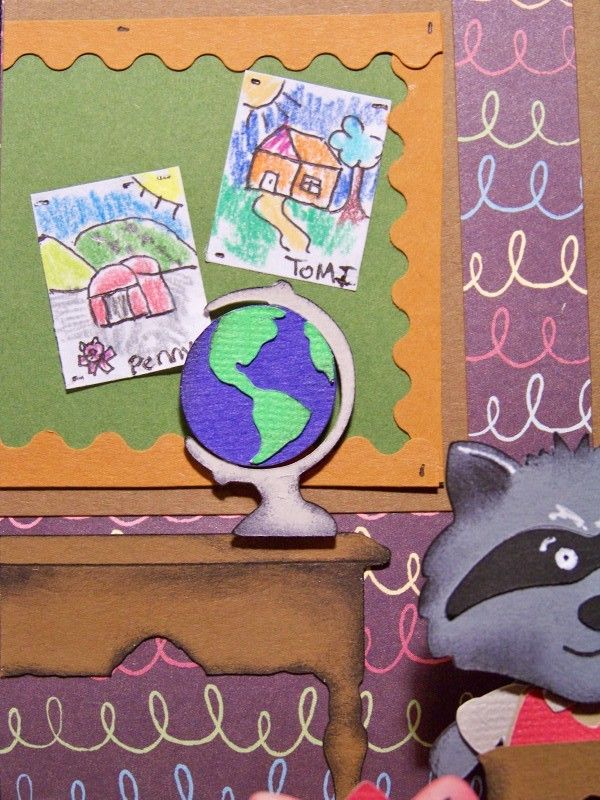
I hand-cut their drawings (1" x 3/4") and reports (3/4" x 1/2").  The reports were punched with a tiny Martha Stewart hole punch to make those tiny holes.  The bulletin board edging was made with decorative scissors.  The picture of George Washington was cut at 1" from My World (page 28).


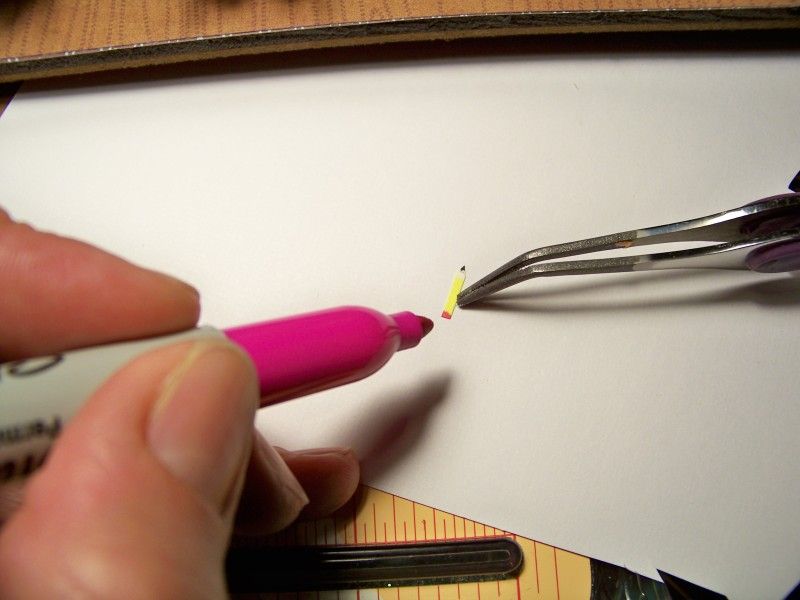
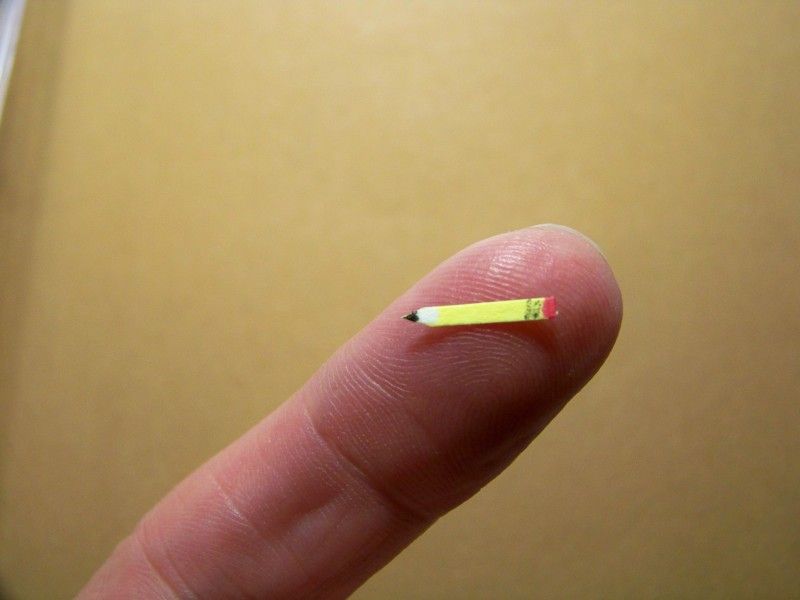
I hand-cut tiny pencils, using markers and pencil to give details.


The globe was cut at 1-1/4" from Locker Talk (page 47).  It is popped up 1/8".  The table it sets on is from Sentimentals at 1-1/2" (shadow feature).  Like the student desks, I also trimmed off the inside points here too.


The books on the cat's desk were cut from Locker Talk at 1" (page 47).  I trimmed off the bottom book.  The books are popped up 1/8".


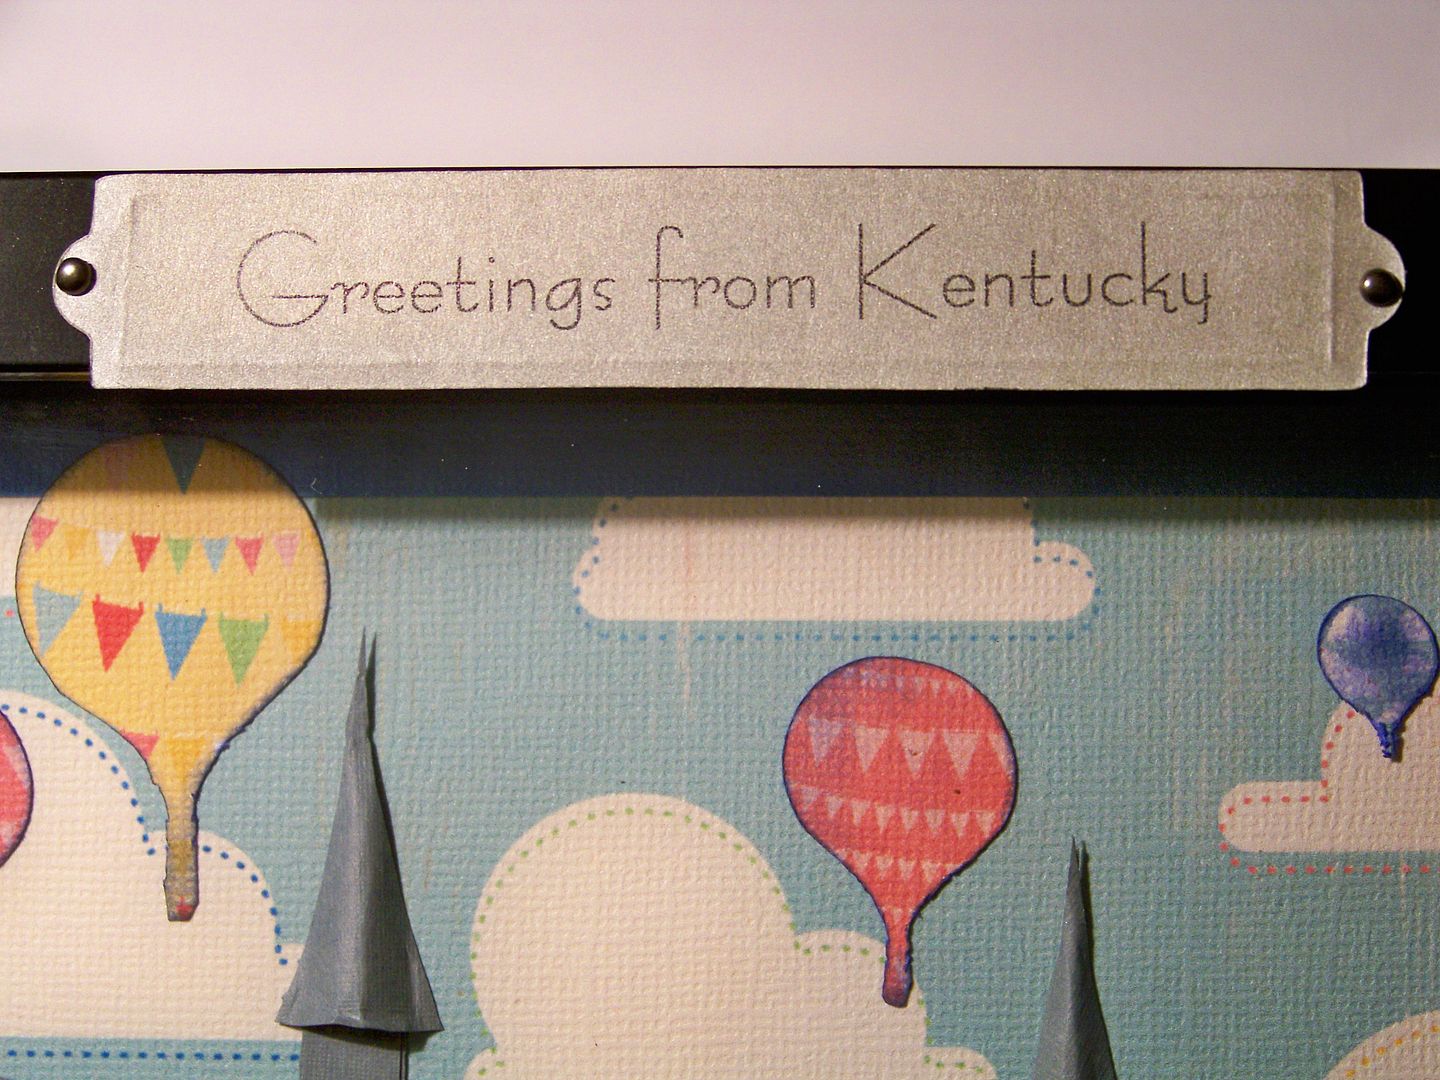
The pennant banner at the top of the page was printed and cut from Spring Chic.  (1.3" for the red/yellow ones; 2" for the blue.)  I hand-cut to change the shape of the blue ones.  Some are glued flush to the paper; others are popped up 1/8".


The apple on the pig's desk is from the Teddy Bear Parade cartridge (key #28) at 2".  It was popped up 1/8".


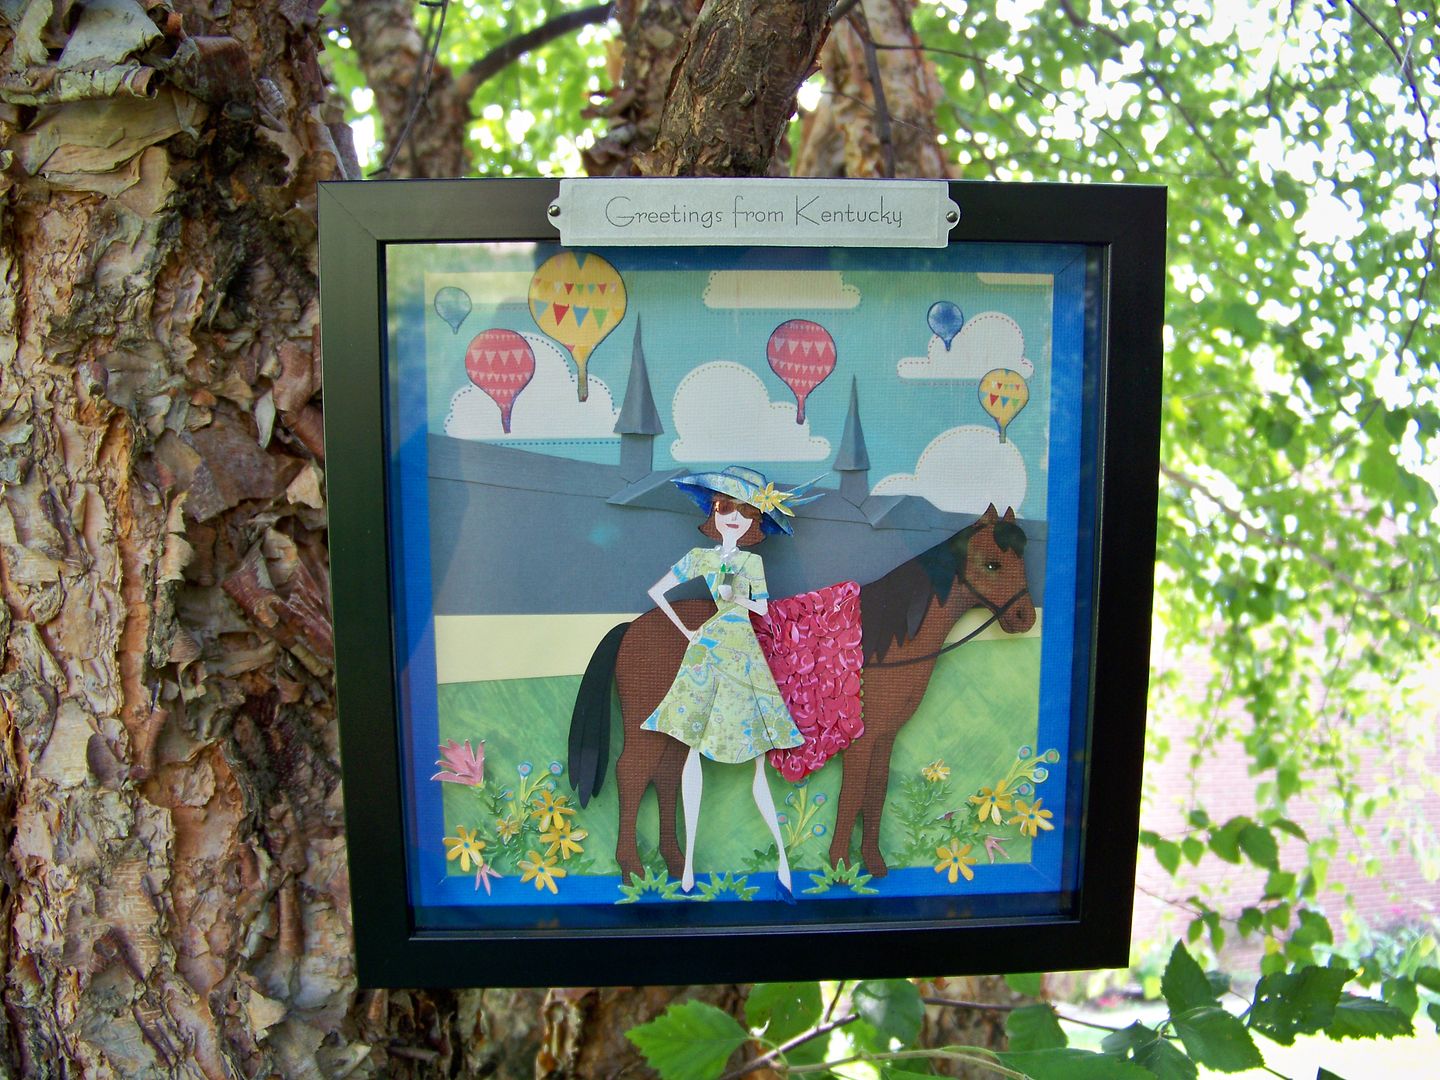
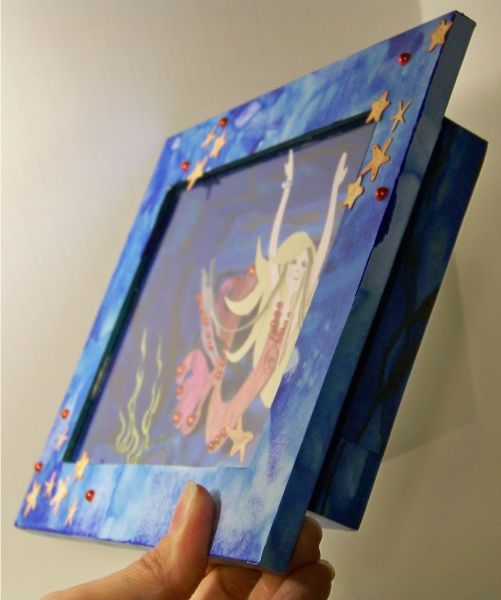
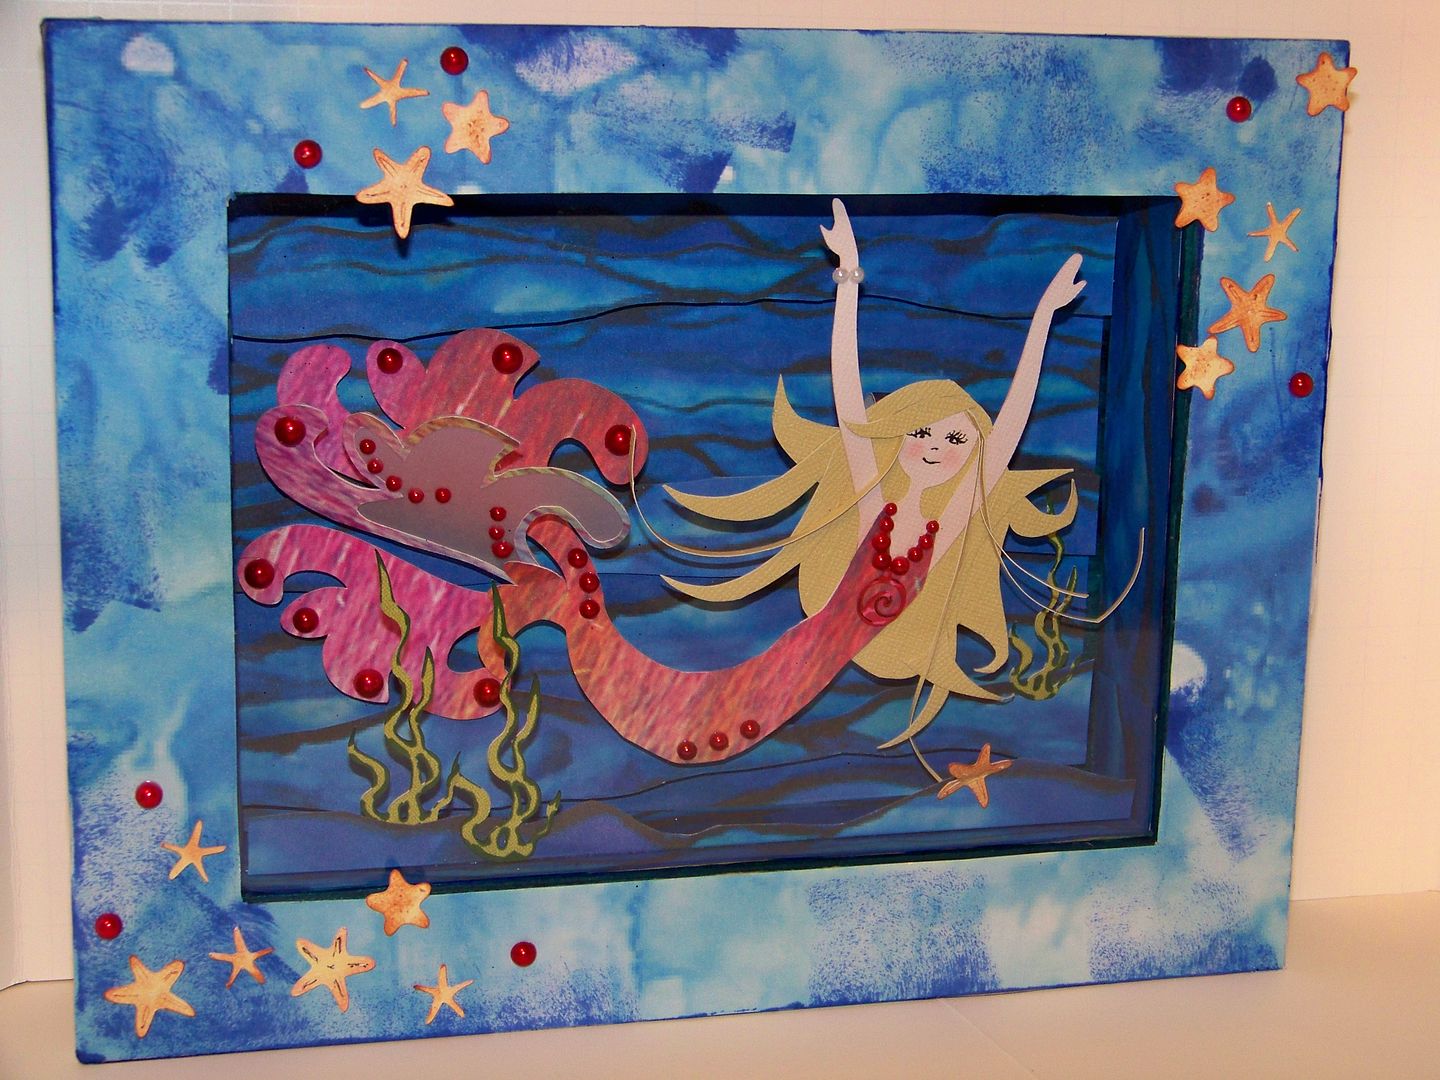
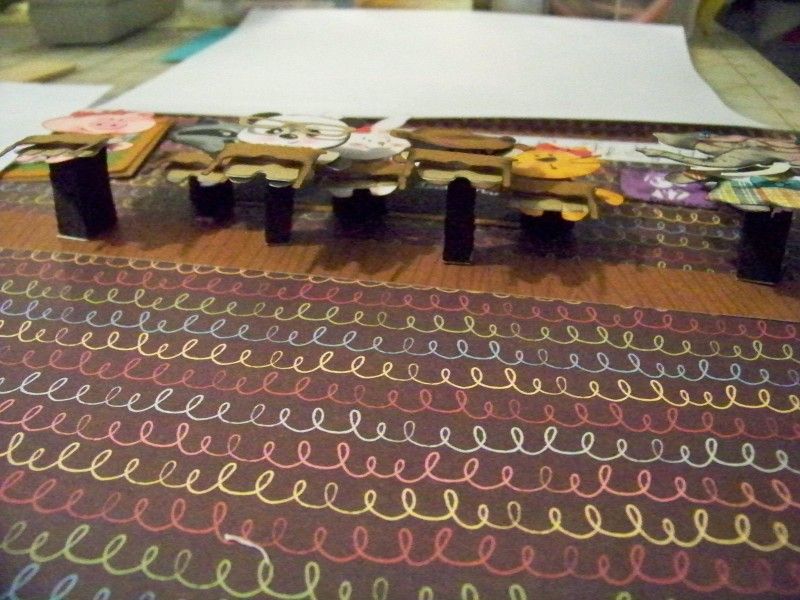
After looking at the project in natural light....


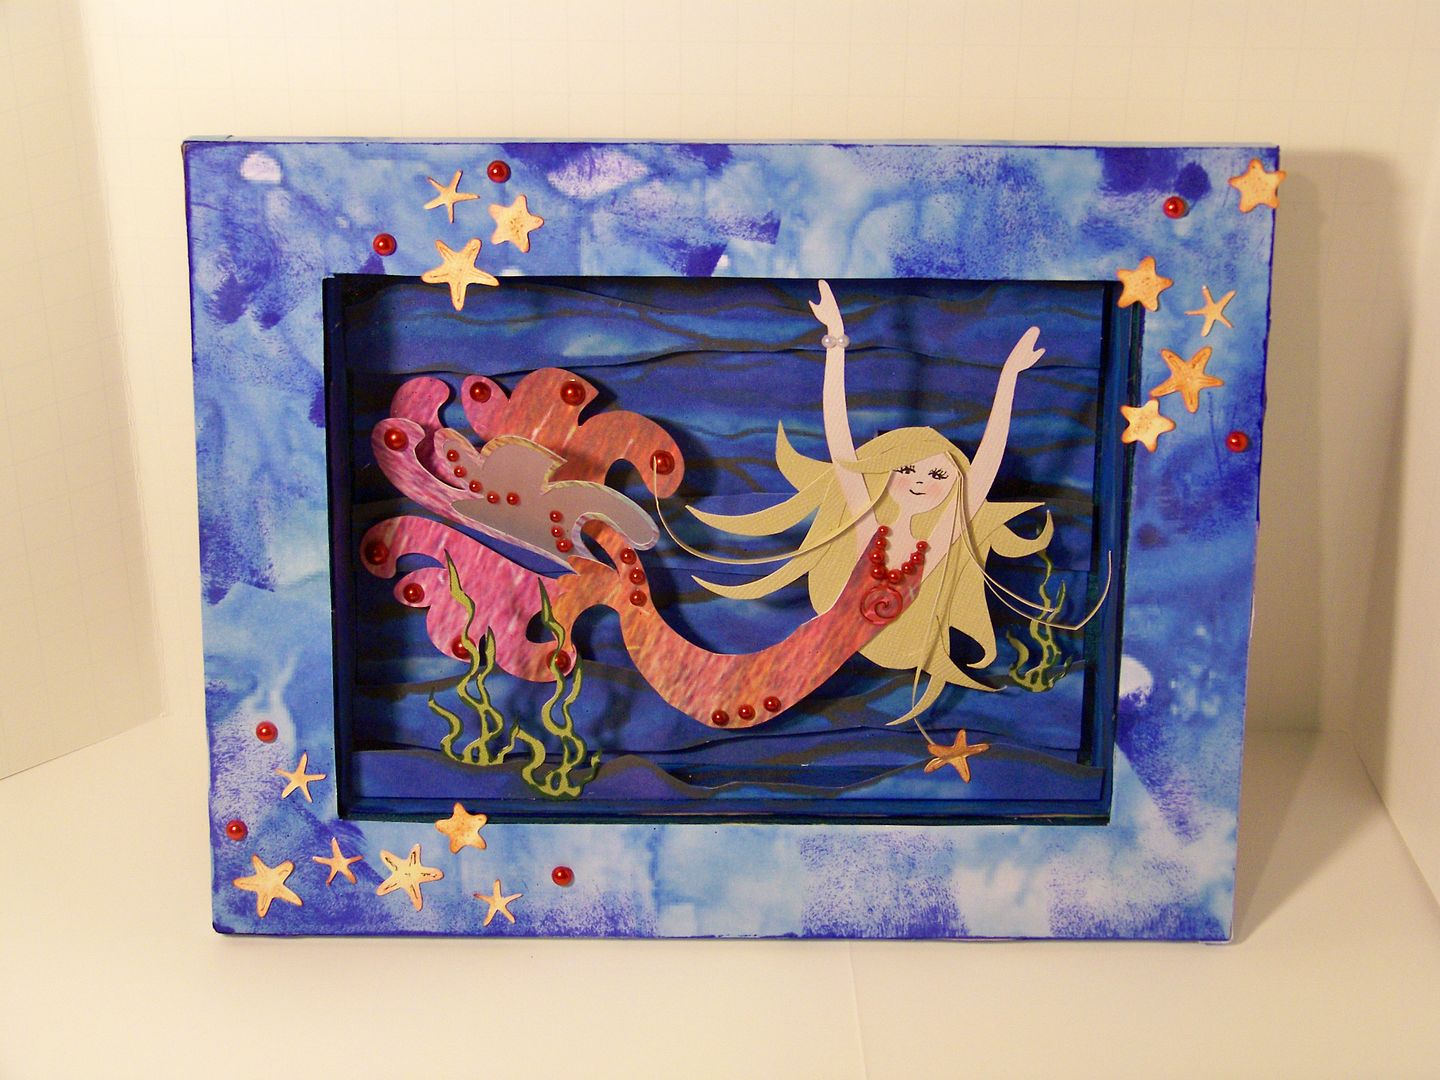
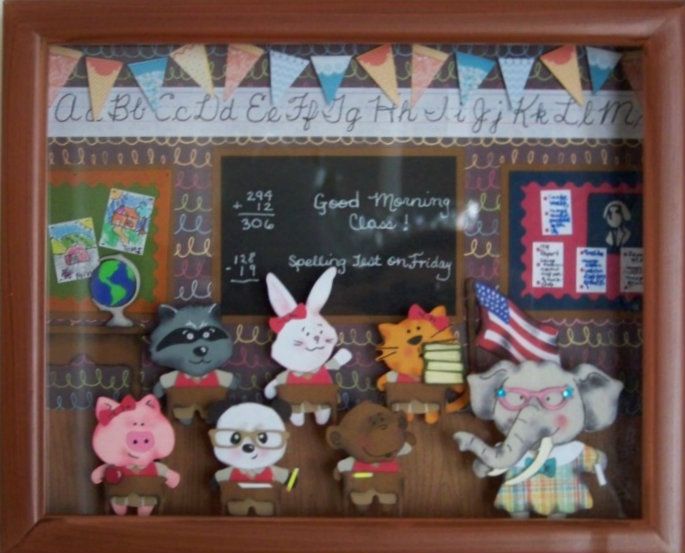
...I placed it in a shadow box that allowed for my 1-1/4" projections.


I learned a lot from this project!  And what a joy to get to review older cartridges, like My World, to find treasures!  Did you know there are busts of Lewis and Clark on that one? -- and maps, and so, so much more!  I loved finding the 'head feature' on Animal Kingdom!  Lots of 'head only' cuts for more morphed animals!!  I loved making some hand-cut elements and really enjoyed adding in lots of fun details for the classroom.

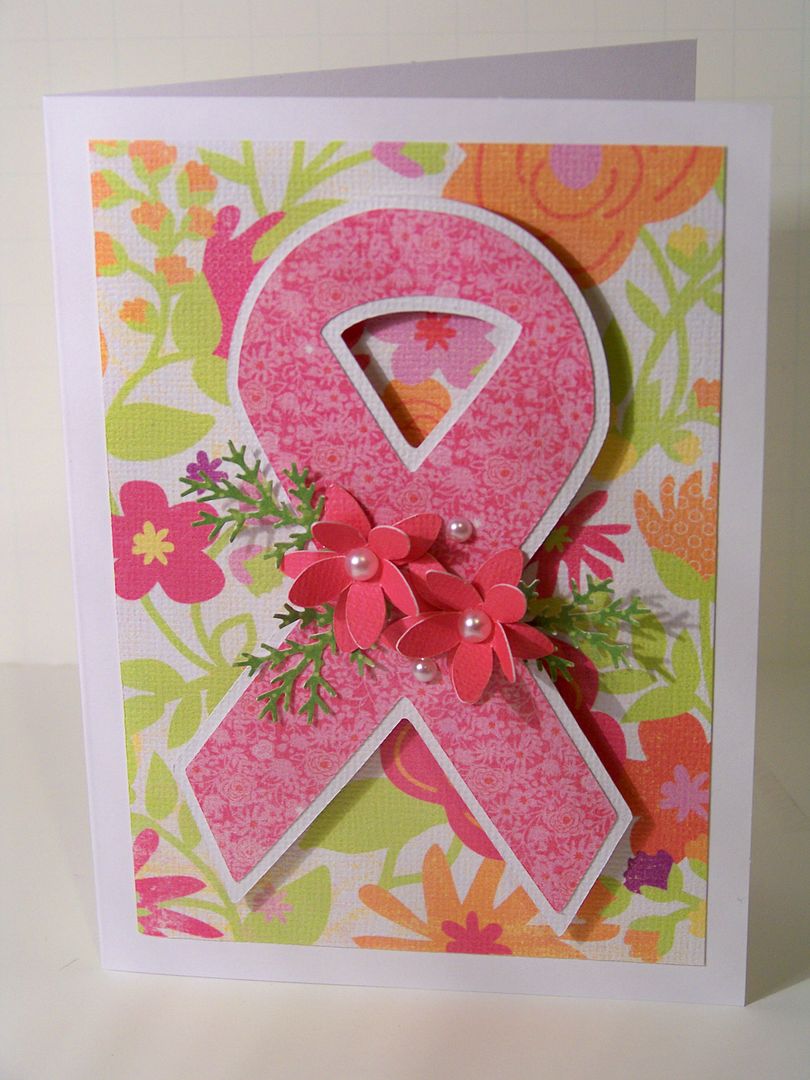
I am the guest designer on the Cricut Fanatics blog today!  I have another small Teddy Bear Parade morph over there-- a back-to-school card!  Check it out:  click here!  

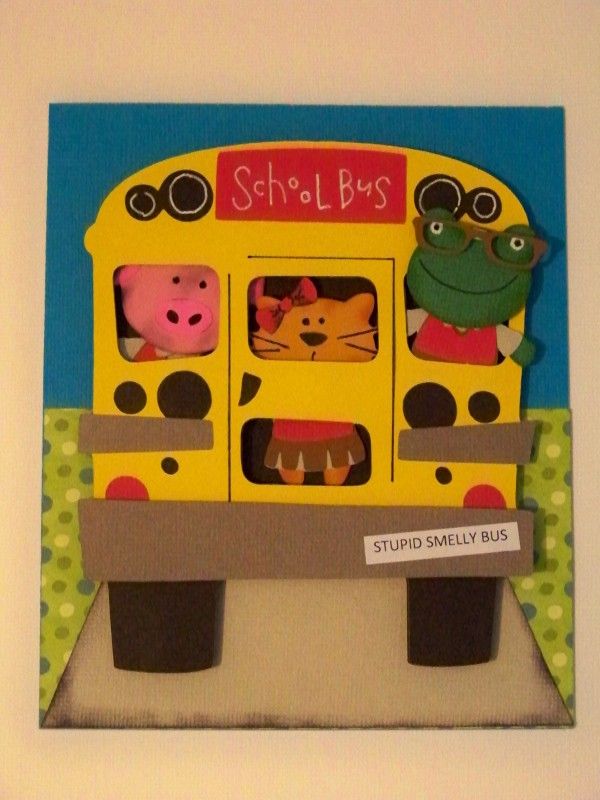
This card is on the Cricut Fanatics blog (see above for link).  I will be featuring a whole set of these cards with different designs later this month here on my blog!


To see many of my previous paper projects, check out My Project Gallery (or click here)!

Monday, November 21, 2011

Meet Me Over on the Paper Boutique Today!

Wow!  How did it get to be Thanksgiving Week so fast?!  After celebrating (and eating!) with family, we like to decorate for Christmas.  In honor of that, I have put together a project for Linda at the Paper Boutique blog.


The Paper Boutique


I created a shadowbox (made to look like a gift) that features a light-up vignette inside!  I hope you will join me over there to see my project.  As always, I provide cut sizes and how-tos, including how to make a shadowbox, how to create a wood floor, how I created this custom figure, and how to add lights!


Just click on the button below to take you directly to my project post!


The Paper Boutique


And exclusively on my blog...because I have gotten several emails from crafters wanting to re-create my projects, but stressed over the hand-cutting, I have provided a pattern for the legs.  This includes the finished shape for my lady on the ladder, as well as the single leg I used to create that and the bicycle-riding lady from a previous project.  Click here for the leg pattern for hand-cutting.  This is sized to work with Country Life (page 32 layer 2) cut at 7-1/2" relative size on the Imagine or E2. 


Best wishes for a very
Happy Thanksgiving!

Friday, September 2, 2011

Meet Me Over on the Cricut Blog!


I have the honor and pleasure of sharing a new vignette with three altered figures with you over on the Cricut Blog today!  I used a mix of cartridges, a few alterations, and a couple of new techniques.

Want to see a peek?  Here's a corner...


To see the whole project, lots more pictures, all my cut sizes, cartridges used, and how-tos, just click on the "Caught Our Eye" graphic below or above.  See you there!


http://withglitteringeyes.blogspot.com/p/caught-our-eye.html


Tuesday, August 2, 2011

Blue Skies! (Gifts and Ice Cream too)


I like making gifts!  I wanted to share a few gifts I have recently created for friends and family:  a shadow-box vignette, homemade ice cream, and a card.

The first gift is a shadow box that I created inspired by a pennant I made for a crop.  You can see the pennant from a previous post by clicking here
Yep, I hung it in a river birch to photograph it!
I learned so much from making the pennant, but I wished that I had created a forward-facing figure.  For this gift, I did.


I cut the figure from Forever Young, cut at 5" on the Imagine, adding a face, hairstyle, sunglasses, and changing up the dress a bit.  The dimension in the skirt came from cutting two dresses.  Using only the skirt on one, cutting and bending at the drapes.


I hand-cut her hat to accomodate her new posture.  I hand-cut her nose, mouth, and sunglasses.  She is lightly inked; her hat is heavily inked.  I cut off her arm at the elbow and extended the cut into her leg to allow for a hand (since the body would be covered by her dress).  I shifted the arm into position and glued it back at the elbow.  This allows for the bend in the elbow and a curve in her hand to 'hold' her drink.  You can find details on the mint julep cup in the original pennant post.


The horse, balloons, and Churchill Downs cuts are sized down from the original pennant.  (The spires for Churchill Downs were much trickier on this smaller version because the smaller paper cuts were much harder bend!!)  This time, the horse is 4-1/2" from Old West.  The balloons are .7", 1", 1.3", and 1.8" from Summer in Paris.  The flowers on the original blanket of roses were open, in full bloom.  I wanted to have them tight in the bud, so I used a loop punch to change the way they look by cutting and layering them.


The flowers were hand-cut from printed bouquets on Enjoy the Seasons.  I cut them at 1.6" and 1".  I trimmed the parts I wanted, inked in green when necessary to hide the white that I couldn't cut away, and glued them to the branches.


I used a Martha Stewart sunburst edge punch to create tufts of grass at their feet.  I used the branch punch to give the flowers a way to have height. 

This is the finished vignette before going behind the glass:

I found a black-frame 8"x8" shadow box and created a nameplate from Fabulous Finds (page 82, stretched), cut at .7".  I used a pen to draw a frame on the back while the nameplate was on a flower-making mat to emboss it lightly with a rectangle.


I flipped it over and ran it through the computer printer to add my text using Bernhart Fashion BT font at 24 point.    I added mini brads, bent as close as possible before being glued to the frame with plastic adhesive.


My next gift was ice cream!

I had never made ice cream with my daughter.  I surprised myself when I realized that!  As a child, I used to make ice cream all throughout the summer with my grandparents using their old hand-crank ice cream maker.  My strawberry ice cream was a hit when I presented it as my final chemistry project in high school.  I have been making ice cream for years, but for some reason, not this past seven!  I use a digital, automatic model now:  no hand-cranking, no ice, no rock salt... it does still taste good, but I am not sure how that can be. 


Piper's favorite flavor is blue raspberry, so we made a batch to take to my in-laws for a little 'cheer up' kind of gift to share.  The secret to this is using semi-frozen berries so that you don't have to chill the mixture and lots of blue food coloring, adding until it goes from purple to smurfy blue.

Piper's Blue Raspberry Ice Cream
(for a printer-friendly version, click here)
2 cups heavy cream
1 cup whole milk
1 cup sugar
4 oz eggs (this is 3 eggs for me)
1 teapspoon vanilla
1 cup raspberry puree (I use semi-frozen berries in a food processor)
blue food coloring (I use the liquid kind at the grocery)

Combine eggs, sugar, and vanilla.  Beat well.  Beat in raspberry puree.  Add cream and milk.  Beat well.  Add food coloring until you get the desired color- it will take a lot to overcome the pink from the berries!  (If you use fresh or thawed berries, you will need to chill thoroughly at this point!)  Follow the instructions on your ice cream machine for 1-1/2 quart recipe.  Once it is at the soft-serve stage, remove from machine and place in container for full freezing to get nice and hard.

Last, I made a card for a message board friend recovering from surgery.  This was part of a weekend challenge in her honor. 


This is a simple card, using Stand and Salute, cut at 4.3" on the Imagine, with shadow.  The floral papers are from the Berries and Cream Imagine cartridge.  I cut a 5.7" square to floodfill with the large print in order to cut it down to size for my card.  The flowers are from Mother's Day Bouquet , cut at 1" and layered.  The greenery was made using the Martha Stewart branch punch.

Thank you for visiting my blog!  Don't you just love to make gifts... and hand-made or homemade gifts are my favorite to receive as well.  They just make me feel like blue skies and green lights!

Sunday, April 3, 2011

My Dancing Mermaid... and a Quick Best Friends Frame!

This is my entry for the April Monthly Challenge:  Reuse, Repurpose, Recyle. 
Mermaids have been swimming in my mind.  I have been doing a little surgery to combine fish and figures to find a mermaid I liked.  Not yet happy with the results, once I read the requirements for the April Monthly Circle Blog Challenge:  Reuse, Repurpose, Recycle, I knew it was time to figure out the mermaid.  I grabbed all my rejects and a little trash too!

I figured out combining the cuts to create a mermaid.


Using an old folder divider with an interesting print, I cut the fish body.  This was my first recycled/repurposed element.  The dancer is from Shall We Dance (page 29), cut at 4-1/2".  The fish is from Pagoda (page 42), cut at 5-1/2".  I cut additional fish at 5-1/2" and 4-1/2" to add to the tail.  I used a little vellum on the second 5-1/2" tail and embellished with adhesvide beads.  The mermaid's hair is all hand-cut. The charm on her necklace was cut from Life is a Beach, page 45, at 1/2" and detailed with a Sharpie and a Zig fine pen.

The shadowbox itself is my second recycled/repurposed element.  This was headed for the garbage can after getting wet and the original artwork was destroyed.  For the purpose of this challenge,  I was so glad I had held onto it after so many times wanting to toss it in the trash! 

I used a beautiful box lid for the frame of my shadow box (my third recycled/repurposed element), adding extra ink to get some darker areas so that it would relate to the darker paper inside the frame.  This covered up the damaged areas on the shadowbox!

The background paper was also a fun way to use a previous mess-up.  That paper was actually fabric I found on-line and printed out.  Having miss-cut it for another project, I had tossed it aside but was able to use it for this project.  I cut additional strips and popped them up to get a little more dimension in the background.
I used a loop of paper to pop up only the head and torso of the mermaid.

I was able to add layers of dimension by folding an element for the floor of the scene.  This allowed for the seaweed, which was cut from the Spongebob cartridge (page 76), at 2-1/4" and 1-3/4". 
The starfish were cut at 1" from Life is a Beach (page 65).
My daughter told me yesterday that she wanted this when I finished it.  This morning, I asked her if she liked it while I was photographing the finished project.  She told me the starfish needed smiles.  I think I know who ProvoCraft consulted with for carts like Simply Charmed!  I have a feeling she will be adding to this project once it gets to her room!


I also wanted to share a super quick little project that I did on the Imagine:
This is the 3D frame from Sesame Street Seasons, cut at 7".  I used a pattern on Cricut Imagine cartridge Hopscotch.  The 'Best Friends' topper is from Imagine More, cut at 1.6".  Super fast and the perfect size for a 2-1/2" x 3-1/4" wallet size (standard size in Windows Gallery).  I added some flowers I had laying around that I cut out from Mother's Day Bouquet -- just some that I had cut for fun when I first received that cartridge.  The colors just happened to match.

Thank you for visiting my blog today!

But wait! There's more! Click 'older posts' above!

But wait!  There's more!  Click 'older posts' above!