Thursday, December 16, 2010

Gift Wrapping!


I have always enjoyed gift wrapping.  I remember, in the 80s, being obsessed with stamping and gold paint on brown mailing paper to make my own wrapping paper after watching a lady on PBS doing that.  You may have heard of her, Martha Stewart.  (I have been a fan of her projects forever.)  She explained how to use dried lemon slices, cinnamon sticks, and fir branches to decorate boxed gifts.  (I bought my food dehydrator just for that use when I was 18.)  That interest in bow-making, paper decoration, and gift design started in my teens and has only grown with the use of my sewing machine and Cricut die cutting machine.

I love using my Cricut for package decoration.  This Christmas, with my busy work schedule, I have had to create a gift tag "factory" in my craft area to get it all done!  I have simplified this year, choosing to only create tags instead of fully decorated boxes and bags, but I love how these have turned out and thought I would share some of  them with you!
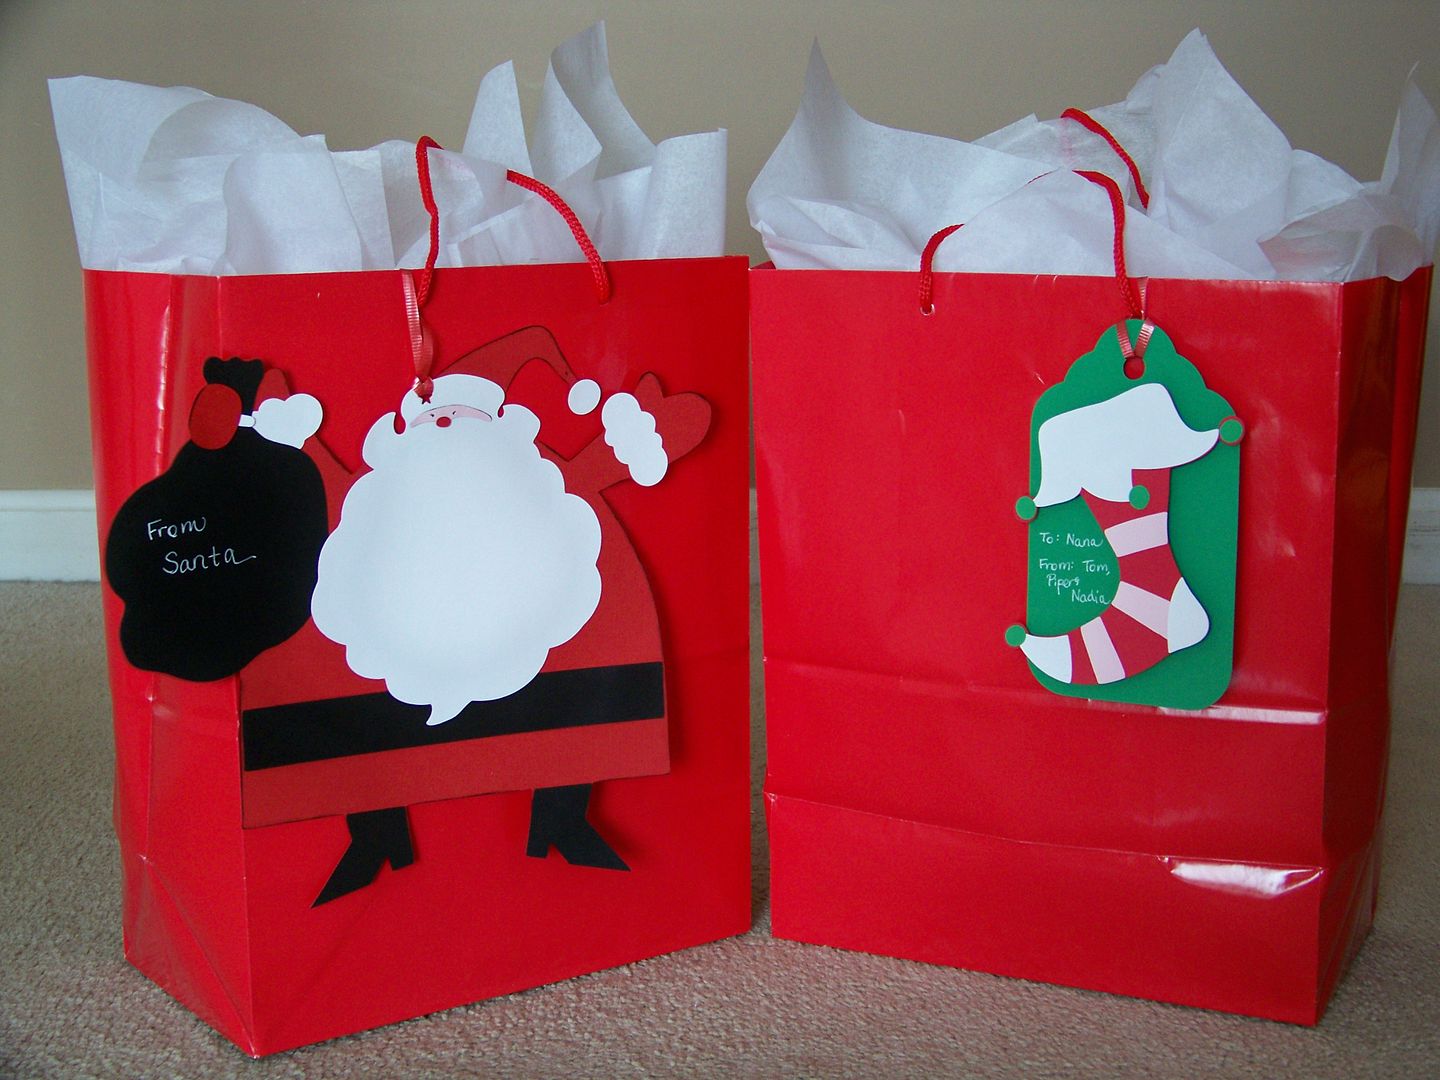
The Santa tag was cut from Jolly Holidays at 9-3/4".  The stocking was also cut from Jolly Holidays and cut at 5".  The base is one I had on-hand from George and Basic Shapes.  I used a Sakura Jelly Roll pen to write my messages.

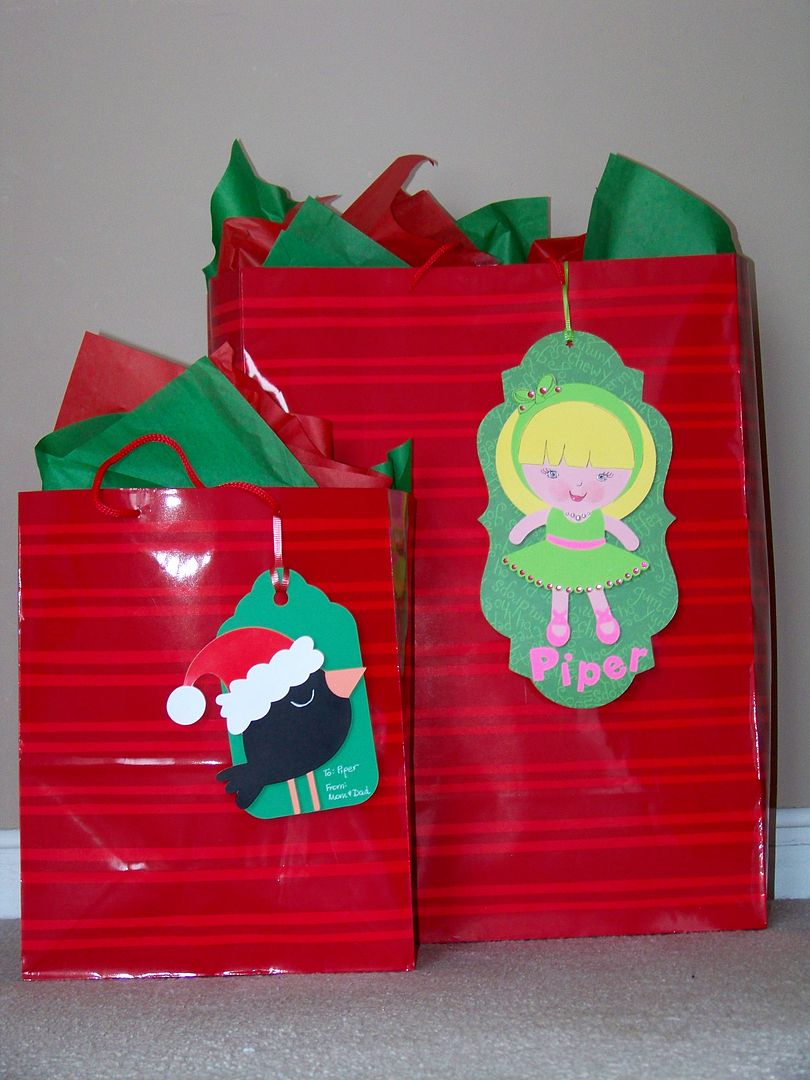
The Santa Bird is cut from Jolly Holidays at 5".  The base is one I had on-hand from George and Basic Shapes.  The ballerina is from Twinkle Toes, cut at 8"; the base is from the same cart, cut at 6-1/4"; the lettering is from Mickey Font, cut at 1".  I drew on the face.
These are bucket gifts for the ballet teachers.  The pails were from Walmart for $1.  I bought tons of them this year!  The ballet shoes were cut from Twinkle Toes at 3-3/4".  The base is from George and Basic Shapes cut at 3-3/4". 
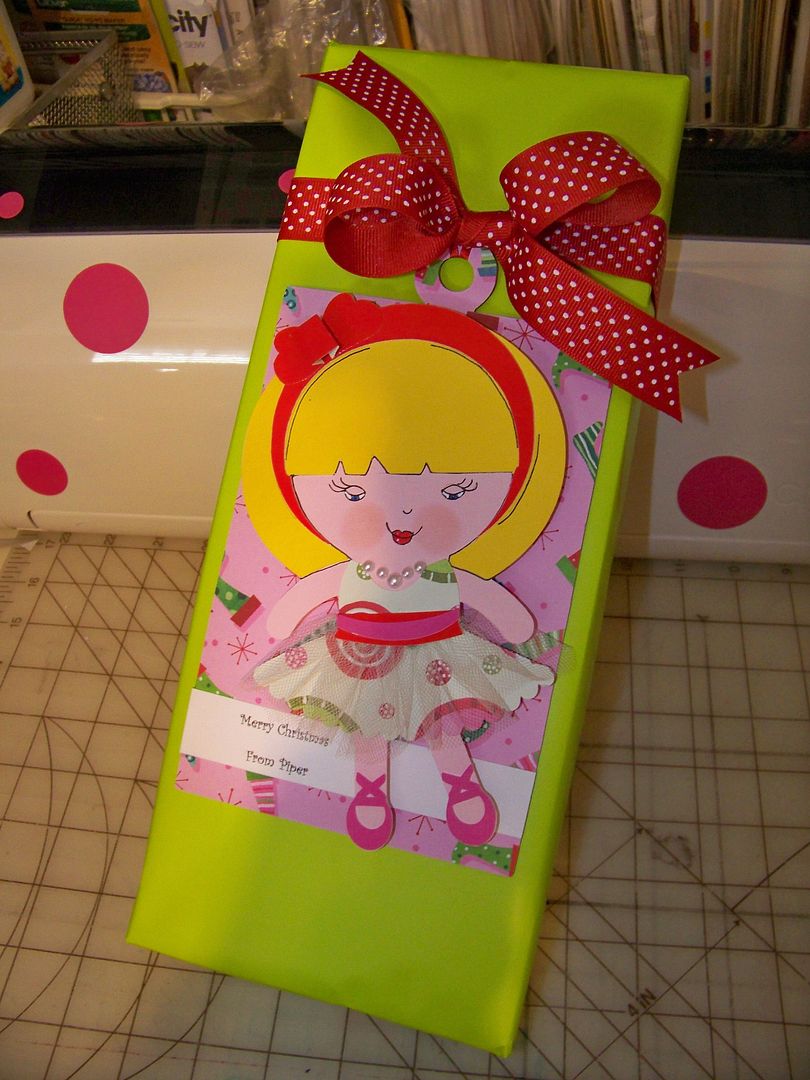
This gift was for a swap at my daughter's dance school Christmas Tea.  The character is from Twinkle Toes cut at 7".  The base is from George and Basic Shapes cut at 7-3/4".  I drew on the face.
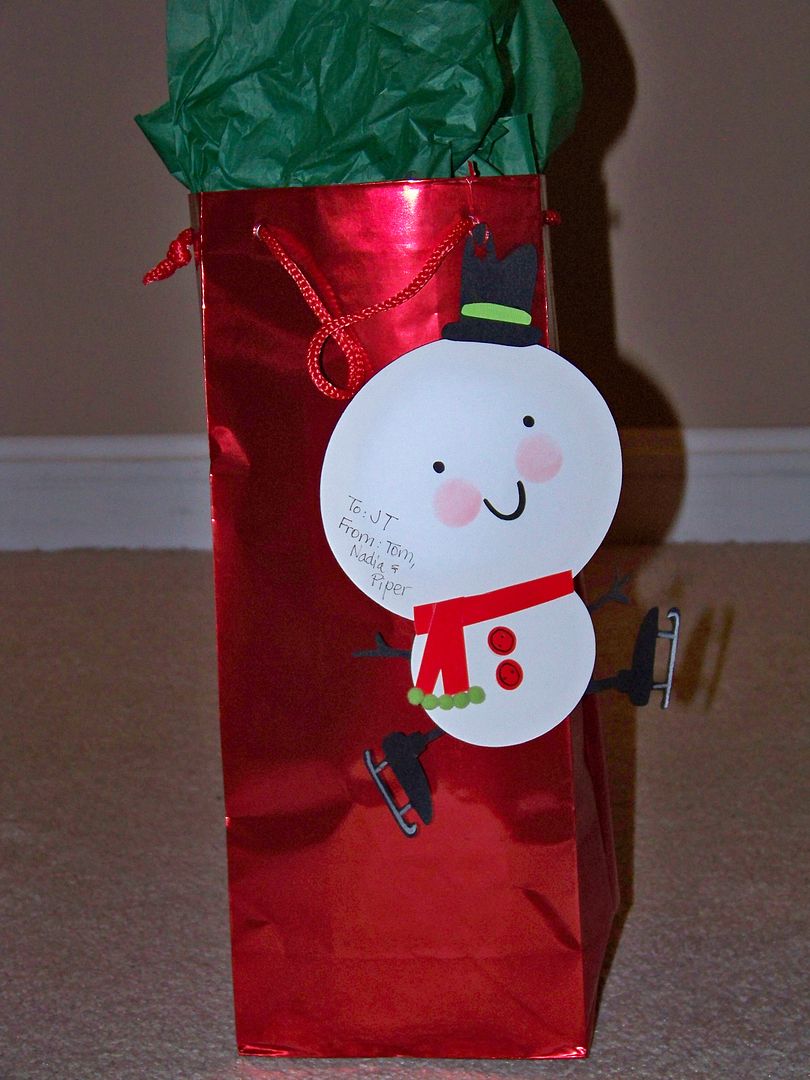
This snowman tag was cut from Jolly Holidays at 8". 
This tag was cut from Jolly Holidays at 3".  I drew on the face and details.
This is a candy dish I just found at a local department store.  This is a teacher gift.  I cut the snowman from Winter Frolic (page 31) at 4-3/4". 
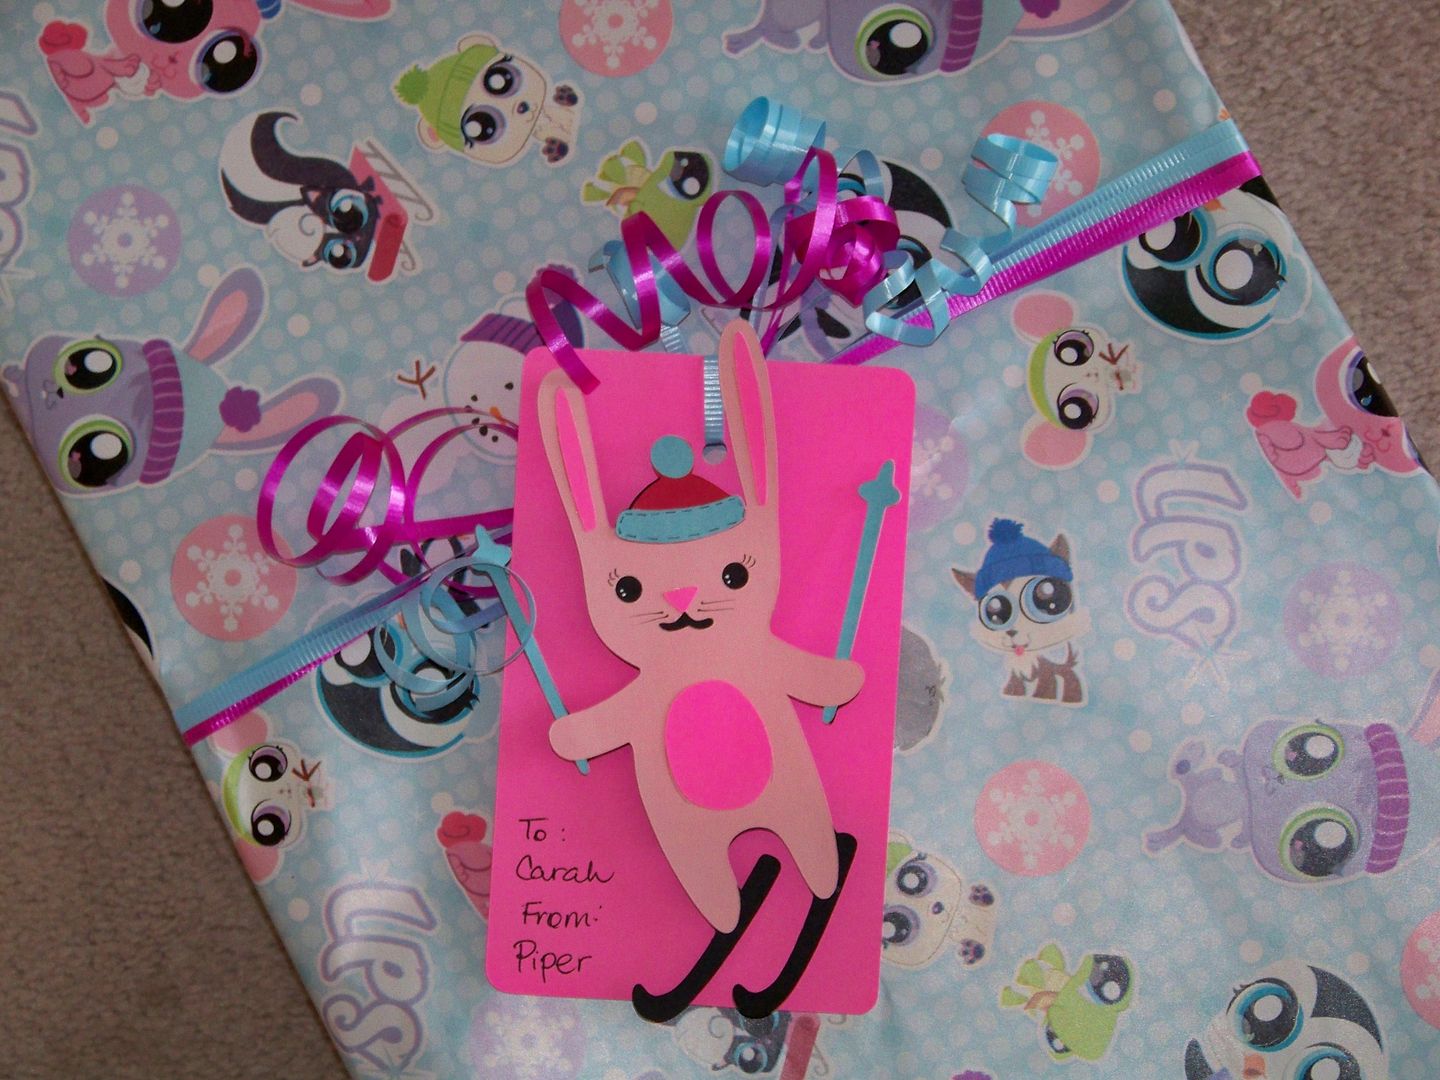
This ski bunny is from Winter Frolic (page 33), cut at 6".  The base is from the same cart and page, cut at 3-1/2". 
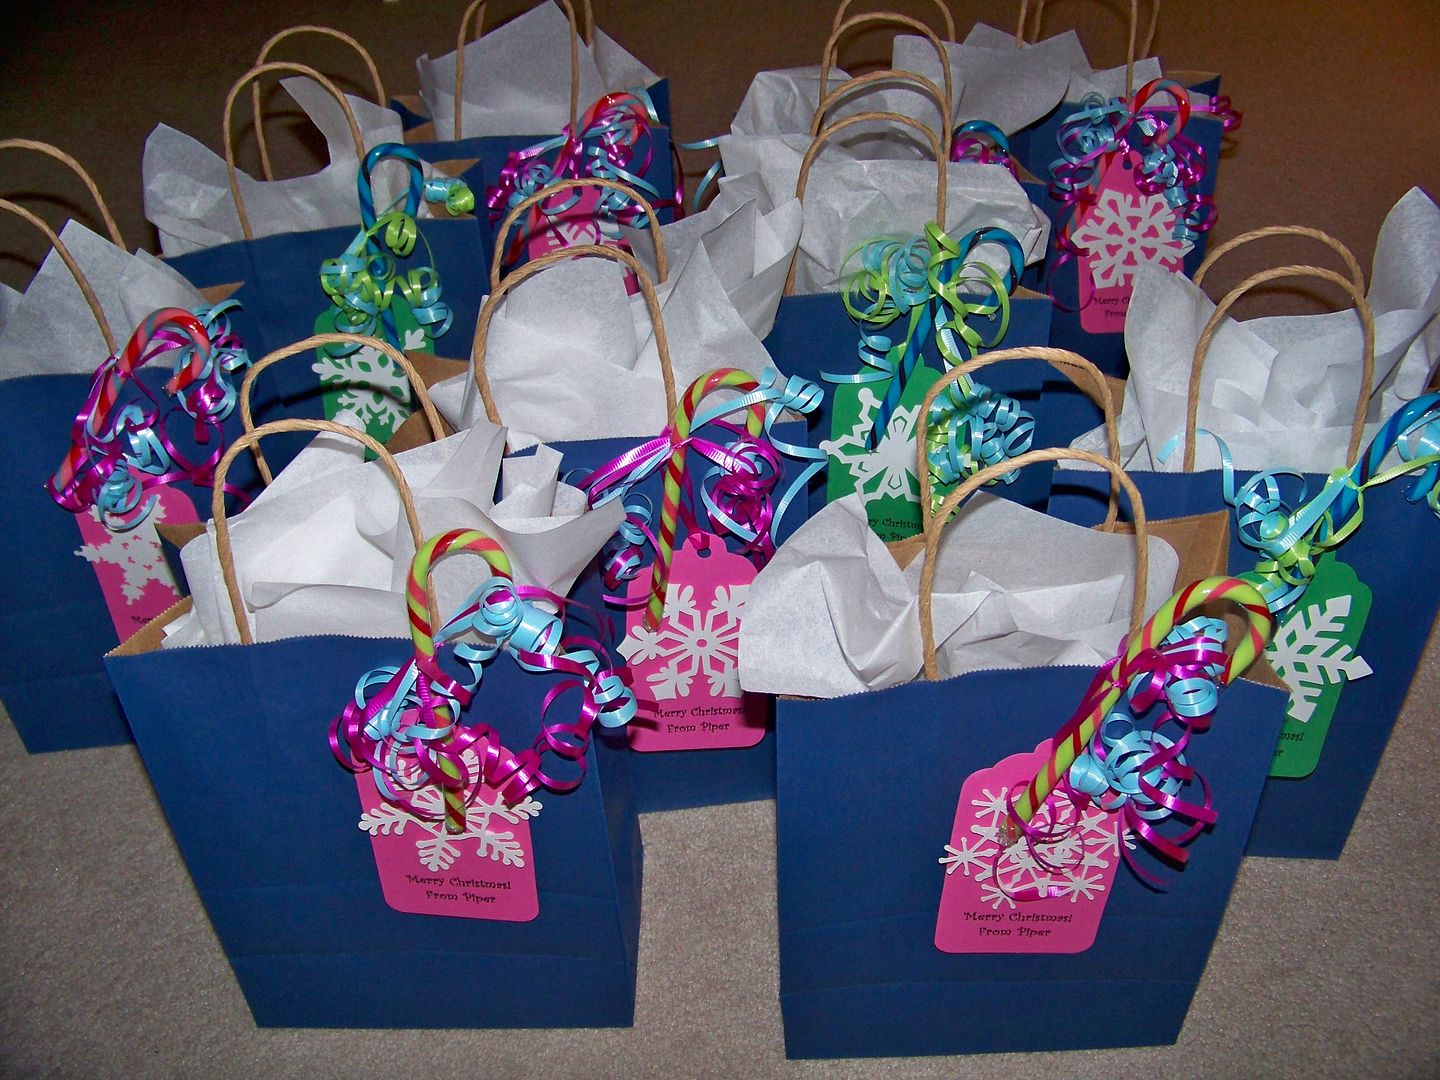
These are gifts for all the kids in my daughter's class.  These are bags I found at Deals packaged as 2/$1.  Who says blue and pink don't say "Merry Christmas"!?  They each have a unique snowflake, cut from Winter Lace at 3-1/2".  The base is cut from George and Basic Shapes at 5-1/2".  I found Jolly Rancher candy canes in fun colors and lots of great colors of curling ribbon for $2 at Walmart.
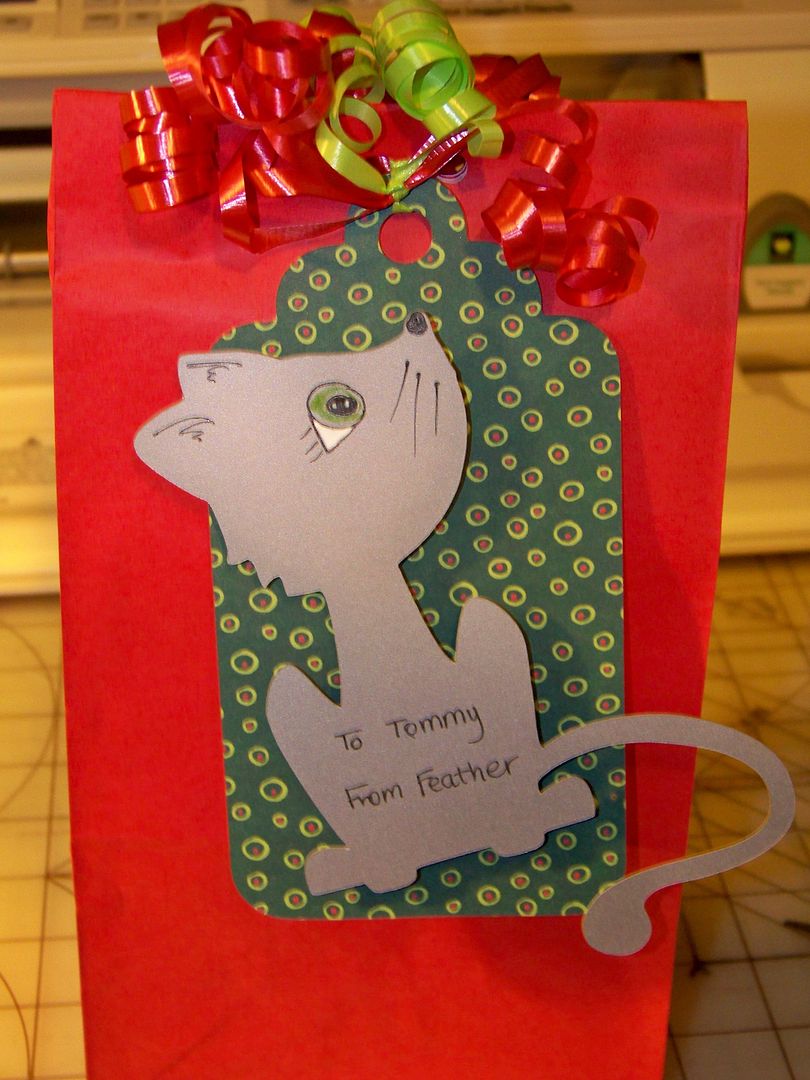
This is a gift from our cat!  I used Four Legged Friends (cut without the layers and simply hand-detailed) at 5-1/2".  I used a tag from George that I had on hand.
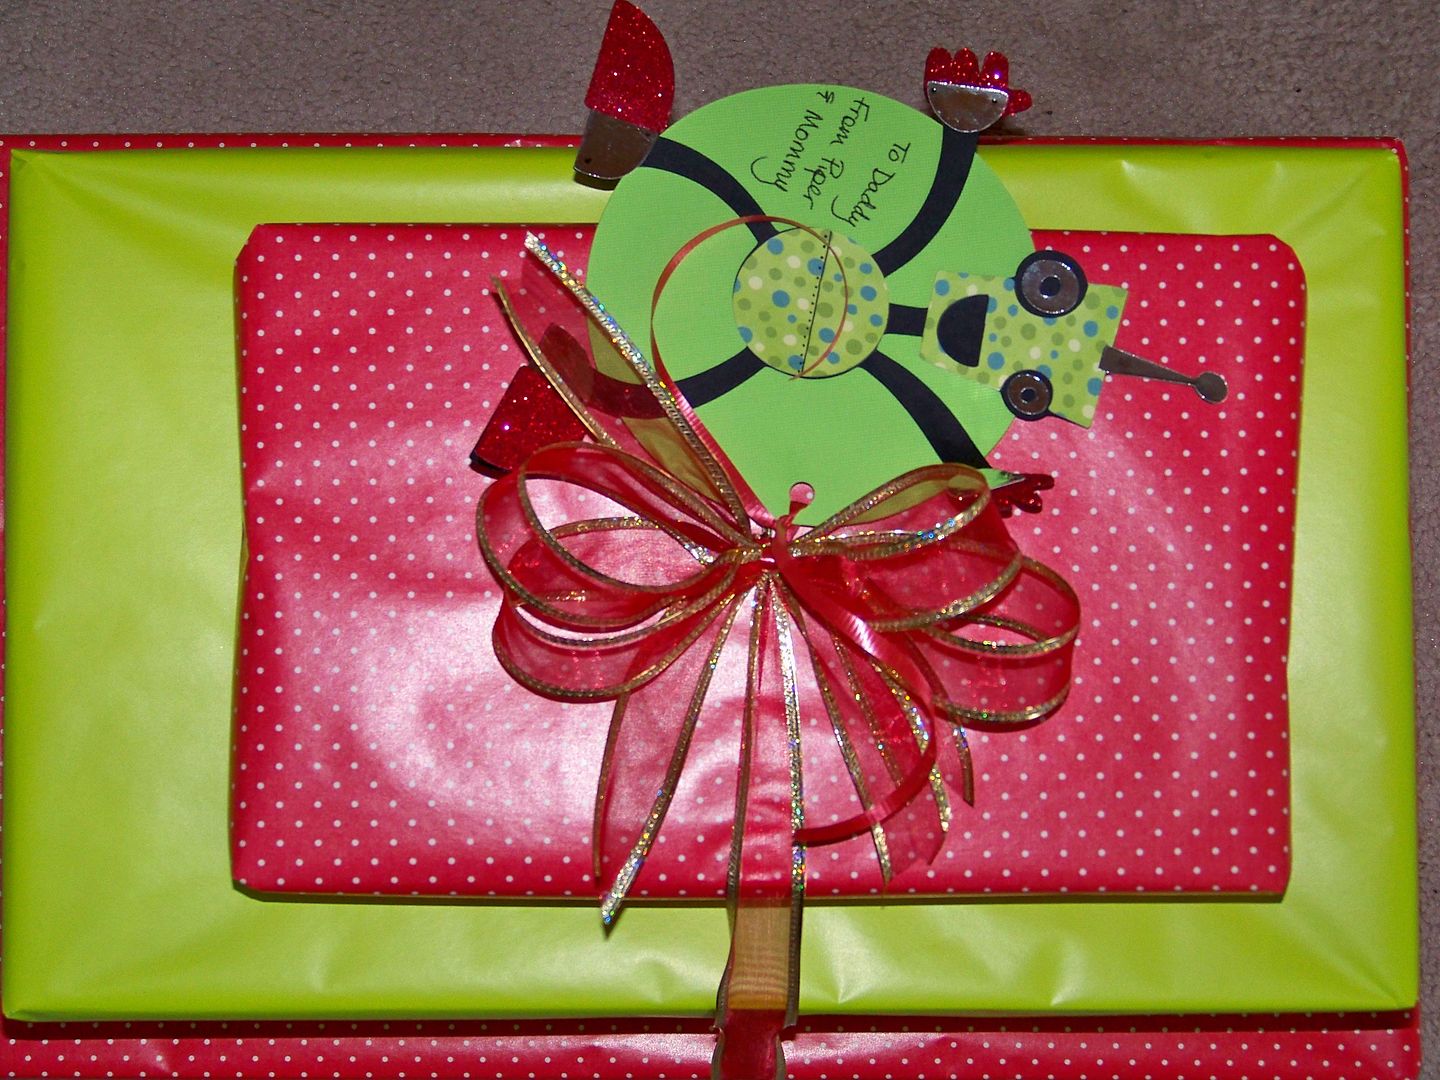
Christmas robot?  Yes, if the recipient is a toy robot collector!  This tag is cut from Robotz at 7".  The circle base is from George and Basic Shapes, cut at 4-1/2".  

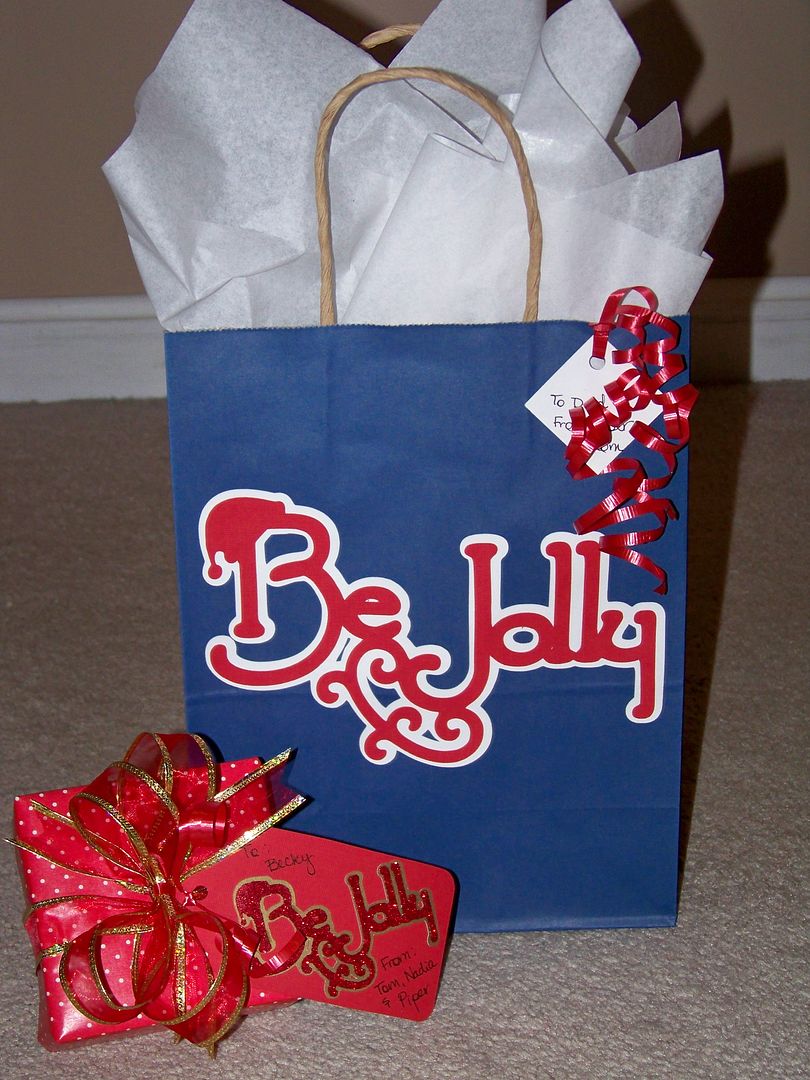
Both 'Be Jolly' tags were cut from 3 Birds on Parade at 2" and 4-1/2" respectively.  The base for the small tag is from George, cut at 4-1/2". 
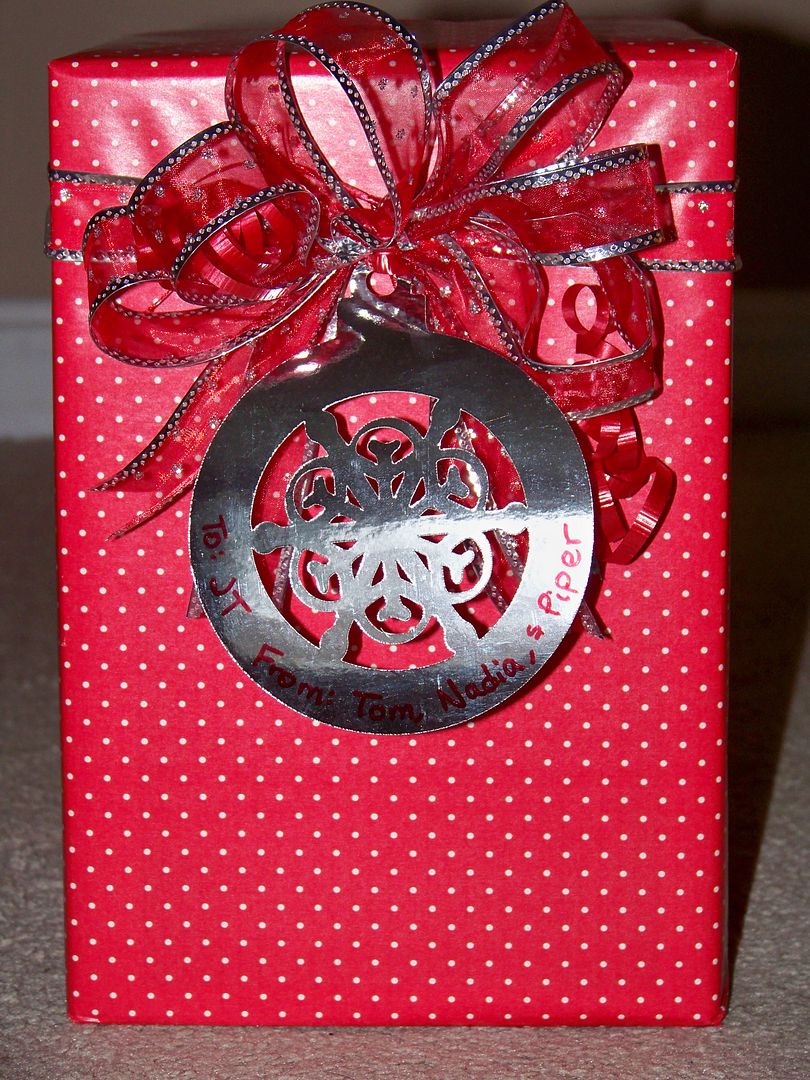
This ornament tag was cut from Joys of the Season (page 61) at 4-1/2". 
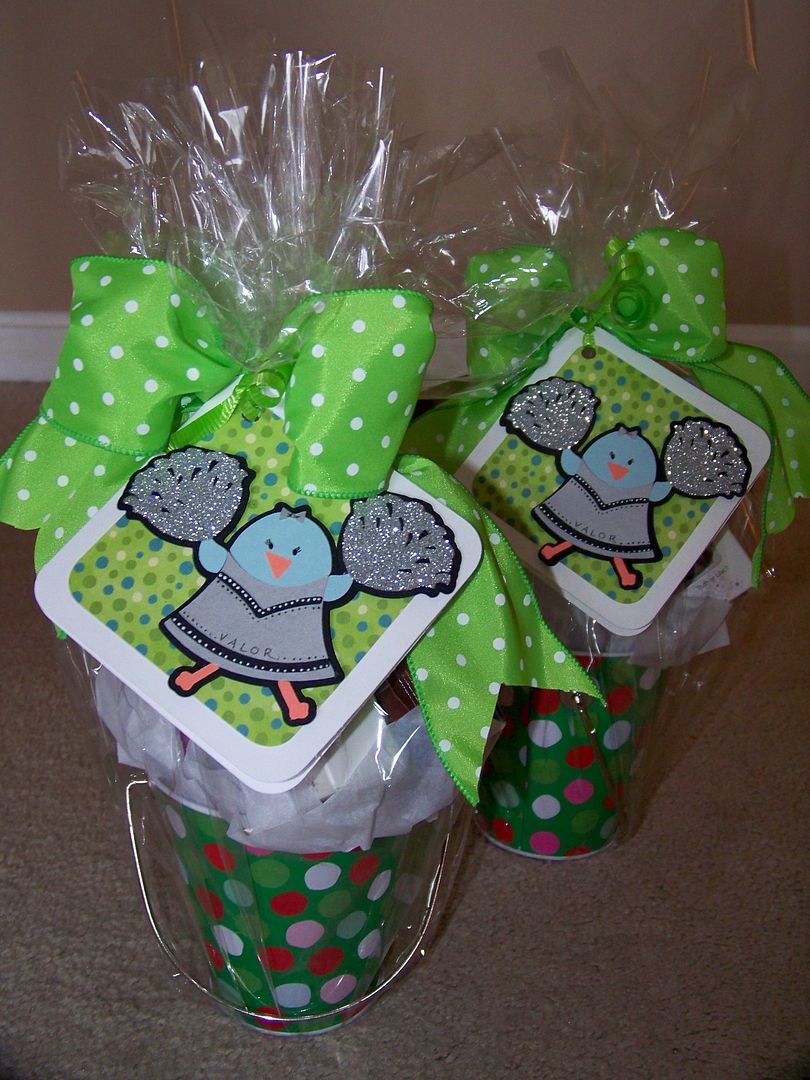
More of those Walmart buckets!  These are for the cheerleading coaches.  The tags were cut from Going Places at 4".  It makes a little card, perfect for a little message inside!  The cheering bird was cut from 3 Birds on Parade at 3".  The poms were put through my Xyron and glittered. 
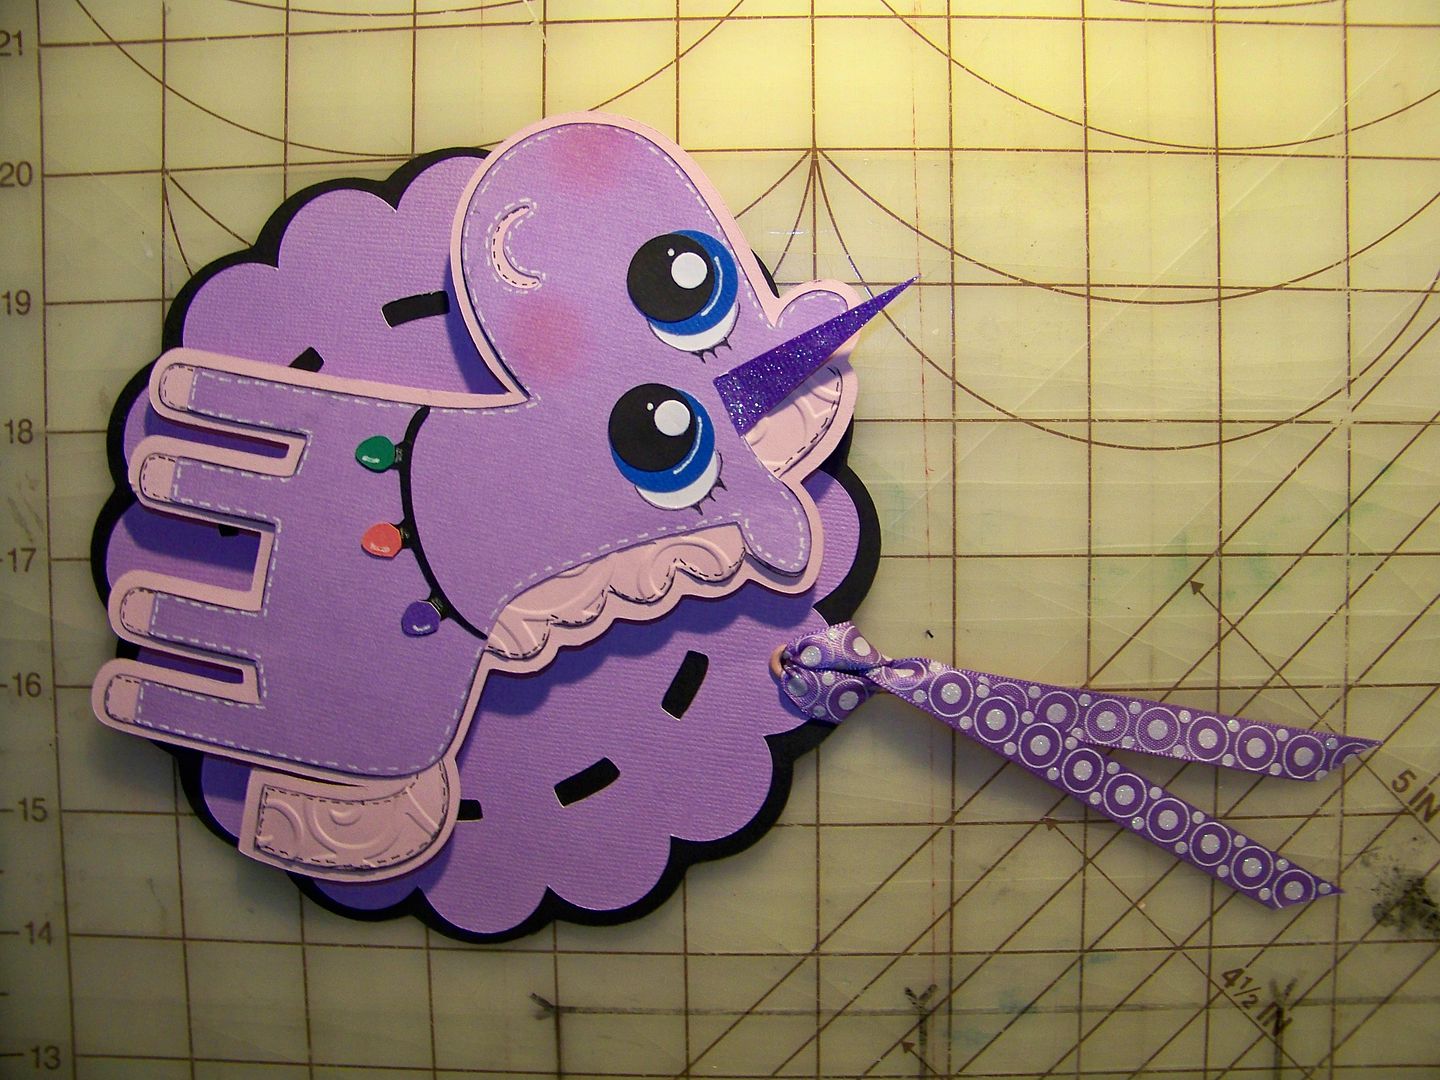
I created a couple of tags to go with the Littlest Pet Shop paper I found.  My daughter calls these "big-eyed creatures".  I used 5/8" and 3/4" punches to alter the eyes.  The unicorn was cut from Create-A-Critter at 5" (page 59).    The lights are from the same cart (page 73), cut at 2-3/4".  I detailed with a Sakura Jelly Roll pen, Zig Millenium 01 pen, and gold gel ink.  The base was cut from Mini Monograms (real dial size 5-1/2" stitched and 6" for shadow). 
The penguin was also altered from Create-A-Critter at 5".  I found a fun photo clip as a tag holder. 

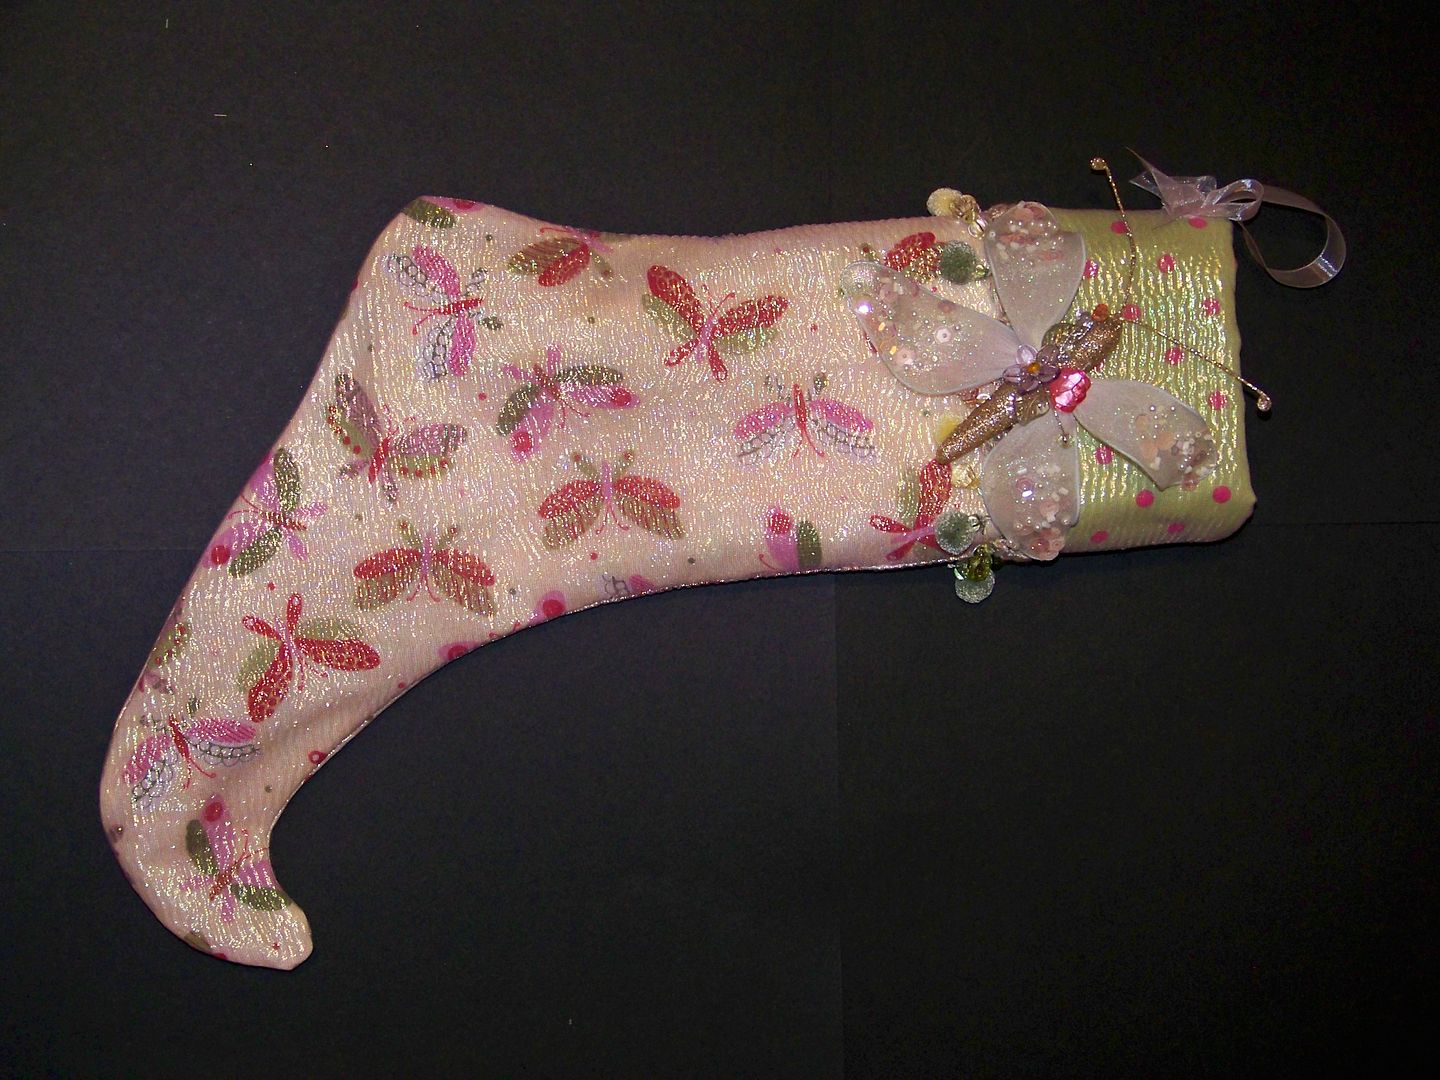
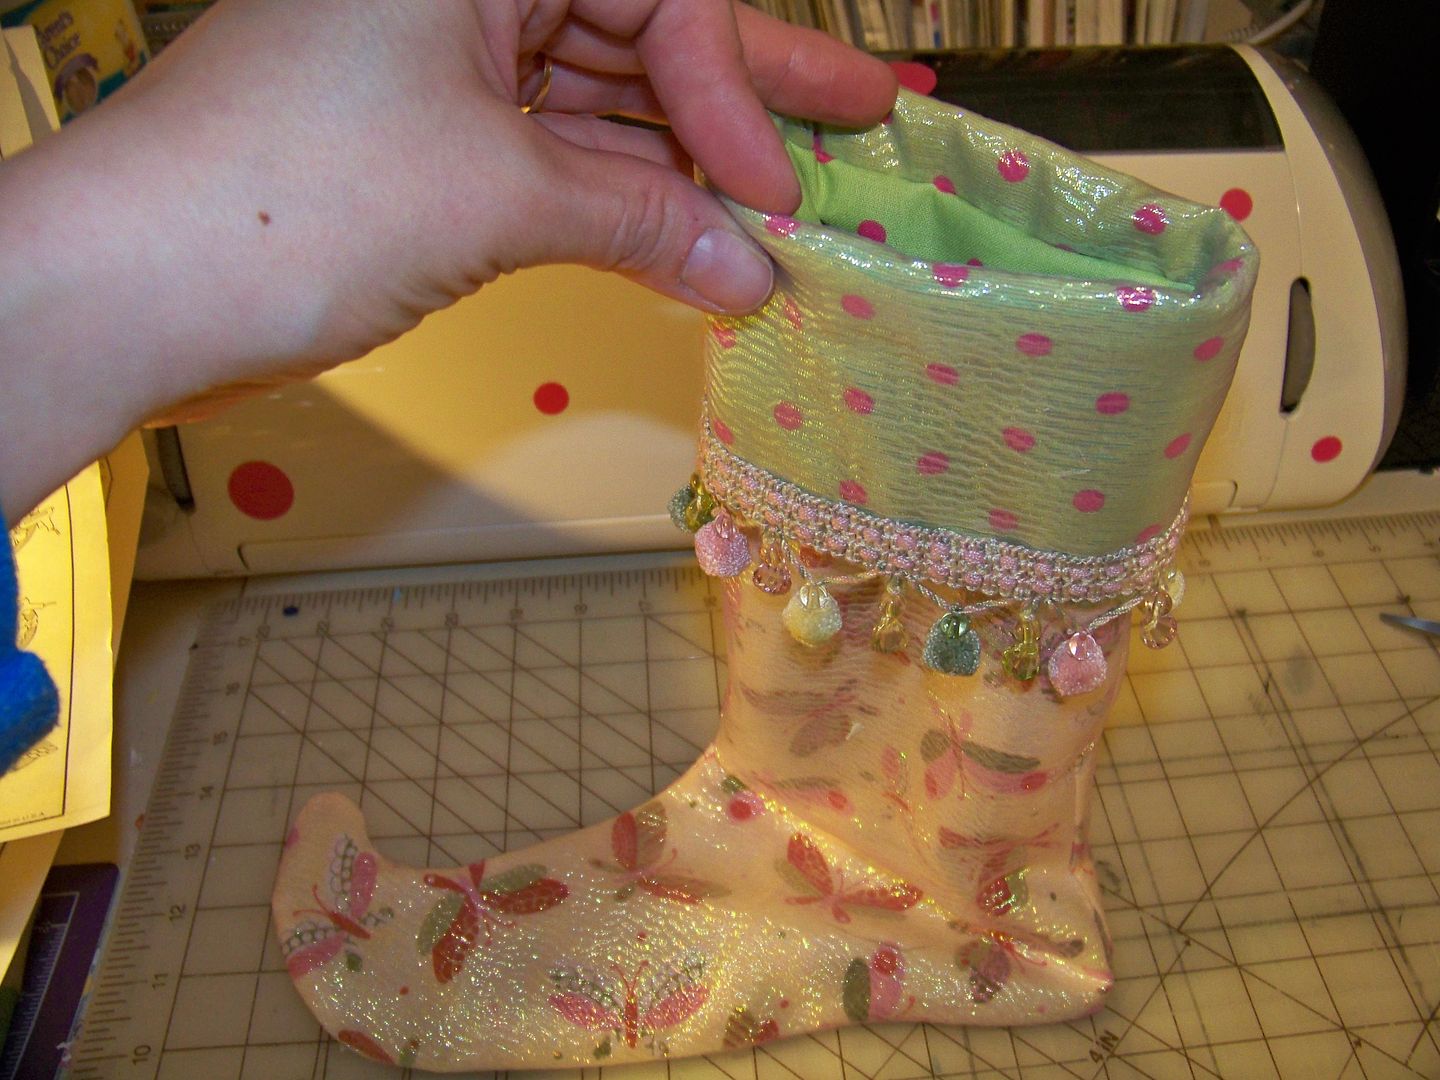
In addition to paper wrapping, I love to make stockings as a gift wrap.  This year, I only made one.  It was for a Circle message board swap.  One of my favorite ways to add sparkle to sewing projects is to add a sparkly, sheer overlay to my base fabric. 


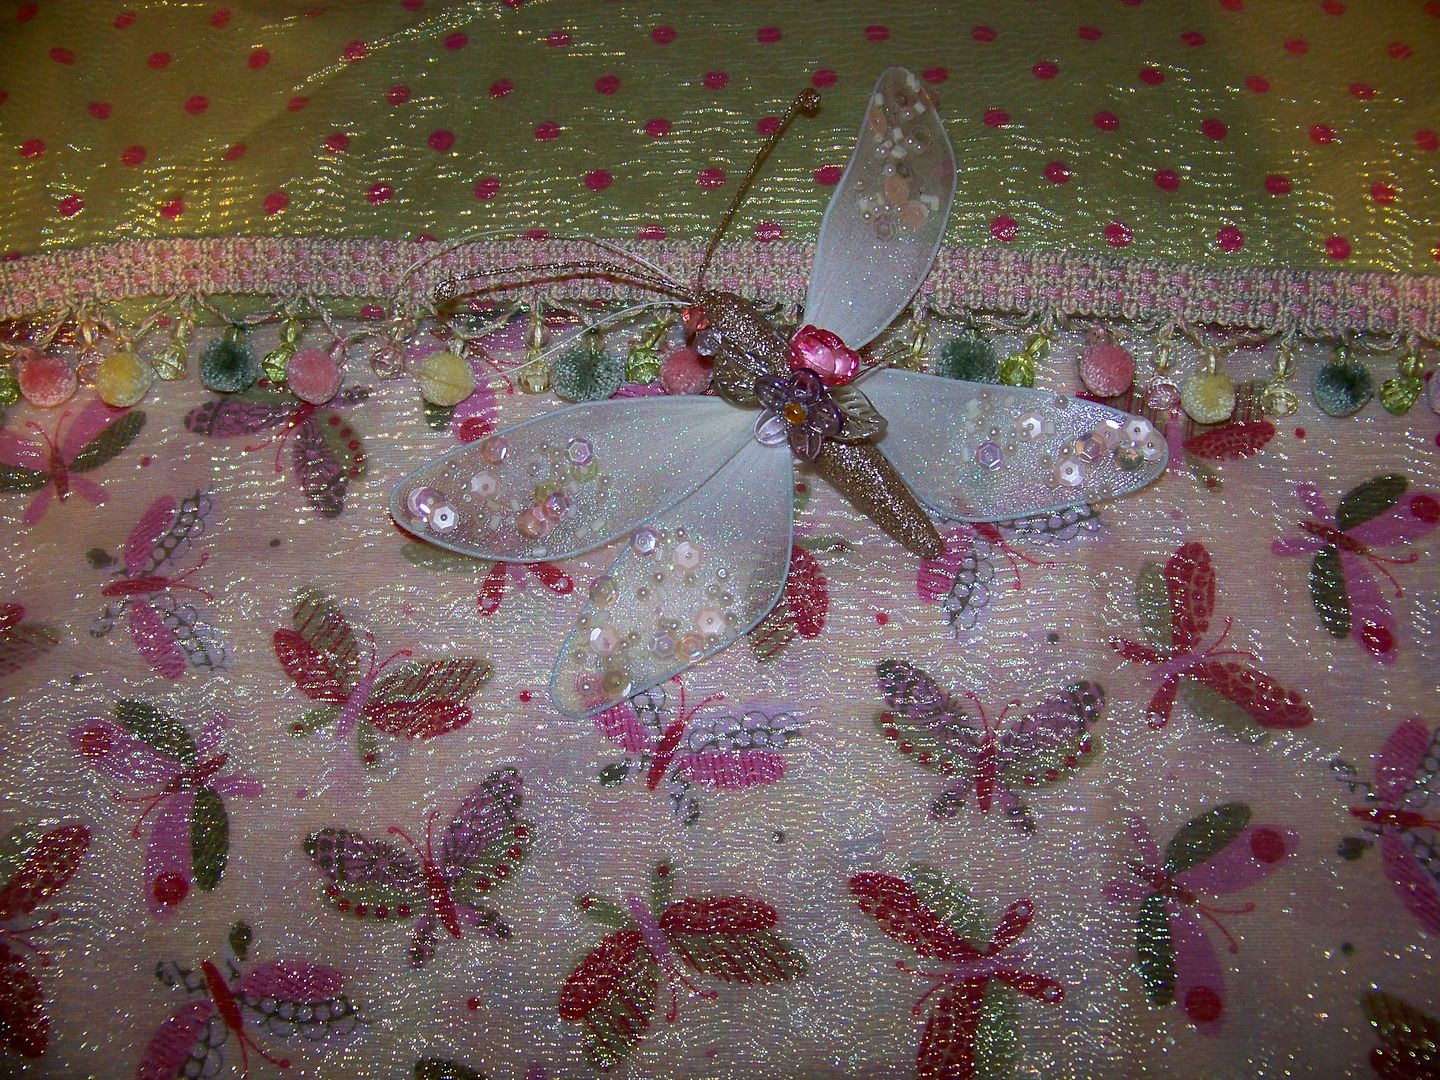
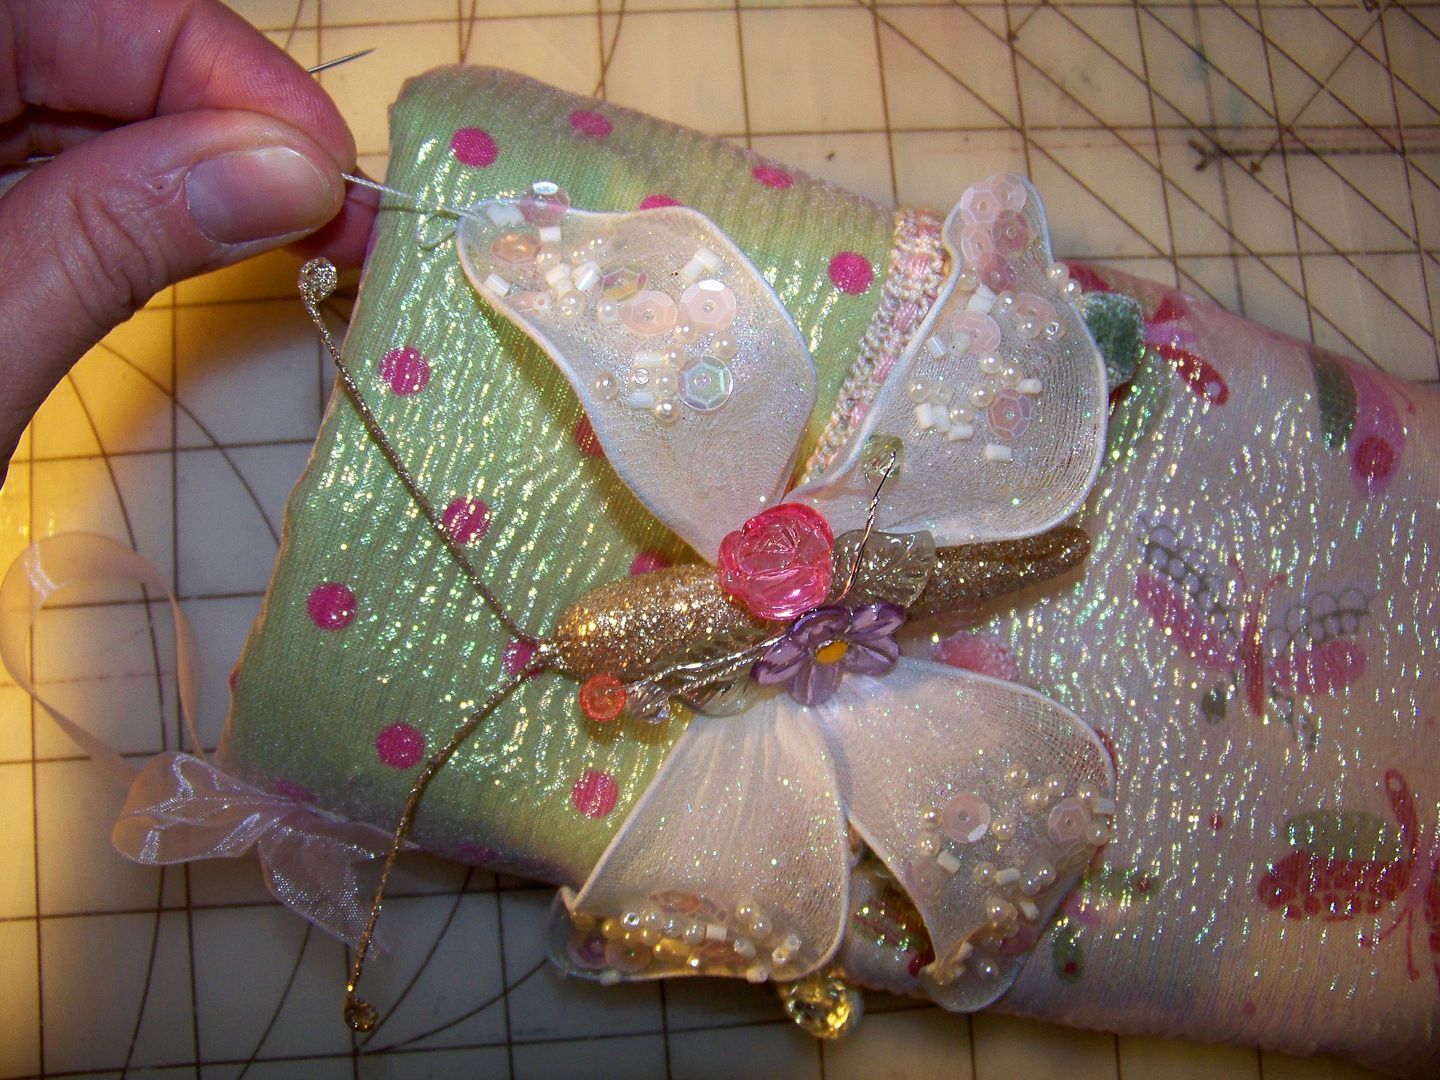
Using this technique, I was able to match the butterfly ornament that would be my stocking embellishment.  This was a purchased ornament that I loved.  
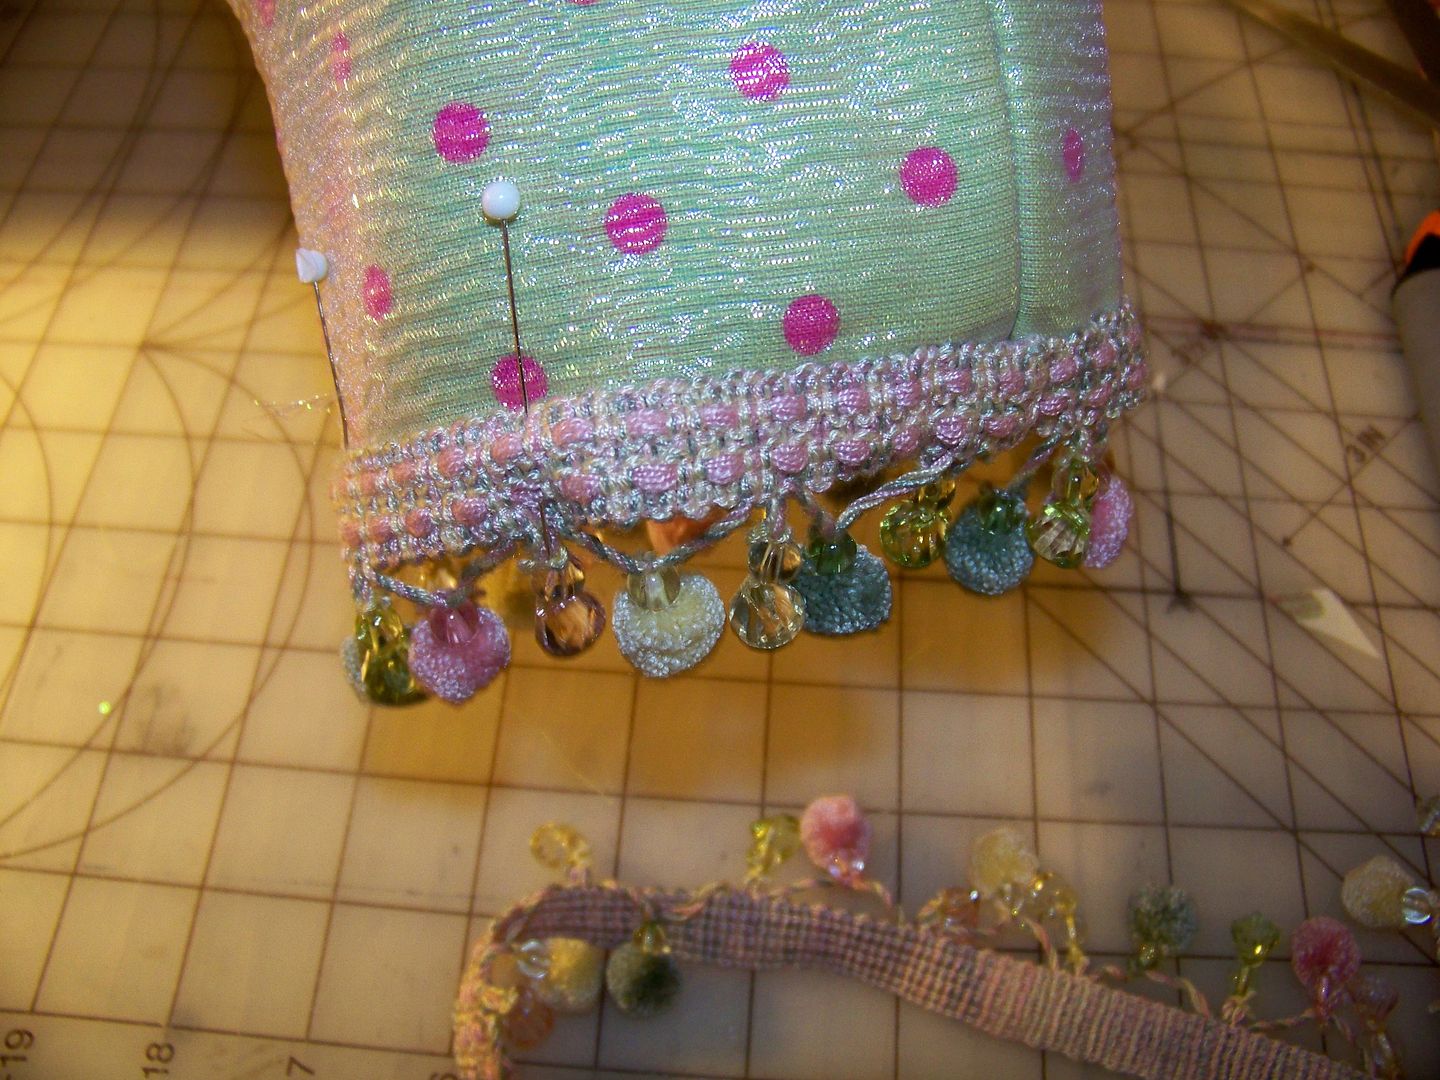
This stocking was made for someone who has a connection to the symbol of butterflies, so I knew I would be using that image all over this stocking!  I had a fun polka dot to use for the cuff and lining.  I found a trim that blended with the other materials.

I have a favorite stocking pattern that I use every year, over and over again, but any stocking will do and making your own pattern can be as easy as tracing a stocking you already have and adding seam allowance.  My stocking pattern has a curled up toe and a cuff.  I love those features!

When cutting out, I simply cut duplicate pieces of the sheer.  I sandwich them with the base fabrics and stitch them all together.  I also use a felt or batting in the cuff to give it body.  You can simply interface that area, but I like the loft!.
Simply stitch around your stocking and trim all seams.  For the cuff, I cut it so there is only one seam.  I cut a decorative cuff (with the sheer overlay) and a facing.  The facing is not necessary if you will be stitching your cuff down in place.
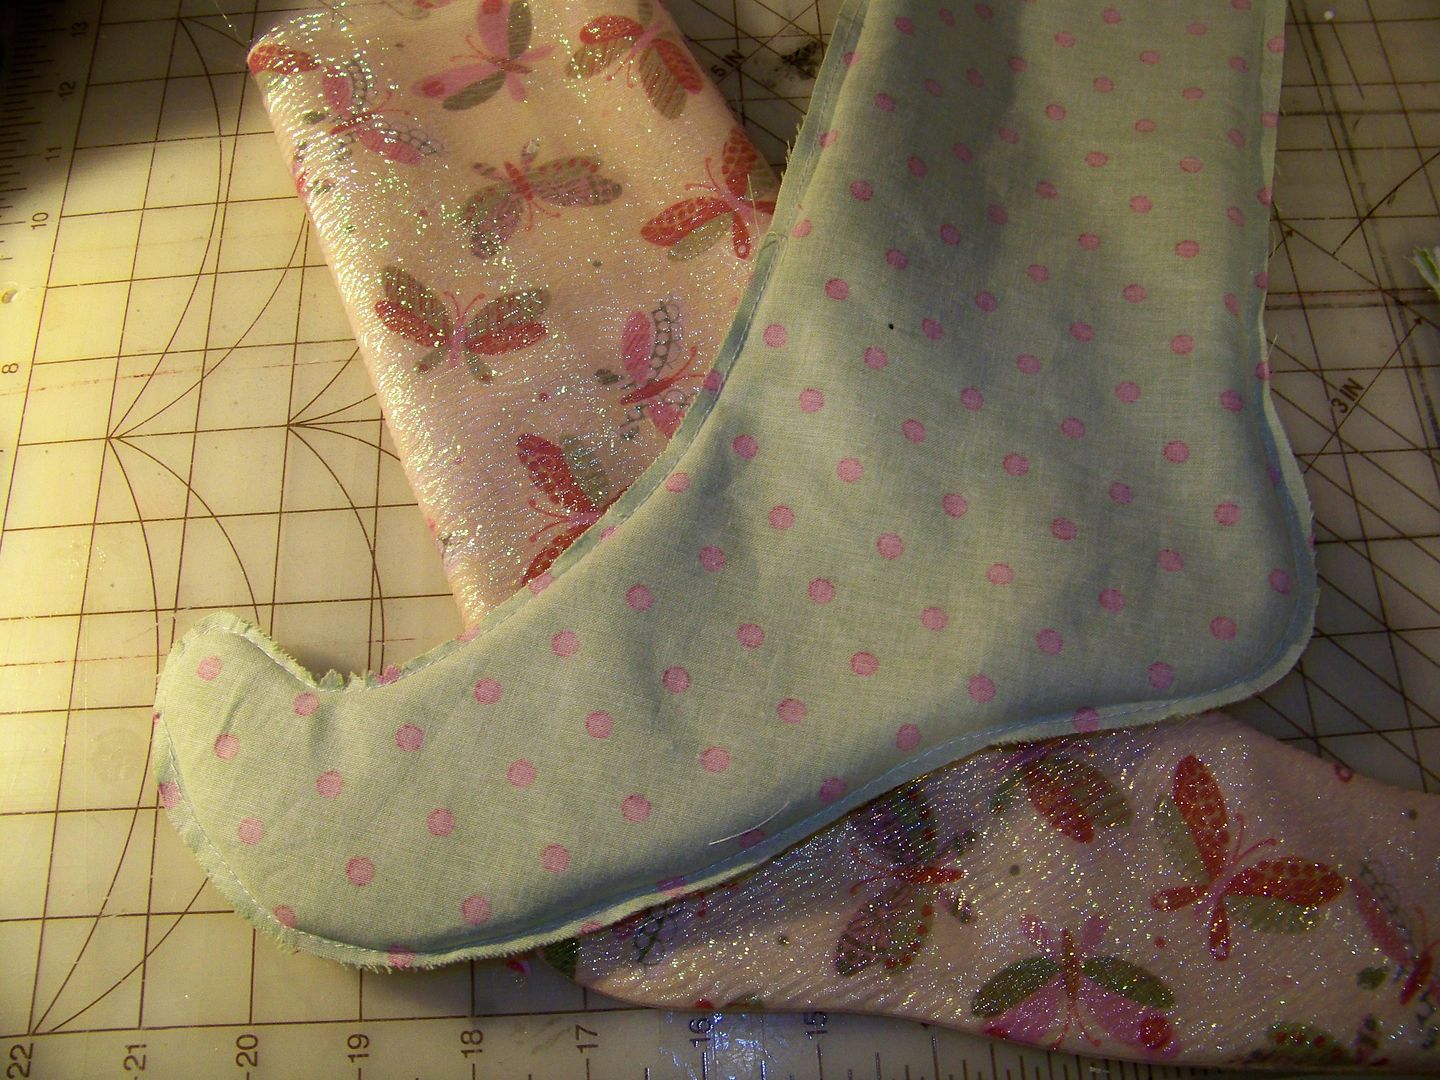
I like lined stockings.  The person who receives a stocking tends to really examine it to get out all of the goodies, so I like it to be finished on the inside!  Simply cut and trim using the same pattern piece you used for the outer stocking.  I tend to turn it and press and then turn it back so the right side is on the inside, but turning is not necessary!
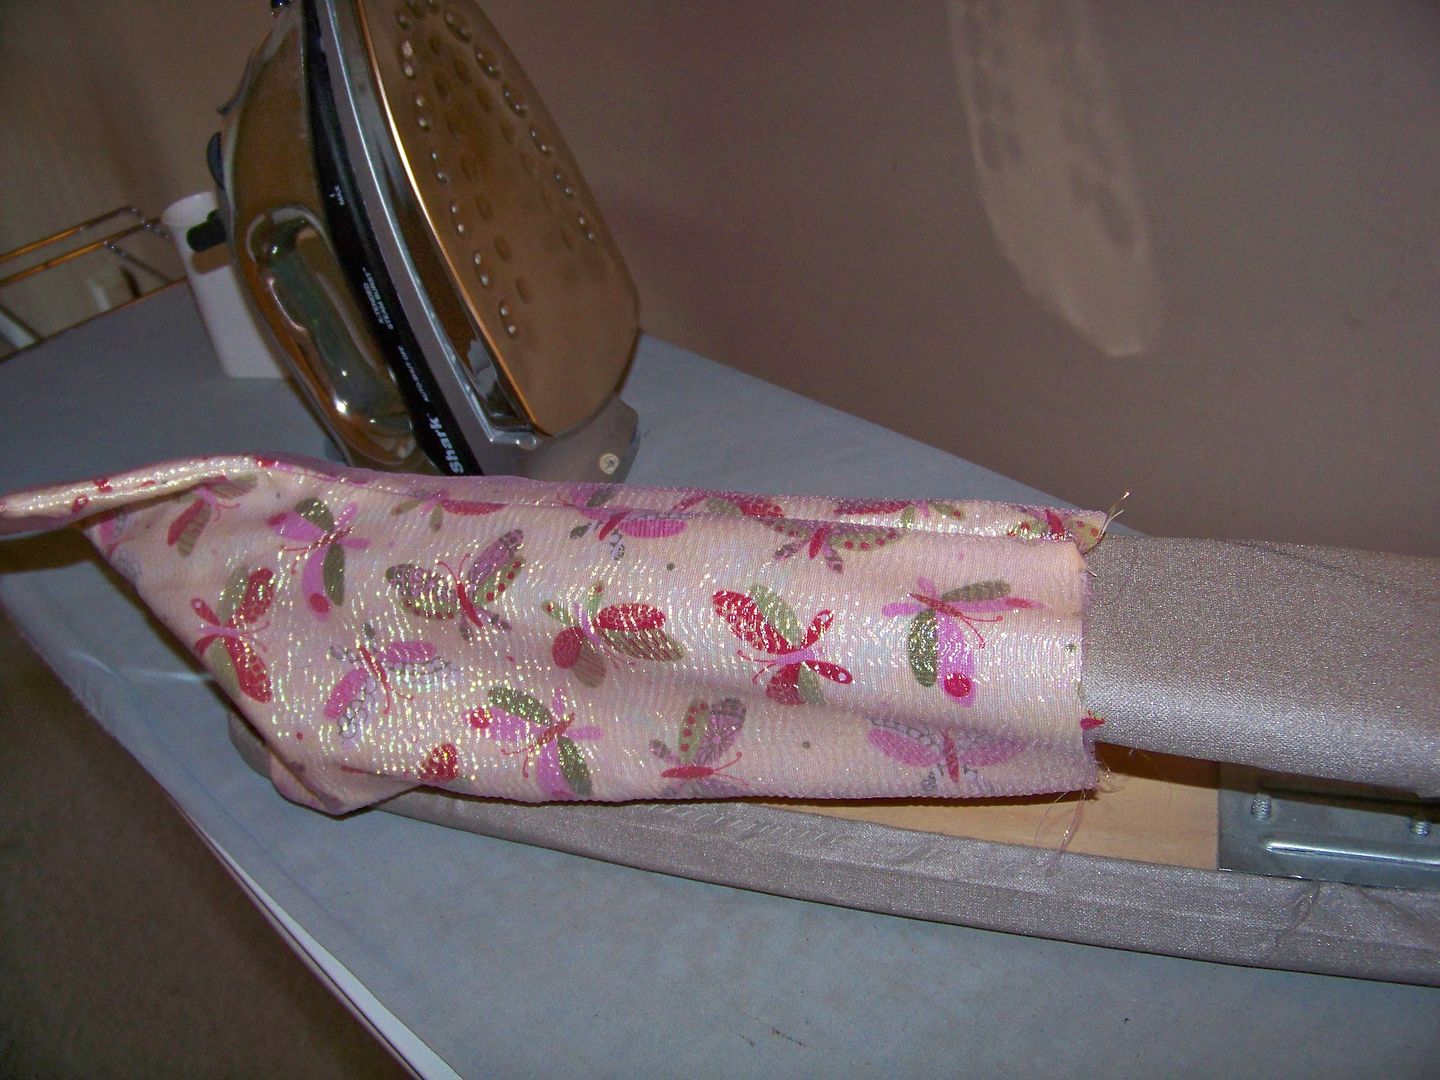
When pressing your stocking, press open the side seams using a sleeve board.  I press the toe end flat!
The cuff is next!  Separately, sew the side seams of the decorative cuff and cuff facing (if you are sewing a facing).  Then, place them right sides together and stitch the upper edge to join them.  This is the edge that will get turned down and embellished.  Turn so the right sides are out and press the seam flat.  I stitch on the decorative trim at this point.
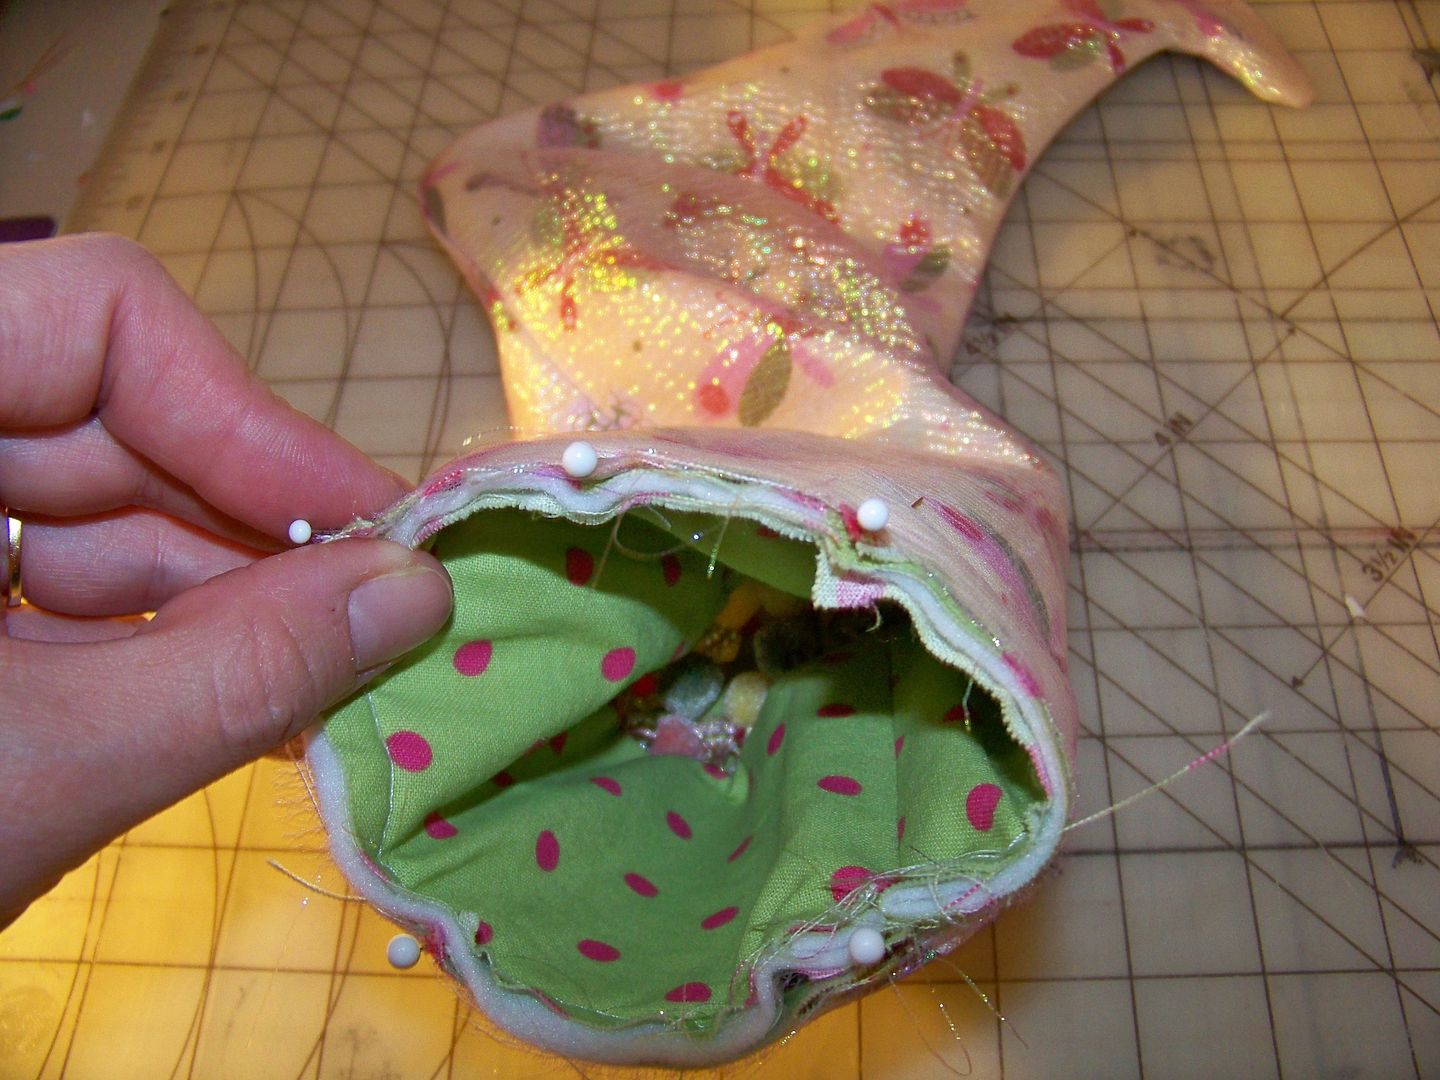
Next, stuff the cuff into the stocking.  The right side of the cuff is next to the lining of the stocking with all raw edges even.
When you look into the stocking at this point in the construction, you see the facing side of the cuff inside the stocking.  Stitch the top seam.  Trim the raw edges to about 1/4".  Turn your cuff out.


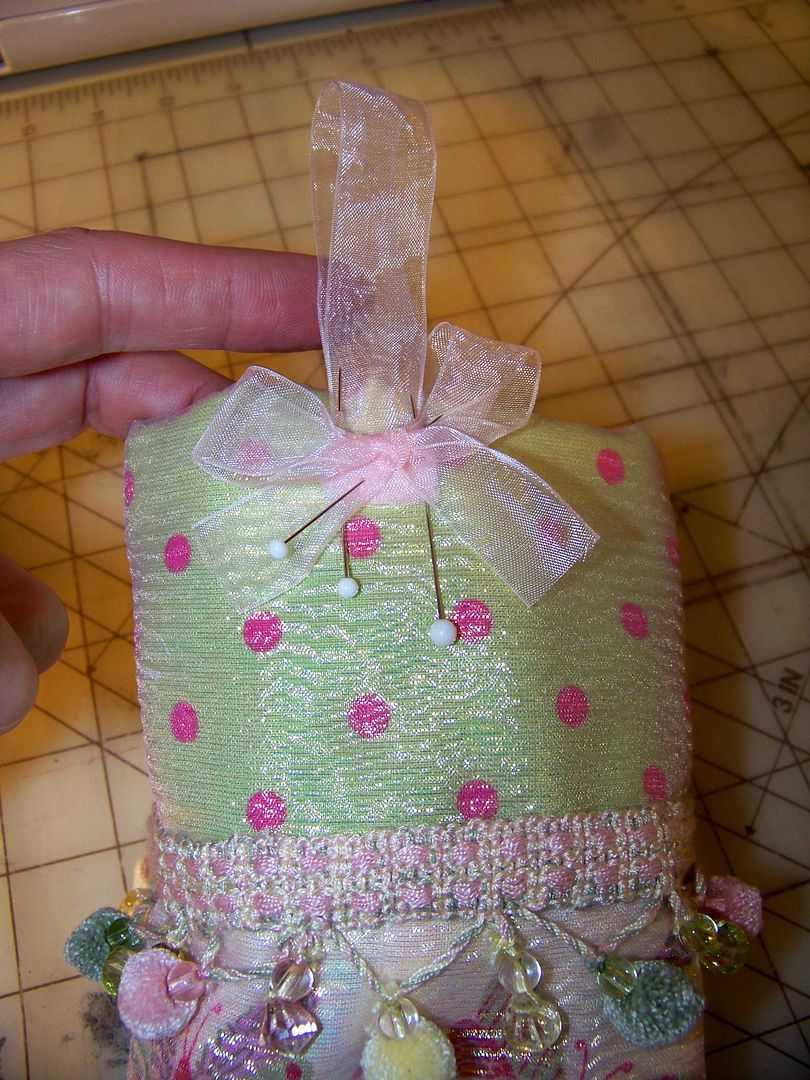
I add a decorative hanger to the outside of the stocking.  I like this organza ribbon with the other material choices!  I hand-stitch this in place.  I also tack down the cuff.
I tack on the ornament with a few hand stitches.


Thank you for looking at my gift wrappings!  I hope you are having fun purchasing gifts and making some too!

Sunday, December 5, 2010

Oh Blog, how I have missed you!

I cannot wait to get back to my passions:  crafting and writing!  All of my thoughts these days are of ticket sales, staffing, working on the books, and promoting; it has been the death of creativity!  I have always believed that spreadsheets and diesel smoke kill art.... or maybe that is just how it works in my brain!

3D Rapunzel
Straight from the Disney Family Website!  Scroll down for the links!  You make this from a PDF.
I have been on a crafting and blogging diet since before Thanksgiving as we gear up for this, our company's final event of the year and our busiest time of year.  We own a motorsports company that produces, insures, and promotes truck and tractor pulls (would you guess that of me??).  We are less than a week from our indoor event, The Bluegrass Super Pull, at the Alltech Arena (made famous a couple of months ago as the venue for the World Equestrian Games) at the Kentucky Horse Park.  If you have any motorheads, gearheads, or grease monkeys in your world, send them to Lexington, Kentucky December 10 and 11! 


This event falls on the same weekend as my wedding anniversary (my husband will really owe me one!) and the Mother-Daughter Christmas Tea Party with my daughter's ballet school.  Happily, my sweet mother-in-law (known as 'Nana' around here) will be escorting Princess Piper to the party, but I will miss the special dance they have choreographed.
Tangled Tower
This is also made from PDF printables on the Disney Family website! 
I did take time over the Thanksgiving weekend to take my daughter and nephew to see Tangled in 3D.  That was a beautiful movie in every way.  The artwork for that animated film was spectacular and has me thinking about magical hidden towers and enchanted villages.  If you have a little girl in your world, you have to take her!  Check out Disney Family's fantastic website that includes PDF's to make your own Rapunzel and her tower (both pictured above, as well as the bracelet below)!  I think combining their PDF cut-outs with Cricut-created flowers and accessories would be a fun project!  There are all kinds of crafts and recipes celebrating the movie on the website.  My daughter and I will be spending several days of her Christmas vacation working on these projects!
Tangled Shrink Charms
Don't you LOVE this Tangled charm bracelet?!
This time next week I will be back to crafting after a weekend of diesel fumes and dirt coated on my laptop.  I cannot wait to let my mind think about Christmas, crafting, and sharing on this blog!

Tuesday, November 23, 2010

Thanksgiving, Thankfulness, and Thanks!

Tuesday of Thanksgiving week has me exhausted but so grateful for all of the blessings in my life!  I have a wonderful husband who loves his family and works so hard for us.  (I have been pulled into that crazy work too, but as so many are out of work, that is a blessing as well).  My beautiful, brilliant, caring child is safe and healthy.  My mom is independent, funny, generous, and close.  My home is cozy.  My country is free and full of opportunities.

Those are the big things, but there are so many things that make me so happy and thankful.  My daughter's school, while not free, is affordable and near our home and offers her a first class education.  She has friends and we have made a point to get to know the families of her friends.  They are kind to her and love her. 

Today was the Thanksgiving meal at my daughter's school.


This kicks off Thanksgiving week for our family.  We eat the non-traditional fried chicken after getting the lecture that we must eat quickly and get out for the next group to have time for their fried chicken feast.  The headmaster, though very caring toward the kids' minds and spirits, is a stickler for schedules!

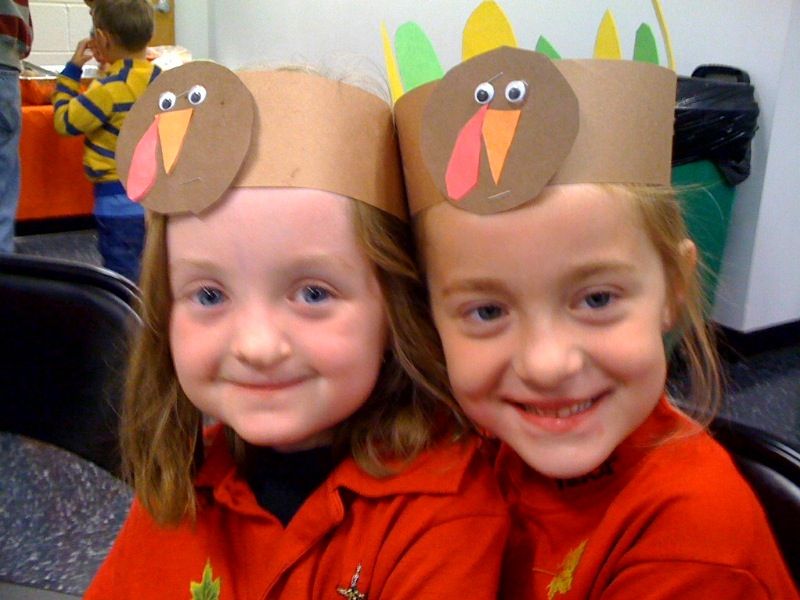
As we enjoy the silly things, like paper turkey hats and 14 kinds of mashed potatoes, I cannot help but think of service men and women who are far away, without family, feasts, or fun.  Our family has just adopted a Marine.  I went shopping today for his first care package.  I cannot imagine what draws these young people to military service, but how thankful I am for them.


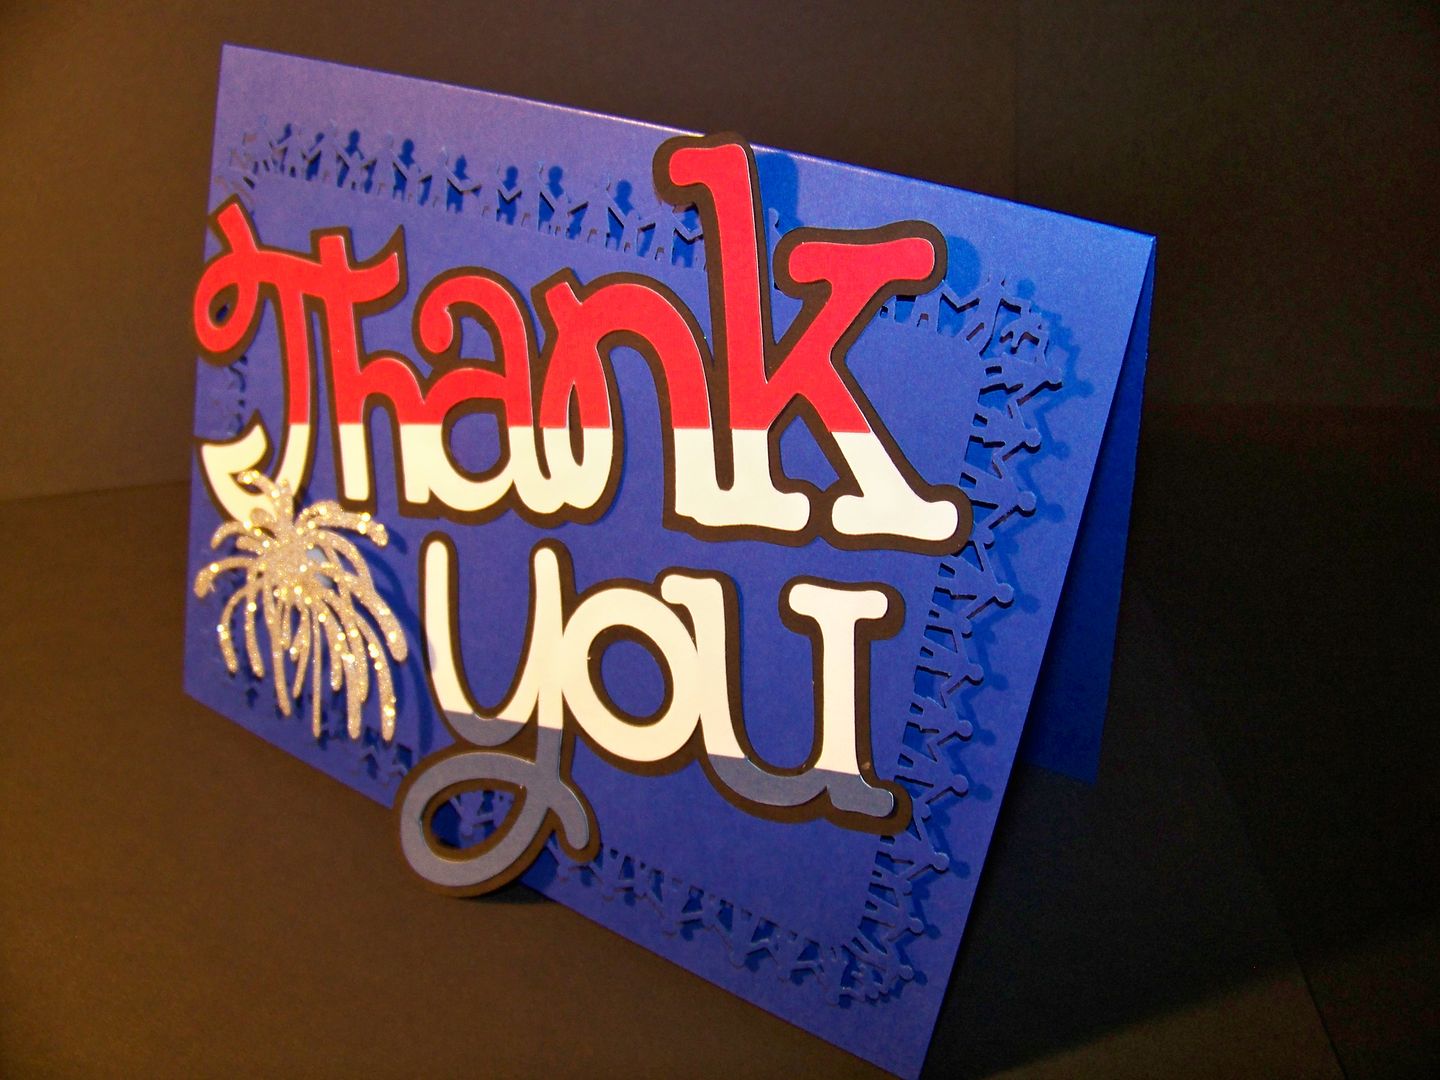
I am including a card I made during the last on-line swarm.  I think our first box will just be a "Thank You" kind of box.  I received the name of this Marine from one of the fabulous ladies on the Cricut Circle, Jennifer Bell.  The Circle is another one of those little things for which I am so thankful.  What a glorious group of women - creative, generous, funny, and caring!  How fortunate I feel to be a part of the Circle.

I am fast becoming an expert on what to send military service people in Afghanistan, mostly thanks to information from my post office, Jen, and the other ladies on the MB who have loved ones overseas.  One thing I have learned is that a box takes two weeks to get to the FPO so I can send this one now and then one in a couple of weeks for Christmas.  I love surprises, and I hope our Marine does too.

Speaking of surprises, I had blog awards given to me this week.  Caroline of Caroline's Craftograghy Blog has given me the Attittude Blog Award.  Wende at Passionately Paper , Rachel at Back Porch Creations, Maria at Stamp, Cut, Create!, Kristin at My Fantabulous Life, and Carolyn of Carolyn's Creative Corner have given me the Stylish Blogger Award.  A big thanks to those ladies for sharing the love!

 https://blogger.googleusercontent.com/img/b/R29vZ2xl/AVvXsEhFaxOgI79T2knuW8eqw7e5poVV2F84397qtwwQUQjPEhzI3eG-Jub92PDGV1sz_CZUYQYsJYdWjcB9DDLAU2DojfHLoQpA7vDplYWpso7-MEhvyhTgKeTN0LS8Rw-fWS8lX1MEZ47iMJZ9/s1600/Blog+Award.jpg       http://1.bp.blogspot.com/_wB2La4HNmDw/TOtRhtITJpI/AAAAAAAAAeA/QsAg4SQ5xOM/s1600/stylish_blogger_award.jpg 

I am so shocked that my new crafty buddies like my blog and so pleased!  I try to make it unique with some non-Cricut content, keeping with the theme of Roald Dahl's quote.  I like to give away all the secrets with size and technique.  I enjoy sharing a bit of my life mixed in with my crafting.  Whenever I can squeeze in a favorite recipe too, I do; I am such a foodie.  My love of sewing really influences my projects and the attention to detail that I learned through sewing has really helped my paper crafting.  I have loved the opportunities to share jewelry-making here too, after picking that up in the most hap-hazard way.  Blogging and crafting give me a much needed break from my job and house-hold responsibilities.

I would love to pass these awards on to some of my favorite blogs Laurens Creative, Sugar Peas Creation Station, Polish the Stars, Sour Kraut Krafts, Red Couch Recipes.  I am so thankful that we live at a time where technology is so easy and live in a place where it is so accessible.  We, as women, are more fortunate now than ever before in so many ways.  To think that women got the vote within my grandmother's life... it is amazing how far our culture has come.... again, how thankful for this I am!

At this time year, I always remind my friends of the little things we can do to show our gratitude.  Give blood if you can, give your change at the bell ringer stations, pick up a gift to donate to the elderly or to a needy child.  When we see a need we can meet, that is God speaking to us.  We are to serve as "the body of Christ" in fulfilling Jesus' words during the Sermon on the Mount, that needs will be met.  God meets the needs of others through us!

If you are feeling blue right now, I urge you to pick up Andy Andrews' The Noticer and to keep a gratitude journal.  As he says, "Sometimes all a person needs is a little perspective."

Happy Thanksgiving Week!  Eat extra pie for me.  I would love you to share with me what you are most grateful for this year!

Saturday, November 20, 2010

Flower Fairies

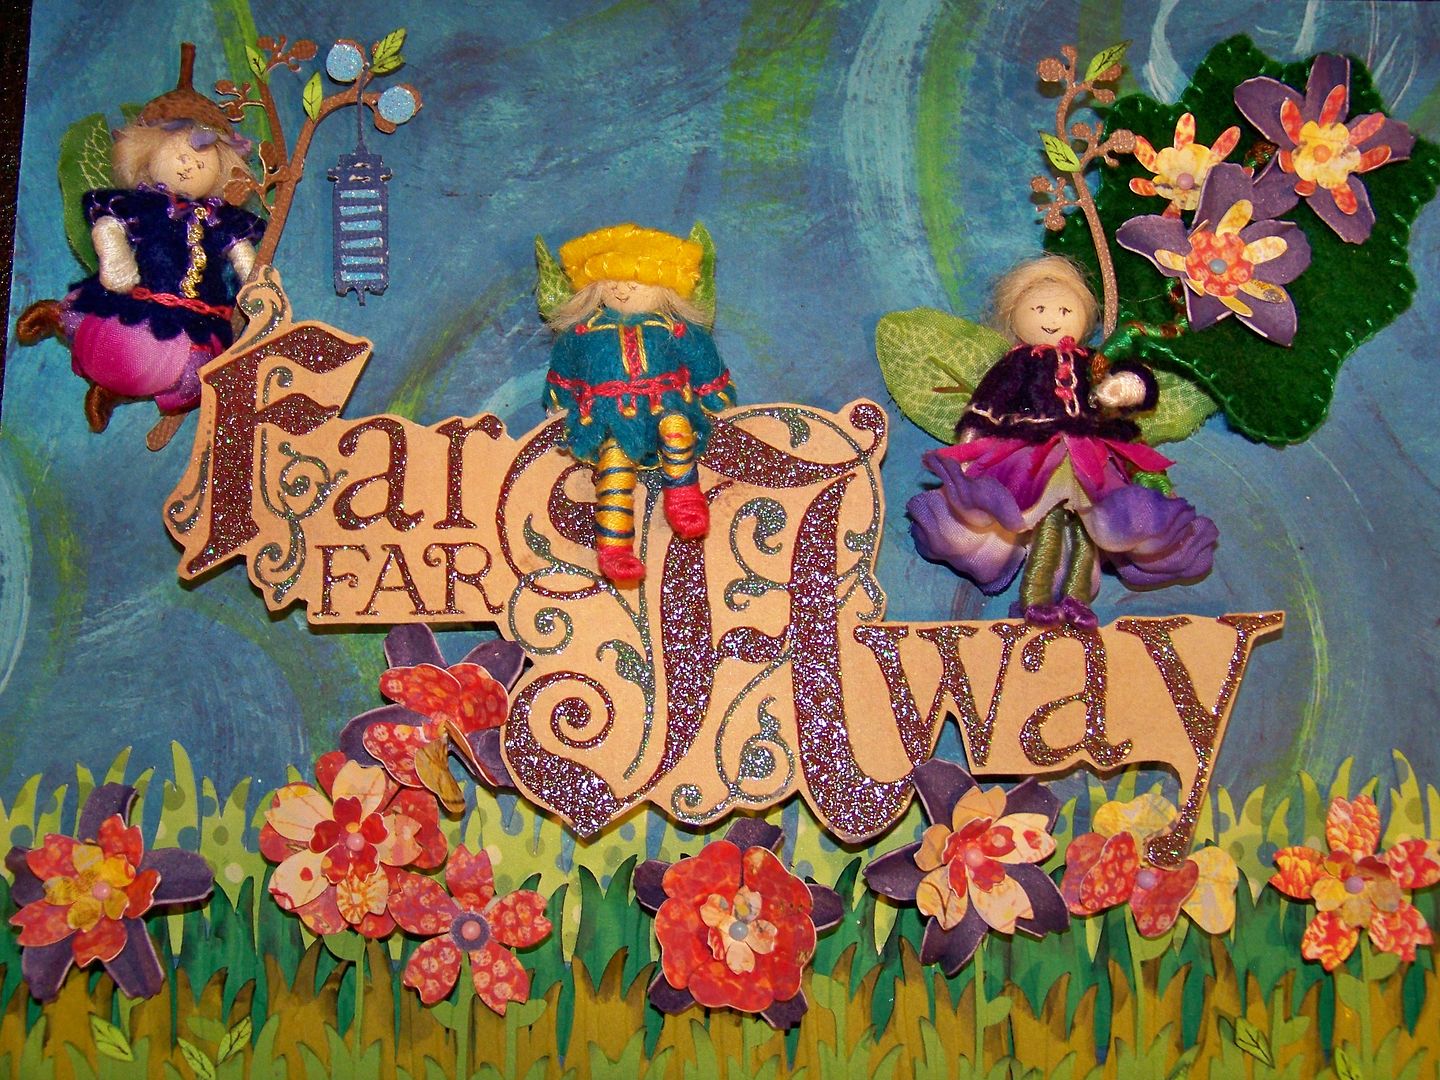
This month's Circle Blog Challenge is called Home Sweet Home.  This is a home decor challenge requiring at least one Cricut Cartridge cut, the Cuttlebug, felt, and the color green.  The requirements immediately pointed me toward a project for my daughter's room!
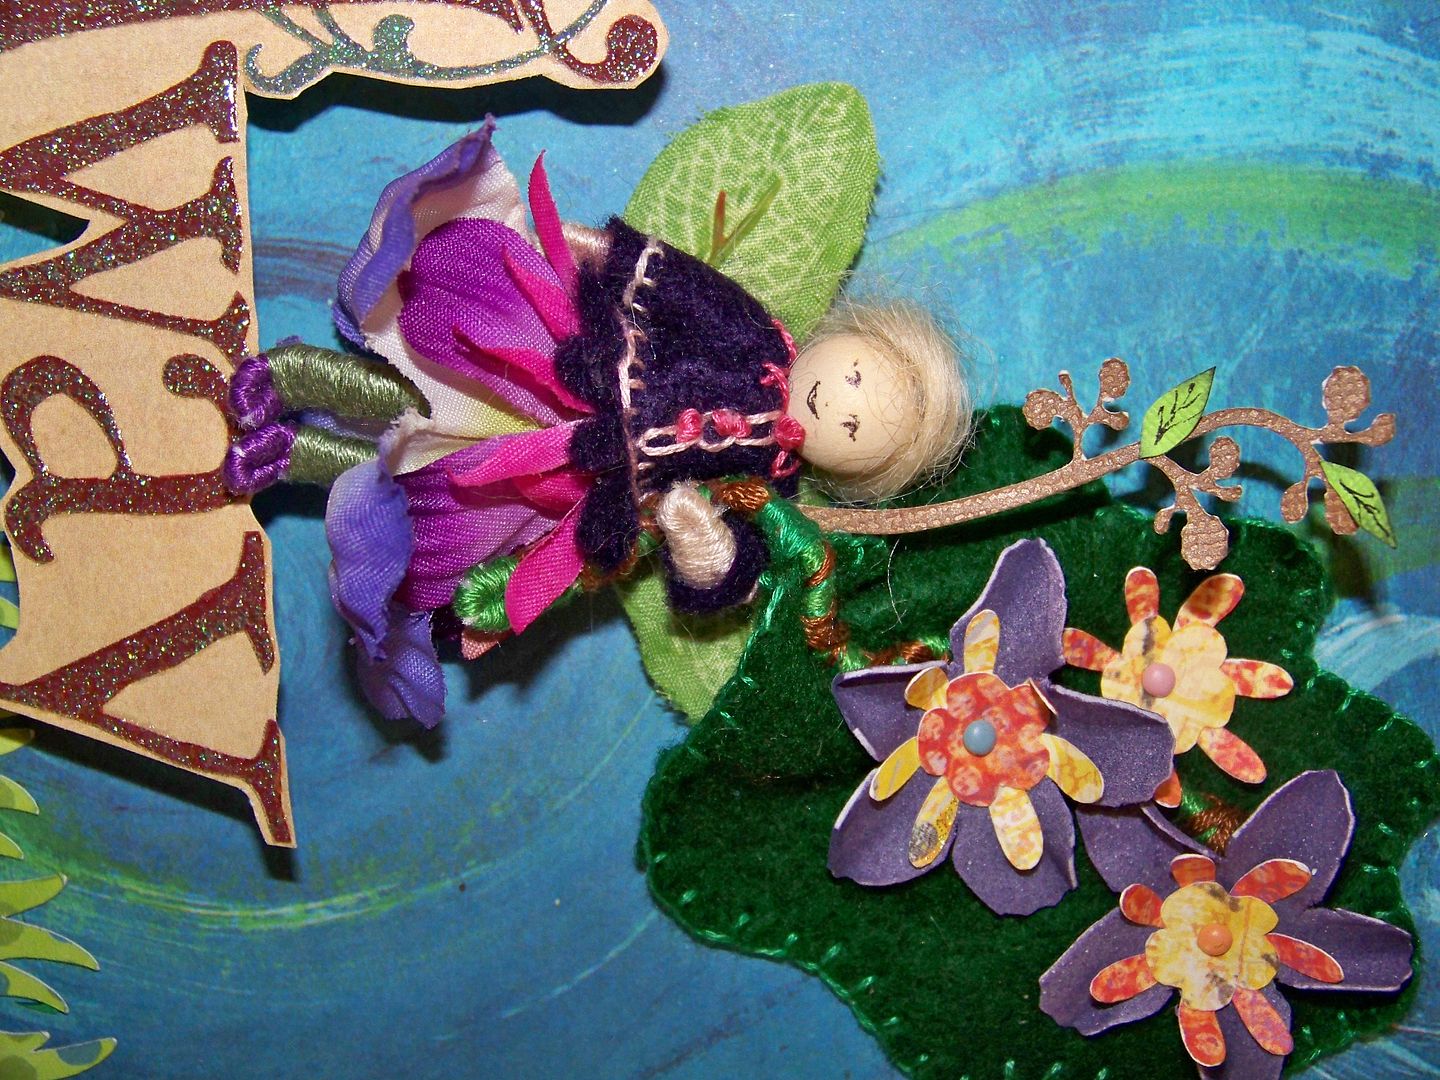
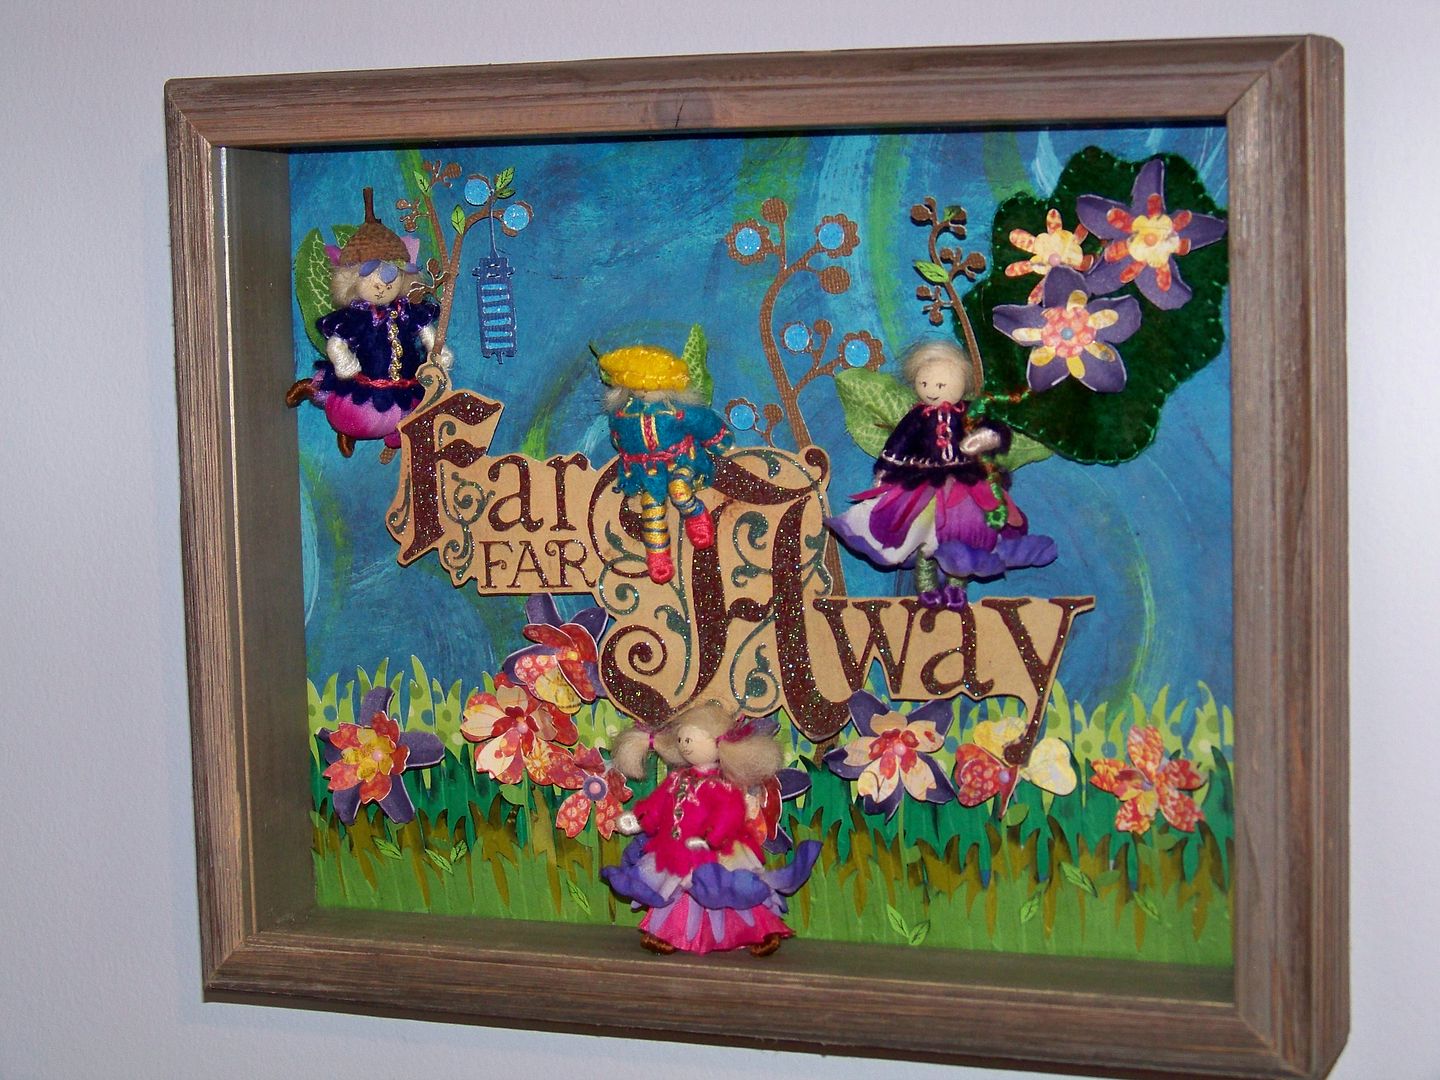
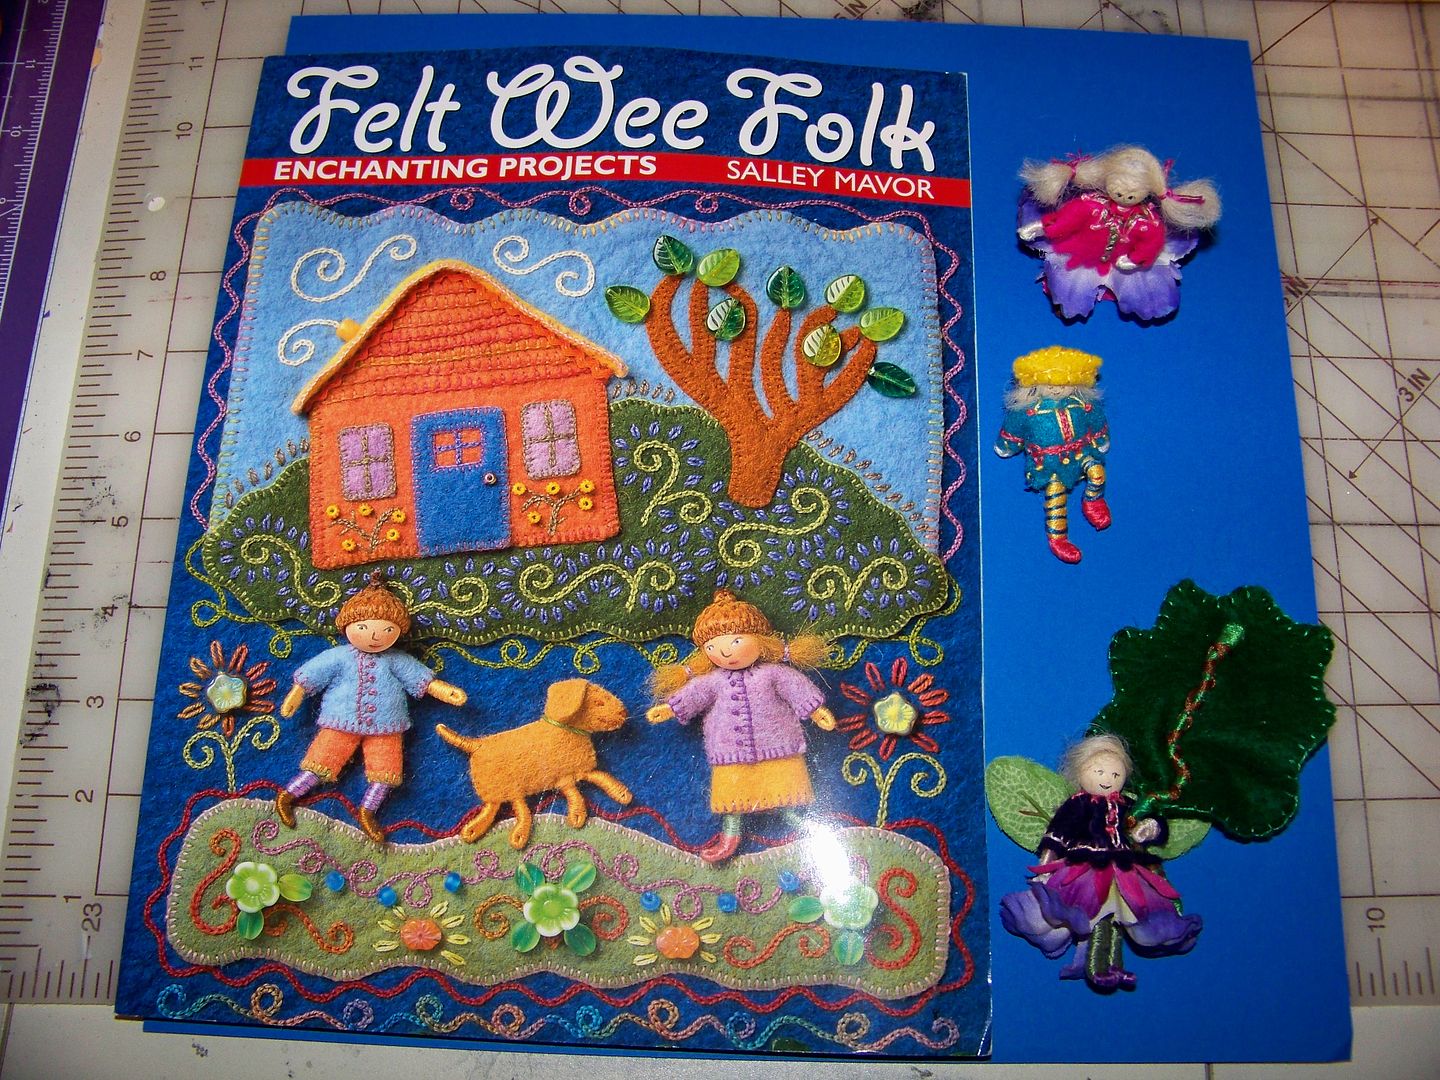
This project started with one of my favorite craft instruction books, Felt Wee Folk by Salley Mavor.  I have made so many of the little fairies and characters in the book.  I think they are so much fun to give and to incorporate into mixed media projects.


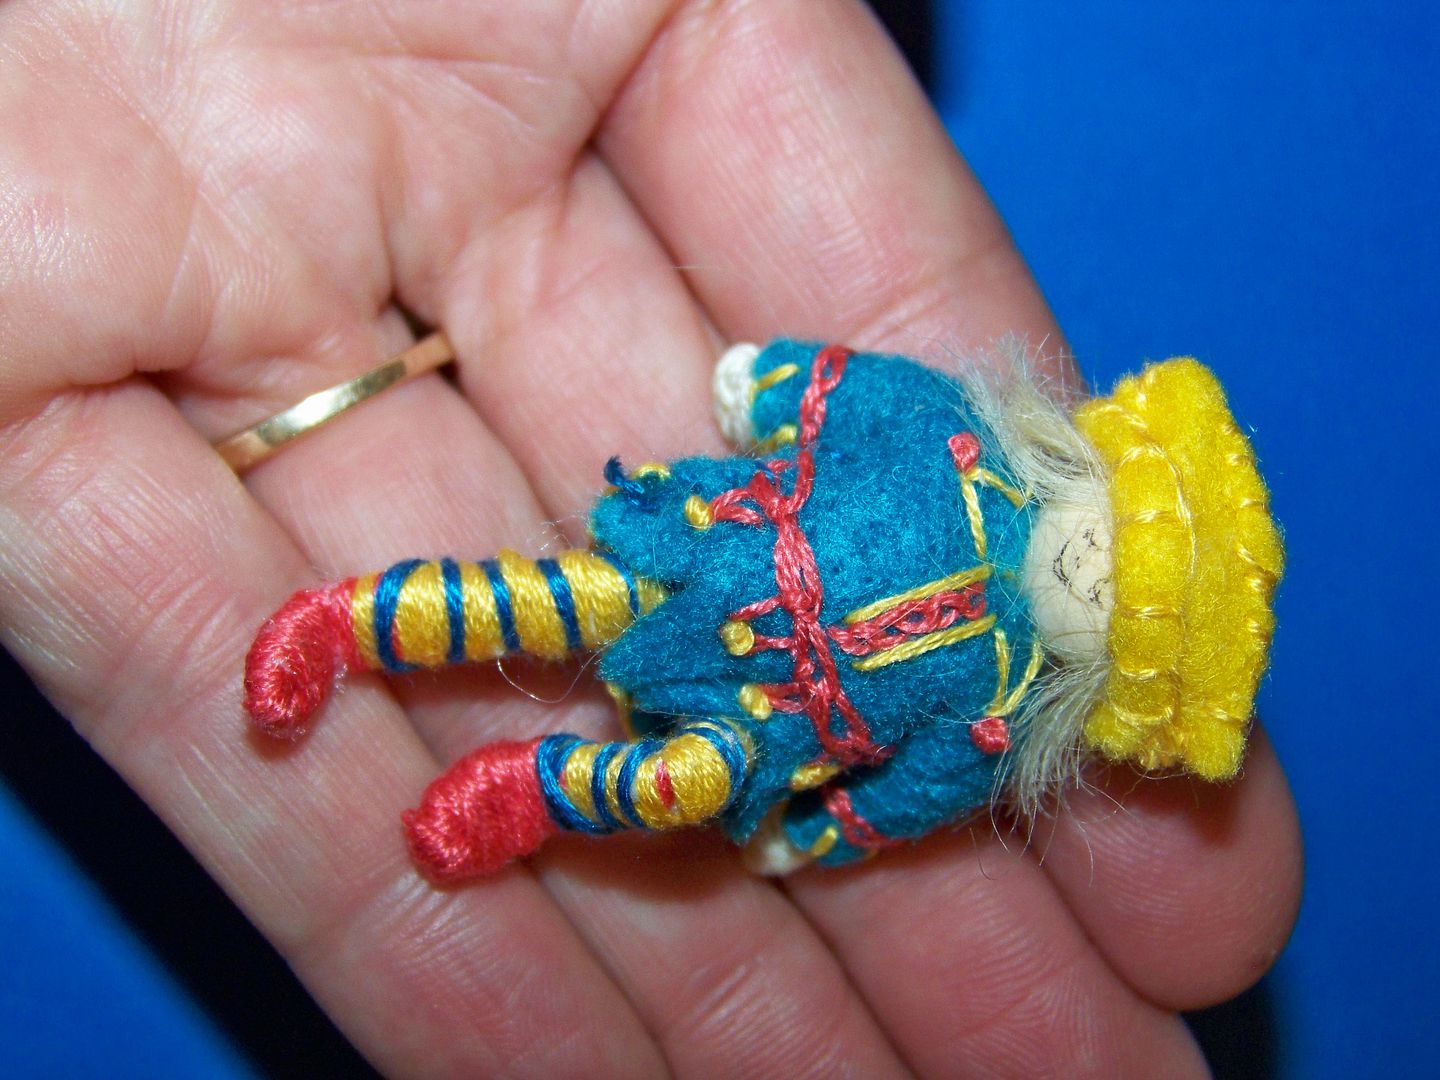
I love making these little characters!   I made their little clothes by hand-sewing and loved doing the embroidery on the jackets!  These details make them so much fun to look at to me!

I found the text 'Far, Far Away' on a page in a paper stack I had in my stash and manually cut around it.  I popped it up with Ranger Pop It! pop dots, stacked to raise it 1/2" off the page.

I cut flowers  from Walk In My Garden, page 84 (cut at 1/2") and page 82 (cut at 1"), and  layered them with silk flowers.  I also cut assorted branches for the fairies to hold from Straight From the Nest, page 43 (cut at 3/4", 1", 2-1/2").  I added hand-cut, inked, and detailed little leaves to add a bit more detail.
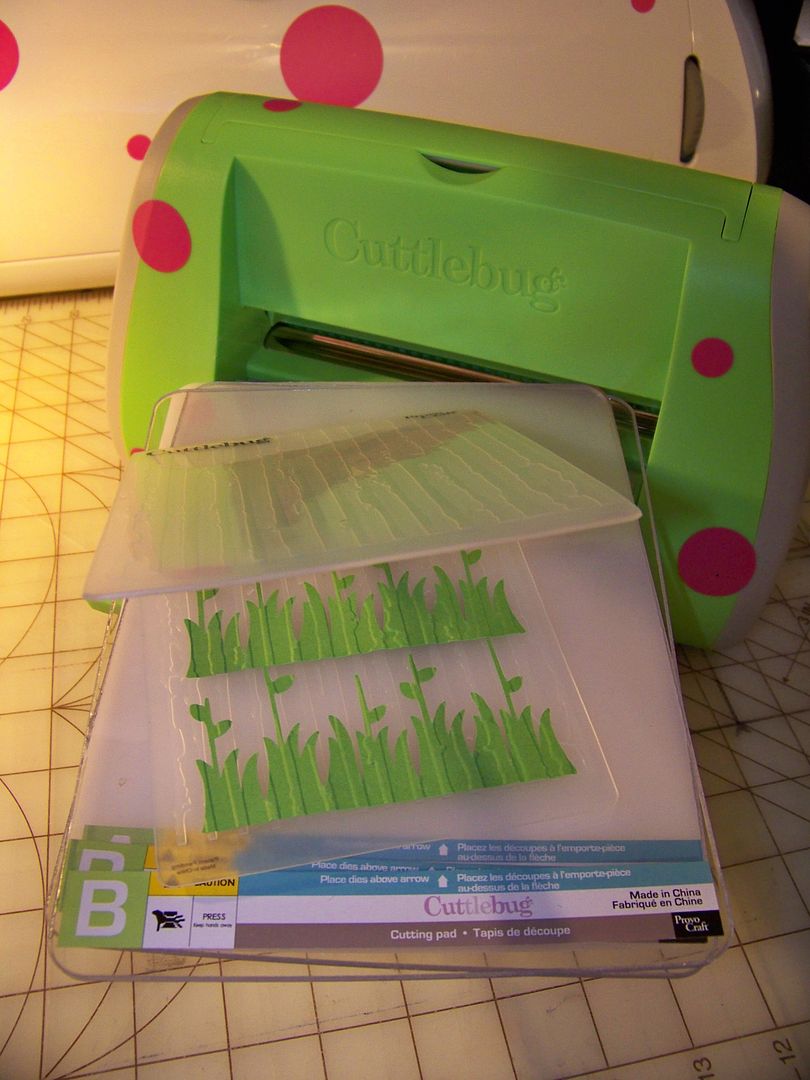
I cut the grass layers from Straight From the Nest, page 41 (cut at 1-3/4").  I ran the top layers through the Cuttlebug to gain a little texture since these layers would be in the foreground.  I added hand-cut leaves to the grasses as well.
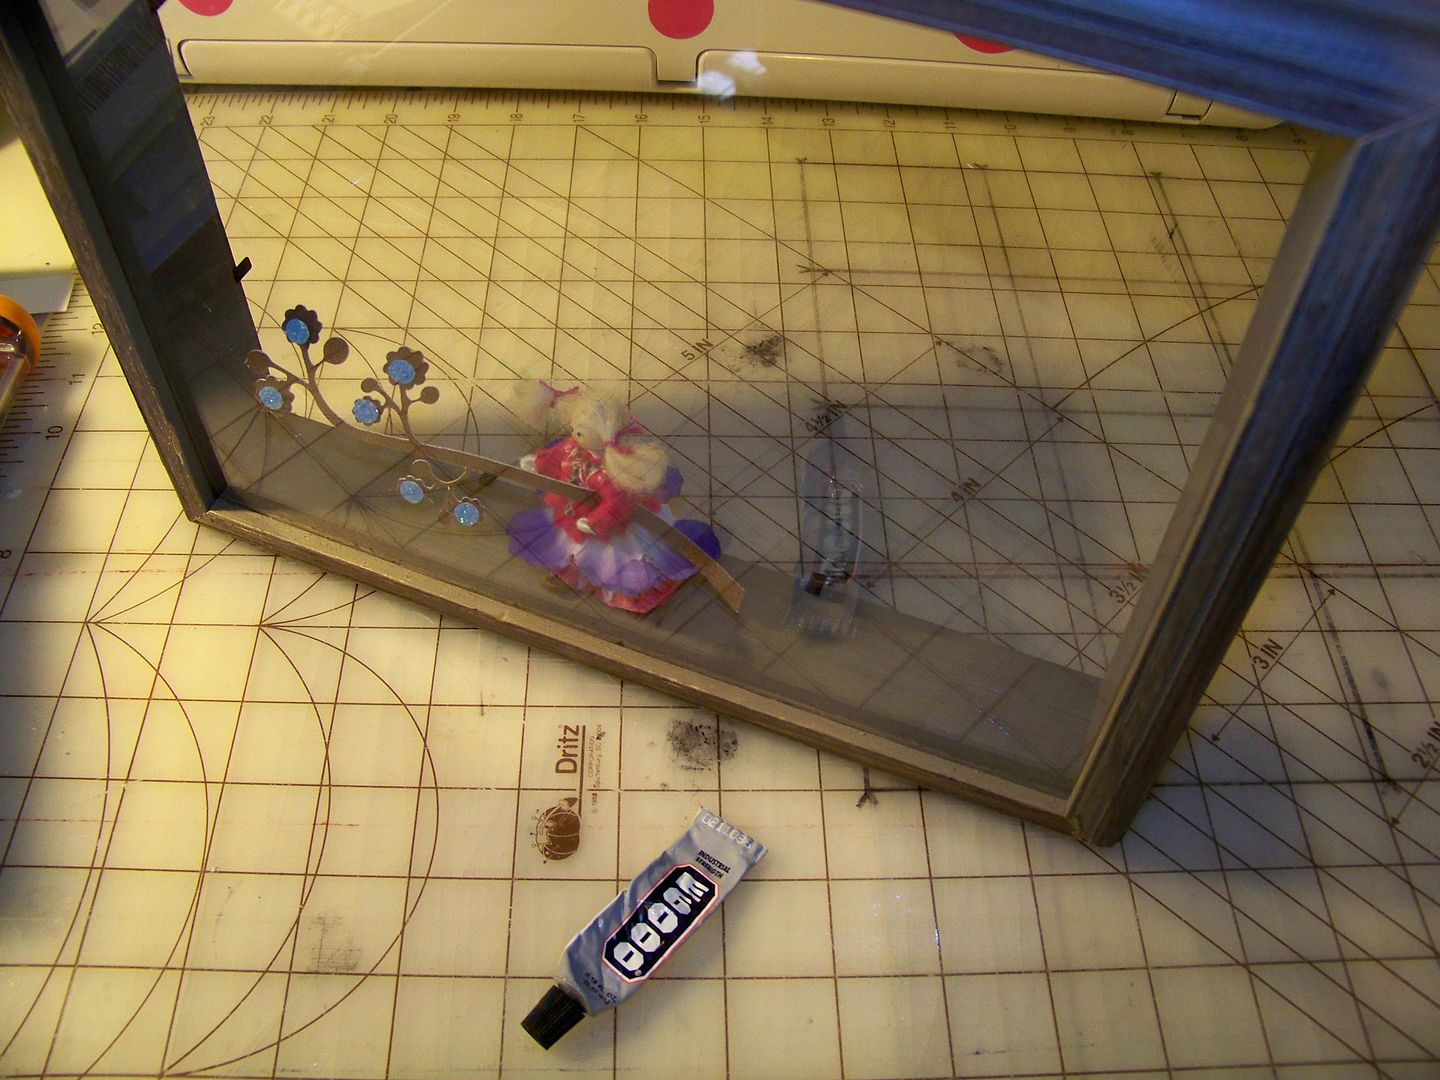
I decided to glue one of the characters inside the frame to take advantage of the shadow box.  I played a bit to find placement.
I finalized the picture, adding a lantern to one of the branches, cut from Pagoda, page 26 (2") and flowers from the same cart, pages 56 and 57 (1" and 1-1/4").
I put the backing and frame together to combine all the fairies!
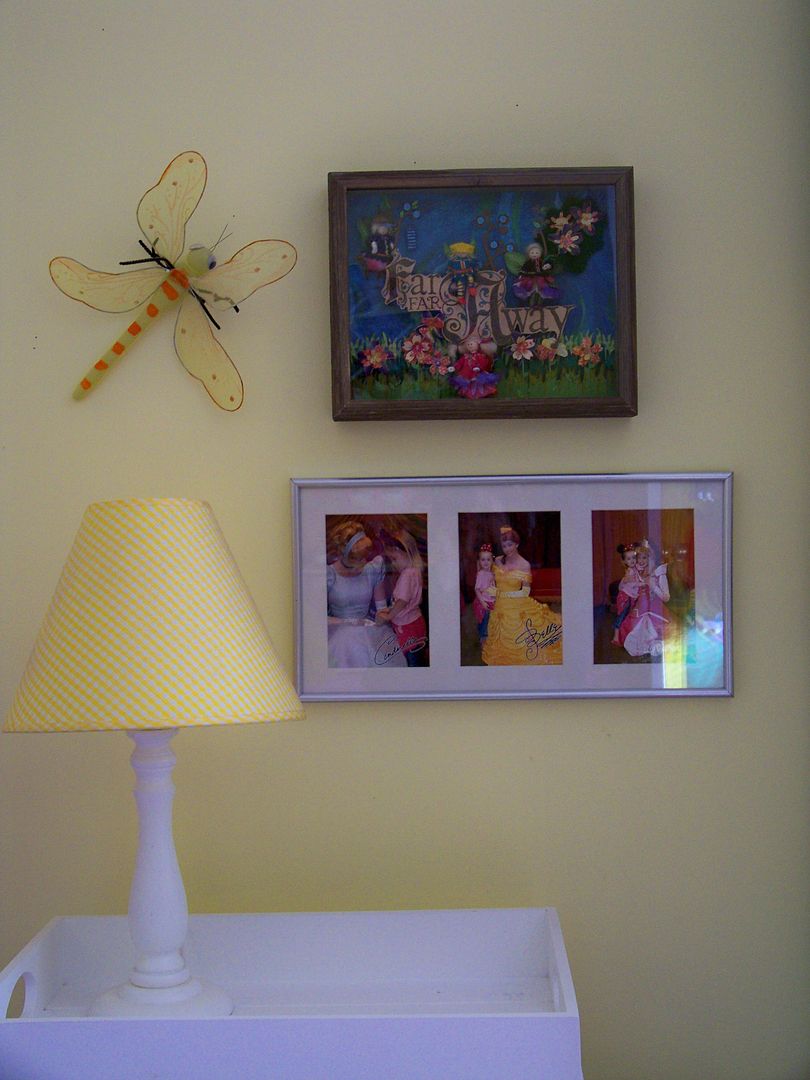
My daughter checked in on me throughout this project and had already decided on a place to hang it in her room.

Wednesday, November 17, 2010

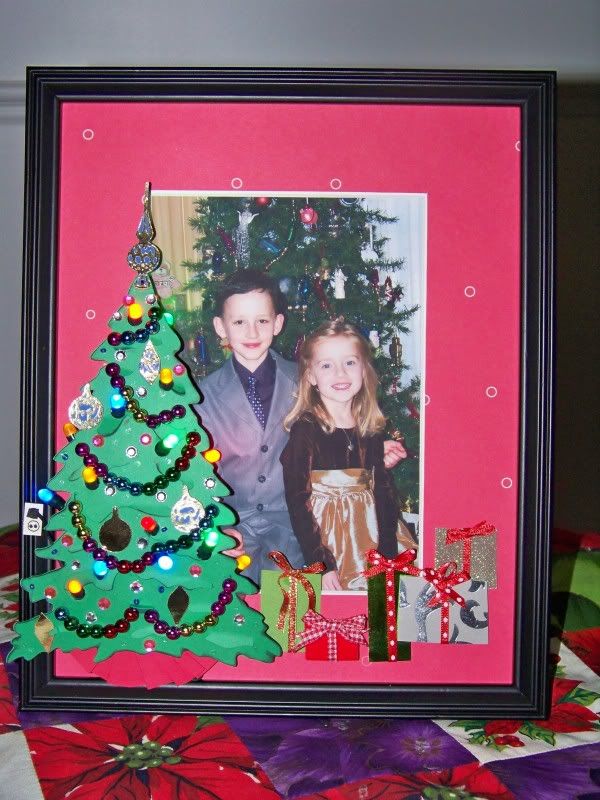
Light Up Christmas Frame!

Hi, everyone!  Today,  I have a project that I made for The BugBytes blog.  I am sharing it here too!

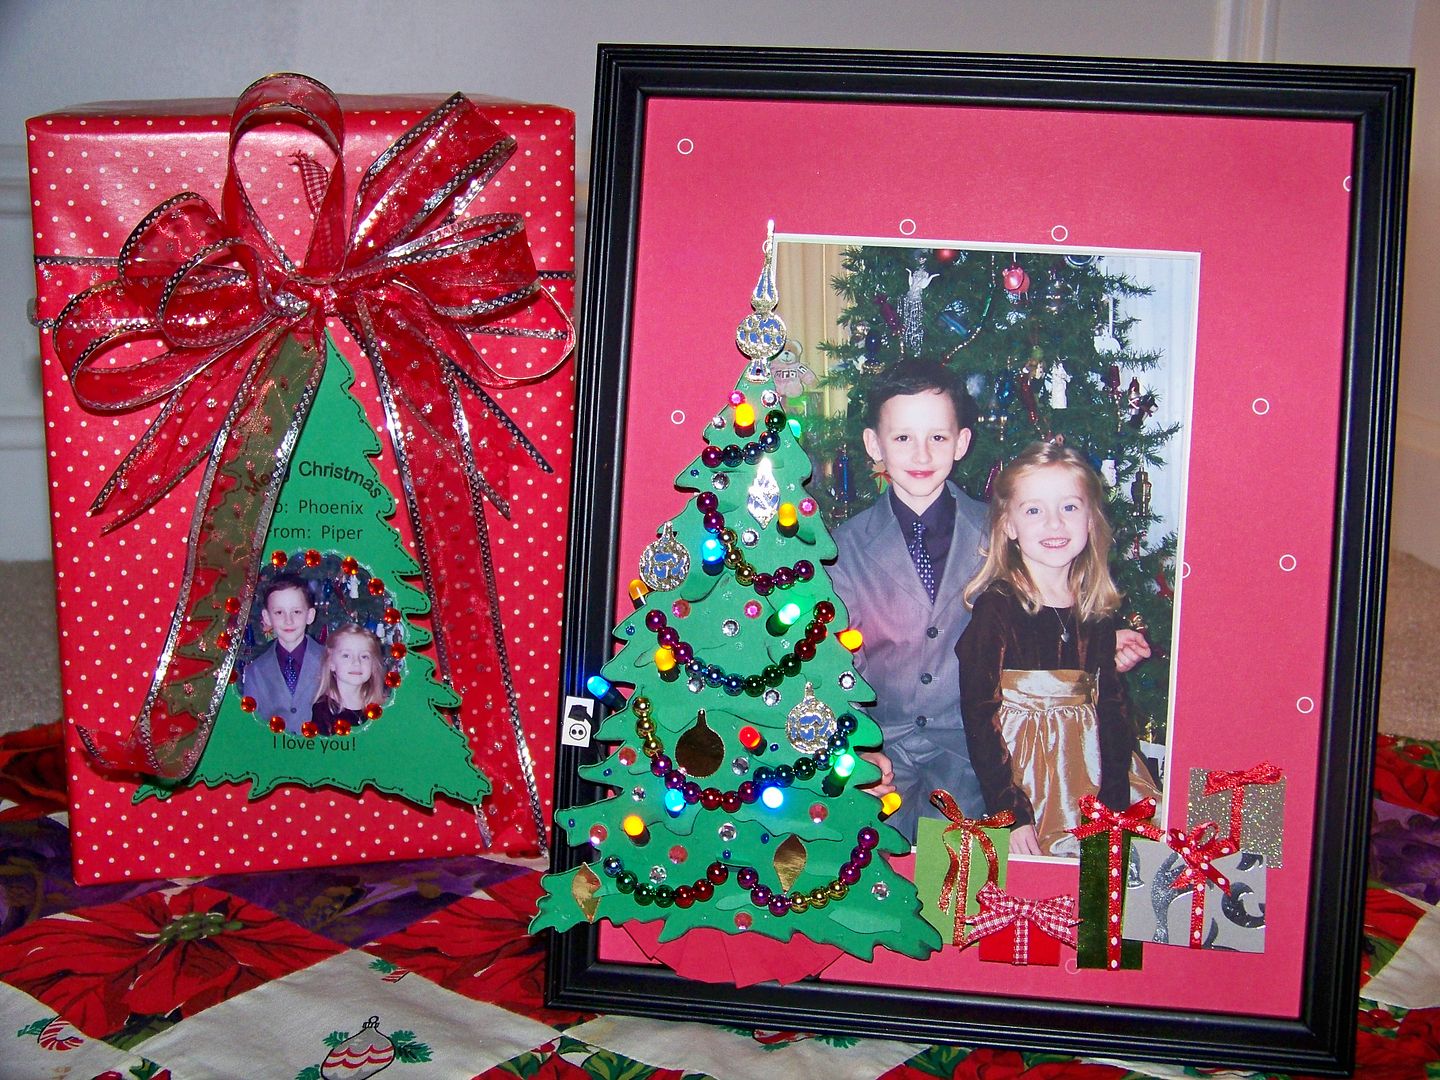
I created a light up photo frame for Christmas.  The idea of adding lights came a bit late in the project -- sometimes projects change while being crafted in my little world!


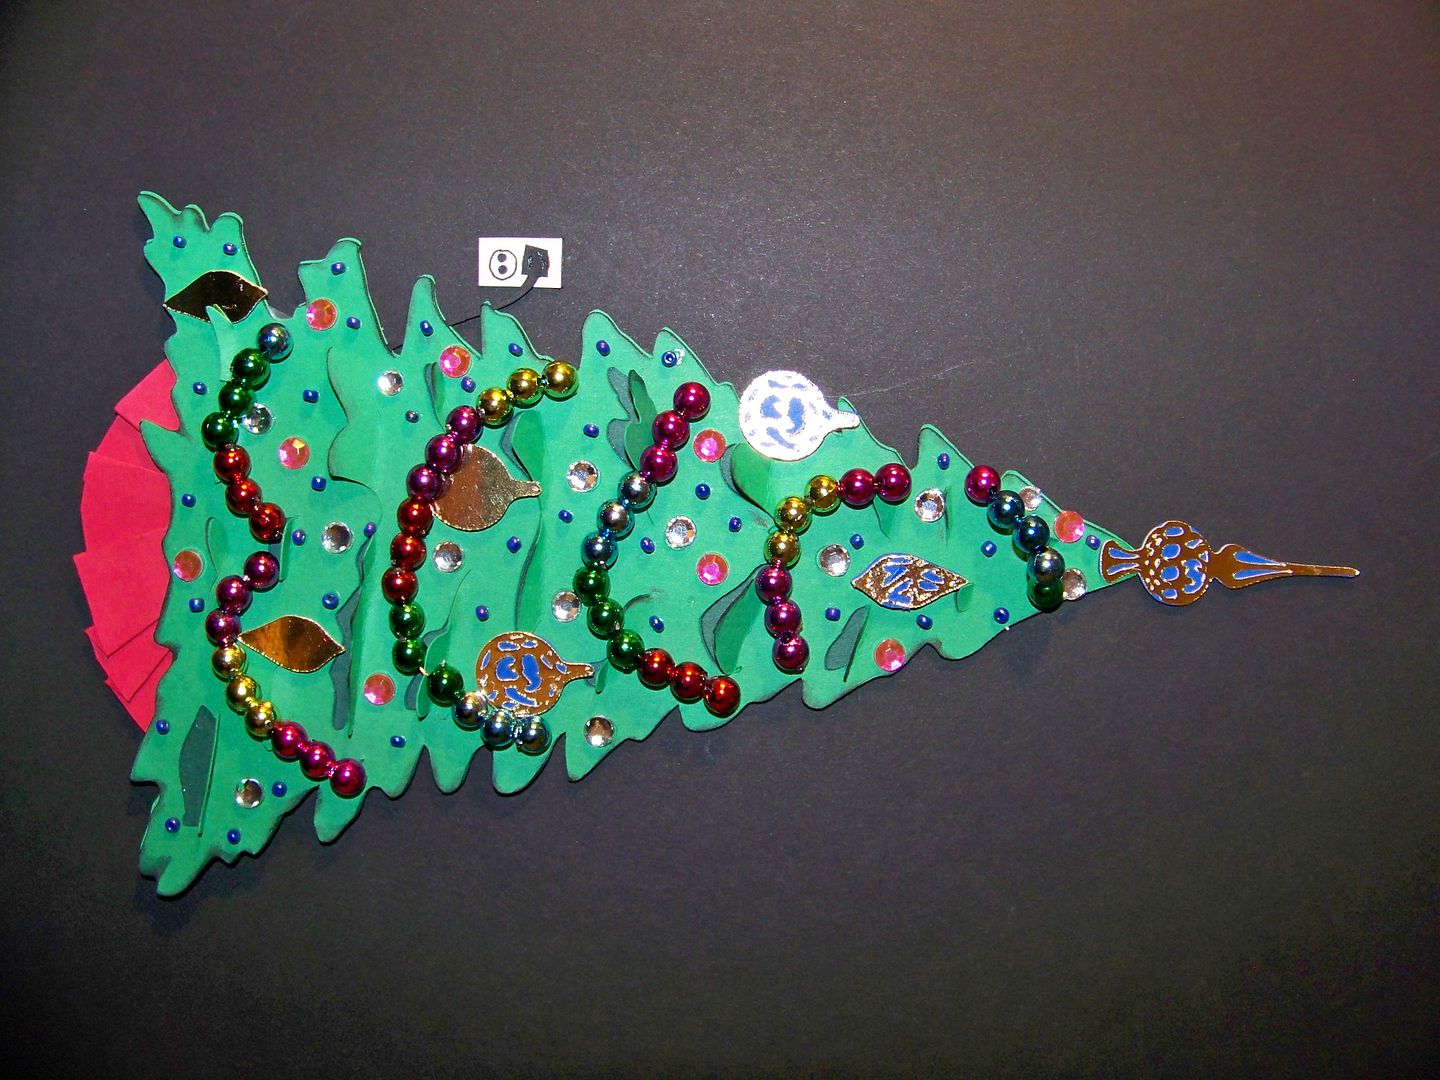
I started this project without the idea of adding lights.  I used the tree from Christmas (Solutions cart).  I cut two trees at 6-1/2" so I could put them together and lift up the branches on the top tree.  


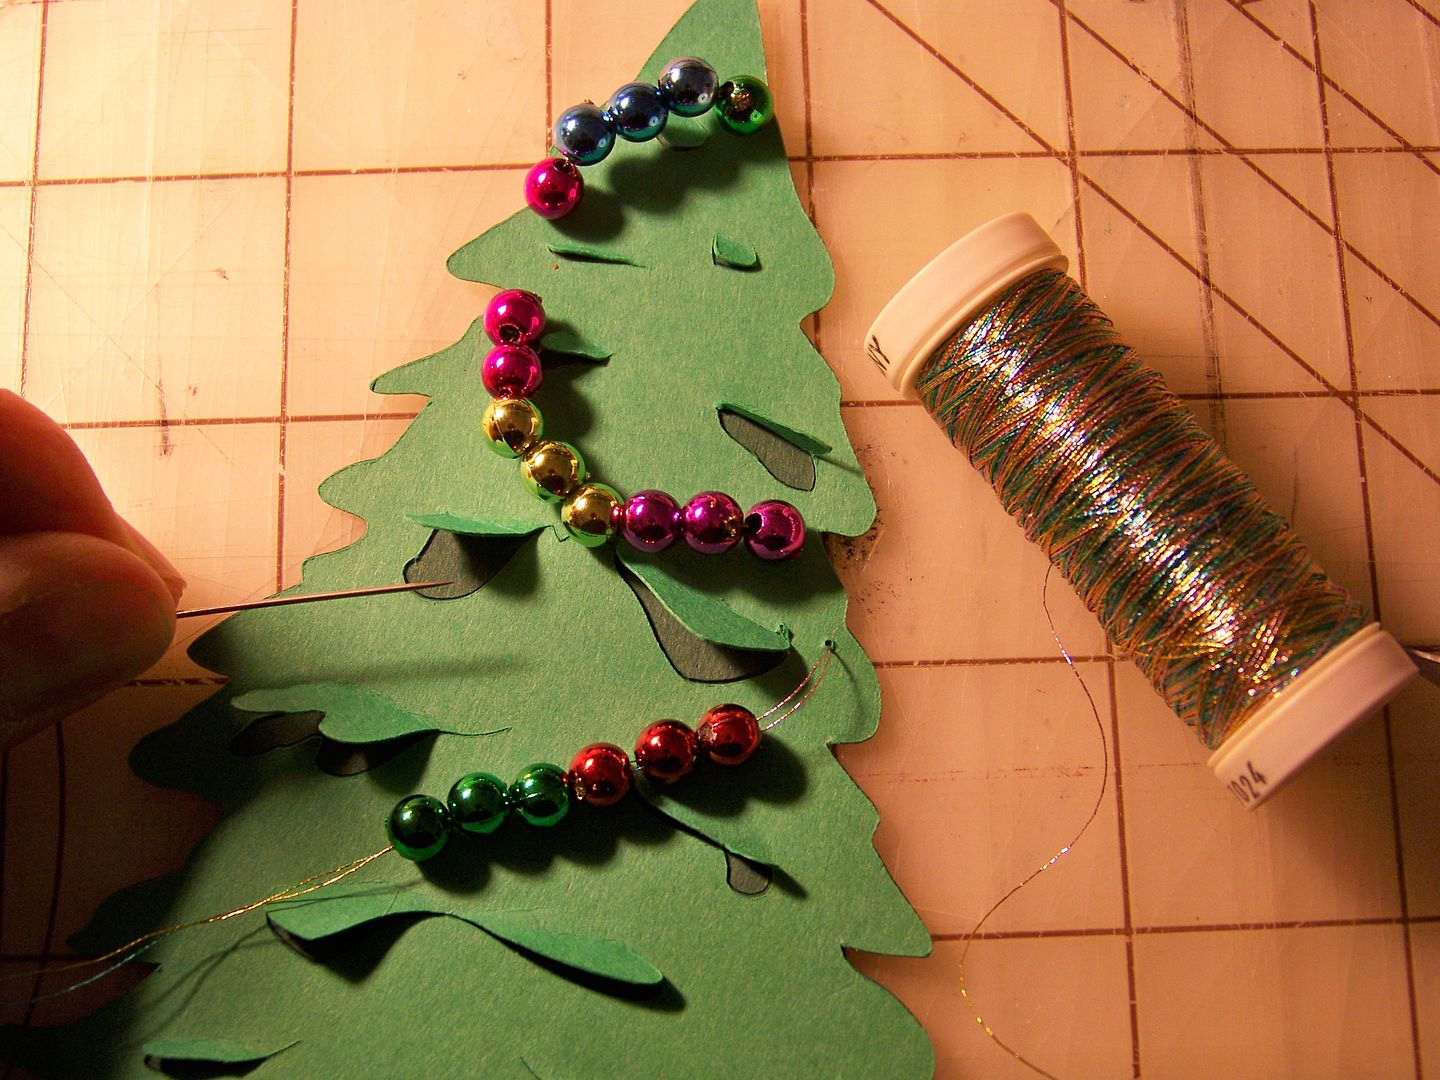
I created a garland by stitching on lines of beads with metallic thread.  Unlike gluing, stitching a long line of beads will allow them to hang, like real garland!


For fun, and to remind me of the silliness of our family, I added a paper electrical cord and outlet.  Keeping the electrical cord visible and clear was the subject of repeated lectures growing up as my sweet paranoid mom dealt with the real tree that she always bought, despite her fear of it catching on fire. 

I decorated the tree with jewels, beads, and ornaments (cut at 3/4") and a topper (cut at 1-3/4") from the same Christmas cart.  I added a tree skirt that I hand-cut and folded.

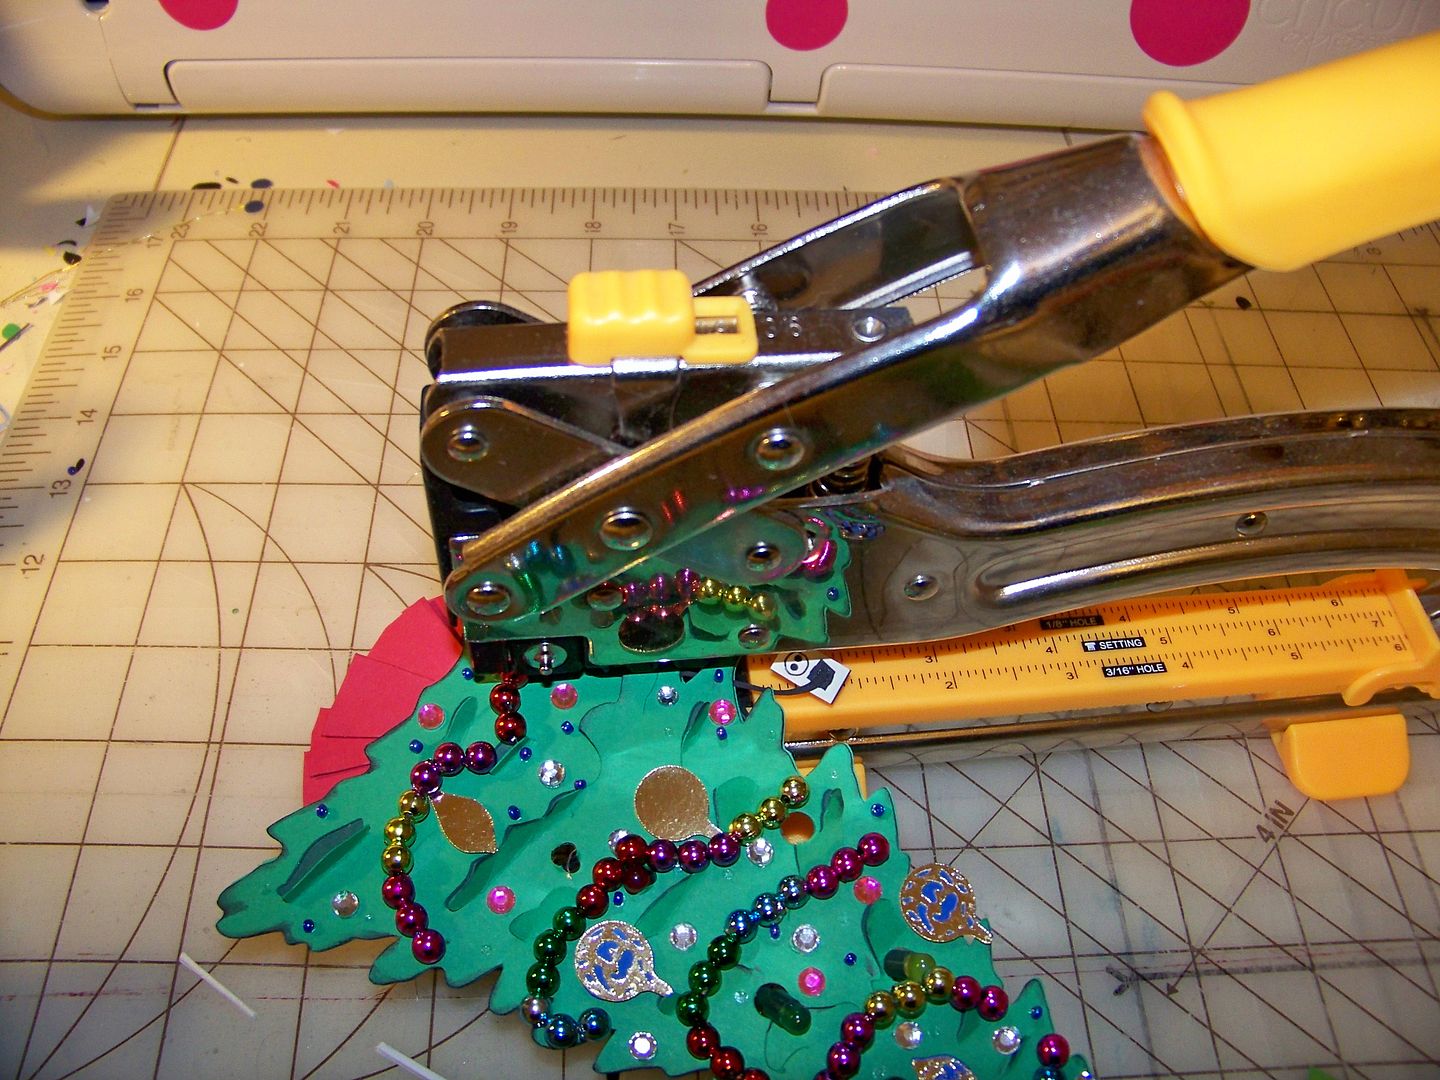
...And then, an epiphany!  Why not add lights to make the tree really light up and play off the joke of the paper plug and outlet?!  I used a hole punch and Crop-A-Dile Big Bite for the holes in the center of the tree (a task which would have been much easier before the tree was decorated). 


I removed the glass from the inexpensive frame I purchased.  I cut a paper mat that I glued to the purchased frame's white mat with double-sided tape, allowing the beveled edges of the mat to show.  I printed off a copy of the picture I had chosen for this project and attached it from behind the mat with double-sided photo tape.  Using a mat knife, I cut a triangle out all the way through the picture and frame back so that I could feed the cords through from the back to the tree that will be on the front.


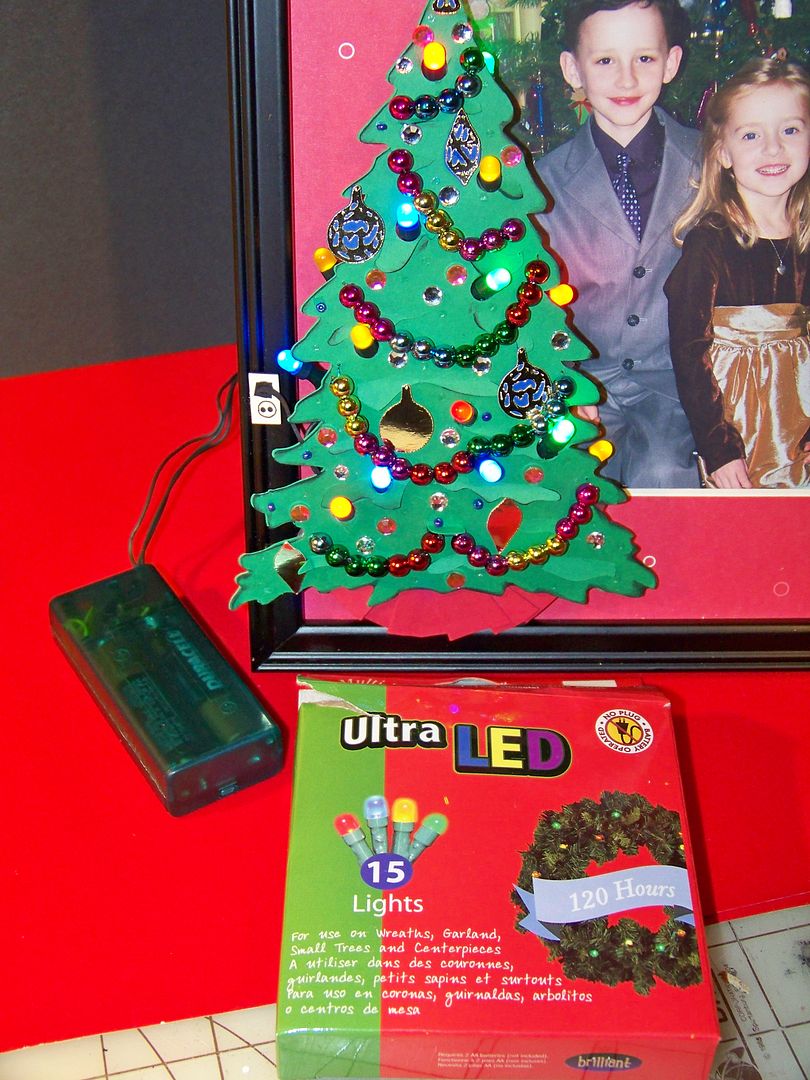
I applied the lights to the tree, keeping the cords on the back as flat as possible and adhering with tape.  I applied the tree to the frame with pop dots on the top and sides, attaching to the mat.  I glued the bottom flush, attaching to the wood frame. 

I found these lights at Meijer for under $4.


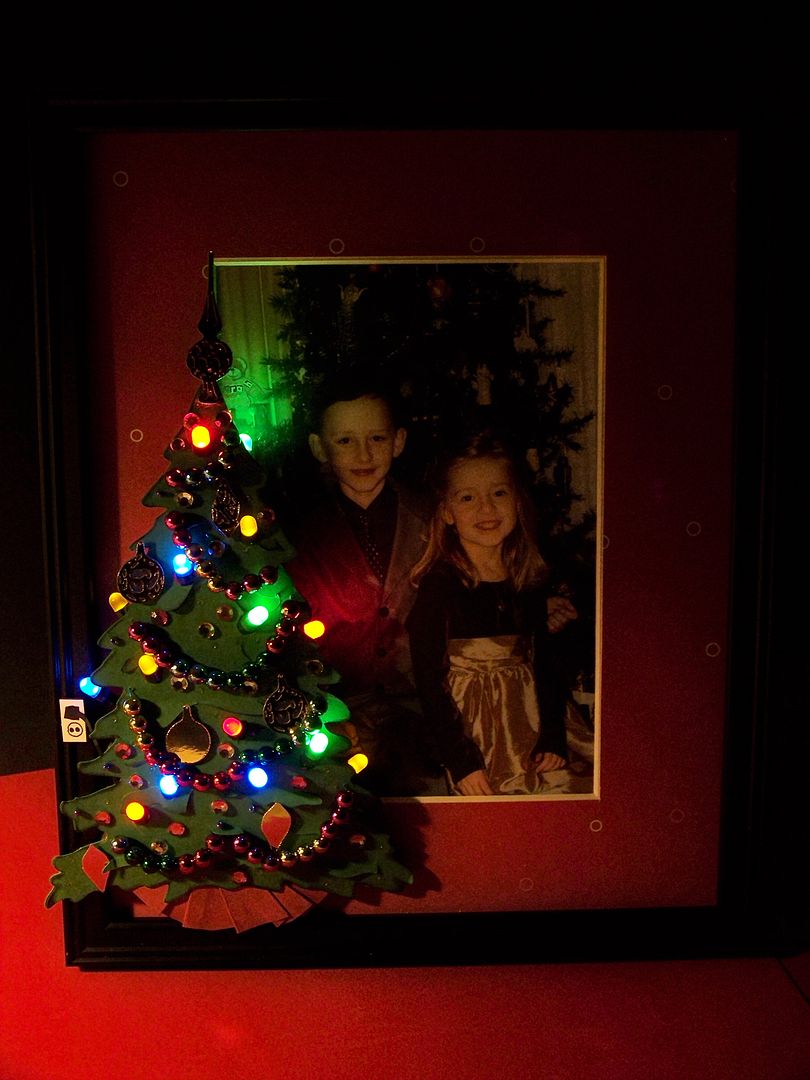
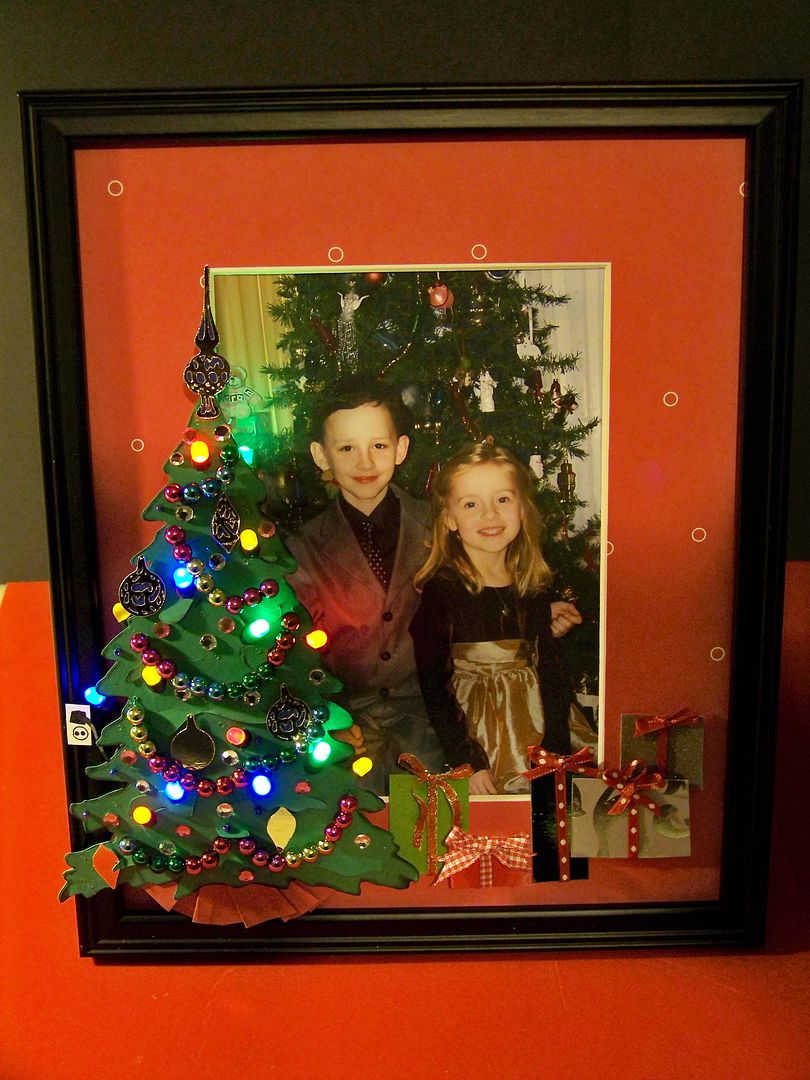
Like a kid, I had to photograph it with the lights off so I could see it glow!

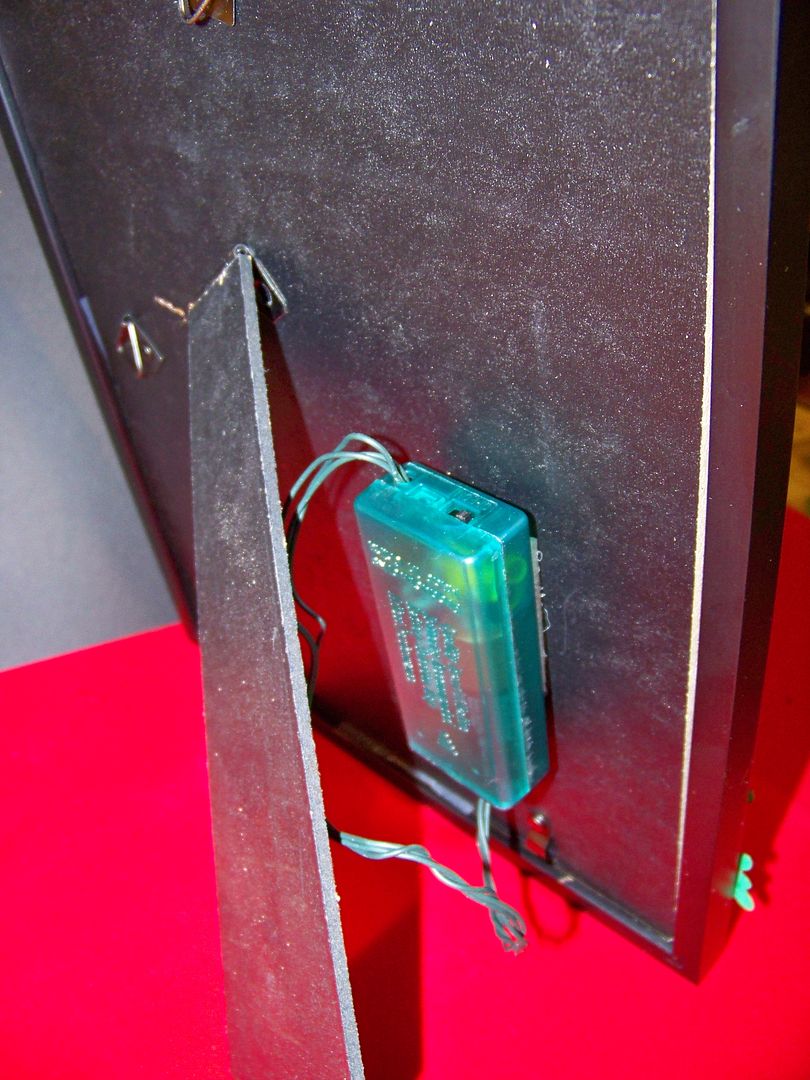
I used Velcro to attach the battery unit to the back of the frame.


I added a few gifts that were simply rectangles, embellished with ribbon and bows I tied.  Some are popped up with pop dots to add a little dimension.


I hope you like my frame!  To carry on the theme, I created a tag using the same tree and photo, printing the tag on my computer, and cutting a window using Mini Monograms at 2-1/4" using the Centerpoint feature.


While working on this project, I had so many great childhood Christmas memories flood my mind!  My mom was a single parent throughout most of my childhood and financially struggled most Christmases, but we NEVER knew it.  She always made sure that we had wonderful experiences, beautiful gifts, and fabulous foods.  In her honor, and to indulge a bit in my memories, I thought I would share this recipe.  It is one of my Mom's standard recipes.  It is one that I started taking to my in-laws' Thanksgiving celebration a few years ago, and is now required!  Loaded with sugar and butter, it is only healthy for the spirit, not so much for the arteries!

My Mom's Sweet Potato Casserole

3 cups cooked, mashed sweet potatoes
2 beaten eggs
1/4 cup milk
1 cup sugar
1 teaspoon vanilla
1/2 cup butter
Mix and put in a buttered casserole.

Mix and sprinkle on top:
1 cup brown sugar
1/3 cup flour
1 cup chopped pecans
1/3 cup melted butter

Bake 30 minutes at 350°.


But wait! There's more! Click 'older posts' above!

But wait!  There's more!  Click 'older posts' above!