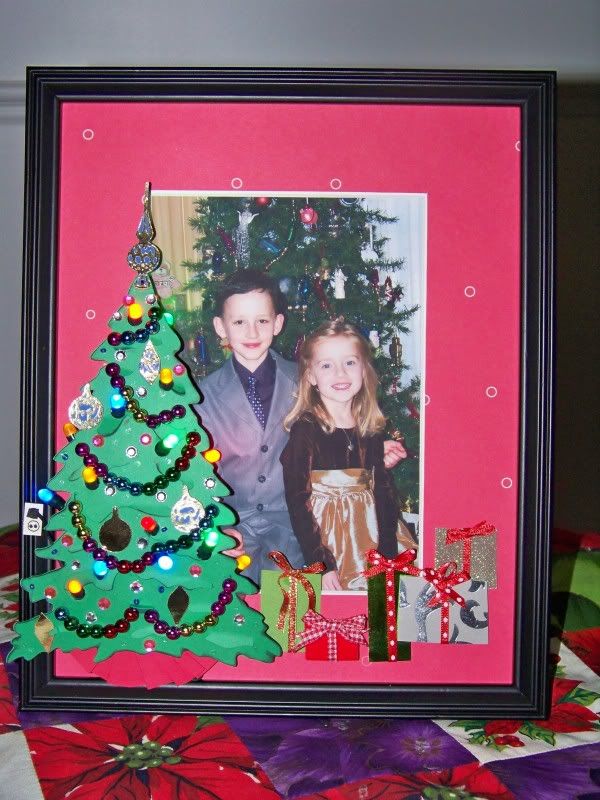
I created a light up photo frame for Christmas. The idea of adding lights came a bit late in the project -- sometimes projects change while being crafted in my little world!
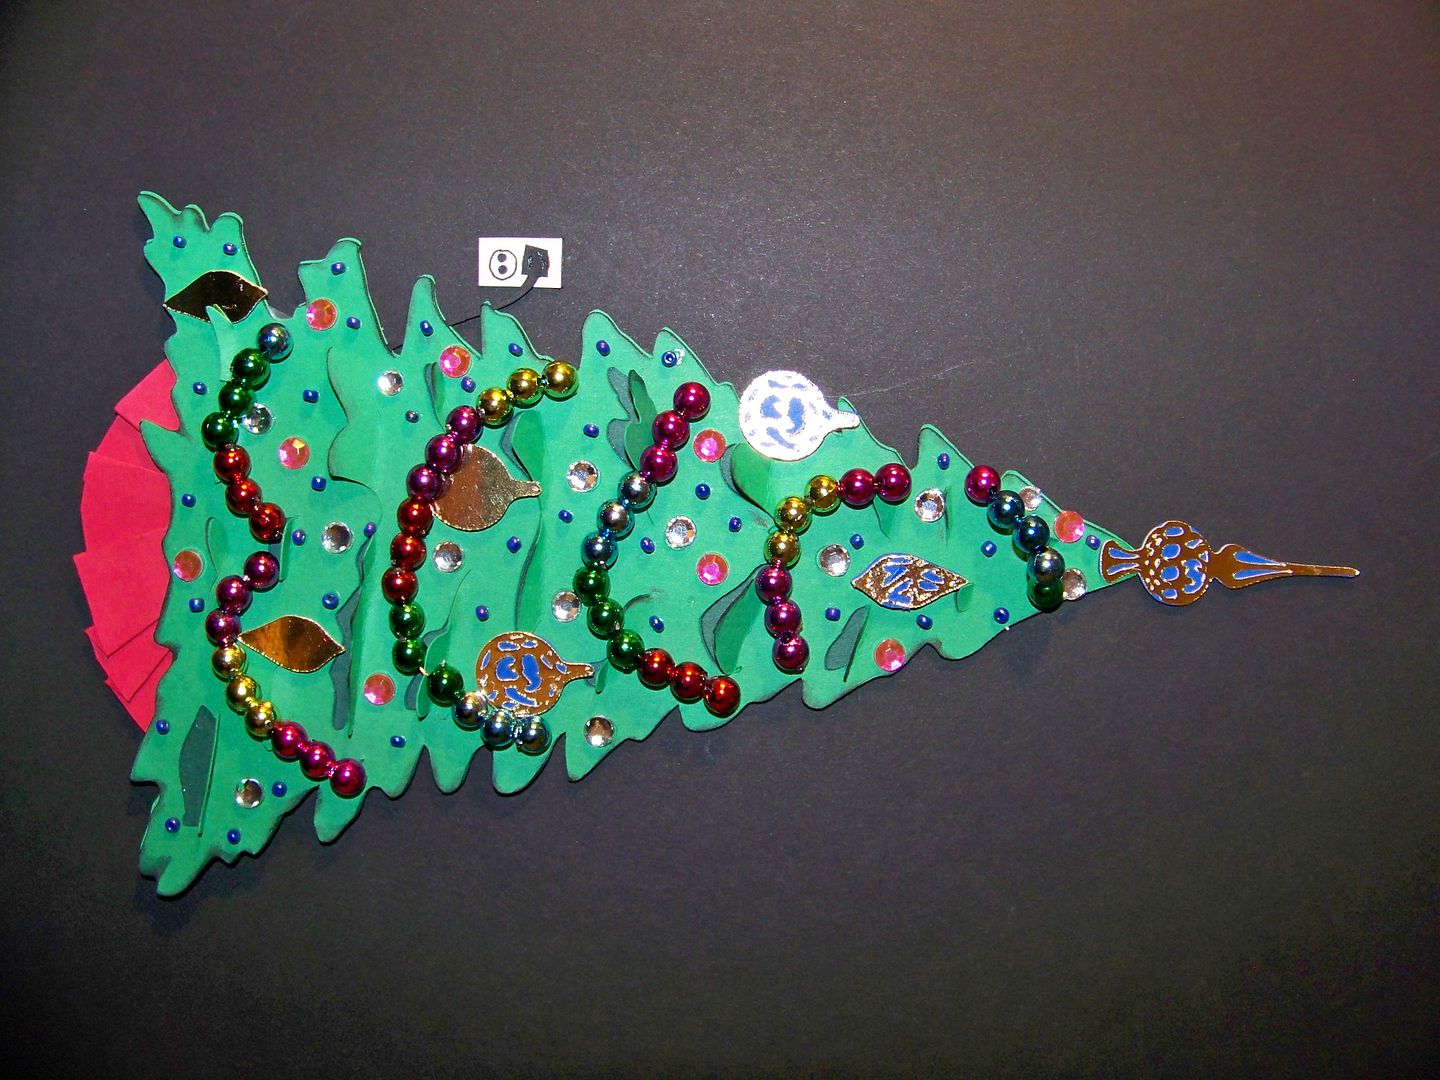
I started this project without the idea of adding lights. I used the tree from Christmas (Solutions cart). I cut two trees at 6-1/2" so I could put them together and lift up the branches on the top tree.

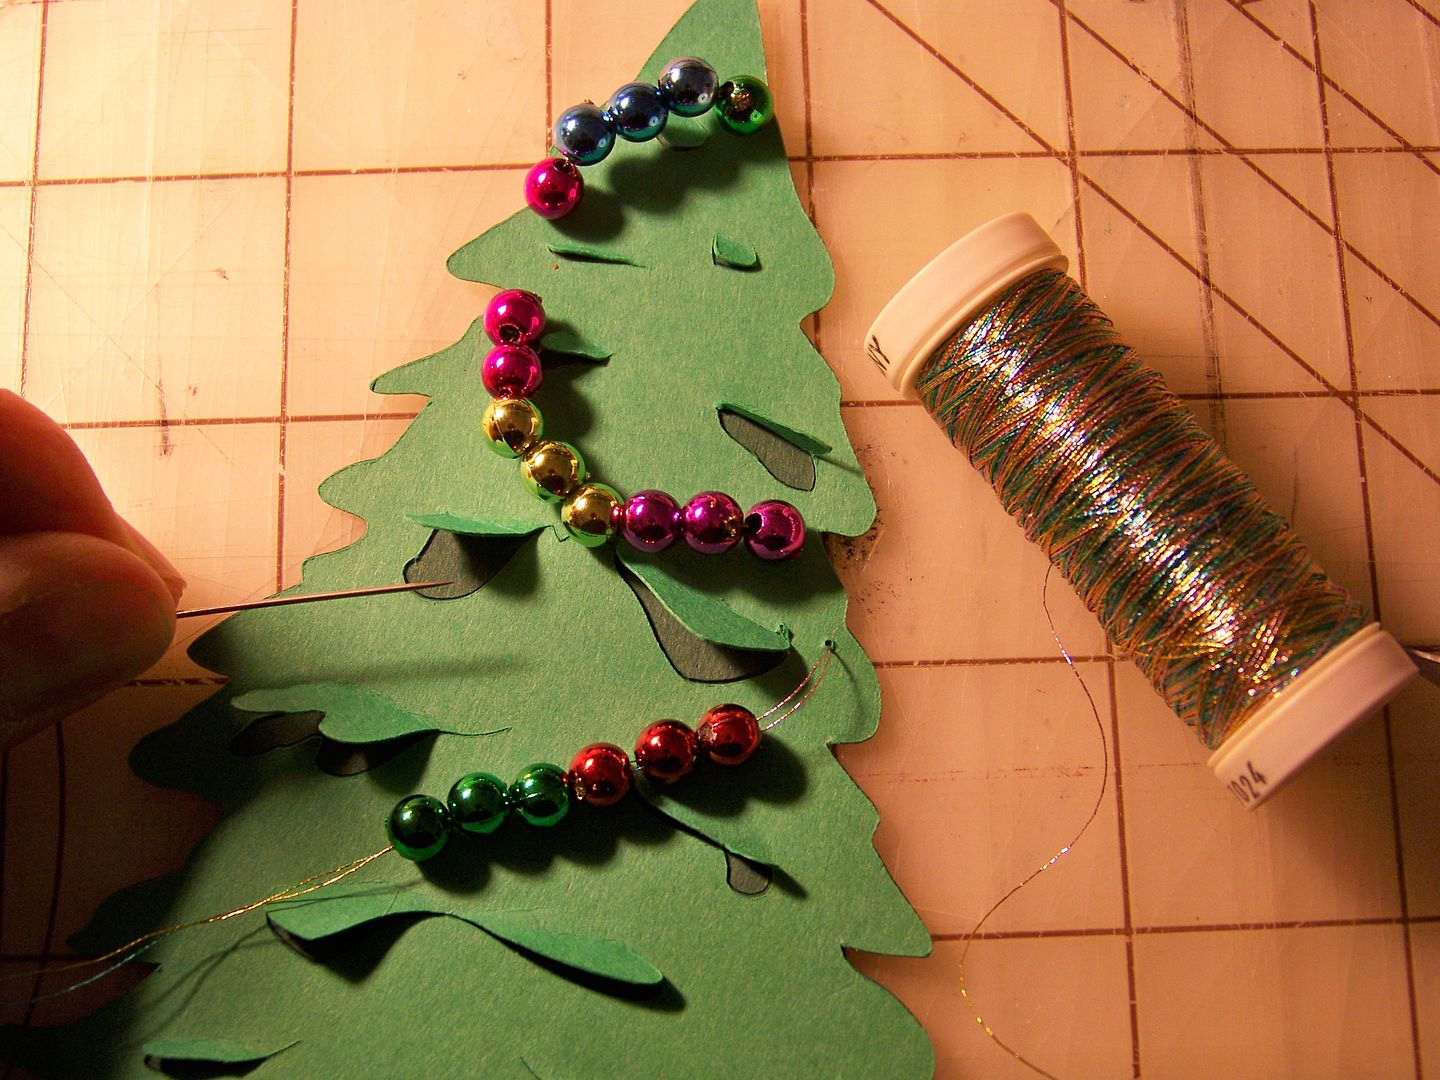
I created a garland by stitching on lines of beads with metallic thread. Unlike gluing, stitching a long line of beads will allow them to hang, like real garland!
For fun, and to remind me of the silliness of our family, I added a paper electrical cord and outlet. Keeping the electrical cord visible and clear was the subject of repeated lectures growing up as my sweet paranoid mom dealt with the real tree that she always bought, despite her fear of it catching on fire.
I decorated the tree with jewels, beads, and ornaments (cut at 3/4") and a topper (cut at 1-3/4") from the same Christmas cart. I added a tree skirt that I hand-cut and folded.
I removed the glass from the inexpensive frame I purchased. I cut a paper mat that I glued to the purchased frame's white mat with double-sided tape, allowing the beveled edges of the mat to show. I printed off a copy of the picture I had chosen for this project and attached it from behind the mat with double-sided photo tape. Using a mat knife, I cut a triangle out all the way through the picture and frame back so that I could feed the cords through from the back to the tree that will be on the front.

I applied the lights to the tree, keeping the cords on the back as flat as possible and adhering with tape. I applied the tree to the frame with pop dots on the top and sides, attaching to the mat. I glued the bottom flush, attaching to the wood frame.
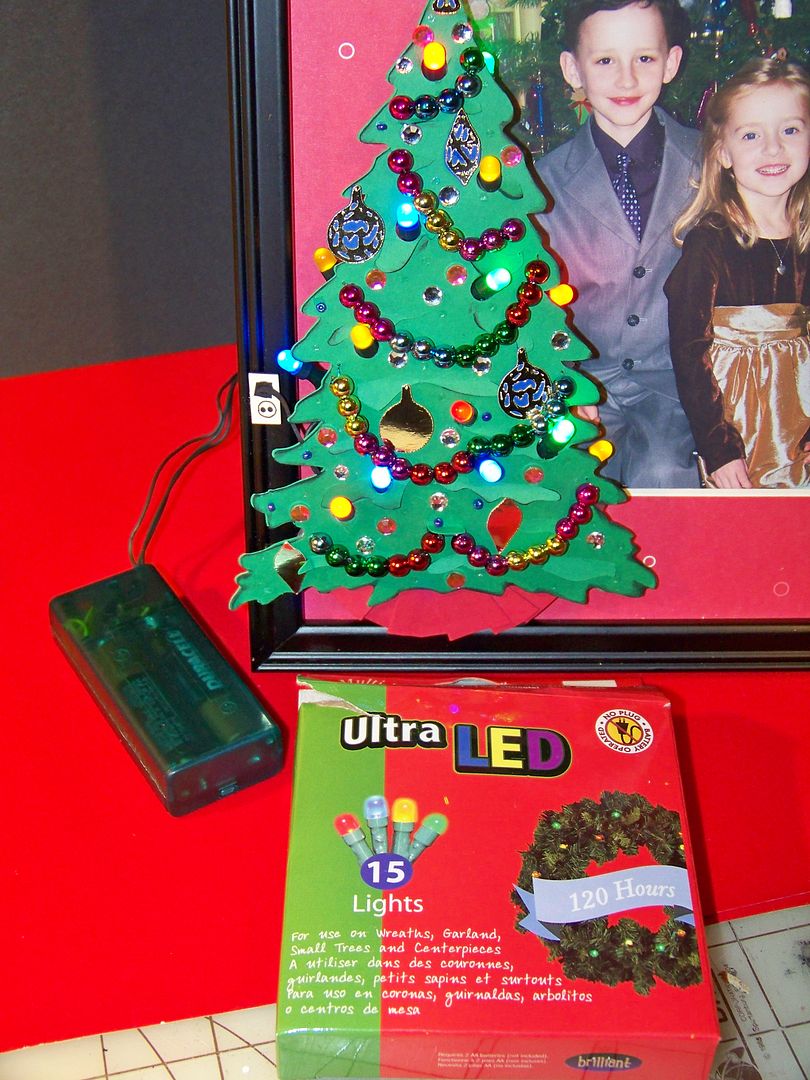 |
| I found these lights at Meijer for under $4. |
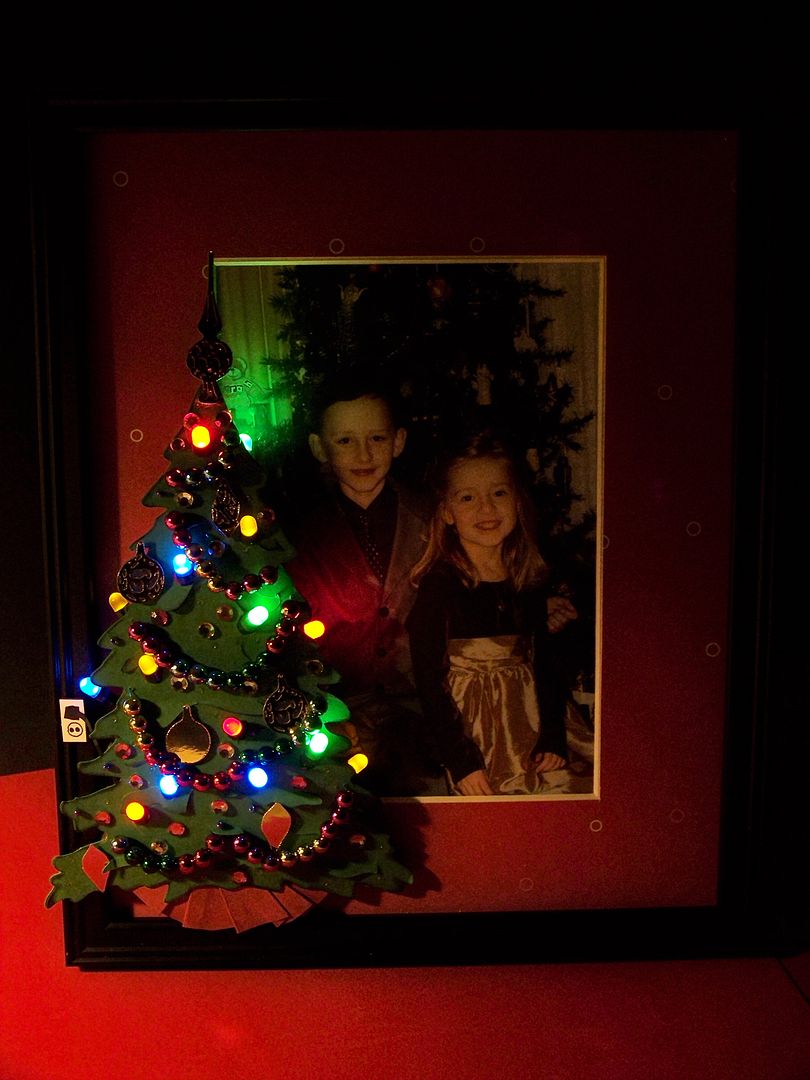 |
| Like a kid, I had to photograph it with the lights off so I could see it glow! |
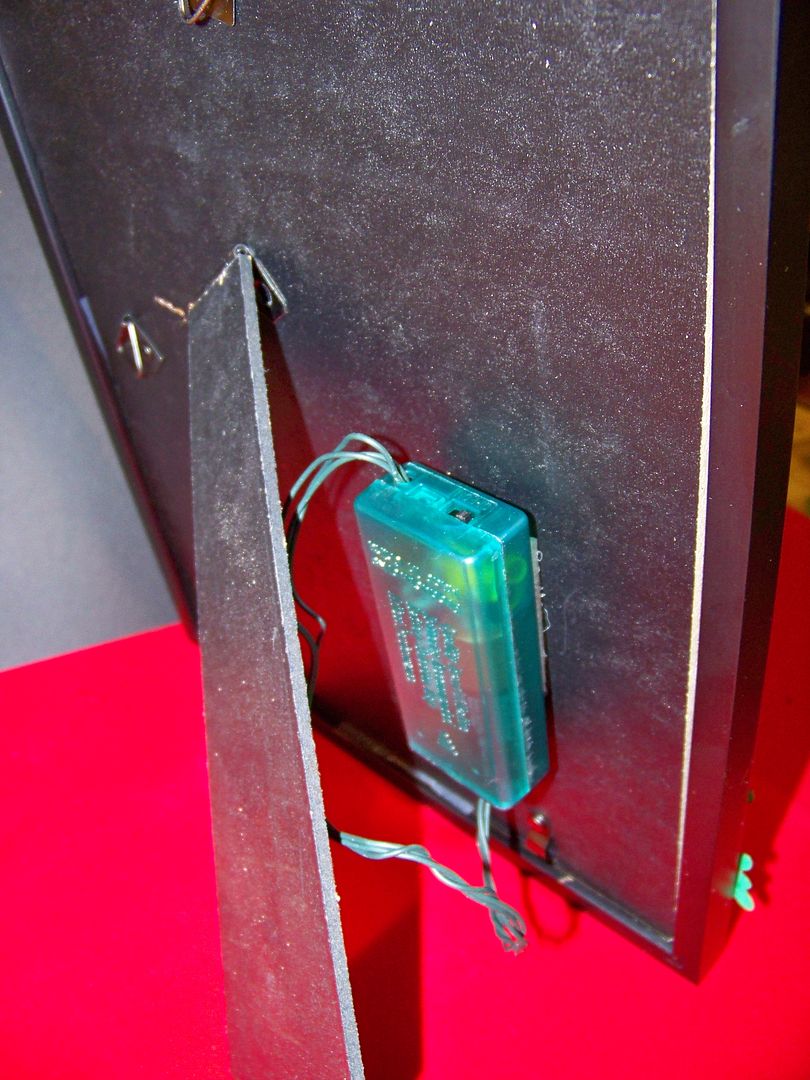
I used Velcro to attach the battery unit to the back of the frame.
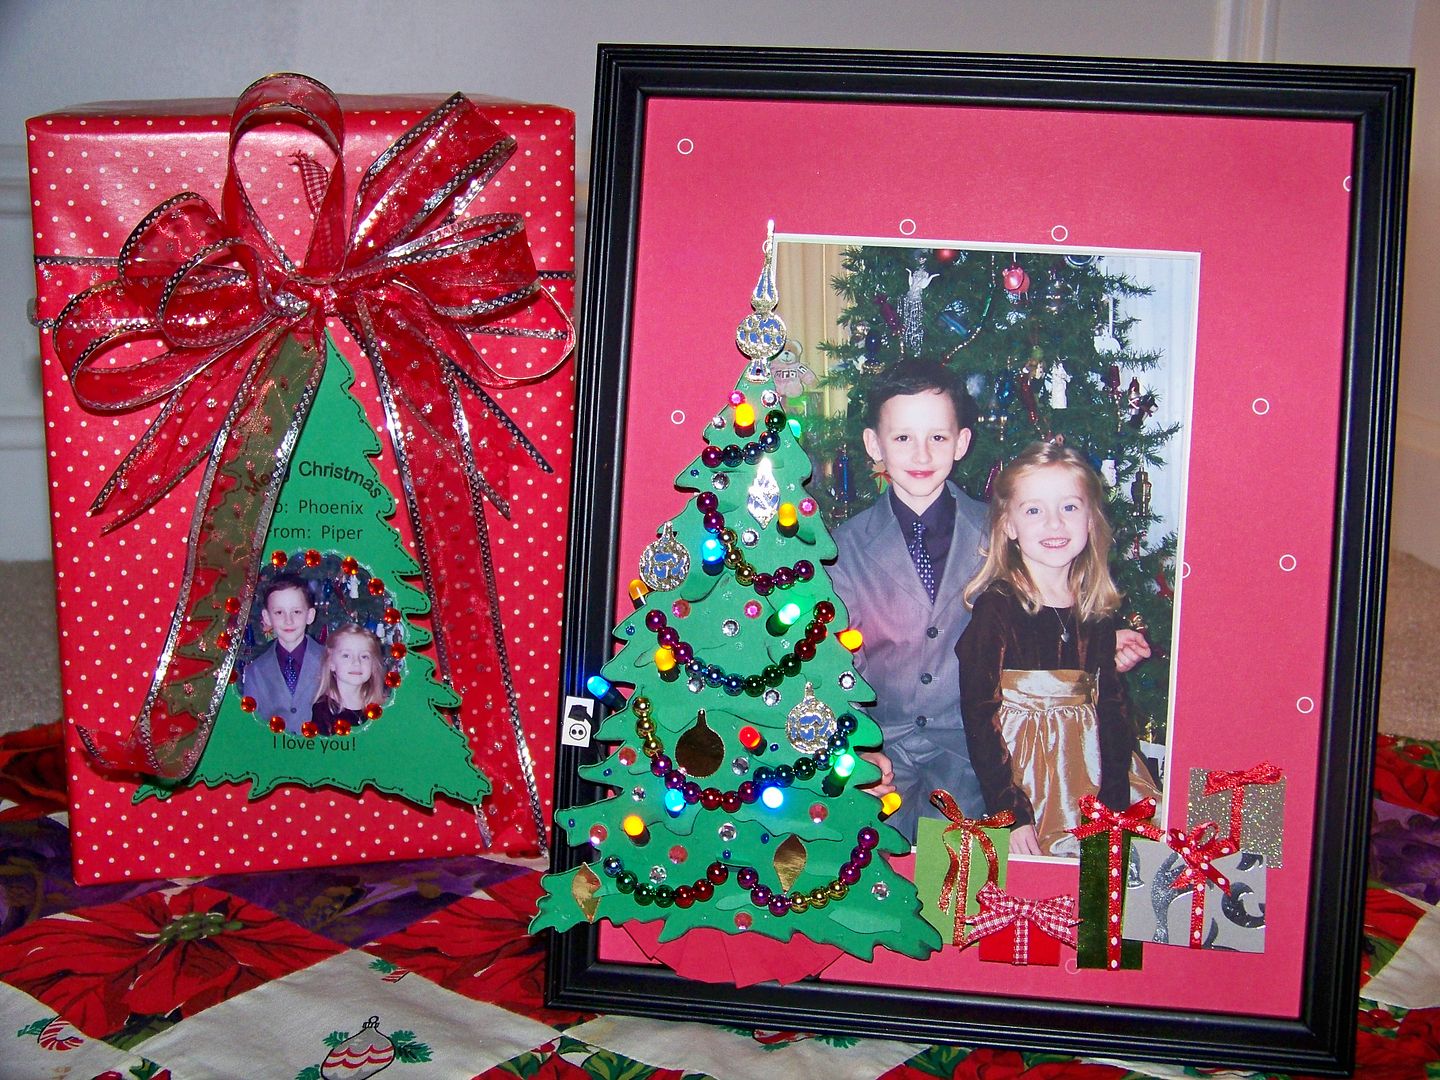
I added a few gifts that were simply rectangles, embellished with ribbon and bows I tied. Some are popped up with pop dots to add a little dimension.

I hope you like my frame! To carry on the theme, I created a tag using the same tree and photo, printing the tag on my computer, and cutting a window using Mini Monograms at 2-1/4" using the Centerpoint feature.
While working on this project, I had so many great childhood Christmas memories flood my mind! My mom was a single parent throughout most of my childhood and financially struggled most Christmases, but we NEVER knew it. She always made sure that we had wonderful experiences, beautiful gifts, and fabulous foods. In her honor, and to indulge a bit in my memories, I thought I would share this recipe. It is one of my Mom's standard recipes. It is one that I started taking to my in-laws' Thanksgiving celebration a few years ago, and is now required! Loaded with sugar and butter, it is only healthy for the spirit, not so much for the arteries!
My Mom's Sweet Potato Casserole
3 cups cooked, mashed sweet potatoes
2 beaten eggs
1/4 cup milk
1 cup sugar
1 teaspoon vanilla
1/2 cup butter
Mix and put in a buttered casserole.
Mix and sprinkle on top:
1 cup brown sugar
1/3 cup flour
1 cup chopped pecans
1/3 cup melted butter
Bake 30 minutes at 350°.

20 comments:
are you kidding me?...freaking amazing!...
VERY cool! Love your frame and light upi tree :)
You are one amazing talented girl!! your projects always make my mind blow up! And thank you for sharing your project at thebugbytes :)
What a fabulous project! Thanks for all the details and sharing your sweet memories with us.
Pam! I am so glad you like it. Thank you for letting me be a part of your blog!
I can't even focus on the great project (but, of course, it IS great!)...I'm too excited about the recipe! My son is going to LOVE this...maybe I'll make it a surprise for him! Thanks for sharing!!
This is the cutest thing. I love it. In fact I love all your projects. I'm a new follower.
Thank you all for your sweet comments. I am so happy you like my project! I really had a lot of fun making it and could not wait until I could post it for Pam!
AWESOME,your imagination blows my mind.You beat me to the lites I just bought mine today and then I saw your blog with this lite up tree very cool. Keep up the fantasic work my friend.
Therese
You are amazing! I love it,
I love it...I would love to try to recreate that frame but I am sure it won't come out nearly as good as yours. Fabulous.
OMG - this is awesome! So clever! And I love the mini electrical outlet!
WOW!! This is awesome!! I am going to have to try this!!! What a great idea!! TFS!!
Your work is amazing!! Thank you for sharing your creativity, it is very inspiring!
and the princess in the convertible blew me away.... then i visited your blog. you are simply amazing. and yes you love details. love all there is about your blog = even the words of wisdom.....we would get along very well.
Maureen
mo_sala@pacbell.net
eeeks! I thought I posted here.
I must have just posted on thebugbytes.com.
This is such a fun project. As I was scrolling
and reading and seeing all the detail I was
so excited. THEN I came to the piece de resistance!!!
The lights. Thank you for taking the extra measure
even though it was difficult as an added final
thought. It really makes it spectacular!
:) TR
Hi! I have something on my blog I'd like to share with you.
Maria
ADORABLE!!!!!!!!! Very unique idea too, gahhh, I just love it!
Thank you SO much for sharing your project. Just finished scraplifting it this morning and although not as cute as yours, I am sure my DIL will LOVE it! Thank you again, and Merry Christmas!
This is cool! Love your frame and light upi tree :)
Post a Comment