The parents all take on jobs too, as this whole thing is done with only two paid workers: the two teachers of the school! All other jobs are done by parent volunteers, from set design and construction, to costumes, to lighting, to stage management to house management. This is the first year that I was the production coordinator, a much bigger job than I have ever done before in the previous five ballet recitals my child has danced.
Each year, the families take up a donation for end-of-year gifts for the teachers. I wanted to create special cards that would be a little different from the usual store-bought ones the teachers have gotten in the past from the students. I used my embroidery machine, a simple Brother PE-770, along with Embrilliance software and files I bought from Urban Threads and .bx fonts I had uploaded previously, to create them.
One very helpful feature of Embrilliance is the ability to print out full-size paper versions of the embroideries so that you can see the size they will really be and the orientation they will stitch.

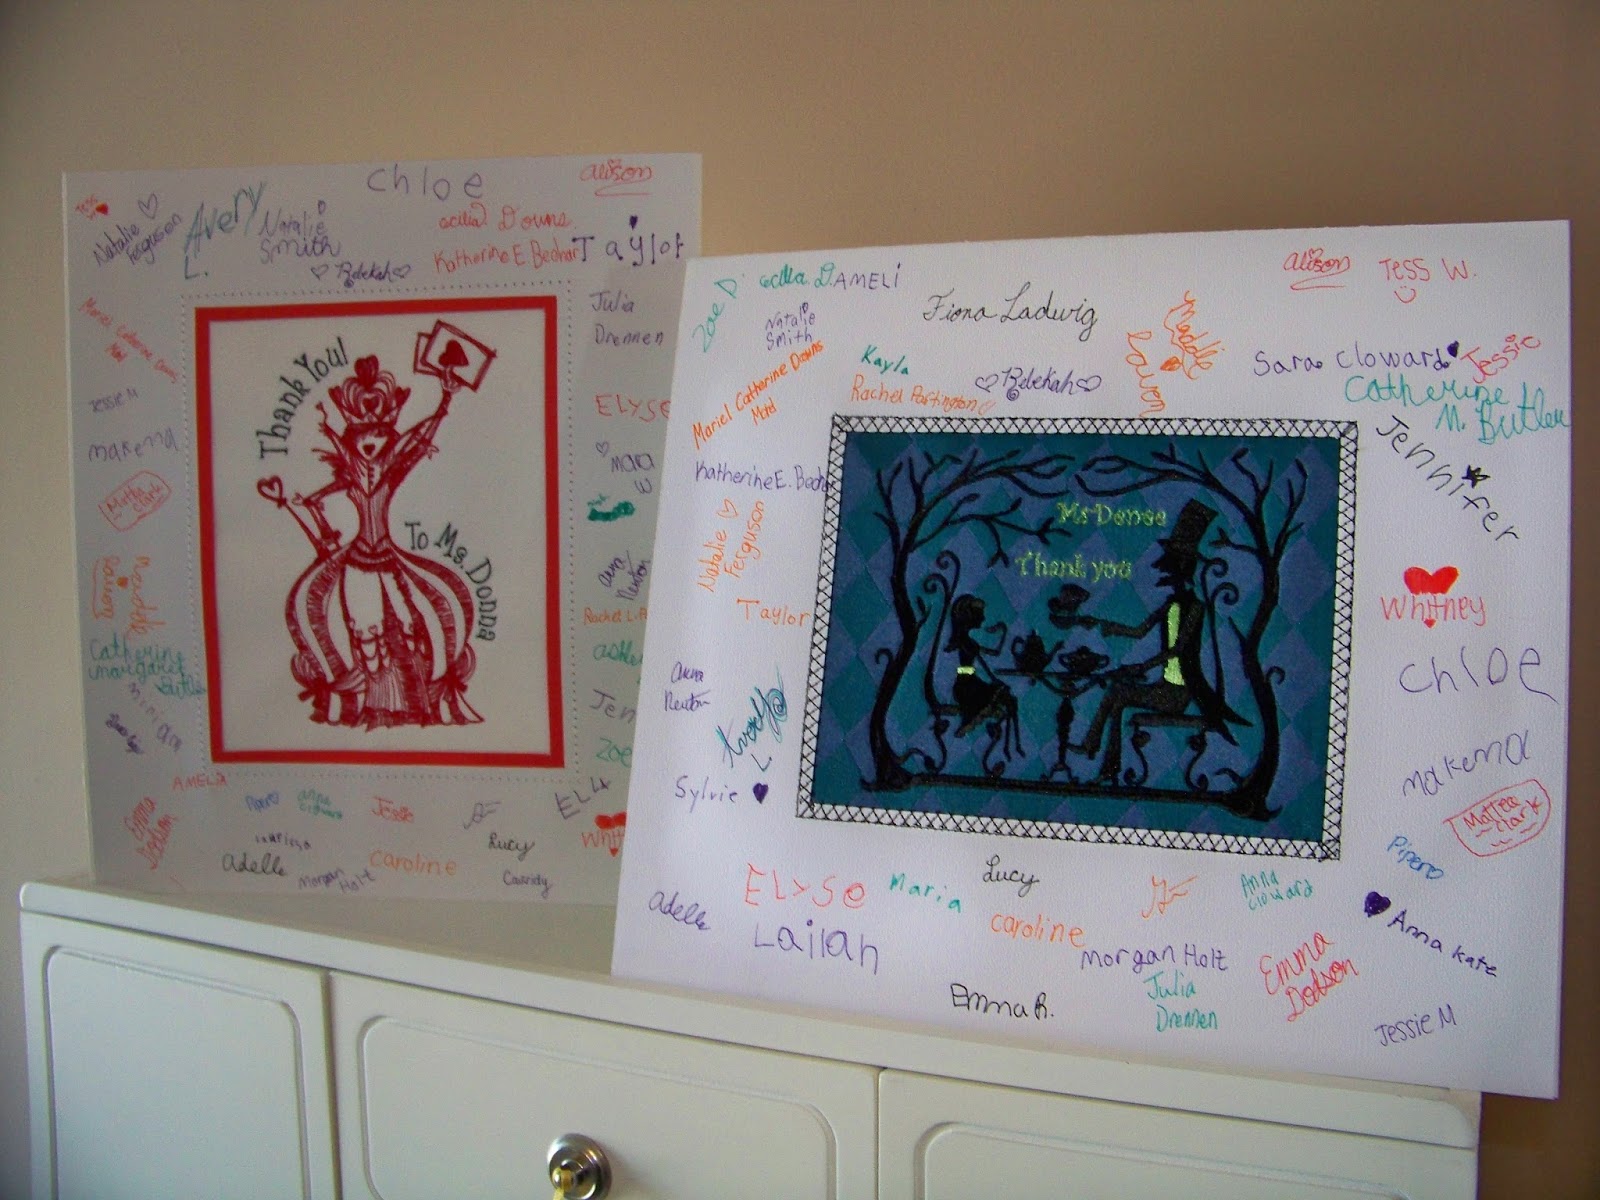
The paper frames were used to make the cards large, since the senior girls present these as gifts (along with money inside the cards) on stage after the final performance. I wanted plenty of room for signatures so the girls were allowed to sign the insides of the cards or on the fronts. I like the signatures on the card fronts because it incorporates the girls names into the design! I was able to use the paper printouts to cut card stock frames while the embroidery machine stitched the centers.

I embroidered them to fit my 5x7 hoop. I hooped the fabrics and three sheets of tear-away all together. Since this is a card, I left the tear-away in place on the finished embroideries! There is really no reason to tear it away. There is also no reason not to over-stabilize since the embroideries will be mounted and sewn in place to a paper frame. The most important thing is that they stitch perfectly with no puckering or pulling. I trimmed them so that the crimped stabilizer would not be an issue.

I used textile adhesive to temporarily adhere the frames to the embroidered fabrics. (Textile adhesive will not gum up the needle).

Then I sewed them in place using my regular sewing machine.


The card base is actually heavy art board that I cut and scored. I wanted something that would stand up to the weight of the embroidered fabrics.


I used double sided tape to adhere the paper frame to the art board card.


To hold the money inside, I created currency-sized envelopes using the Artiste cartridge and my Cricut Expression. These are sealed and adhered to the inside of the card using Scor-pal tape.


I created envelopes by hand by piecing 12x24 paper as needed to make the flaps large enough. I sealed them with Scor-pal tape and put a hand-tied bow on the each to finish them as gifts.
I love how they looked with the girls' signatures!
 |
| This file, called The Queen, is from Urban Threads. The font is one of many I had previously uploaded. I curved it with Embrilliance software. |
 |
| This file, called Wonderland Tea Party, is also from Urban Threads. The font is one I had previously uploaded. |
The girls gave lovely performances!

Thank you for checking my blog post today. I know I promised tutorials on baby gift sets....But sometimes life just changes things around! They are still coming though!
For more....
- To see my previous recital projects, click here for Beauty and the Beast and here for Cinderella.
- To see my notes and posts on machine embroidery, check my embroidery page here.
- To see many of my papercrafting projects, check out My Gallery.

No comments:
Post a Comment