Wednesday, November 14, 2012

Surprise Inside Greeting Cards

In my last post, I figured out how to make a pop-up accordion mini book.  While I was making it, I thought that those little scene pages would make great cards.  These are the ones I came up with...


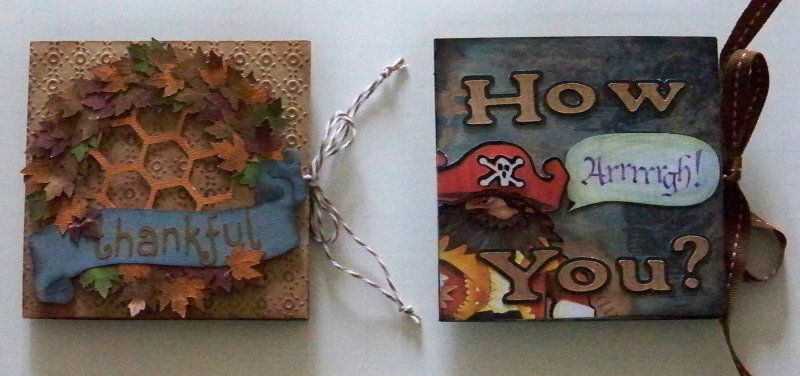
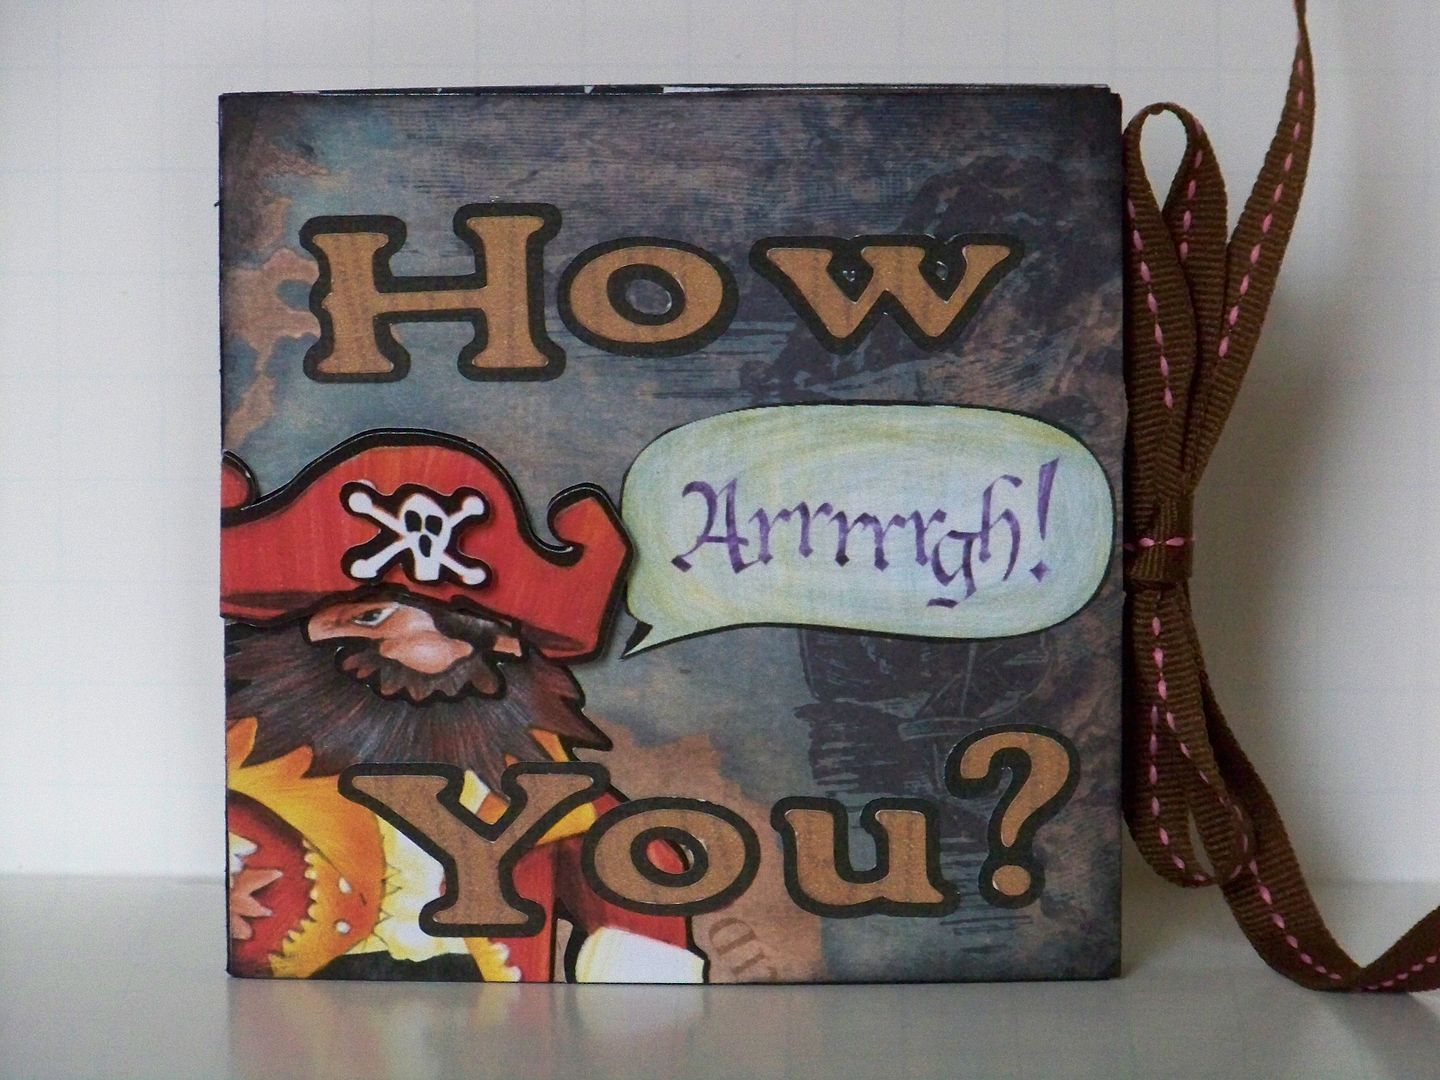
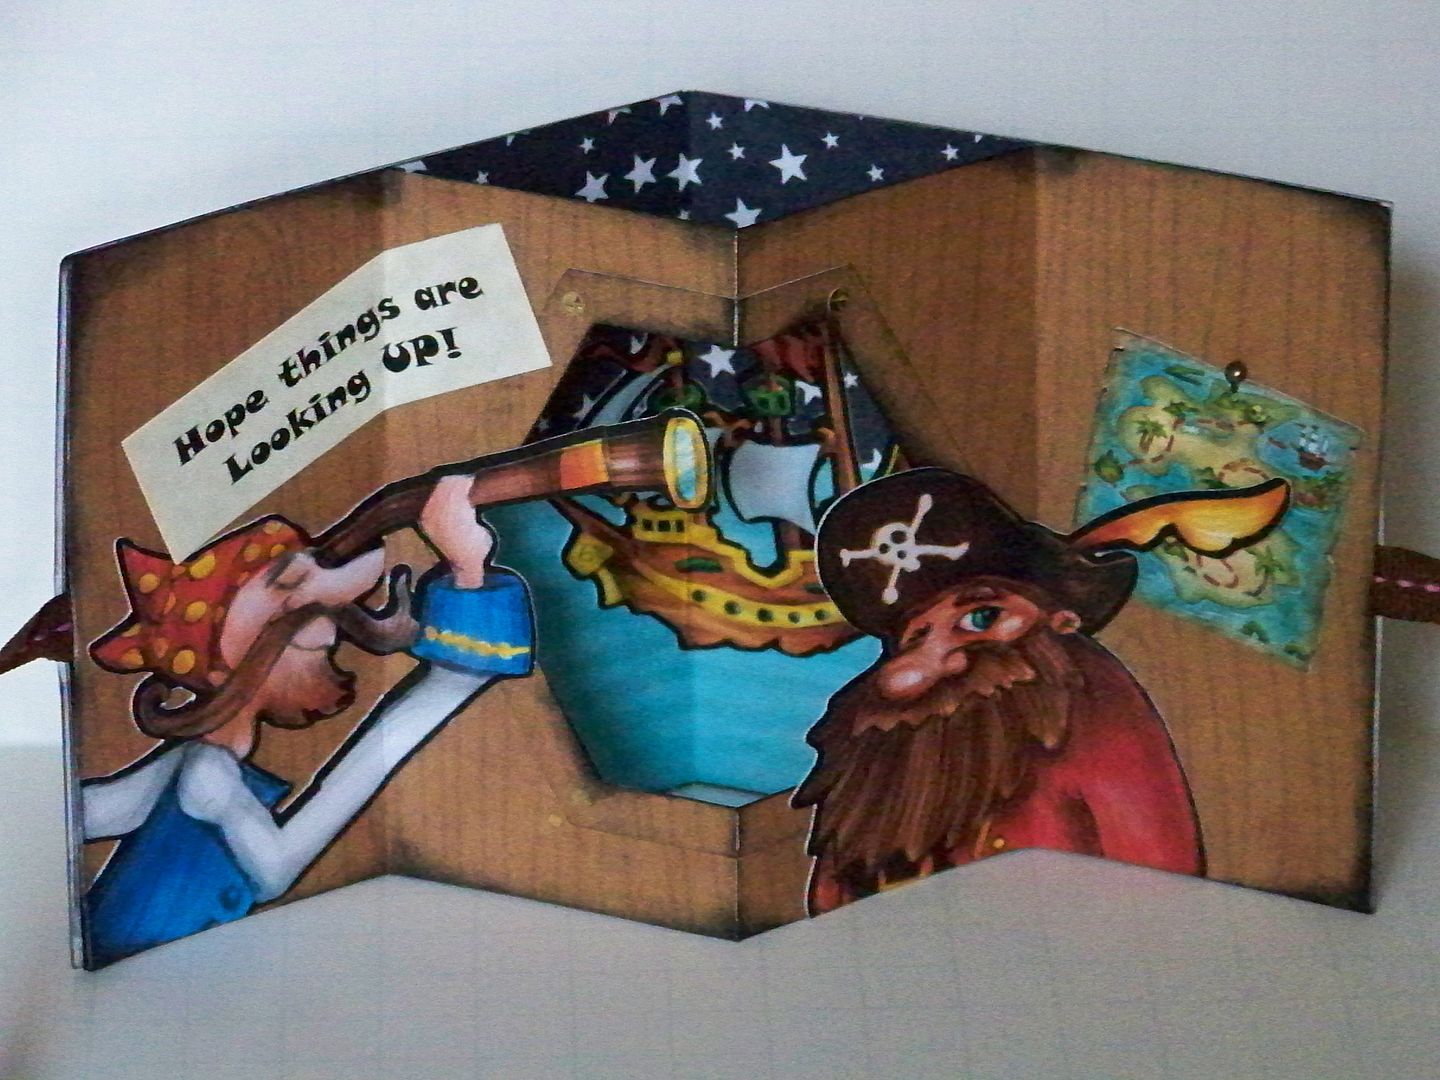
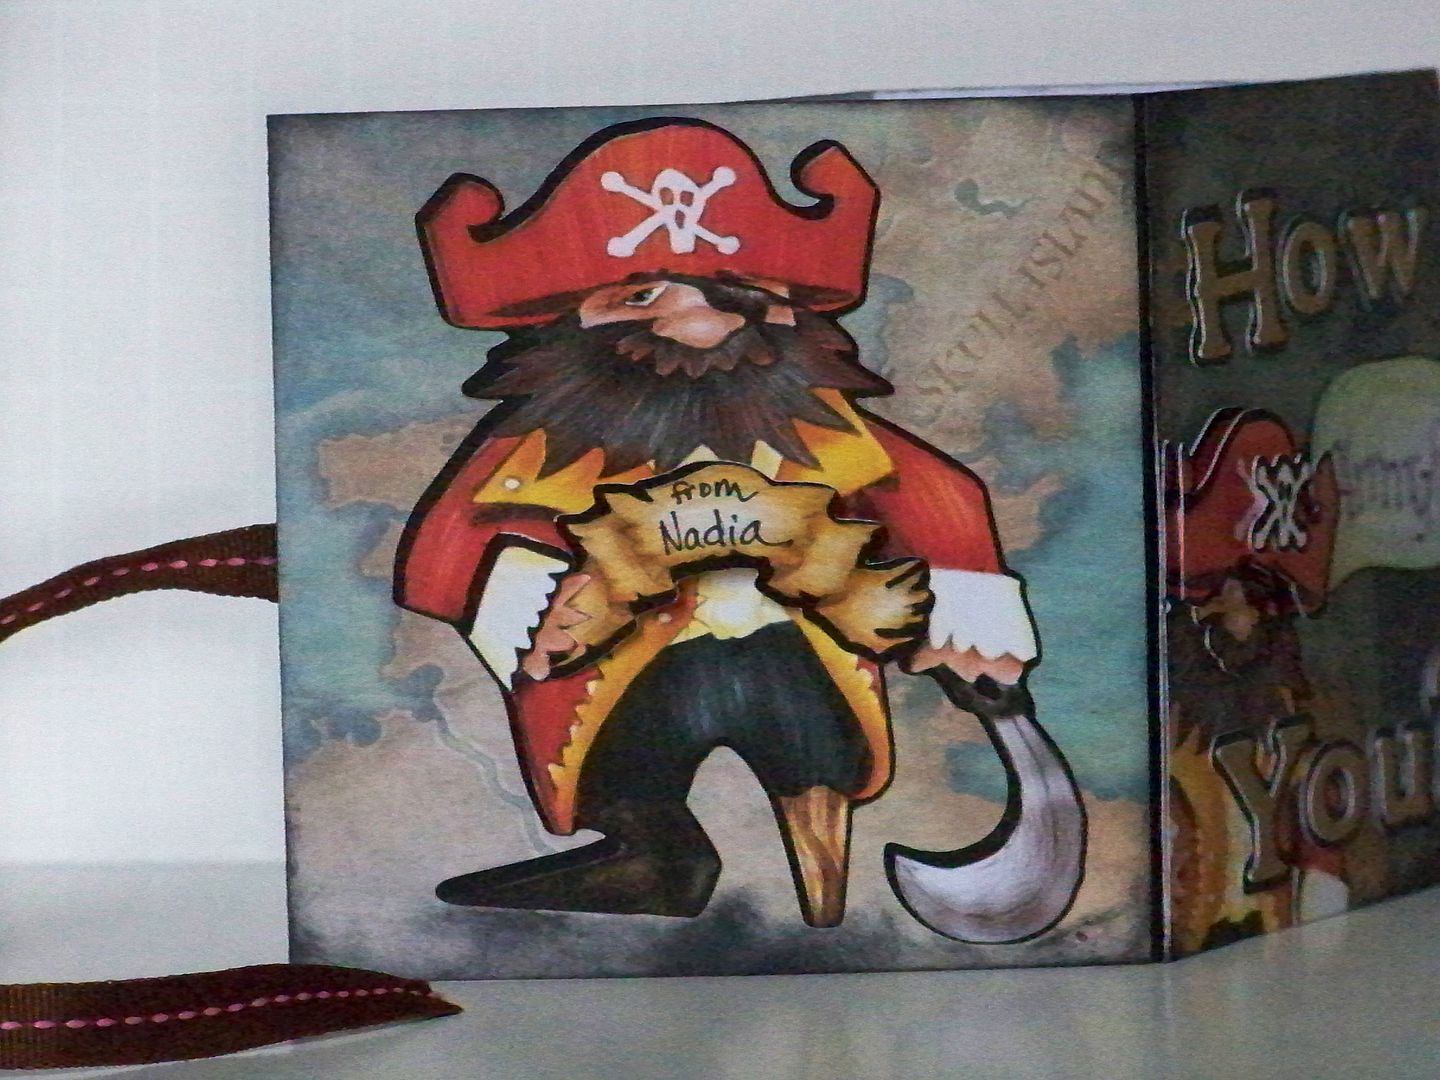
I made a pirate card to mail to a friend...
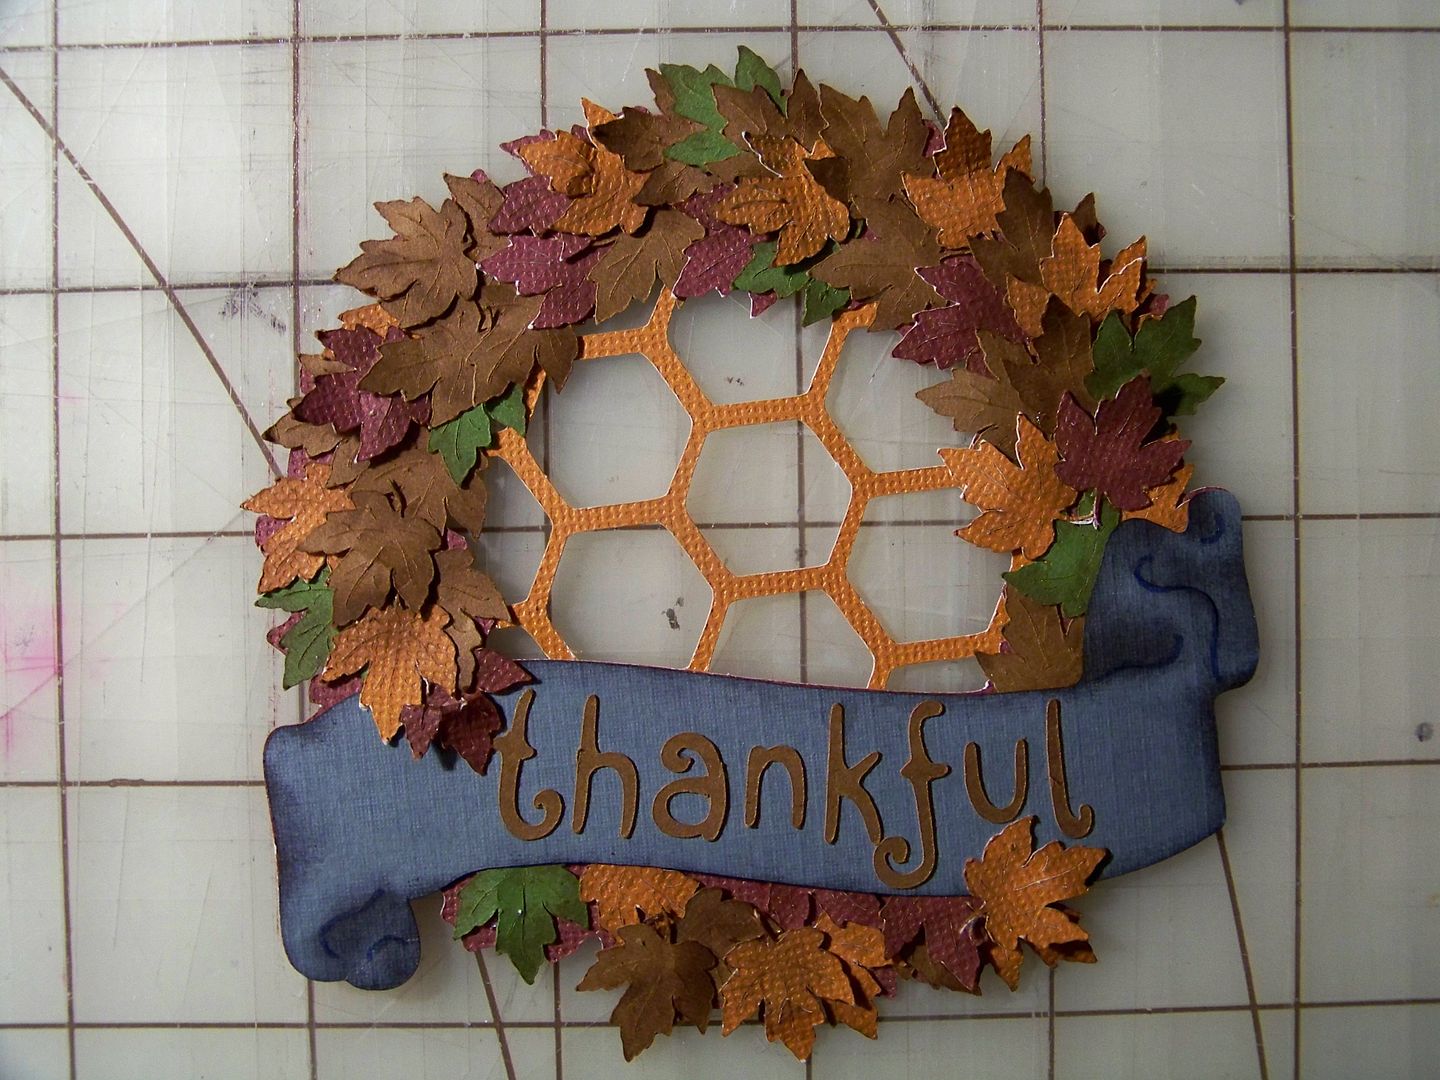
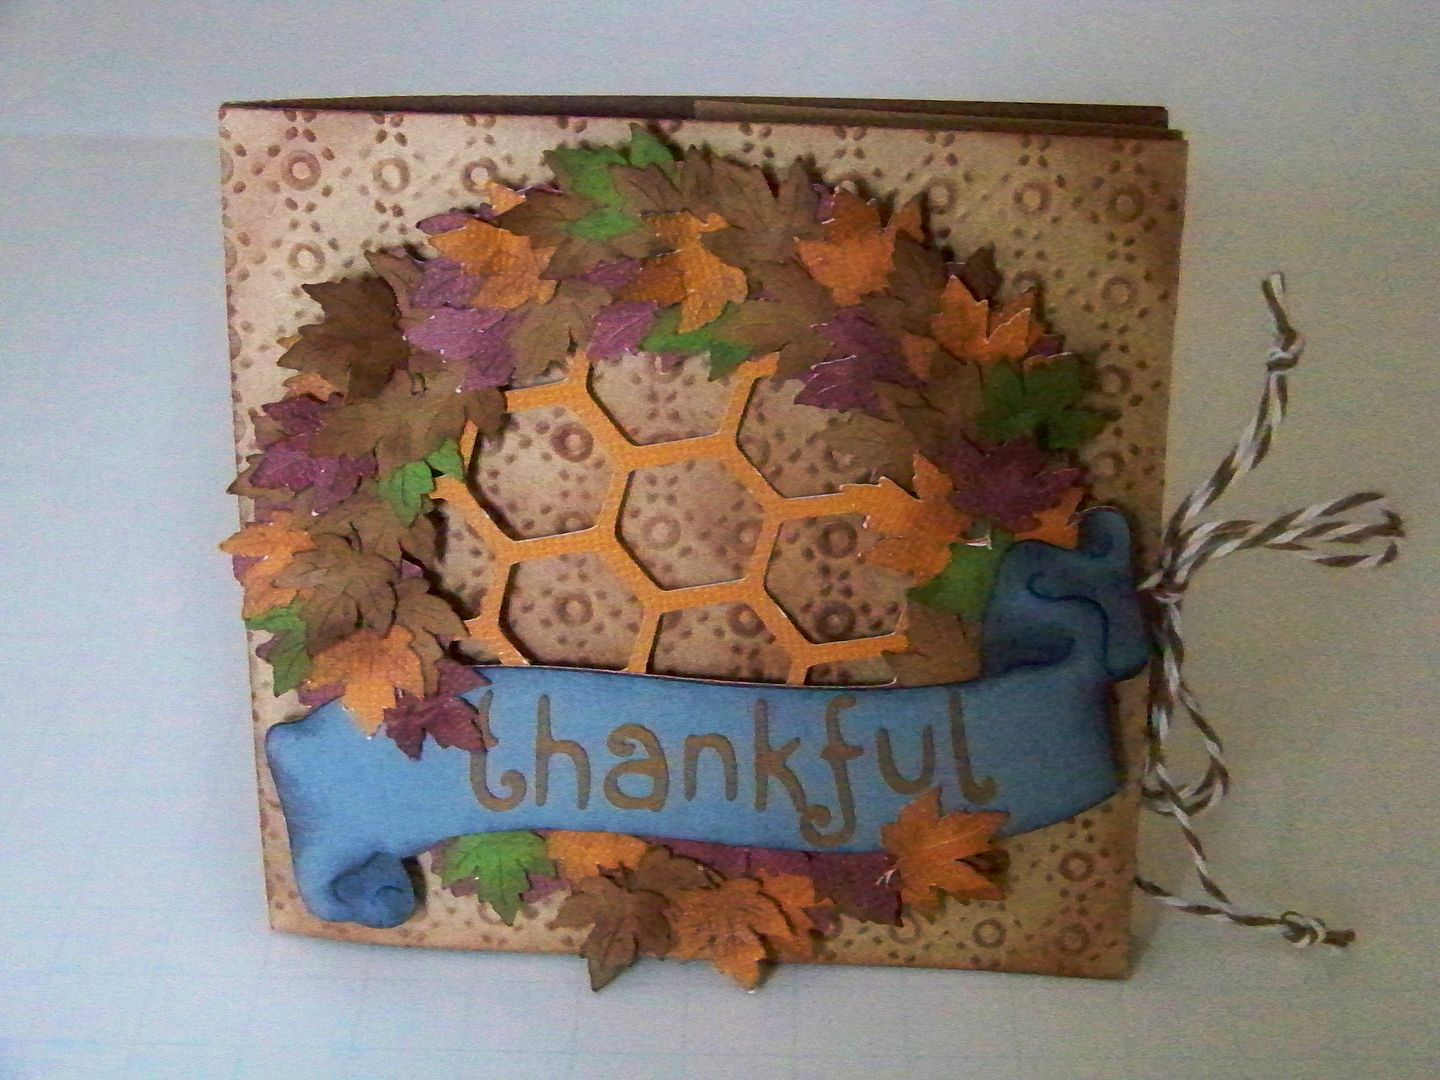
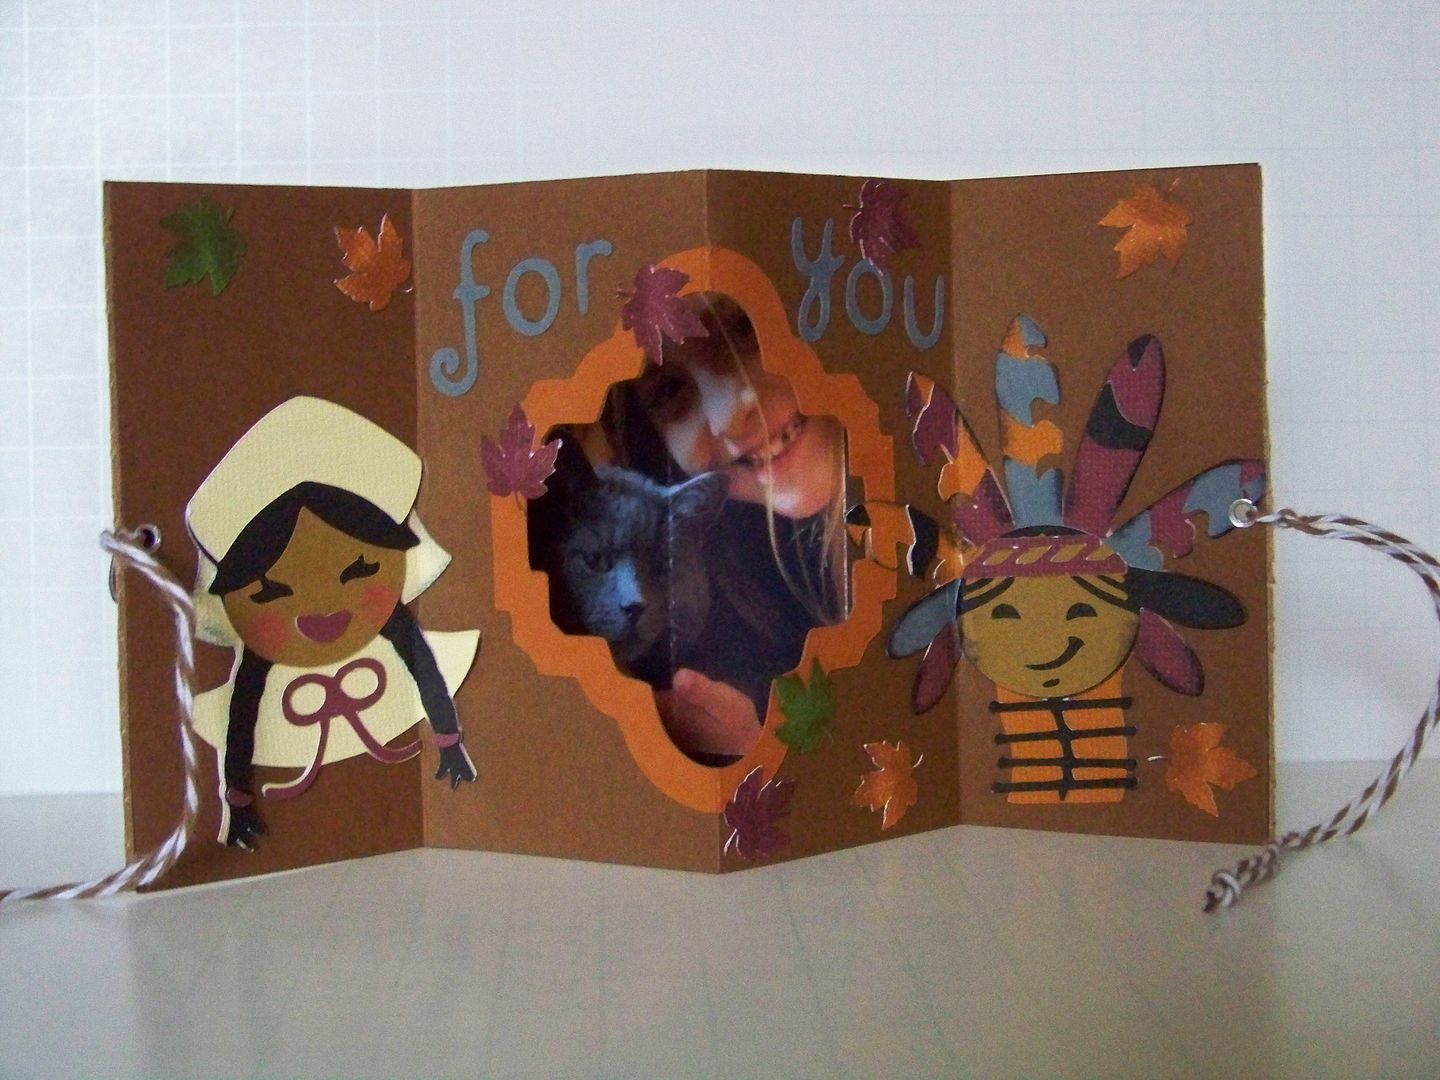
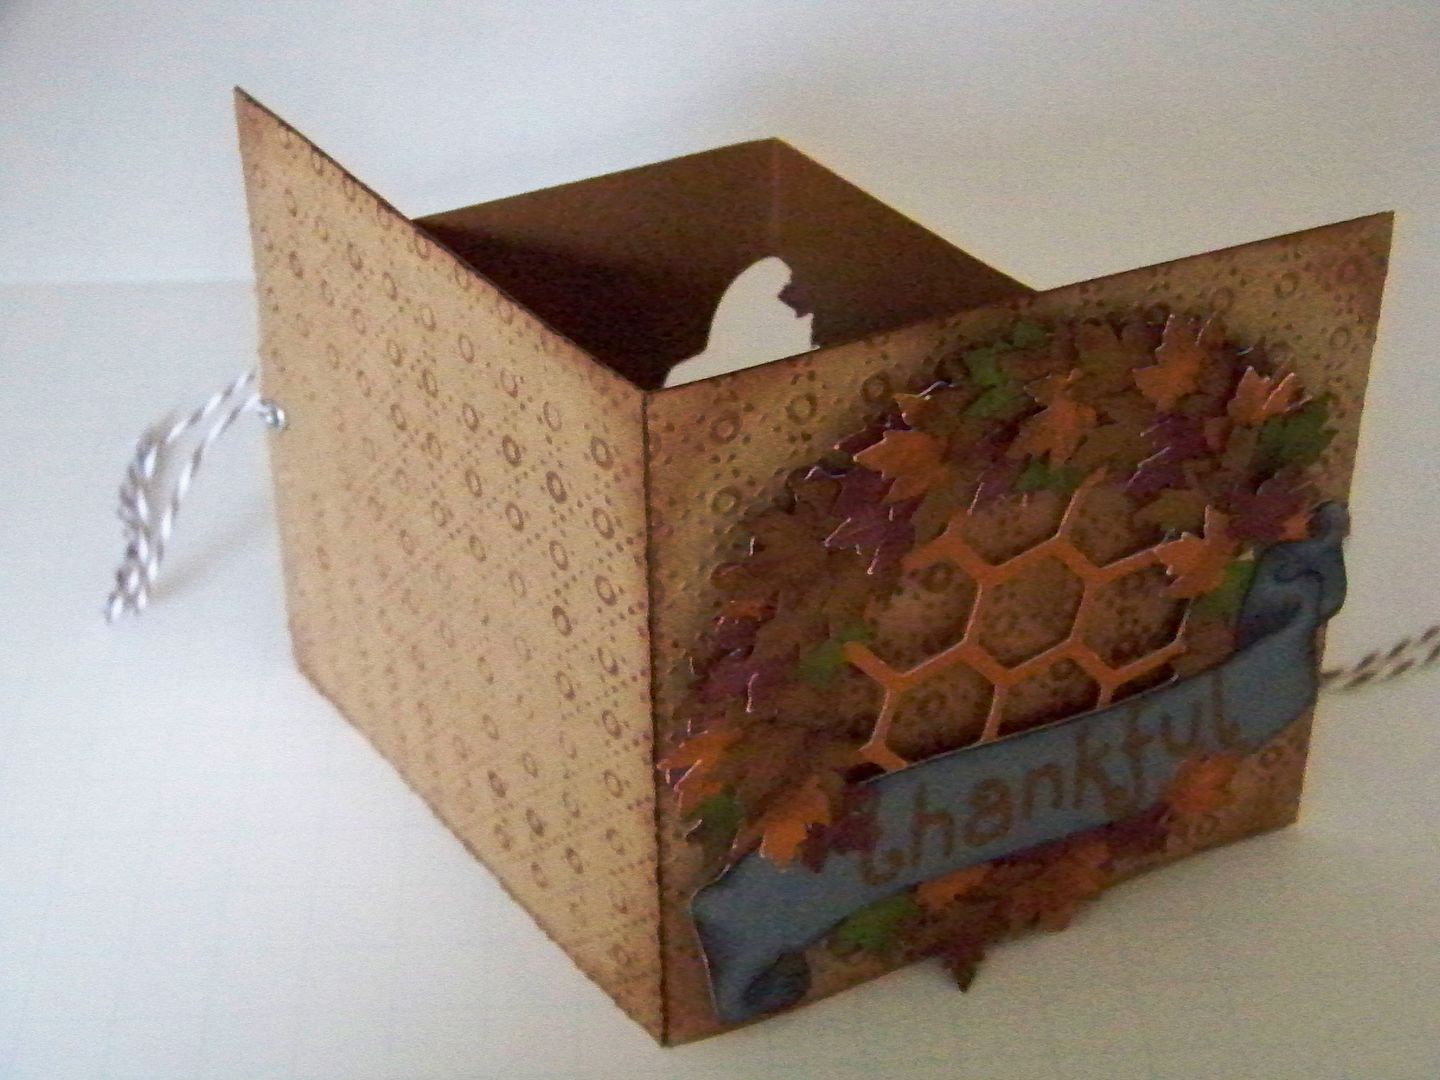
And I made a 'thankful for you' card to give to my daughter at her school's Thanksgiving luncheon...
After making the mini books on that last post, there were several things I wanted to try, including setting up the scenes before attaching the base papers.  WOW!  What a difference that made!  I wanted to use my Imagine to create quick, un-bulky die cuts.  I also wanted to investigate when it was best to score with a bone folder versus when it is best to use an Xacto knife.  These cards gave me lots of opportunities to figure it all out!

For each of my cards, I cut two pieces of 4"x8" cardstock. These form the inside of the card.  I cut two 4"x4" pieces of cardstock for the outside covers.  I cut all of my die cuts and adhered them flat to the bases before joining them.

Pirate Card (How Arrrrrgh You?)


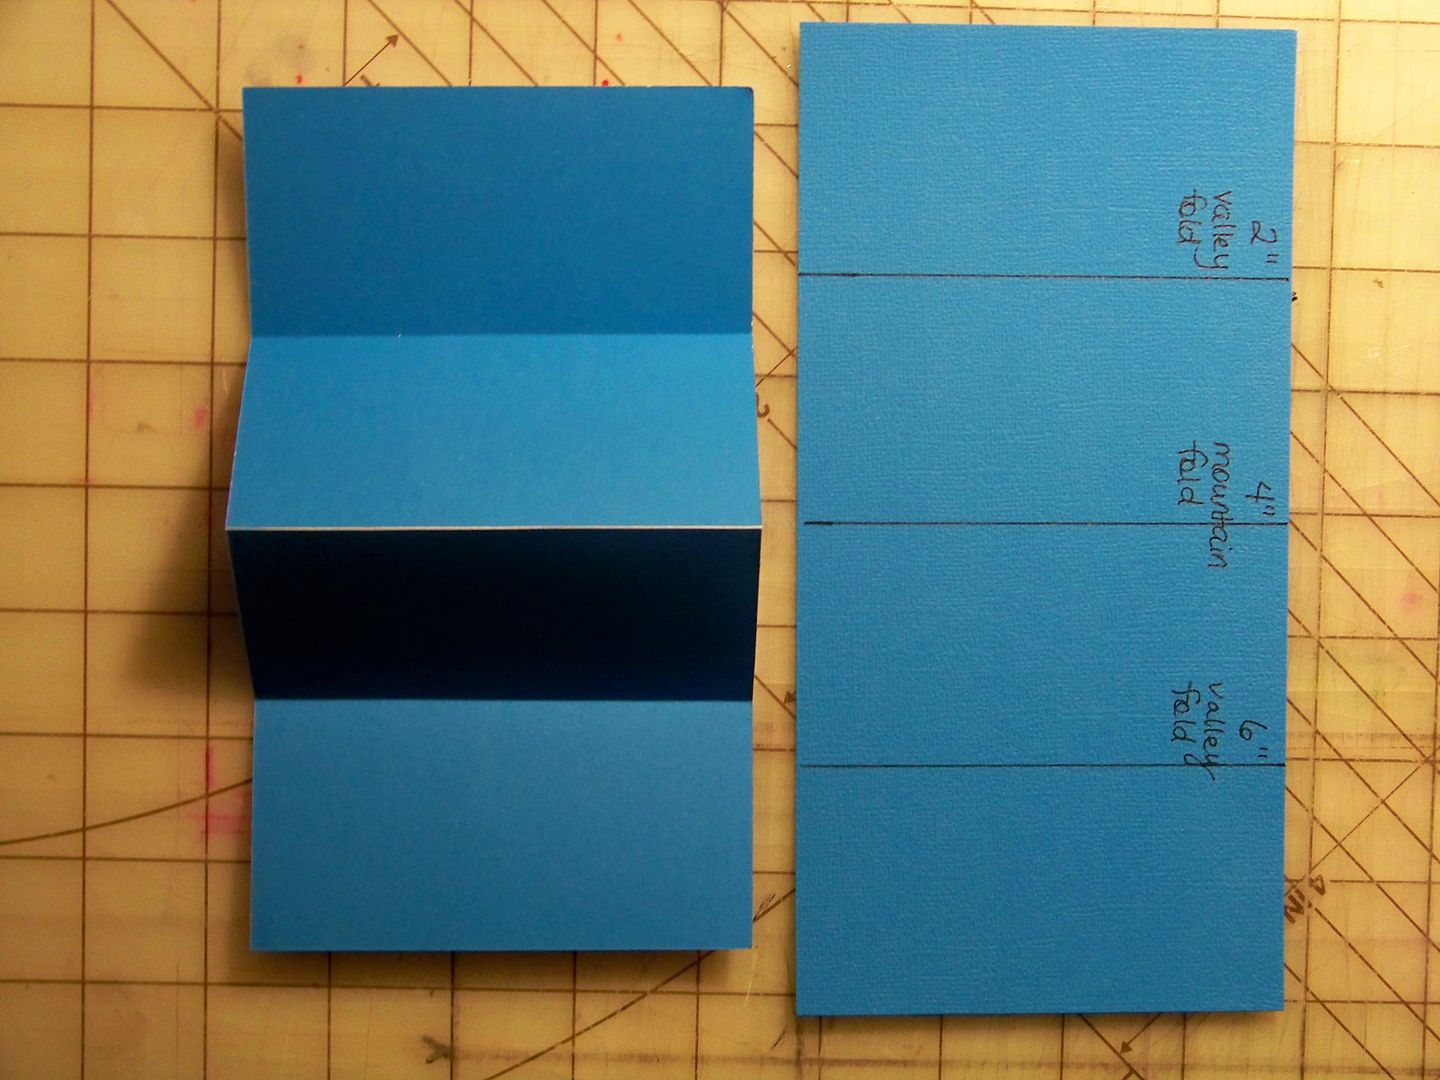
I cut the paper that would be the majority of the inside of the card-- the one that would have a window cut into it.  It was cut at 4"x8" and scored at 2", 4", and 6".


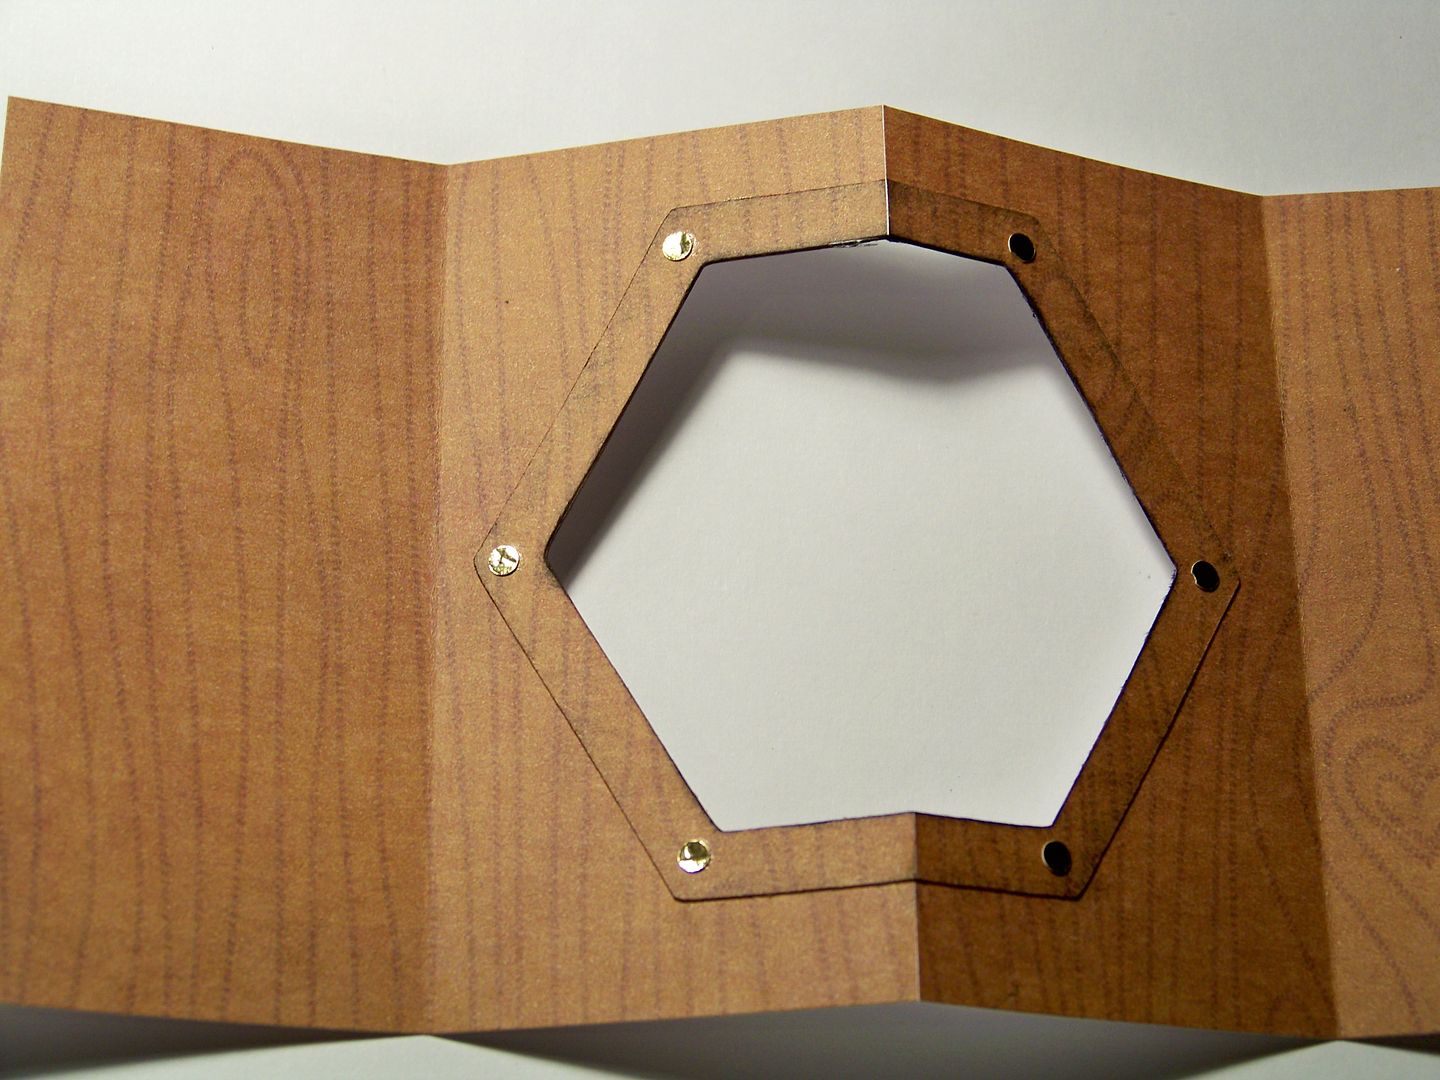
I cut a window in the middle of the paper using the Centerpoint feature. I also cut a frame with the same cut.  This is from Holiday Frames and Tags.


I cut the paper what would be seen when looking through the window at 4"x8" and scored in the center.
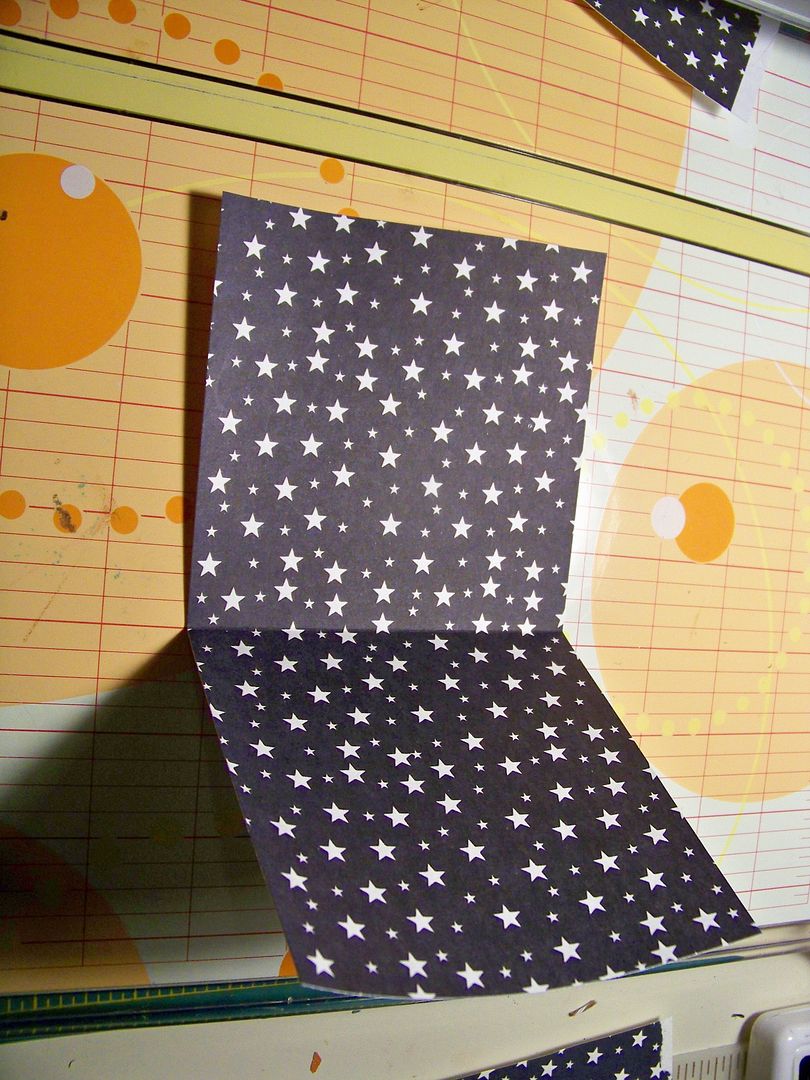

This would be the sky!  I wanted to add water.  I cut a 2"x4" piece of cardstock, scored it, and adhered it to the star paper.
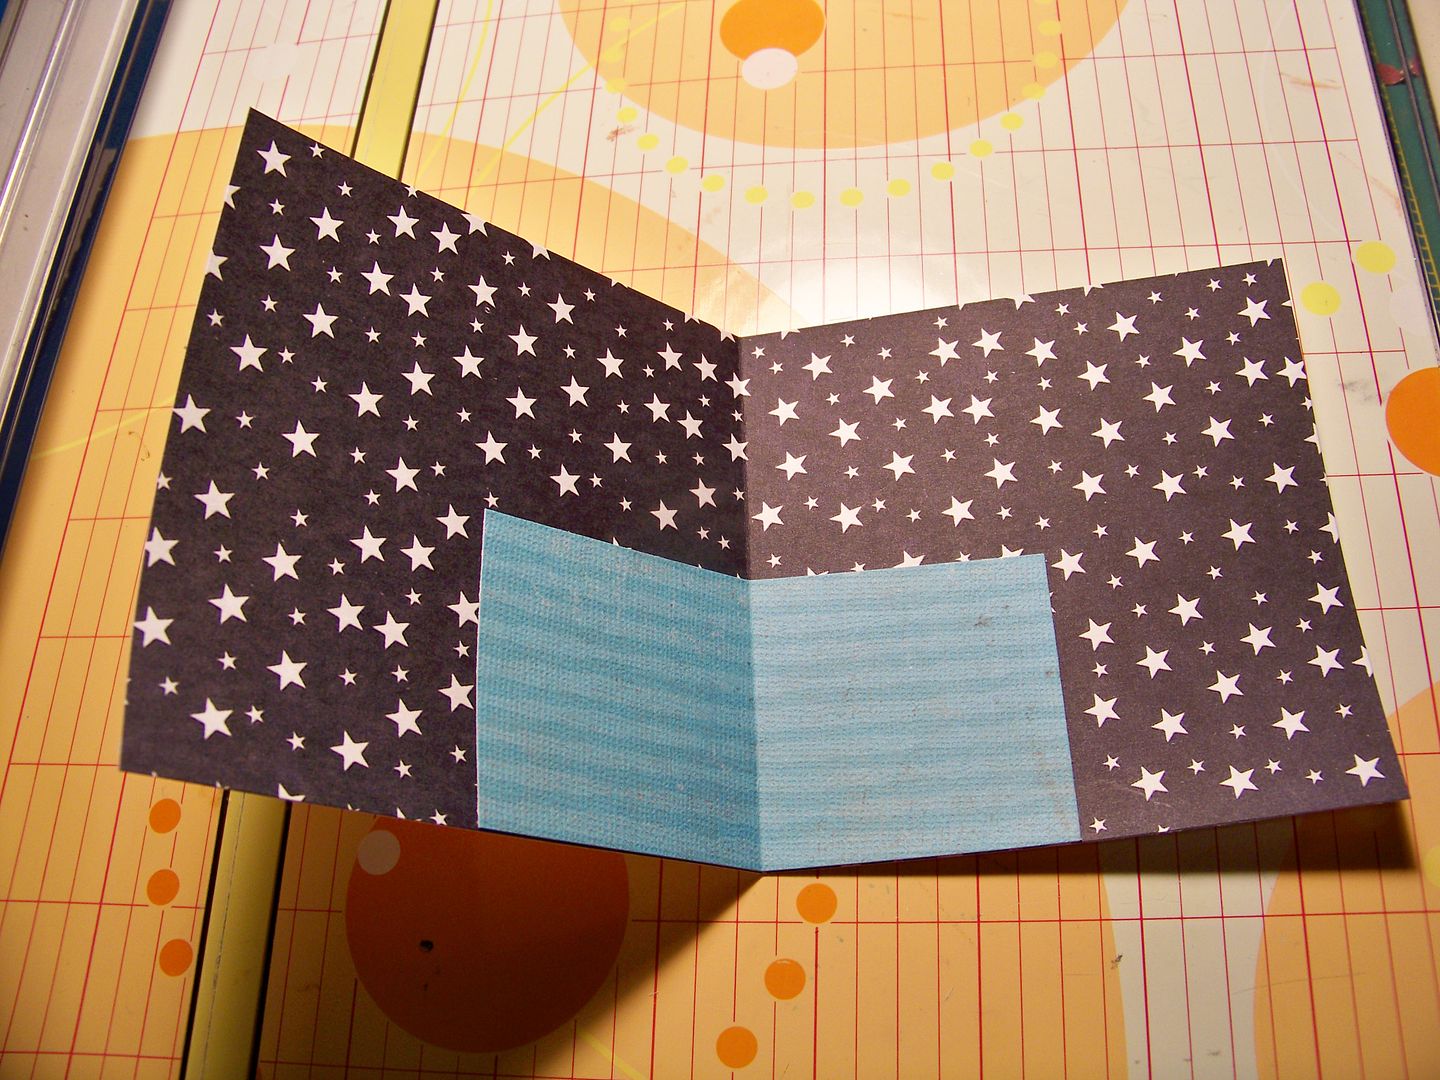

I cut the ship and added it.  I cut the characters and map and adhered them to their papers.  I cropped the characters to fit.  I used a brad that was inserted only part way to look like a nail holding the map up.  I did not glue the feather on the pirate's hat, allowing it to give a little dimension and create a shadow.
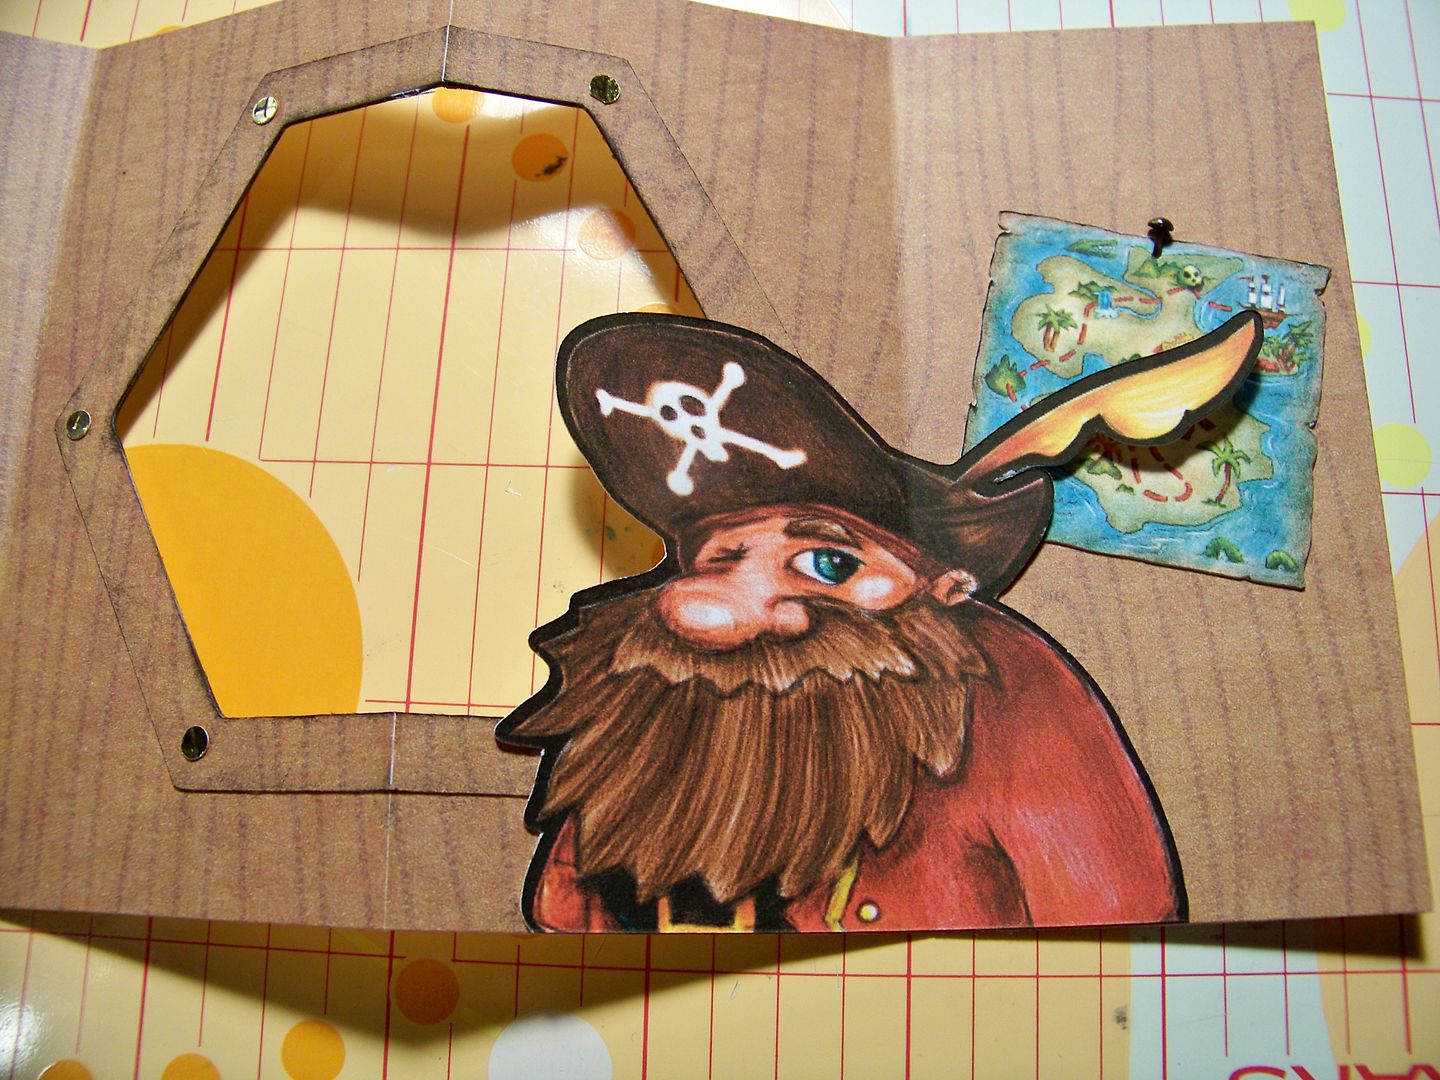

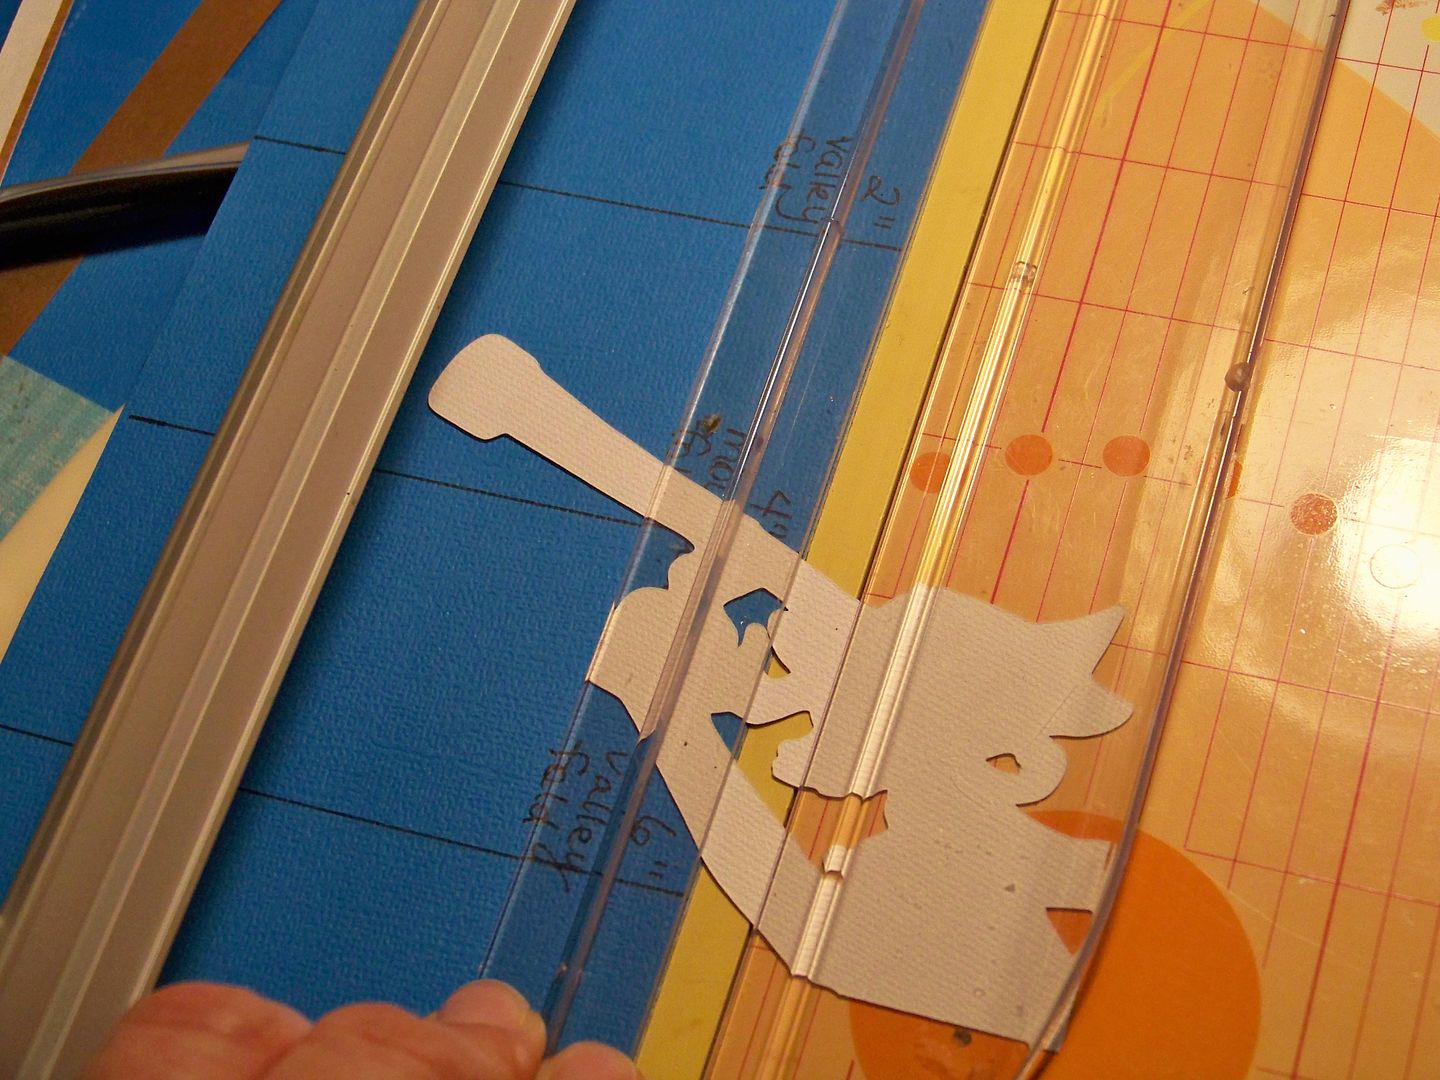
I used the straight edge of a piece of scrap paper to help me determine where to score a die cut (remember you have to score anything that covers a score line!).  I used the paper to indicate where the score goes, then I flipped it over and scored along the line.
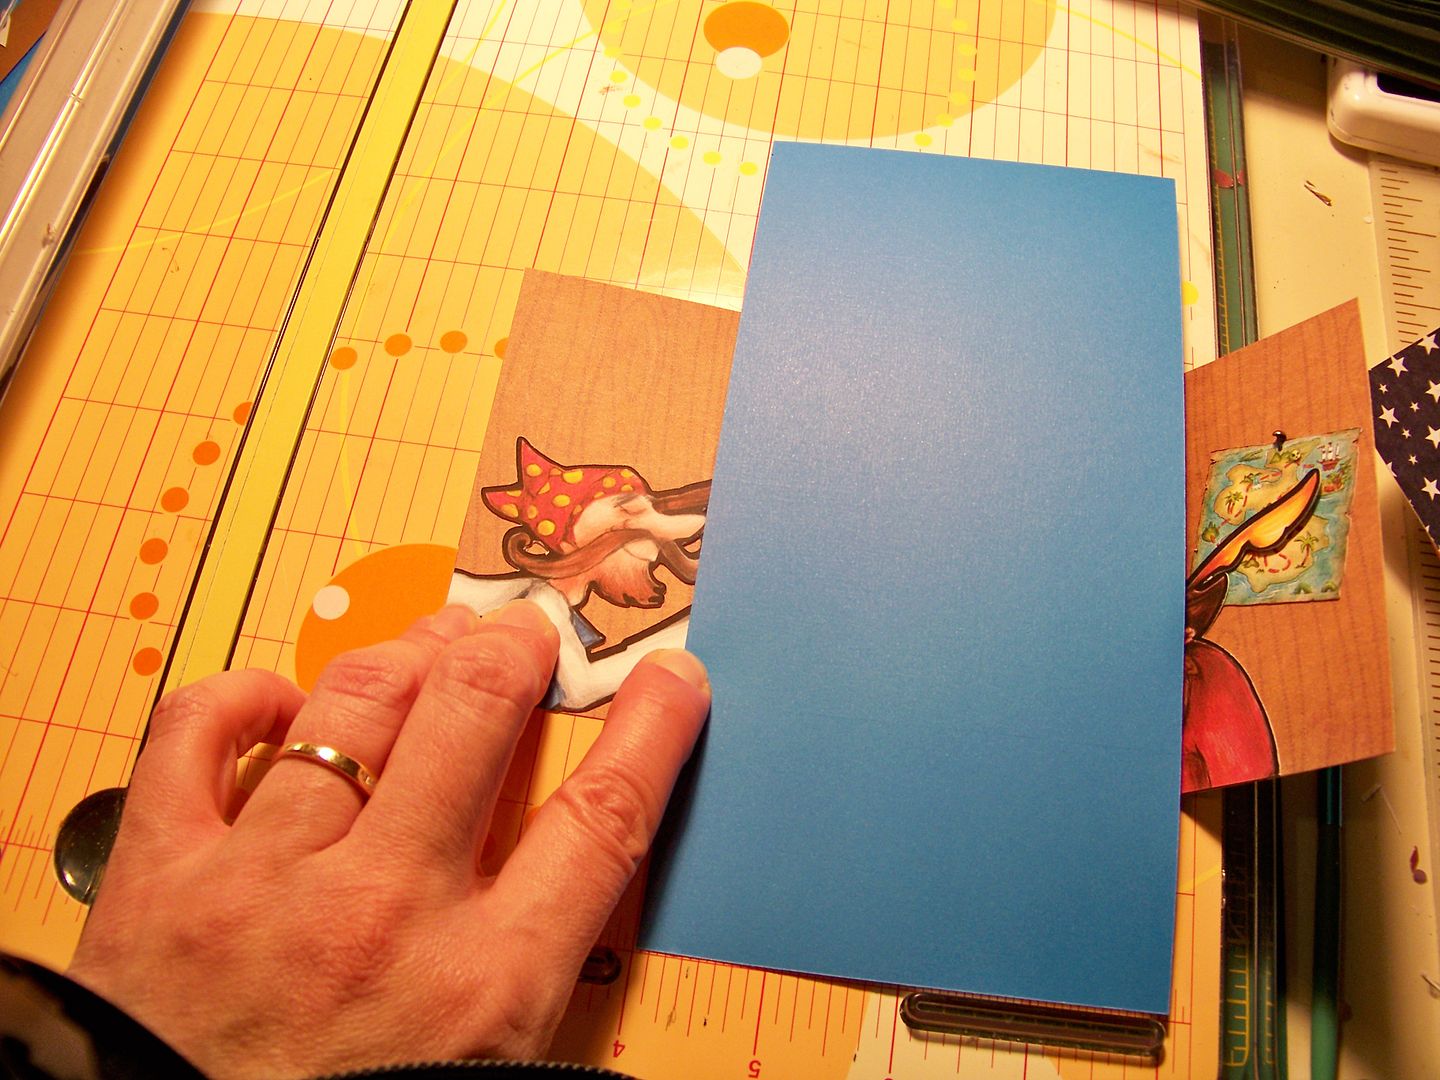


Then I joined the star paper to the faux bois paper.  The valley fold of the star paper lines up directly behind the mountain fold and window of the faux bois paper.  The side flaps were adhered using ATG tape.

I realized that the telescope surpassed the center of the window so I manually cut it down.  Otherwise, when closed it would have been visible on the outside of the card.
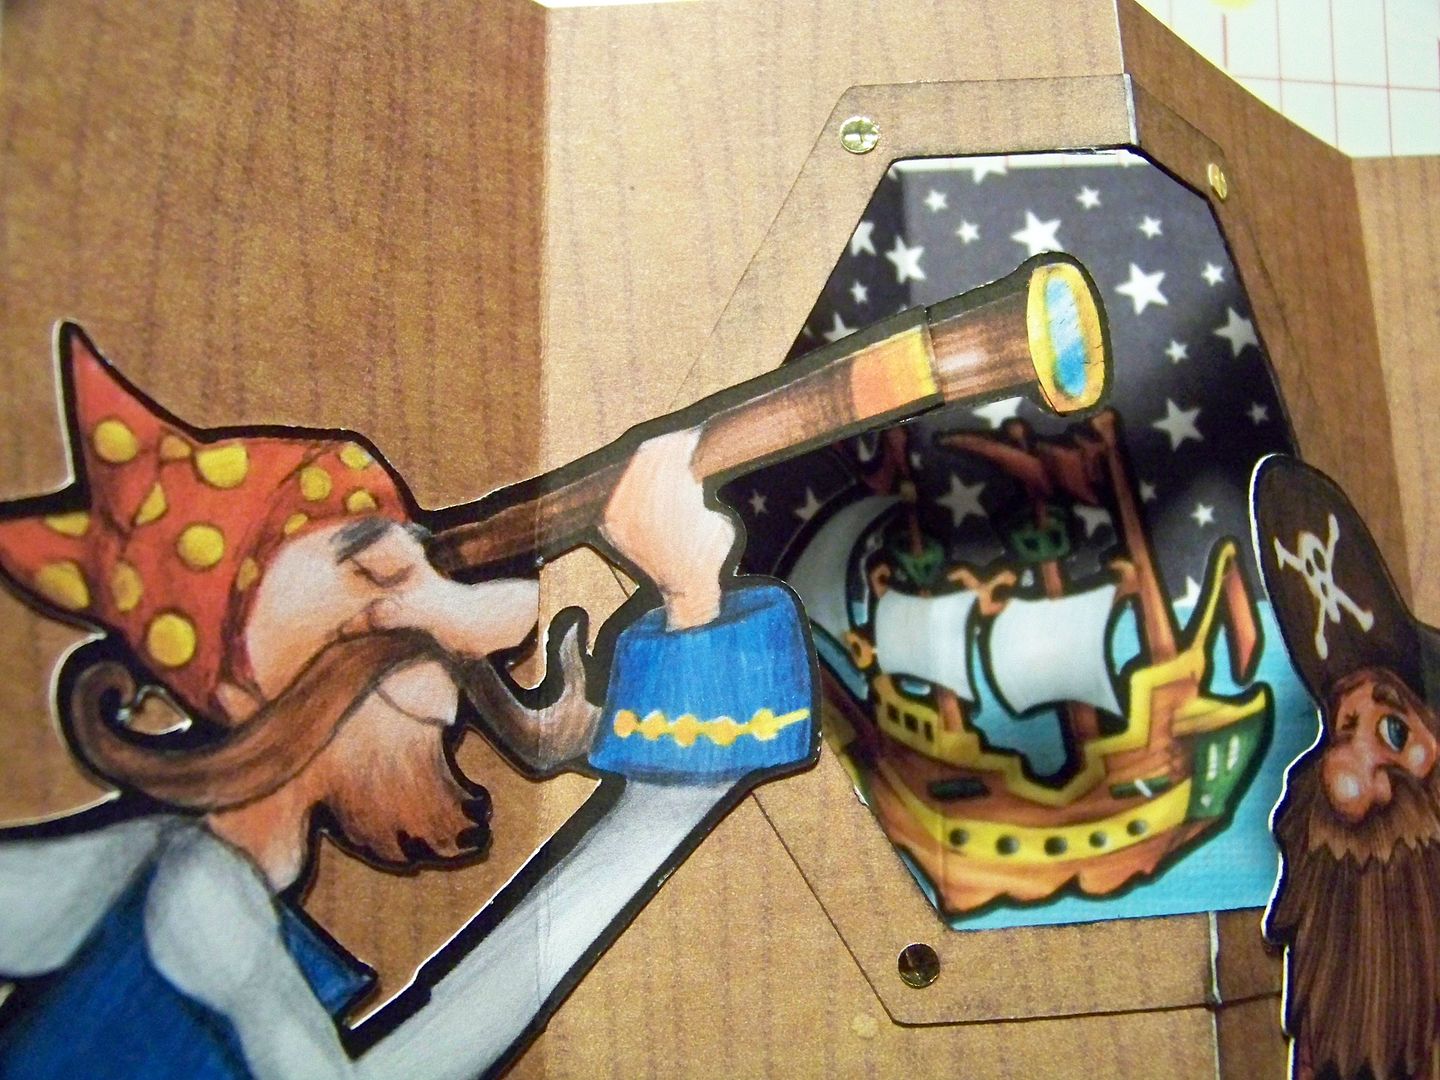
I snipped off the end of this pirate's nose.  The lesson I keep re-learning is that small shapes overlapping a score line will never stay adhered and set correctly!  Best to avoid that at all costs!  

I added a computer-printed sign and inked the inside corners and edges.


Once the two inside papers where attached.  I attached ribbon so that the card could tie closed.  I glued and taped the ribbon ends in place.
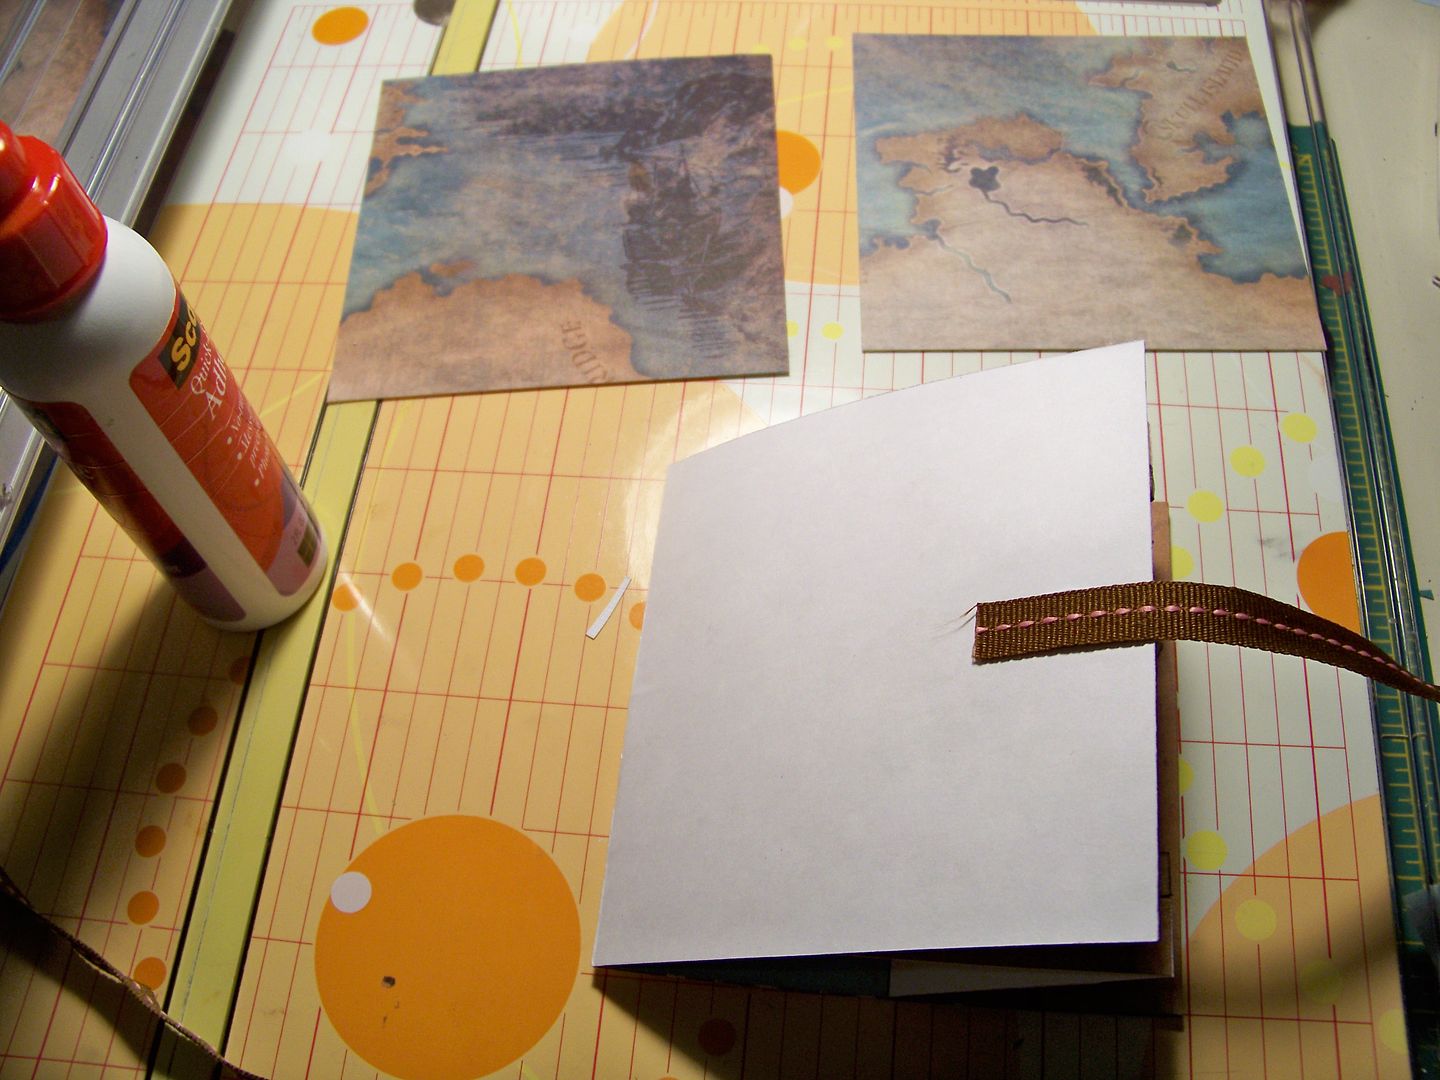

I embellished the covers and then adhered them to the front and back of the card with Terrifically Tack Tape.
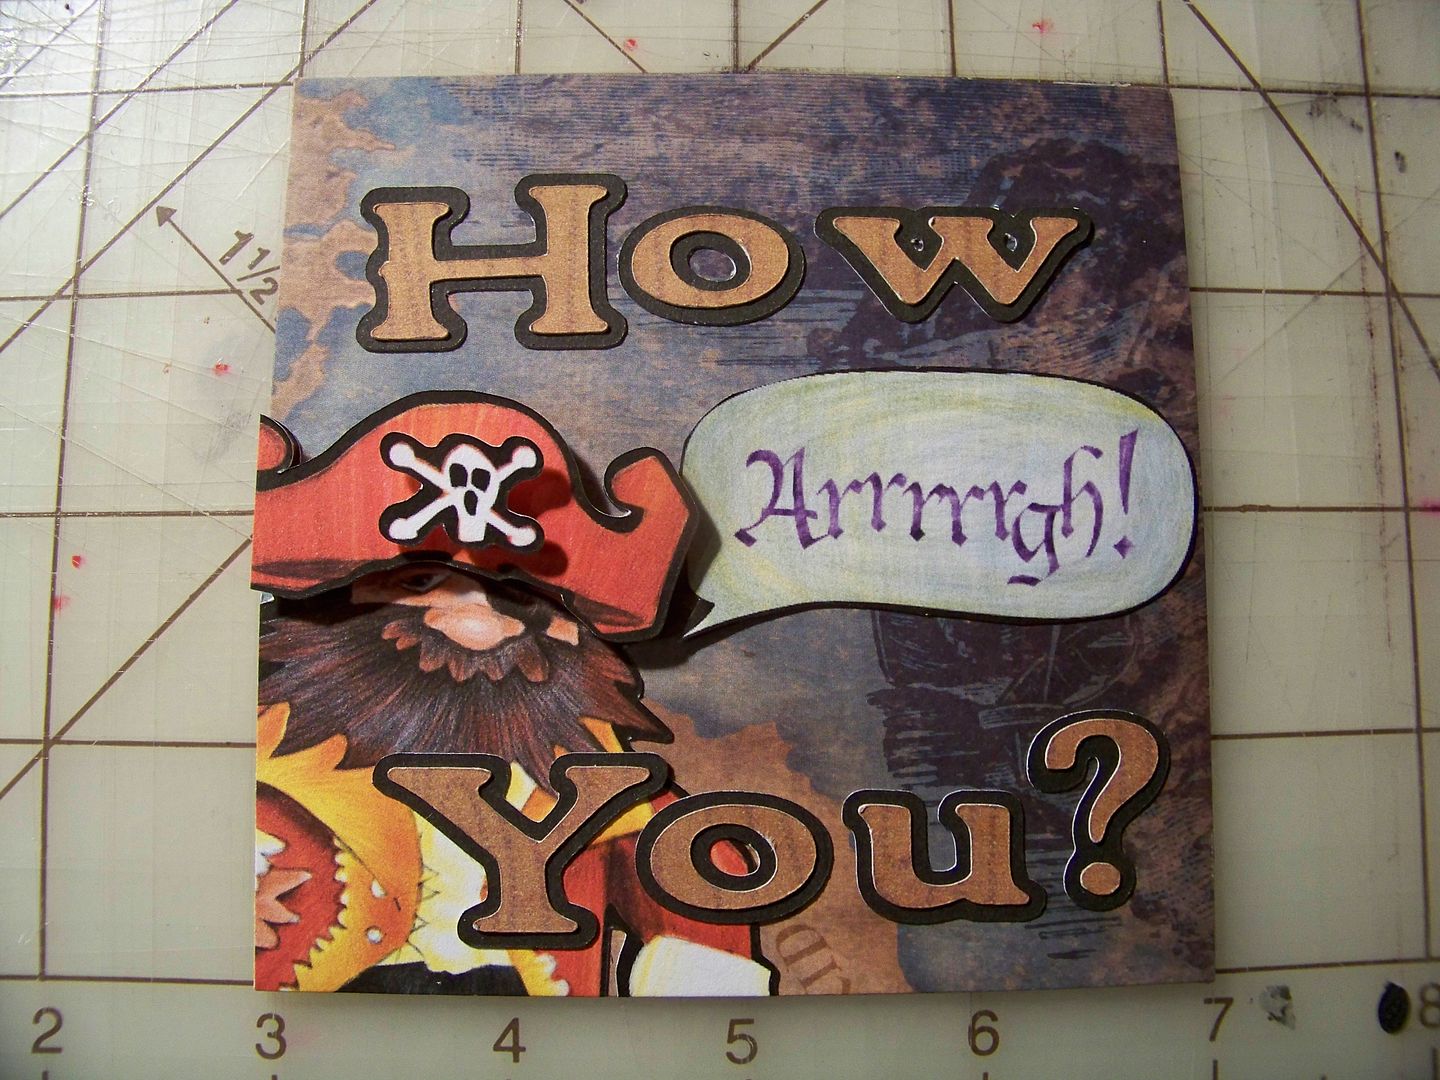

Then, I cussed because, oh yes, I applied the front cover upside down! After prying the cover off and re-attaching it, it all worked out, but I can definitely assure you that it really is terrifically tacky.  grrrr....

Once it was worked out, I applied the back cover.  I added a little dimension to the front and back covers because those are the only places to add it!  Everything inside must be as flat as possible to enable it to close.
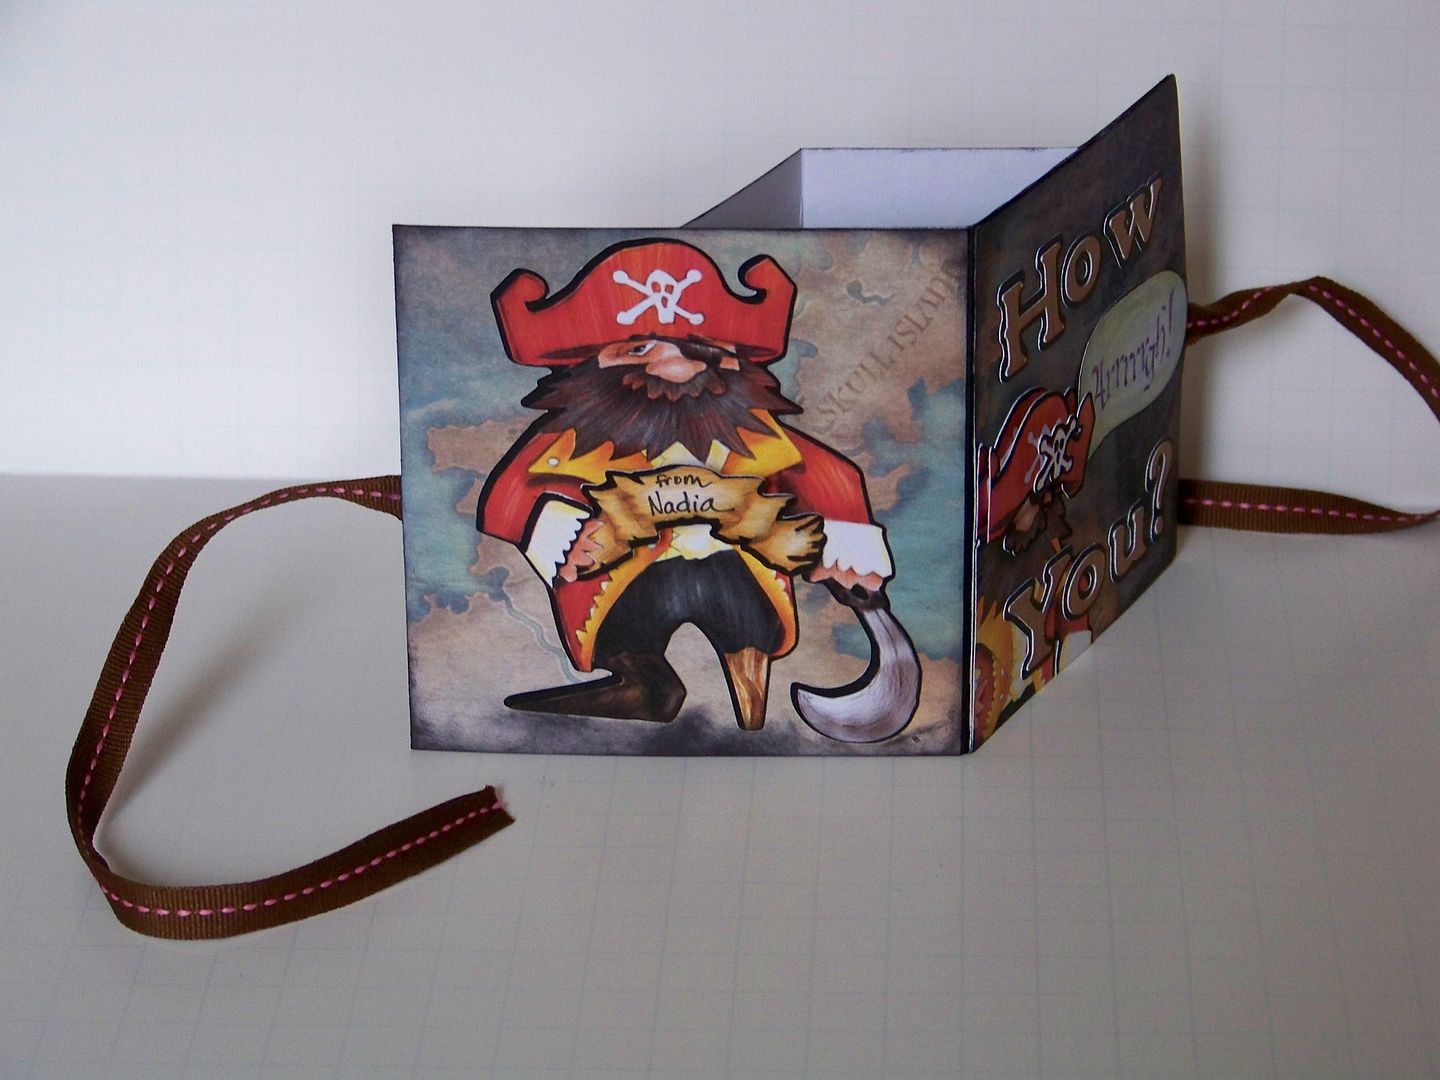

I finished by inking the corners and edges.
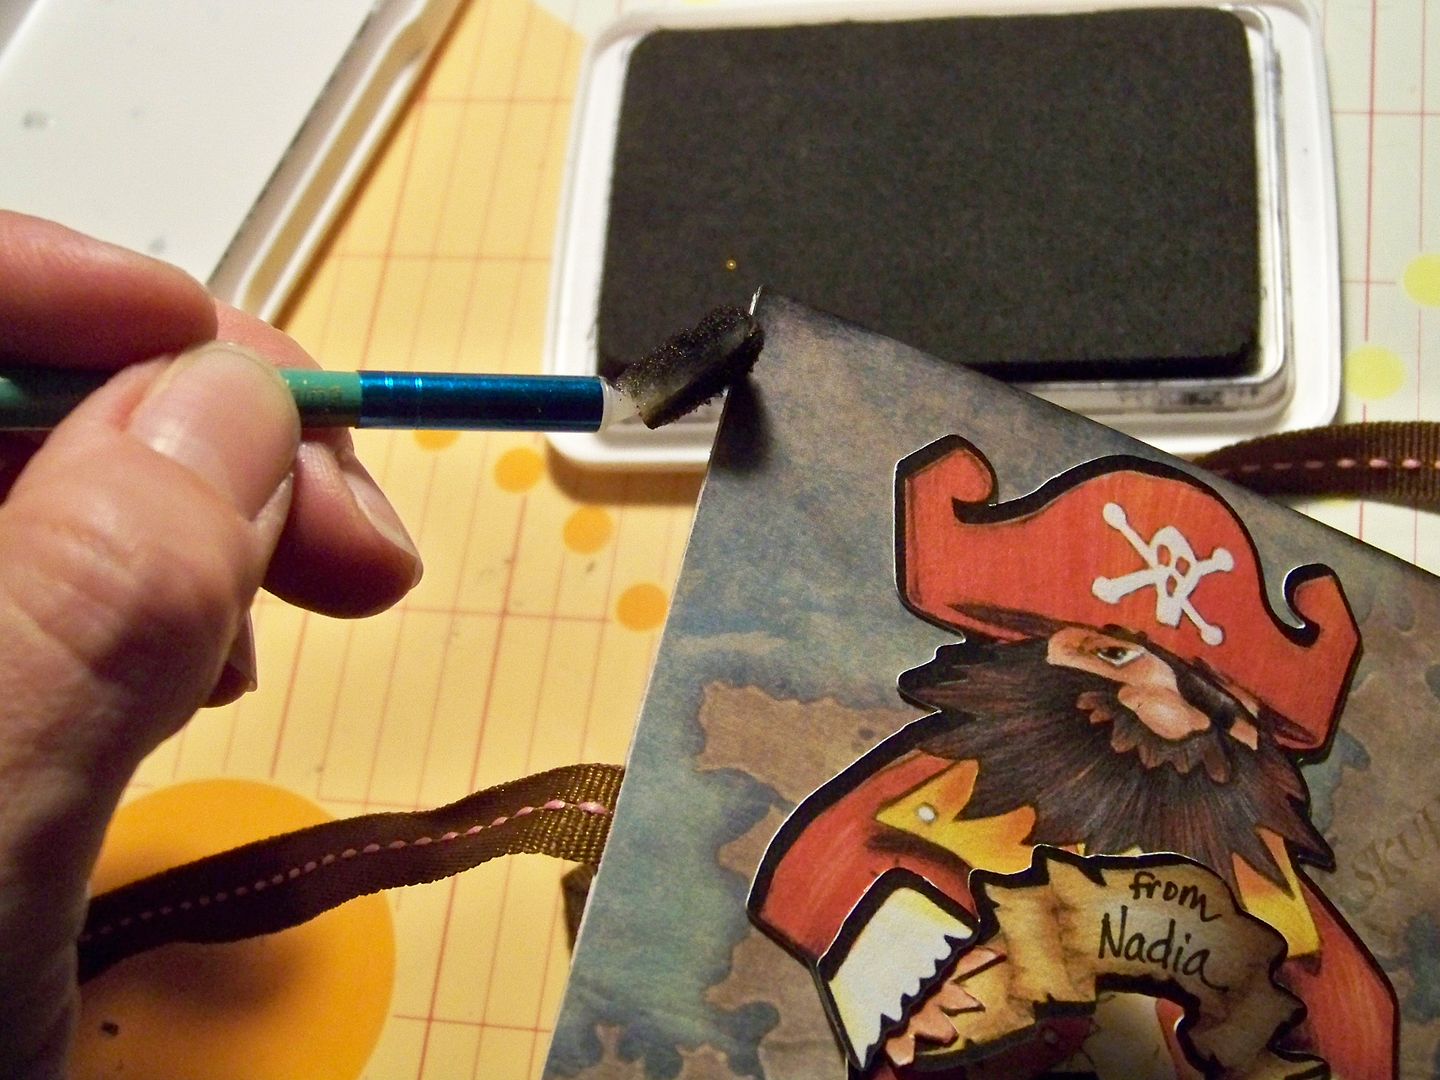


Crafty details for Pirate card:
  • Inside window - Creative Memories Holiday Frames and Tags Cricut cartridge, cut at 5-1/2" on an Expression.  I used the Centerpoint feature, layer plus shift.  I allowed it to cut the center of the cut and stopped the machine before it cut the outer shape. That created my cut-out window.  I cut this shape again on another piece of matching paper, allowing the machine to complete the cut.  This created the wood molding around the window.  I cut out little circles using an edge punch and applied them to look like screws.
  • Pirate with telescope - Buccaneer 5".  
  • Ship - Buccaneer 2".
  • Map - Buccaneer 1-1/2".
  • Captain inside - Buccaneer 3.7" cropped.
  • Arrrrgh! (word bubble) - Buccaneer 1.2".
  • Captain outside - Buccaneer 3.7" cropped on front, not on the back.  I also cut extra layers.
  • Text - Hannah Montana base font with shadow 3/4".
  • Banner (back of card) - Buccaneer 1".

Thankful for You card


I created the card bases, window, window frame, and covers just like I did on the Pirate Card.
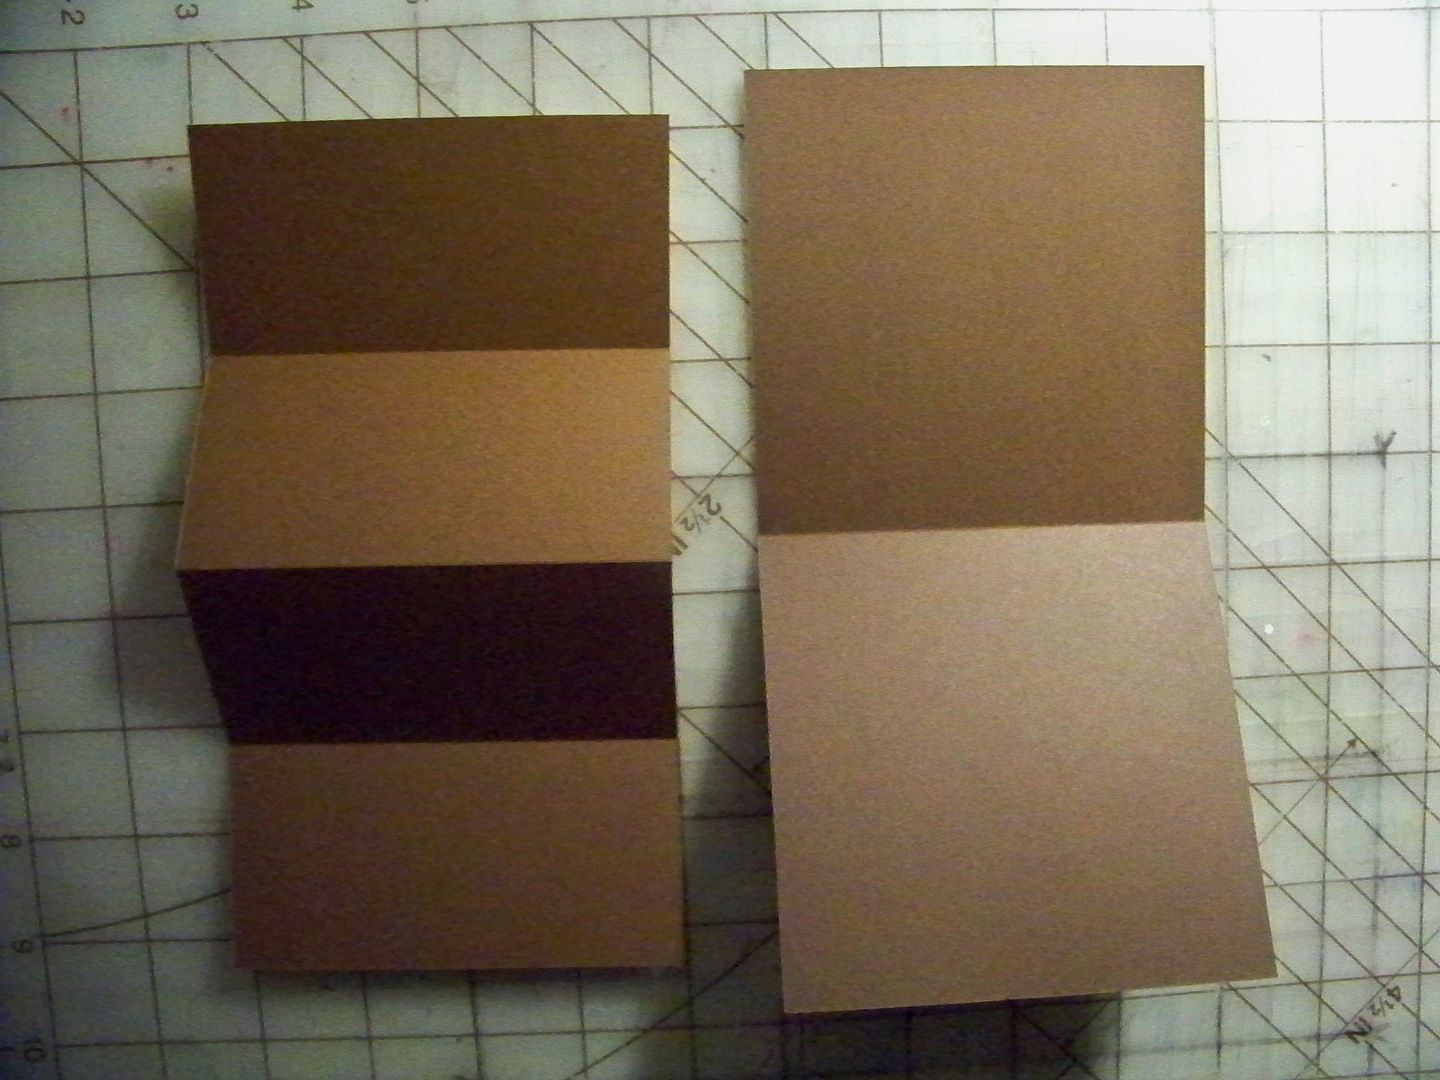

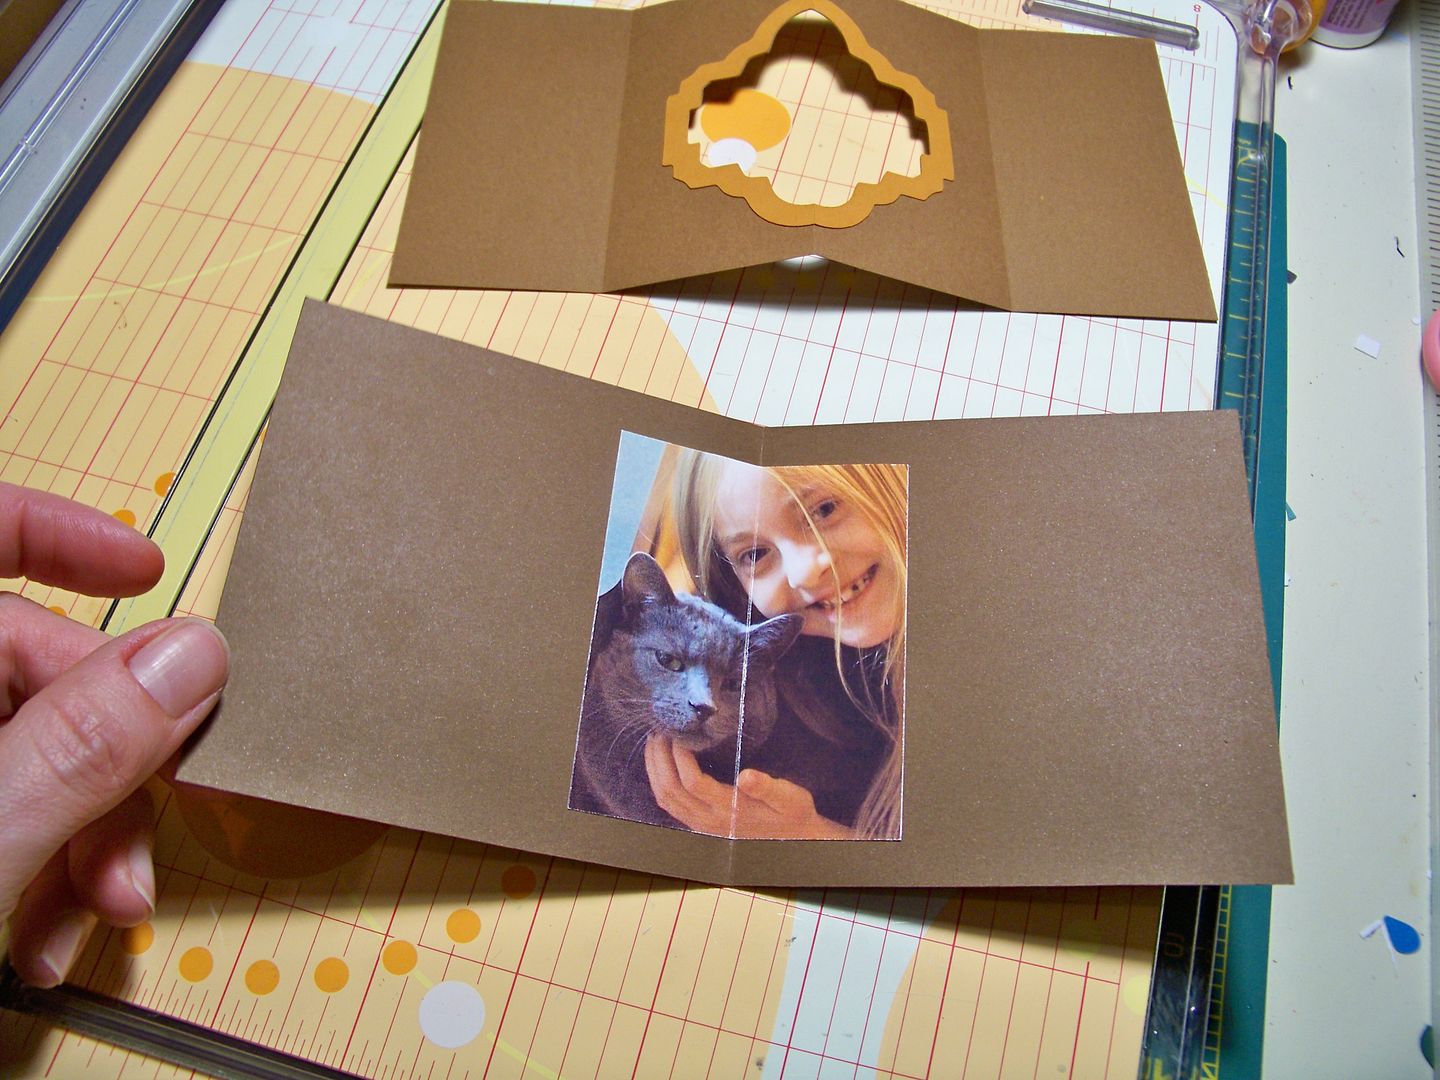
Again, I loved the new Holiday Frames and Tags cartridge for creating the window and a frame around it.  I used the frame (Layer) for each cut.  To make the cut out, I simply stop the machine after it cuts the center, since it makes that part of the cut first!  Then I insert a contrasting paper and cut the shape completely and a frame is created to accentuate the cut out.


I find that Scotch Scrapbookers Glue is much more flexible than Scotch Quick Dry.  I liked Scrapbookers glue for anything that had to fold.

For the photo, I scored the photo on the back since it was a valley fold.  I used my Xacto knife to score.  I found that photos that I print with glossy photo paper do best when scored in this way.  Papers, I have found are fine to score this way whether mountain or valley, but layered cuts are better folded to score.  I decided this after fighting with the frames and die cuts here!


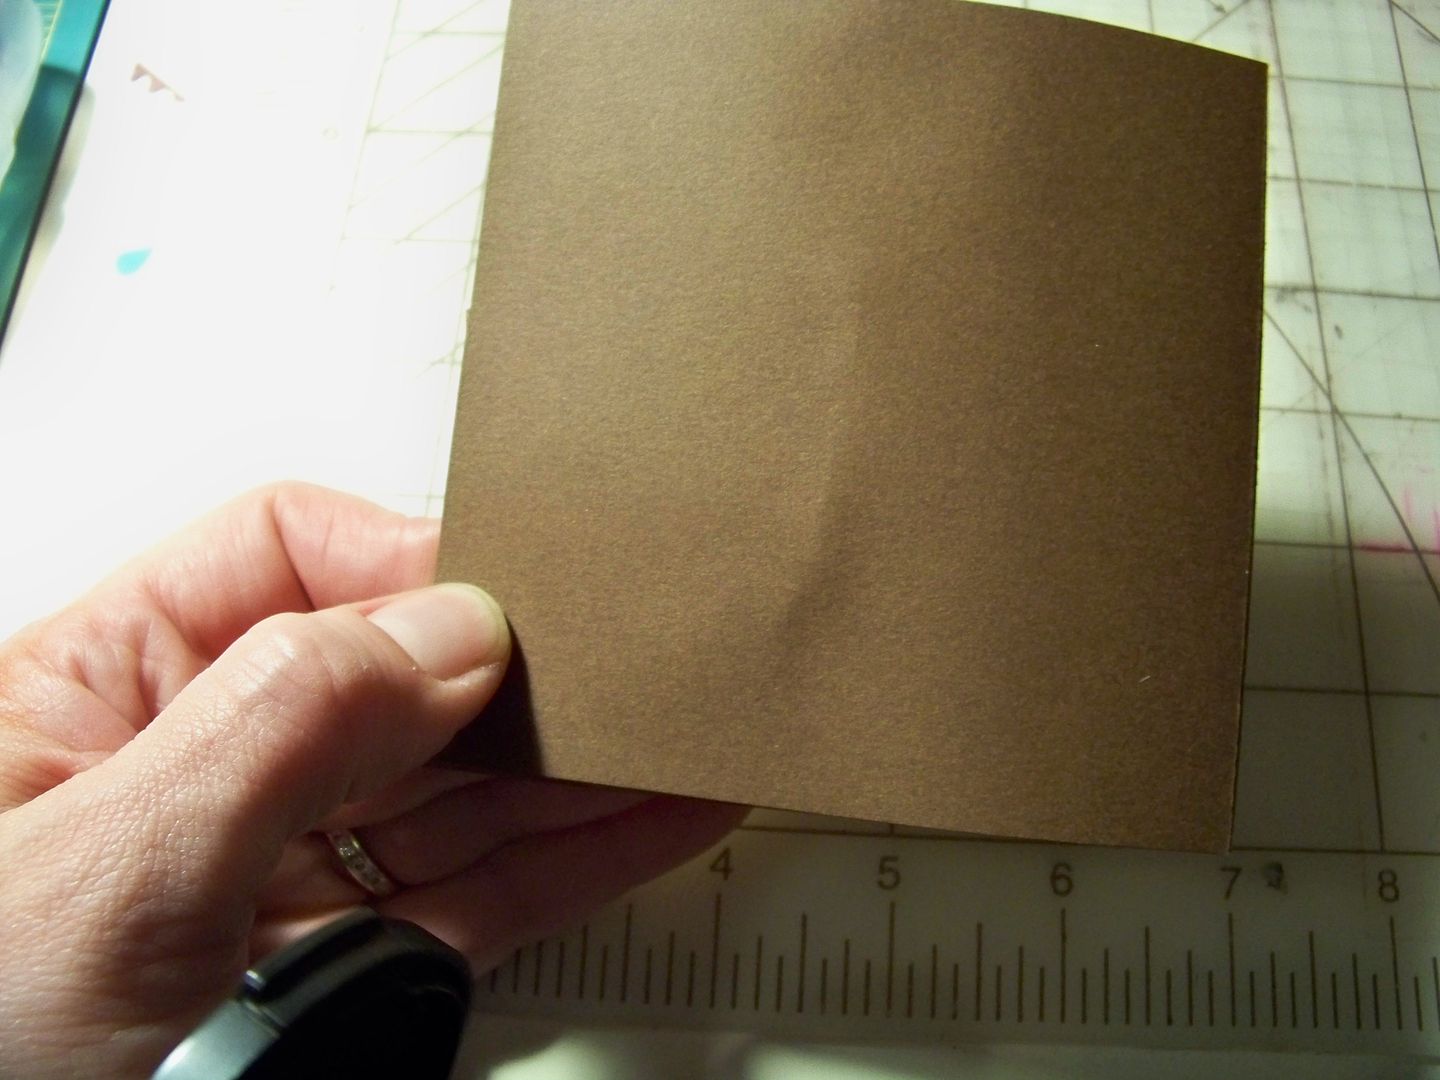
I attached the photo with ATG tape.  The line that you see is the light reflecting on the fold.  I took the pictures so that you could see the score line, but it is not cut all the way through; it is only scored.

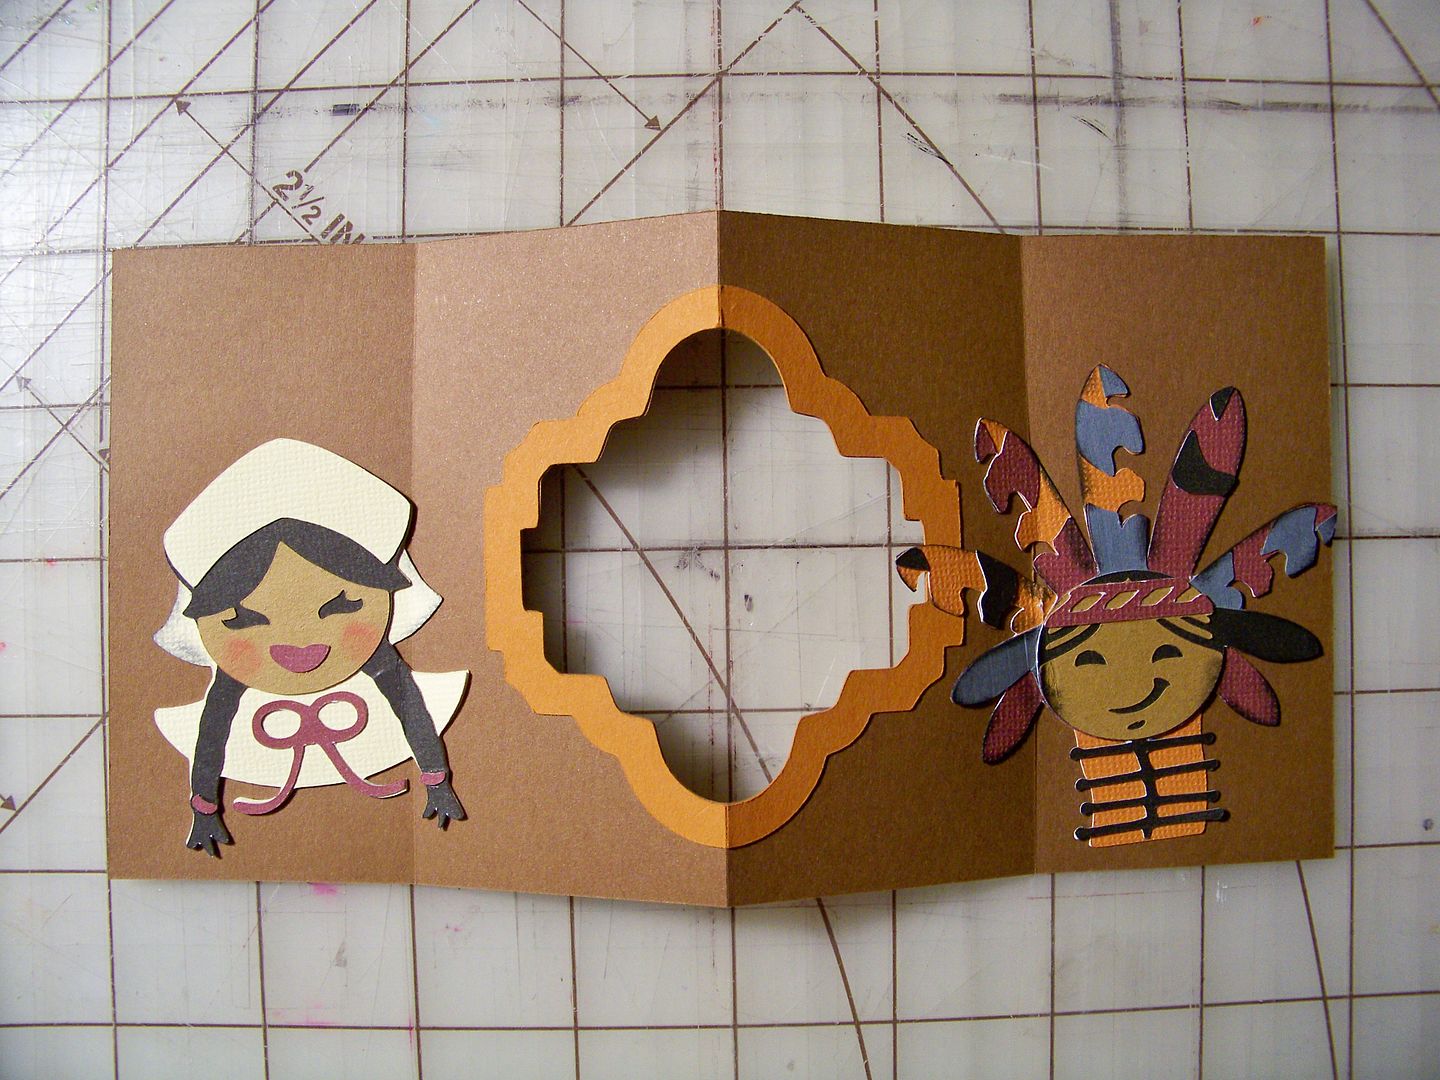
I wasn't as careful as I should have been on the layered die cuts.  It is so important to avoid small pieces in the score line.  Like the nose of the pirate on the above card, it would have been better if I had  trimmed the side of the Indian's face instead of allowing the edge of it to be folded in the score line!  The rule, I have found, is that the die cuts either need to far exceed the score line or not cover it at all.  Otherwise, the tiny piece will pop up no matter how much glue you use!

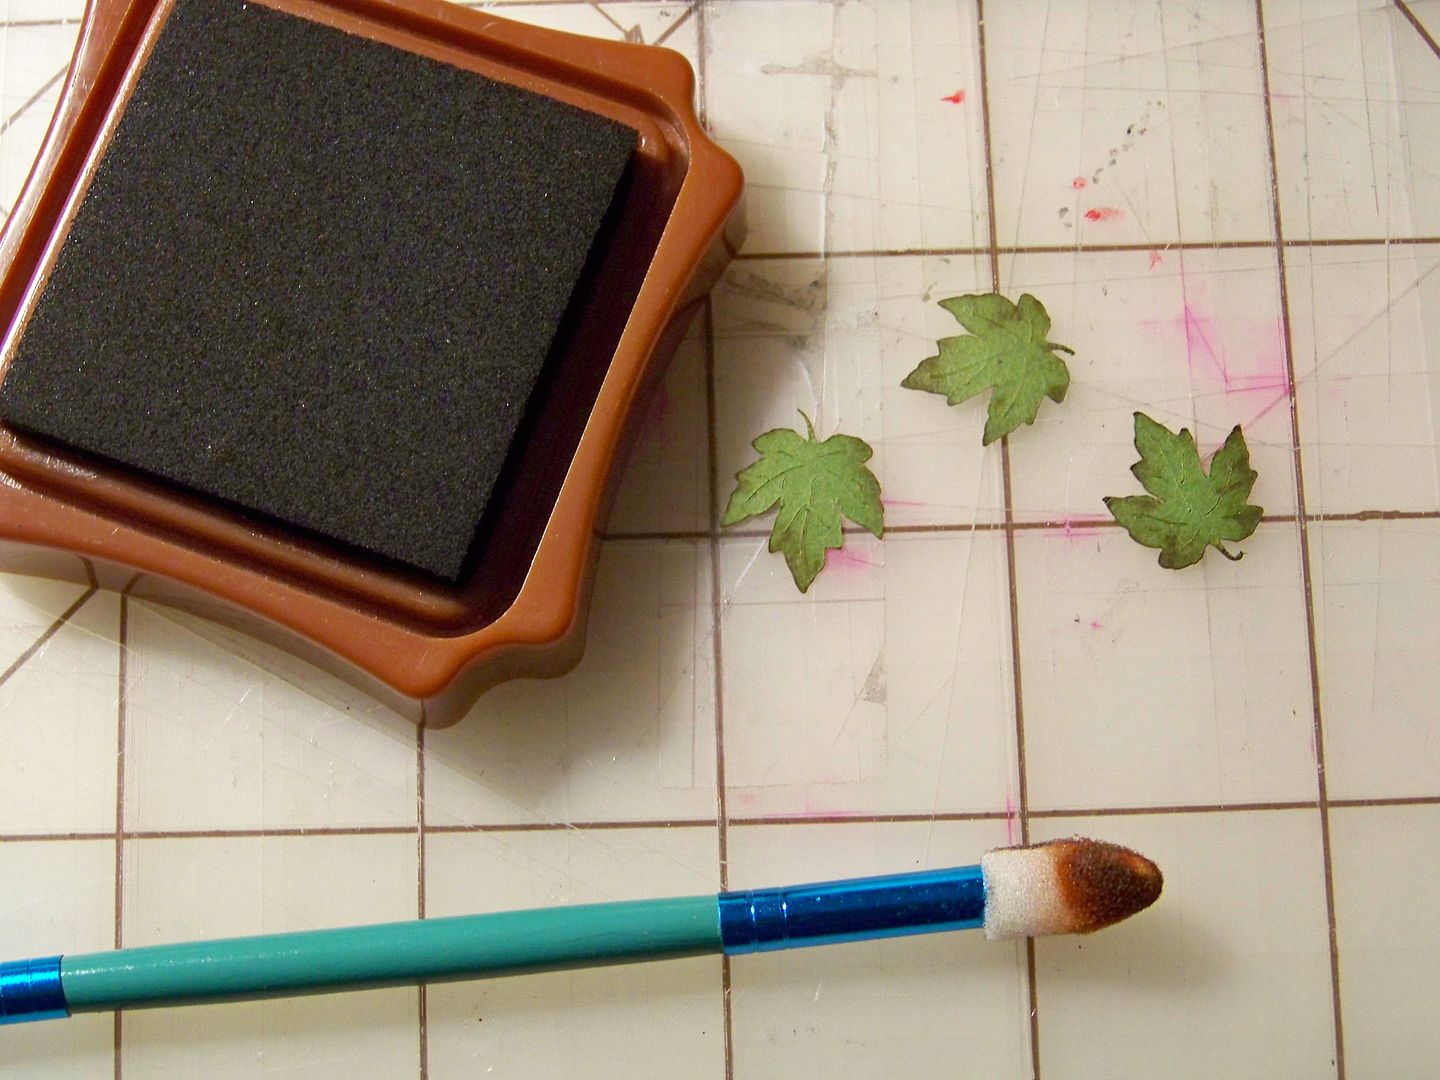
I cut and inked leaves and added them and text.


Initially, when I was planning this card, I had considered not cutting separate covers, using the backside of the inside paper for the outside of the card.  ....But then, my bulky die cuts which looked just fine on the front, created an unsightly bump on the reverse side.  *gasp*  Cutting 4x4 covers solved the problem by perfectly hiding them!


I embossed kraft paper, inked the embossed areas, and added eyelets for twine that will serve as a closure.  I also darkened in with ink the area that would be behind the wreath.  The covers were adhered to the card with Terrifically Tacky Tape.


For the wreath on the front, I used the wreath from December 25th and leaves I cut and inked from A Child's Life.  I put that honeycomb/chicken wire pattern behind the wreath simply to avoid a hole in the middle of the card.  The cover papers were embossed and inked.
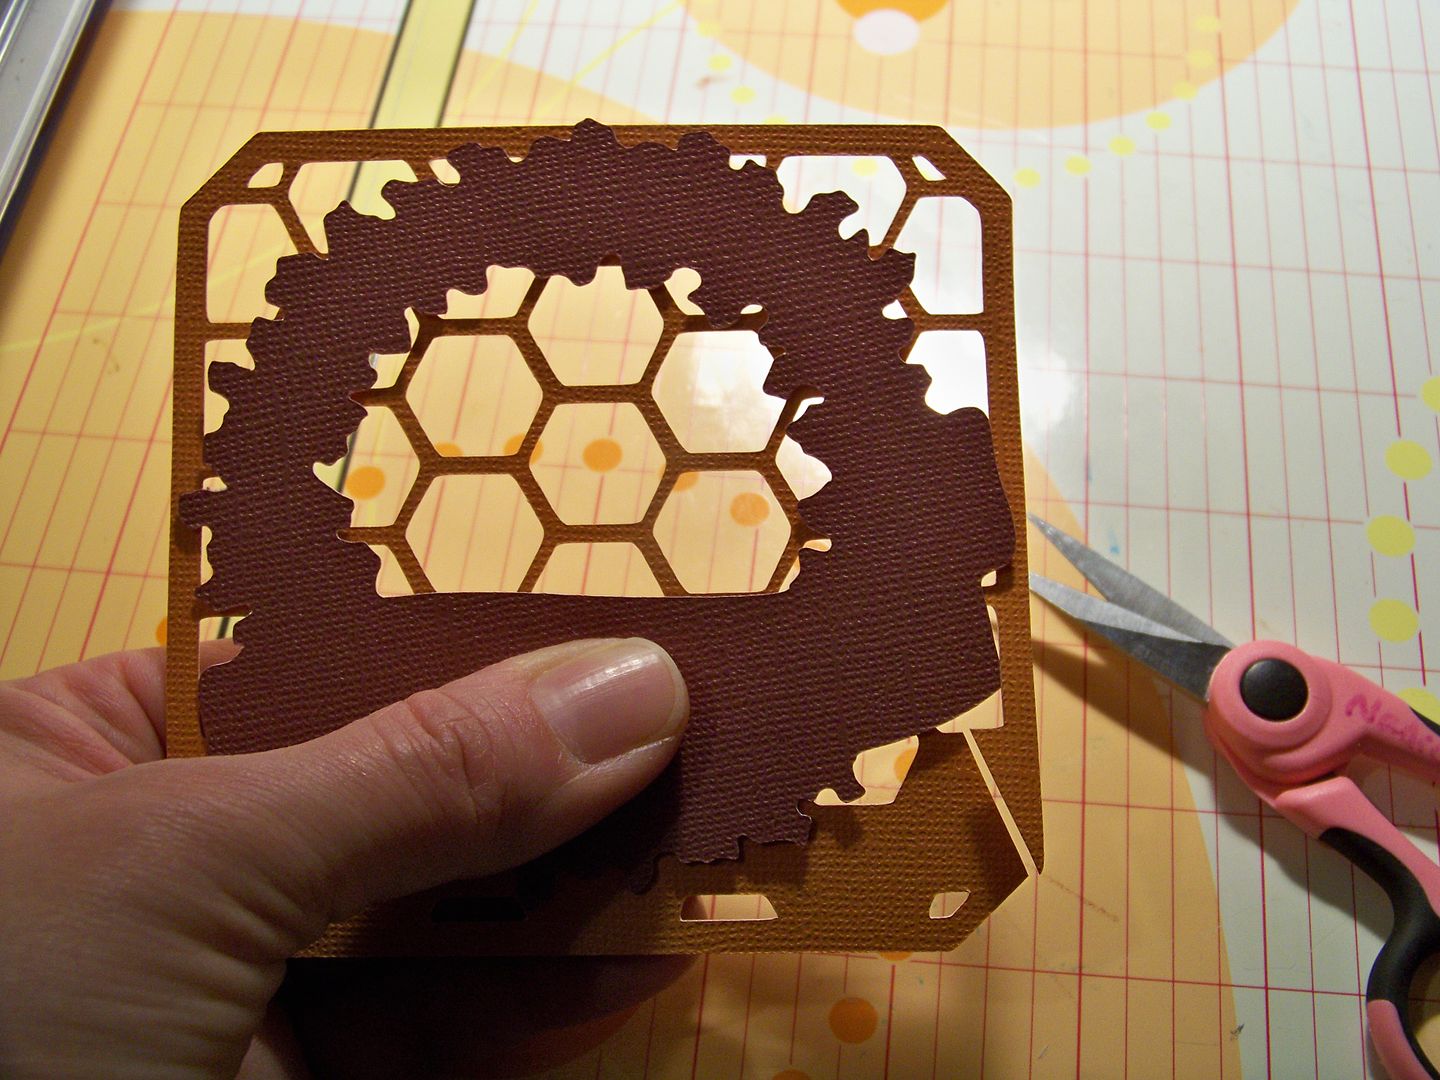


The wreath was added to the front cover with pop dots.


Crafty Details for Thankful for You Card:

  • Wreath - December 25th, cut at 3-3/4".
  • Honeycomb/Chicken Wire - Letter Envy Font (page 31), 4".  I placed it behind the wreath and manually trimmed away the excess
  • Leaves - A Child's Year (page 37), cut at 3/4".
  • Letters (on cover) - Holiday Frames and Tags (Jolly Font), 3/4".
  • Inside window - Holiday Frames and Tags (page 45), 3-1/2".  Just as the card above, I used the frame cut, but stopped the machine after it only cut the center to create the cut out.  Then I put in contrasting paper and cut the shape in its entirety for the frame.
  • Indian - Autumn Celebrations (page 66), 3".
  • Pilgrim - Autumn Celebrations (page 67), 2-1/2".
  • Letters (inside card) - Holiday Frames and Tags (Jolly Font), 1".

Thank you for checking my blog post today!  To see many of my previous projects, visit My Project Gallery!  My "thankful for you" card is also on the Cricut Fanatics blog today.

Saturday, November 10, 2012

Christmas Pop-up Accordion Book


Welcome to the Holly Jolly Blog Hop! I hope you have enjoyed all the wonderful crafty inspiration!  This is the last stop so thank you for making your way here!

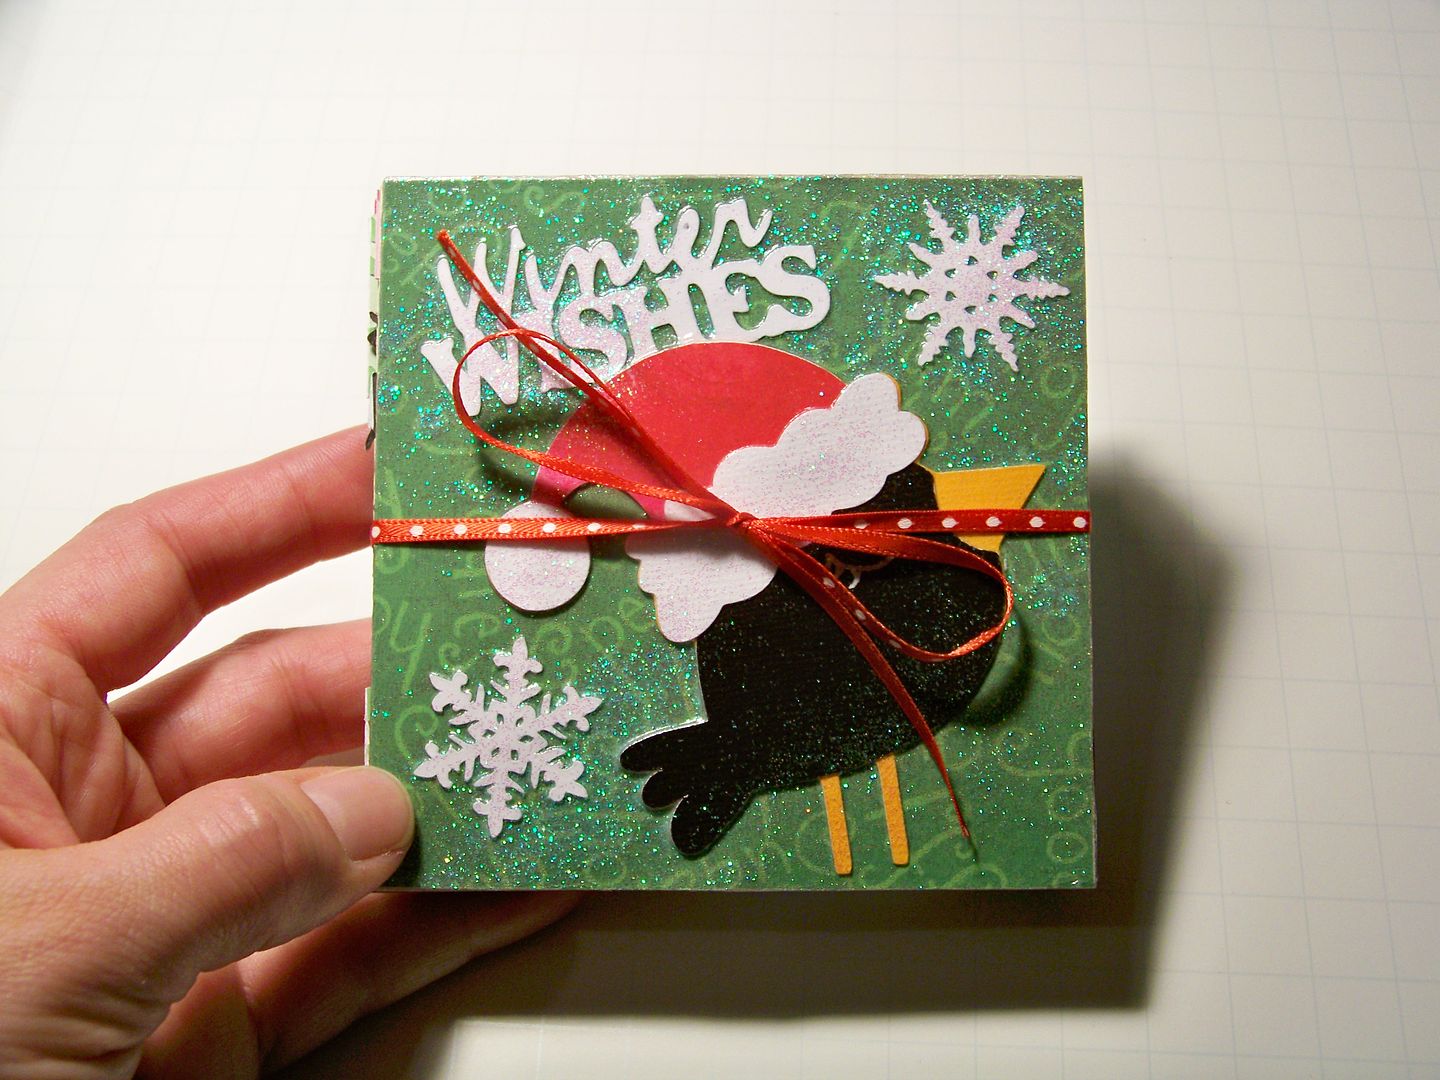
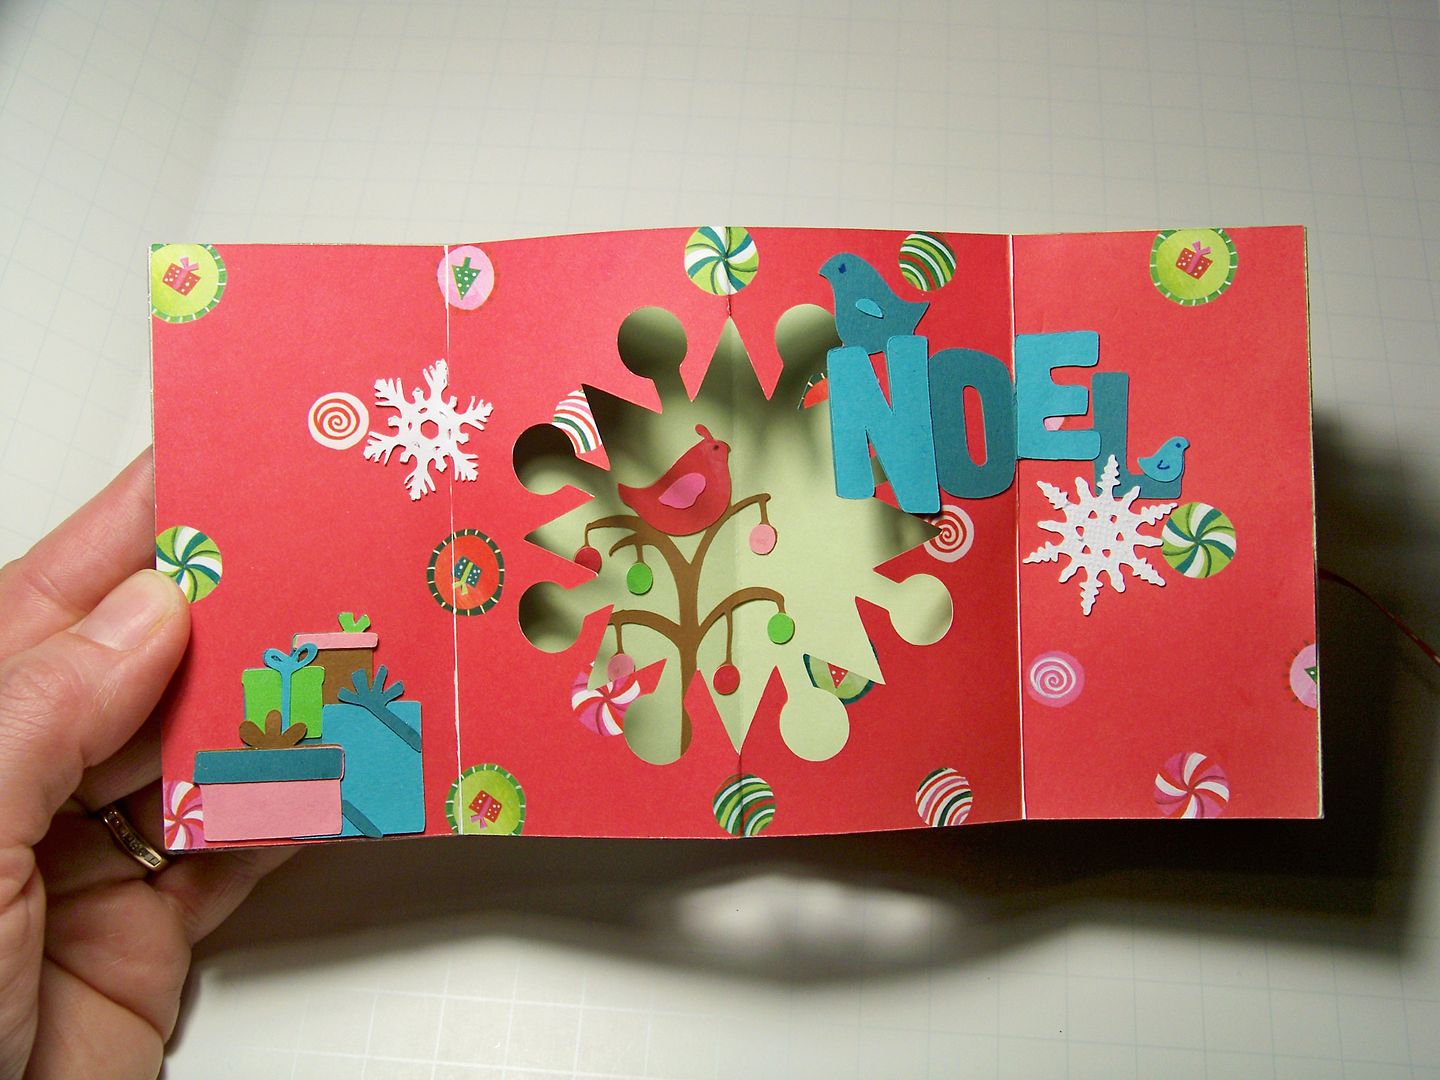
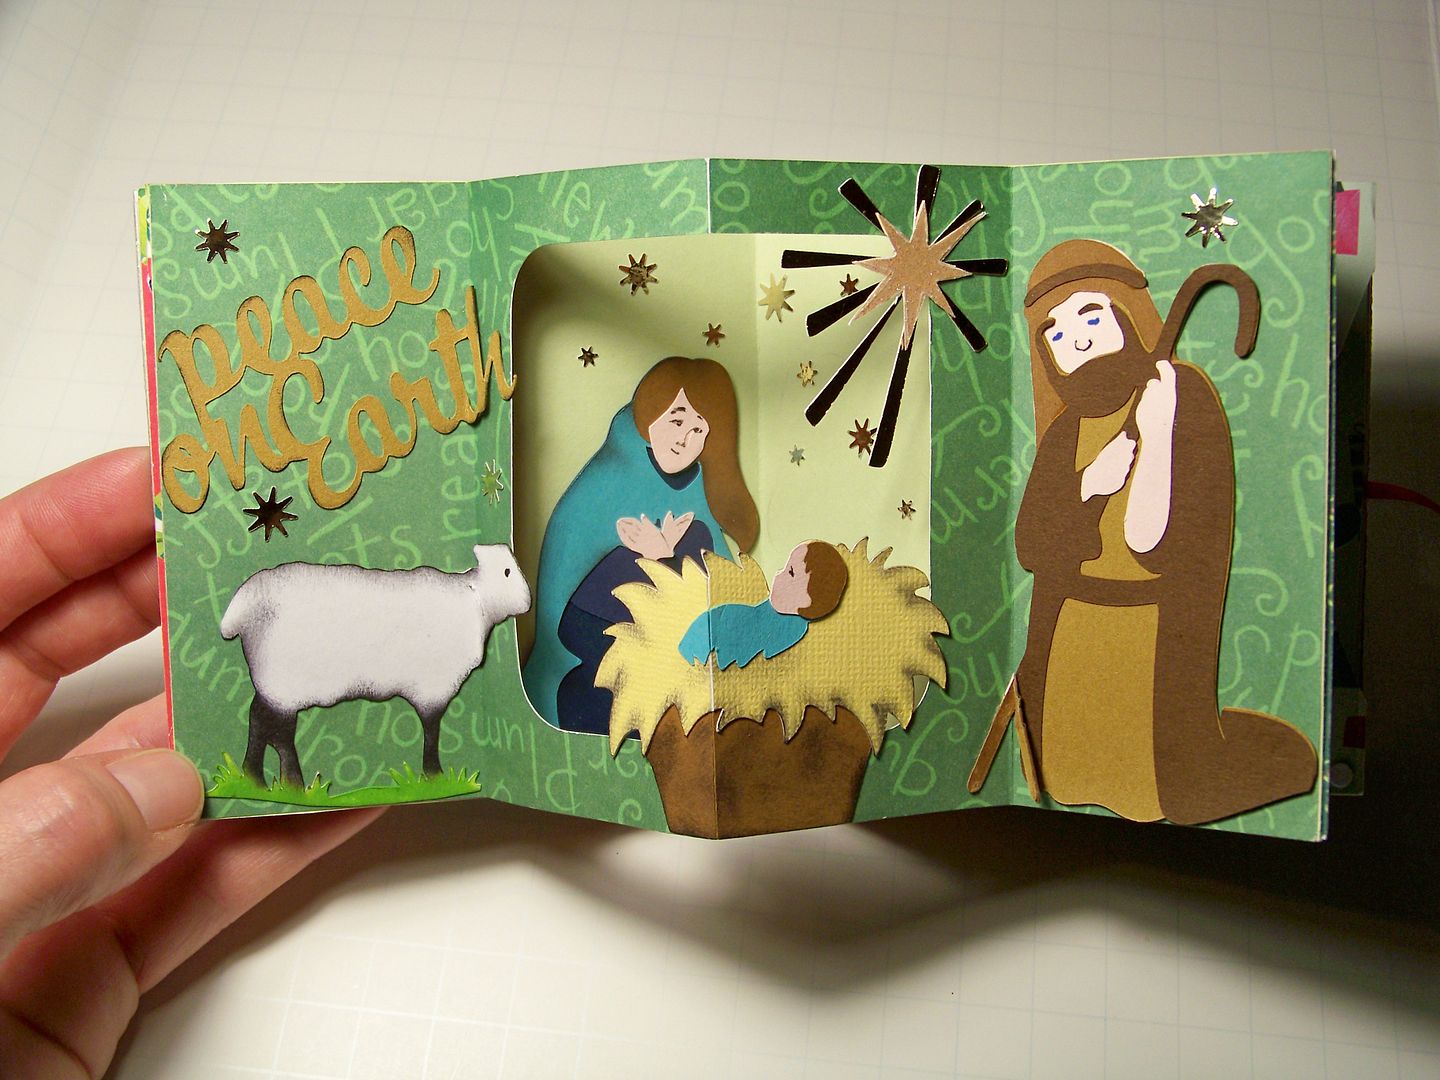
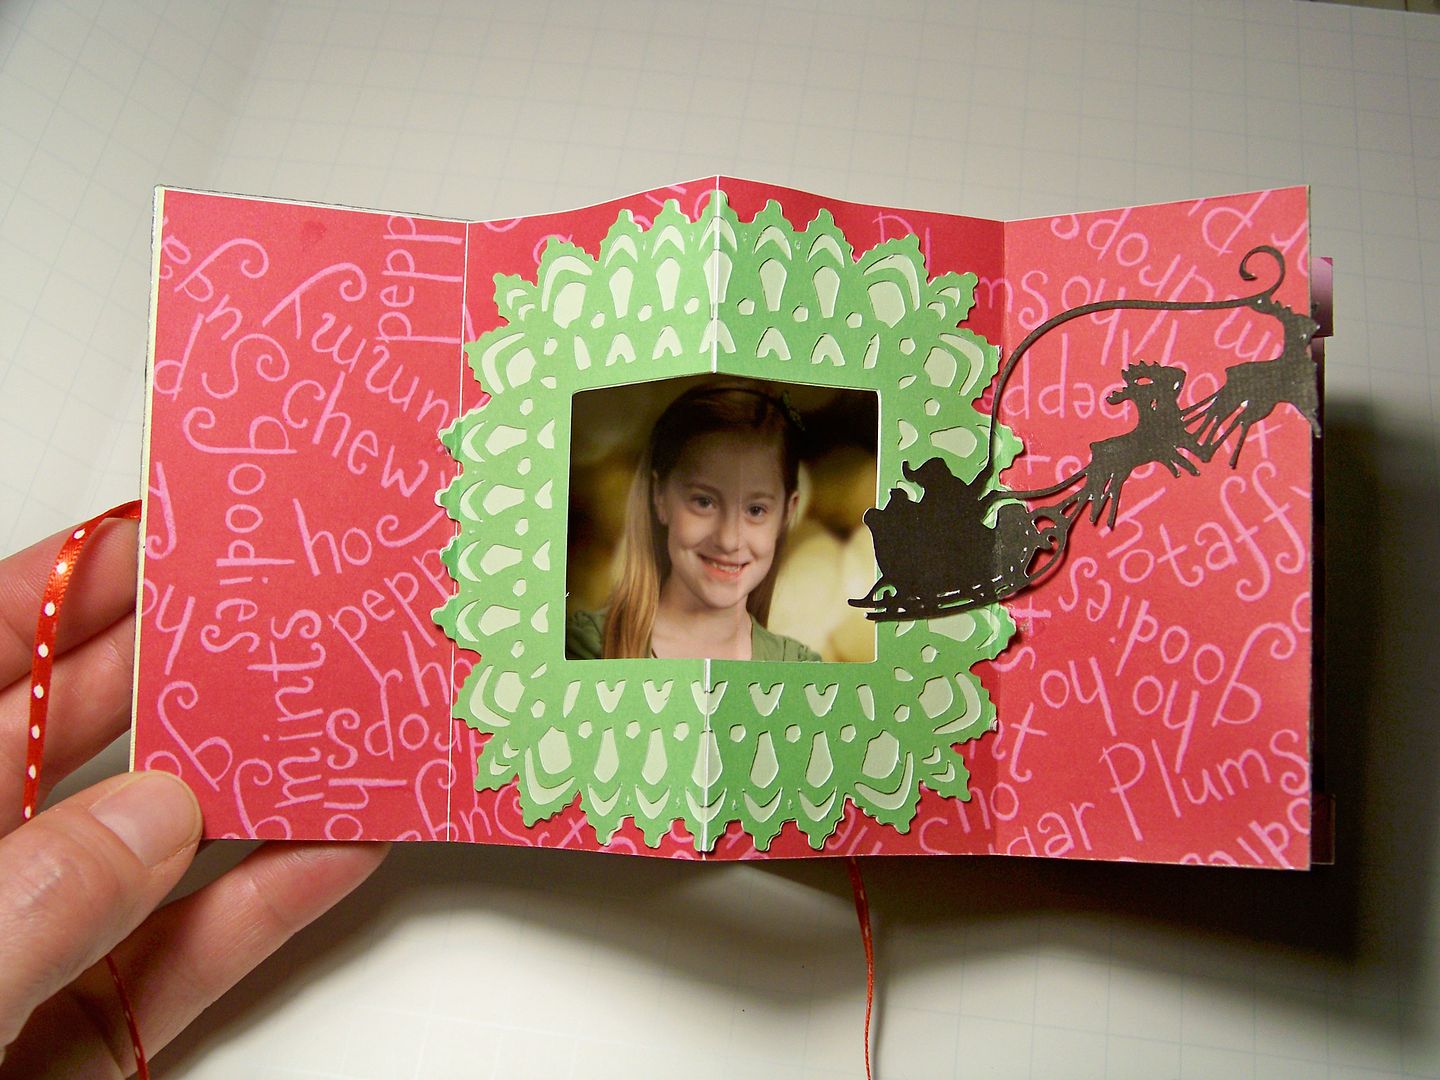
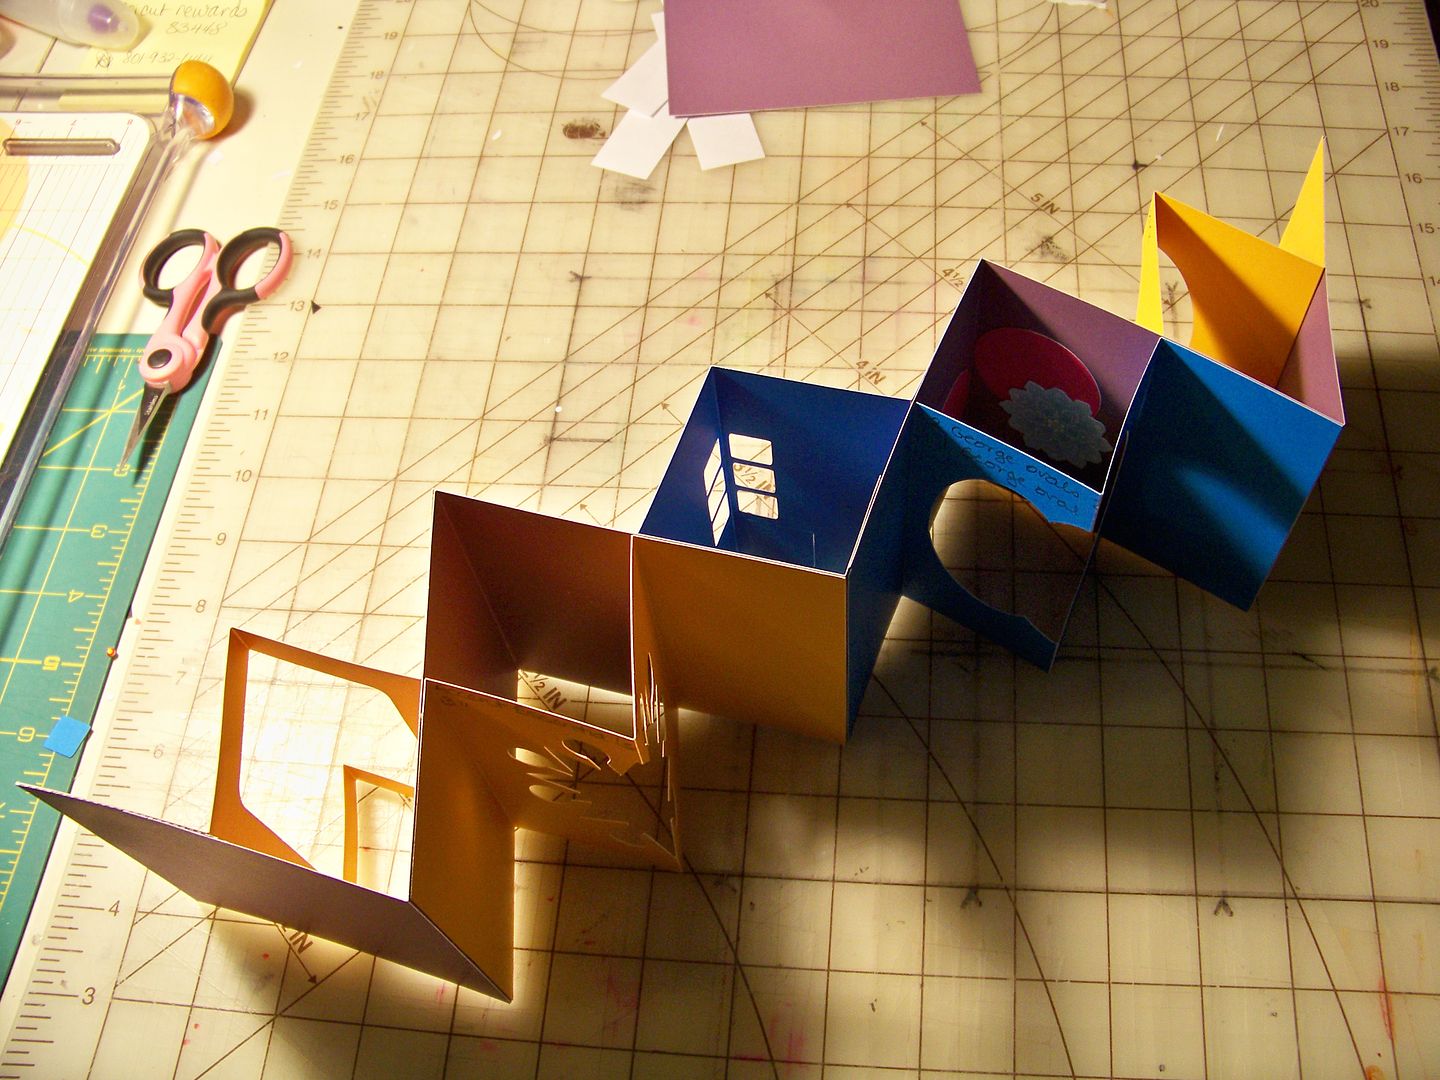
My project is a book in the style of an accordion mini album with a twist!  This book features five pages with windows that pop out for dimensional scenes!  I saw this kind of mini book about a month ago and I figured out how to make it.  I created a Christmas one using my Cricut! I have made a complete tutorial that I made as I was learning how to do this!  First, take a look at the Christmas book I made...


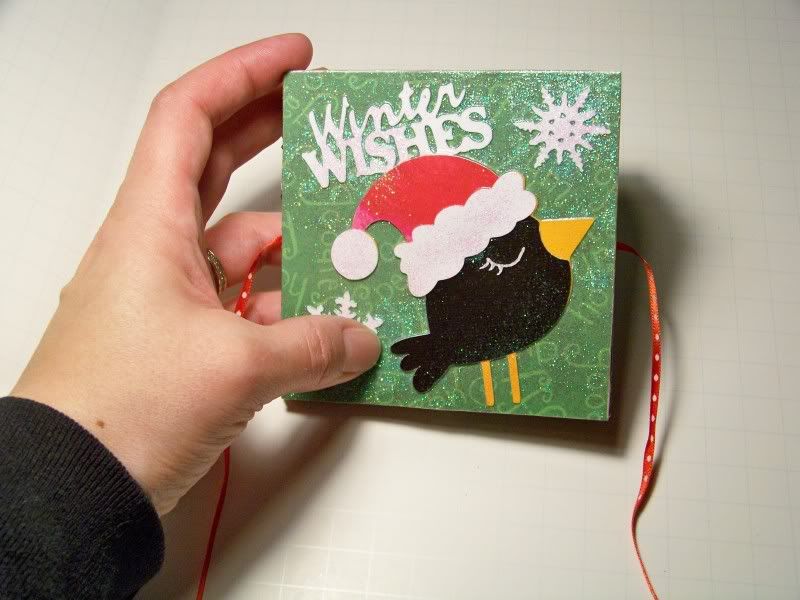
This is the back cover...


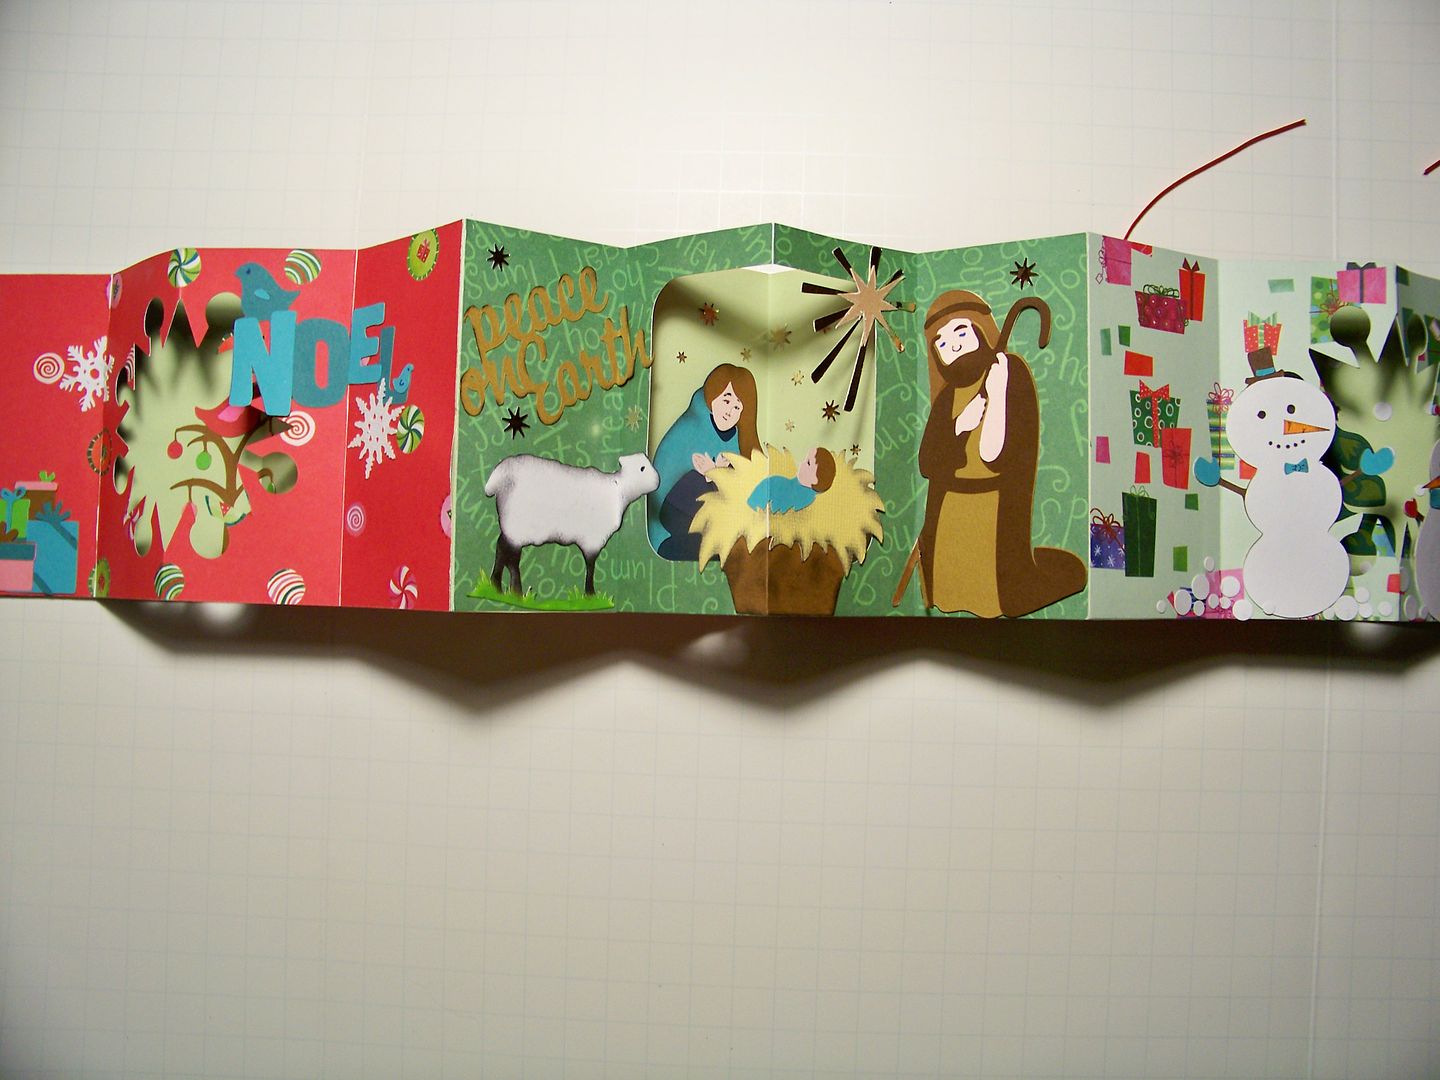
When you stretch it out, it looks like this...


Flipped over, the back looks like this-- the covers end up being part of the overall design on this side...


As I created my Christmas book, I realized that this project is a perfect one to pull out a paper stack and one cartridge and instantly have coordinating cuts and papers!  I would love to do a book of nothing but cuts from the Art Deco cartridge for instance!   It would also be a perfect project to use Imagine printed and cut shapes to avoid the layering!  I learned so much doing this project-- and it was a REAL challenge for me to avoid adding texture and dimension to my die cuts!!  This would be easy to mail and perfect for a little mantel decor or tablescape.  And guess what?  I used my stash for this entire project!  (Thanks, MamaC!)  OK... on to the tutorial...

Before I made my Christmas book, I made a mock-up book to figure it out.  That is what I have used here to illustrate the process!

Note:  For both the mock-up and for my finished book, I used my Cricut Expression.  Measurements can be slightly different for the Imagine and the E2.

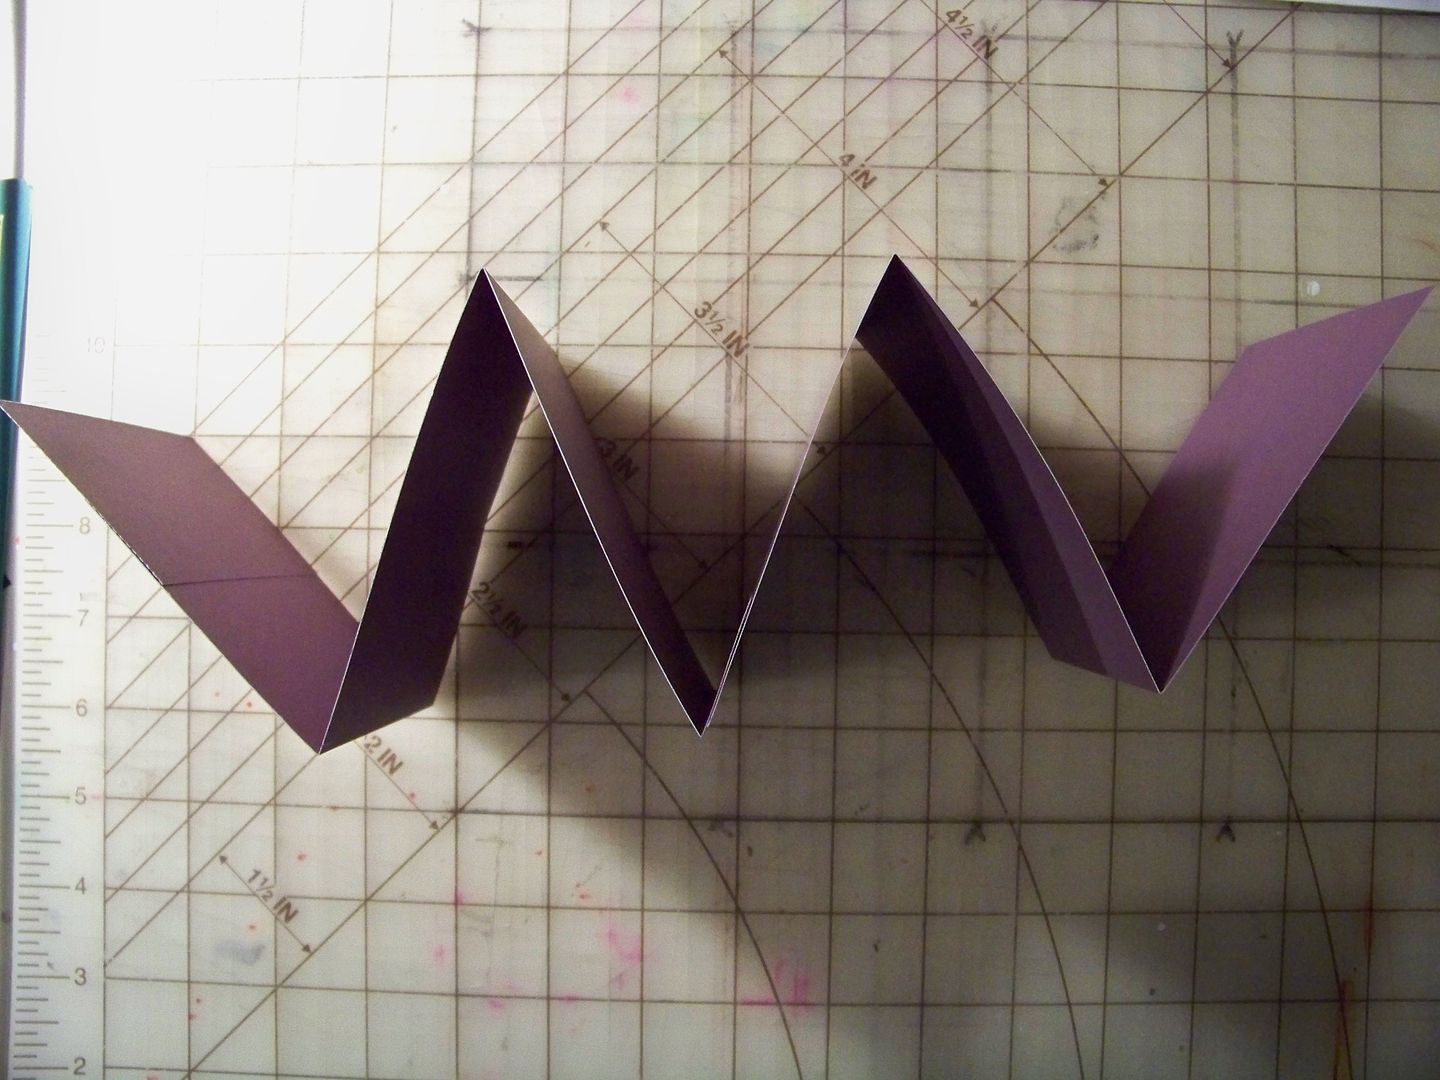
Step 1:  Cut a strip that is 24" x 4".  This is your base.  Score this at every 4", flipping after each score so that you alternate which side you do the scoring on.   I use an Xacto knife to score with to get a very clean, unbulky fold.  Once scored, fold it accordion style.  (The insides of your scenes will be this paper unless you choose to cut 4" x 4" squares -scored like the base- to adhere over the base.   For my finished book, I decided to keep the base color behind my windows for continuity since my scenes were all so different.)


Step 2:  Cut five 8" x 4" papers.  These will be the pages that fold toward you and will create windows!    Score these in the following manner:  Create a valley fold at 2", a mountain fold at 4", a valley fold at 6".  (For me, using my Xacto knife to score, I flip the book over and cut in my score line on the back at 2", then I flip it back over so the right side is up and score at 4".  Then I turn it back over and score at 6".)


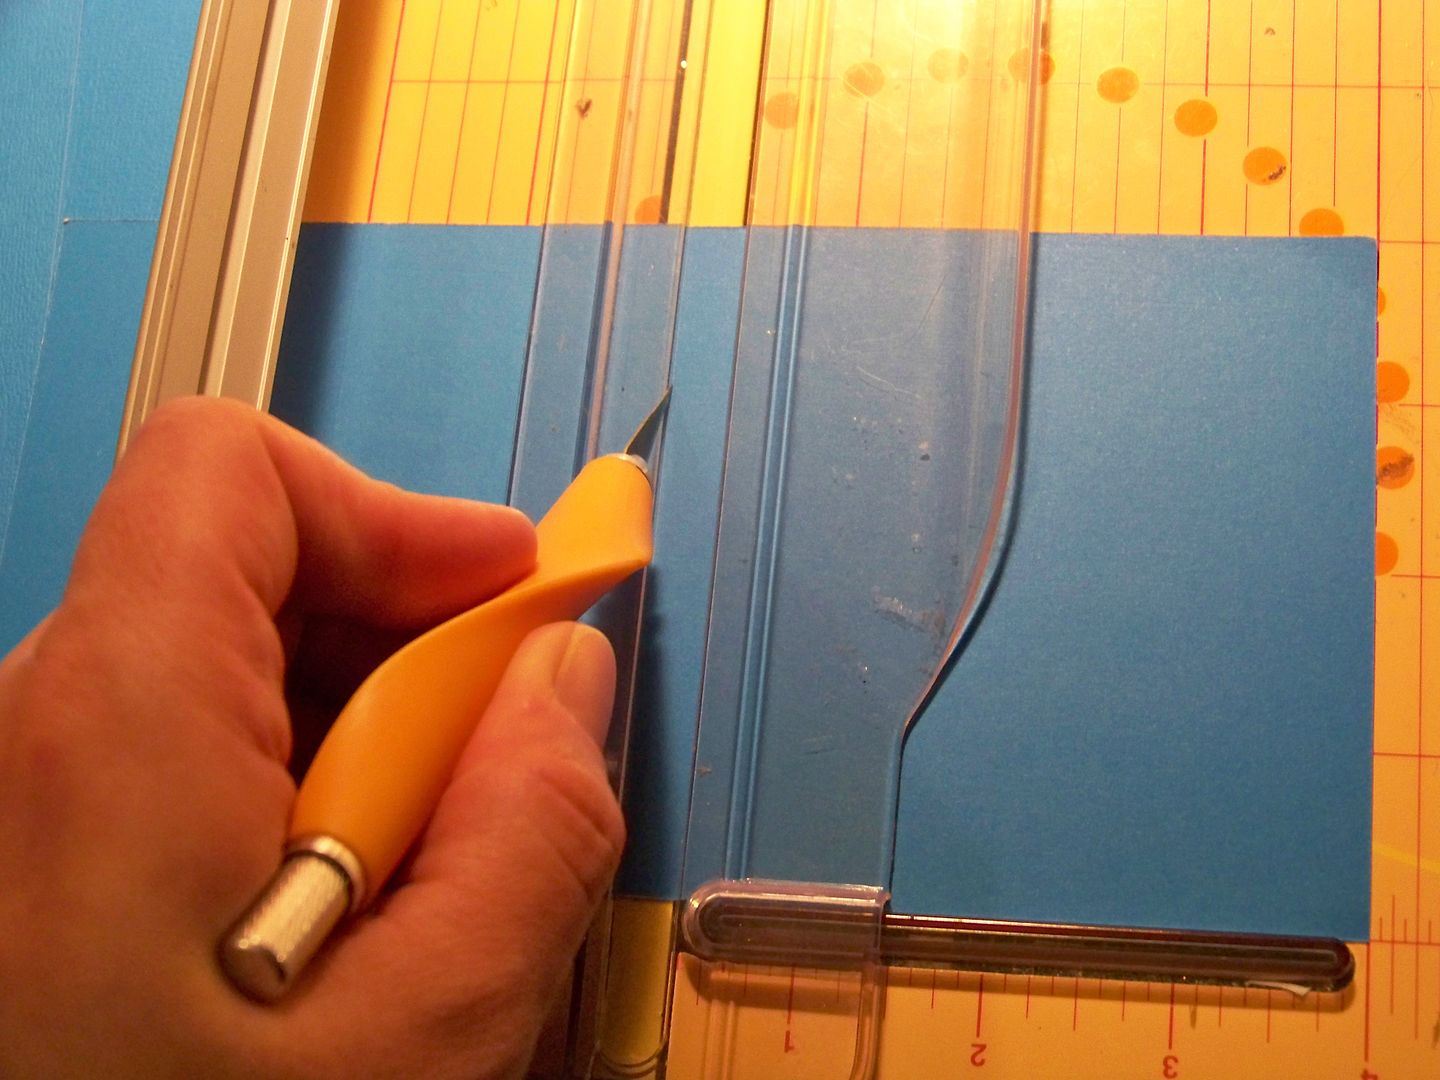
I like to score by lightly cutting into the cardstock with an Xacto knife.  I use my trimmer's guide to keep it straight.  For this book, I found that the Xacto knife way of scoring created much sharper folds, something very important as you add layered die cuts to embellish it with later!


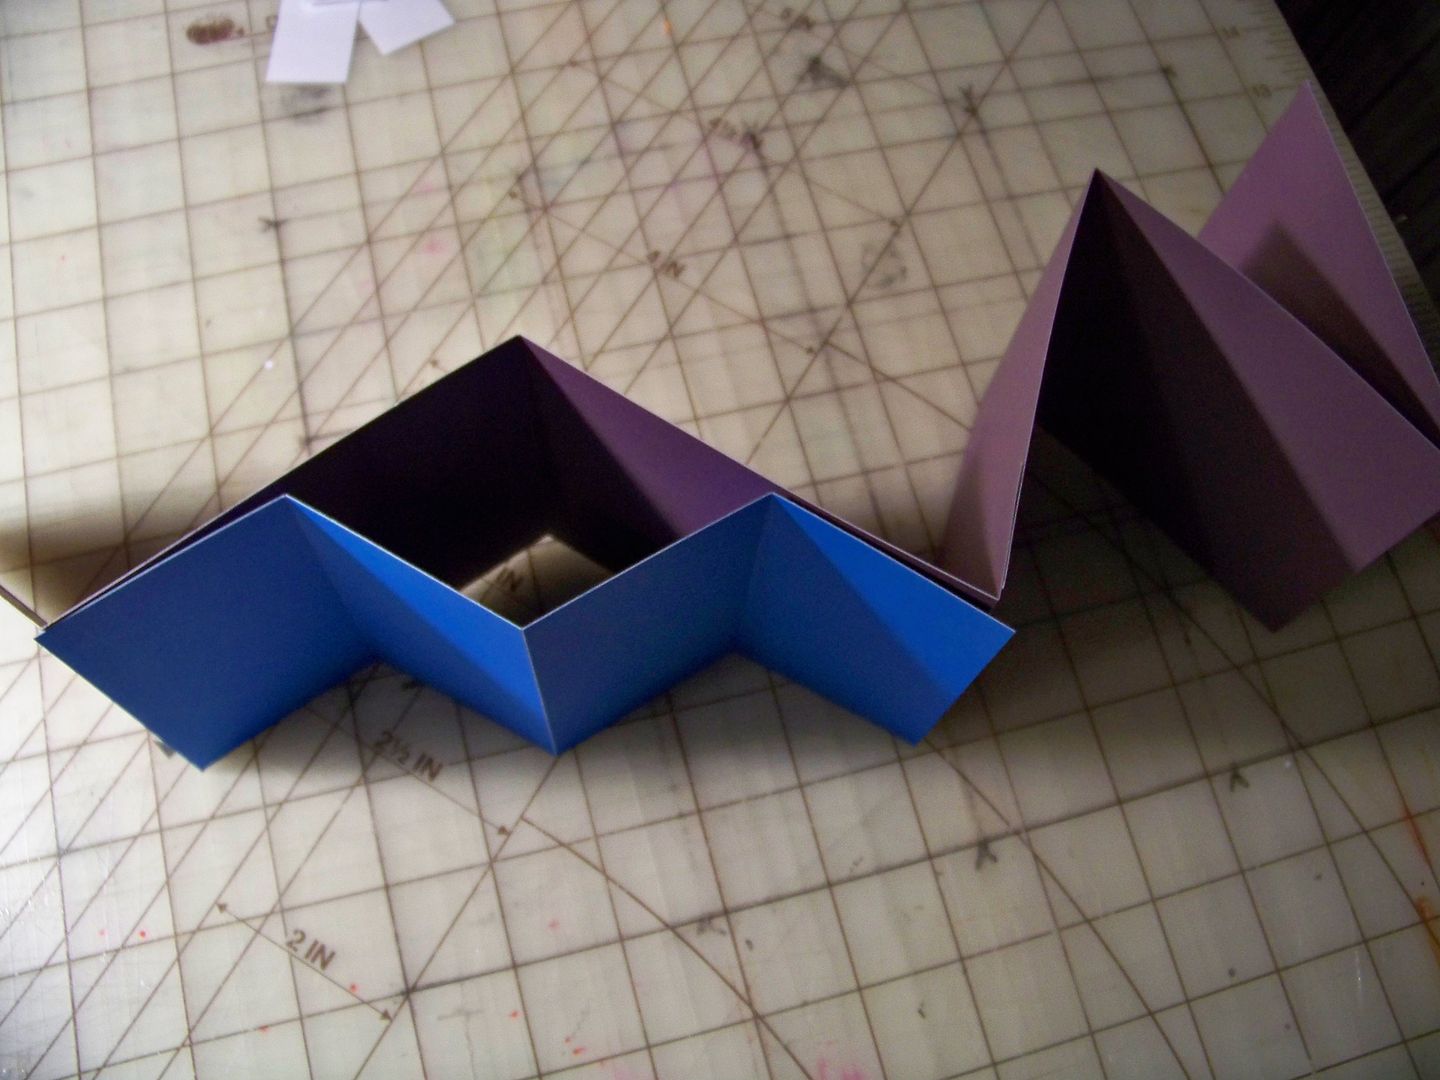
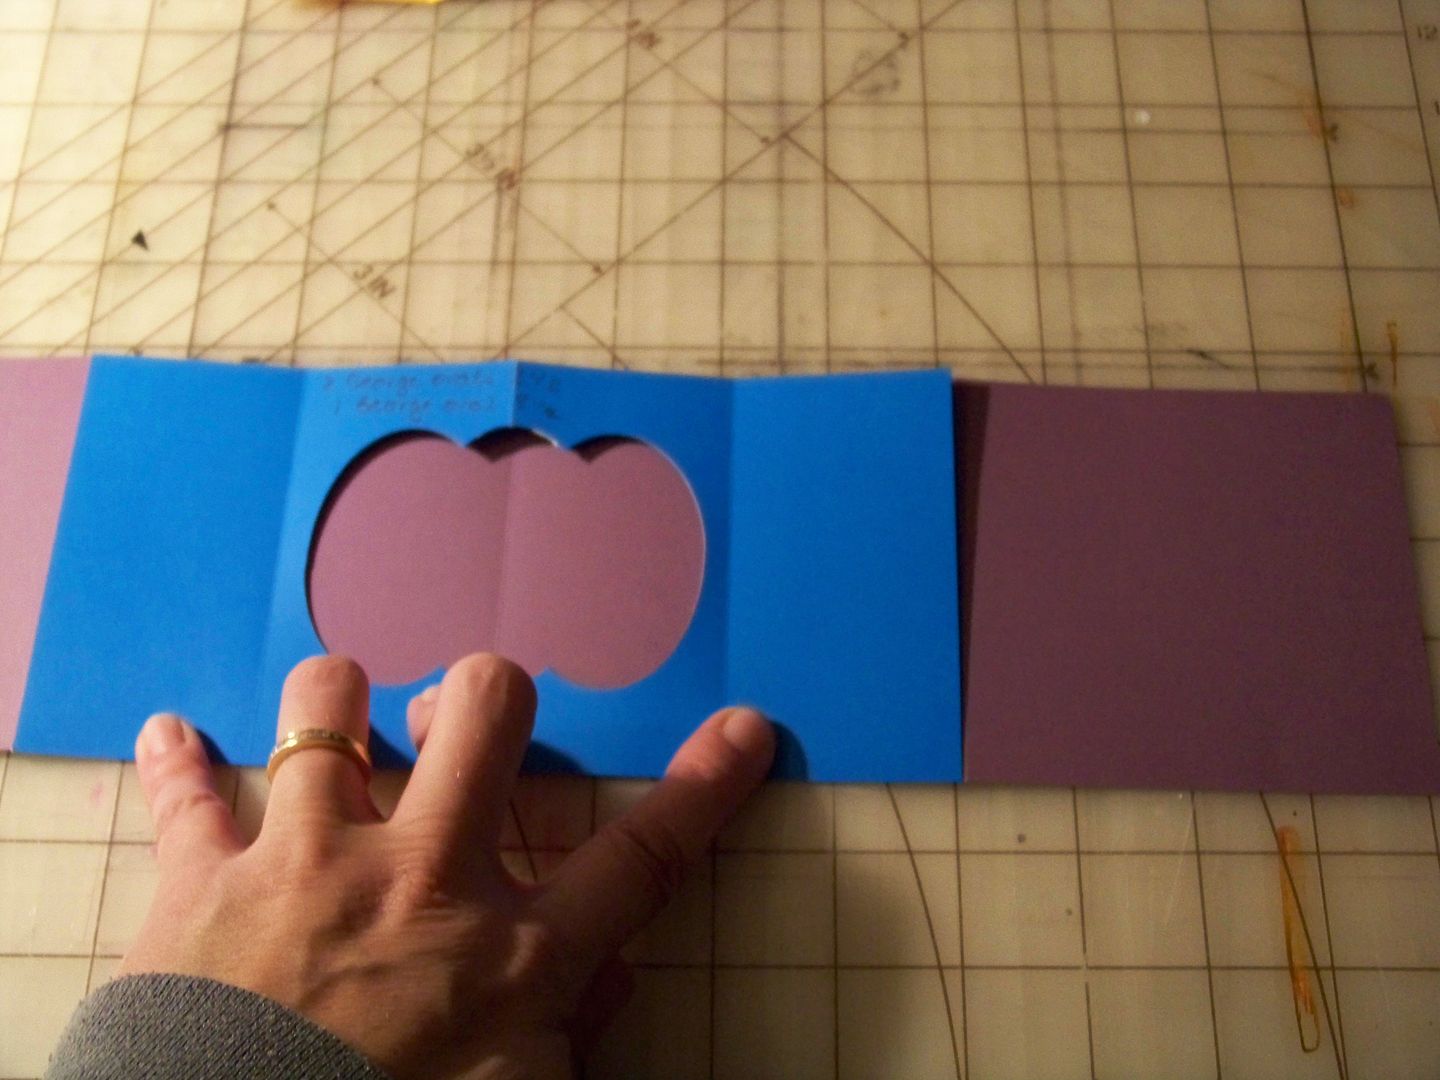
Here, you can see how it will fit to the base.  Remember the purple base's valley fold is directly behind the blue page's mountain fold!


Step 3:  Cut two 4" x 4" covers.  The cover can be covered chipboard or just pieces of card stock.  You could use almost anything for the covers-- even fabric-covered board, metal, or wood.

Step 4:  Pick out a simple shape on a cartridge to create your window.  (I tried lots of different ones on my mock-up as I was trying to figure out what I wanted for my final project's windows. There are endless options-- just keep the shapes simple and cut big enough to see through!) Use the Centerpoint feature on the Cricut to cut a window in the center of the mountain fold.


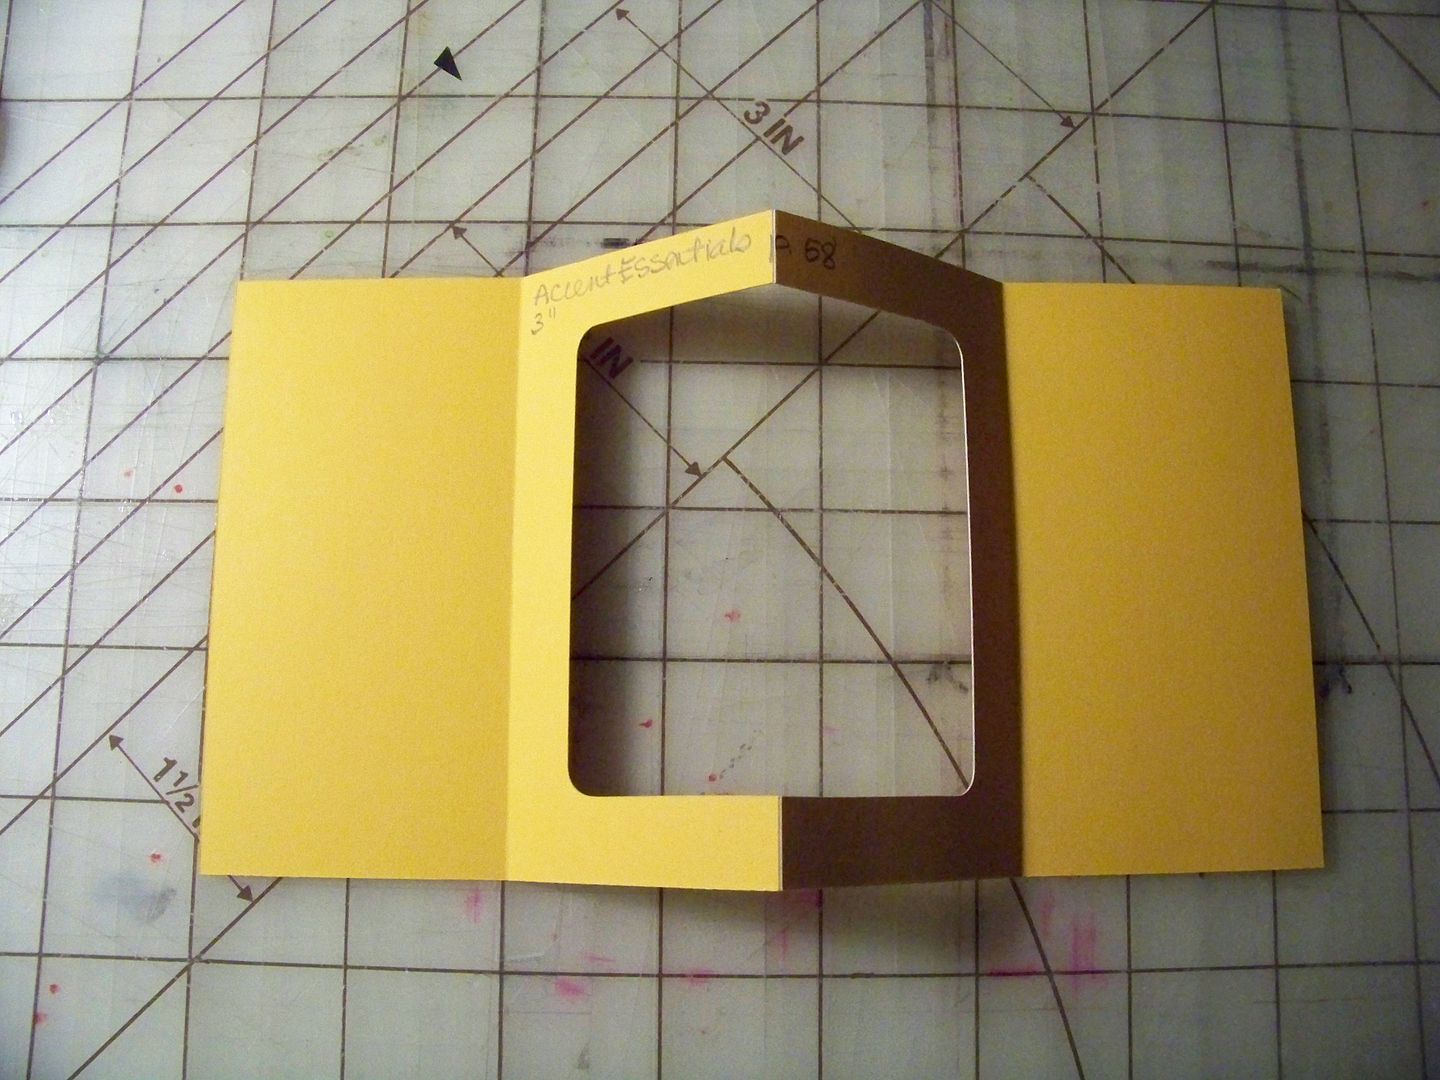
This was cut from Accent Essentials, page 44, at 3".

This was cut from Accent Essentials, page 58, at 3".

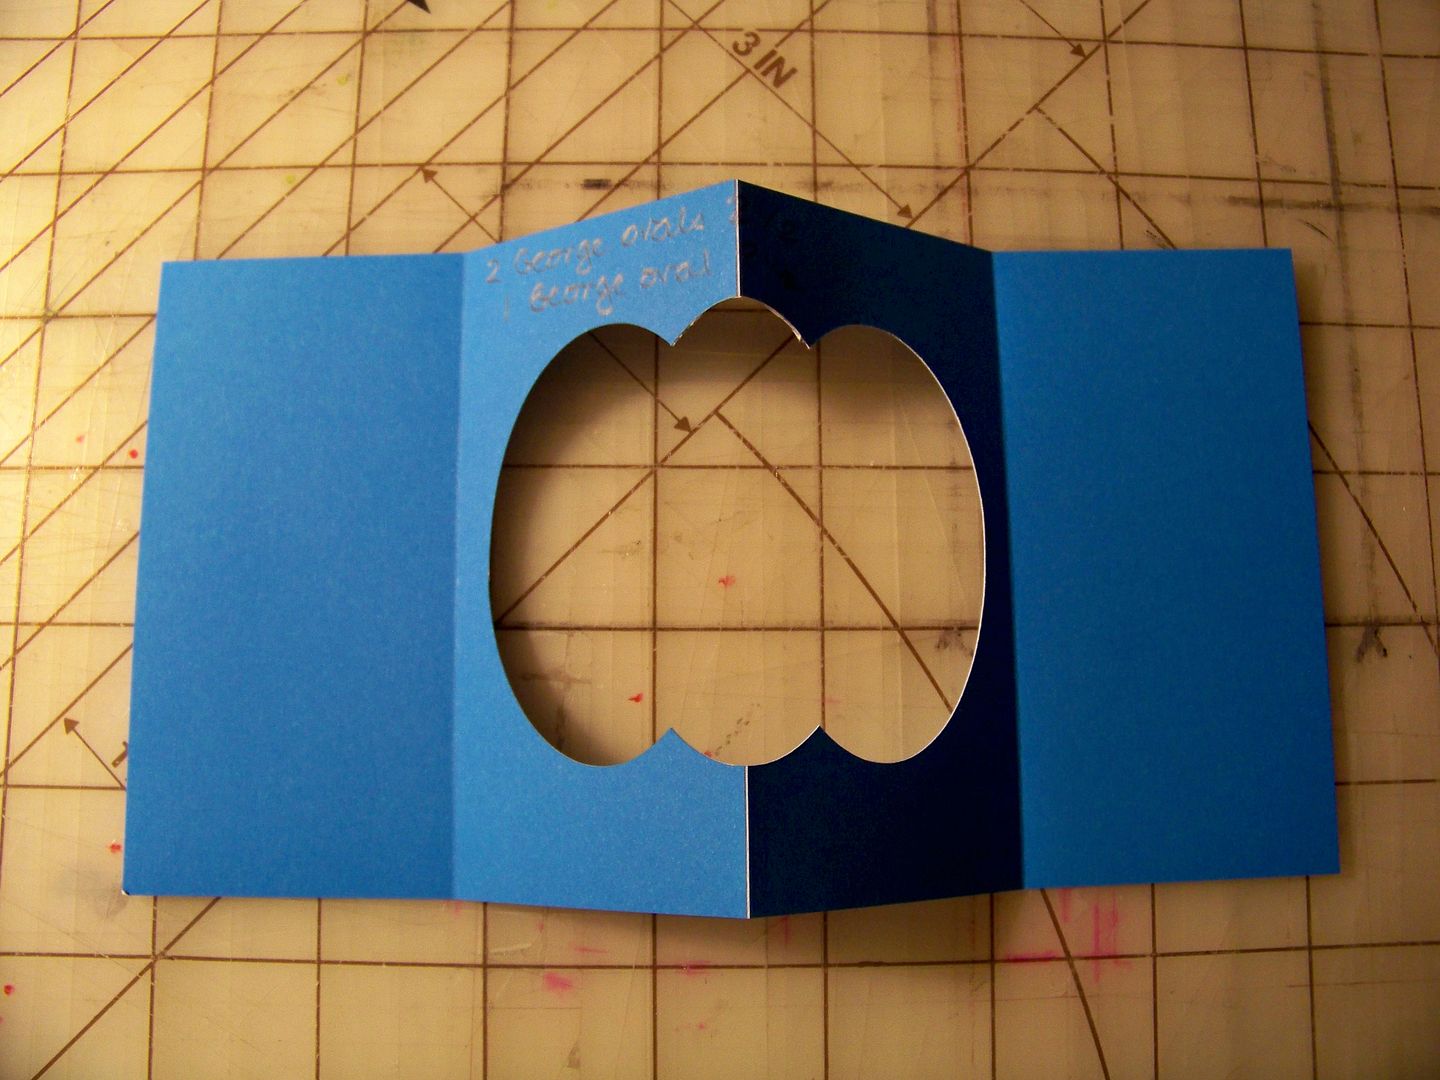
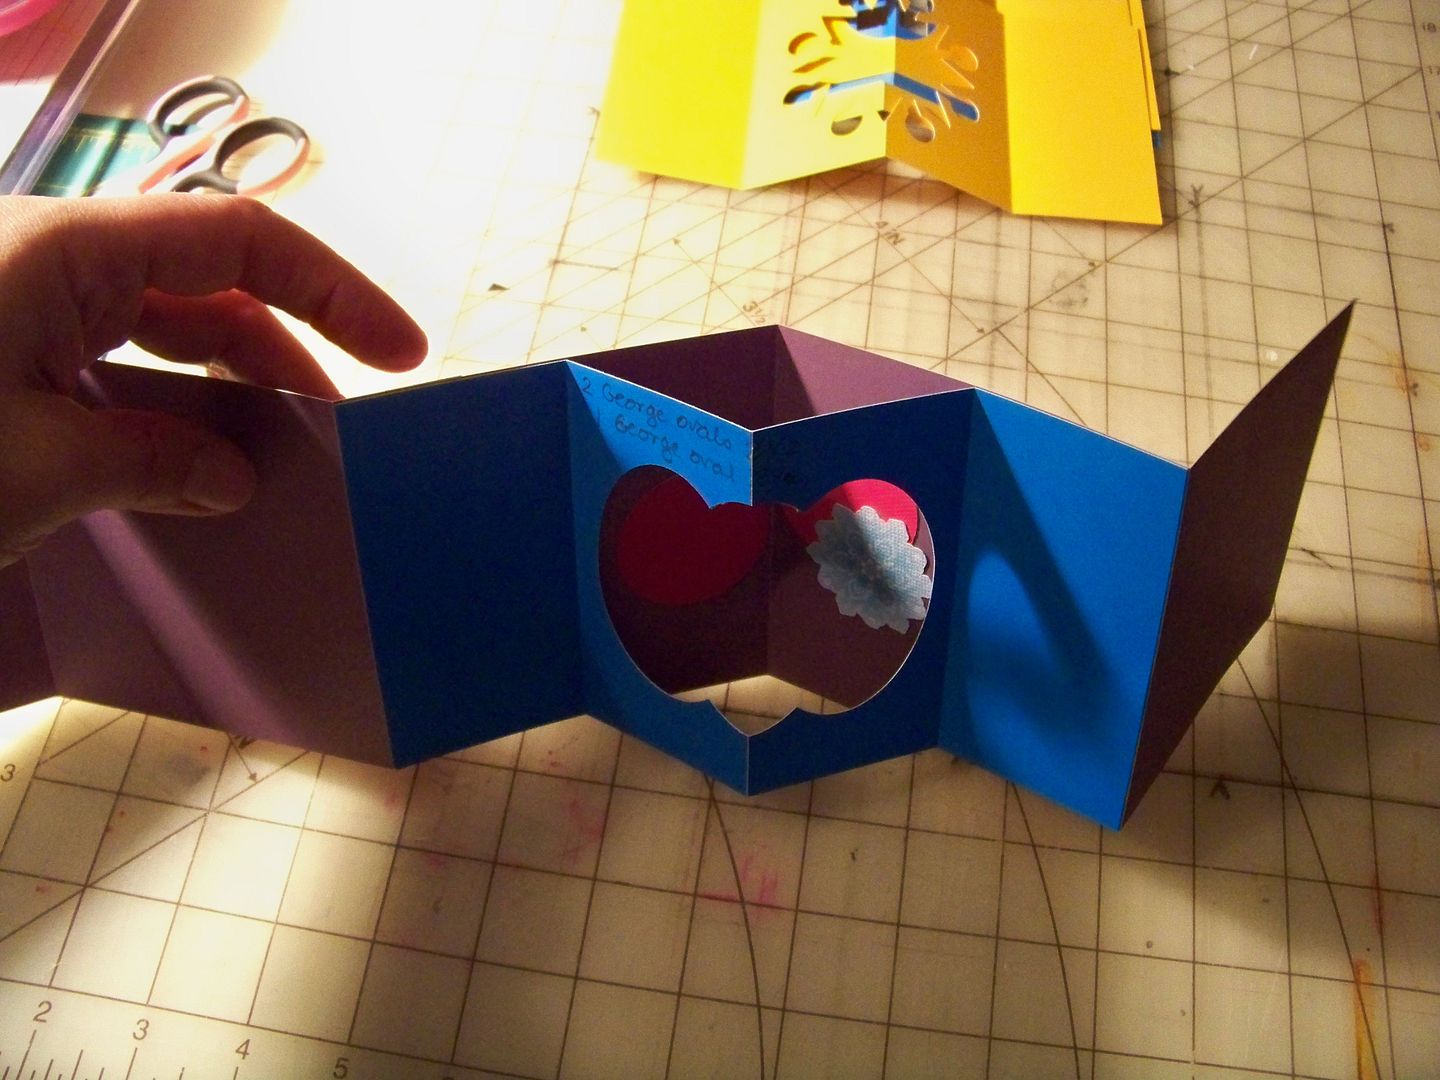
This was cut from George (the oval) at 2-1/2".

For this cut, I entered two ovals (same as above at 2-1/2").  The blade went back to the center. Then I entered one oval at that size and re-cut.  This is the result.

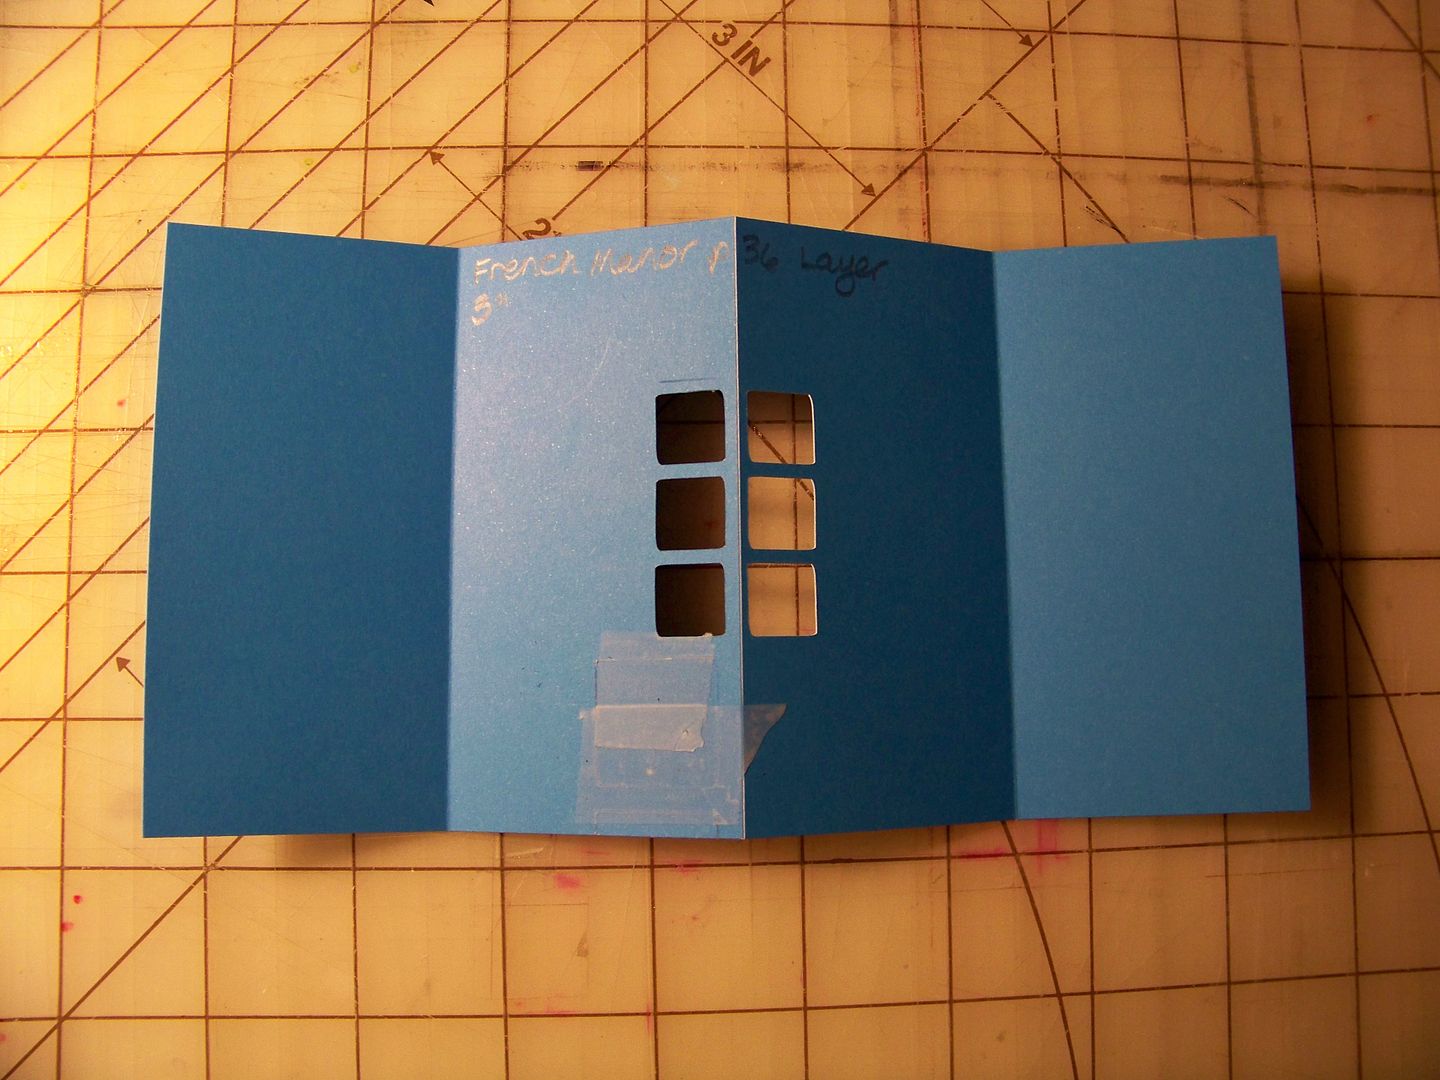
This was cut from French Manor, page 36, at 3".  This was the layer cut.  I never used this one for my final project, but I definitely would enlarge it if it were used for the next one!


Step 5: Adhere the pages to the base by taping the 2" flaps on each side of the page with ATG tape.  This will leave the center 4", that includes the cut-out, unglued and free to move!  Notice that the center fold of the blue page is mountain fold; the fold under it on the purple base is a valley fold.  This is key.  You can add your embellishments here, before adhering the pages to the base or you can add them at step 7.  The huge benefit to adding them here is that you can ensure that you get everything perfectly flat.  Remember that anything you add here must be scored exactly like any fold it covers!  For both my mock-up and for my final book, I chose to wait and add to each scene like decorating a room, after the pages were adhered.


After all the pages are adhered, it looks like this...


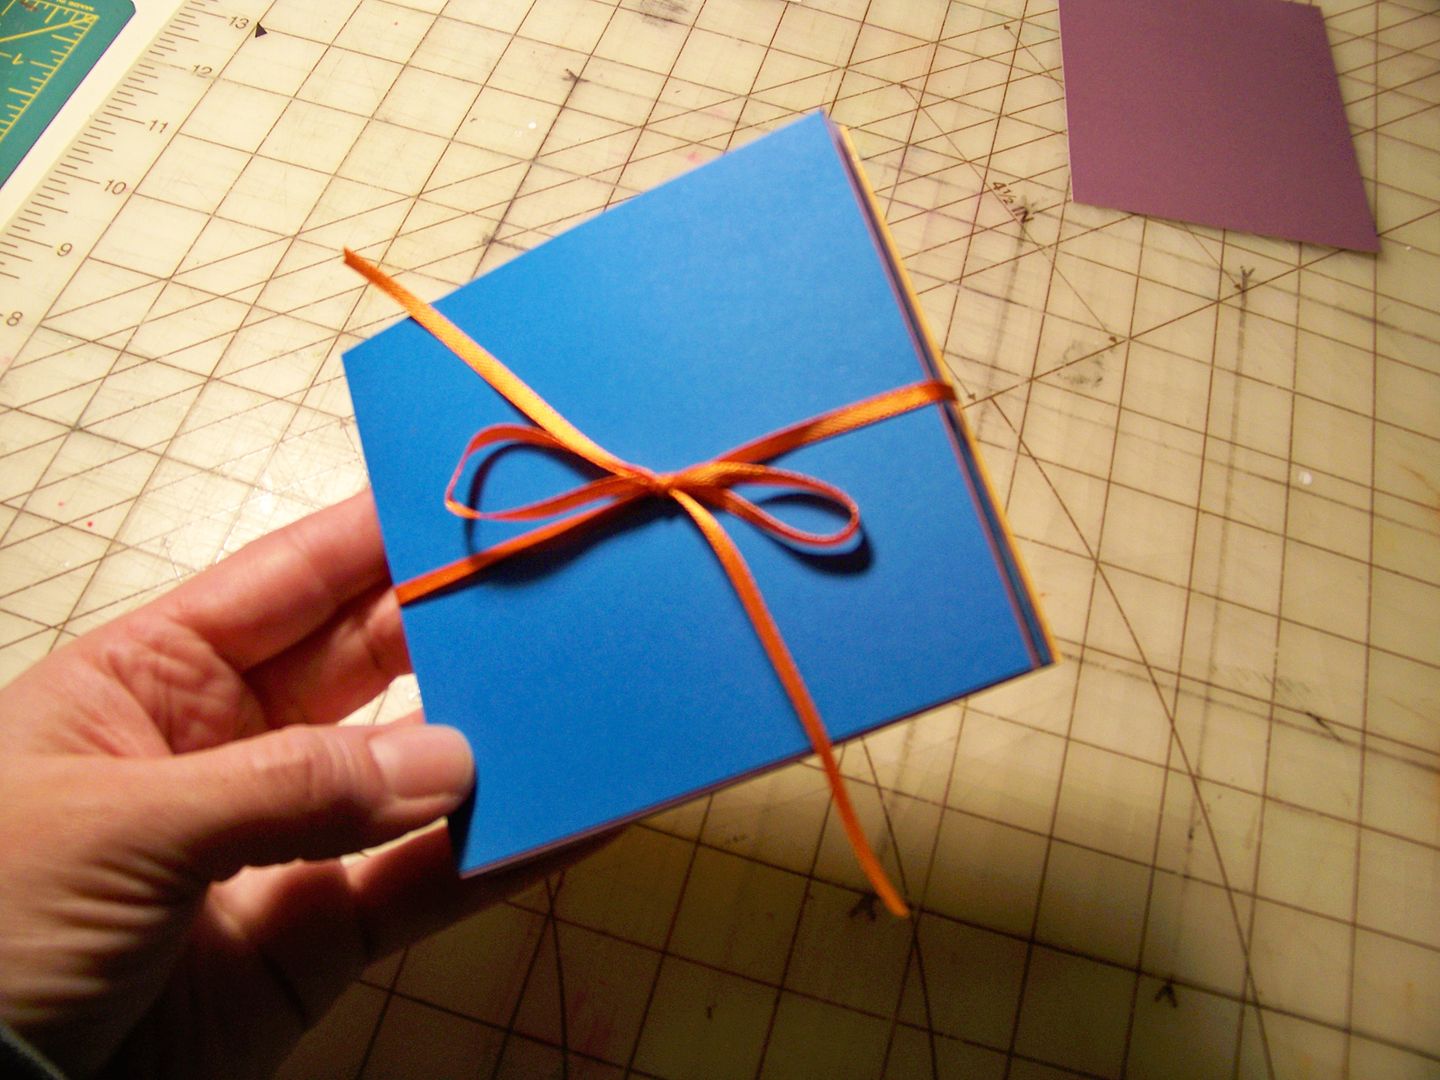
Step 6:  On one end, adhere a 10" piece of ribbon on each side to make the tie.  Adhere one cover on top, sandwiching the ribbon in between the end and cover on that end.  On the other end, adhere a cover to the end, without ribbon.  I used Terrifically Tacky Tape to adhere the covers to the ends of the book.


Step 7:  Add embellishments to each page, remembering that anything that is placed over a score, must be scored.  I found that multi-layered die cuts must be scored with an Xacto knife, not a bone folder!  They are just too bulky and require the cutting to force the shape to fold as flat as possible. I learned that Scotch Quick Dry Glue creates brittle layered cuts.  Scotch Scrapbookers Glue was much more flexible and less prone to "breaking" the paper at the score lines!!!


Step 8:  Fold up.  Hold the book so that the end with ribbons is on the bottom.  Bring the ribbons up and tie the book closed.


Crafty Details for Christmas Pop-Up Accordian Book:
After I figured it out, I created my Christmas one!  You know I don't believe in re-inventing the wheel, so these are my cut sizes for the final book:

My base was pale green.  I used a 12x24 paper pad so that I wouldn't have any extra seams.  Just like the tutorial, it was cut to 4" x 24".  My pages were all different prints at 4" x 8".  My cut outs were the rounded square on George (page 111) cut at 3" and the snowflake on Accent Essentials (page 44) cut at 3".

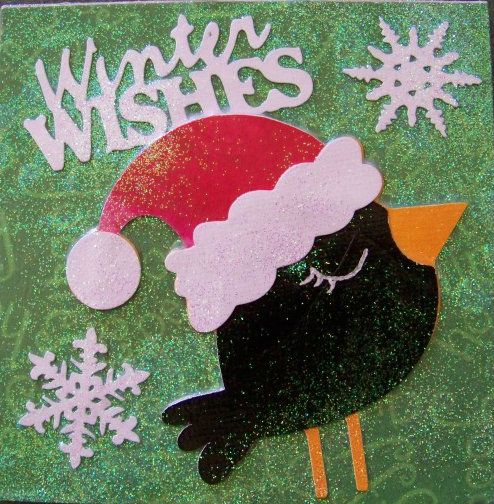
For the front cover, just like the tutorial, the base for the cover was cut at 4" x 4".  The bird was cut from Jolly Holidays at 3".  The text was cut from the same cartridge, at 1".  The snowflakes were cut from December 25th at 1".

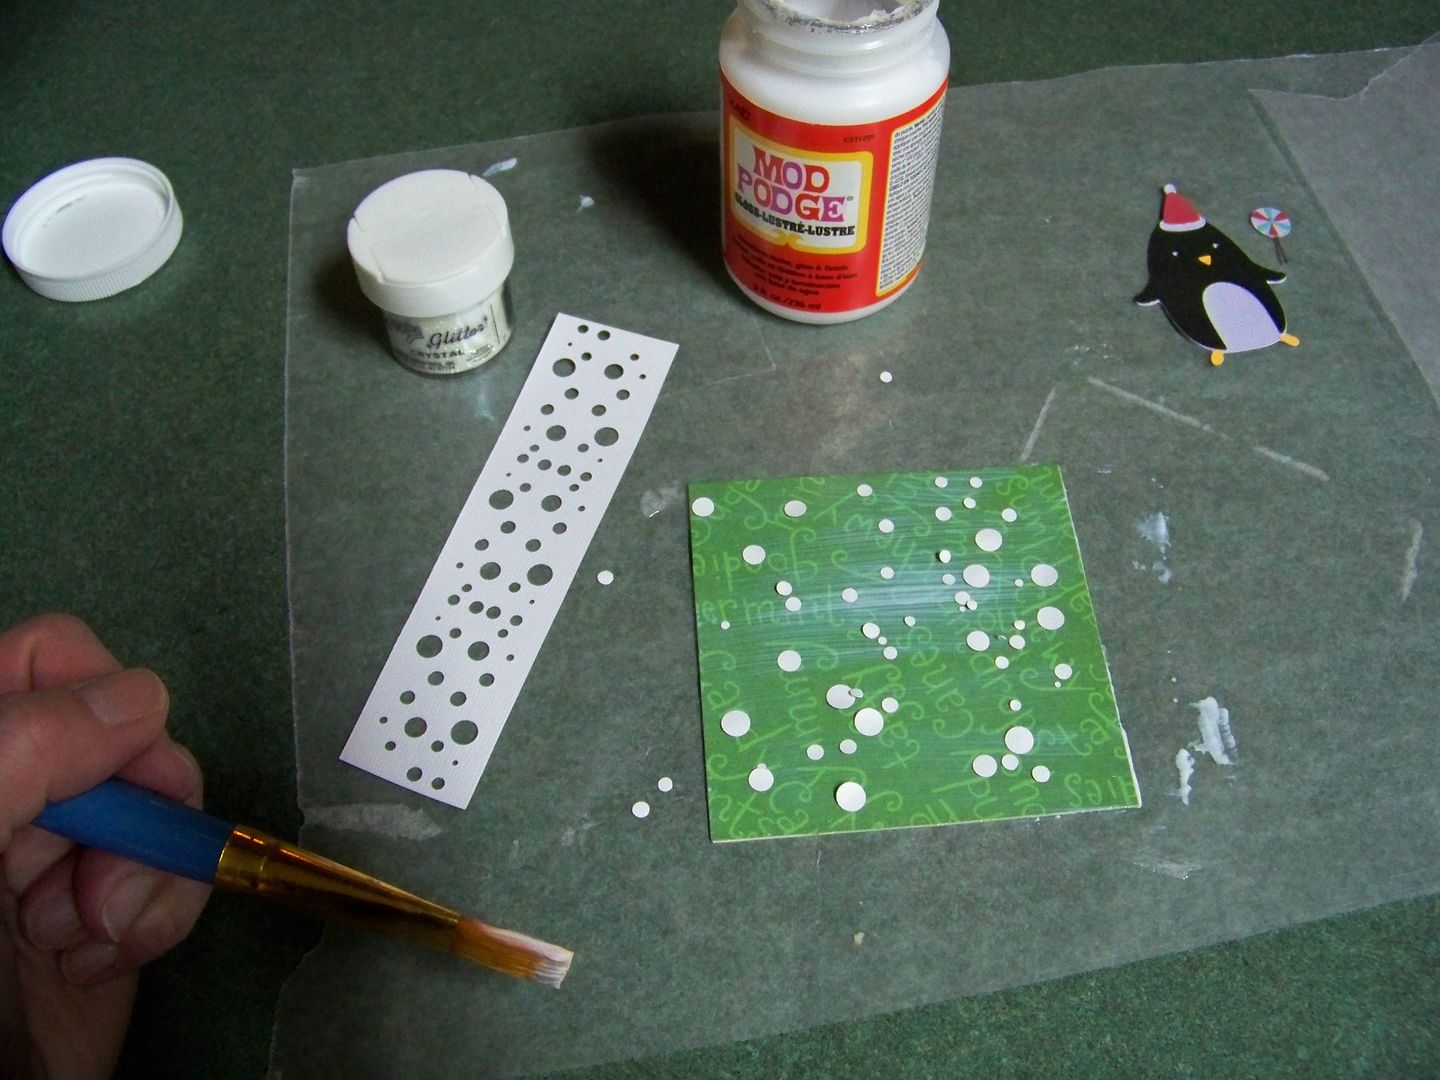
I adhered the base of the cover to chipboard with Mod Podge (glossy).  I added the cuts and more layers of Mod Podge.  I added glitter to the top coating of Mod Podge while it was still wet.  For the back cover, I applied the glitter differently so see if there was a difference in the finished project. (The answer:  no difference visually but the back cover, is smoother).

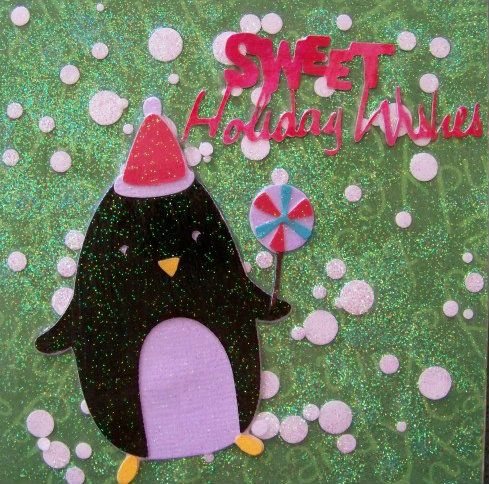
For the back cover, the penguin was cut from Winter Frolic (page 57) at 3".  The Phrase was cut from the same cartridge and page at 1".

I cut the snow (circles) by using an edge punch.  I applied the Mod Podge, then the base paper.  Then I applied more Mod Podge and applied the snow circles.  More Mod Podge, then glitter.  More Mod Podge (be sure to scoop out Mod Podge from the jar when you get to this part so your brush won't infect the whole jar with glitter!), then the cuts.  I topped it with a couple of layers of Mod Podge.  (I allowed the Mod Podge to dry completely between layers of course-- in case you were wondering.)  By using this technique, I had nice, sturdy covers with materials that I had on hand.


For the red page, the tree is from Winter Frolic (page 67), cut at 2-3/4".  The gifts are from Winter Frolic (page 66), cut at 1-1/2".  The text was cut from Winter Frolic (page 68) at 1-3/4".  The snowflakes were cut from December 25th at 1".  The tree was scored off-center to keep the bulk out of the fold.


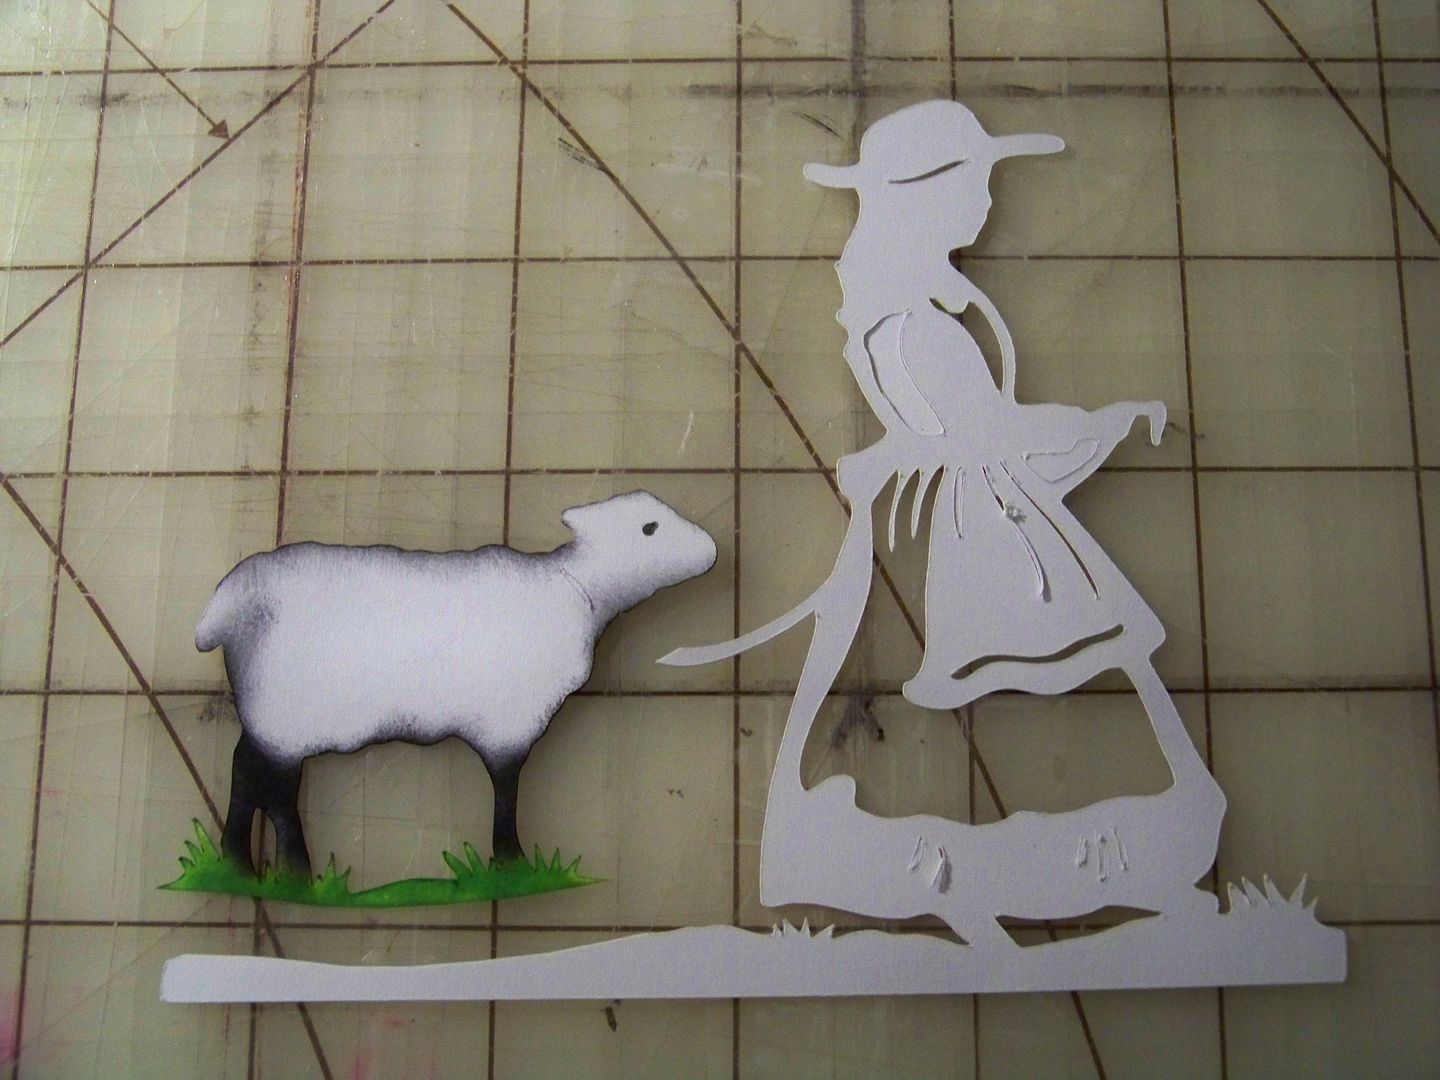
For the Nativity page, the manger with Jesus was cut from A Quilted Christmas (page 49) at 1-3/4".  Mary was cut from A Quilted Christmas (page 50) at 2-1/2".  The star was cut from Winter Frolic (page 71) at 2-3/4".  Joseph was cut from A Quilted Christmas (page 51) at 3-1/2".  The text was cut from Scandinavian Christmas Cards at 1-1/2".  I manually cut away the star on the text.  The lamb was cut from Nursery Rhymes (page 45) at 4".  (I cut the the figure away from the lamb manually and inked).  Note that both the manger and lamb cuts are scored to match what they were adhered to.

There are tons of sheep and lambs on Cricut carts, but I didn't like any of them as much as this one! Super easy to ink up for color and detail without any bulk!  I simply cut Mary's Little Lamb away from the silhouette.


For the snowman scene, the tree is from Scandinavian Christmas, cut at 2".  The snow is from the same edge punch used on the front cover.  The snowmen are from Winter Frolic; page 28 at 3" and page 32 at 2-1/2".  The tree was scored and applied off-center to reduce the bulk at the fold


For the photo page, I cut the frame from Fancy Frames (#6) at 2-1/2" and turned it on its side.  I will give you this bit I learned:  next time I will cut a frame that either does not overlap the side score lines or one that overlaps them greatly!  Small, thick pieces do not like to stay attached to the pages when they get folded and unfolded.  The photo was scored just like any other embellishment that covers a score line! (Since the photo is inside the window, it is adhered to a valley fold so that means I scored it on the BACK side of the photo, avoiding a visible cut on the front!   The sleigh silhouette was cut from Christmas (Solutions cartridge) at 2".  I loved that this element moved from page to page-- more of that next time!

For the Santa page, I cut Mrs. Claus from A Quilted Christmas (page 33) at 3-3/4".  I used an edge punch for the hem of her apron.  The chimney with Santa was cut from A Quilted Christmas (page 29) at 2-1/2".  These images had the most layers.  I did learn for next time to cut away unneeded parts of layers and to NOT use Scotch Quick Dry glue for these, using a more flexible glue (like Scotch Scrapbookers Glue).


Thanks so much for joining in on the hop today!  Please be sure to check out all of the participants' wonderful projects.  I've posted the links below for everyone in this hop in case you've missed anyone.


Photobucket

You can find many of my previous projects by checking My Project Gallery.  

Sunday, November 4, 2012

Helping Victims of Hurricane Sandy


Click image above to go to the UMCOR site to make a donation for their hurricane victims fund (Hurricane 2012) or click here.


Click image above to go to the American Red Cross site to make a donation for their hurricane victims fund (Disaster Relief) or click here.


Click image above to go to the Catholic Charities site to make a donation for their hurricane victims fund (Hurricane Sandy Disaster Relief) or click here.


I am working on projects for an upcoming blog hop, some Christmas gifts *gasp!*, and helping my daughter with an involved history project.  Crafting projects coming soon, but people dealing with the aftermath of Hurricane Sandy have been on my mind, and I am betting they are on your mind too.  These are three charities I have contributed to that I think do good work with the money they receive.  Just passing it on in case you were thinking of making a donation.  Back to the craft room....

But wait! There's more! Click 'older posts' above!

But wait!  There's more!  Click 'older posts' above!