
This tutorial is all about making die cuts more dimensional and these ideas work with any brand of cutter! It works if you like to hand-cut or if you like to use software to alter your cuts! It can change whole cuts or just specific areas that seem to flatten out. I love die cuts because they are a great starting point with so much of the basic illustration, theme, and style already figured out! The fun is making it your own (and that is where the 'art' is too!)
A few ideas for adding dimension and emphasizing perspecitve:
- Things that would be closer to you in real life should 'appear' closer to you on the die cut. You can depict that by using brighter or deeper colors or more detailed patterns, using pop dots or bending the paper to physically pull parts closer, and creating more detailed cuts. These things are in the foreground.
- Things that would be farther away to you in real life should 'appear' farther away on the die cut (or behind the die cut if you are making a scene or vignette.) You can depict that by using more muted colors, less detailed or less focused patterns, inking to make things seem to recess, or covering the background with something like vellum to 'mute' the colors. For backgrounds, the flatter and more recessed you can make them, the more they set off things in the foreground.
- It doesn't have to be perfect. Imperfections just add to the charm of something original and hand-made.
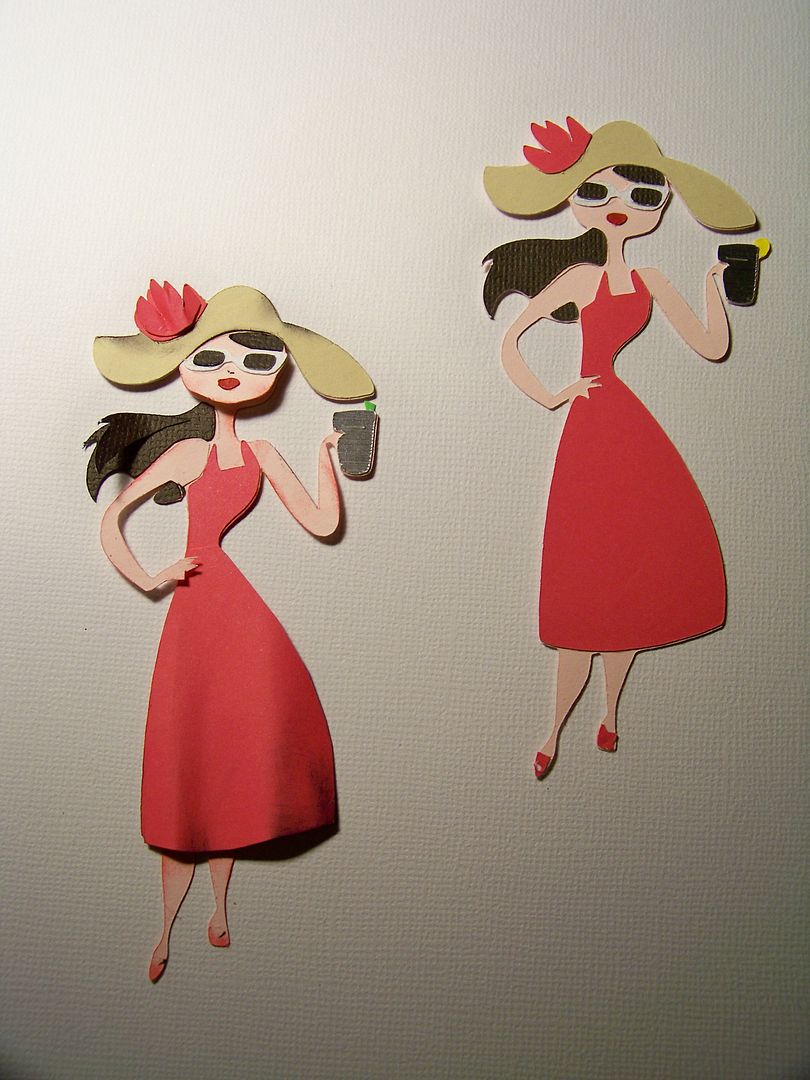
To illustrate this on individual cuts, I made a few examples...
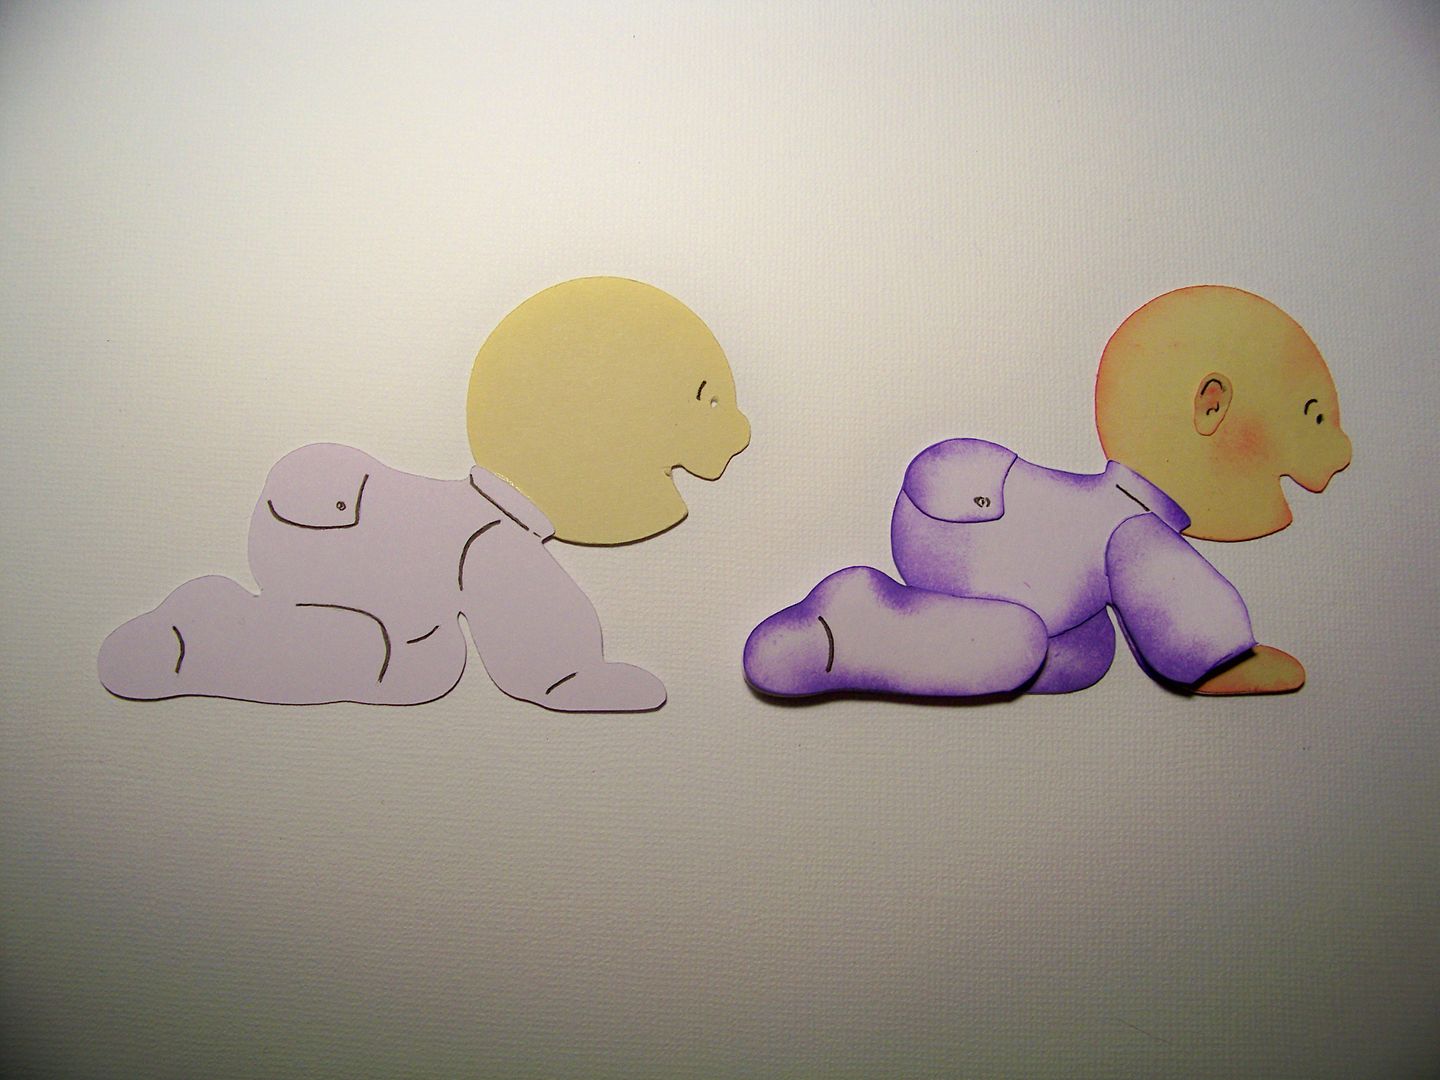
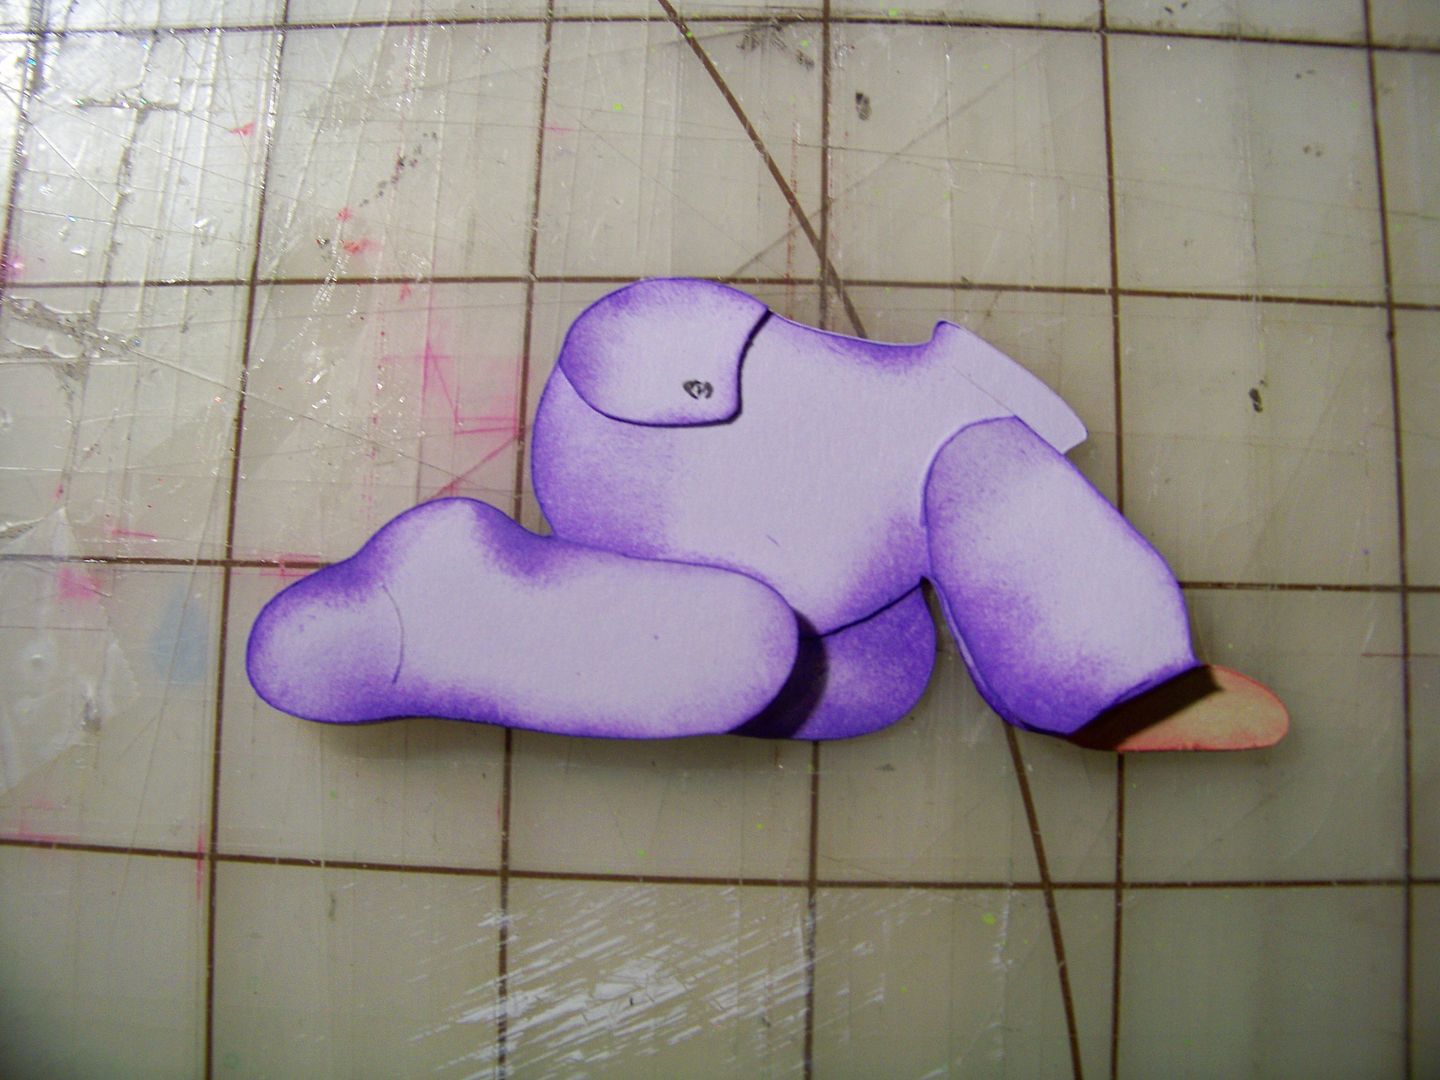
The die cut when created just as it is on the cartridge (left) is flat, especially the body, with no difference in the knee that is farther away than the leg that is closest to us! By cutting "extra parts" and adding ink (applied with an eye shadow sponge) and sometimes pop dots, the baby has more dimension and looks more separated from the surface of the paper behind it.
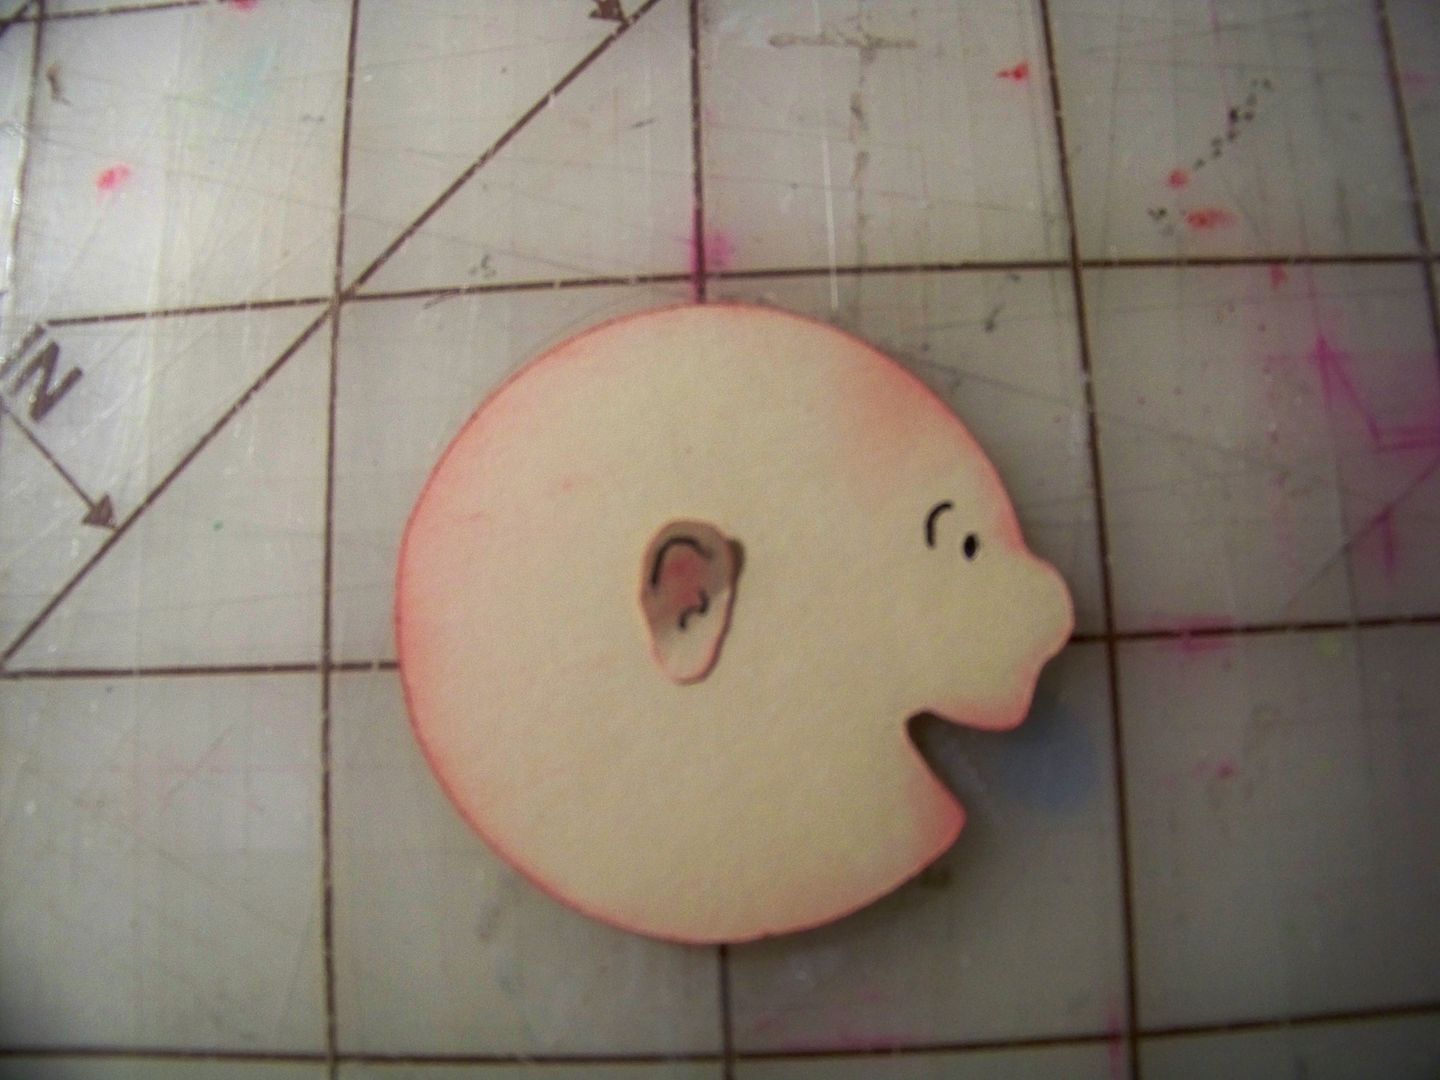
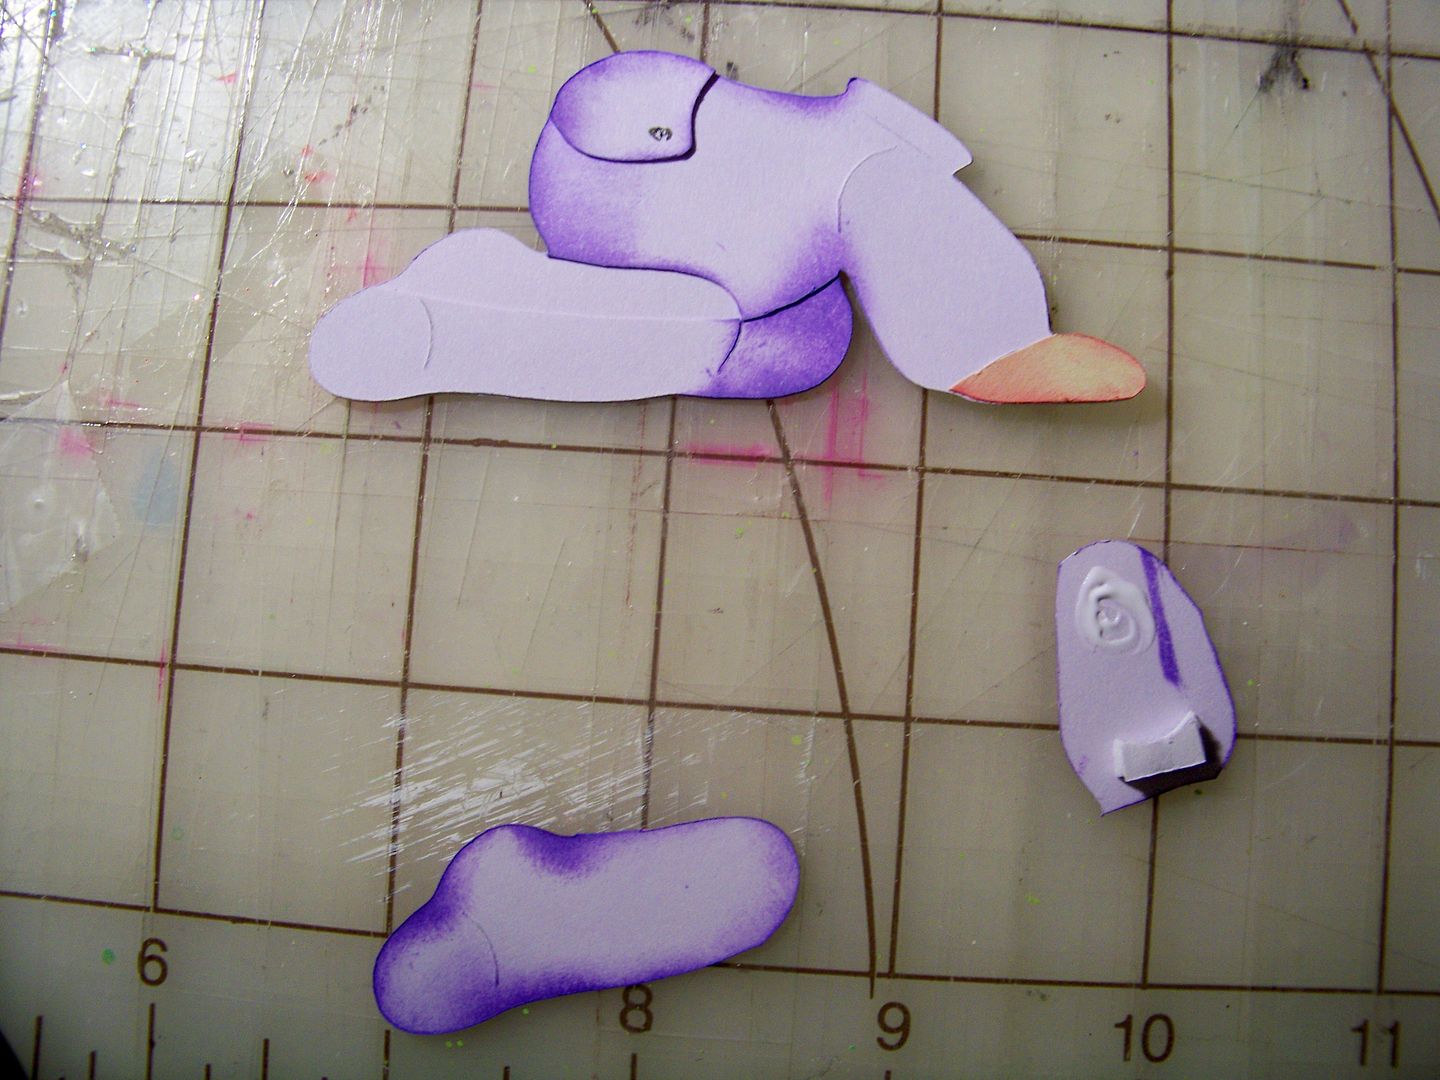
For the body, I cut four: one that matched the head so I could steal the hand, and three cut in lilac to make the sleeper. One of those was cut using the 'blackout' feature and would be the base. The other two were cut for 'spare parts' so that I could build up the figure. I simply cut where indicated on the die cut using the marks the machine made.
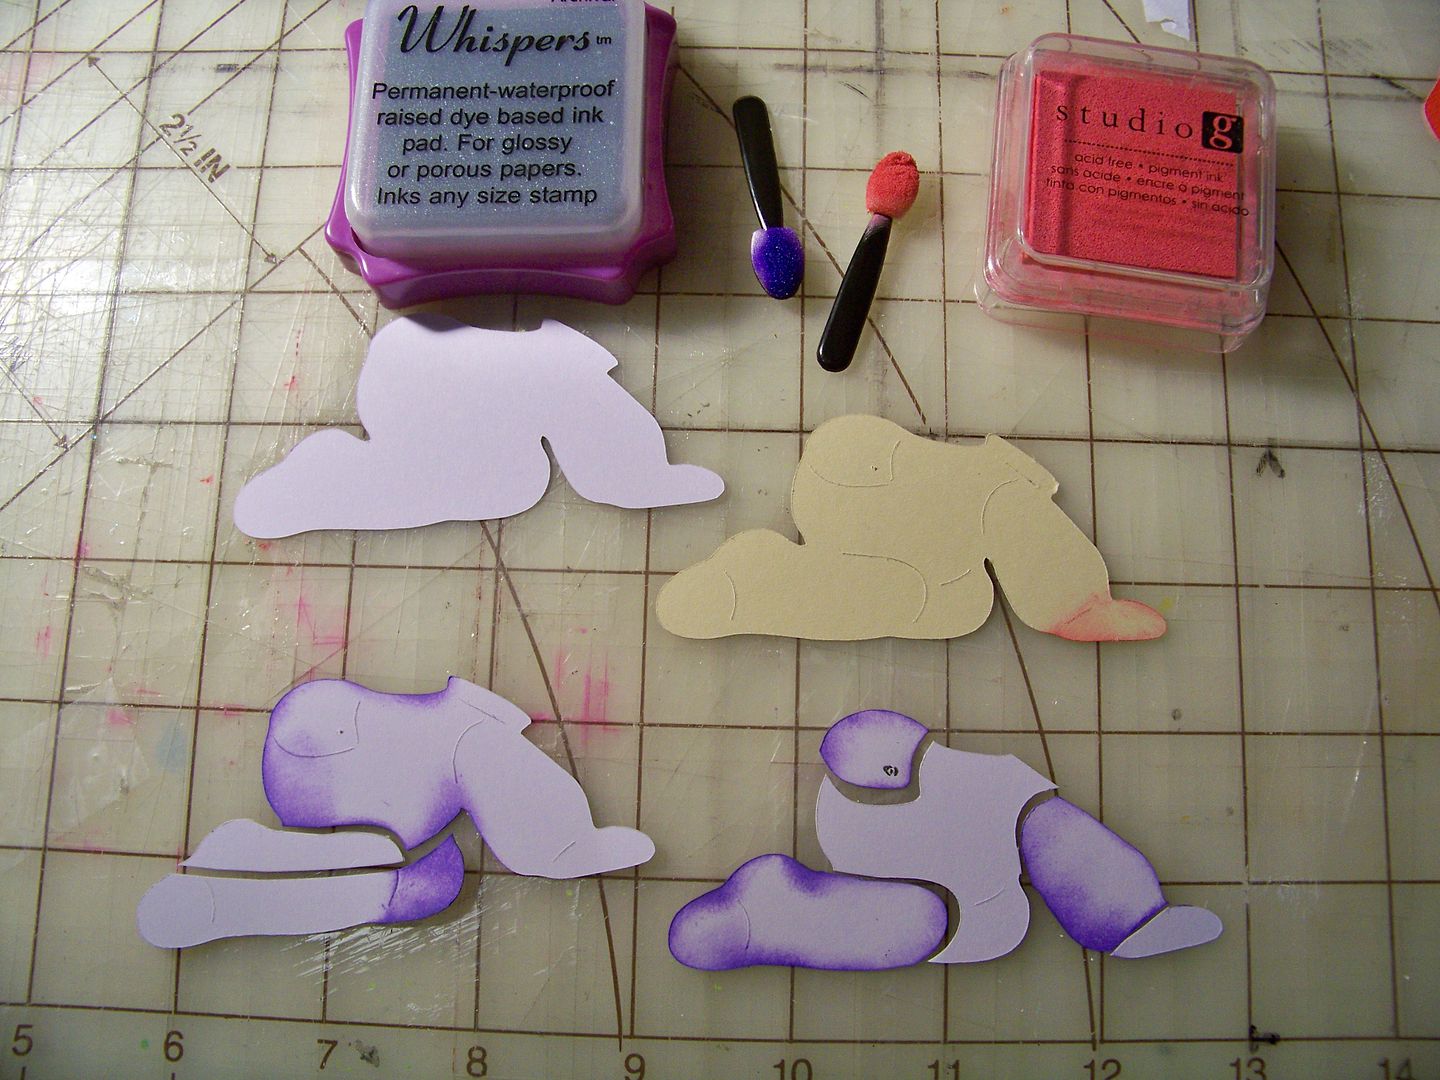
You can see that the lower left cut was used just for the back knee. I inked it heavily because in real life, it would be more shadowed than the leg closest to us. I also used the rest of the body from that cut and adhered it to the base. I cut off the hand from the flesh-colored cut and adhered it next.

I adhered the arm. I glued it flush at the top, but used a pop dot at the bottom so that the upper part looked more sewn-in and the part near the wrist looked like it was loose around the hand.
The leg was attached with pop dots.
I attached the head to complete it.
This works for all kinds of different figures and styles.

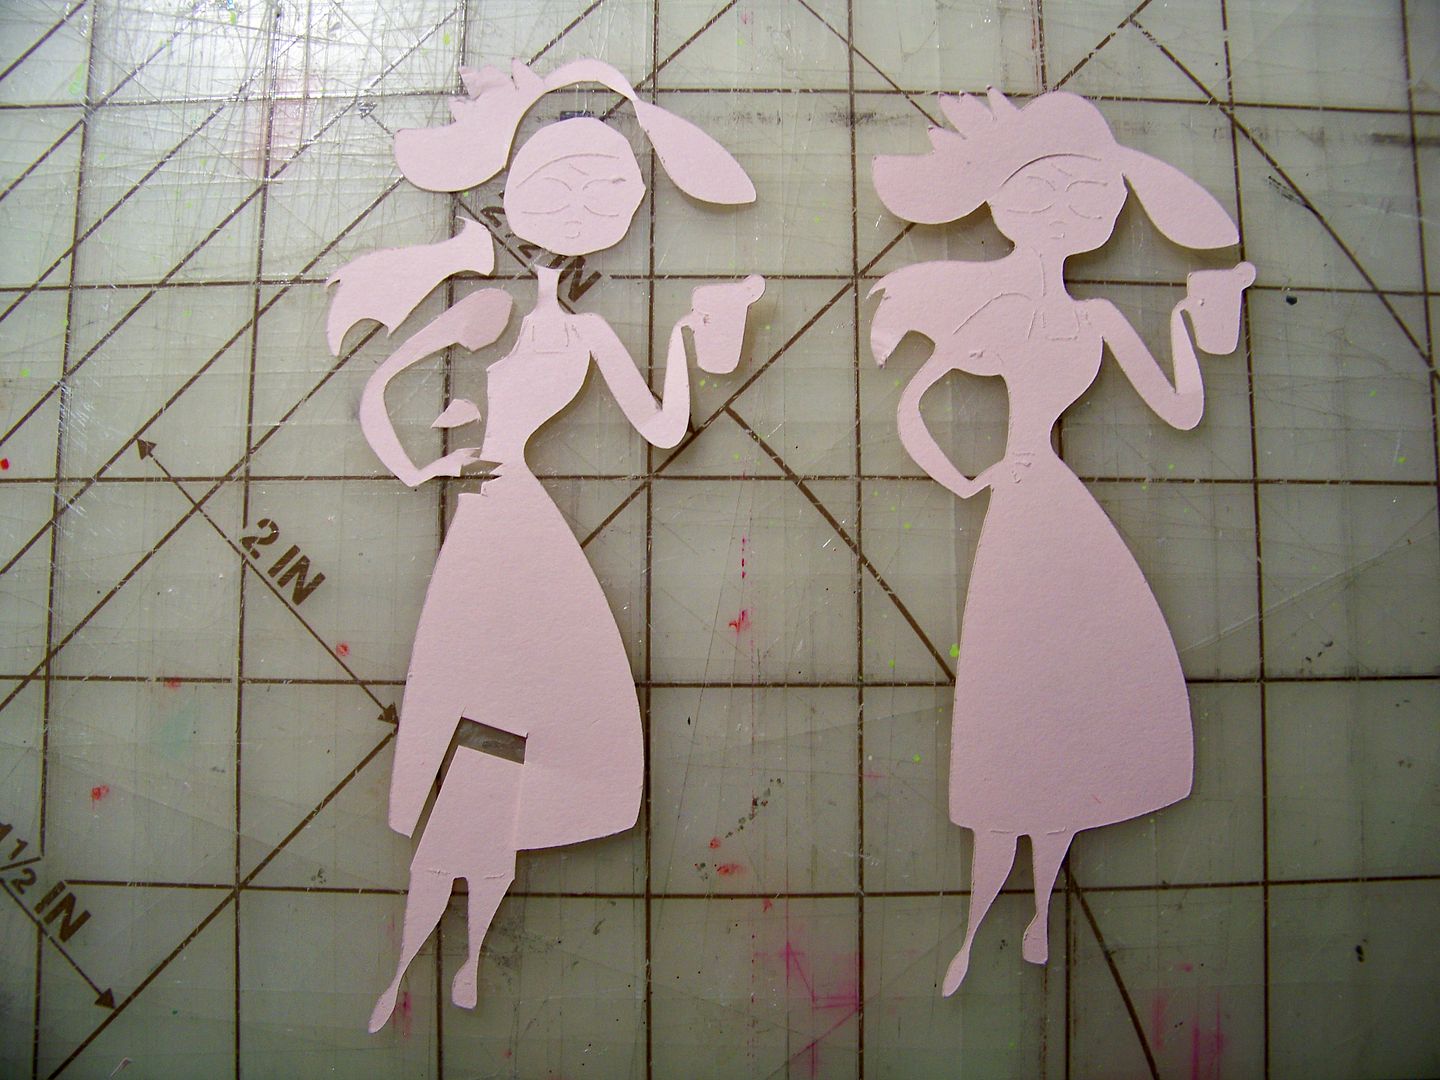
This example was cut from Cricut Pack Your Bags (page 21) at 4-1/2". I liked her because she looks like she is wearing a Derby hat and I forced her to change her drink order from a lemon-adorned beverage to a mint julep in a traditional silver cup for Derby Day today.
I started with two cuts in flesh.
I discarded everything from that figure except the parts I needed and clipped away the unnecessary parts of the remaining flesh-colored figure (left arm, legs, and lemon) and discarded those.
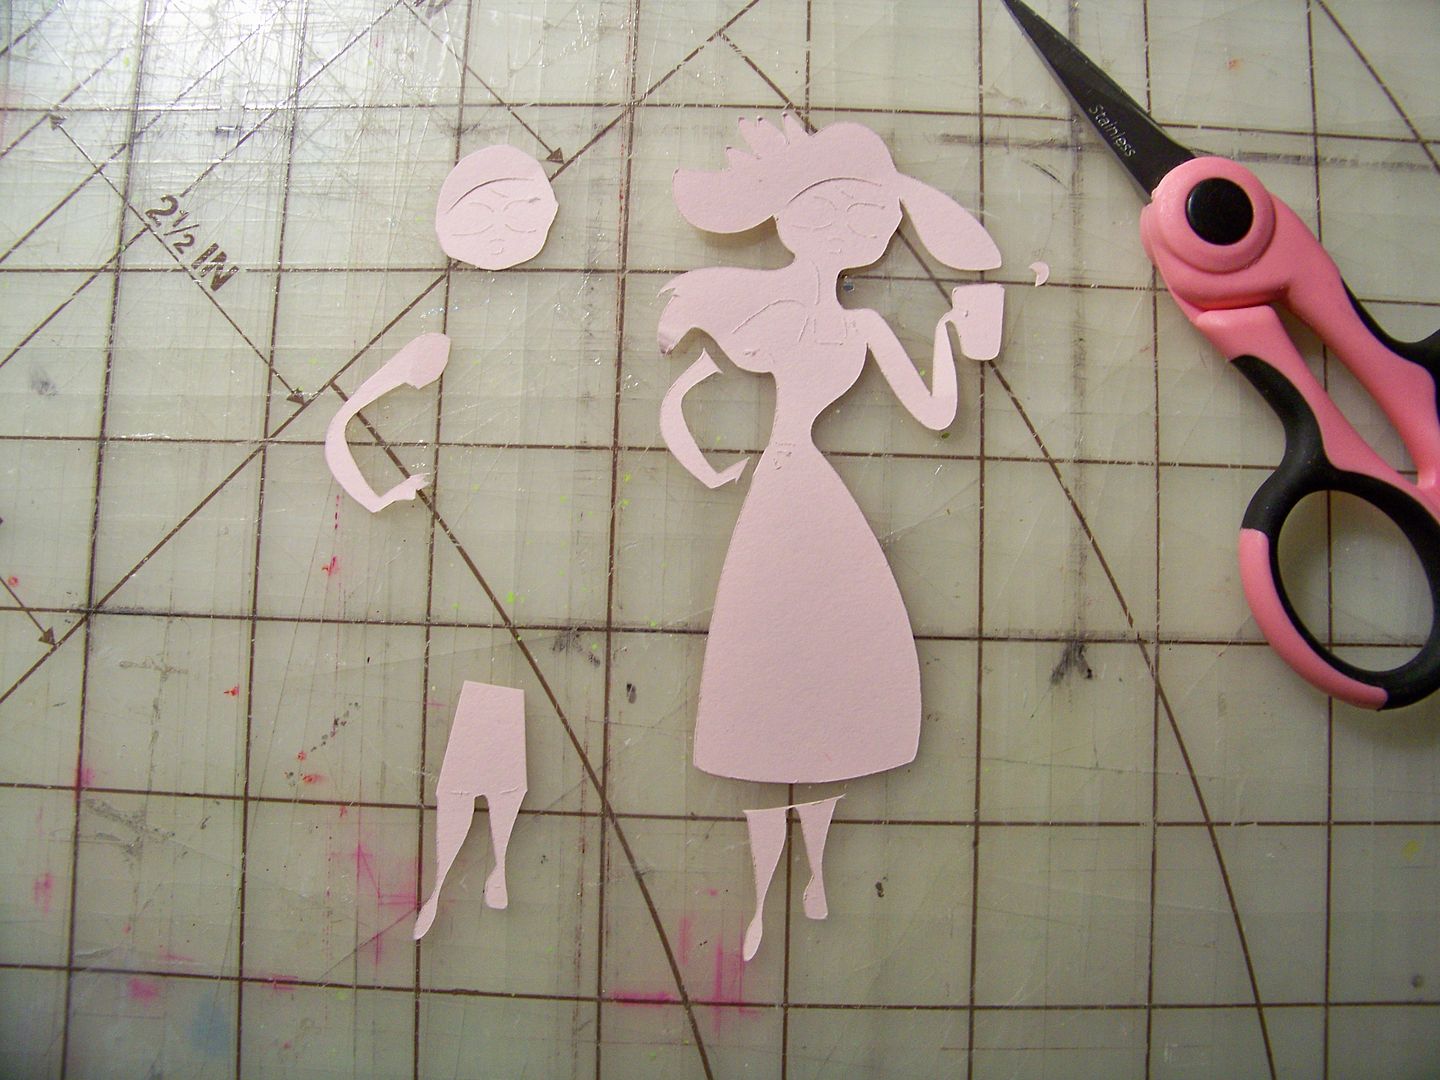
I cut two hair layers, one for the base and one to cut to make extra locks that would be attached only at the top and bent up at the bottom for dimension. I wanted it to be a windy day (as opposed to the rainy one we are having today!)

I placed her extra face on top of the base after inking it. The top was applied flush with glue. Her jutting chin was made by using a pop dot on the lower part.

I added her bangs and inked her arm and chest-- easier to do before the dress is applied.
I added the other details to her face using the regular cuts on the cartridge and a Micron pen (for her hint of a nose).

Next, I added the hat, cutting off the flower detail since I knew I would be using a different color for that. (No one likes to keep lining up those petals that will just get hidden!) In fact, I just used the flower from the hat that was cut as a part of the dress layer. (Why not?)
I cut a second flower and folded it for dimension and applied it on top of the flat flower cut.

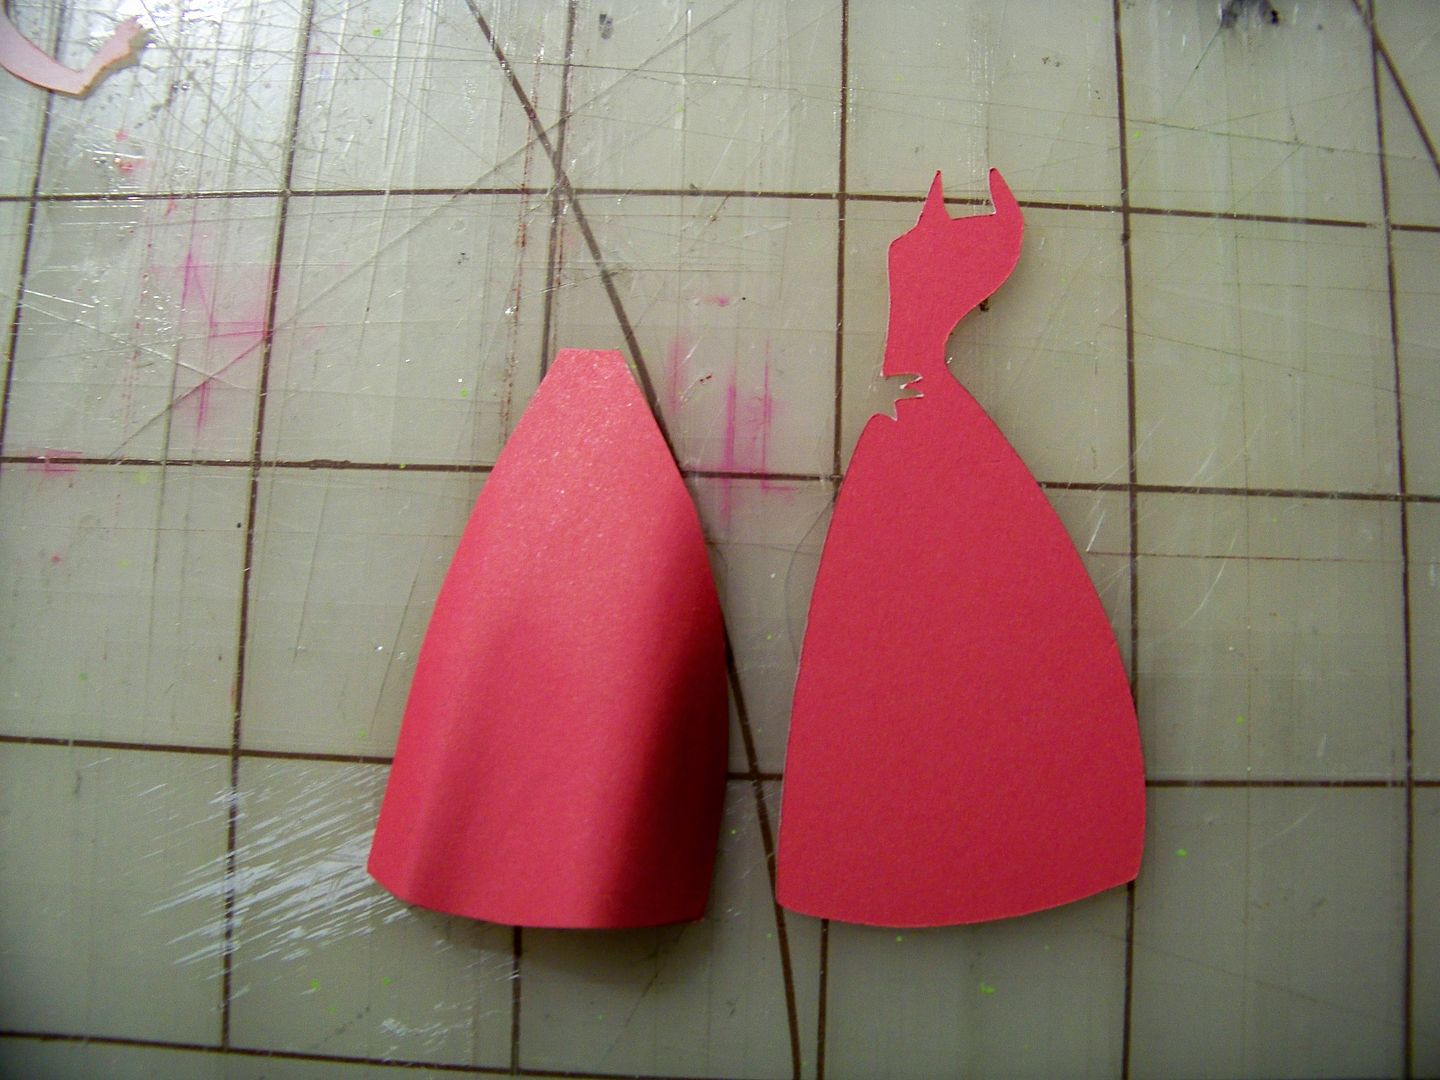
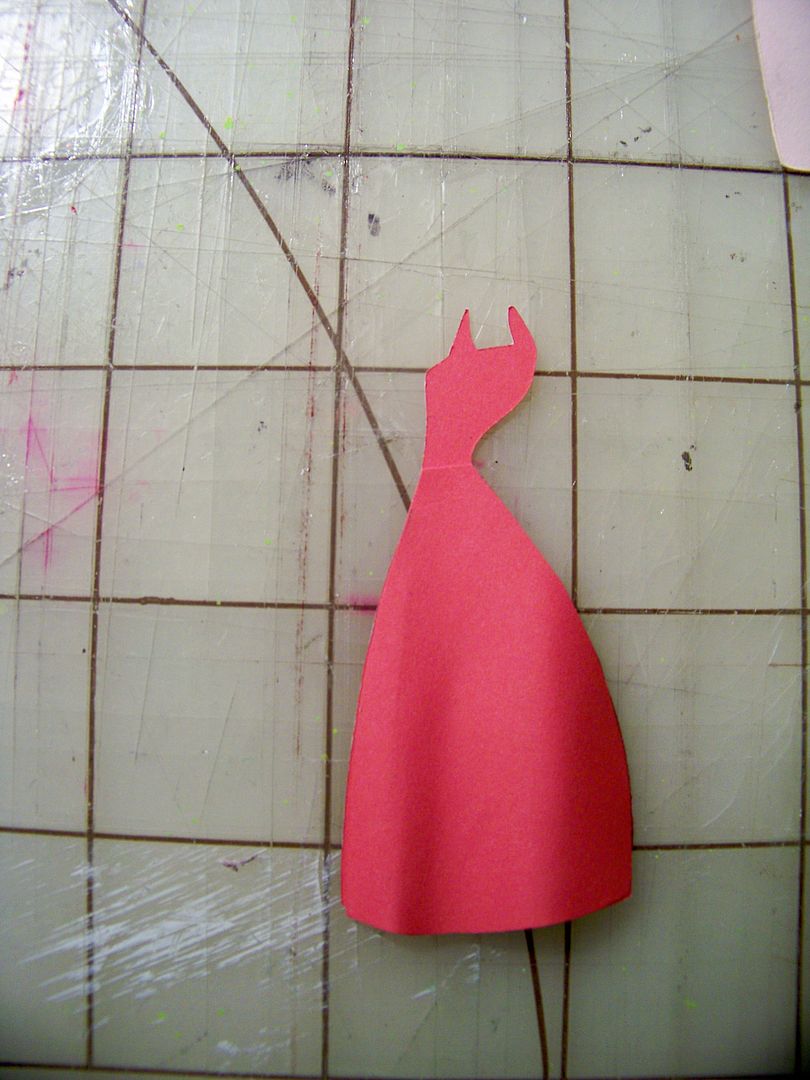
Her billowy, wind-blown skirt would need to pull away from page.
I cut a skirt right off the cart and then hand-cut a separate skirt (without a hand cut out) that I applied to the dress. (I wanted her hand free, otherwise, I could have just cut two from the card and bent one for the top layer.) Honestly, I think it would have been okay either way.
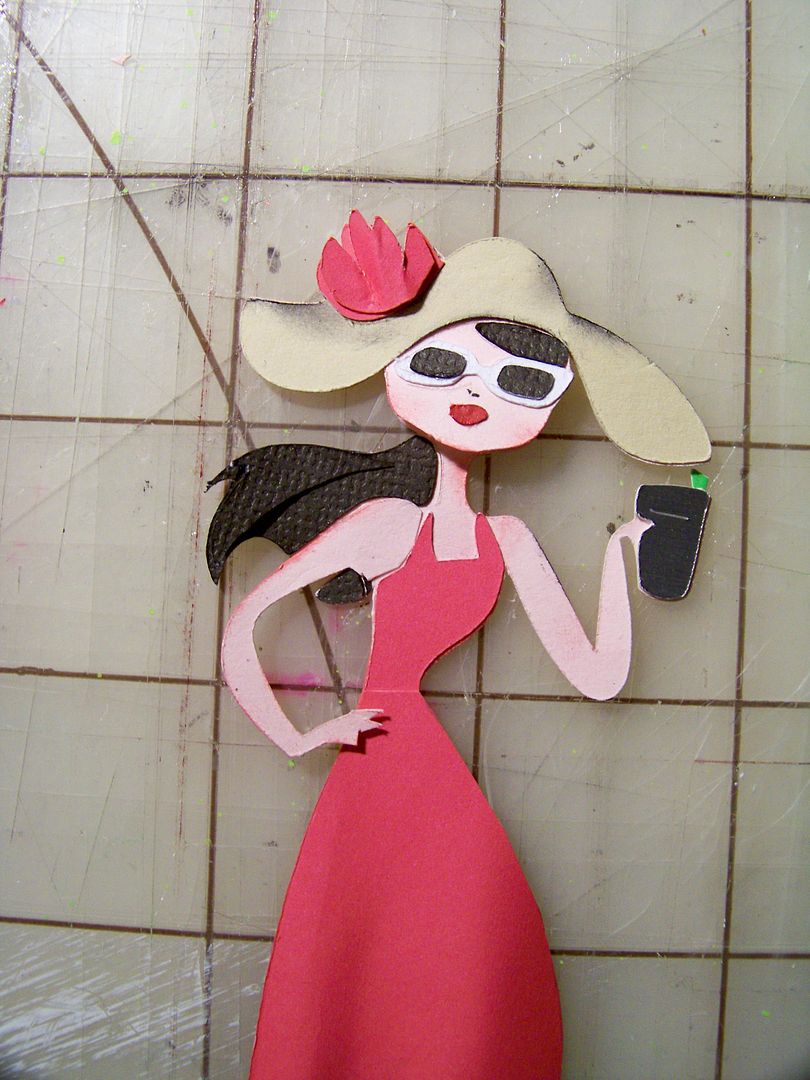
I glued her arm on at the shoulder only and kept her hand free. Last, I colored her shoes in and inked her legs. The shoes were an experiment. I was hoping to make them recede even more by making them less bright than the hemline. I used a little black ink on the folds of the skirt, placing the sponge applicator wherever the shadow naturally fell to emphasize them.
This idea can also be used on cuts of inanimate objects. I think ink does wonders for home decor cuts.

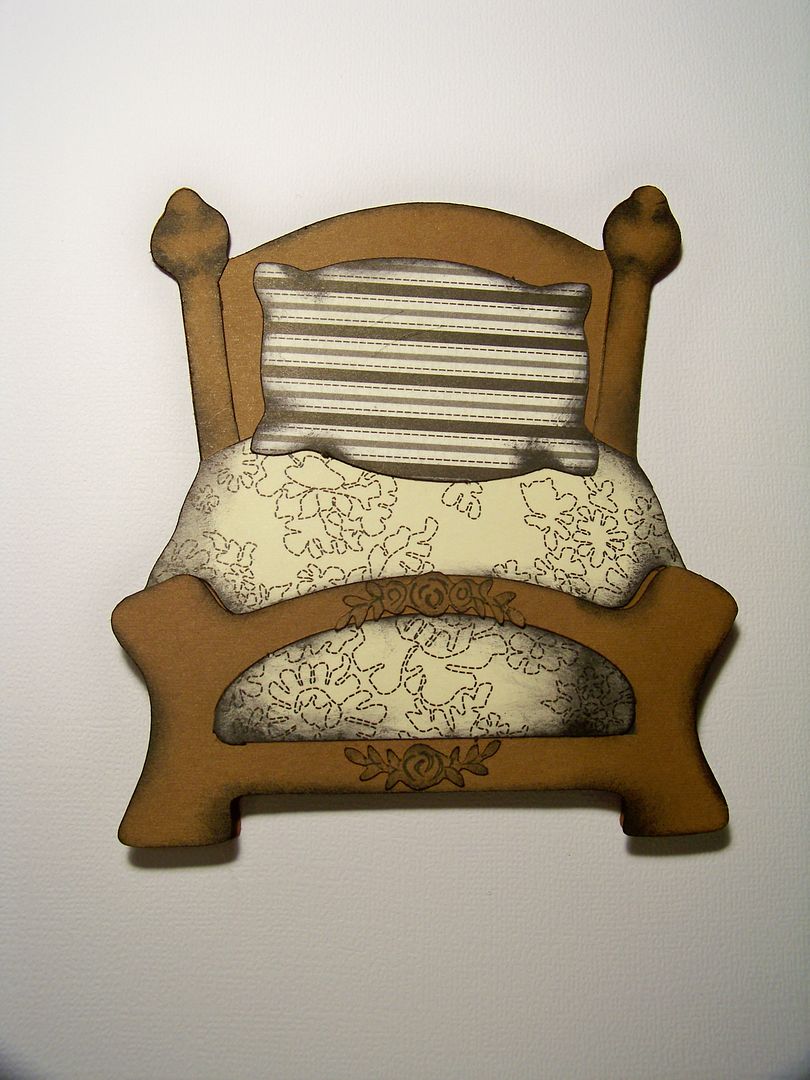
For this example, the bed was cut from Cricut Everyday Paper Dolls at 4-1/2". (The pillow above was cut from the same cart at 4"). I think this is a great cut, but with only one layer, it really is flat even with the foreshortened perspective. We get more dimension just by cutting the same shape in a printed paper for fabric elements and an extra brown cut for extra parts. The extras include posts at the head to be inked and applied flush and a popped up foot board that we will give extra decoration. I hand-cut the elements apart, using the die cut's own lines that were cut in-- very easy!!
By using a printed paper for bedding, I lost some of the foreshortening, but I liked the pattern and didn't want to give it up!
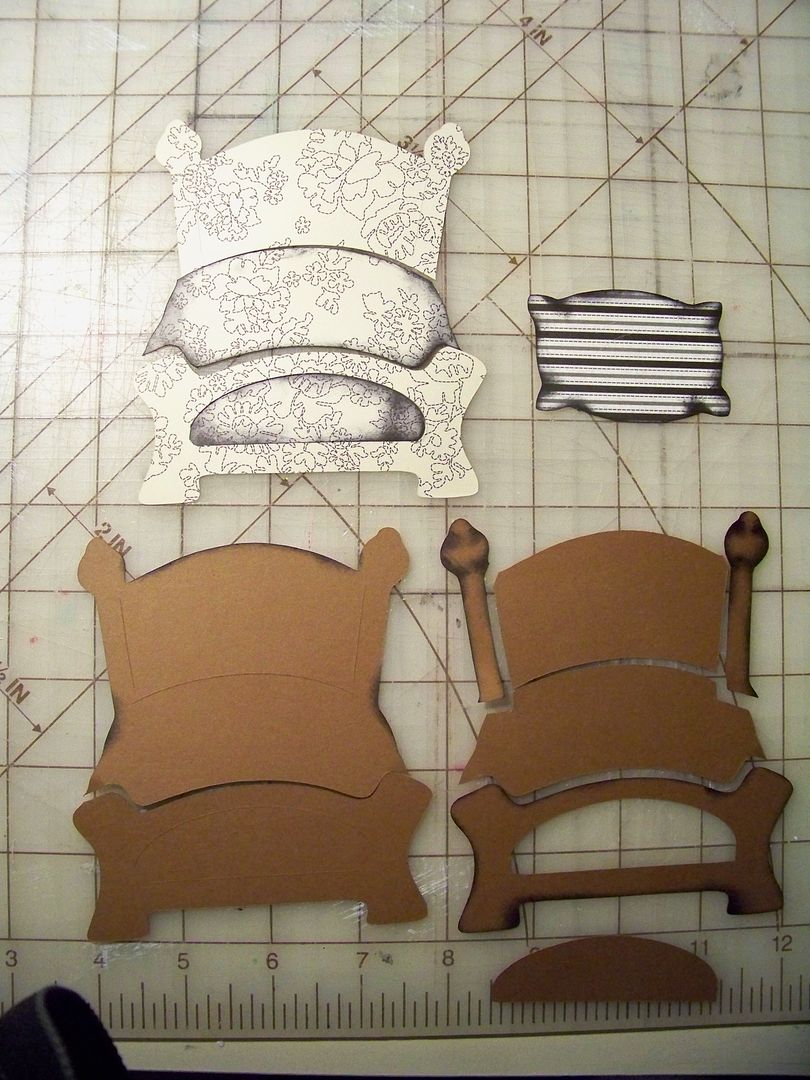
I inked anywhere on the bedding where I thought a shadow would naturally be, or to recess the shape, such as on the sides on the bedspread.

After I applied the foot board, I realized that the bedspread that was tucked into the end would be closer like the foot board so I popped it up too. (In the end, I think it would have been fine either way. Sometimes it is just about guessing.)
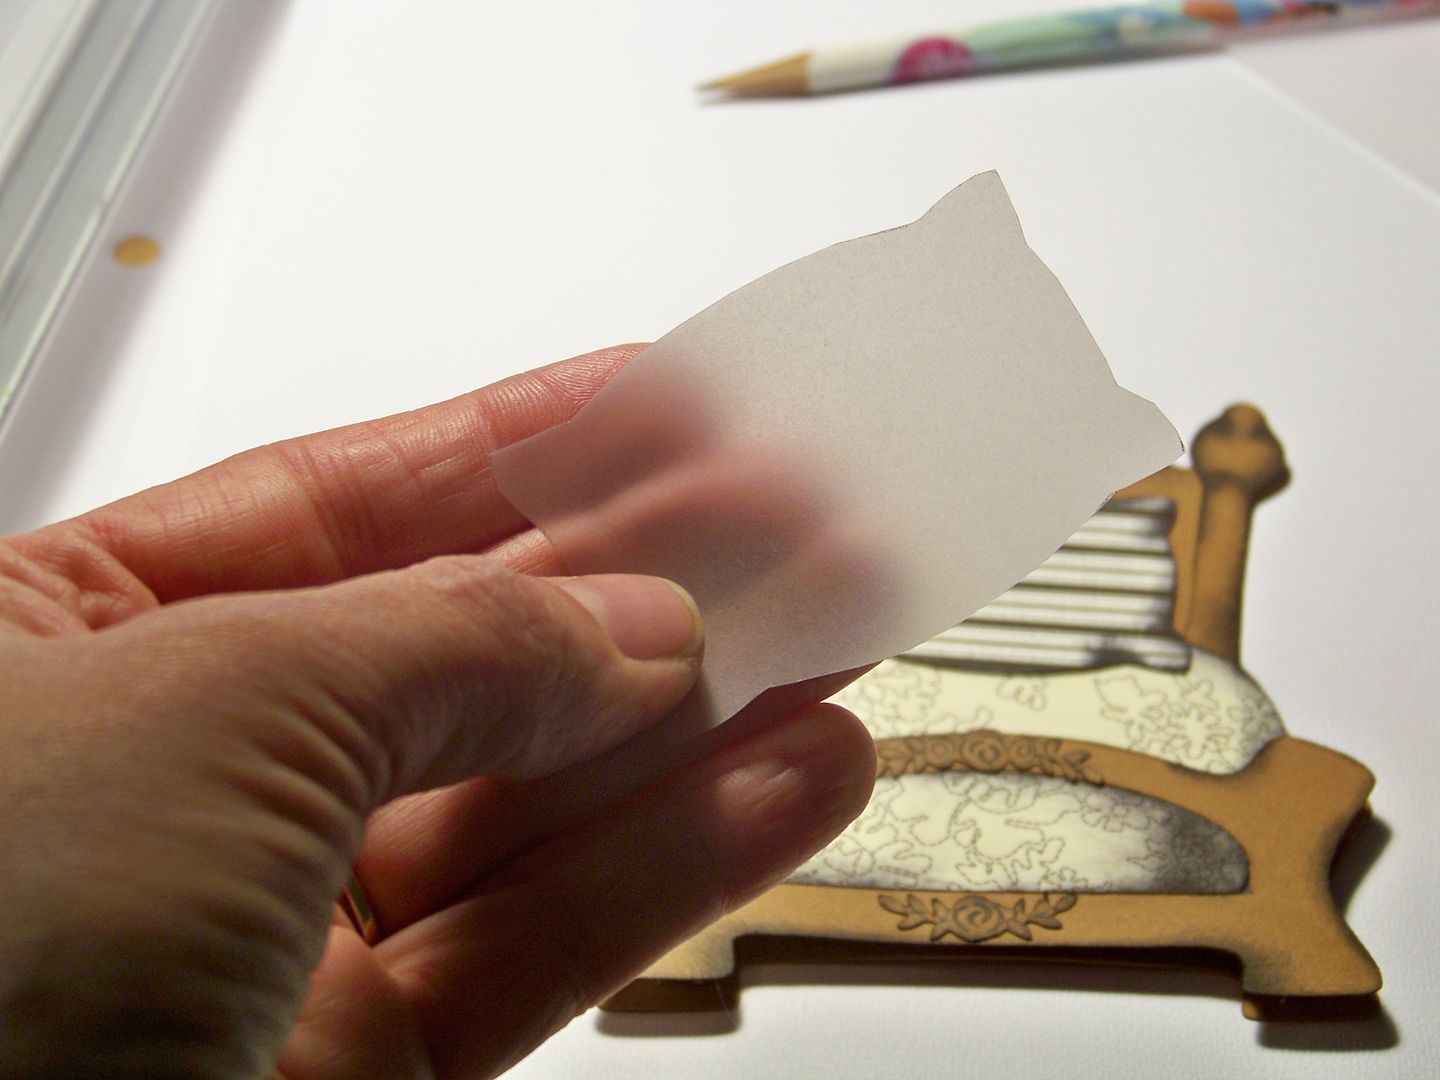
Then, I cut decorations to look like wood carvings on the bed from Something to Remember (page 51 phrase-shift). I inked it and used a Micron pen to add details. I only put it on the foot board, hoping to help pull it forward... not sure if it did the trick, but I really liked the way it decorated the bed.

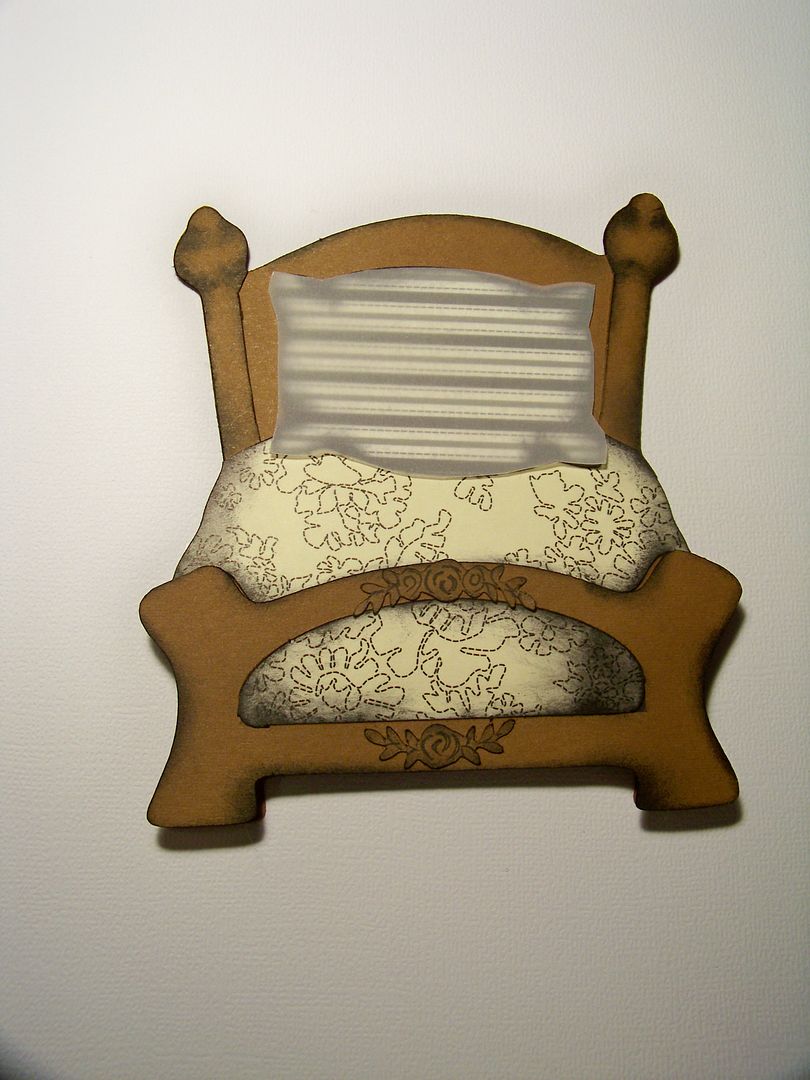
I liked it... .until I took pictures! Something wasn't right... The pillow was too bold and pulled forward visually. I cut a piece of vellum to soften the pattern and color saturation a bit.
Before...
After...
So those are the basics!
Are you ready for a little drama? This is perfect for turning a silhouette (like those on the Suburbia cartridge) into a dimensional figure!
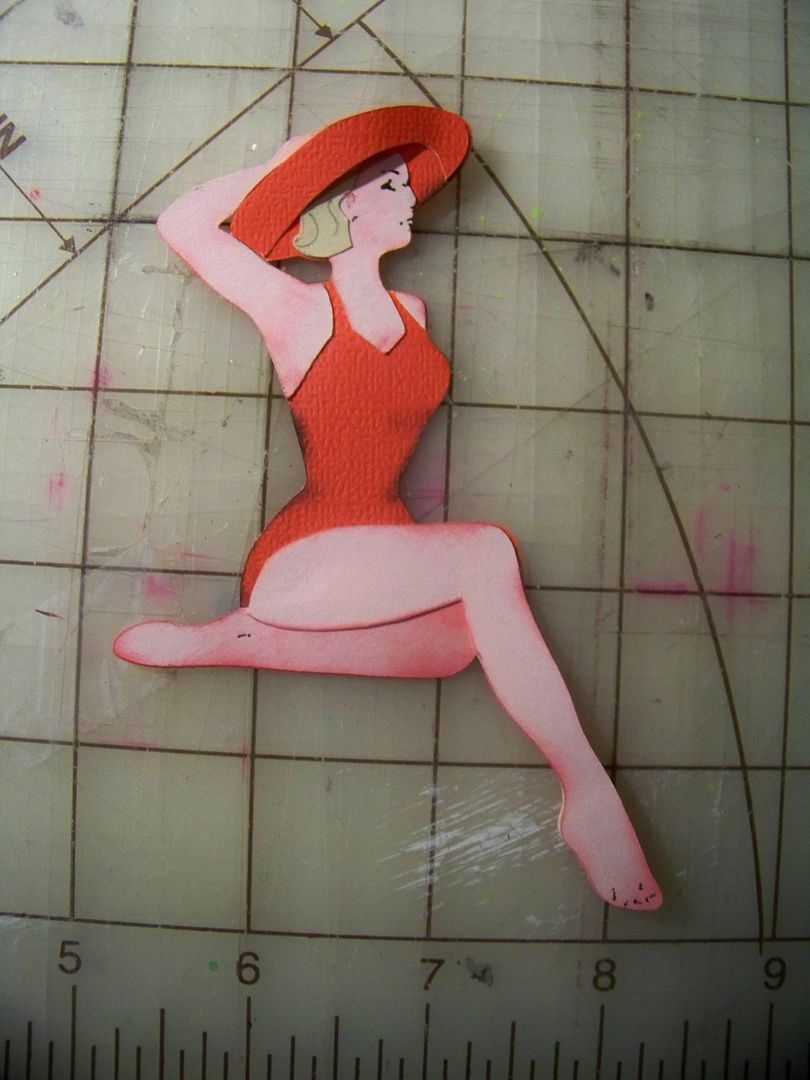
I started with the woman on the beach from the Cricut cartridge, Suburbia, cut at 4-1/2". For illustrative purposes, I made it just like the cartridge handbook shows. Then I made her again with dimensional layers and inking!
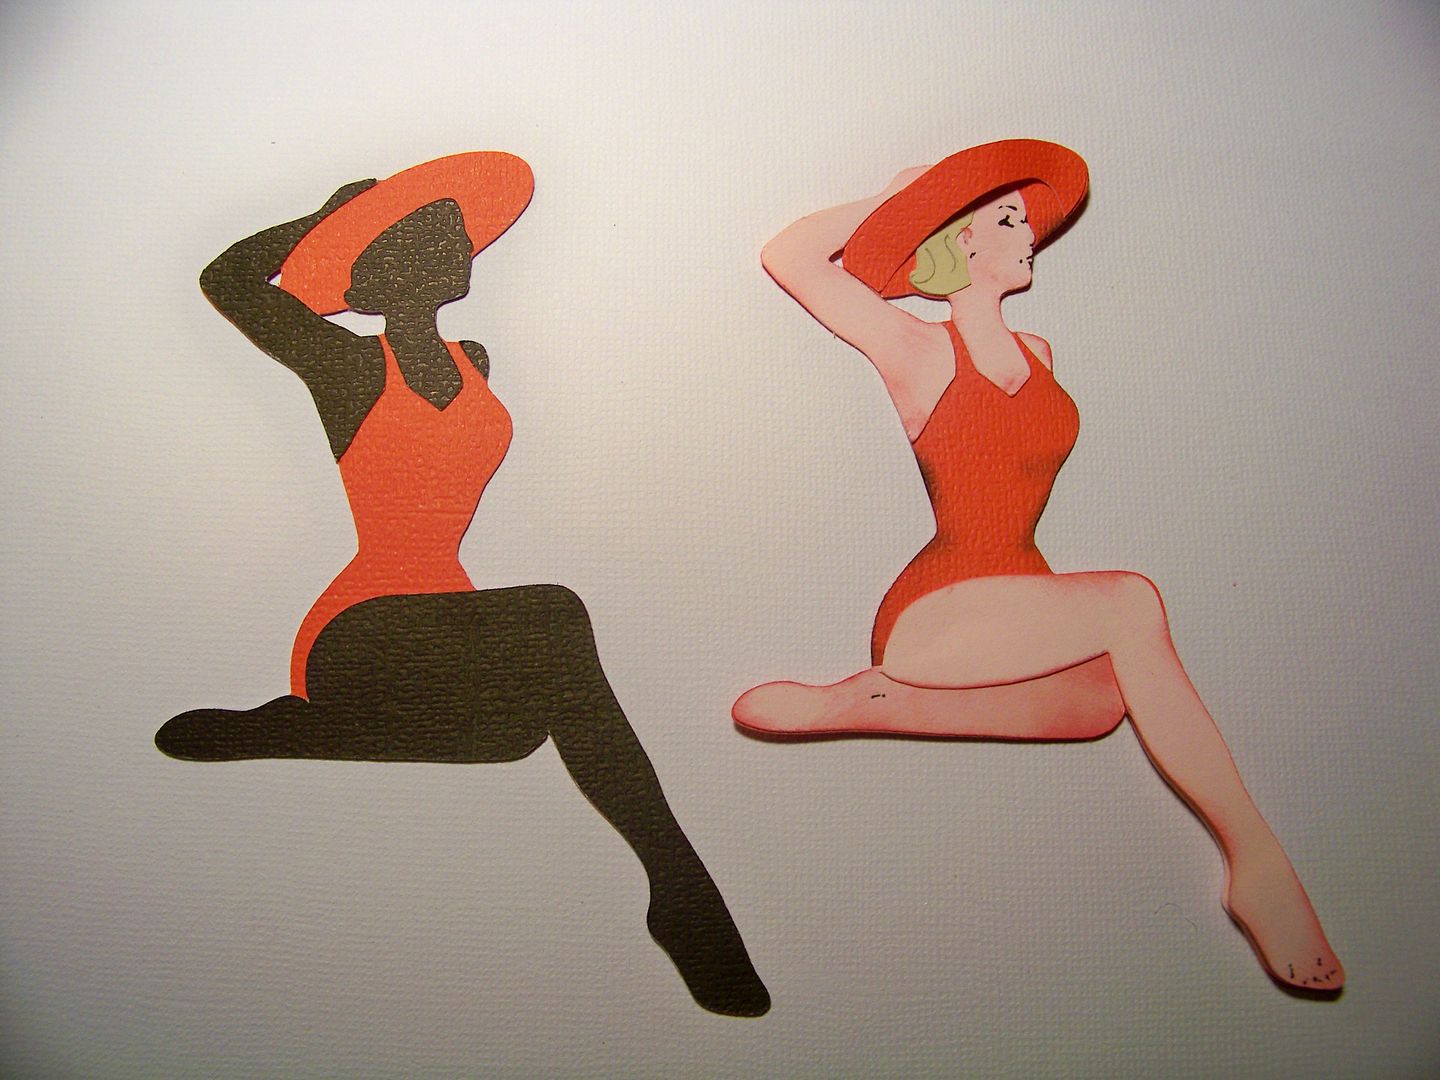
A silhouette necessarily flattens out any object. All die cuts without layers really are just silhouettes. Altering the cuts, cutting 'spare parts', adding layers that get popped up, and inking, as shown above, will transform a cut so that the perspective is clear and dimension is achieved.
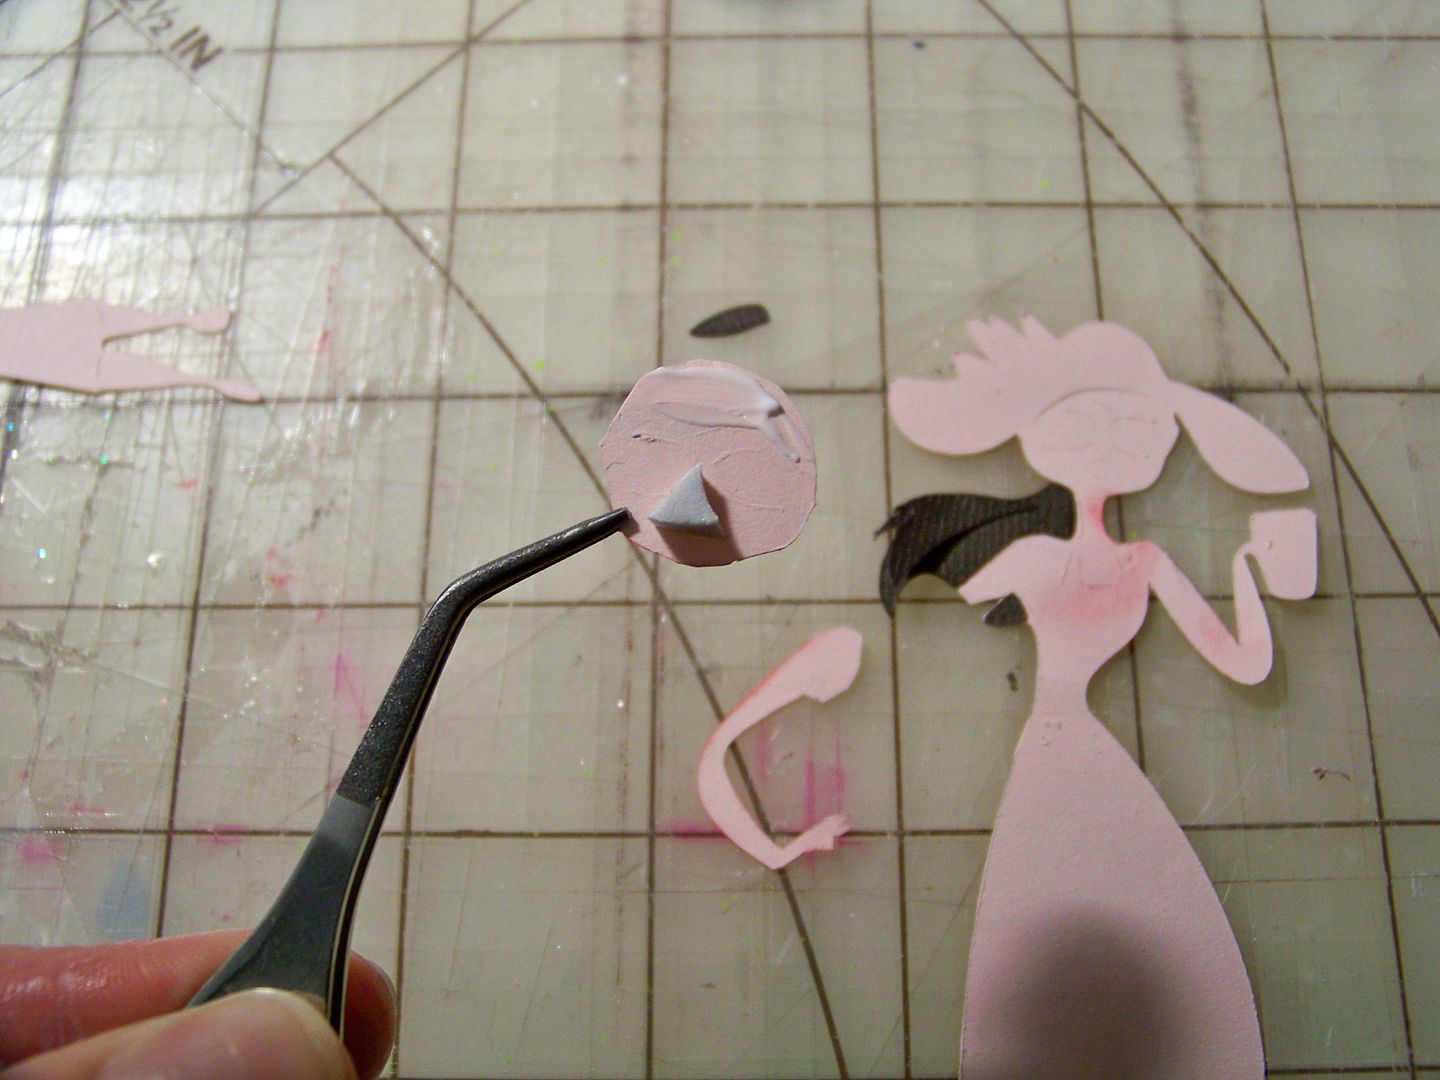
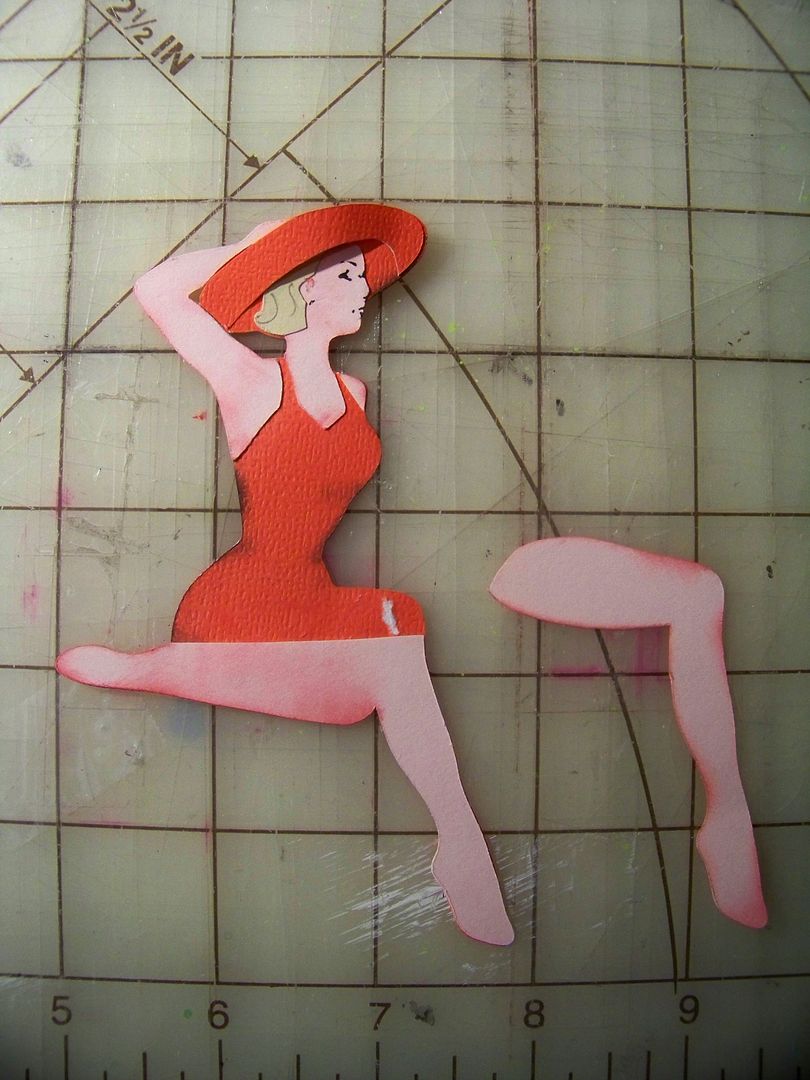
I started with multiple cuts of the same figure.
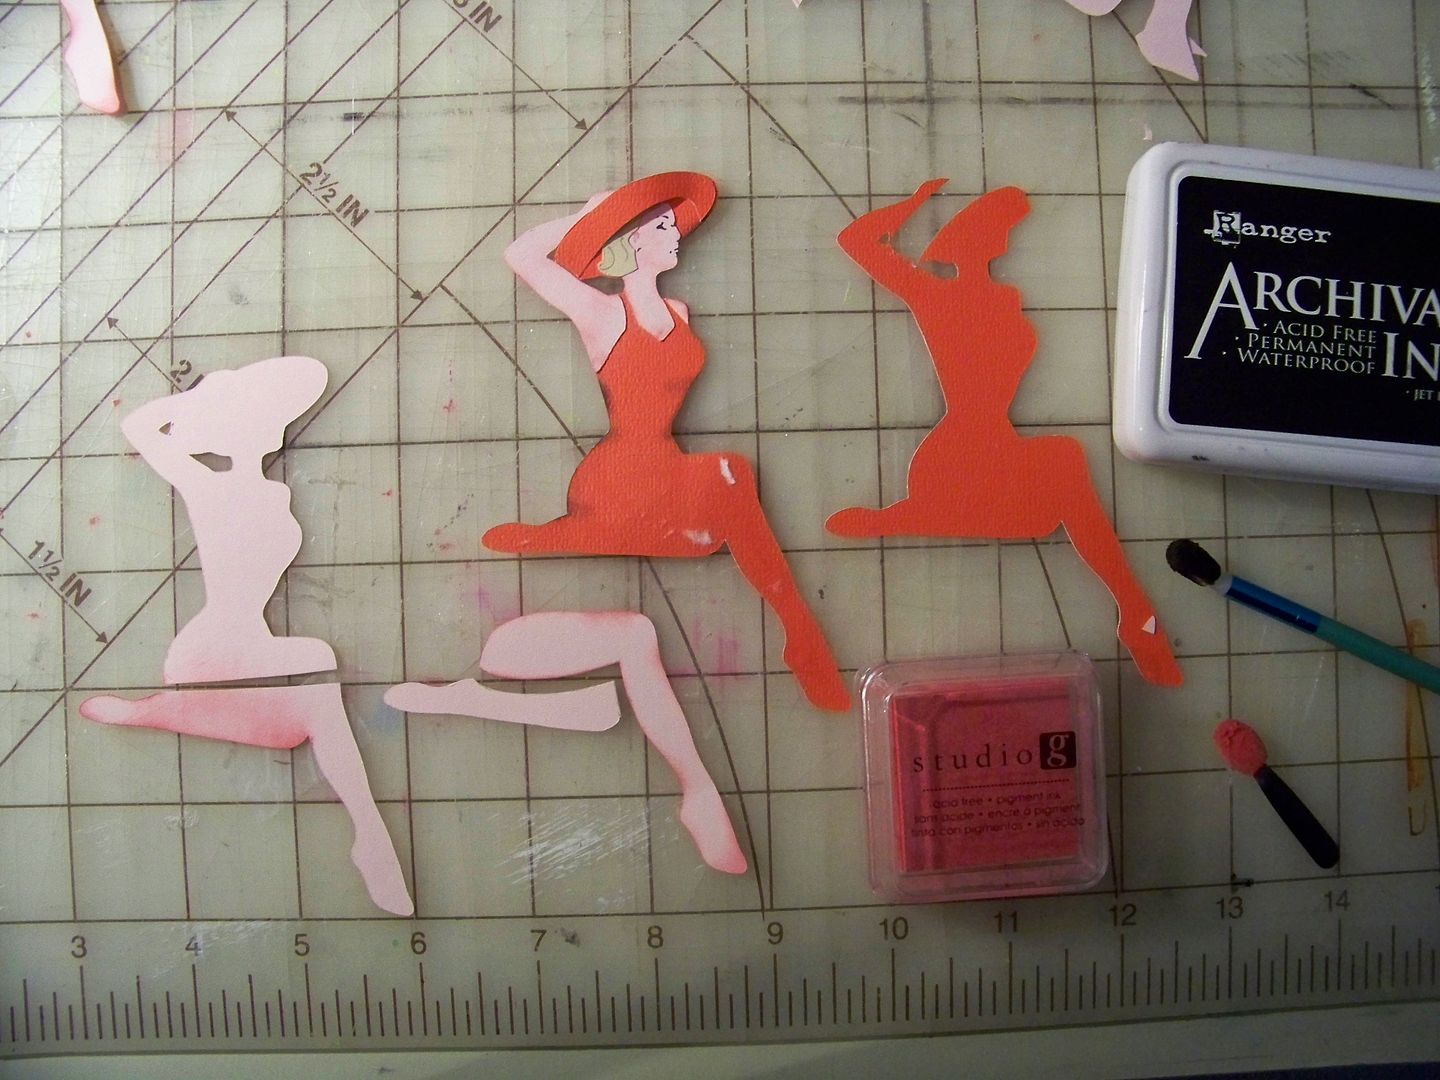
I cut two in the color I wanted to use for the swimsuit/hat and two from flesh. I used the arm and head/neck from one flesh cut and applied it to one red cut. I hand-cut hair, inked, and added facial features with a Micron pen. I didn't add an ear, but I did cut the hair in a way to make a silhouette of the ear. Since the head is recessed, subtle features aren't required anyway. From that same flesh cut, I cut the top leg and inked it.
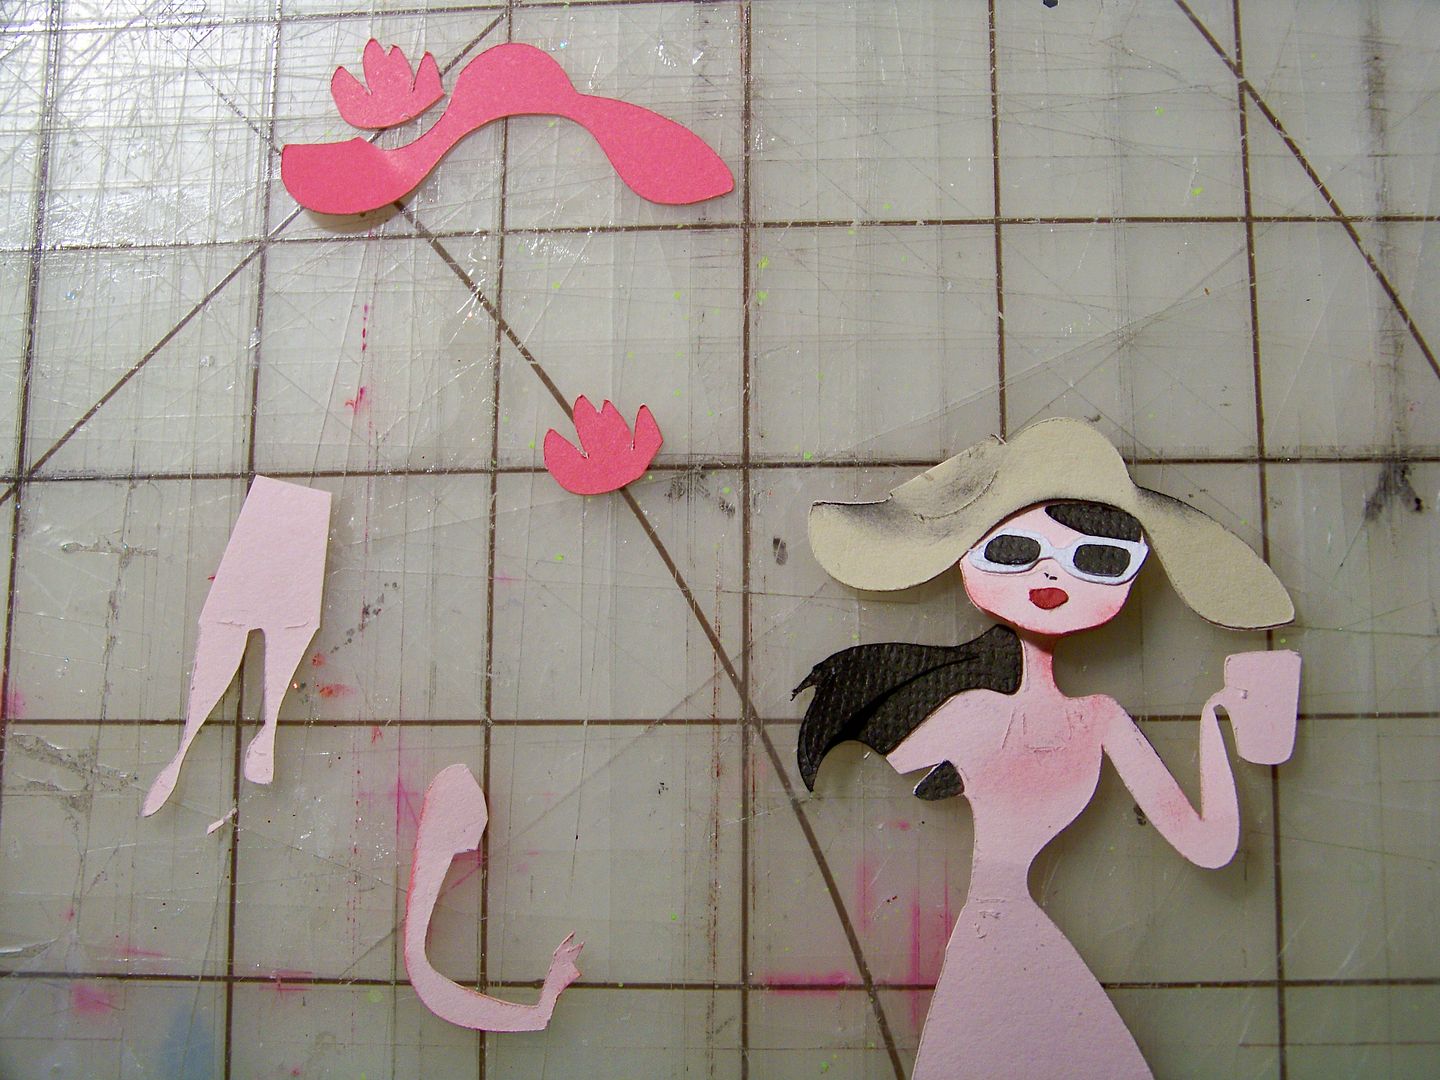
From the second flesh cut, I only needed the bottom leg. I inked it heavily and glued it on top of the red figure I was working with. From the second red figure, I only needed her hat band, which I attached to her with a pop dot in the center and gluing flush on the ends, to curve it.
I applied the top leg by gluing flush at the hip and thigh but popping up at the foot.
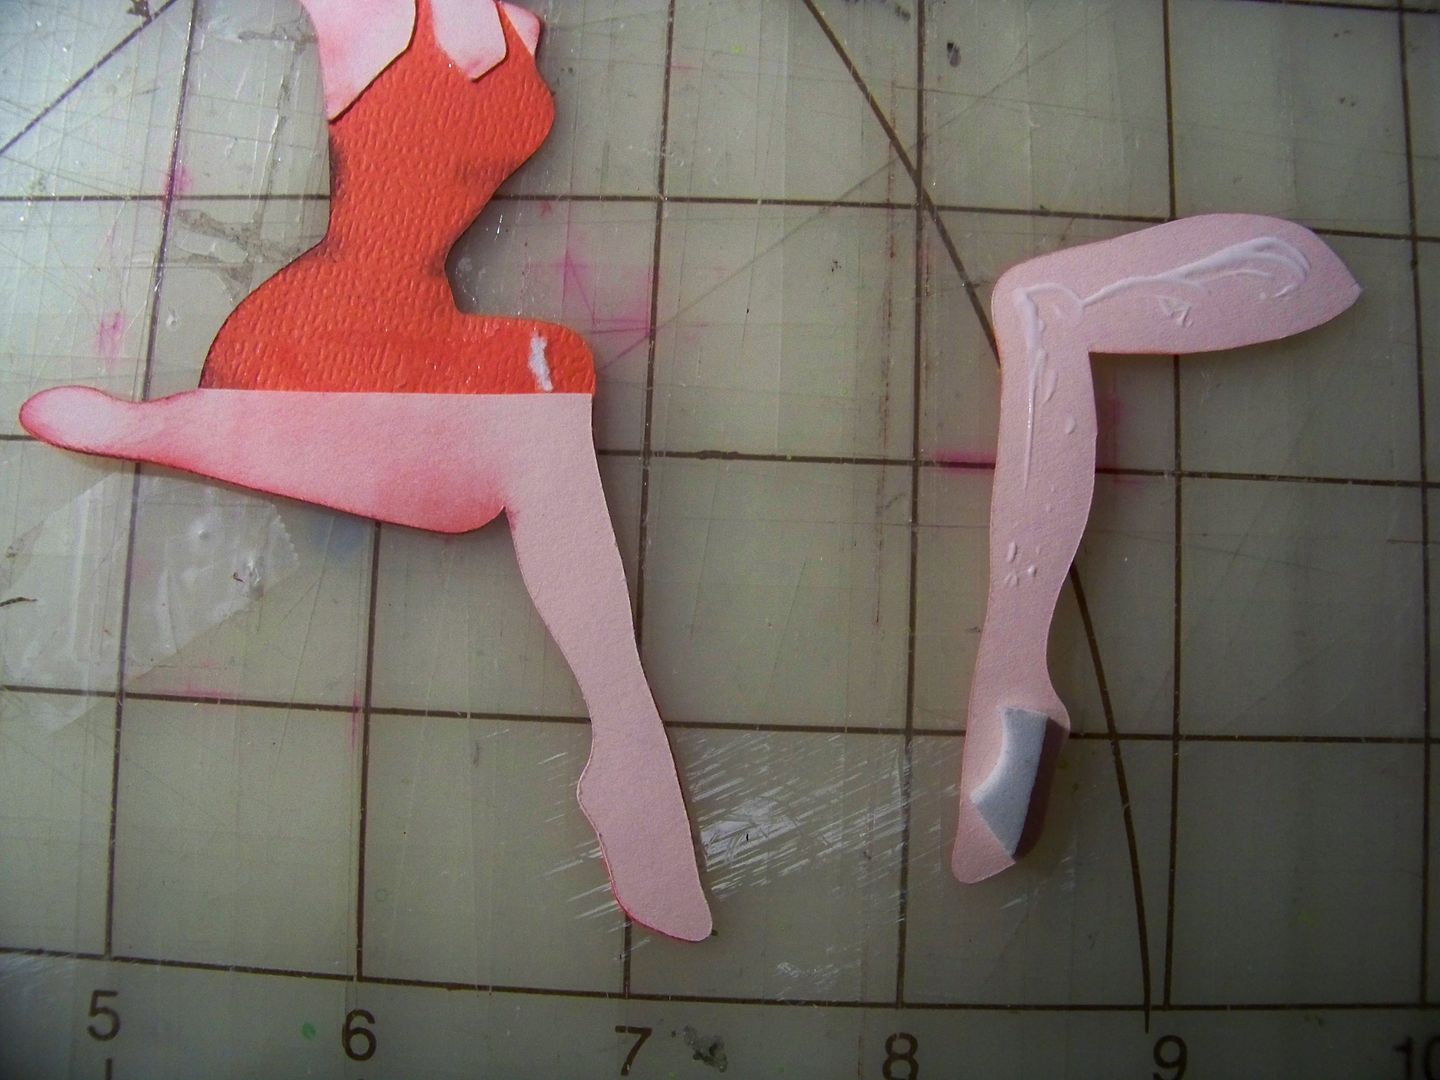
And speaking of the foot, you are probably thinking, gee, her foot is the closest to the viewer, why don't you have a very detailed foot drawn in with painted toenails? Well, I am horrible at drawing feet (like most people) but I couldn't ignore them so I put a few dots to hint at detail. (Just a bit of cheating!)
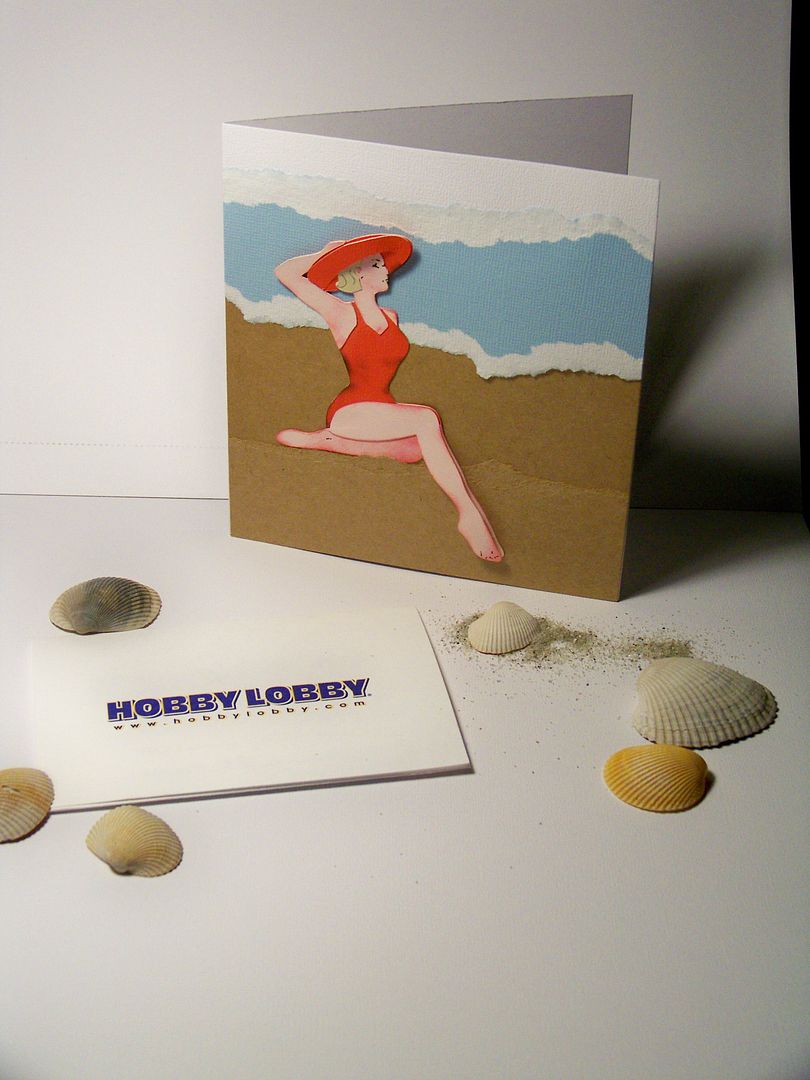
I realize that I have ignored a big point when it comes to adding dimension and that is atmospheric perspective. I thought this figure might be a good one to move from 'example' to 'finished project' so I decided to make her into a card. (Is it weird that my project for National SCRAPBOOK Day is a card?!)
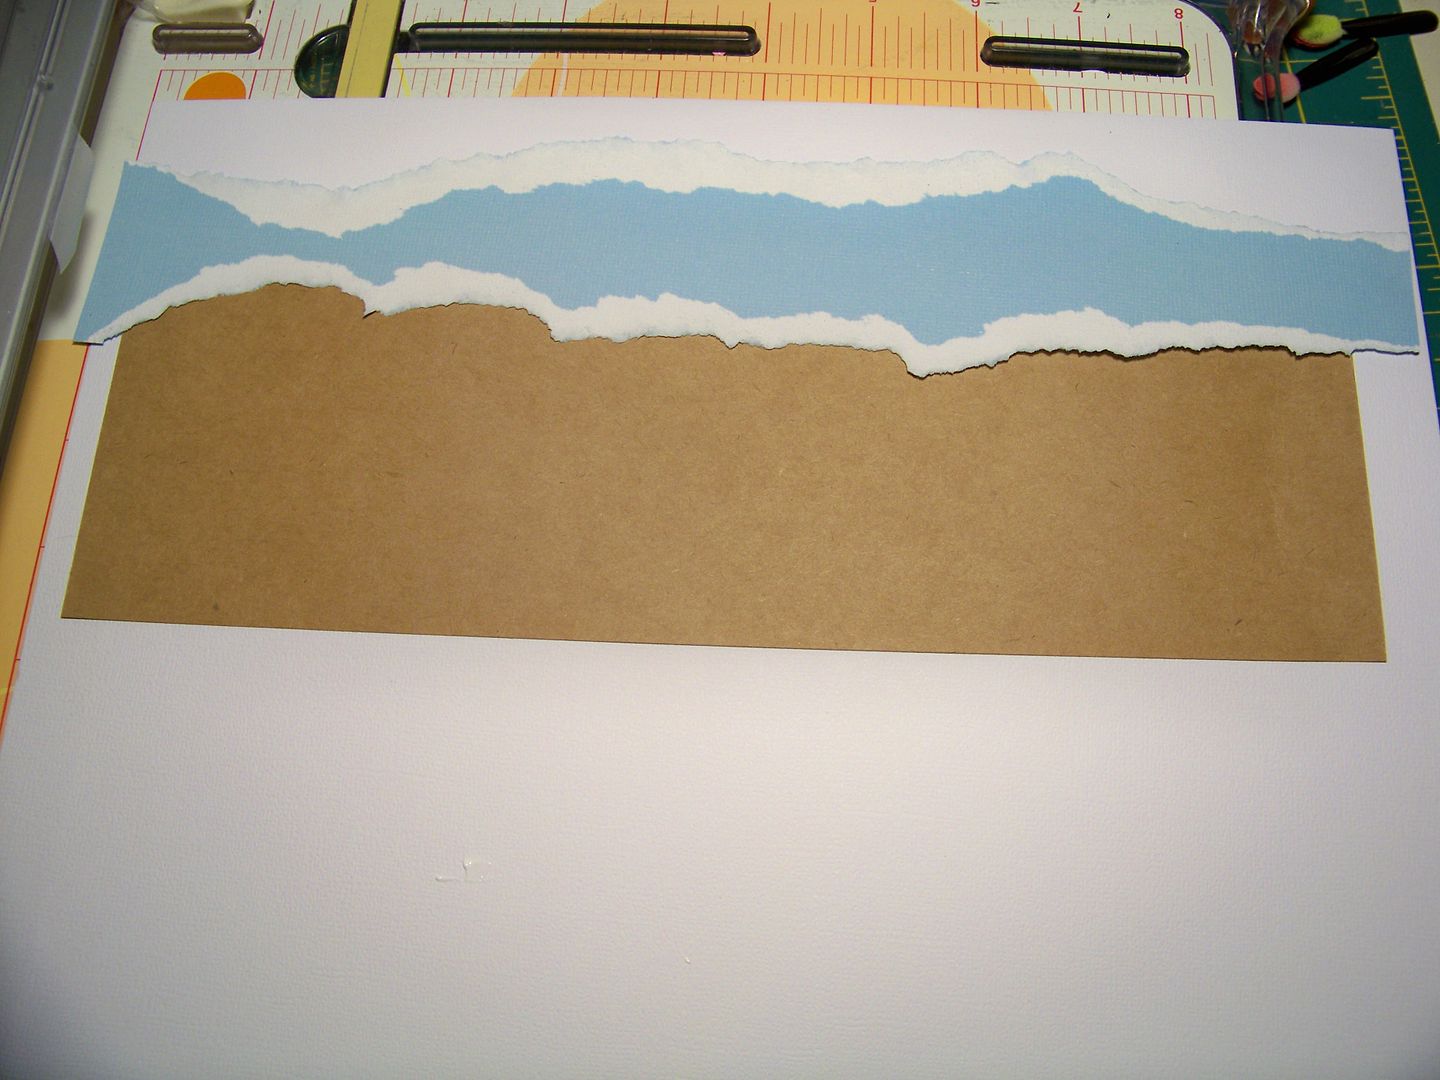
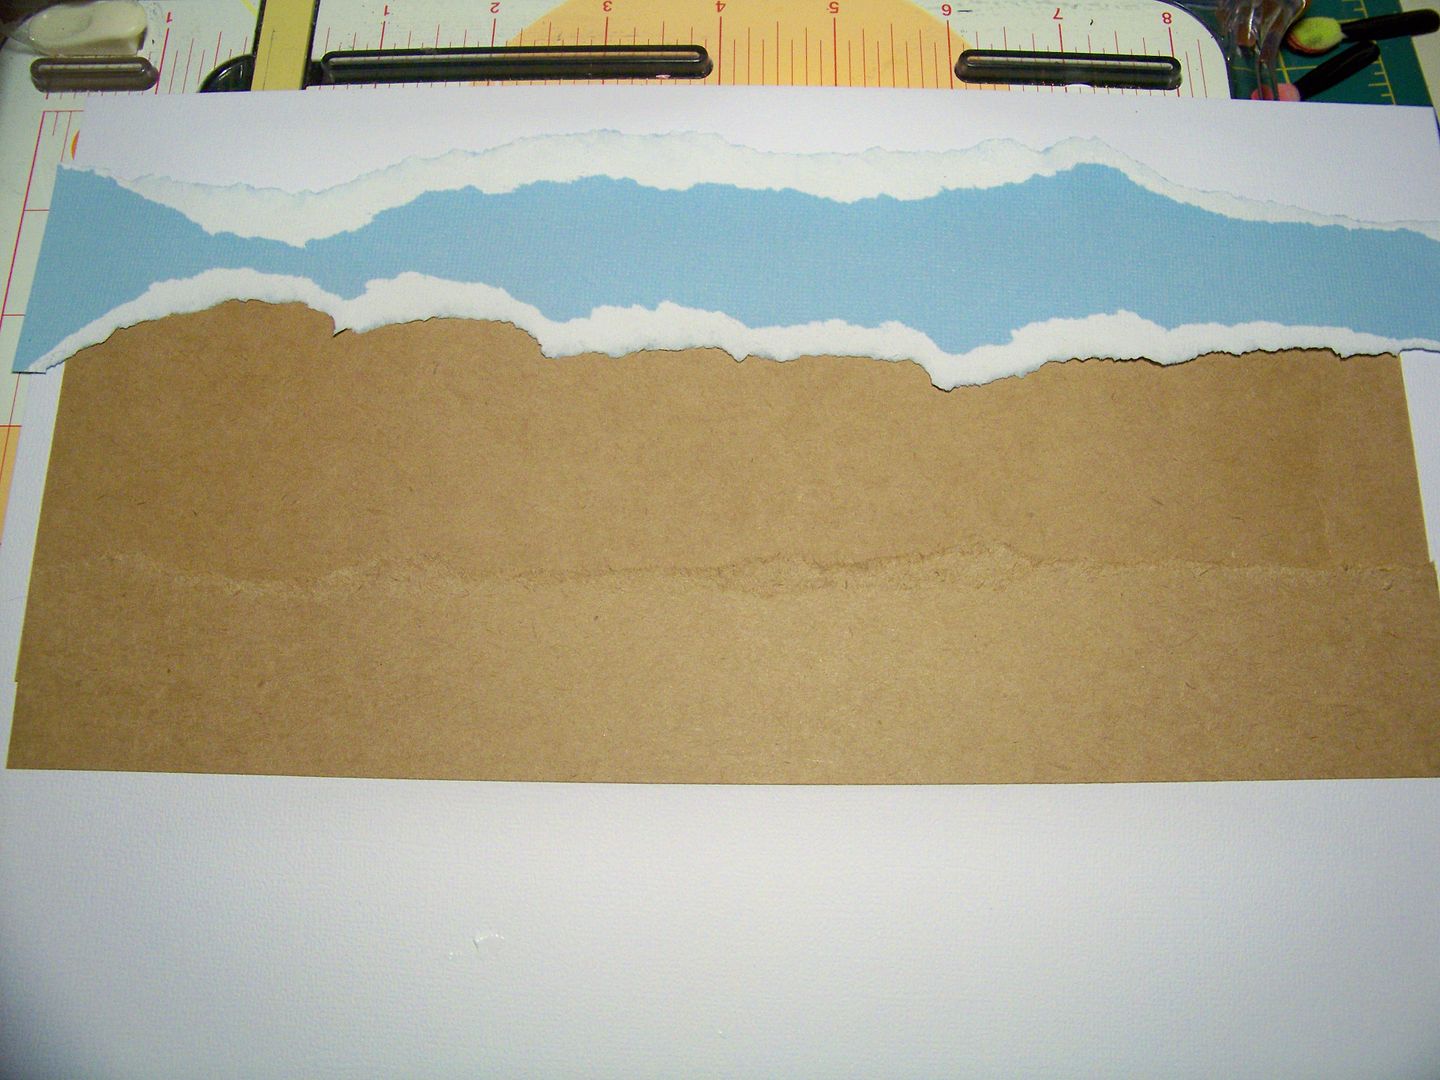
So, here's the thing, if I put her on a detailed background, it would lose the effect so I decided on a simple background, though something more realistic would have been just fine too, as long as it didn't have lots of details. After all that attention to detail, it is kind of fun to tear some paper so that is how I made my beach.
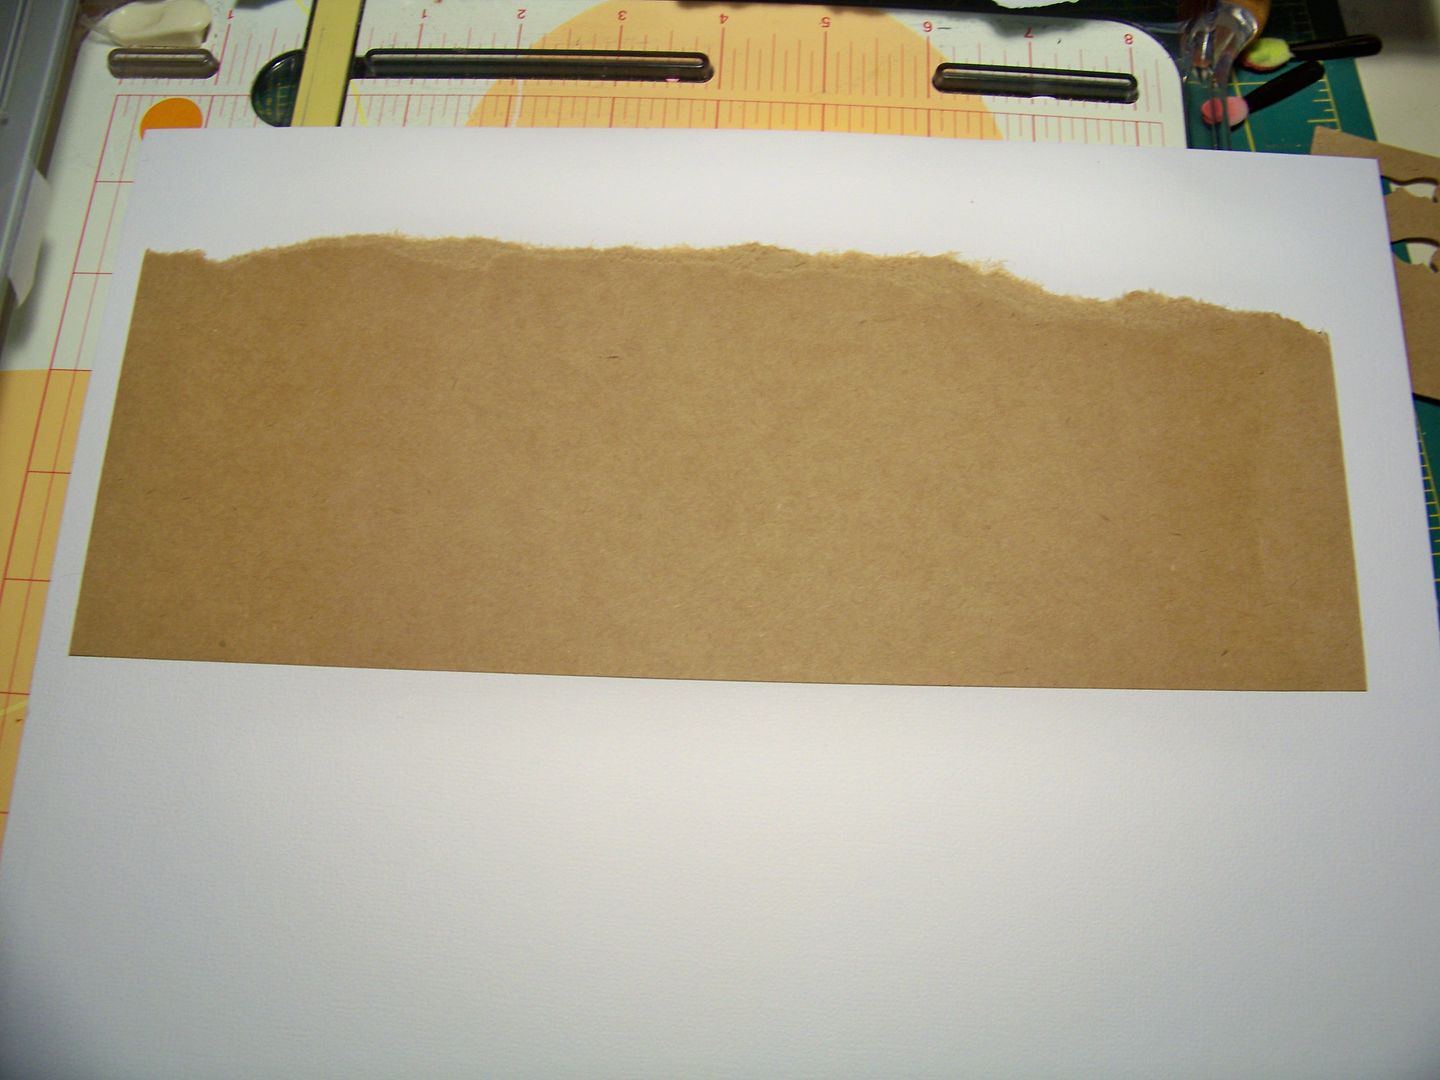
Then I trimmed it down and glued down my figure.
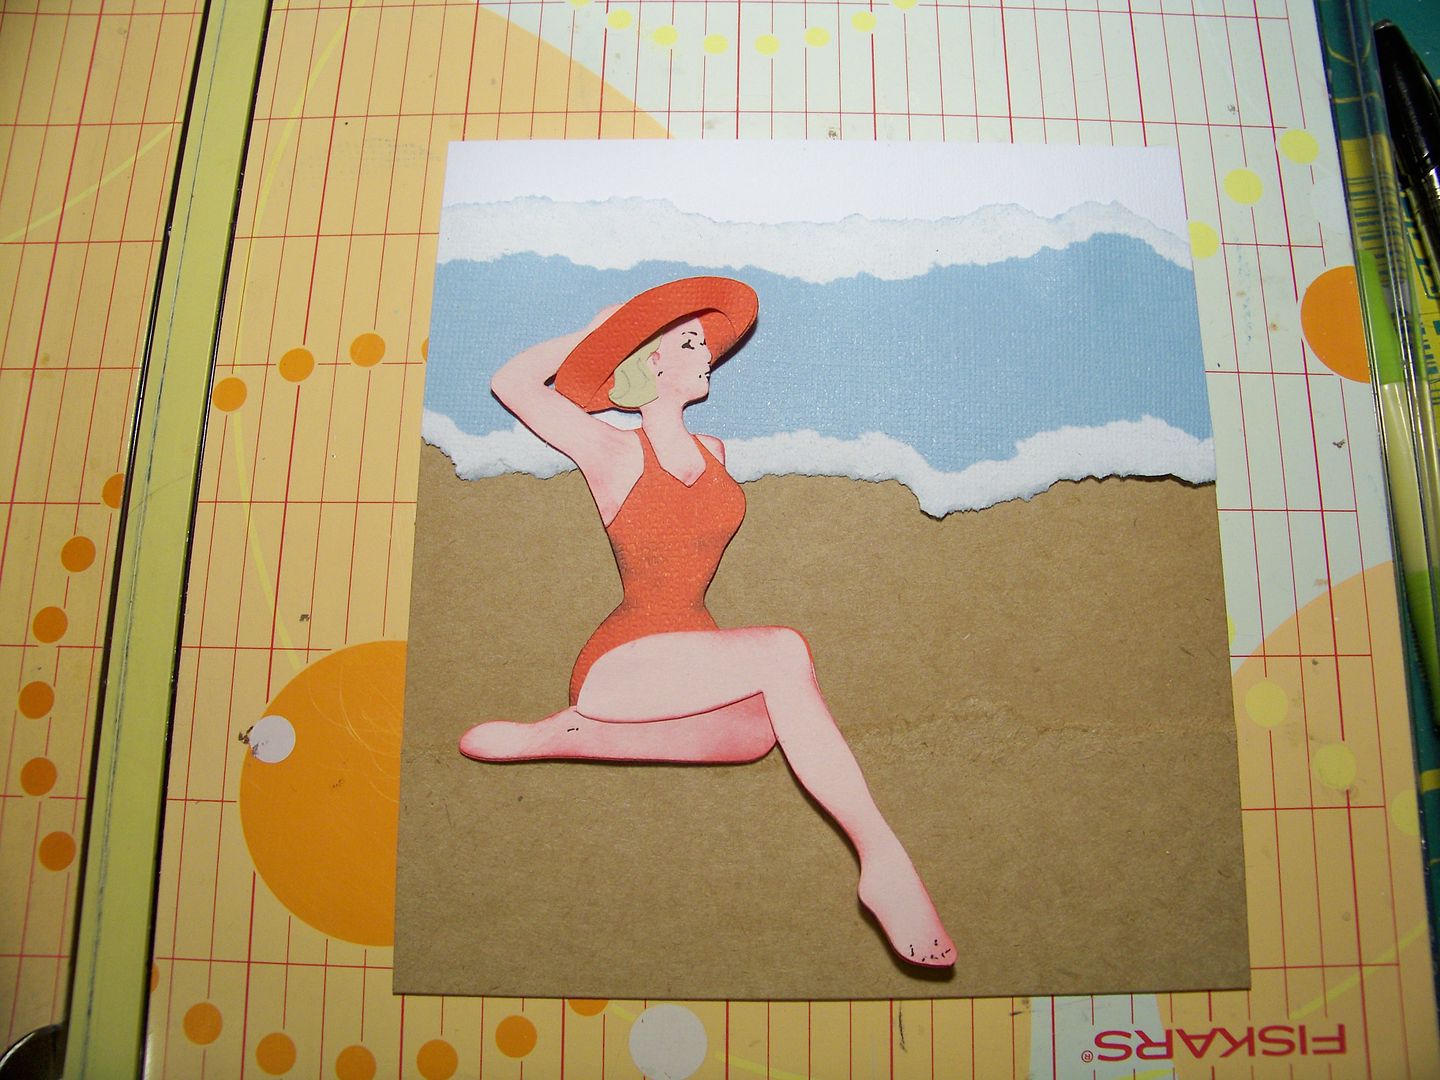
This mat was then adhered to a card I cut to fit. I tucked her bent leg in under the paper layer a bit on the finished card.
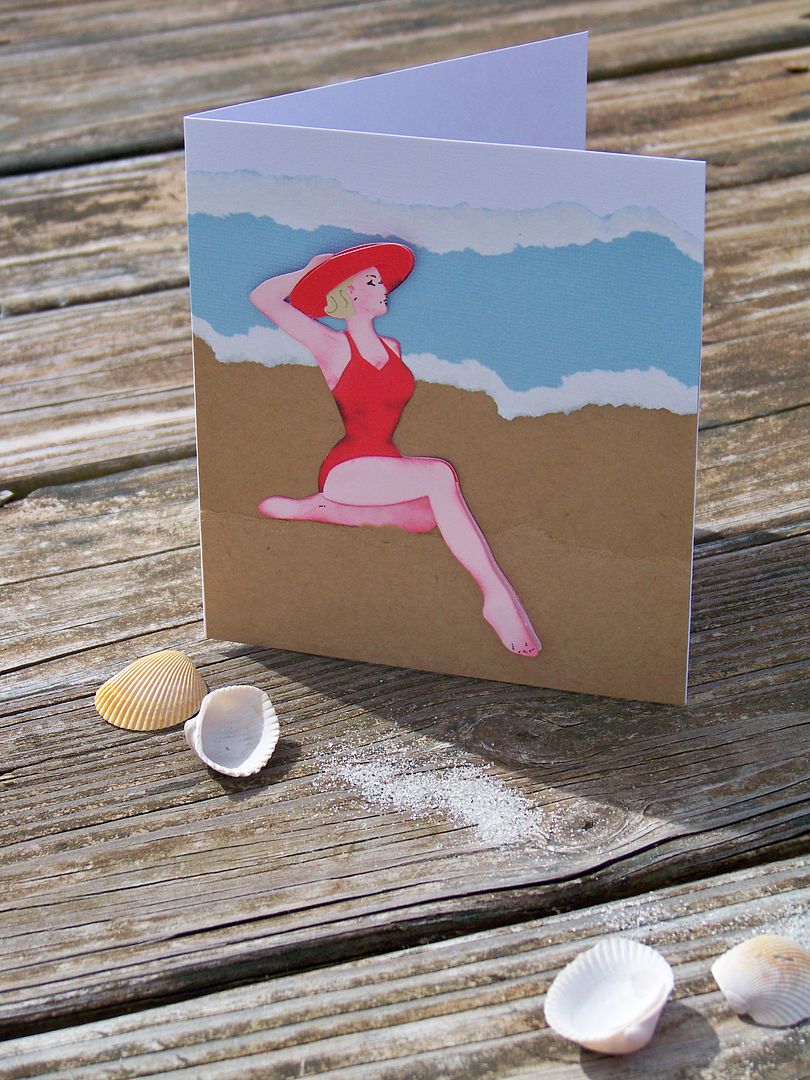
You can see that by altering the digital and cartridge cuts, the images become less 'Cricut' or 'Silhouette' and more YOU as it shifts from craft to art in this way. ...And it is just more fun too!
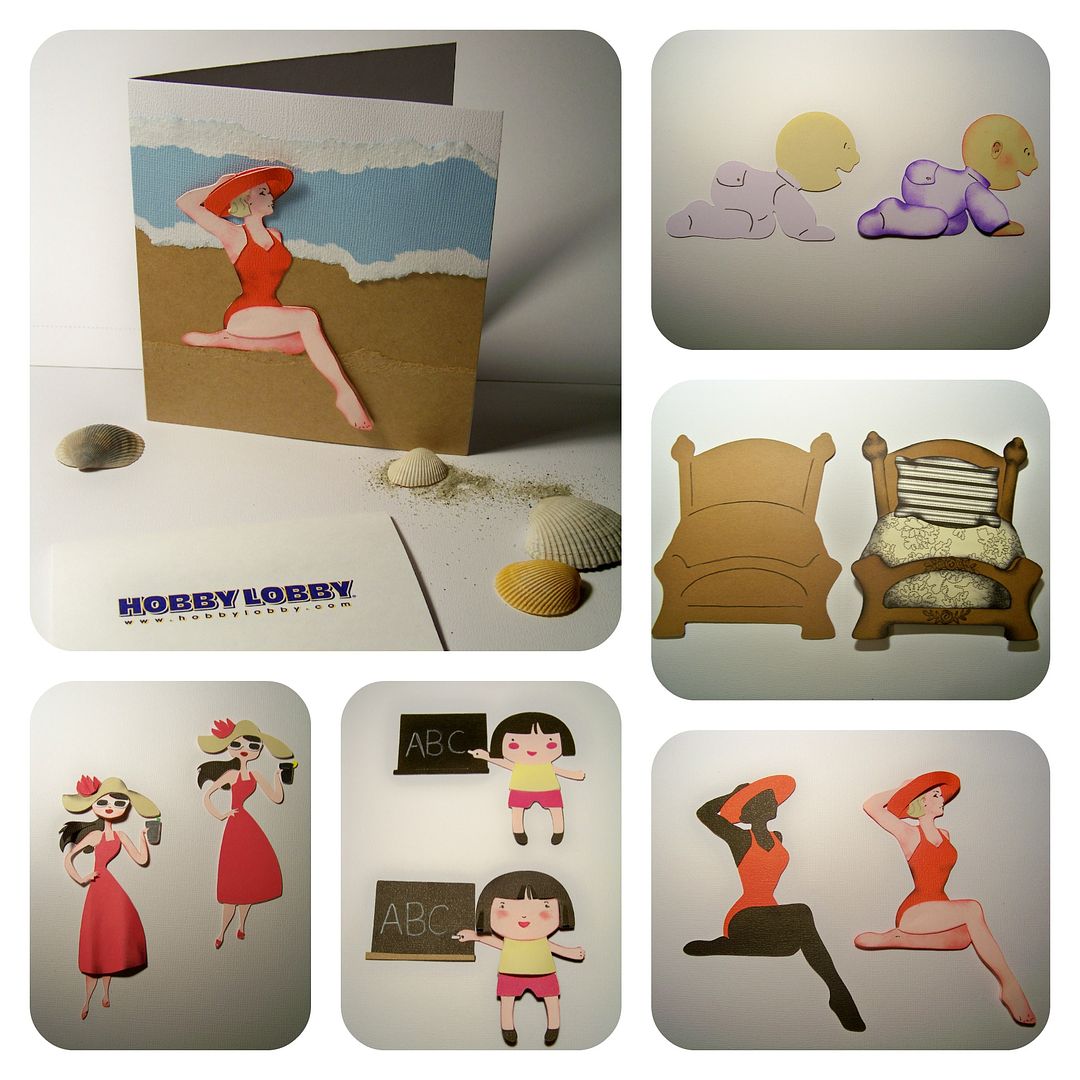
OK- so I promised a give-away! I have a $20 Hobby Lobby gift card to give away in honor of National Scrapbook Day to one randomly-drawn person who comments on this blog post! Only one comment per person will go into the drawing (just to save you and me the trouble of multiples!) The cool thing about Hobby Lobby is that they have an online store so you can use your gift card even if there's not one in your town... and they have sales on shipping from time-to-time as well. You don't have to be a follower of this blog (unless you just want to) in order to enter. You do need to provide an email address or other way for me to contact you if you win, so please don't forget to do that. (You know if I can't find you, it will kill me to have this gift card in my possession so let's do us both a favor on that, okay?) I will draw for a winner next Sunday, May 12, 2013 (Mother's Day)!
Now if you don't normally swing by my blog, but want to find me again in the future, you can follow me using the nifty "Join This Site" app on the sidebar so that I show up in your Feedly or other reader.... or you can follow my page on Facebook (click here) or you can follow my board on Pinterest (click here) or you can sign up for email updates (you will find that on the sidebar under the Members app).
And lastly, there are several of us who are participating in the Circleville NSD Weekend who are also posting our tutorials and/or challenges and/or prizes on our personal blogs.
Everyone is invited to join in the fun! Here is a list of participants and the times you will find their posts on their blogs (all times are Eastern Daylight Time):
- Around the Block with Scrapalette - 11AM EDT Saturday, May 4, 2013 "Tic Tac Toe Challenge and Blog Prize!
- Col's Creative Corner - 1PM EDT Saturday, May 4, 2013 "Ease on Down the Road" Blog Prize- $15 Michael's Crafts Gift Card!
- Paper, Craft and Scissors - 3PM Saturday, May 4, 2013 "On Pins" theme and Blog Prize - $25 Simon Say Stamp Gift Card!
- Stamp, Cut, Create! blog - 4PM EDT Saturday, May 4, 2013. "Tin Is In" theme and Blog Prize!
- All Scrapped Out - 6PM EDT Saturday, May 4, 2013 "What's It Owl About" theme and Blog Prize!
- The Non-Crafty Crafter - 8PM EDT Saturday, May 4, 2013 "Let's Split- CCR Tutorial" (Learn to create a split letter monogram) and Blog Prize!
- Scrappin With The Bug blog - 10PM EDT Saturday, May 4, 2013 "The Crazy Bs Challenge" and Blog Prize!
- Sara W. Andrews blog - 9AM EDT Sunday, May 5, 2013 "Go Big or Go Home Challenge" and Blog Prize - $20 Hobby Lobby Gift Card!
- Scrappin With the Bug blog - 11AM EDT Sunday, May 5, 2013 "Tropical Sunset Color Challenge" and Blog Prize!
- I Came, I Saw, I Created blog - 6:30PM EDT Sunday, May 5, 2013 "Did-I-MENSION???" Challenge and Blog Prize!

80 comments:
Hi I have been following you already. I just love the look of the things that you make. Thank you so much for showing us how you accomplish these wonderful scenes.
Came by from
http://talesofthereborncrafter.blogspot.com/
Oh my gooodnesss! How many shades of awesomeness can I post here?
Thank you for this fabulous tute. And happy NSD!!
michellebowley@gmail dot com
Wow! You sure come up with some great ideas. I have been following your blog for quite a while and think it is just amazing at what you can all do with paper!
Incredible insight for creating dimensional figurines. Thank you for the in depth detailed tutorial as well as the opportunity for a gift card. I just need to think about what my project will be. I look forward to seeing what everybody else has planned for this fun filled day. Thank you again to you and everybody who arranged for this event. Happy Derby Day too.
Michelle@scrapngrow.com
Awesome tutorial! You really make the cuts POP! I am excited to try some of the new techniques and tricks I just learned! Thank you for sharing your amazing talents! Have a great weekend!
Rita
OMG...thank you so much for the indepth tutorial...I love your work!!!
Happy National Scrapbook Day and Derby Day!
Nadia, you rock girl! Im going to try this...your tutorial is awesome!
Di&Co
Wow, this is amazing! Would never figure out how to do this without your tutorial! Thanks so much!
You are an amazing artist, Nadia! The vellum trick is genius! Thank you so much for sharing these great tips.
The the dimension you achieve. Thanks for the tips.
Another great tutorial Nadia
You are so awesome! I love how you take everything apart and put it back together, better than it was before. Thanks for the lessons.
Thank you so much for sharing your tips. I just love staring at your creations trying to discern how you have enhanced (lol) the overall look.
Hugs
cherilynne5@yahoo dot com
This is the first time I have visited! Thanks so much for your wonderful insight. I will look at these cut outs in a completely different light.
This is one of the very best tutorials I have seen on altering shapes and perspective. Thank you so very much for these terrific techniques.
Love the tips on adding dimension to the cuts. I am going to use vellum to soften the back window of the car from the Sweethearts Cartridge that I am using for a wedding card. That is a wonderful idea. Thank you for taking the time to post this tutorial and I love seeing all your creations.
Nadia, I am in awe. Thank you for sharing "your perspective!" I can't wait to try our techniques. Suburbia has been on my wish list a long time. I think I need to go ahead and buy it!
-Margo (go-go on the circle board)
Nadia thanks for the tutorial you really move these figures into another dimension with all the layering and ink. Thanks for adding to our fun NSD!
Thanks for the awesome tutorial. You are so detail oriented and it makes your projects amazing!
I've been flirting with these techniques, but not to the extent you show in this tutorial. This gives me some hints to "go all the way"! Gotta give it a try! Thank you!
Nadia,
Thanks so much for sharing such explicit directions for adding dimension to die cuts. Your artwork literally leaps off the page.
Enjoy your day!
Donna
Just got PackYourBagsandim going to have to make the hat lady!!! Maybe I can even get it dome in time to post on the board!! Thanks for your tutorial!!
Thank you so much for the tricks of your trade! They will make such a difference in my cuts.
llendacky@gmail.com
Nadia, what can I say that I haven't already said. LOL You just totally amaze me w/ your creativity/talent! :-)
I kinda got off track a bit (from NSD) and was checkin' out your slide shows and gallery (once again!). I still have a grin on my face! :-)
What really got me? --- the look on sweet Piper's face said it all. :-)
Thanks, again, for sharing your talent w/ all of us! :-)
Thank you for such a wonderful tutorial! I have new hope in being able to jazz up my cuts and bring a little life to them!
Nadia you never fail to amaze me. This tutorial is wonderful.
First off Nadia, I want to thank you for taking the time to share your talent with us. And it truly is a talent! Your tutorial is detailed and easy to follow. I try to incorporate some of these techniques, but my end result doesn't even come close to yours. Now I need to ponder a project to try this week! Thank you soooo much for the inspiration!
aka Coah'sNana
I'm hanging onto this tutorial. It's amazing and the results are even better. It's going to get a bunch of re-reads. TFS
Great tutorial!! One of my favorite backgrounds is the ripped paper beach scene! Your lovely lady is perfect for that!
Nadia, LOVE your tutorial!!!! I have always wondered how you work your magic and your step by step tutorial really helped put it in "perspective"! Can't wait to try...
Your tutorial is awesome! Thanks for the inspiration that you always bring to the boards and to the blog world. I can't wait to try some of your techniques.
Happy NSD!
Love this tutorial.... I try to do this myself with my cuts. I love more dimension on my pieces!!!
Your talent and ability to transform diecuts is truely amazing!!
Kathy
Salido99@msn.com
http://3spoileddogs.blogspot.com/
Nadia - love love love your tutorials. Great job as usual. Love the layered/cutting techniques. Can't wait to go try this.
Thanks for all you do.
Terri
Nadia, another GREAT tutorial! I love love love the beach card!!! (can it be a lake card for me??? LOL) Happy Derby Day and NSD!
(((hugs))) Carrie
Great post, I will be looking at my Cricut cartridges with a new eye! Thanks!
cindybydesign@ameritech.net
Love your tutorial! I love fussy cutting and do it sometimes to relax, thanks for the info about shading and color choices and placement. Happy Derby Day!
SouthernGypsy aka Patty
Oh! The layering of body parts makes a world of difference in bringing the figure to life.
I follow your blog and would love to win
mschmidt4atgmaildotcom
There is no other crafter like you.You have that talent that can turn paper into something so real and beautiful.Thanks for the pic tutorial.
O M G!!!!!!!!!!!!!!! And, that's all I've got to say about that...I think!! Nah!
Totally AWESOME, totally AMAZING, totally YOU!!!!!!!!! Thanks for sharing some insights into your amazing skills & even if I only try to incorporate a tiny smidgen of what you've shared, I know my cuts & projects will benefit from it...THANKS!!
WOWSA, thank you for the fun. New fan here.Thanks for the chance to win too...usually do not win but love the inspiration...so guess that is a win.
chris@iwooten.com
Nadia -- love your tutorial -- your work is fabulous!!
Thanks for sharing the great tips! I can't wait to try them out.
tderosa142 at gmail dot com
Very cool ideas! Cute projects TFS
williase at hotmail dot com
Love your art!
Thank you for sharing your techniques and in such detail and pictures!
Great tutorial. Lots of terrific tips. TFS
D- dmcardmaker (AOL)
http://designsbydragonfly.blogspot.com
already an email and now google follower
Thanks so much for all the tricks and tips. You are so artistic and creative. I love all your projects. Thanks for the chance to win the gift card too.
Happy Mother's Day to you!
Donna Thomas
thom4398@bellsouth.net
Great project insights - can I just say my favorite is the Every Day Paper Dolls bed - love the toile and ticking!!! Holy cow - amazing!!!! Thanks for the amazing tutorials!
Awesome tutorials! Thanks so much for sharing your talent with us. poteat64@hotmail.com
Great examples!! Thanks so much for all of them.
Beth
baby.cowgirl88 at yahoo dot com
I just love all the projects you make!! Thank you for showing such detail!
Christina
ccapps35@gmail.com
Love your tutorial Nadia. It really sinks in when you can see the before and after side by side. I will definitely try your techniques. Thanks for sharing.
CindyLouScrappinWho
Wow! I love the detail in your projects. Thanks for sharing!
Thanks for the great tutorial! Love the bathing beauty card!
This is fantastic. I tend to use some of these techniques on people cuts but that bed is terrific. I will be remembering this for inanimate objects, too.
Several months ago while looking at card making ideas on YouTube, I came across something that led me to your site and Project Gallery. I was awestruck. The next day I had to show my co-workers your cards (added to my Favorites) and they were blown away. You are the crafter I aspire to be. Thank you for showing your process for turning average cuts into works of art. You are truly very talented and seeing your creations brings me and others great joy. Thanks for sharing your gift.
Kind regards,
Karen
email: duchessofbstreet@hotmail.com
You did an outstanding job showing and explaining. I am just amazed at how much difference a few things make. Amazing!
Thanks so much for this super tutorial. I learn so much from you!
Wow this tutorial is the bomb! I so like how you think about the dimensions of things and people! This will help me add so much to my cards! Thanks!
Kris in Alaska
funamom at yahoo dot com
Thank you so much for this wonderful tutorial! I've admired your work for quite some time. I've made many of flowers and I think it's time to take it to a new level!!
Hi Nadia! Yesterday completely got away from me, but I finally made it in to read your post. SO glad I did! You have awesome tips, which is not at all surprising since your paper piecing is nothing short of amazing. :) Thank you, thank you! Happy belated NSD!
I totally enjoyed your post today as I always marvel at how you transform your cuts into dimensional. Thanks for the step by step tutorial!
wow your attention to details is amazing!!! These are phenomenal and I love them all! Thanks for all of the how tos! Thanks so much!
Lisa
I love everything you do. You are so talented. Thanks for sharing.
Great instructions - I am going to try this -- can I post all the trash I make from this too!! LOL
Nadia such a fantastic tutorial on your process!
Thanks so much for the great lesson. Also thanks for a chance to win!
Wow, I am impressed. Great dimentionality. Thanks for letting us be part of the great giveaway.
marg0006 at Verizon dot net
Loving Scrapper 101
Super duper tutorial! Love the dimension and excitement that you add to cuts. I'm working on that crawling baby right now!! Thanks for the time you put in to sharing this with us!
Great tutorial! My daughter was even oohing and ahhing over it (she might become a paper crafter yet!).
Thanks for the opportunity and the inspiration!
Thank you Nadia for such a fantastic and in-depth tutorial. How you alter your die cuts to add dimension and interest is just phenomenal.
llpirelli at msn dot com
Fantastic tutorial! Thanks for sharing.
Kim M.
kkmaehrer@gmail.com
Your work is always so awesome. We missed you at Mania. I always check your blog to see what you are up too and follow you on FB!!!
Thanks for the chance to win! :) How fun
I am always amazed at how much you share with each of us. Your work is outstanding. Loving your creations.
Thank you so much for your very detailed tutorial. I'm always amazed at your creations and how you bring things to life. I intend to follow your directions and give it a try :)
Nada
thank you so much for the tutorial. I love how you always add dimension to your projects, and it is so awesome of you to share this with all of us. Love it and am going to try it tonight.
Thanks
Becka
Oh, dear! Angie (Angie's Paper Passion) left the following message. I accidentally deleted -- darn phone and tiny links!. Anyway, normally, I wouldn't worry, but with the contest, I was able to go to email to find the message and sender name but couldn't approve it, so here it is:
AMAZING as always, Nadia! I especially loved the lady from Suburbia!!! I don't know if I can do one like that but I'm going to try! (When I grow up, I want to be like Nadia, lol). I just posted my altered cut on the thread on the Cricut Circle board so I can play along! Thanks for the inspiration!
Angela (TiffysMom on the Cricut MB)
angiespaperpassion at gmail dot com
OK-- I am getting ready to draw for a winner so I am ending comments for this post! Thanks to all who entered!
Post a Comment