Saturday, August 13, 2011

Diagonal Floodfilling


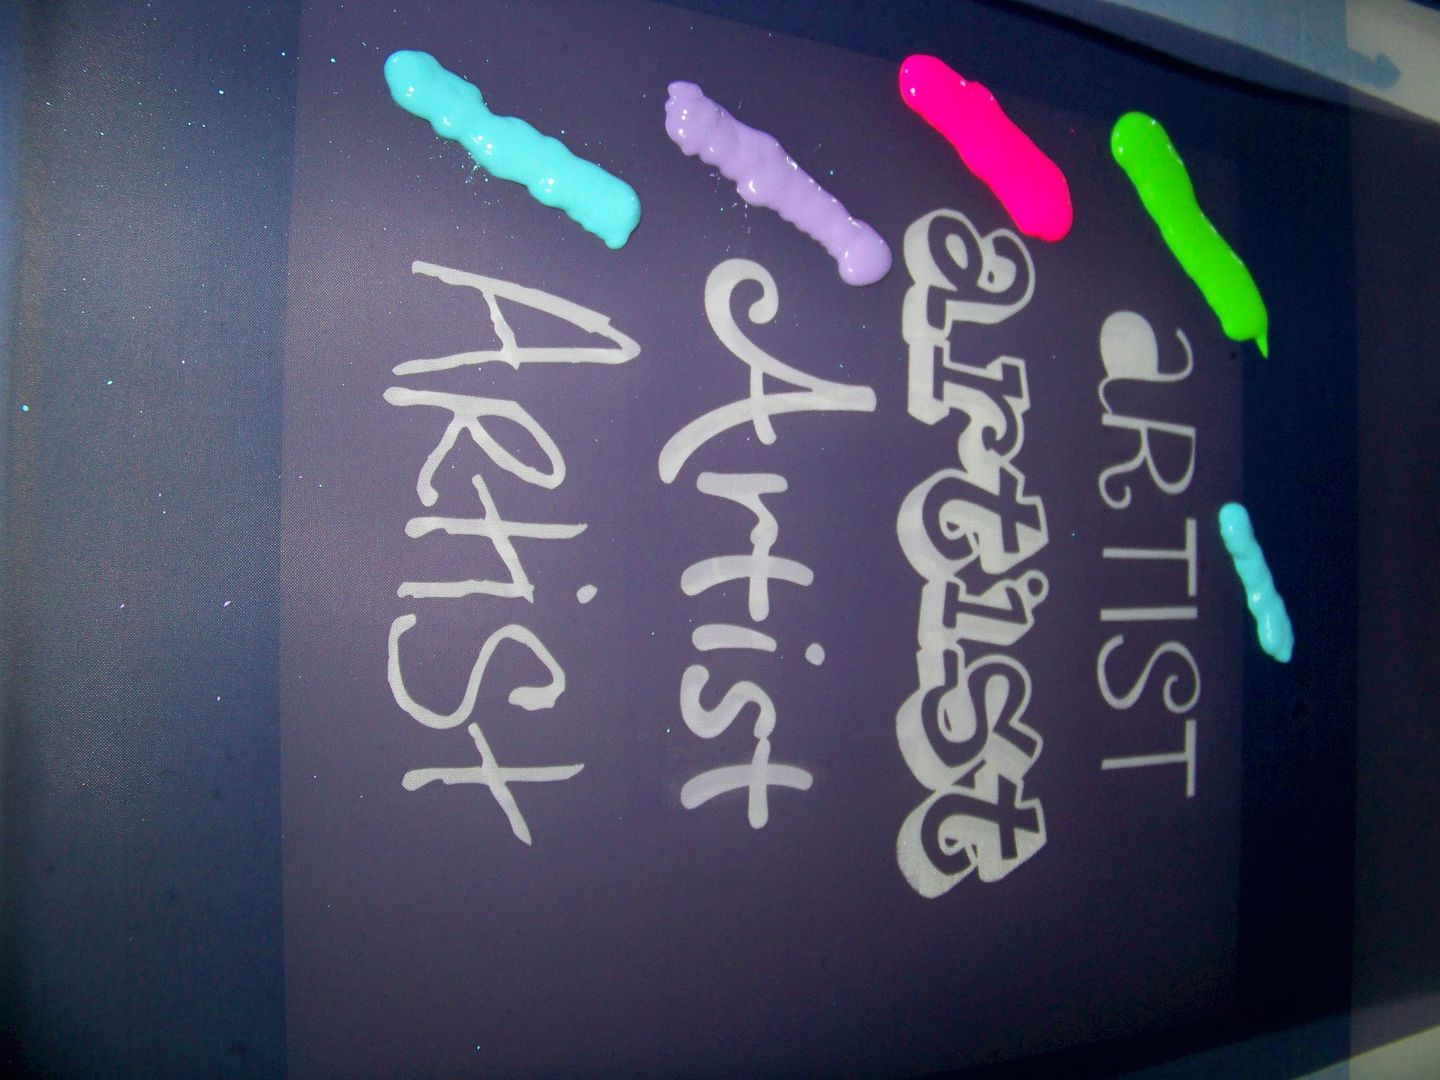
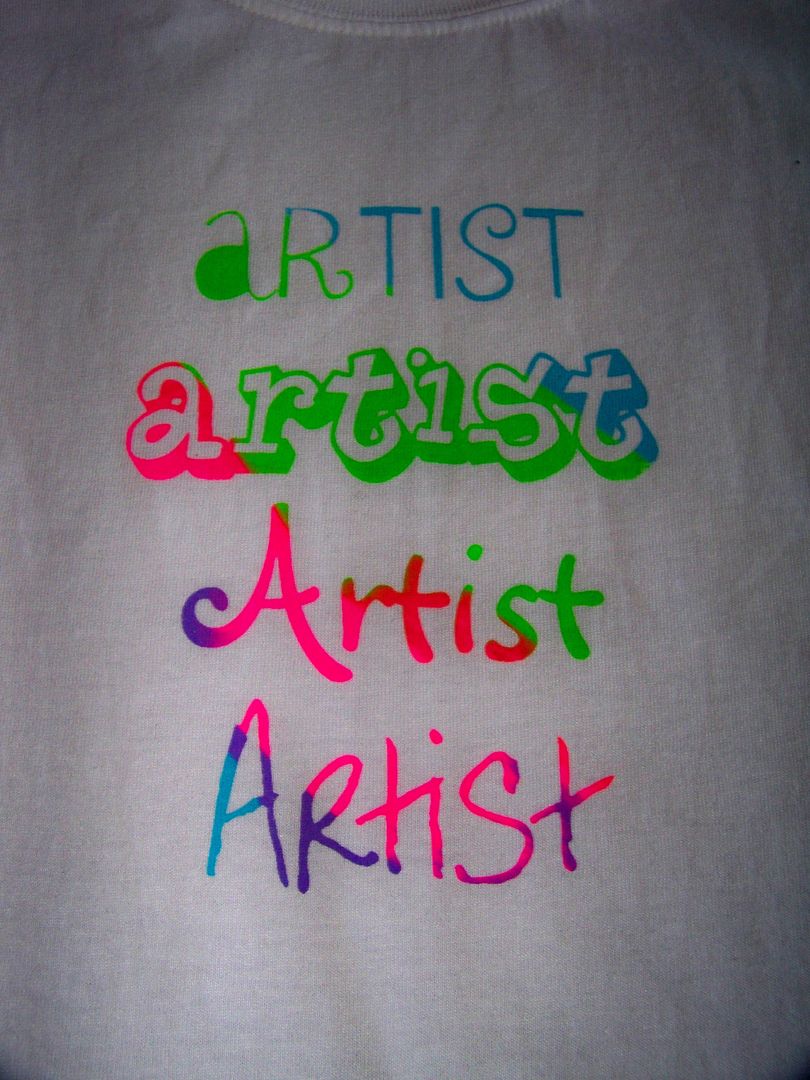
I have been brainstorming ideas for adding color to my Yudu projects on a single screen.  This is my latest experiment:  floodfilling the screen with multiple colors diagonally.

I also wanted to try out some new inks that I found at Hobby Lobby.  The colors are so much fun and different from any I have from Yudu or Ryonet.  These are "Simply Screen" inks by Plaid.

They are $1.50 per ounce, which places them right in the middle of the price range I have been paying for ink.  The Ryonet inks I have bought have been 84 cents per ounce; the Yudu brand inks are $2.33 per ounce.  I love the colors available in this line!  The OMG Green is a perfect Cricut green!

I decided to use them all together on this project. 

I prepared my screen with emulsion as usual.  You can click here to go to my Yudu page for details on how to apply emulsion and prepare the screen.  The fonts I used were straight from my computer (Microsoft) and I printed them directly onto my transparency.  In this order, they are: 
Sybil Green (100 point)
Planet Benson 2 (100 point)
Melanie BT (160 point)
Annie BTN (150 point)

Then, I added the color diagonally, making my best (though failed) attempt not to let the colors overlap.


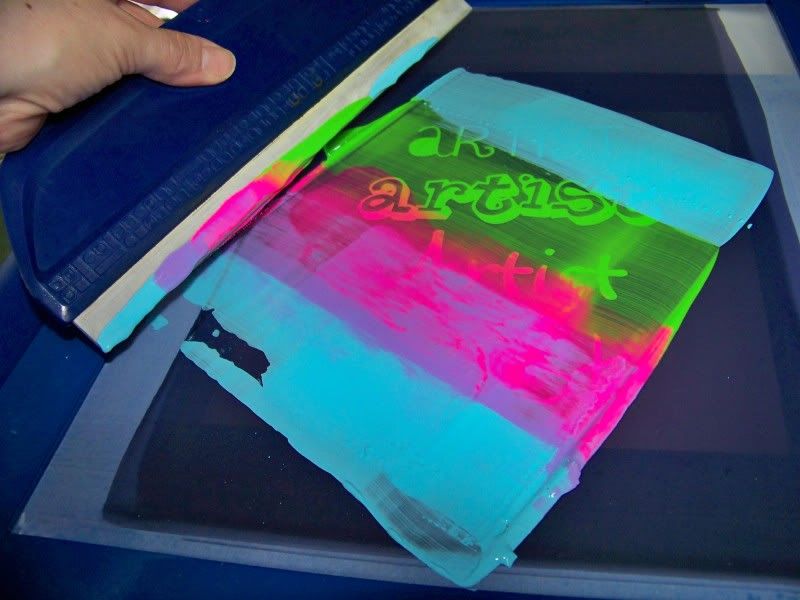
With the frame raised, I used my squeegee to floodfill the screen, but unlike usual screenings, this time I did so diagonally.  I moved from upper left to lower right and then back up to be sure the ink was in place.


I lifed up my squeegee and cleaned it off.  Then I lowered the screen to the t-shirt and pulled the ink as normal by moving my squeegee down the screen.

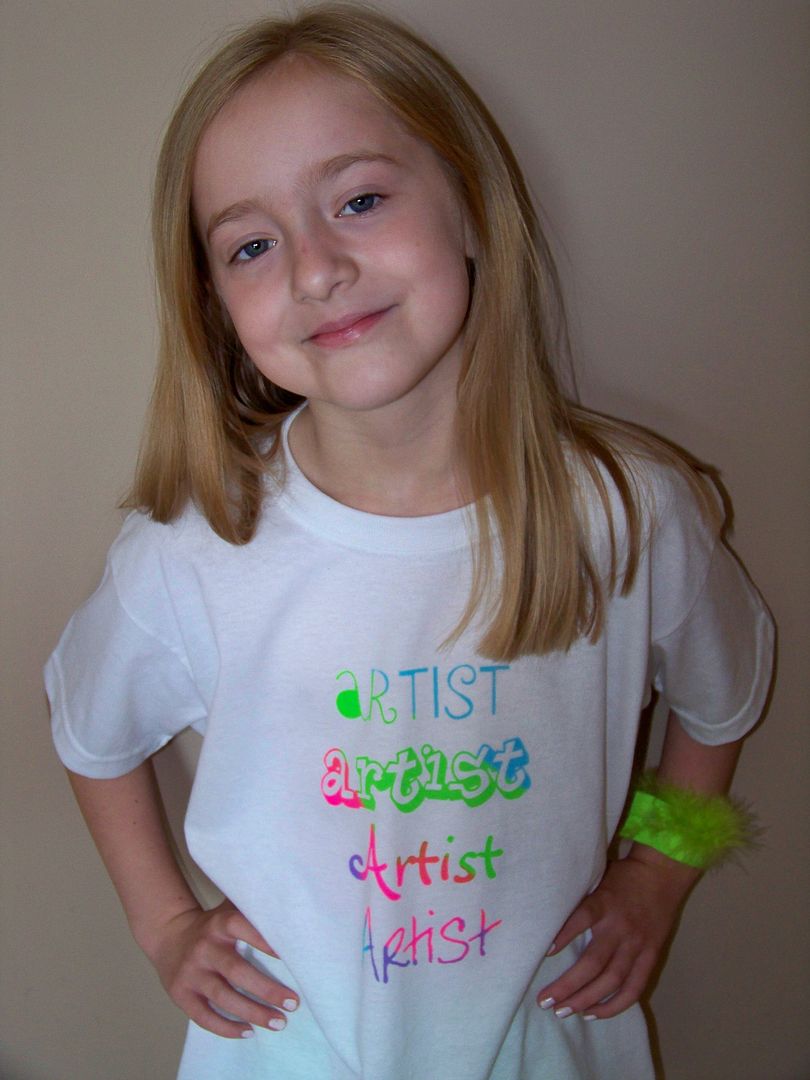
And when I lifed the screen, this was my treat:


Thank you for visiting my blog today.  You can see all of my projects by clicking here or by clicking the "My Project Gallery" tab at the top of the blog.  There, you will find my paper and Cricut crafts as well as my other Yudu projects. 

Thursday, August 11, 2011

Art Nouveau Necklace

So... last night was date night for the hubs and me.  As usual, I happened to check my messages on my phone when he stepped away from the table only to find that FedEx had just delivered my Art Nouveau cartridge!  After sushi, we took a walk and passed by a few vintage stores.  The window display of one featured jewelry with period pendants. 

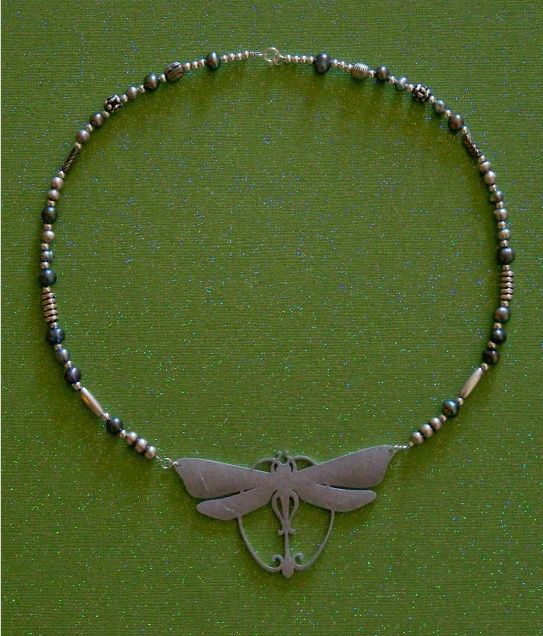
This morning when I tore open my cartridge, I knew just what I would be making first:  a dragonfly necklace!


I cut a 4" dragonfly (the first layer only) out of shrink film, on my Expression, from the Art Nouveau cartridge, using these settings:

Blade:  6
Speed:  3
Pressure:  5
Multicut: 3

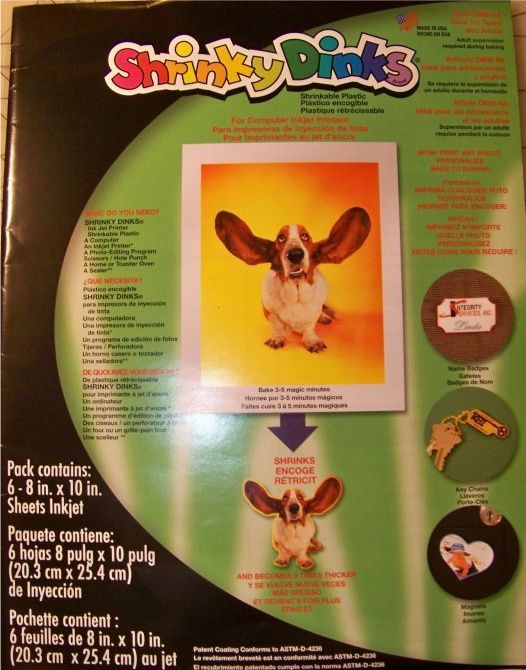
I used this brand and kind of shrink film:  


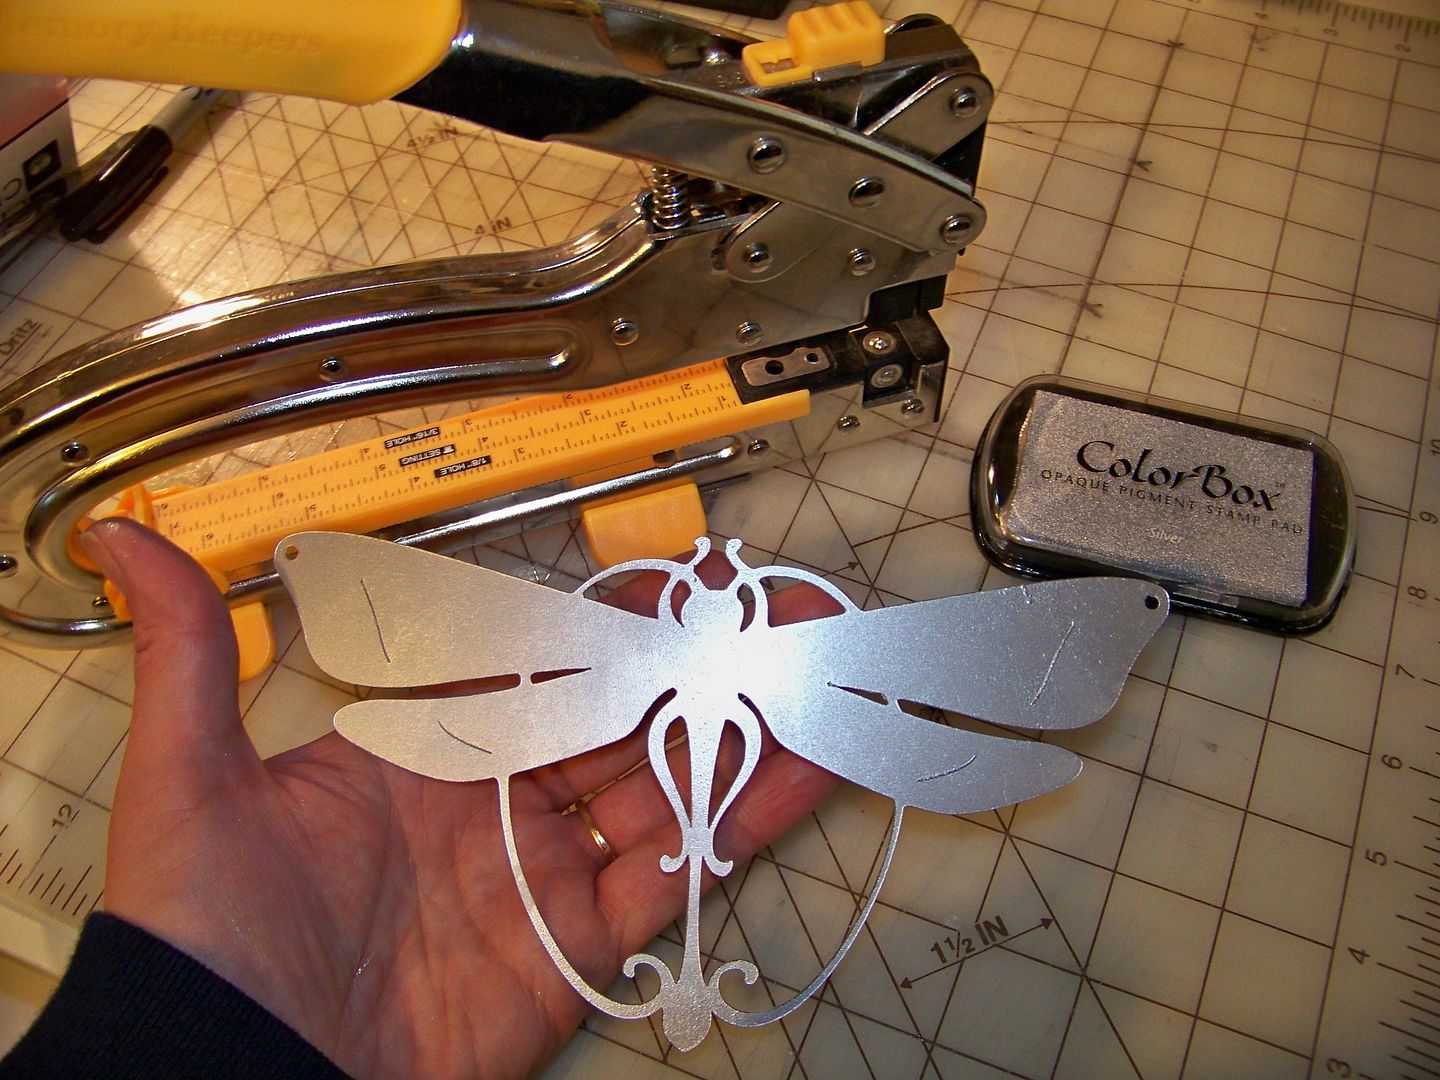
I used an old silver Color Box stamp pad.  When I say "old", I mean old!  I have had this since college (is that possible??) -- the label on the back isn't white any more!  I just pressed onto the die cut until it was covered completely.  Then I used the 1/8" hole on my Crop-A-Dile Big Bite to make small holes on each wing.


I placed it on a parchment paper-covered baking sheet and something weird happened while it baked:  it just shrunk.  It didn't buckle or twist like the other projects I have done with this product.  I guess it was the ink from the stamp pad.  It baked for 6 minutes at 300 degrees.  Honestly, it might have been done when I checked it at 3 minutes, but I was just so surprised that it was flat that I kept baking it! 

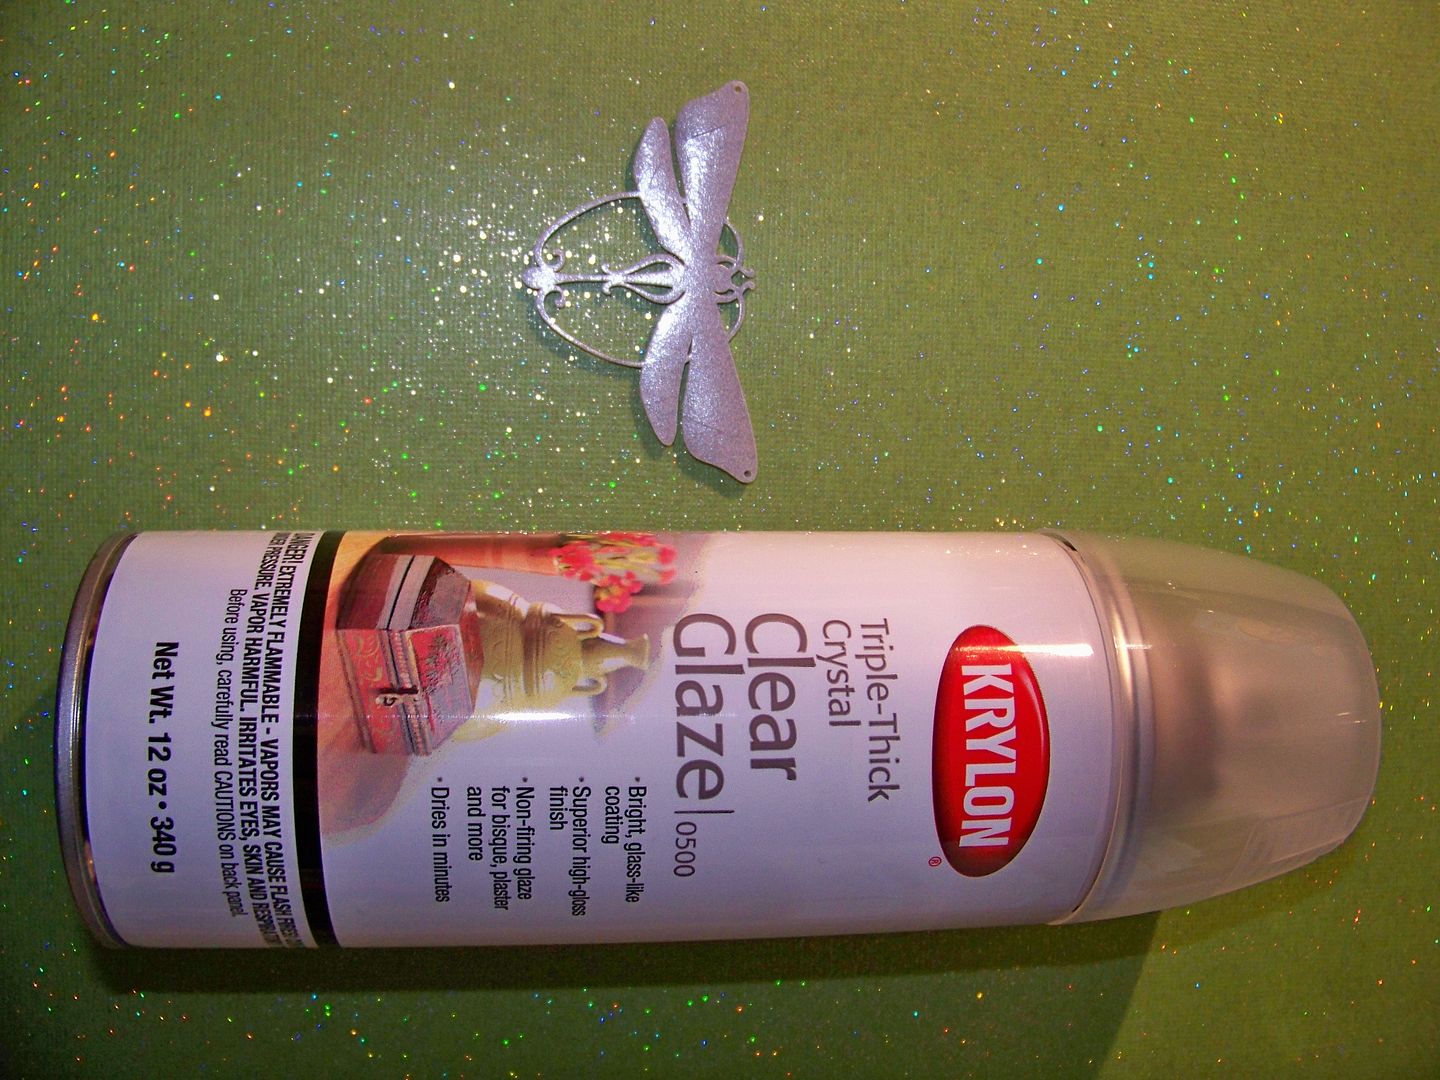
The ink was wet when it came out.  I pressed it with a paper towel to remove the excess.  Once it was completely cool, I sprayed it out-of-doors with Krylon Triple Thick Crystal Clear Glaze (thank you Marcjo for posting about this product). 


After it dried (about 20 minutes), I went over the back and edges with a wet paper towel to be sure all the ink that wasn't on the top surface (and glazed over) was removed so that it wouldn't rub off onto skin or clothing. 

I placed it on my bead board and worked on the necklace strand.


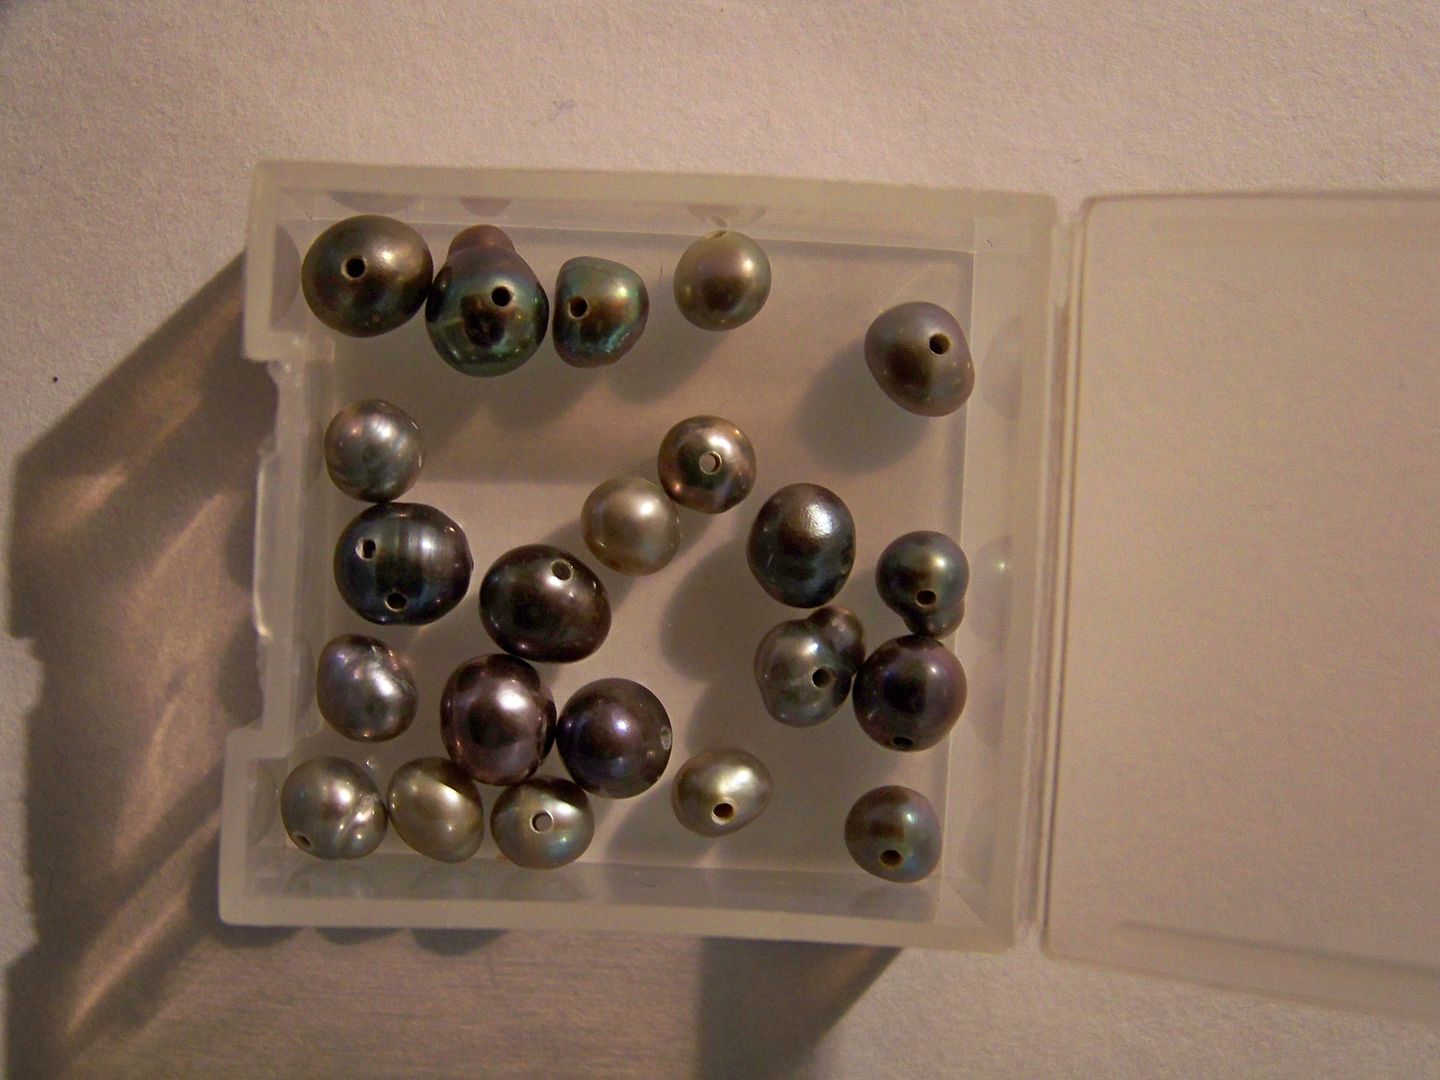
I used sterling silver beads, silver-colored beads, and fresh water pearls.  My natural pearls ranged in color from gunmetal to yellow-silver.  Just like mother-of-pearl buttons, you will know they are real and not plastic because they are cold to the touch.  They are irregularly shaped and colored, which is why I loved them for this project!


I used jump rings and crimp beads to join the beaded strands to the pendant.  To see how to make jewelry with coated wire and crimp beads, click here to see a previous post on this blog.


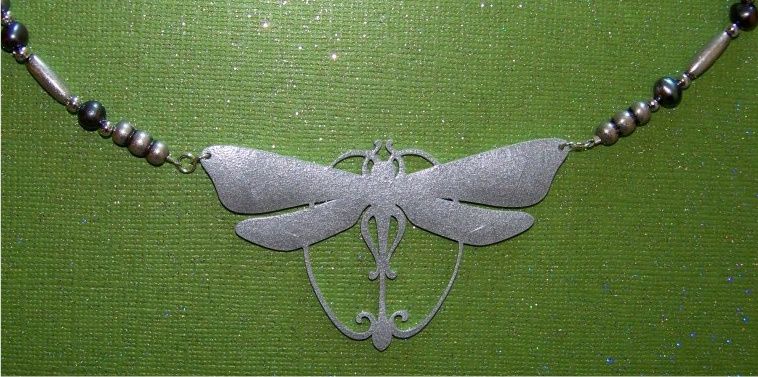
My finished necklace:


Thank you for visiting my blog!  To see my Shrinky Dink charms made on the Imagine and sealed with UTEE, click here.  To see my princess charms colored with markers, click here.  You can find all of my projects by clicking the the tab for "My Project Gallery" at the top of the blog or by clicking here. 

Tuesday, August 9, 2011

Yudu Glitter!!!!


Have I mentioned that I LOVE glitter?  When I first started buying Yudu supplies a few months ago after seeing a wonderful demo from Provocraft's Shannon Lerner, I fell in love with the idea of the glittering screened images. 


Just the FAQs:
  • Use a 70 mesh screen.  The larger holes are needed to allow the glue to be pulled through it!  Apply emulsion, dry it, and burn it just as you would for projects with ink.
  • Use a water-based screen printing adhesive instead of ink. 
  • Be sure to flood fill the screen before and after pulling the design onto your garment, just like you do for projects with ink!
  • Just like when printing on any non-tissue t-shirts, you do not have to place the platen into the t-shirt; you can just lie the shirt right on top of it.  This makes it easy to pick up the whole platen and move it to a safe (out-of-the-way place) for it to dry. 
  • Sprinkle the Yudu Microfine Glitter over the freshly pulled design on the shirt and allow it to dry.
  • You can reclaim any unused glitter and put it back in the container, just as is done for paper glitter projects.
  • Once the shirt is dry, you can shake it out outside to remove the loose glitter you could not reclaim.  Then, use a piece of tape wrapped around your finger to get those wayward pieces that are clinging to the shirt fibers.
  • Use a piece of white computer paper as a press cloth to heat set the design using a dry iron for a few minutes on each side.


Thank you for visiting my blog.  For info on how to use your Yudu, how to apply liquid emulsion, and links to my other Yudu projects, check my Yudu page above, or click here.

Friday, August 5, 2011

More Yudu Experiments: Silver Argent, Ryonet Inks, Altering a Graphic

I have been wanting to figure out how to use a photo as a graphic on my Yudu.  I have been less than successful for a variety of reasons, but recently I got a little motivation to figure it out.  I also have been wanting to try my new Ryonet Enviroline inks, and the Yudu brand Silver Argent ink.

I found an inkstamp graphic of the Three Gossips by searching Yahoo Images.  I wanted to play on words and link it to a little joke (you can find my post about Keith-in-Alaska's joke of the The Three Gossips by clicking here). 


Using a Sharpie and White Out film on my paper original, I changed the graphic to have less detail so I could use my 110 mesh screen and easily wash out unburned emulsion from the design.  It became this when I added the text and copied it onto a transparency :


So let's talk ink!  Up until now, I have only LOVED Yudu brand inks.  The only other fabric silk screen ink I have used has been Speedball, which I found to be much too thin, requiring more than one pass with the squeegee.  I bought a little starter set of Ryonet's Enviroline inks and WOW!  (You can find a link to Ryonet on my Yudu page -- see the tabs above.)  The Enviroline inks do have an odor when wet, unlike the Yudu inks, but they are thick, creamy, and so much cheaper!  The kit I purchased from Ryonet had four pints of ink at about 84 cents per ounce. 


I love the blue and chose that color for my "I rock" shirts.


My next shirt had text that included one word that I wanted to emphasize.  I did not want to have to use two screens and registration panels, so I simply beaded the ink on the screen in two colors.  I placed the silver only over the "Mr." and floodfilled it.  I cleaned off my squeegee and placed a thick bead of black and floodfilled the rest of the screen.  I cleaned off my squeegee and pulled the ink to get this:


This is probably not the preferred method for adding a second color, but it was so quick and easy-- painless in fact!  I LOVE the silver argent Yudu ink!  It is sparkly and kind of glitters!  I will definitely be using this on a shirt for my daughter, which is why I bought this ink in the first place!


I am still plugging away, playing with my Yudu and loving that machine!  You are welcome to check my Yudu page (see the tab above or click here) to find Provocraft's Shannon Lerner's tips on using the Yudu, my tips on using direct (liquid) emulsion, my sources for Yudu and aftermarket Yudu-compatible products, and links to my other Yudu projects!

Thank you for visiting my blog!

Tuesday, August 2, 2011

Blue Skies! (Gifts and Ice Cream too)


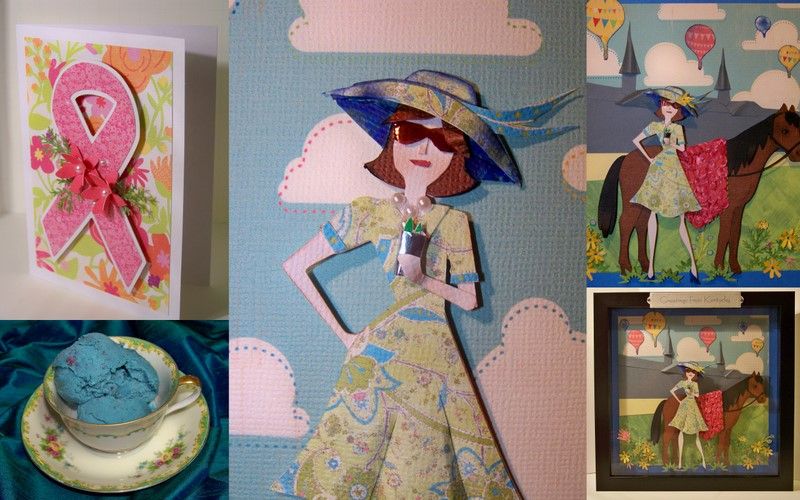
I like making gifts!  I wanted to share a few gifts I have recently created for friends and family:  a shadow-box vignette, homemade ice cream, and a card.

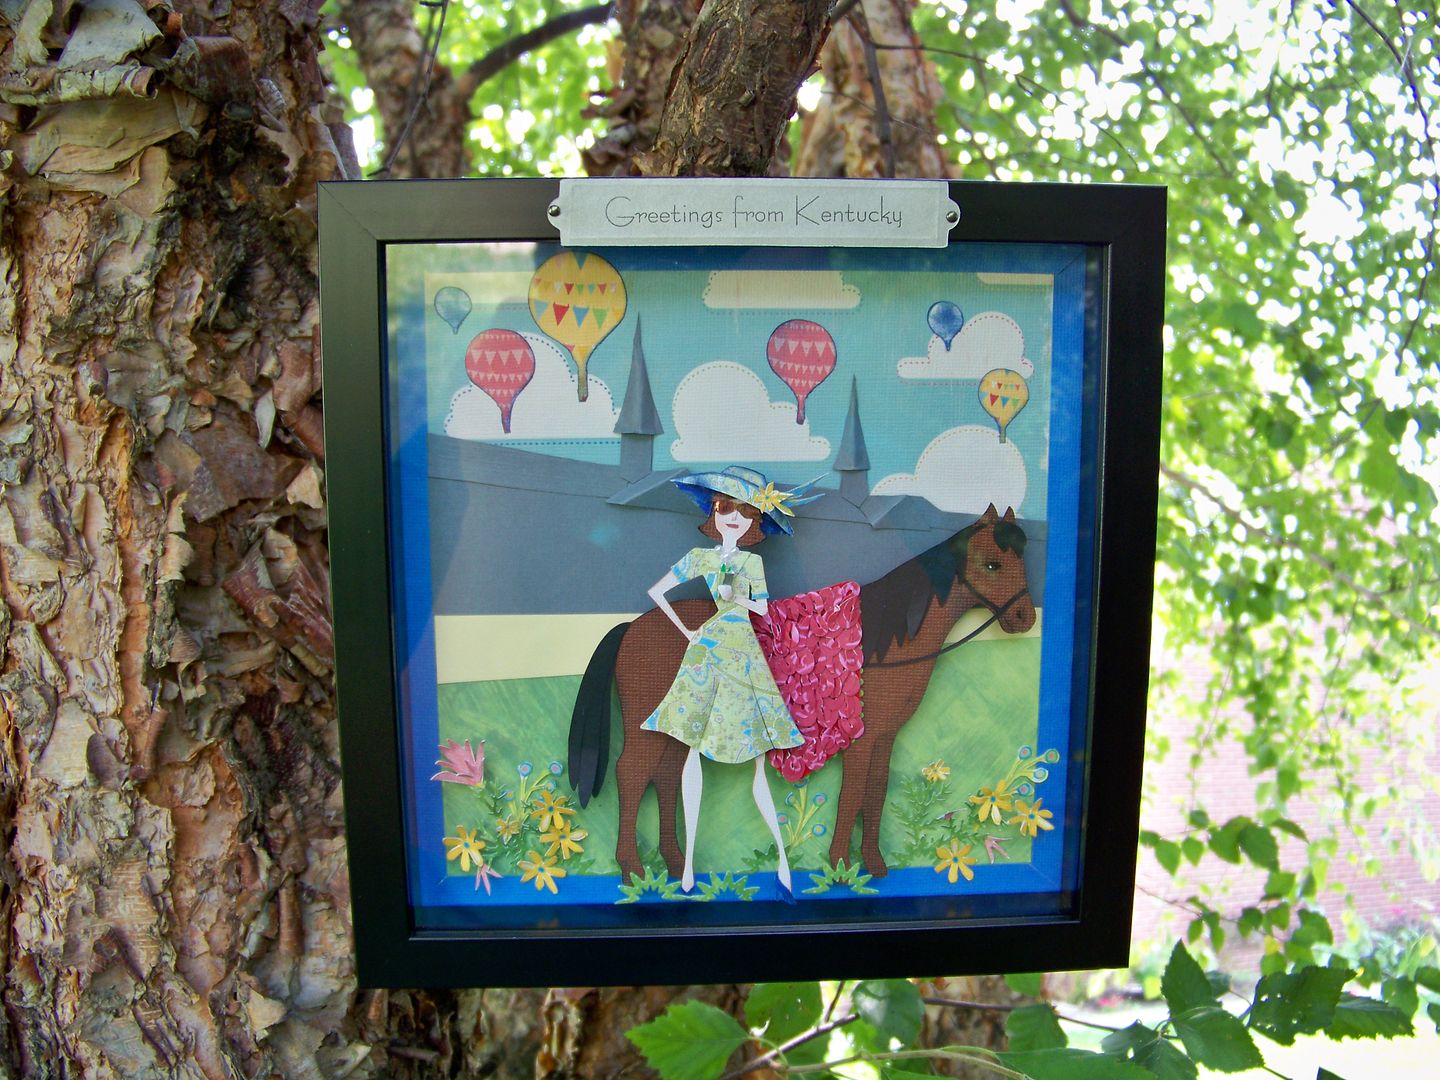
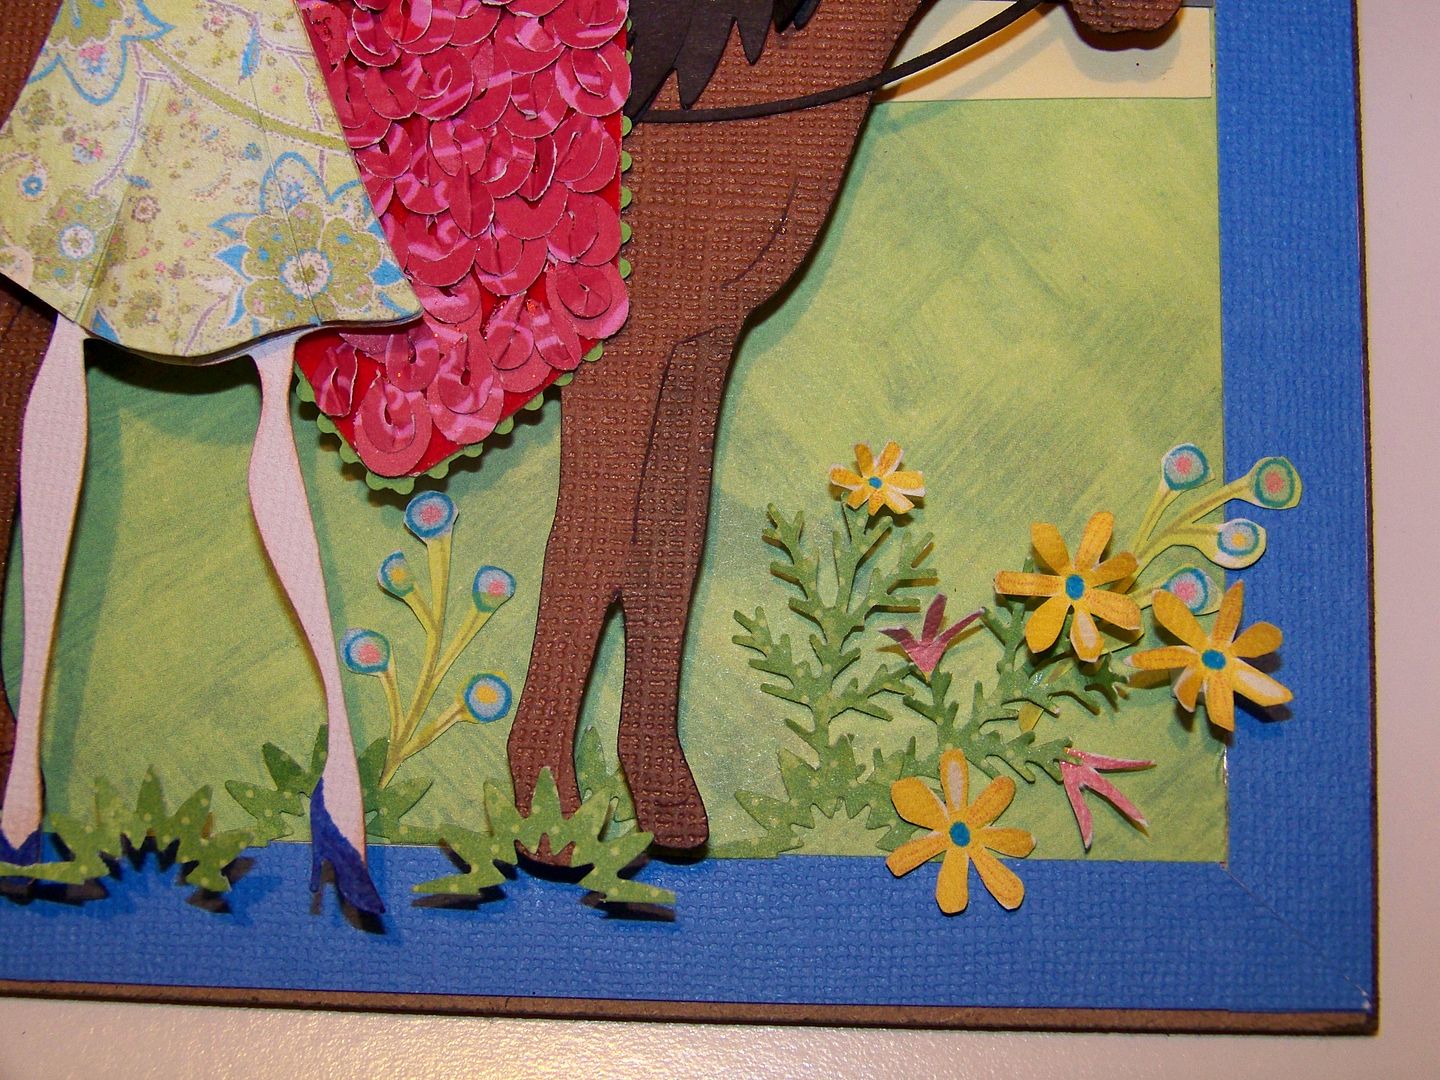
The first gift is a shadow box that I created inspired by a pennant I made for a crop.  You can see the pennant from a previous post by clicking here. 
Yep, I hung it in a river birch to photograph it!
I learned so much from making the pennant, but I wished that I had created a forward-facing figure.  For this gift, I did.


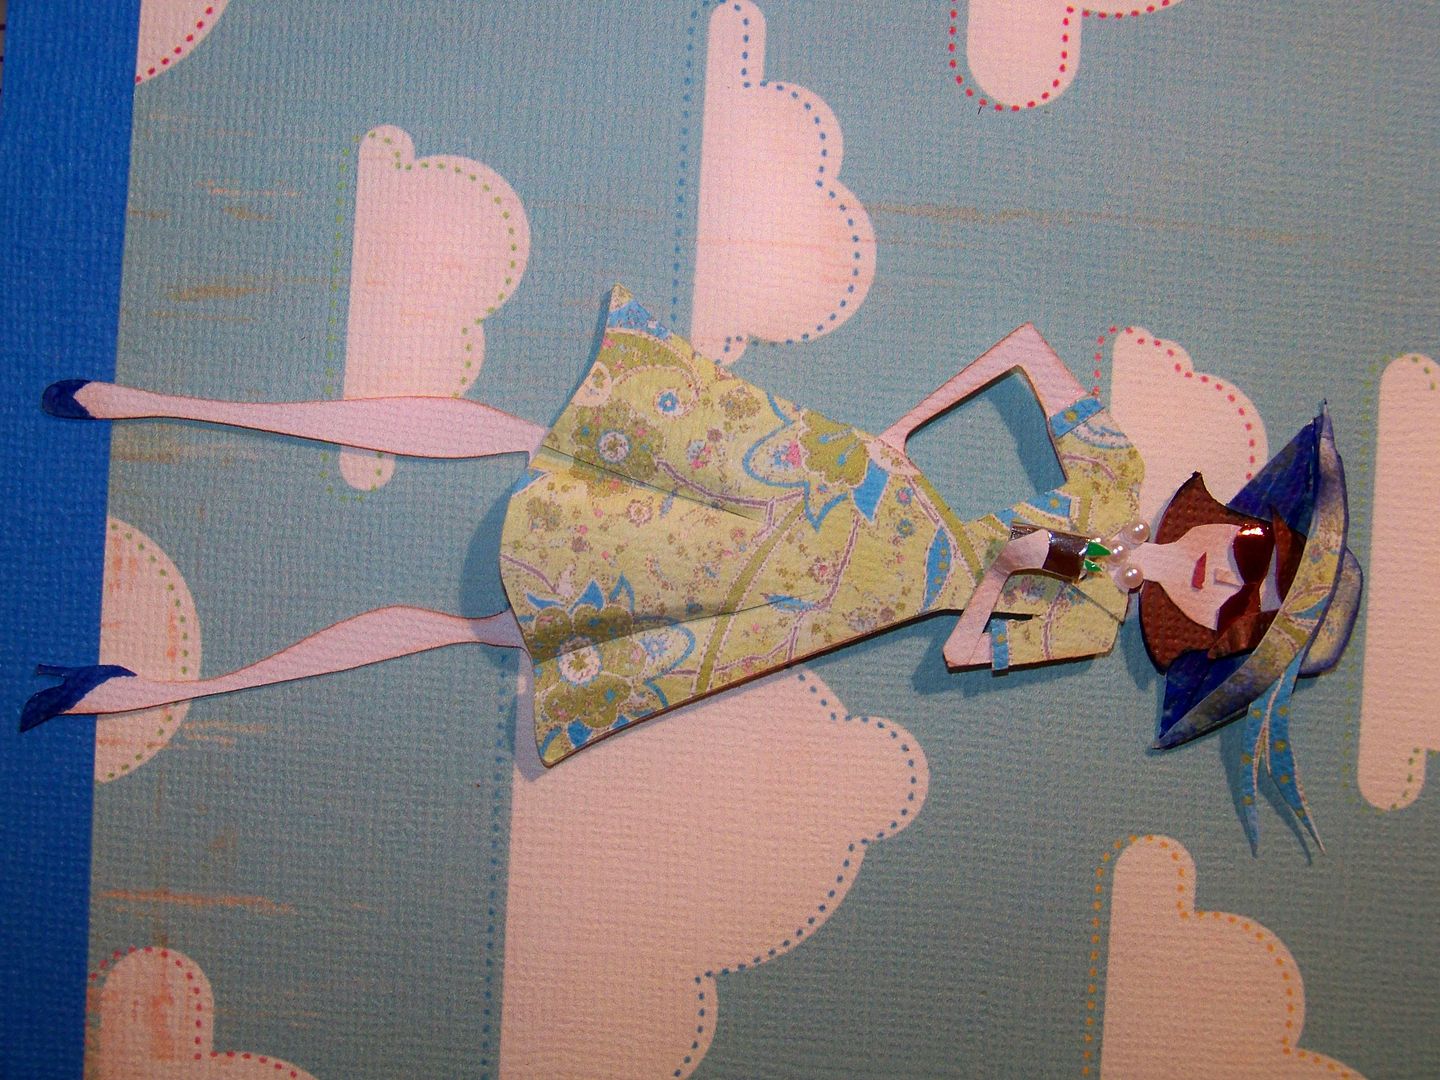
I cut the figure from Forever Young, cut at 5" on the Imagine, adding a face, hairstyle, sunglasses, and changing up the dress a bit.  The dimension in the skirt came from cutting two dresses.  Using only the skirt on one, cutting and bending at the drapes.


I hand-cut her hat to accomodate her new posture.  I hand-cut her nose, mouth, and sunglasses.  She is lightly inked; her hat is heavily inked.  I cut off her arm at the elbow and extended the cut into her leg to allow for a hand (since the body would be covered by her dress).  I shifted the arm into position and glued it back at the elbow.  This allows for the bend in the elbow and a curve in her hand to 'hold' her drink.  You can find details on the mint julep cup in the original pennant post.


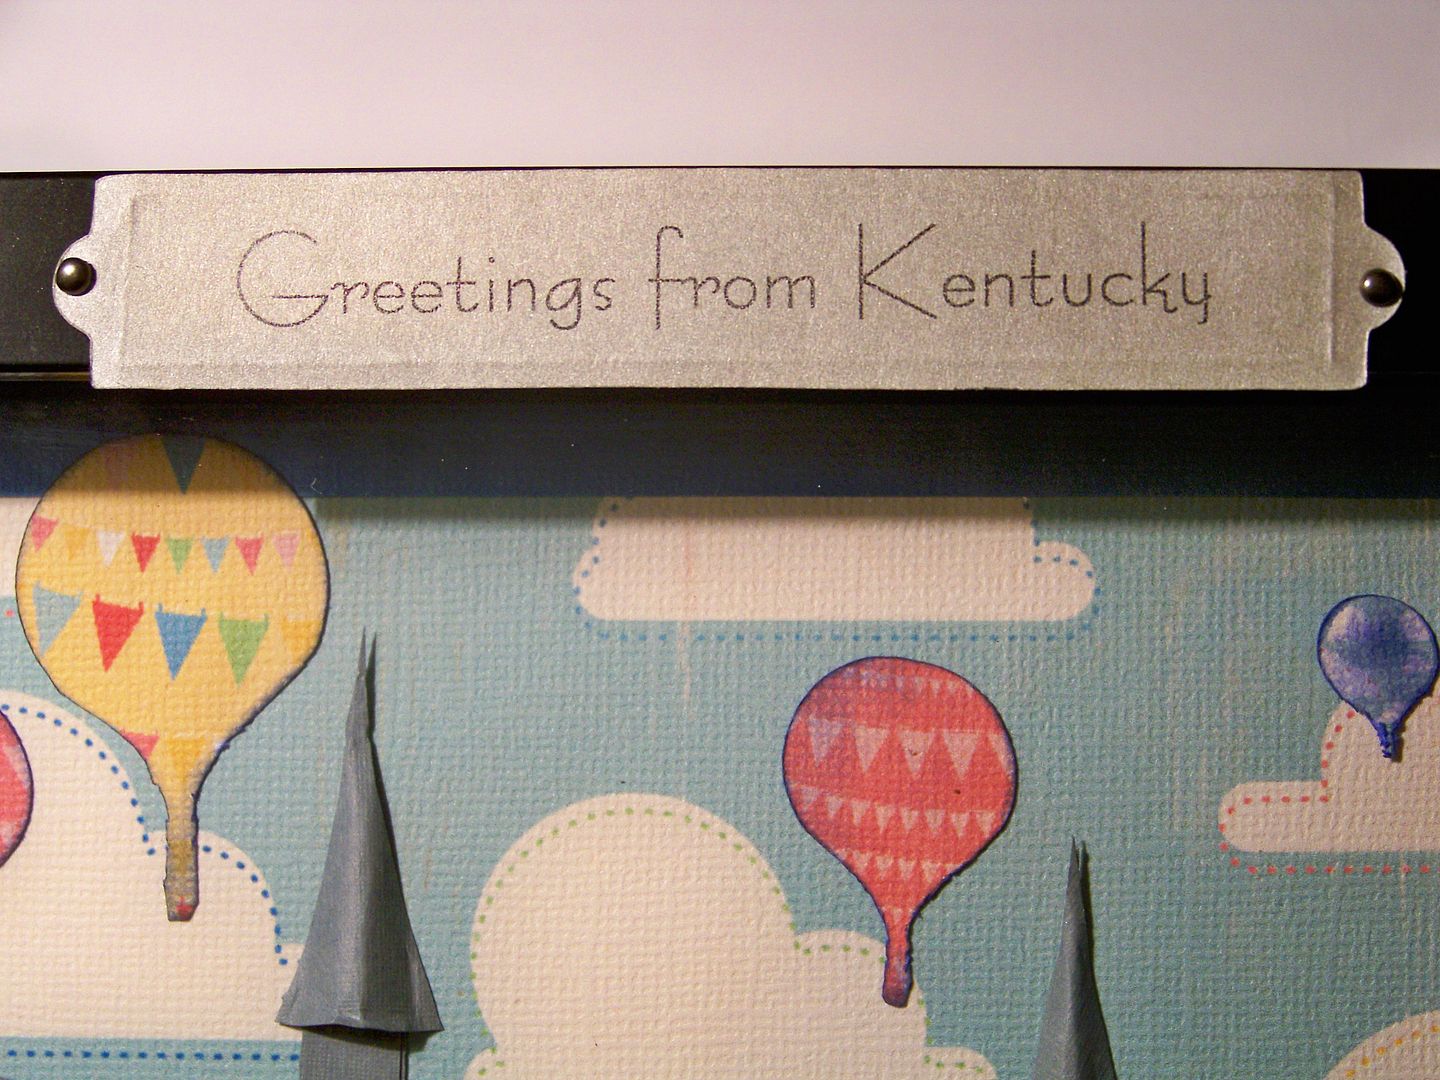
The horse, balloons, and Churchill Downs cuts are sized down from the original pennant.  (The spires for Churchill Downs were much trickier on this smaller version because the smaller paper cuts were much harder bend!!)  This time, the horse is 4-1/2" from Old West.  The balloons are .7", 1", 1.3", and 1.8" from Summer in Paris.  The flowers on the original blanket of roses were open, in full bloom.  I wanted to have them tight in the bud, so I used a loop punch to change the way they look by cutting and layering them.


The flowers were hand-cut from printed bouquets on Enjoy the Seasons.  I cut them at 1.6" and 1".  I trimmed the parts I wanted, inked in green when necessary to hide the white that I couldn't cut away, and glued them to the branches.


I used a Martha Stewart sunburst edge punch to create tufts of grass at their feet.  I used the branch punch to give the flowers a way to have height. 

This is the finished vignette before going behind the glass:

I found a black-frame 8"x8" shadow box and created a nameplate from Fabulous Finds (page 82, stretched), cut at .7".  I used a pen to draw a frame on the back while the nameplate was on a flower-making mat to emboss it lightly with a rectangle.


I flipped it over and ran it through the computer printer to add my text using Bernhart Fashion BT font at 24 point.    I added mini brads, bent as close as possible before being glued to the frame with plastic adhesive.


My next gift was ice cream!

I had never made ice cream with my daughter.  I surprised myself when I realized that!  As a child, I used to make ice cream all throughout the summer with my grandparents using their old hand-crank ice cream maker.  My strawberry ice cream was a hit when I presented it as my final chemistry project in high school.  I have been making ice cream for years, but for some reason, not this past seven!  I use a digital, automatic model now:  no hand-cranking, no ice, no rock salt... it does still taste good, but I am not sure how that can be. 


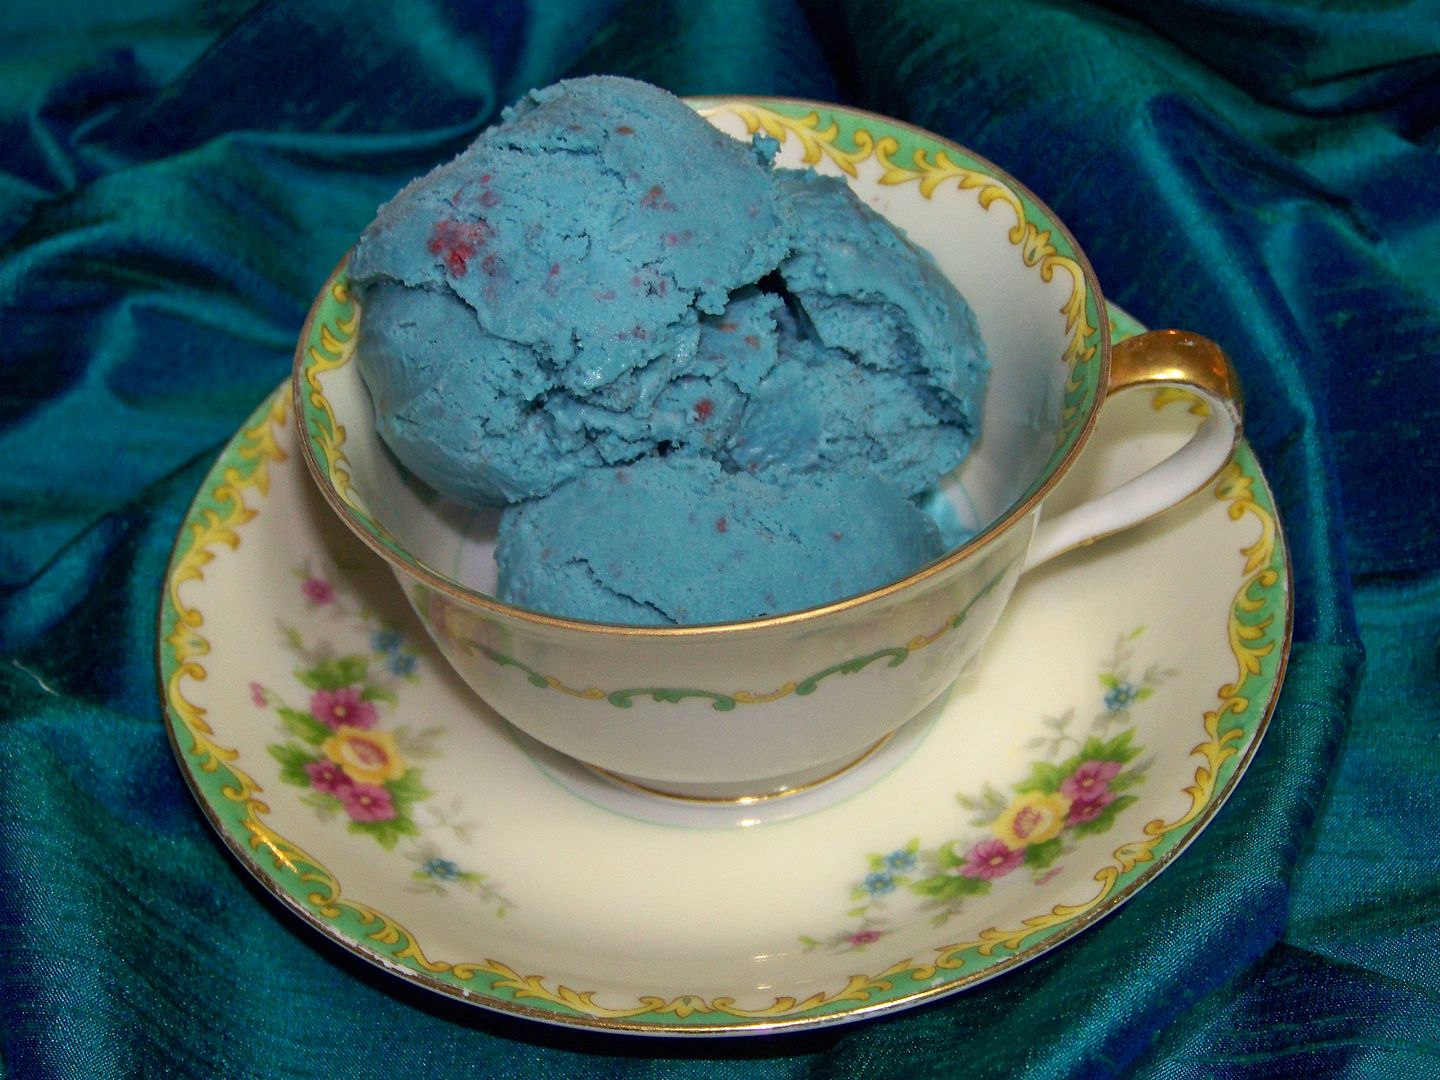
Piper's favorite flavor is blue raspberry, so we made a batch to take to my in-laws for a little 'cheer up' kind of gift to share.  The secret to this is using semi-frozen berries so that you don't have to chill the mixture and lots of blue food coloring, adding until it goes from purple to smurfy blue.

Piper's Blue Raspberry Ice Cream
(for a printer-friendly version, click here)
2 cups heavy cream
1 cup whole milk
1 cup sugar
4 oz eggs (this is 3 eggs for me)
1 teapspoon vanilla
1 cup raspberry puree (I use semi-frozen berries in a food processor)
blue food coloring (I use the liquid kind at the grocery)

Combine eggs, sugar, and vanilla.  Beat well.  Beat in raspberry puree.  Add cream and milk.  Beat well.  Add food coloring until you get the desired color- it will take a lot to overcome the pink from the berries!  (If you use fresh or thawed berries, you will need to chill thoroughly at this point!)  Follow the instructions on your ice cream machine for 1-1/2 quart recipe.  Once it is at the soft-serve stage, remove from machine and place in container for full freezing to get nice and hard.

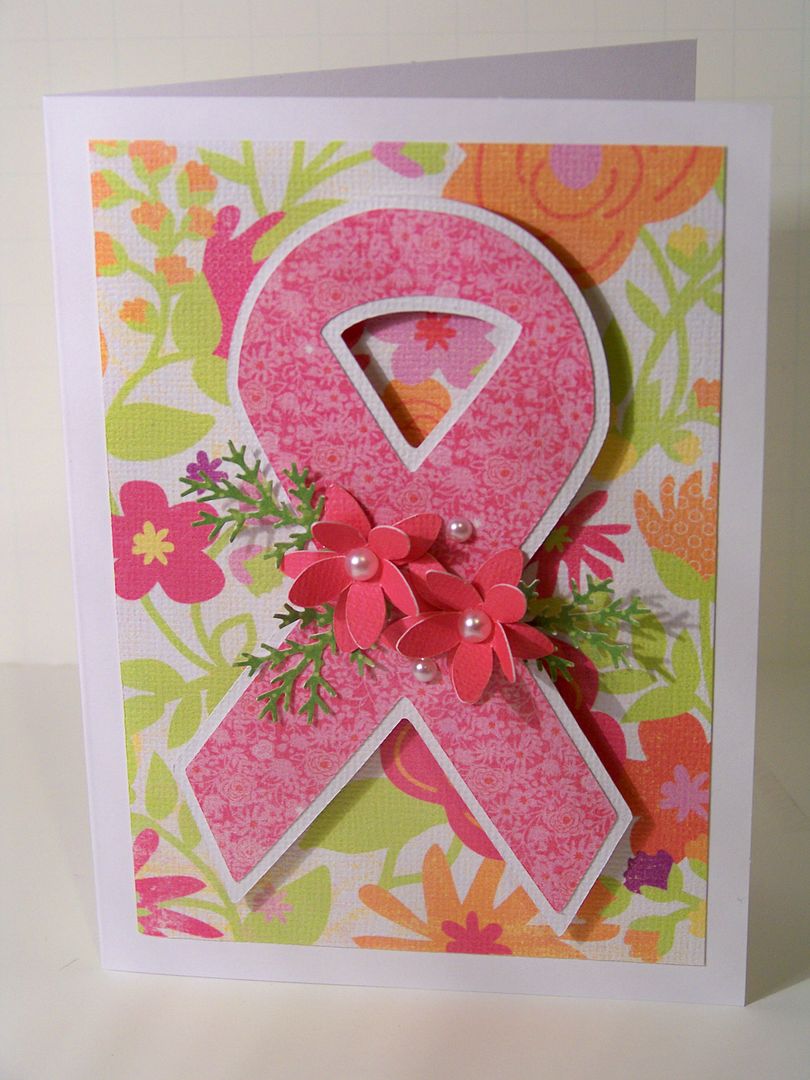
Last, I made a card for a message board friend recovering from surgery.  This was part of a weekend challenge in her honor. 


This is a simple card, using Stand and Salute, cut at 4.3" on the Imagine, with shadow.  The floral papers are from the Berries and Cream Imagine cartridge.  I cut a 5.7" square to floodfill with the large print in order to cut it down to size for my card.  The flowers are from Mother's Day Bouquet , cut at 1" and layered.  The greenery was made using the Martha Stewart branch punch.

Thank you for visiting my blog!  Don't you just love to make gifts... and hand-made or homemade gifts are my favorite to receive as well.  They just make me feel like blue skies and green lights!
Monday, August 1, 2011

Shrinky Dink Charms on the Imagine!

Ready for a Christmas project?  Well I am not ahead of the game; I am being prompted by a Christmas Charm swap.

I have wanted to try Shrinky Dinks on my Imagine since before I even owned one.  I have only played briefly in the past with Shrinky Dinks -- using my Expression.  You can see the charms I made for little girls by clicking here from a previous post on this blog. 

I had to make 26 charms and I chose the Imagine Snow Angel cartridge for my design.  Using a layer from the ornament on page 27, I printed it and cut it at 2.7" true size on Shrinky Dink brand film made for inkjet printers.  (Autofill allows for 6 per sheet). 


I found that my Imagine cut this differently than did my Expression (plus I used a different brand on my previous project!).  As I am finding for most projects, I like a barely sticky mat and a sharp blade.  (Use Scotch Magic tape to tape the corners of the material to the Imagine mat).  I used the following cut settings to cut the Shrinky Dink film on my Imagine: 
Blade - 6
Speed - 3
Pressure - 5
Multicut - 2

I punched the cuts with the 1/8" hole with my Crop-a-dile Big Bite.  I wanted a hole that would just allow for the jump ring. 
You can set your printing to 'draft' to get a lighter result, but I did not do this, leaving it instead at 'best quality'.  I liked the more intense coloring!

The baked (shrunken) charm is on the left.  You can compare that to the pre-baked die cut on the right.  Baking changes not just size and color, but also the shape.  My finished charms were not symetrical and not round.  I like this-- it looks like something created --not manufactured!  Since I was using a printed scene, this was a bonus to me!  Yay for happy accidents!

The Shrinky Dink package called for preheating the oven to 300 degrees.  I placed my die cut shrink film on a parchment paper-covered cookie sheet. 

I had to bake my shapes for much longer than the 3-5 minutes noted on the directions; I baked them for 6 minutes (using a timer to keep me reminded of them), then checked on them and baked for 3 minutes more.  Some batches required a bit longer, up to 3 additional minutes!  They will buckle and curl, but you know when they are ready when they are small and mostly flat.  (I kept the oven light on so I could look at them through the door to check on their progress).  I used my oven-mit-covered hand to lightly press down the centers of finished ones, while still in the oven, to make sure they were perfectly flat.
Imagine ink is not waterproof and I wanted to seal them, not knowing their end use.  (The ink will run when it comes in contact with sweat or water).  I have been told that you can use a spray sealant to prevent this (like Krylon or Plaid), but I wanted to try using embossing powder.
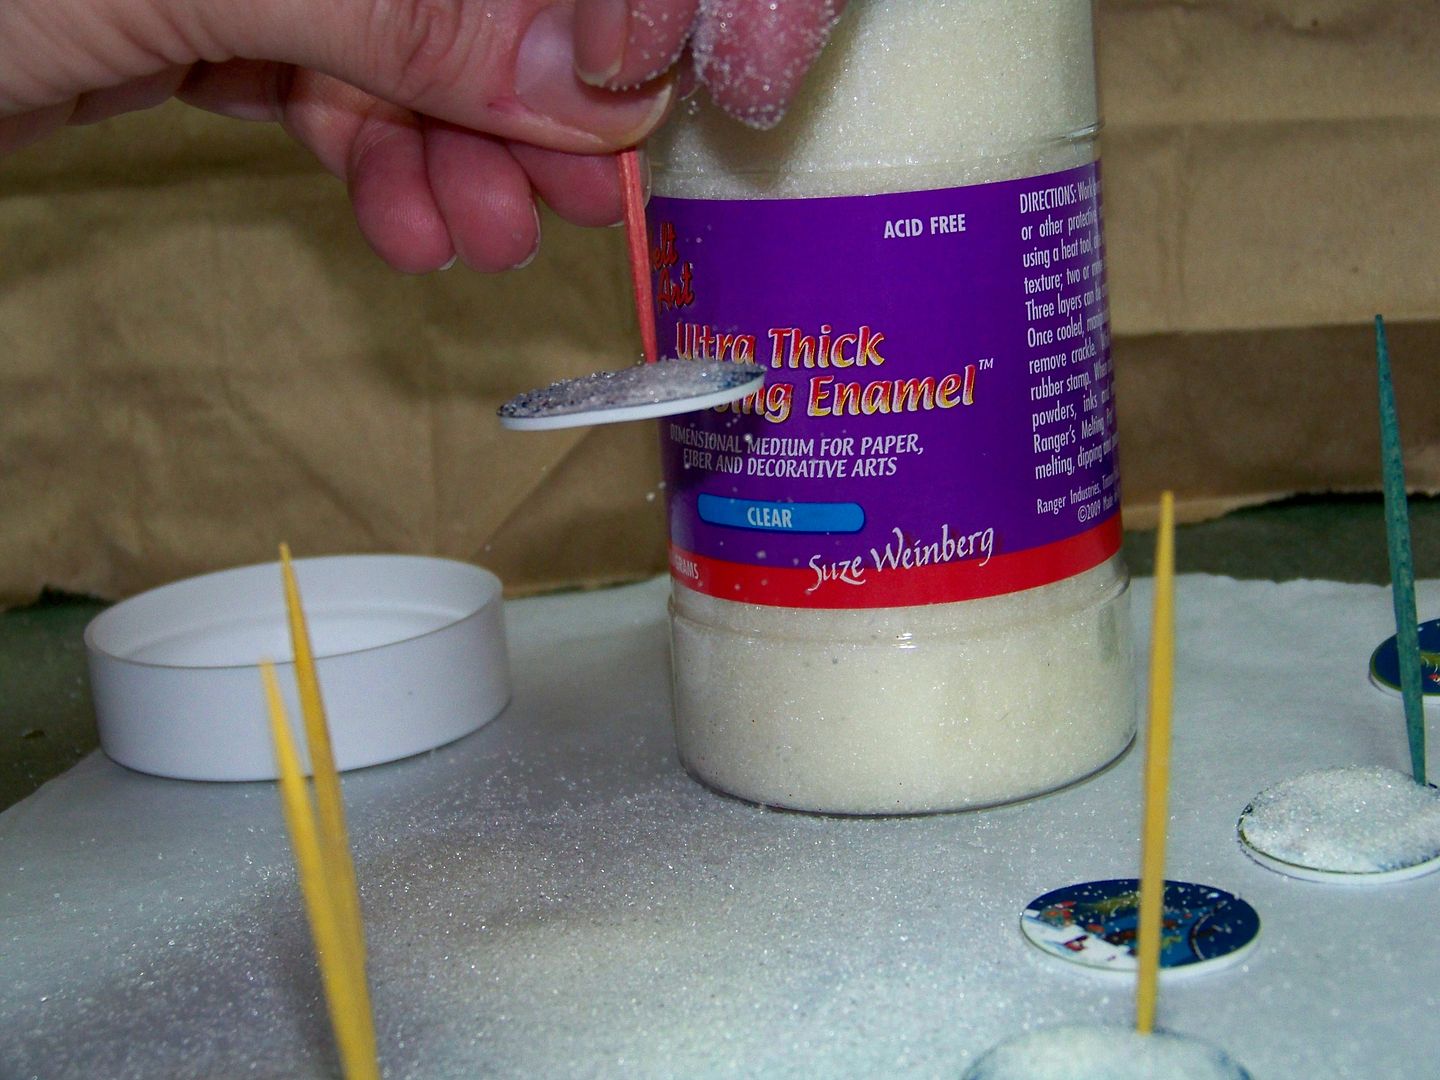
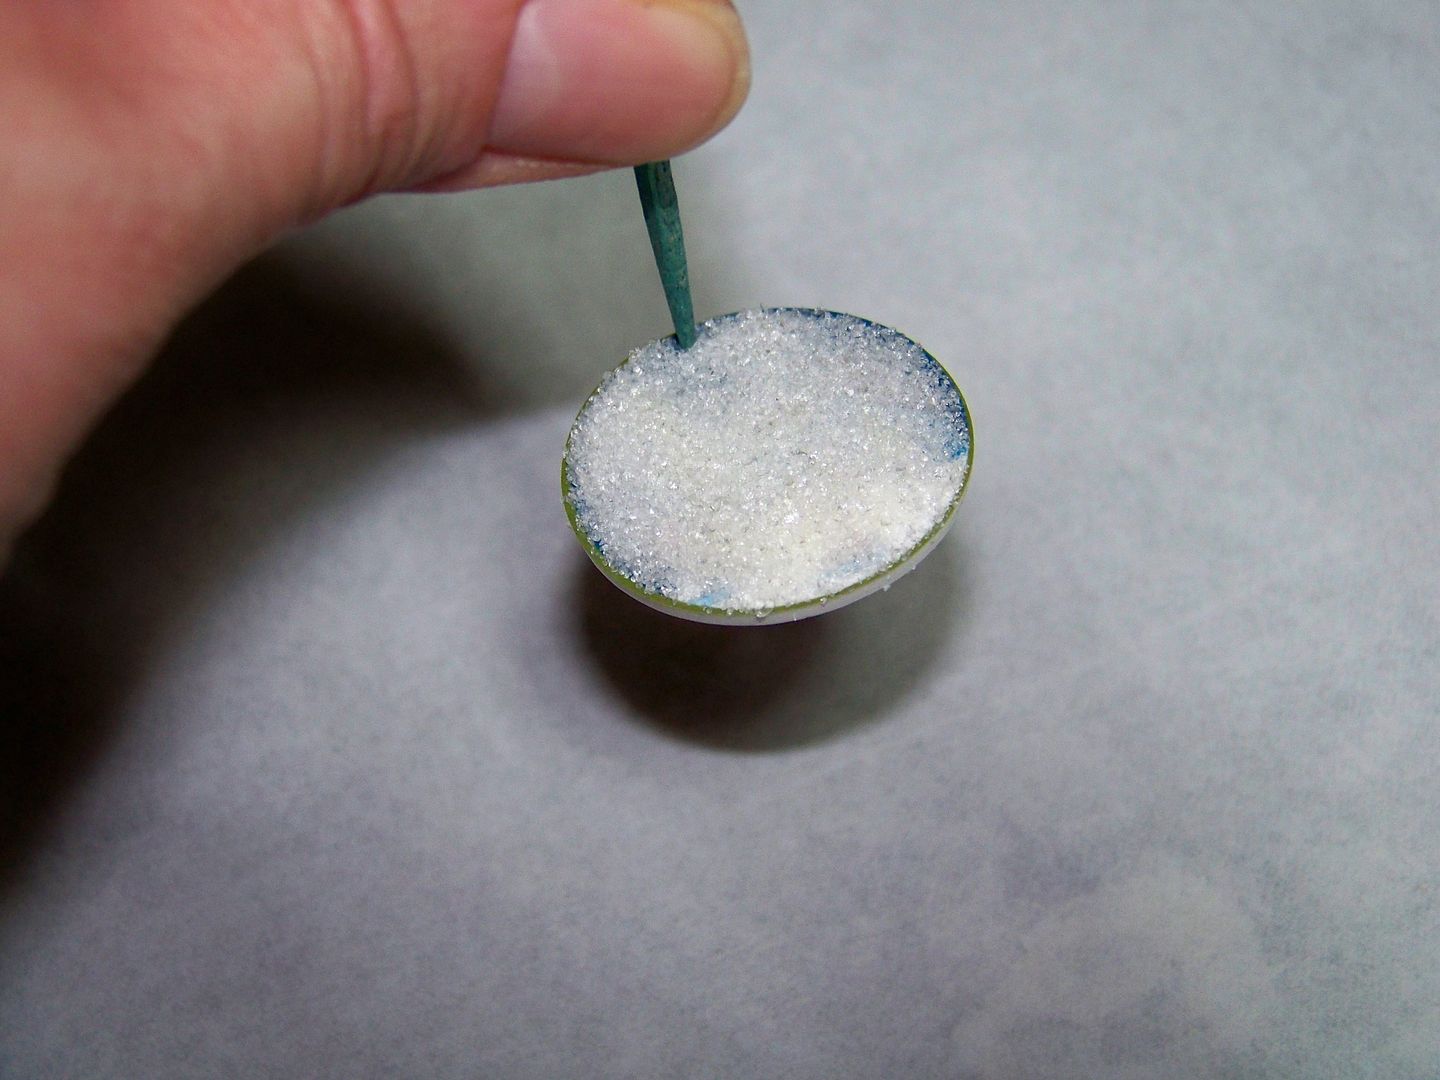
Because you cannot wet the surface of the charms, the Extra Thick Embossing Enamel that I was using flew everywhere when I tried to shoot it with a heat gun so I ended up popping them back in the oven.  I found that I could poke a round-tipped toothpick in the tiny hole of the charm and pile on a layer of the UTEE powder.  The toothpick served as a handle and kept the hole from getting clogged. 


I removed the toothpicks and  placed them back in the oven for 6 minutes (still at 300 degrees).

Once out of the oven but still hot, I moved them off of the parchment paper and onto a paper Chinette plate to cool.  (The charms come out of the oven with a gooey surface.  I accidentally flipped one upside down when removing it from the parchment paper.  This ruined the smooth, perfect surface.  To fix it, I simply placed it on a protected surface and used my heat gun to melt it again.  It smoothed itself out perfectly once again-- you can add more embossing powder or not.  I did this the next day so no worries.)


Glossy and so pretty!  I instantly knew that I would be re-visiting this technique to make sweater buttons this fall -- love the finish!

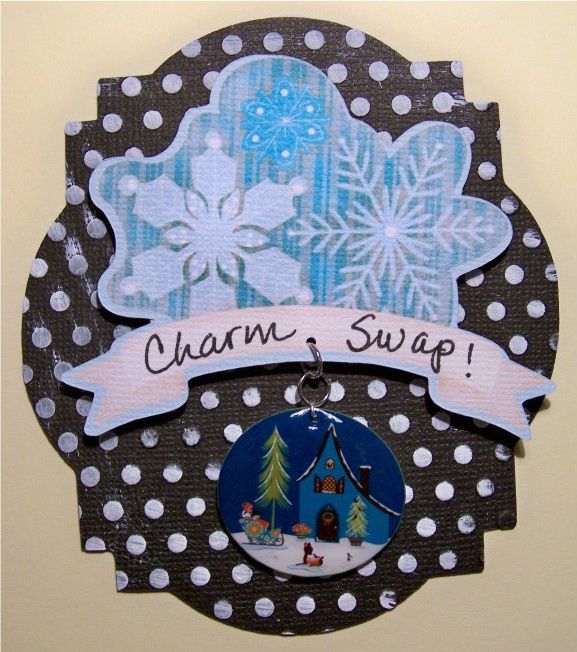
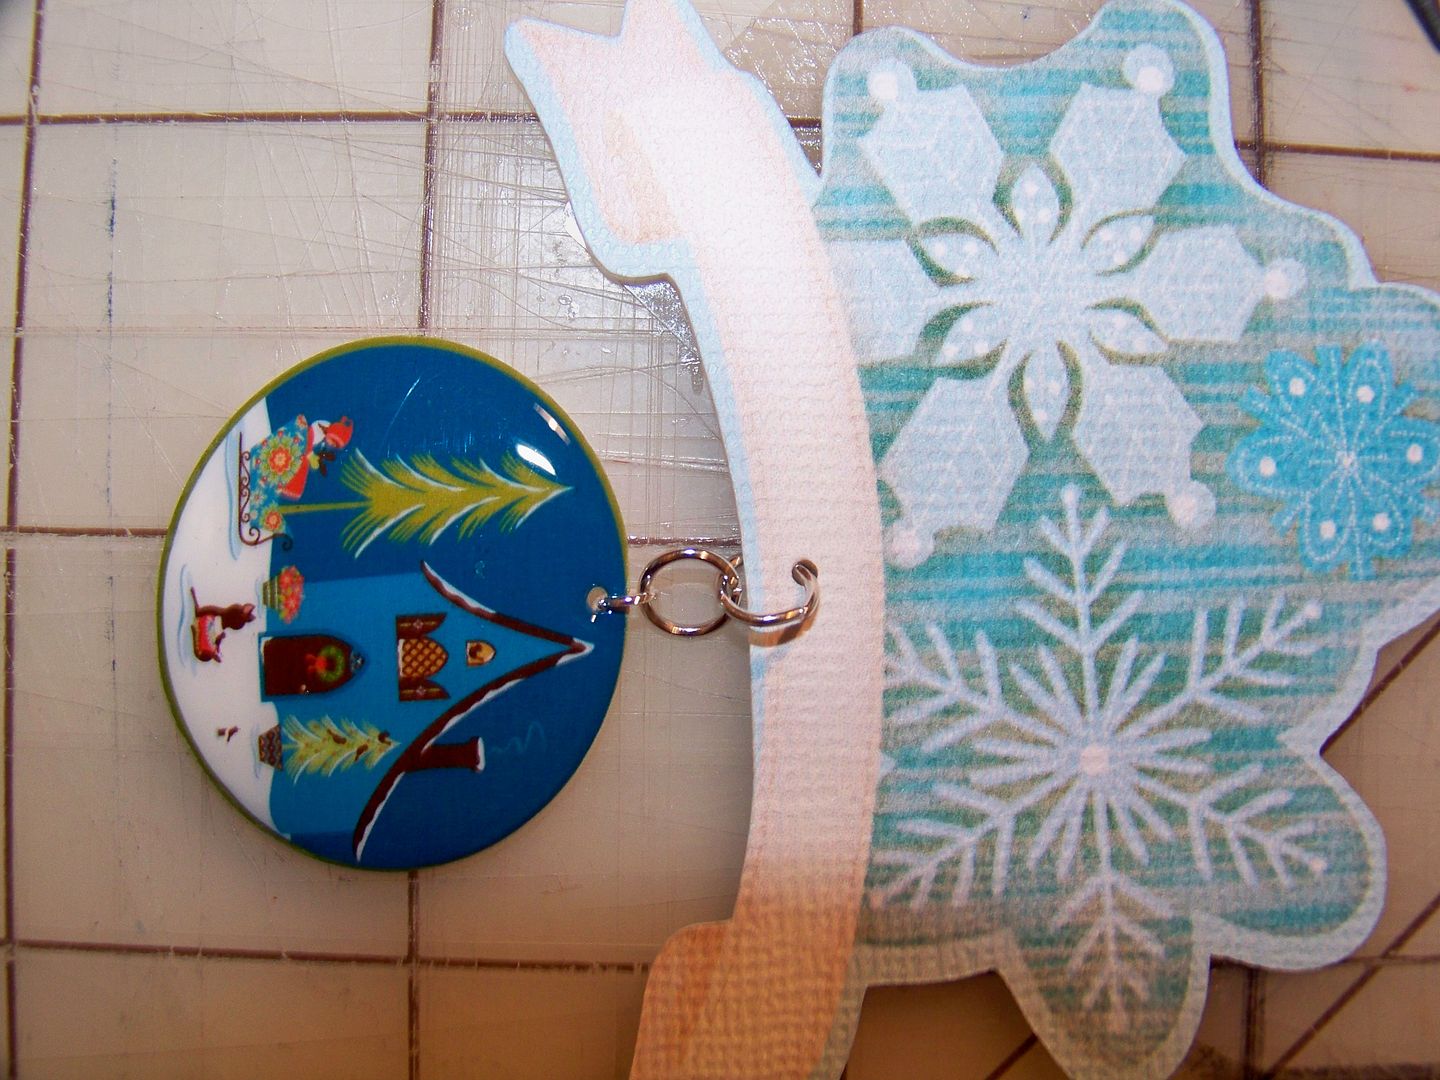
I used 4mm and 6mm jump rings on each and attached them to a snowflake banner cut from Enjoy the seasons cut and printed at relative size 2.4".  I reinforce the back of the banner with a foil sticker and then use the tiny Martha Stewart hole punch.


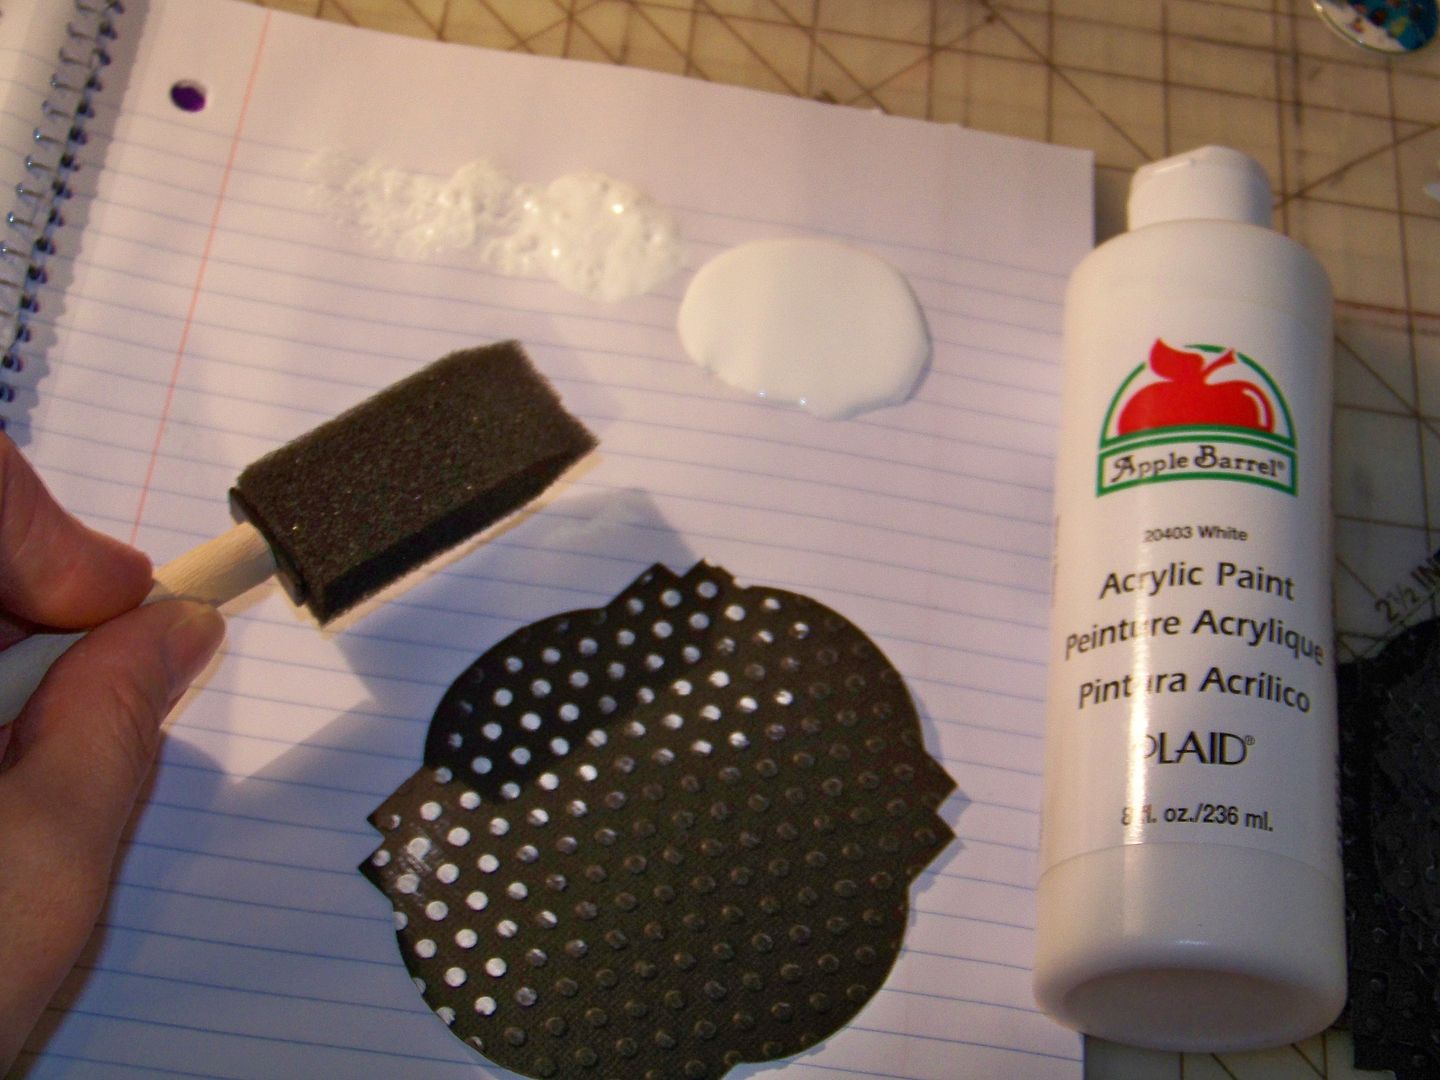
The card base is cut from Lacy Labels (#4) cut at 3.5" on the Imagine.  I used black card stock and then ran each through the Cuttlebug.  I used a dry sponge brush to apply white paint to the raised dots.  The snowflake banners with charms were attached to the cardstock base with pop dots.  I applied my calling card info to the back with double sided tape.

I packaged them in clear bags to protect the charms and they are ready to be mailed! 

Thank you for visiting my blog!  I love the potential of using Shrinky Dinks and the Cricut Imagine--- so many fun ideas coming to mind!

But wait! There's more! Click 'older posts' above!

But wait!  There's more!  Click 'older posts' above!