Showing posts with label Holiday - St. Patrick's Day. Show all posts

Thursday, March 14, 2013

St. Patty's Day Birthday Gift Bag

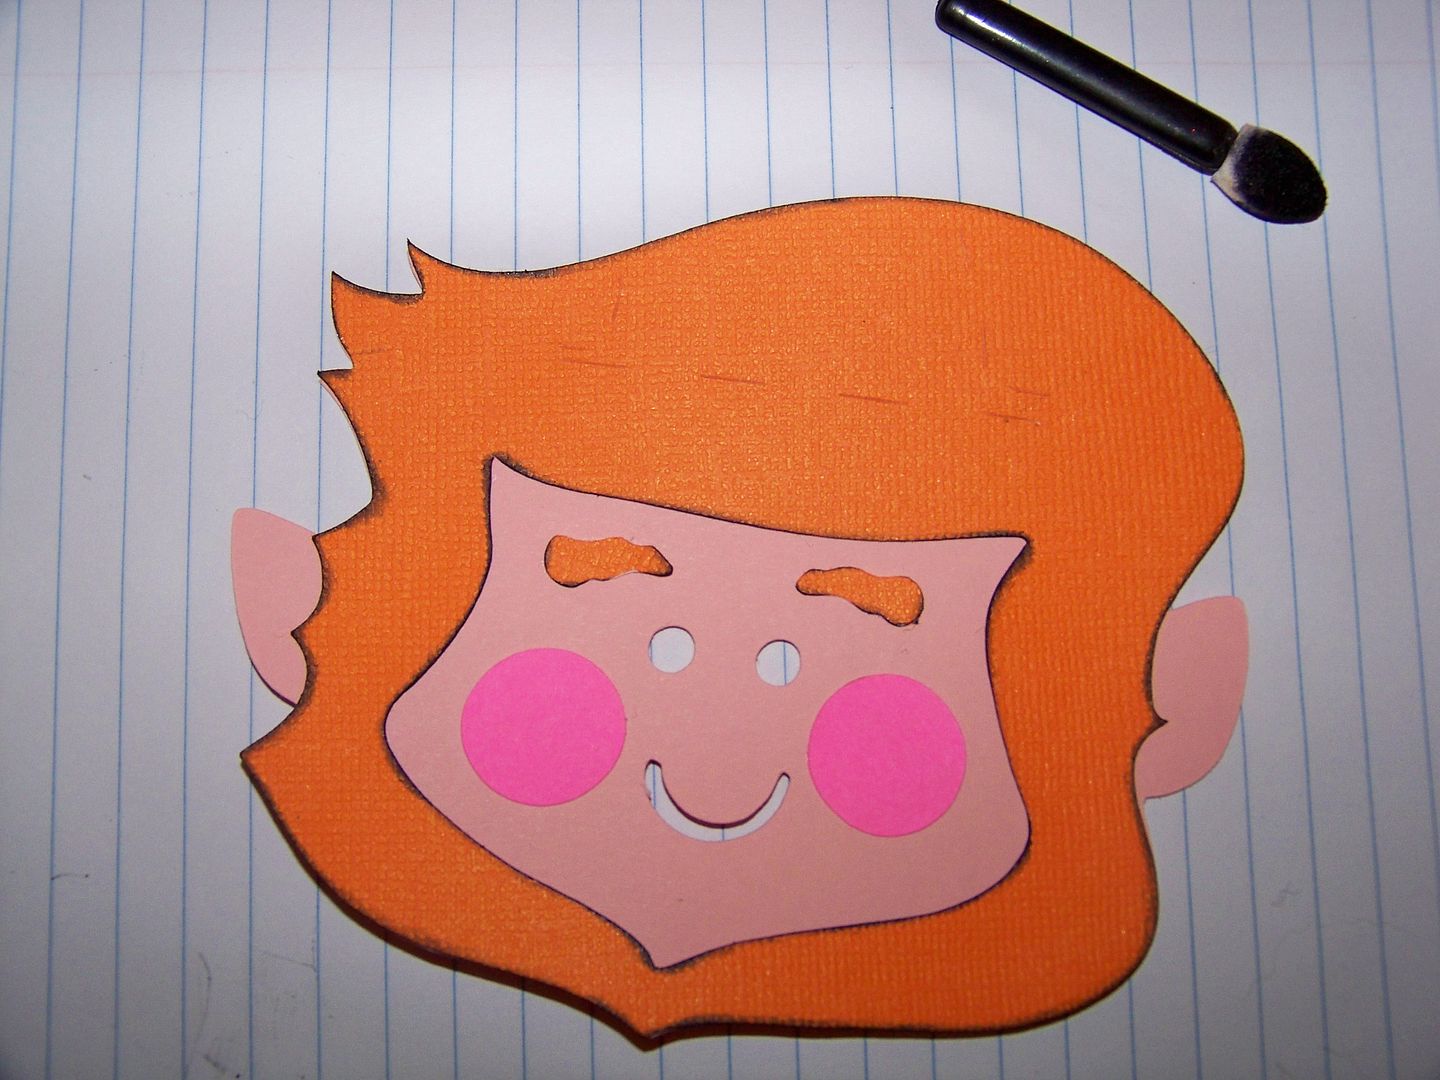
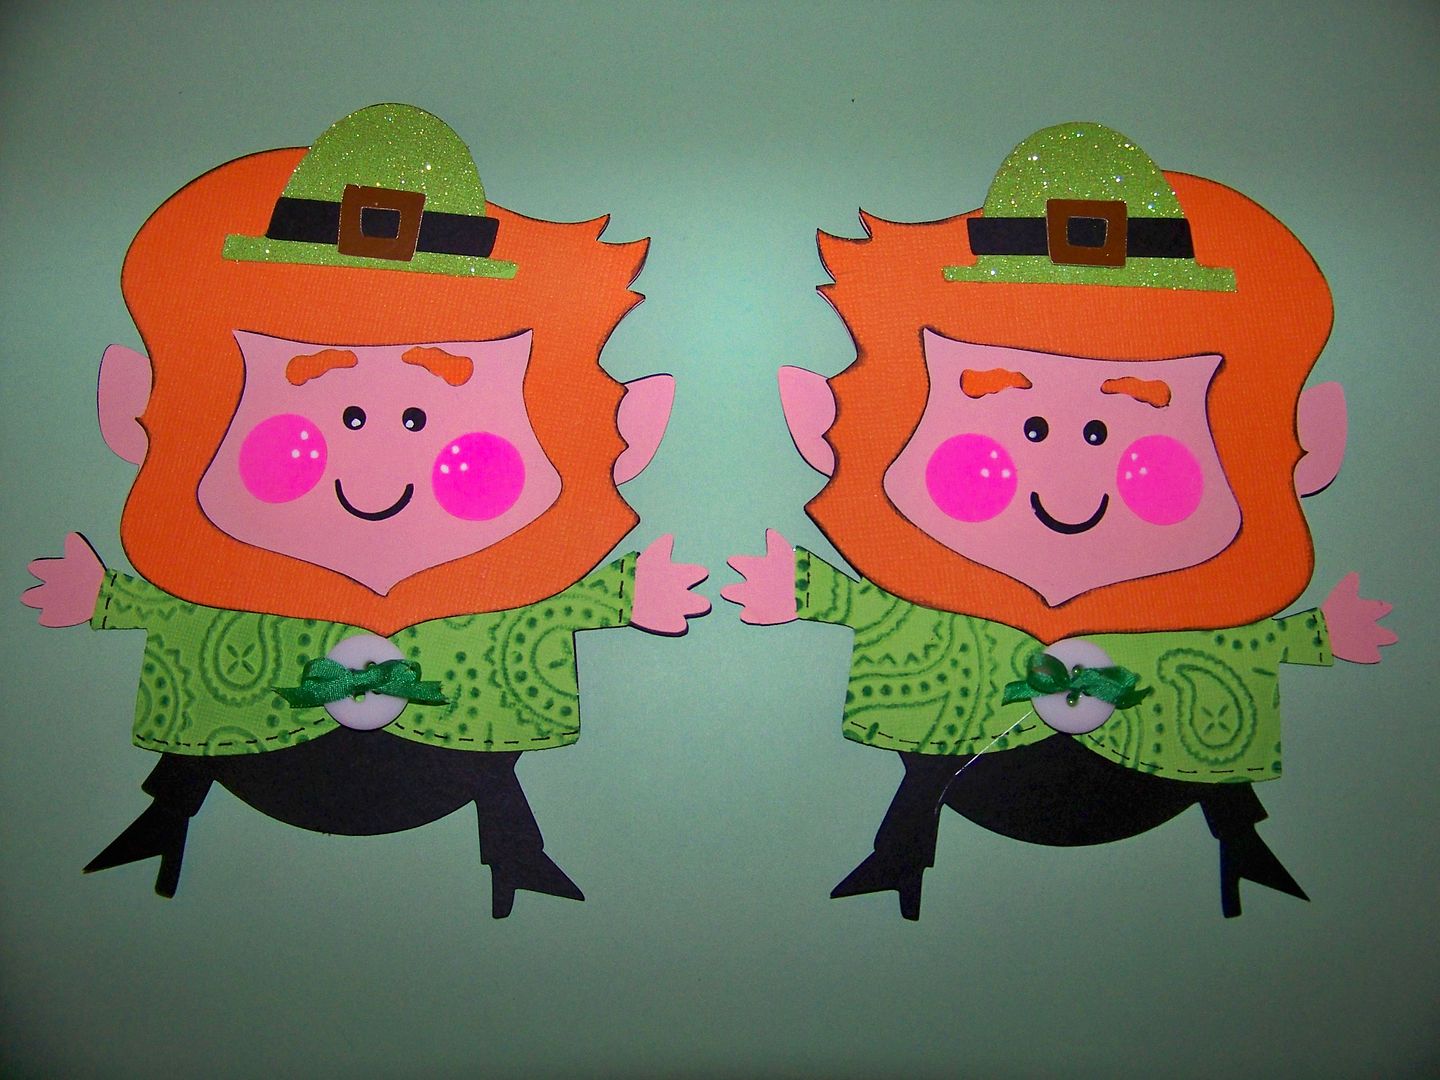
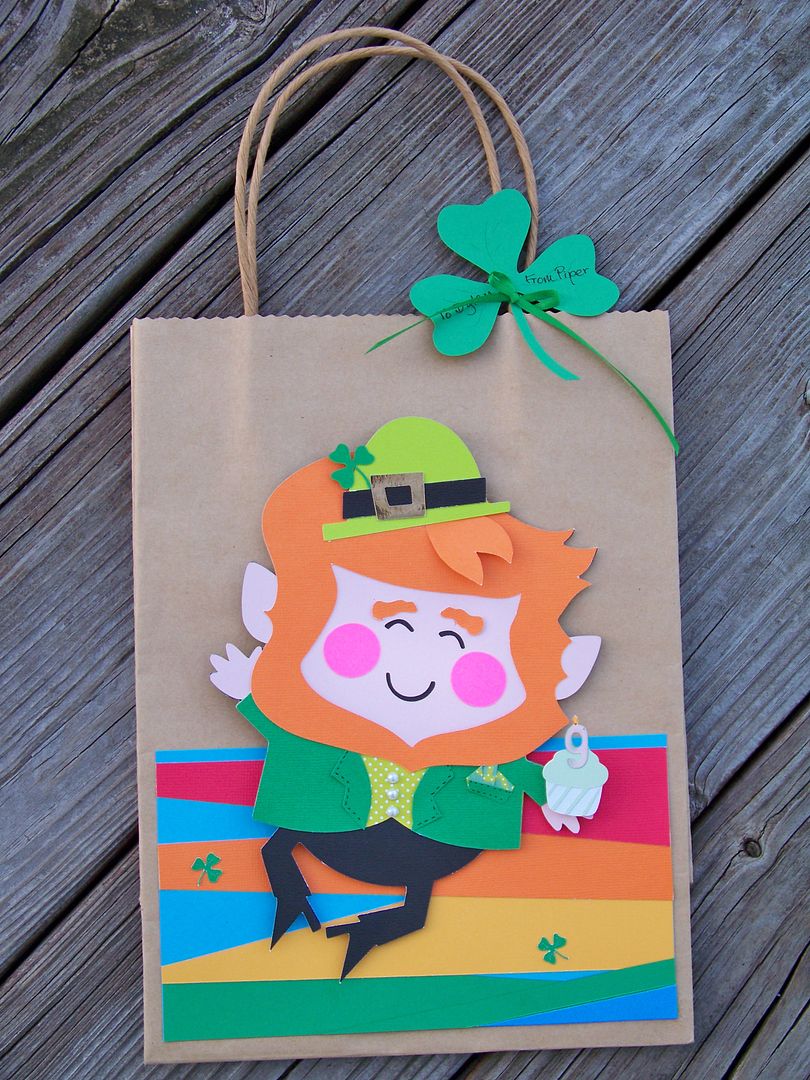
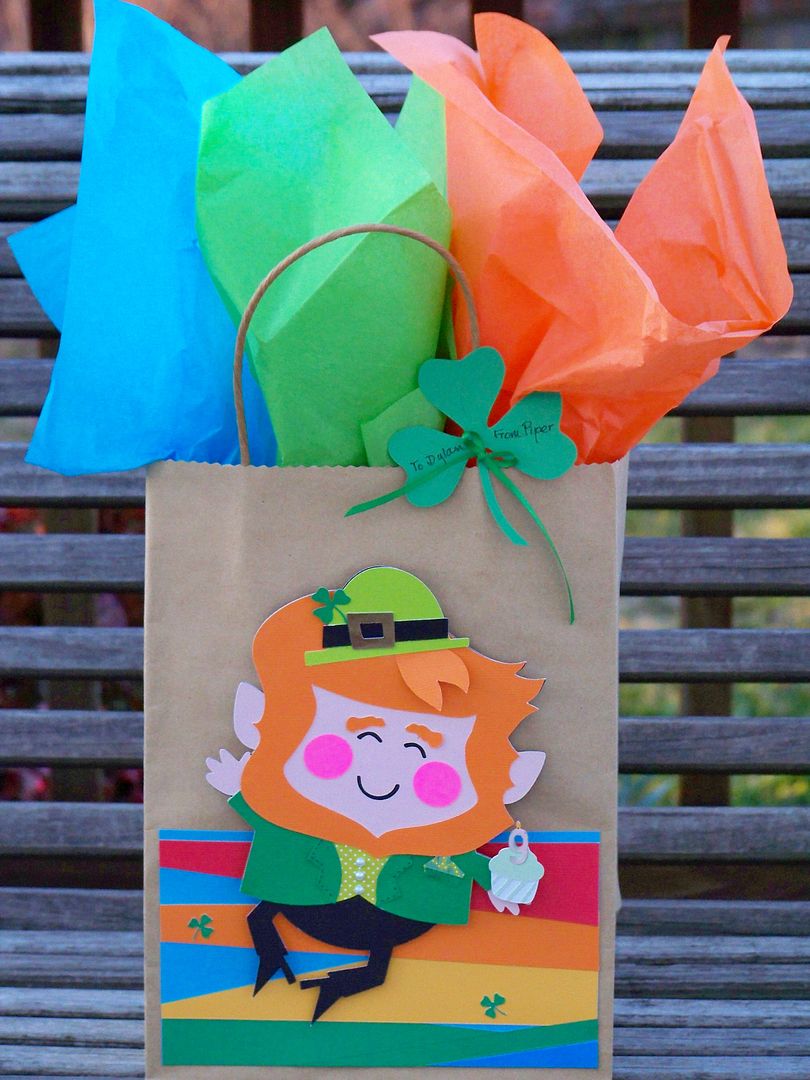
One of my daughter's little BFFs has a birthday on St. Patty's Day so I came up with a little gift bag for her with a birthday leprechaun.


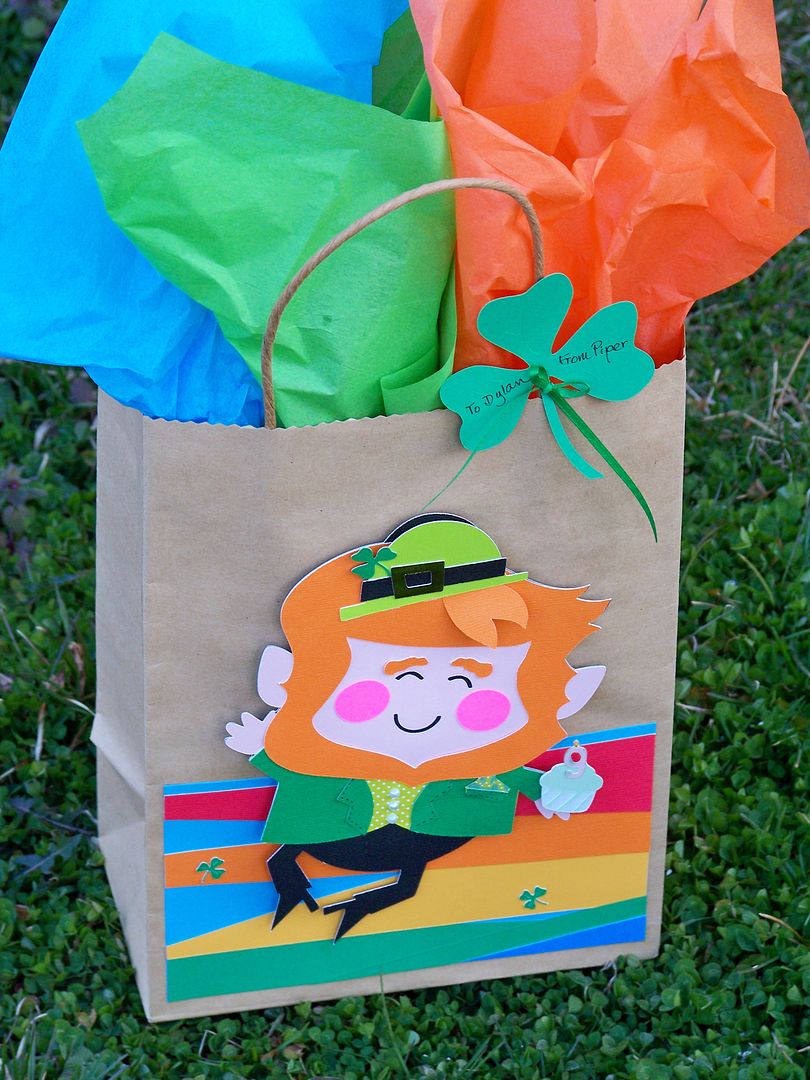
I keep on-hand 7-1/2" x 10-1/2" kraft paper gift bags-- that was my base.  (That is the measurement minus the handles.)  I cut the jumping leprechaun from Simply Charmed (page 32) at 7".


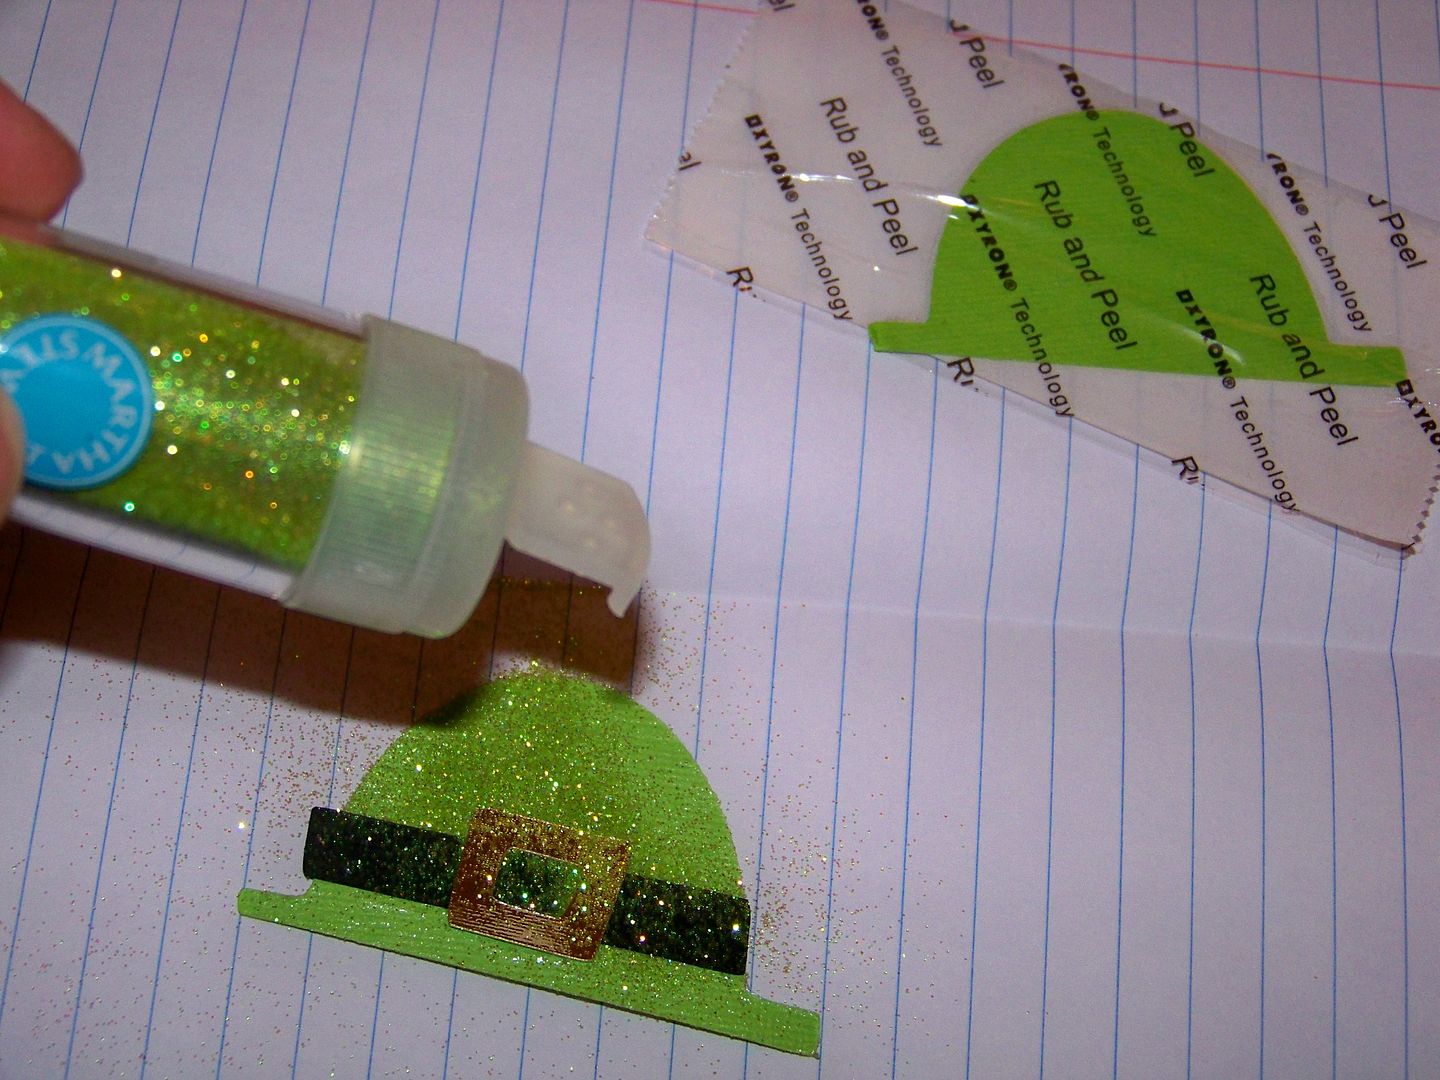
The thing with a big cut is that you kind of have to add extra details and pop up some elements to keep the die cut from flattening out.  For this little guy, I hand-cut an extra lock of hair.  I glued it flush on the 'scalp end' and popped it up with 1/8" pop dots on the 'curl end'.  I also popped up his little hat and added a shamrock to the hat band cut from A Child's Year (page 31), cut at 3/4".  I added a vest layer to his outfit but cutting two jackets and cutting one away so that I could layer them and see the second layer, like a vest.  I added adhesive pearls for vest buttons.  I hand-cut lapels for the top layer, the jacket, and added a breast pocket and pocket square.  


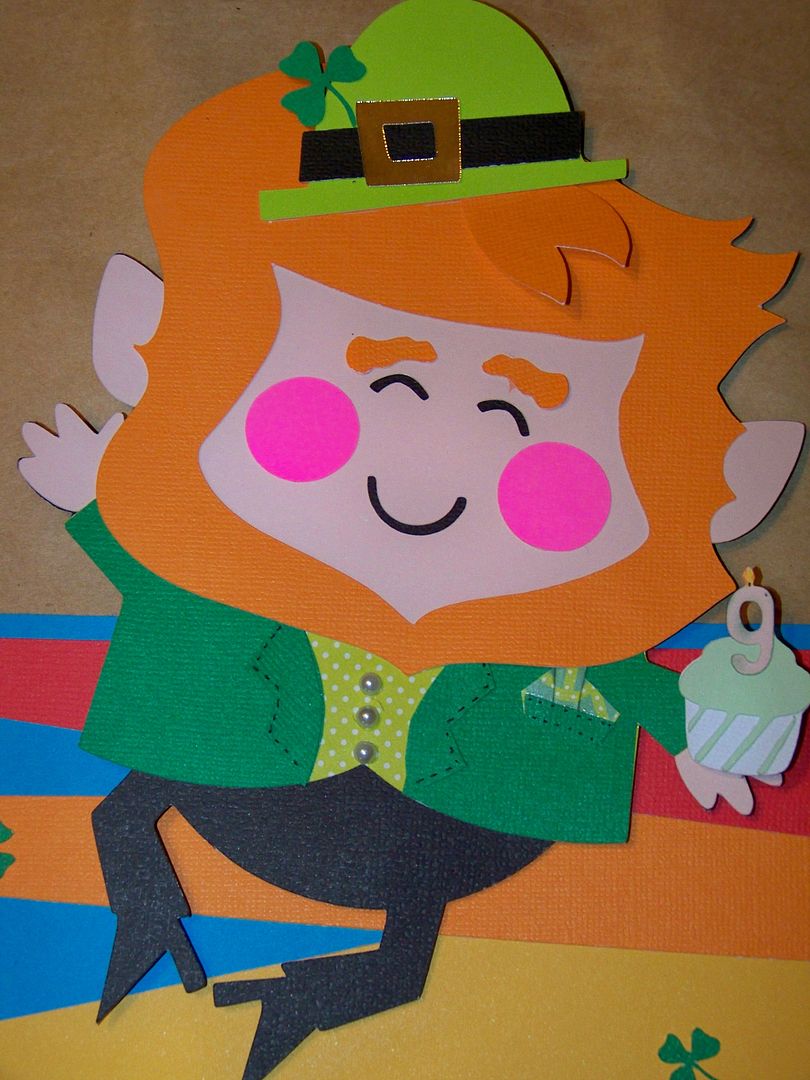
To make him a 'birthday' leprechaun, I cut a little cupcake from Something to Celebrate (page 22) at 1".  I only cut the first two layers since it was so tiny.  I cut a "9" candle from the same cart (page 30) at 3/4".  I hand-colored (with pencils) the flame and wick.

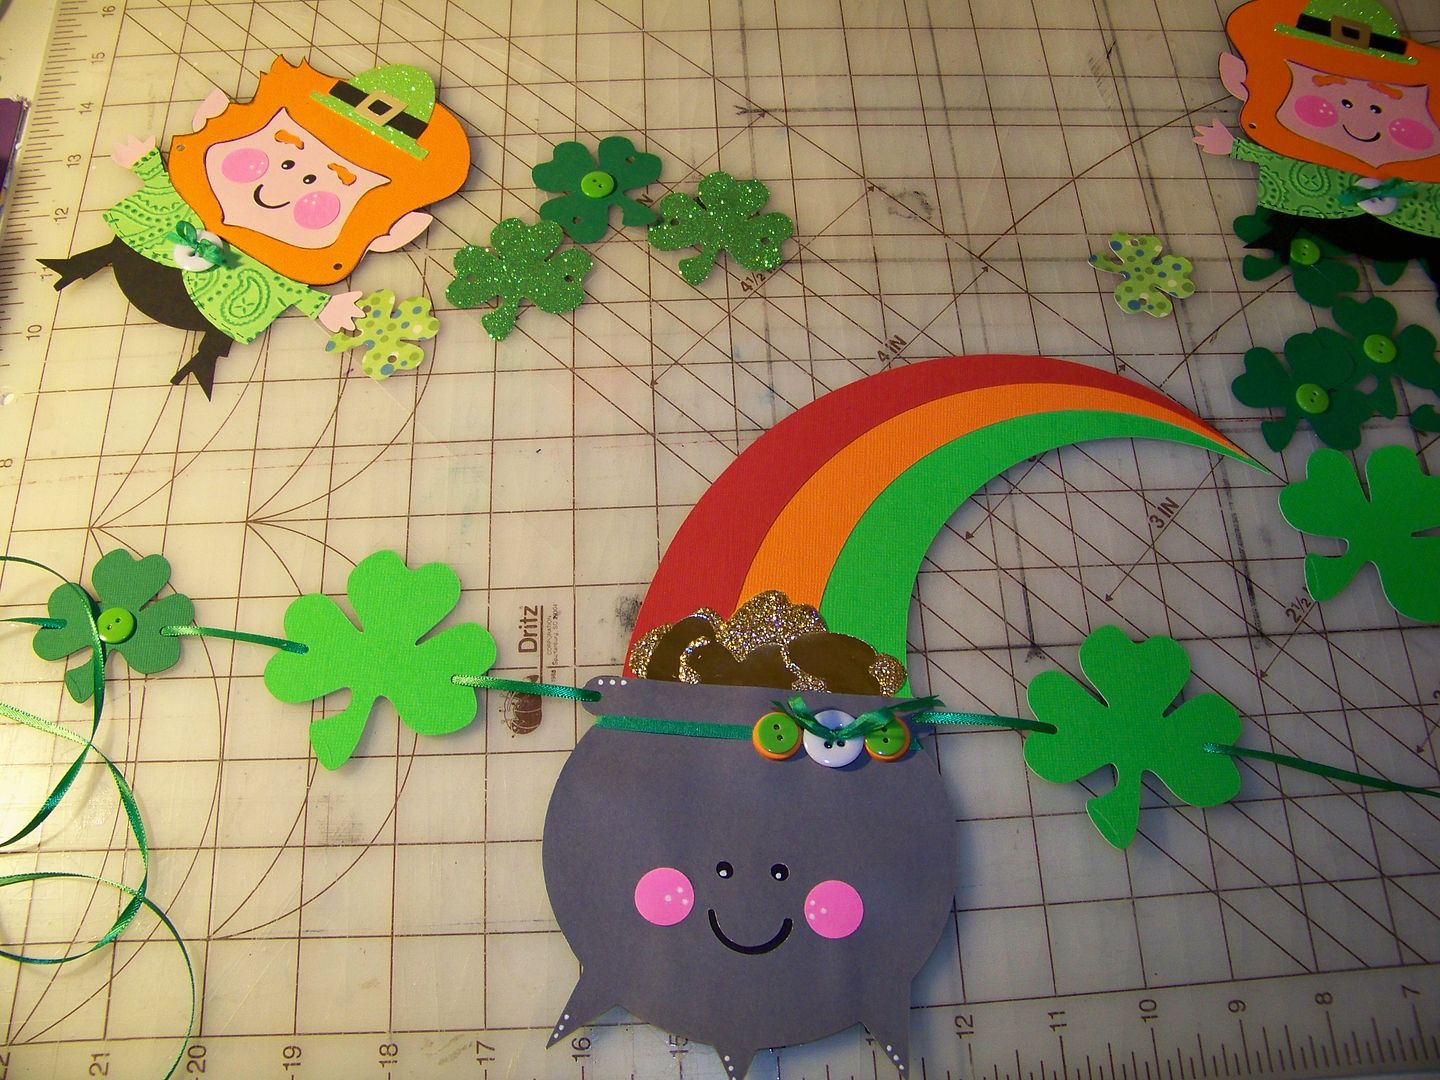
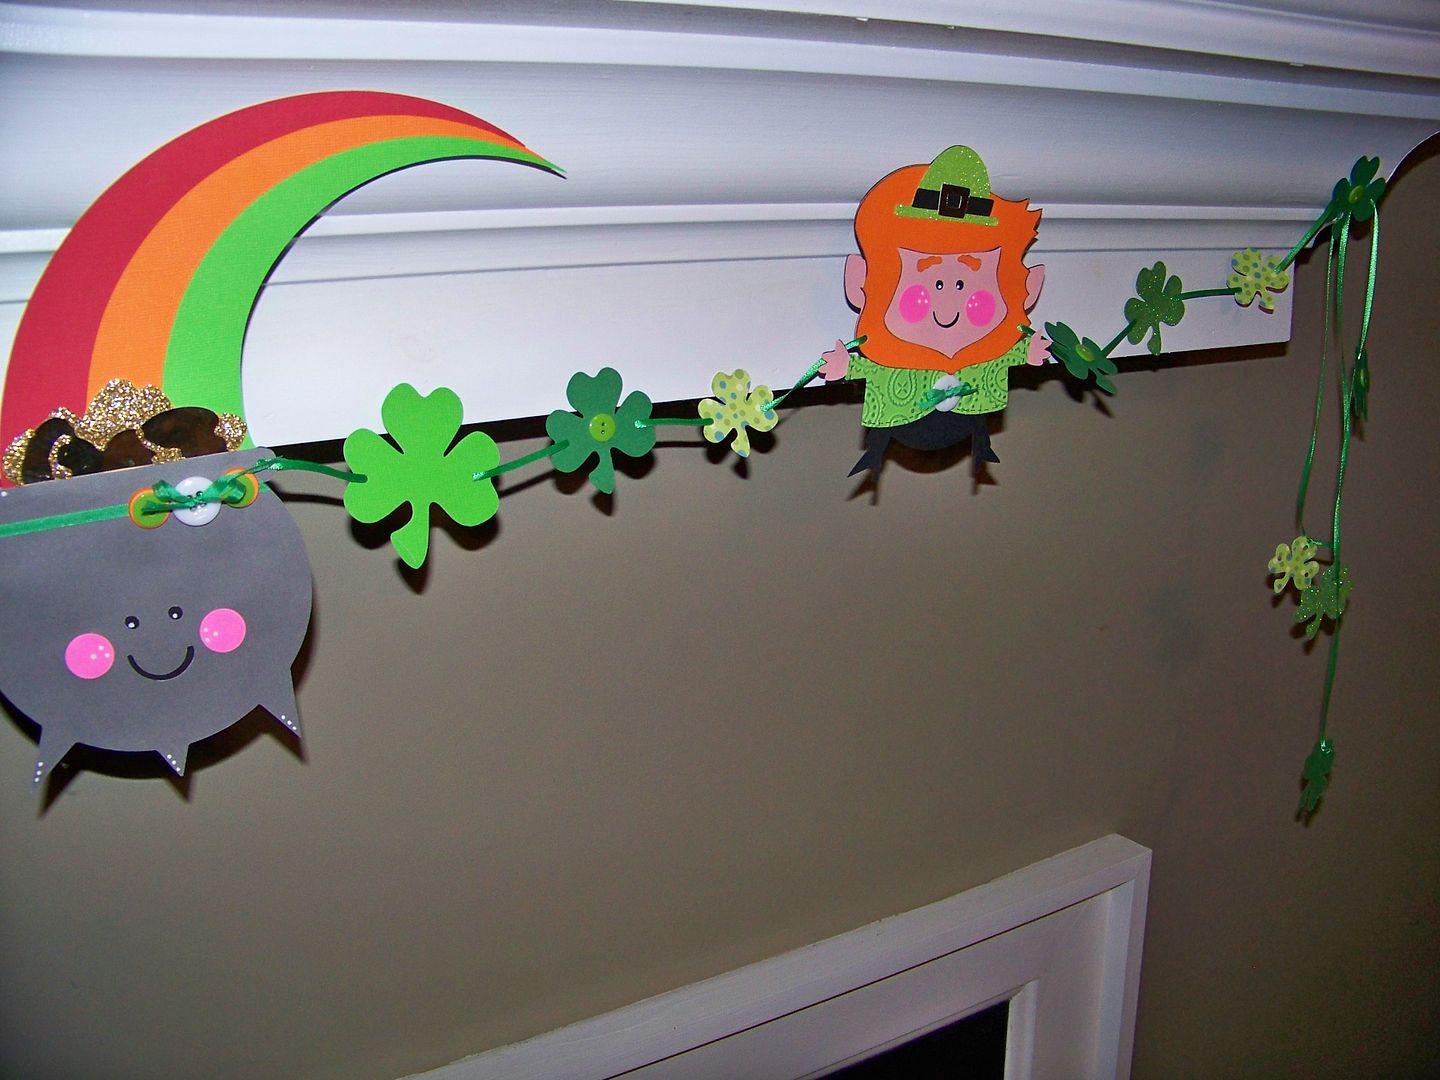
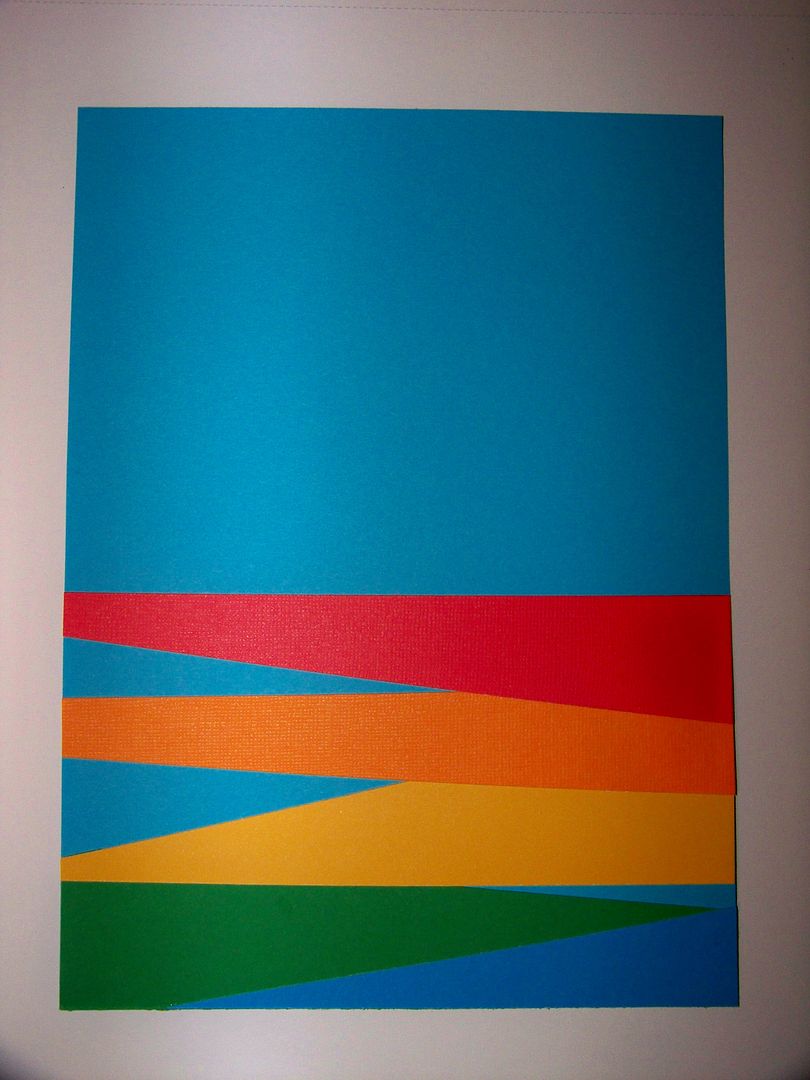
To give him a "place" to exist, I trimmer-cut rainbow-colored solids and layered them to create a ground and horizon line.  I placed a couple of tiny shamrocks, cut from A Child's Year at 1/2".  I popped the leprechaun up with 1/8" pop dots to lift him off the surface a bit.


Lastly, for a tag, I cut a last shamrock, also from A Child's Year, at 3-1/4", and tied it on with 1/8" ribbon.


Lately, I have taken a little inventory of my Cricut cartridges and, as you have also probably figured out, there are many repeating icons among them!  I used to 'need' all the cartridges and came pretty close to getting them all before last autumn.  The good thing about this economy, hopefully there is a silver lining, is that many of us have gotten a chance to re-prioritize and to be more creative!  So... if you don't have the cartridges listed above, you can find shamrocks on the following cartridges that you may have:

  • Create-A-Critter 2
  • Designer's Calendar
  • Elmo and Friends Holiday
  • Give A Hoot
  • Imagine More Cards
  • Celebrate with a Flourish
  • Paper Doll Dress Up
  • Phrases 
  • Spring Fever
  • Holiday Cards
You can find leprechauns on the following cartridges that you may have:
  • CCR Exclusive:  St. Patrick's Day
  • Teddy Bear Parade
  • Paper Doll Dress Up
A cupcake image can be found on dozens of cartridges.  This is just a sampling:
  • A Child's Year
  • American Alphabet
  • Best Images of 2006 and 2009
  • Birthday Bash
  • Create-A-Critter 1 and 2
  • Storks Delivery
  • Divine Wedding
  • Doodlecharms
  • Elmo's Party
  • Every Day Paper Dolls
  • Hello Kitty Greetings... and the list goes on and on!!!!
Numbers can be found on any cartridge with font of course.


 Thank you for checking my post today!  You can always find my blog on: 


To see many of my other paper projects, check out My Project Gallery (click here).

To see my previous St. Patrick's Day projects, click here.

Thursday, March 17, 2011

Happy Saint Patrick's Day!

 
My daughter's class is having a Saint Patrick's Day party so I made some treats.  I  have been wanting to try lollipop flowers from AllisonF's Goody Bag Diva blog  since the time she posted her daughter's party favors during Princess Week.  You just have to see 'em!  Allison's flowers are gorgeous with lots of layers, but I thought a little shamrock instead of the flower layers would be fun for this project.  I bought a couple of bags of Charms Blow Pops (mostly for the word 'charms').  I used the shamrock on Designer's Calendar (at 3" autofill will cut twelve on 12x12 paper or six on 8-1/2x11 paper).  The small hole punch on the CropADile Big Bite was the perfect size to allow the sticks to be pulled through the shamrock.
I wanted a cute way for Piper to take them to school for the party.  I created a little grassy box using my new, fabulous Martha Stewart Fringe Scissors (how does that woman know what I want when I don't even know?), a  3"x12" styrofoam block, and the Paper Doll Dress Up Cricut cartridge.
For the grass, I cut three 4"x12" strips and fringed on one side.  The picket fence was cut at 3".  I used sewing pins to hold everything on the block temporarily.  Mini metal brads and glue became the permanent solution!
The shamrock pops where crowded in together.

I also was given sugar cookie duty for the party.  I have a favorite recipe that I use for all kid holidays.  This is a basic iced sugar cookie that is pressed into colored sugars that have been placed in a pattern.

SUGAR COOKIES for ST. PATRICK'S DAY (click here for printable version)
3 cups all-purpose flour
1 teaspoon baking soda
1/8 teaspoon salt
1 cup sugar
1 stick Butter Flavor Crisco
2 tablespoons water
2 eggs
1 teaspoon vanilla
2 cans Whipped Butter Cream icing (yes, this is cheating but just be sure to get one that is both whipped and buttercream for best flavor!)
Wilton leaf green gel food coloring (in little pots)
assorted sprinkles and colored sugars
Combine flour, soda, and salt.  Set aside.
In a large bowl, beat sugar, Crisco, and water until light and fluffy.  Beat in eggs.  Add vanilla.  Gradually add flour mixture, forming a soft dough.  Add about 1/2 teaspoon food coloring, adjusting to get the green you desire.  Mix until the coloring is evenly distributed throughout.
Shape dough, wrap with plastic, and chill for two hours.
Preheat oven to 375°.  Spray baking sheets with Pam for Baking.

Roll out dough on floured surface to 1/8"  (I like mine more like 1/4" but the cookies will spread and their form may distort which will only matter for cookies other than circles, but they will be softer).  Cut out shapes (I used my grandma's 2-1/2" biscuit cutter for a round cookie) and place on baking sheet.  Bake 8-10 minutes.  Let stand a few minutes before transferring to cooling rack.  Cool completely.
Mix about 1/4 teaspoon of food coloring into each can of icing.  Adjust to get the color you like.  Mix completely!  Ice cooled cookies.  Sprinkle colored sugars and sprinkles onto a plate.  I like to make a striped pattern. 
Press iced side of cookie into sugars.  Repeat with all cookies.  My daughter loves these!  This recipe (minus the food coloring) works great at Easter too, using an oval cookie cutter and pastel sugars.

One last thing:  I wanted to share this sweet little cartoon about Saint Patrick that my husband found.  It is an Oscar-nominated short and it is adorable!  Click here to go watch it!

Happy Saint Patrick's Day!

Sunday, March 13, 2011

St. Patrick's Day is an enchanted time...


St. Patrick's Day is an enchanted time - a day to begin transforming winter's dreams into summer's magic.  ~Adrienne Cook
This little card for my daughter was created using the guidelines from the Weekly Circle Challenge, to create a project with a monochromatic color scheme...and a touch of gold.  Aside from the pink of my little March girl's skin, the rest of the project is every shade of green I had in my scrap drawer.  Even the bottom layer for her hair and eyes is cut from a dark midnight green instead of the black I would usually choose. 
Using my Cricut, I started with a character from Rock Princess, cut at 5".  I gathered a bit of lime green tulle and attached it under her skirt.
I hand-stitched the layers together to keep her skirt flat and added a bit of ribbon to begin adding layers for her clothing.
Cutting her arms apart and replacing them allows for a change in her gesture. 
A few extra ribbon details, brads, and hand-details complete the figure.  The shamrock in her hands is from A Child's Year, cut at 3/4". 

I found a sweet sentiment and printed it directly onto my cardstock.  Trimming and using the wonderful Martha Stewart tatting edge punch gave me a base for the figure.  Using green ribbons from my stash and more shamrocks cut at 1" (for the bow detail) and 1/2" for all others (covering a couple in gold glitter glue), I embellished this layer after the popped-up figure was placed. 
The gold glitter glue works well with the mint green background.
This layer was applied to bright green cardstock base with ATG tape.
I think my little Irish girl, Piper, will like it.

This weekend started the St. Patty's Day celebrations.  In our town, we have a HUGE parade referred to as Hooley in the Highlands.  Given my husband's love of all things "St. Patrick," we were there!  
Do you think Piper likes beads and candy or what!?!


Obviously, you don't have to be fit to be in a head-to-toe lycra suit on this float!

We have a great Irish restaurant right in the heart of it all, but most locals (well, the ones who haven't started drinking before the parade is over) head away ---past the closed-off streets and hightail-it to a nearby neighborhood with its own great Irish Restaurant, The Irish Rover.  Here it is Lent, a time of self-denial and I found myself with a huge serving of Smoked Salmon and Potato Gratin after the parade.  Well... it was fabulous, as always.  Our local newspaper has published the recipe and you can find it here

What a fun weekend!  I am hoping that you are enjoying this time as much as my family is!


Sunday, March 6, 2011

Saint Patrick's Day Garland to Appease the Giant Leprechaun


My husband absolutely loves St. Patrick's Day!  Last year, he went over the edge and dressed up like a leprechaun, meeting my daughter at the door after school.  He had stories of a real leprechaun visiting him earlier in the day.  He had a scavenger hunt for gifts, complete with clues for my daughter.  He set the table with shamrock-covered plates, provided each of us a light up green ring, and had pizza for us.  The pizza, while not very Irish, was shocking because this is not the kind of guy to fix or arrange for dinner for the fam. 

This year, he bought a shamrock light set, a plaque, stickers, cards to send, and asked me to decorate with that stuff.  Not an easy order considering what it was!  Anyway, to make him happy, and to participate in the Sunday Challenge: Bling with Buttons, I created a little garland.

I used Simply Charmed to cut two 6" leprechauns (one is flipped).  I embossed their jackets and rubbed lightly with a stamp pad to show off the design.
I inked the hair, beard, and eyebrows.
I ran their hats through the Xyron and then placed the hat buckle and band before sprinkling with Martha Stewart glitter over the adhesive-covered hat.   

I also cut the rainbow with a pot of gold from the same cart, also at 6".  I accented it with gold glitter glue and buttons.  I cut shamrocks from Paper Doll Dress Up at 1-1/2", 2", and 2-3/4".  I used a CropADile to hole punch all the shapes and laced the pieces together with 1/16" satin ribbon.
I added a few extra shamrocks to dangle on each end.  The garland was secured with mounting putty.
My daughter really is having fun with this crazy stuff, which makes it all worth the effort.  Now... shamrock lights... that is going to take a little thought!

But wait! There's more! Click 'older posts' above!

But wait!  There's more!  Click 'older posts' above!