Showing posts with label sewing. Show all posts

Sunday, August 28, 2016

Busy Summer Stitching

Our family business kicks it up several notches in the summer so my poor blog and fun crafting suffers greatly during this time of year.  I did get a few projects done, mostly for fun and one for necessity.  I wanted to share what I have squeezed into the summer work schedule.

I repaired my 25-year-old bath robe...yes, I am just that silly...but I love that robe.  After years of laundering (and I used to be a bleach-user in my twenties) the wear on the robe included thread-bare areas and totally worn out and missing areas.  I am pretty frugal but mostly, I really wanted a very absorbent robe.  For the past few Christmases, I requested a terry robe and received polar fleece, minky, and flannel robes.  (Clearly, I need to educate the family on fabric types).  I gave up on them and started looking on line and in stores but I have noticed one thing:  vendors like to call things 'terry' that aren't.  Plush robes are NOT absorbent; they are warm and fuzzy but that is not what I wanted. I looked at fabric, thinking I might just make one, since I have made lots of robes and they are really easy.  Even with 50% off fabric coupons, however, a robe was looking to cost more than $50 to make it myself and that just seemed silly since I had a robe I loved.  The perfect ones I found were over $200.  So, instead I bought a hand towel and used it to replace the parts of the robe that were worn out.


I drafted patterns from the robe itself just by tracing and sewed it all in place.  It took almost no time.  I finished it by adding a monogram.  This is the bamboo monogram from Apex.

For a little stress relief, I worked on dressing up some pillow cases.  


The frame is from the Monogram Frames and Borders CD that was in the Anita's Attic sale.  I really love the texture and attention to detail in the digitizing.  This is an example of why I have gone hog wild on Anita Goodesign since I discovered them this year:  really special designs unlike the other stuff in my obsessed-with-embroidery-files collection.


The monogram is Carson from Itch2Stitch.

I did these using a repositional 5x12 hoop with Embrilliance software.  


The pillow cases were one of the unopened packages at the back of my grandmother's linen closet. She has been gone for a while now but embellishing something from her house just makes me happy. I have no idea how long she had these or why she never used them, but the price tag says 97¢ and the store on the tag closed in our city in the late 70s (or early 80s?)  It is going to take a few washings to get the creases out because my steam press couldn't do it.  Vintage pillow cases are one of those things I like to collect so this is sort of in line with that even though the embroidery is new.   


 My current wish on my project board is a purse set with matching accessories.  This is the first accessory:  an eyeglass case.  After trying a pattern that was a total pain, I decided to make my own pattern.  This includes a zipper top and an extra pocket to hold my readers.  The monogram is Elegant Scroll from Itch2Stitch.

I enjoyed doing this so much that I decided to try another and work out some things I wished were a little different on the first one.


The monogram on this one was Apex Curlz Fun Circle font.  I quilted the floral with my sewing machine, but I let my embroidery machine and a block from the Anita Goodesign Quilting 123 collection quilt the strawberry fabric.  I enjoyed these little cases so much!  I have a tutorial coming soon.

Links from this post:

The sewing was done on a Bernina 1230.  Feet used were the #0,  #37 (quarter inch foot), walking foot, and a generic cording foot.  Embroidery was done on a Brother 770PE and Embrilliance embroidery software.  

Thanks for checking my blog post today.  To see many of my other embroidery projects and resource info, check out my Embroidery page (click here).  My paper crafts can be found in my Paper Gallery (click here).  I am looking forward to getting back to more regular sewing and crafting in a couple of months when work slows down.  I hope you are loving your summer!

Saturday, January 2, 2016

Digitizing Sewing Pattern Pieces

Happy New Year to you!  This year, no resolutions for me but there are things I want to work on, and one of them is digitizing.


I always wanted an embroidery machine to enhance my sewing, but up until now, it had a life of its own as I learned to use it with blanks.  Today, I worked on a project that I wanted to do for Christmas but time ran out for it.  I digitized a pattern piece for a bag: corners that are both functional and decorative.  It is something that was supposed to be applied like an applique with satin stitching.  The pattern author intended that a regular sewing machine be used, but I like the absolutely perfect satin stitches that my embroidery machine does better and thought this would be a great project to try out my idea of digitizing pieces from sewing patterns.

There are probably better ways to do the digitizing that I describe below, but I am really still learning and just jumping in to do things with what I have figured out. Apologies to any seasoned digitizers who find themselves screaming at the computer that I am doing it wrong!

I started with Simplicity 1129.  It is a child's sleepover set that has so many cute pieces, but it was the overnight bag that got me!  (Joann Fabrics has crazy pattern sales from time-to-time.  This was purchased during their $1 sale.  I keep my eye out for those!)


First, I found the pattern piece and scanned it in my computer so I could put it into my software.  I measured the actual pattern piece so that I could size it later in the program.  It is 4" across, going through the small dot at the "V".


I used Embrilliance Stitch Artist.  Stitch Artist is a digitizing program.  There are three levels to Stitch Artist.  This uses features from Level 1.  I opened the program and clicked on the image button to bring in the scanned image onto the virtual hoop.  This is just a picture that will be used to trace to get the shape and size I need.  I grabbed a handlebar to make the size the very same as the pattern piece.  I found it easiest to do this project using the grid in inches.


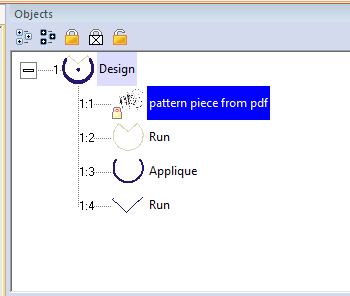
I wanted to first make a placement guide so I would know where to put my fabric bag front and back pieces on the hoop.  I used the Draw with Points button to trace the image.  I used the Open/Close Outline to close the shape.  Then I selected the Run button to make it a stitched line.  I made it two-pass.


I can see in the Objects Pane my image that I traced and my run.


Next, I wanted to make the applique.  I only wanted satin stitching outside the seam allowance.  (Putting it inside the seam allowance would add bulk unnecessarily). I did a second trace starting from the stitch line printed on the pattern and moved all the away around the image to end at the stitch line on the other side.


To turn my outline into stitching, I clicked the applique button.


It put the applique stitching on the outside of the shape.  I found the Create button on the toolbar and selected Outline, then Reverse Points.  That moved my stitching to the inside of the circle.  I selected the satin stitch.

Next, I wanted to make a tailor tack mark.  I did the same trace by drawing with points and then turning it into a run.


I no longer needed the scanned picture so I deleted it by selecting it on the Objects pane and clicking delete on my keyboard.


And that left me with my digitized stitching lines.


I saved it and printed it out.


I could then place the actual pattern piece over it and see that it matched in size.  I went on and created the monogram I would be using on the front of the bag.  I used Embrilliance Essentials to do the monogram.  Essentials is a separate program from Stitch Artist (even though it is from the same company and all shows up on the Embrilliance platform on my computer).  It allows me to simply type in my letters to place them in the file and it spaces them for me, although I can change the spacing and resize as I want.  I placed both print outs from the software under the Simplicity front pattern piece to check placement and to make sure that everything would match up.


I cut out the fabric pieces for the bag.  I applied the digitized corners onto the fronts and backs using my embroidery machine and the new file I just created!  I matched the cut lines to the stitched placement lines.


I can turn the hoop to the back to see how the placement lines and the fabric piece match up perfectly through the light.


From there, I stitch the applique just like any other applique, adding the corner fabric, backed in Heat N Bond Lite, and then trimming after it stitches, then allowing the machine to satin stitch over the cut edges.


I repeated the process for all four corners and trimmed to the pink fabric cut edges.

I stitched the monogram on the front as well.  This is Designs by Juju #719 Open Vine Monogram.


With that, my front and back pieces were ready for construction.


I did add a little name tag inside since this was for a child.  So to the lining back piece, I added a frame from Planet Applique and text from Jolson's.  This is Tiny Fonts Script #61.


I followed the sewing pattern directions, although I did make a construction change in that the pattern suggests combining the front fabric, batting stabilizer, and lining fabric together, stitching as one.  I prefer a fully lined bag with no raw or even serged side or bottom seam edges showing so I lined the bag separately.  I also turned the inside bag bottom (board) and filled with Peltex instead of zigzagging the edges closed.  This way, the inside of the bag looks as finished as the outside.


And the corners turned out just perfect!


This was initially supposed to go with one of the Christmas presents I gave my niece.  The colors all coordinate with her monogrammed robe, slippers, and appliqued PJs. Since this will be a gift for no reason, I thought it would be fun to add something....


This is the Eye Mask from Applique Corner.  It is #2475 In-the-hoop Sleep Mask.  It was made completely in the embroidery hoop and is super fast to do.  I did add a few inches to the elastic length they suggest.  Although this is for my niece, my daughter modeled it for me.


I like them together as a gift set.


List of links shared in this post (these are not affiliate links; just direct links only):

  • Simplicity1129 (I bought mine from Joann's but this link is to the Simplicity company):  click here.
  • Embrilliance Stitch Artist:  click here.
  • Embrilliance Essentials:  click here.
  • Designs by Juju Open Vine Monogram:  click here.
  • HeatNBond Lite (hnbl):  click here.
  • Gigi Frame from Planet Applique: click here.
  • Jolson's Tiny Fonts Script #61:  click here.
  • ITH Sleep Mask #2475 from Applique Corner:  click here.
Additionally...
  • The fabrics all came from Walmart and were pre-washed for absolutely no good reason since I don't anticipate that the bag will ever be laundered.
  • I used fusible fleece that I adhered to my fabric with a steam press. The pattern called for Peltex but I was feeling frugal.  
  • I used Peltex in the bottom board only.
  • Pattern and zipper were from Joann Fabrics.
  • Embroidery threads are Metro.
  • I used tear-away for the applique corners and poly mesh for the ITH eye mask.
  • Sewing was done on a Brother Runway sewing machine and embroidery was done on a Brother PE770.
  • I added cord to the handles to make them keep their shape and have grip.
Thanks for checking my blog post today! For a list of my embroidery resources and my other embroidery projects, check out my Embroidery page using the tabs at the top of this blog or just click here.

Wednesday, October 21, 2015

October Stitching!


This busy summer meant that I didn't have much time for crafting so I am so excited for October and a little more time that can be spent in the craft studio!  I got back into the zone a couple of weeks ago with a class with Reen Wilcoxson, owner and designer for Embroidery Garden.  Embroidery Garden is a company that specializes in in-the-hoop embroidery projects, including fully lined and zippered bags and 3D stuffed animals.  It gave me an opportunity to just make something (which is so freeing) and it reminded me how much fun this is!  

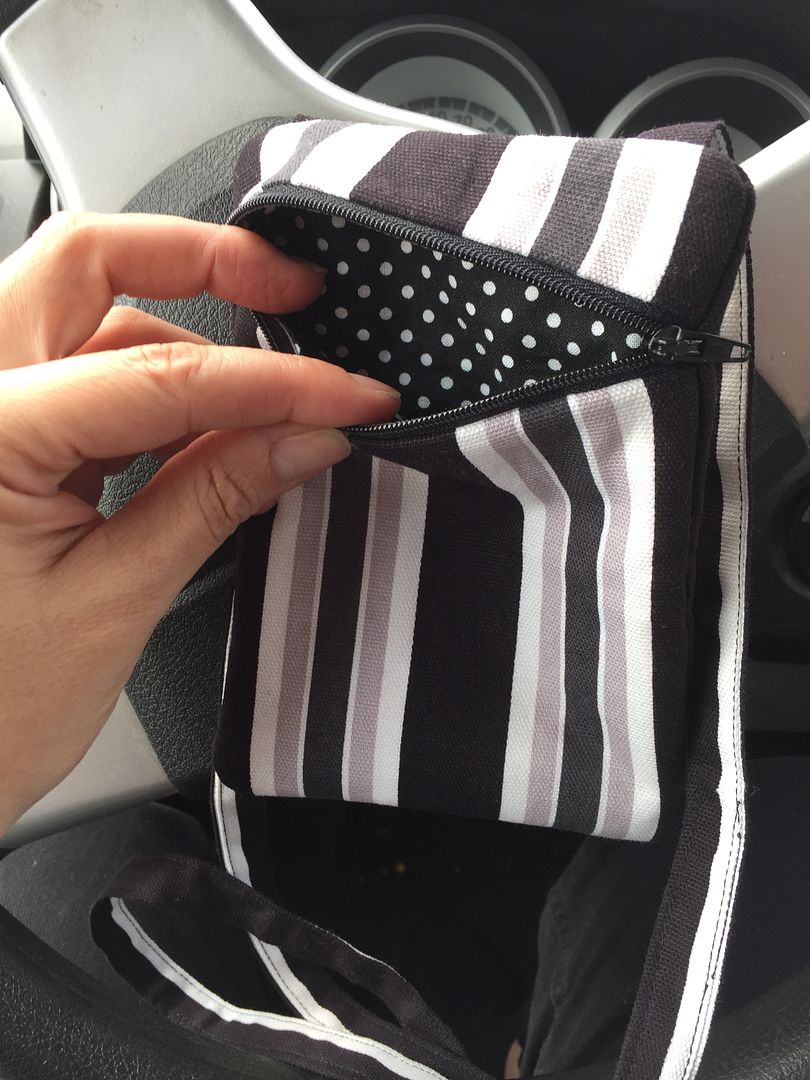
I made this simple bag in class.


This is available to purchase on her website:  click here.  It is super easy to match stripes because of the way it is cut at the very beginning!

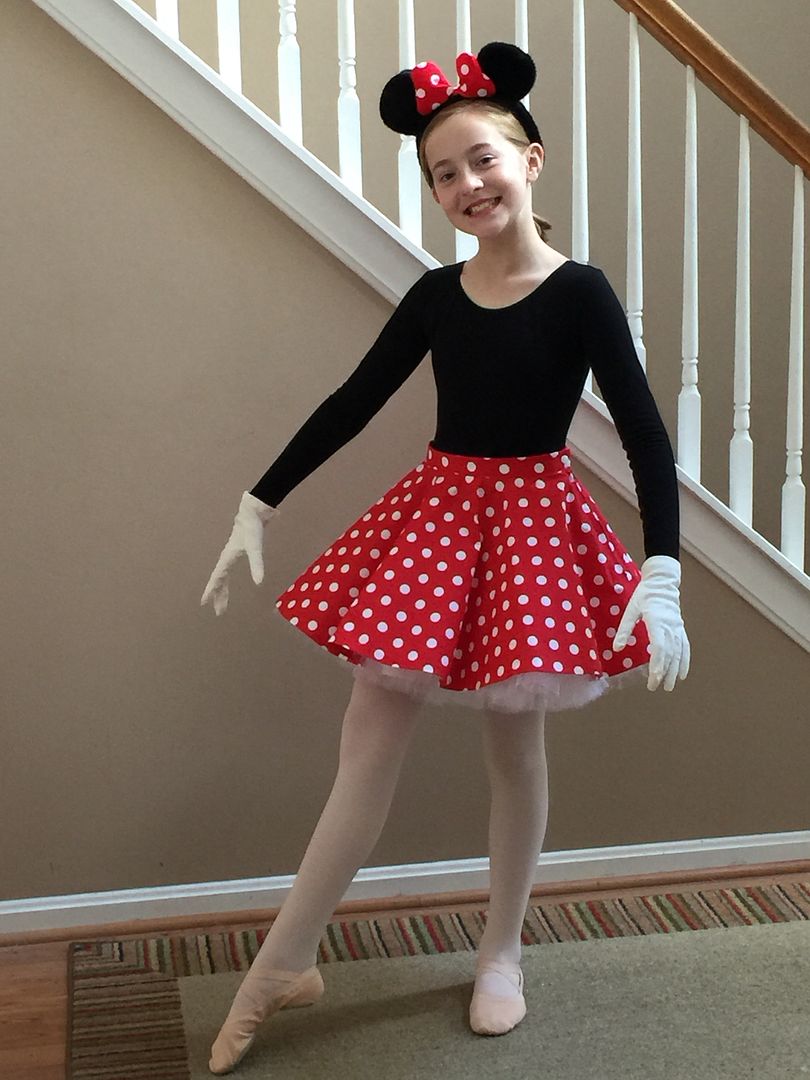
Last weekend, I shifted into high gear and decided to get my daughter ready for Halloween.  She typically has one costume for trick-or-treating and a second costume for ballet class.  The trick-or-treating costume has to be warm; the ballet costume has to be one she can dance in.  Once we were able to use the same costume for both, but usually it just doesn't work that way.  Since my kiddo loves dressing up, Halloween, and putting together characters, she has fun with this and prefers two different ones.  This year, her ballet Halloween costume is Minnie Mouse.  


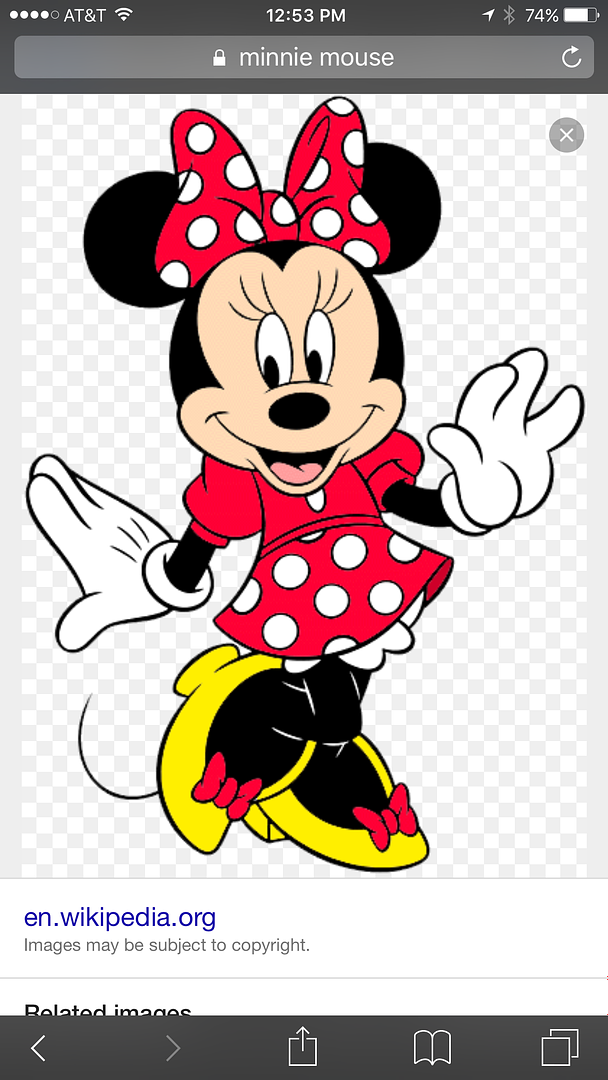
Because all the photos of Minnie showed the edge of her bloomers...


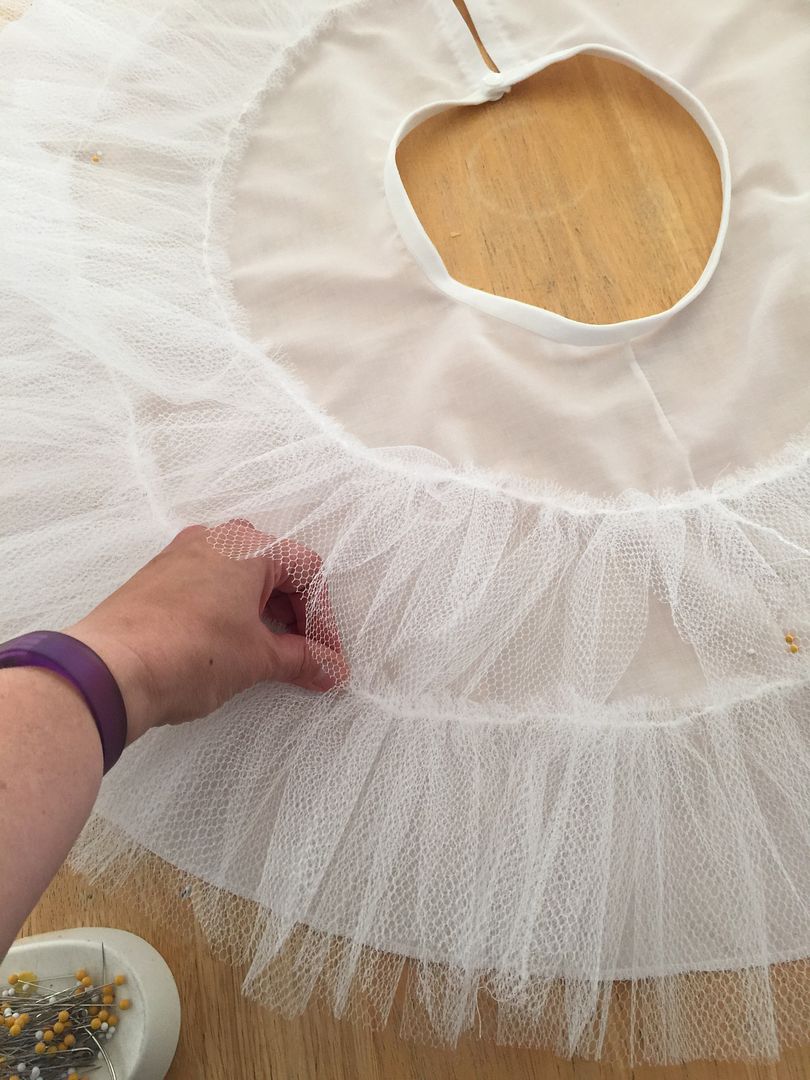
...I thought making a crinoline would duplicate the look but be easier (and more fun!) for dancing.  It has been many, many years since I made a crinoline, but I remembered that the key to make this easier was to stitch the ruffle placement lines onto the slip first.  This means that no thread tacks or marking is needed!  I also zig zag onto a cord (I use perle cotton thread) to make gathering a cinch!  Cutting the netting was super easy by folding it into fourths and using my rotary cutter to lop off each section.  Instead of grosgrain, I find that fold over elastic is more comfortable to wear.  I used my nifty Kam snaps as a closure for the crinoline.  


The skirt and crinoline were cut from Simplicity 3836.  The skirt is a short, circular skirt with a waistband and zipper.  It only has to fit at the waist so this was really fast and easy to make.

She is wearing her required leotard, tights, and shoes.  The headband is one we bought at Disney World.  The gloves belonged to my grandmother that I had in my stash of stuff.

I gave myself the day to do the costume, but it really only took a couple of hours so I spent the rest of the day making up projects my daughter had requested when I was busier during the summer.  She uses her iPad to look at my embroidery files online that I have pinned to Pinterest.  (For info on how I have created an online "catalog" of my embroidery files and have organized them by type, theme, and vendor, check out my Organize With Pinterest page, or click here.)


Info about these designs:

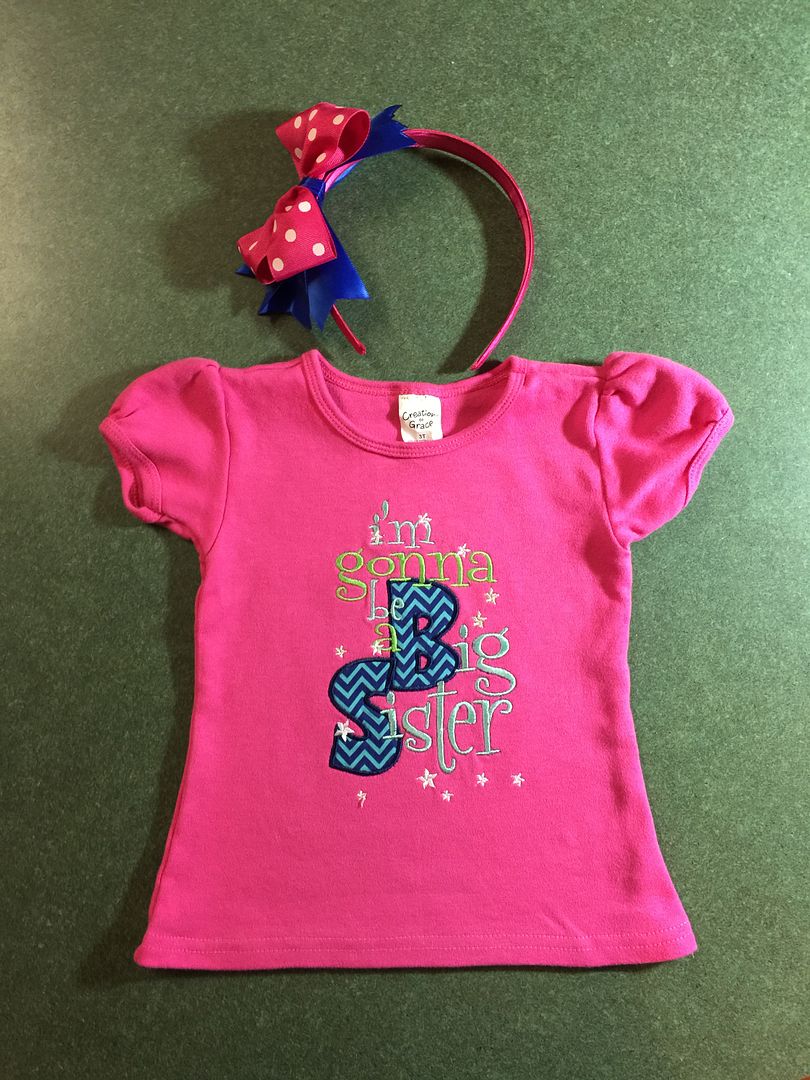
Next, I made a toddler top for my little niece.  Her mommy is expecting a new baby next month so I barely got this done in time!!  


I am not gonna lie: this project put me through changes!  I got the opportunity to deal with bird nesting.  I got the opportunity to struggle with metallic thread.  Then, as if that wasn't enough, I somehow bumped my machine and the final step, stars, stitched in the wrong places, including on top of some of the text.  I figured no one would know so I tell on myself just in case you buy this file and wonder why mine looks different!  The file is from A Stitch On Time.  The thing to know about this company is that some files are instant download, some are emailed to the customer, and some require info because they are customized.  I *think* this one was an instant download.  

The headband was purchased with the satin covering.  I added the bow and spikes I made.  The ribbon used is 1-1/2" wide.

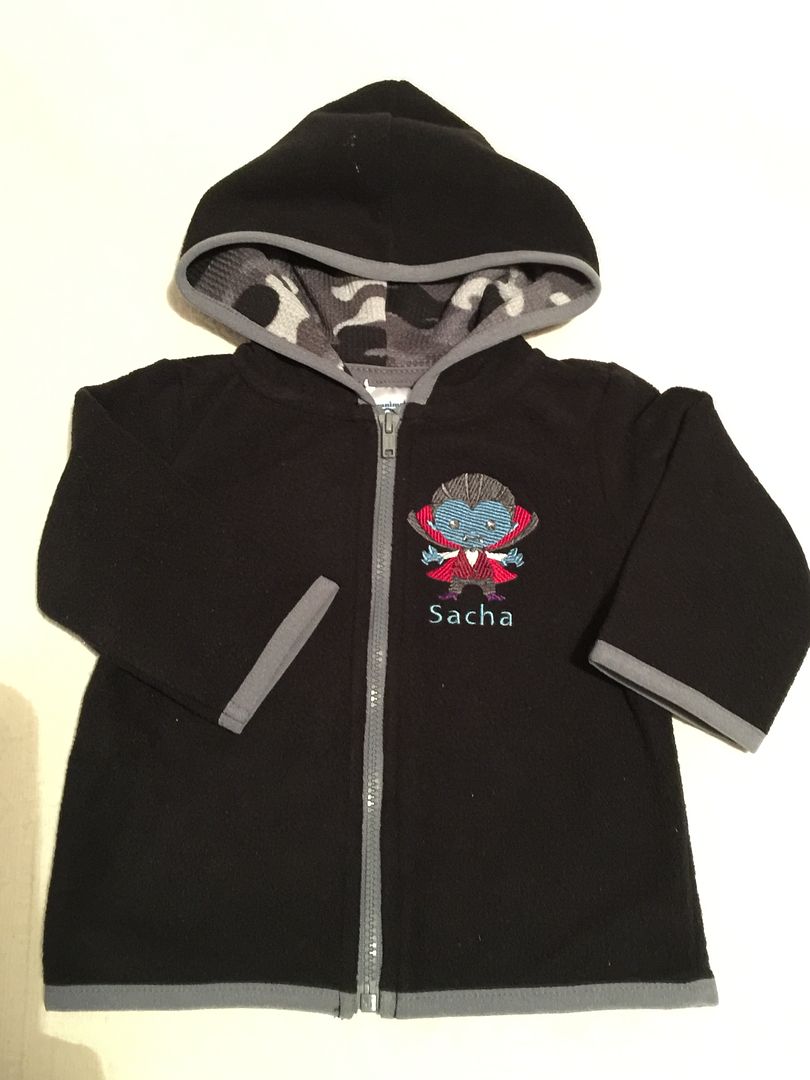
Next, I found an inexpensive fleece baby jacket and added a Halloween image to it for my little nephew who just graduated to the 3-6 months size!  This is a Garanimals brand jacket.


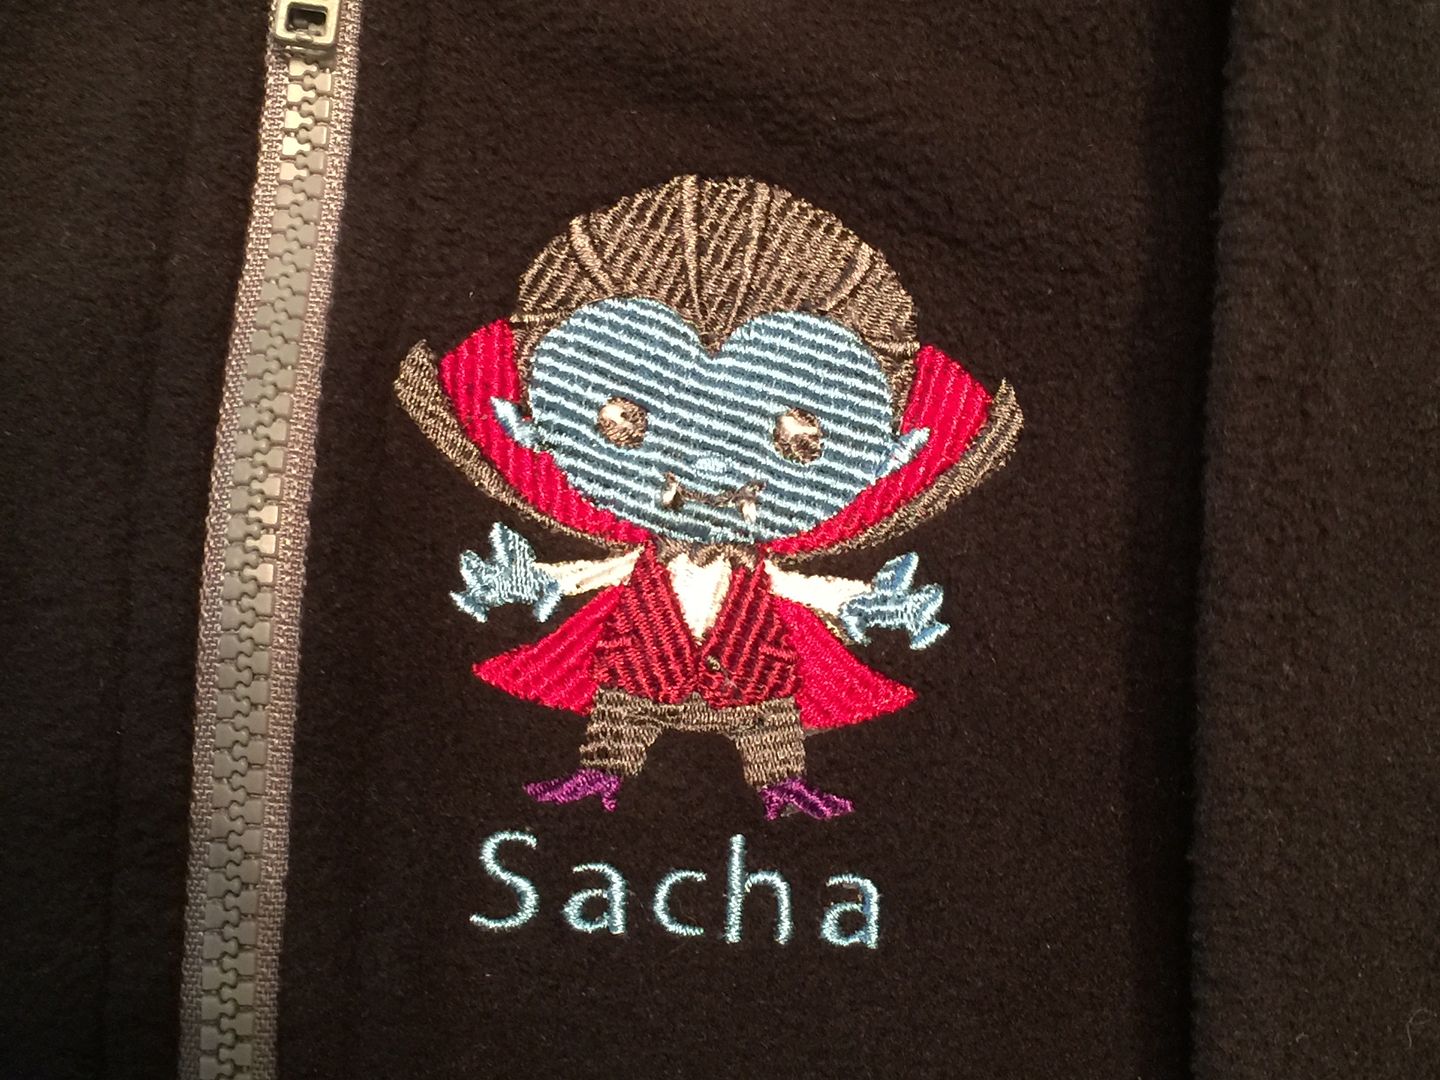
The little vampire is from Embroidery Library.  So...to continue telling on myself...I greatly reduced the size of this file because I had purchased it to fit my 5x7 hoop.  That works just great with Embrilliance, but I should have used the Density Repair Kit (which I also have in my Embrilliance suite) because this design was bullet-proof (as can be the case with Embroidery Library designs sometimes anyway)!  It was so dense, that it shredded and broke the thread when it tried to stitch the fangs!  


I don't exactly adore the way they chose to fill in the face color, but I LOVE, LOVE, LOVE the what they did the hands on this design!  And I love the hair.  

The text for the name is the block font that is built in on Embrilliance.  It's the one that comes up when you add text if you don't switch it to a different one!

I also embroidered a dress for his big sister, a second-grader. 


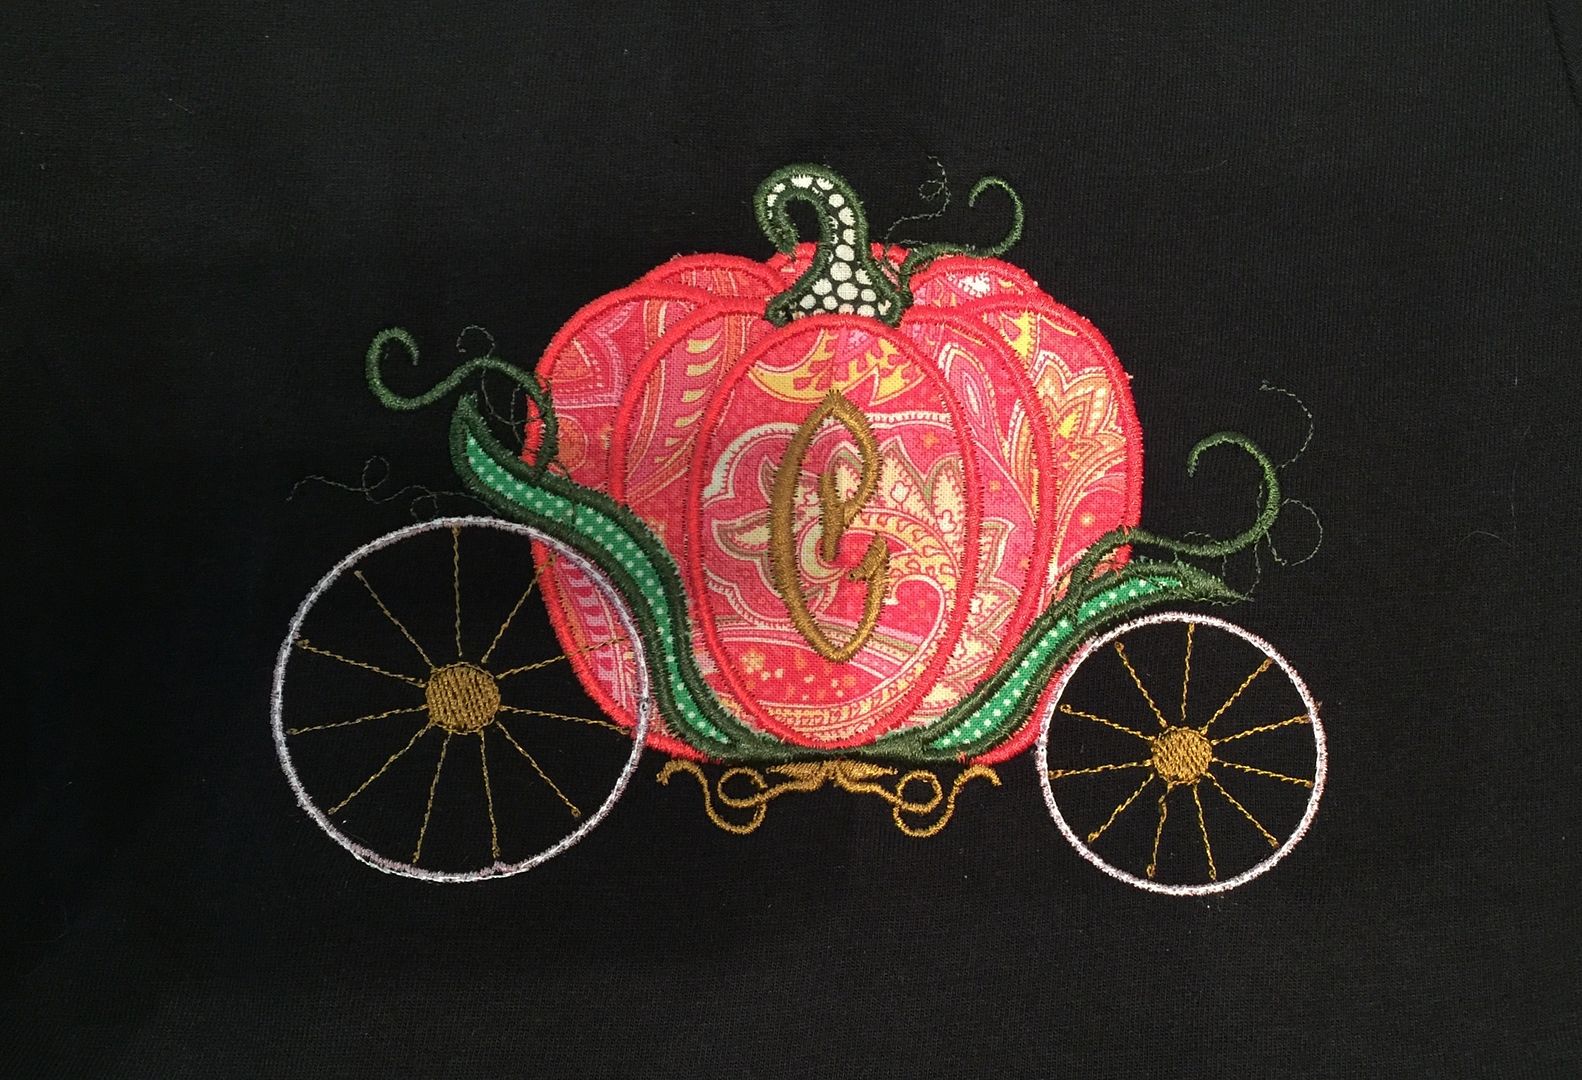
I didn't want it to be creepy.  I went with a fairy tale Halloween look, all the way to the monogram.  I was inspired by a photo in one of the embroidery Facebook pages, but I moved the carriage to the top and switched the name to a monogram.  That switch to a monogram was really for safety as most people where I live don't put kids' names on their clothing or backpacks so that strangers won't know kids' names.  (They also aren't into monograms much either so we will be trendsetters with this.  hahaha).  


I loved this font because it had a fairy tale look to me.  This is Carson from Itch2Stitch.  I also really loved the way it stitched out with the beautiful satin stitch.

The carriage is from Applique Corner and I just loved it.  I added another "C" from Carson on the applique in my software.


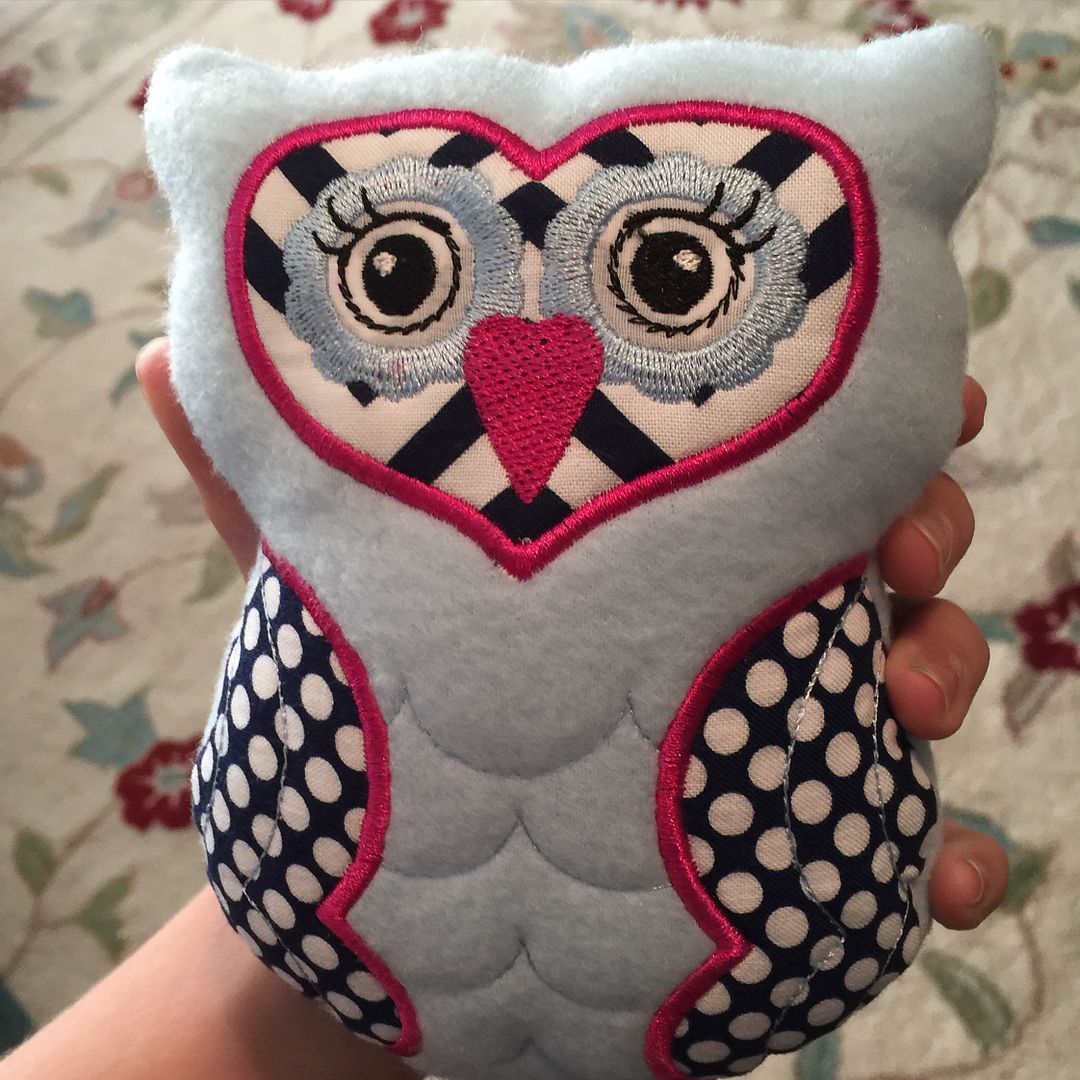
And back to Embroidery Garden, I made her Owl Stuftie for my daughter.  This was an easy, easy project.  The entire project is made on the hoop using the step-by-step directions that come in the file. 


Once all the sewing steps are complete, the excess fabric is trimmed off and the owl is turned, stuffed with polyfil, and the bottom opening is slip-stitched closed.  The finished owl has a pocket on the back that is perfect for placing a note or gift card.  When I took the class earlier in the month from Reen, she told us that she NOW likes to use poly mesh stabilizer instead of the tearaway that the pattern calls for.  As a person who has made several in-the-hoop stuffed toys, I can tell you that the poly mesh makes a HUGE difference.  So I am passing that tip to you too!  I also did not use the Heat N Bond Lite for the applique.  I always use it for garment appliques or for anything that will be laundered, but this project never will.  I didn't see a change in not using it on this owl.  

So that was the result of my binge sewing and all brought on by a simple and fun class!  I am looking forward to stitching for Christmas next!  And I have an upcoming paper crafting retreat so that might help me get my paper craft on again!

Links shared in this post:
All of my embroidery projects are done on my Brother PE770 and all designs are put into my Embrilliance software before taking to my machine to stitch out.  For info on where I get my stabilizers and other tools and supplies, check out my Machine Embroidery page, or click here.

Thank you for checking my post today!  

Friday, February 3, 2012

Share the Love


Pin It

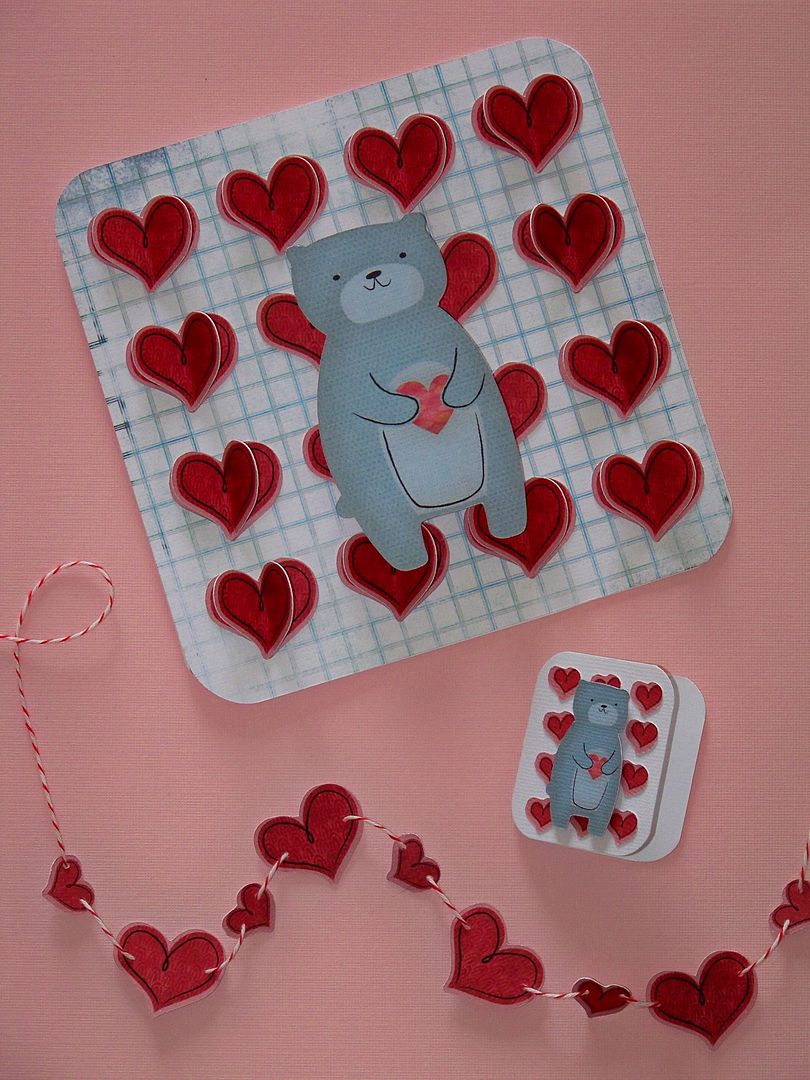
Valentine's Day has been major holiday in our family for as long as I can remember. My mom's birthday is February 14, so we have always celebrated BIG on that day-- and continue to do so even now! Pink and red, heart-shaped foods, pink drinks, Valentine-y outfits, presents for everyone, a Valentine tea, and parties are still the norm at our house! For my daughter's Valentine gift, I made a little outfit for her doll. I love finding new ways to use my Cricut machines and cartridges!  This present, gift bag, garland, card (and mini card) gift-set is also my entry for this month's Cricut Circle Blog Challenge: Share the Love!

For the crafty details:
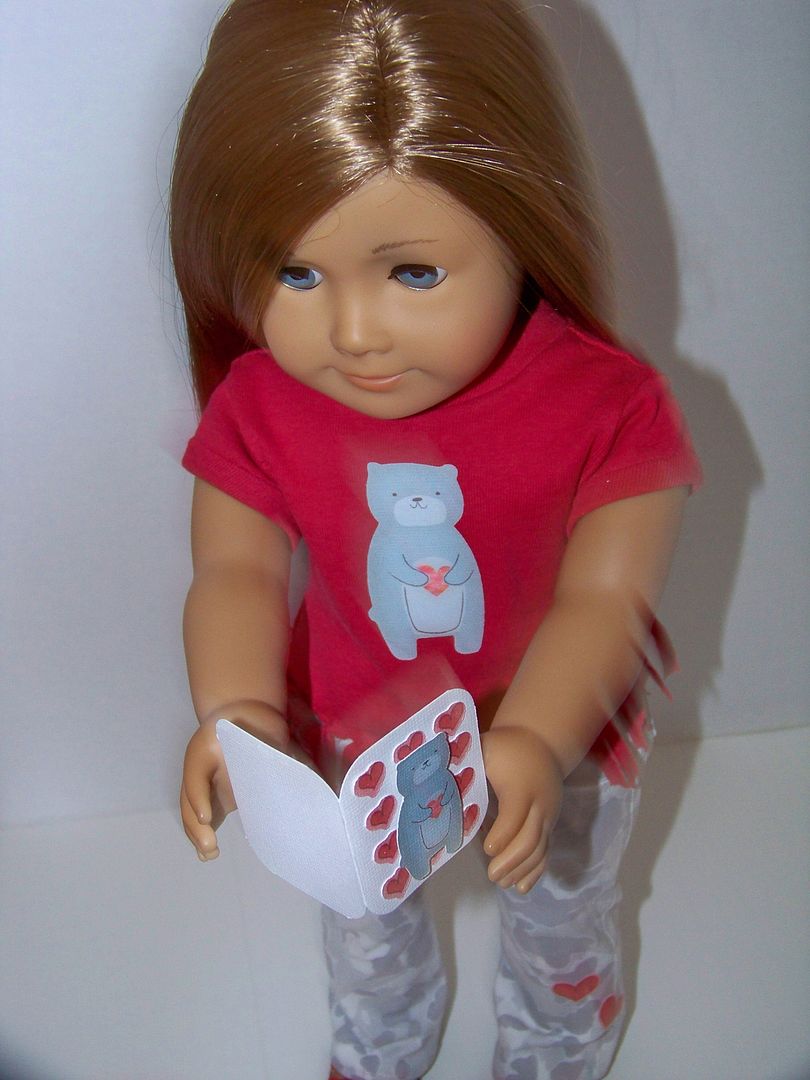
The card is made from two cuts from Better Together and a built-in Imagine shape, floodfilled with a pattern from JT.  The bear was cut at 3-1/2"; the rounded square was 6"; the hearts were 1".  Extra hearts were folded and glued in the centers only for a little dimension.  The bear has been popped up 1/2".


I also made a doll-sized card... and a garland made with the extra hearts I cut.  Doll-sized cuts:  card folded is 1.75" x 1.875"; hearts .3"; bear 1.5". 


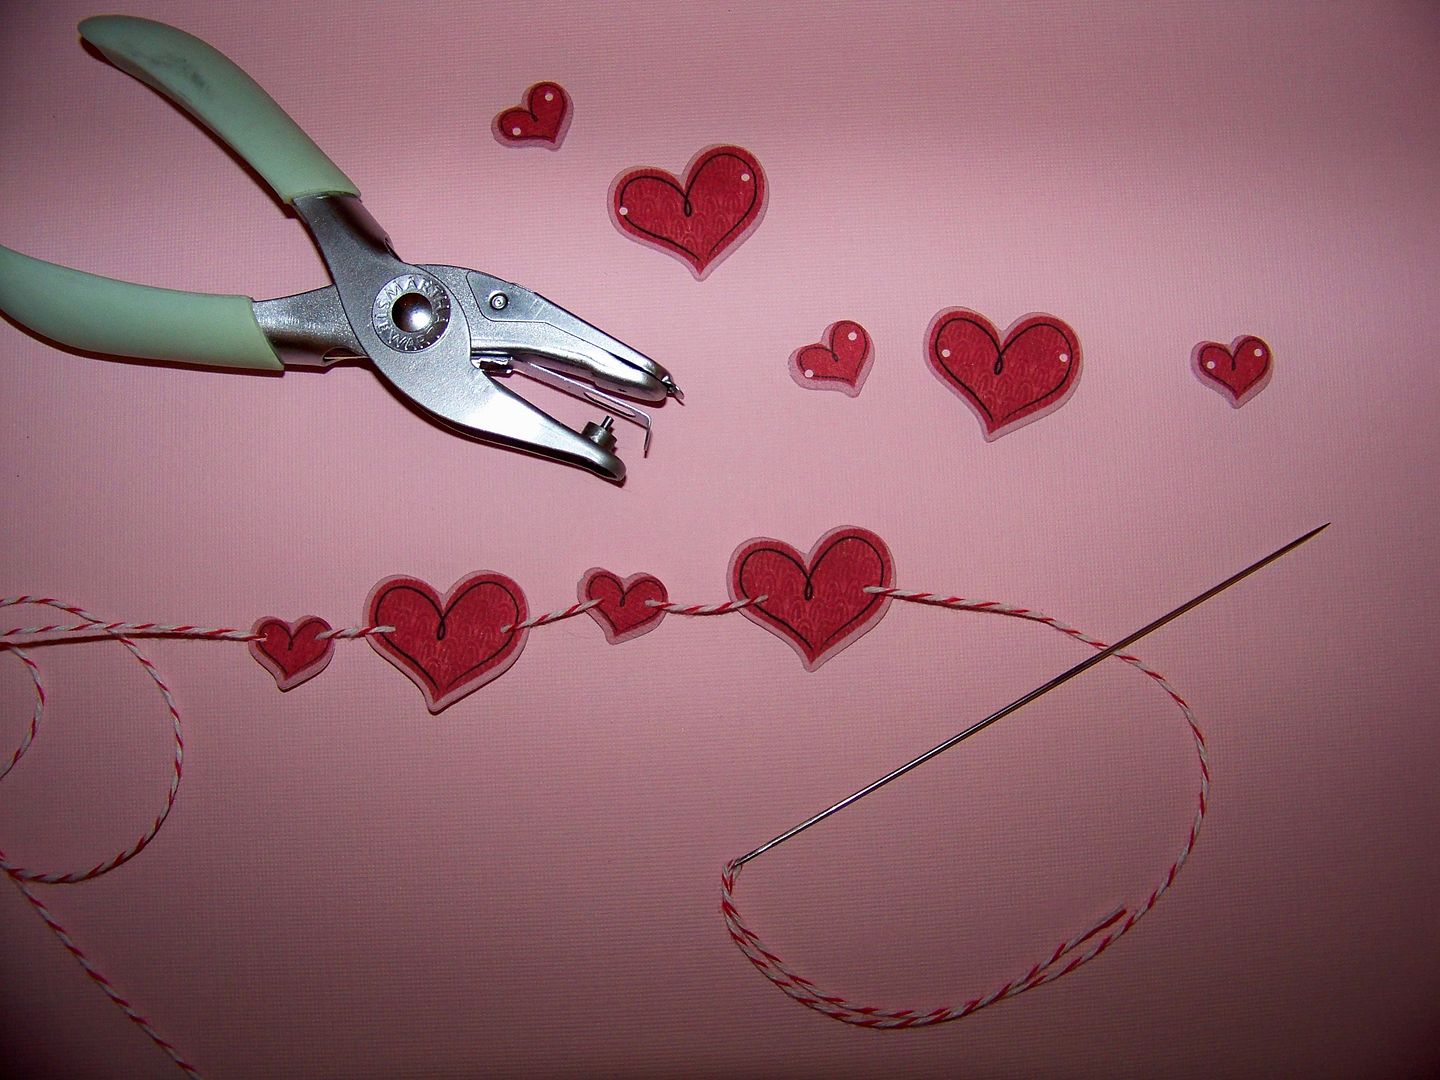
I used the tiny 3/16" Martha Stewart hole punch and an upholstery needle threaded with bakers twine to attach the hearts into a garland.  Garland hearts are 1" and .5". 

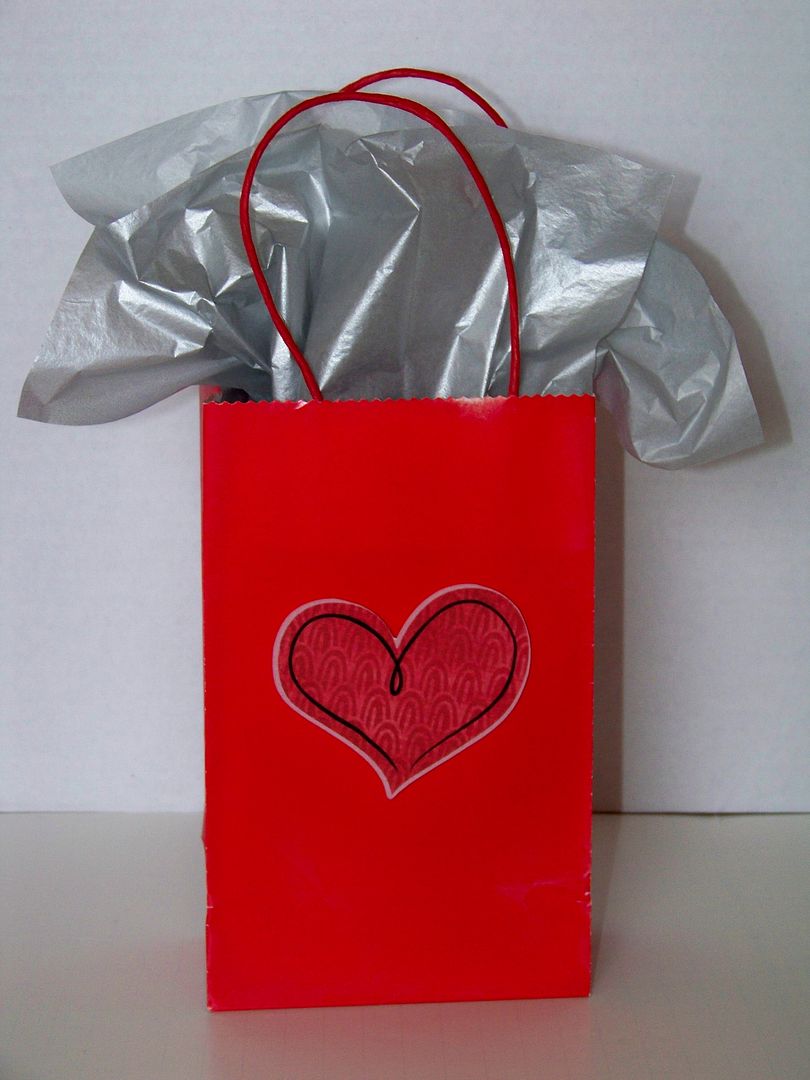
The gift bag is simply embellished with the same heart cut from Better Together at 3".

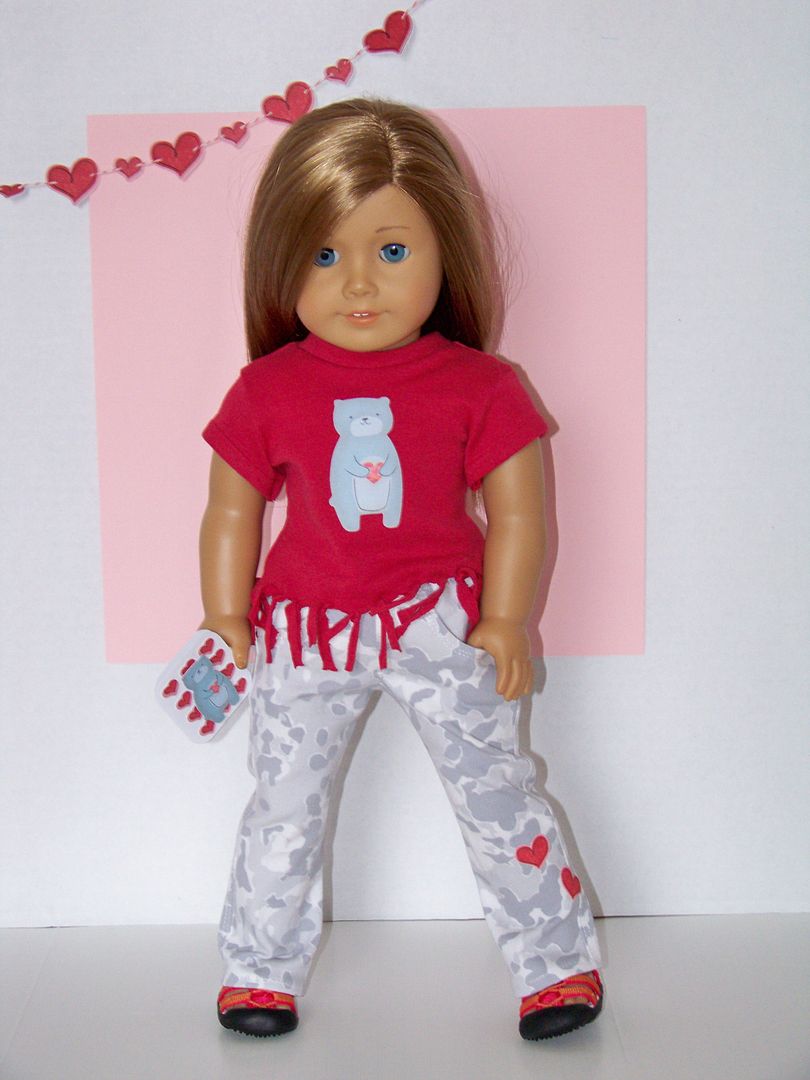
The doll outfit used the same Imagine cuts to keep continuity.


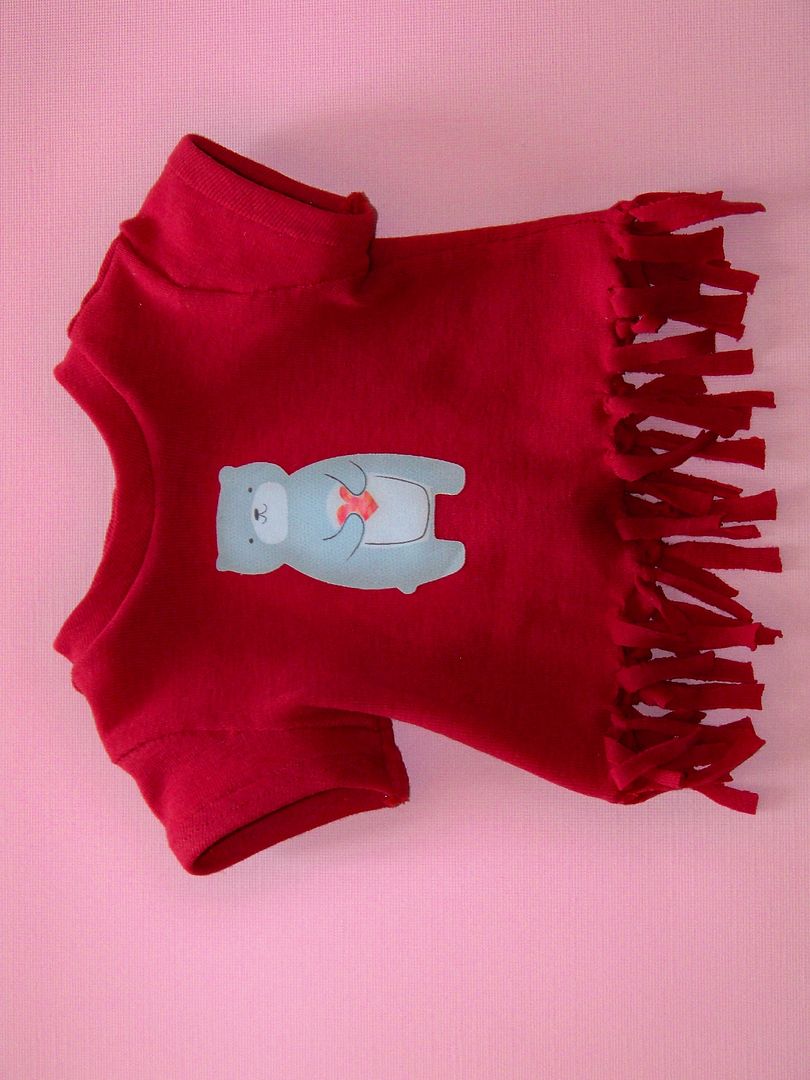
The t-shirt features an image from the Imagine cartridge Better Together (cut at 2-1/2"), printed on Avery's Printable Cotton.  I love this product for use in the Imagine.  Instant iron-on image!  One tip:  be sure to use a new, sticky mat!  I made the shirt using the Liberty Jane T-shirt Variations pattern .  I received an email from my daughter's favorite clothing store, Justice, that featured a trend in fringed t-shirts.  (Why are elementary-school girls so obsessed with that store??!!)  I think if Piper sees a display at Justice with this look, she will think it is cool that she has this for her doll...


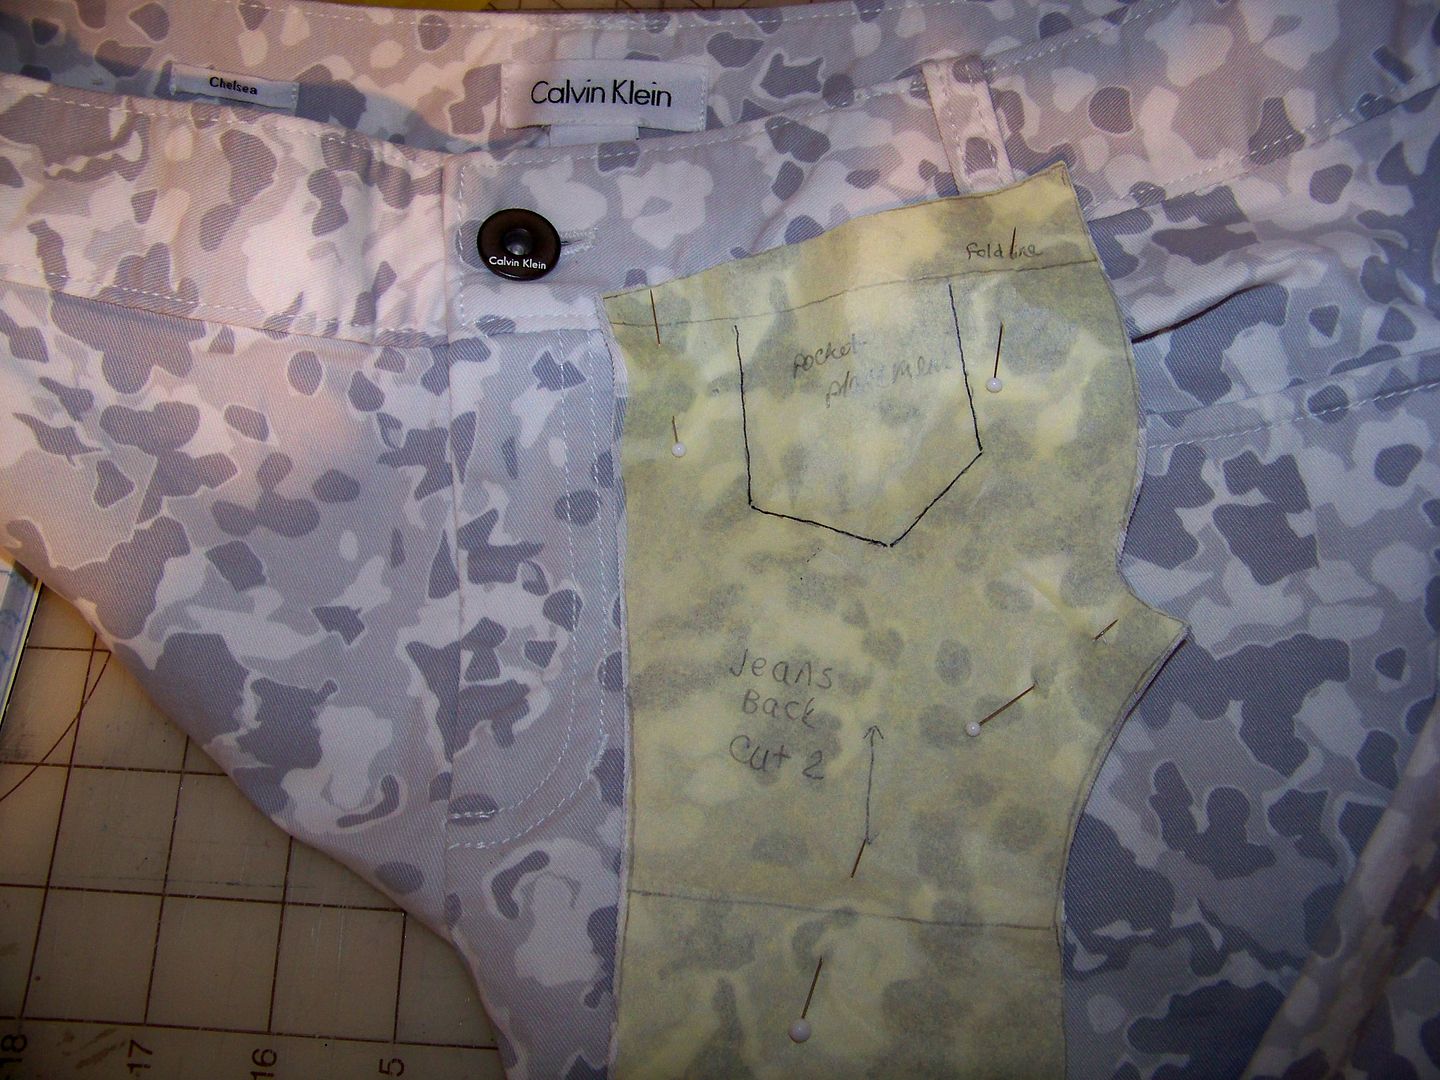
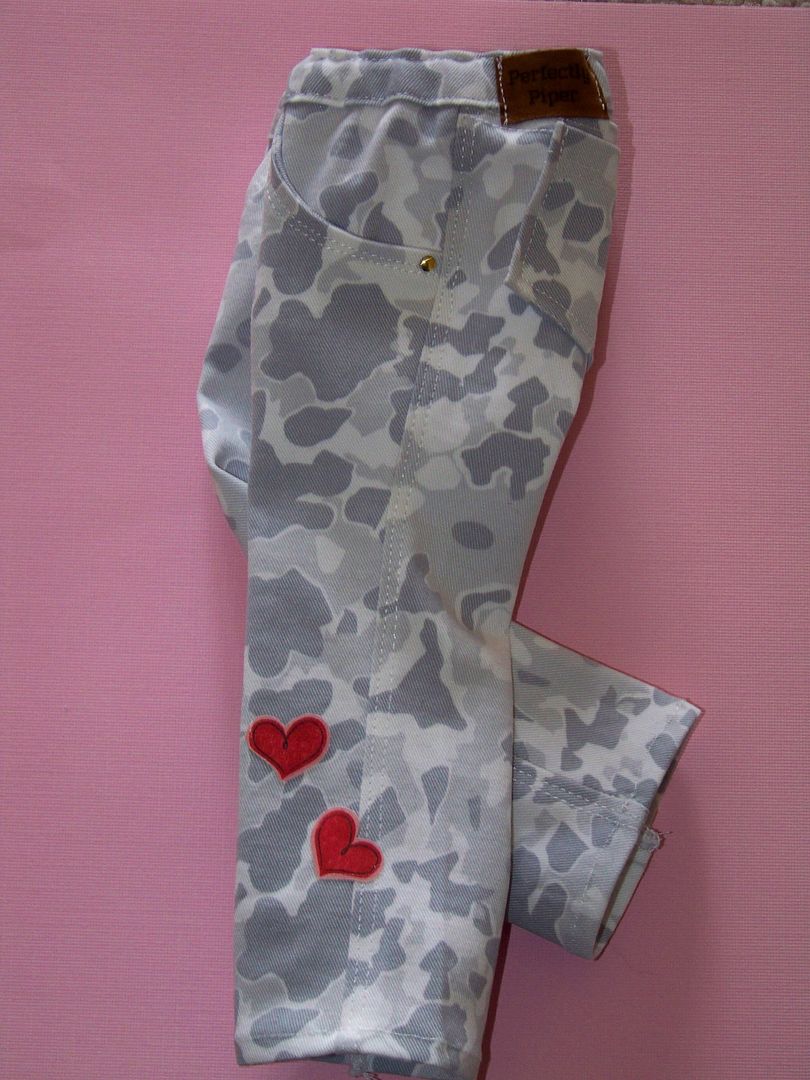
The jeans are upcycled from Calvin Klein jeans we found at a thrift store.  I have been working on designer doll jeans for my new Etsy store, which I will tell you about in a bit.  The pattern is altered from Liberty Jane's Jeans pattern and includes lots of topstitching, real working pockets, and a mock fly.  This print worked well because it was a small scale so it was the right scale on the doll!


The hearts on the leg are the same repeated heart motif from Better Together, a separated layer printed and cut at .7". I used fusible studs to create the look of rivets on the front pockets and created a tag for the back waistband on suedecloth....just like real jeans!


I think Piper is going to love this-- it is a total surprise as this whole challenge was completed yesterday while she was in school.  Something about the doll-sized card cracks me up... but then I might be too immersed in the whole "doll thing" right now!  And... it really points to one of the things I love about my Cricut machines:  I can change the size instantly to make miniatures.  The Imagine artwork makes it so incredibly FAST to do too!


So... I mentioned that I was working on doll clothes for my new Etsy shop... My daughter and I have been having such a fun time with a new little doll clothes venture we have started together, Perfectly Piper Doll Couture!  


It has just been a fun way to spend time together crafting while getting her excited about sewing (we start that this summer!) ...and making a little money for her activities.  Piper has a creative fashion eye (and is a brutally honest supervisor) and I am a hard-working seamstress elf. Although I think I am a fast worker, the Piper tax requires that Piper get copies of her favorite styles (which is all of them), so the shop is filling, but at a slow pace! You can find us at...


  • Perfectly Piper Studio Etsy shop, perfectlypiperstudio.etsy.com
  • Doll blog, perfectlypiper.com
  • Perfectly Piper Doll Couture Facebook page


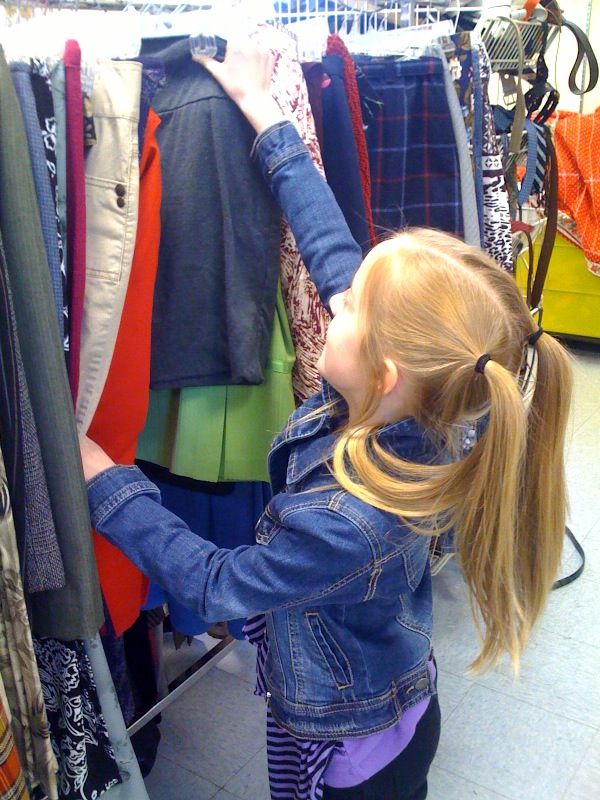
  • We have had a great time shopping for fabrics... even finding some special fabrics at thrift stores to upcycle. This is Piper on a recent "thrift run" helping me search for suede. She is awesome at finding treasures!


    In case you were wondering.... this blog, With Glittering Eyes, is my favorite project so I will continue featuring my papercrafting, sewing, loom knitting, and Yudu-ing here!  And I am trying to participate in more Circle challenges --I have missed getting to do those!

    But wait! There's more! Click 'older posts' above!

    But wait!  There's more!  Click 'older posts' above!