Showing posts with label Holiday - Halloween. Show all posts

Thursday, October 19, 2017

Halloween Treat Bag - Lined Drawstring Bag with Embroidery Charm


In putting together some soap shares, I wanted to make Halloween candy treat bags to go with them.  I was inspired with skeleton earrings digitized by Sonia Showalter and thought they would be perfect for charms.

I opened the file in my Embrilliance embroidery software and added as many skeletons as I could easily fit in the virtual 5x7 hoop.  I used the color sort feature so that the black loops and the area that will make the eyes are stitched first on all of the bodies, then the white stitches are all done.  That would allow the embroidery machine to handle this part of the project while I made the bags.  My machine stitched three hoops of skeletons.


I hooped two layers of vilene stabilizer.  This is a heavy water soluble type of stabilizer.  After stitching, I trimmed close to the stitching and ran each skeleton under hot tap water, dissolving the stabilizer, leaving me with these free-standing-lace-style charms!   Leaving in some of the starchy stabilizer meant that they are kind of stiff and have a little character!  (Allow them to dry completely before using.)


These are very stitch-heavy, as you can imagine they would need to be!  The good thing is that while the machine stitched these, I was able to use my sewing machine to make the bags.

I started with stacking my fabric and using my rotary cutter and mat to cut bag pieces that are 7.5" wide by 6.5" tall.  I cut two for each outer bag and two for each bag lining.


I sewed two bag fronts, right sides together, sewing all the way down one side, across the bottom, and down the second side, leaving open a space on one side.  I did that by stitching down 1/2", backstitching, leaving a 3/4" gap, backstitching, and sewing down the side.  (see diagram above) When I turn this right-side-out, I see a gap in the seam.  This is required for the ribbon casing later in the project!


Now, at this point, I must say something:  in the picture above, you can see that I serged the edges of the fabric pieces.  There was a time in this project when I thought I would make an unlined bag so in true workroom style, I prepped all the pieces, but after I tried one, I really didn't like it!  I decided that a lined bag would be better looking and take only three extra steps so it was a no-brainer!  Un-serged edges are much easier to work with in the casing so don't serge the edges!

Next,  I sewed the lining.
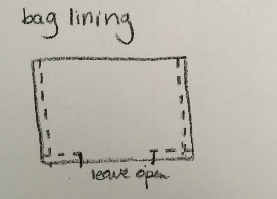

I did that by placing two lining pieces, right sides together, and sewing both sides and the bottom, leaving a nice, big opening on the bottom.  (see diagram above) Leaving this opening in the bottom is required so that the bag can be turned!

I clipped the points off the corners of both the outer sewn bag pieces and the lining bag pieces.  This will help later when I square the bag so it sits up by iteself!


I turned the outer bag right-side-out but kept the lining right-side-in and put the outer bag inside the lining.  


I stitched the upper edge with a 1/2" seam, matching side seams.


Using the opening in the bottom of the lining, I pulled out the bag, ending with both fabrics right-side-out and looking like a long rectangle.


I stitch the lining closed by folding in the seam allowance and top stitching.  It will be in the bottom inside the bag so it really doesn't need to be perfect!


I tuck the lining down into the bag and find the upper edge seam, rolling in my fingers to get the seam on the very top edge.


I stitch my casing by stitching 3/4" from the top edge.
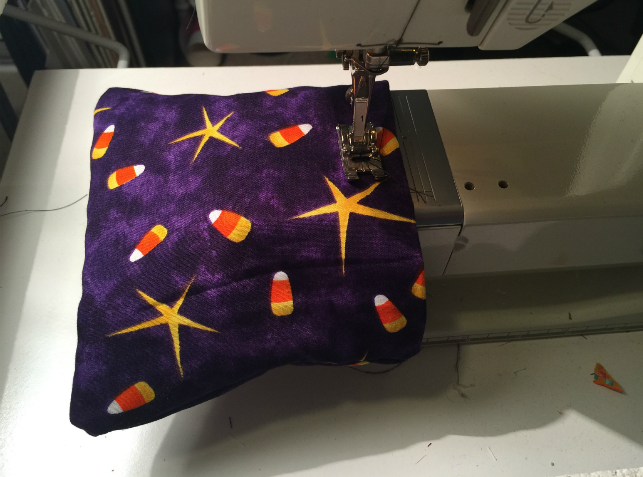

To make the bag one that will sit on its own on the table, I square off the corners.  I do this by turning the bag inside out, lining up the seams (peek inside to see), and stitching 1" from the point.


Now, when I turn the bag back so that it is right-side-out, the corners are gone and the bag sets on the table open (easy for getting candy out!)


Next, I measure 17" of ribbon and stick a safety pin in one end to make a bodkin with which to feed ribbon into the casing.  This is the drawstring.


I feed it into the hole that was left in the seam.


I pull the safety pin through, keeping the ribbon flat, and feeding it until I get back to the opening and pull the ribbon through so both ends are out.


I pull the ends to even it up and tie in a knot close to the end of the tails.


I set my sewing machine for a wide zigzag and zero length to sew on the skeleton charms below the casing.


Ta-da!  Making these essembly-line style, meant that I got 15 done while my embroidery machine made the charms!  This is much, much faster than doing an in-the-hoop style bag (and I don't have any size restrictions)!


These were filled with packaged candy.


I combined these with soaps (calorie-free Halloween treats!)  that I made a couple of months ago in order to have them completely cured.  There were eight soaps used (three were combined with each treat bag).  All the soap recipes can be found on my soap page (or click here) and are soaps #29, #31, #32, #33, #37, #39, #41, and #42.

I wrapped the soaps with food-safe paper and used decorative washi tape to keep together.  I made ingredient labels this time for each soap and wrapped with bakers twine for decorative purposes.  I included a homemade soap info sheet to explain a bit about my soaps.  I don't sell my soaps, so the labels and info sheet are just for educating my gift recipients.


My super simple tags were made using the Tim Holtz stamping platform and Close to My Heart #S1608 Purr-fect Halloween Stamp of the Month set. (It's an oldie from my stash).


List of links and items mentioned in this post:


Happy Halloween crafting!

Saturday, October 25, 2014

Explore Writing Options and Alternative Pens II: Halloween Treat Boxes using Jellyroll Pen and Dingbat Drawings


Since I bought my Cricut Explore back in March, I have been very interested in handwriting options and pen choices aside from the Cricut branded ones.  I did previous blog posts on both of those subjects, but now I have even better news!  The Chomas Pen and Marker Holders allow for even more options, including Sharpies, Jelly Roll Pens, glitter pens, and more!  (For my original post on pen options, click here! For my previous post on handwriting fonts to download, click here!)

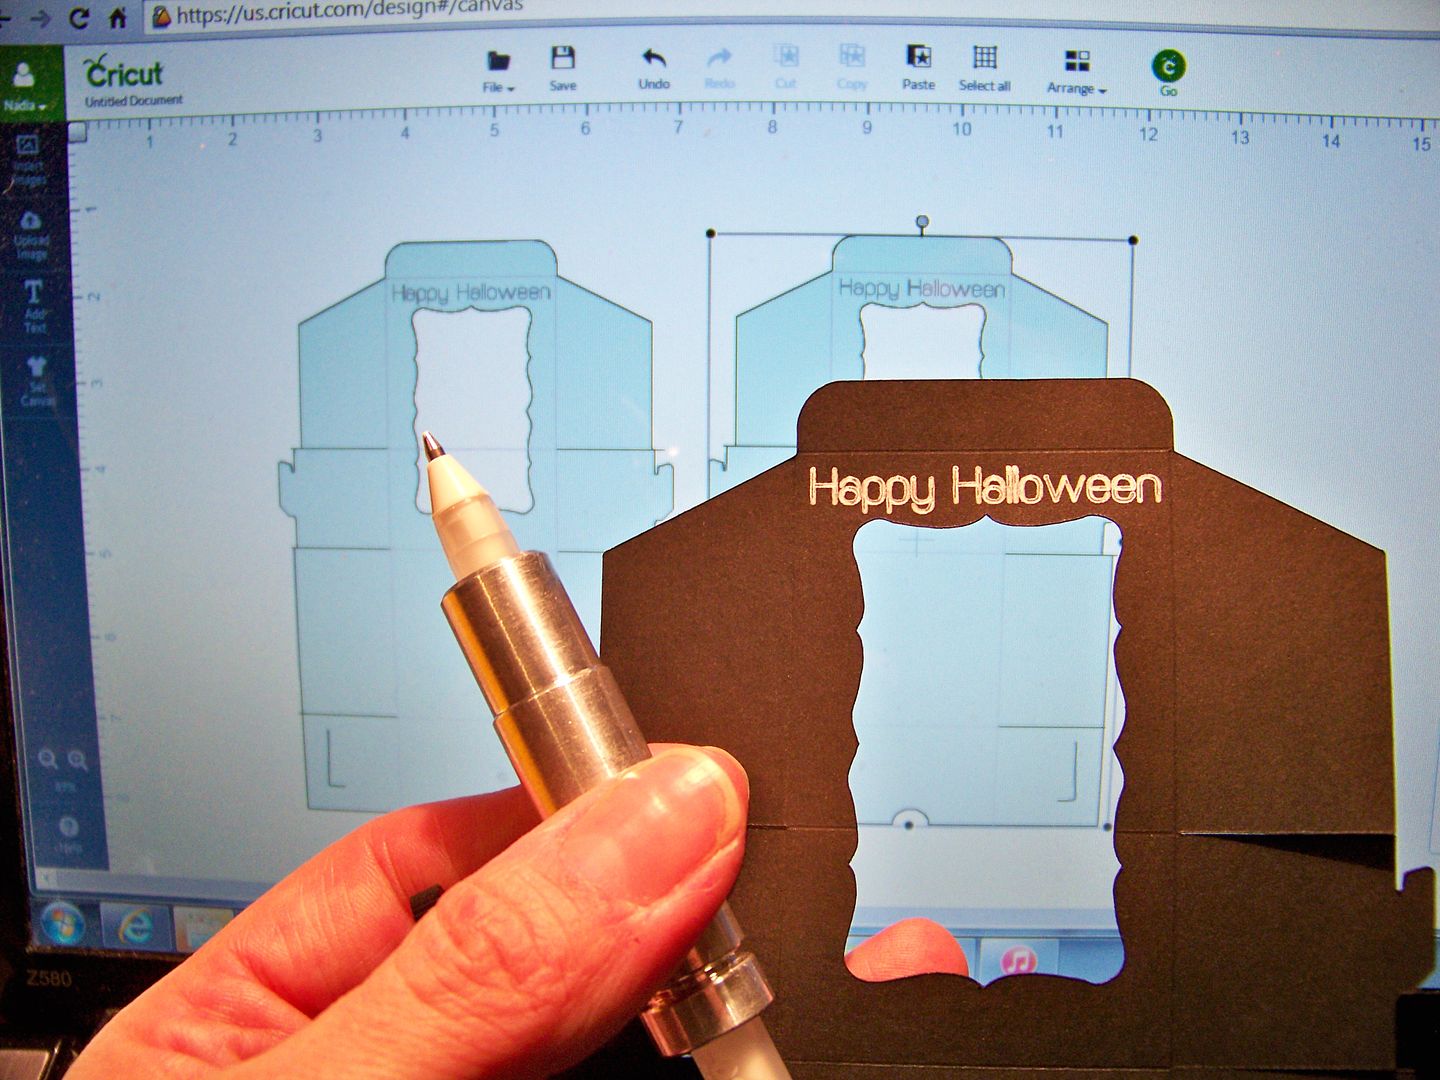
Now you can write in WHITE gel ink!
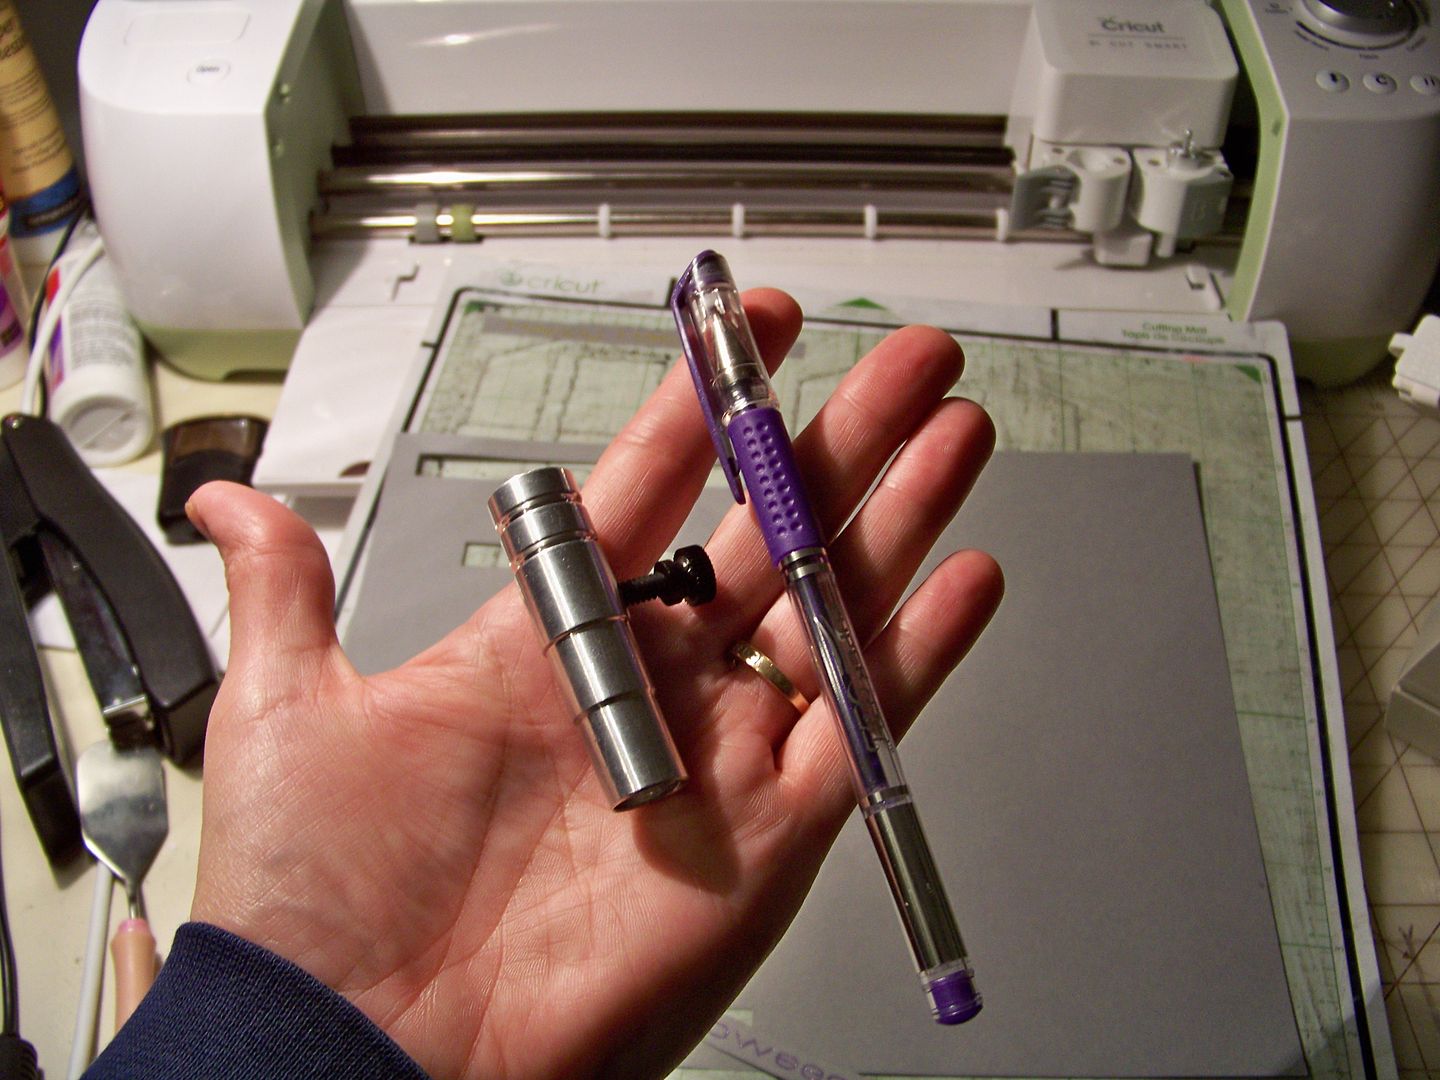
The Chomas Pen and Marker Holders are aftermarket items.  In order to use them, you will need to swing open the arm of the pen holder and pop out the holder.  To see this in action, check out Amy's video (click here).  I like this option much more than some of the homemade things I have been seeing people do with tape and things that risk breaking the holder.  Her implements fit in the spot that the holder would normally set in and the arm will swing shut to hold it in place.  See links at the end of this post for how to buy this from her.  (And just so you know, I had to buy mine- regular price, and she did not ask me to post this.  I don't benefit in any way from sales of her tools. I really just love having more options to use with my Explore!)

I have missed the use of my Jellyroll pen!  The closest I had been able to come to a usable WHITE pen in the Explore was chalk markers.... but they are engineered to be choppy.  They are supposed to look like chalk!  I wanted a smooth gel for writing on dark papers and I love the way the Explore writes with gel ink! 

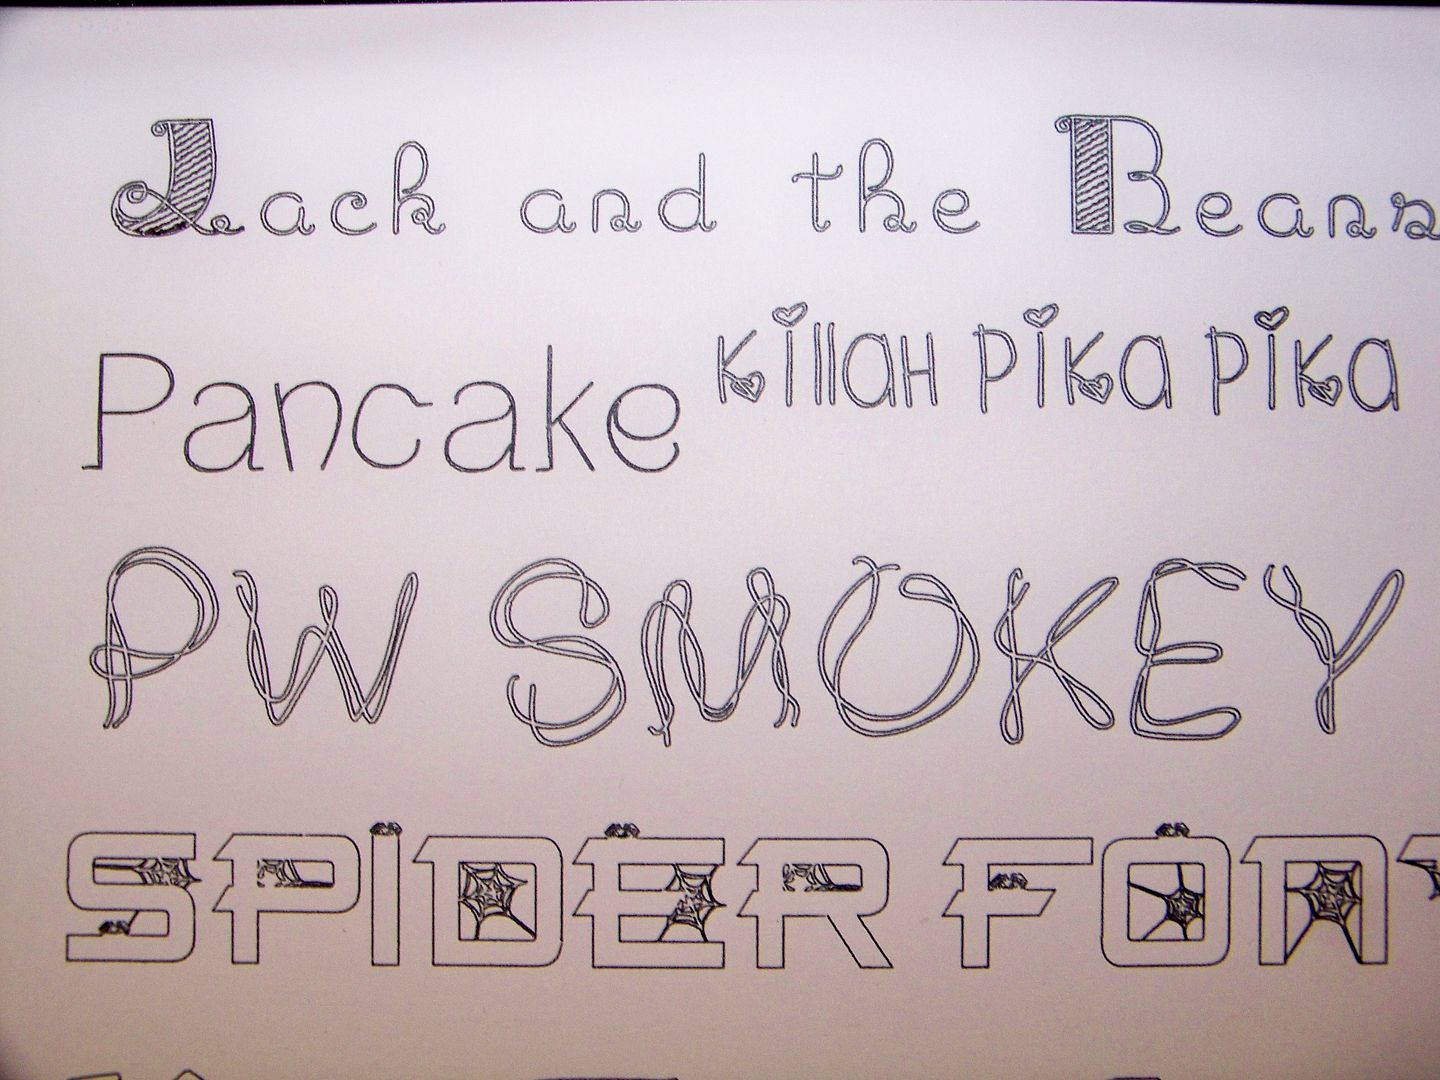
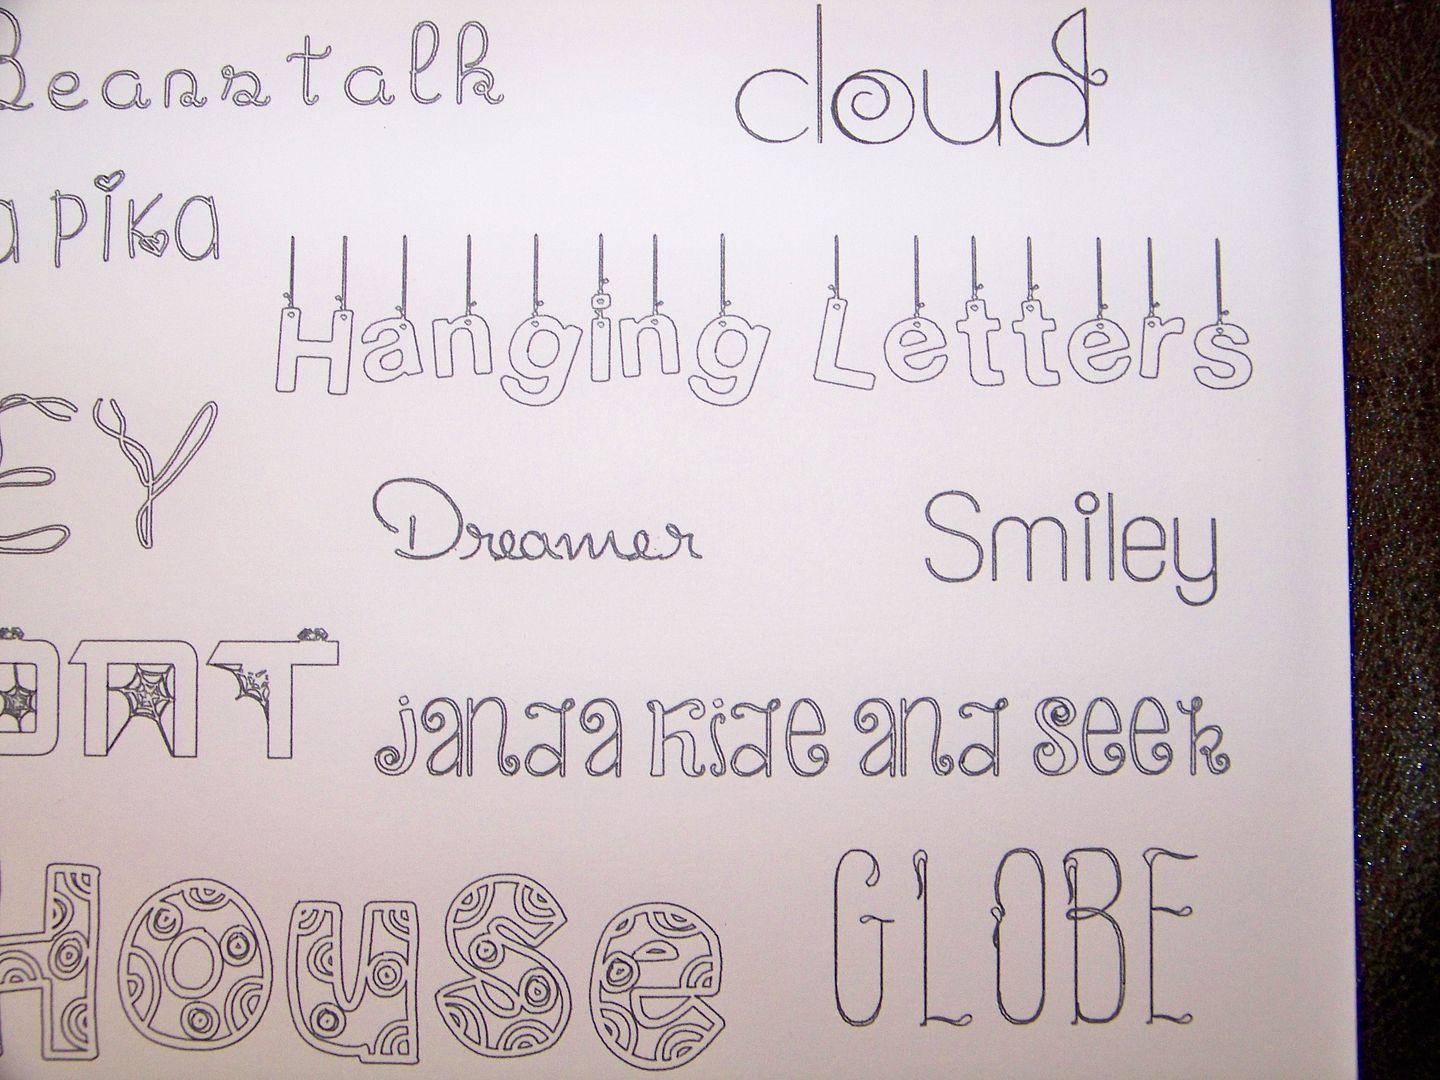
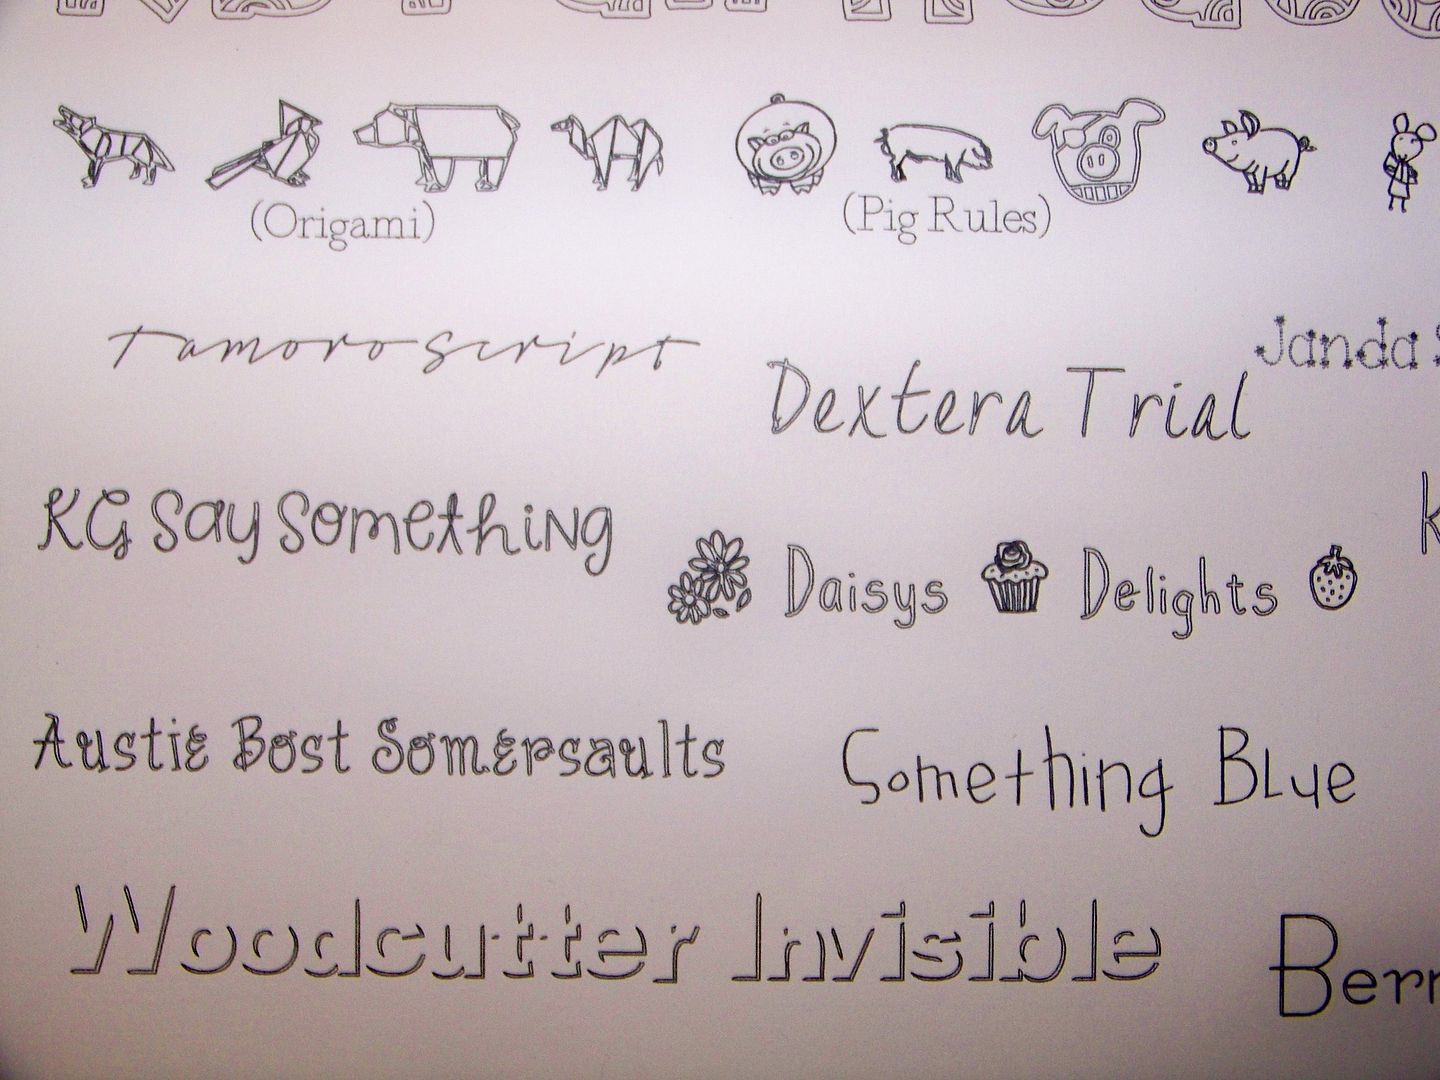
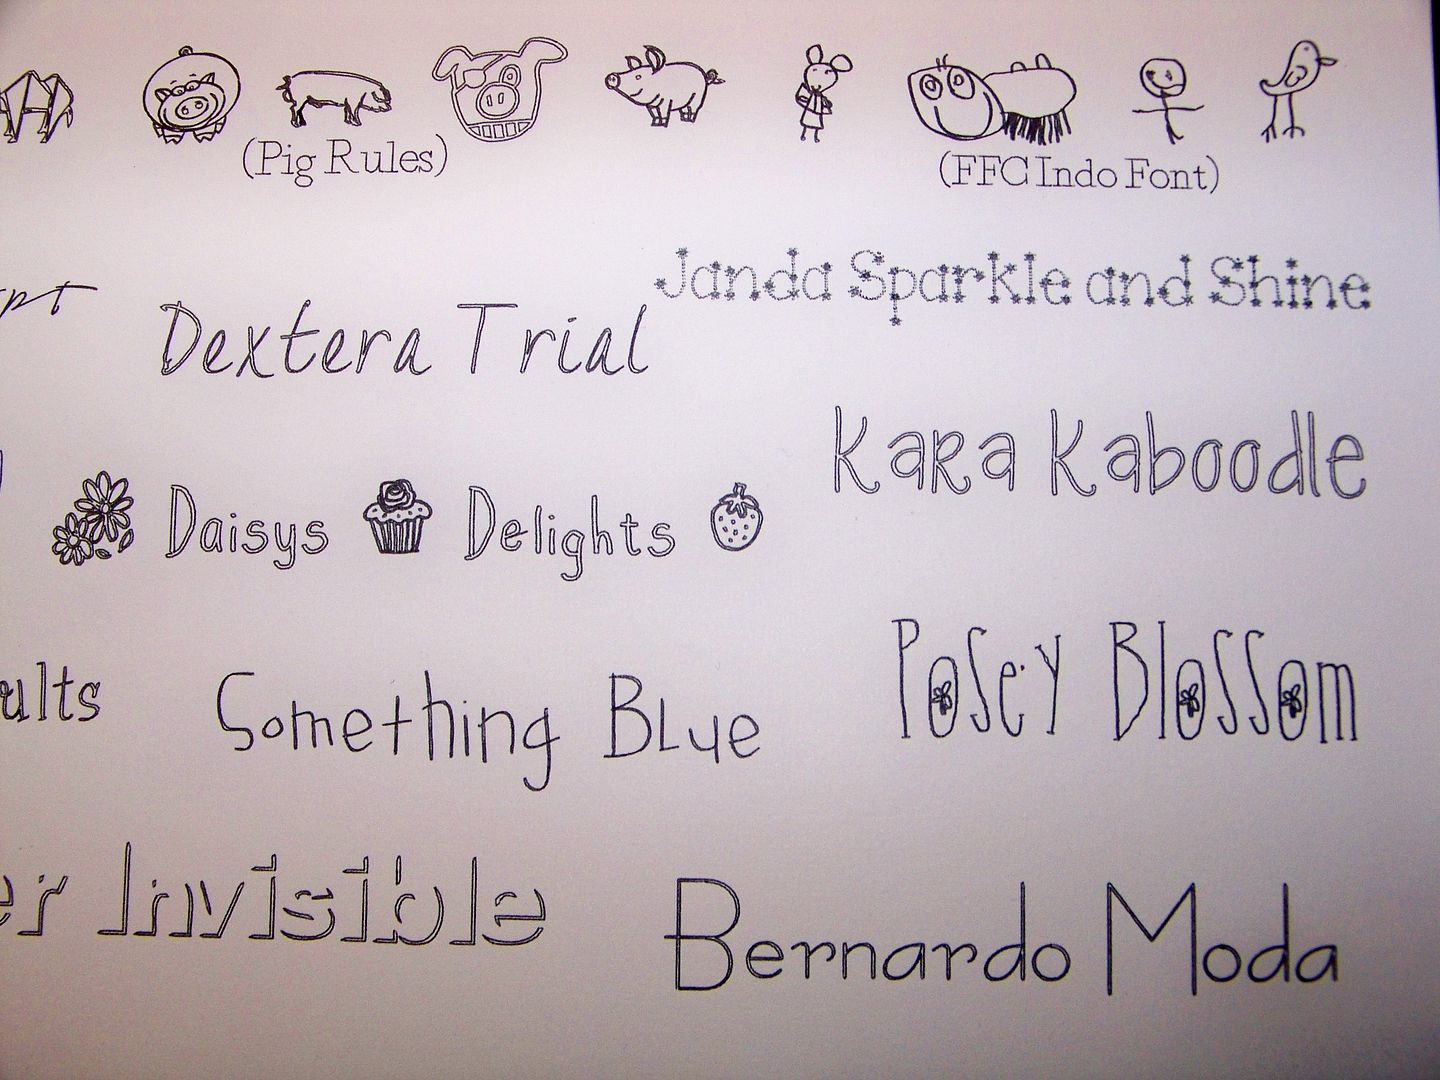
And the only thing more fun than finding new pen options is finding new free fonts to use that mimic handwriting and pen art!  Remember, all true type fonts (TTF) are system fonts so they will outline.  Using skinny fonts simply means that they will look like single stroke fonts.  Your chosen pen or the point size you choose can make certain ones look even more like handwriting.  For a full explanation of this and info on how to download, check out my previous post about this.  These are all from dafont.com.  Under each photo, I have links to each font. 

Jack and the Beanstock
Pancake
Killah Pika Pika
PW Smokey
Spider Font

Cloud
Hanging Letters 
Dreamer
Smiley
 Janda Hide and Seek
KB Fun House
Globe

Origami (Dingbat)
Pig Rules (Dingbat)
Tamoro Script
 Dextera 
KG Say Something
Daisys Delights
Austie Bost Somersaults
Something Blue
Woodcutter Invisible

Pig Rules (Dingbat) - repeat
FFC Indo (Dingbat)
Dextera - repeat
Janda Sparkle and Shine
Daisys Delights - repeat
Kara Kaboodle
Something Blue - repeat
Posey Blossom
Bernardo Moda

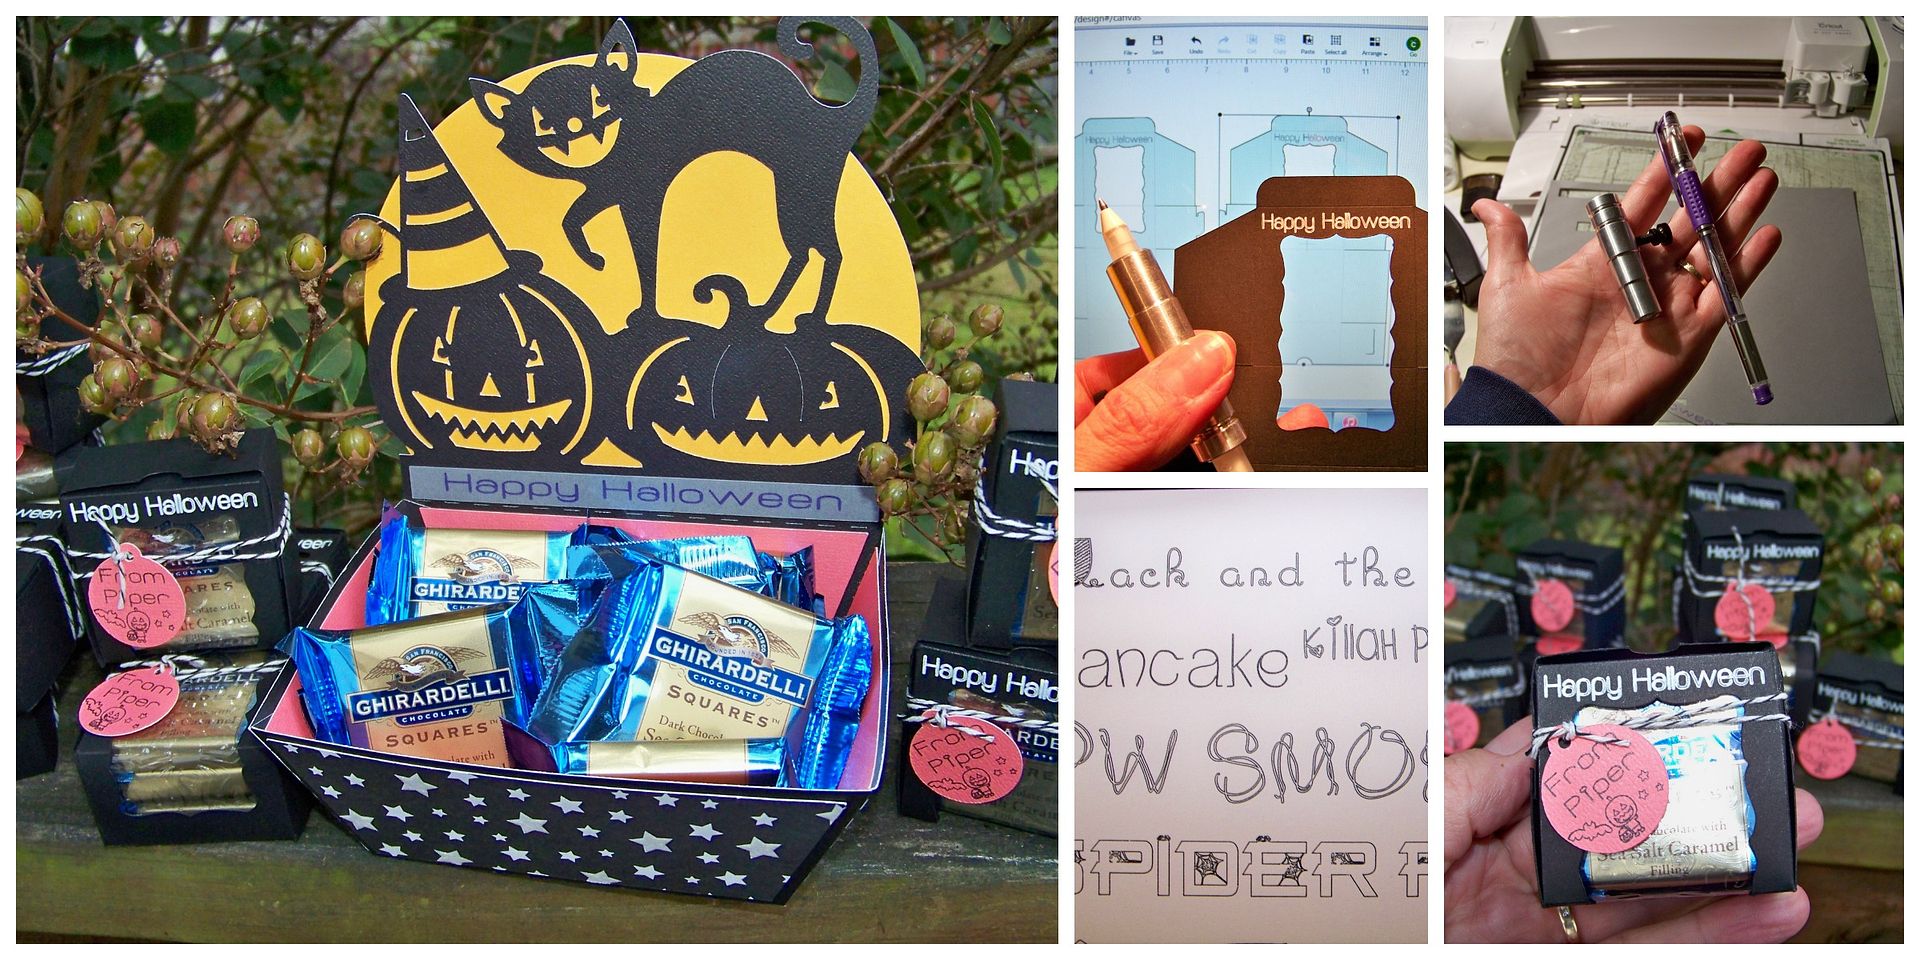
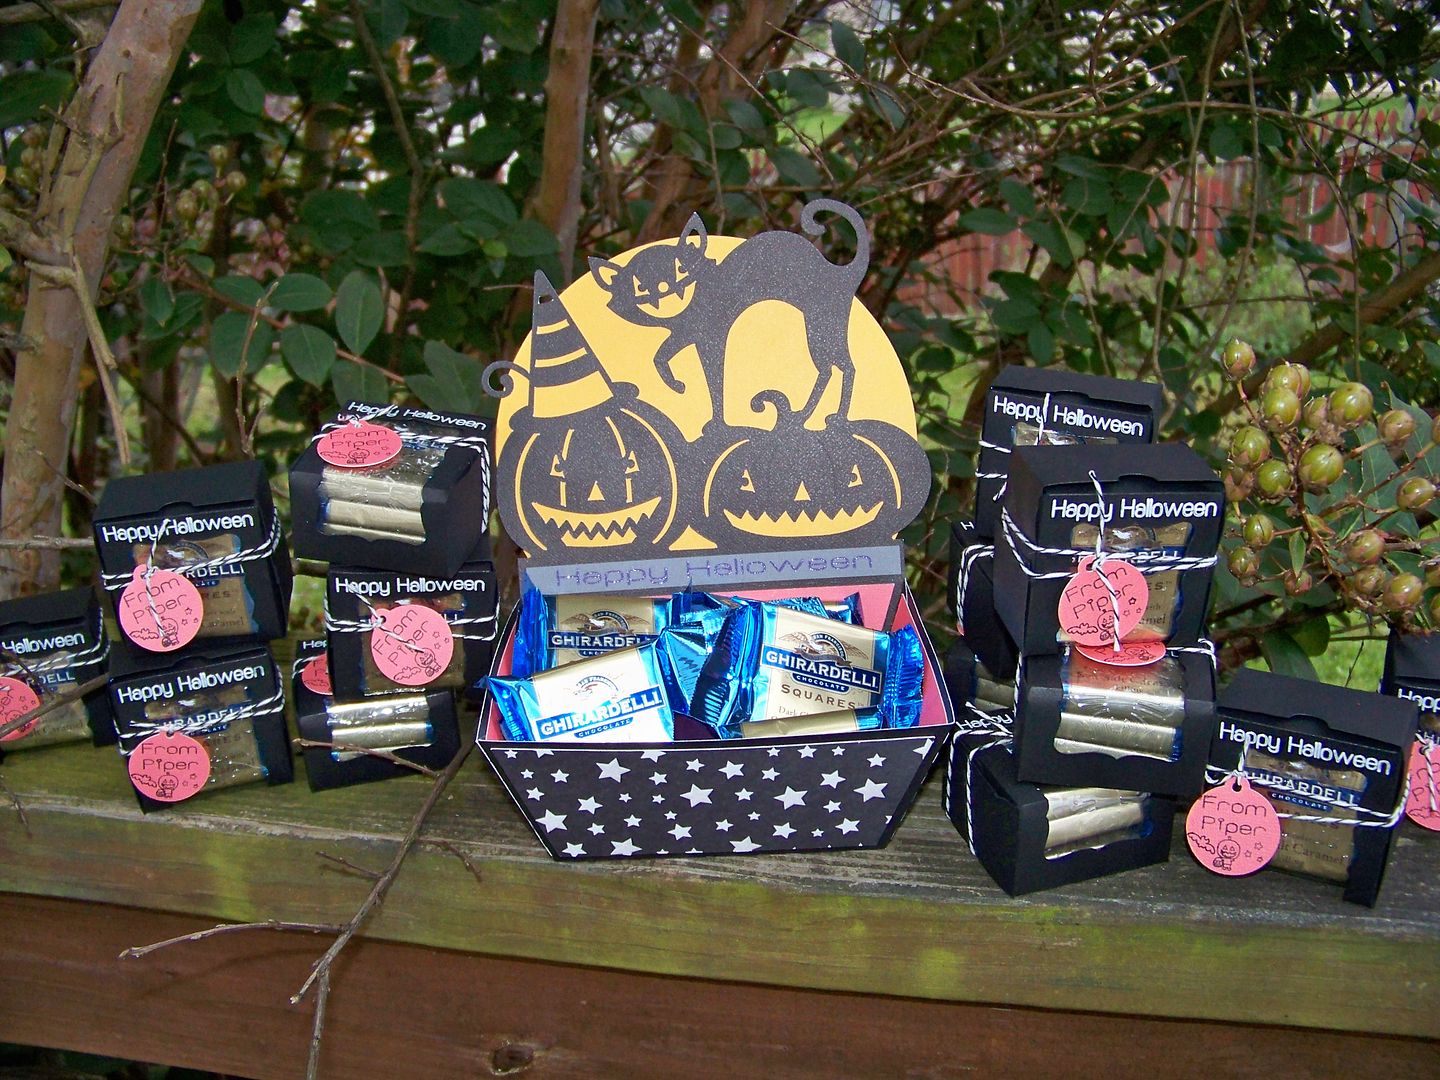
Using these new options, I created some tiny treat boxes for the ballerinas in my daughter's Junior Pre-Pointe Ballet class and a little candy dish for her ballet teacher!  Her academic school doesn't allow the kids to even mention the word 'Halloween' so we make up for it with her extra activities, like ballet class!


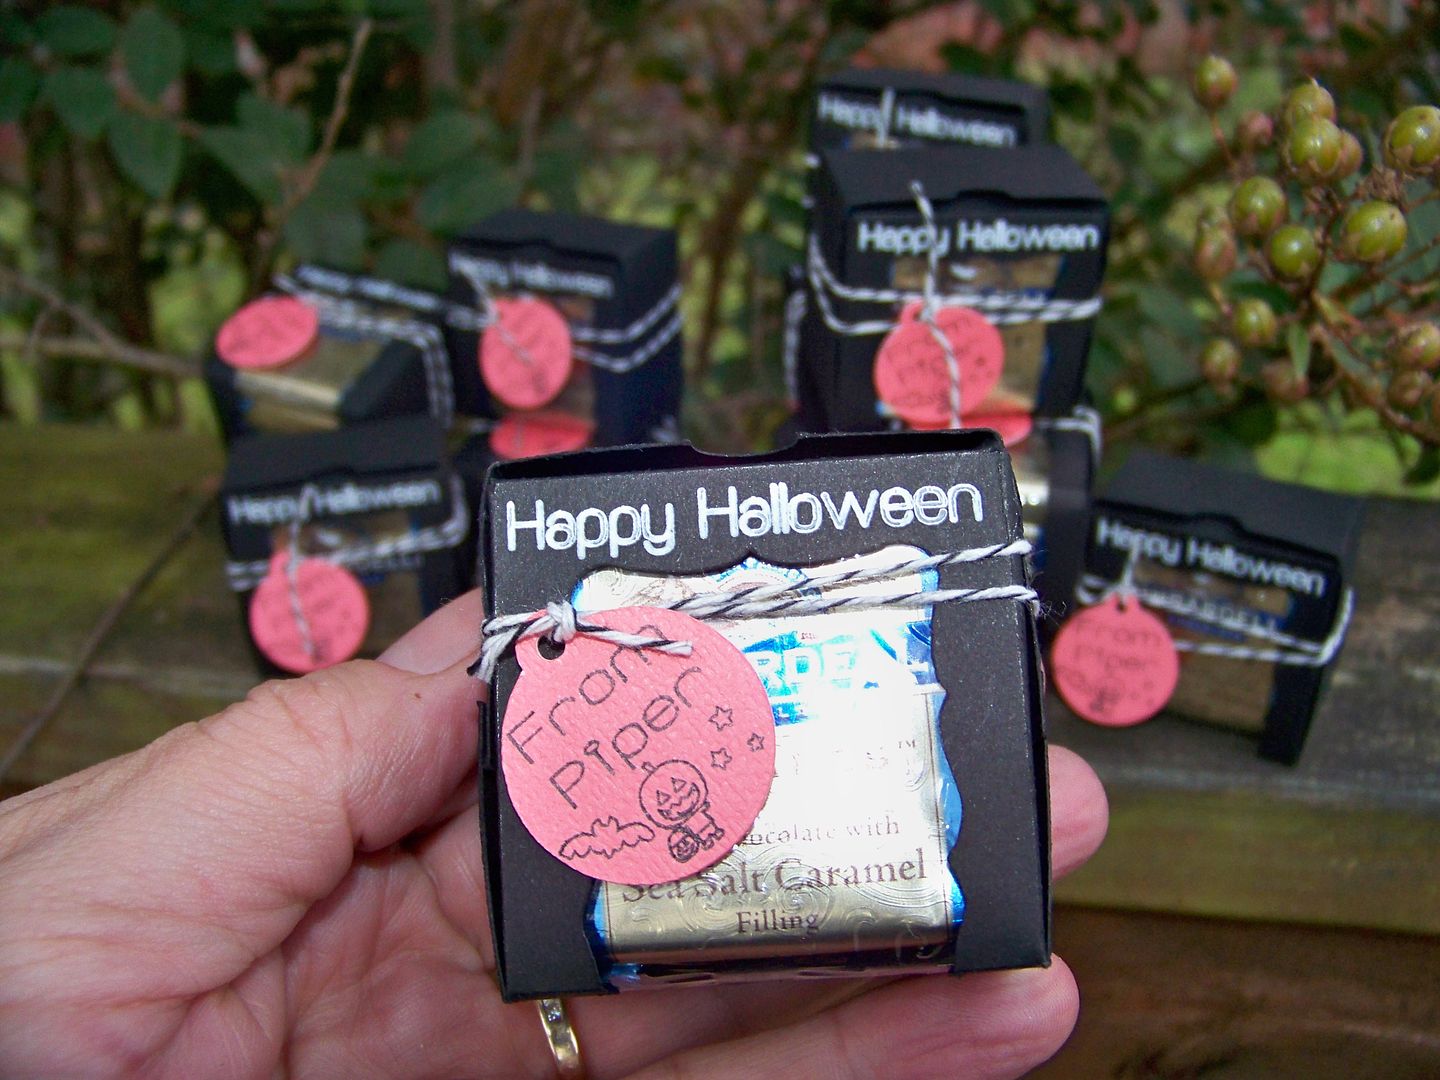
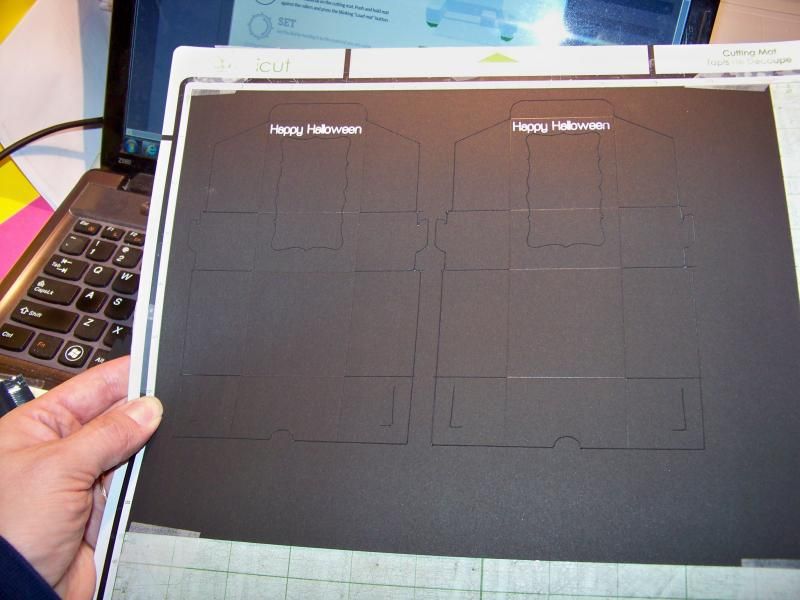
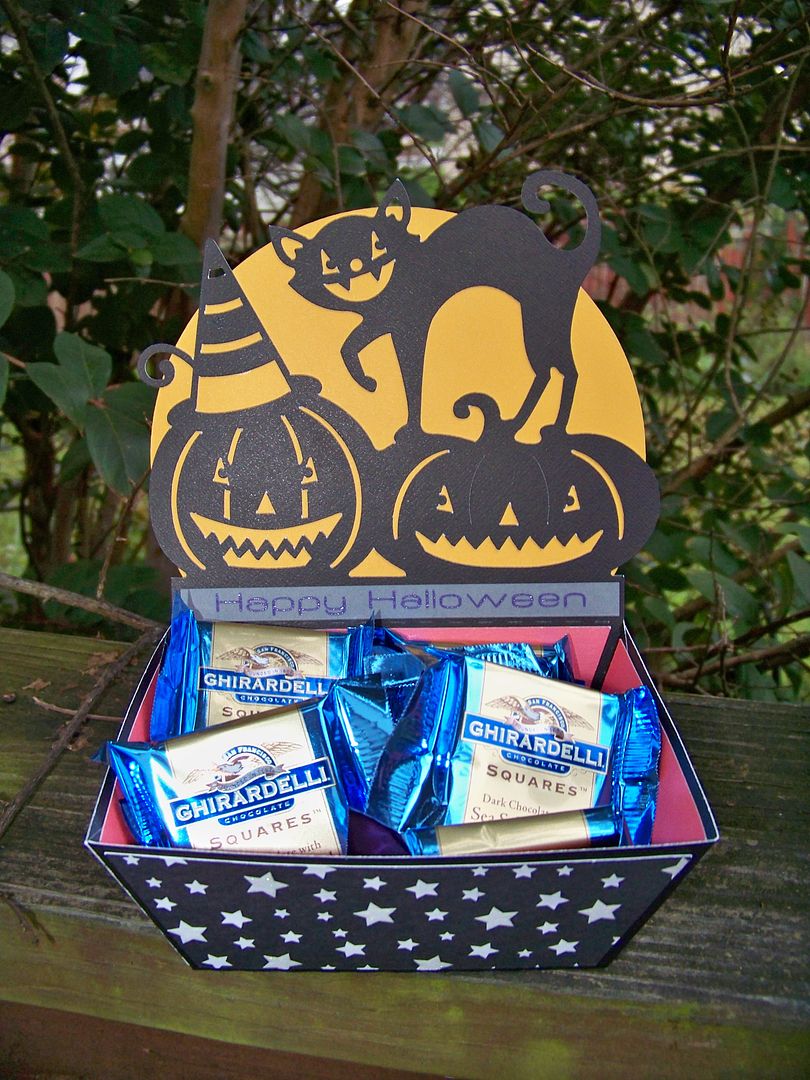
Thanks to MizEsther and Margo Jacobson, I was introduced to the fabulous little box on the Cricut Baby Shower Cartridge!  Cut at 4.5", this box is the perfect size for three Ghirardelli Squares!  


I found that I could fit only two boxes on the mat, whether the paper is 12x12 or 8.5x11 so using up smaller paper is the way to go.  This design utilizes the score tool as well, so the box folds perfectly.  I added text using Dafont's 'Smiley' and had the Explore write it in white Jellyroll pen with the Chomas Pen Holder!  My Design Space File for this is here:  https://us.cricut.com/design/#/canvas/project/21549753


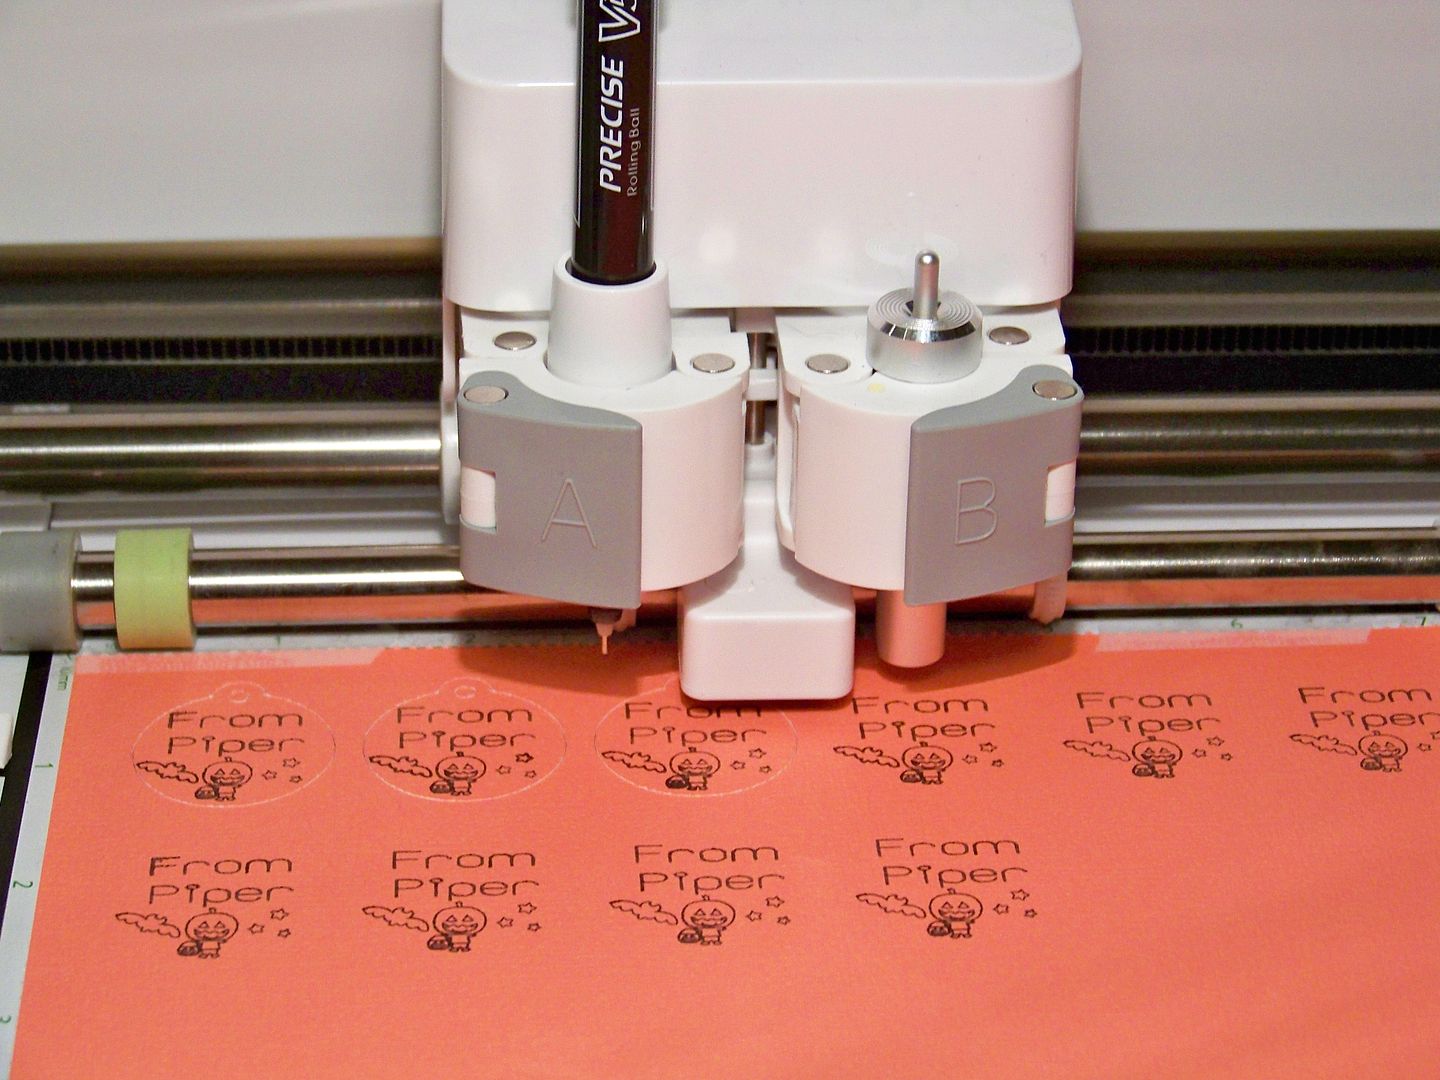
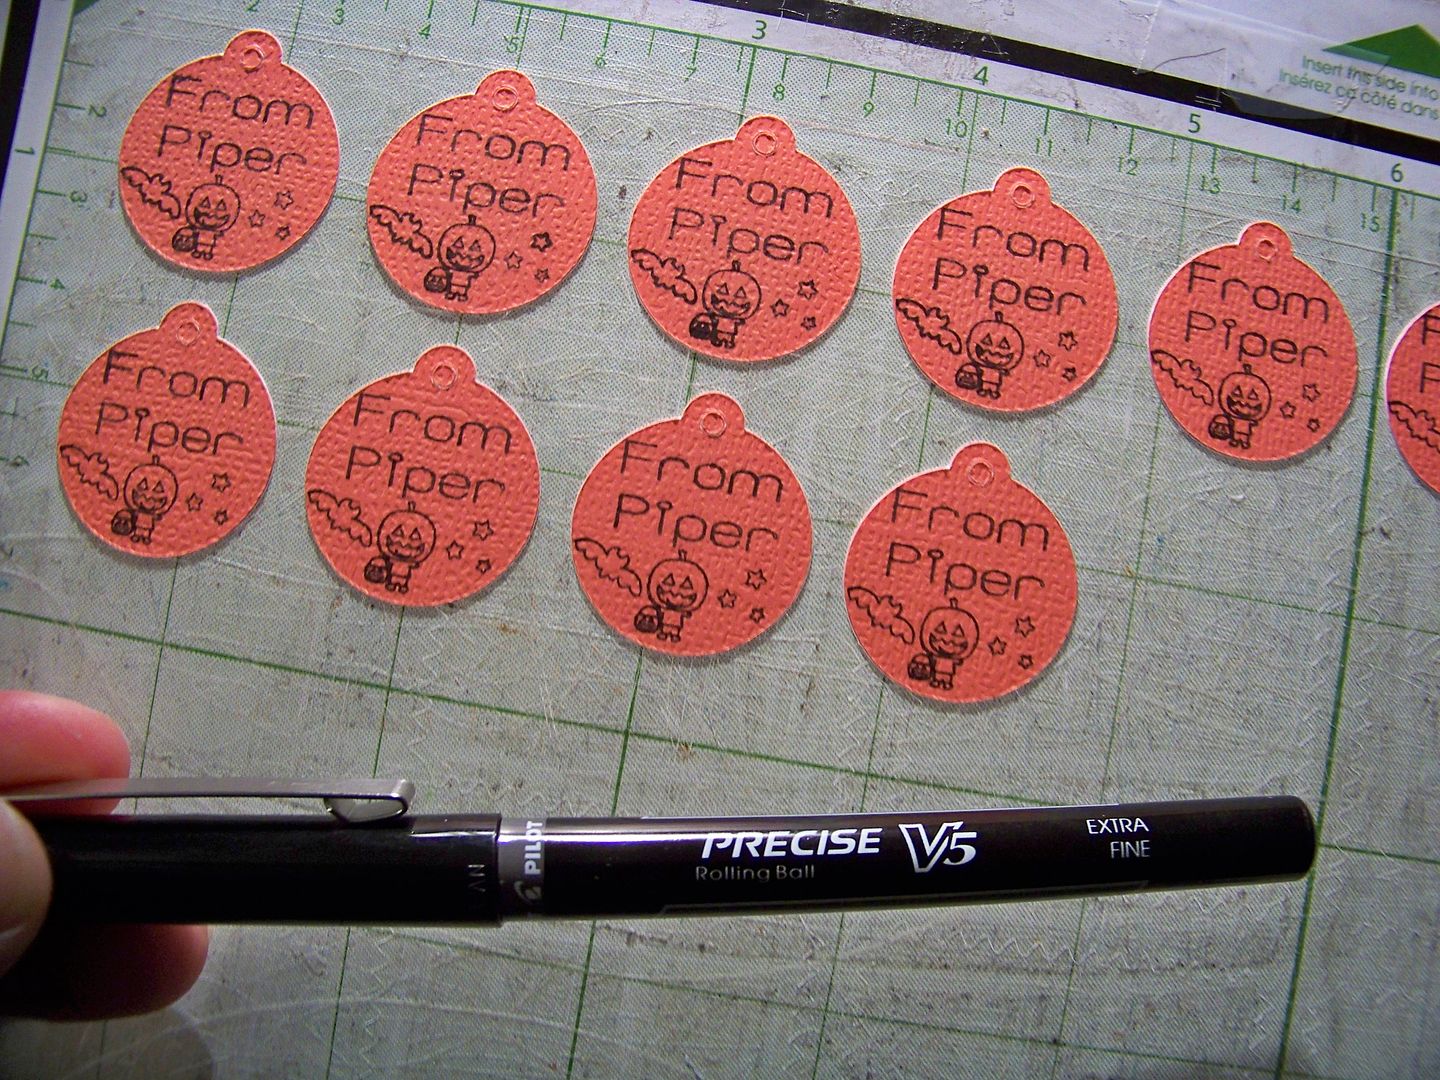
I tied on little tags I made using a simple circle tag from my Cricut images and text that included dingbats.  Check out Dafont's WTF Sweet Halloween Dings!  Have you used dingbats with your Explore?  You can cut, print, or write the characters and there are so many fun ones!  (Be sure to print out the key so you know which drawing relates to each alpha-numeric character.)  For these tags, I used Pilot Precise V5 black pen.  This pen fits just fine in the regular Explore pen holder with no other assistance or implement!  These pens are super fine so tiny details don't get lost!  This is my file for my tags: https://us.cricut.com/design/#/canvas/project/21533908  The text is Smiley font.  The tags were cut from Tags, Bags, Boxes, and More 2 at 1".


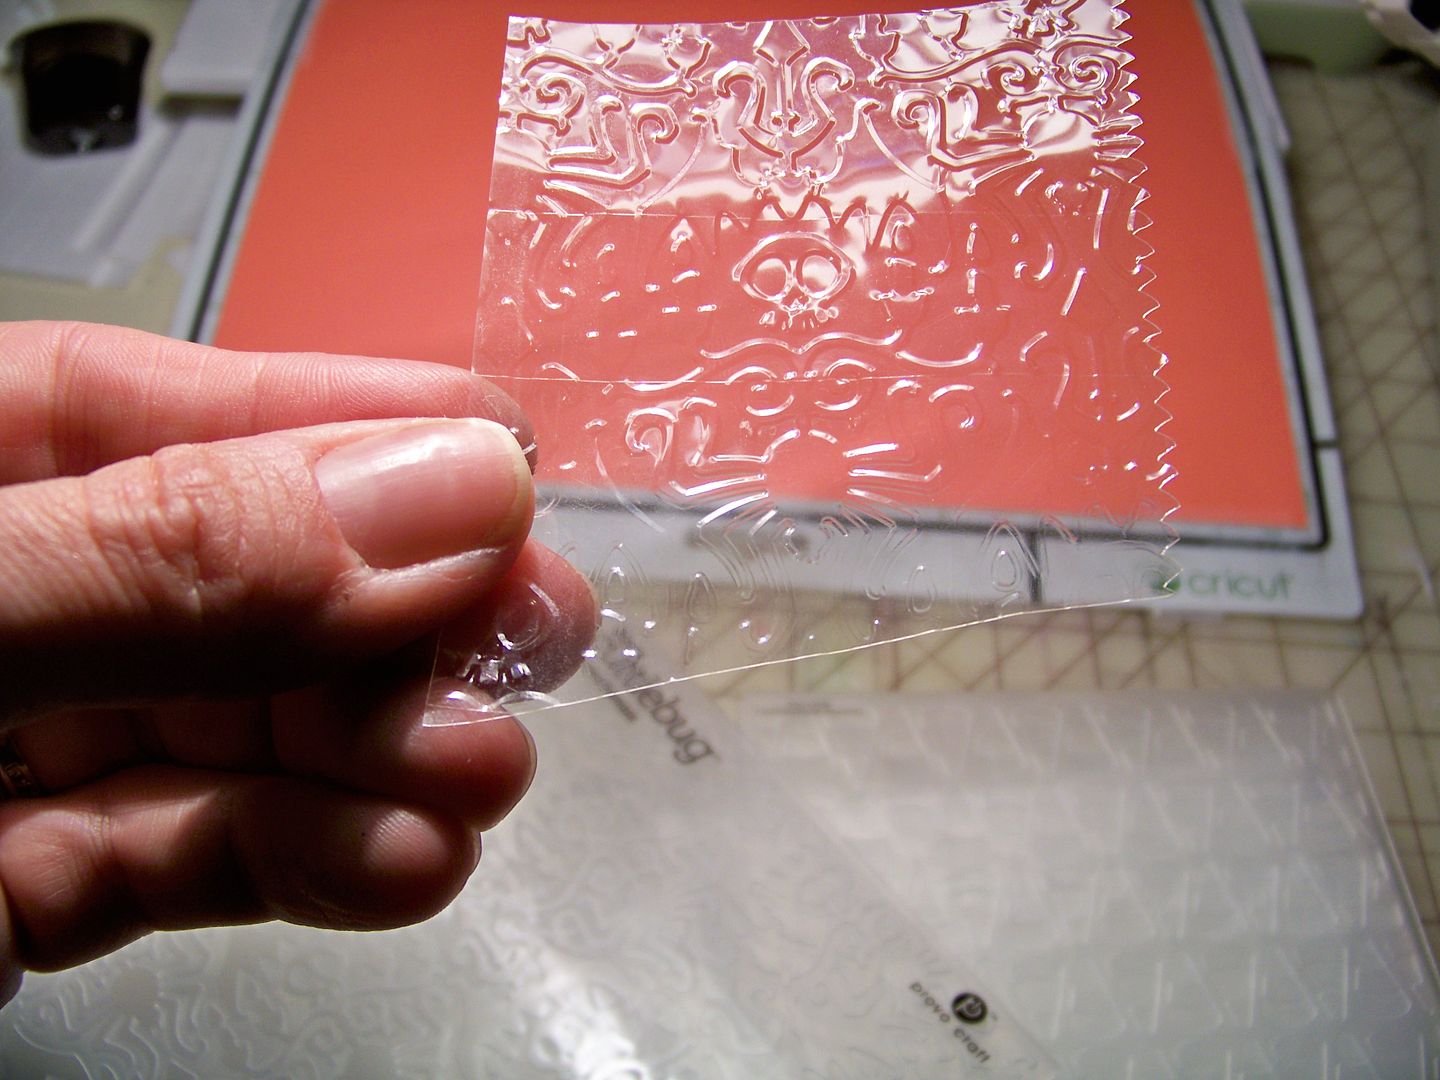
The fun thing with this little box is that you can use all kinds of re-purposed materials for the window.  On these, I used the plastic film that comes on Cricut cutting mats.  I have lots of those.  I cut them using the cardstock setting.  I love embossing it too!  (Embossing also hides any scratches or imperfections on the film.)


The candy dish was super fast and easy!  This was a quick file from SVGcuts from the Midnight Jamboree collection!  


To the little strip, I had the Explore write "Happy Halloween" in the Smiley font using a glitter pen.  I used the Chomas marker holder since this pen is thicker due to the rubber grip on the barrel.  


Quick Links:

My Design Space File for the Boxes (you will need Baby Shower and the Smiley Font installed):  https://us.cricut.com/design/#/canvas/project/21549753

My Design Space File for the Tags (you will need Tags, Bags, Boxes, and More 2 and the Smiley Font installed):  https://us.cricut.com/design/#/canvas/project/21533908

Chomas Creations Blog for Video on using her aftermarket pen and marker holders:  click here!

Chomas Creations Store to buy aftermarket pen holder, marker holder, and engraving tool:  click here!

Free Fonts:  find links to specific ones listed under each photo.  Just click the font name!  For the Halloween Dings, click here!

For my previous post on fonts that look great written by the Explore and how to download fonts and get them into Design Space, click here!  

My Previous Post on Pen Options that FIT in the Explore withOUT aftermarket holders or other assists:  click here!

Midnight Jamboree Collection from SVGcuts (candy dish):  click here!

Thank you for checking out my blog post!  I am in the middle of an on-line crop and these are two of my challenge projects!  Gotta get back to cutting and gluing!  Are you getting your craft on today?

Wednesday, October 31, 2012

Nothing Like Waiting Until the Last Minute


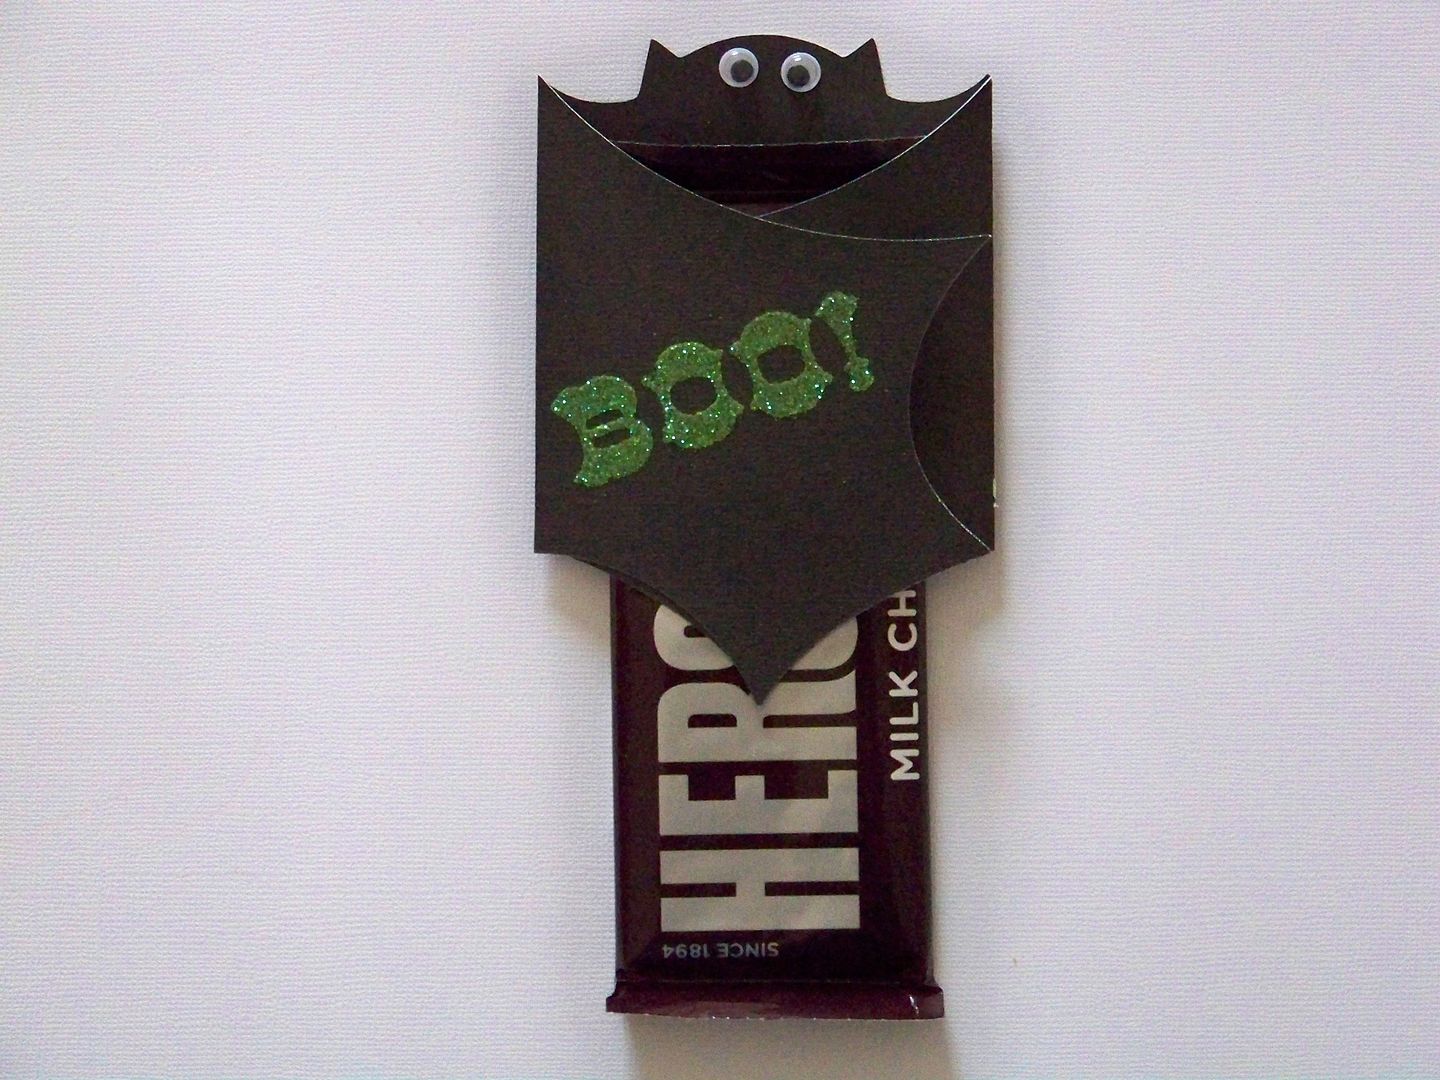
 This past weekend, I was teaching my kiddo how to make a book for a history project and planning for today's Halloween hooha, keeping me from making Halloween goodie-bags for the ballerinas in Piper's dance class.  I was thrilled when I saw the Halloween Treat Holders posted by HappyScrapper64 on Facebook and on the Circle Message Board.  You can find her project on her blog, Random Thoughts of a Scrapbooker.  I didn't just see them and use her idea, I also asked her on Facebook if they would work with candy bars.  Honestly, she did everything but actually make them for me, so thank you, Brenda, for saving me today by sharing your brilliant use of a card as a treat wrapper!


I cut mine for 1.55 ounce Hershey bars.  I used Artiste (page 76), cutting at 4-3/4" on the Expression.  I stamped "Boo" using a glue pad and glittered the image.  These went together so incredibly fast and with only one cut and no layers, I was loving Brenda during this entire process.... Please check out Brenda's fun blog filled with her other great ideas!

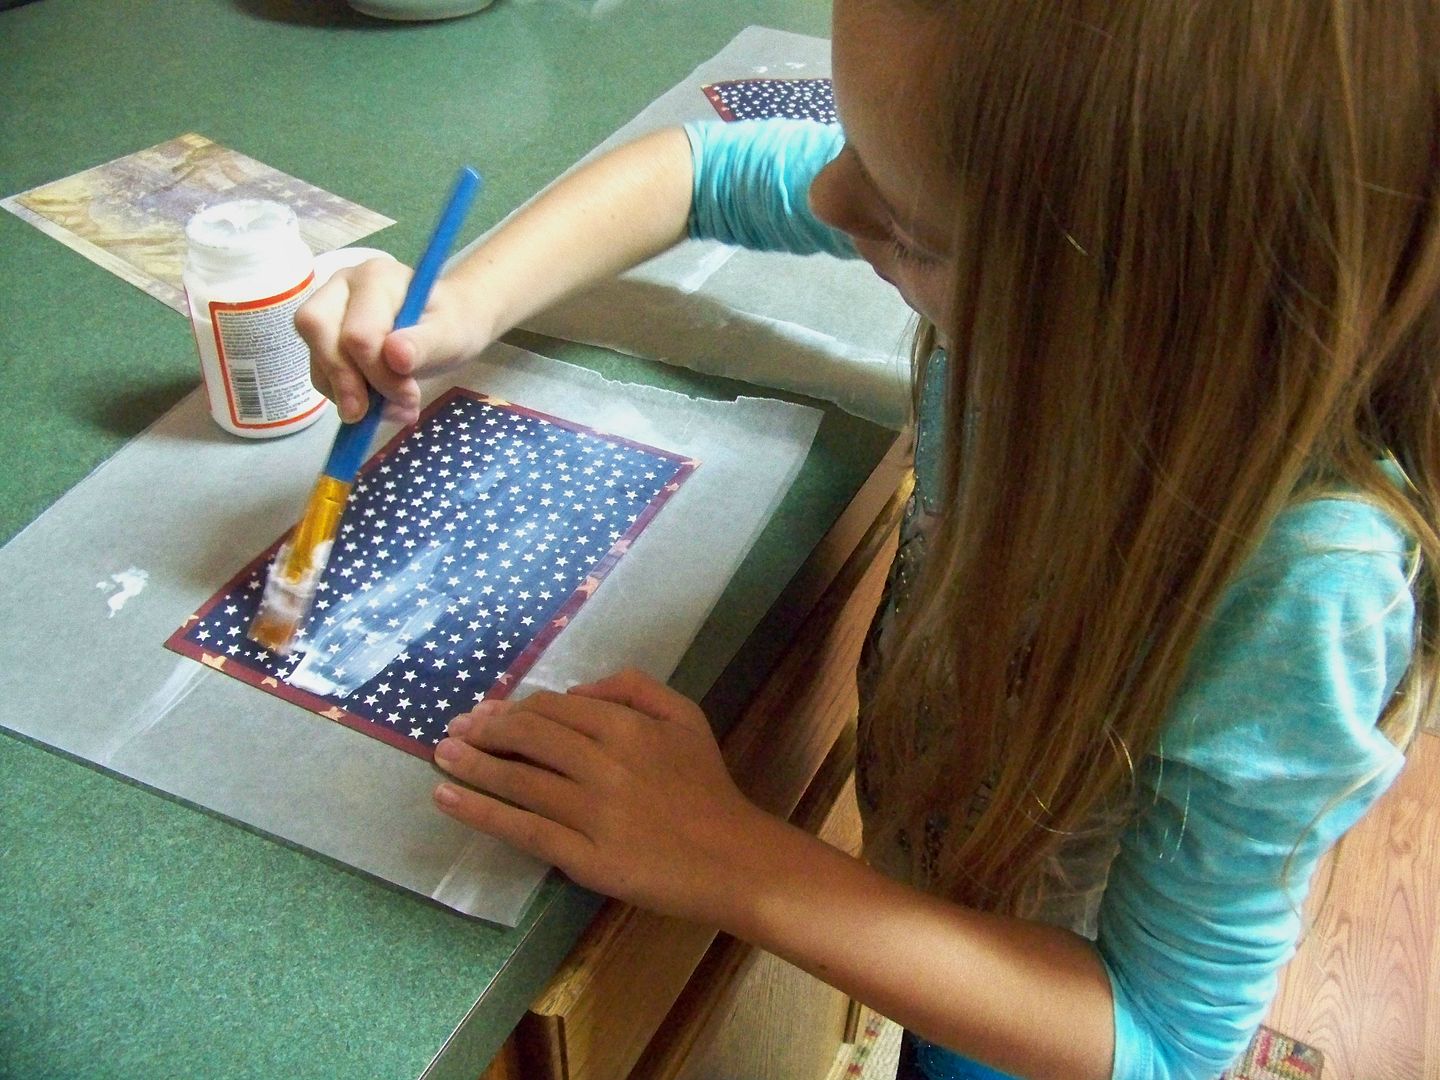
Sooo....  My daughter and I have been working hard on a book she is creating for a history project.  It is a 3rd grade school project, but most (ok all) of this project has been done at home, not at school.  I have had to teach her several new things, including how to decoupage chipboard to make a cover, how to make letters with a shadow on her Cricut (she has never used the shadow feature even though she has her own Cricut and uses it), how to use a Bind-It-All to punch holes (we haven't bound the book yet but I will probably close the wires for her), how to use a light-box and lined  paper behind unlined paper to make text straight.  Needless to say, I am glad we have until December to finish this!


She has been getting on my laptop and finding facts about each of her 26 historical Americans and drawing her own portraits of them, but the actual 'putting together a book' part of this project has been a big art lesson between Piper and me!  It has been fun, but I remember making books in middle school where we learned a crude binding process using cardboard covered in contact paper and embroidery floss to sew the pages into the cover.  I also remember getting the technical how-to info at school!

So, today, I am grateful that I have the time, skills, and tools to teach my kiddo and to help her.  And... I am grateful for crafters who share their projects with cut sizes and other info as Brenda did!

Speaking of grateful, I was reminded to thank God for all we have in a text I received last night from my friend, Gina Piazza, who is enduring the aftermath of hurricane Sandy while she waits on an upper floor for 6 feet of water to recede from her home and for power to be restored to her neighborhood in New York.  My thoughts are with Gina as I pray for speedy solutions, safety, and full recovery for our friends who have come in harm's way and who have lost so much due to the storm!
Thank you for checking my blog post today.

But wait! There's more! Click 'older posts' above!

But wait!  There's more!  Click 'older posts' above!