Showing posts with label Birthday. Show all posts

Thursday, March 14, 2013

St. Patty's Day Birthday Gift Bag

One of my daughter's little BFFs has a birthday on St. Patty's Day so I came up with a little gift bag for her with a birthday leprechaun.


I keep on-hand 7-1/2" x 10-1/2" kraft paper gift bags-- that was my base.  (That is the measurement minus the handles.)  I cut the jumping leprechaun from Simply Charmed (page 32) at 7".


The thing with a big cut is that you kind of have to add extra details and pop up some elements to keep the die cut from flattening out.  For this little guy, I hand-cut an extra lock of hair.  I glued it flush on the 'scalp end' and popped it up with 1/8" pop dots on the 'curl end'.  I also popped up his little hat and added a shamrock to the hat band cut from A Child's Year (page 31), cut at 3/4".  I added a vest layer to his outfit but cutting two jackets and cutting one away so that I could layer them and see the second layer, like a vest.  I added adhesive pearls for vest buttons.  I hand-cut lapels for the top layer, the jacket, and added a breast pocket and pocket square.  


To make him a 'birthday' leprechaun, I cut a little cupcake from Something to Celebrate (page 22) at 1".  I only cut the first two layers since it was so tiny.  I cut a "9" candle from the same cart (page 30) at 3/4".  I hand-colored (with pencils) the flame and wick.

To give him a "place" to exist, I trimmer-cut rainbow-colored solids and layered them to create a ground and horizon line.  I placed a couple of tiny shamrocks, cut from A Child's Year at 1/2".  I popped the leprechaun up with 1/8" pop dots to lift him off the surface a bit.


Lastly, for a tag, I cut a last shamrock, also from A Child's Year, at 3-1/4", and tied it on with 1/8" ribbon.


Lately, I have taken a little inventory of my Cricut cartridges and, as you have also probably figured out, there are many repeating icons among them!  I used to 'need' all the cartridges and came pretty close to getting them all before last autumn.  The good thing about this economy, hopefully there is a silver lining, is that many of us have gotten a chance to re-prioritize and to be more creative!  So... if you don't have the cartridges listed above, you can find shamrocks on the following cartridges that you may have:

  • Create-A-Critter 2
  • Designer's Calendar
  • Elmo and Friends Holiday
  • Give A Hoot
  • Imagine More Cards
  • Celebrate with a Flourish
  • Paper Doll Dress Up
  • Phrases 
  • Spring Fever
  • Holiday Cards
You can find leprechauns on the following cartridges that you may have:
  • CCR Exclusive:  St. Patrick's Day
  • Teddy Bear Parade
  • Paper Doll Dress Up
A cupcake image can be found on dozens of cartridges.  This is just a sampling:
  • A Child's Year
  • American Alphabet
  • Best Images of 2006 and 2009
  • Birthday Bash
  • Create-A-Critter 1 and 2
  • Storks Delivery
  • Divine Wedding
  • Doodlecharms
  • Elmo's Party
  • Every Day Paper Dolls
  • Hello Kitty Greetings... and the list goes on and on!!!!
Numbers can be found on any cartridge with font of course.


 Thank you for checking my post today!  You can always find my blog on: 


To see many of my other paper projects, check out My Project Gallery (click here).

To see my previous St. Patrick's Day projects, click here.

Tuesday, June 12, 2012

Cash Cow Exploding Gift Box

My sister, Tila, has asked for cash in lieu of gifts or even a birthday luncheon this year.  I wanted a fun way to present it.  I decided on an exploding box!


I let the crafty Renee choose my colors for me.  She is hostessing a color challenge this week on her blog, I Came, I Saw, I Created.  You can see it by clicking here!  (I cheated ever-so-slightly by also using some prints with it from All Wrapped up that added a bit of red and yellow, but the majority of colors on my project used her blue-pink-orange combo!)


I have never made an exploding box before, but I had the idea of a tiny 'cash cow' inside with the money.  I set out to learn how to make this kind of box and found a great little tutorial on Enfy's blog, Going Buggy. You can see it by clicking here!  I followed Enfy's instructions on the box except for inner-most layer.  I wanted that layer to be diagonal so I sized it to be a 2-1/4" diamond base that would be adhered to the square bases.  For that layer, I started with a 6-3/4" square, scoring at 2-1/4" increments and cutting out the corner squares like the others.  For the lid, I cut an 8" square from All Wrapped Up and followed the directions from her tutorial to put it together.


For the shapes on the inside orange flaps, I cut medallions from All Wrapped Up at 3" and topped them with blue punch cuts from the large Martha Stewart sunburst deep border punch.  (I cut on each side of a 2-1/2" strip of paper to create the sunburst).  I cut silly pictures of her kids and added them to the tops of each.


For the blue flaps, I cut medallions from All Wrapped Up at 1-1/2".  I glued rolled up money on two of them.  I wanted it to be easy to take off the money without ruining the box, so I wrapped the money in a strip of paper and attached it by putting a pop dot under the paper only.  (She can either pull off the rolled up money or scoot it out, leaving the paper strip.)  I later added butterflies to the plain medallions.


My cow is from Noah's ABC Animals, cut at 1-3/4" on the Expression.


To attach it to the box, I cut a little square of paper and cut in slits under each leg.  I slipped in her little feet and glued them in place on the back.  I attached the square to the box using 1/16" pop dots since the feet poking through would prevent the square from adhering flush.


I cut a tag using a punch from a piece of Cricut clam shell acetate that I recycled.  I trimmed it down to remove any extra acetate.


To that, I adhered butterflies, cut using a Martha Stewart punch.  I used E6000 glue to attach the butterflies to each side of the acetate.  I attached the butterfly-covered acetate to the middle layer of the 3D cow using a strip of Terrifically Tacky Tape, scooting it down inside the cow to hide the tape.


For the outside of the box, I cut 1" strips of cardstock for ribbon.  I attached the "ribbon" to the lid separately so the lid would still easily pull off of the box.


For the bow, I used the tutorial by Linda at the Paper Boutique.  You can see it by clicking here.

For the tag, I used the butterfly tag on All Wrapped Up, cut at 2".  I printed my sentiment on the reverse side so that it would make sense to her when she found a cow inside:  "For your birthday, we thought you would like a cash cow."

I attached the bow and tag to the box lid using the bow's construction brad.


This was fun, and for my first one, I liked it.  If you want to ever feel inadequate as an exploding box maker, I suggest checking out Elaine's Magic Boxes (click here).  Wow-- she is a magician with these!  So much fun to see and the main reason I had to have floating butterflies in mine.

Thank you for checking my blog today!  To see many of my previous projects, please check My Project Gallery.


Friday, April 13, 2012

Letter Envy Challenge!

These are my challenge projects using Letter Envy.  As a change, the Cricut Circle Magazine Challenge is letting Circle members submit multiple projects for this challenge.  Each project must include a cut from Letter Envy and at least two other cuts from any other cartridge.

Birthday Card


I used Something to Celebrate with my Imagine for the card base and banner shapes (each cut at 1.8" relative size), flood filling with pattern and colors from Floral Emporium.  One of my favorite things about the Imagine carts is the color palette of solids and prints which make it so easy to quickly coordinate elements from different cartridges!

I used Letter Envy for the lettering on the banner, cut at .7".  I cut the juggling beaver at 4.5" from Birthday Bash, also floodfilling with colors from Floral Emporium and using RGB codes for the fur and face.  (RGB for the fur is 105,49,17; RGB for the face and ears is 255,219,175.  I snipped off the lower body of the beaver, allowing me to use a larger size for his upper body than I would have been able to if I used the whole body.

I glued the lower edge of the juggler to adhere it flush but used super thick pop dots for the upper part so that he would pop off the card!  I used the same pop dots under the balls to pull them away from the banner so that the banner would look like it is in the background.


Note Card Set


I used All Wrapped Up to create notecards on my Imagine, cutting at 6.3".  Using the colors in the queue from All Wrapped Up, I selected solids from which to print and cut the "N" layers from Letter Envy at 2.6".  I embellished the initial with flowers I cut from Mother's Day Boutique at .6", also using colors from the All Wrapped Up queue.


Just Because Card


I used Baby Boutique with my Imagine to create the printed card base.  I cut the card at 9" and then manually trimmed it down to 5-3/8" wide to accommodate the frame.  The frame was cut from Ornamental Iron 2 at 4" on the Expression.  I used parchment to cut the shadow for the frame to mute the card colors and tie the "hello" to the frame.  I cut the "hello" from Letter Envy at 1-1/2" on the Expression.


Wow!  I just barely got this posted under the deadline!  I loved this challenge because it helped me to think of the cartridge in new ways and prodded me to use some cartridges I had never used before!

Thank you for checking this post.  As always, you can see all of my projects by clicking here to visit My Project Gallery.


Saturday, January 7, 2012

Elizabeth-Marie-Gertie-Jean, Birthday Queen

Decades ago, when I was in my 20s *ouch*, I created dimensional stuffed cloth dolls for local art galleries.  One of my favorite series was the Birthday Queens!  These were dolls for women, not girls, and though whimsical, had a little story to tell too.

I decided to resurrect a Birthday Queen in honor of my upcoming birthday-- this time in paper.  I wanted to get back to a little paper crafting after a fabulous time of loom knitting and sewing.  I thought you might enjoy...

Elizabeth-Marie-Gertie-Jean
 The Birthday Queen


My project was inspired by the jaw-dropping gorgeous figures by George Stewart at the Ventura Museum, photos of which I caught on a blog from MJ Ornaments.  Click here to see them!  You can see all of George Stewart's Historical Figures by clicking here.  They are incredibly fun to look at.

For the crafty how-tos:  Well, I really have to admit that Elizabeth-Marie-Gertie-Jean is pretty much a hand-cut gal.  I did start with a figure from Country Life at 9" on my Imagine, floodfilling her with RGB 250, 229, 210, but my scissors really re-cut everything on her from her head to her chest and arms.  (I know what you are thinking and, no, none of the women-folk on Country Life have bosoms.  Those were hand-cut too with 'droop' and all.)  Her lower body was completely cut off, since it was not needed with the dress.  I did appreciate having the upper body as a guide, but I changed her proportion when I gave her that lean, long torso in the form of a fitted bodice.


In the past, my Birthday Queens were matronly, more than a little thick through the middle, and a little too prophetic for my ease.  I decided that I wanted a lean and long Queen who obviously worked on her core muscles and did a little yoga.  Maybe that would come to fruition too....fingers crossed, yoga mat placed.

Her dress was embossed with two Cuttlebug folders.  The birthday candle trim on the bottom of the underskirt was made from an EK Success edge punch.  The gold paper is part of a paper pack my Santa-Mom gave to me this Christmas.  Tissue paper was used for the collar and cuff flounces.  The gold stars are the waste from a Martha Stewart edge punch; the silver stars were in with the metallic shred I used for her hair... more about that in a moment.  The jewels are self-adhesive rhinestones and pearls from Kaisercraft.  (I absolutely love those but can only find them at Meijer.  What's up with that?  So much easier than hot-fix jewels or using glue.  Each pack has a great variety of sizes coiled together and they have a great hold.)

Her hair is made from twisting Metallic Shred basket fill from Hallmark.  Her head is incredibly heavy.  I twisted the fibers until they curled onto themselves and hot-glued them in place, suffering one of the worst burns ever. (Whininess is ageless don't you think?).


Her crown is a Cricut cut combined with edge-punched gold paper.  I started the crown with a 3" layer from Baby Boutique, printed and cut on the Imagine.  I trimmed it, jeweled it, and manipulated it to curve out.  Then I placed it behind the birthday candle edge cut, that I wrapped around her head.

Her face is hand-drawn and inked.

I hand-cut her gift... and her fingers that hold it.  You know, historically, royalty has given the absolute best gifts, right?  Just a needless reminder:  Birthday Queens bring wrinkles with wisdom so use care (and eye cream) when accepting their mandatory presents. 

So... as I was saying, the background paper was from a paper pack that has been setting, ignored, for too long.  The birthday cakes are from Yummy, printed and cut in various sizes.  The tables are from Serenade at 4" and 3" with hand-cut and trimmed tablecloths.


It's a new year and we are all a little older.  Happy Birthday to all the January babies (you will always be a baby to someone somewhere).

More gifts to me from me in the next few posts!  Can't wait to show you!


Pin It

Thursday, August 25, 2011

Cosmo Cricket Child's Gift Set

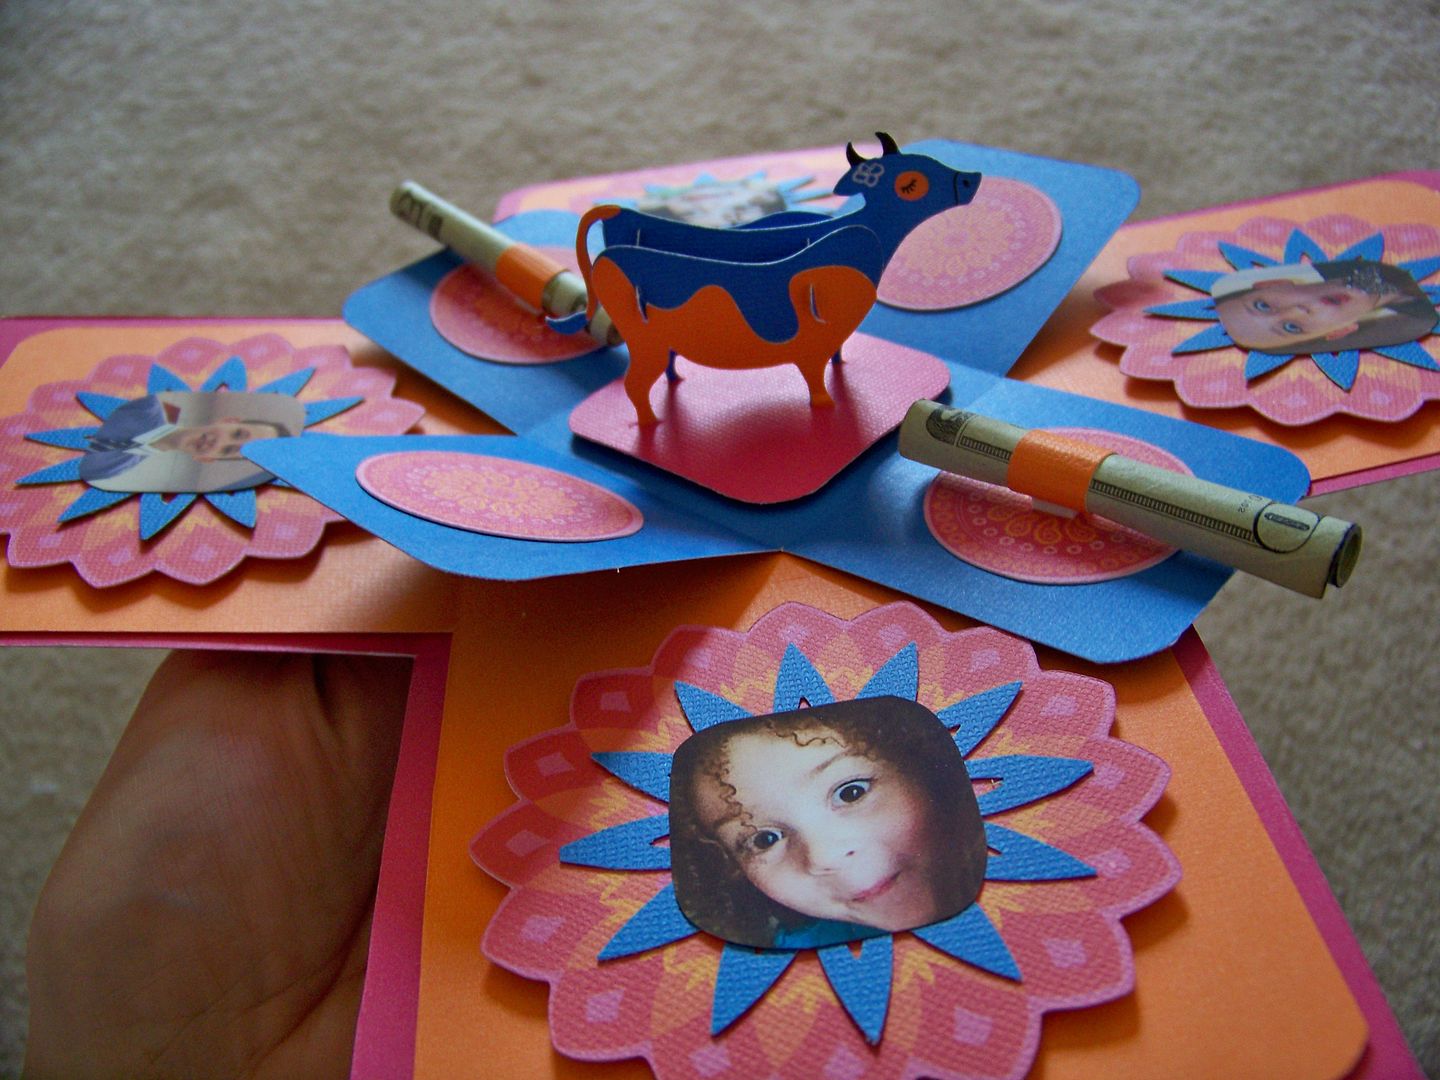
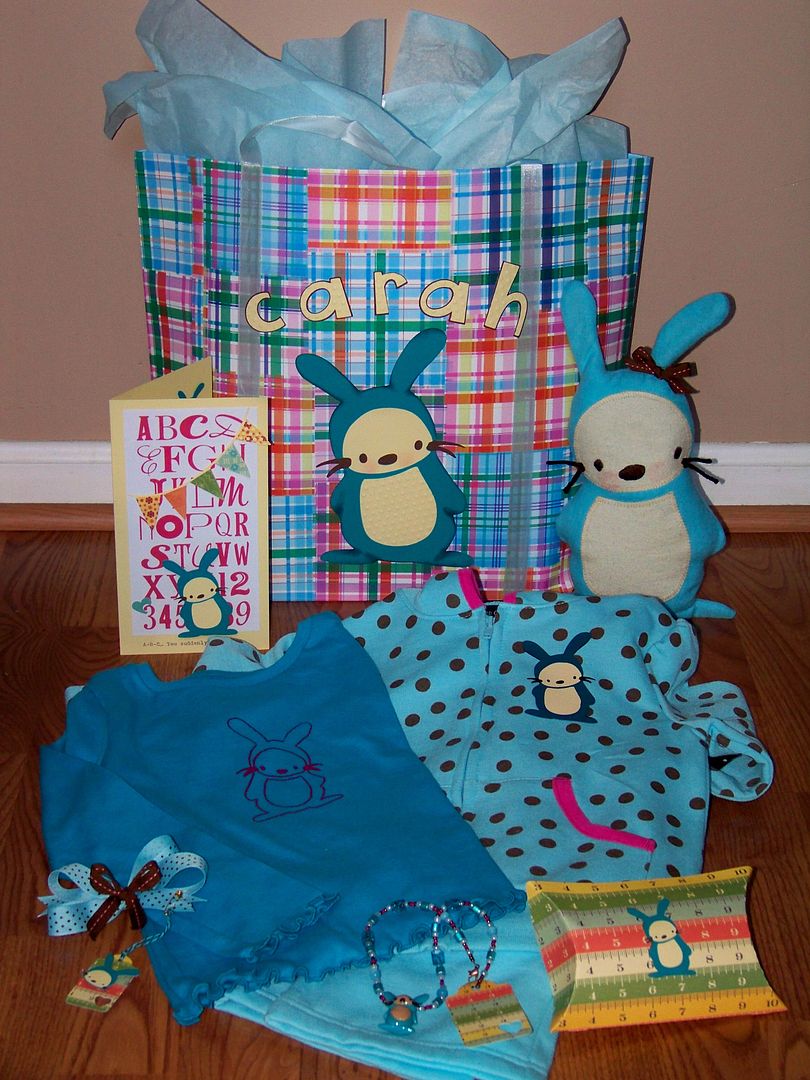
I wanted to share with you a gift set I have made for my niece, Carah.  This is my entry in the Cricut Circle Magazine Challenge:  August Cosmo Cricket Contest.


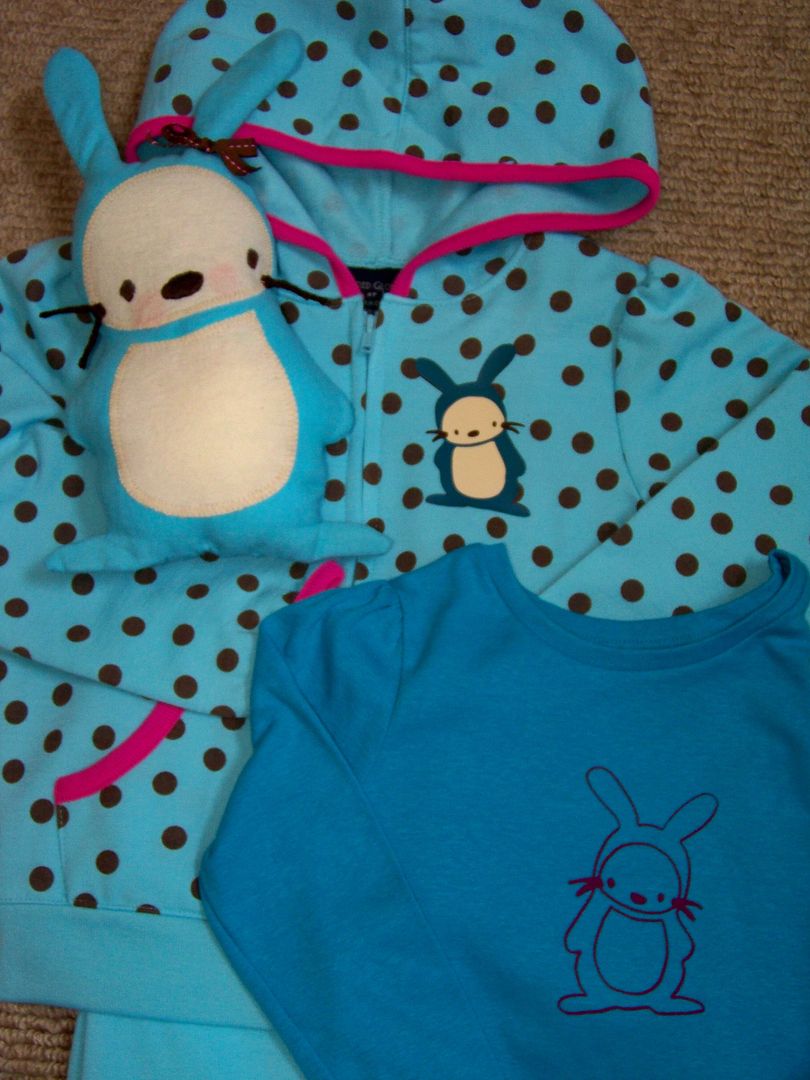
I love the little bunny from the Cosmo Cricket Just A Note cartridge.  Pop Surrealist Tim Buskup came to mind for my husband when he saw this little guy.  I have used it as my repeating icon for this gift set.  I wanted to move my Cricut machines and the icon in several different directions to create a special collection.  Baby Carah turns three in September, so this is my Carah Collection.  (This is definitely my way of being silly-- but I do love coordinated groups of things -- always have!) This set includes a birthday card, decorated gift bag, silk screened shirt, decorated playsuit, stuffed toy, necklace with pillow box packaging, and a hair bow.  All were made with the Cricut or using the Cosmo Cricket bunny icon in the handbook as a pattern or guide.


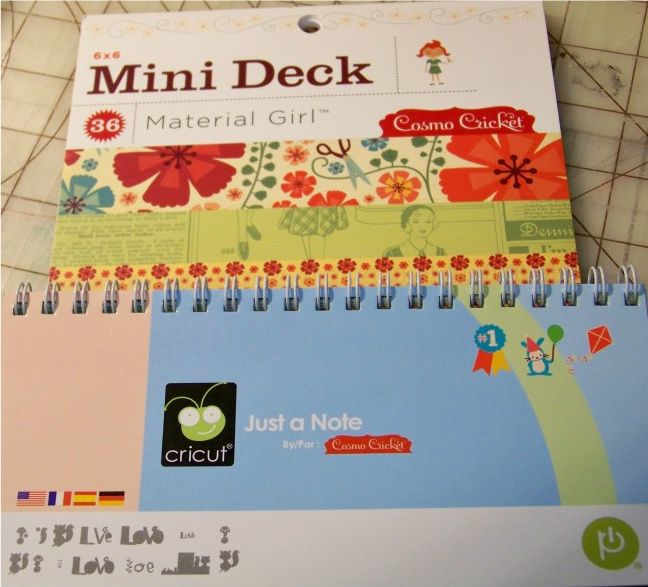
In addition to the Cosmo Cricket-designed Just A Note cartridge, I also used a mini deck from Cosmo Cricket on various elements on this gift.
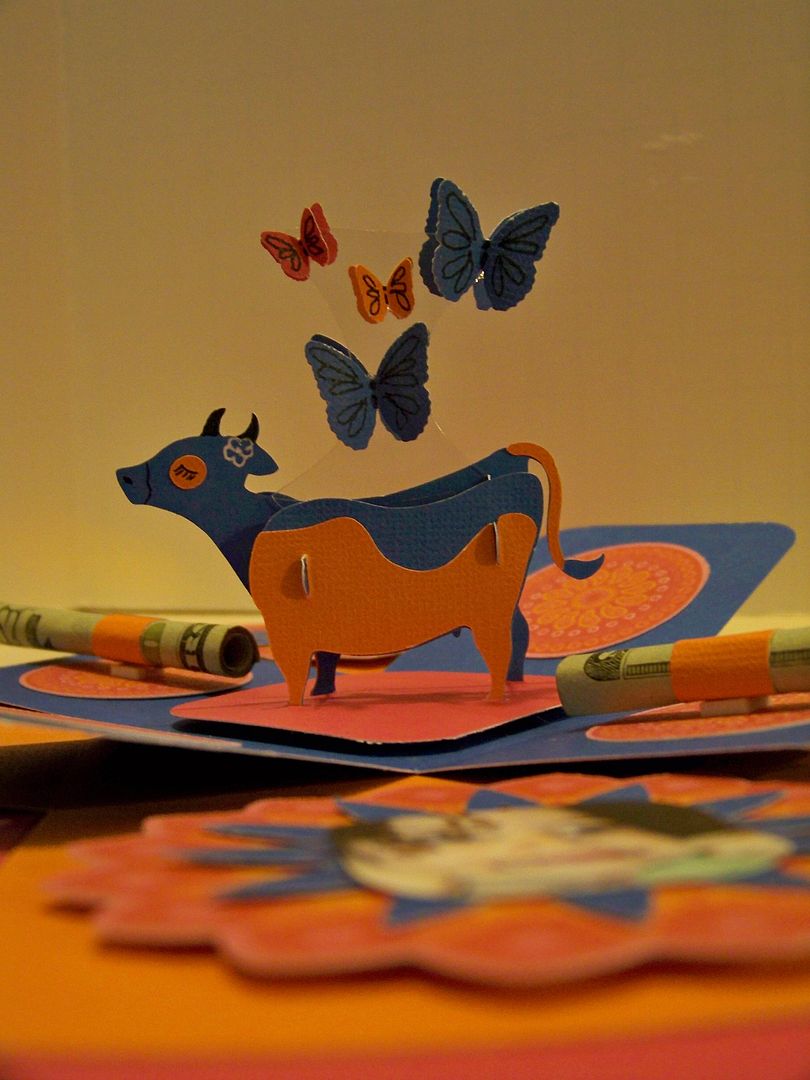
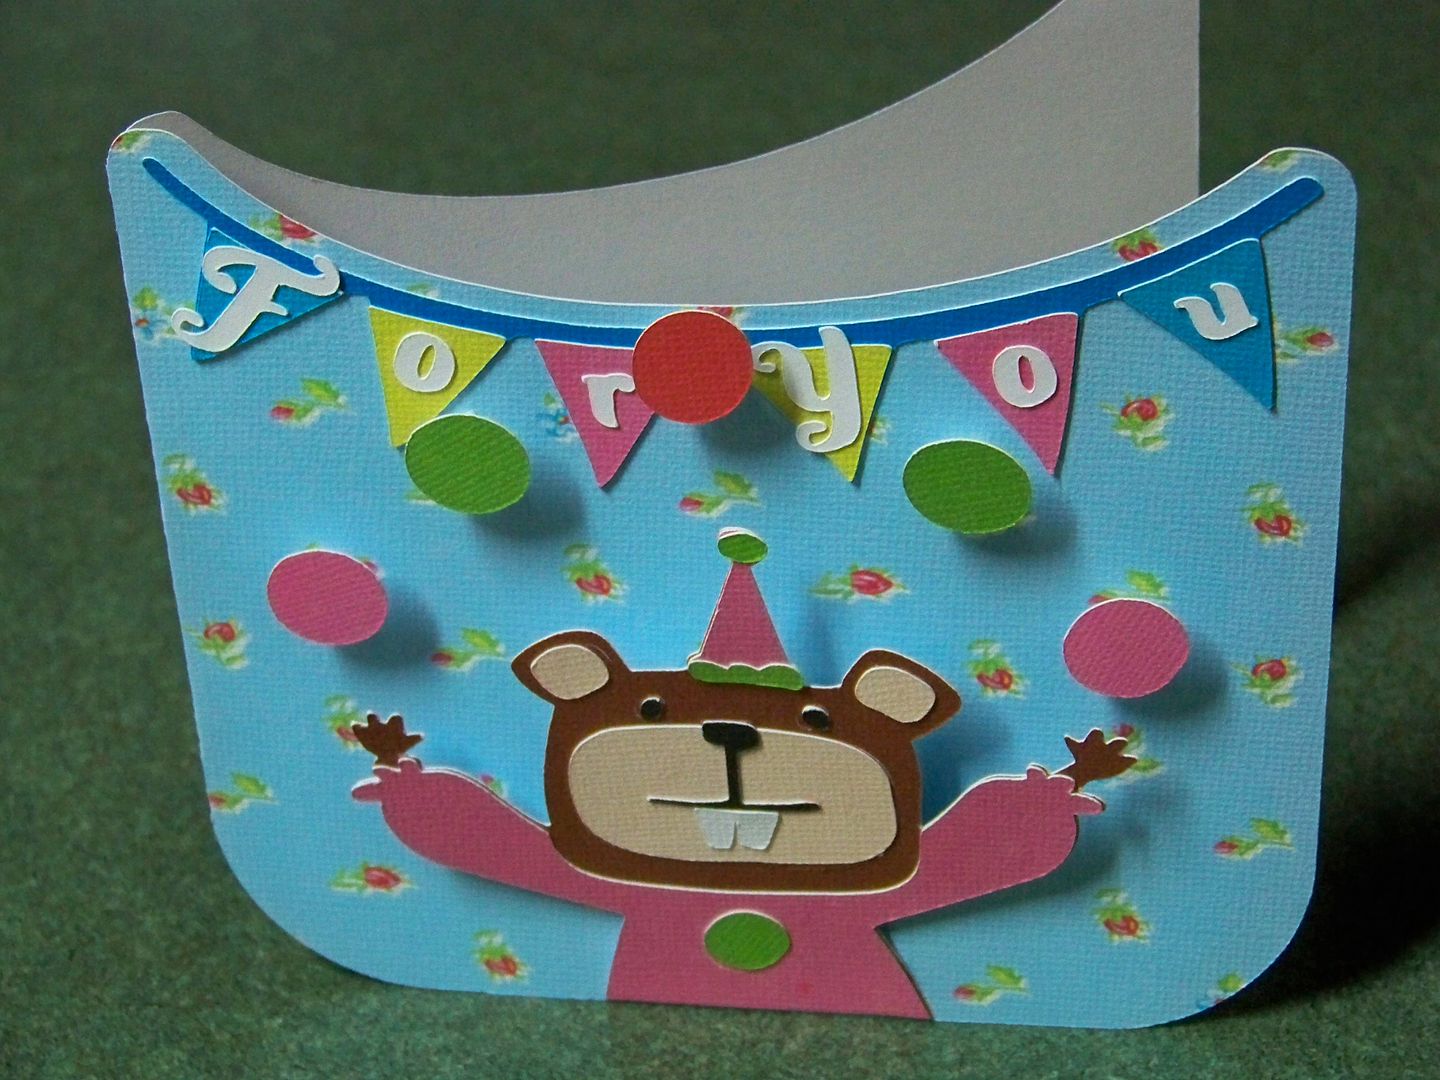
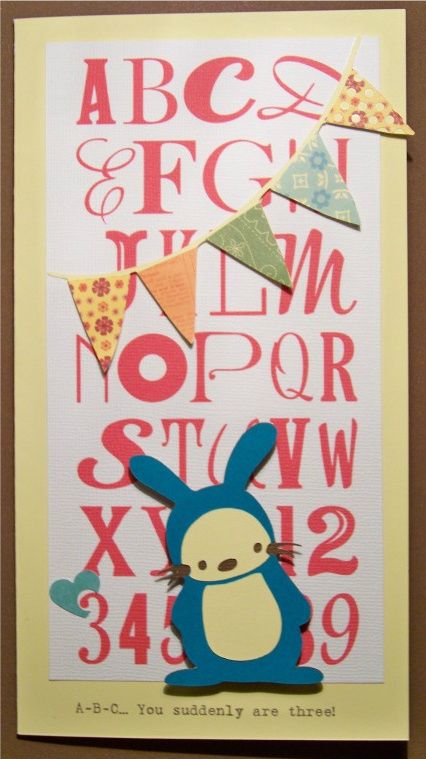
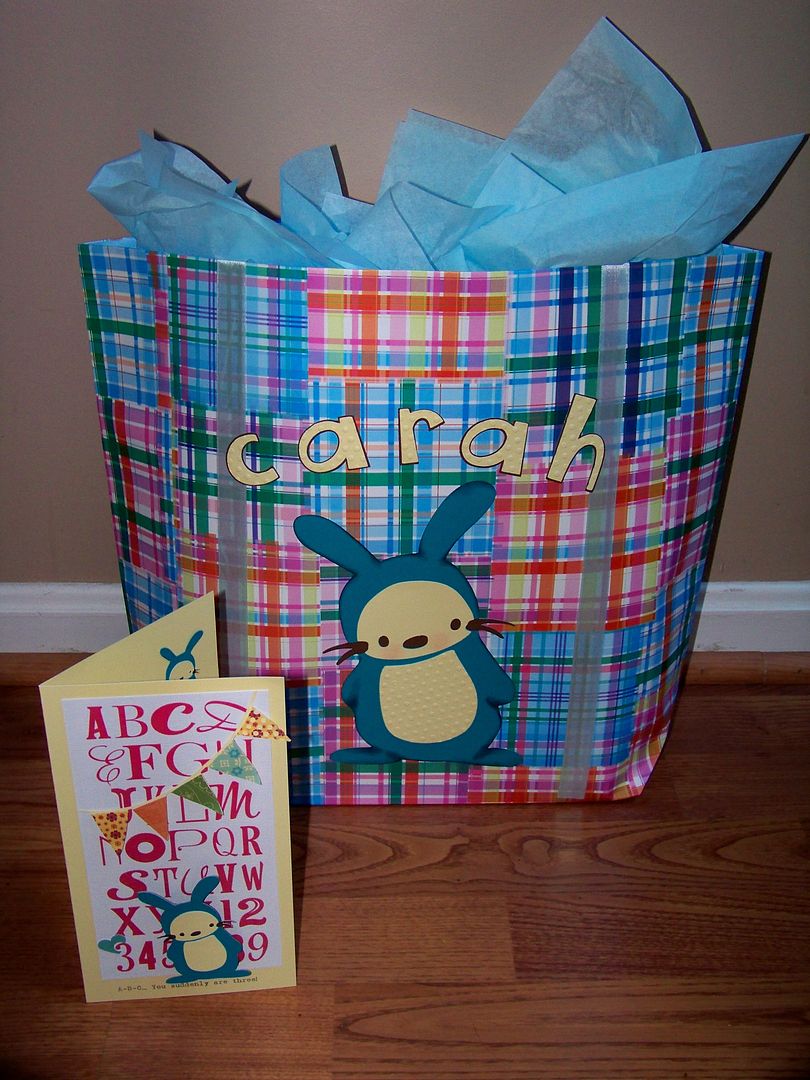

Birthday Card: 


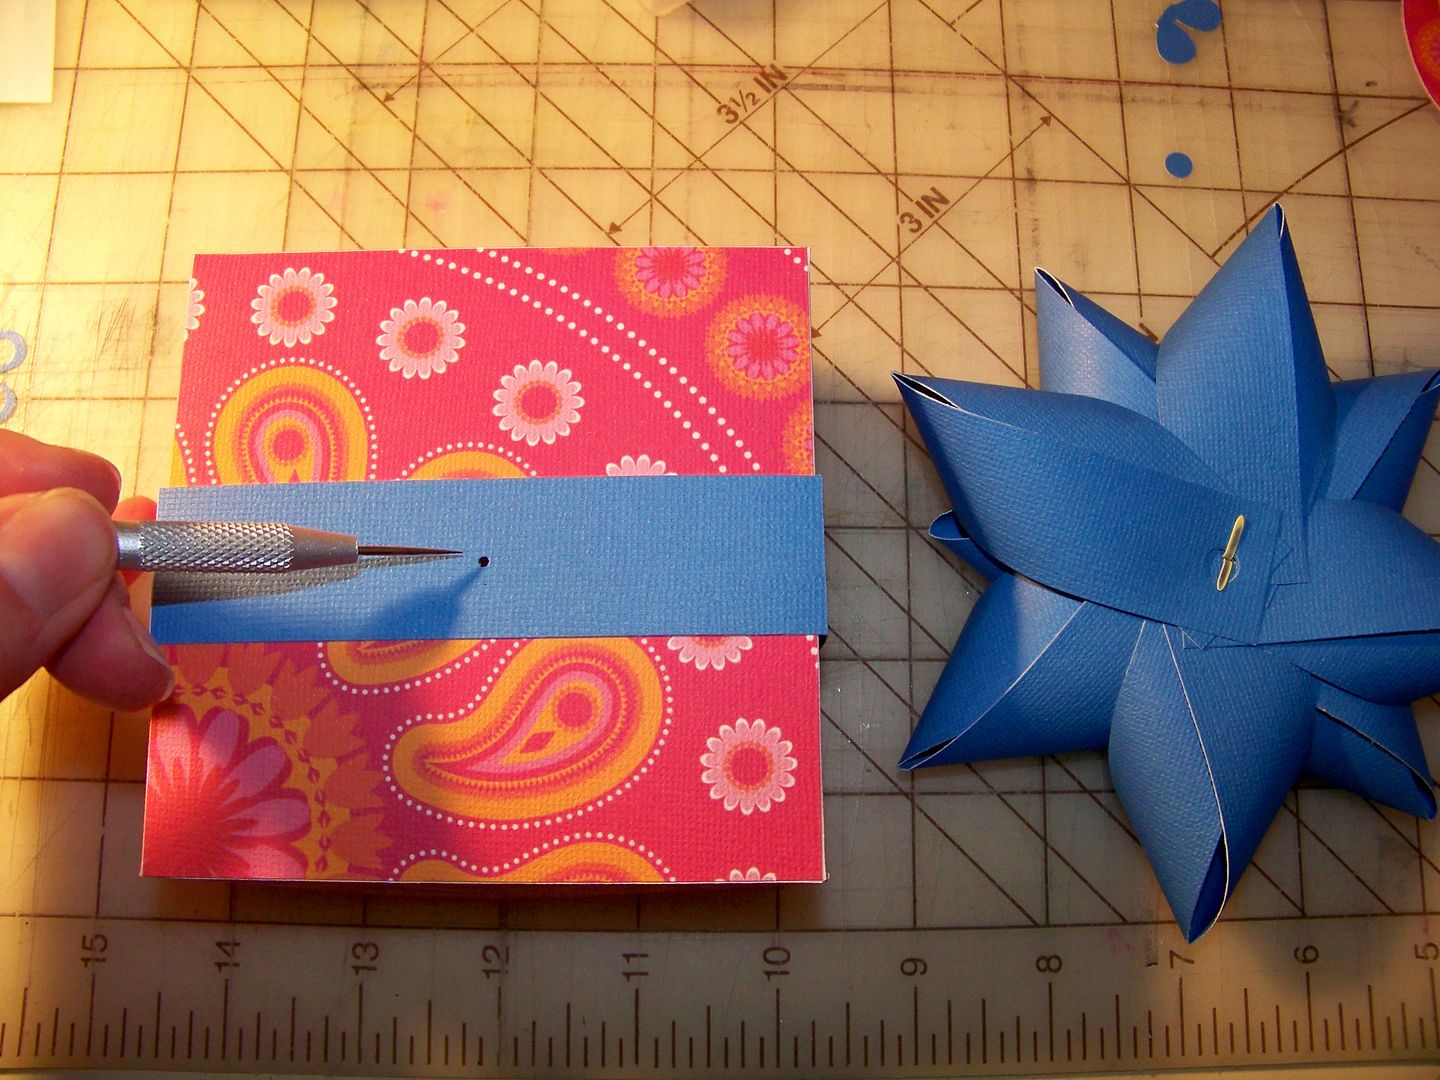
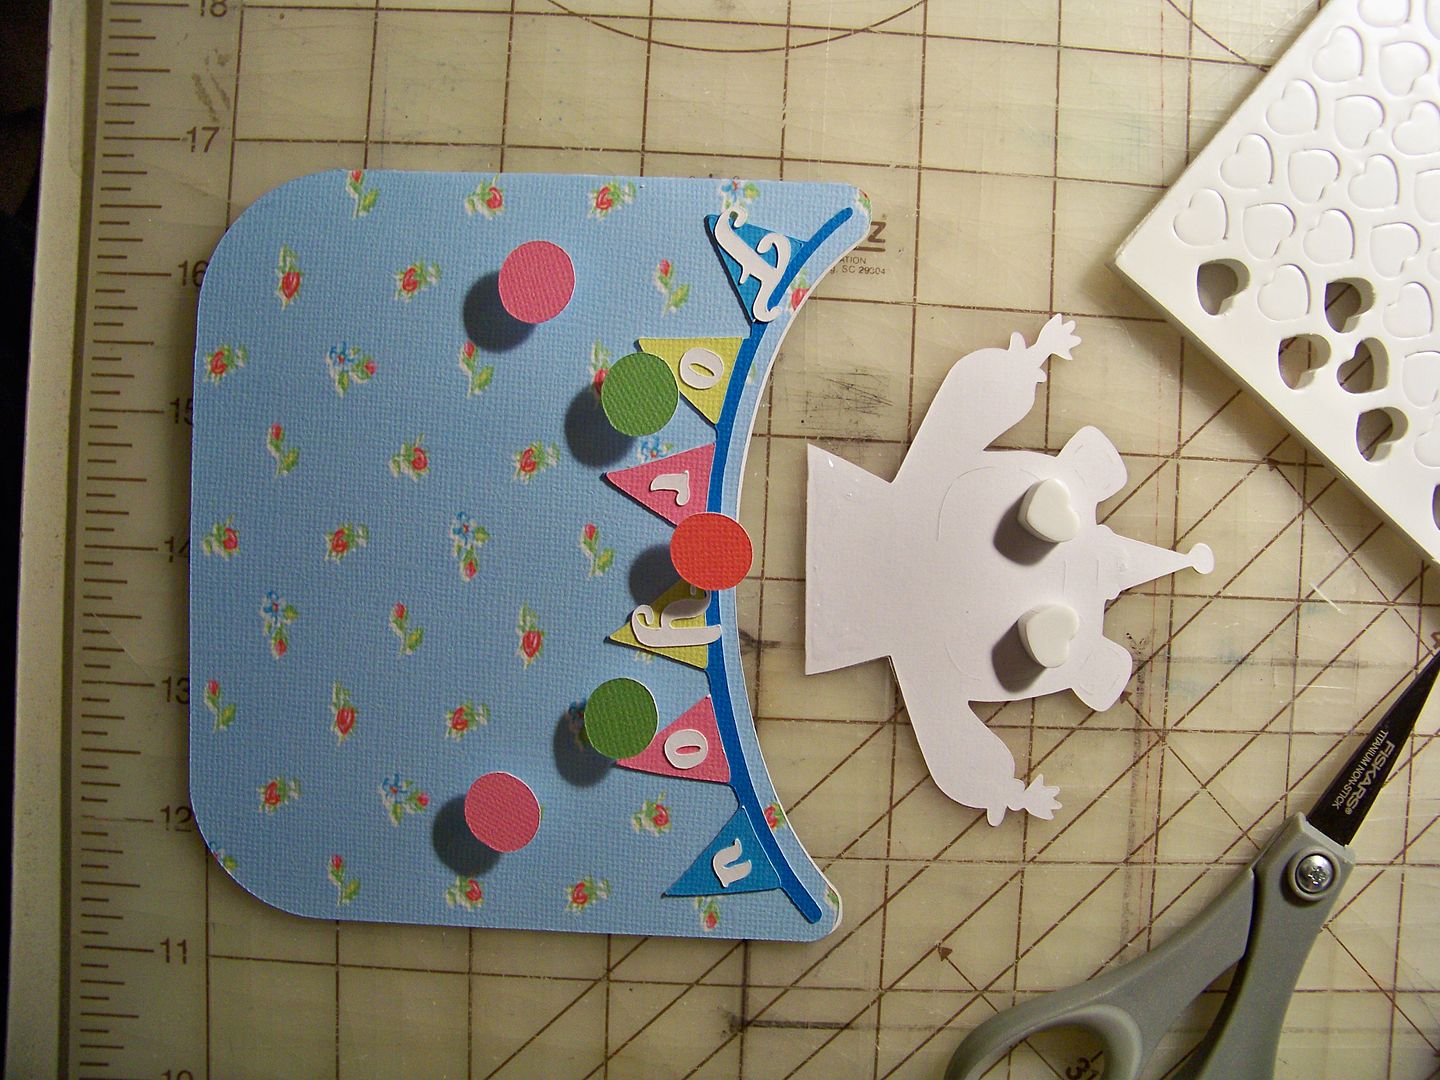
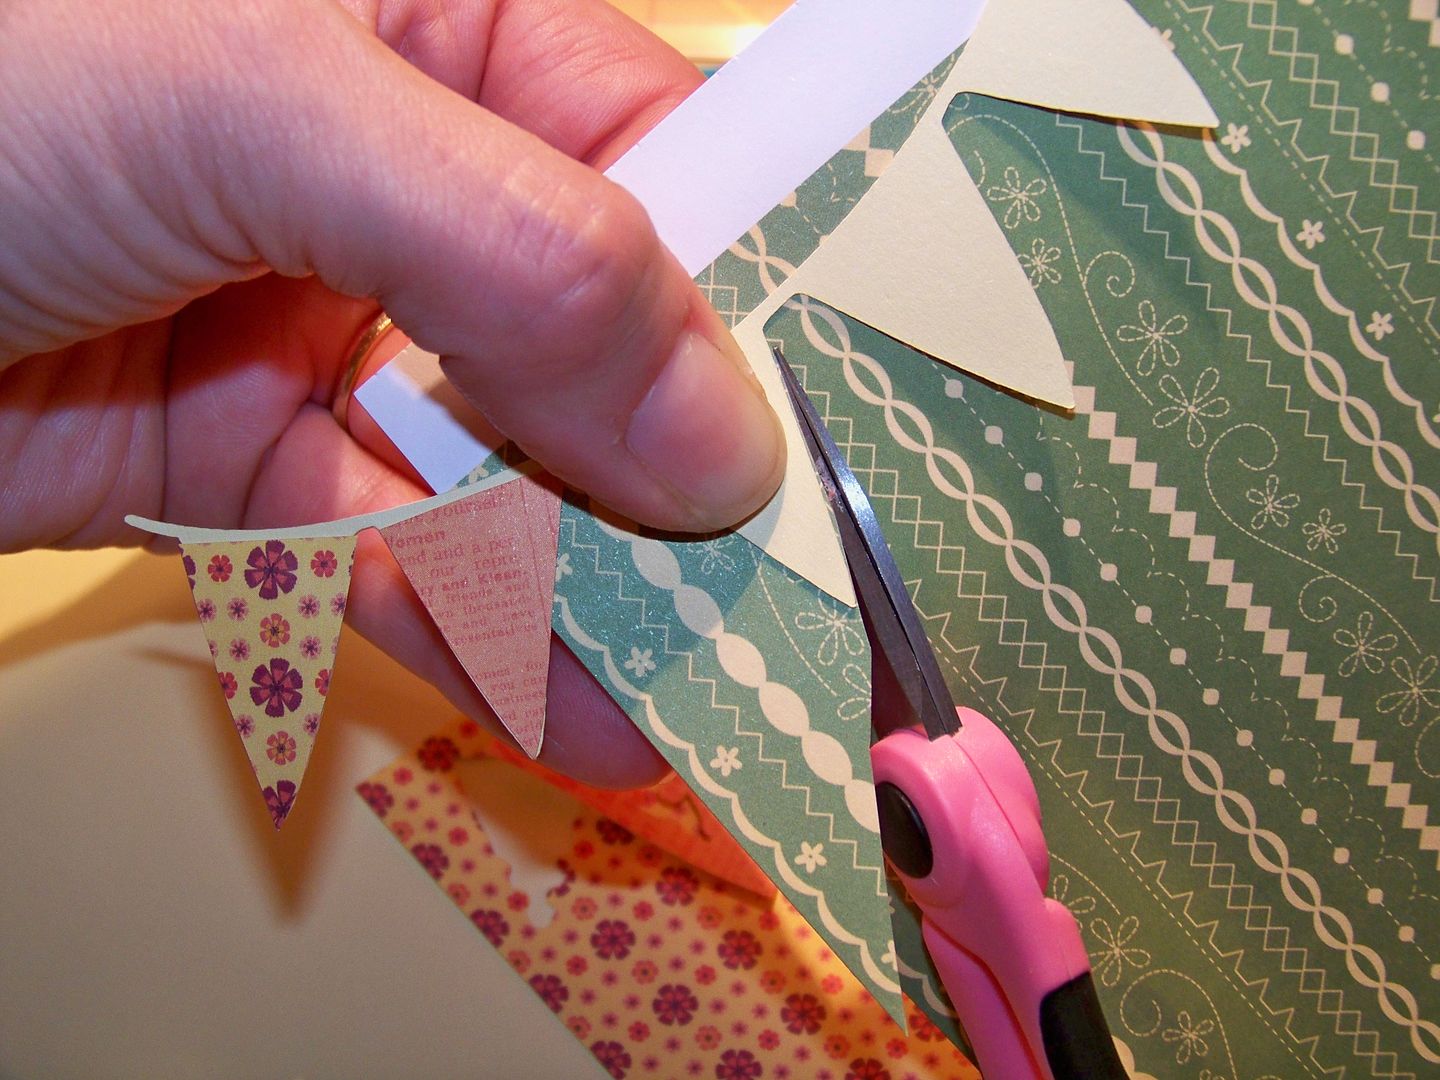
I used my Imagine to print (no cutting) the alphabet sign from the Word Collage cartridge at 7".  I selected a color from my queue for the text and trimmed the printed area to 3-7/8" x 7-3/8".  I cut the bunny from Just A Note at 3" and the banner base is from the same cart at 2".  The pennants are cut from the Material Girl Mini Deck. 


My open card finished at 9" x 8-1/4", which is too wide to put through my office printer to add a sentiment, so I taped down all sides with painters tape and ran it through folded.  The extra thickness and raised edges usually end with ink being dragged onto it so this was my solution to avoid that.  Unlike the result with wall paint, this tape will sometimes mar paper, so I used gentle tension when removing the tape from the edges after printing.  The text was printed on using Microsoft Batik Regular at 12 point.


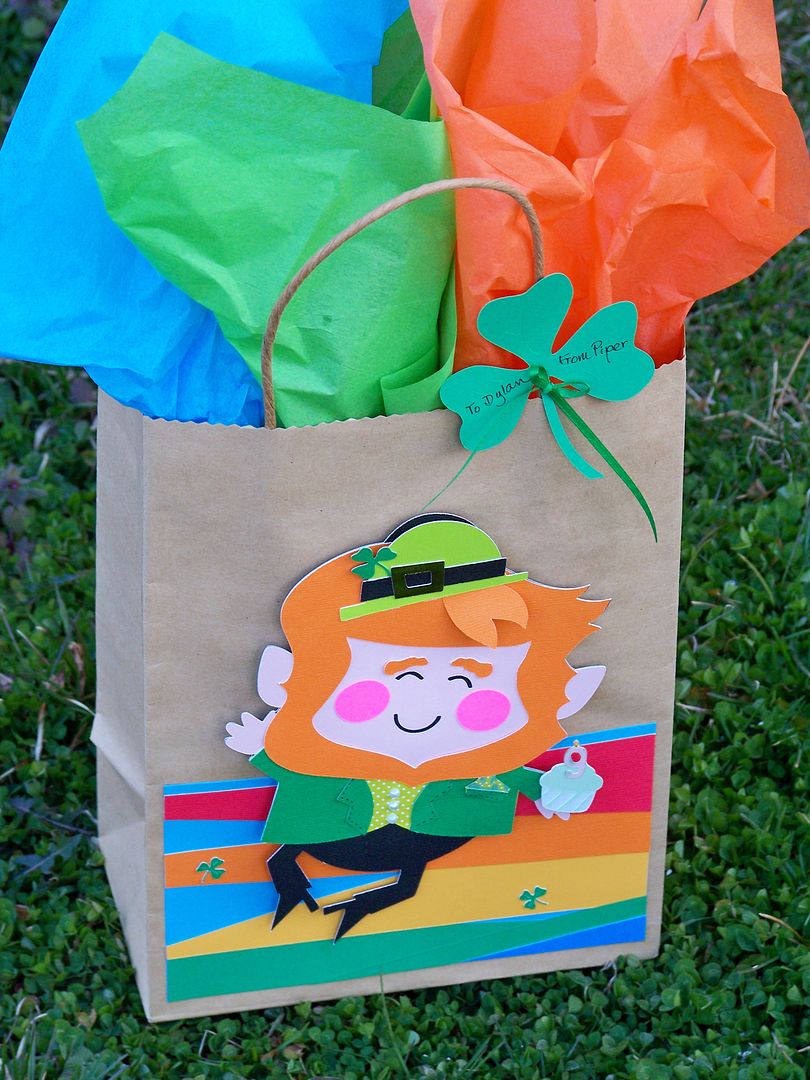
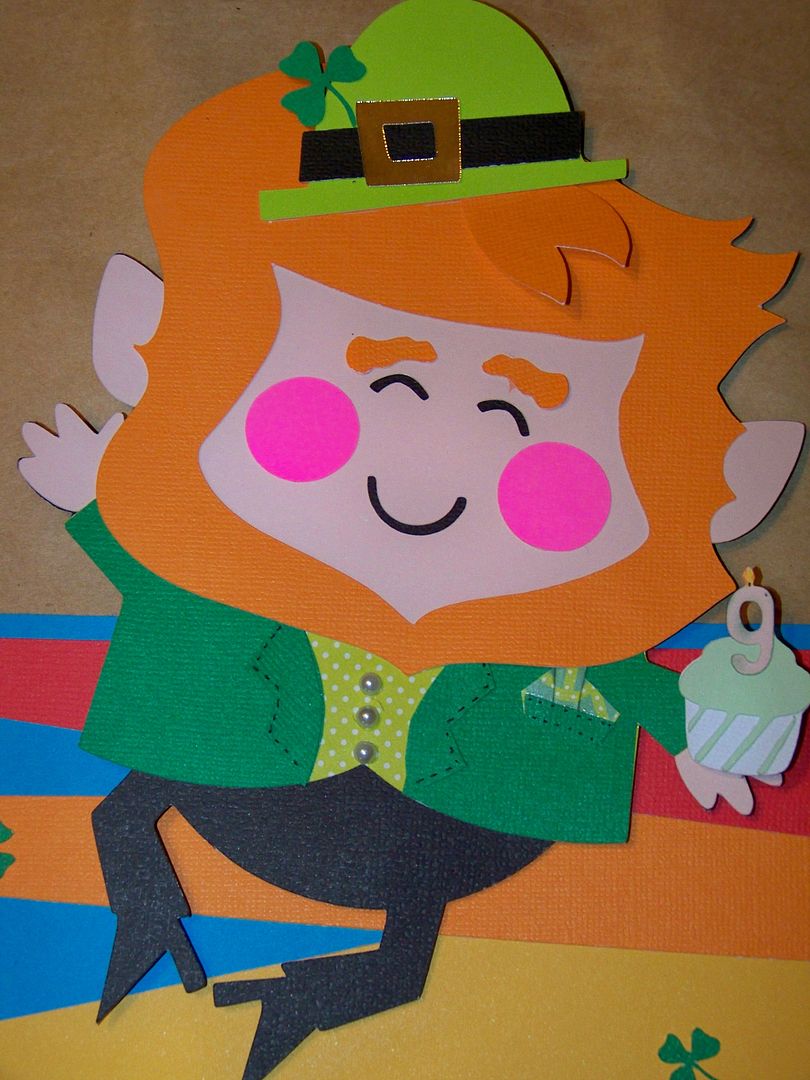
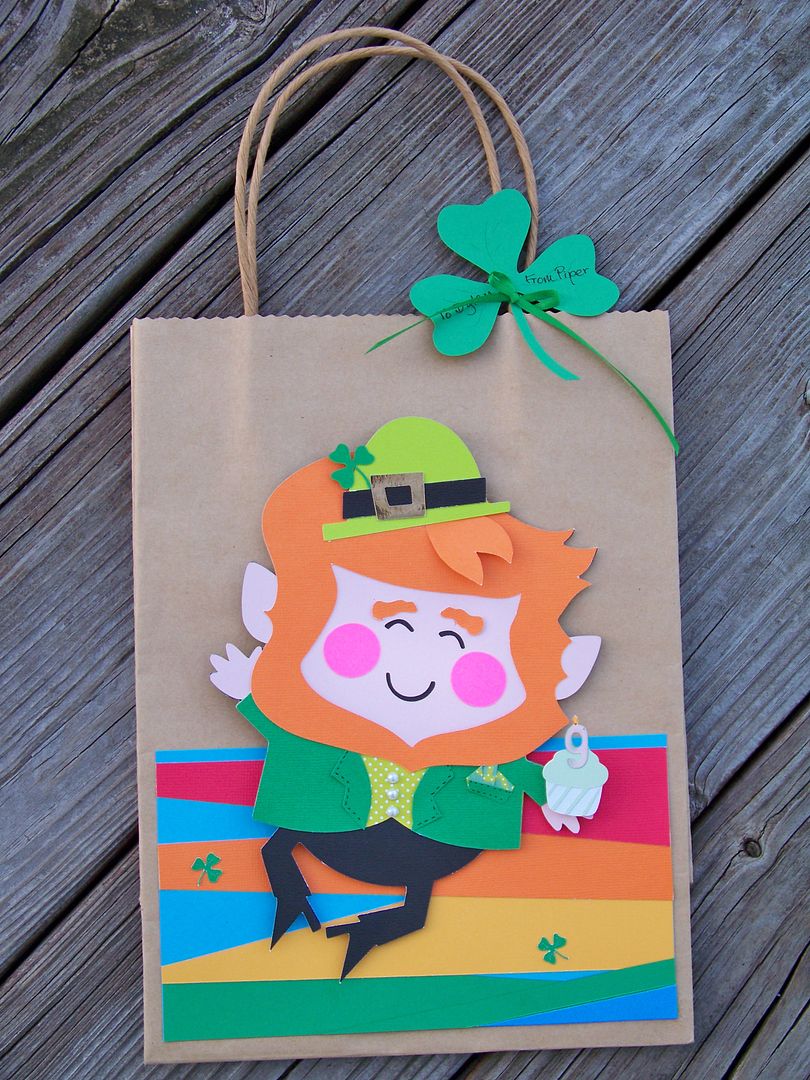
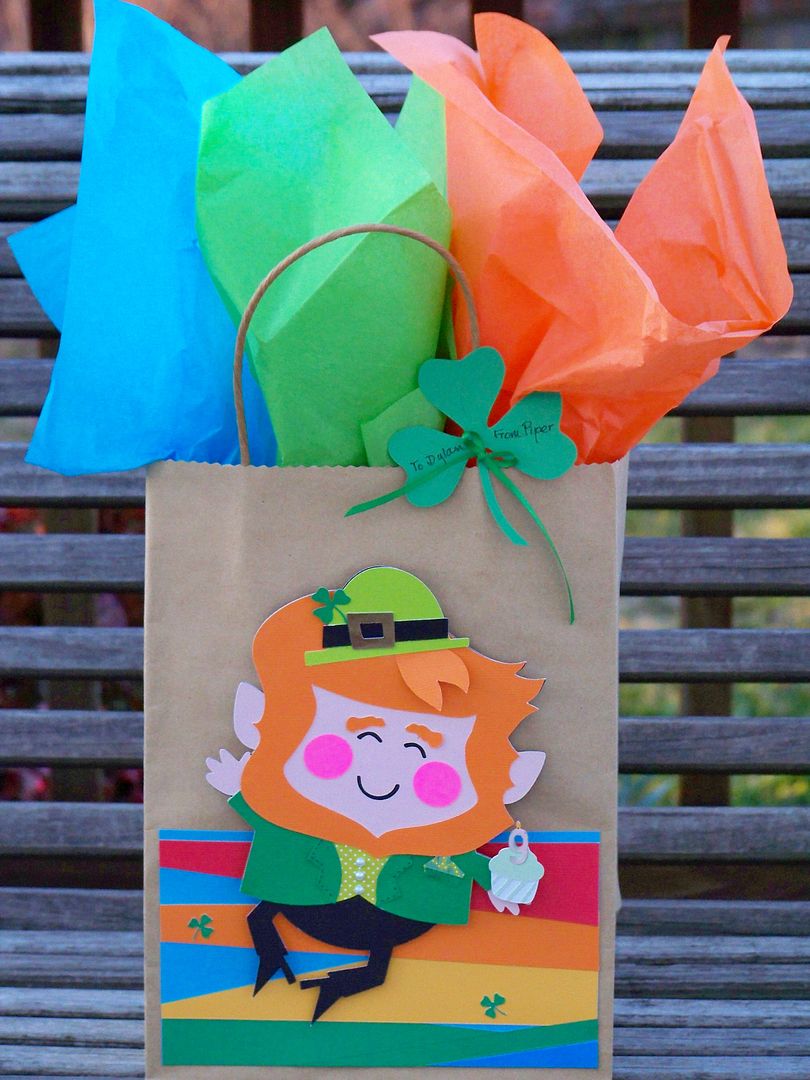
Gift Bag Decoration:


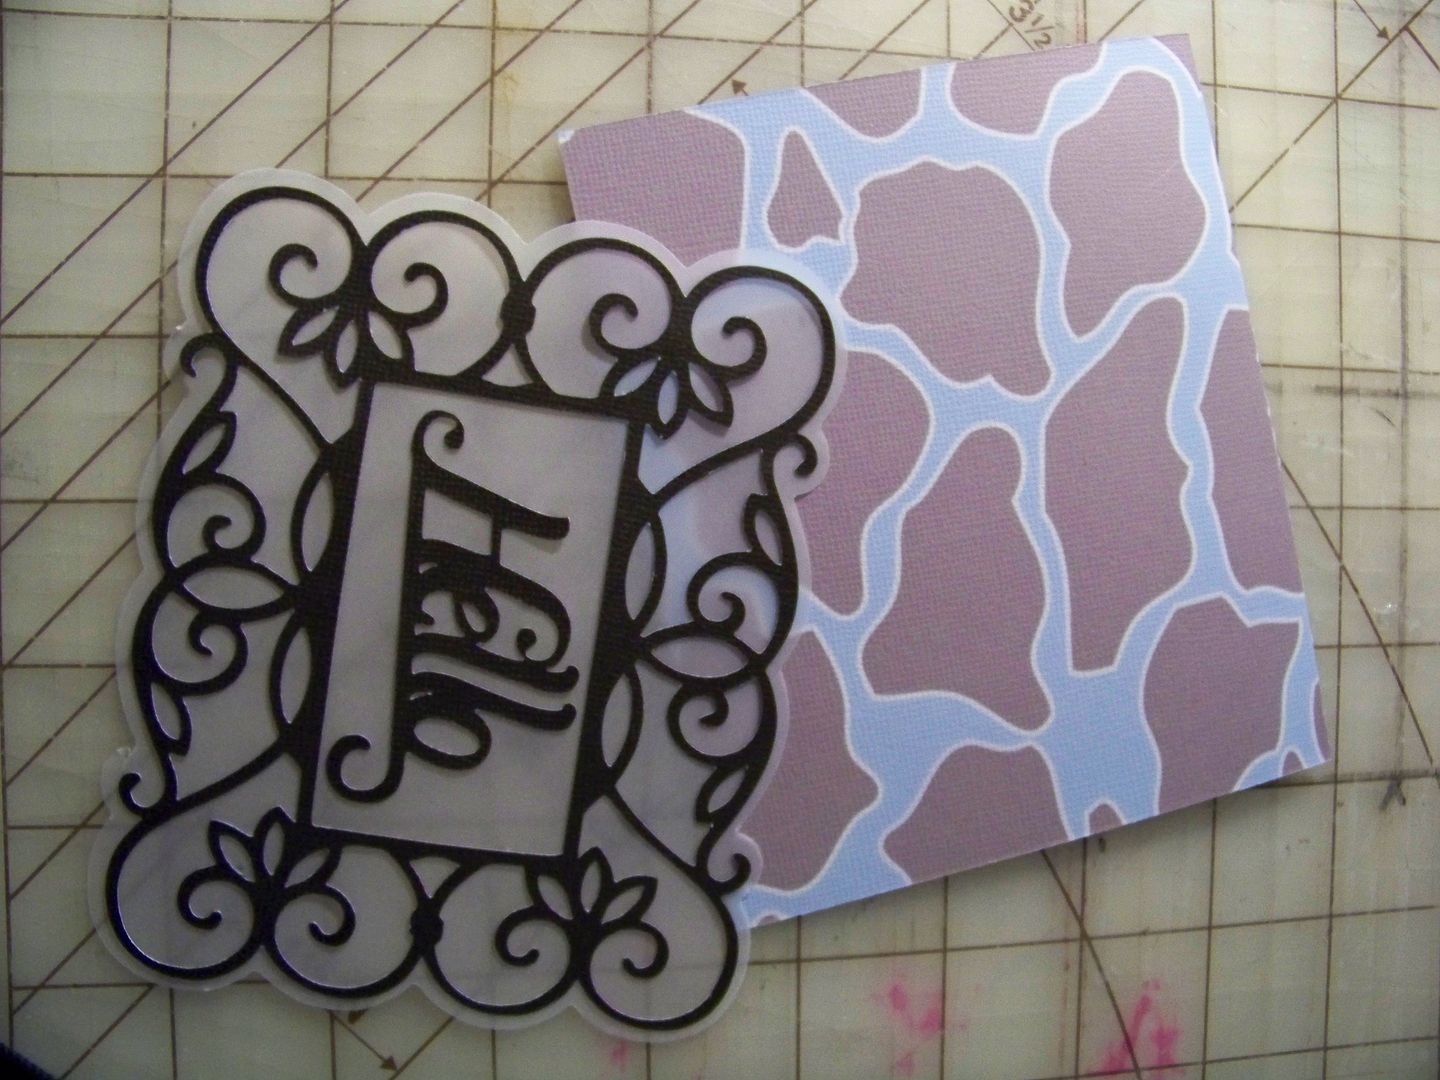
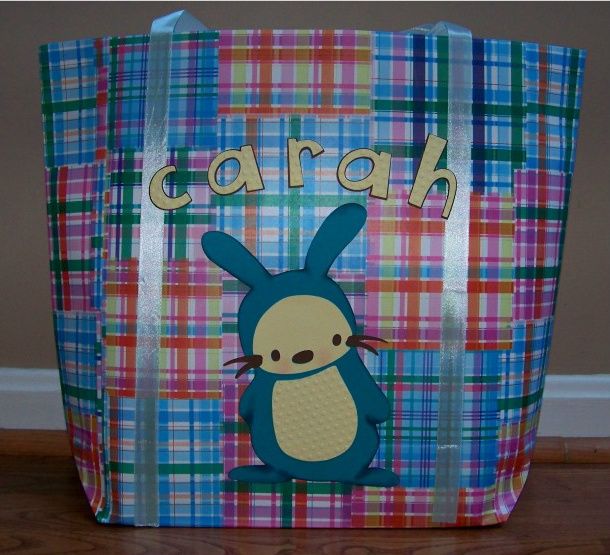
I decorated a gift bag I found at one of those 'everything for a dollar' kind of stores using the same bunny cut at 8"  from Just A Note.  I inked the cheeks and embossed the belly.  I used the same embossing folder to emboss the text, cut from Cuttin Up (cartoon with shadow) at 2". 


Happy with the paper part of my gift, I moved on to the fabric elements. 


Silk Screened Shirt:
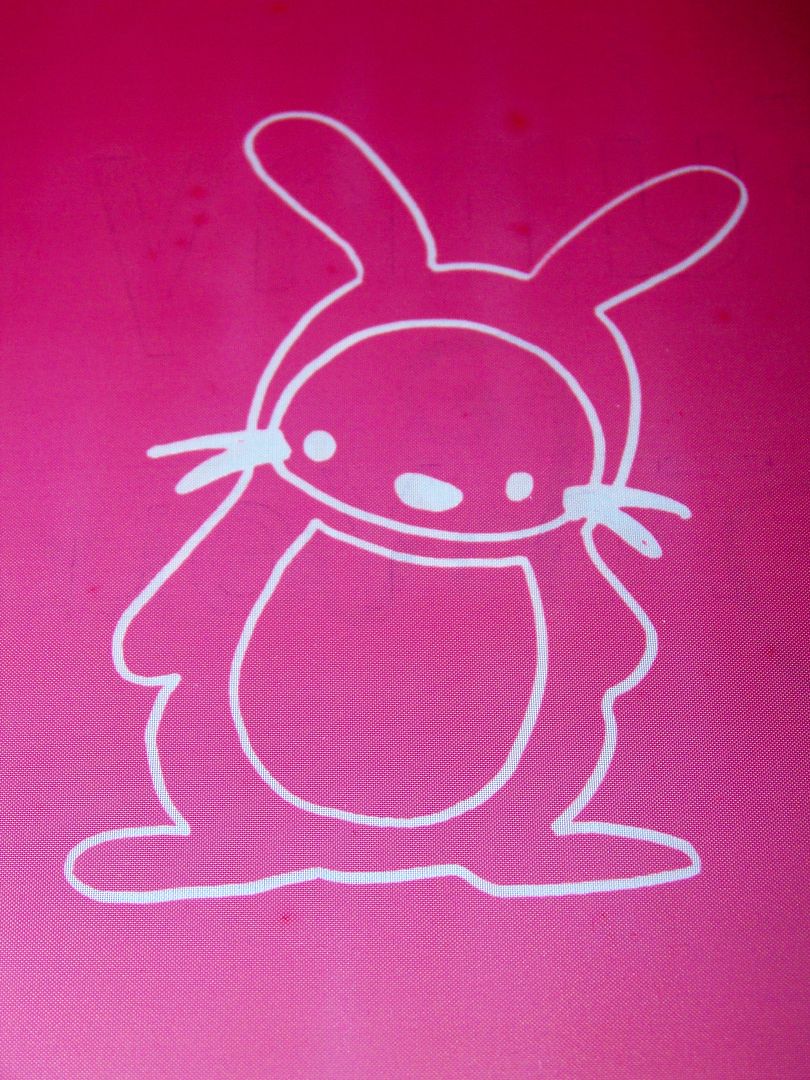
I enlarged the bunny picture in the handbook on my copier and traced it onto an injet transparency to create a Yudu design for a knit shirt.  I used a rolled up piece of cloth to rest my wrists so that the lines would be smooth and not jagged from pressure.


I am using a new direct emulsion, having just used up my first pint.  This one is red.  This is my design burned into the emulsion, rinsed, and dried.


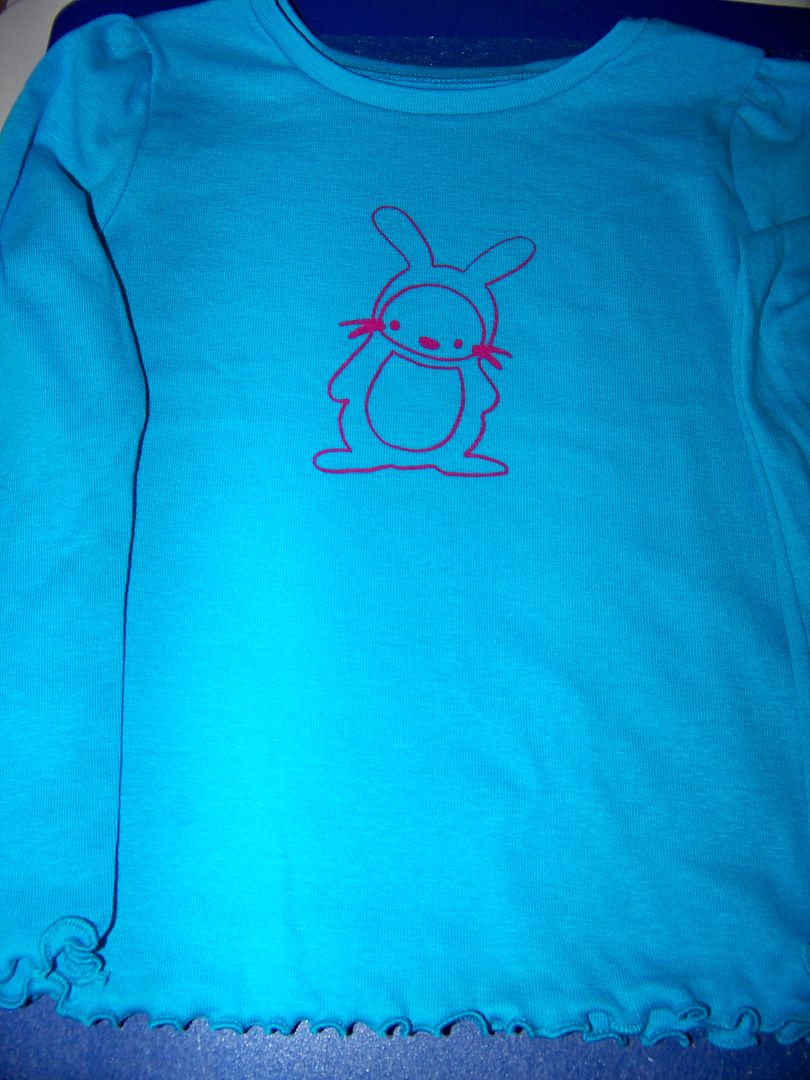
I used Yudu-brand ink.


This is the finished shirt as the ink dries, still on the platen.

You can find detailed information about using a Yudu, my tips on applying liquid emulsion, my list of suppliers, and more by clicking the Yudu tab at the top of my blog or by clicking here.


Decorated Playsuit Using HTV:
Next, I used heat transfer vinyl to create a layered bunny.  It was applied to a ready-made playsuit.


This is Siser Easy Weed vinyl.  To do this, I pressed the flip button to create a mirror image of the design.  I cut only the vinyl (not the shinier adhesive backing) by using these settings on my Cricut:

blade:  3
pressure:  3
speed:  3

I weeded off the vinyl that is not part of the design, leaving my layers on the backing...


... and applied them, one at a time, to the garment.  I pressed with my home iron, peeled off the backing, and applied the next layer.  I repeated this for all three layers.  (The bunny was cut at 3-1/2").
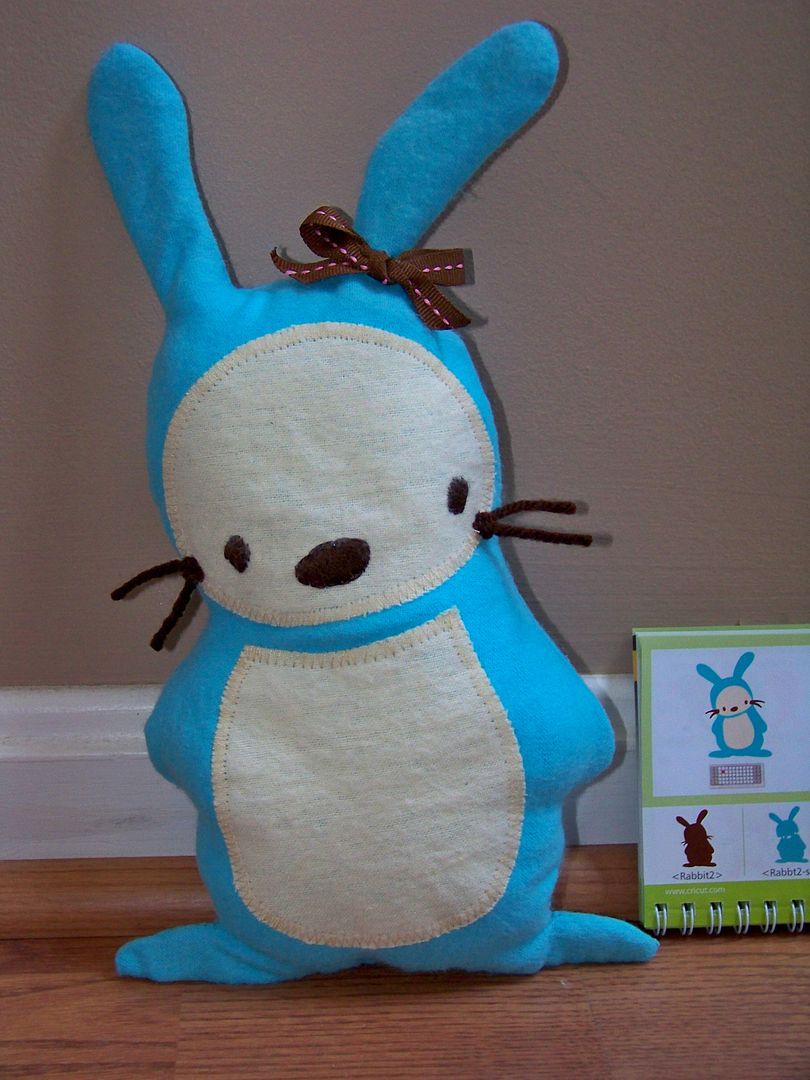
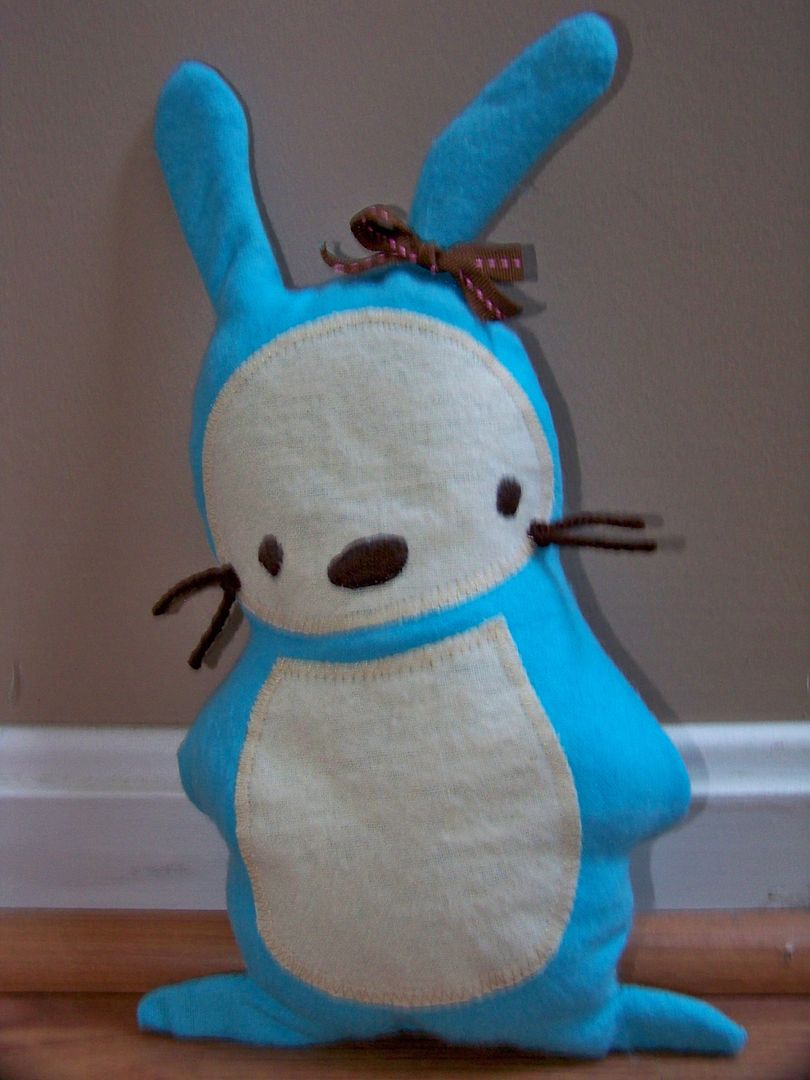

Stuffed Bunny:
Next, I used my Cricut to cut a sewing pattern for a little stuffed toy.

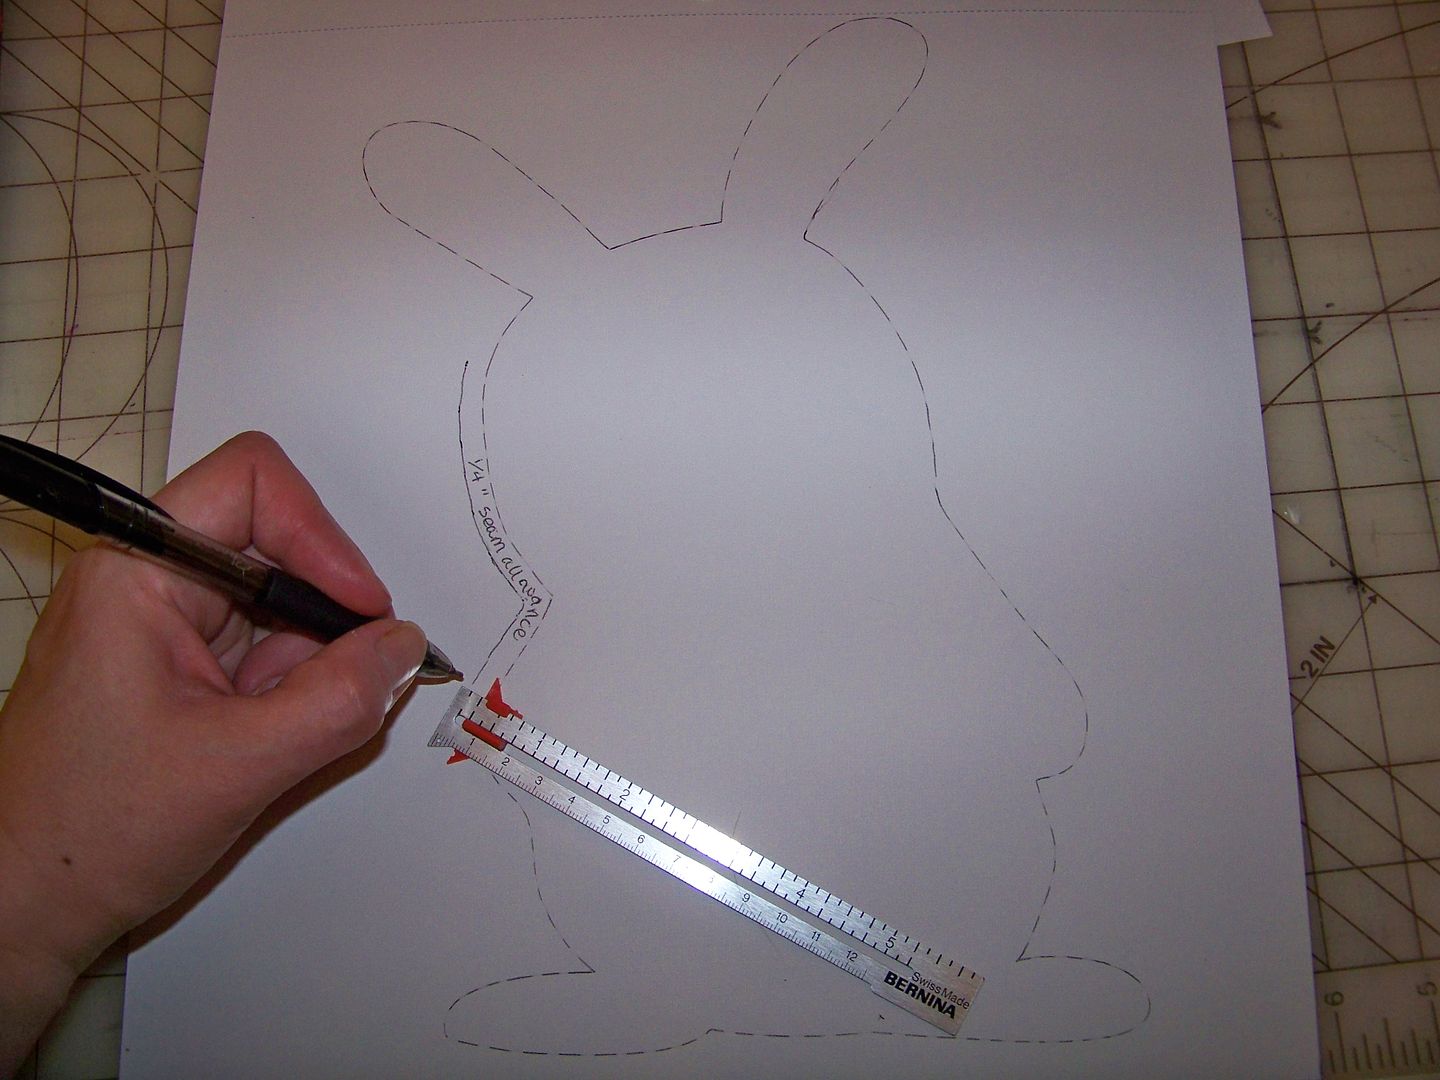
To make a sewing pattern, I cut the base layer (brown in the handbook) and the face/belly layer at 11.54" (fit to page size).  I trimmed off the whiskers and traced the image of the body onto a sheet of plain paper.  Then I added 1/4" seam allowance. 


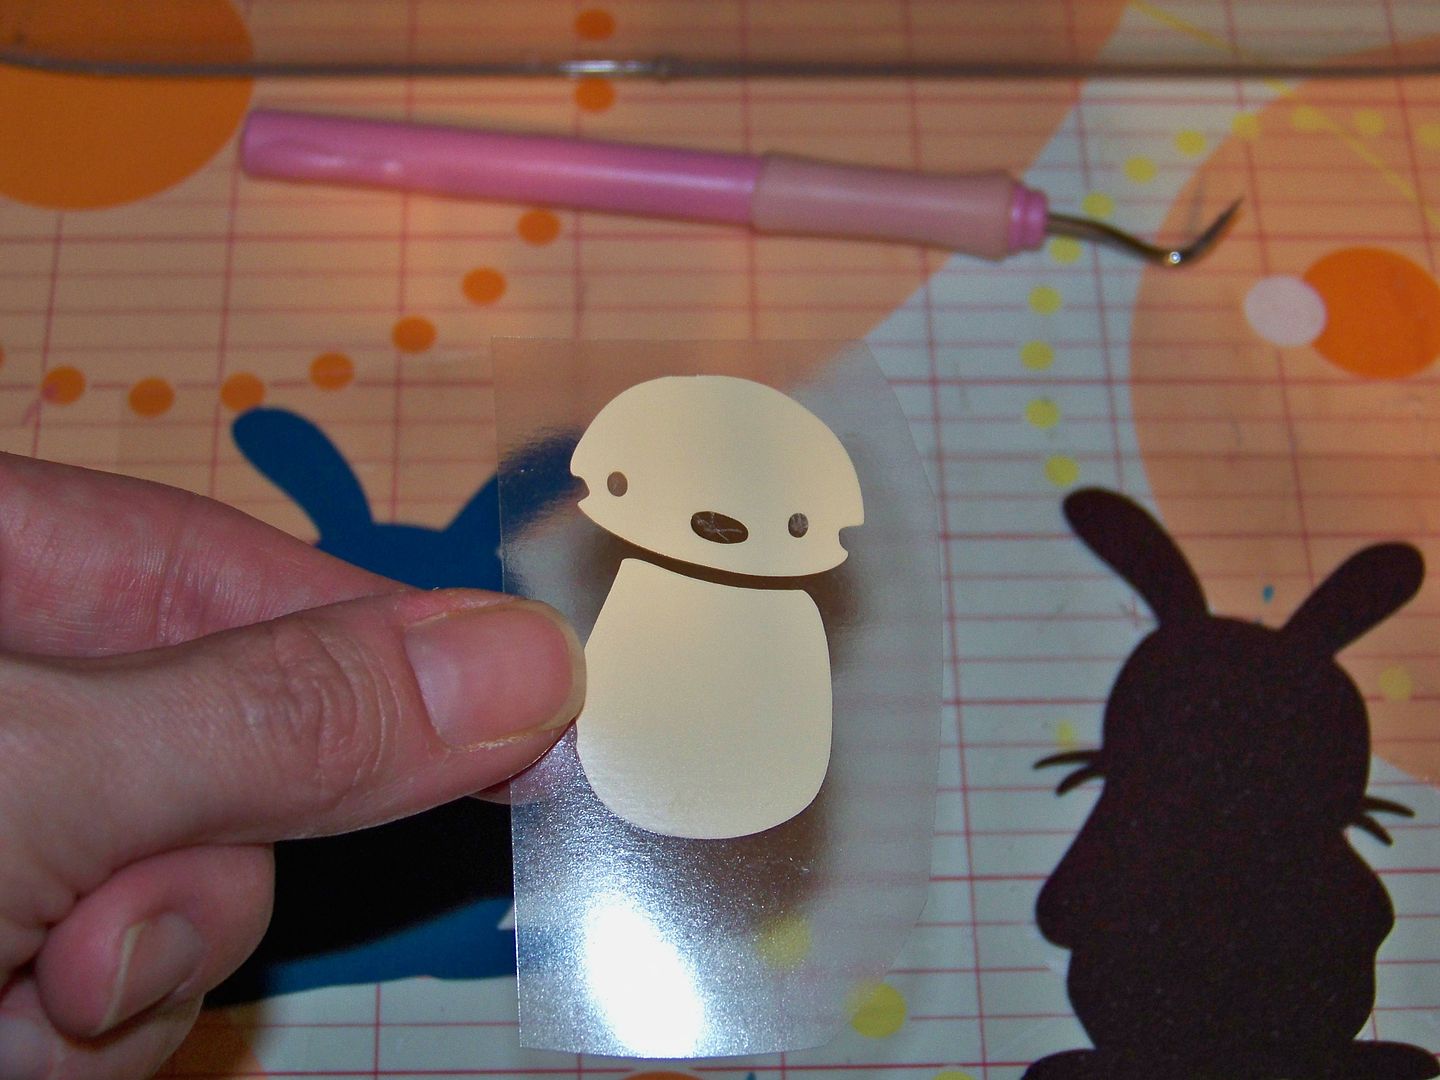
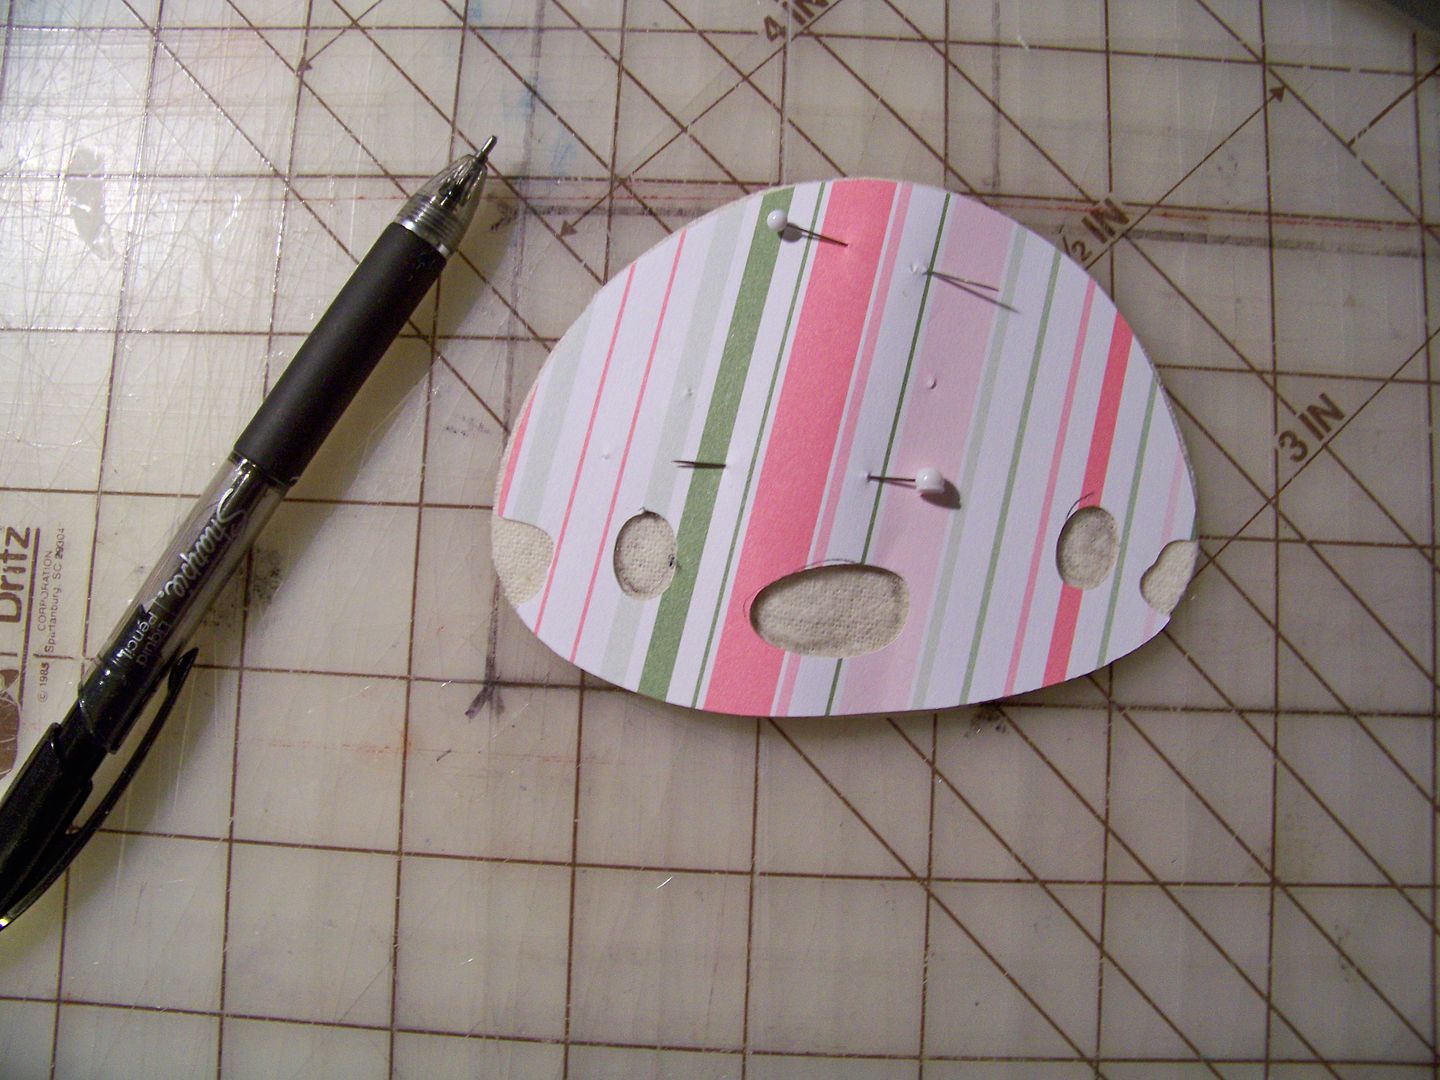
This is the pattern I used to cut the blue flannel.  I used the Cricut cuts of the face and belly and cut the beige flannel directly from them.  (I did not cut in the side notches on the face).  I used a pencil to draw in the eyes and nose for my embroidery guide.


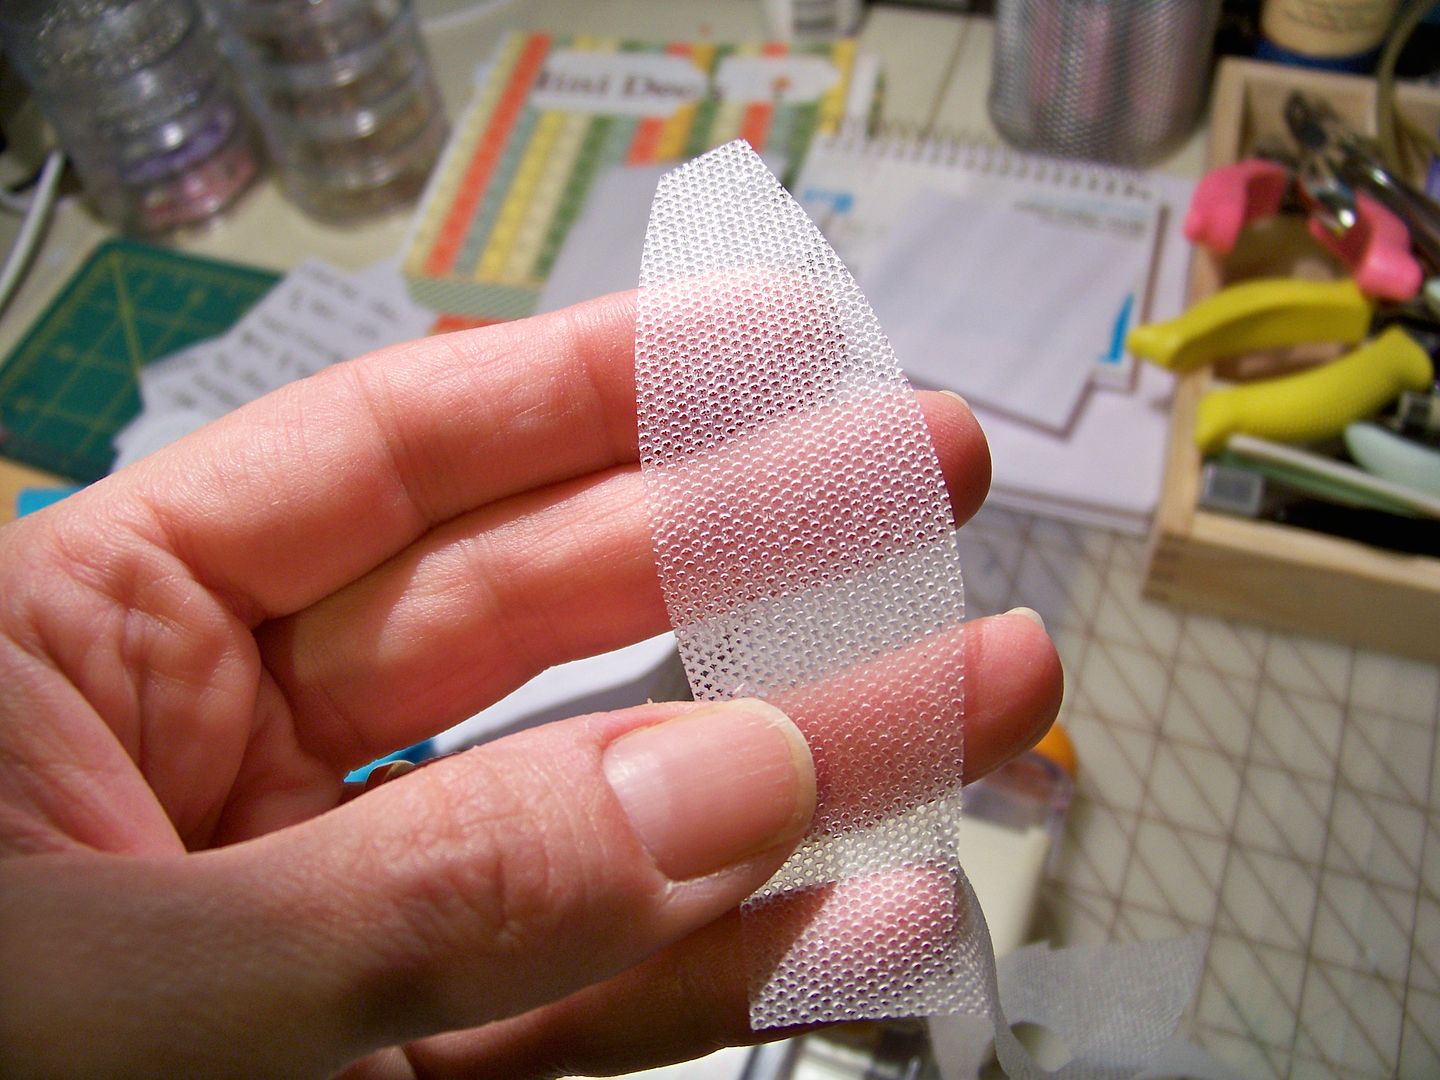
I also cut the belly and face from Steam-A-Seam.  This is the most effective heat-activated webbing I have found.  The small holes allow steam from the iron to really melt the product, resulting in a bond that is actually washable, although I have never tested that claim, opting always to sew the edges.


The other nice quality of Steam-A-Seam is that it is slightly tacky, allowing it to stick to your fabric after it is cut, holding it in place for ironing. 
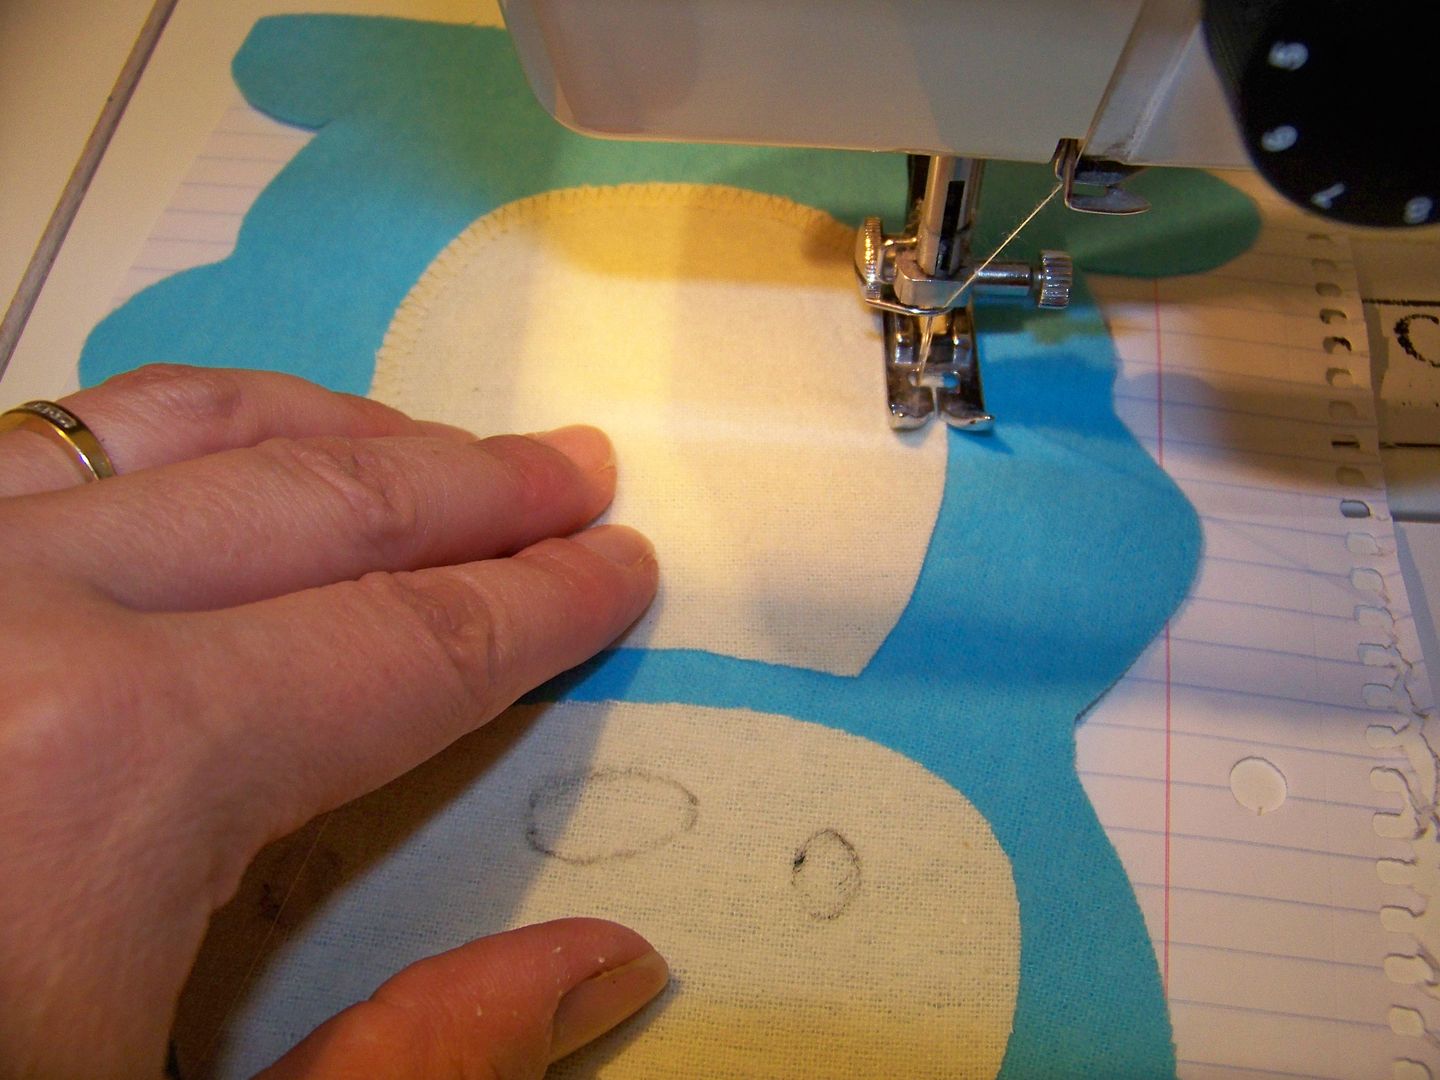
After ironing in place, I used a zigzag stitch instead of a satin stitch along the edges of the belly and face.  I used notebook paper as my stabilizer.


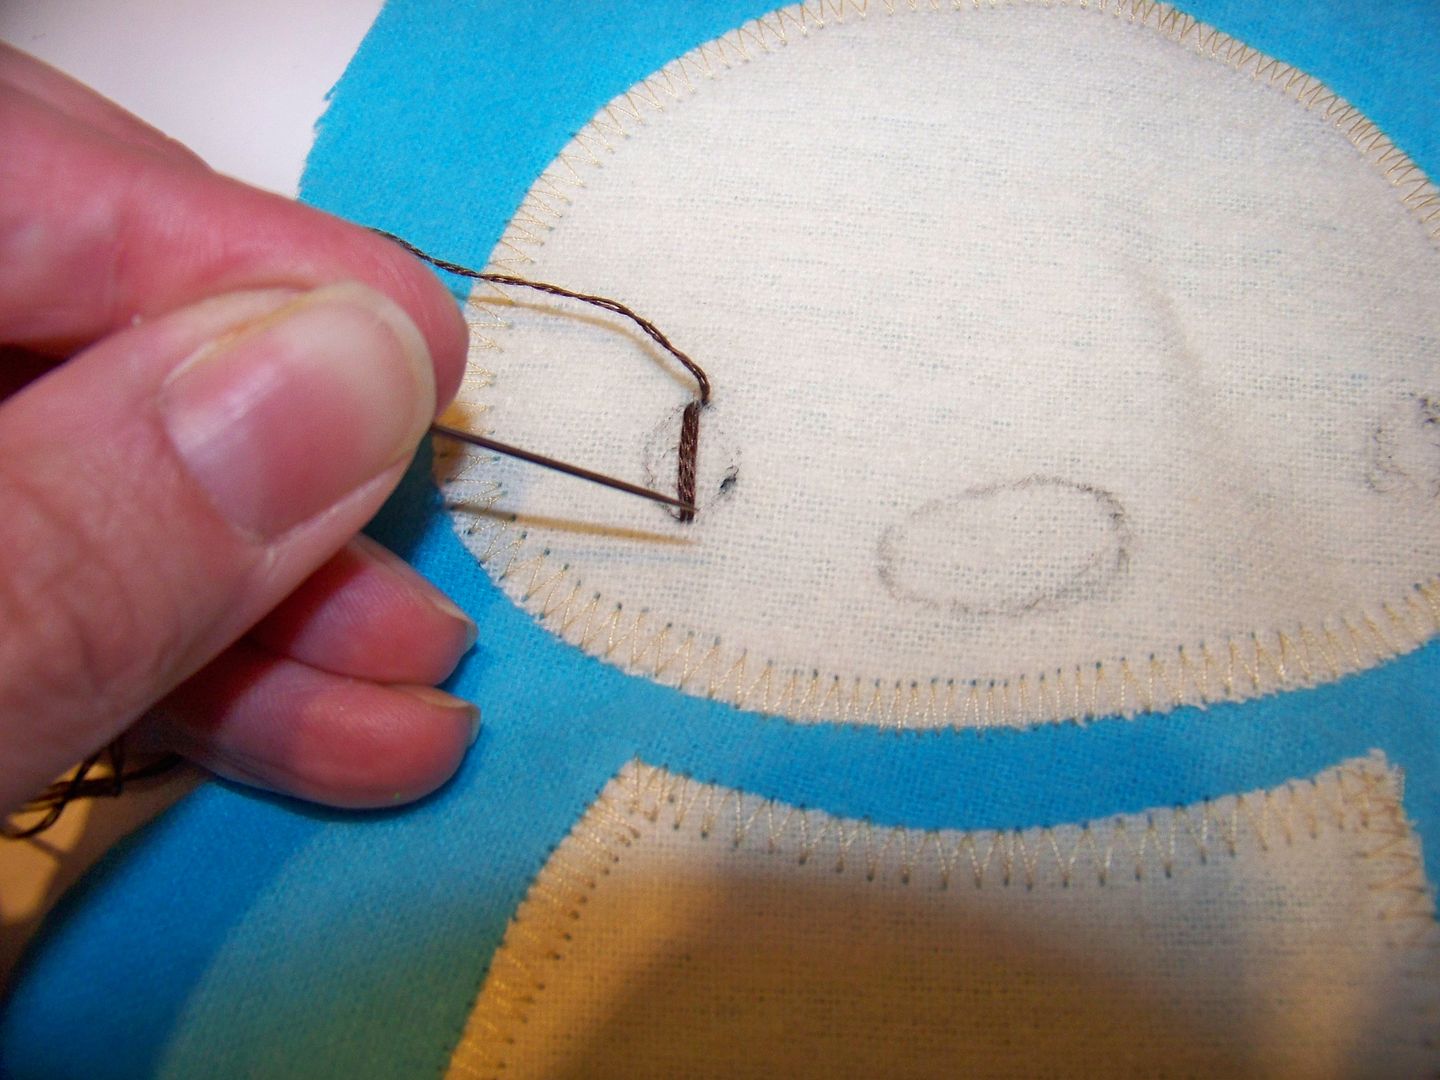
After tearing off the notebook paper, I hand-stitched on the face using embroidery floss and long stitches.


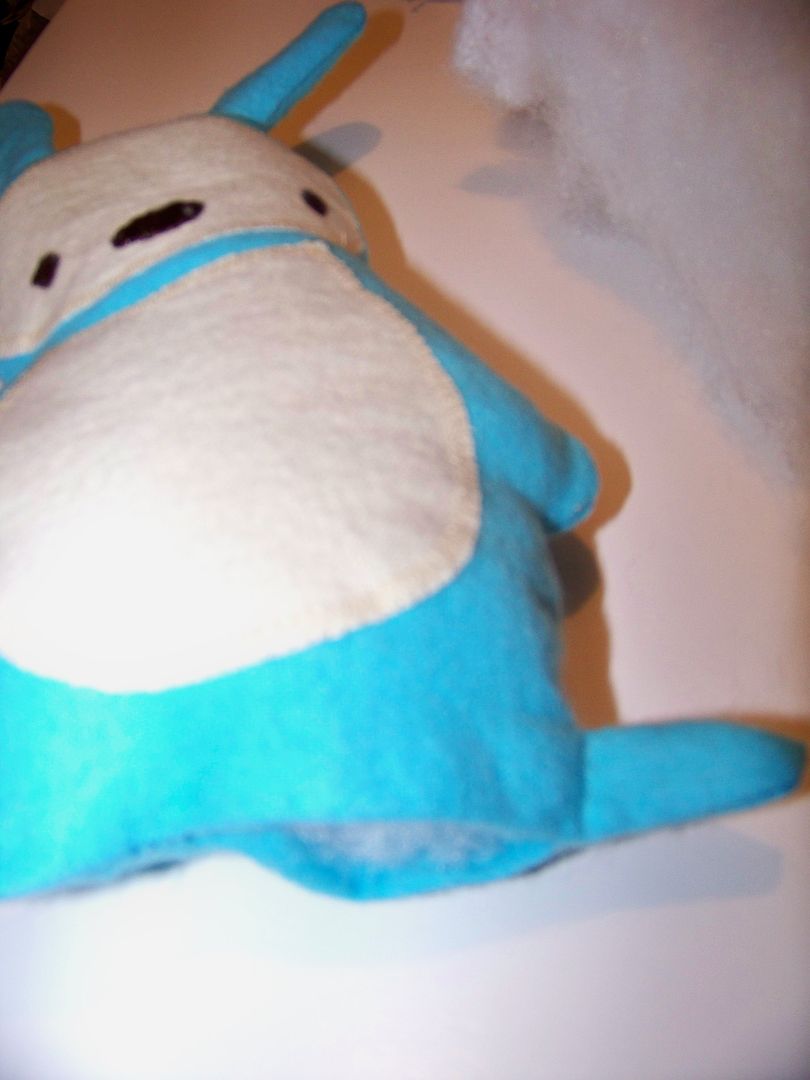
I sewed the front and back body pieces, right sides together on my sewing machine, using a 1/4" seam allowance, leaving the bottom open to turn it out.  I lightly stuffed it since I didn't make an allowance for volume.  I used pipe cleaners to stuff the ears and feet to fill them out and keep them flat. 


The rest was stuffed with polyfill and the bottom was slipstitched closed. 


For whiskers, I knotted a piece of yarn and stitched it on by hand for each side of the face.  I hand-stitched on a little ribbon bow so this would be a girl bunny for sure!


Happy with the fabric part of my gift set, I moved on to the accessories!
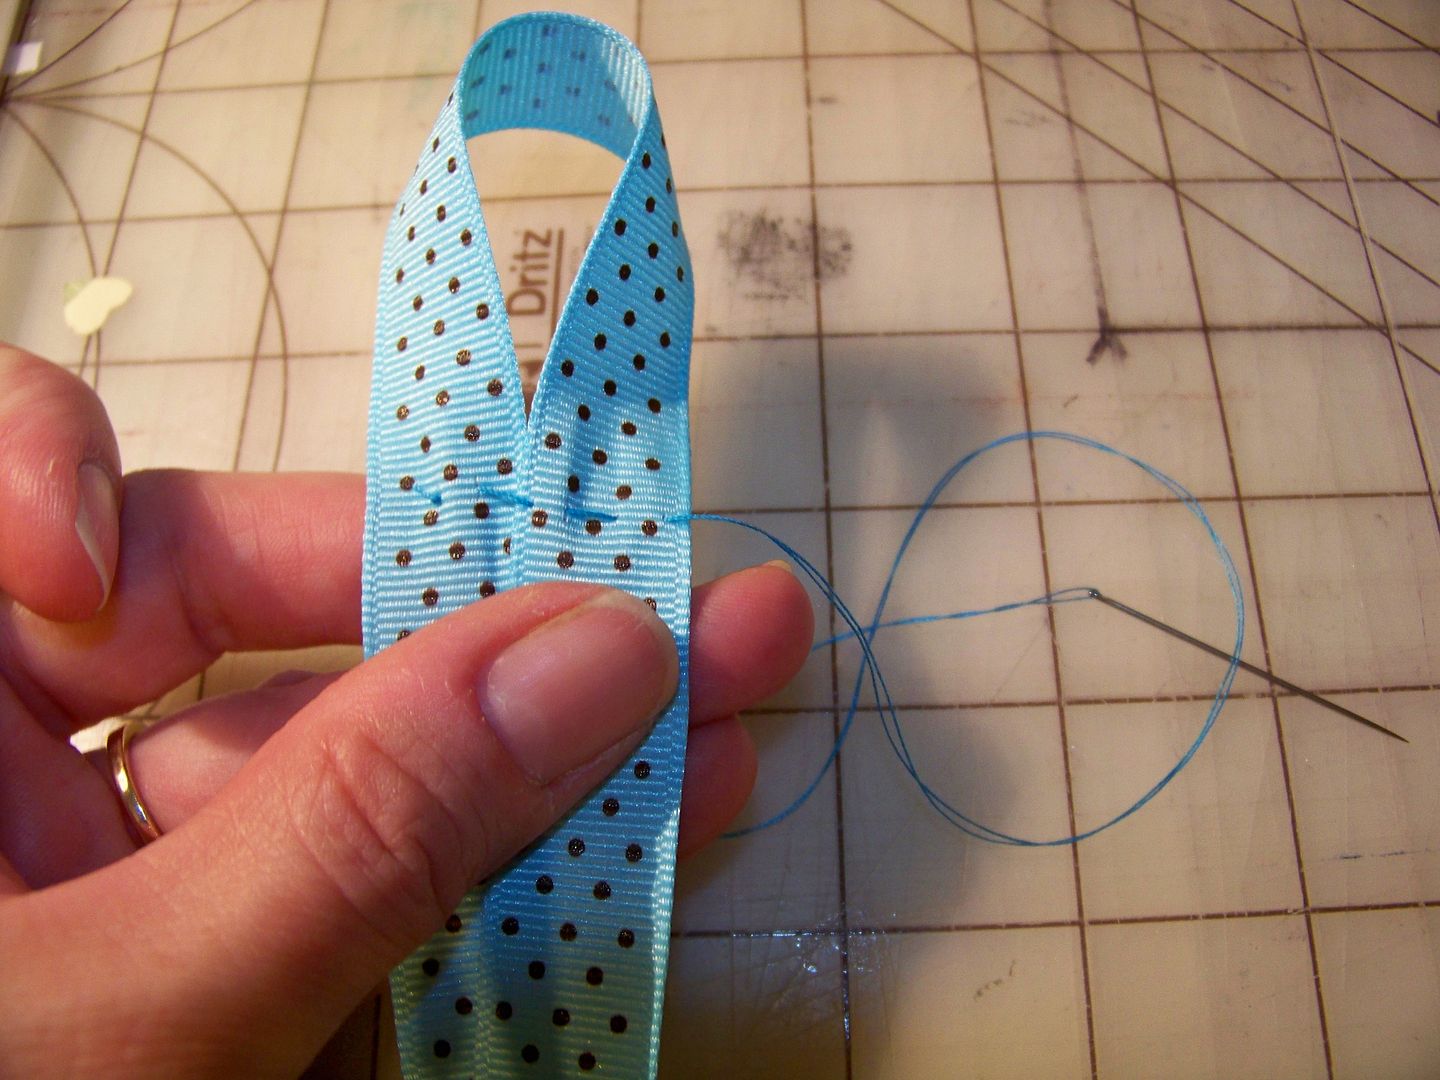
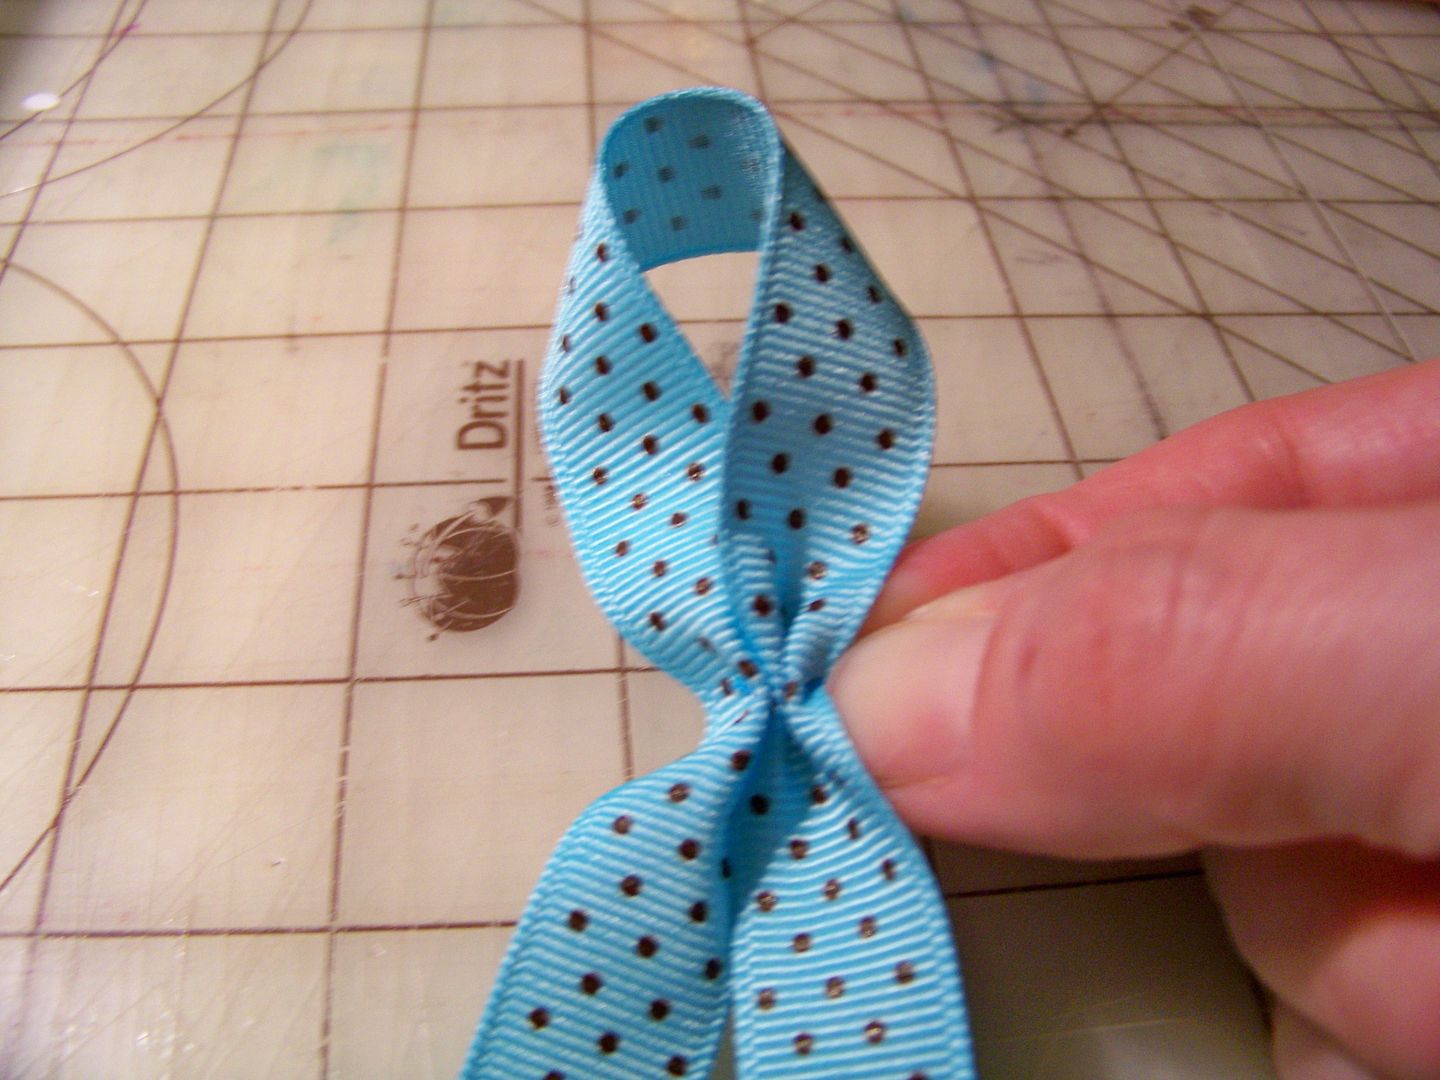
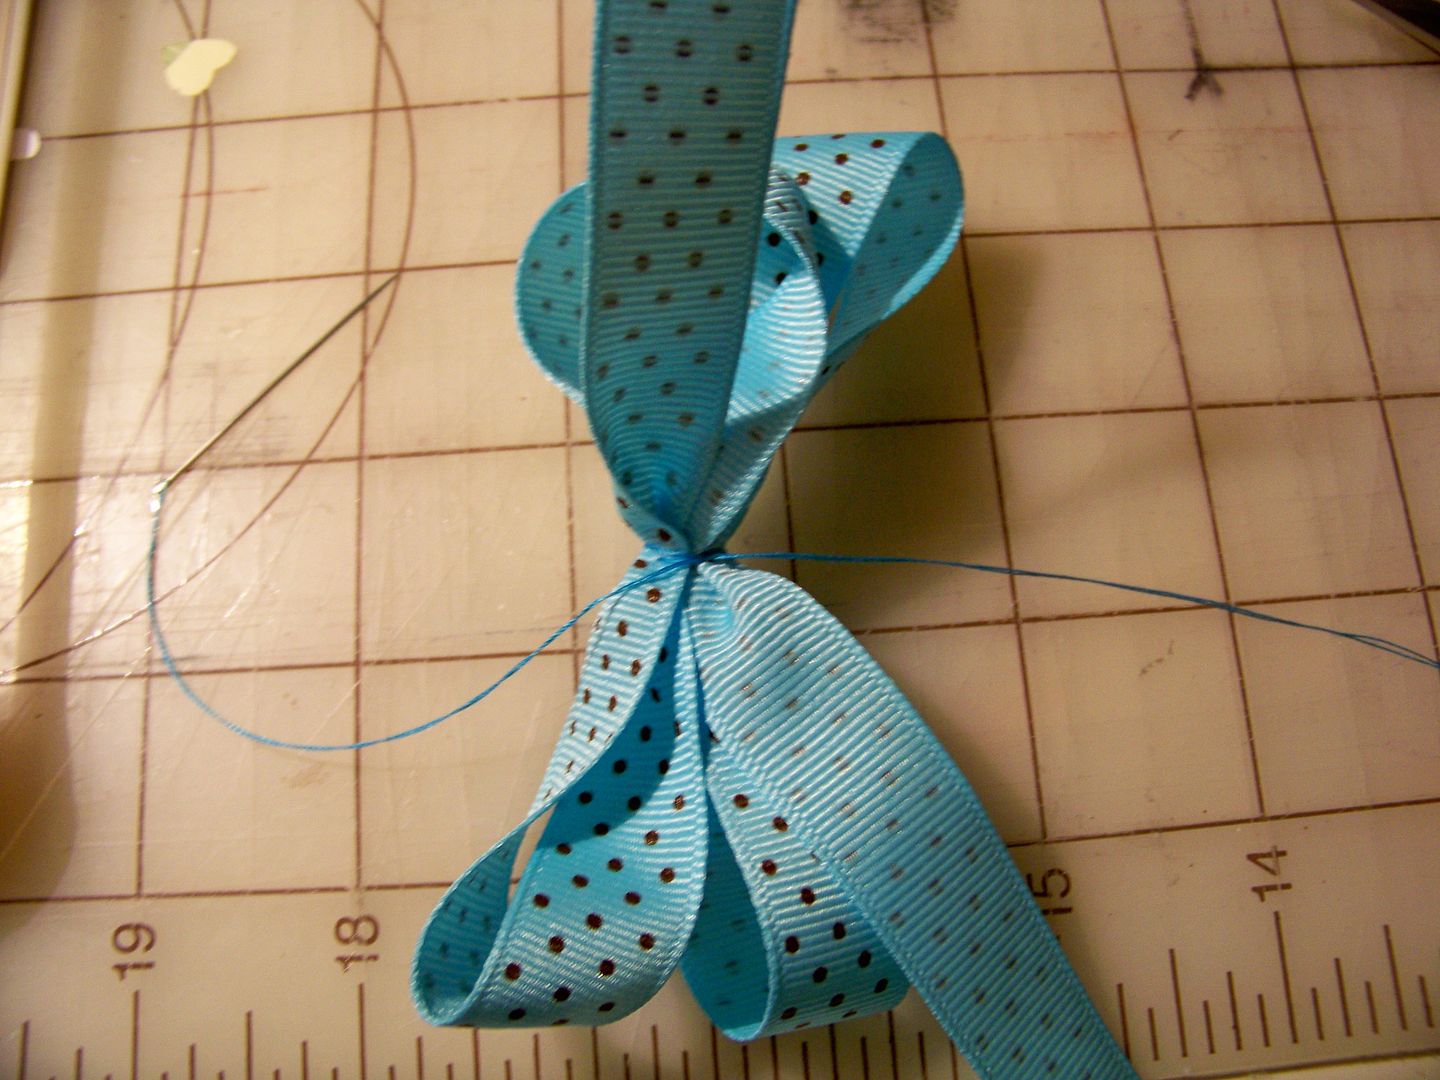
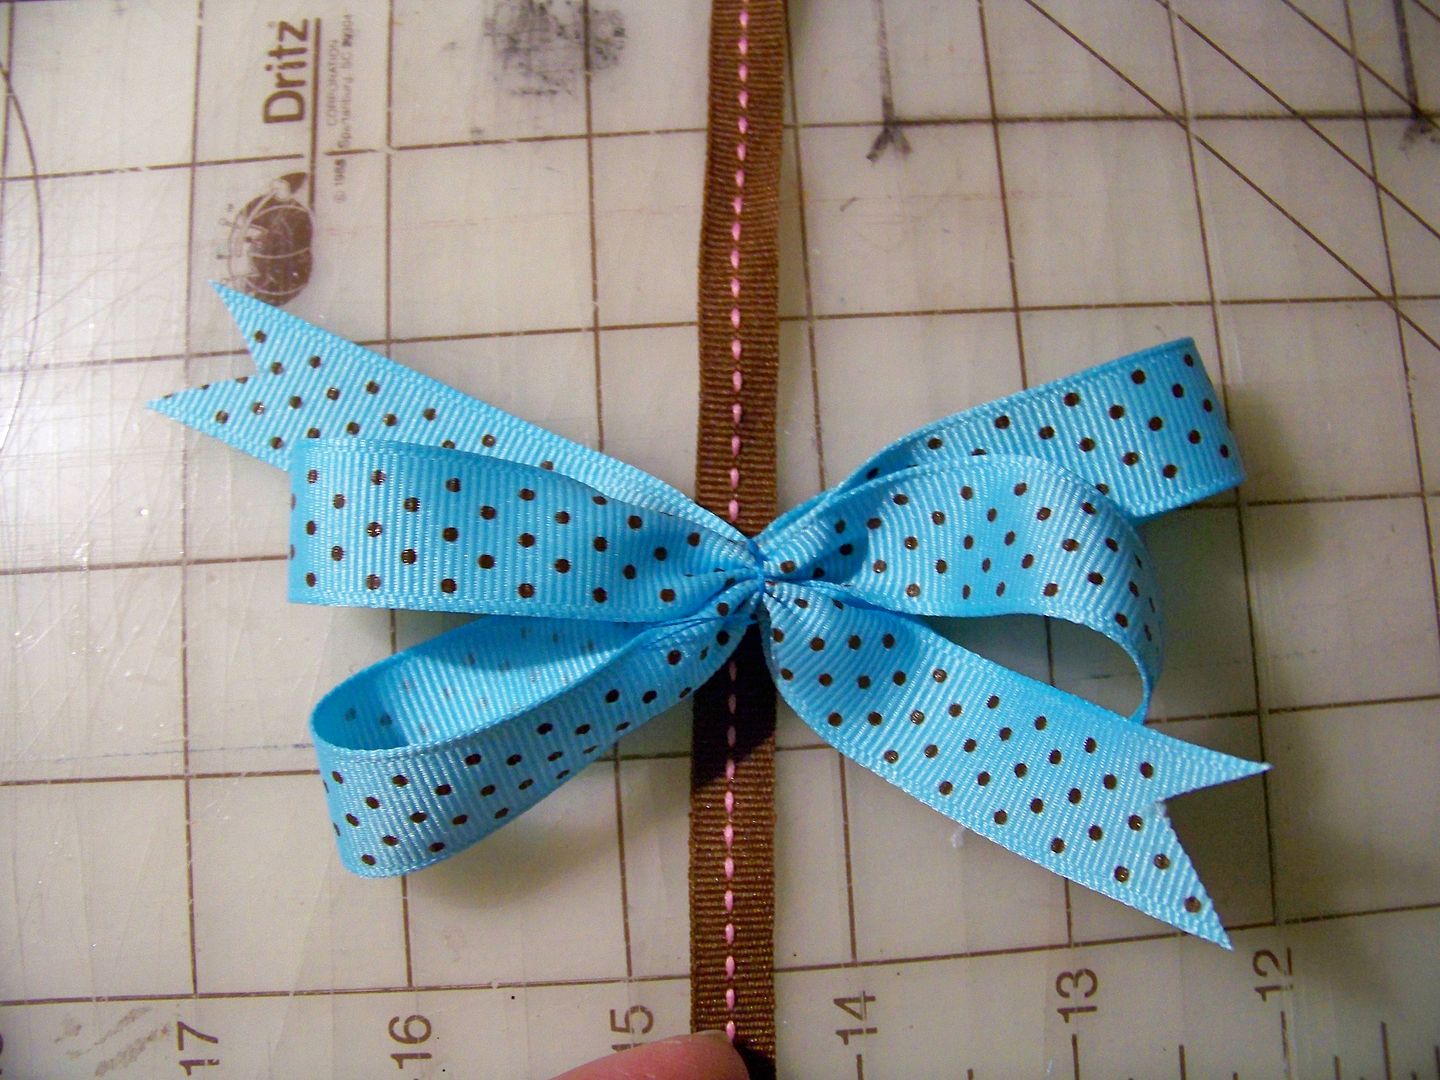
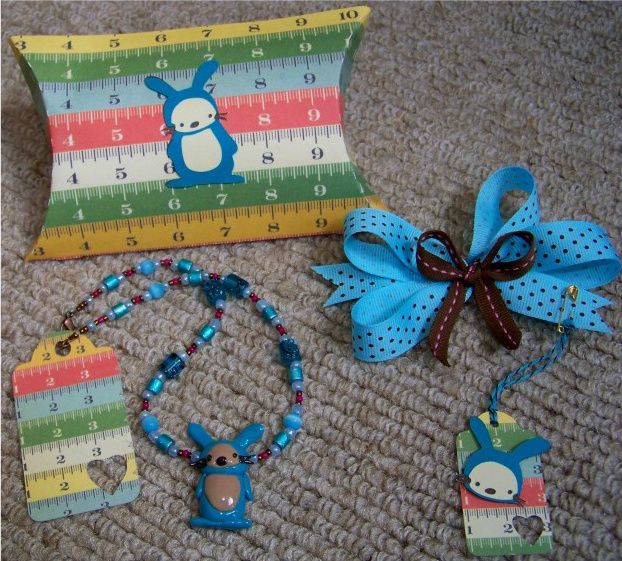

Hair Bow:
The only Cricut-y part of the bow is the packaging:  a tag to be removed with the note "handmade" on the back.  The tag is from Art Philosophy, cut at 2".  The bunny is cut at 2" and the head is separated from the body.  The paper for the tag is also from Cosmo Cricket.
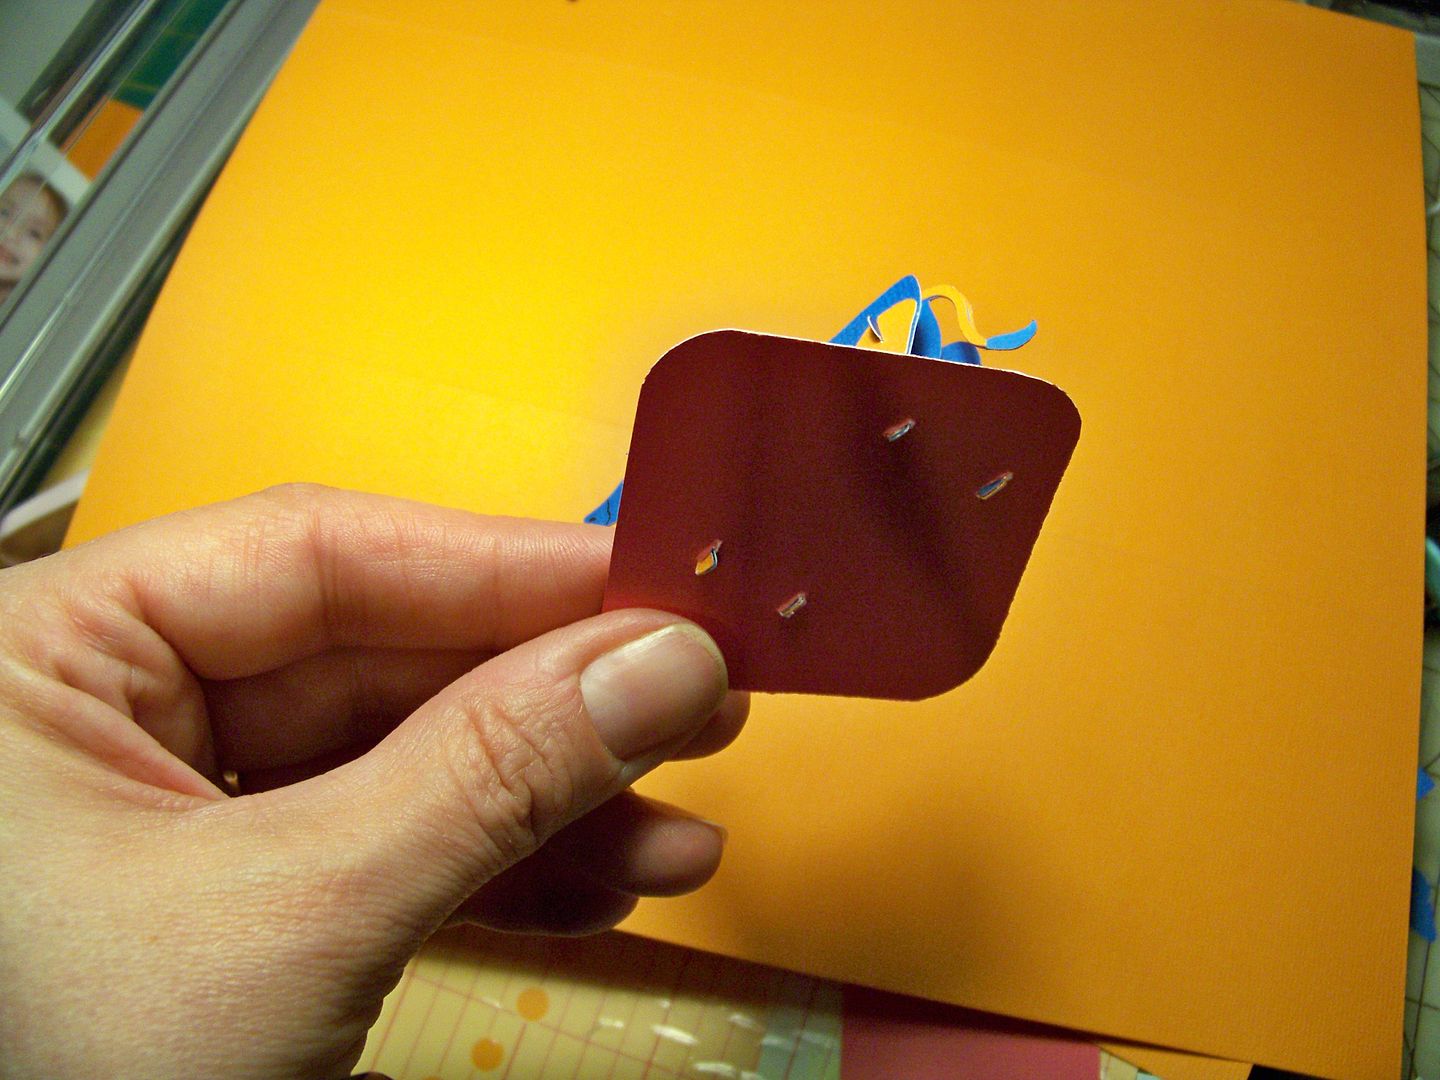


Necklace:
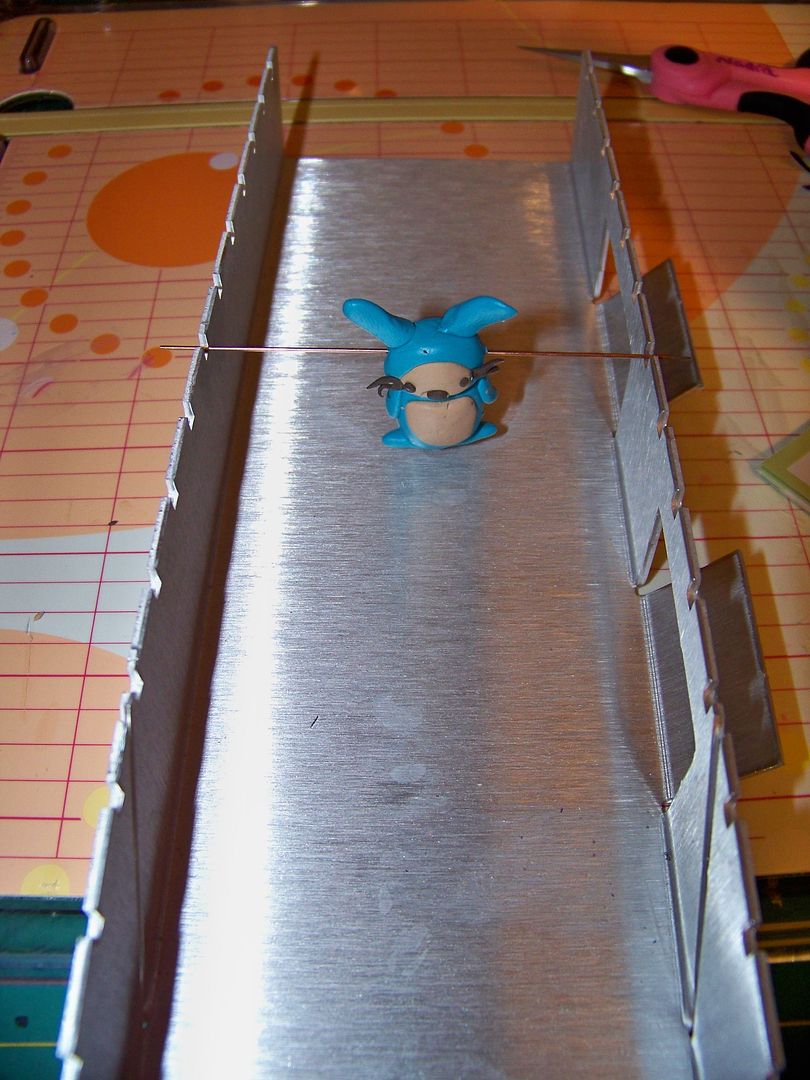
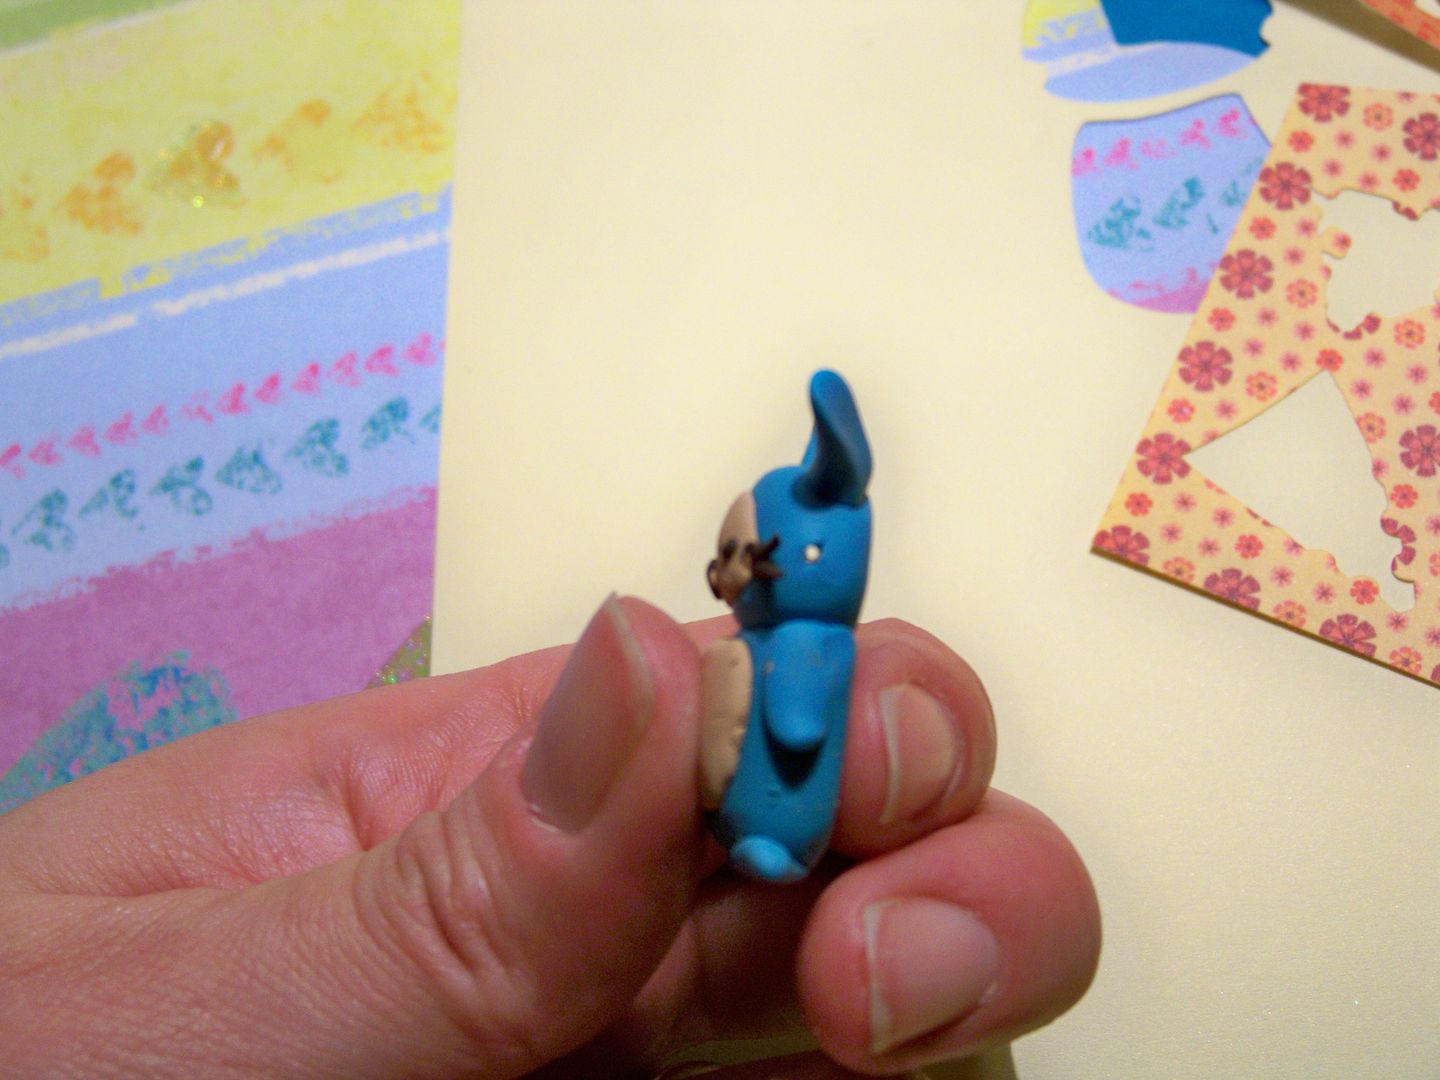
I used the picture in the handbook to create my own little bunny pendant, shaped by hand from Sculpey and Prema oven-dried clays. 


The key to these are to place the hole in the upper part.  Holes placed too far down will create a pendant bead that spins and flips when worn-- very frustrating to wear!  A drying box to bake it in is a must when doing these!  The pendant will hang suspended from the rod which formed its beading hole.


The bead I made took 45 minutes to dry in the oven. 


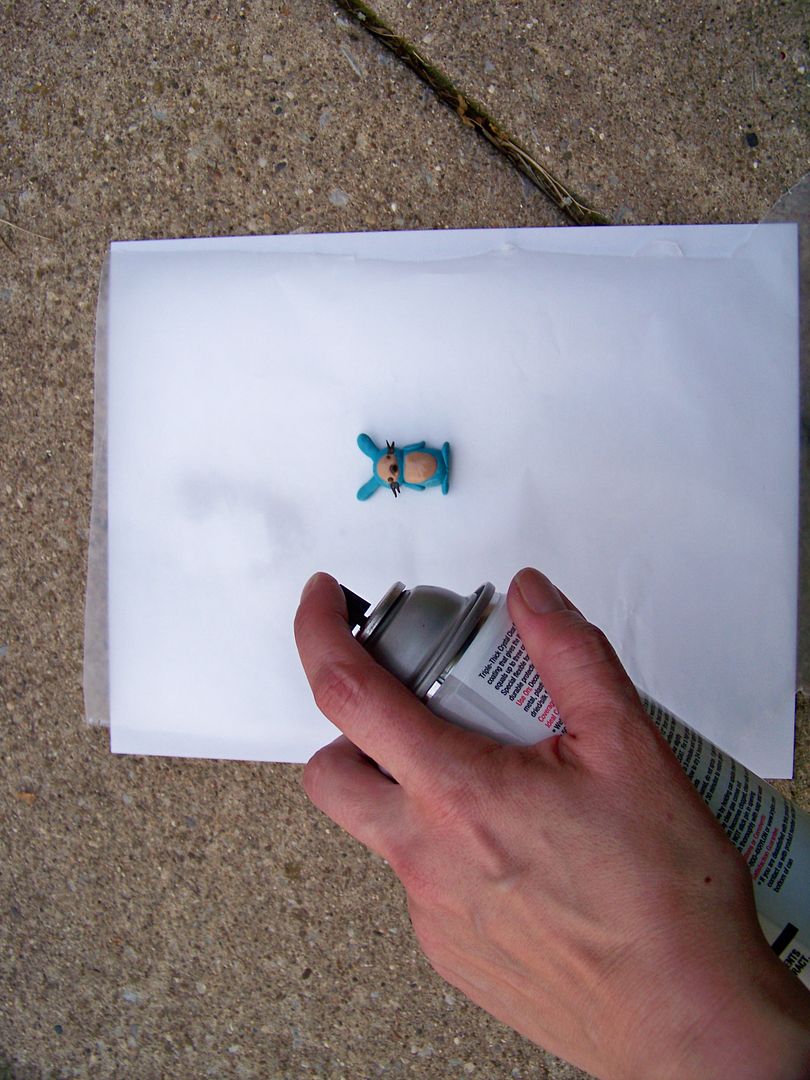
Once cool,  I took it outside and sprayed it heavily with Krylon Triple Thick Crystal Clear Glaze.

 My bead is on a layer of paper and wax paper to prevent the gooey glaze from sticking to the paper.  I sprayed back and front.  I sprayed it heavily and it took about a half hour to dry.

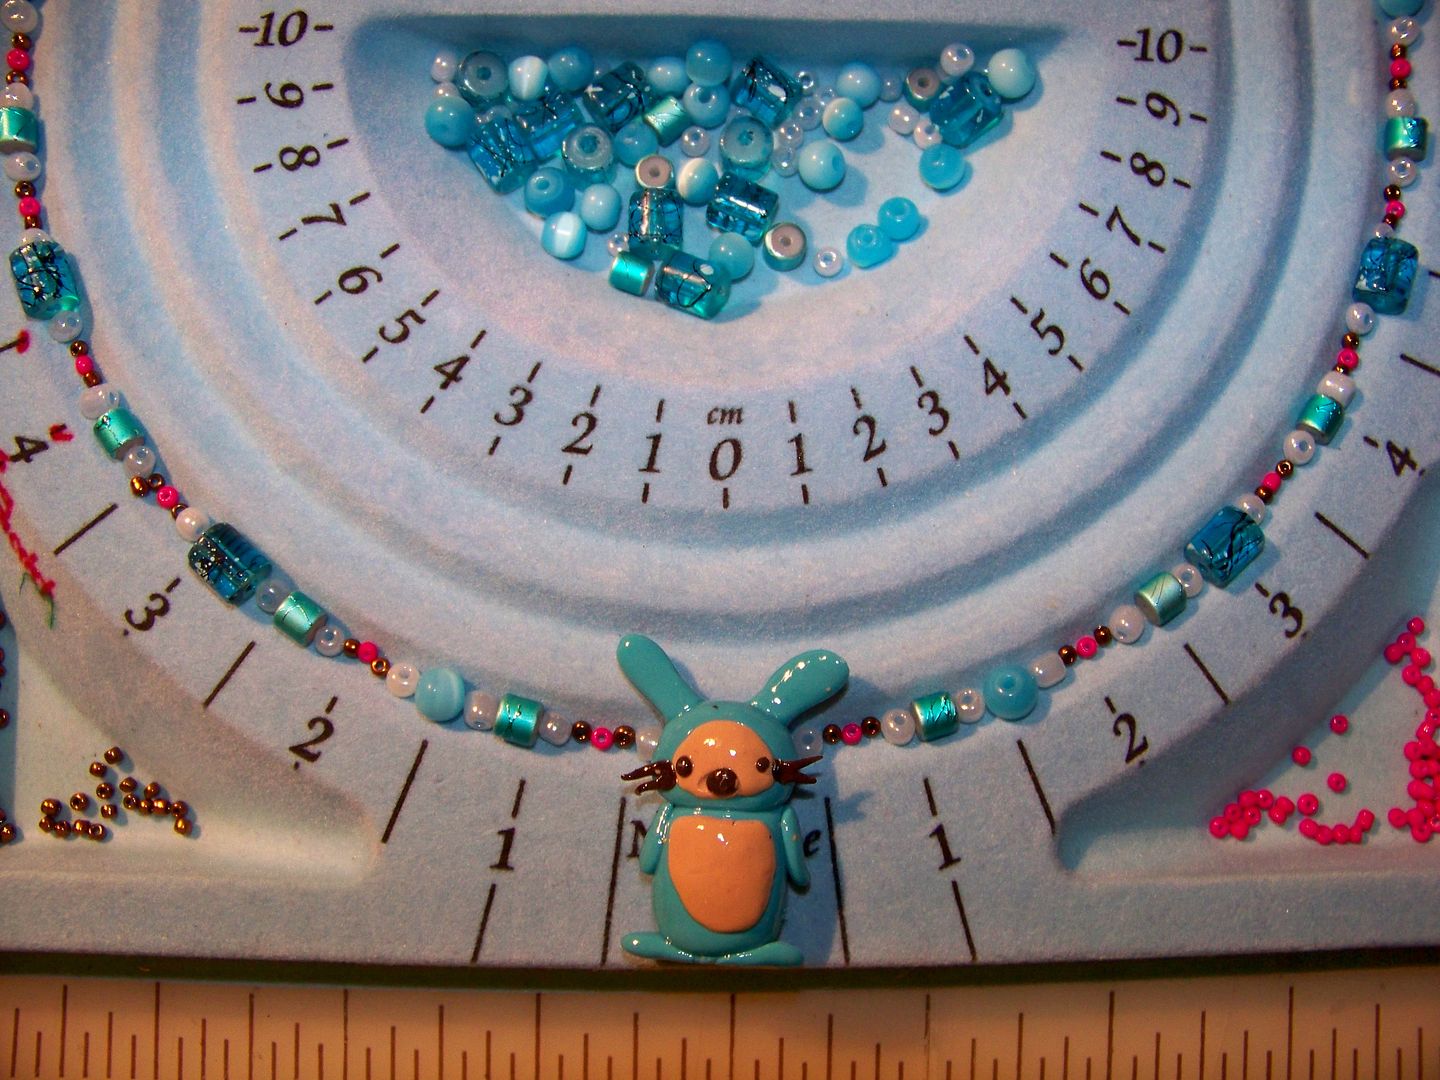
I placed it on my bead board and created a necklace to match the clothing.


I used coated wire, bronze-colored crimp beads, and bronze-colored findings to string and finish the necklace.  You can find my how-to on making this kind of jewelry by clicking here.


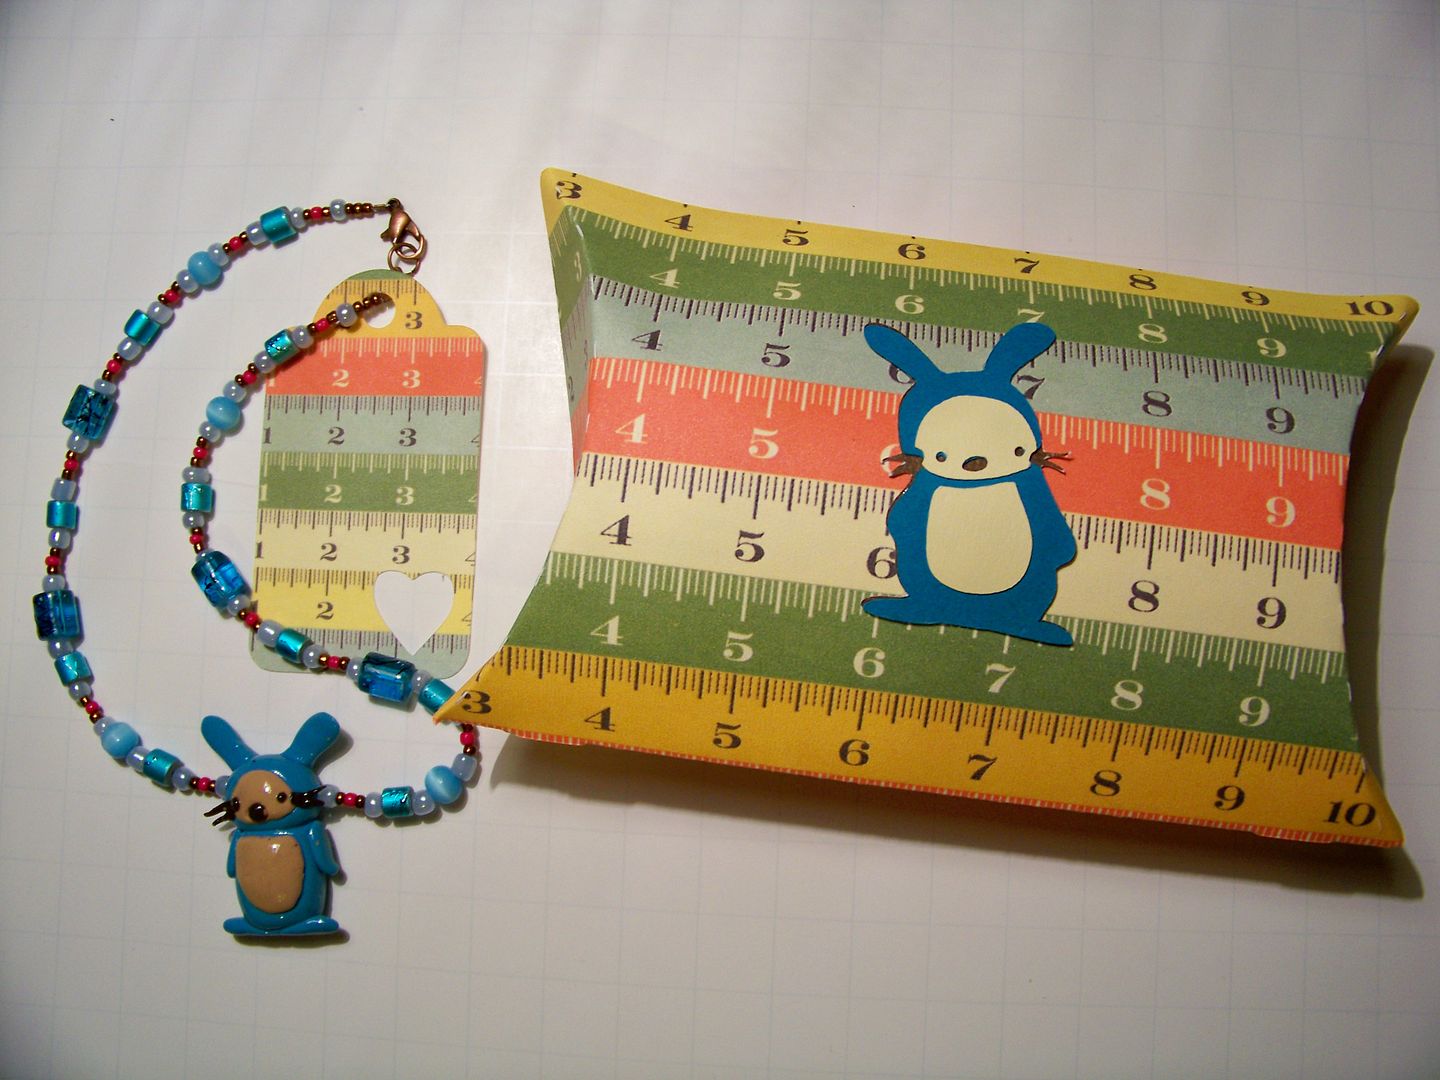
To make the necklace more gift-worthy, I created a tag for it (Art Philosophy 2-3/4") and a pillow box (Art Philosophy 7") for packaging it with a little tissue paper.  (I like to write a little bit about the materials used on the tag for the mommy's info when I make children's jewelry).  The bunny on the box is 2" from Just A Note.  The paper is from Cosmo Cricket.


Happy with the accessories part of the gift, all elements were done!!


Thank you for visiting my blog!  I had so much fun putting this gift together! 
You can see all of my projects by clicking My Project Gallery at the top of my blog, or by clicking here.

But wait! There's more! Click 'older posts' above!

But wait!  There's more!  Click 'older posts' above!