Showing posts with label Baby Shower. Show all posts

Sunday, June 28, 2015

Burp Cloth Tutorial: Personalized Baby Project 1


I have been making customized baby burp cloths as part of a gift set for friends who are expecting or who have new babies.  It has been a fun way to learn and to get to know my machine.  The mommies are always so excited so it really is encouraging!  This post shows how I make my burp cloths.

This method uses a cloth diaper as a base.  I use Gerber brand that I get in multi-packs.  (Other crafters swear by cottonbabies.com but while I learn, I am staying frugal.)  This method fully encloses the back side of the diaper (so that none of the back of the stitching is visible) and has decorative fabric ends so that the project is fully finished!

I create my design in Embrilliance and make sure to include a basting box. (The robot I used is from Breezy Lane and the text is from Lynnie Pinnie.  I made the text circular using Embrilliance software.)  I print off a paper version of the design using the software and copy the design on a USB drive and move it to my machine.


Diapers will shrink so the first thing I do is to wash and dry them.  I wash them with hot water and no detergent and dry with regular heat. (This project does not use any applique, but when I do applique designs on my burp cloths, I pre-wash and dry those fabrics too.  I iron with starch on the fronts and apply Heat N Bond light on the back sides of the applique fabrics).  


Once washed, I iron the diaper to try to get back to a smooth, rectangular shape, pulling on grain diagonally if needed.


I cut off one end at a 90 degree angle from the sides.  Since it won't be straight on the end after washing, this will also help the finished project to be straight.


I flip it over to the back and, using a seam ripper, carefully and quickly remove the two inside stitching lines that hold the padding in place.  I like this kind of diaper because the padding adds dimension to the stitching (it is even more fun with applique).  I open it enough so that the design will fit.  My goal here is to stitch on the front and padding and then re-stitch the backing down to cover the back stitches of the embroidery and/or applique.  You most probably will not need to remove stitching all the way down the length of the diaper.  Only go as far as necessary. I use my paper pattern to help me decide how much stitching to remove. 


I hoop medium-weight cut-away stabilizer.  It will be completely hidden on the finished project because it will be enclosed in the diaper.  I like using cut-away because the stitching will hold up to even the roughest laundering situations, as is often the case on things made to be covered in messes. This is just my personal preference.  


I flip the diaper back over to the right side and determine where I want the applique design to be placed.  I use the paper print out to do this.  

I use a thumbtack method to transfer the position of my design instead of making marks on the fabric. (I place my paper pattern on the hoop, matching cross-hairs, then I place thumbtacks at the center and on one leg of one axis.  The thumbtacks leave marks on the paper pattern.  I move the paper pattern off the hooped stabilizer.  I spray my hooped and marked stabilizer with textile adhesive.  I move the paper pattern to the diaper and place it using a ruler to find the center.  I tape the pattern in place and pick up the diaper with taped-on design and lay it on the hoop, making sure the thumbtacks go in the exact same holes as before.  I remove my thumbtacks and smooth the fabric on the hoop to best adhere it.  (For pictures and more details on how I do this, you can find more on a previous post on my blog by clicking here.)

My diaper is now floated in place on my hoop and temporarily attached with spray adhesive.  I roll up the sides and pin or clip out of the way to prevent them from accidentally getting stitched under the hoop.


I top with the filmy kind of Water Soluble Stabilizer (WSS)  because the padding of the diaper can cause the stitches to sink down; this will prevent that.  I begin my stitch out, making sure that my basting box is the first sewing step.  This holds the diaper on the hoop, as the textile adhesive is only temporary.  It is even more important for those diaper burp pads that use applique! 


I used my Brother PE-770 to do the embroidery.  My machine is a single needle with a 5x7 hoop.

After the design is complete, I remove from the hoop, clip all jump stitches on the front and as many as possible on the back.  The back won't show so it is not imperative to do this perfectly on the back, but long threads should be clipped.

I  remove all the WSS.  I use the end of my Stitch Fix seam ripper or the end of a Frixion pen.  (When appliqueing, I press the design to adhere the Heat N Bond Light.)

I trim the cut-away stabilizer close to the the design.  I don't trim between words; just trim around the outside perimeter.  


I straighten out the diaper and place the back pieces in their original places so that it looks like it did at the beginning.  


I use a 1/2" Steam A Steam fusible webbing to replace pinning to hold the backing together before sewing.  (This is the only brand that really works for me for this application.)  I press and fuse the backing closed.  Then I take the diaper to the sewing machine and stitch up the inside lines that I had removed previously, skipping over areas that have machine embroidery or applique.  


To make the decorative fabric ends, I fold a piece of cotton fabric along the grainline, making sure that I follow the print, if any, so that it appears to be straight.  (If the fabric is printed off-grain, I always follow the pattern, not the grainline).  I cut the folded fabric to make a thick strip, usually around 2" - 4" but sometimes I vary that based on the pattern or how much fabric I have.  This one is 2-1/2".  Cutting a 2-1/2" strip of folded fabric makes a 5" strip unfolded just to be clear!


I turn the diaper over so that I am looking at the BACK of the diaper.  I open the strip and place one thickness of fabric face down, making sure I have 1/2" over overlap on each side of the diaper.  


I stitch in place using a 1/2" seam.  (Here, I flipped it over so you can see that the fabric was sewn facedown to the BACK of the diaper, just to be clear!)


I press the fabric so the seam is flat.


While at the ironing board, I press the long, unsewn edge of the fabric up 1/2".


I pick up the strip and sew the sides, right sides together, with a 1/2" seam allowance.


I clip off the corners to remove bulk.


I turn and push out the point.  I use a bone folder but only because I can't find my point turner!!


I turn the diaper to the front.  I use a piece of Steam A Seam 1/2" fusible tape to fuse the strip in place by lining up the fusible tape just under the stitching line.  The folded fabric should be right on top of the stitching line.  Fusing is a substitute for pinning only!  This must be sewn to hold up!


I press in place, using steam.


Using an edge foot or being careful to stitch on the very edge of the fabric, I sew all the way down the strip.  


On the other end of the diaper, again, I trim off the end of the diaper and follow the same steps to add a decorative fabric trim to that end as well.

The finished front of the burp cloth...


...and here, you can see that the back is completely finished and the stitching is enclosed.


For presentation, I fold the burp cloths in thirds and then in half.


I have read lots of posts on message boards that warn not to use these inexpensive Gerber diapers, that it will ruin the burp cloth after laundering.  I couldn't figure out why so I washed this and dried on high heat. Wrinkling is the only thing I see, as I imagine will be the case with all 100% cotton diapers.  Just sharing in case you were wondering about this too.  By pre-washing and using a cut-away stabilizer, I think I have prevented the majority of foreseeable disasters.


These are some of the baby gifts I have made.  I plan to share my tutorials on door hangers, bibs, onesies, and teddy bear rattlers in future posts!


Thank you for checking my blog post today.  All of my machine embroidery notes, links to my projects and my resources are on my machine embroidery page on my blog (or click here).  

Tuesday, August 21, 2012

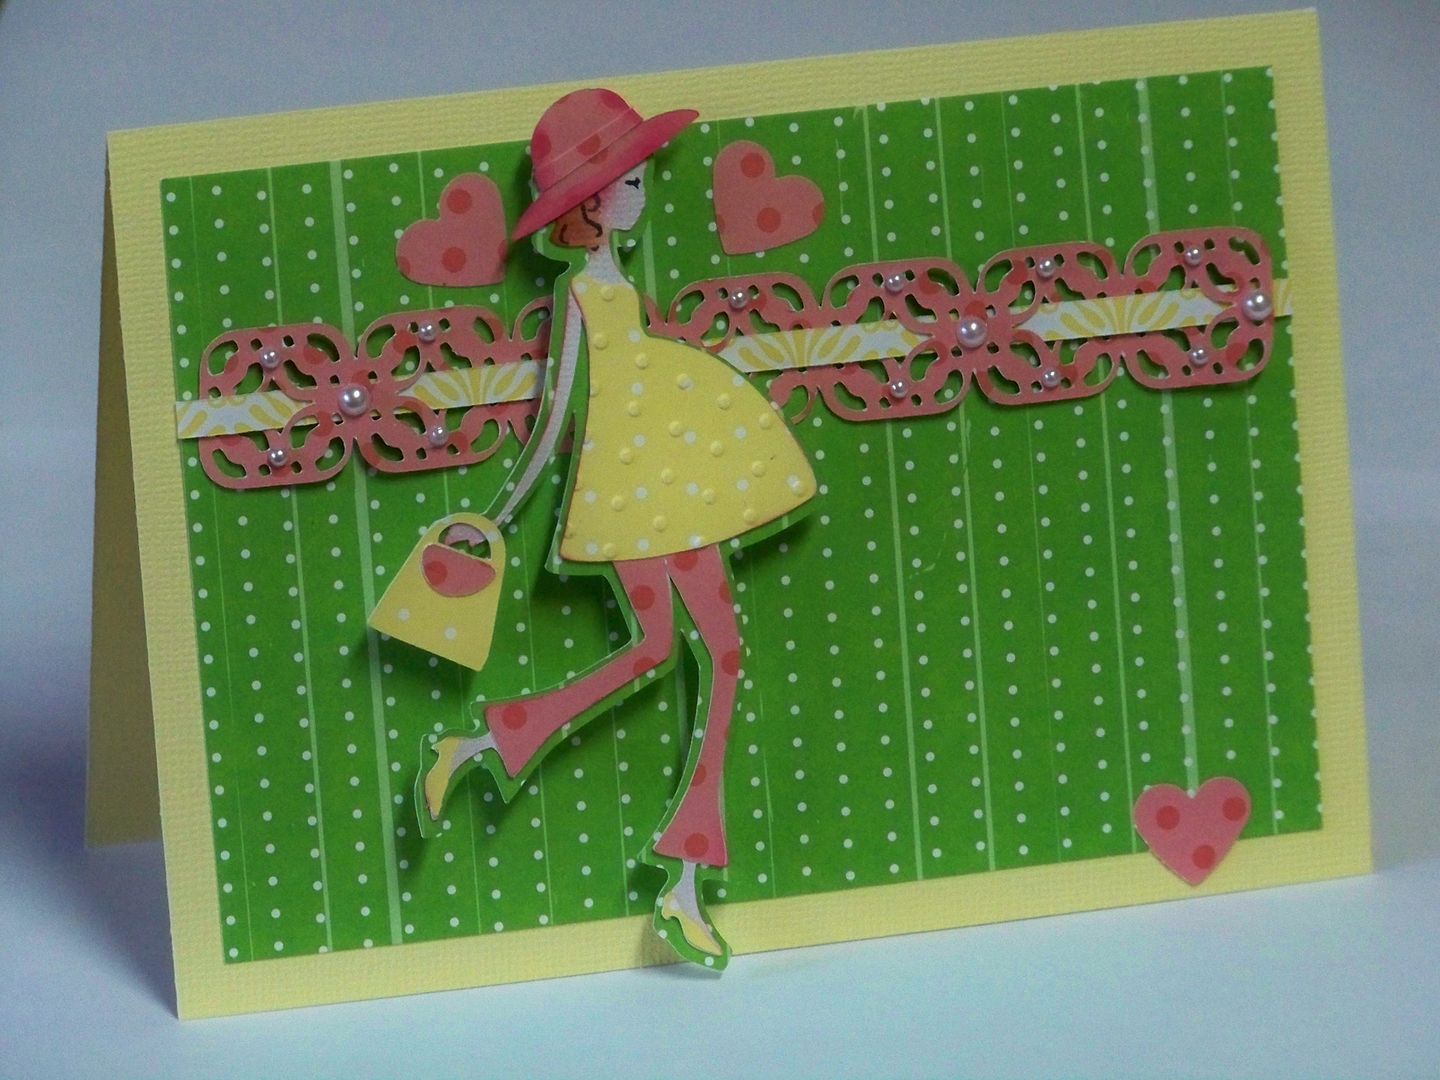
Simple card: Happy Pregnancy


Another simple card -- this one is for a friend who is pregnant with her first child!  

  • I sized this card to fit in a manufactured envelope; it finished at 4-1/4" x 6".  The green mat was 3-3/4" x 5-1/2".  
  • The pink border was cut from Paper Trimmings (page 28) at 3/4".  I trimmed it down to 5-1/4 in length.  I laced it with a 3/16" strip of paper and added pearls.
  • The figure was cut from New Arrival (page 82) at 4".   Her top was embossed.  Her hair was added with ink and a sponge applicator.  I used a Micron pen for small details on the head.  Her hat and body were lightly inked.  She is popped up 3/8".
  • The hearts were cut with a punch.


Thank you for checking my project today!  Many of my previous projects can be found at My Project Gallery (or click here).

Monday, February 20, 2012

Oh, Baby! It's a...Challenge!

Pin It
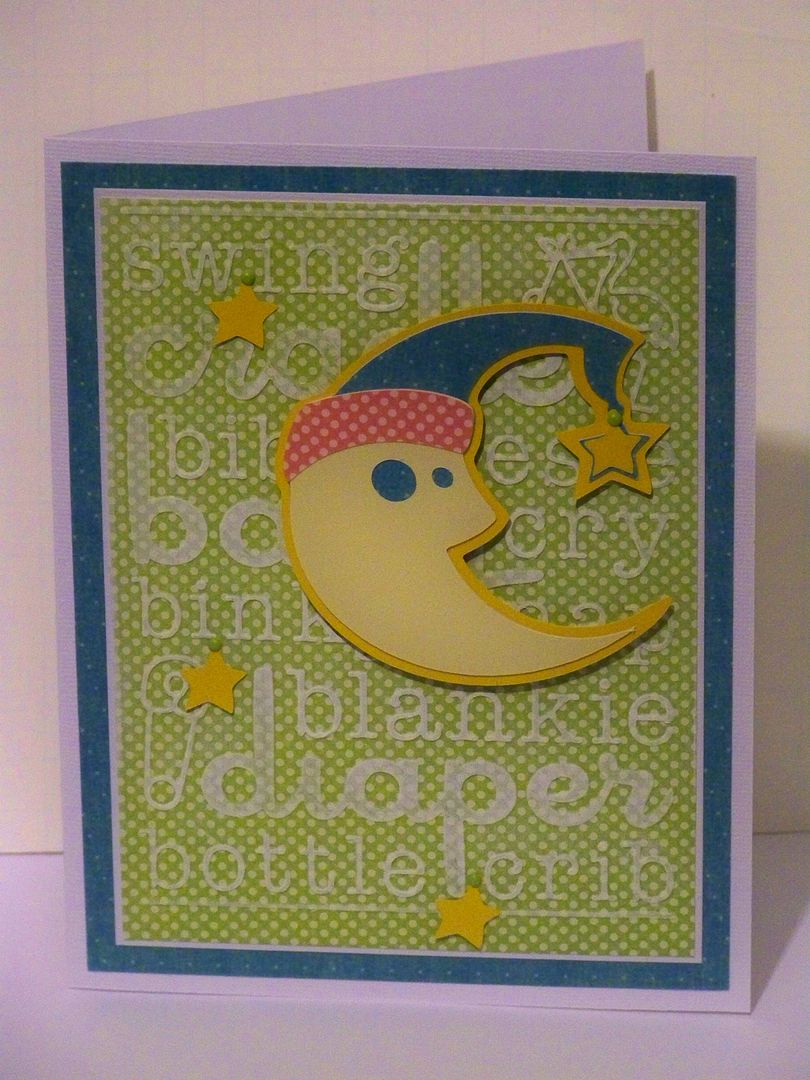
My husband's cousin and his wife are due to have their first baby any day now.  What perfect timing to take advantage of the Typecast Creative Baby Cartridge Challenge!


The blog owner of Typecast Creative is Curt Jensen, an illustrator for Provocraft.  This challenge required using Curt's cartridges or Cuttlebug folders to create a baby project.  I chose a Word Collage embossing folder and an image on Campin' Critters!

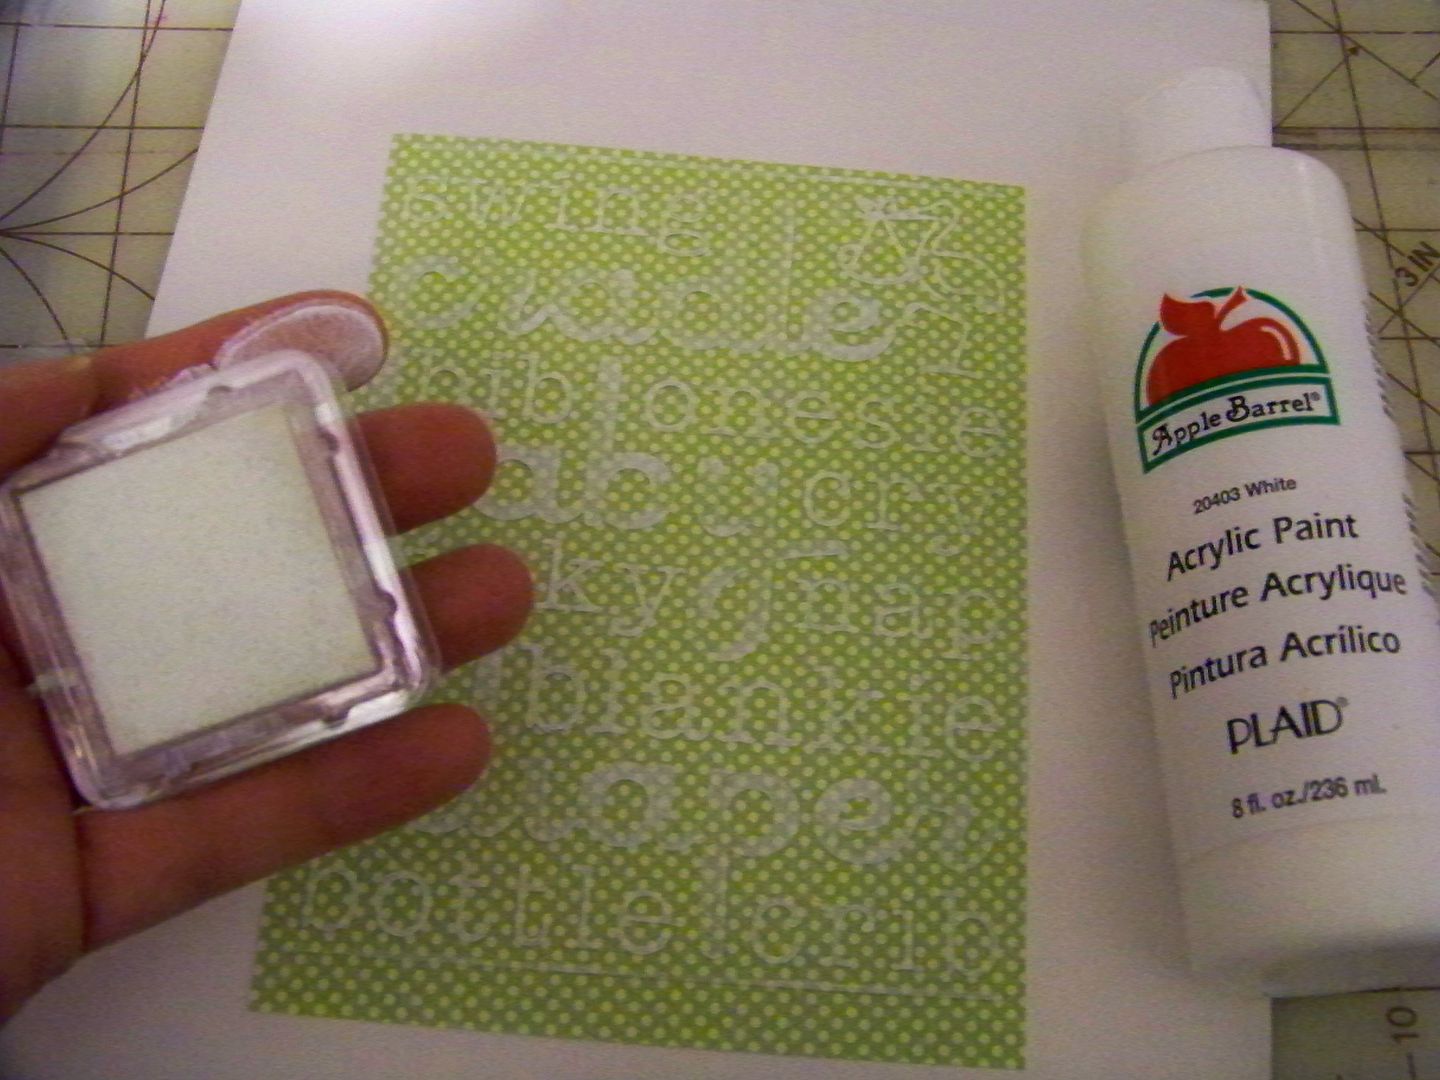
I embossed the green layer and rubbed over it with a foam pad that was covered lightly with white acrylic paint to help the raised areas stand out.  (Yes, the finger is the best applicator of paint!)


We won't know the gender of the baby, so I chose my colors to be as gender-neutral as possible.  I also wanted the card to coordinate with the gifts I purchased.  (I know:  buying baby gifts does violate the Crafters Code but time is of the essence because I have procrastinated!!!  I blame Pinterest.) 

These were my cuts for the card:
  • Card base cut from white cardstock - 12"x7.75" folded down to 6"x7.75"
  • Teal layer - 7.375"x5.625"
  • White cardstock layer - 5.125"x6.875"
  • Green polka dot layer - 6.75"x5"
  • Moon from Campin' Critters (cut on the Expression) and extra stars - 3.25"; small star dangling from hat was cut at 2.75"
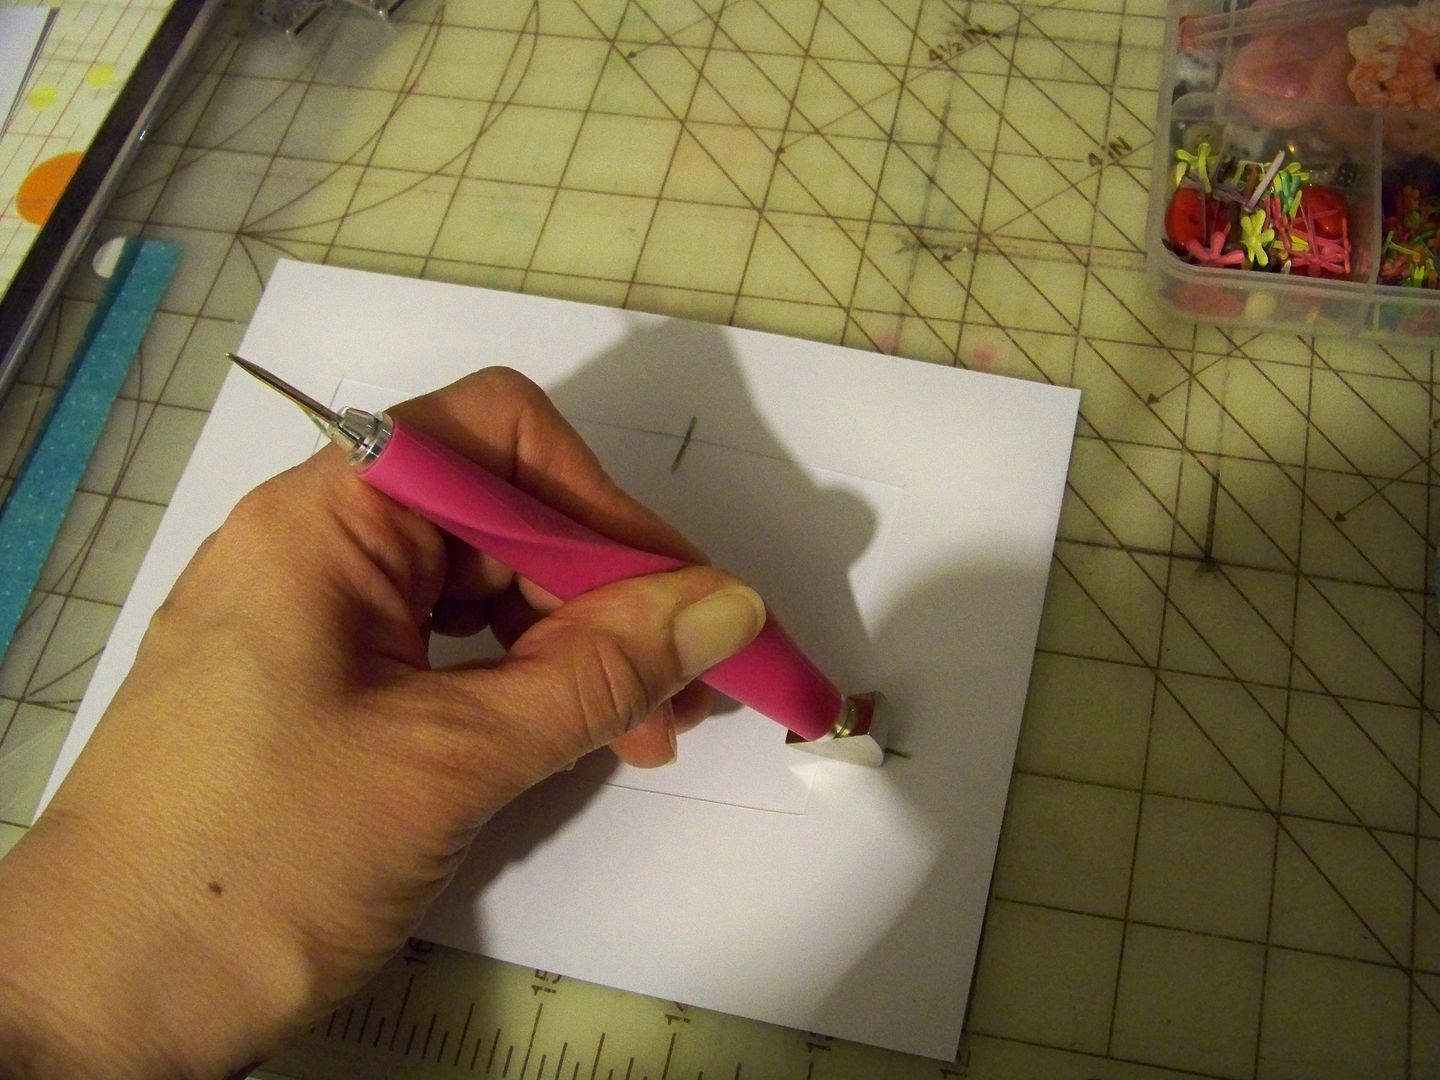
The stars were applied with brads that match the green paper.  I love the awl and bradsetter by WeRMemoryKeepers!  The brads were applied before the layers were adhered to the base so the brad prongs were hidden!


I think these images would also be perfect for baby onesies.  For my tutorial on making baby onesies with the Yudu and Yudu Cardshop, click here.  To see all my paper and Yudu projects, check out my Project Gallery, or click here.

I am looking forward to seeing all the baby projects made for this challenge.  All projects will be posted on Typecast Creative March 12, 2012.  Be sure to check it out!

Thursday, October 20, 2011

Screening Onesies on Yudu Cardshop

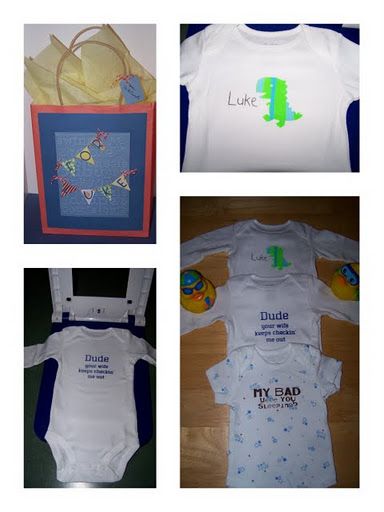
I discovered a great, new use for my Yudu Cardshop!  It is the perfect size for screening onesies!!  If you follow me on Pinterest, you may have noticed my Yudu board has been overwhelmed with onesie ideas lately.  I have a baby gift to make and I thought personalized onesies would be cute to give!  The stork is scheduled to bring Luke (baby brother to one of my daughter's friends) later this month so I went to work!
 
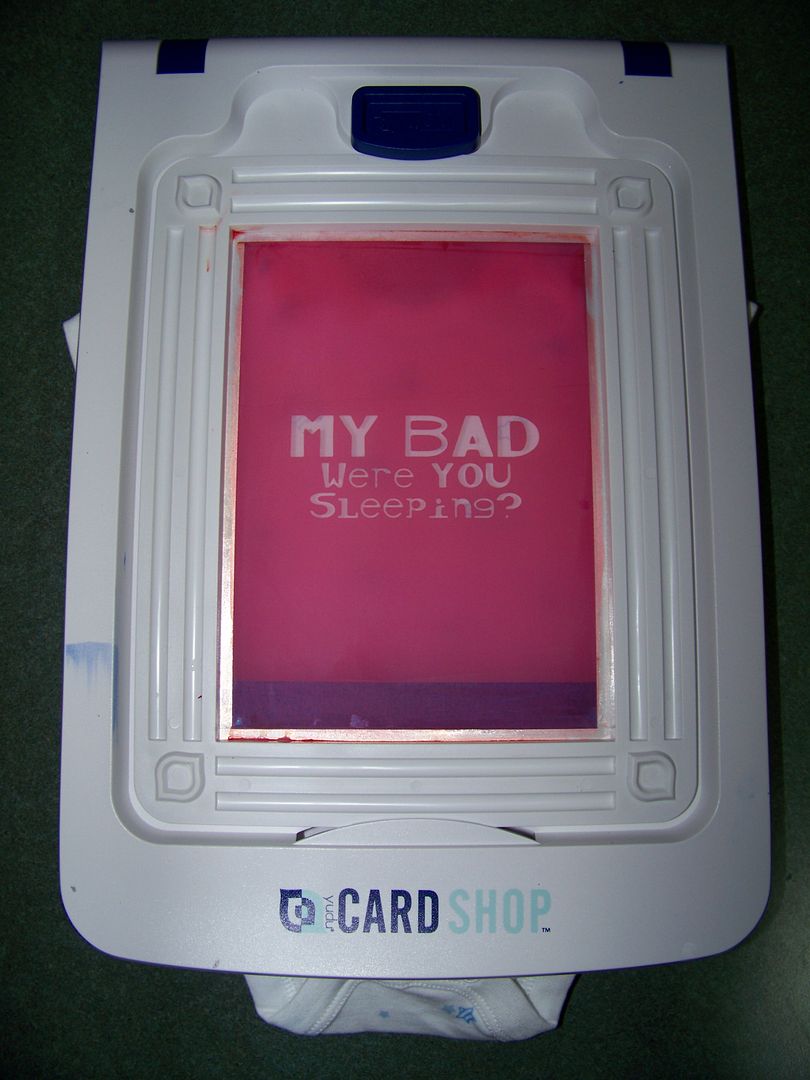
When I say that the Yudu Cardshop is perfect for screening onesies, look at how perfectly the 0-3 months size fit in my unit! It just barely overhangs!  I was worried that the neck stitching would cause me to have problems screening but it worked perfectly!  I burned the mini screens in my big Yudu but actually screened the onesies using Cardshop.
 

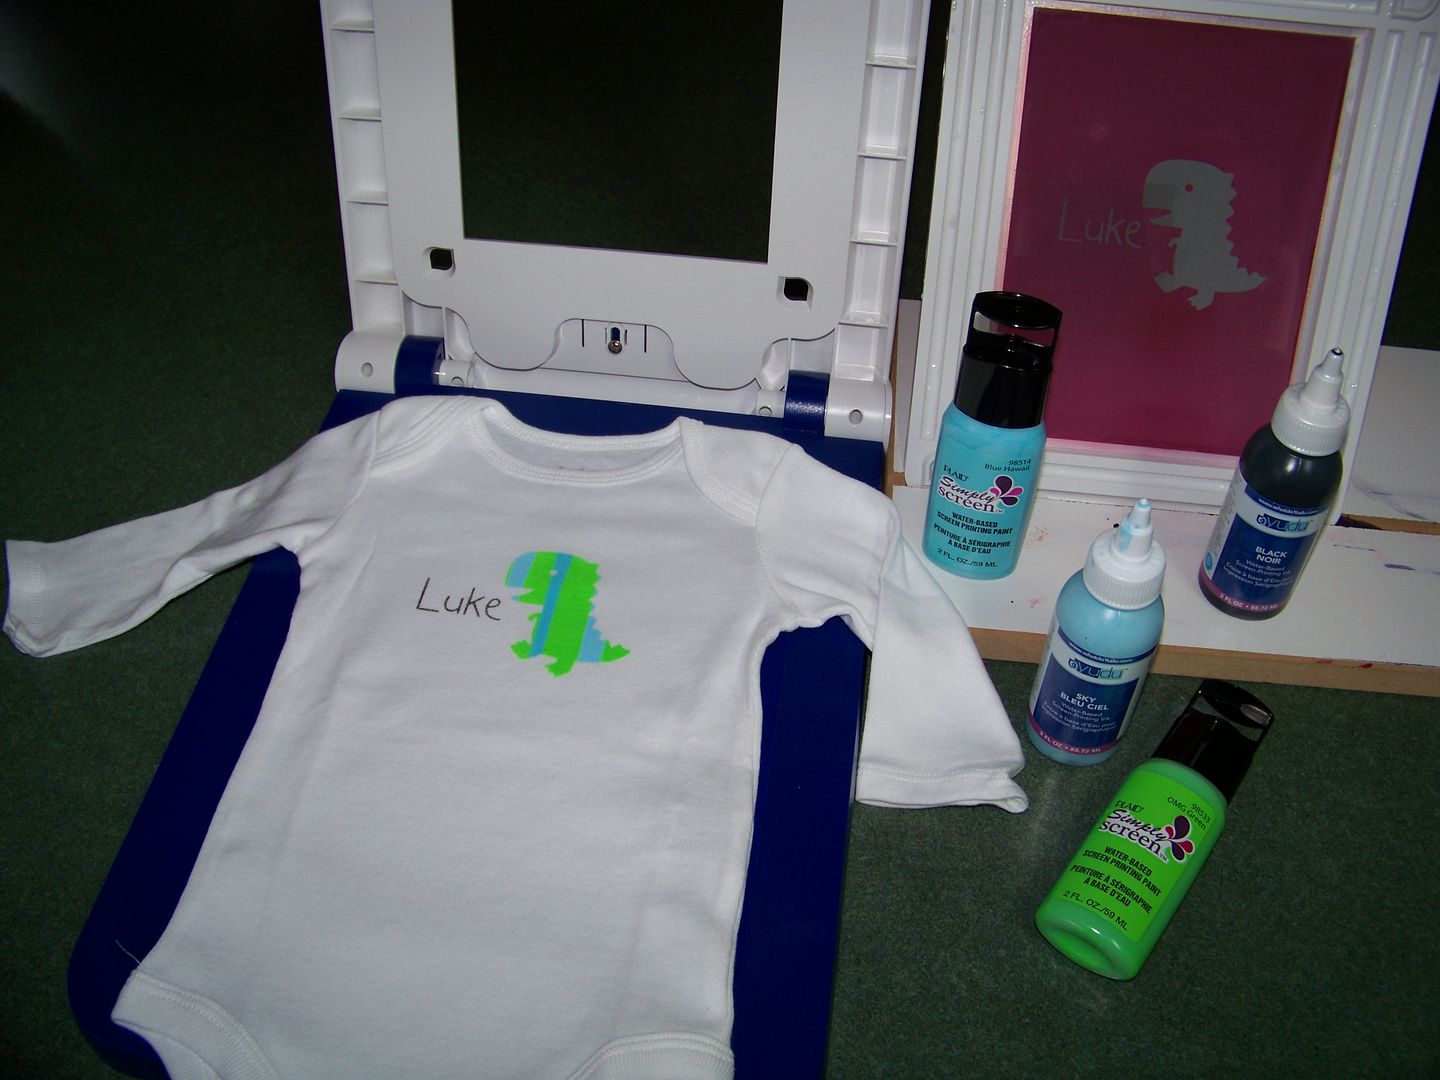
The first one was created using the dinosaur from Create-A-Critter at 2-1/2" on on my Expression, cut onto black vinyl.  I used the settings for a KISS cut (blade 3, pressure 3, speed 3) and placed the cut on my transparency using transfer tape.  The text was Microsoft's Cheddar Salad BTN at 72 point, which I printed directly onto the transparency using my regular office printer.  
 
'Luke' and dinosaur screened with Yudu and Plaid inks.
Here's the secret for this multi-color project using only one screen:  I taped over the name Luke, leaving only the dinosaur to screen first.  I squirted ink in alternating colors of light blue, medium blue, and green, floodfilled, then screened.  I left the shirt in place but removed the screen, rinsed and dried it with a hair dryer.  I replaced the tape-- this time over the dinosaur.  I screened the text in black.

The next one has a text idea that I got from my Yudu board on Pinterest (the photo is credited to Zulily, but the link does not work so sadly I cannot link it to the original poster for you).


'My bad- were you sleeping?' screened with Yudu ink.
I only used text straight from my computer-- so easy!  This font is Microsoft Alcohol Licks at 50 point for "MY BAD" and 30 point for the remaining text.  I screened the text in brown because there were little brown stars on this patterned onesie

The next one was also an idea from my Yudu board on Pinterest from an Etsy artist


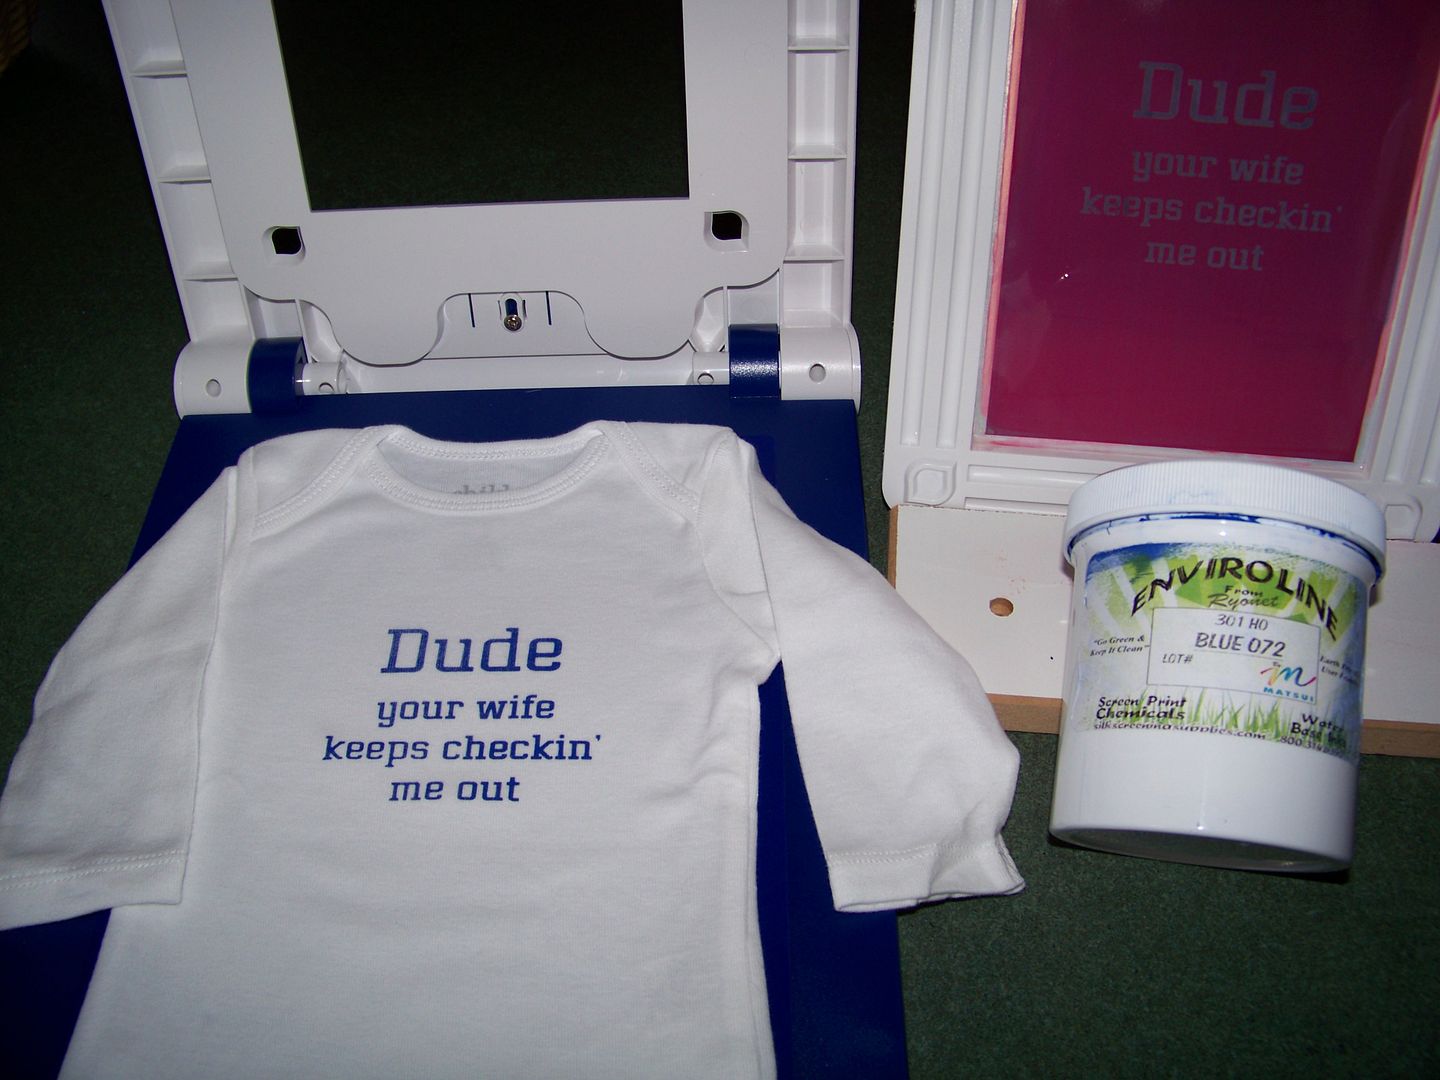
'Dude your wife keeps checkin' me out' screened with Enviroline ink.

This was also simply text printed onto a transparency.  This text is Microsoft Gasoline Serif BTN at 72 point for "Dude" and 36 point for the remaining text.

For more detailed Yudu directions, check out my Yudu page (see the tab at the top of my blog or click here).  For my tips on using the Yudu Cardshop, click here for my previous post!  I did happily discover that because the designs I used for these projects were placed away from the corners, I was able to successfully screen up to 4" width.

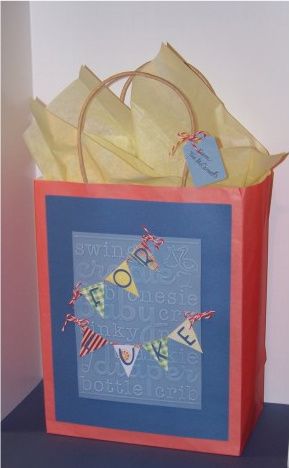
I wanted to create a little gift bag for my baby gift.  I love Word Collage so I was thrilled to see a Word Collage embossing folder collection!  I used the baby one for this project.

The banner was hand-cut.  The letters were cut from Makin the Grade at 3/4" on the Expression.

Thank you for looking at my blog!  I am LOVING using these mini screens!  They are so fast to cover with emulsion and even faster to dry!  Click here to see all of my projects in My Project Gallery.


But wait! There's more! Click 'older posts' above!

But wait!  There's more!  Click 'older posts' above!