There was a learning curve to using the Yudu Cardshop, which I hadn't expected since I already knew how to apply and burn emulsion. I wanted to share what I learned with you!
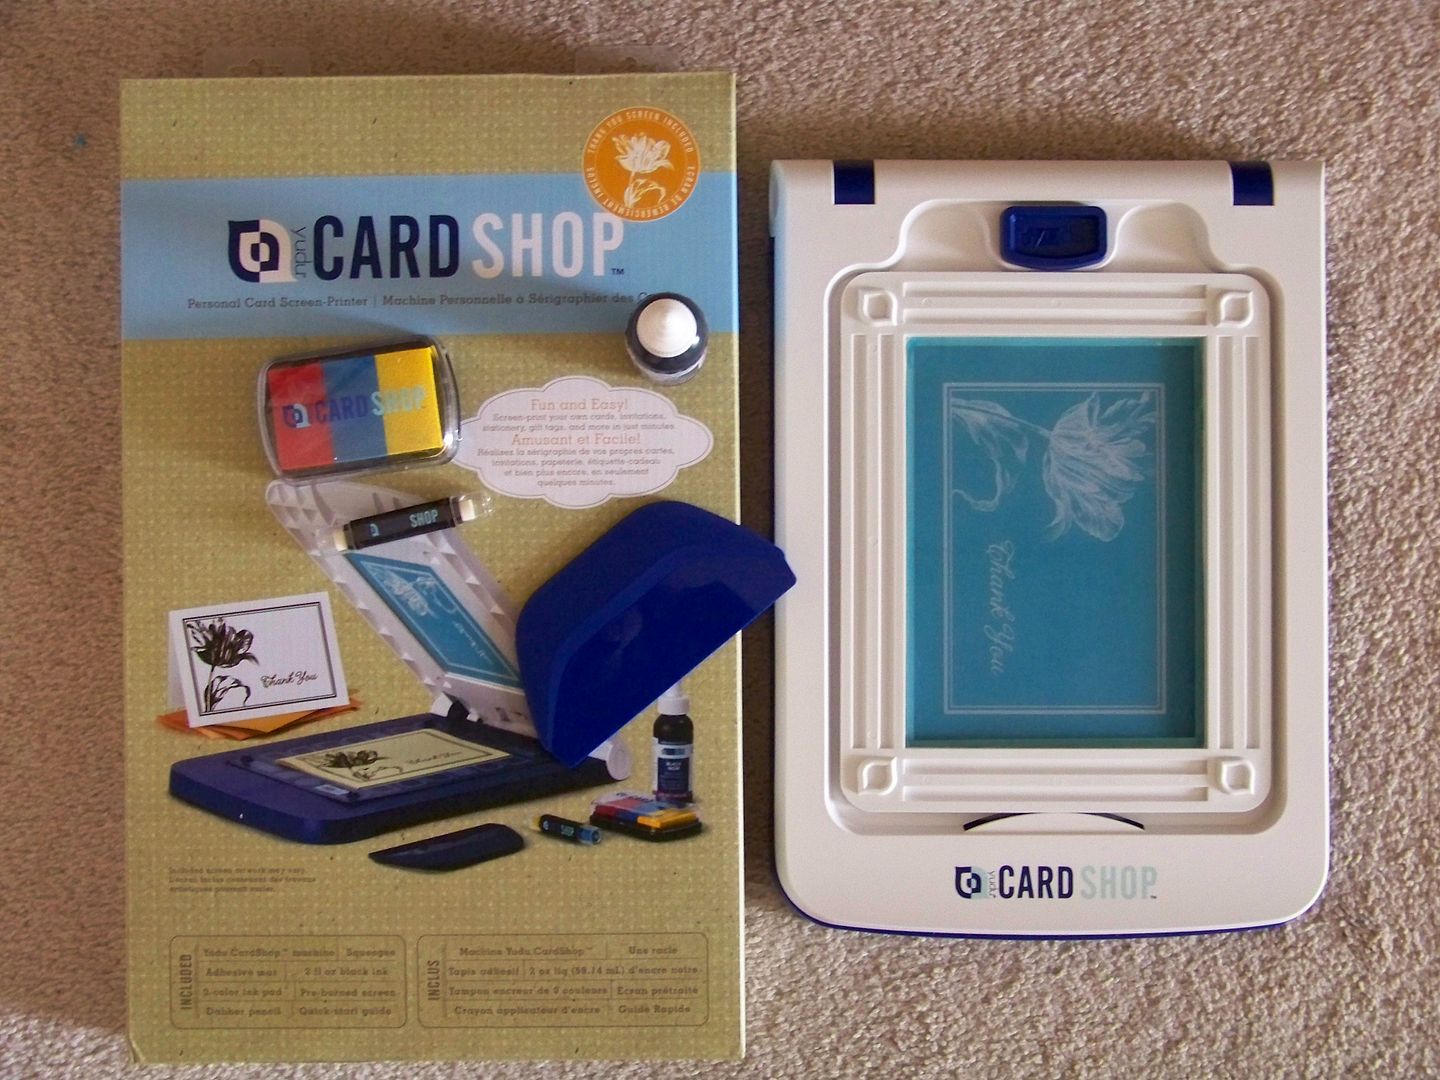
I must preface this by saying quite honestly that you really need a large Yudu for this purchase to make sense at all. Currently, I think there are only a few pre-burned screens available and you cannot burn an image with the Cardshop alone. (In fact, the Yudu Cardshop is not electric-- it is basically a holder to allow you to screen small items only!) If you do have a large Yudu and have wanted an easy way to screen small papers (up to 5" x 7"), then this might just be perfect for you.
First, I tried using the pre-burned screen that came with the product. I was frustrated with this. It is impossible to pull this screen and have the whole design with decorative frame pull onto paper. I tried it with an after market [better] squeegee and tried different inks. After about 12 tries, experimenting with anything I could control, I realized the the bottom line: the corners of the frame in the design will never pull through! Why? The design is too close to the edges so the tension of the screen just prevents it.
This is something that has not been an issue for me on my big Yudu because I use a 10" screen coater and 8-1/2 x 11" transparencies so I always have tons of space between my images and the frame! Now, if I had learned this just from using this pre-burned screen, I would have said, "Wow! I sure am glad they provided this example of what not to do when designing an image to use on this." Unfortunately, I am sometimes not too smart and this was one of those times. [Feel sorry for me at this point!]
I will fast forward to the point just after figuring out how much space a design can actually use of the mesh! Just know that at this point, I was an expert on coating the mini screen with emulsion because I had done it two times before with images that were too large before this successful one! If you are taking notes, the prime space is in the middle of the mini screen, no larger than 3-1/2" x 5-1/2"!!!!
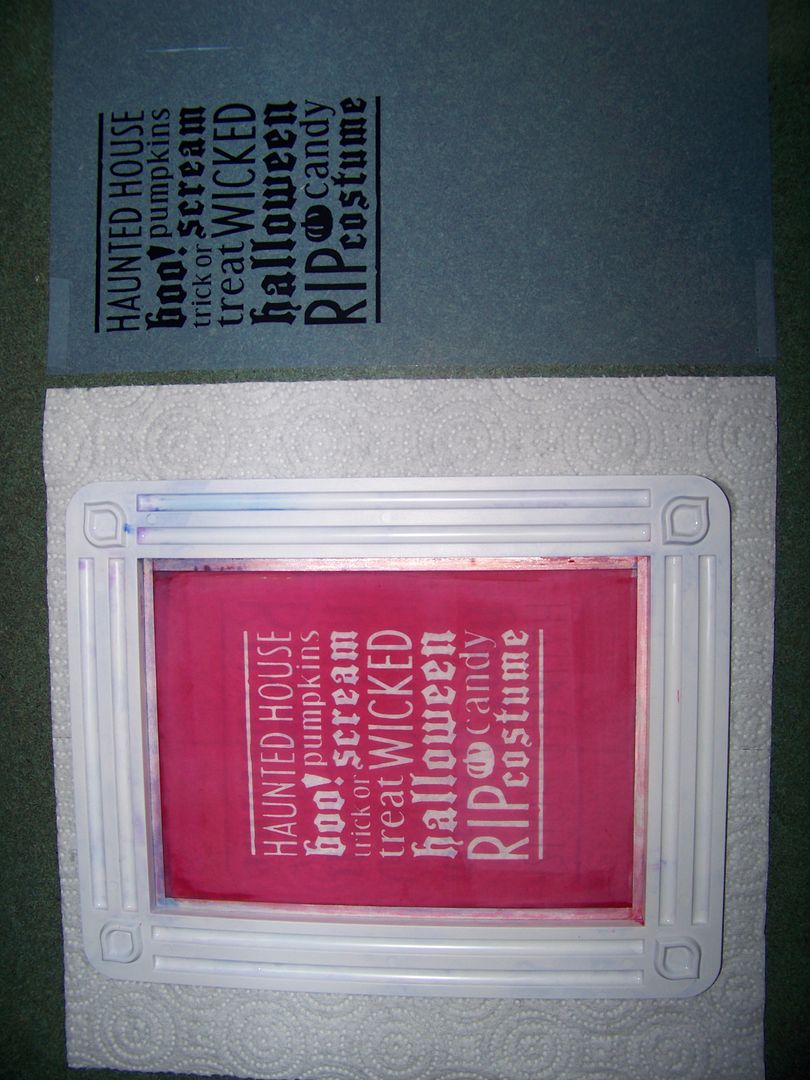
For my successful screening, I printed my image onto a transparency (4.5" Halloween text from Word Collage - select 'print only') and headed downstairs to Yudu! I found that the mini screens fit perfectly into my screen stand that I always use with the regular Yudu. The small squeegee that came with my Yudu Cardshop was perfect to apply the emulsion.
Yes, I made a mess! I was actually working with the light off, so the only time I could see the mess I was making was when I took a picture! (A smart person could have allowed a little bit of light in or used a bug light!)
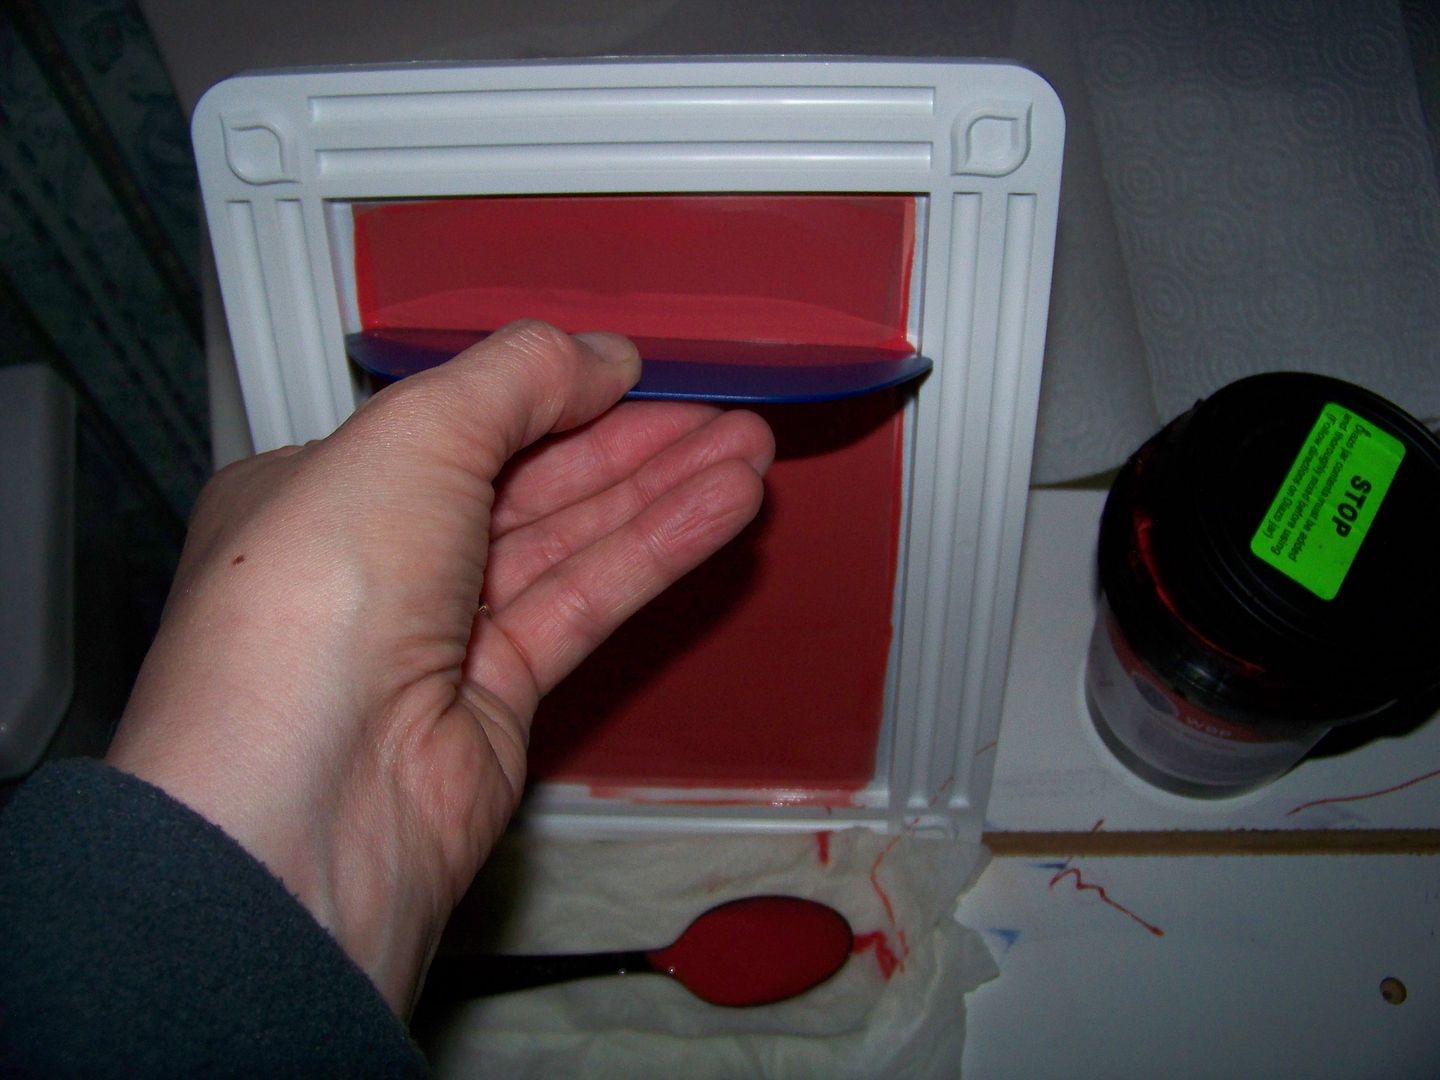
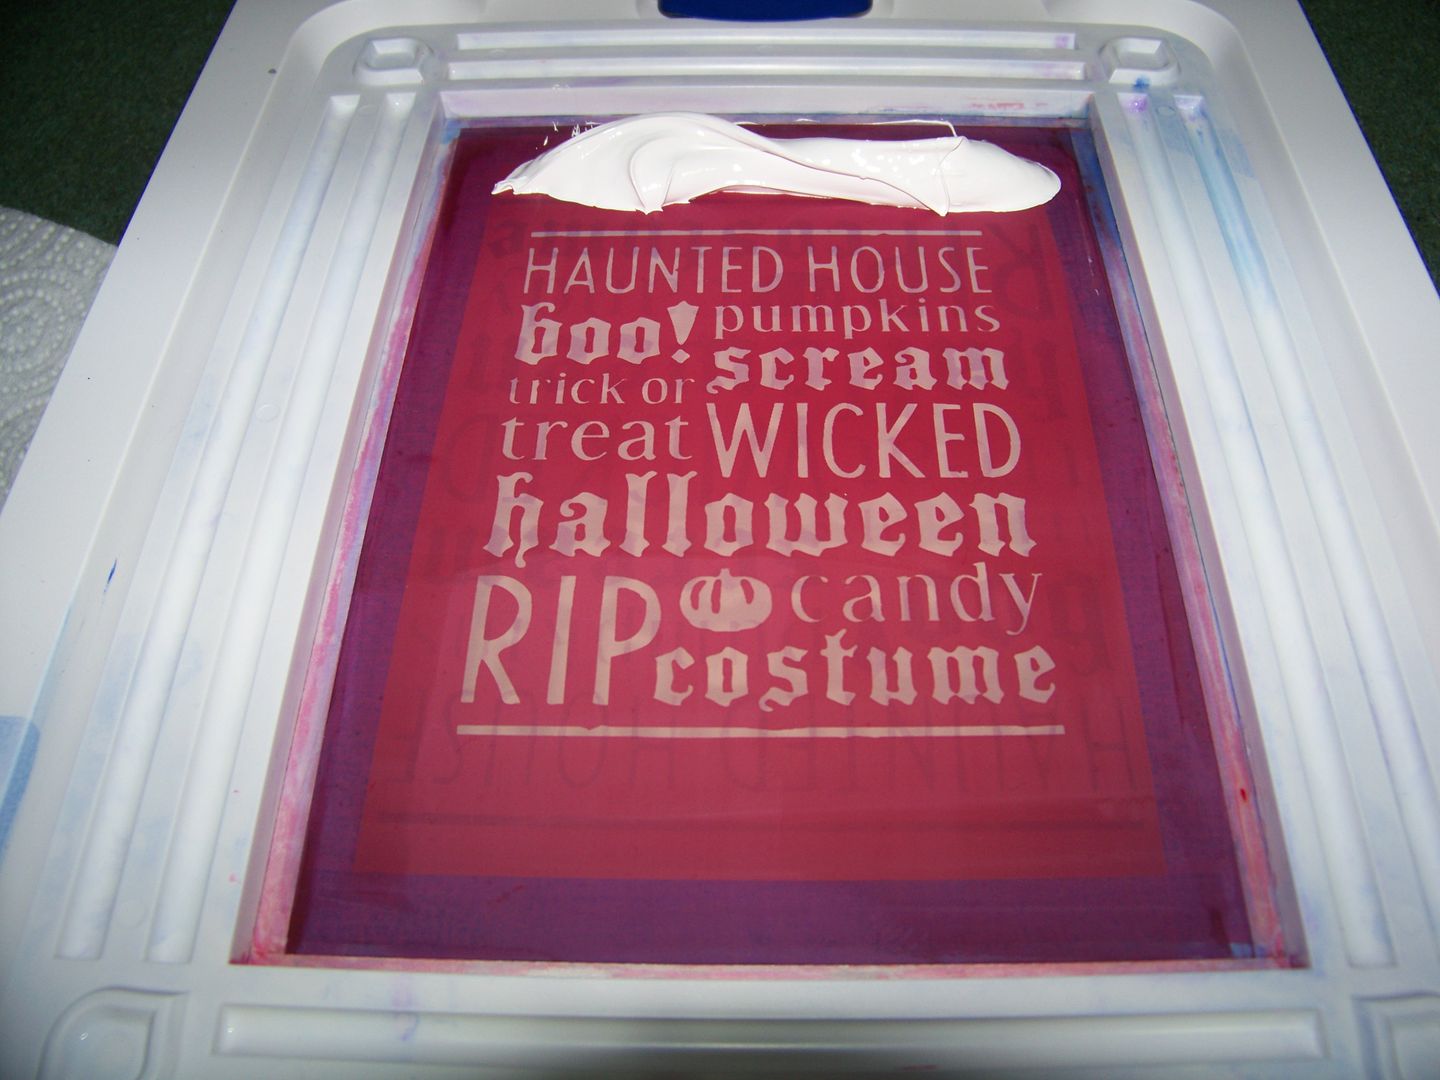
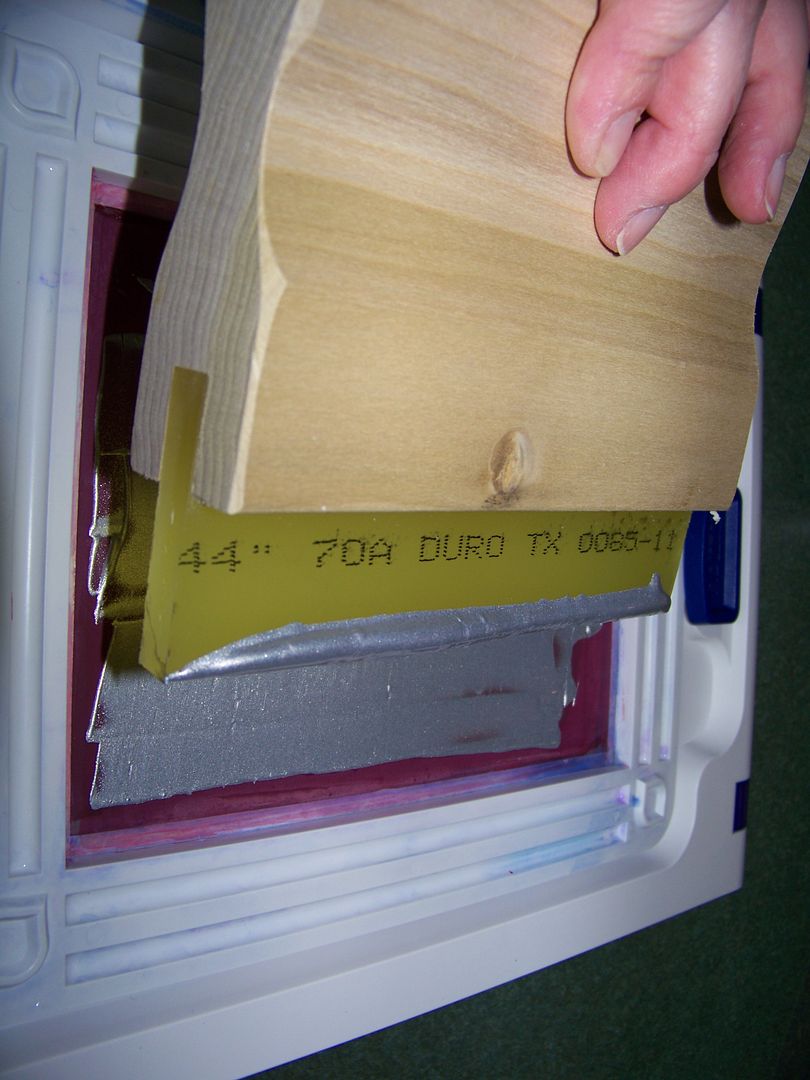
I basically used a plastic spoon to lay a bead of emulsion about 1/2" from the bottom of the frame. Then, I used the squeegee to pull the emulsion up. I went over it a couple of times to remove excess emulsion to get a super thin coating! (You will hear a zip sound when you do this just like when you coat a large screen!) I coated the back and then the front in this way. While the emulsion was still wet, I used a wet paper towel to clean up the frame, and everywhere it dripped.
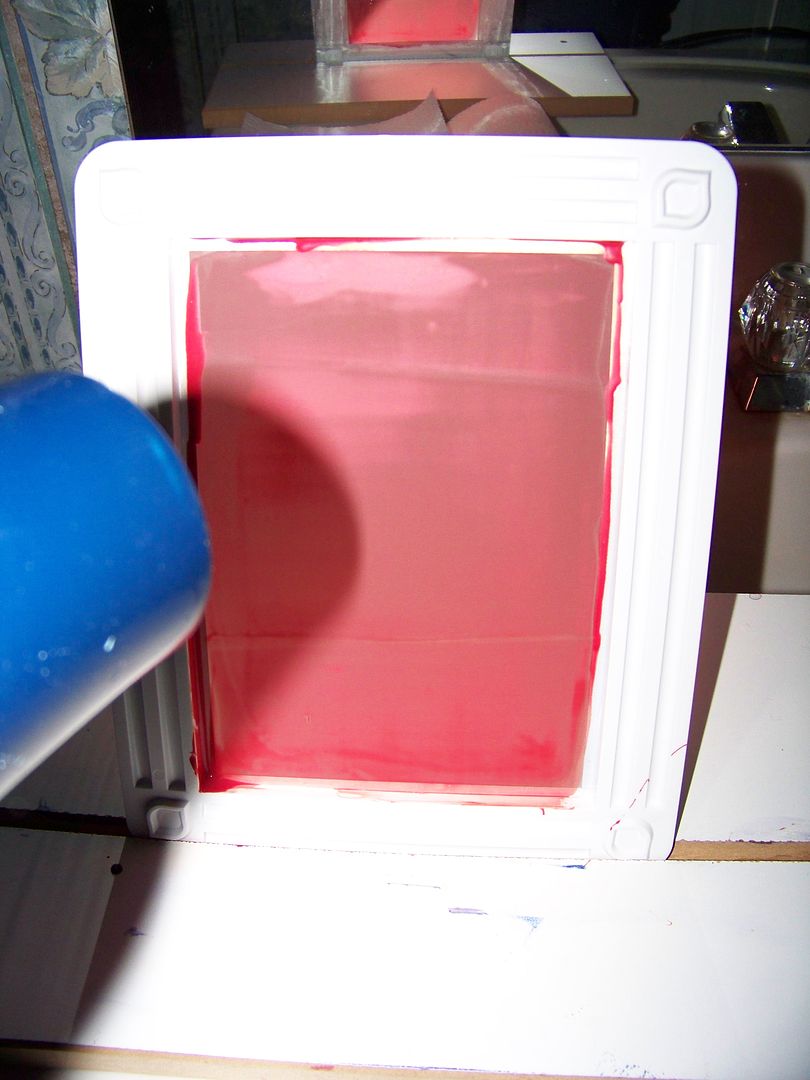
I dried it with a blow dryer since I could not use the light-proof drier space in the big Yudu. This was actually a blessing and my screen was ready to burn in just under two minutes. I used heat, which is something I don't normally do, but it seemed to work perfectly -- and I was able to reclaim it just fine too (remember, I had done that a couple of times by now!!)
I placed the transparency under the screen and burned it using my regular Yudu. The first time I burned a mini screen, I was worried when I saw lots of light even though I had weighed down the frame...
... but it burned perfectly! (So now you know too!)
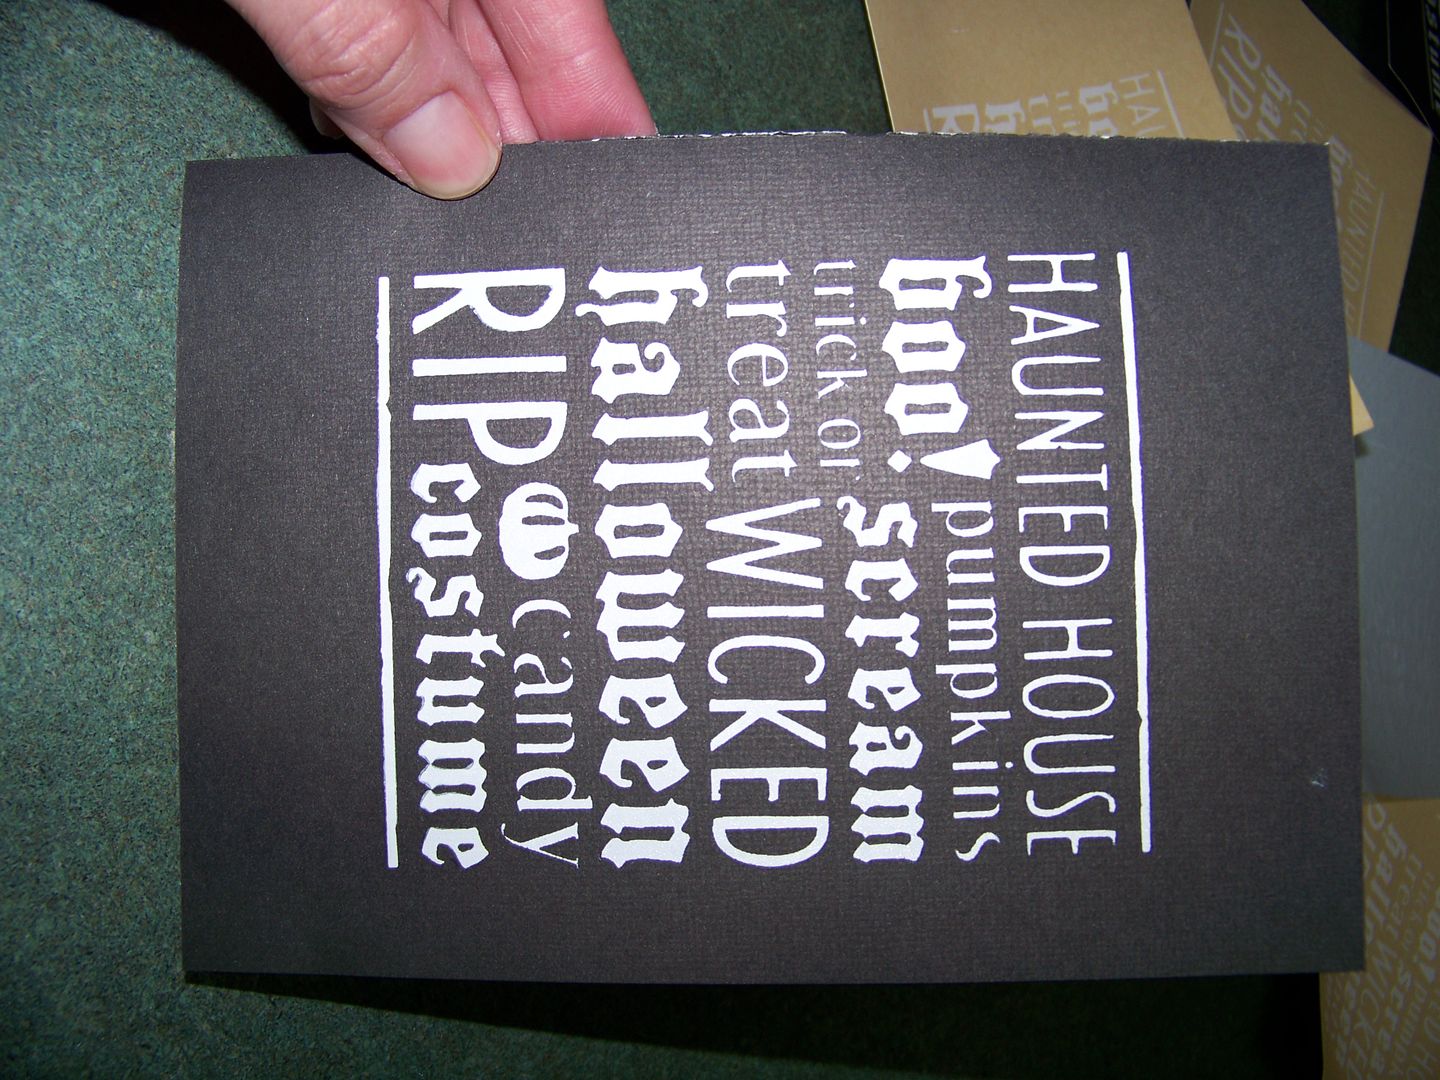
Most of my test papers came out perfect!!!! I cannot tell you how important changing the size to allow for more space around the design is to ensure perfect pulled designs -especially the corners.
I say "most" because I had a bleeder or two which made me think maybe these mini screens are 110 mesh and not 220. (220 is what is recommended for use with paper. I suspect that is the case, but I am not sure since it is not marked on the packaging or individual screens. I will ask at the next Cricut Circle meetup in November and report back what I am told!)
I tested all kinds of inks. For the white one above, I used Enviroline Opaque White from Ryonet-- it is as thick as marshmallow cream!!! Check it out below! It makes me want to try it on a black t-shirt on my regular Yudu to see how it screens on clothing!
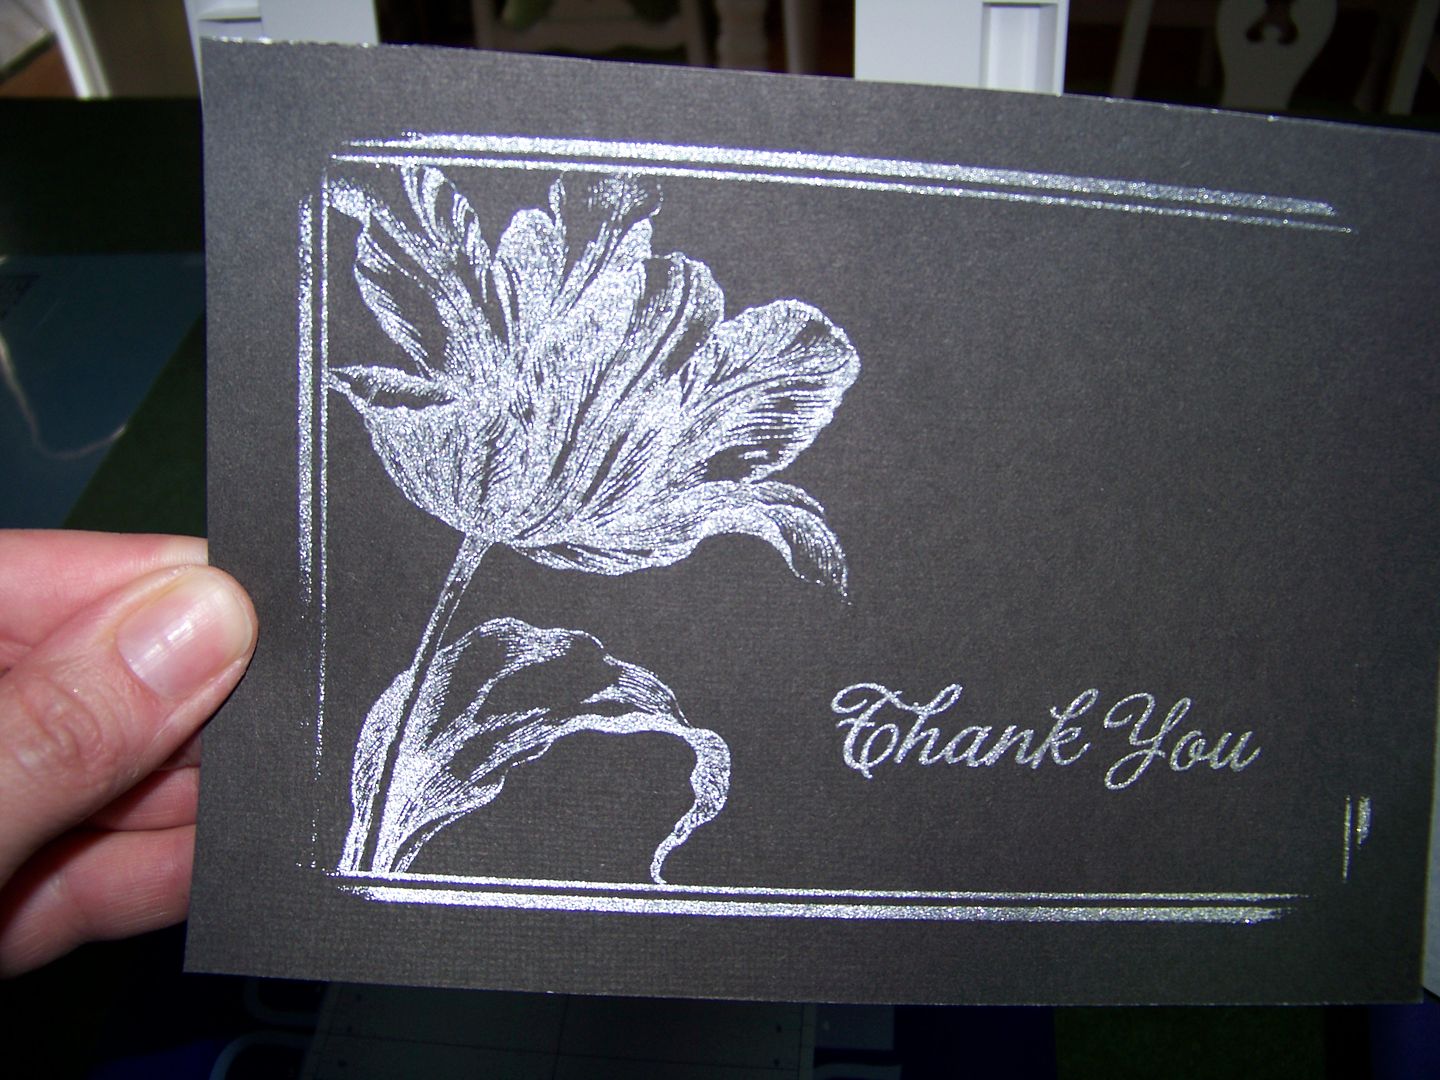
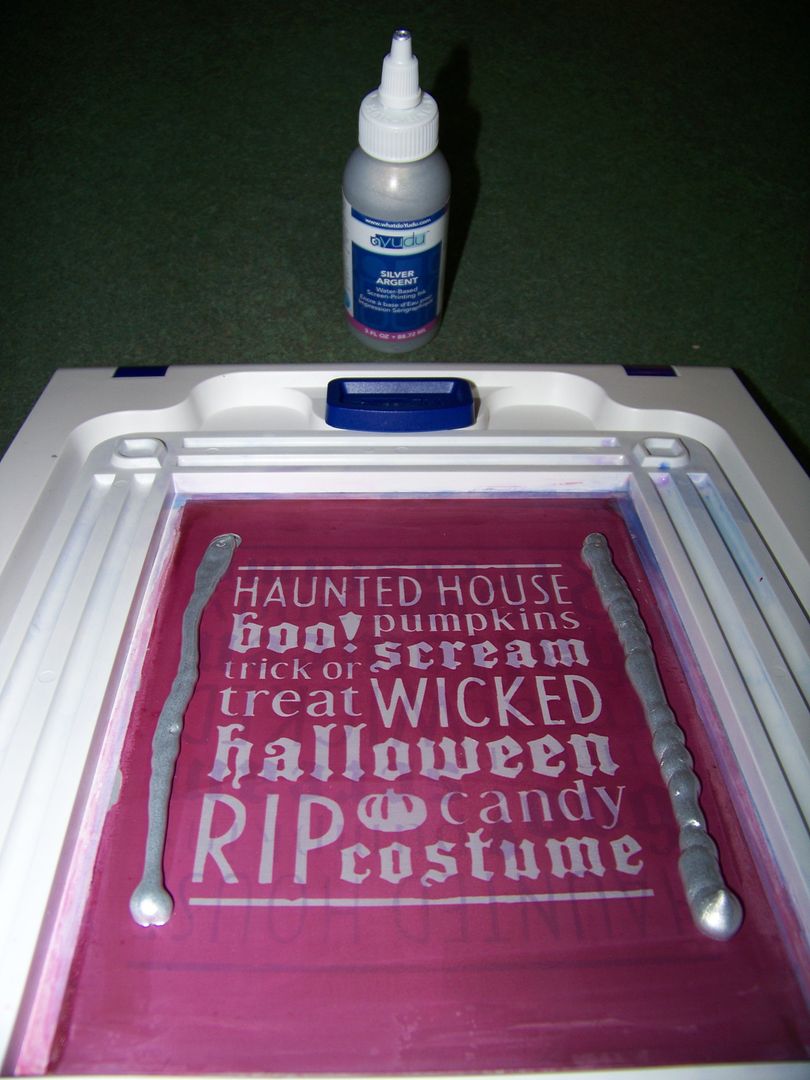
I also tried one of my very favorite inks: Silver Argent (Yudu brand). I tried it with a squeegee that I have from Ryonet. I screened it sideways since this 6" squeegee is too wide to go the other way.
I absolutely loved how this came out!!!
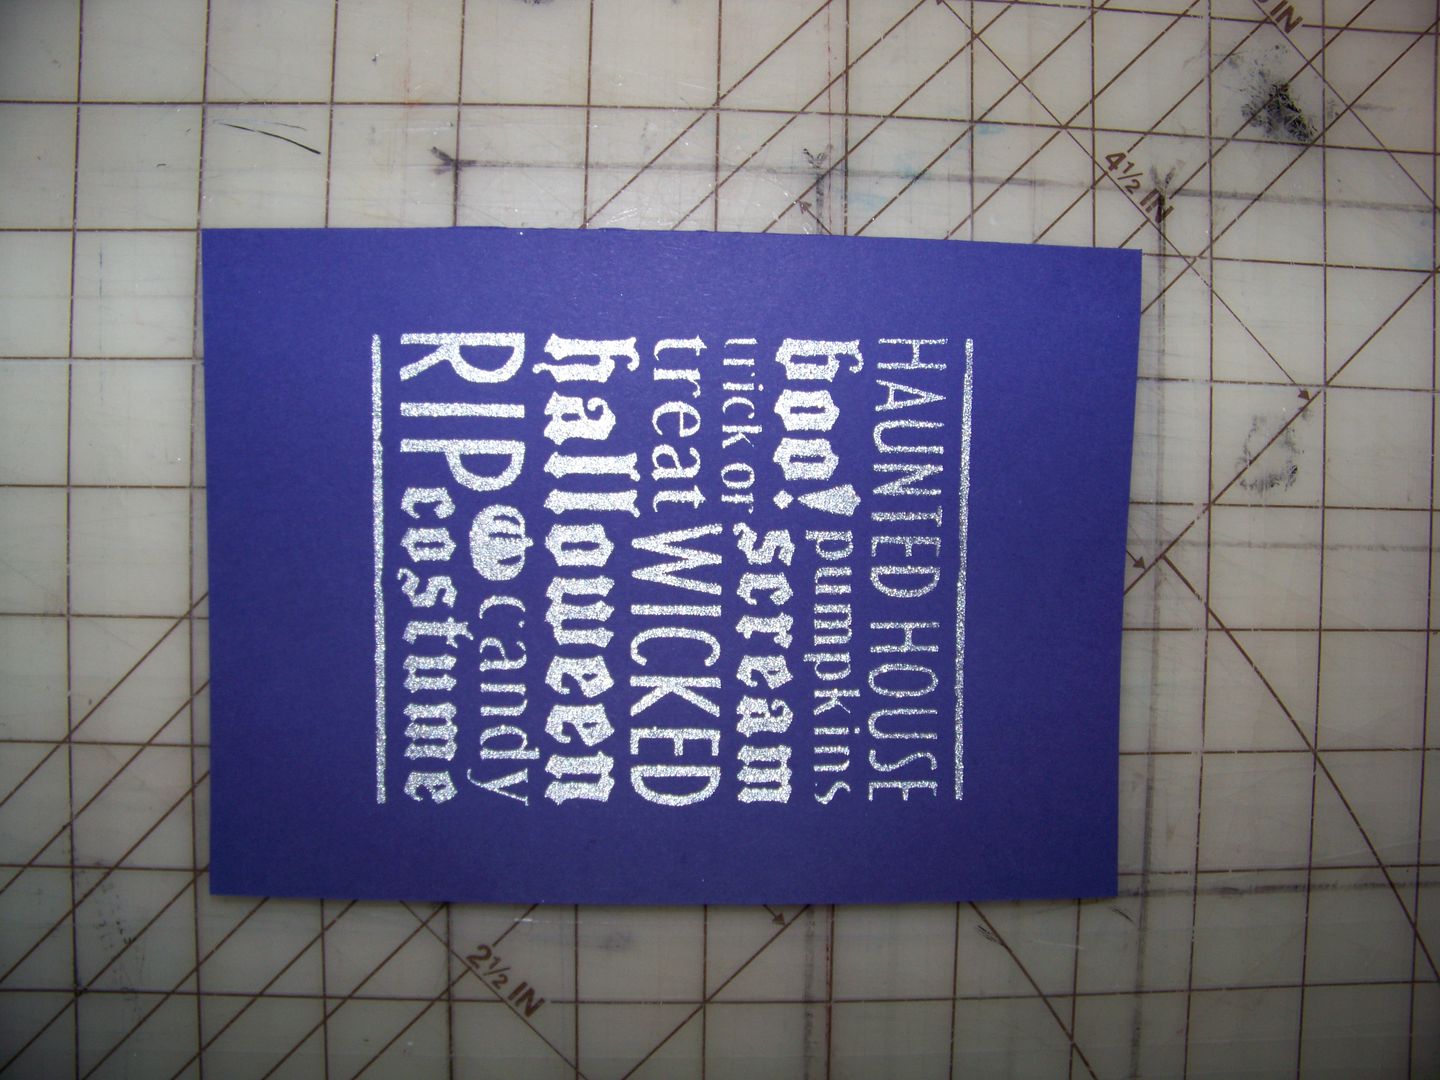
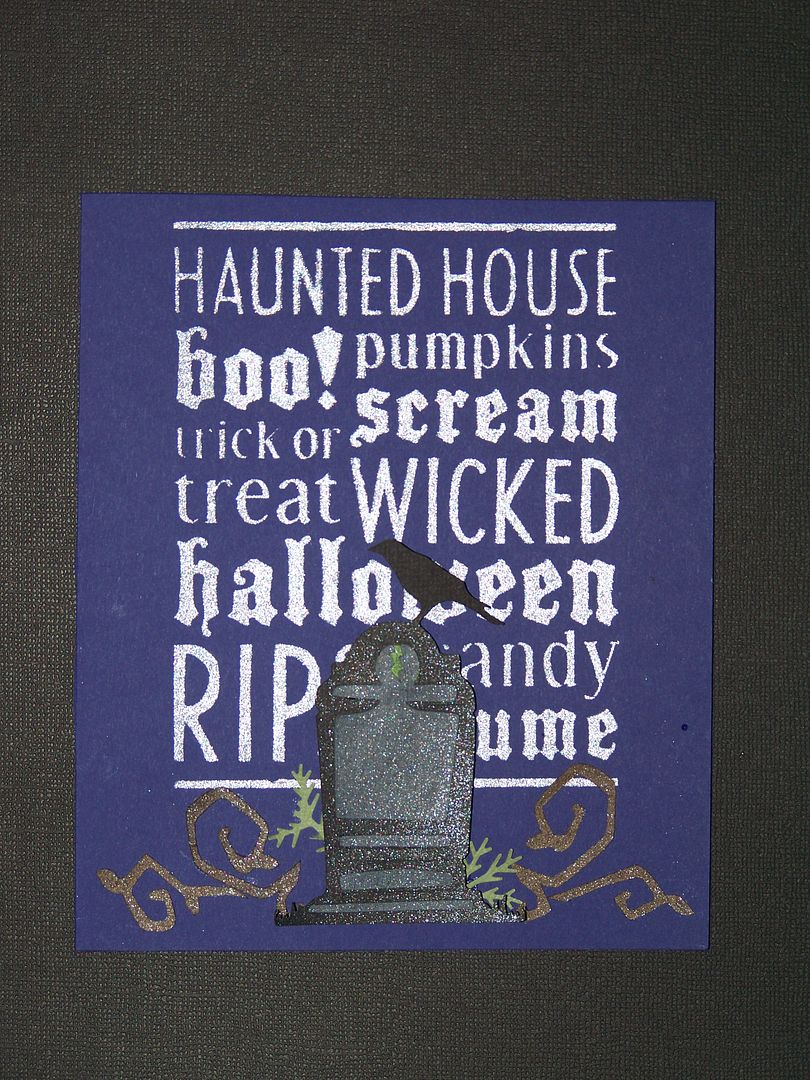
I decided to use it for a card. From Happy Hauntings, I cut the tombstone (page 60) at 2-3/4" and the pumpkin vine (page 59) also at 2-3/4". I used Glimmer Mist in Graphite on the tombstone, shielding the bird. On the vine, which I hand-cut to reposition, I used Graphite and Tattered Leather shades. I used a Martha Stewart branch punch to add some weeds!
My Tips for Using Yudu Cardshop:
- Purchase for use with small items. The inside of the screen is 5"x7".
- Use a t-shirt to de-sticky the mat (just like Cricut mats), otherwise the project will curl badly upon removal.
- Design your artwork to be no larger than 3-1/2" x 5-1/2" (my artwork on this card was 3-1/2"x4-1/2")
- Center your transparency nearly perfectly under your mesh frame when burning. This is how it will look on your card!
- Test before screening onto your final project.
- Apply liquid emulsion with the mini squeegee that comes with the Yudu Cardshop
- Use a spoon or squeeze bottle to apply liquid emulsion at the bottom of the screen and pull up. Emulsion must be applied when the screen is upright, at a slant. (You can use a capillary sheet of emulsion that you cut down if you prefer; I just always use the liquid stuff!)
- Dry your screens and emulsion with a hair dryer.
- Weigh down the frame when you burn your image (just as always); do not worry about light showing under the Yudu frame!
- Yuduing works great to get white images on darker bases--- something a printer cannot do!
- I used a screen stand, 6" squeegee, Enviroline white ink, transparencies (waterproof film positives), and WBP Hybrid Emulsion (pint) from Ryonet.
- I used blank Yudu Cardshop screens (two come in each $14 box), black ink, and Silver Argent ink from Cricut.com. Yudu Cardshop is also available there! The squeegee I used to apply the liquid emulsion comes with the Cardshop.
Click here to see all of my projects in my Project Gallery.
Click here to see my Yudu page for more Yudu tips and instructions.
15 comments:
Thanks for all the great directions on learning a little of how to do this... you do such wonderful job on this machine. i don't know if i would use it that much.. i don't use half of what i have now. lol
Nadia thanks for the tips and the visuals on the steps you went through to learn this new toy of yours. I was debating between this one or the bigger one and as I have already told you before, the big one won out - not that I've used it yet either. Thanks for the inspirations!
;)Melody
Thanks for posting these instructions. I have the big Yudu as well as the CardShop and my blank CardShop screens are due to arrive in the mail tomorrow.....with your instructions...now I don't have to do trial and error!! Thanks!
Patty
Great job, Nadia!!! I'm going to call you a "brave" Yudo pro.
I have both Yudo's. I've had the big one for over 2 years (the inks are probably dried up by now... lol!) but I've been so intimidated by it. The cardshop I did try and after pressing and pressing with the sqeegee I still couldn't get a good image! I don't think I'll ever get the hang of these things; may just be a waste of my money!!!
Wish I could come "hang" out with you!!!
Thank you Nadia for this tutorial. I was lucky enough to win the card shop at its launch but have had trouble with the pre printed screens as well. I'll have to try burning some on the large Yudu. Question for you. Have you tried using contact paper with your cut out designs or only burn your images? TFS
Mary - I have used Oracal 651 on a regular Yudu screen. It worked great! I did not try it on the Cardshop screens though.
Audrey - I would love to hang out and Yudu with you!!
Patty - you are going to love your new toys! Can't wait to see what you make!
Melody - getting the big one was definitely the right decision!! Without the big one, the little one would have been useless! (just my opinion!) Can't wait for you to start Yuduing!!
Sandy - you are always so sweet! :)
Nadia, super directions. I always wondered about the Yudu, you just made it easy to understand. I am not sure that I 'need' that tool with the many I already have, but when I run out of things to do - LOL - definitely on my list. Great job as always, you are awesome. Thanks for fabulous instructions.
Oh my! Gotta get Word Collage... love your card! I'm pretty sure I can get the Card Shop for my bday & my mom still has most of her screen printing supplies (she had one of the professional 5-screen machines for a while), so maybe I can wait on the big Yudu for a while... Thanks for the great tips!
Nadia,
Thank you for the wonderful lesson! I always learn so much from your posts and this one is no exception. I especially appreciate how you determined the max size of the design on the card shop screen. I am getting closer to trying this! And I will definitely returning here to follow your instructions.
stopping by from Made It Myself Mondays and I just adore this project. Thanks for sharing.
craftingwithnatasha.blogspot.com
Thanks for the nice comments you left on my blog! I am honestly just as amazed by you. This Word Collage project is awesome! And your 20 seconds of frame layout was amazing. I was blown away by all the work you put into it! When the company voted on these layouts, yours was my number 1 hands down.
Great tutorial.
http://lorisartsyobsession.blogspot.com
Stopped by from Made It Myself Mondays! Great card, thanks for all the info. If you have some time I would love for you to stop by my blog.
Peace & Harmony,
Raven
http://feralscraps.blogspot.com/
It seems the Yudu Cardshop screens have fallen off the face of the planet! I can't find them anywhere, even used. I wrote to Ryonet (screenprinting.com) to see if they can still make them. Any suggestions?
Well, this post is from 2011. I'm sorry but I don't know about buying the blank screens any more. I'm sorry not to be more help.
Post a Comment