Saturday, May 14, 2016

My Kickasserole Carrier


Every now and then, some crafty genius comes up with such a fun idea that I just have to try it.  That is the case with the casserole carriers that I saw, first by Heidi Hadaway Marlin, and then by Diana Smith Thomas on the Brother PE Embroidery page on Facebook.  Heidi shared all the how-to details of her invention.  Then Diana played off of that and changed it a bit for her preferences.  Diana also shared the word "kickasserole" on one of her casserole carriers and I told her I was going to remember that!

The basic idea of this project is simply to sew together a couple of store-bought placemats, add straps and some kind of personalization, and a way to close it.  Heidi used buttonholes with a serving spoon that served as a closure; Diana added an interlining of Insul-bright batting and elastic hair bands to close, while tying her spoon on top.  On mine, I used Velcro to close the cover and tucked my spoon inside the cover to keep it clean.


I found my cute scalloped, quilted placemats at Walmart.  This is part of the Pioneer Woman kitchen collection.  For Christmas, my little girl convinced my husband to buy me plates and bowls that match this pattern.  Apparently, it took quite a bit of convincing because my husband just couldn't believe I wanted Walmart dishes.  She was right though, I had been eyeing those dishes for a bit.  When I saw that there were matching placemats,  I wanted to find some kind of use for them.  I ran right out to buy them as soon as I saw Heidi's and Diana's projects!  While I was there, I bought a new 13x9 rectangular baking pan and a cute spatula that I decided would be fun as a serving utensil. (I liked the color and even the handle).  I made sure the pan would fit inside the perimeter of the placemats with room for the thickness.


I pulled some fabrics to help me decide on colors to go with the placemats for the applique.  I decided to use an Itch2Stitch applique frame.  I picked two and started on the handles.


Handles:  My handle fabric and part of my applique was cut from one fat quarter.  This fat quarter was 21" x 18".  From the other ladies' notes, I knew I wanted my handles to finish around 32".  I cut four strips that were 4" using the 18" dimension of the fat quarter for length.  That meant that I had to sew two together for each handle.  Then I trimmed them down to 34" and kept the scrap to use for the applique.  It doesn't matter where the seam falls when you use a print; the seam gets lost in the design.


Then, for each one, I pressed the lengthwise foldline.


Then I opened it back up and folded in each side and pressed that in place.


Then I folded in half again and pressed one last time using the original foldline I started with.


On one end of each of the two straps, I folded in about 1/4" and pressed it down.


Then I folded it back, and took it to my sewing machine to stitch closed by topstitching on each side.  I like my blindhem foot for that because I can let the edge of the metal in the center of the foot work as a ledge to glide my strap against.  It makes the topstitching perfectly straight without much effort.


 I set the handles aside and worked on the top of the carrier.

Embroidered top:  I opened my Embrilliance software (I only need Embrilliance Essentials for this).  I brought in the frame file and I added two different text objects.  "Nadia" is done using Itch2Stitch Magnolia Sky, spaced and re-sized to fit the space.  "Send home with" is Applique Corner Rodney in 1/4".  The design is turned in my 5x7 hoop so that it can be the maximum size.  I added a basting box in Embrilliance (found under 'utility' in the toolbar).  I printed my design so I would have a paper template  to use for placement.


I just hooped tearaway stabilizer in my hoop, found the center of my placemat and marked it with an "X".


I used the thumbtack method to place my placemat in the exact center of my hoop.  I do this by marking the cross-hairs on my hooped stabilizer using the grid inset for my hoop.


I place my paper template on the stabilizer, matching cross-hairs on the template with those on the stabilizer.  I place one thumbtack in the center of the cross-hairs from the back and a second one on another spot, usually on the x or y axis.  Noting the left and right of the template helps to make sure it is placed correctly in the hoop.


I remove the paper template, leaving the thumbtacks.  


I take off the paper template, fold it along the crosshairs and place it on the X that I made on the placemat.  Folding it helps to match it up against the mark.


I had to pin it in place because this fabric was slick and with the multiple layers and quilting, my normal use of tape wasn't working.  (I usually spray with textile adhesive but the placemat was too thick for that to be effective).  Then I placed the placemat with the pinned-on paper template on my prepared hoop, matching the thumbtacks up into the very same holes they made previously.  I double-checked by lifting the placemat and visually inspecting that the cross-hairs continued and appeared to match perfectly.


I removed the pins to remove the paper template and then replace them  to pin all the way through to include the stabilizer. This shows my pins.


 I placed my hoop on my embroidery machine and stitched out my design, starting with a basting box to hold the placemat in place.  I did apply water soluble stabilizer (WSS), but I had to stop the stitching of the basting box a couple of times so that once an area was stitched down, I could remove my pins so they wouldn't be enclosed in the WSS.  Then I continued with sewing all the steps of the embroidery file.


Once done, I removed the basting box, WSS from the front, and tearaway from the back.


Attaching handles to the back:  I used the embroidered front on my gridded cutting board to figure out where I wanted my handed to be.  I used tape on my grid to mark the corners and centers.  I placed the handles on the top placemat (the embroidered one) and marked with tape on the grid where they were placed.


Then I removed that placemat and put the bottom placemat in its place, using the tape marks to get it placed properly.  I place the handles using the marks I made. I use a ruler to overlap the ends in the same place so that the two handles match.


I overlap the raw end with the one I turned under 1/4".  The overlap is about 1/2" or so.


I take it to my sewing machine and stitch a 6" box inside the topstitched handles to secure them to the bottom placemat, which will now be the bottom of the carrier.


I move the handles out of the way so that I don't accidentally stitch through them!


I use the center mark on my presser foot to make sure the line I stitch is straight for the box.


The handles are stitched in place.


I gather up the handles and pin to the center of the placemat to keep them out of the way while I sew the sides up and sew the closure.


Closure:  I used Velcro to close one end of my carrier.  I sewed that before the sides were sewn. I cut a length of each side (hook and loop) and pinned them in place, making sure they matched on the ends of the carrier.


 After the Velcro is sewn in place, it really barely shows because of the busy print and quilting lines.


Sew the sides:  Next I finish by sewing all sides except for the one I just did with Velcro.  I put wrong sides together, match up the scalloped binding edge and just topstitch all around!  (The picture above shows two clips.  That is where the stitching stopped and started so you can see that the end is left completely open between them to make it easy to put the casserole dish in and take it out.  I make absolute sure to back-stitch to secure the stitching at the beginning and end so that regular use won't cause the seam to tear from stress).


Because these were reversible placemats, the inside of the carrier is pretty and looks lined.


 I unpin the handles and put them in place around the carrier.  And it is complete!


And my new 13x9 pan fits perfectly!


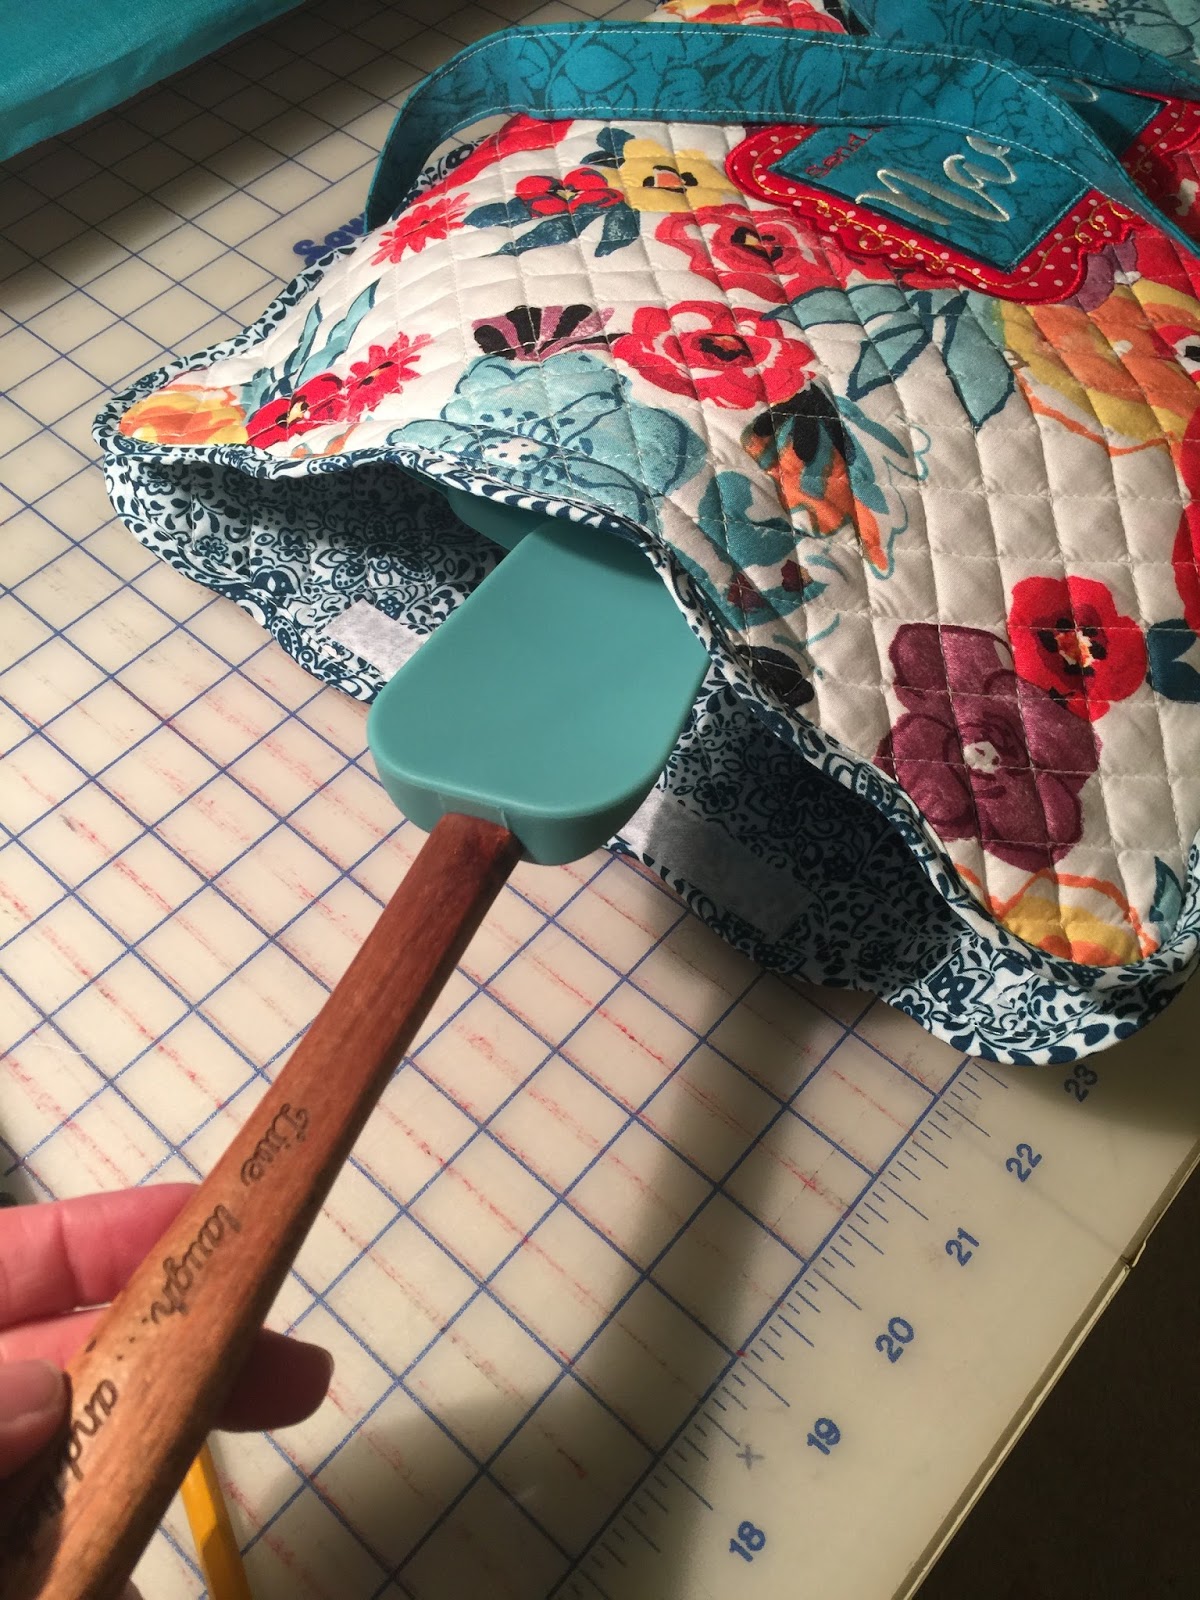
The spatula fits in just perfectly with it, as would a serving spoon or other utensil.


And it closes up perfectly.


Links shared in this post (none of these are affiliate links):

  • Pioneer Woman reversible placemats (this is a four-pack, but they sell them individually at the store):  click here.
  • Itch2Stitch Fancy Double Applique Frame:  click here.
  • Embrilliance Essentials embroidery software to merge, resize, add text:  click here.
  • Font used for "Nadia" is Magnolia Sky:  click here.
  • Font used for "Send home with" is Rodney:  click here.
I used a Brother PE 770 embroidery machine and a Brother sewing machine to make this project.  Embroidery thread I used was from Metro.  The sewing thread was from Coats and Clark.  I used pre-wound bobbins and tearaway stabilizer from World Weidner.  For all my notes and resources for embroidery, check my embroidery page on this blog, or click here.  

Friday, May 6, 2016

Happy Mother's Day! Classes and Files for Great Gifts for Mom!


I love Mother's Day!  I adore my mom and I love my mother-in-law too!  To me, Mother's Day has always been about things you make for your mom.  My daughter usually makes something for me and I usually try to include something hand-made for my mom to go with a store-bought gift.  My mother-in-law is not as keen on things that are made, but she gets something any way, along with something else that she probably appreciates a little more.  This year is no exception.

For my mom, I decided to use what I had learned from two Craftsy classes I had taken.  One class is called Finishing School: Edges & Bindings.

This was an awesome class that finally taught me how to miter my quilt binding and how to sew my ends with a diagonal seam.  So many shortcuts, but my favorite tip by instructor Mimi Dietrich was how to cut the binding using a scrap of the width of the binding in order to cut it to the exact size while sewing it in place.  (Kind of like a mathematical miracle that doesn't involve doing any math!!)  It was a class I watched on my phone while waiting for my daughter to get out of ballet and while waiting at the doctor with my husband.  The cool thing about Craftsy classes is that they don't ever 'expire' and you watch when you want to!  And when I was ready to actually use her tips in my sewing room, it was easy to watch just the part I needed on my computer.  I could watch and pause as needed, adding notes and using the '30-second replay' function when I needed to hear something again!  I have to admit:  this class started me on a Craftsy love affair.  I have watched and signed up for so many since and even became an affiliate because it has helped me so much!

The second class I used was Quilt-As-You-Go Patchwork Bags.  Another clever class by a really easy-to-follow instructor.  I signed up for it because I really wanted to know the secrets for quilt-as you-go (QAYG) on a regular sewing machine.  I have been enjoying that technique with my embroidery machine, but I wanted to get past the limits of my hoop size.  By moving to my sewing machine, I have no limits!


The sample I made, which is the first project in the class, a potholder, was the first gift I made for my mom in her gift set.  I loved instructor, Tara Rebman's style and really loved this class!  Her handy zipper trick is one I didn't use for my mom's gift, but it was my favorite of her ideas in this class! Will be using it soon!  The potholder I made set the stage for the colors of the whole gift set.


I bound the potholder from the QAYG Patchwork class using what I learned in the binding class! I added a loop and a little machine applique before I put the backing on.  That gave me my color palette for two towels for my mom.

To do the towels, I simply cut strips of pre-washed cotton fabric, sewing to each other to form a band the size I liked.  I turned under on all sides, keeping in place on the towel temporarily with 1/4" SteamASeam fuse tape before stitching in place.


The towels are bar mops from Walmart.  The "Mom" text is Ballerina from Itch2Stitch.  The teapot is a free design I got from Embroidery Library during the Happy Hour sale in April (M3893 but I think it was only available as a freebie with purchase for that promotion).  The floral is also from Embroidery Library.  The hearts on a clothesline that I embroidered on the potholder is from Lynnie Pinnie.    The fabrics are scraps and fat quarters from my stash.  I just wanted a cheery kind of look that would be fun to open and useful in the kitchen.


My mom's main gift was small in size and I thought it would be fun to make a little zipper pouch to put it in.  I love the idea of wraps that have practical uses.  This is a file from Embroidery Garden.


I took a class here in town from Reen, the owner and digitizer for Embroidery Garden.  I used some tips I learned in her class to make some changes on the way I stitched this.


First of all, I did not hoop Vilene as the directions state.  I hooped poly mesh instead.  And I cut a window out of the poly mesh where the zipper is while it was nice and easy to do just after step 4!

This is the iPhone case, but I had planned to make the 5x7 case and just cut for this size accidentally.  But it worked out and was the perfect size after all.


I liked how this whole gift came together!


Next,  I did some simple chalkboard-style stitching on dish towels for my mother-in-law.  Her real gift is store-bought but I think everyone should get something made from the heart.  I want to make a set of these for myself!


These are both designs from Embroidery Library (Good Day and Home).

For both my mom's gift and for my mother-in-law's gift, I used gift bags to wrap.


To do the watercolor photo on the fronts of the bags, using my phone, I took a photo of my daughter (she was showing me this light-up headpiece she had just gotten) and then I put it through the Waterlogue app on my phone.


Then I just printed the Waterlogue versions at Walgreen's using their phone app and picked them up an hour later.  Super simple!

For my mother-in-law's bag, I cut a 6" (length) frame from Cricut Fancy Frames.

For both gifts, I made a luggage tag from Embroidery Garden to use as a gift tag that they could reuse on their luggage!


I finally realized that I could use the fabulous Embrilliance function that creates an SVG for cutting in a Silhouette (or other cutter) to make a template that I could use to cut by hand.  Although I have used my Silhouette many times to pre-cut my appliques, for cutting two simple shapes quickly, hand-cutting was preferred.  I never connected, until now, that making and printing an SVG would make a hand-cutting pattern!  To learn how to make an svg (for cutting with an electronic die cutter OR for printing out a pattern to hand-cut), check out the video by Terri Johnson.


List of Links from this Blog Post (Craftsy classes are my affiliate links so I hope you will use them!):
  • Craftsy Class-  Finishing School Edges and Bindings:  click here.
  • Craftsy Class- Quilt As You Go (QAYG) Patchwork Bags:  click here.
  • Mom text on towel- Ballerina font from Itch2Stitch:  click here.
  • Bohemian floral embroidery design:  click here.  
  • Hearts on a clothesline embroidery design:  click here.
  • Zipper pouch:  click here.
  • It's A Good Day embroidery file:  click here.  
  • There's No Place Like Home embroidery file:  click here.
  • Waterlogue app to make photos look like watercolors:  click here.  
  • Cricut Fancy Frames:  click here.
  • Luggage tag to use as gift tag:  click here.
  • Video explaining how to use Embrilliance Essentials to make an SVG from an embroidery file for cutting in an electronic die cutter (or to print and cut by hand as I did):  click here.
I hope you are enjoying making something for your favorite mom or that you receive something handmade from your favorite kid!  I am sorry to post Mother's Day ideas so close to Mother's Day, but my mom reads my blog sometimes!  We are having an early Mother's Day this year a couple of days early so if I have planned this right, she and I will be at lunch when this posts, saving my surprises for her.

To see my previous paper projects, click the Paper Gallery tab or click here.
To see my previous embroidery projects with resources, click the Embroidery Gallery tab or click 
here.


But wait! There's more! Click 'older posts' above!

But wait!  There's more!  Click 'older posts' above!