
Wow! Has this been fun playing with the new Cricut Explore or what!? The projects here are ones I was never able to make in the past with my Cricut die cutters because previous machines did not allow for the use of imported files. What I like most about the Explore, and what makes it different from every other cutter on the market, is that now you can cut and join imported files with cartridge images. The Explore also has a dual housing carriage which allows the machine to cut as well as draw and emboss on the same mat without removing the mat from the machine--- and it prompts you to put in a pen or embossing tool as needed!
So this post is all about what I have learned this week after more experimenting. In this post, I have tips for:
- How to make monograms using a free service from Mark and Graham.
- How to use the Windows snipping tool to make a .png file of your Mark and Graham monogram.
- How to attach writing to a cut piece on the same mat.
- Which pens work in the Explore for writing.
- How to make notes on the mat in Design Space.
- How to cut fabric with the Explore.
I am loving the energy and excitement around the Cricut brand-- it has been a long time coming!
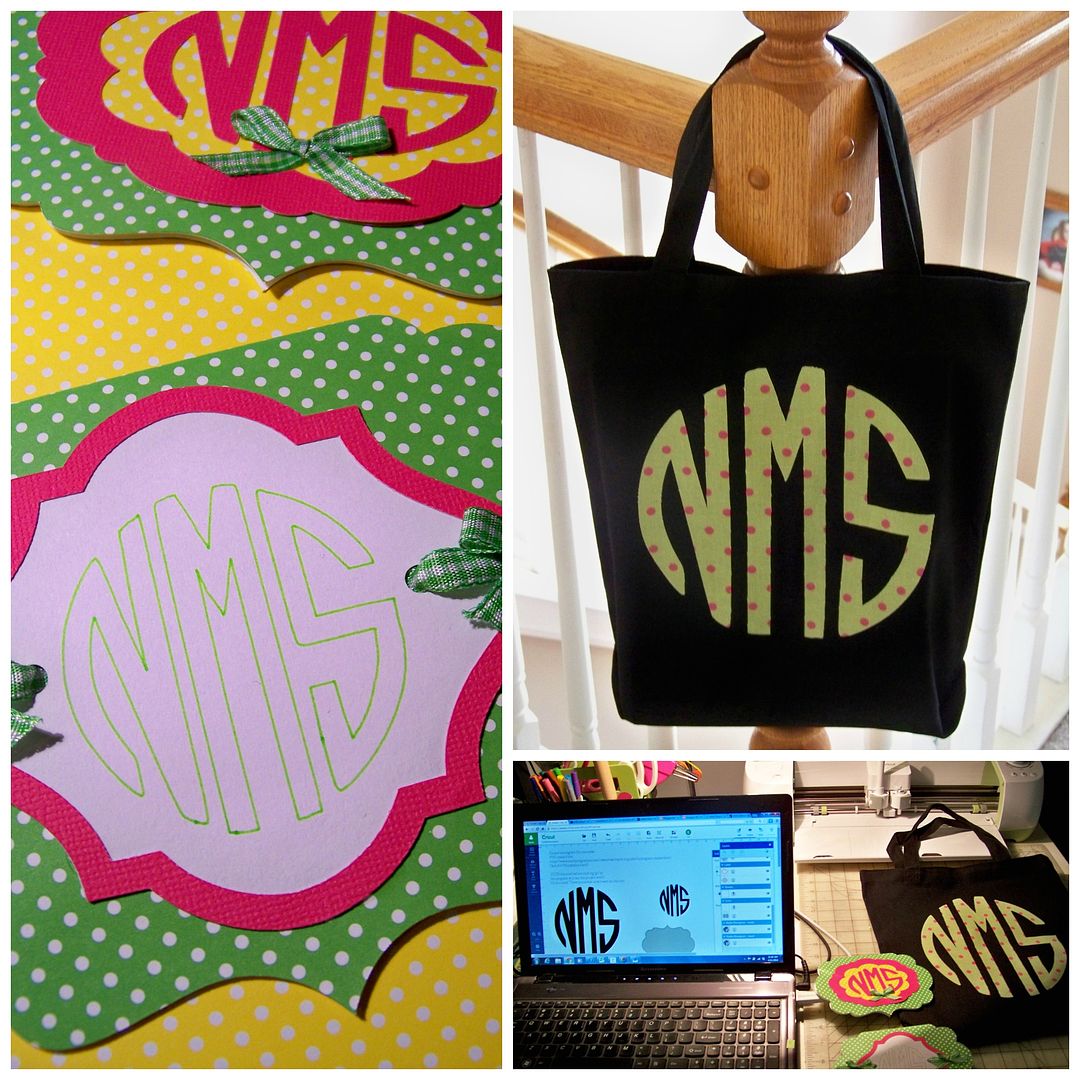
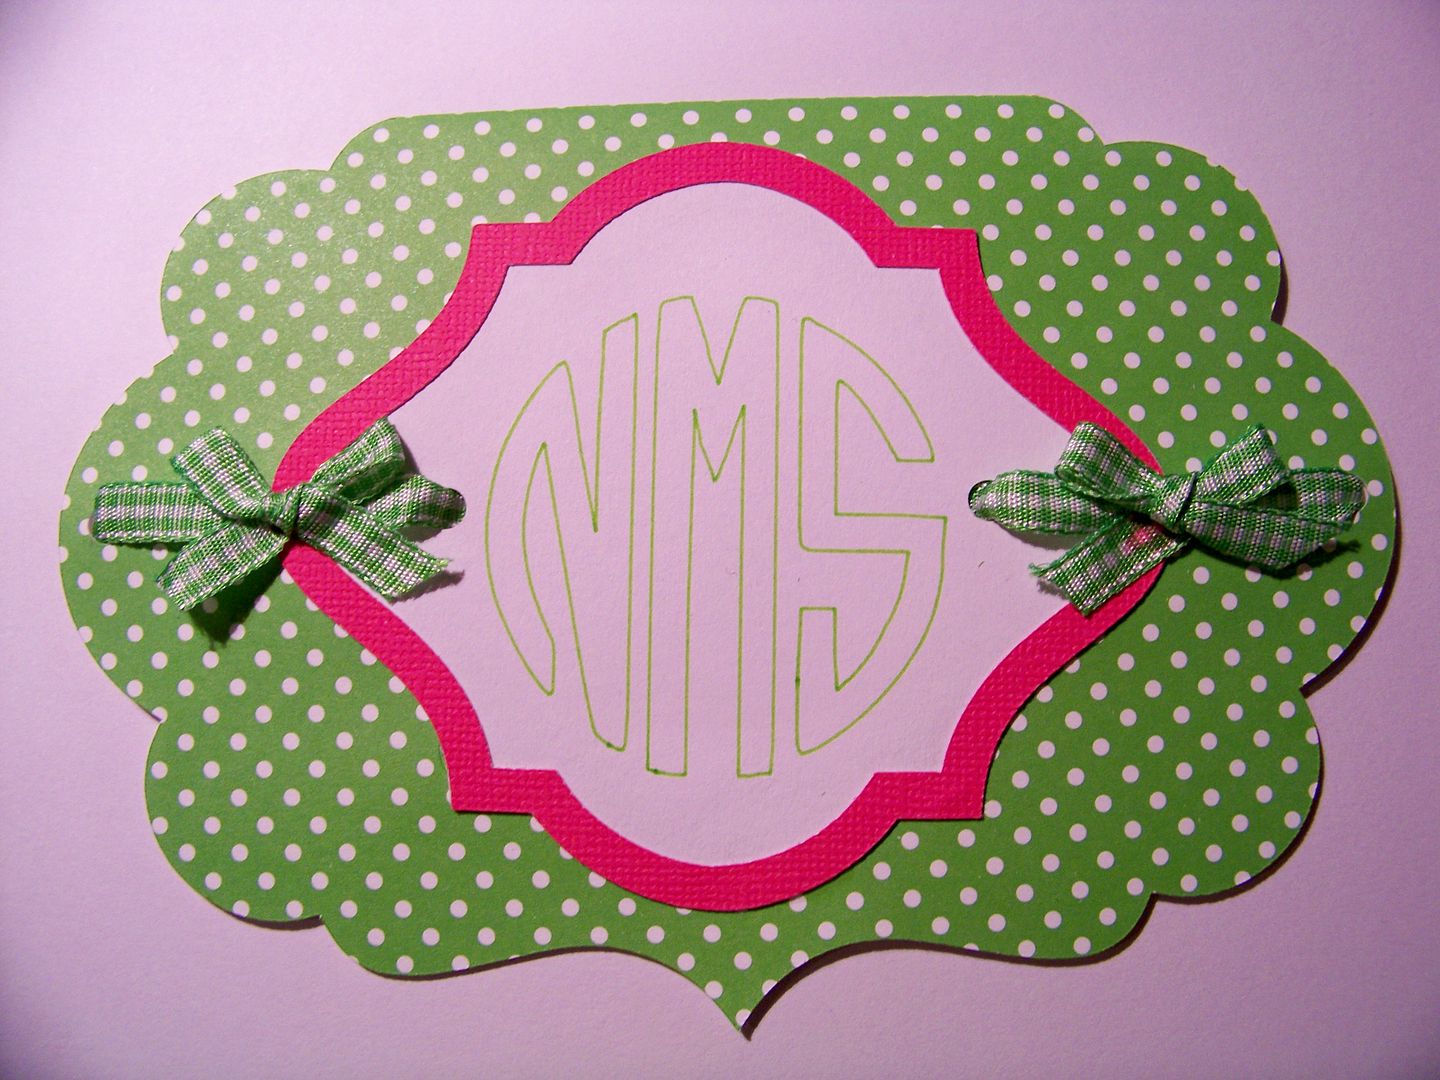
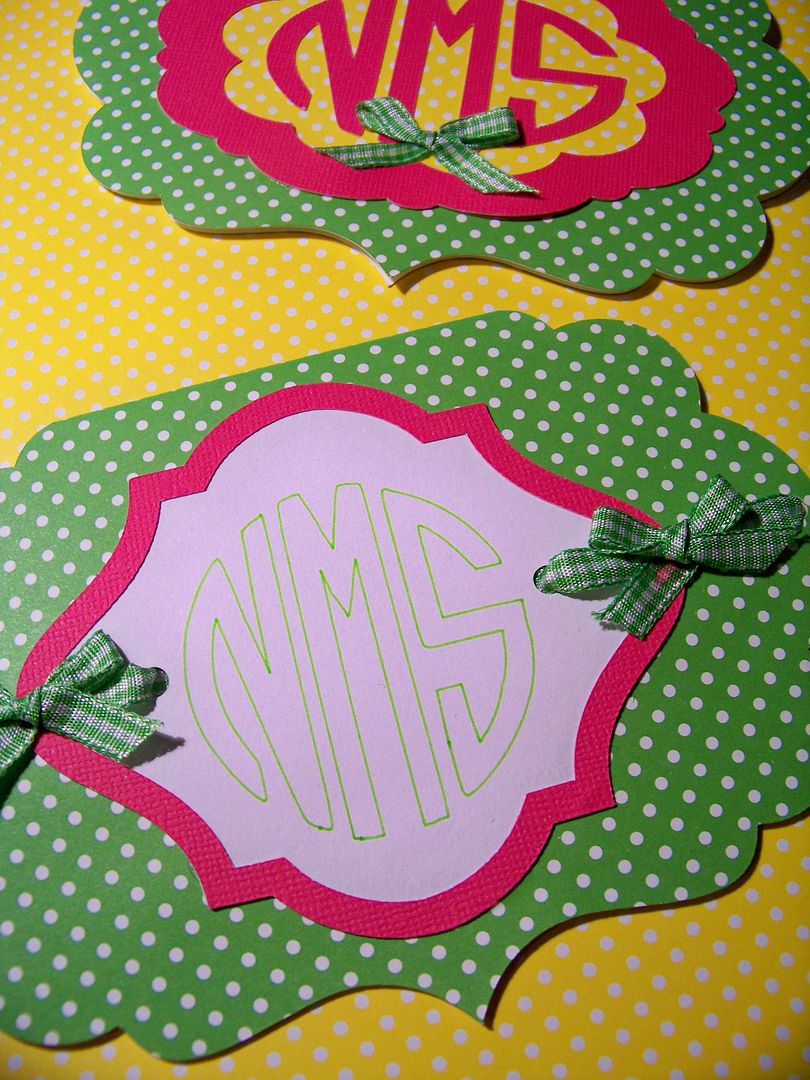
For this card, I made a monogram online and imported it to Design Space. I used the handwriting option to put the monogram on the card. I assembled the card as usual.
(This section was last updated 7-9-15)
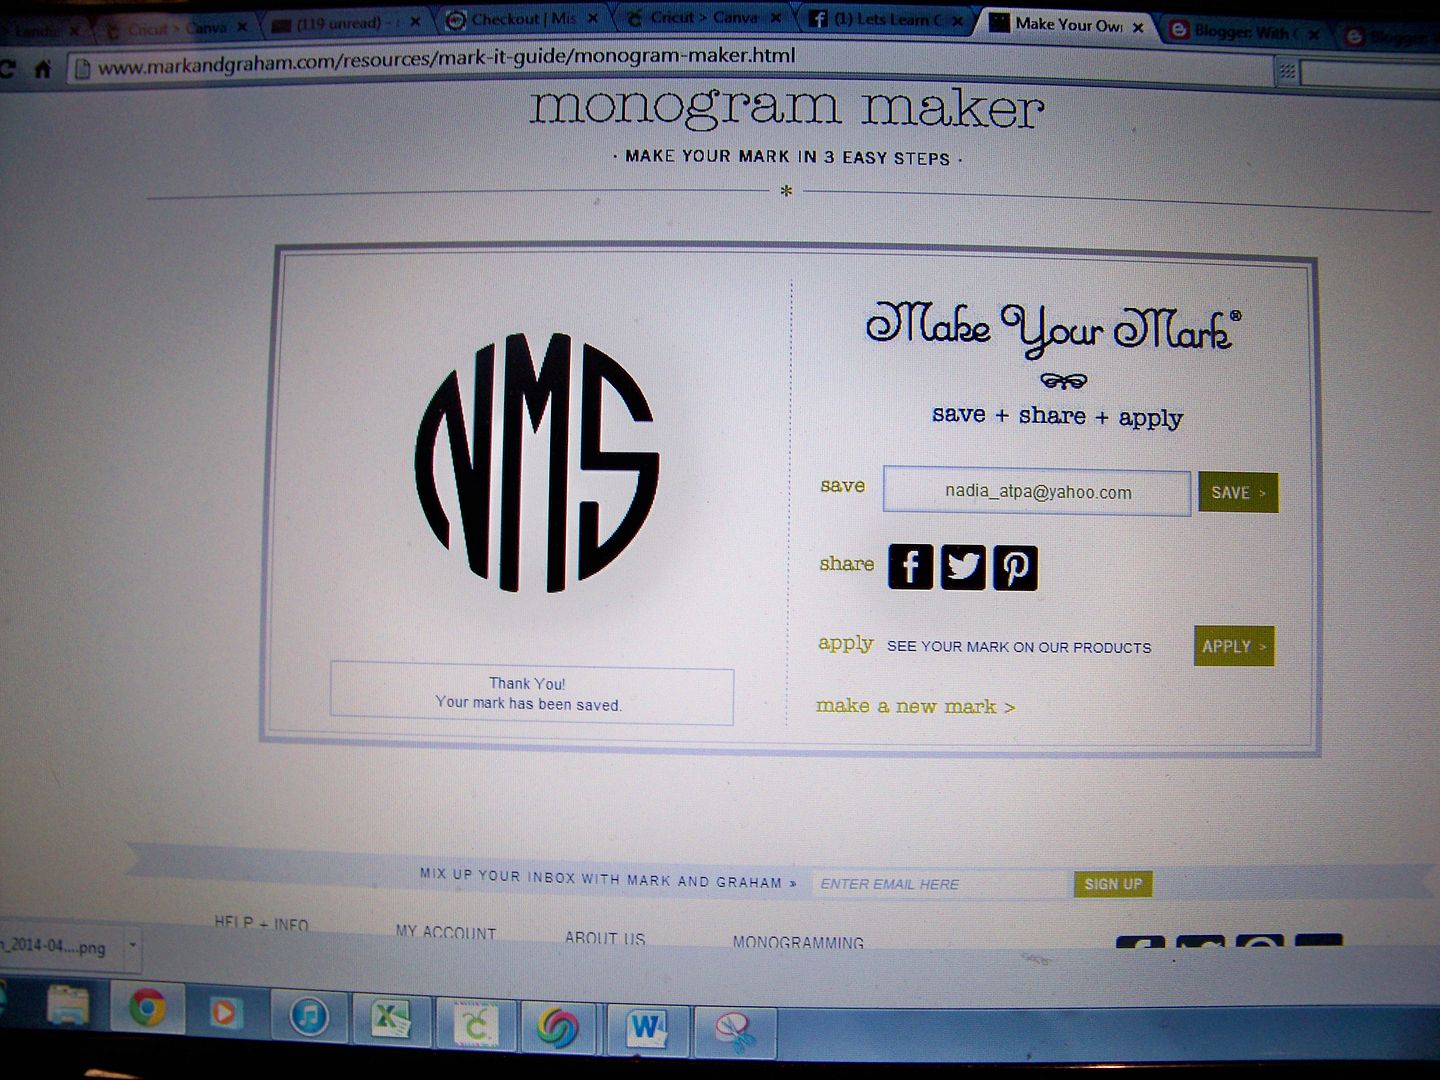
- Go to Mark and Graham (click here) to create a .png file of your monogram. (Thank you to Sara Brauer for sharing this link on Facebook! It is an awesome tool for anyone with a die cutter that can cut .png files!)
- Enter your initials. The program will re-arrange the letters so the last name initial is in the correct place. Select the style you like-- there are twenty-seven to choose from!
- You will see a preview. Now, at this point, you can click save+share and it will be emailed to you, but honestly, it takes a while to get the email and some of mine were never emailed so instead I do this:
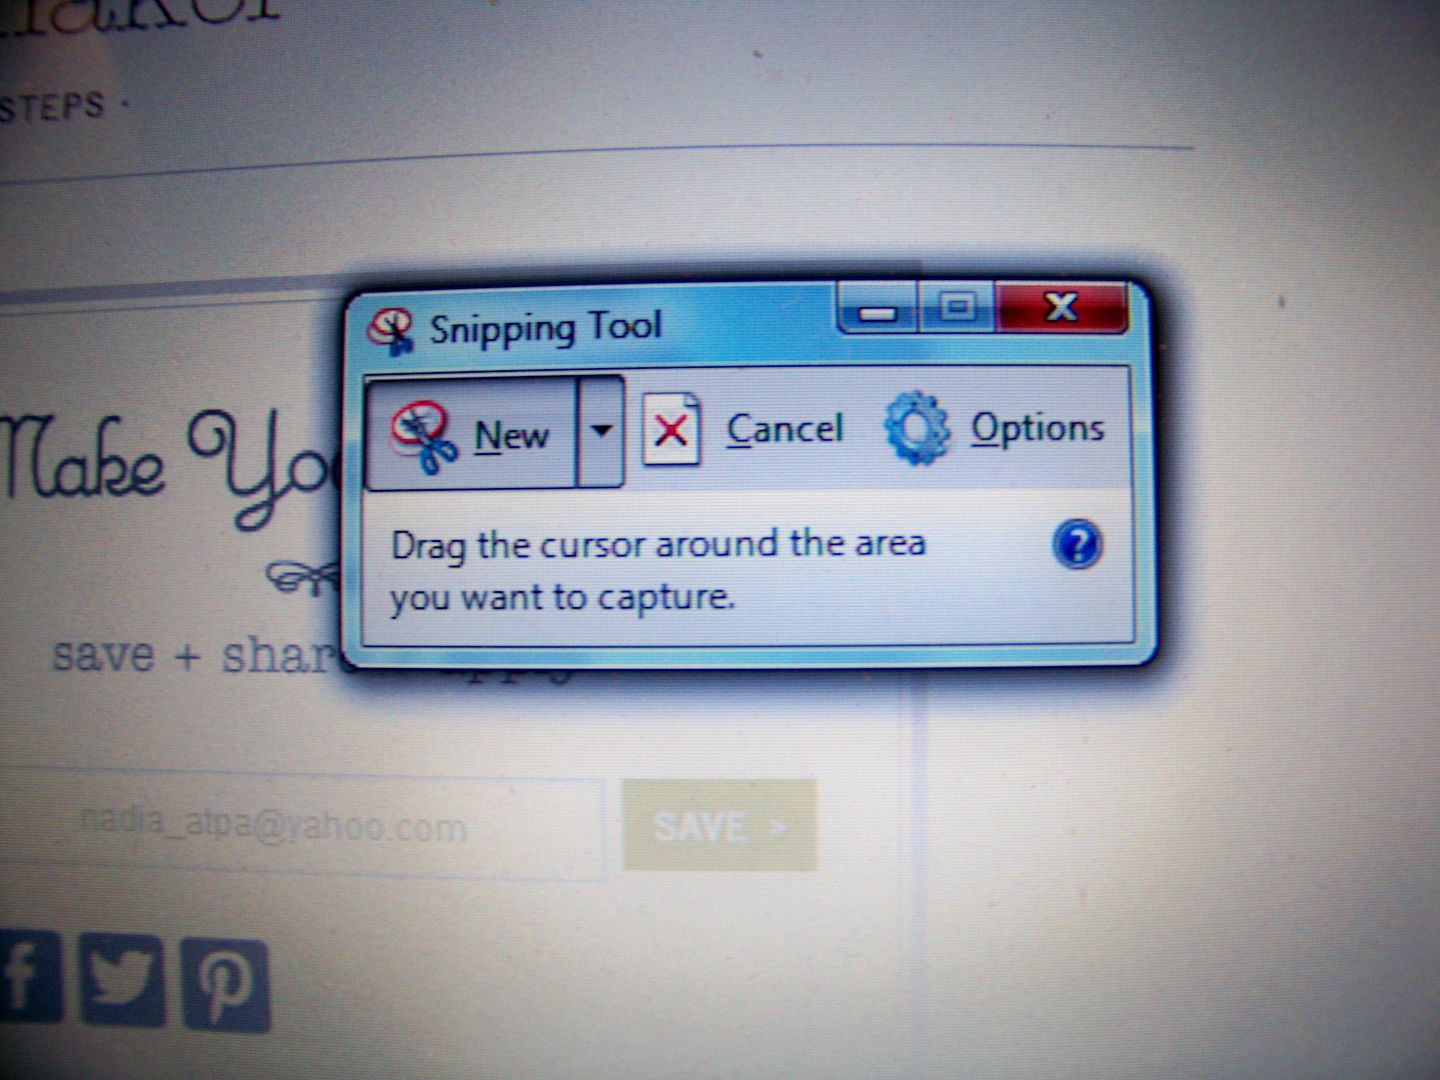
- Use the Windows snipping tool on your computer (click start and in the search box type 'snipping').
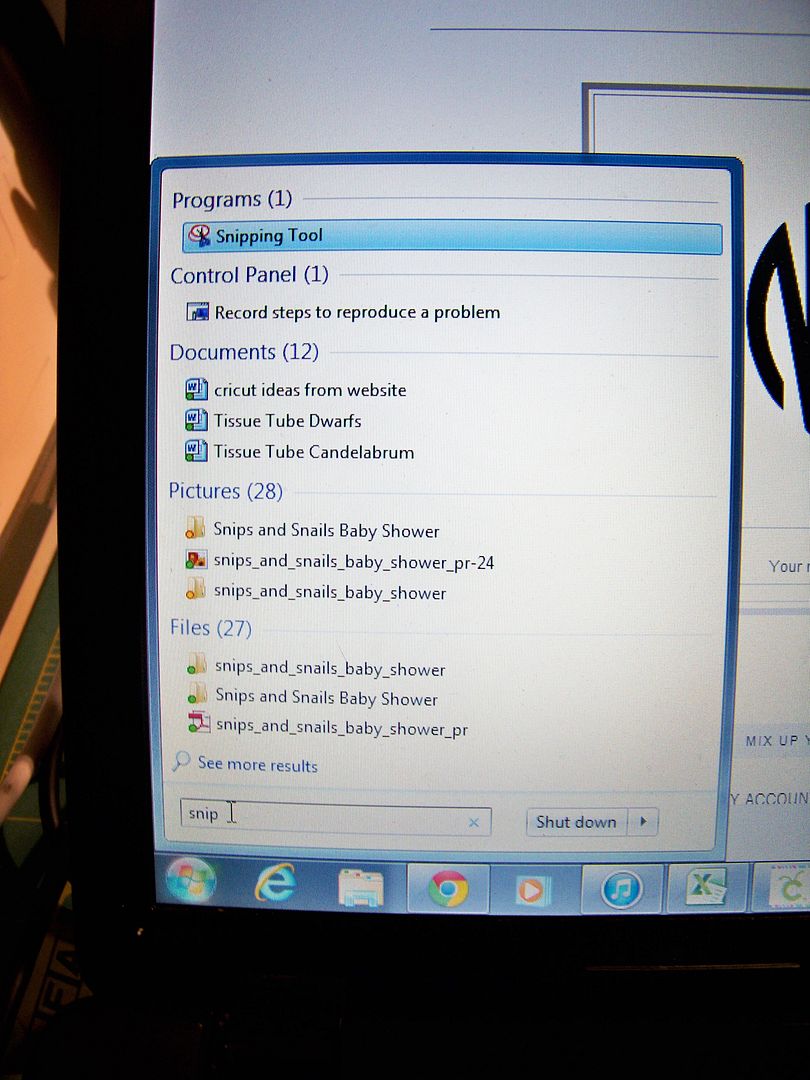
The snipping tool allows you to screen shot anything so you can make it a png file that you can use with your crafting! Simple black and white images are ideal for use with Design Space! - A little box will pop up and you can highlight the monogram.
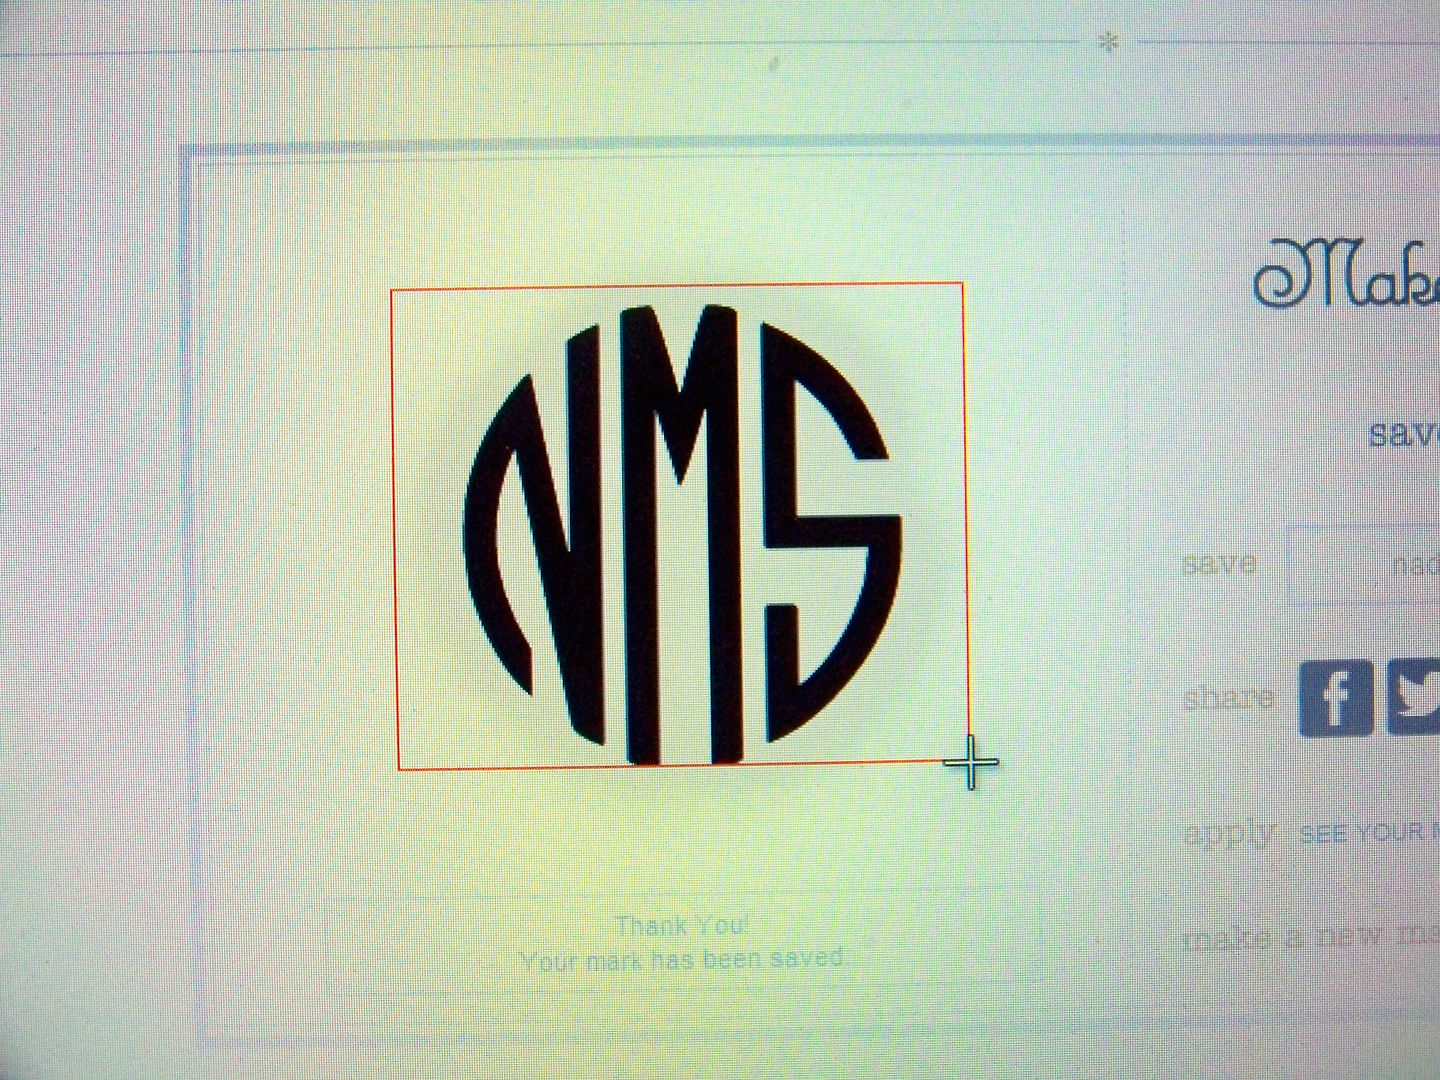
- A box will pop up with your monogram in it.

- Click file, Save As. Choose the location you want it saved in on your computer, name it, and see that the saved file type is PNG (default).
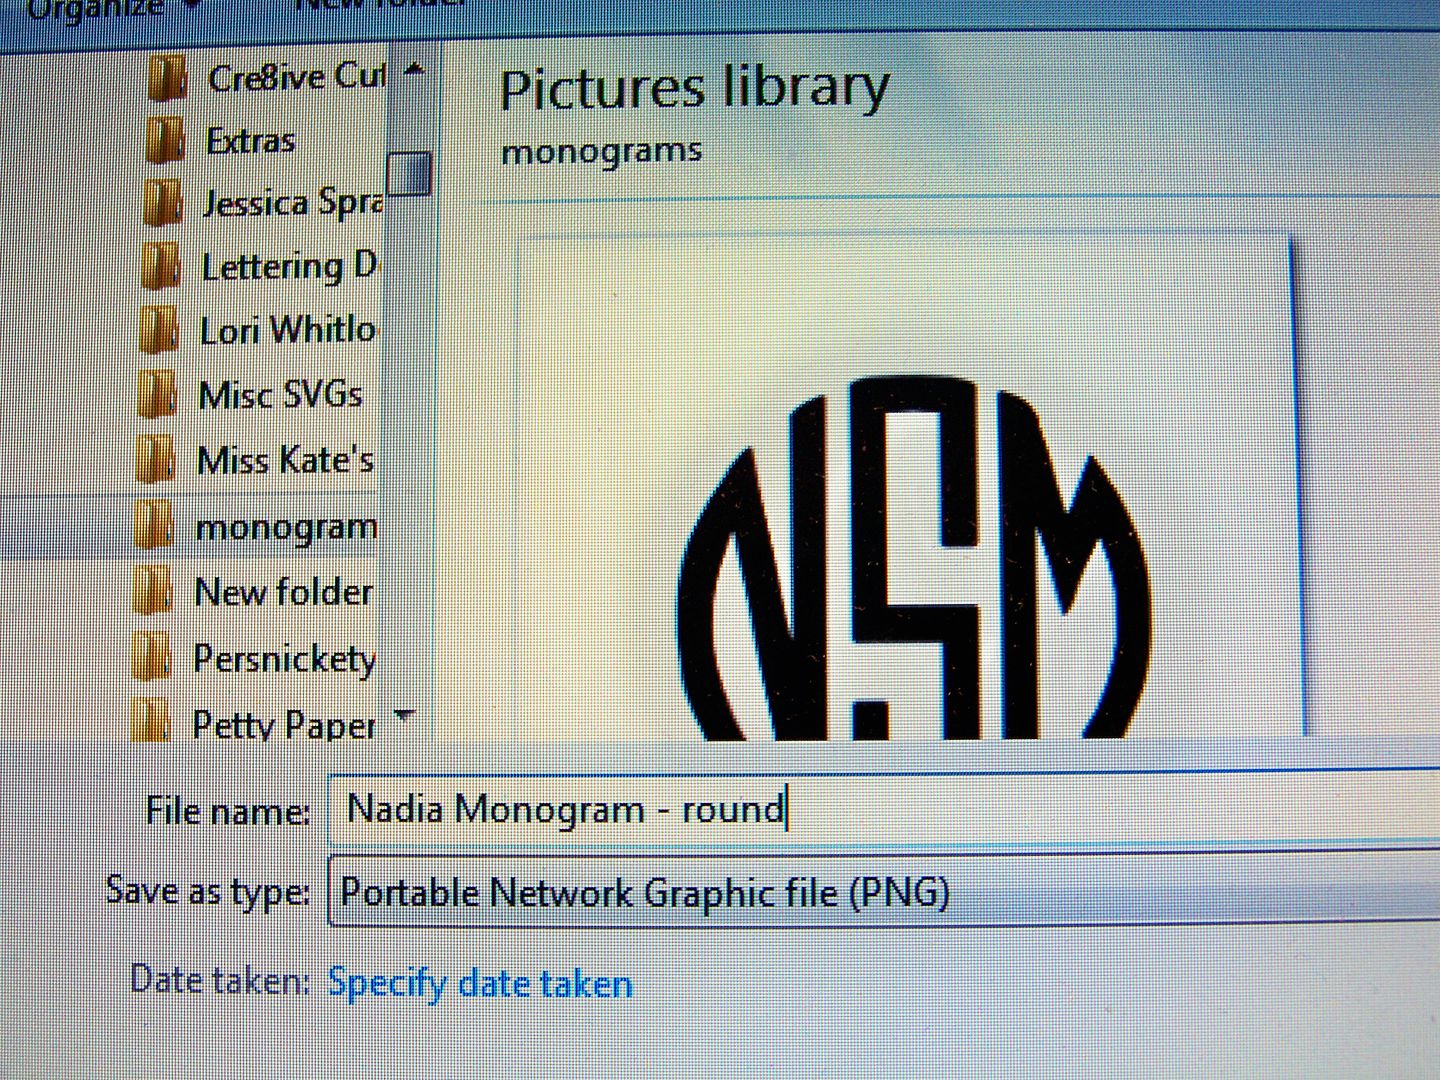
- Now you have your monogram ready to import into Design Space
- Go to Design Space and sign in. Select File then New.

- Select Upload Images from the sidebar.

- Select Basic Upload.

- Select browse and find where you saved it previously.

- Select the file and click Open.

- The file shows up on the screen with a checkerboard around it. The goal is to have that checkerboard in ALL the spaces except your design! Select Simple Image. Then click Continue.

- Click on the space around your image and the checkerboard appears around all of the letters. This is exactly the way you need it....

- You can test it to be sure that the red outline shows only what you want to cut! Click on the preview button...

- Like this.

- Select continue and your image, outlined in red (the cutting line) will appear. Change the image name if you don't like what it is named as a default and any tags you might want. Click save.

- It will look like this as it saves...

- Your image now appears in your library of images.

- You can use it as you would any image there by clicking on the image and clicking on Insert Images.

- Then your image will be placed on the design mat in Design Space for you to use as you wish!

This section last updated 7-9-15.
How to Put Notes on Your Design Space File:
After I make a project file in Design Space, I like to add a note on the mat so that I can remember where I got the image (cart names, SVG locations, and any other note I want to make). To do that, you simply click 'add text' like you would if you wanted to add text to a project. I like to edit the text to 'handwriting style' and I use Cake Basics, but you should use one you have. I resize the text box to my mat. Remember to hide the text box before hitting go or skip mat if you forget. (Choosing a text you have will keep the program from trying to get you to buy it if you forget to hide it. Remember that if your text box is too big and you forget to hide it, the program will tell you your project is too big for the mat!!)

How to Attach Text on an Image:

- Insert your cuts from imported files or from Cricut cartridges in Design Space. Size it for your needs.
- Ungroup if it is a grouped image.
- Click Add Text from the panel on the left.
- Edit to change it to handwriting style and choose a font. Size it to your project. You don't have to use a handwriting font, but other fonts will only draw the outline of the lettering, not fill it in.
- Highlight your cut with the writing and click 'attach'.
You can check that it is done correctly by clicking 'go' and looking to see that the handwriting is on the same mat as the cut. OfficialCricut is the very best place to look on Youtube for great videos, including the one for "Attaching". If this is still confusing to you, check out their video (click here).
Pens for Drawing with the Explore:
There are several pens on the market that fit into the Explore. Aside from Cricut brand, these will also fit into the pen housing and draw in the Explore. I haven't tested all of these; they come as recommendations from other Explore owners:
There are several pens on the market that fit into the Explore. Aside from Cricut brand, these will also fit into the pen housing and draw in the Explore. I haven't tested all of these; they come as recommendations from other Explore owners:
- American Crafts Slick Writers and Precision Pens
- American Crafts Metallic Marker Fine Point
- Crayola Fine Line
- Recollections Fine and Medium Point (bold does not work in the Explore)
- Pilot Precise V5 roller ball pens
- Bic Ballpoint
- The Write Dudes Infinity Neon and Accent Pens
- Marvy LePlume II (for ultra fine tip) I used these pens for the 3/4" tags that I put on the bottoms of Hershey kisses. They write very tiny text! They are available in 108 colors and are my very favorite ultra fine pen to use!
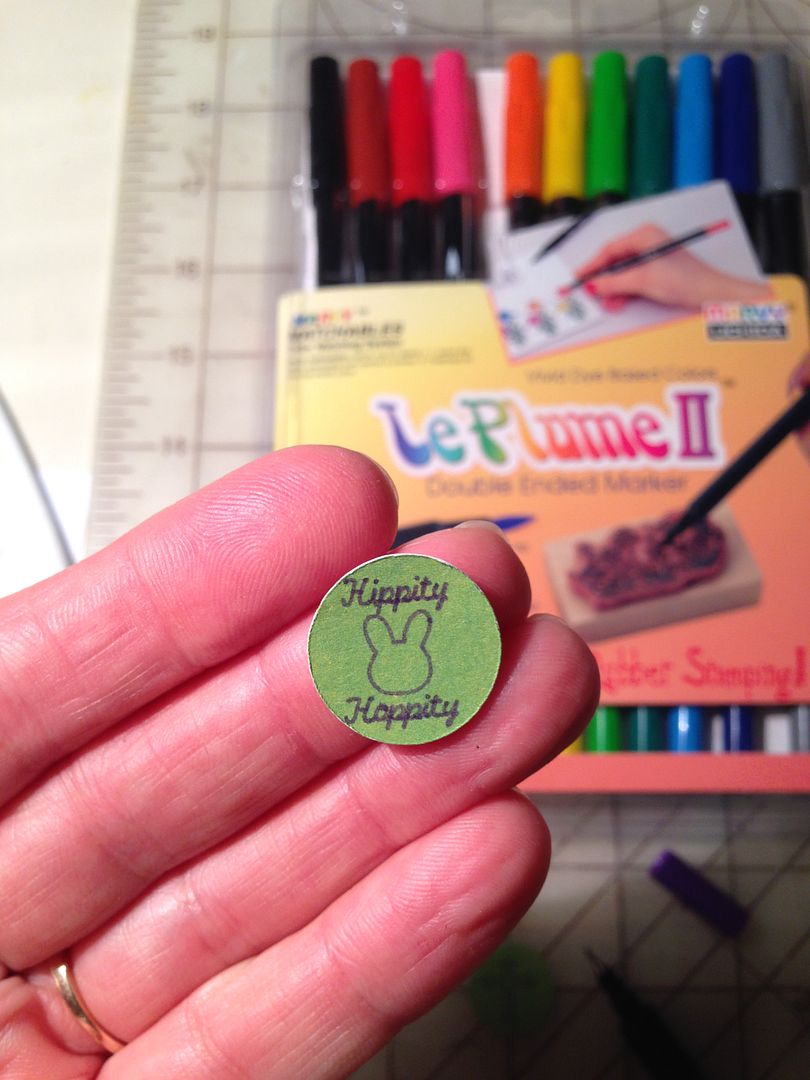 |
| Marvy LePlume II for super tiny writing. |
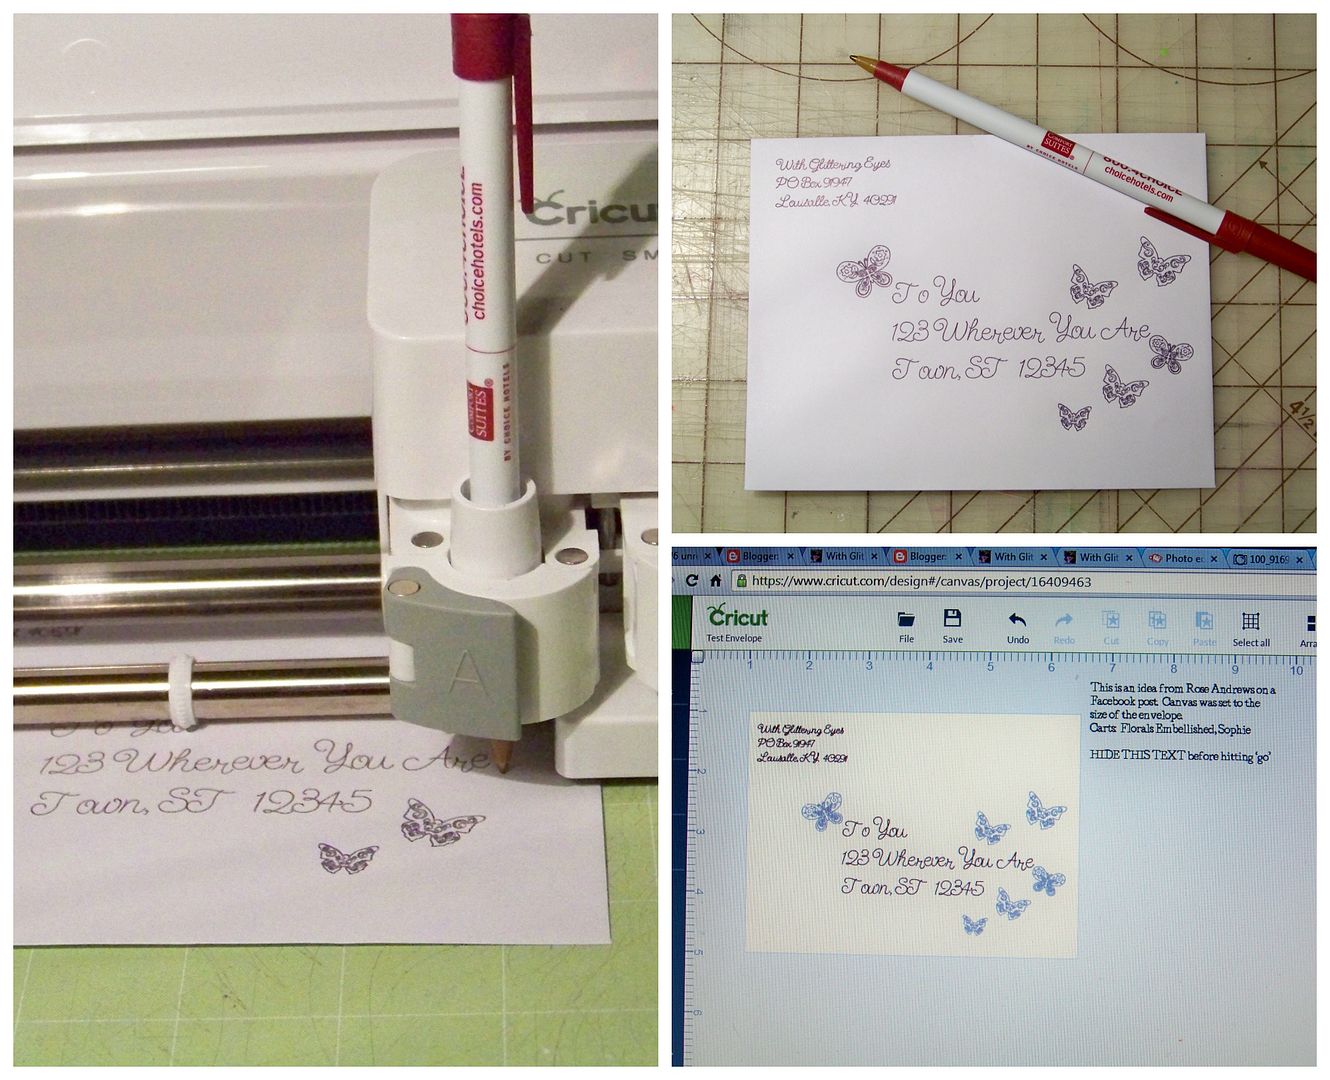 |
| This is the BIC pen! Writes even finer than the Marvy LePlumeII. It has to be this style, not the kind with the clear barrel. Since it can't bleed, you can use it for designs that get traced multiple times, like these butterflies |

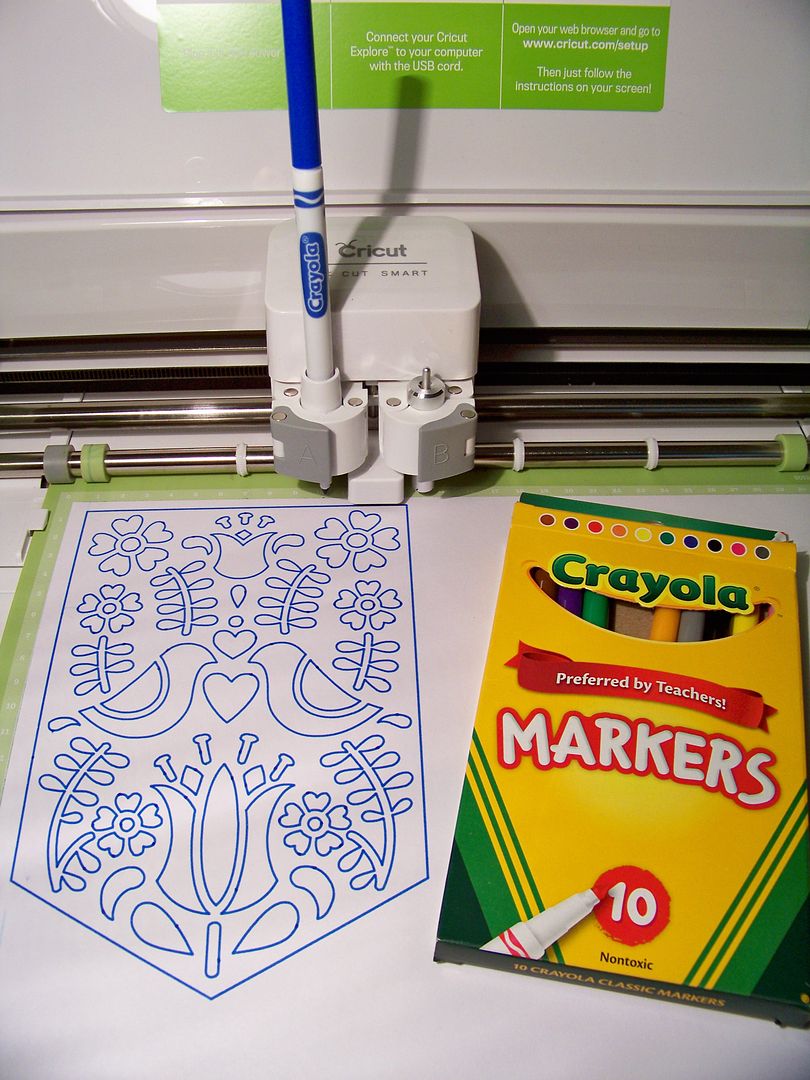 |
| Crayola Fine Line |
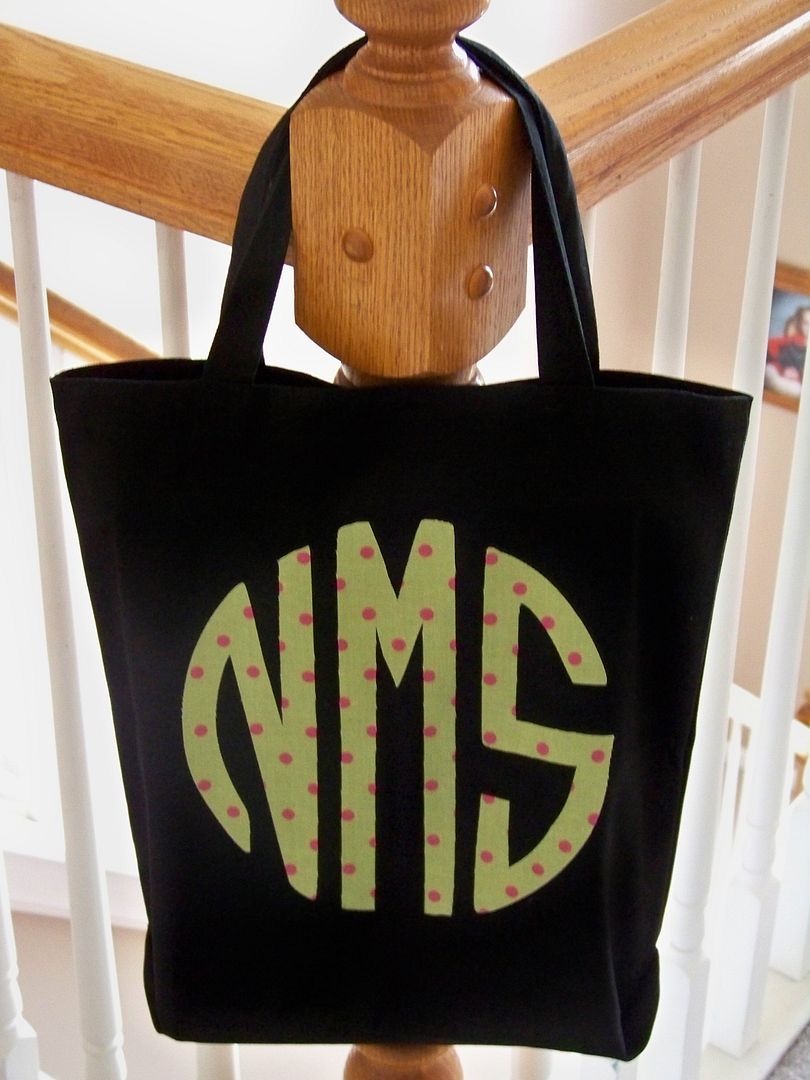
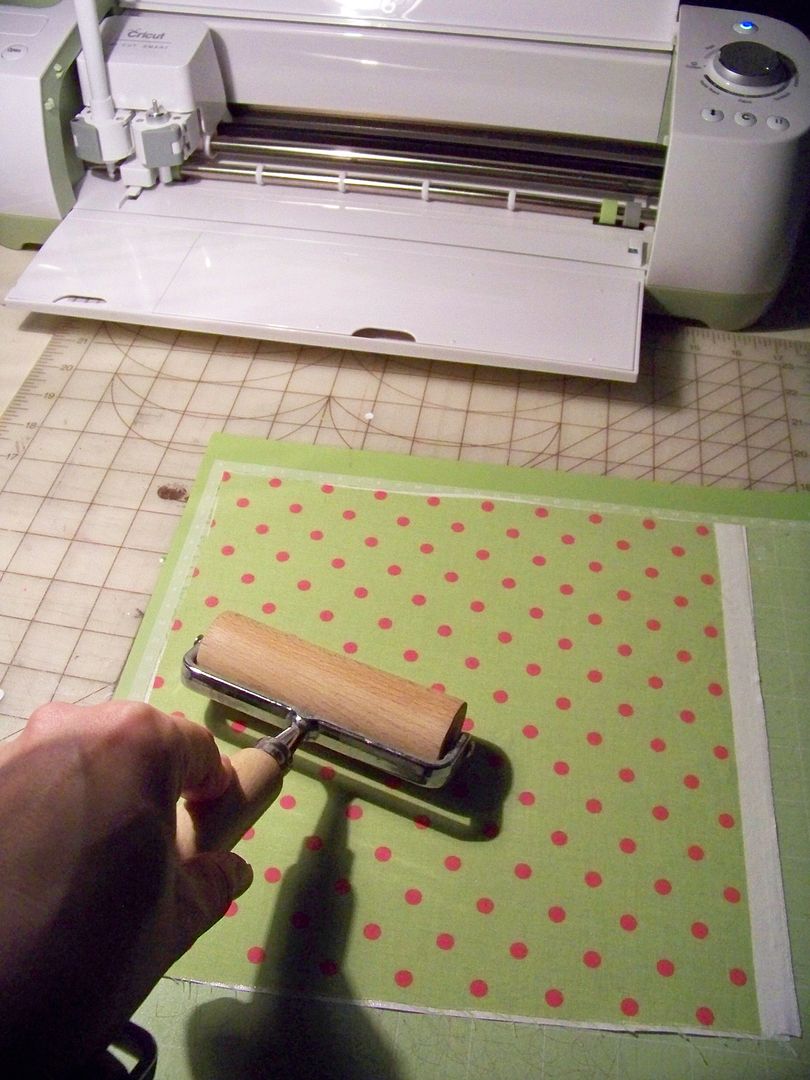
How to Cut Fabric with the Explore:
I have been experimenting with cutting fabric on the Explore. For this bag, I cut fabric using my same monogram image.
I have been experimenting with cutting fabric on the Explore. For this bag, I cut fabric using my same monogram image.
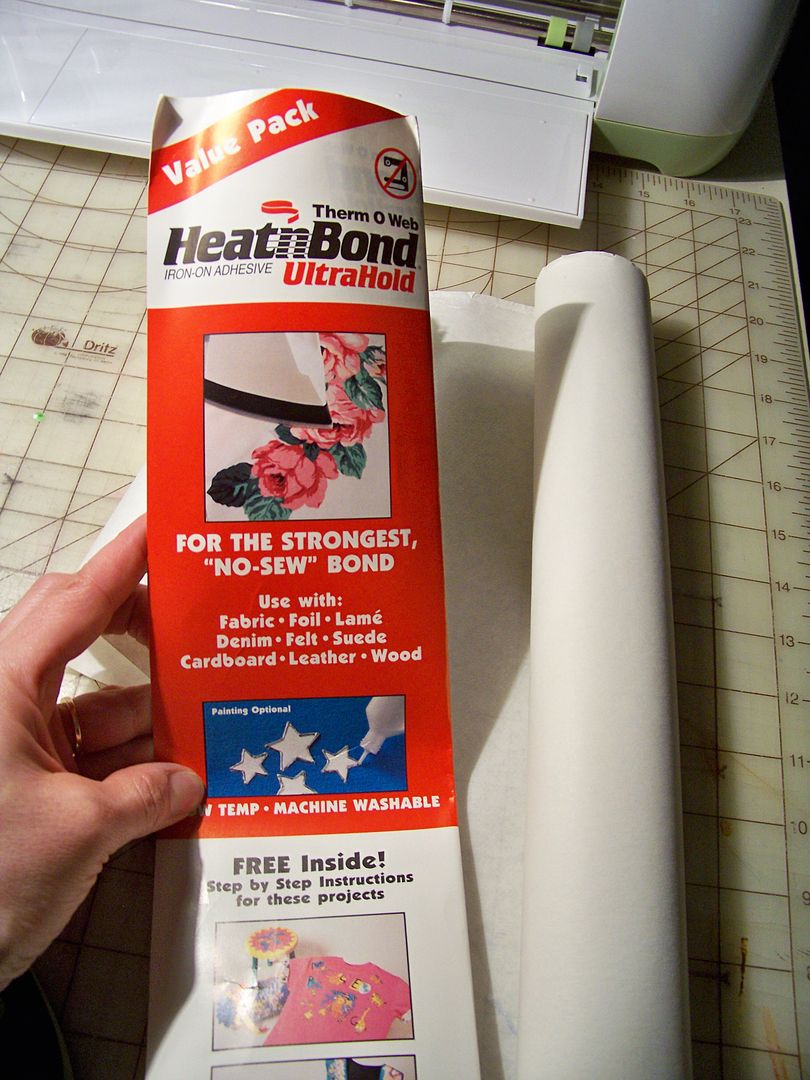
- Iron your fabric to prepare it. Set the iron for the fabric and use steam if that is appropriate for the fabric you have chosen. If it is something that will be washed in the future, you are advised to pre-wash it to shrink it first.
- Press with your iron HeatnBond Ultra Hold to the wrong side of your fabric. "Press" is different from "iron" in that you will lift and lower your iron and not move the iron over the fabric, risking a shift of the fabric on the bonding agent. Don't use steam on this step.
- Place your backed fabric on a very sticky mat. I just use a new mat, standard grip, but there is a Strong Grip mat available. I use a brayer to press the backed fabric into the mat.
- Cut as usual with your explore, selecting 'fabric' on the dial. If you are using heavy fabric, you can move the dial one notch over (between 'fabric' and 'poster board' and the machine will multi-cut 2). Felt has its own setting, by the way. For cutting felt, just select "Custom" on the dial and select "felt" on the drop down box on your screen in Design Space. The felt setting will automatically multi-cut 2.
- Remove the cut from the mat, peel off the backing and press to your project. Here, you can use steam if that is appropriate for the fabrics you are bonding together.
- HeatnBond, unlike SteamASteam, is not permanent after fusing. You are advised to stitch around cut edges for permanent hold. HeatnBond, however, is preferred for use as a backing because it is a smooth and even backing!
- I experimented with cutting felt, backed and unbacked, factory-backed taffeta, and quilting-weight cottons. They all cut beautifully! I did use a multi-cut when cutting the felt, but for all fabrics, I used the standard blade housing, NOT the deep cut. I also used the Standard Grip Mat.
____________________________________________________
After this week, I do have a new set of "wishes" for improvements to Design Space and the Cricut product line. (You can see my first list on my previous post- click here.)
- We need a way to center automatically one element onto another. I would have loved a one-click way to center the monogram writing onto the center of the card since I attached it! I eyeballed it and it is off a bit.
- White gel pens! Come on Provo Craft, we need gel pens that fit in the Explore-- especially white ones! So far, I haven't found any on the market. Glitter pens would also be great! Use the same concept as the gel pens you sell for the Expression, but put them in a barrel that fits the Explore! Pretty please!!
- I linked 317 cartridges this week. Some of them just don't show up in the search. For example, Simply Charmed doesn't show up in My Image Sets, but it does show up in All Image Sets as "purchased" so I know I linked it correctly! Another example: Art Philosophy doesn't show up in My Image Sets or in All Image Sets, but the individual images show up in My Images as purchased. It makes it impossible to find something on purpose for those missing-but-linked carts!
- While linking those carts, I found that George and Basic Shapes and Celebrate with Flourish could not be linked and had to be linked by Provo Craft customer service. When I called, the rep was very nice, but she told me, "I will do this as a one-time-kind-of-thing." That made me think it was some special favor but I later found out from my favorite expert that my George cart is probably blank. The images were programmed into the Baby Bug and subsequently the Expression and the cart was just a "connection" so to speak. Once PC realized people were hacking the "connection" with some paper clips, they started creating real George carts and redid the Expression programming. That's why some people can link their George and some can't. Celebrate with Flourish had a programming error because they misspelled it when it was initially programmed. So when you try to link it, the title reads it from the card but it doesn't match the one the one in the list of carts in the Image Library. They did correct that problem too but most people can't link that cart." So now we ALL know the details-- just need to clue in the Customer Service folks!
- Not all of my cartridges could be linked using my Explore. I was able to link them (except for George and Flourish mentioned above) in CCR by hooking up to my Expression. Seems like that could be a problem for many people in a couple of months, as I only had a two-week subscription to the Image Library but all those folks with the three-month subscription may have this problem too, if they are like me and never linked carts previously.
- The embossing done by the Explore needs to be deeper or adjustable. We could use it for form not just function if we could see the embossing, such as in outlining the monogram for cards. It would be more effective if it were deeper too.
Thanks for checking out my blog! I would LOVE to read and see what you have been learning about the Explore too! Let me know or send me to your blog. And if you find gel pens, specifically white ones that work in the Explore, please share what they are and and where you got them! Happy Crafting!
18 comments:
Nadia, I love the monogram. That is actually my favorite monogram. Last week I looked for the font set to purchase it, but it was expensive. This is a great idea! Thank you for sharing it.
Margo
Nadia this is great information. Thank you for sharing!!
Nadia- ty! And yes- so happy that there any many other choices for pens that work with the explore!
Thanks so much for this post. You are a treasure trove of useful information! I'm a fan!
Ann
Gosh Nadia such wonderful and useful post. I know it took a lot of time to write it up for us and I just wanted you to know how thankful I am. Three cheers to you! Melissa
Thanks Nadia! This is a lot of information and I appreciate the time you took to 'put it together' for us. Special thanks for the pen selection. FYI, Tuesday Morning has the American Craft pens for $3.99 per set (of 5?). TFS PatM.
I don't have an explore yet, maybe some day. However you are inspiring me to get one. Thanks for all the information.
Maureen
LOVE that you love it and I love mine as well. Can't wait for summer break when I can really try things out. Right now my favorite thing - cutting Disney Characters perfectly without any odd flaps or cuts...just awesome
Thank you so much!!! I have been wanting this font for a very long time!!
I don't know how I missed this one but I am glad to see it today! As usual, a great source of information and inspiration!
Just a quick question...When I upload my monogram from the PNG file it says print only...how can I switch this to cut?
To Mpervier:
On the layers panel, you will see a printer icon. Switch it to the scissor icon. Doing that will make it cut. (You have to click on the icon to get the panel with options.)
To Mpervier-- here's another idea: when you upload, step 3 includes a checkbox under the preview that says "Preserve original image within shape". If that is checked, it will print. If not checked, it will just cut the red line. You need to make sure yours is unchecked.
Thank you so much for this post! I am new to the Cricut World, but I'm very excited for the possibilities. You rock! :)
I'm brand new to Cricut and I haven't found a way to do writing like you did with the BIC. All I can do is an outline of the letters. Is there something I am missing? I would REALLY like to be able to have it write the actual letters!
Thank you!
Debi- there is a drop down in the edit panel that will allow you to select "has a handwriting style". Those are the best. Other than that, you can choose a system font that is thin and mimics handwriting. I have a post on this blog about that.
Thank you SO much for taking time to post this tutorial. I am a new Cricut owner and my frustration was getting the best of me. You're awesome!
Thank you for this post and the link to free monogram files! I am new to the world of cricut and this has me excited to create!
Post a Comment