%20and%20Lightkeeper%26%23x27%3Bs%20House%20from%20SVGcuts%26%23x27%3B%20Seaside%20file!%20%20Includes%20links%20to%20Melody%20Lane%26%23x27%3Bs%20collaborative%20video%20for%20this%20post%2C%20free%20SVGcuts%20sand%20dollar%20cut%2C%20and%20changes%20to%20the%20file.%20%20)
Do you know SVGcuts? If you have a Cricut Explore, you know you can now import files! You are no longer tied to cartridges as your only source for images, although I love to combine Cricut cartridge images with other kind of files. I recently posted a treehouse I made using two SVGcuts files and a bunch of Cricut cartridge and before that, I posted my bunny house boxes that I decorated with cart images. SVGcuts is my very favorite place to find 3D files for several reasons: the designs are perfect and imaginative, they include a "menu" guide to the cuts, and all the dimensional files have corresponding construction videos.
I was recently approached by Melody Lane, fellow crafter and crafty-video-guru, to collaborate on a project: use my blog and her videos to share something we both like.

It is no surprise that SVGcuts was a perfect topic for us! You can find Melody's video that corresponds to this blog post by clicking here. Melody's video makes using SVGcuts so easy to do-- be sure to check it out!

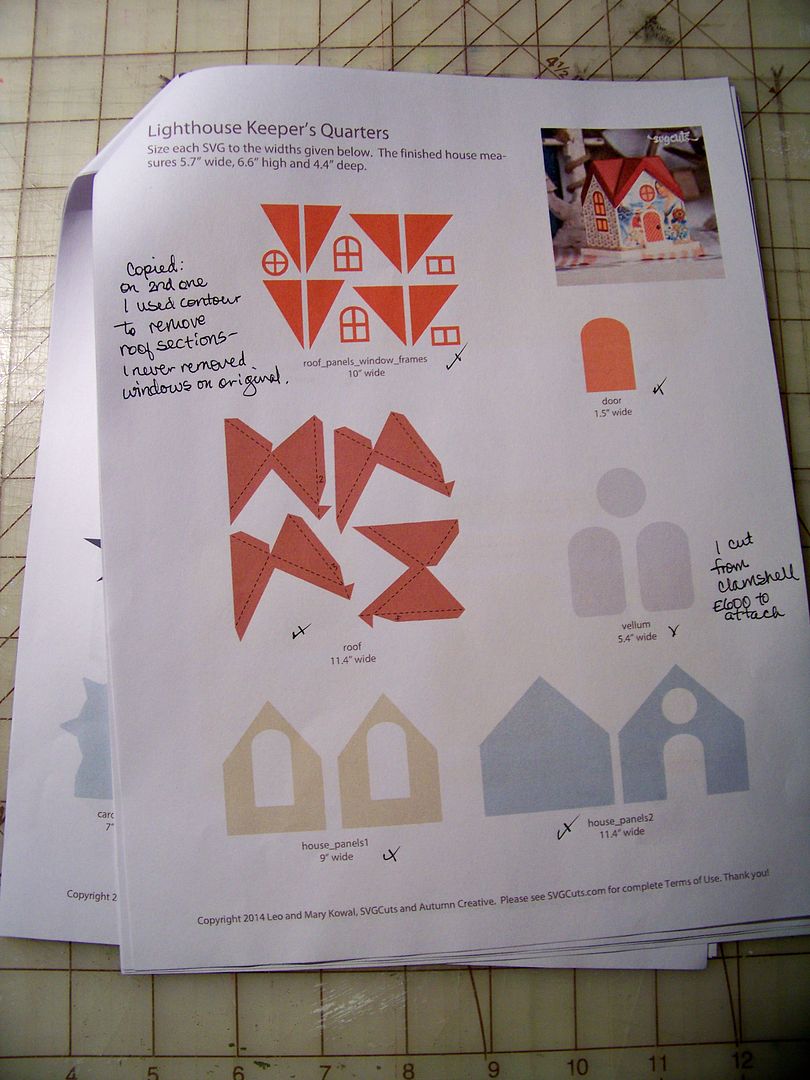
I love the file "menu" with each collection. For Explore owners, that means that we don't have to worry that the files don't import at native size into Design Space; we can size them to cut exactly as the designer planned without guessing. It also means that we get to see, with a color legend, how all the cuts look and all the extras that are included. As a person who has many Cricut cartridges and enjoys thumbing through handbooks, I print out the SVGcuts' menus each time I buy a file so I have a reference and a reminder of the files I have purchased. I also have a convenient place for my notes and changes that I make to the files.
I love that the company posts construction videos on Youtube so that there are no surprises and no guessing on how to glue the pieces together! You will never have to rush to a message board or Facebook to ask if someone knows how to put something together; you will know how it goes together before you even buy the file, if you wish to watch the videos first!
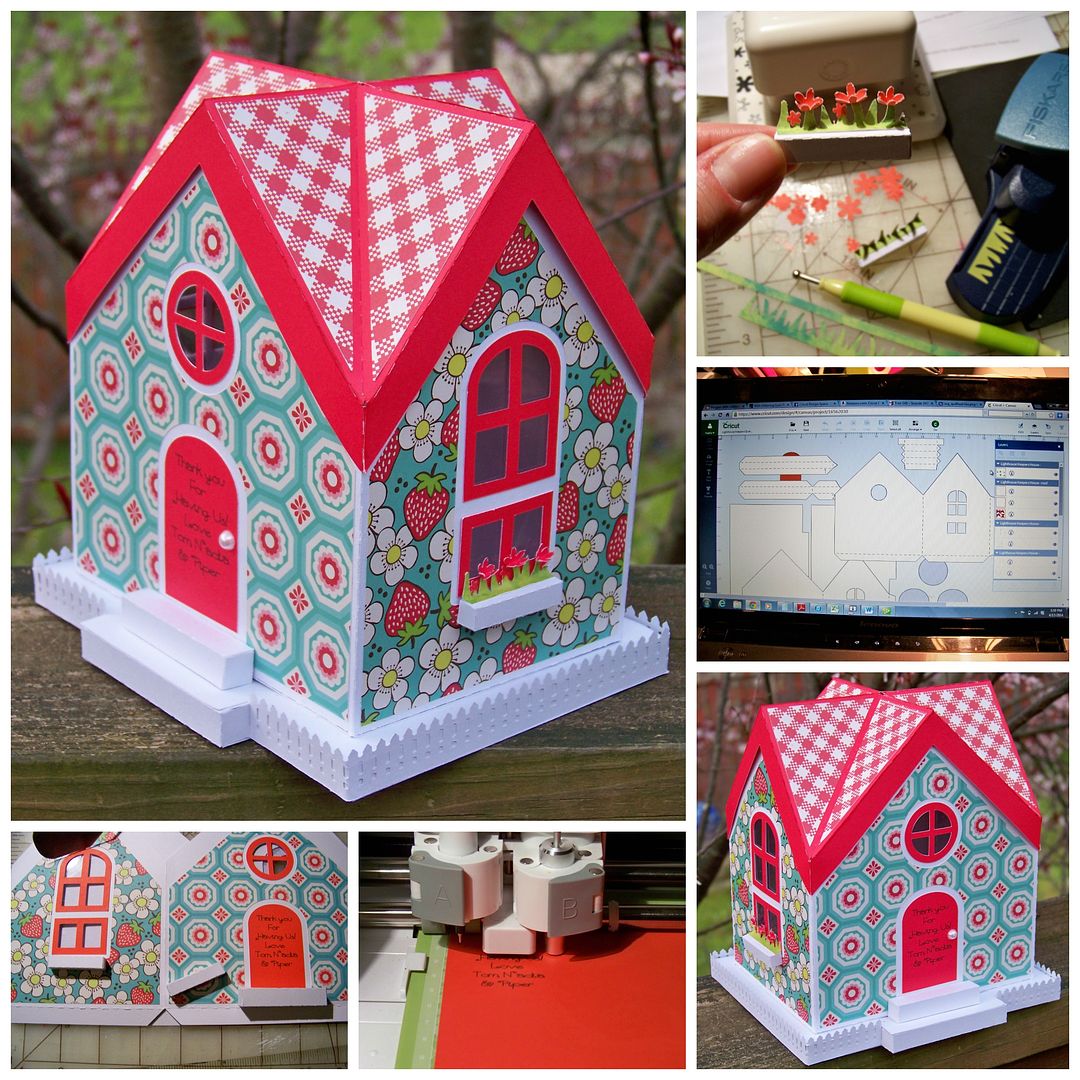
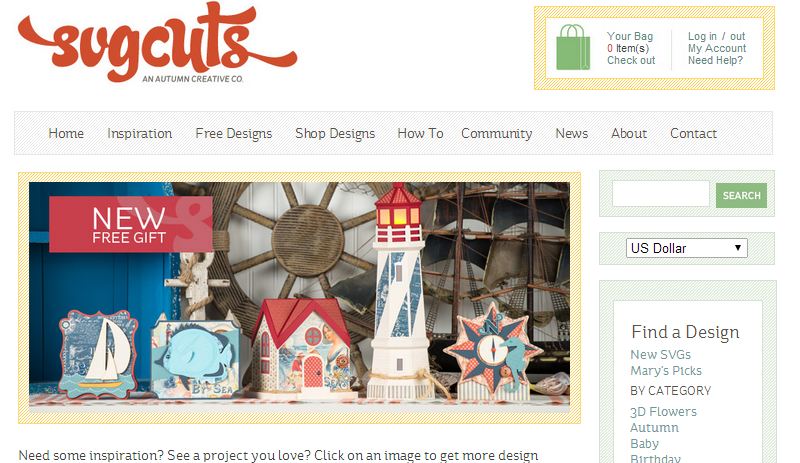
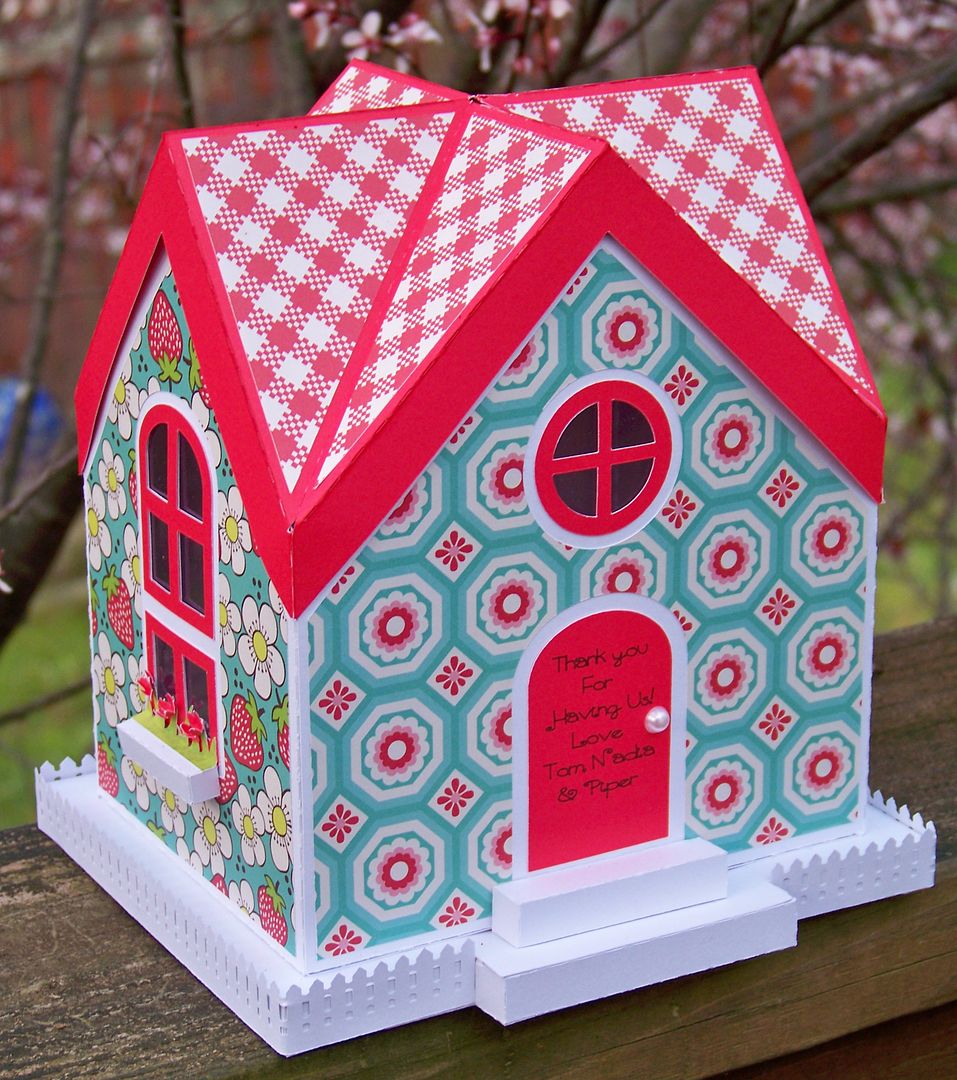
The newest SVGcuts file is Seaside-- and it is also FREE until April 21, 2014 with any $9.99 purchase-- so you still have a couple of days to get it free! I got it for the light house, but I need a hostess gift for this weekend, so the little Light Keeper's House is the project I needed to make!
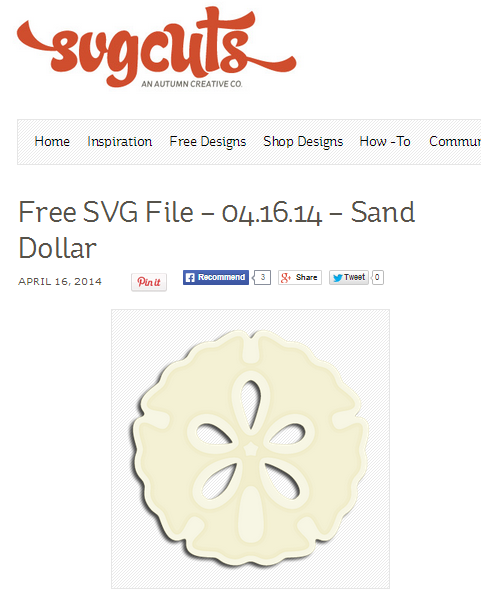
Right now, SVGcuts is also offering a free sand dollar image. If you are a little worried about how to cut SVGs in your Explore, let me suggest you do two things: download the free sand dollar file (click here) and watch Melody's video (click here) so you will know exactly how to do it!
On to my hostess gift...
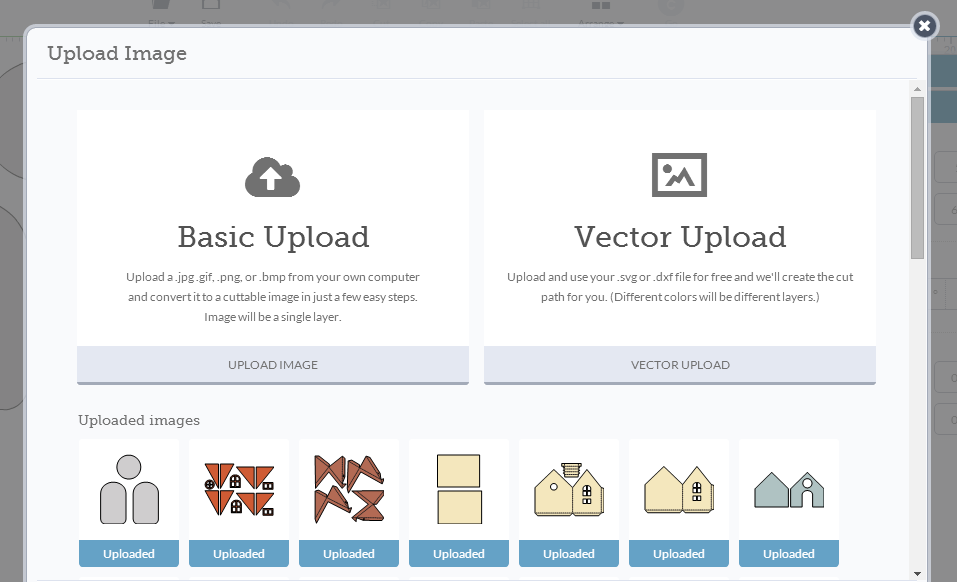
To cut this box, I first found where I saved the file on my computer and imported it using the Import Images button on the left panel and then selected Vector Upload. One at a time, I uploaded a file, named it, tagged it, and saved it. There are ten files that make up the Light Keepers House, so I had ten file pictures that I had to select before clicking 'Insert Images' at the bottom. In case you find this helpful: I did find the first time I uploaded a project like this with many files, I uploaded them one at a time, re-sizing and attaching score lines before uploading the next. If that is helpful to you, it won't affect your Design Space file at all, and is an option.
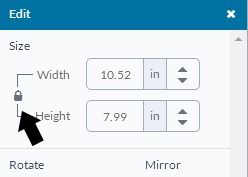
Once on my mat, I clicked on one group at a time to re-size. (When re-sizing the cuts, keep the little lock icon on so that when you enter the width, the height will change proportionately.)
The most important thing to remember when importing 3D project files in Design Space for the Cricut Explore to cut, aside from re-sizing the pieces, is attaching the scoring lines to each piece! Design Space will place them on a separate mat by default, but by highlighting the piece intended to have scoring along with the score lines, and clicking 'attach', the Explore will cut and score correctly (on the same mat). And to be clear, SVGCuts utilizes cut-in dash marks for scoring, not the score tool and solid lines for scoring so you will not need a score tool or to remember to use it! Attaching the score lines will make the pieces turn black. After this happens at each file, just change the color back (or to another one you like that corresponds to your paper choices) so that they will appear correctly on different mats.
Then, all that's left is to cut and glue! The construction video produced by SVGcuts for this collection can be found by clicking here.
I did make a few, small, easy changes to the file.
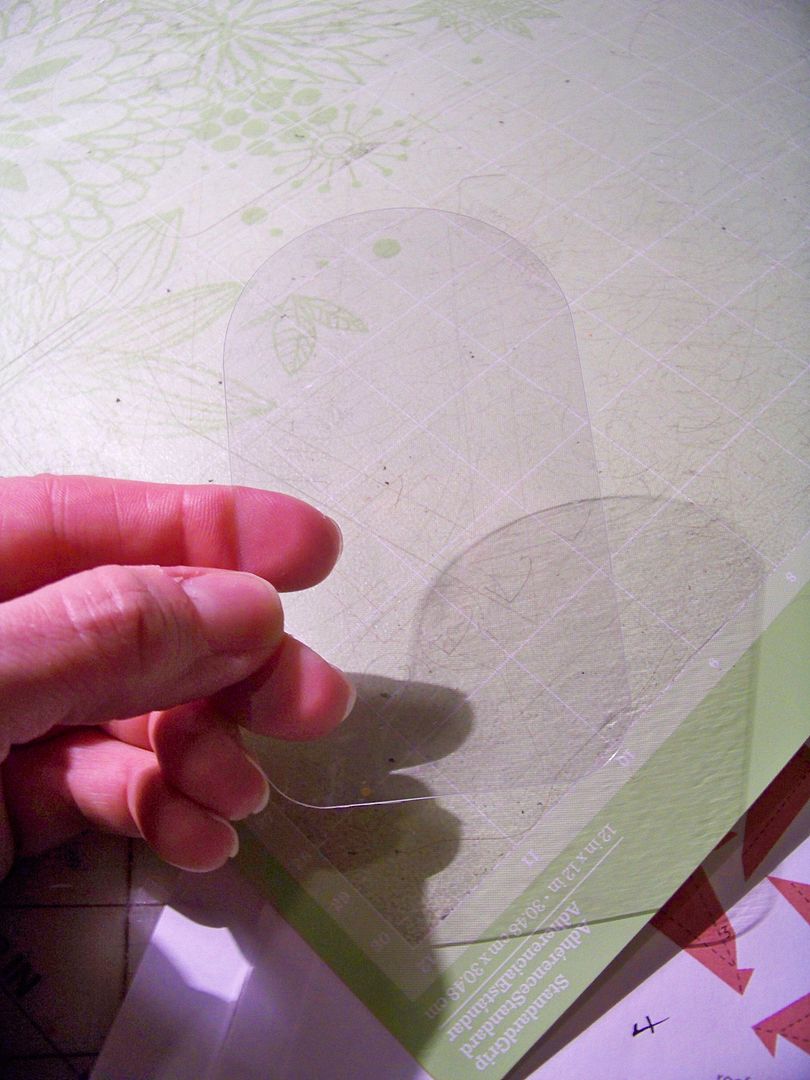
- First, I cut the windows out of recycled acetate that I cut from clamshell packaging so the windows would have clear 'glass' instead of cutting from vellum. I added a material to the Explore custom settings. I called it 'clamshell acetate' and set the pressure to 338 and multicut to 3. It sort of scored it but it was effective in getting it to a point that I could just "peel" it along the cut line to get my windows.

- Next, I cut extra house_panels1 and house_panels2 in white to match the base so that I could back the inside of the box, hiding the edges of the acetate.
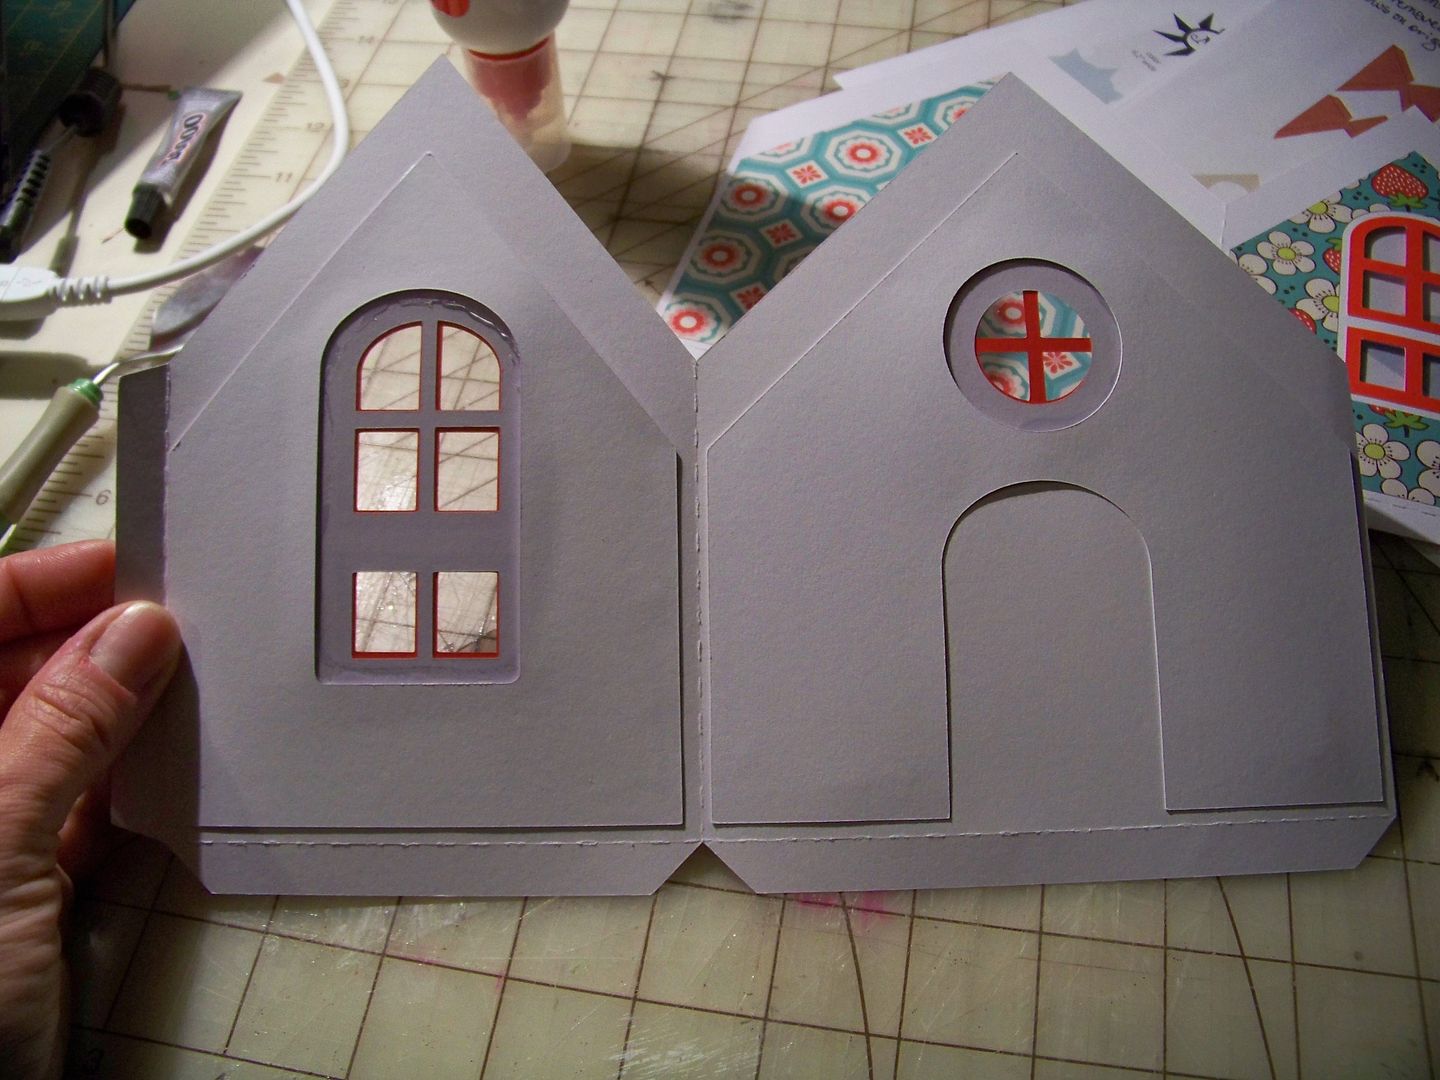
- Then I separated the window frames from the roof panels. I wanted the roof (base) that you can see around the edges of the roof panels to match the window frames and door. I did that by hiding the contour lines for the roof panels. Not the most efficient use of paper, but it worked for me. Next time, I will try ungrouping instead!
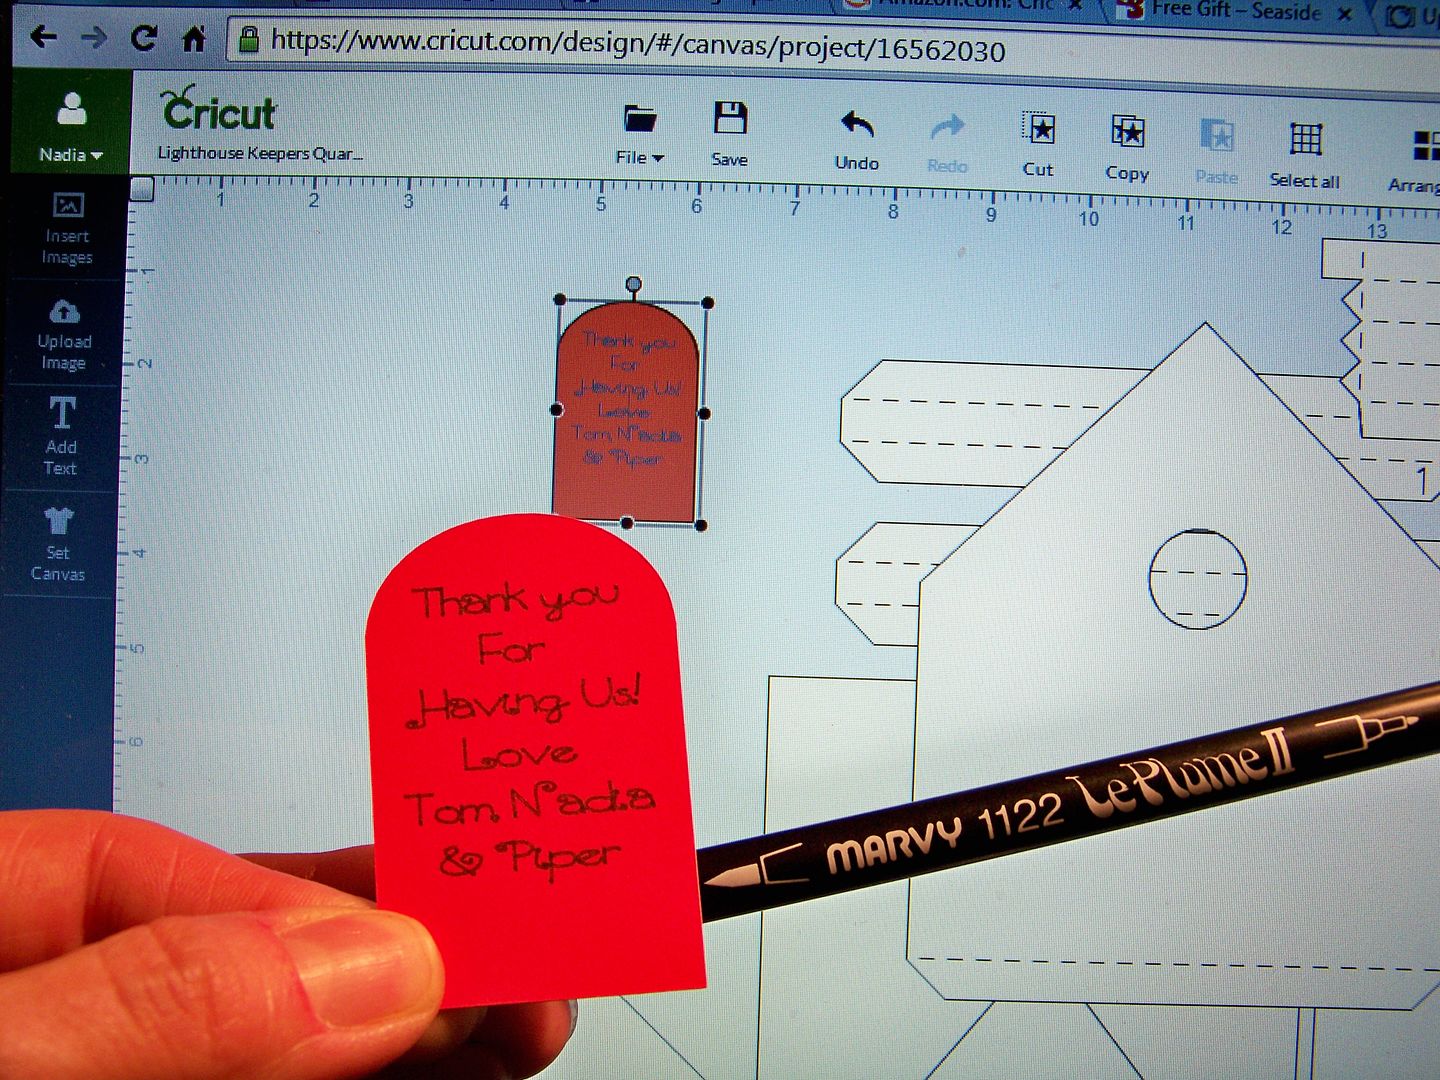
- Then I used a Writing Font and a Marvy LePlume II pen so the Explore could write a personalized message on the door in lieu of a tag for my gift. I love that the Explore has Writing Fonts and that it can write directly onto a shape that it cuts on the same mat. Remember to highlight the door and the writing and to click the attach button!
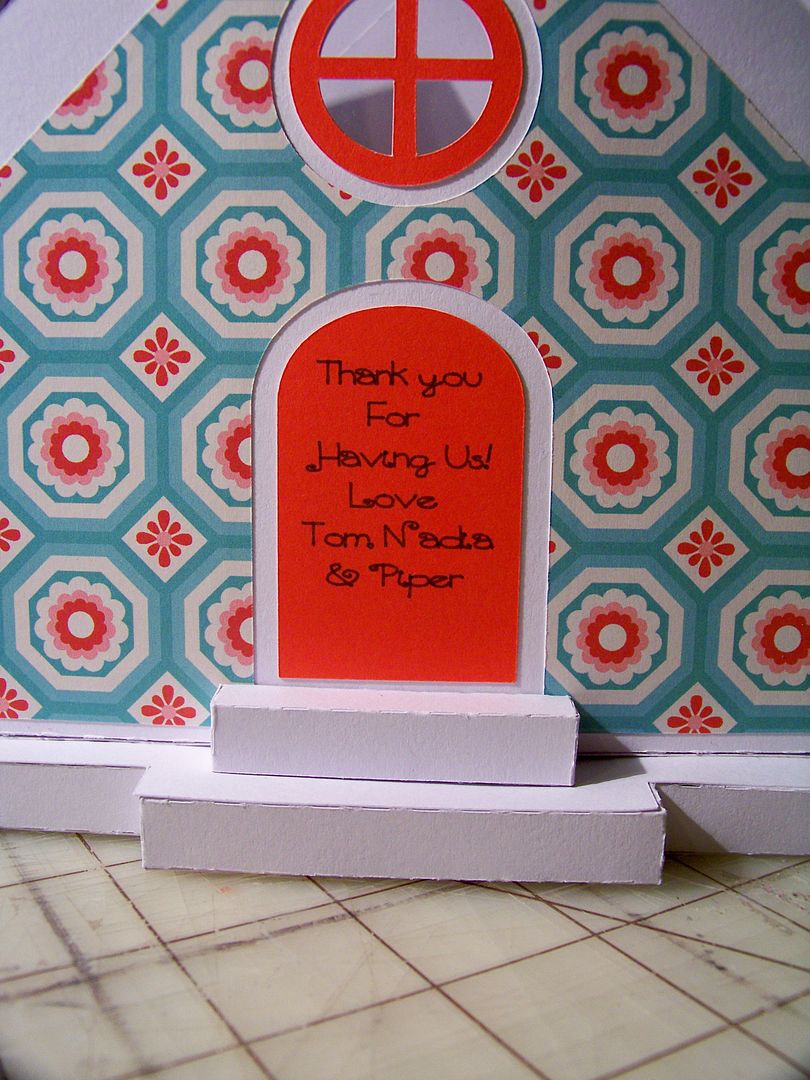
- Lastly, I copied the step that is part of the house2 file so that I could make flower boxes from a scaled-down version of it. I started a new file (because it was getting crowded and I wanted a less complicated space) to which I added a square canvas sized to 1-1/2" just for reference. I adjusted the size by eyeballing it a bit. I used the contour button to remove the house, leaving just the adjusted shape.
I attached the scoring to the step, then cut and constructed it exactly like the step.
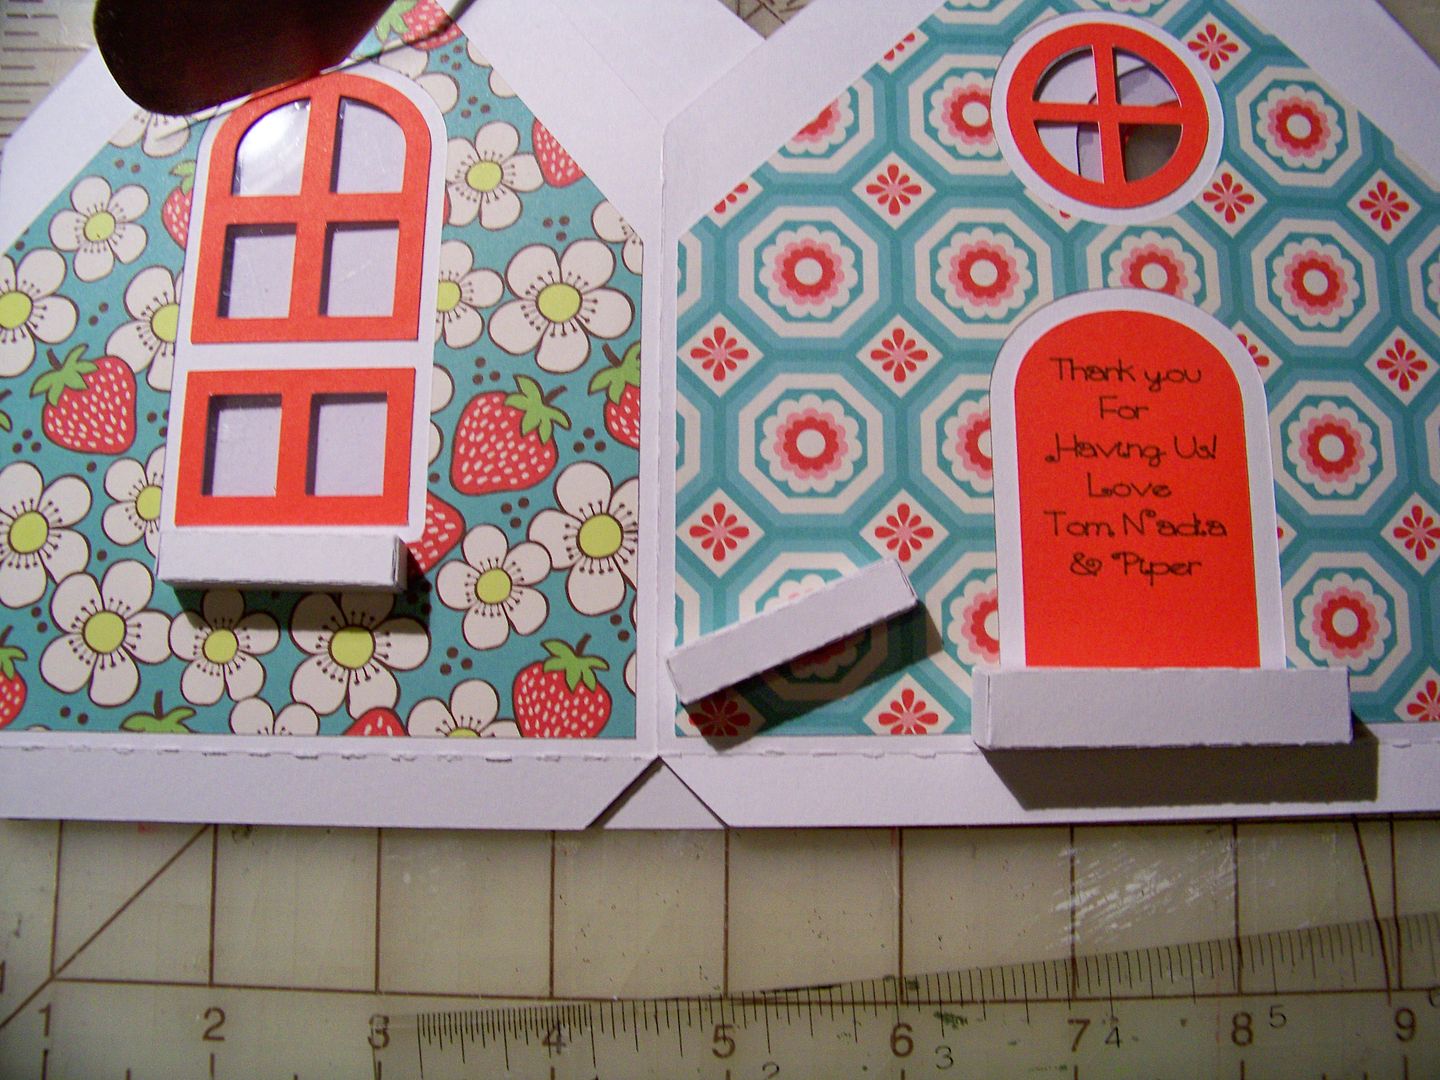
I used an edge punch and Martha Stewart center punch for the flowers to finish the flower boxes.


I added an edge punch trim around the base.

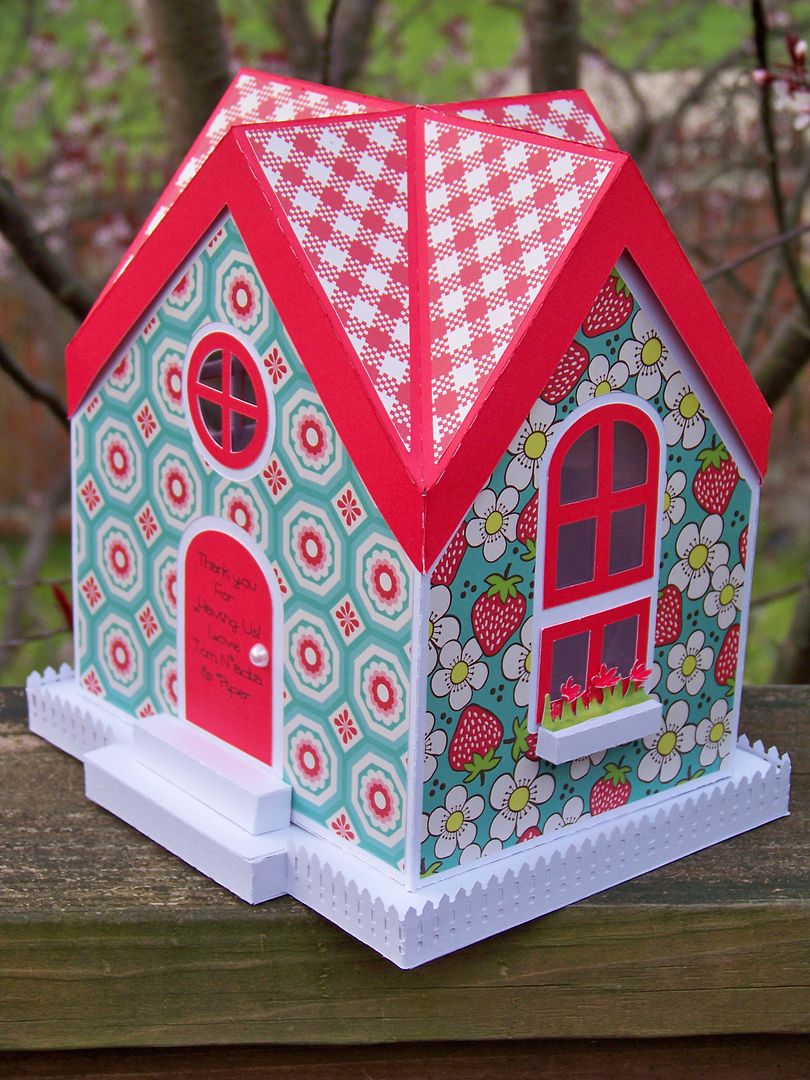
This is the perfect gift wrap for the embroidered tea towel hostess gift that will go inside. If you plan to make this box, please keep in mind that the paper base foundation will best support a light-weight gift inside. A battery-powered tea light can be placed inside if you want to use it for a tablescape or decor item!
If you are looking for more tutorials for the Cricut Explore, check a previous post here, where I included details on how to cut fabric, how to use the Windows Snipping Tool to make .pngs, how to use .pngs in Design Space, how to add notes to your Design Space files right on the mat, how to write on cut images using the Explore, and which pens fit in the Explore. I also have pages you can click on at the top of the blog for the Explore.
Quick Links:
SVGcuts Website
Seaside Collection
Seaside Assembly Video
Melody Lane's Video: SVGcuts in Design Space She shows you how to navigate the SVGcuts webpage, how to upload SVGs into Design Space, how to size the pieces, and how to attach scoring lines! Be sure to subscribe!
Thank you for looking at my blog today! Thank you to Melody for inviting me to collaborate on this project! If you found your way here from Melody's video, please let me know and thank you for swinging by!
You can see many of my previous projects by checking My Projects Gallery.
Happy Crafting!
13 comments:
Nadia, I am so happy you purchased the Explore so we can see all your beautiful creations again!!! :)
What an amazing job. I love it!
I am so happy to be a subscriber to your blog and see all your fabulous creations! I got the Seaside kit and did the lighthouse for a birthday gift for my daughter. I am now going to do the house. BTW what kind of paper did you use? I used Colorbok 12 x 12 white paper from WalMart and while the bottom (white) parts of the lighthouse are lighter weight, it works but was wondering if maybe using a heavier weight paper would be better. Off to see what Melody has on her blog!
BTW, love the extra touches of the flower boxes, trimming the inside layers of the house and the trim around the base of the house. Your personal additions always make such a difference!
Your house is fabulous, those window boxes are my favorite part! You are made for SVG CUTS! Love it!
I'm speechless!! Another amazing creation!
Your house is fabulous. I wanted to thank you for the tip on printing the SVG Cuts file menus. I never even noticed what that was before. I get so excited when I can find a file I save and actually cut it in Silhouette I don't look at anything else. Just finished printing all my SVG Cuts files. Thanks a bunch. Have a wonderful Easter.
Another amazing creation! I'm so glad you're back to crafting with Cricut again. I always look forward to your creations.
You did GREAT! We must do this again!
Another stunner! Love the colors, the patterns, the house, and all that Nadia-style and detail!
Wowza!
Wow Nadia I just love your seaside collection. Amazing work I'm so glad to see your creating with the Explore even though as of now I'm not able to get it. I'll definitely know who to go to for help when I do get one.
TFS!
Thank you for posting your beautiful work and sharing with us. The house is gorgeous and your instructions really help someone new to the Explore machine.
I came from Melody's video (a little late in the game) but am finding your little cottage so bright and cheerful. I have yet to jump in and use SVG cuts - I haven't used any others either. I feel I can now use Melody's advice to use one of the free files to practice. I am sure one of these houses is in my future!
Thank you - Julie
Post a Comment