Sunday, February 27, 2011

Once upon a time, a monster turned into a princess...

For the Weekly Challenge #22:  Once Upon A Time Challenge, I decided to make a vignette and have a little fun by changing up the character a bit!  I love, love, love the face on the Mrs. Frankenstein character on Happy Hauntings.  The layers and detail make her beautiful in green so I had promised myself months ago that I would try her in less zombiesque colorings.  I also wanted to make something my daughter would enjoy in her room. 
I started with a castle for my little project.  I cut it from Once Upon a Princess at 5".  I used a dobber to add a bit of color and highlight the embossing I did.  I added a bit of ink and Glossy Accents to highlight the windows.
I cut clouds from Serenade at 1-1/2", a rainbow from Groovy Times at 4", and a unicorn from Once Upon A Princess at 1-1/2".  Then I went back to that castle and decided I wanted furrowing flags on the turrets.
I cut flag poles and long triangles that I folded.

Then, I went to work on the princess.  I cut the head from Happy Hauntings (page 31) at 4".  I cut away her body.
I used Rock Princess (page 29) for her body, cut at 4-3/4".  I hand cut her dress by cutting away the head, microphone cord, and mic to use as a pattern.  I cut away her arms to use with the new dress. 
I LOVE embellishing!  I cut her hair with Paper Doll Dress Up (page 31) at 2-3/4".  Her glasses are from Life's A Party (page 53) at 3/4".  I made the glasses to actually fit her, so... then the decision of whether to have her wear or just hold the glasses...

I
I decided to have her wear the glasses!  I placed my work-in-progress in a frame and continued to work.
I cut the text from Storybook at 2-1/2" with a shadow.  I cut the vine border and corners from Storybook (page 38) at 1-1/2".  The flowers on the border are from George, cut at 1/2".  The gnome was cut from Freshly Picked (page 37) at 1-1/2".  

And I was pleased with this until my daughter saw my pictures with the glasses off of her face and told me it looked better the other way... so a few quick changes later...
I knew she was right and wanted her to love this since it was going in her room.  I hope you agree with her, but please don't tell me if you don't!!!

Sunday, February 20, 2011

Tangled Birthday Party!!

My sweet little Piper is 7-years-old this month and her "kid party" is at a local gymnastics studio where we have picked a Disney Tangled theme!  This place provides great games and supervised trainer-driven activities out on the floor, but requires the parent to do all the decorating and take care of all the food in the party room.  They don't even provide invitations, so this party is just screaming for some creativity!! 

I used some super-cheap supplies I purchased at Walmart (curling ribbon, paper bags, textured cardstock packs, treats for favor bags).  I found all of the movie images I needed via Google Images.  Along the way, I found the original Disney artwork for the movie and fell in love with Claire Keane.  Her artwork -- which was the artwork that Rapunzel painted on her walls in her tower --  was the influence for the colors for the cardstock and for the fabrics I used.  I have a link to her site at the end of this post-- check her out!

First project:  Favor Bags!

I used an image of Pascal I found on Google Images and added text using Microsoft Word for text wrapping and positioning. 
Once I created the message, I copied it several times on a single page and printed the page as a guide.  I cut white cardstock circles using Mini Monograms, page 126, at 3-1/2".  I lightly taped (barely) the top edge of a circle over each of the Pascal messages on my page and placed it back in the printer and printed the art onto the circles.  I repeated this until all the circles were printed.

Next, I cut scalloped circles for the base of the tags using Mini Monograms again at 4-1/2" (page 129).  The black flower that is layered in between the scallop and printed circle was cut from the same cart, page 128, at 3-1/4".

The printed circle and flower were attached to each other via ATG tape.  They were attached to the scalloped base with a 7/16" Ranger pop dot.  The base was attached to the bag with ATG tape.  The bags were filled with bubbles, watercolor paints, glittery bouncy balls, stampers, rings, and lots of candy, then the tops were folded over and holes for the ribbon were cut with a hole punch.  Colorful curling ribbon was fed through, tied, and curled.


Next:  the banner!
I used the scalloped pennants from Country Life (page 46), cut at 8-3/4".  I found more movie images and printed them on white cardstock.  I cut them using Mini Monograms (page 126) at 5" using the Centerpoint feature.
I knew I wanted to use paper rosettes with these to get a little dimension to give a hand-made look.  I found a great tutorial that made it super easy.  Check it out by clicking here.  I used a trimmer that I have outfitted with a scoring blade to assist with the folds for the rosettes.  For each, I cut two strips of paper 12" x 2.5".  I scored them at every 1/2", adhered the two to make one long strip and then adhered to form a circle.  I trimmed the tips at an angle to give them a bit of shape.
Instead of the button and thread used on the tutorial, I used a small square of card stock and Elmer's gummy dots on the top and bottom to hold in place.

Stickles was added to the top edge of each fold to add a little sparkle.  The printed circles were adhered on top.
The pennants with letters were made with circles cut from Mini Monograms (page 126) at 5-1/2" and 3" letters cut from Elegant Cakes with the shadow feature.  The letters were run through the Xyron and glittered with Martha Stewart glitter.
The pennants were joined with more of the curling ribbon that was used on the favor bags for continuity.  I added 3/4" dots that cut with a punch from scraps of each of the colors. 


Next:  the centerpiece!  I used more movie images that I printed onto cardstock.  Using white floral tape, I covered wooden skewers and then taped them to the back to use as picks.
I placed floral foam into a metal container, tucked in all my pictures using the skewer pick, then covered the base with Easter basket grass I found in my gift wrap stash.  I made 3D flowers on the Cricut using Pagoda, cut at 1-1/2" and my 3/4" circle punch.  

I placed these in the purple grass with a bit of glue.
I found a great picture of Flynn climbing up the tower and used ATG tape to adhere it to the container.  Narrow ribbon was tied around the container and secured the beaded purple butterfly accent.

Next:  Table Squares and Table Decor!
I found great fabrics for table squares that coordinated with the movie pictures and cardstock I used.  I have found that 22-1/2" or so squares of fabric work better for party tables and buffets.  They are cheap (5/8 yard will make 2; 1-1/4 yard will make 4), easy to hem quickly with the narrow rolled hem feature on the serger, and a snap to iron and launder. 

When serging, remember to change the throat plate for rolled hem, remove the left needle, and tighten the looper tension dials by three.
A dap of Fray Check on the corners needs time to dry before trimming the tails and pressing the cloths.

I used the inspiration picture, printing two on a page of cardstock and flipping one image, for table decorations where the kids will be sitting.  I cut out and popped up a commercially printed Rapunzel.  3D cricut roses added a fun dimension to the tent cards.  For info on how to make the roses using your George cart, check out Kathy Orta's great video tutorial!  I cut my inital shapes from George using the blackout shadow feature per Kathy's video, at 1-1/2".  I added a flower from Pagoda, cut at 1-1/2", and some layered flowers from George, cut at 1" and 1-1/2". 
I created a "Happy Birthday Piper" word art banner in Microsoft Word, hand-cut it, and applied it with pop dots.  Both sides of the tent cards are identical.

So, we have a family dinner on her actual birthday, and I've set everything up that we will using at the kid party to brighten up my dark dining room and to let Piper enjoy the decorations that we have planned for her kid party.  All that's left is the food and cupcakes for two parties... and cupcakes to take to school... and treats to take to ballet... gotta love bein' a kid!


In addition to the favor bags for the kids, I have a take-away craft project that I printed on cardstock.  This is a 3D Pascal to color and create.  Click here to link to Disney Family's pdf!  I love that website for Disney projects for kids!

Also - be sure to check out Claire Keane's site.  Her artwork is stunning.  If you loved Rapunzel's walls, then you will love her work!  Check out the video she has embedded on her site that she did with her husband Vincent, another artist from the movie.  Oh, and if you are excited by the colors she uses, you might be interested to know that their child is named Matisse.

Enjoy and thank you for looking at my blog and projects!  I am most happy with this because these projects have been a labor of love for my little Piper!

Sunday, February 13, 2011

Valentine Gifts, School Project, Baking, and Challenges!

The past few months have been so busy working with my husband that I have had to put my blog aside.  I am so happy to be able to share a few projects of late, including a project my daughter did for school using her Cricut!  I have also taken a bit of time to work on a couple of challenges on the Cricut Circle website and  Blog.  I love those challenges!  I have been on the new Weight Watchers program, but have been doing a bit of sinful baking -- but all for good reasons -- that I thought I would share here too!

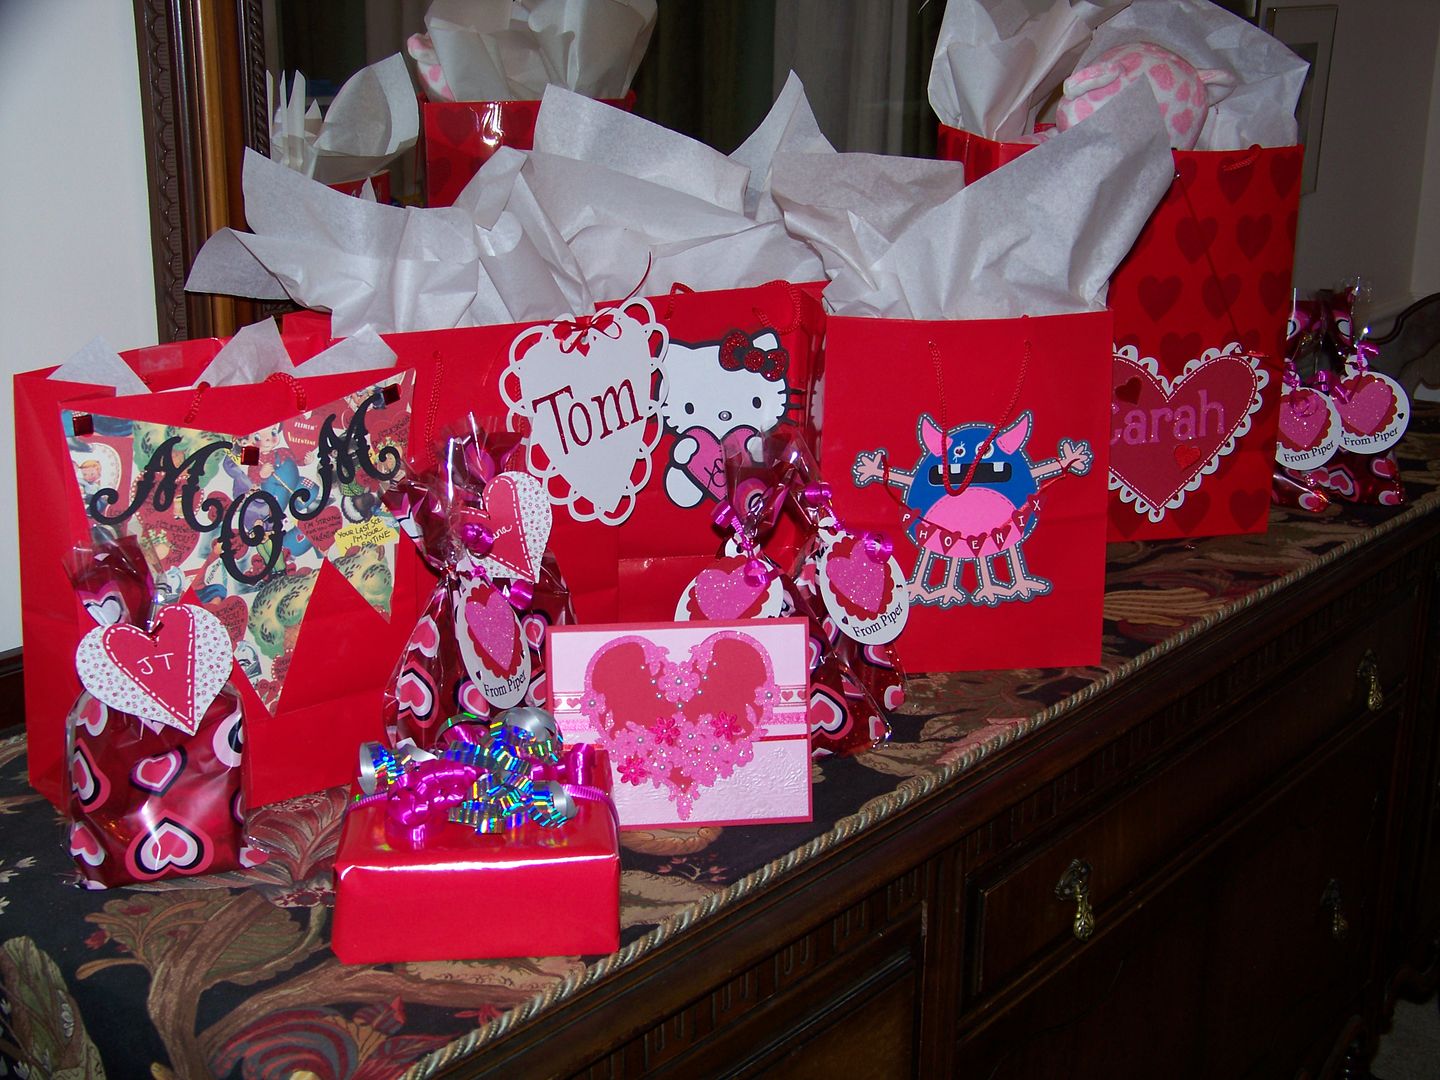
So, it is Valentine season!  That was big stuff growing up, as my mom's birthday is Valentine's Day!  To continue the tradition, I have special gifts for my little girl, my niece, my nephew, my siblings, my in-laws, and of course, for my Mom and husband!


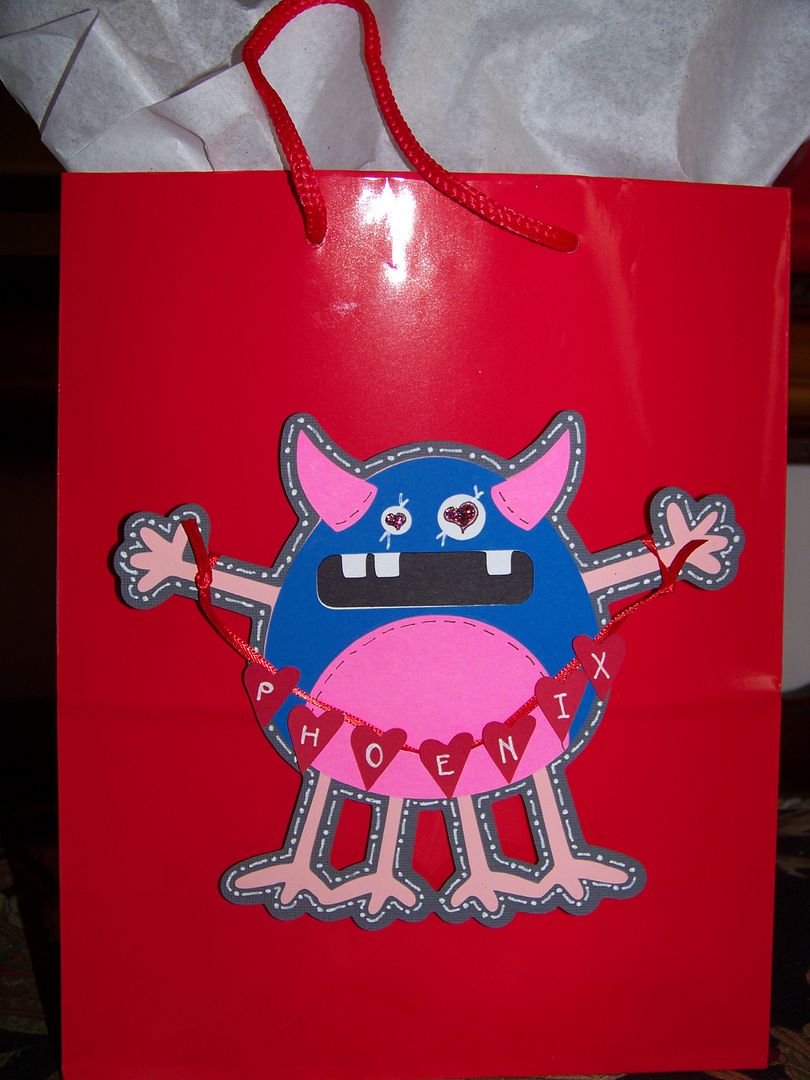
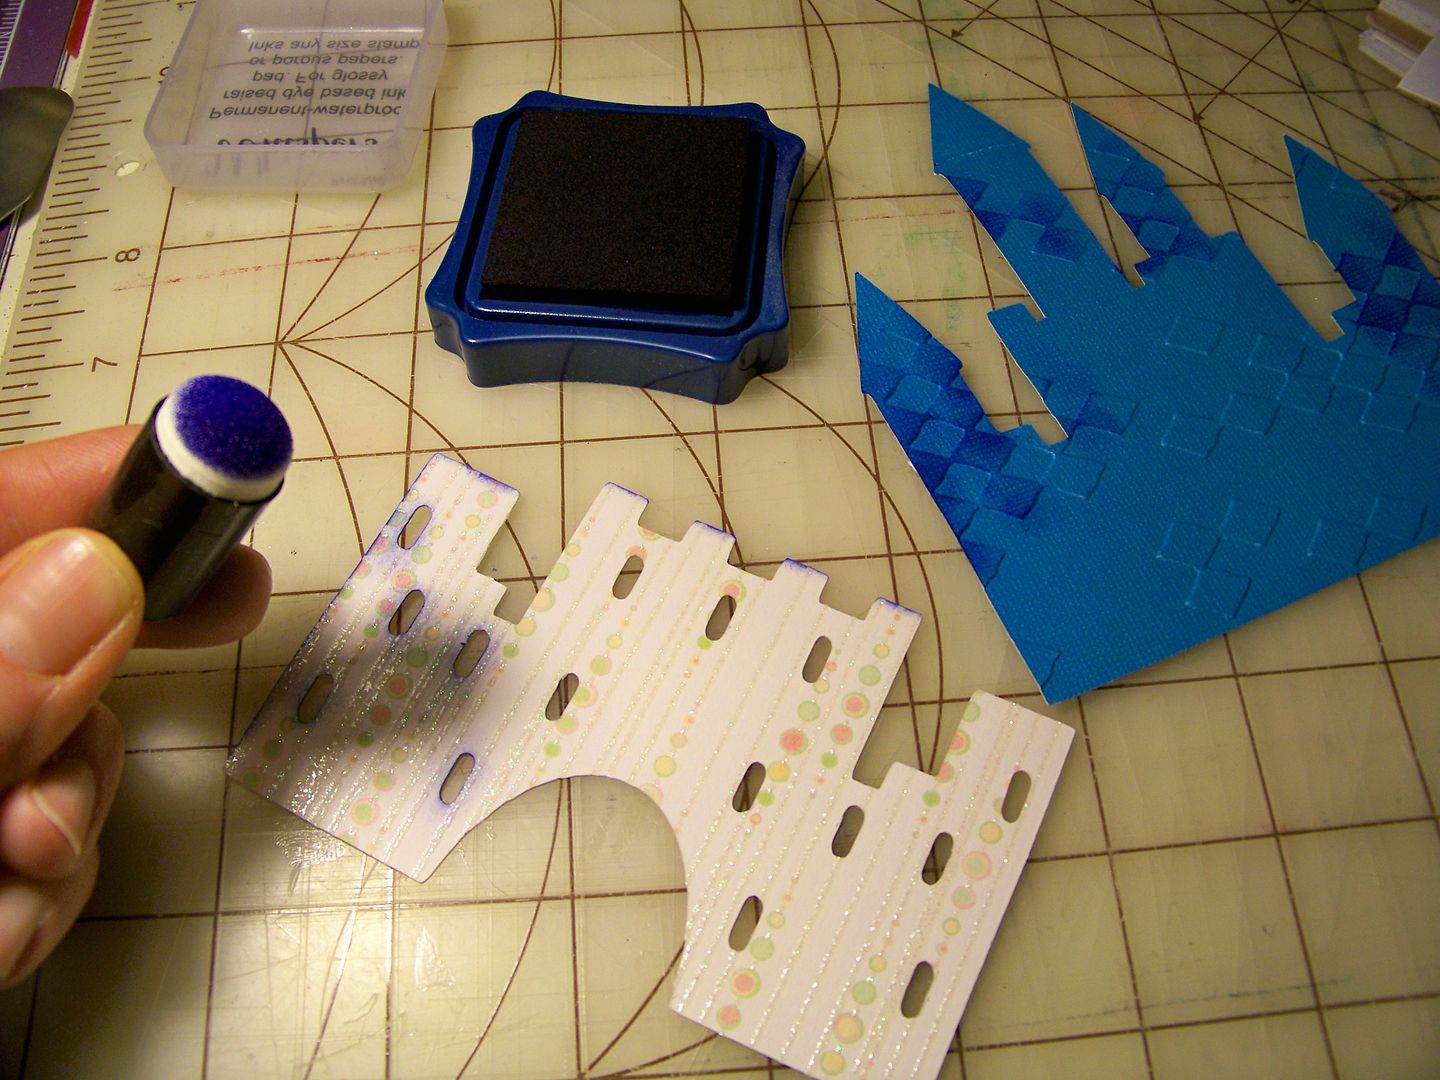
This little Love Monster is made from Mini Monsters (page 30), cut at 5".  The hearts for the banner are from George (page 119), cut at 3/4".   This is also my entry for the the February Monthly Challenge:  Banners! contest on the blog.

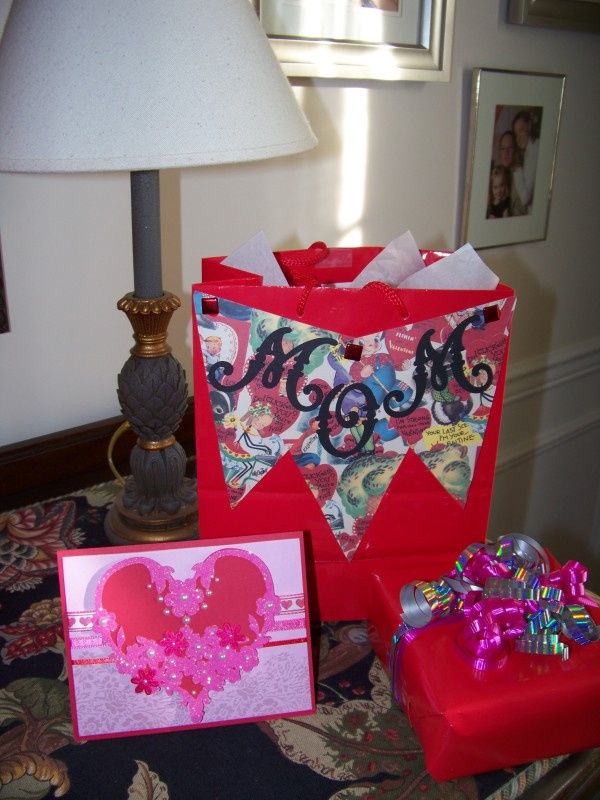
These are a few things for my mom.
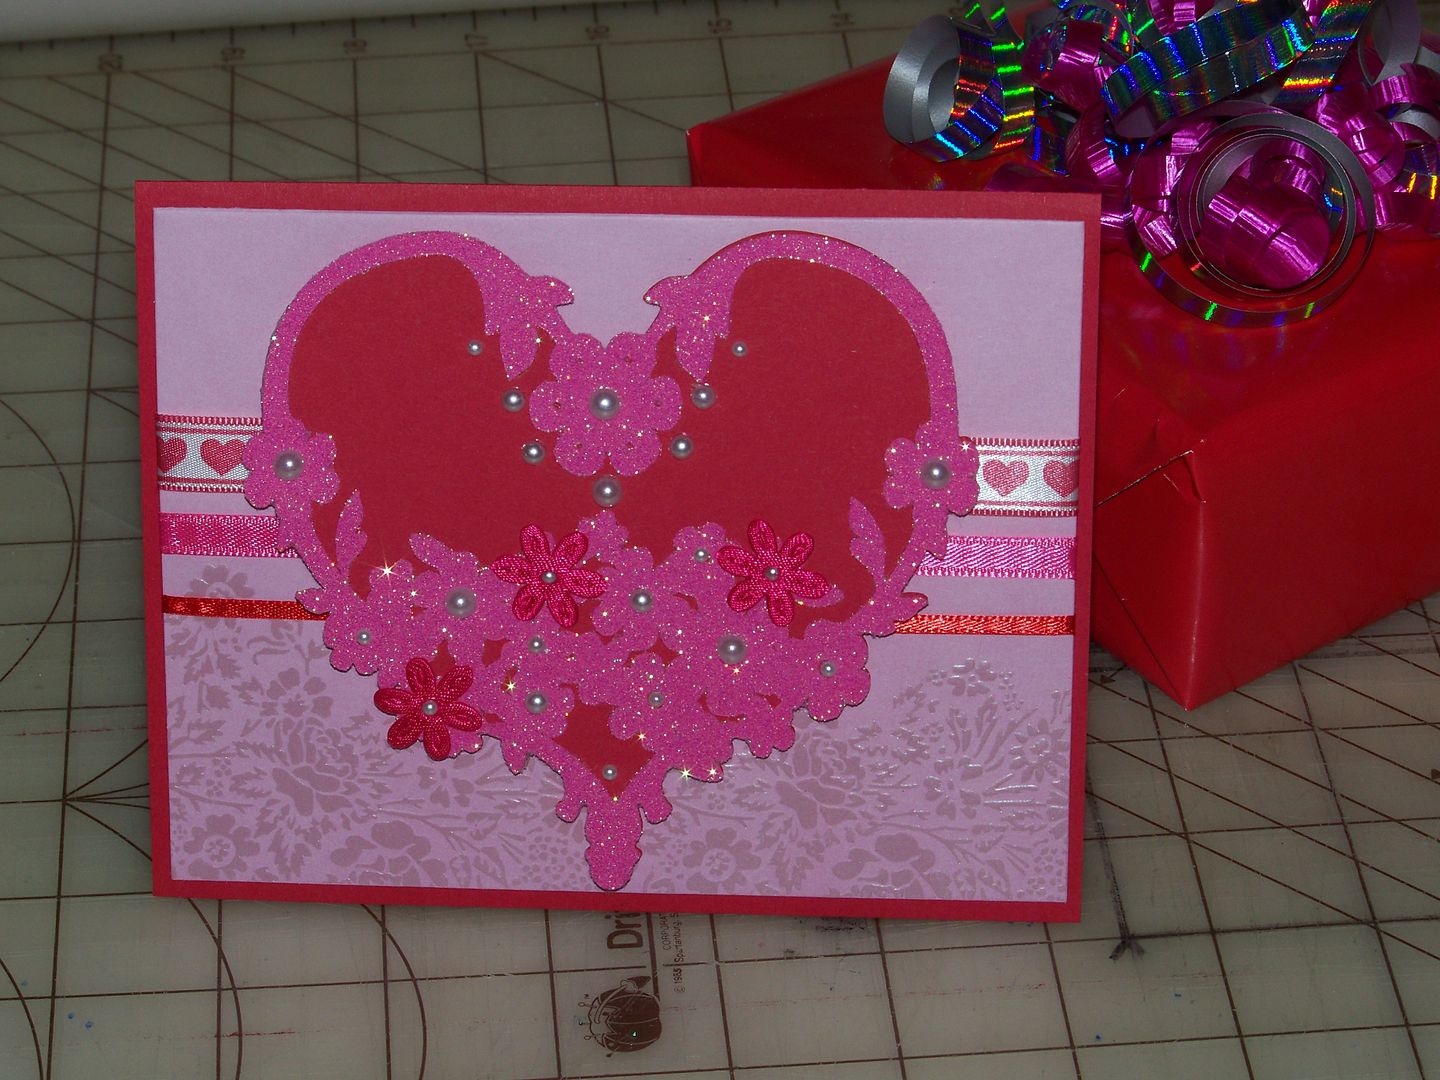
 The card was one I did for the Weekend Challenge on the Circle.  The heart was cut from Love Struck at 4".  I ran the top layer through my 5" Xyron to add hot pink glitter.  Adhesive pearls and silk flowers add to the embellishments.  The card finishes at 4-1/2" x 5-3/4". 
The gift bag is from triangles cut on the Mother's Day cart at 5-1/4".  The letters are from Elegant Cakes, cut at 2".

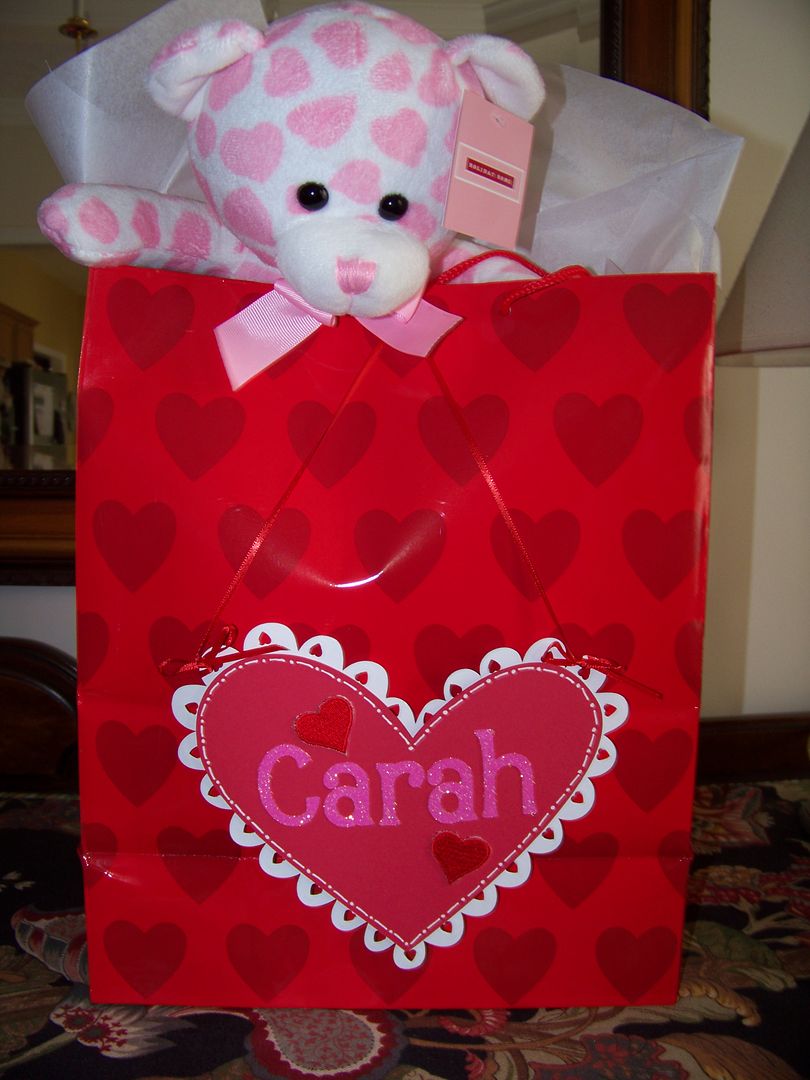
This gift tag for my niece is cut from DoodleCharms (page 85), cut at 6".  I popped the top heart layer with pop dots.  The letters are from Alphalicious, cut at 1-1/2".  More glittering with the Xyron on the letters!  (How can you resist glitter??)  I used a heart punch around the edges of the base heart and embroidered heart patches for embellishments.  The tag is hung with narrow ribbon over a brad in order for the tag to become a room sign for Carah's new room.

This is a Valentine card I did for my daughter.  It is cut from Hello Kitty Greetings (page 49), cut at 5".  The message on the heart is from George (page 124), cut at 1-1/4".  I used the card function and cut it at 5".  The heart was embossed on the Cuttlebug with the Swiss Dot folder.  The cuts for the bow were put through the Xyron and glittered.  Her nose is an adhesive pearl.  This is also my entry for the Weekly Challenge #20:  Love Notes Challenge!

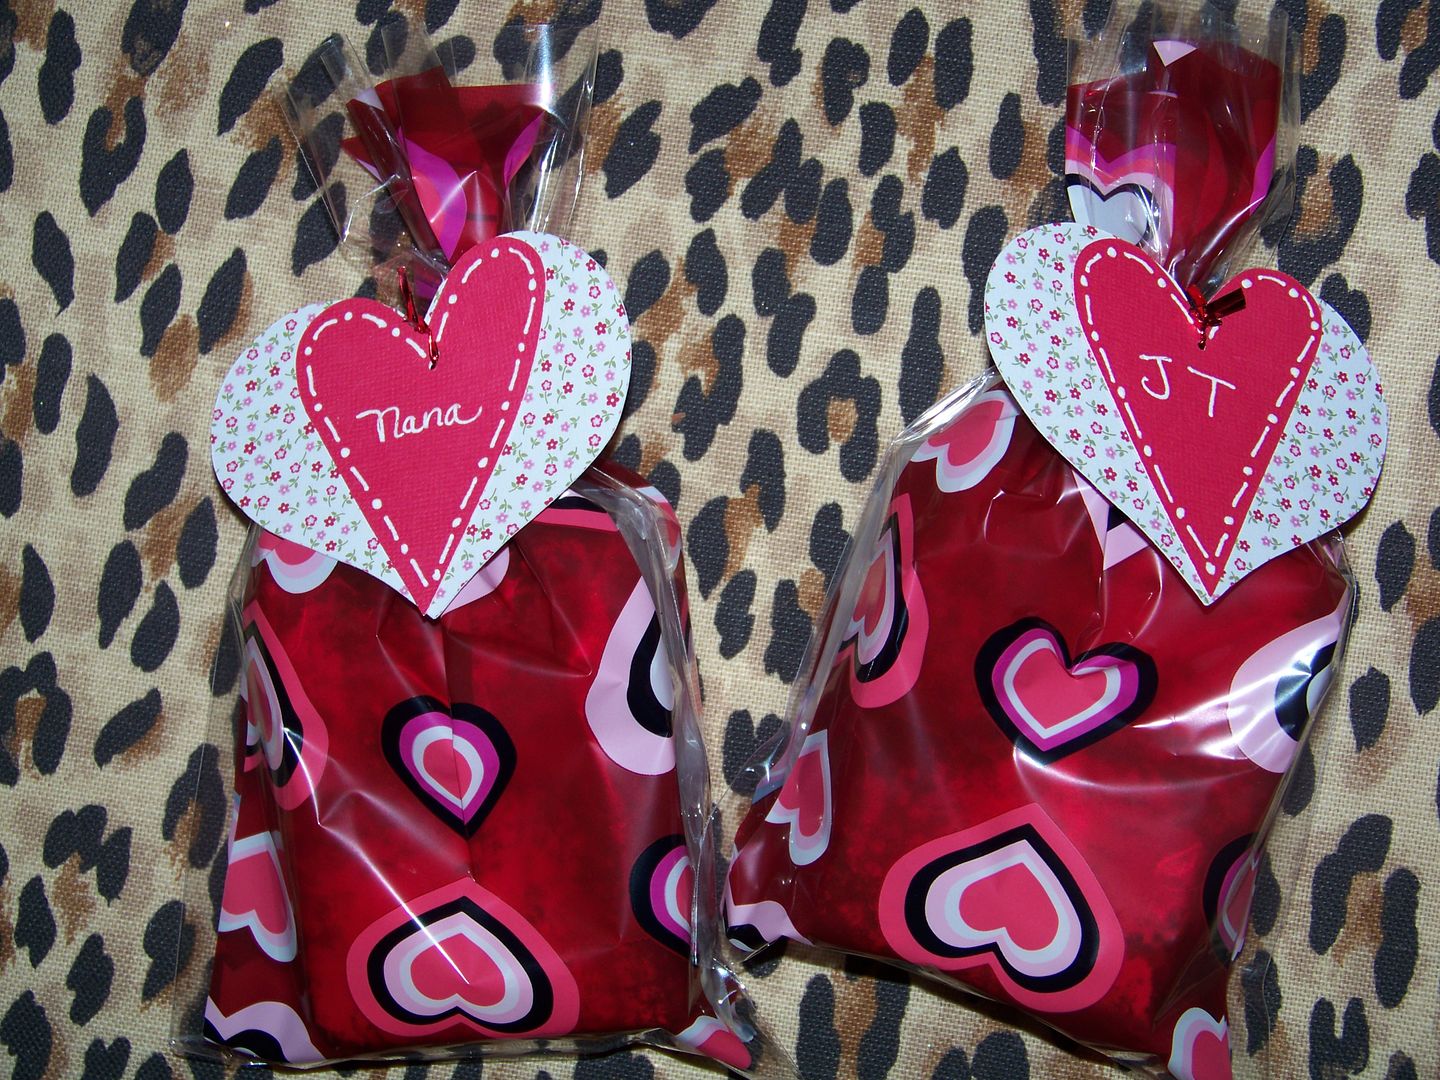
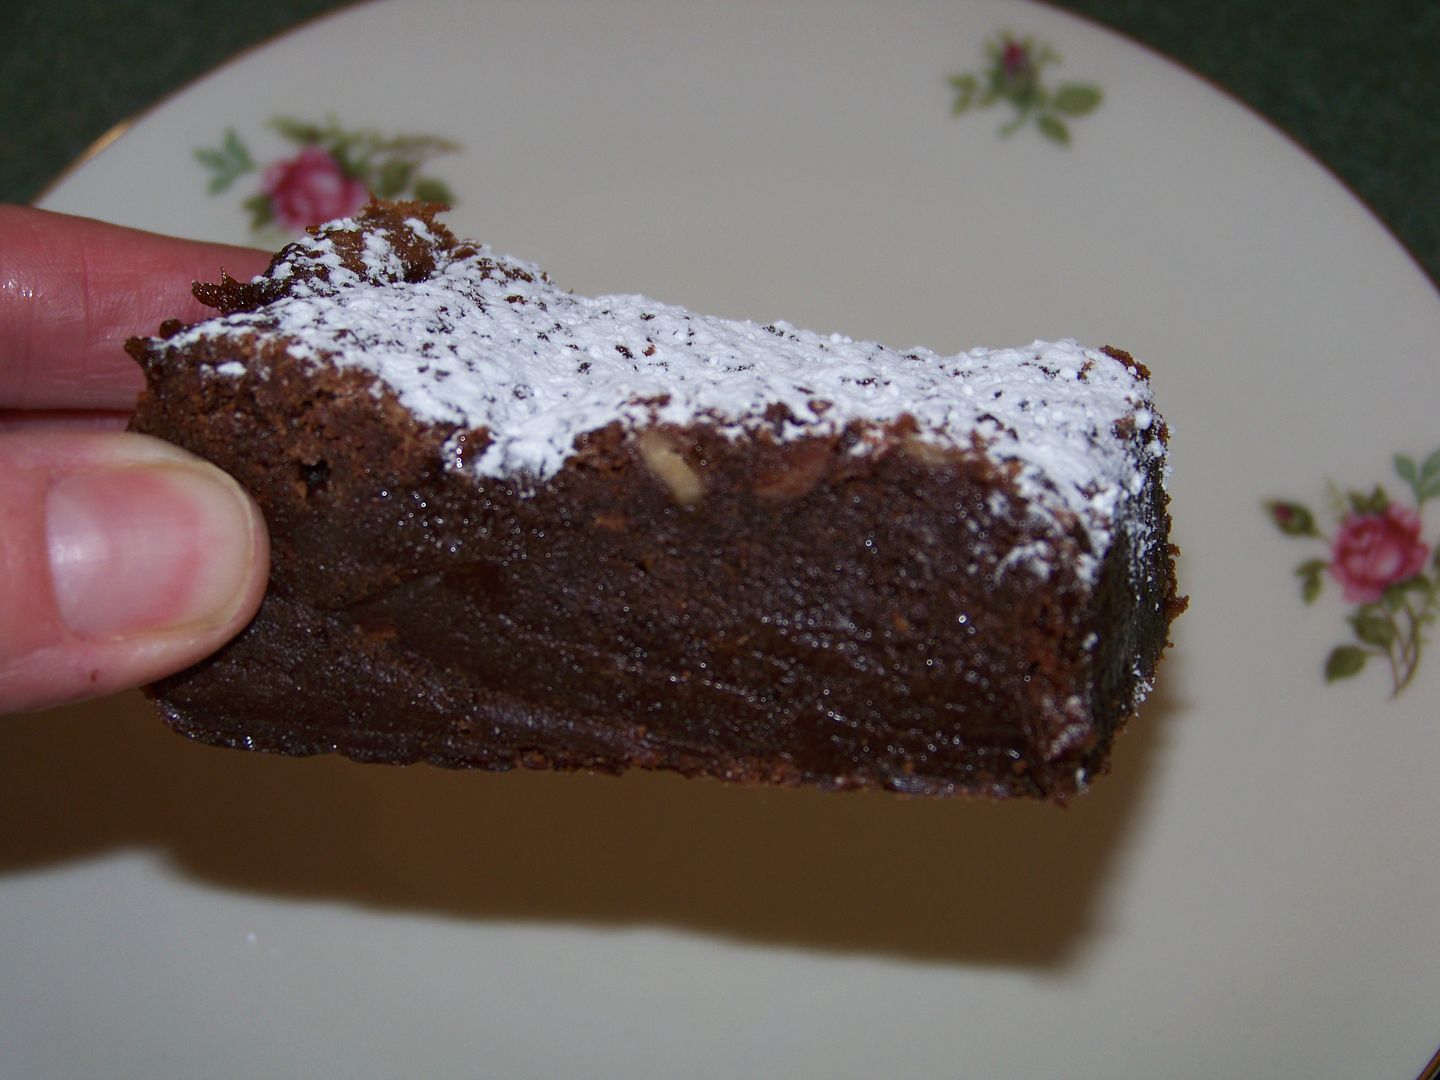
I baked fudgy brownies for the adults on my list.  I created tags with George, using the two hearts on the cart, cut at 2-3/4" in each style.  I thought it would be fun to share my brownie recipe here!  These are fudgy with chewy corners. 


BROWNIES
1 14-oz can sweetened condensed milk
6 oz semi sweet chocolate
6 oz bittersweet chocolate
2 tablespoons real butter
1 cup Butter Crisco
1-1/2 cups brown sugar
3/4 cup granulated white sugar
3 eggs
1 teaspoon vanilla
3 cups flour
1 teaspoon salt
8 oz bag Heath toffee bits
1/2 cup caramel ice cream topping

Preheat 350°.  Line 9x13 metal baking dish with foil.  Spray with Pam for Baking.
In a microwave-safe bowl, combine milk, chocolates, and 2 tablespoons real butter.

Microwave in 30 second intervals, stirring after each interval.  You want the chocolate melted and the mixture smooth.
In a separate bowl, beat sugars and Crisco until combined.  Add eggs, one at a time, and combine each well.  Add vanilla.
In yet another bowl, whisk flour and salt.  Gradually add to sugar mixture.  Beat to combine.  Add chocolate mixture.  Again, beat to combine.  Add toffee bits.  Mix to evenly incorporate.
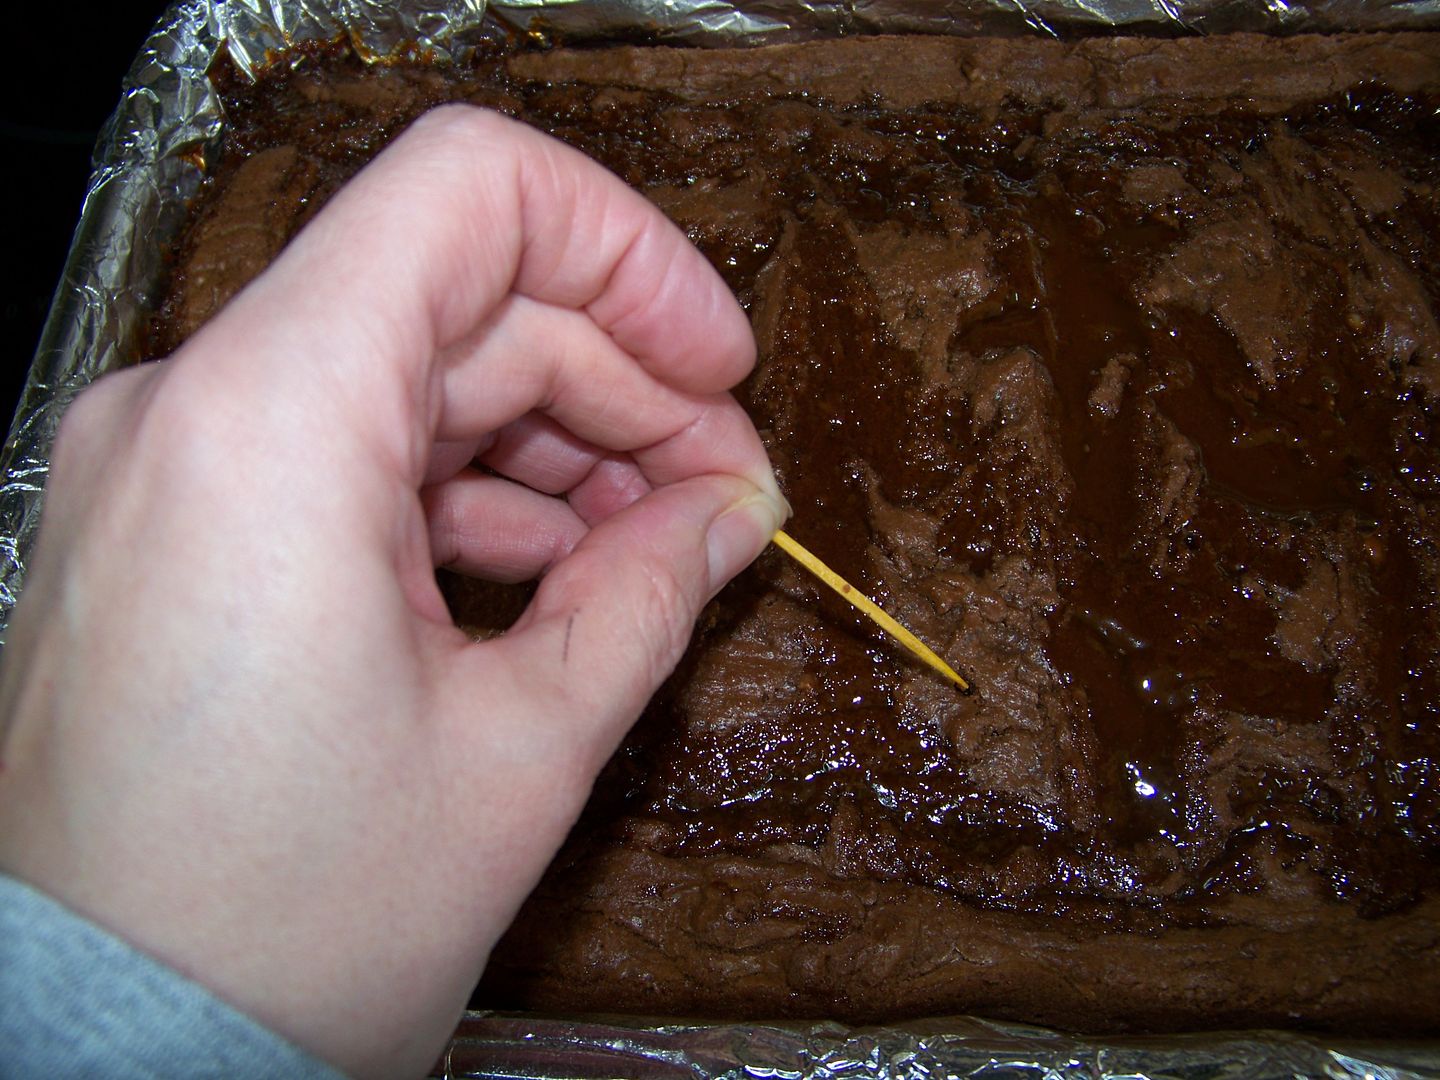
Spoon batter into prepared pan.  Pour caramel topping in stripes over the top.  Bake 1 hour.  Brownies will be giggly, but a toothpick inserted in an area without caramel will come out clean.

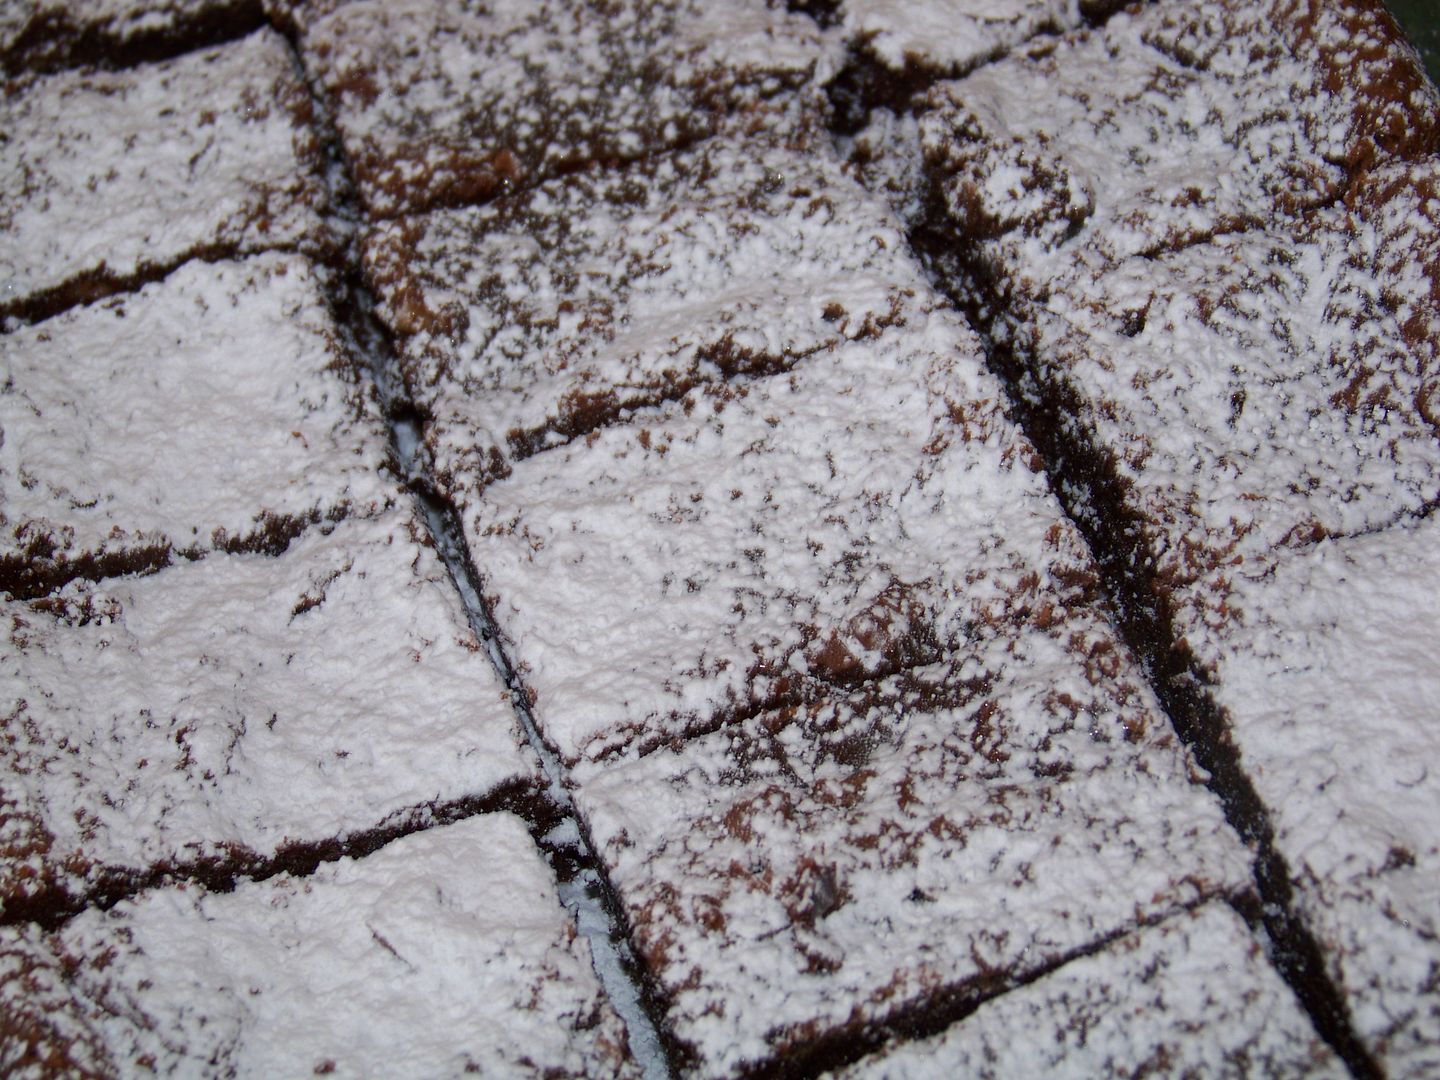
Cool completely before cutting.  Dust with powdered sugar.  Makes 12 generous brownies.  Wrap individually in wax paper.

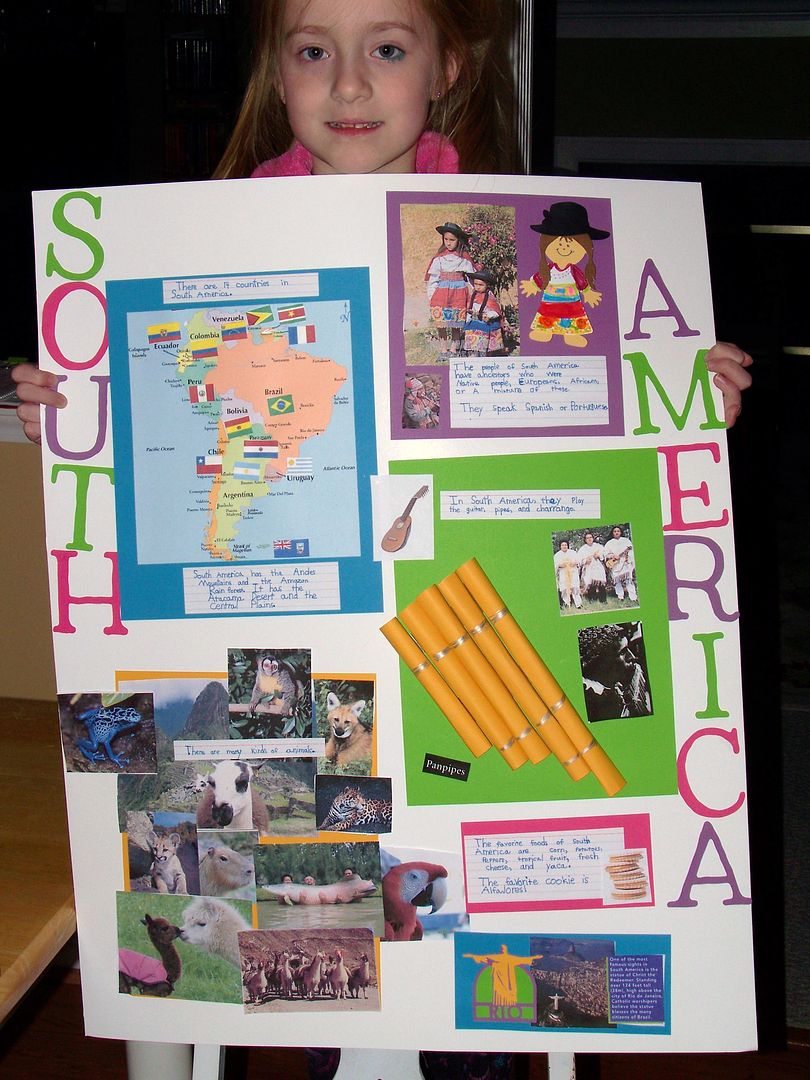
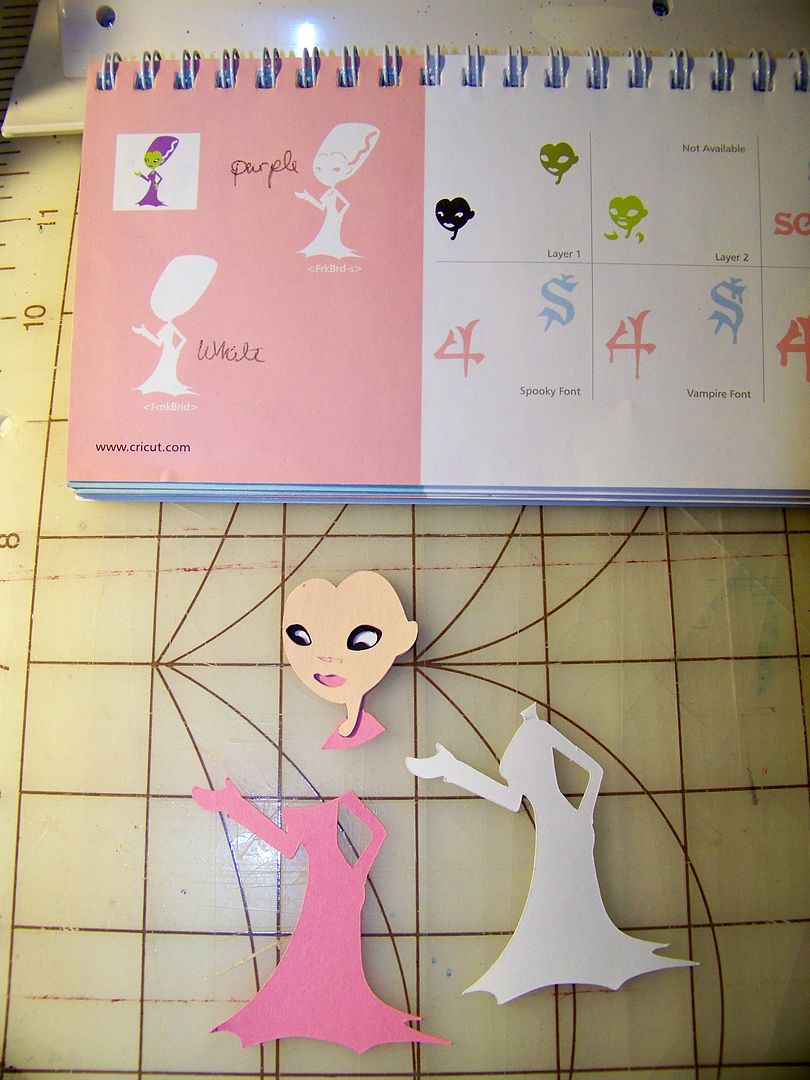
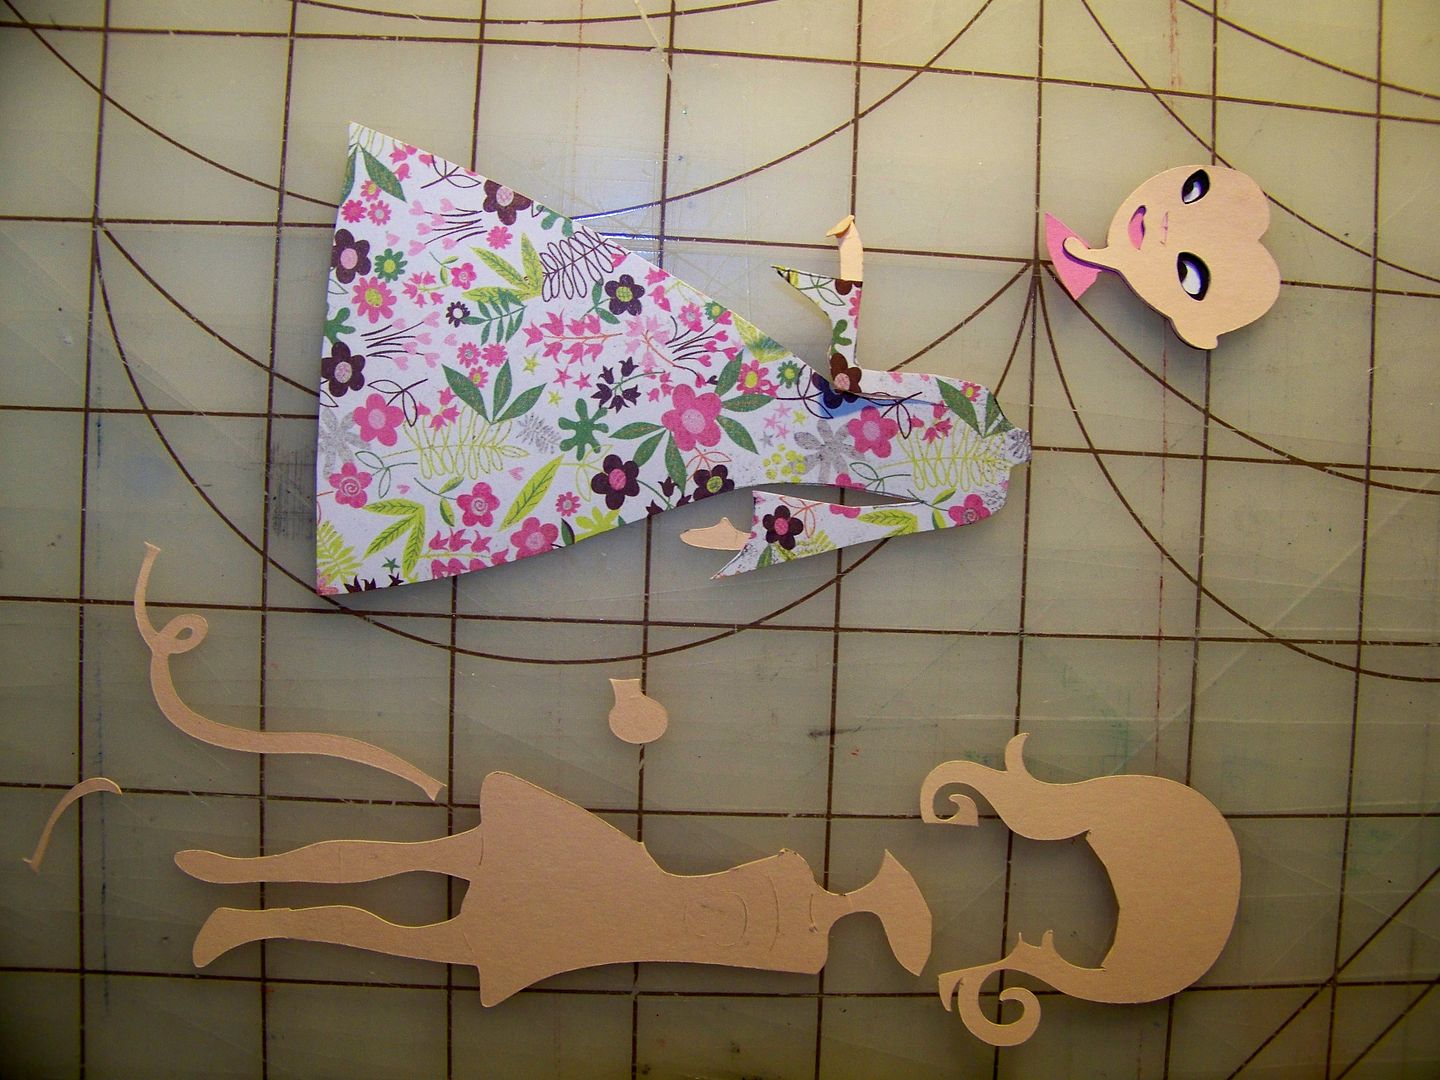
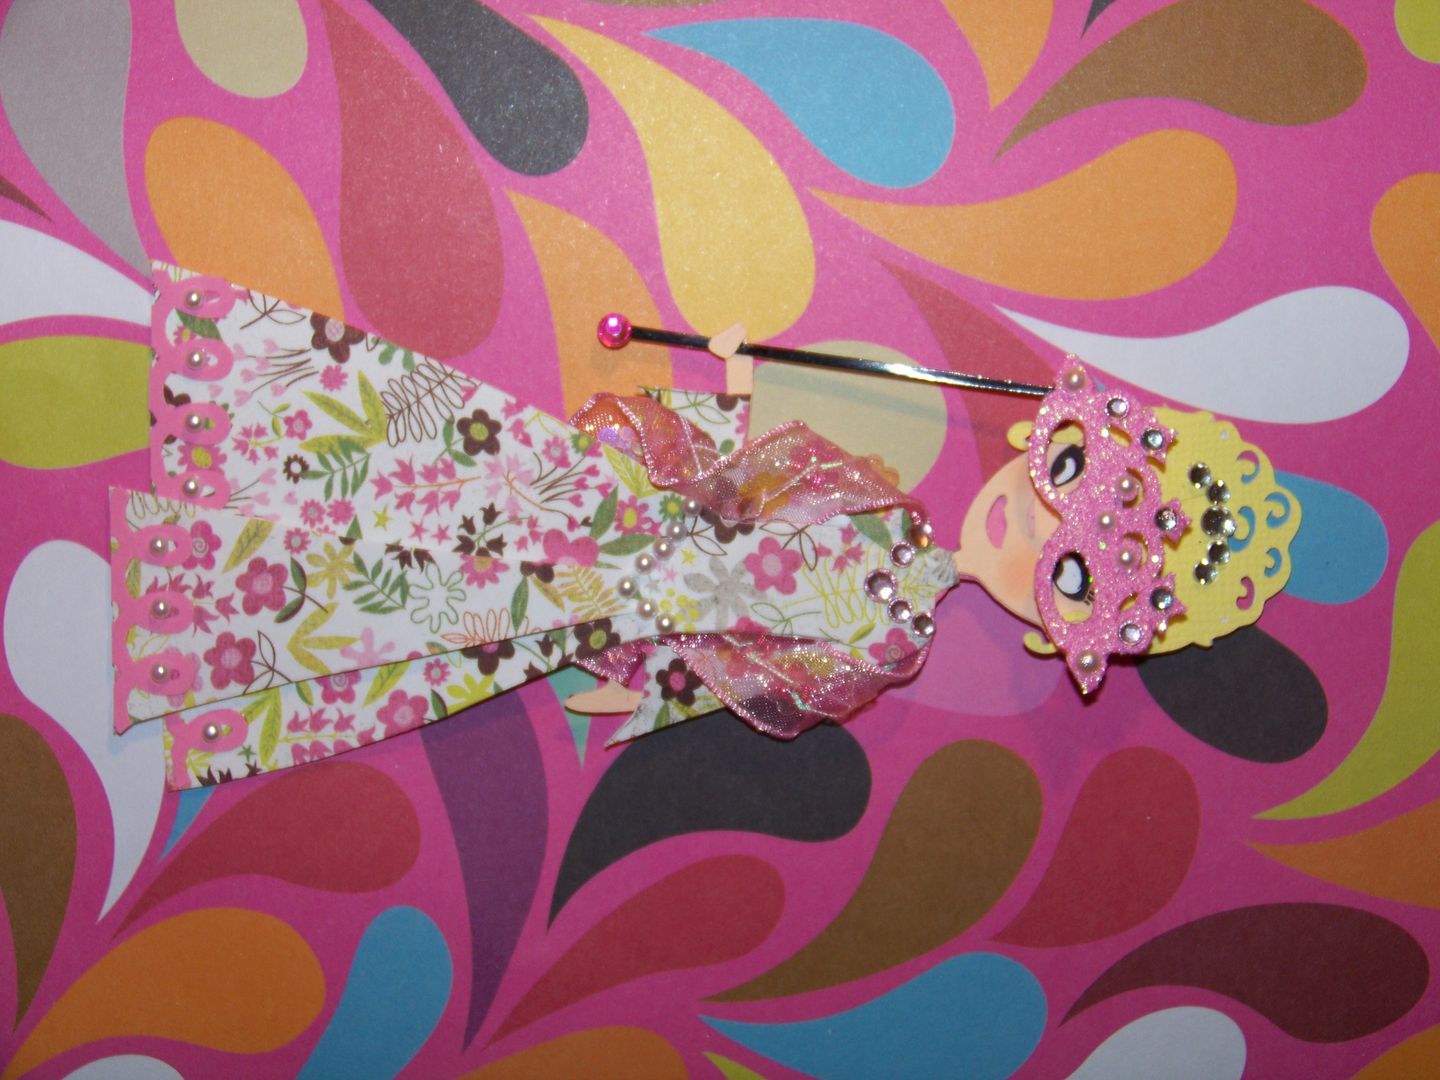
During the Christmas holiday from school, I gave my six-year-old daughter my old Cricut (Baby Bug) and a couple of duplicate carts I had, along with a few other supplies.  After I posted this, Scrapalette (Paulette Trent) sent my daughter a brand new Paper Doll Dress Up cartridge.  It goes without saying that Piper adores the cart and has even used it on this project -- her first school project!  She was assigned to share some facts about South America.

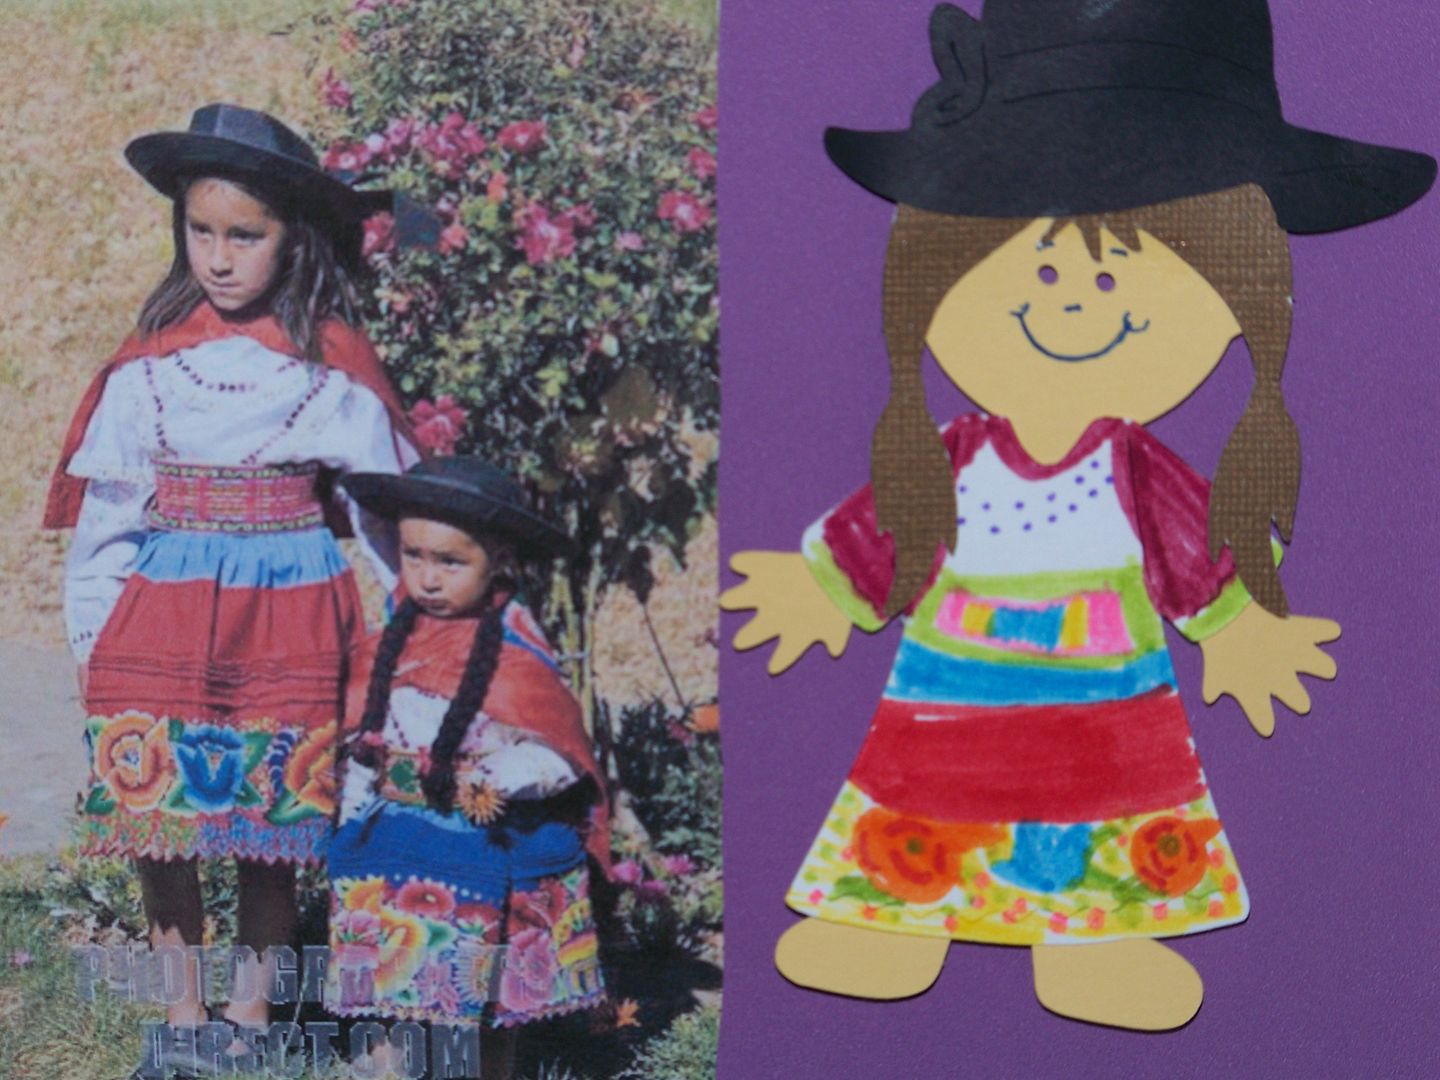
She used the Paper Doll cart to illustrate clothing.  She also used her Cricut to create the letters for her title.  I was so impressed that they were given this project in the First Grade!  Piper was able to learn to Google for images and how to use the on-line card catalog at our local library to find a couple of books in the juvenile department that she could read.

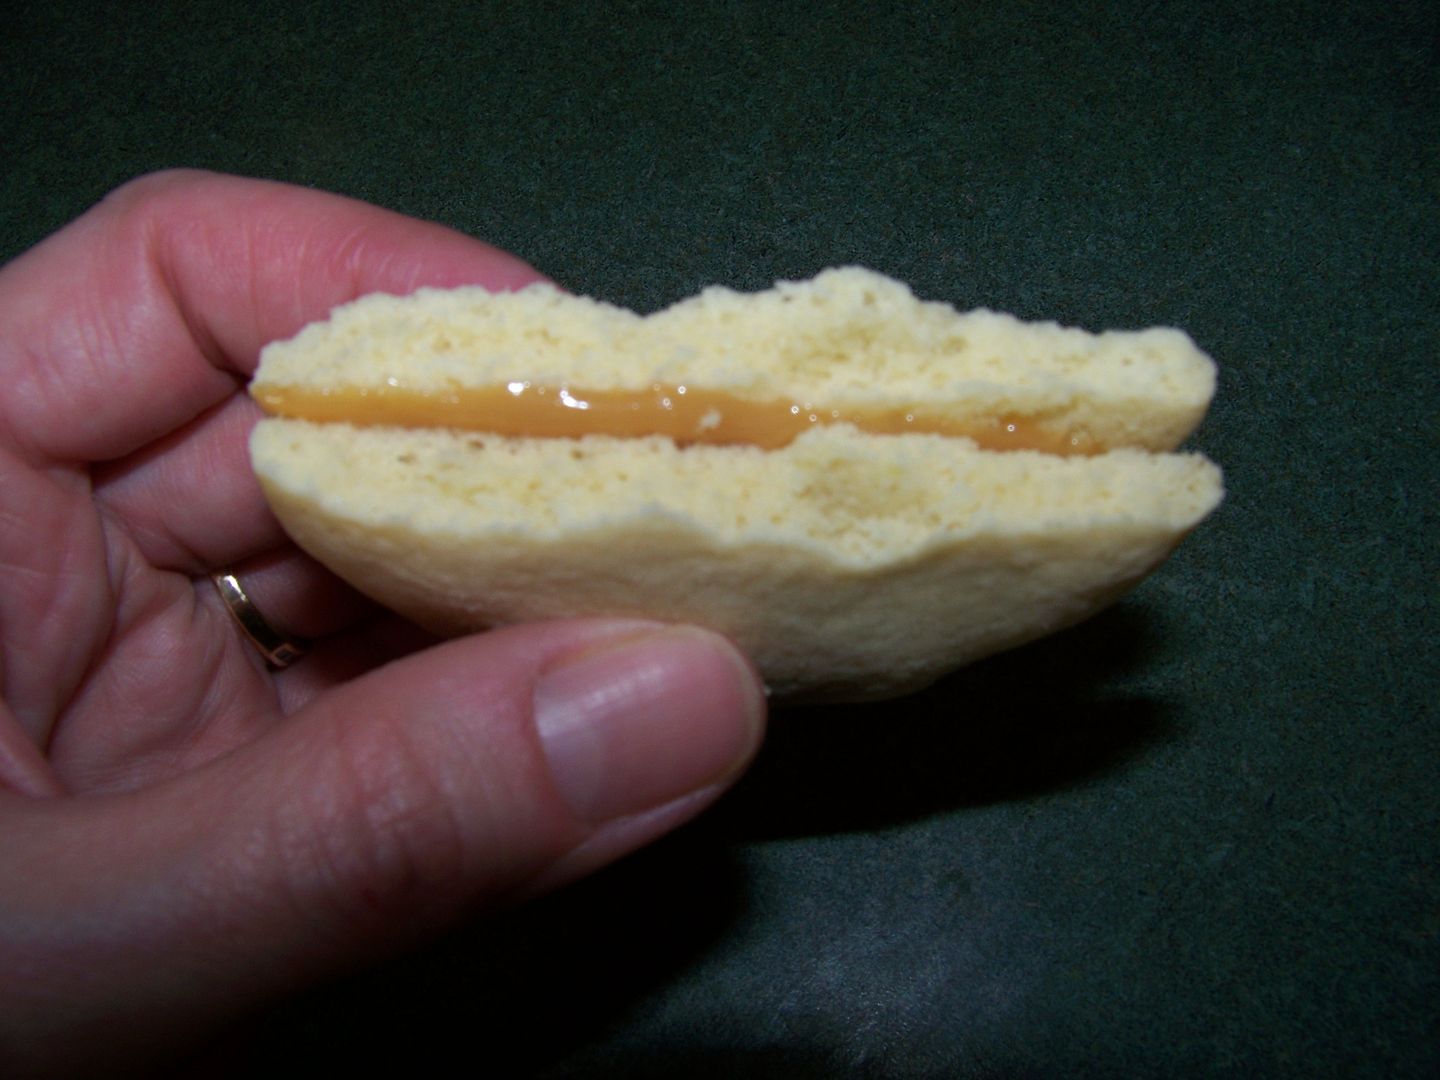
While on-line, we learned about a cookie popular in South America, called the Alfajor.  We both learned how to make dulce de leche in the oven.  I made alfajores for her to take the day of her presentation.  These were amazing.  How had I never heard of these?  The dough is tender, more so than a sugar cookie dough, but the finished cookie is somewhat like shortbread.  The dough is rolled out and cut with circle cutters to create a sandwich cookie.  The filling is dulce de leche.  I made a few adjustments after finding several recipes and sort of combined a few ideas.  Many recipes rolled the edges in coconut.  I chose not to do that since these were picky 1st graders!


ALFAJORES
1-1/4 cups flour
1/2 cup cornstarch
1/4 teaspoon baking powder
1/8 teaspoon salt
1/2 cup sugar
1/2 stick Butter Crisco plus 1 tablespoon water
1 large egg
1/2 teaspoon vanilla
Dulce de Leche (see recipe below)
powdered sugar (to dust over the top of finished cookies)

Make the Dulce de Leche (see recipe below).
Preheat oven to 350°.
Beat sugar and Butter Crisco until light and fluffy.
In a separate bowl, whisk flour, cornstarch, baking powder, and salt.
Add egg and vanilla to sugar and Crisco mixture.  Mix well.  Add dry ingredients a little at a time.
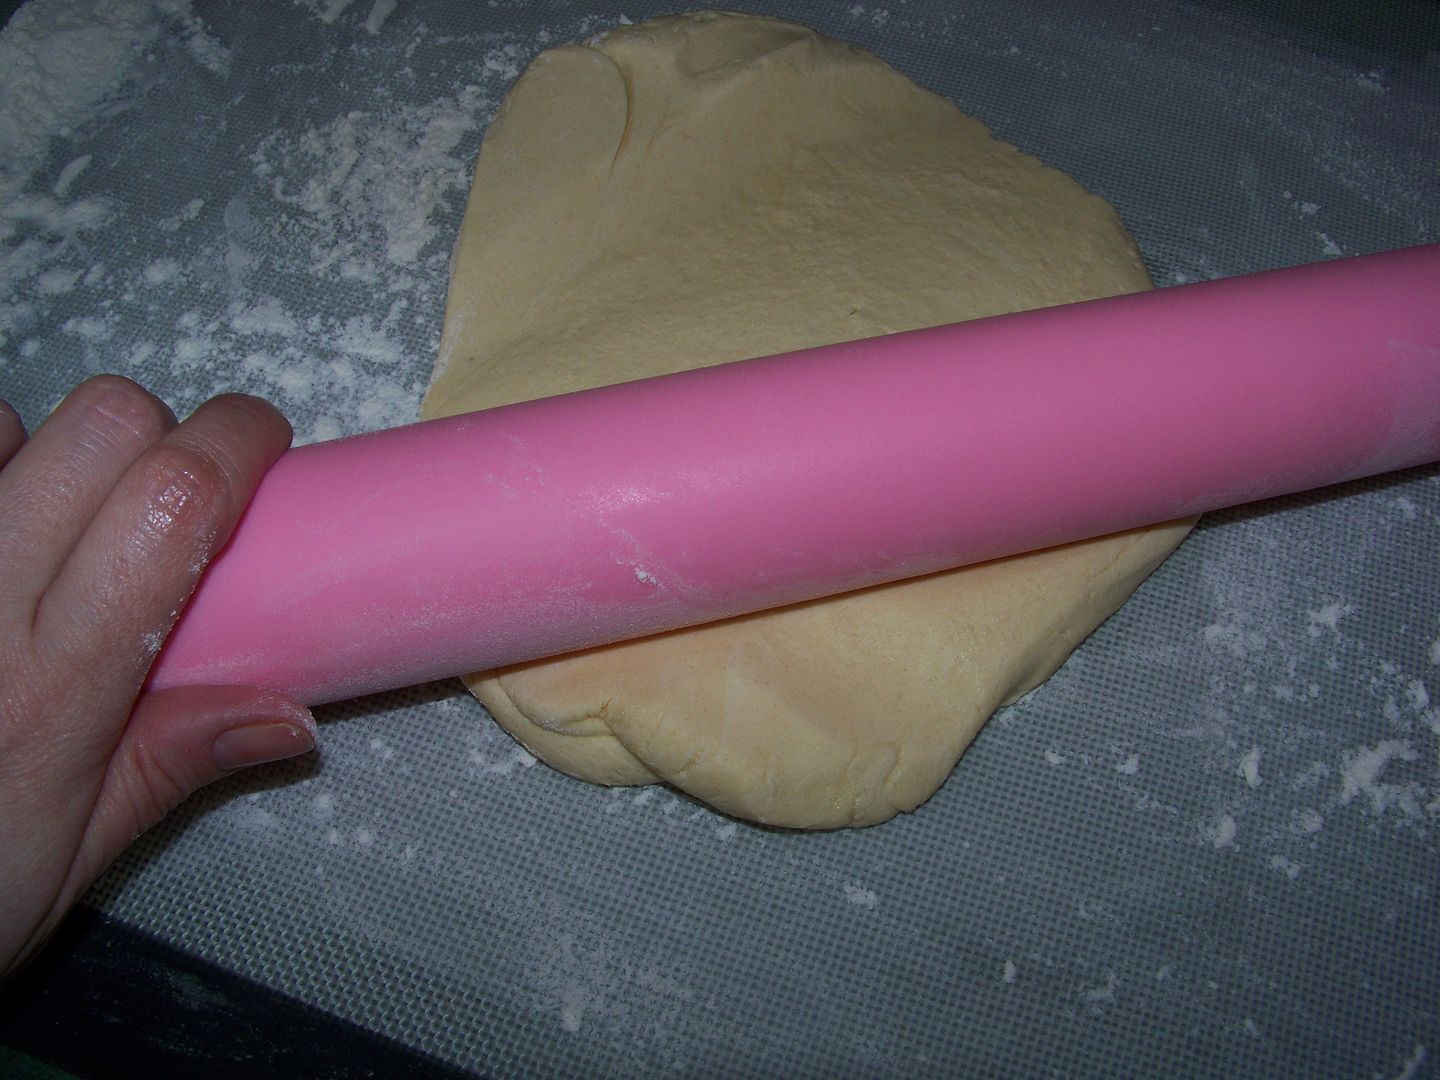
Flour a Silpat rolling sheet lightly.  I like to use a lightly floured Rolpat rolling pin.

Roll out dough to 1/8" thickness.  Use a cookie cutter to cut out dough.  Place on a parchment-lined baking sheet.  They do not expand much, so you can crowd the cookies on the sheet.
Bake 14 minutes.  They will be very light with a bit of browning beginning on the edges.  They will firm up as they cool.  Allow to cool a few minutes on the baking sheet before transferring to a rack to cool completely.
Using completely cooled cookies, sandwich them together with Dulce de Leche.  Dust with powdered sugar.  Store in the refrigerator in an airtight container.
I used my grandma's 2-3/4" diameter biscuit cutter.  This recipe made 26 rounds (or 13 completed cookies).


DULCE DE LECHE
1 14-oz can sweetened condensed milk
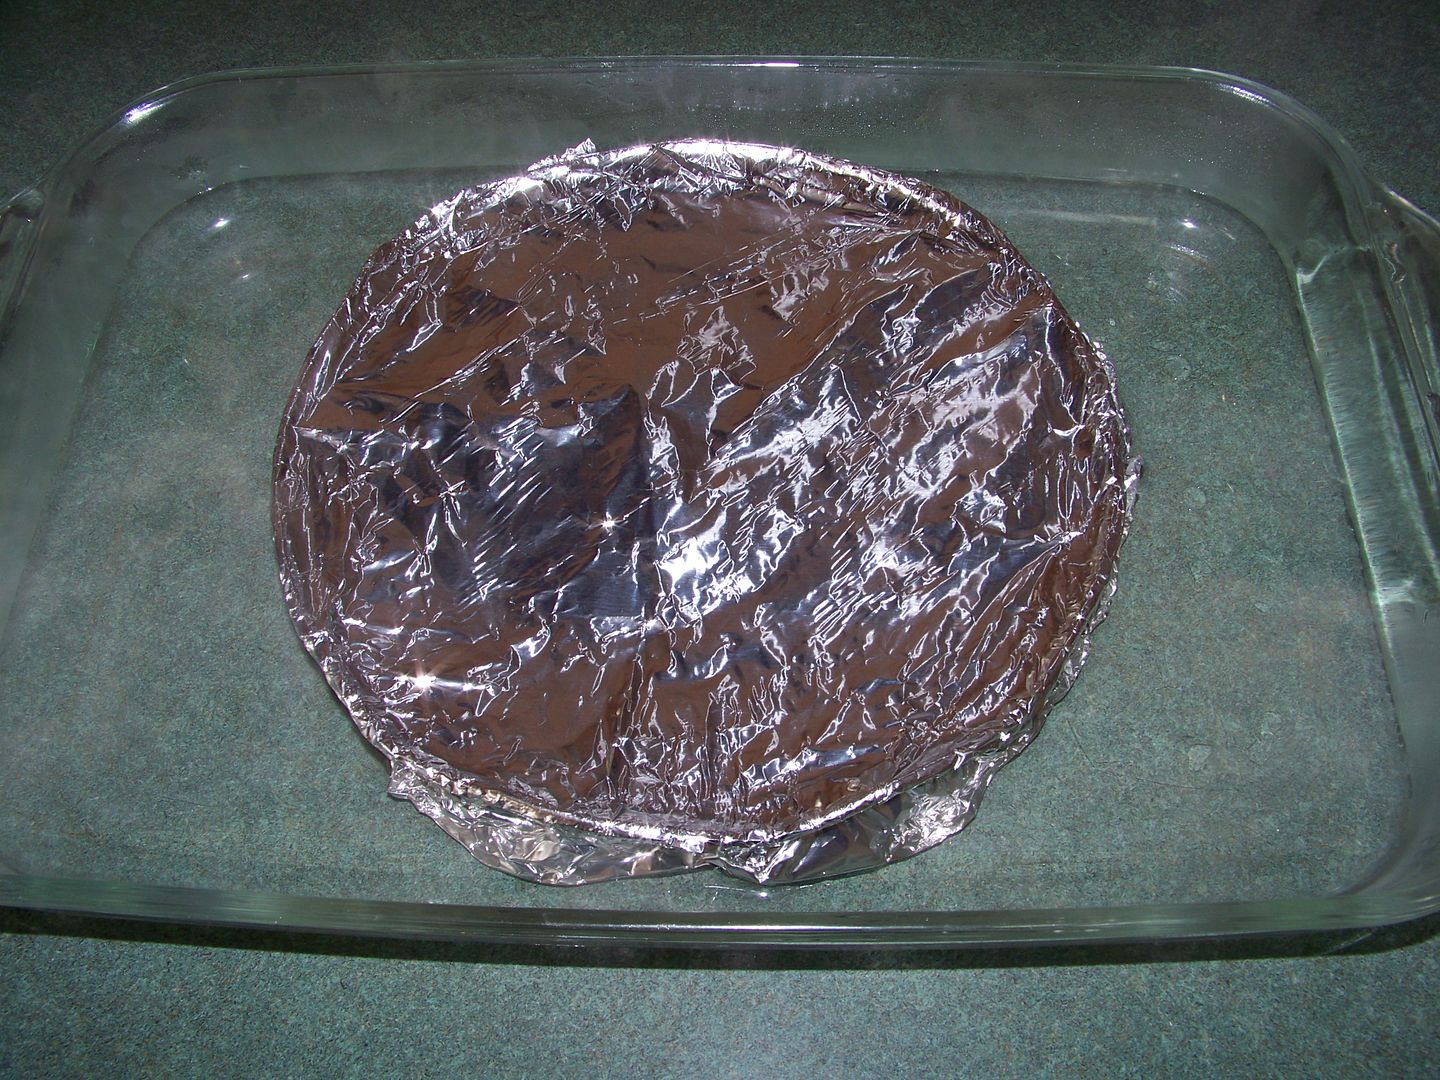
Preheat oven to 425° F.  Pour milk into a disposable pie pan.  Cover tightly with foil.  I use two layers.  Pour boiling water into a 9x13 glass baking dish.  Pour just enough to go halfway up the pie pan.  Place the pie pan in the water.

Bake 75 minutes.  Peel back foil; stir.  Recover with more foil to cover tightly again.  Add more boiling water to replace what has evaporated away.  Bake 30 more minutes.

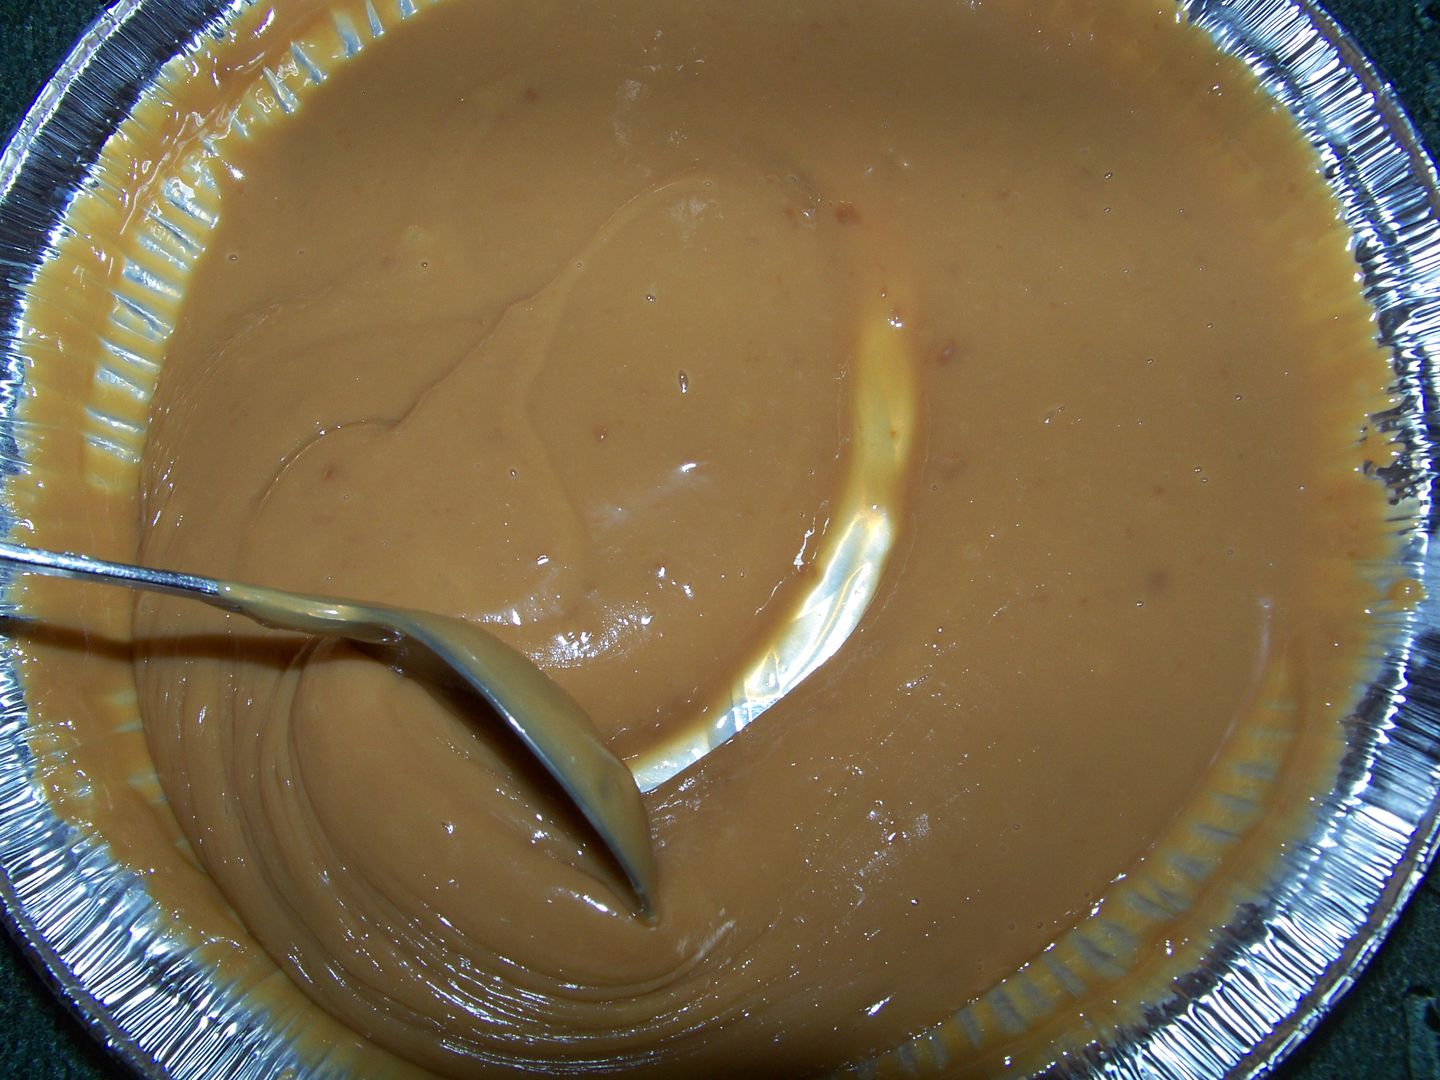
You will know it is done when the color is a nice brown color and has thickened up so as to show the bottom of the pie pan when scraped with a spoon.  Stir the Dulce de Leche to make smooth. 
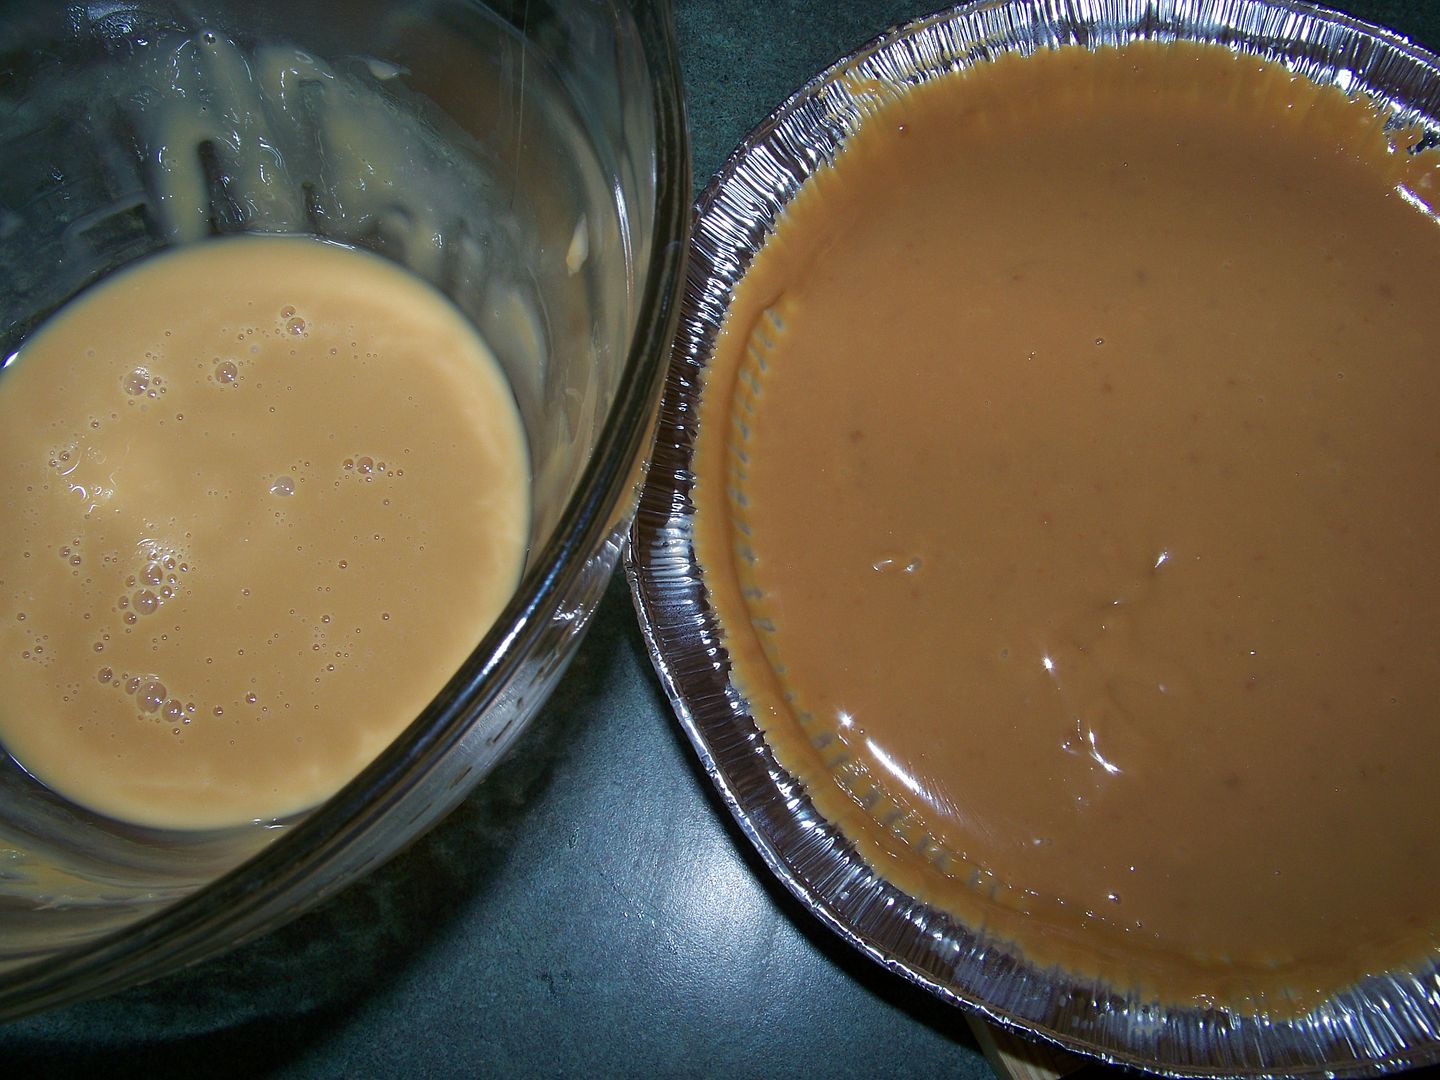
This is the difference between 1 hour of baking (on the left) and 2 hours of baking (on the right).  The product produced from one hour of baking would be great for ice cream topping or crepes.  For the cookies, however, you need something that is so thick it will not ooze out of the cookies.
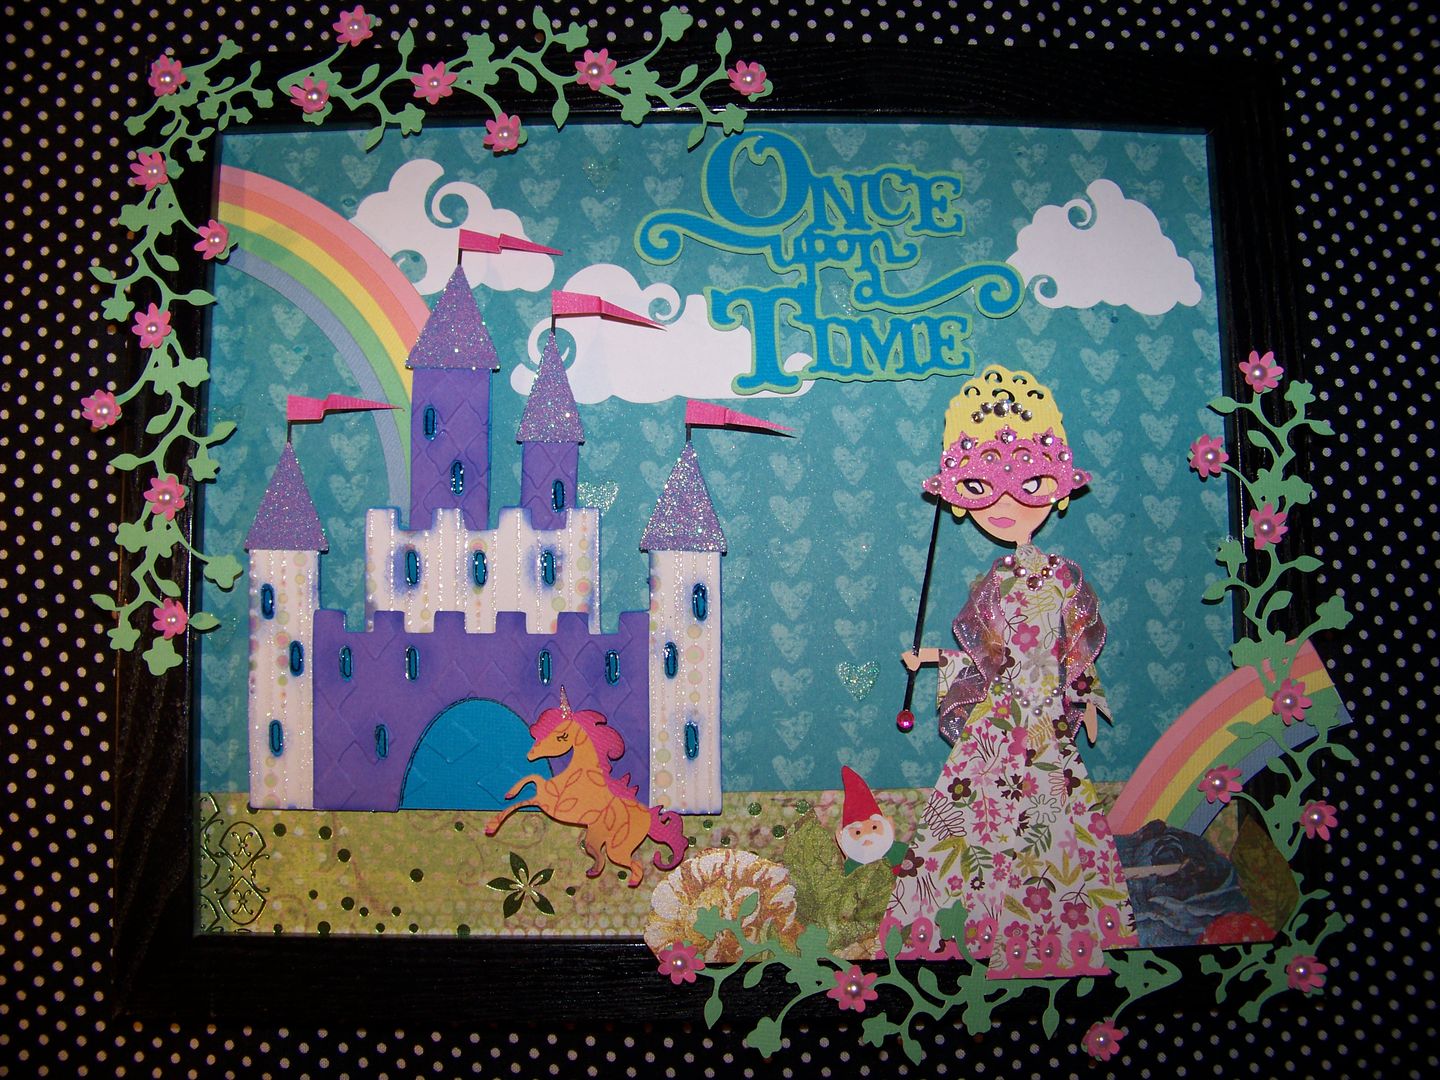
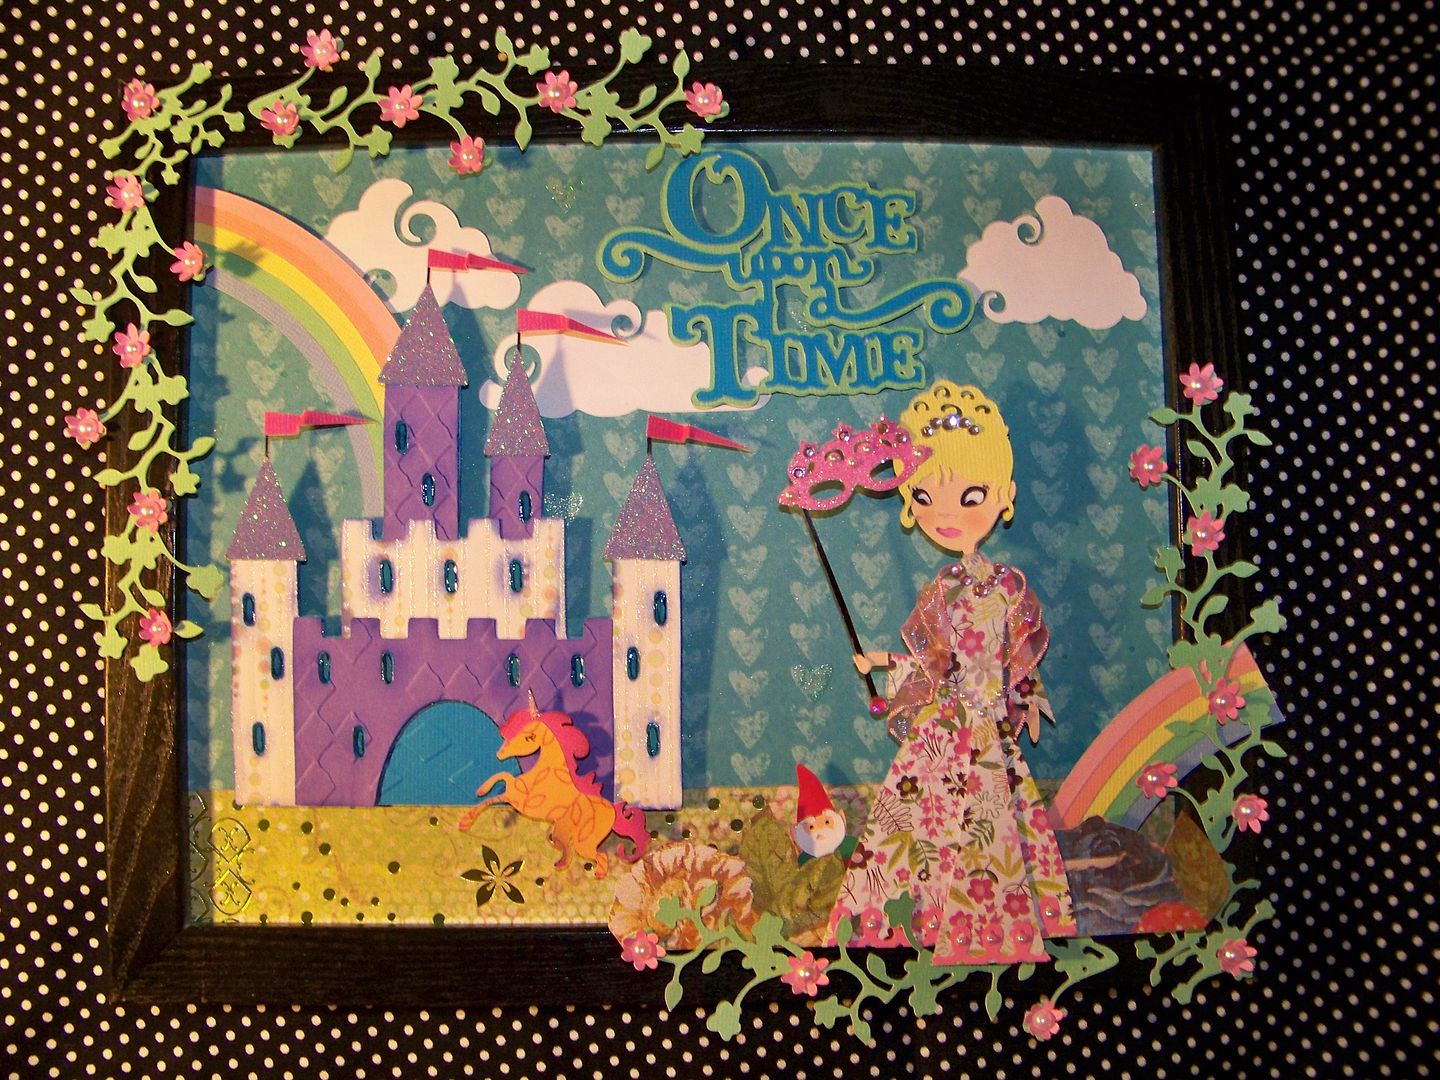
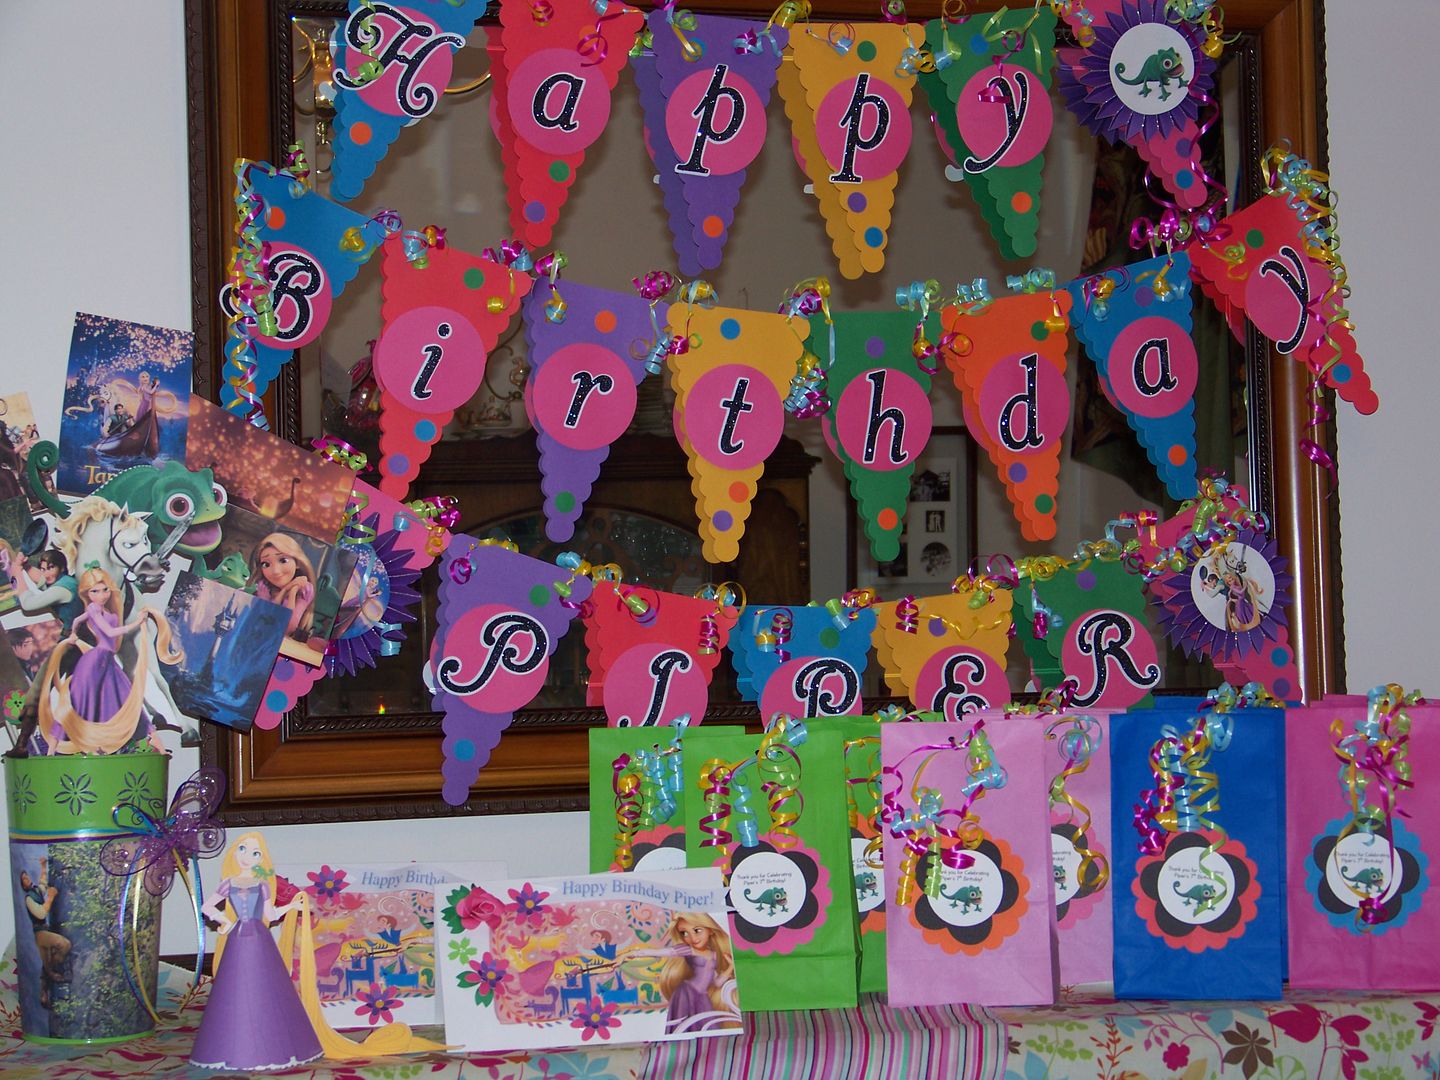
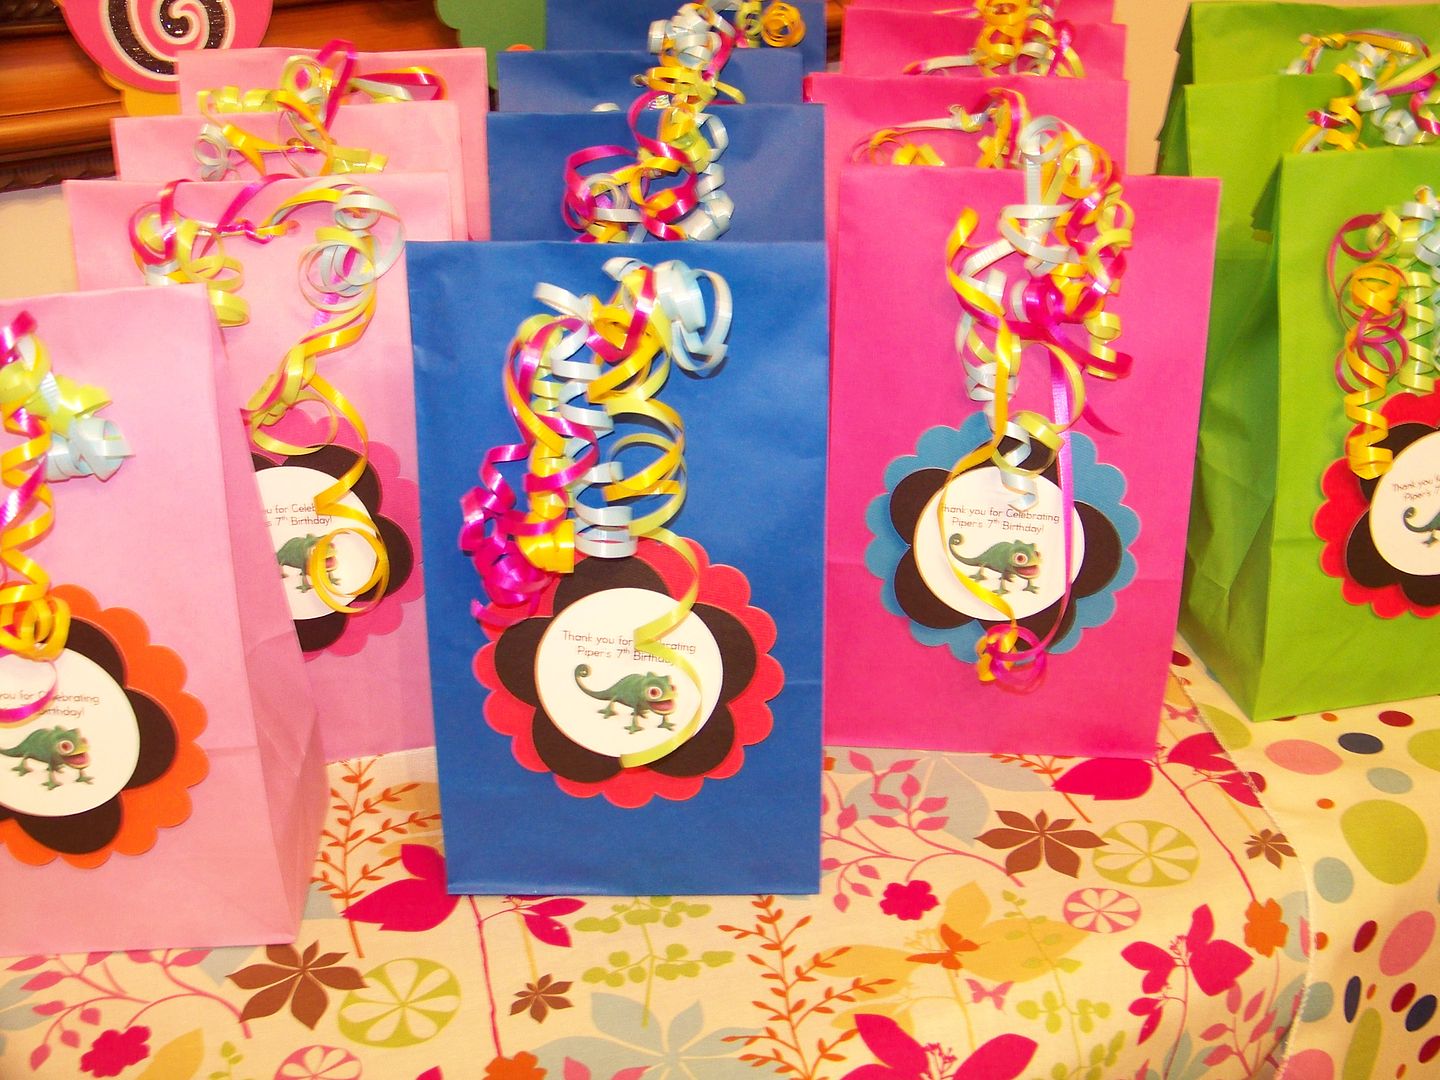
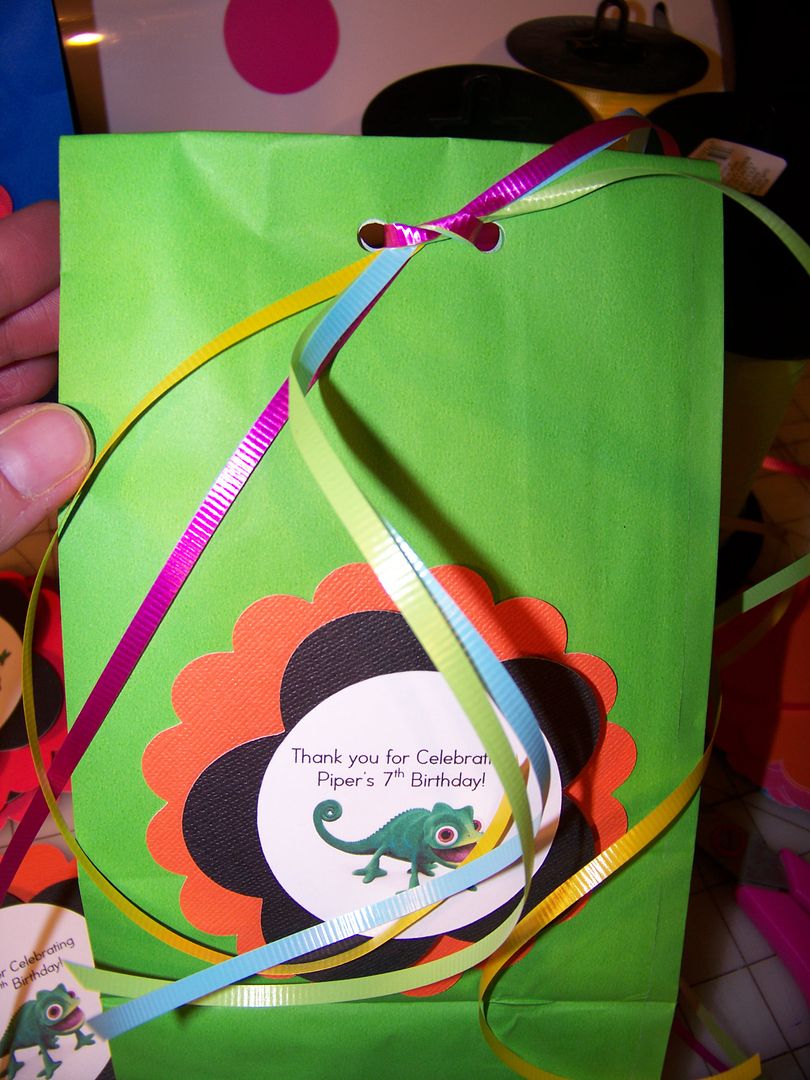
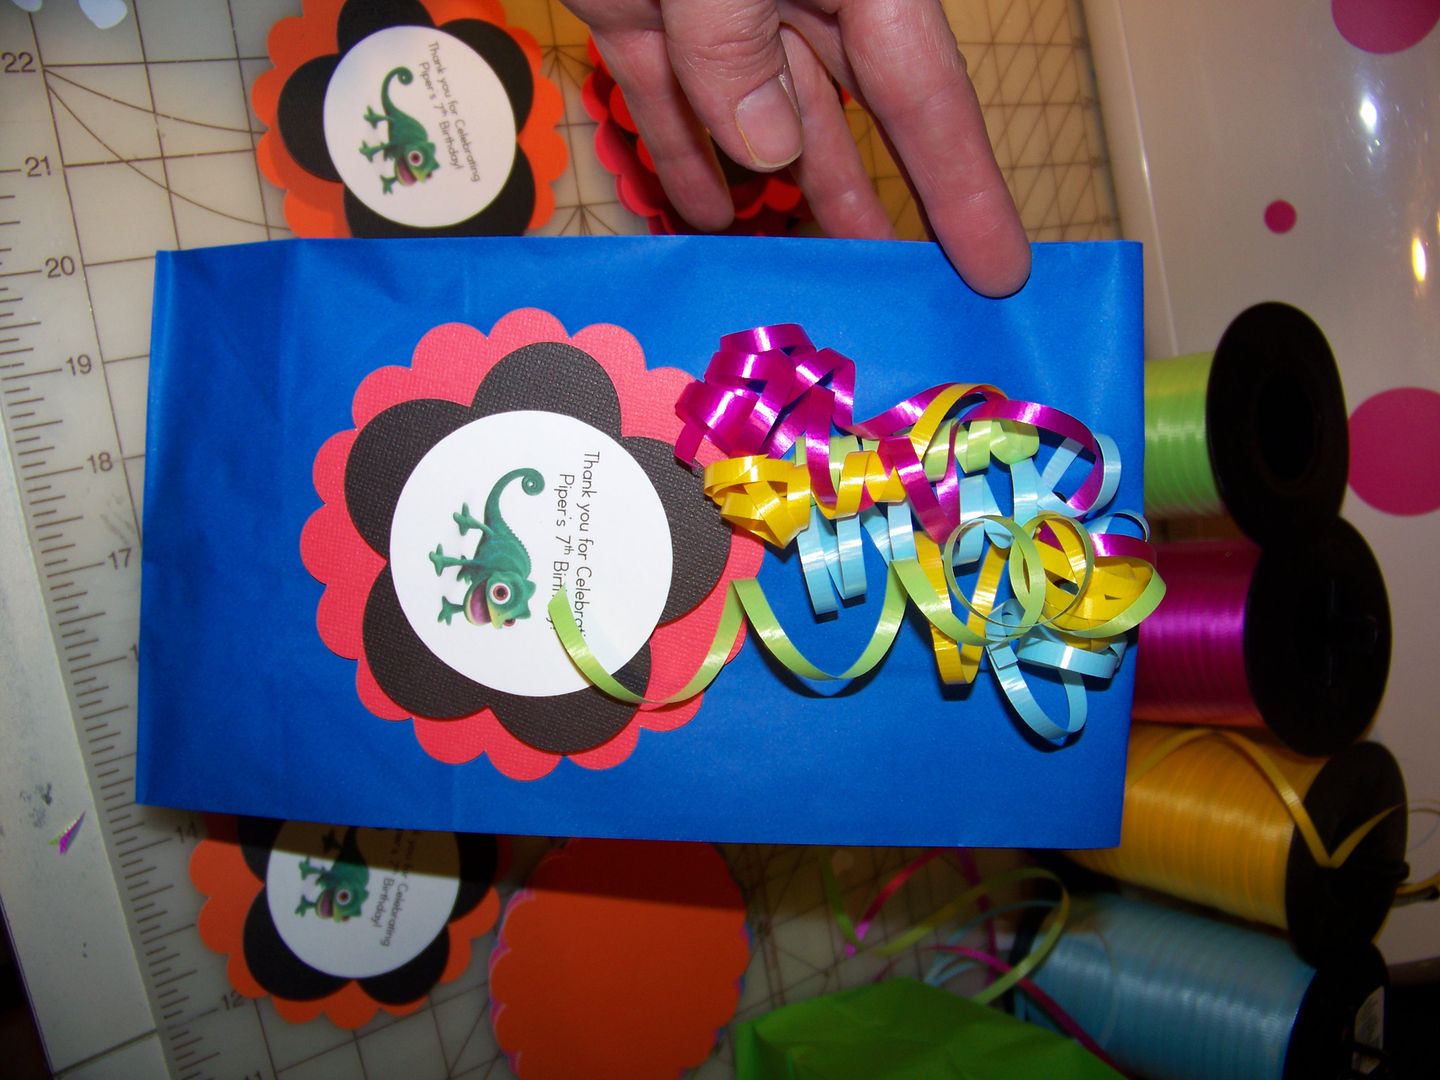
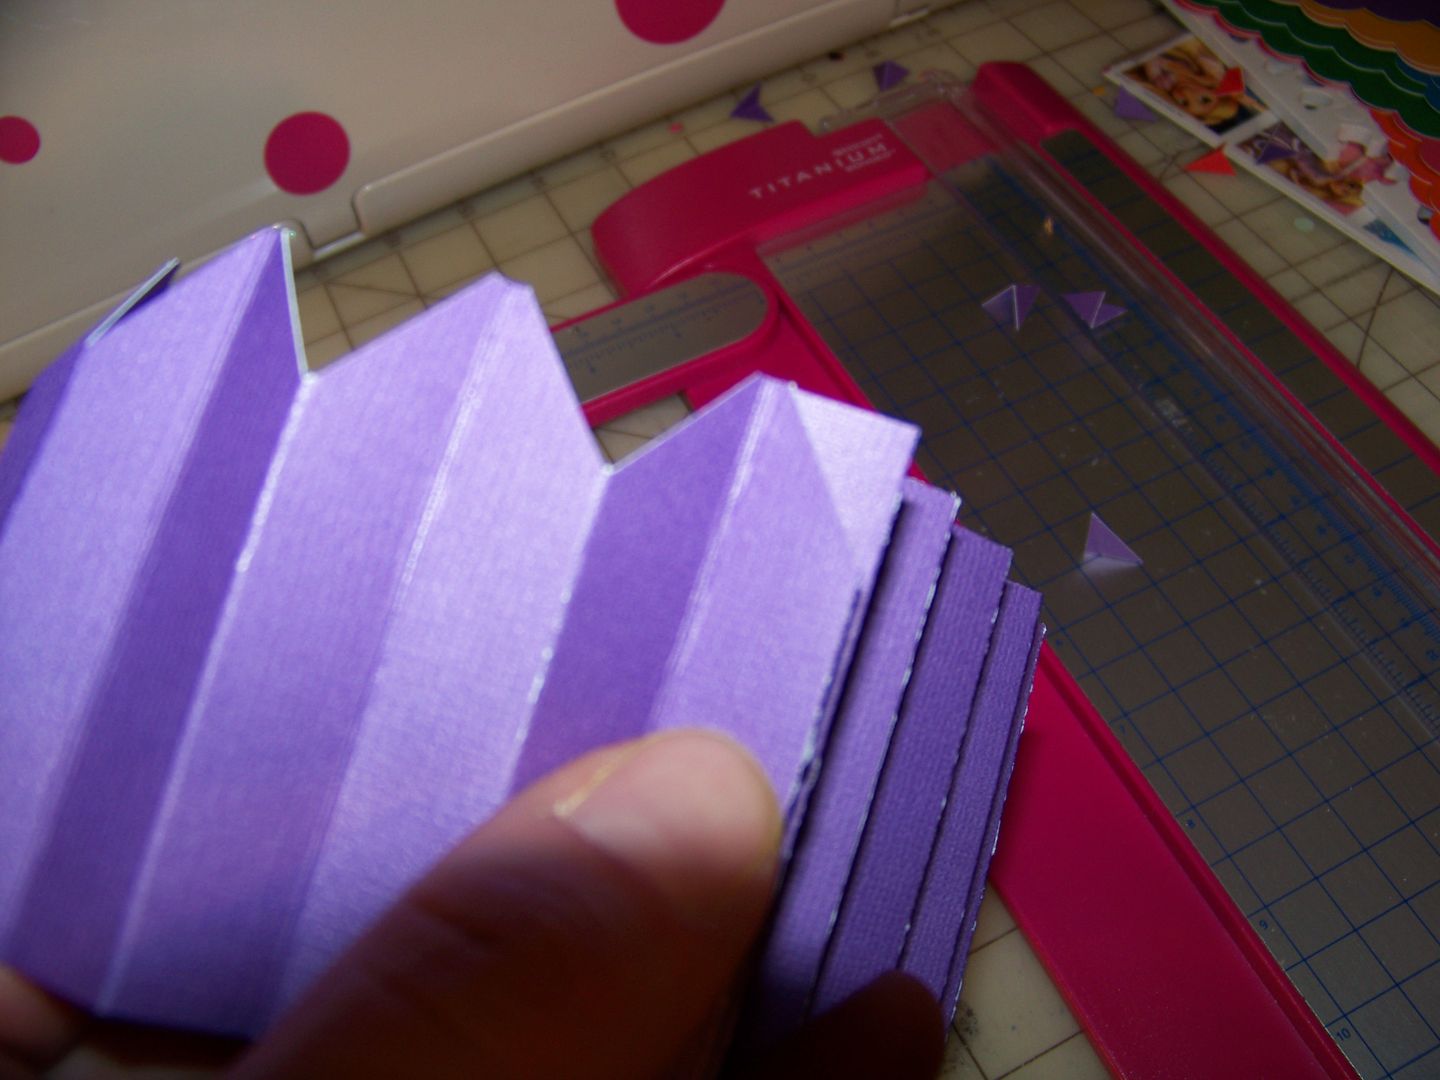
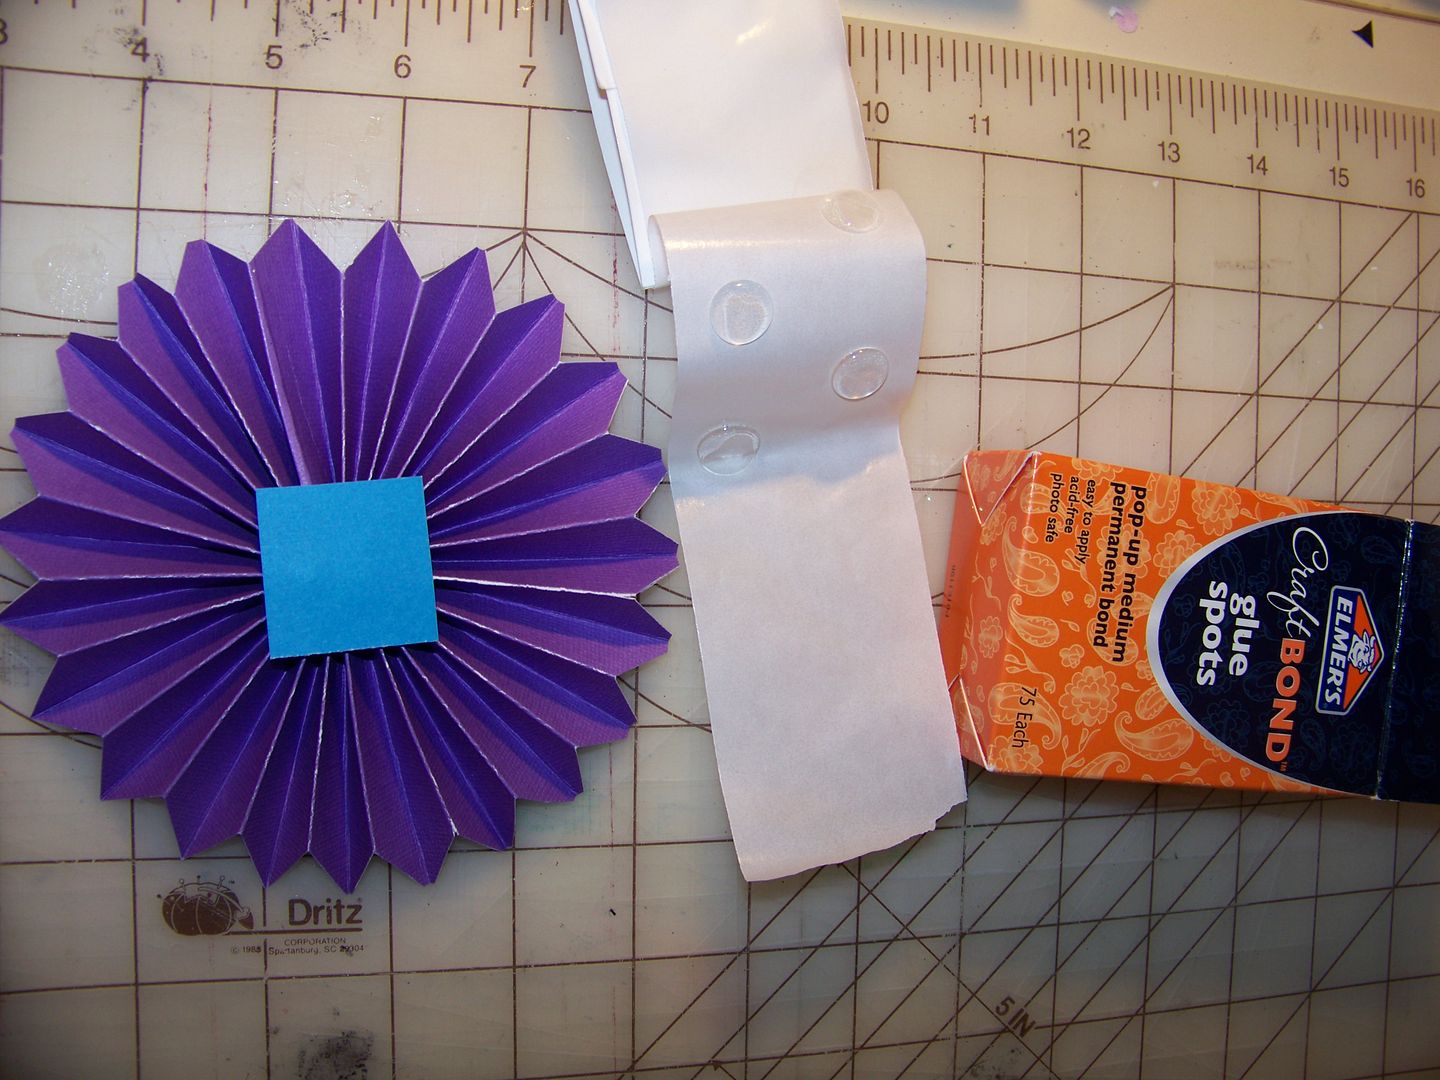
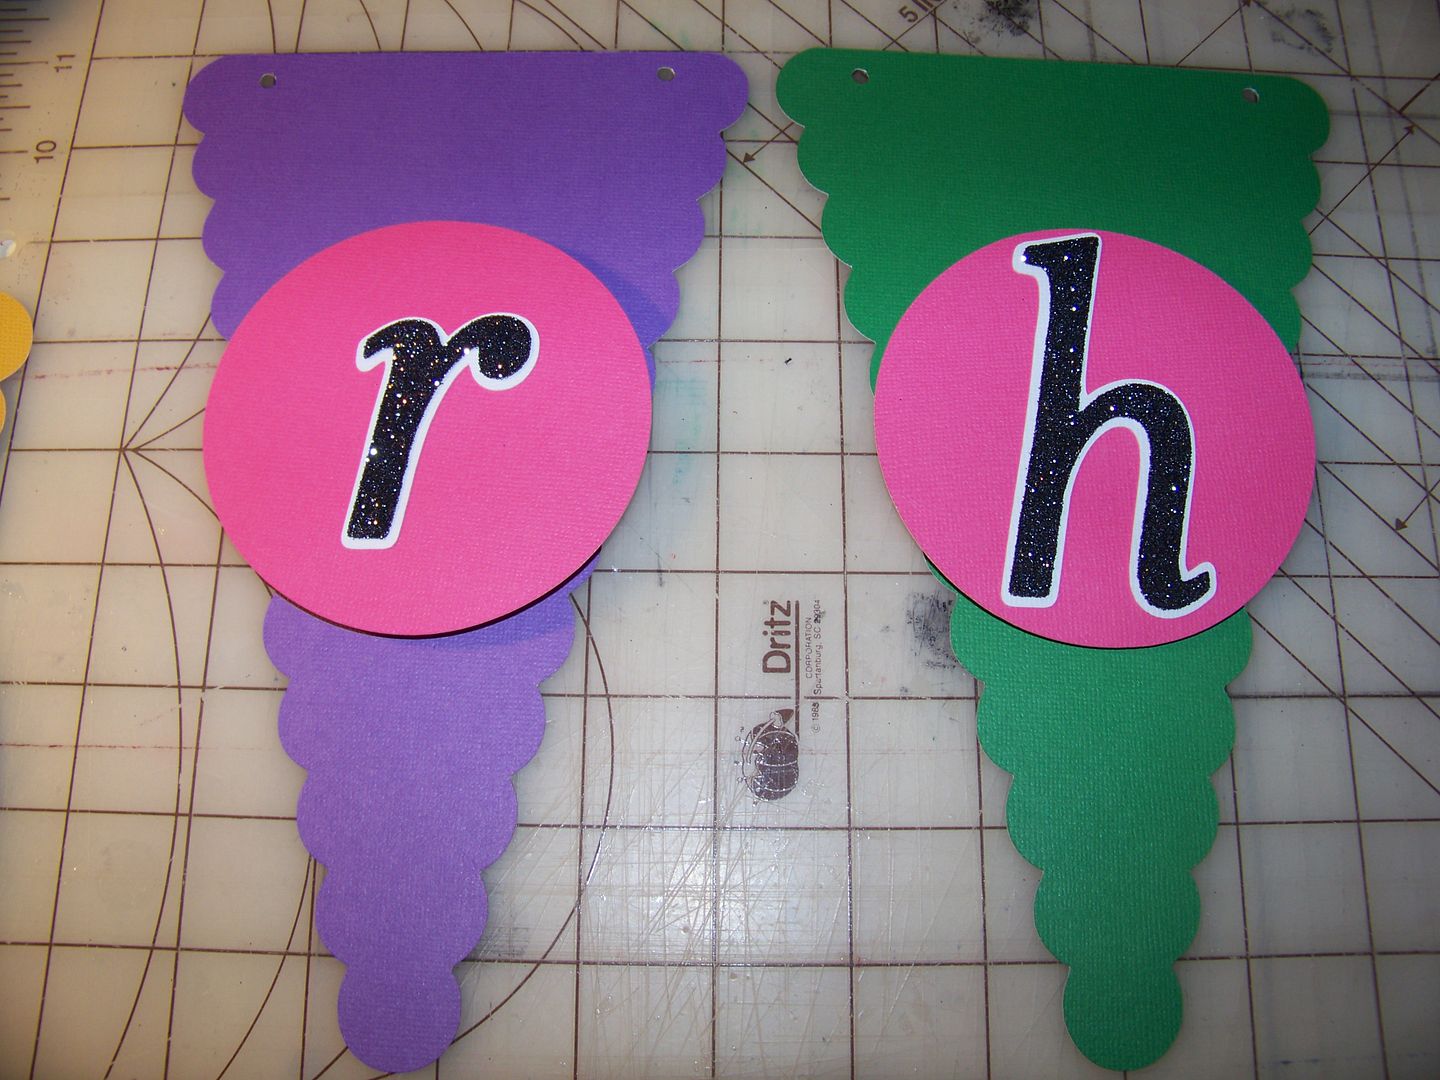
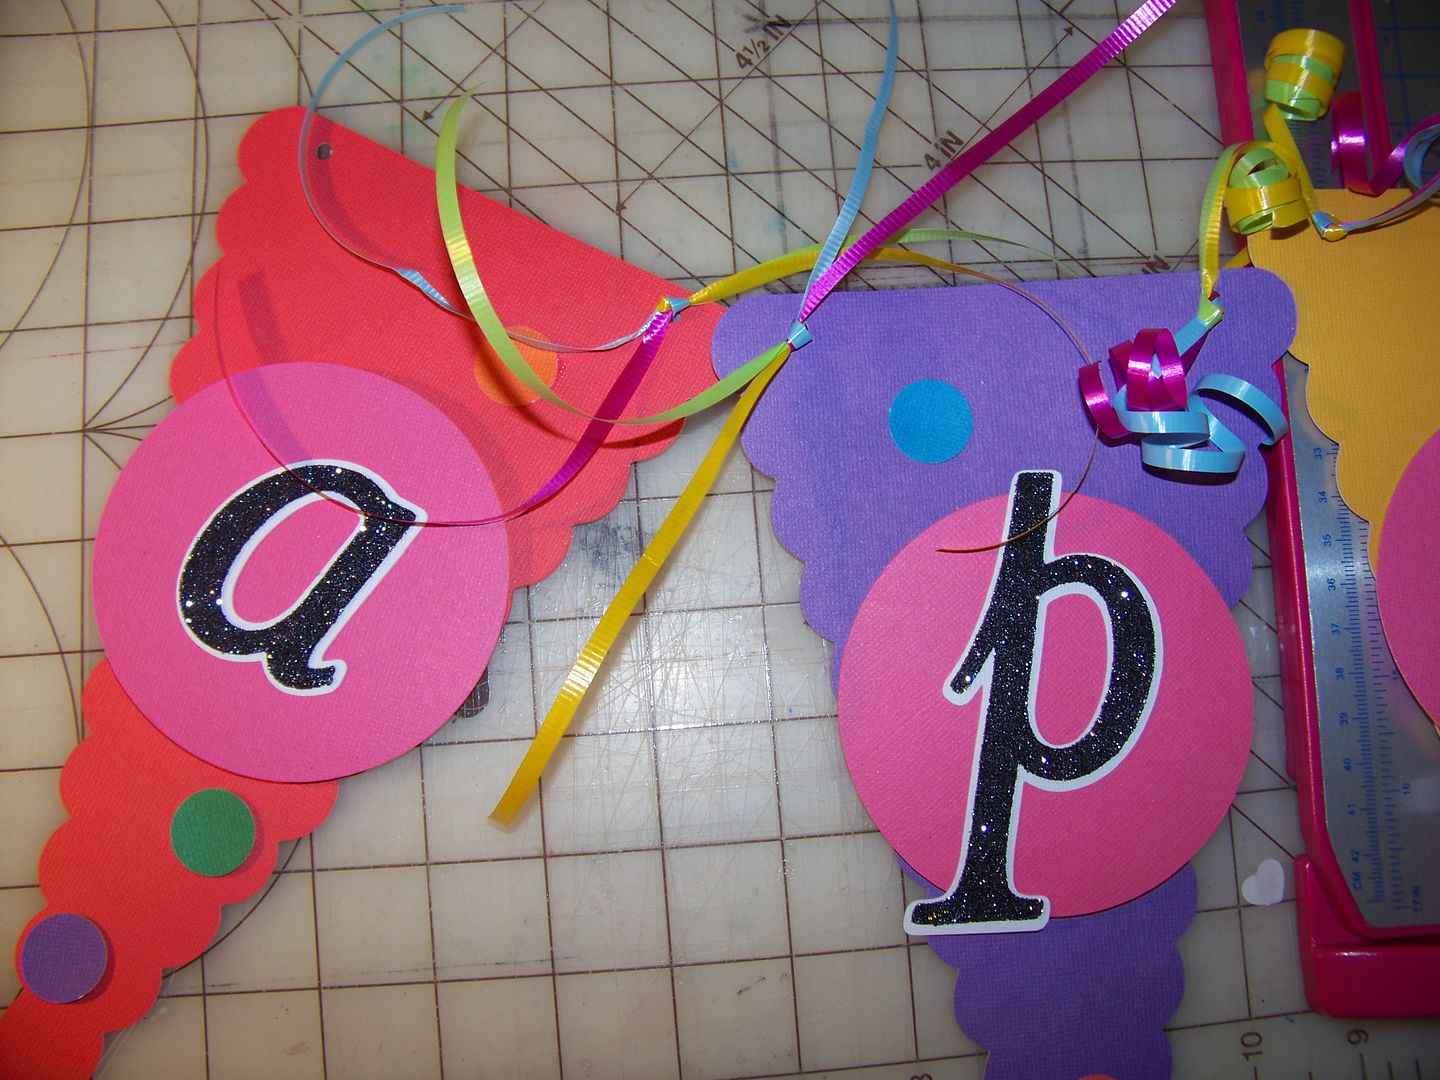
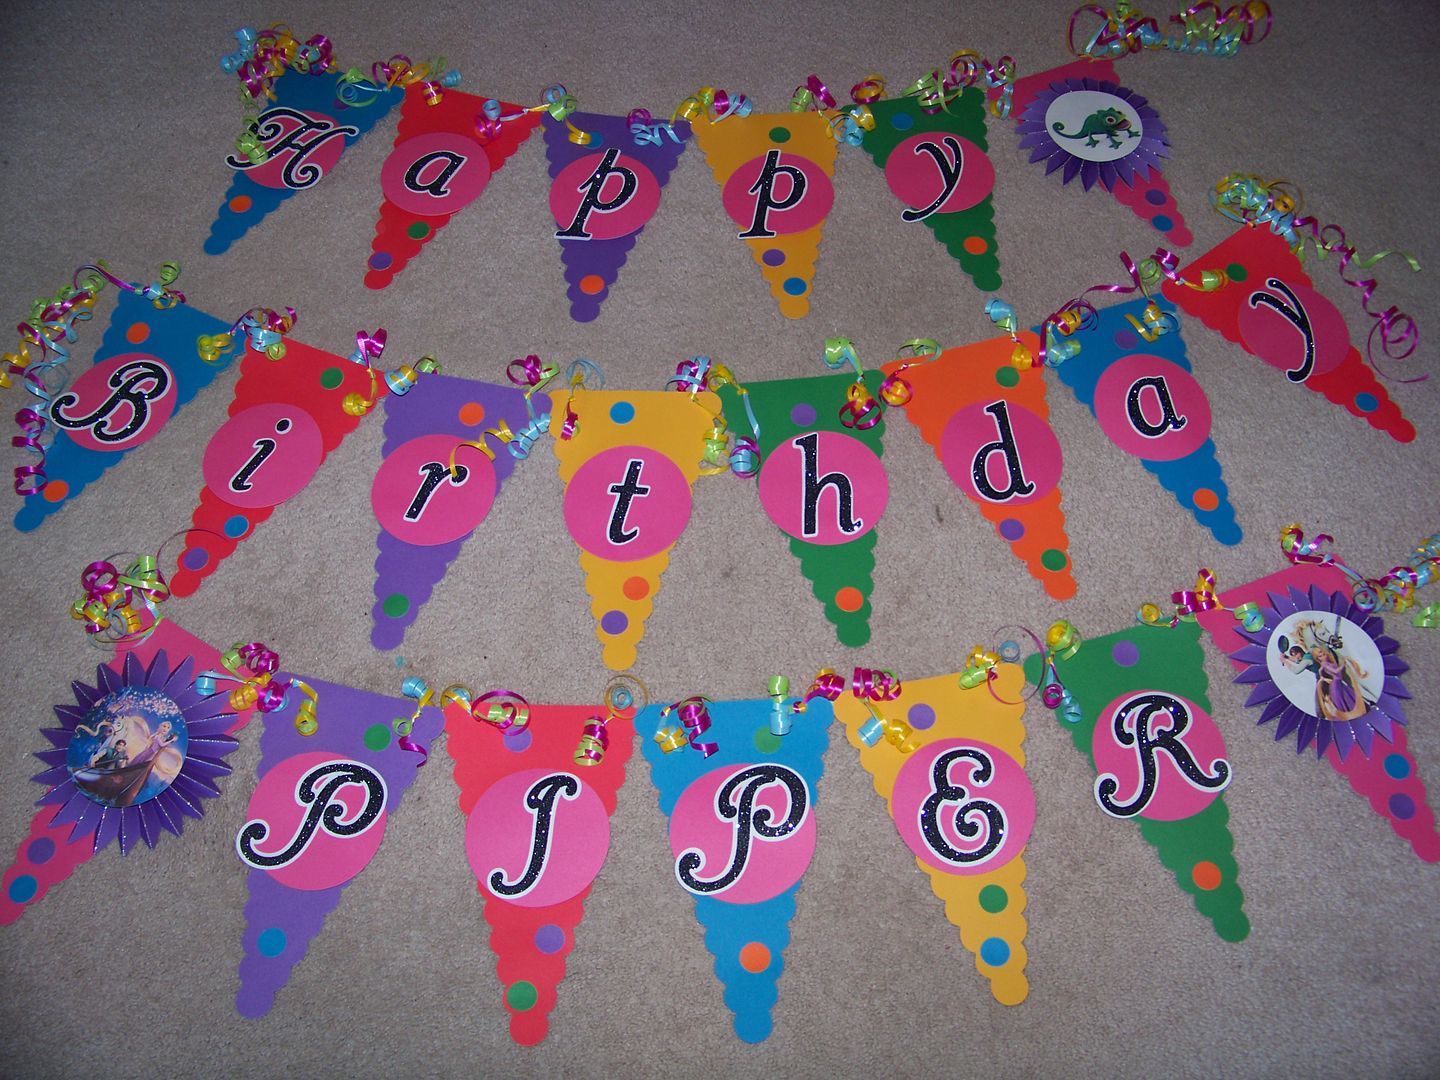
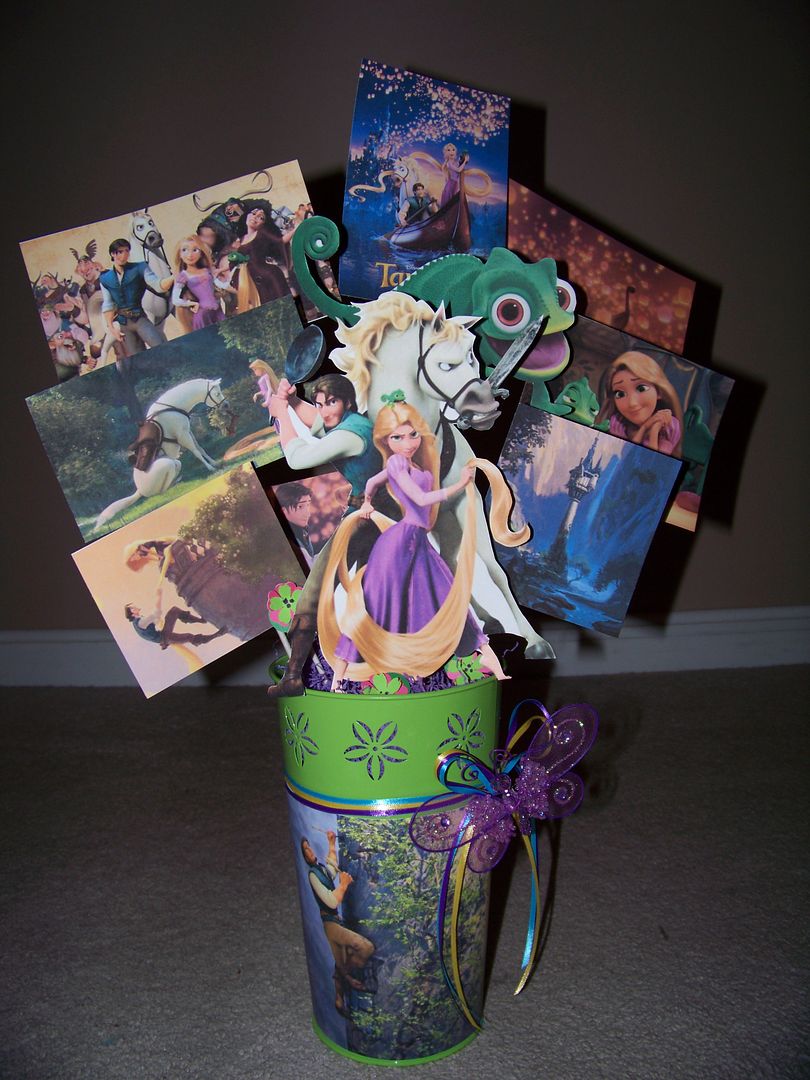
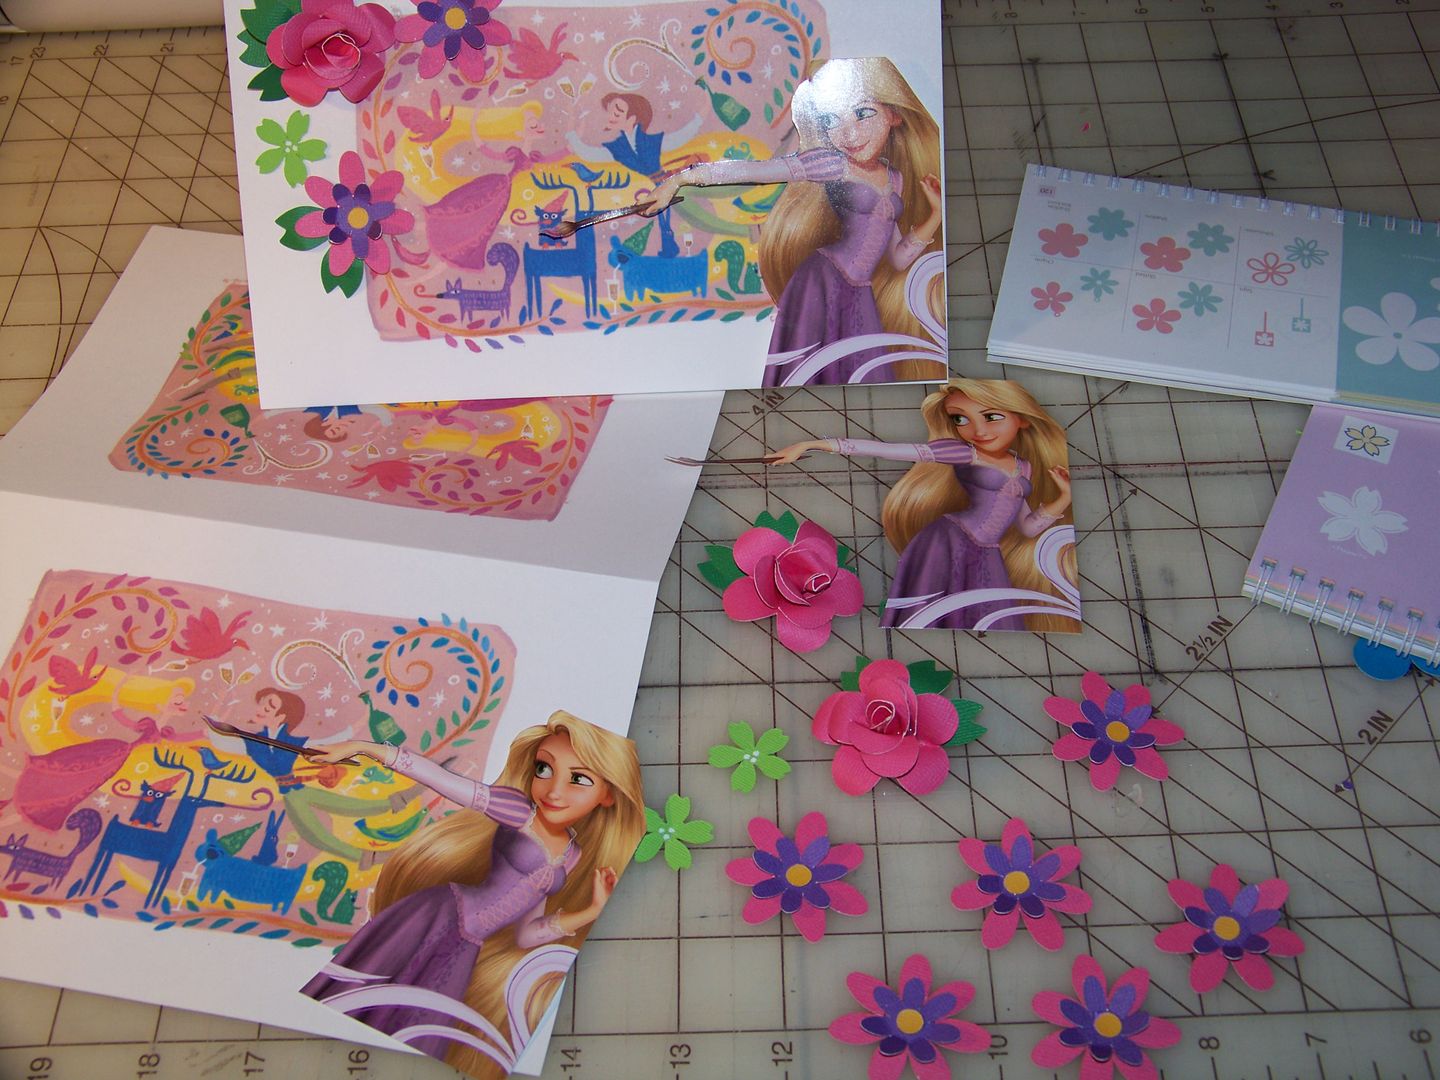
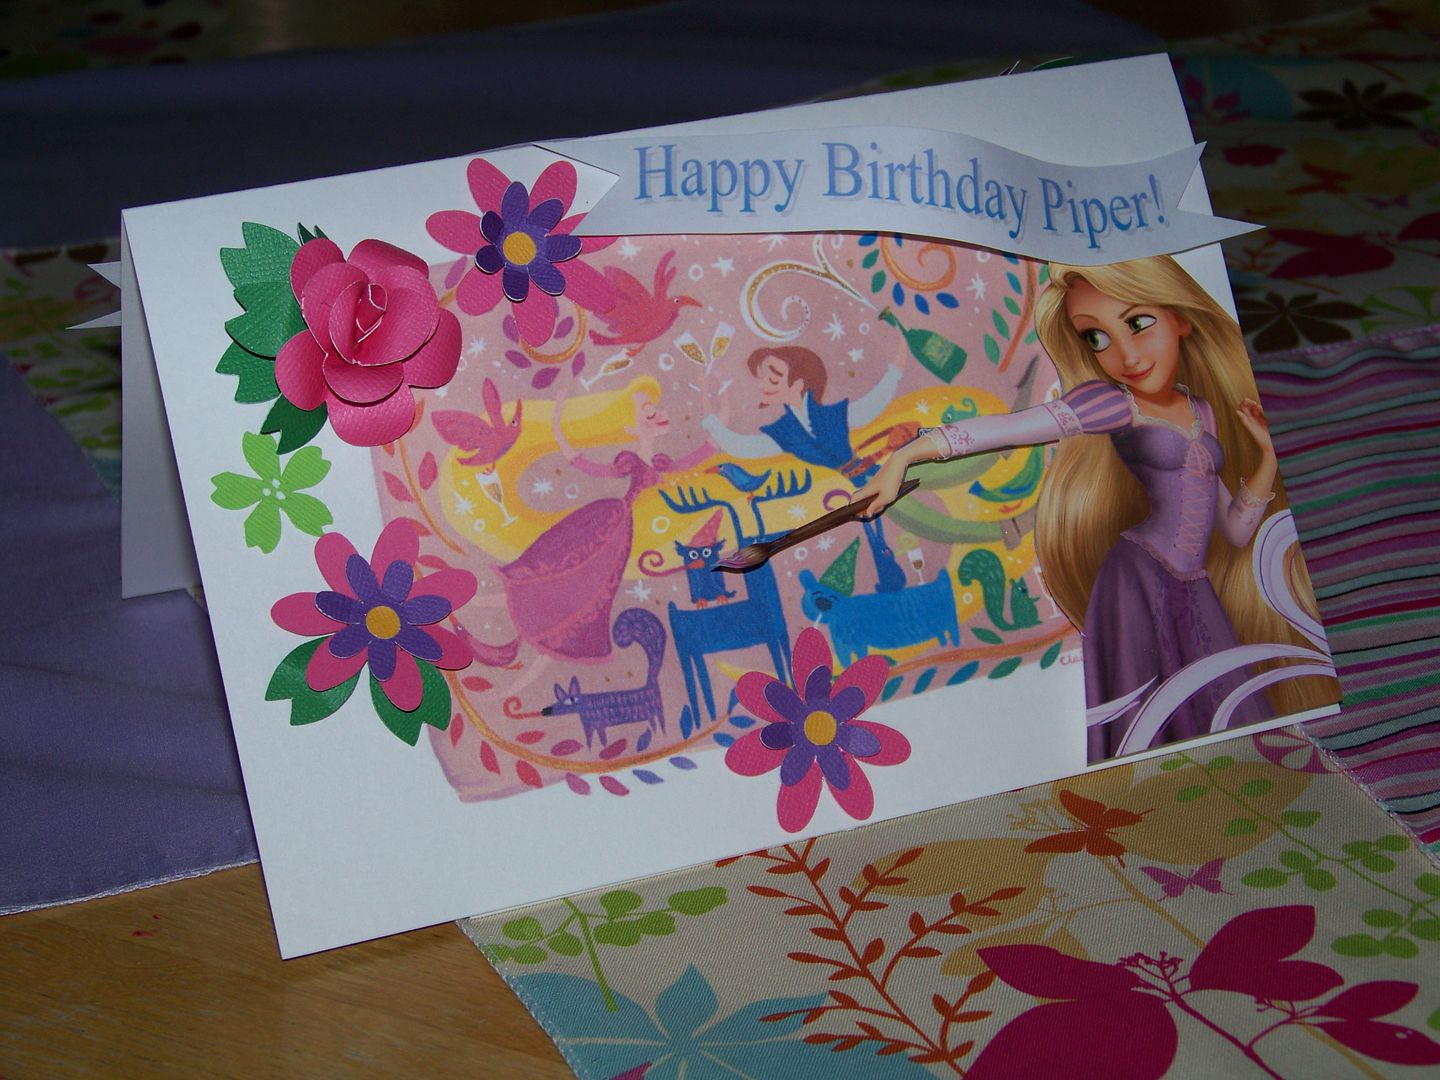
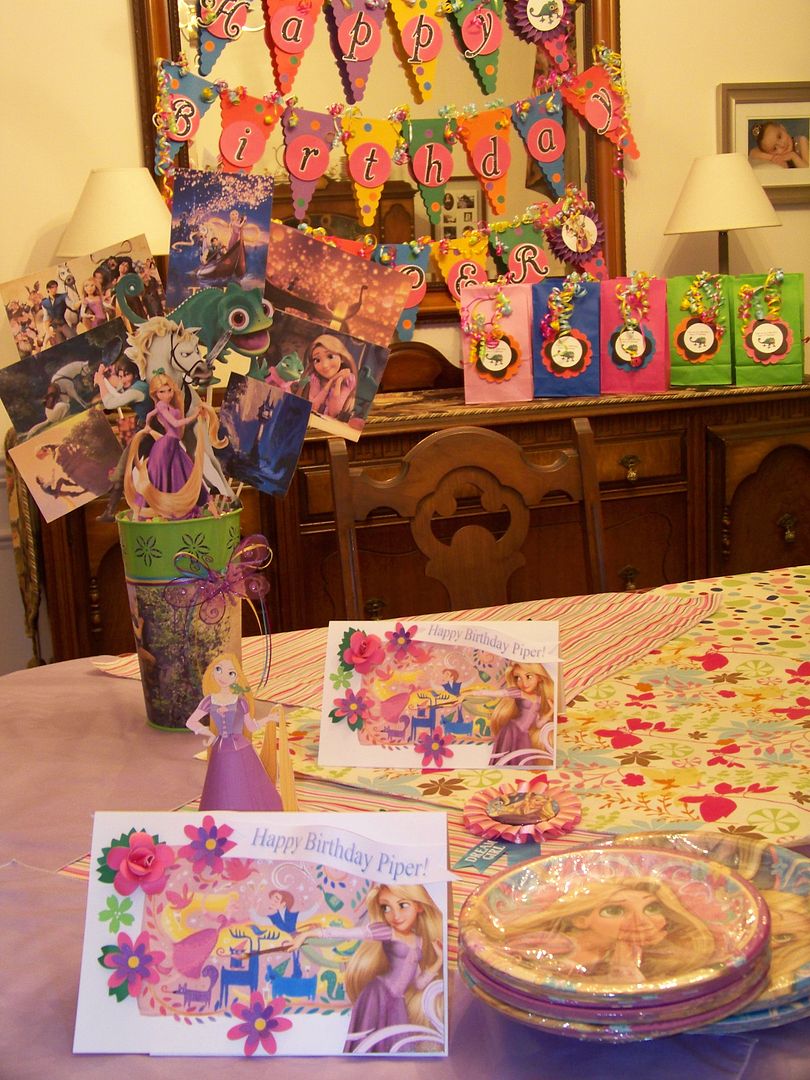
I have had so much fun taking time to craft and bake.  I happily look forward to Piper's 7th birthday in a couple of weeks.  More opportunities to bake and craft with my Cricut!  Thank you for checking out my blog!

But wait! There's more! Click 'older posts' above!

But wait!  There's more!  Click 'older posts' above!