Monday, May 30, 2011

Bravissimo! I figured out how to make them!

These are my versions of the Bravissimo collection!

I found the sweetest collection of award ribbons and medals at my local Michael's store.  They are from the Bravissimo collection by Making Memories.  They offer different rosettes, metals, frames, and ribbon tails.  When you put it all together, it is a bit pricey, but with a Cricut and scraps of papers and ribbons, it costs next to nothing to make yourself!

I thought you might like these too! 

I started by cutting the circles and scallops for the fronts.  For each award, I cut one of each from Mini Monograms:
4" circle
4" scallop
4-1/4" circle
4-1/2" circle cut from white for the back (will not show from the front)
I embossed the 4" circle.  I placed the 4-1/4" circle behind it and the scallop behind them both.  They are adhered together with ATG tape.
For the rosette, I cut two 2-1/2"x12" strips of paper.  I used an edge punch to finish one side.  Then, I used the Martha Stewart scoring board to score at every half inch.  I accordian folded the strips and then joined them to form a circle.  I had to cut off one 1/2" strip on each piece so the mountain/valleys would alternate.  I learned how to make rosettes using a fantastic video.  You can find the link to this on my sidebar under "Inspirations".  (Look near the bottom for UK Maryanne's rosette video). 

I used hot glue to adhere the center of the rosettes to a small square I glued to the fronts and backs.  The squares will not show in the end.

I think the edge punches and choices of papers really added  fun elements to the rosettes. 


This is paper is from Berries & Cream.  The birthday candle edge punch is from EK Success.

This is paper from Hopscotch.  The sunburst punch is from Martha Stewart.


This paper is from Imagine More Cards.  The loopy punch is from Martha Stewart.


This is the same Berries & Cream stripe but this rosette was edged with a Martha Stewart eyelet lace punch.

Between the circle layers and the rosette, I placed loops of ribbons.  These are made from folding each 4-1/2" ribbon strip and placing 6 of them on the rosette.

The ribbons were adhered with hot glue.
I attached the layered circles to the ribbon-topped rosettes  with hot glue.  Then I cut 6" strips of ribbon for the tails and hot glued them to a paper square.  (This square also won't show on the finished award).
The square of tails was also attached with hot glue.
I used different cuts to personalize each ribbon award and glued them to the tops of the embossed circles.

Next, I ran the white 4-1/2" circles through my regular printer to put my name and blog address on it.  I used the Martha Stewart mini hole punch to make a small hole for a brad to fit.  I placed the brad on so the head was on the wrong side of the circle.

I hot glued the back on the backside of the rosette, making sure to put extra hot glue around the head of the brad.  This creates an award that is ready to be easily attached to a gift bag (my use for it!).  I wanted to make it so that the award could be saved if the recipient like it.

I punched a small hole in the gift bag and attached the award to it, opening the prongs inside the bag.


These are my finished ribbons:

I used "Merci" from Create-A-Critter.  The cut was run through the Xyron and glittered.  It was run through the Xyron again to adhere it to the embossed circle.
The banner was cut from Enjoy the Seasons (rel size 5.7").    I ran the banner through my office printer and printed the text with Microsoft's Holiday Springs BTN (20 point size).  The banner is adhered with 1/8" pop dots.
"Hi" was cut from Sentimentals at 2" with shadow.  It is adhered with 1/8" pop dots.
The monogram is from Tie the Knot at 2".  I ran it through the Xyron to adhere it.  I added adheive pearls to accent.  I also added additional ribbon (unlooped) to the rosette for added color.
There are so many possibilities for making these.  I want to try making some with my new Baby Boutique Imagine cart for some black and white ones!  These will be so much fun to make at Christmas time to decorate my packages.  I think they will be fun for birthdays too! 

Thank you for visiting my blog. 

Monday, May 16, 2011

S'mores for the Last Day of School


I cannot believe my daughter's last day of school is this Friday!  How did that happen so fast?

For fun, Piper always takes a little good-bye gift for all the kids in her class.  I have seen lots of little s'mores kits on the message boards this past winter and spring.  So many cute ones!  I decided to use that idea and create some for her class. 

I found the most wonderful flavored marshmallows.  Piper loves the strawberry ones but I am in love with the caramel marshmallows! 

After we did a little test kit last week, I found that the marshmallows get hard after 3 days in the sealed plastic bags that I purchased for packaging.  I am guessing that the combination of air in the bag and the graham crackers cause this.  Since I didn't want to wait until Friday morning to put these together, I ended up using a little Saran Wrap to individually wrap each marshmallow to keep it fresh before placing them in the bags with the other ingredients.  I bet you are thinking it wouldn't matter if it got hard since we are microwaving it.  That's what I thought too, but nope, it makes a big difference!  Are you impressed how thoroughly I test these projects?  *brushing the crumbs off my chin*

I created the text on the computer for the fronts and for the directions that will go on the back of the bags.  I wanted a fun play on words.

The directions are on the back of the bag topper.
I used Campin' Critters for the little porcupine.  I loved that I was able to find a little guy roasting a marshmallow! 
The googly eye were adhered with E6000 so they wouldn't pop off!
I cut him at 2-1/2" on my Expression.  At that size, starting with the largest shape (the outline), I was able to get 12 on the page when I used Autofill.  That allowed me to know that I wouldn't need any more than one sheet of paper for each layer.
I used Liquid Applique to give the paper marshmallows dimension and texture.  I applied a thin layer so it wouldn't pop up too high; I wanted it to look like a roasting marshmallow!  I found that leaving the heat source on it caused it to brown!  I love that!!!

I used reclosable bags that are 4"x6".  For the bag toppers, I cut patterned paper into twelve 3"x4" pieces.  They were folded in half to finish at 1.5"x4".  This used only one sheet and fit the bags perfectly.  I used ATG tape to apply the greeting and directions to the topper, as well as to adhere the critter in place!
Thank you for visiting my blog... now I have to figure out some kiddo activities for next week and the rest of the summer.  Yikes!!!  (Wasn't it winter like a month ago?!)

Tuesday, May 10, 2011

Quick Spring Projects and Strawberry Bread too!

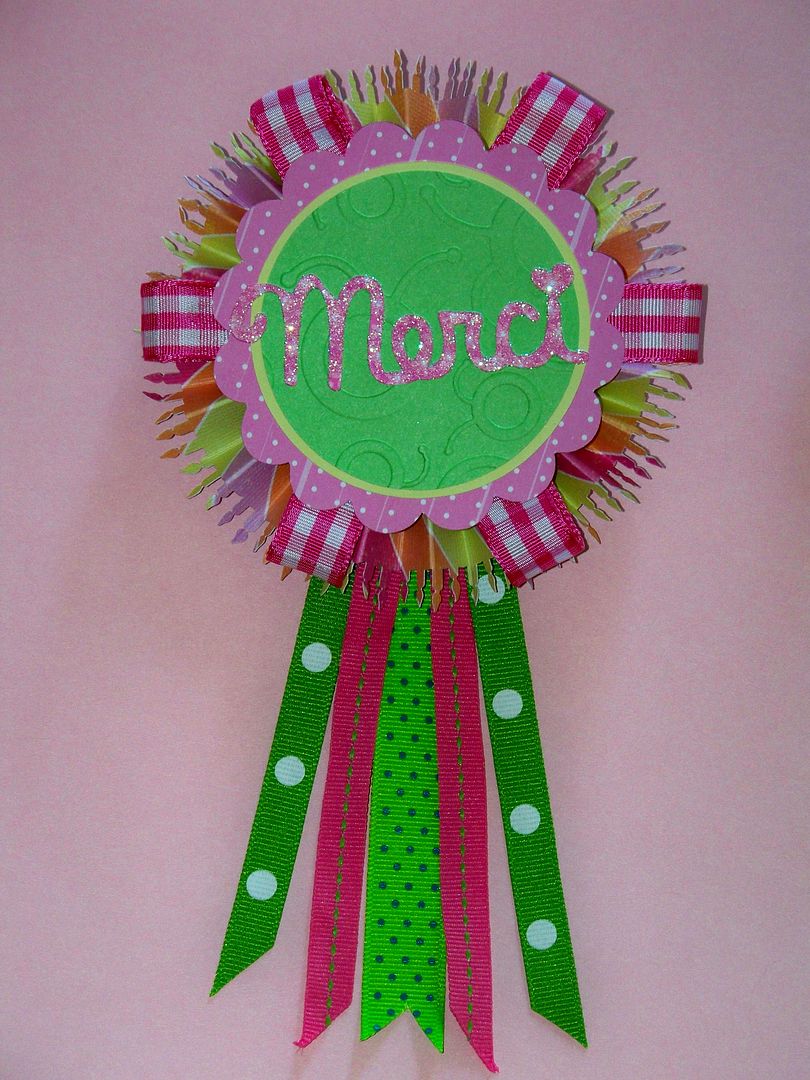
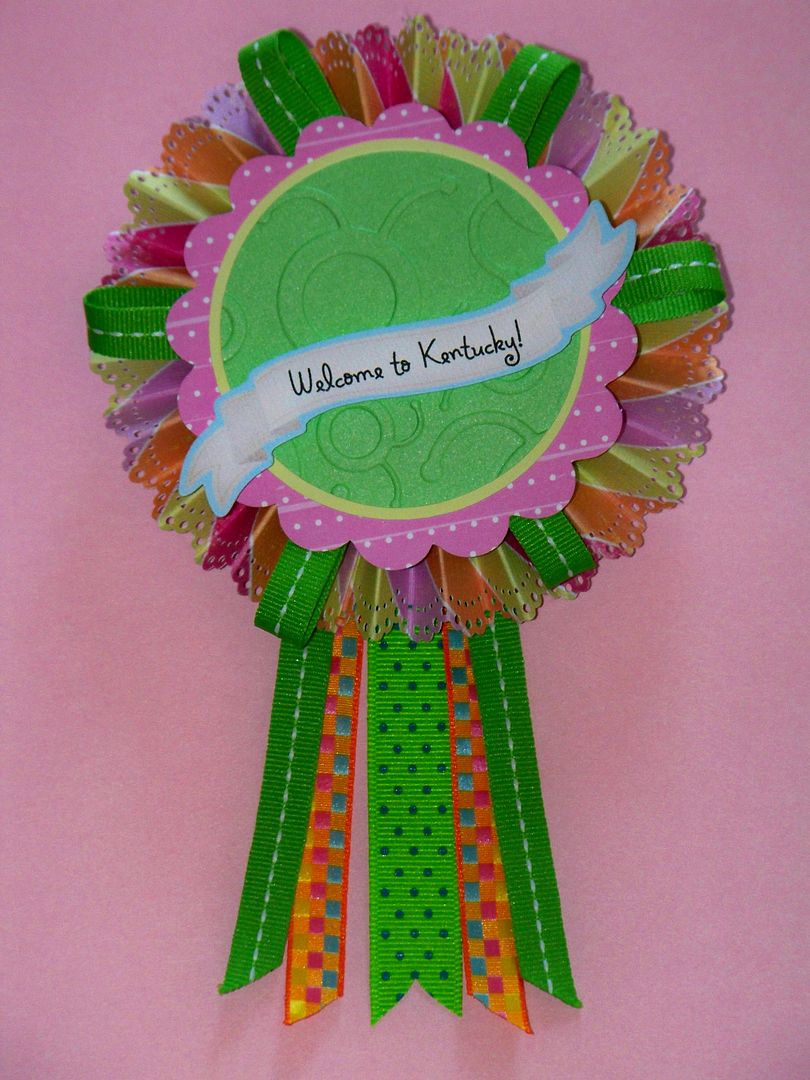
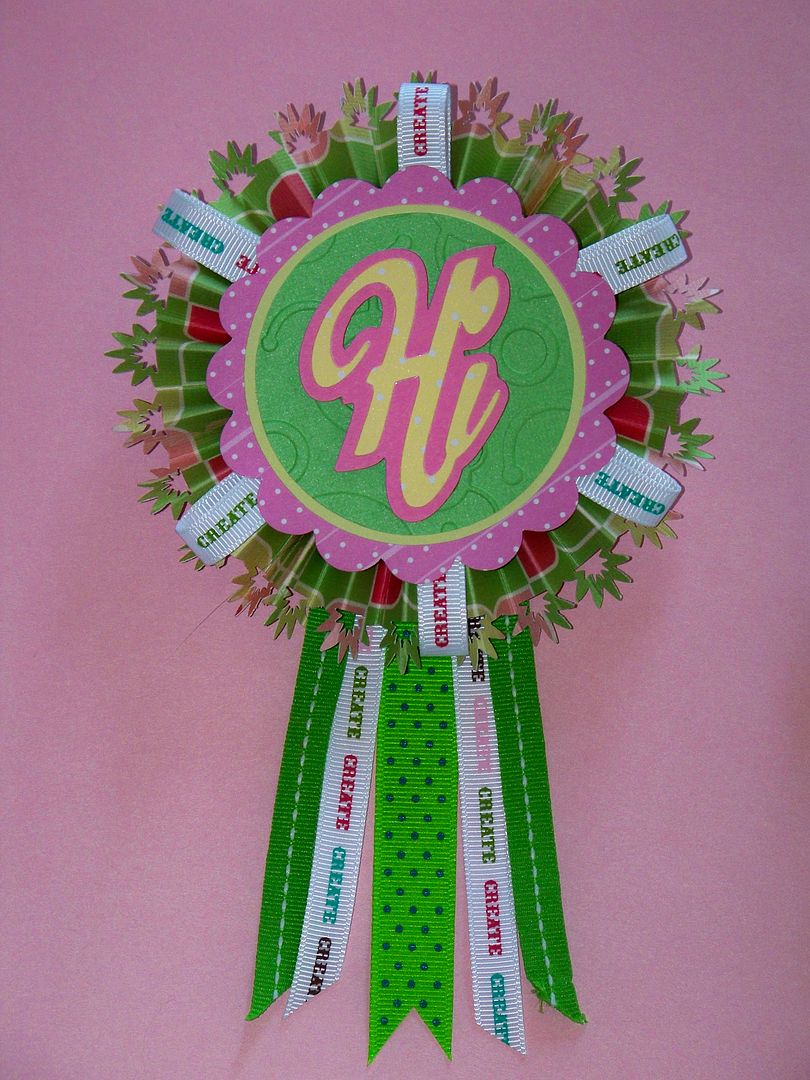
This time of year is ripe for quick, fun projects!  I wanted to share a few recent projects. 
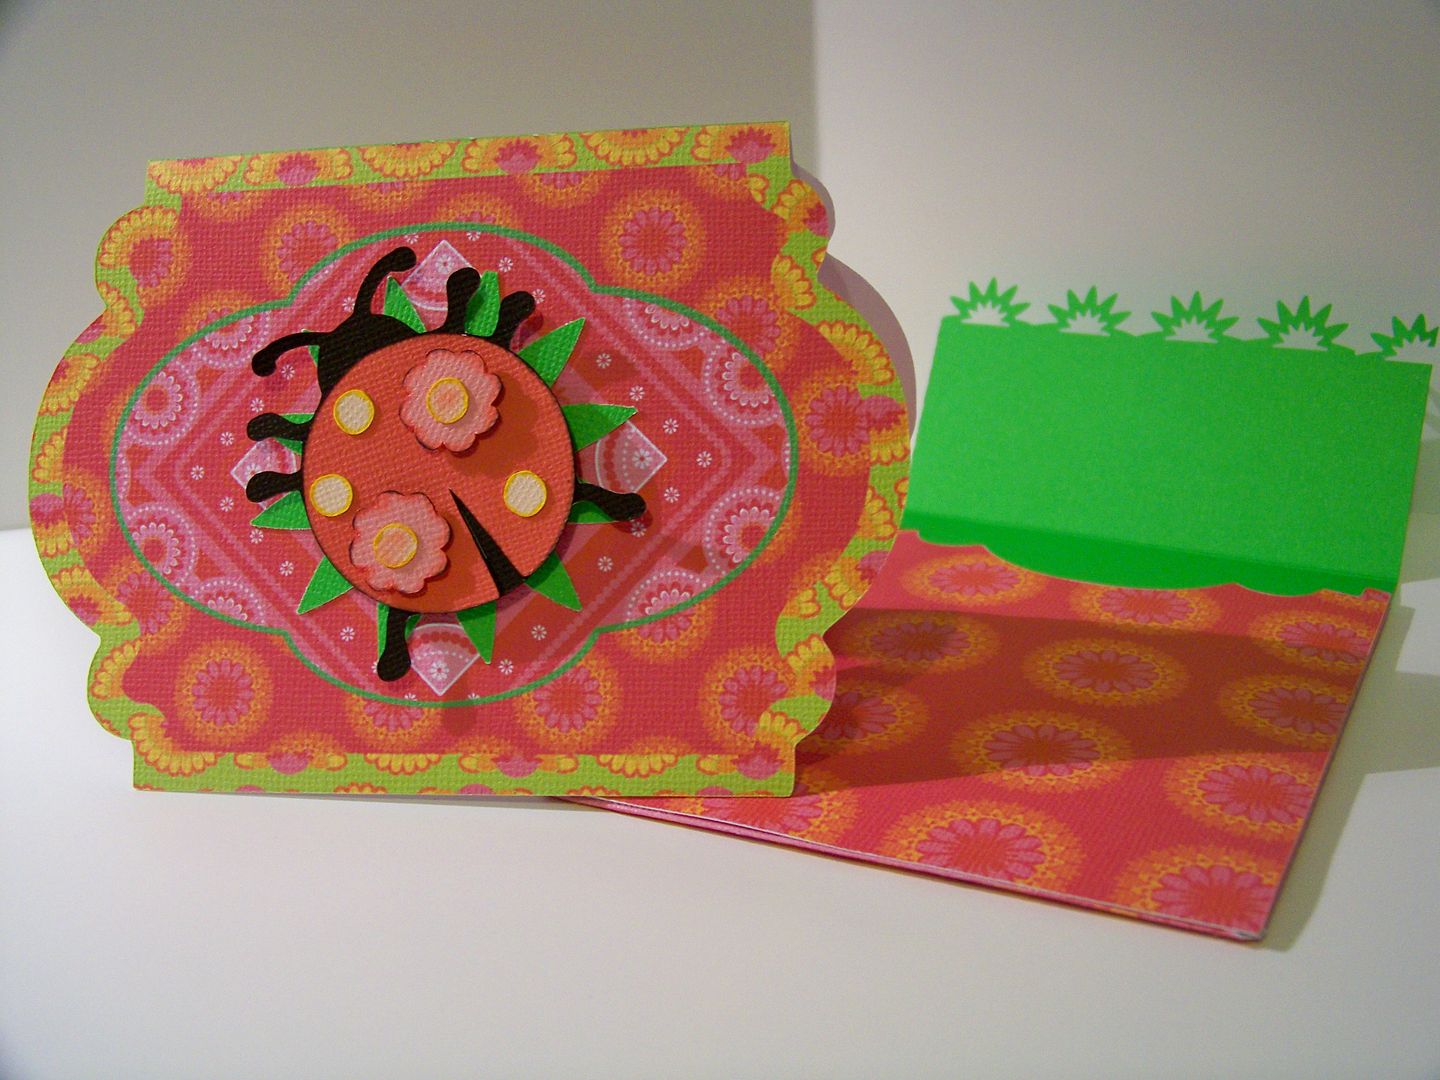
Thank You Card
I just picked up All Wrapped Up and LOVE the colors on the cuts!
This is a thank you card using All Wrapped up and Paisley.  I did add a flap to the envelope that I decorated with a Martha Stewart Punch.  For correct size:  I selected the card and envelope on the Imagine.  Once the mat view was on the screen, I selected Fit To Page to get the largest compatible size possible on one sheet.  The lady bug (Paisley cartridge) was cut with her features popped up for fun.  I outlined the circles and flower shapes with a bright yellow Sharpie.  Beneath the lady bug is the same green from the envelope that was cut with another MS punch.  The rest of those great colors and patterns were straight off of the cartridge design!  So fast! 


Inspiration Challenge
I participated in a challenge that AllisonF hosted on the Circle MB.  She provided an inspiration picture from A Mid Summer Night's Dream.  This is one of the most challenging challenges that I have done in some time.  I loved that! I uploaded her inspiration picture into the wonderful tool on the Colourlovers site to get the RGB codes for hair, skin, and her dress.  (As you can imagine, there were dozens of codes for each; picking just one for each was a task!)  I finally settled on these:
skin - 255-119-175
hair - 132,80,11
dress (light) - 196, 143, 139
dress (dark) - 146, 103, 110

I had been looking at the wonderful hand-cut art of Jackie Huang.  Her little bear has been on my mind and I wanted to find a way to use the Cricut to get the effect of the popped up frame that she used in that piece.    I cut my frame from French Manor page 56  at 6".   This is the negative space from the shape.  The paper under the figure is made from a color copy of the first page of A Mid Summer Night's Dream, sprayed with Glimmer Mist to give it a little sparkle and to obscure the text a bit.

The figure is cut from Shall We Dance at 4.5".  I cut two of the skirt so that I could hand-cut a bit for a little more interest in the folds of the fabric.  Her wings are cut from a butterfly on Lori's Garden.  I cut two at 2.4" and used only the right wings of each.  I popped up the body, lifting her arms more so than the rest of the body.
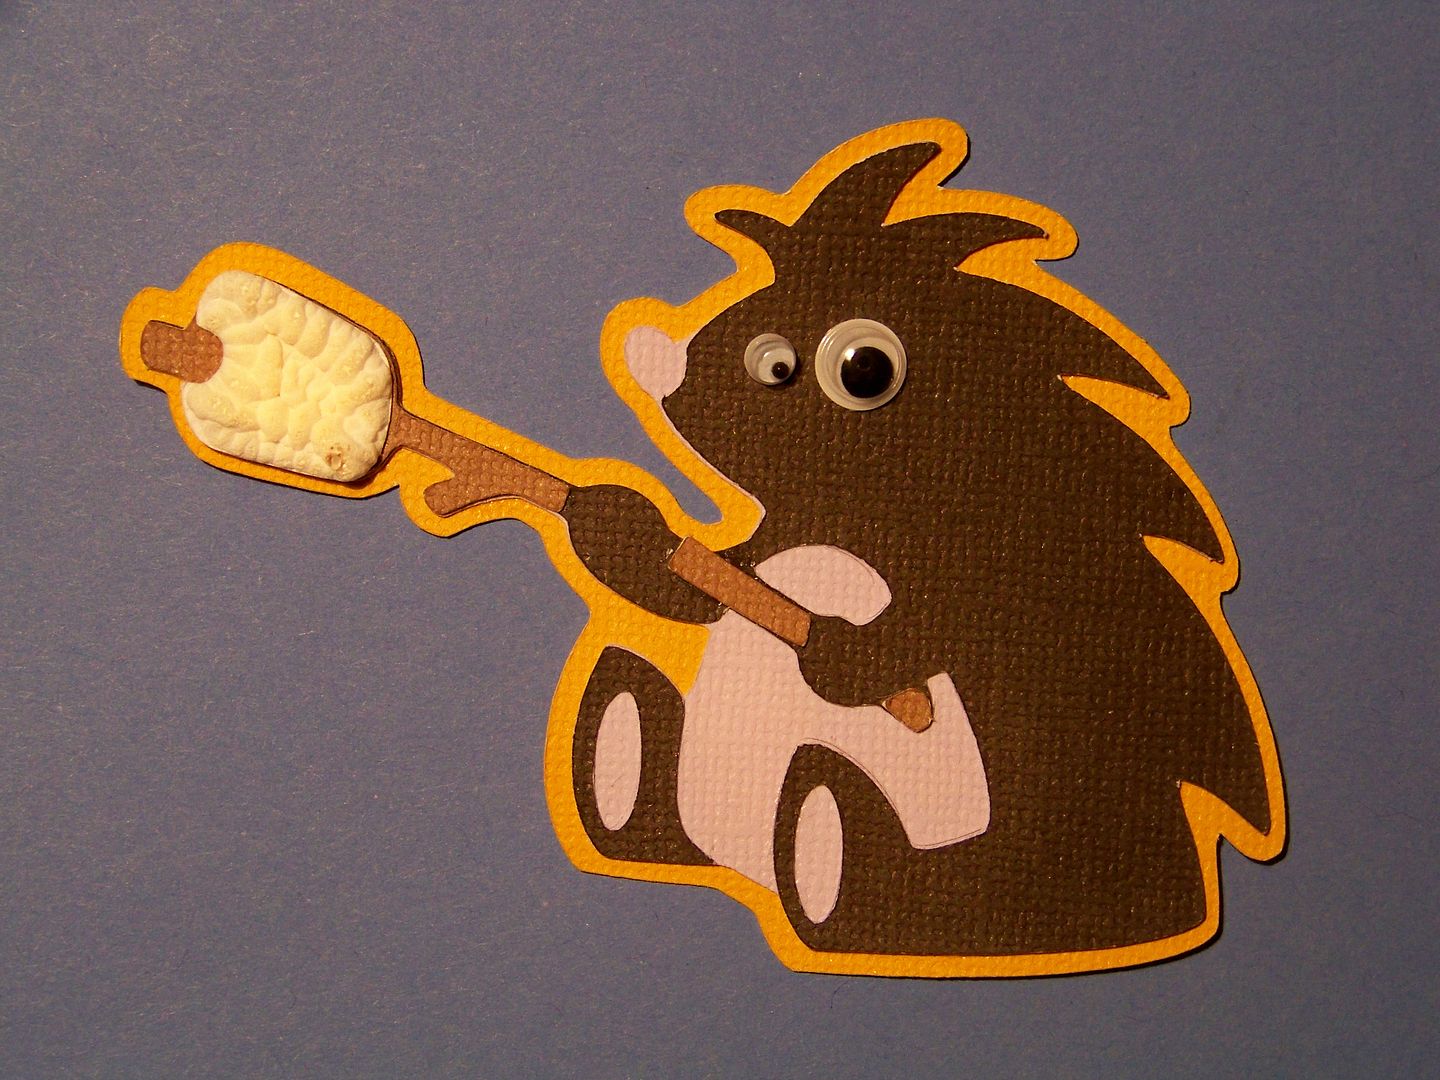
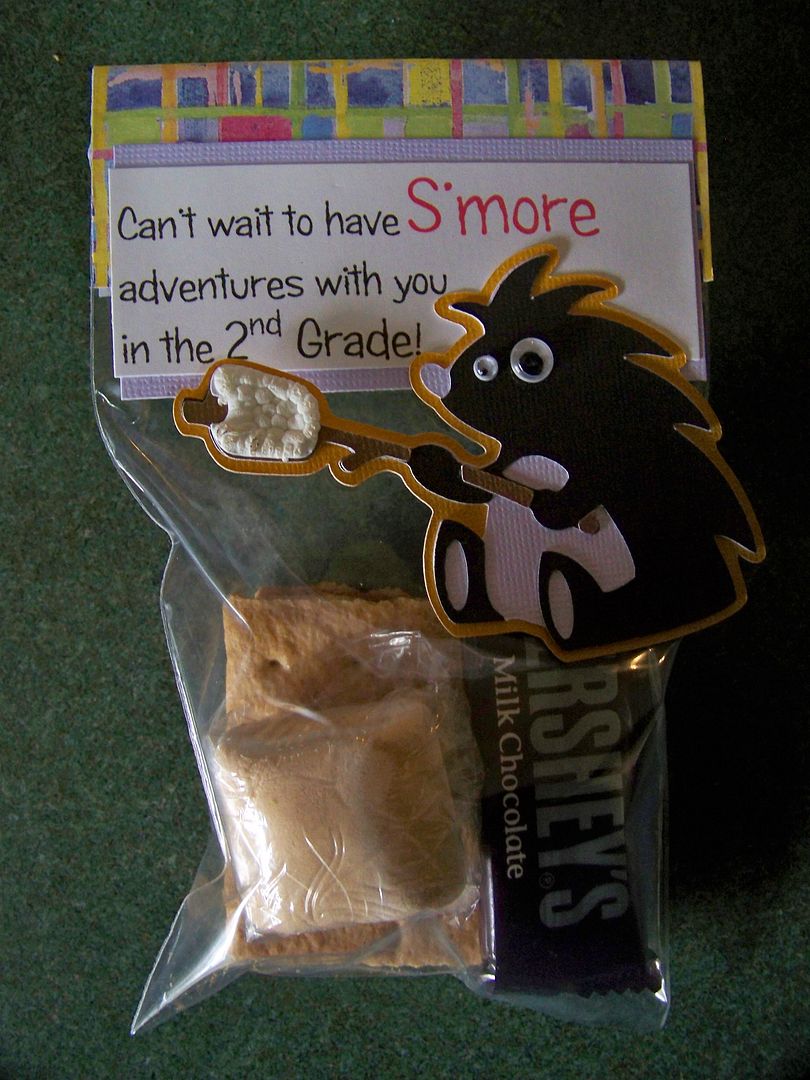


Spongebob Gift Wrap
Next, in a whole different direction, I wanted to share a quick little gift wrap for another of my daughter's friends.  Another children's birthday party... another personalized gift wrap opportunity! 
Gift wrap for birthdays is the reason I bought cartridges like Spongebob Squarepants!  This one was cut at 6".  I used the following RGB numbers with my Imagine to floodfill each shape to get the correct colors.  These are the ones I used:
Body 252,248,19
Holes 162,164, 0
Tie 252,0,28
Pants 188,107,22
Blue Eyes 9,161,201
Bottom of shoes 149,145,140

The eyeballs, teeth, and shirt were cut without printing.  The shadow was a dark gray I selected from the queue and the black base was the basic one built into the Imagine.

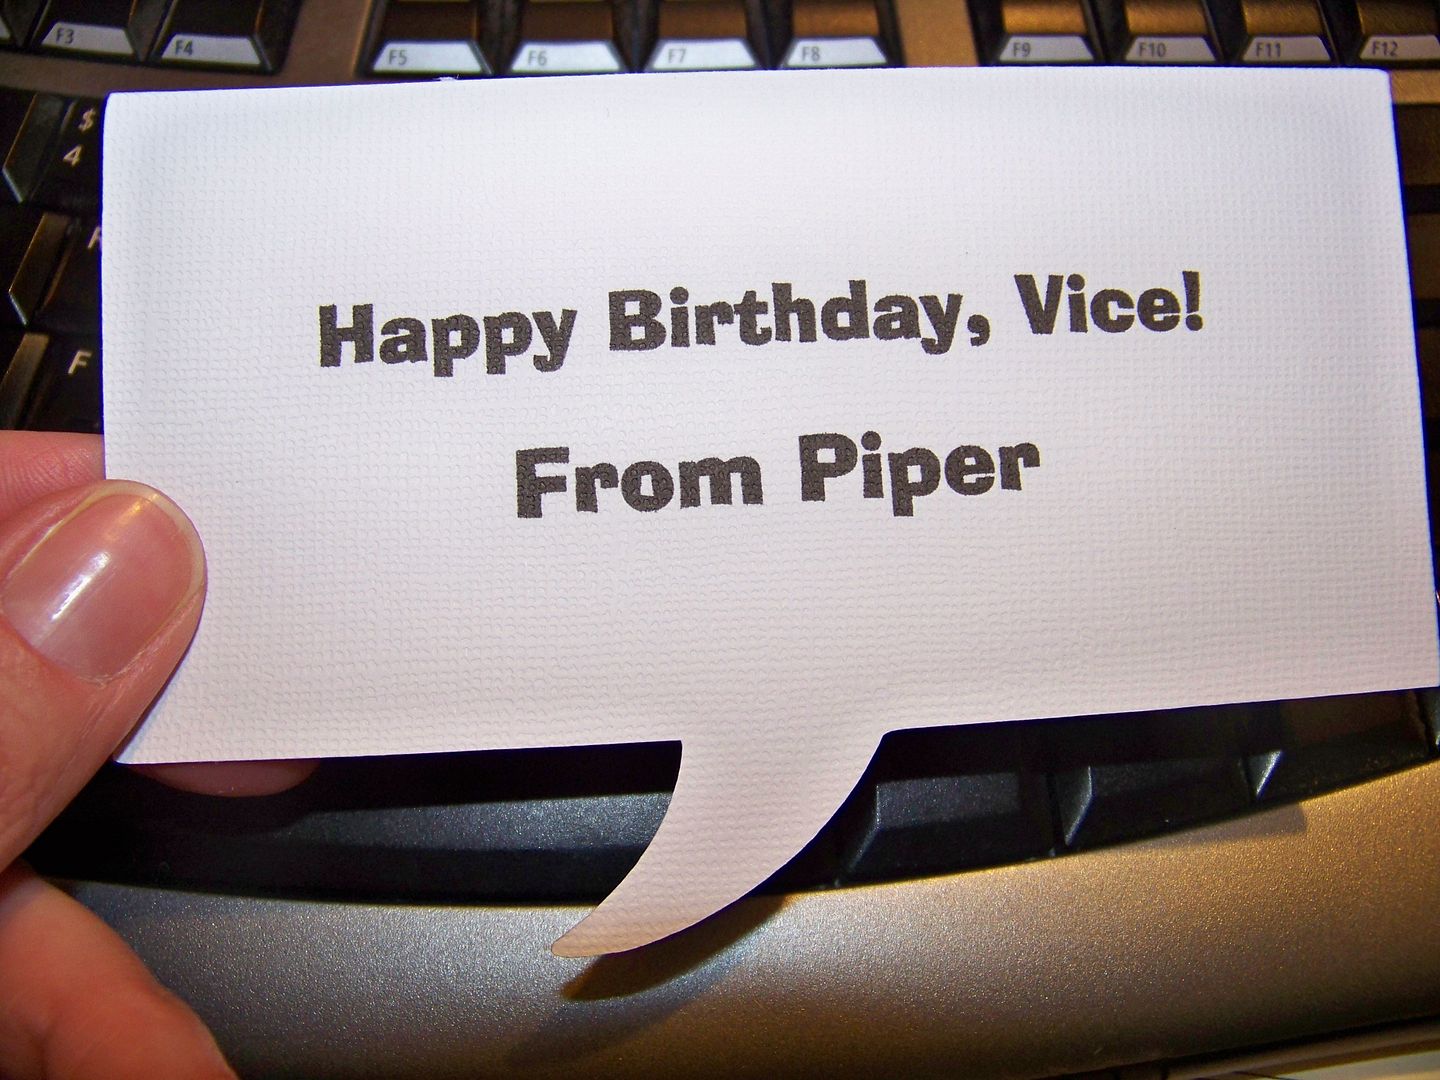
I cut the conversation bubble from Cuttin Up at 3.1" (short stack).  I used my laptop and printer to add text to the bubble.

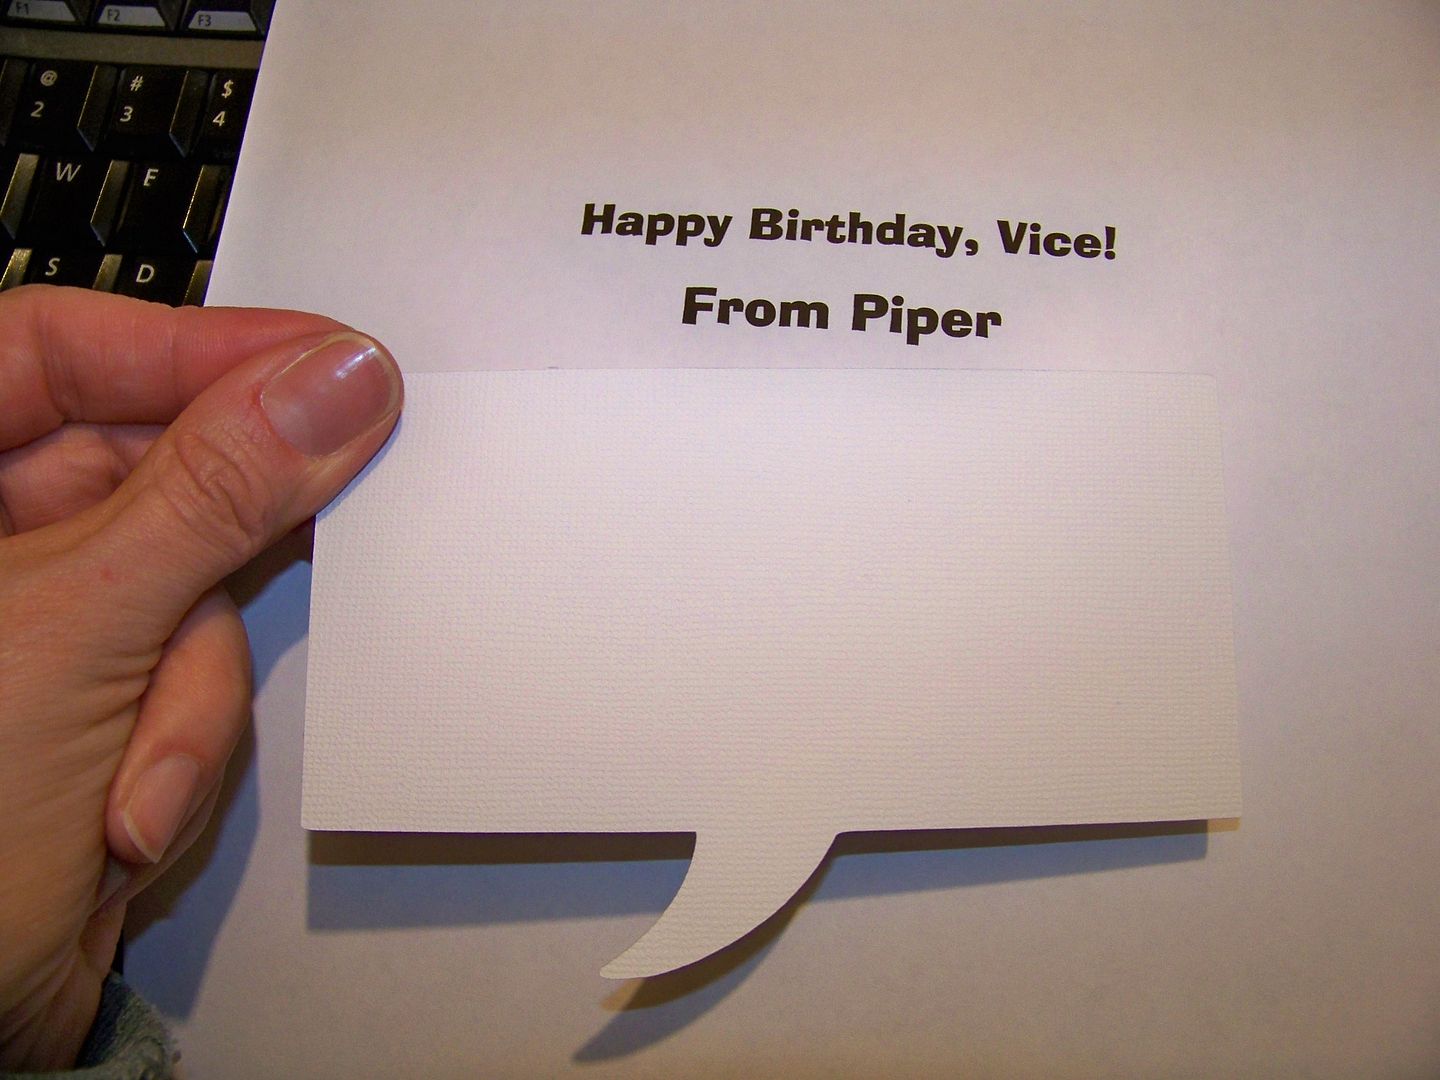
I decided on font called AdLib BT, bold, at 24 point size.  I printed it first on a regular sheet of paper to see if it was the right size. 

I placed the die cut over the text and held it up to the light to center the text.  I lightly applied just a bit of tape to the top to hold it in place and then placed it in the paper tray of my printer.
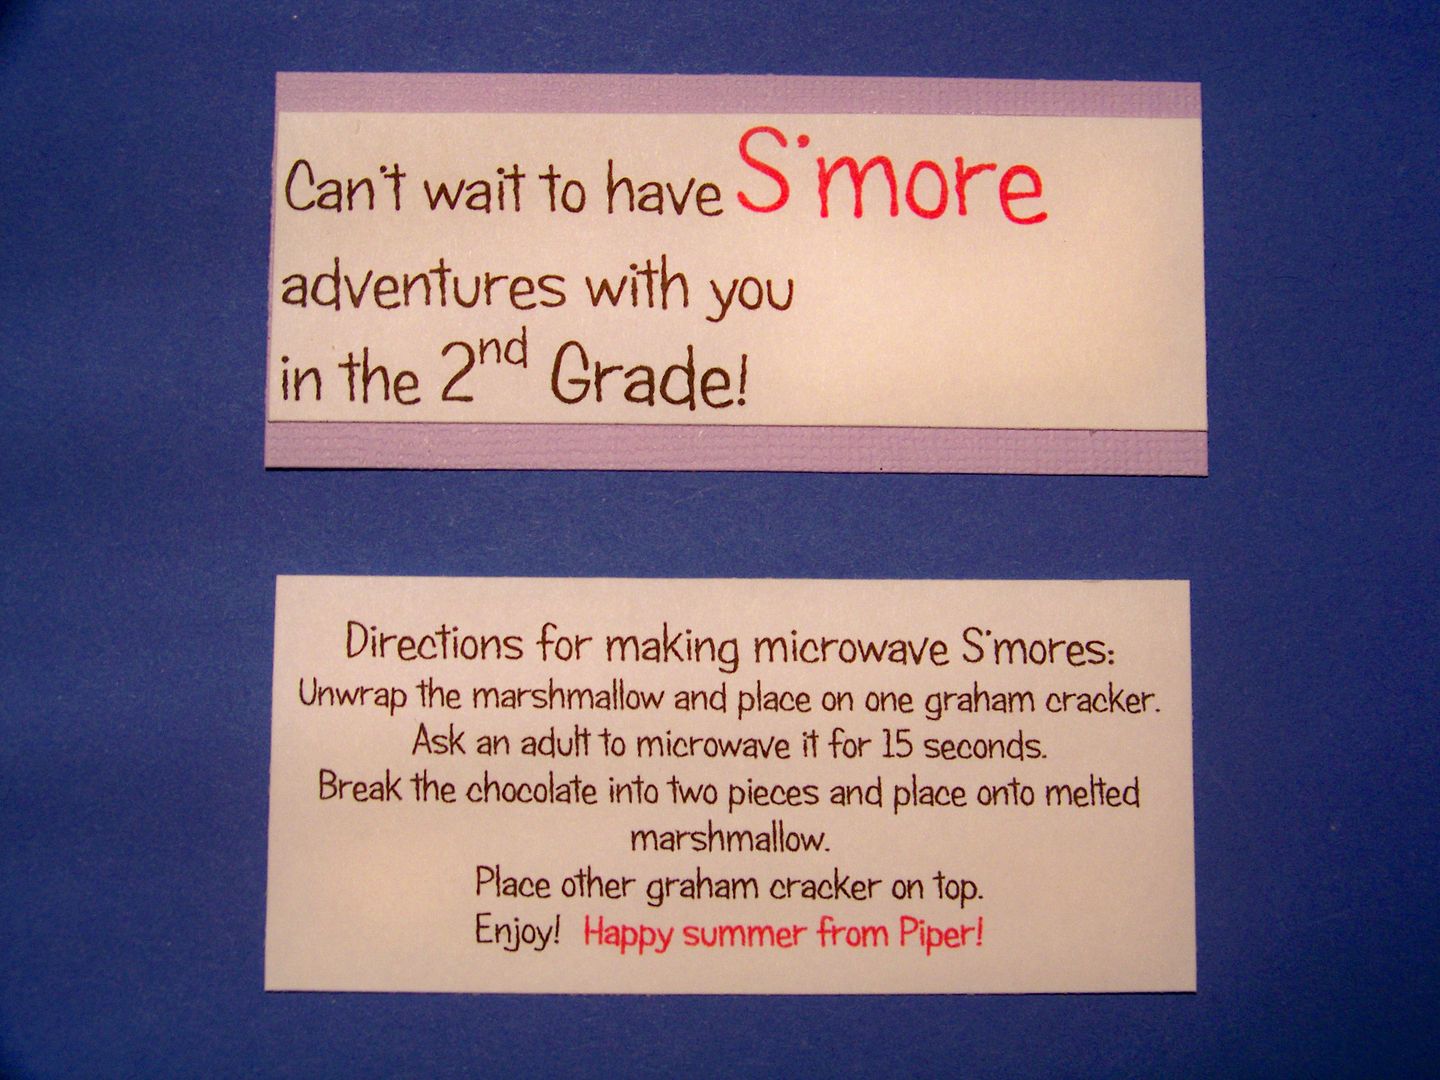
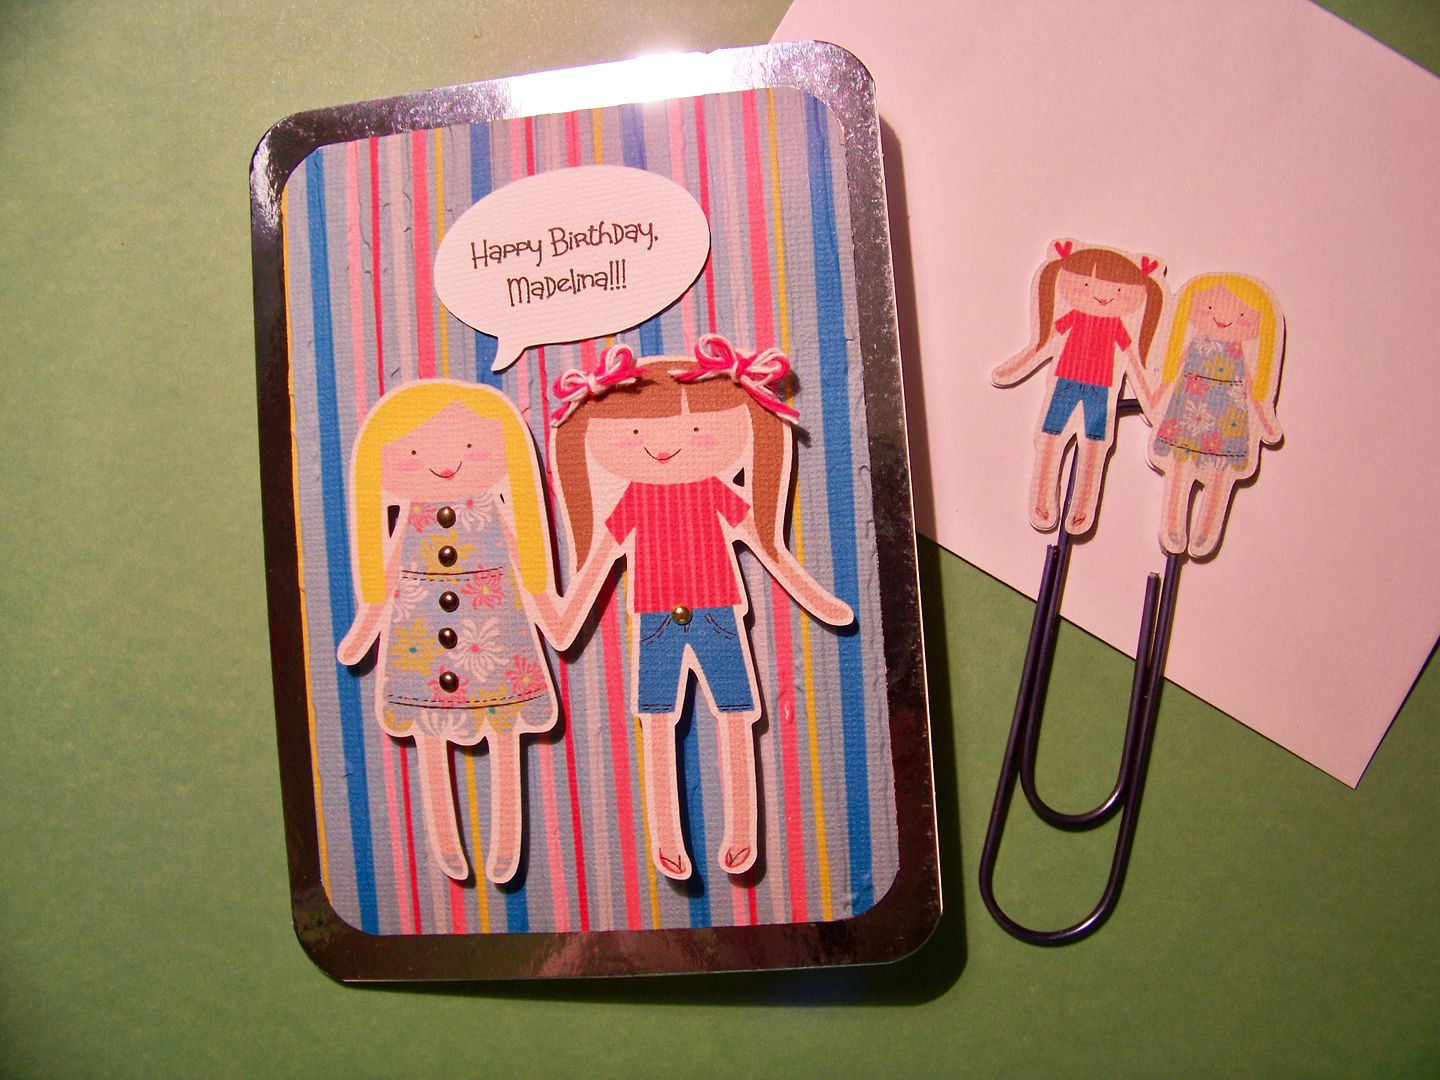
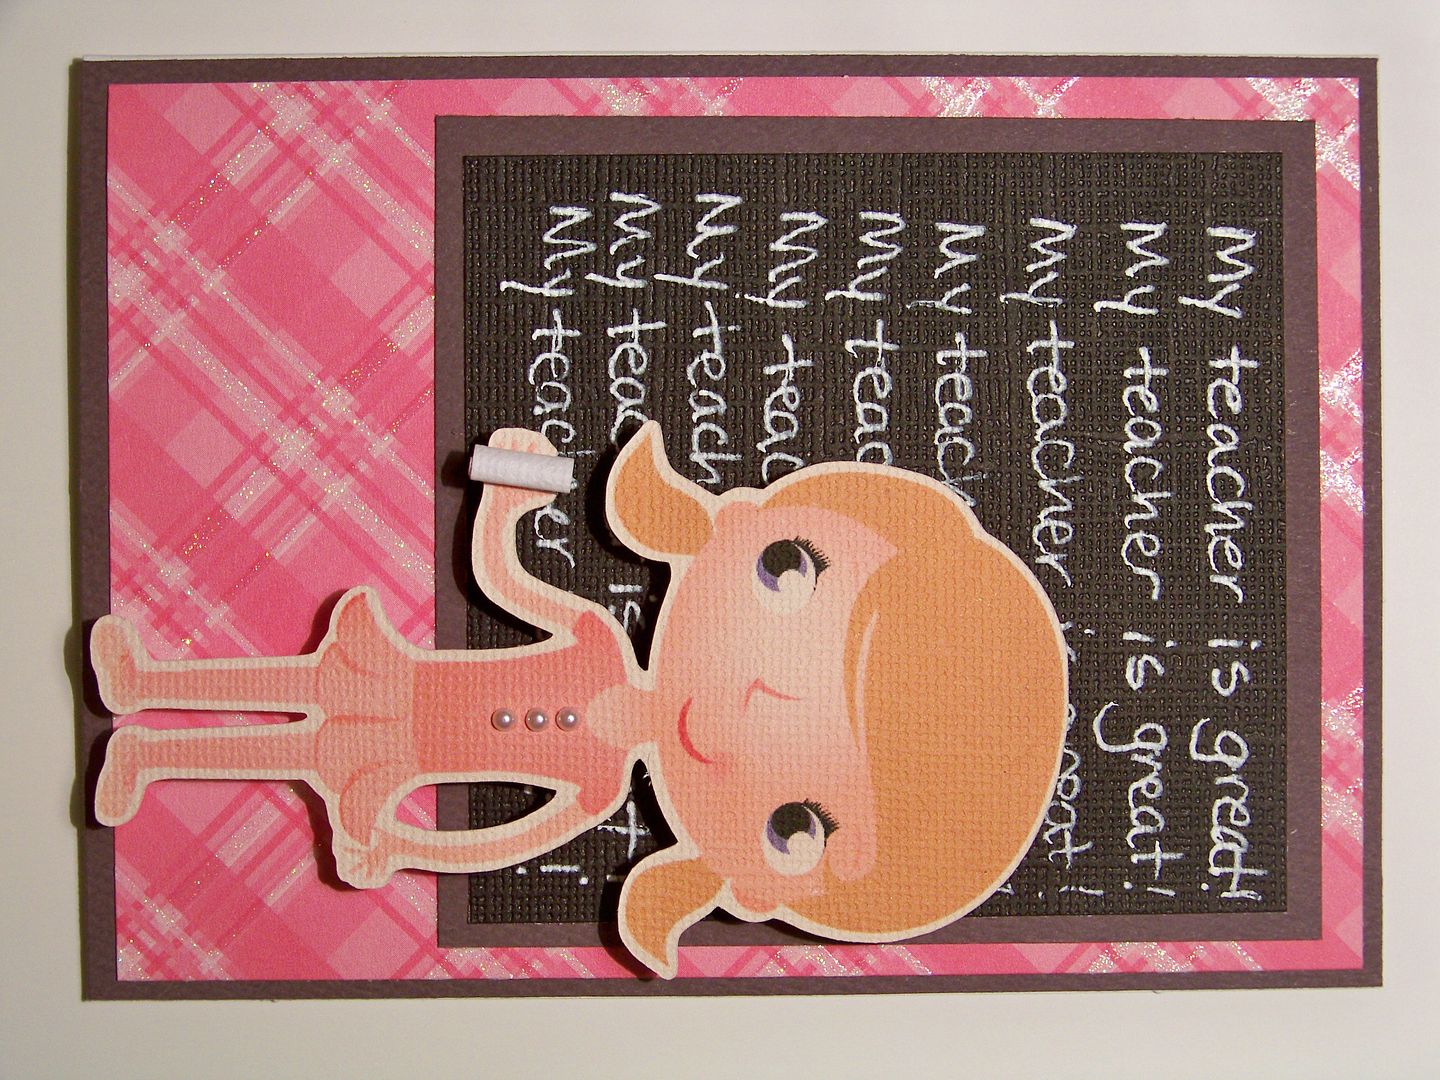
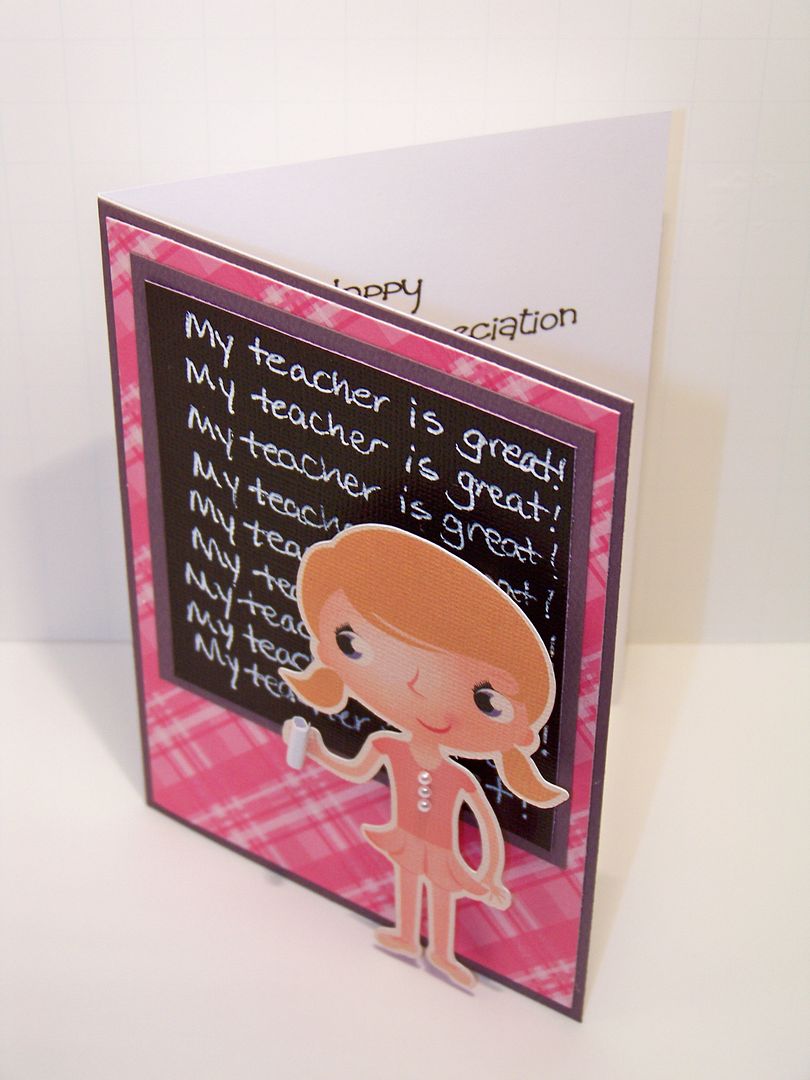


Birthday Card
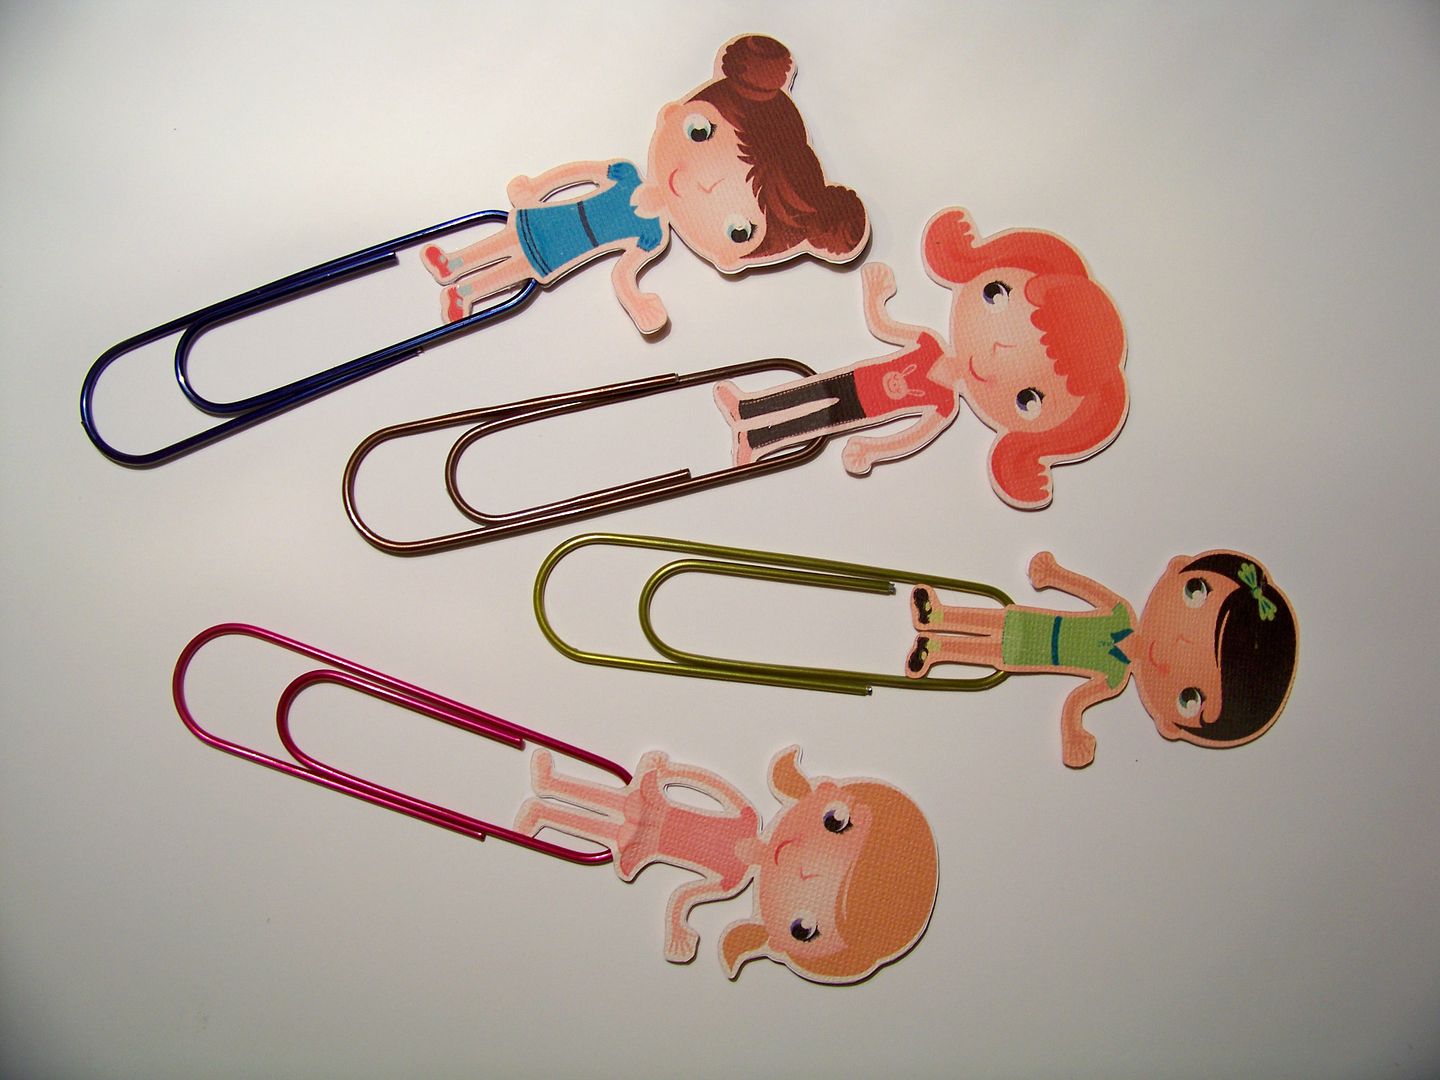
Next, my daughter needed a birthday card for her penpal and I needed a project for Doxie's metal challenge a couple of weeks ago.  This card and matching clip was what I came up with.  My daughter and her penpal make drawings for each other when they write and this time was no exception; the clip was used to keep the drawings for this mailing together neatly.
I used Better Together for the image of the girls.  I cut the image at 3" for the card and 1.8" for the clip.  The speech bubble was a built-in Imagine shape.  I used my computer to add the text, as I did above, using Microsoft's CandyBuzz font.  The striped paper was printed on the Imagine from the Better Together cartridge as well.  The girls were popped up with foam dots.  I added brads and bows for fun.  For the clip, I cut two smaller images, flipping one.  I used E600 to adhere the paper shapes to metal paperclip.
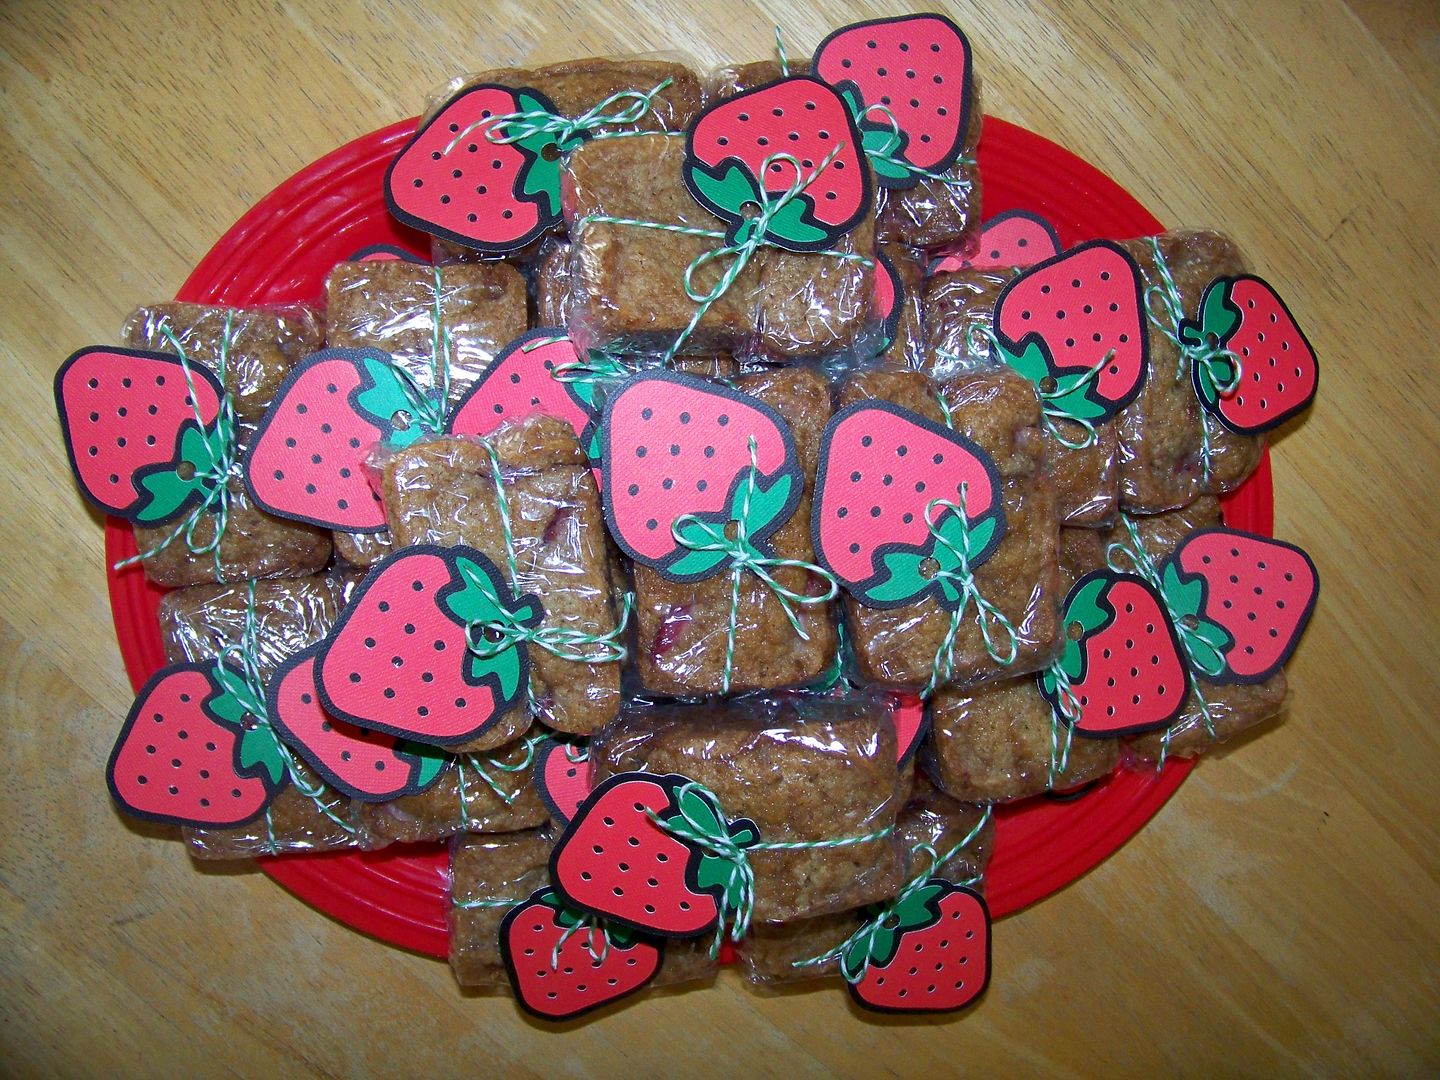


Bake Sale Goodies
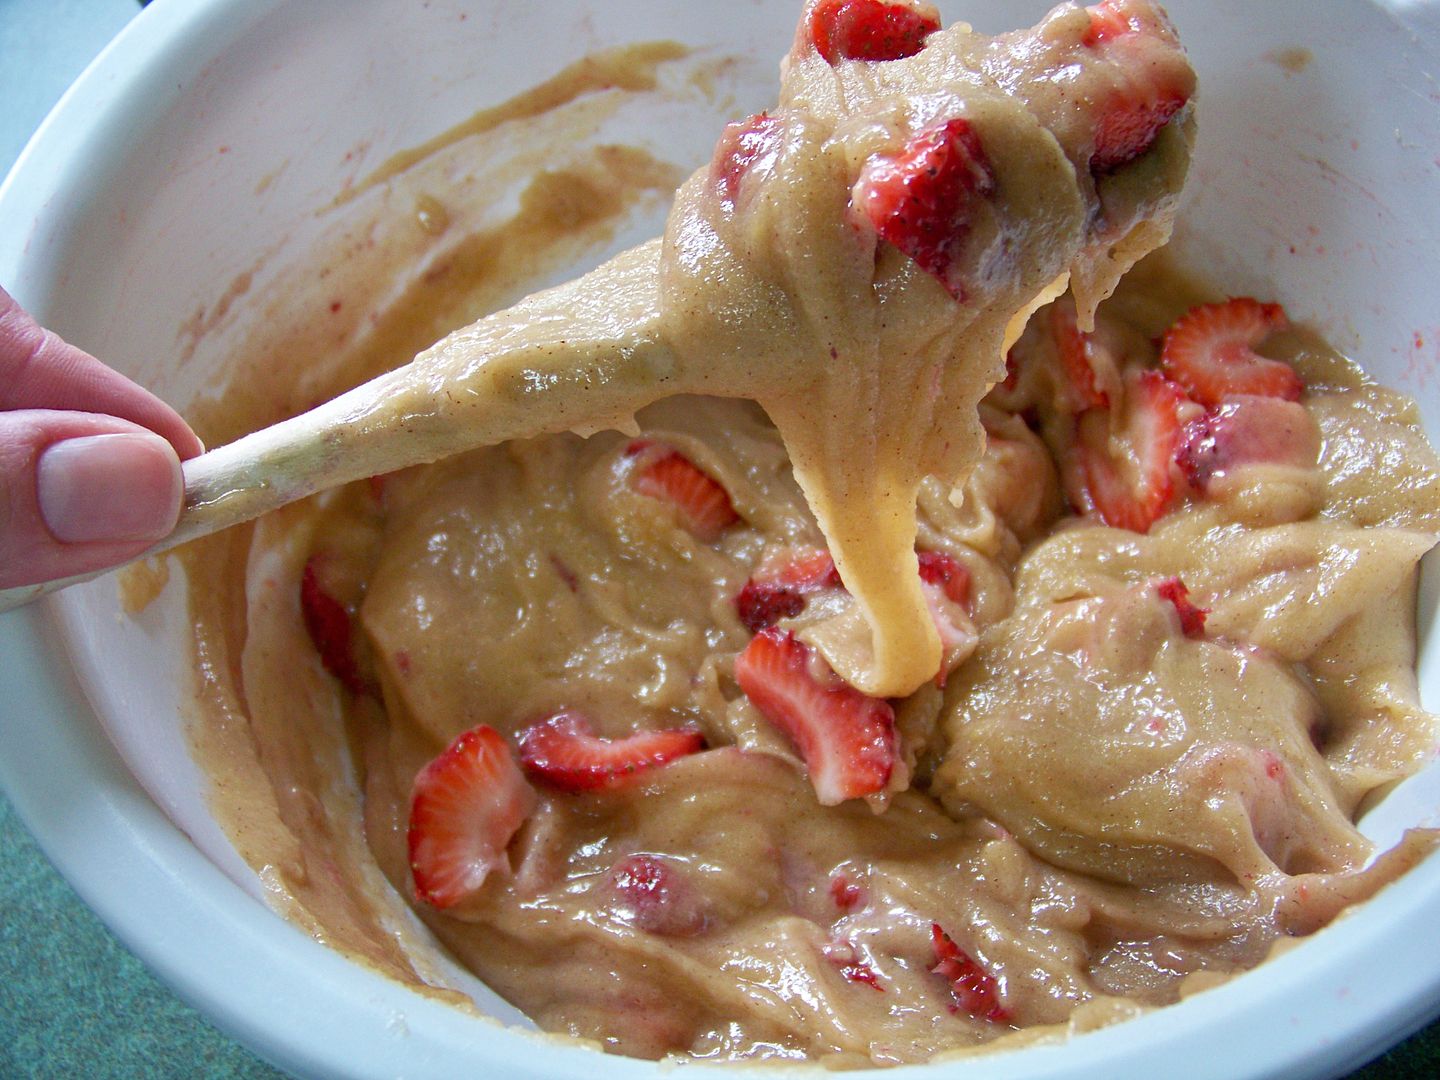
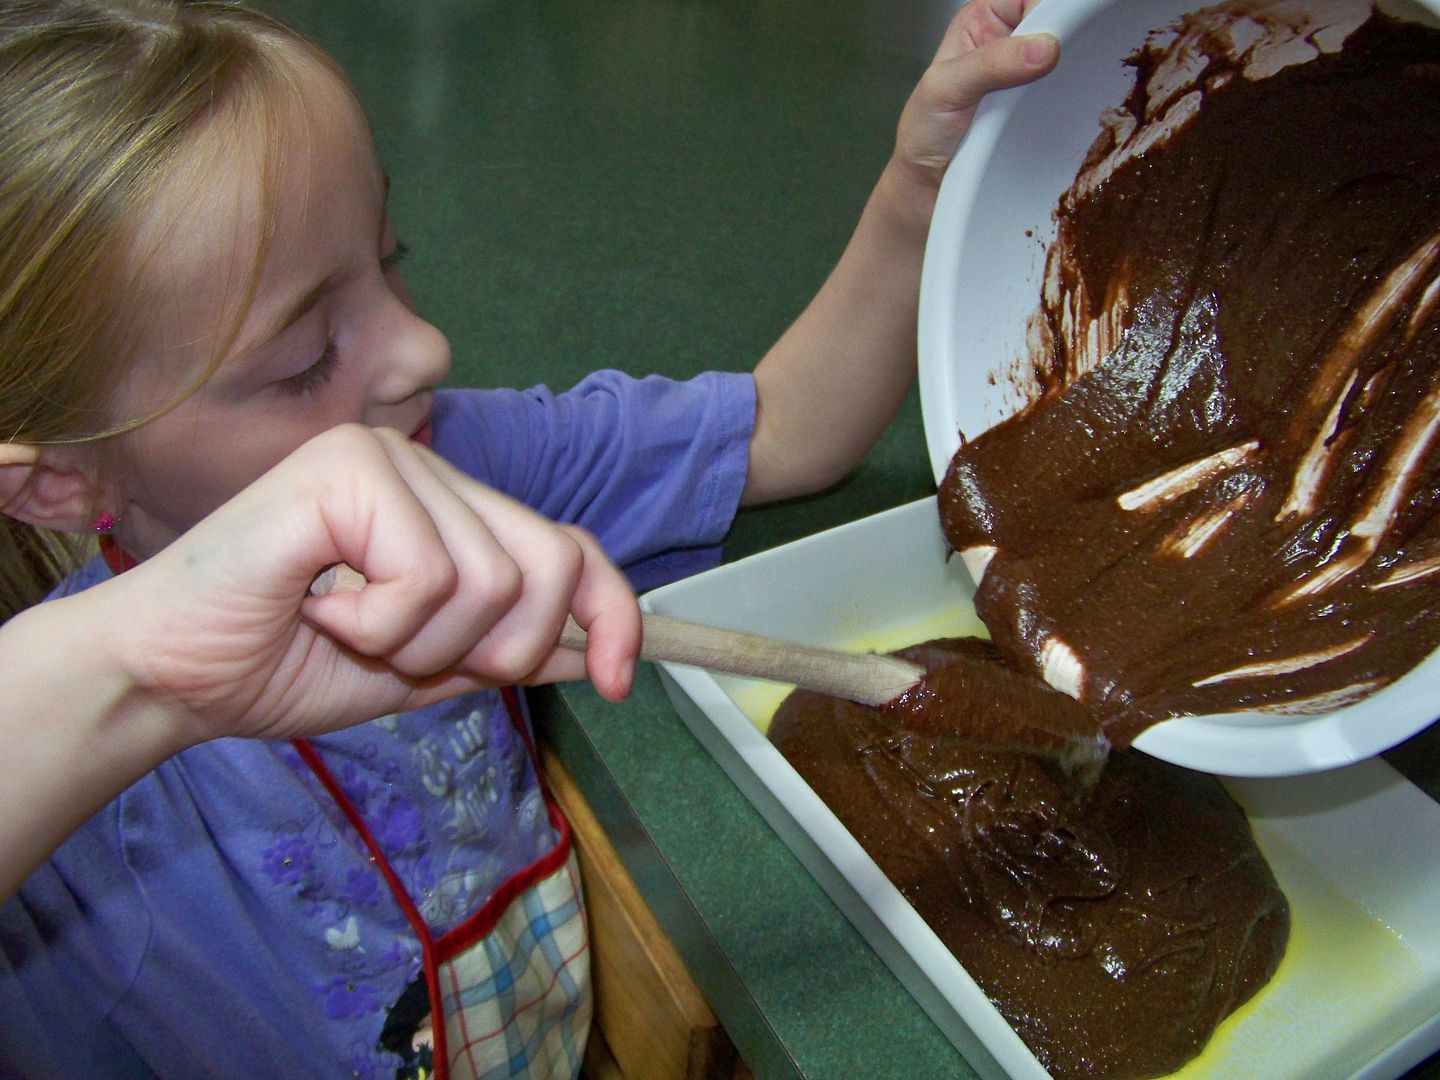
I was asked to help with a bake sale at church.  Since strawberries are so sweet, inexpensive, and available everywhere right now, I decided on Strawberry Bread. 

I thought mini loaves would bring in the most income for the fundraiser and decided to decorate them with baker's twine and the strawberry from Hello Kitty Greetings, cut at 2.5".  I was able to cut the black base on two sheets with Autofill on the Imagine.  The red layer was cut using Autofill on the first page and, using the art number button for the remaining 7 needed.  For the green layer, I adjusted the paper size on the screen so the machine thought I only had an 8" long paper.  This allowed me to use Autofill and not have to cut the full page since I did not need that many.  (I was feelin' smart when I figured that out!) 

I wanted to share my bread recipe with you. 
Strawberry Bread Mini Loaves (click here for printable version)

3 cups all- purpose flour
1 teaspoon baking soda
1 teaspoon salt
1 teaspoon ground cinnamon
1 teaspoon vanilla
2 cups sugar
4 eggs, beaten
1 cup cooking oil
2-1/2 cups strawberries, sliced (just under 1 pound container)


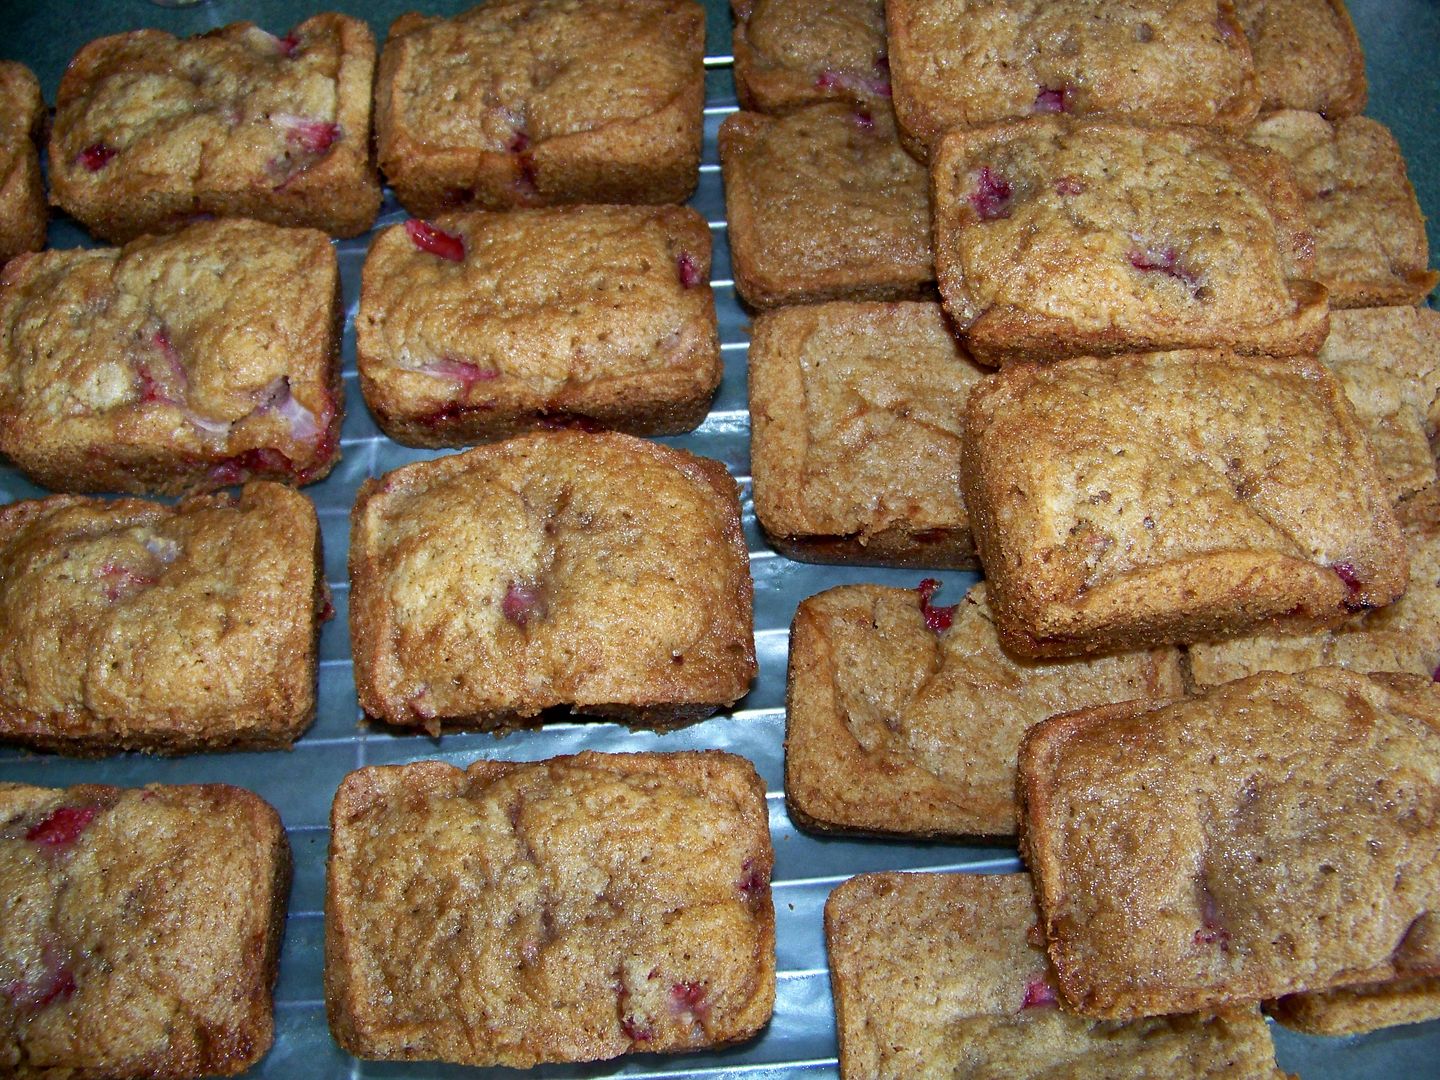
Preheat oven to 350 degrees.  Spray mini loaf pan with cooking spray.  (I used a dark pan that made 8 loaves per pan).  Set aside.


Combine all ingredients except fruit.  Mix by hand.  Stir in strawberries.  (This dough is stiff and sticky and unlike most quick bread batter that I have made.)
Place batter in prepared pan and bake 30 minutes. 

Remove from pan and place on wax paper covered rack.  Makes 16 loaves per recipe.  I made two batches for this project.


I love quick projects! 
Thank you for visiting my blog today!  Happy Spring to you!

Sunday, May 8, 2011

Happy Mother's Day!

My daughter came into where I was working this morning and asked me for a certain color of permanent marker...and she told me to keep away from the hall where she was working... then she asked for a hole punch and reminded me to keep away... then she asked for yarn and told me she was working on a surprise...

So, I did what any mom would do.  I peeked.  And I took a picture.


When I was given permission to look, this is what she had made for me!  I love it. 


Happy Mother's Day! 

Monday, May 2, 2011

Teacher Appreciation Day!

My daughter, Piper, LOVES her teacher.  She is kind and patient and accessible to the parents, even answering emails on weekends, including Easter!  She truely loves the kids... and they love her.  She has worn her heart on her sleeve this year, as she shared with her 1st grade class and their families that she and her husband were expecting their second child.  Then she shared her pain when she miscarried.  Many of the families have felt very close to her.

She has been so understanding and kind to my daughter.  She has been a positive and encouraging force in all subjects, nurturing Piper's love of learning.  When I read that I had an opportunity to win an Expression for my daughter's school by showing my appreciation for her teacher, I jumped at the chance!  This is my entry in the Circle Magazine Challenge.

I started this project at Walmart looking for the base items for a teacher set.  I have loved the sets I have been seeing on the Circle blog.  I knew that I wanted some sort of collection or set of gifts.  I had in my mind using black for a blackboard and some 'ready made' Imagine images so I could avoid piecing layers.  I decided on the Best Friends cartridge.  There is a character with blonde hair and a tutu.  My daughter and I agreed that she looked like that character.  She picked out others that looked like her friends and I printed out and cut LOTS of these in various sizes. 

I started with a pencil holder.  I found a solid black one to use.  I cut three images at 4" and glued them on with E6000 plastic adhesive.  Using a white pen, I wrote between the characters to mimick chalkboard writing.

The giant paperclips I purchased for part of the gift set served perfectly to keep the paper images in place while the glue dried.

Rolled up strips of paper create 'chalk' for the characters to hold.
I had purchased a box of solid-colored pencils and cut lots of characters at 2" (flipping half of them to glue onto the backs).  I placed some of the paper dolls at the top of the pencil, just under the eraser and some in the middle of the pencil, covering up the brand.


Piper and I worked on making brownies.  Piper insists that brownies are her teacher's favorite treat.  I hope she is right. 


While the brownies baked and cooled, I finished up the projects, starting with a card.  I had been thinking of a card I had seen a while back from Sonia Kertznus on the Cricut message board that used a car decal girl and placed her in front of  a blackboard with 'my teacher is great' written over and over like punishment sentences.  I thought that was so funny and clever.  I used this design with my Best Friends Piper doll, cutting her at 4", popping her up and giving her a piece of rolled paper chalk.

I printed the sentiment inside on my computer.

I gathered those jumbo paperclips that helped with the pencil cup and decorated them to match the set.  This idea originally came from Scrapalette.  She once posted her bug head paperclips and then sent me one to see firsthand.  Over the weekend, I did my first one with Doxie's metal challenge.  I loved the way it finished so I decided it would be fun to include a few with this set.  Like the pencils, I printed two of each character, flipping one, for each clip.  These were each cut at 3".  I used the E6000 again to ensure that they would stay together.


I had purchased some baby roses and wanted to make a pick that would carry on the theme.  These were also cut at 3". 


Once the brownies were cooled, they were individually wrapped in wax paper and them packaged in plastic.  I made a little tag using a 2" character.


I put it all together, ready to go out the door, letting all those faces peak over the top of the bag.  I clipped the card to the bag with one of my jumbo paperclips. 

 I hope she likes it.  Hopefully it will make her smile. 

Thank you for visiting my blog.  I have had such a fun evening putting together this gift for such a wonderful teacher and kind person.

Sunday, May 1, 2011

When someone sends you a treasure....


I went downstairs this morning to find a box my husband had left for me that was at the post office yesterday.  I had received a message from a fellow crafter on the Circle message board, Sis 'O Snap, a few days ago, asking for my address so she could send me a card she had made to celebrate my confirmation.  I realized this box contained her 'card'. 

Sis 'O Snap, or Noele, created a treasure for me. 

It was protected in a box she made of chocolate brown cardstock with a subtle sparkle, wrapped with a silky piece of earthy green binding, and tagged with an inked  bit of cardstock hand-written with:   "For Nadia ~ on her confirmation Easter 2011."  It was already special to me.  Noele shared with me in her initial message that she was not Catholic but that she had read my post during Holy Week where I mention my confirmation. 

I opened the box to find an image of Saint Francis that she had created using a variety of Cricut cuts, combined with her alterations by hand. 


What struck me immediately, was the figure.  I love altering figures and knew she had to have done this to create this project.  Her kind note indicated that she altered figures and changed heads!  On a later message, she told me these details which I know you will appreciate  (I have removed her sentiments that are personal):

"...the idea has been floating around in my head for so long - with no way to get out as I could not use a paper doll for St Francis. His body and robe were originally a Christmas lady ....his robe was hand trimmed to make it more robelike and more male.  I used the milk girl face from Country life and added an oval to make a full head. It seemed that leaving the face plain was better than adding eyes or other features...  Most of the papers came from the Seasons imagine cartridge - except for the "Italianate" one which interestingly came from a stack called Far East. Go figure - proves a title should not limit you.  It was the first book I made..."

Her details are magical with the hand-drawn lines on the figure's robe and the bird frozen in flight courtesey of a thin strip of acetate.


Noele is masterful in her creation of dimension, creating a sculptural interest.  Some elements are popped up as much as 1" to create perfect spaces for each.


This project 'feels' like a book with its weight, created from a heavy core and her layers of decorative papers. 


It is even bound like a book with a fabric binding and creased spine.  I was stunned to read that this is the first book she had created!


Oh, those papers!  Beautiful patterns so lovely together, perfectly balanced in color and scale!  Just like the flora and fauna that she has depicted with her choice of cuts.  Her curved banner with her handwriting expertly mimicks the curve of the tree and balances her beautiful composition.  Just perfect!

The inside is so meaningful with the powerful Prayer of Saint Francis.


This gift absolutely touched me.  Its beauty is not just the lovely artwork and beautiful prayer, but also the gentle kindness of the gift and the generous nature of the giver.  I am so humbled that anyone would do this for me!  It will be an honored treasure to me forever.  Thank you, Noele, for thinking of me and for sharing your talents and your time!

And on that, I will end this post with the prayer.  It is so beautiful!
 

Prayer of Saint Francis of Assisi

Lord, make me an instrument of your peace.
Where there is hatred, let me sow love;
where there is injury,pardon;
where there is doubt, faith;
where there is despair, hope;
where there is darkness, light;
and where there is sadness, joy.


O Divine Master, grant that I may not so much seek
to be consoled as to console;
to be understood as to understand;
to be loved as to love.
For it is in giving that we receive;
it is in pardoning that we are pardoned;
and it is in dying that we are born to eternal life. Amen


But wait! There's more! Click 'older posts' above!

But wait!  There's more!  Click 'older posts' above!