Sunday, January 22, 2012

Criss Cross Alpaca Scarf

I learned a new stitch, Criss Cross, recently and used it to create my final birthday gift to myself... a scarf to go with my new coat!


Pin It
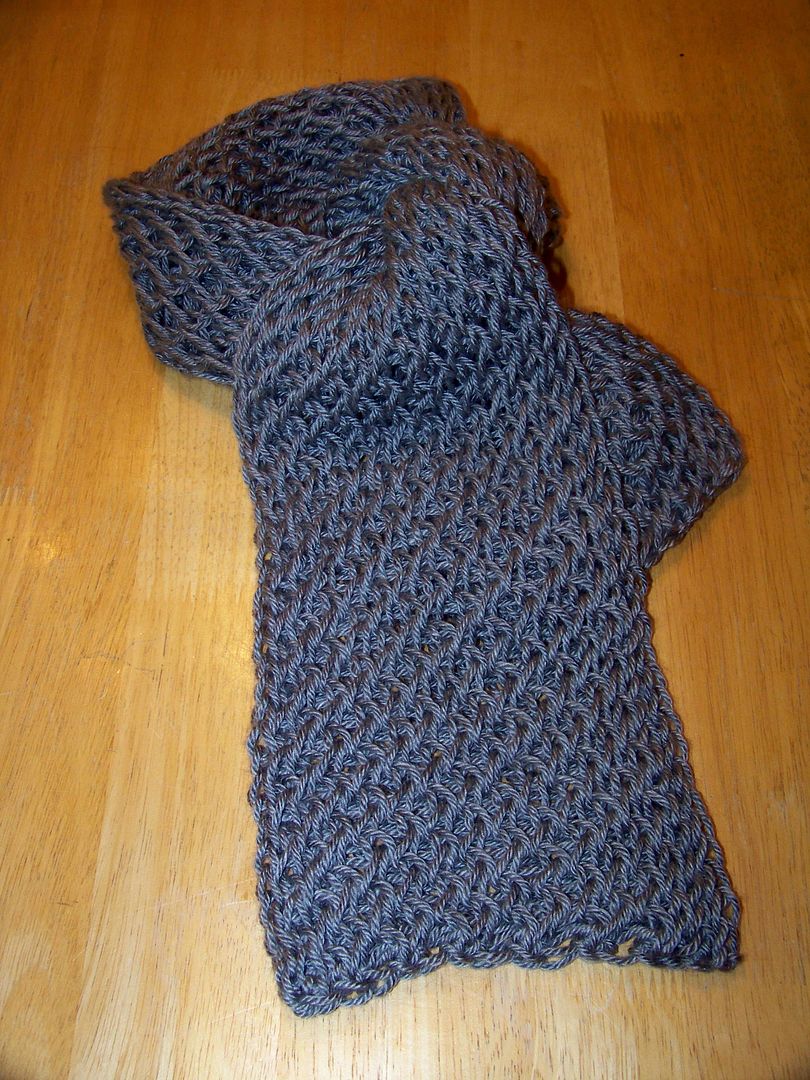
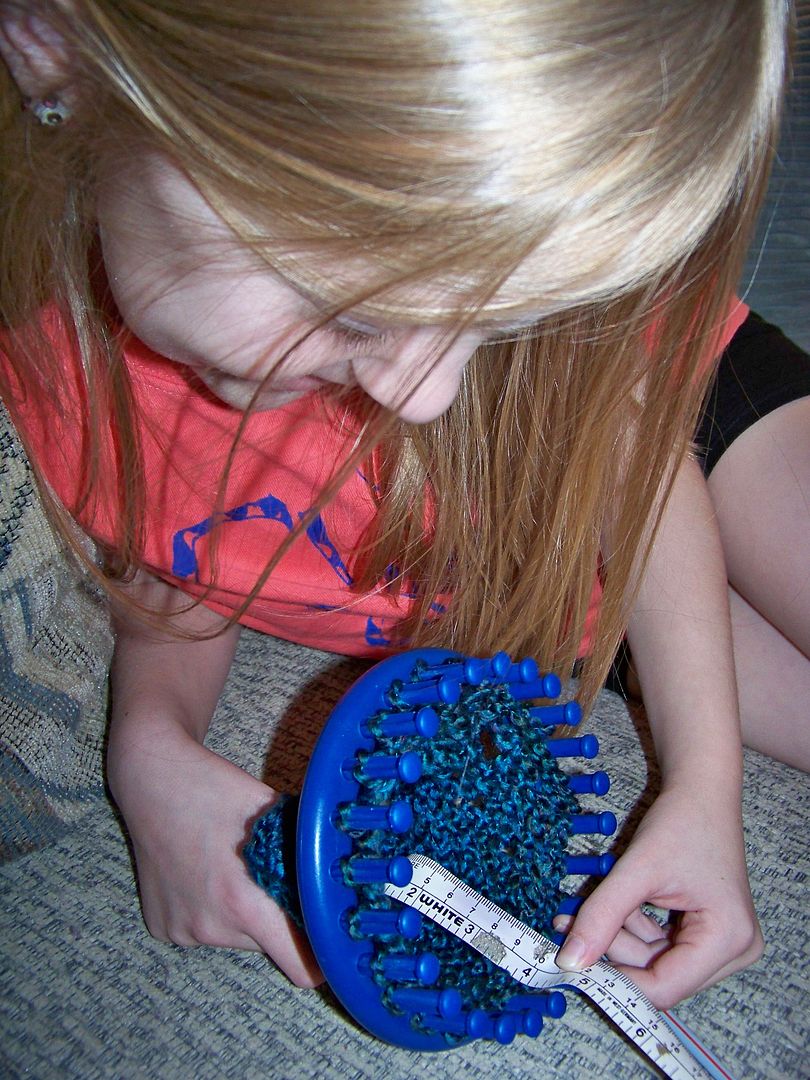
I found this yarn at Michaels. It is Yarn Bee's Andes Alpaca in color Damson.  I picked it because it looked like a purple and brown, which I had been looking for. It is a longer varigation - or maybe a shorter skein. Whichever the case, look at all the other colors in this, even though only purple and brown showed at the store on the outer skein! I think I love it better with all the colors, but I was so surprised as I was knitting that it started looking like this! (A happy surprise!)  I really liked the "depth" I got by using a varigated yarn!  The finished size is 40"x7". This took two skeins of yarn, or roughly 200 yards.

Five inches on each end are double knit stockinette.  I knitted 30" using the Criss Cross stitch. 


I used the double knit stockinette because I found after doing a gray practice scarf that I did not like the Criss Cross stitch on the bottom edge.


The Criss Cross stitch is one I learned after seeing a video on YouTube. Click here to see it. After watching it, I had to re-watch it to create a diagram so I could actually do it.


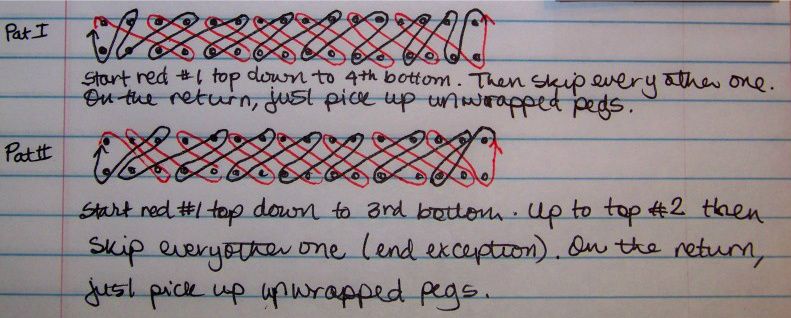
The Criss Cross stitch actually is a pattern of two different combinations, each creating a stripe. When combined, you get a whole new and interesting design.   After I finished my practice scarf and the final one, I did a little sample to figure out what I was really doing.  You can see how each pattern is a stripe.

Pattern II is at the top and Pattern I is at the bottom.


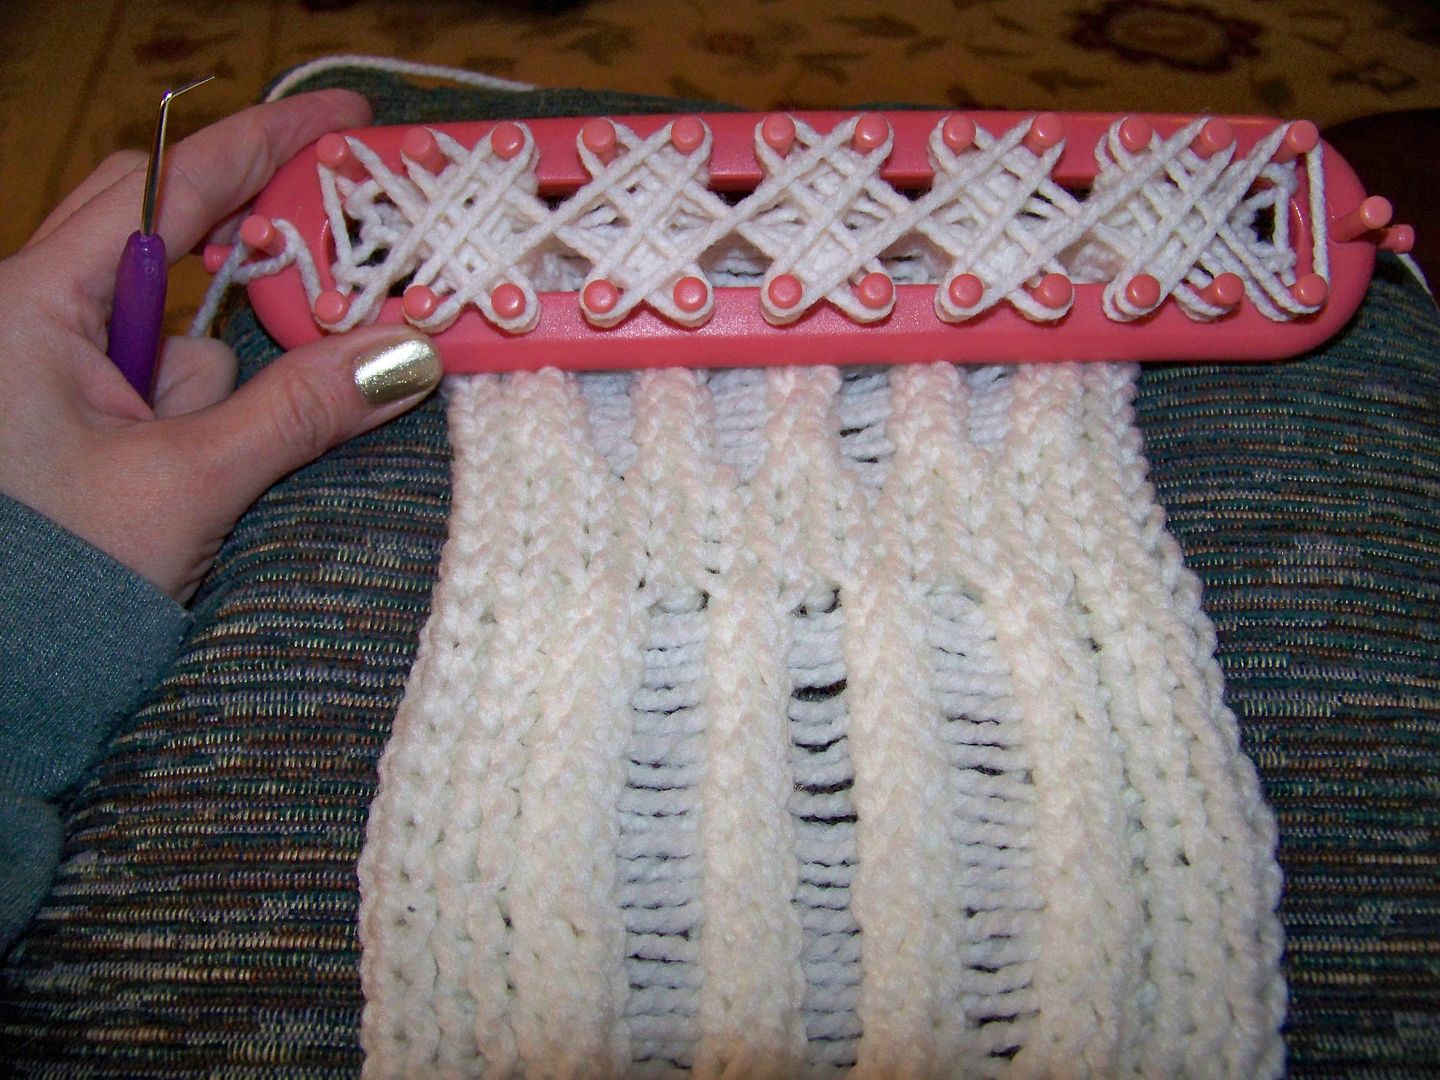
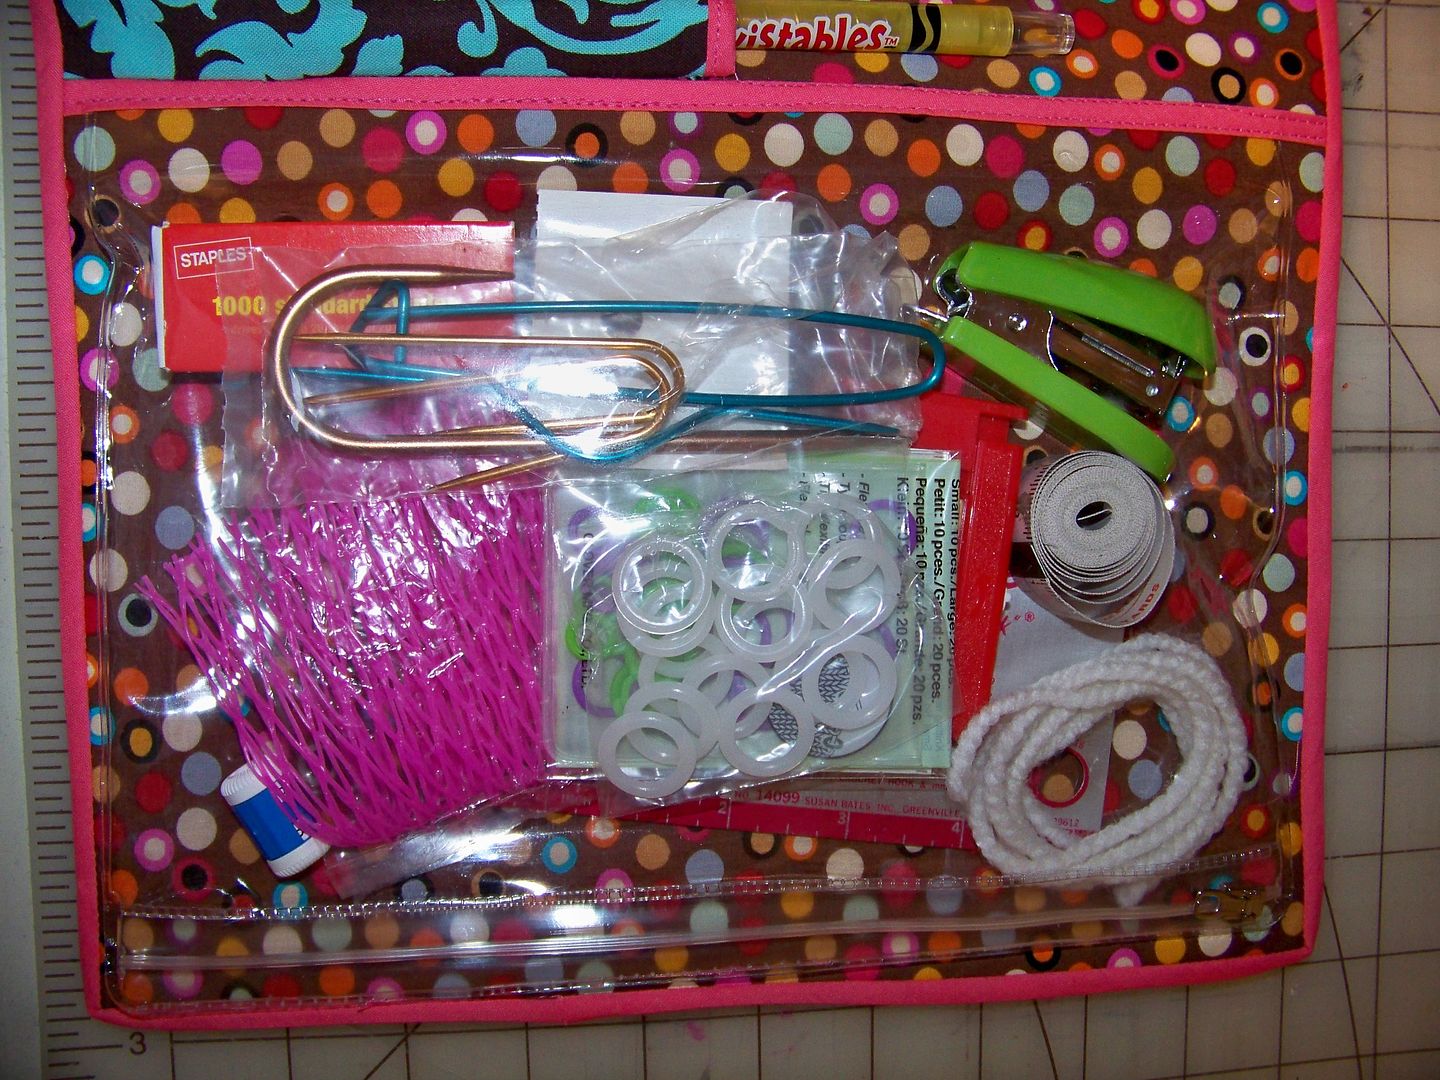
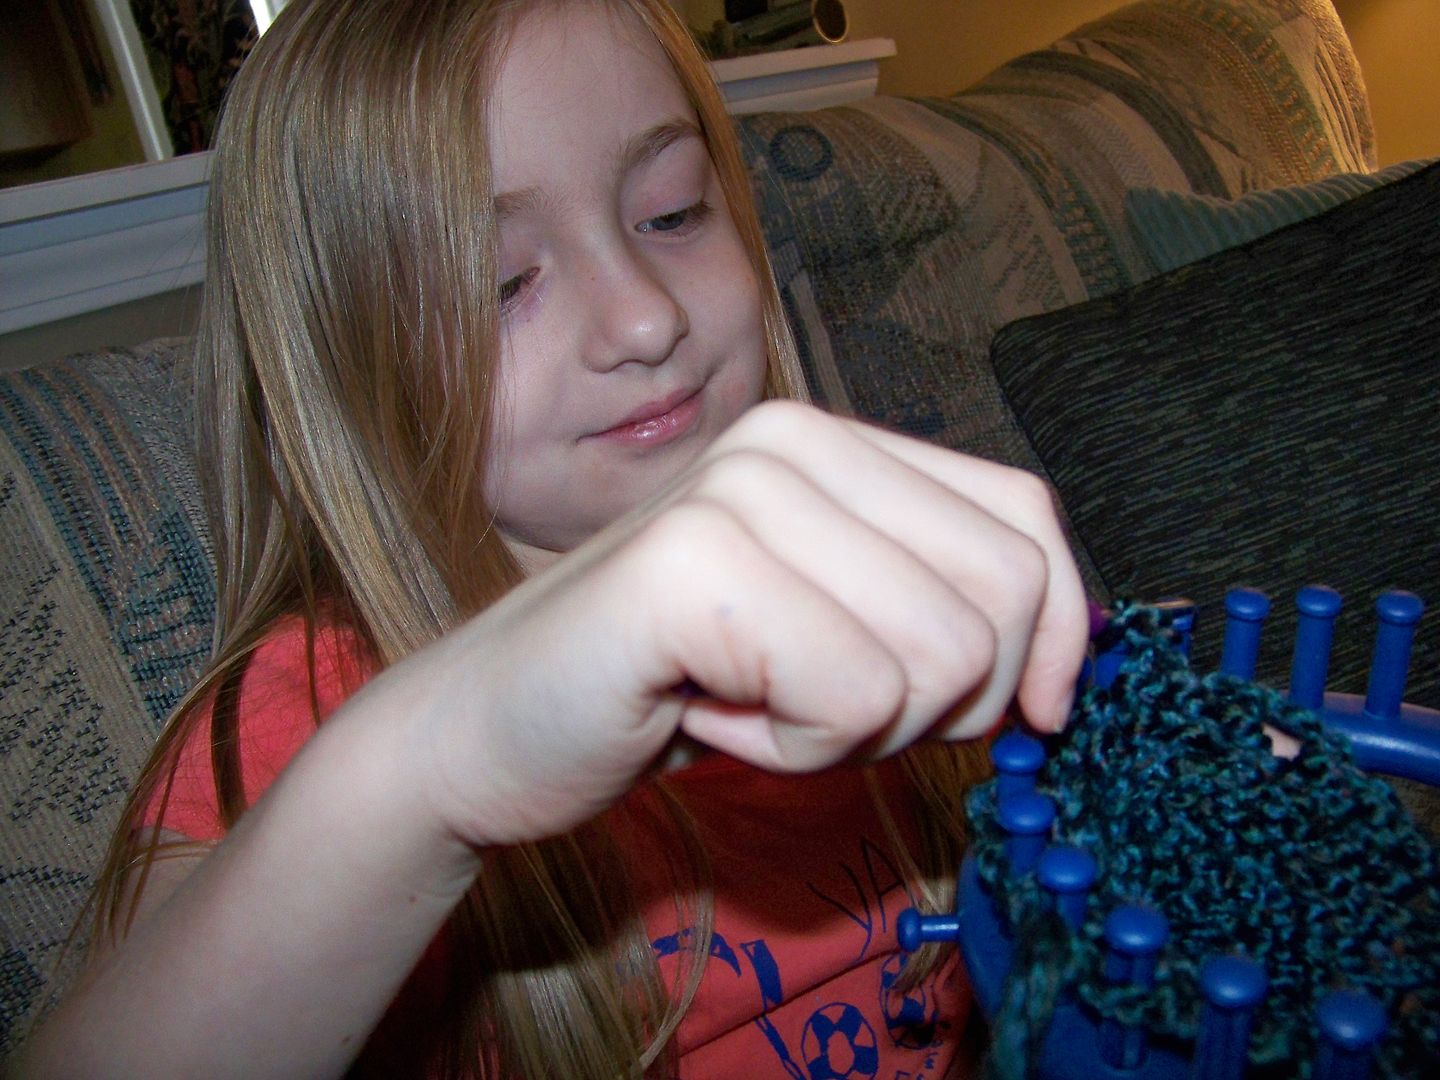
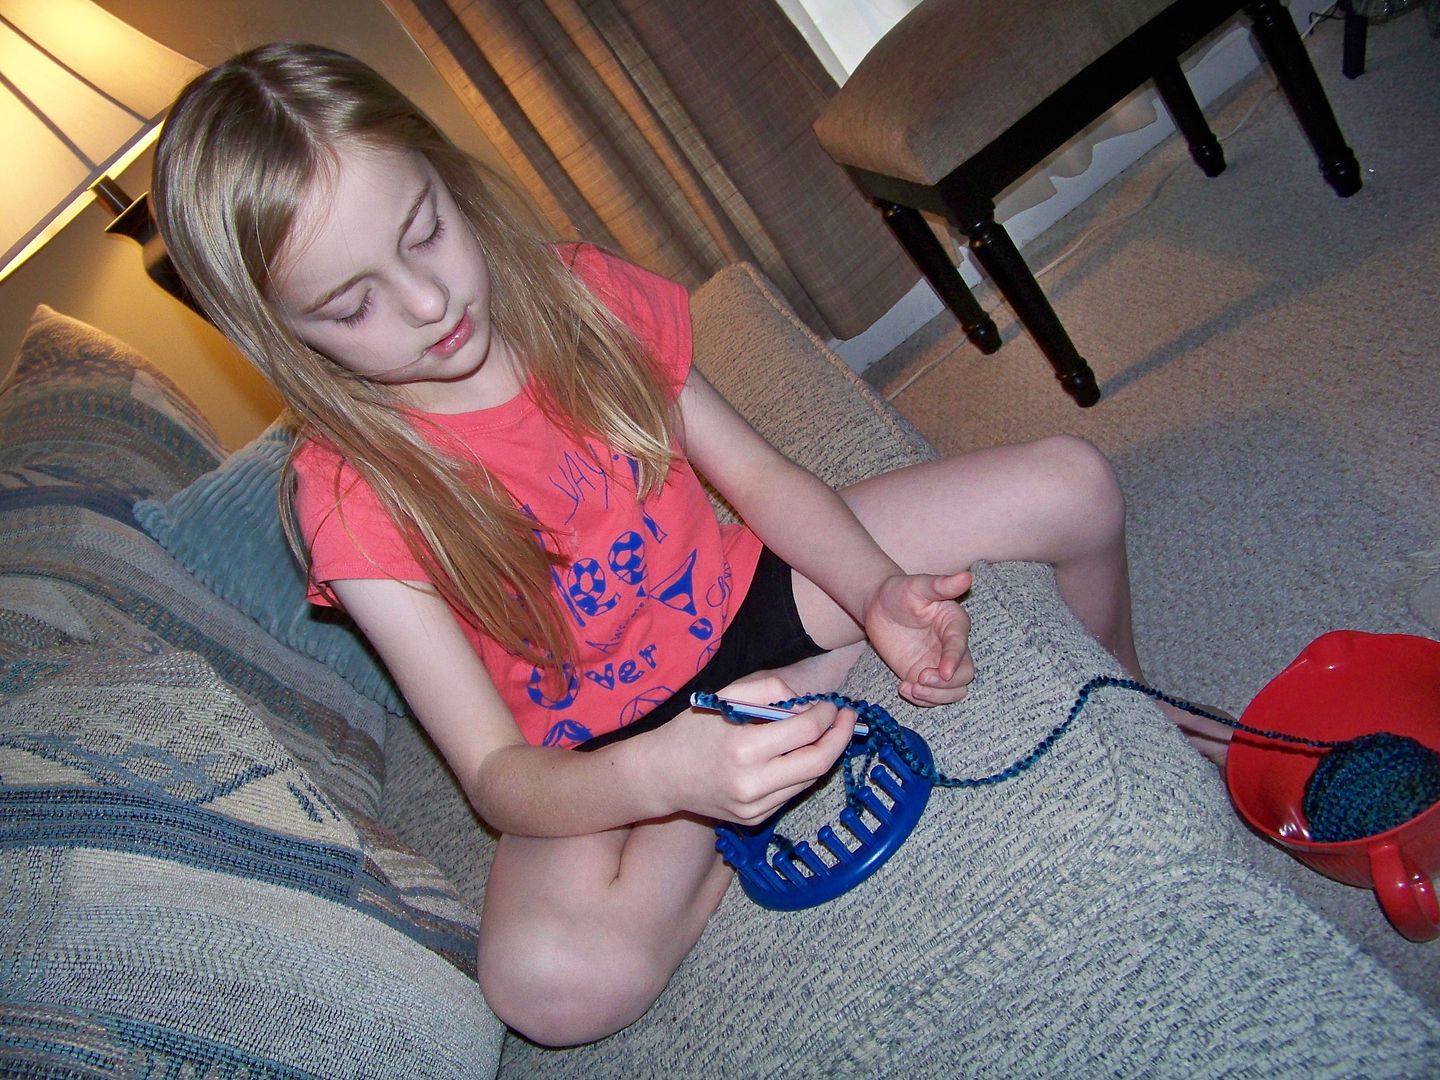
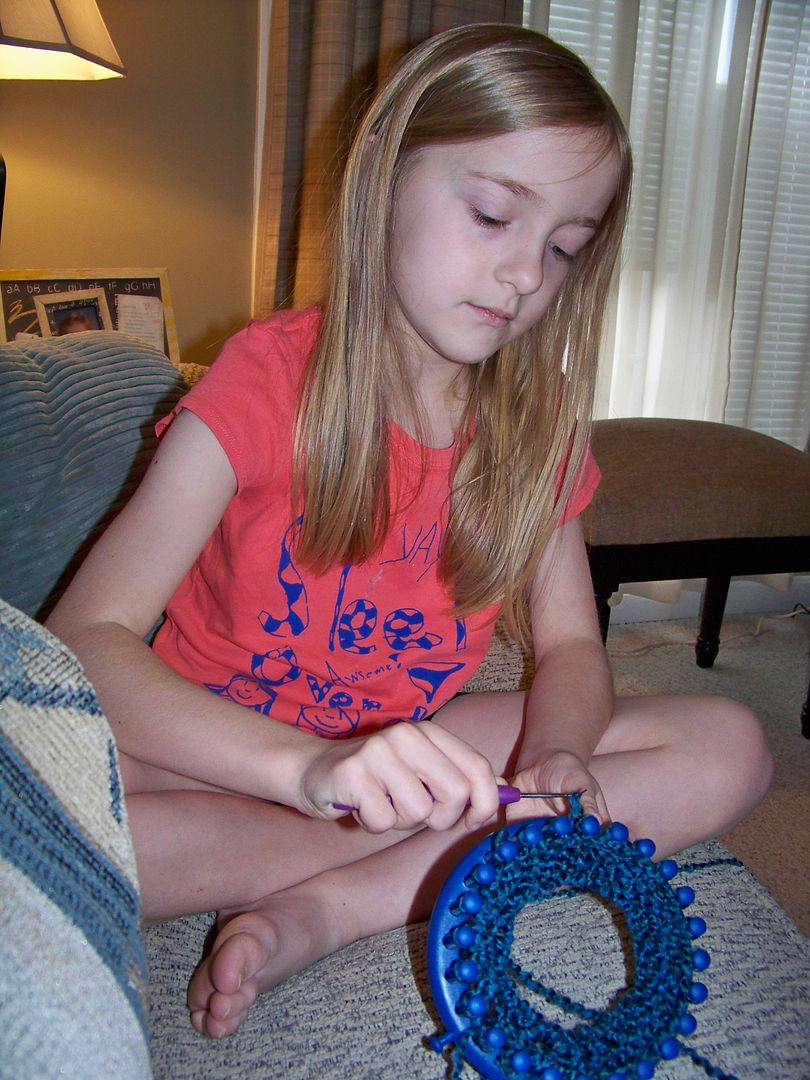
I did this on my Knifty Knitter looms and I will warn you that a #4 yarn is too thin unless it is "hairy". You can see the weave well here on the practice piece (I used Simply Soft yarn), but I liked the weave tighter on my birthday scarf.


Using alpaca for my final scarf made all the difference in not shifting. The final product is a nice, tight weave. I also liked it on my cream-colored sample that used a #5 chunky yarn!

On my sample, I also played with alternating two and three of the same pattern at a time.  This is what I did on this sample to play with variation shown on the lower part of the sample below:
two rows pattern II
one row pattern I
three rows pattern II
one row pattern I
three rows pattern II
one row pattern I
two rows pattern II

I think it created a fun design and I really liked this stitch with a chunky yarn:
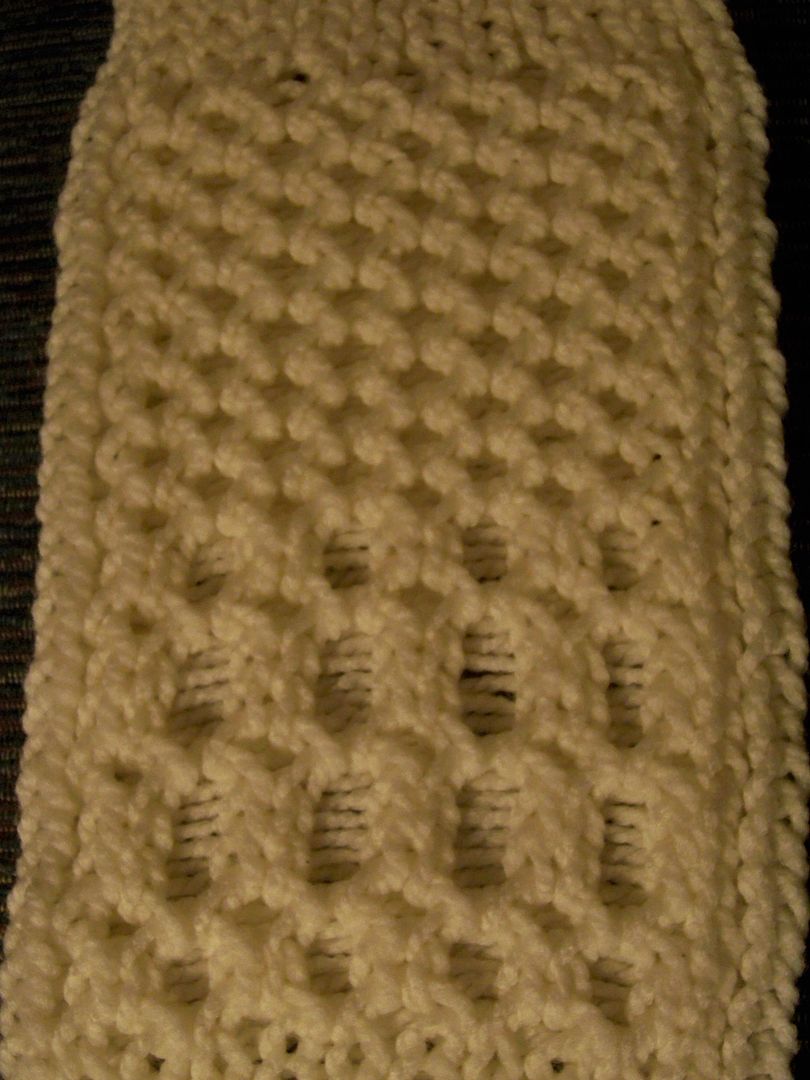
The upper part is pattern I and II alternating as designed.  The lower area shows variations of two and three rows of pattern II with single rows of pattern I.  This is a chunky #5 acrylic yarn.


So, this is my last birthday gift to myself! It has been a super-busy and stressful January in our office and at home. (My husband and I work from our home!) I am looking forward to an easier February for sure. For my friends who share a birthday with me today-- and there are four that I know of -- here's a little fun!


Sunday, January 15, 2012

Fabric Accessories for my Knitting Basket!

It's my birthday month and I am featuring gifts I am making for myself... how crazy is that?!  Well, my next gift is something I have wanted since I started using my knitting looms back in November:  fun holders for my tools!


The basket I use for transporting my knitting projects (I take my knitting everywhere) is one I made in my 20s.  It has been well-loved, having used it in the past as a picnic basket, thread holder, kitchen decor item, mail holder, magazine holder, and pantry-space-taker-upper.  These days, I love it for my knitting!  The problem is always the tools I needed to travel with...  I needed something to replace the unsightly and disorganized Ziploc bag that had been my tool holder.


I decided I wanted a little pouch for the handle of my basket to make my knitting tool easily accessible and a portfolio for all the rest of my stuff (since everthing other than the knitting tool is used much less in the process) for the bottom of my basket.  I keep a journal in my basket too, to note stitch patterns, projects, yarns, and ideas.  I wanted my pens and stapler to have a spot in the portfolio too!


In the event that you have the same interest in making some little accessories for your knitting basket, these are my instructions:

Materials to make both projects
  • 1/2 yard decorative fabric (blue/brown print in the photos)
  • 1/3 yard of contrasting decorative fabric (brown dots in the photos)
  • package of doublefold bias tape
  • For the portfolio, you will need a pencil pouch, 5/8 yard of 1/2" wide ribbon, and a decorative button. 
  • 1/3 yard boot pellon inside both projects.  Boot pellon is a stiff, heavy, non-woven interfacing.  It is about the thickness of the felt squares you see at craft stores but very stiff like heavy watercolor paper.  If you can't find boot pellon, you can use shade pellon or even fusible fleece to give body to the fabrics so that the finished projects will perform as pictured.

Boot pellon is stiff like watercolor paper and thick like felt.


Knitting Tool Pouch

  • Click here to download my pattern pieces. 
  • Cut out the pieces:
              Cut two bases from decorative fabric. 
              Cut one base from boot pellon. 
              Cut one of the pocket for lining (I used the same decorative fabric). 
              Cut one of the pocket from contrast.  (This is the one that will show).
              Cut one fabric tie (not pictured below).
 
  • Place pocket pieces with right sides togeher (will be abbreviated as RST for remainder of this post).  Sew the upper edge of the pocket with 1/4" seam.  Open and fold the newly-sewn pieces with wrong sides together (WST) and press flat.
  • Layer the pieces (as you want them to finish with right sides out) in this way from the bottom: base, boot pellon, base, pocket (contrast on top!)  Baste in place 1/4" from edge.


  •  For the tie:  fold in 1/4" on each long side of tie and fold in half.  Press.  On one end of tie, unfold, snip corners.  Tuck under 1/4" and re-fold.  Stitch near edge.
This is actually longer than the piece you will have.  I started here and cut it down.  The pattern piece on the PDF is the right size.


  • Stitch hook side of velcro to one side of finished end of tie.  Stitch loop side of velcro to the holder, clearing the stitching line.

  • Place the tie on the back of the holder, allowing the velcro NOT to hook, but rather to extend past.  Sew in place. 

  • Trim and finish edges with double fold bias tape.  Stitch bias tape so that the basting stitches are covered!

Your pouch is finished!  You can place it on your basket, pressing the velcro together after looping the tie around the handle.


Tool Portfolio


  • Cut pattern pieces (no download for this since they are all rectangles):  
Cut two 23"x11" pieces for the outside and inside cover (decorative fabric and contrast).
Cut one 23"x11" piece of boot pellon.
Cut two 16"x6" pieces for the pocket and pocket lining (lining will not show).
Cut one 3-3/4"x5" piece for the needle pocket  (I used a contrast).

  •  Put pocket pieces RST.  Stitch upper edge with a 1/4" seam.  Turn WST and press flat.  I sewed a piece of double fold bias tape to the top edge for color, but you can omit that or even sew on a decorative trim!

  • Layer cover front and back WST.  Place boot pellon in the middle.  Baste 1/4" from the edge or less to hold it all in place.

  • For the inside pouch, I found a great (which means cheap) pencil pouch at Meijer for under a dollar.  Trim holes and extra plastic so that you are left with just the pouch and nothing to accommodate a binder.  Set aside.


  • Fold needle pocket piece in half RST so that it measures 2-1/2"x3-3/4".  With fold on the top, sew only one side.  Turn WST and press flat. 

  • Align needle pocket to big pocket on lower left edge, matching up raw edges on the left side and bottom of needle pocket to raw edges on the big pocket.  Baste raw edges 1/4" from edge or less.  Sew lines of stitching down to create pockets for the needles.  (I sewed them so that there was 1/2" of space between lines of stitching).  Sew a 3" piece of ribbon 1" above the needle pocket.  Sew snaps or velcro to the ribbon.  (This will be used on your finished portfolio to hold your scissors in place.  It is optional.)

  • Place plastic pencil pouch on right side of project.  Cover left edge with doublefold bias tape and stitch in place, using long stitches so you won't perforate the plastic causing it to rip.

  • Place pocket, folding right edge (next to pencil pouch) under to fit space.  Mark the fold.  Flip pocket onto pencil pouch and stitch along fold line to attach the pocket to the cover.  Trim seam and snip excess fabric at the corner and fold pocket back over into place.  Baste all around the cover to hold the pocket in place 1/4" from the edge or less.


  • Add 16-1/2" piece of ribbon at the top edge aligned with needle pocket.  You will be able to tie this (or snap/velcro if preferred) to your scissors to keep them from walking away.  Baste in place. 

  • Stitch down through all layers to create pockets for crochet needles, extra knitting tools, pens, stylus casings, and pipe cleaner (threader for stylus) using the diagram below. 


  • Trim edges all around the cover.  Make a loop for a button closure on one side.  Finish edges with doublefold bias tape.  Fold portfolio into thirds.  Hand-sew decorative button in place. 

  • After placing all your tools in the portfolio, fold the portfolio in thirds and slip the loop over the button to close!  (The pencil case is loose on all sides except the left so that a composition-size notebook will fit under it, but I have since found that I like mine kept separate so that I can make notes without having to get everthing out).

In the big pocket on the left side, there is enough room for index cards.  I keep knitting stitch diagrams in there for doubleknitting designs.  The scissors are attached in two ways, but I now mostly only use the long ribbon so that they can hang outside of the portfolio but are safely attached.

I keep everything else in the pencil pouch: yarn nets, spacer rings, cable hooks (learning cables is a loom knitting goal of mine!), counters, waste yarn, measuring tape, stapler/staples for my notebook (I like to staple on a sample of yarn with each project's notes), and knitting gauge.
My knitting basket looks so much craftier and fun with my new accessories! 
You can see all of my knitting projects on my loom knitting page (click here)
You can see all of my paper projects in My Project Gallery (click here).
Thank you for viewing my post today!  I will be showcasing more gifts from me to me in the next couple of posts! Thank you for letting me indulge!
Pin It

Saturday, January 7, 2012

Elizabeth-Marie-Gertie-Jean, Birthday Queen

Decades ago, when I was in my 20s *ouch*, I created dimensional stuffed cloth dolls for local art galleries.  One of my favorite series was the Birthday Queens!  These were dolls for women, not girls, and though whimsical, had a little story to tell too.

I decided to resurrect a Birthday Queen in honor of my upcoming birthday-- this time in paper.  I wanted to get back to a little paper crafting after a fabulous time of loom knitting and sewing.  I thought you might enjoy...

Elizabeth-Marie-Gertie-Jean
 The Birthday Queen


My project was inspired by the jaw-dropping gorgeous figures by George Stewart at the Ventura Museum, photos of which I caught on a blog from MJ Ornaments.  Click here to see them!  You can see all of George Stewart's Historical Figures by clicking here.  They are incredibly fun to look at.

For the crafty how-tos:  Well, I really have to admit that Elizabeth-Marie-Gertie-Jean is pretty much a hand-cut gal.  I did start with a figure from Country Life at 9" on my Imagine, floodfilling her with RGB 250, 229, 210, but my scissors really re-cut everything on her from her head to her chest and arms.  (I know what you are thinking and, no, none of the women-folk on Country Life have bosoms.  Those were hand-cut too with 'droop' and all.)  Her lower body was completely cut off, since it was not needed with the dress.  I did appreciate having the upper body as a guide, but I changed her proportion when I gave her that lean, long torso in the form of a fitted bodice.


In the past, my Birthday Queens were matronly, more than a little thick through the middle, and a little too prophetic for my ease.  I decided that I wanted a lean and long Queen who obviously worked on her core muscles and did a little yoga.  Maybe that would come to fruition too....fingers crossed, yoga mat placed.

Her dress was embossed with two Cuttlebug folders.  The birthday candle trim on the bottom of the underskirt was made from an EK Success edge punch.  The gold paper is part of a paper pack my Santa-Mom gave to me this Christmas.  Tissue paper was used for the collar and cuff flounces.  The gold stars are the waste from a Martha Stewart edge punch; the silver stars were in with the metallic shred I used for her hair... more about that in a moment.  The jewels are self-adhesive rhinestones and pearls from Kaisercraft.  (I absolutely love those but can only find them at Meijer.  What's up with that?  So much easier than hot-fix jewels or using glue.  Each pack has a great variety of sizes coiled together and they have a great hold.)

Her hair is made from twisting Metallic Shred basket fill from Hallmark.  Her head is incredibly heavy.  I twisted the fibers until they curled onto themselves and hot-glued them in place, suffering one of the worst burns ever. (Whininess is ageless don't you think?).


Her crown is a Cricut cut combined with edge-punched gold paper.  I started the crown with a 3" layer from Baby Boutique, printed and cut on the Imagine.  I trimmed it, jeweled it, and manipulated it to curve out.  Then I placed it behind the birthday candle edge cut, that I wrapped around her head.

Her face is hand-drawn and inked.

I hand-cut her gift... and her fingers that hold it.  You know, historically, royalty has given the absolute best gifts, right?  Just a needless reminder:  Birthday Queens bring wrinkles with wisdom so use care (and eye cream) when accepting their mandatory presents. 

So... as I was saying, the background paper was from a paper pack that has been setting, ignored, for too long.  The birthday cakes are from Yummy, printed and cut in various sizes.  The tables are from Serenade at 4" and 3" with hand-cut and trimmed tablecloths.


It's a new year and we are all a little older.  Happy Birthday to all the January babies (you will always be a baby to someone somewhere).

More gifts to me from me in the next few posts!  Can't wait to show you!


Pin It

Sunday, January 1, 2012

Teaching My Kiddo to Loom Knit!


I have been so amazed at how easy loom knitting is that I decided to share it with my seven-year-old daugther, Piper, too.  I have received a couple of emails asking if I thought loom knitting would be appropriate for kids and I have seen a couple of posts on the Cricut Message Boards asking the same question, so I thought it would be fun to share this experience.

I had planned to show her the week after Christmas, but one day the week before Christmas she plopped down beside me and asked me to teach her.  So... I did.  We made a quick rolled brim hat for her doll.  Today, she wanted to make another to coordinate with her doll's scarf that was part of a gift of doll clothes I had for her.  (The doll clothes were featured in a previous post; click here to see that.).... And this time I had my camera!

For her rolled brim doll hats, she used the blue round loom from Knifty Knitter (the smallest one in the set). 


For this hat, she chose a Homespun yarn (the same one used for her doll's scarf and leftovers from a scarf I did for my mom).  It is considered a 'bulky' #5 yarn.  I liked this because it requires fewer stitches to complete the hat!  A quick project is essential!  (This took about an hour from start to finish on the doll).

She used a stylus (so do I!) to e-wrap.  It goes sooooo much faster and the tension is perfect and automatic.  This one was just a drinking straw cut to size.  The yarn was threaded in using a pipe cleaner.  The only challenge she found using the stylus was that the wrapping can uncoil and so it helps to keep your straw/stylus near the end of the yarn, next to the pegs!


Because she was using my leftovers, her yarn was in a ball and not in a center-pulled skein.  Placing the yarn ball in a bowl on the floor made it easy for her!


I did find that she likes to really pull the yarn off in a big loop when knitting off the pegs.  I showed her how to tug at the "fabric" she was creating to even up the loops a bit.  She also had to be reminded to wrap in such a way that the fabric was being created on the inside of the loom and the loops were wrapped on the outside.  I finally found the right language to convey this:  the string between the two pegs needs to be on the inside

I was shocked that my daughter didn't know the term "tape measure"!!  (I mean really, I have failed as a crafty mom!)  So, I corrected that right away and taught her how to measure her knitting so she would know when the hat was large enough to quit.  (I cannot emphasize enough the importance of a fast project for teaching this to kids!)


She is good with a needle so doing the gathered cast off was a cinch for her!


She said her favorite part was using the loom tool to pop off the final stitches and pulling the string to gather up the hat!


Ta-da!  She posed for the picture and then ran off to practice cartwheels! 

OK, here's what I figured out in doing this (just in case you were wondering):
  • Make sure your kiddo is able to sit at a task for at least a half hour.  Taking a break is no big deal (we did) but taking several would be a problem I think!
  • Choose a quick project.  I wanted something she could do in about an hour.  (Let's face it, if it doesn't go well, you don't want it to last longer than that!)
  • Stay nearby and check that the stitches are correct before a row is ended.
  • Make a straw stylus.  The stylus made this so incredibly fast and I didn't have to worry about explaining yarn tension.  It does that automatically!
  • Choose a bulky yarn.
Thank you for letting me share my little teaching experience with you!  I am not a very good or patient teacher but this is such an easy craft that it went very smoothly.  (My student more than makes up for my bad teaching; she is always so patient with me!)  This craft helped me to gauge my daughter's readiness for learning to sew.  For a link on making a stylus (and other info on loom knitting), check my Loom Knit page!

But wait! There's more! Click 'older posts' above!

But wait!  There's more!  Click 'older posts' above!