Tuesday, May 21, 2013

Ready for the Last Day of School? Yes We Are!


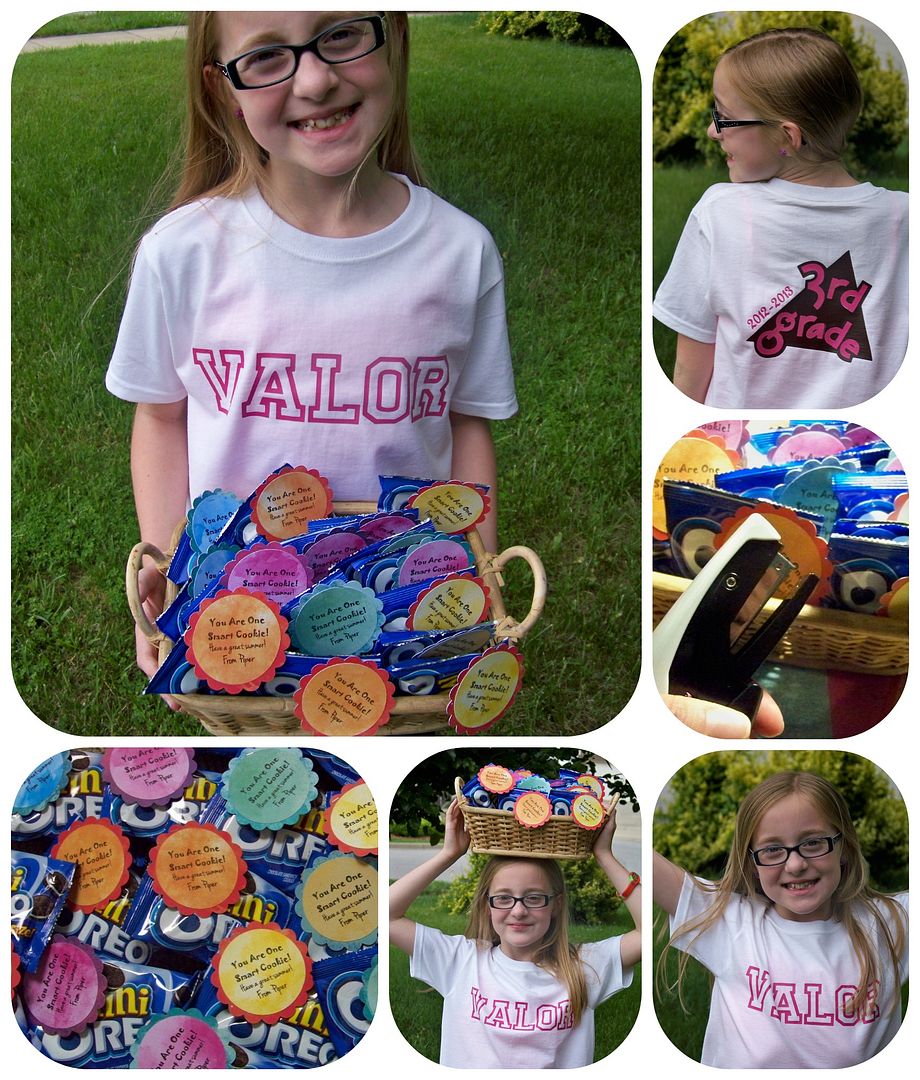
The mad rush was on today as I got together an autograph shirt and treats for my kiddo to send to school for tomorrow, the last day!  Her school has some fun traditions for their final half day, including  a teachers' egg toss, running barefoot down the hall, and signing each other's shirts.

Kindergarten through second grade, I have allowed her to ruin a uniform shirt (which I always hated!), but after I saw the autograph shirt today on the Eighteen25 blog, I knew that would solve my problem!  With a time crunch, there was no luxury of designing something, certainly no silk-screening, but with a couple of Cricut cartridges and heat transfer vinyl, I was able to make this in about ten minutes.


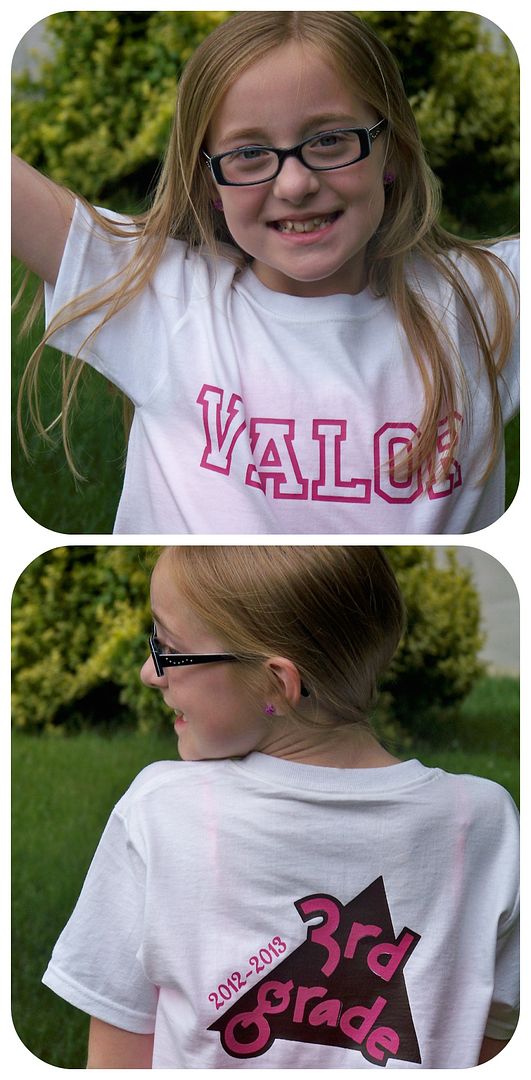
The text on the front was cut from Cricut Total Sports (font 2-shift) at 2-1/4".  The back "third grade" graphic was cut from Cricut Locker Talk at 6".  I added the years info using Cricut Songbird at 3/4".  No designing, no software, just stick in the cart, hit the 'flip' button, and press cut.  I find that using my heat press (without steam) it takes two pressings for each layer to be adhered.  Not too bad for a $3 t-shirt from Walmart and scraps of HTV.  (Cutting HTV-- or Heat Transfer Vinyl-- is a breeze on a Cricut.  Set it at speed 3, pressure 3, and blade 3.  Make sure you are cutting the vinyl side and not the shinier backing side!  "Weed" off the negative space using the Cricut dental pick tool.  Press without steam and voila!!)

Then all heck broke loose when I realized I needed to do 'last day' treats.  (How did I forget that??)  Last week I had the idea of home-baked cookies bagged with fun toppers with a punny message and dancing cookie character.  With no time for all of that, I was saved when I found a sweet, fun idea on Pinterest from bethproudfoot.blogspot.com.  The pin wouldn't take me to her blog, but her idea was basic, fast, and perfect to personalize!


I used Cricut Mini Monograms to make 3" scallops (real dial size) and 2-1/2" circles (real dial size).  I ran the circles through my office printer to add the text.  I used my nifty new Tiny Attacher, courtesy of the fabulous Sara Andrews, who sent it to me as part of a prize I recently won.  With no jagged edges on the back and super tiny, they are perfect for getting ripped off of bags of mini Oreos.
Super fast projects and a super happy kiddo!  Are you ready for the last day of school?  We are!

Tuesday, May 14, 2013

An Old-Fashioned Hello


I have been so inspired lately by the beautiful cards created by Michele Kovak on her blog, Thoughts of a Cardmaking Scrapbooker.  I love her style and have learned so much from her since finding her on the old Circle Design Team.  I thought it would be fun to get out my 'Michele sponge' and make a card inspired by some things I have been seeing on her blog.  I love her recent Mother's Day card tutorial,  mini album, and Easter card.  I also wanted to make something that looked vintage.  I thought this would be a fun card for my last project on the Cricut Fanatics blog. (You can find me there today!)

I started with a paper pack from My Mind's Eye with lots of weathered wood and shabby chic florals.

I cut a doily from Artiste (page 31) at 4".  After inking it and embossing it, I popped it up 1/4" so that a natural shadow would separtate it from the card surface.  I added my ribbon.


I created a dimensional flower using directions by Kathy Orta, cutting the base pieces per her instructions from Cricut George and Basic Shapes at 2".  This is the same flower I recently used in a larger size inside an explosion box.  To see my box, click here.  To check out Kathy's video tutorial, click here.  I added a thin, fine line of glitter paint along the edges of the flowers. That felt old-fashioned, like some of my grandma's Christmas ornaments.  I hand-cut leaves, bending and folding to create a little dimension.

The text was cut from Cricut Lyrical Letters at 1-1/2" and manipulated by hand to curve.  (I cut away the butterfly that was part of the text).

To make everything look aged, I inked with brown, including the flower and ribbon.


For a little inspiration, I got out some of my Great Aunt Henrietta's buttons and findings...and added a few buttons and snaps.  


I really enjoyed making this card... and making a mess, revisiting some of my treasures.  Thank you for checking my post today!


Sunday, May 12, 2013

We have a winner!!


My sweet daughter just went to bed, leaving me without a Master of Ceremonies for my blog drawing!  Without a live 'picker outer' I resorted to random.org...and because I am cheap, I used their free 'Random Integer Generator'.  


Random Integer Generator

Here are your random numbers:
29


I numbered all the comments and the 29th comment-maker was....

TheTulipCollector! 

Congrats--- and send me your mailing address so I can send out your gift card tomorrow!!!

Saturday, May 11, 2013

It's A Surprise! Challenge - Explosion Box

I fell in love with an explosion box by Donna (from her Carolina's Creative Cropper blog).  She shared a message board challenge and a terrific tutorial!  I very rarely ever make something for no reason at all, preferring to craft for a gift or upcoming event.  This project was an exception; I just fell in love with it.

This is my entry in Donna's "It's A Surprise!" challenge.


Donna shared on her blog a video for guidance, which I highly recommend viewing.  The artist who created this design, Paloma, is a crafty genius!  You can watch her video with cutting guide on how to make this box by clicking here.  Her fabulous blog can be found by clicking here.

What made Donna's exploding box different to me were the addition of hearts at the corners!  That was so pretty and unexpected!  I hand-cut the corners after seeing Donna's clever method for cutting hers!  The heart-shaped corners are really what I loved about this!  Click here to check it out!  


To make the paper rose in the center of my box, I used one of my favorite tutorials by Kathy Orta!  You can check it out by clicking here.  In her video, she cuts her base shapes from George at 2-1/2".  For this box, I cut them at 4".  


I topped the box with a paper bow cut from Cricut Artist at 2-1/2".  


Thank you for checking out my blog post!  I had such a fun time making this project!


Badge photo IMG_16991_zps3de420e7.jpg

Friday, May 10, 2013

E-I-E-I-O and Ease On Down the Road Challenges - Mother's Day Card

In a fit of crafty craziness, I got a card done this morning while my husband was in a phone meeting! That may have been the fastest I have ever made a card in my life! But before I get to that, if you are looking for my NSD tutorial on adding dimension to die cuts or for my gift card give-away which ends Sunday, May 12th (Mother's Day), click here!


So my husband and I share a space in our home-- he uses it for his office and I use it for my craft and sewing area.  Although I don't mind working with him in there, he hates it when I am there!  A couple of years ago, I moved my office downstairs just so I could get my work done... why didn't I move the craft stuff too?  Not thinking that day, I guess!  Anyway, the fact that I could learn it and do it so fast  illustrates even better how fantastic and easy-to-follow the easel card tutorial is that Colleen (of Col's Creative Corner) created for a challenge for NSD!  Her challenge started last weekend, but it continues through Saturday so there is still a little time to swing by there!  All you have to do to join the fun is to make an easel card!  Click here to check it out-- and find her great tutorial!

I am combining it with a challenge from Jenny Dennis on the message boards to make a project with a barnyard animal!  Jenny's fun challenge made me think immediately of my mother-in-law who has a farm!  They raise antique tractors on their farm (LOL) but I chose a sheep so that I could get a little punny on her card.  I made it dimensional by cutting two sheep (one flipped) so that the legs were really separated.  I added a separate ear and inked her so that she looked more detailed than the barn and landscape behind her far off in the distance.


I used layered pop dots to make the sheep pop up about an inch.


The sky was made using a Cuttlebug embossing folder.


I added a mat with my sentiment that I printed using my computer.  I turned up the corners on the bottom to make it easy for the easel to 'catch' in place.


This card was made using Colleen's measurements from her tutorial so it is the perfect size to fit one of those gift cards from the grocery with all that extra packaging.


  • The barn scene was cut at 4" from Cricut Country Life (I cropped off the sides to fit the card).
  • The sheep was cut from Cricut Quilted Christmas (I cut off the bell and holly silhouette) at 2".
  • The text mat was cut from Cricut Elegant Edges at 3".


Thank you for checking out my blog post today!  This is a final reminder to swing by my tutorial and leave a comment over there for a chance at a gift card (don't leave it here-- it won't count!).  You can find it by clicking here.

Check out all the Circleville NSD bloggers' posts-- some have challenges, some have tutorials, all have prizes but you need swing by soon because they end by Mother's Day (May 12) so you need to visit before then!  Here's a list:


  • With Glittering Eyes  (that's me!) - "It's All About Perspective" tutorial and $20 Hobby Lobby Gift Card give away.
  • Around the Block with Scrapalette - "Tic Tac Toe Challenge and Blog Prize!
  • Col's Creative Corner -  "Ease on Down the Road" Blog Prize- $15 Michael's Crafts Gift Card!
  • Paper, Craft and Scissors - "On Pins" theme and Blog Prize - $25 Simon Say Stamp Gift Card!
  • Stamp, Cut, Create! blog - "Tin Is In" theme and Blog Prize!  
  • All Scrapped Out - "What's It Owl About" theme and Blog Prize! 
  • The Non-Crafty Crafter - "Let's Split- CCR Tutorial" (Learn to create a split letter monogram) and Blog Prize!
  • Scrappin With The Bug blog - "The Crazy Bs Challenge"  and Blog Prize!
  • Sara W. Andrews blog - "Go Big or Go Home Challenge" and Blog Prize - $20 Hobby Lobby Gift Card!
  • Scrappin With the Bug blog - "Tropical Sunset Color Challenge" and Blog Prize!
  • I Came, I Saw, I Created blog - "Did-I-MENSION???" Challenge and Blog Prize!


  • Wednesday, May 8, 2013

    On Pins and Did-I-Mension Challenges - Mother's Day Set

    The Circleville NSD challenges go on through the weekend and I am still happily on my crafting marathon doing them!  These are my entries in the 'On Pins'  and 'Did-I-Mension' Challenges, but before I get to that, if you are looking for my tutorial on adding dimension to die cuts or my gift card give-away, click here to find it!


    For the 'On Pins' challenge, Sis (from her blog Paper, Craft, and Scissors) asked us to choose an inspirational pin on Pinterest and create a project from that inspiration.  I chose a project by J.J. Bolton (which you can see by clicking here).  She used a punch to create a chevron, glued them down horizontally, then cut the page into vertical strips.

    For mine, I cut colored papers into 1/2" strips, then laid them on a sheet diagonally, glued them down, and cut them into 1/2" strips, forming a diagonal pattern on each little strip.


    I did a second sheet with the strips going the other way diagonally and cut them as above.


    Because I didn't place my strips in exact 45° angle on the paper, in order to know where to begin cutting strips on the second sheet of diagonals so they would match on the final design, I placed one of the strips from the first pile on top and matched the points.  I drew a line to mark the first cut.


    Then I alternated one strip from each pile to form a new pattern-- kind of like bargello piecing for fabric.  It makes a chevron with random colors.


    I chose to make a card for this challenge.  This background was just right for a three-part card on Cricut Picturesque, cut at 4-3/4".  I like that this card has a center section that folds behind the cut-out to hide the wrong side of my chevron pattern!


    I use an Xacto knife to score by cutting lightly to connect the tick marks made by the cutter to avoid those 'pop ups'.

    I placed my mosaic chevron paper behind the window and adhered the frame on top.  I tried to keep the card clean like the pin with no layers or other elements to distract from the pattern.


    Next, for the Did-I-Mension challenge, Renee (from the blog I Came, I Saw, I Created) asked us to create a three-dimensional project using a box or bag or other cut.  I chose the box from Cricut Bridal Shower, cut at 11".  I added a window to the lid by cutting a 2" square using the Centerpoint feature.


    It was easy to place a piece of my chevron mosaic behind the window before the lid was constructed.


    I love this box with its extra tabs and fold-overs for added stability!


    Both Sis' and Renee's challenges have prizes and go on until Sunday, May 12, 2013!  They are part of the Circleville Bloggers, who have fun stuff on their blogs through Sunday (May 12, 2013)!


    Monday, May 6, 2013

    Oh The Places You'll Go NSD Challenge - Card for Dad

    I am putting in a little late night crafting, still plugging away at the Circleville challenges!  This is my entry for the Oh The Places You'll Go sketch challenge, but before I get started with that, if you are looking for my tutorial on adding dimension to die cuts or for my gift card give-away, click here to find it!


    Marty (aka Eyelet on the message board) shared a great sketch from 'I Create, I Think, I Ink, I Stamp' blog and asked us to use it to create any kind of card for her message board challenge.


    For my card, I created a border from Cricut Art Deco (page 67), cut at 1-1/2".


    For the mat under the border, I also used Art Deco (page 62) cut at 5-1/2".  I cropped off the top to mimic the sketch.  I made the same cut from vellum at 4" and also cut the frame at 4".  To apply the vellum shape, I used my Xyron machine.  I used an Xacto knife to cut the vellum where it was applied to the boarder so I could smooth it down to avoid an air channel which would have been very noticeable.


    I used the vellum because I wanted to have a base under the lettering, but I didn't want to incorporate yet another color and I didn't want to cover up that cool art deco border!  I shifted the medallion from the left to the center to work better with the mat.

    The text was also cut from the Art Deco cartridge at 2-3/4".


    Thank you for checking out my project!  I have been doing a crafting and blogging marathon since National Scrapbook Day on Saturday!  I have quite a few challenges to go!  The Circleville challenges continue through May 12, 2013!

    Badge photo IMG_16991_zps3de420e7.jpg

    But wait! There's more! Click 'older posts' above!

    But wait!  There's more!  Click 'older posts' above!