Saturday, March 12, 2011

Child's necklace and gift box

It is starting to feel like spring here and we are still deep in the throws of birthday season within my daughter's circle of friends.  Her BFF asked for a little necklace.  This will be a girly addition to the rest of her birthday gift. 

I set off to eBay to find my favorite clay bead maker, BY (Mei of B&Y Crafts). 

I mention her not only because she makes adorable beads, but she also will add eye pins to the tops of her beads instead of making holes through the beads (which tend to be a problem if not placed properly with respect to the weight of the bead). 

I created a little necklace using beads from my stash and a new clay bead as the focal point.  You can click here to check the tutorial I did on a previous post for the how-tos of making this type of necklace!

For the packaging, I used my Cricut!  The base is a plain purse cut from Forever Young at 5" (the fit-to-page size for12x12 paper).  The front is a tag from Wrap It Up, cut at 3-3/4".  The letters are from Cherry Limeade, cut at 1" with shadow.

I used a 5" Xyron to apply adhesive to the top layer of the tag and used those great glitters from Martha Stewart to create a striped effect with the colors. 
After adhering the tag layers together, I attached to the purse and applied velcro for a closure.  The necklace is wrapped in tulle and tucked in!  I added a few adhesive pearls to the tag to complete the project.

Thank you for looking at my project and for visiting my blog today! 

Tuesday, March 8, 2011

Fat Tuesday!! Have your cake and eat it too!

It's the last fling before Lent starts tomorrow on Ash Wednesday.  I cannot help but start thinking about changes and meditations for Lent... of course, I am having a little cake while mulling it over.

So... for now it is the last fling!  King cake, baking for the dessert contest tonight at church... not dieting... so obvious!  Well, there will be time for that!
My mild little life where cake is sin just begs for color and a little vicarious living today!
It is the color that draws me to the idea of Mardi Gras the most -- over-indulgence is not that glamorous-- well, okay, sometimes it is.  I do get that Mardi Gras symbolically is the last human bit of 'holding on to what is not working' before we enter into deeper prayer and reflection during Lent so we will be ready for the glory of Easter.  Tomorrow, I will be starting a study by Henri J. M. Nouwen. I thought I would share this prayer with you.  I just love it!

"Dear God,
I am so afraid to open my clenched fists!
Who will I be when I have nothing left to hold on to?
Who will I be when I stand before you with empty hands?
Please help me to gradually open my hands
and to discover that I am not what I own,
but what you want to give me.
And what you want to give me is love,
unconditional, everlasting love.
Amen."
Henri J.M. Nouwen

This time of year, and especially as we near Maundy Thursday and Good Friday, I get overwhelmed with the life of Jesus.  I have to apologize for this to my non-religious friends and those friends of differing religions.  I just cannot help but take this path at this time.  As we are told not to judge and to have compassion for everyone's path to God, I head out in full belief that we are all the children of God.

Happy Mardi Gras, y'all!  Eat extra cake for me today!

Sunday, March 6, 2011

Saint Patrick's Day Garland to Appease the Giant Leprechaun


My husband absolutely loves St. Patrick's Day!  Last year, he went over the edge and dressed up like a leprechaun, meeting my daughter at the door after school.  He had stories of a real leprechaun visiting him earlier in the day.  He had a scavenger hunt for gifts, complete with clues for my daughter.  He set the table with shamrock-covered plates, provided each of us a light up green ring, and had pizza for us.  The pizza, while not very Irish, was shocking because this is not the kind of guy to fix or arrange for dinner for the fam. 

This year, he bought a shamrock light set, a plaque, stickers, cards to send, and asked me to decorate with that stuff.  Not an easy order considering what it was!  Anyway, to make him happy, and to participate in the Sunday Challenge: Bling with Buttons, I created a little garland.

I used Simply Charmed to cut two 6" leprechauns (one is flipped).  I embossed their jackets and rubbed lightly with a stamp pad to show off the design.
I inked the hair, beard, and eyebrows.
I ran their hats through the Xyron and then placed the hat buckle and band before sprinkling with Martha Stewart glitter over the adhesive-covered hat.   

I also cut the rainbow with a pot of gold from the same cart, also at 6".  I accented it with gold glitter glue and buttons.  I cut shamrocks from Paper Doll Dress Up at 1-1/2", 2", and 2-3/4".  I used a CropADile to hole punch all the shapes and laced the pieces together with 1/16" satin ribbon.
I added a few extra shamrocks to dangle on each end.  The garland was secured with mounting putty.
My daughter really is having fun with this crazy stuff, which makes it all worth the effort.  Now... shamrock lights... that is going to take a little thought!

Saturday, March 5, 2011

Paper Tea Set

My daughter, Piper, loves to have tea parties!  She uses her real cups and plates and requests special sandwiches and cookies.  I thought she would love a set for her dolls -- one for a pretend tea party.  This is the project I have been planning for the Cricut Circle March Monthly Challenge:  Children At Play. 

Using the popcorn box on Tags, Bags, Boxes, and More (page 131), I used the blackout feature and cut two boxes at 3" for the teacups and one at 4" for the teapot.   I found a square set via PDF from Crafts'nThings.  I used the lid and spout, which was sized perfectly once I reduced it by 50% on my printer.
I created a lid using the triangle pattern on the PDF and created a 4-sided lid.  I used a loop of chenille yarn that matched my paper to form a handle for the lid.  To create side handles, I found Lyrical Letters.  I cut out the < and > symbols.  They were perfect handles!  I cut them at 1-3/4" for the cups and 2-3/4" for the pot.

To decorate the set, I cut flowers from Once Upon A Princess.  They were cut at 1" for teapot and saucers, 3/4" for teacups, and 2" for the serving tray.
I outlined them with a hot pink Sharpie and added glitter glue for a little girly sparkle.

Before putting the boxes together, I glued on the spout and handles.  Then I added my flowers before gluing the boxes together.
Next, I used Mini Monograms to create saucers and a serving tray.  I cut two scallops at 2" and one at 6".  Then, using the Real Size button, I cut two circles at 2" and one at 5-3/4".  I cut a 1/2" x 12" strip on my paper trimmer to use under my serving platter to serve as a foot.  I cut 1/4" x 6" strip for each of the saucers.  The strips were glued to form a circle and then glued under the plates.
This lifts the plates up off the ground and keep the set from looking like it is resting on pieces of paper.

Next, I created a tea bag.
I cut a piece of iron-on woven interfacing, folding to enclose "confetti" created with a whole punch.  I ironed the fabric to trap the paper punches, trimmed, and then lightly inked to look tea-stained.  I cut two little tags from Wrap It Up using the blackout tag feature, at 3/4".  I used a little pearl cotton thread and sewed to the 'tea bag'.  The tags where glued together to sandwich the other end of the thread to form the finished tea bag. 
My little tea set is complete!  My little girl is asleep as I post this and I cannot wait until tomorrow morning when she sees this!
Thank you for looking at my little project and visiting my blog!

Sunday, February 27, 2011

Once upon a time, a monster turned into a princess...

For the Weekly Challenge #22:  Once Upon A Time Challenge, I decided to make a vignette and have a little fun by changing up the character a bit!  I love, love, love the face on the Mrs. Frankenstein character on Happy Hauntings.  The layers and detail make her beautiful in green so I had promised myself months ago that I would try her in less zombiesque colorings.  I also wanted to make something my daughter would enjoy in her room. 
I started with a castle for my little project.  I cut it from Once Upon a Princess at 5".  I used a dobber to add a bit of color and highlight the embossing I did.  I added a bit of ink and Glossy Accents to highlight the windows.
I cut clouds from Serenade at 1-1/2", a rainbow from Groovy Times at 4", and a unicorn from Once Upon A Princess at 1-1/2".  Then I went back to that castle and decided I wanted furrowing flags on the turrets.
I cut flag poles and long triangles that I folded.

Then, I went to work on the princess.  I cut the head from Happy Hauntings (page 31) at 4".  I cut away her body.
I used Rock Princess (page 29) for her body, cut at 4-3/4".  I hand cut her dress by cutting away the head, microphone cord, and mic to use as a pattern.  I cut away her arms to use with the new dress. 
I LOVE embellishing!  I cut her hair with Paper Doll Dress Up (page 31) at 2-3/4".  Her glasses are from Life's A Party (page 53) at 3/4".  I made the glasses to actually fit her, so... then the decision of whether to have her wear or just hold the glasses...

I
I decided to have her wear the glasses!  I placed my work-in-progress in a frame and continued to work.
I cut the text from Storybook at 2-1/2" with a shadow.  I cut the vine border and corners from Storybook (page 38) at 1-1/2".  The flowers on the border are from George, cut at 1/2".  The gnome was cut from Freshly Picked (page 37) at 1-1/2".  

And I was pleased with this until my daughter saw my pictures with the glasses off of her face and told me it looked better the other way... so a few quick changes later...
I knew she was right and wanted her to love this since it was going in her room.  I hope you agree with her, but please don't tell me if you don't!!!

Sunday, February 20, 2011

Tangled Birthday Party!!

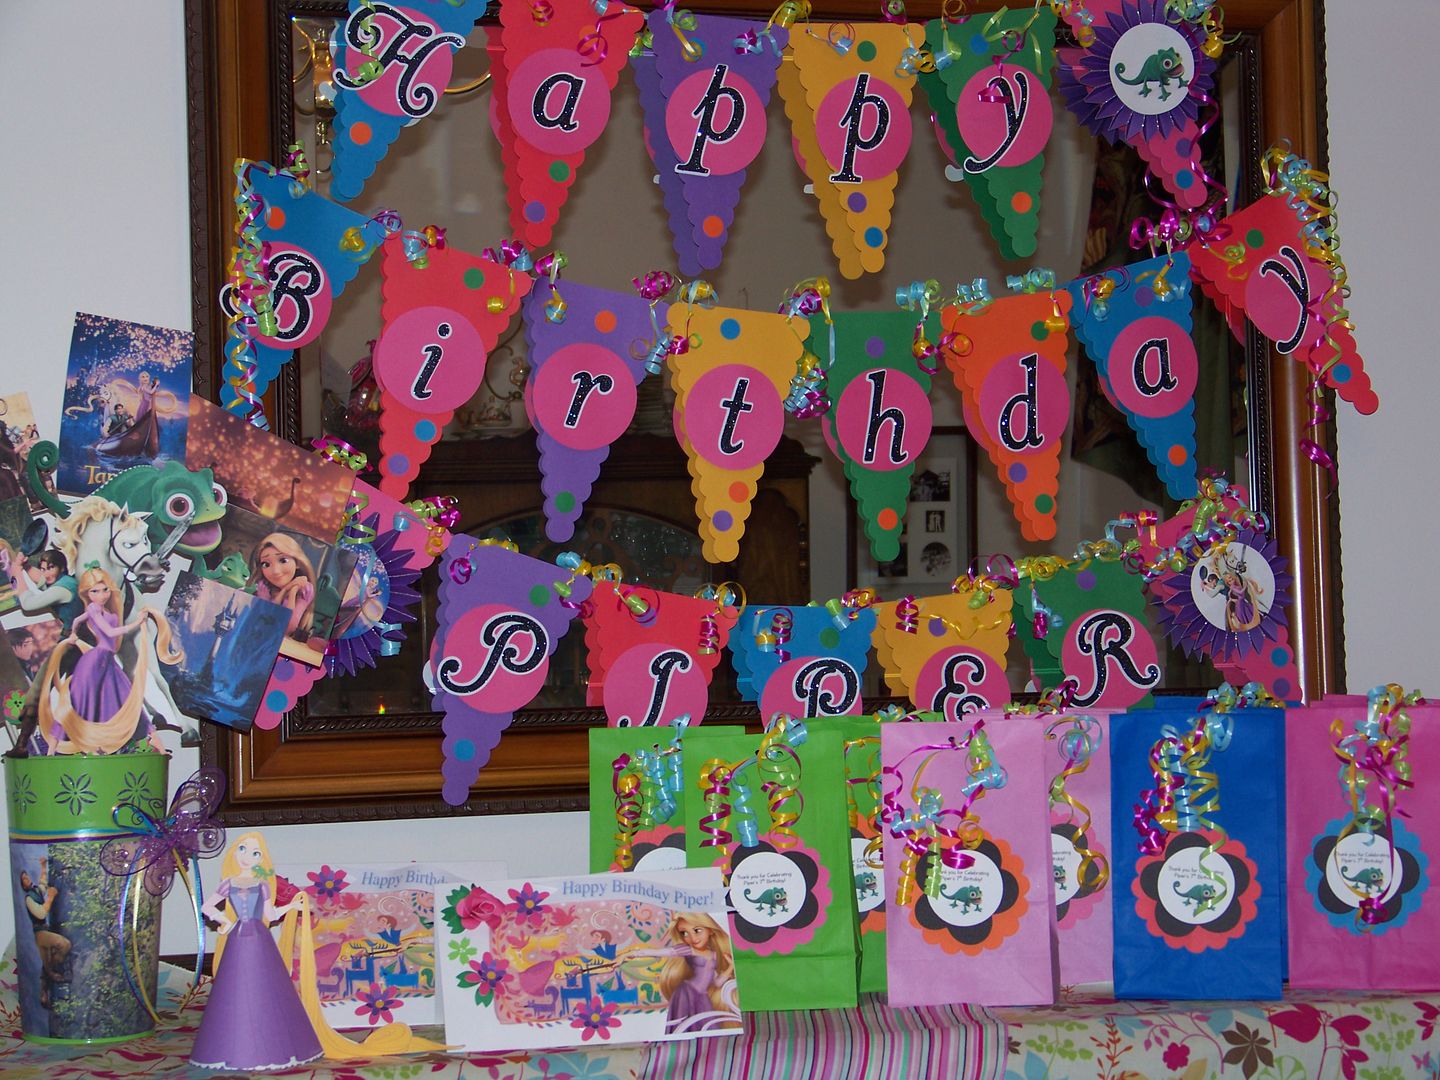
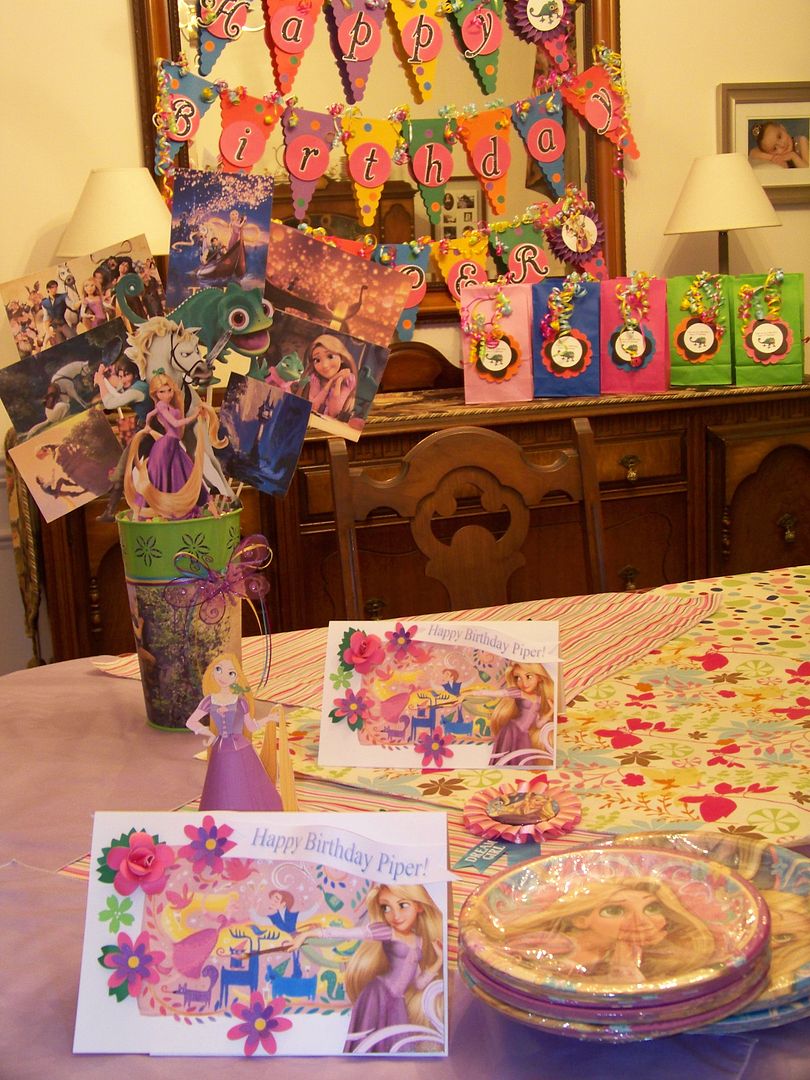
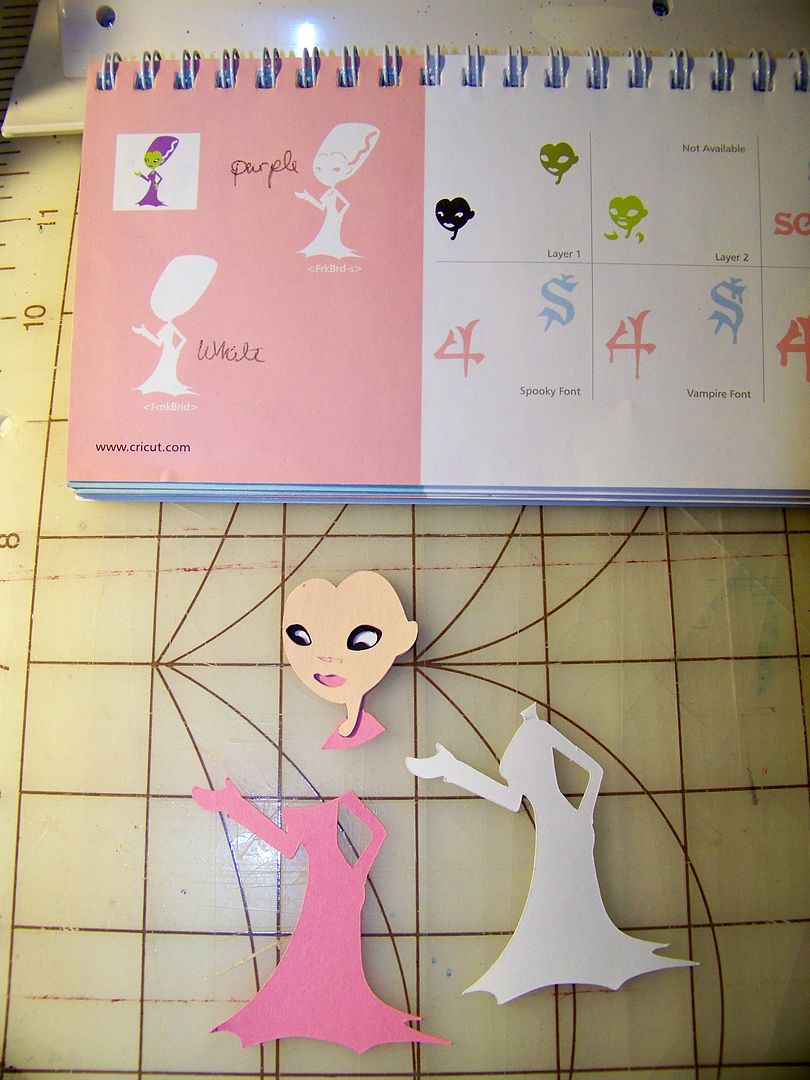
My sweet little Piper is 7-years-old this month and her "kid party" is at a local gymnastics studio where we have picked a Disney Tangled theme!  This place provides great games and supervised trainer-driven activities out on the floor, but requires the parent to do all the decorating and take care of all the food in the party room.  They don't even provide invitations, so this party is just screaming for some creativity!! 

I used some super-cheap supplies I purchased at Walmart (curling ribbon, paper bags, textured cardstock packs, treats for favor bags).  I found all of the movie images I needed via Google Images.  Along the way, I found the original Disney artwork for the movie and fell in love with Claire Keane.  Her artwork -- which was the artwork that Rapunzel painted on her walls in her tower --  was the influence for the colors for the cardstock and for the fabrics I used.  I have a link to her site at the end of this post-- check her out!

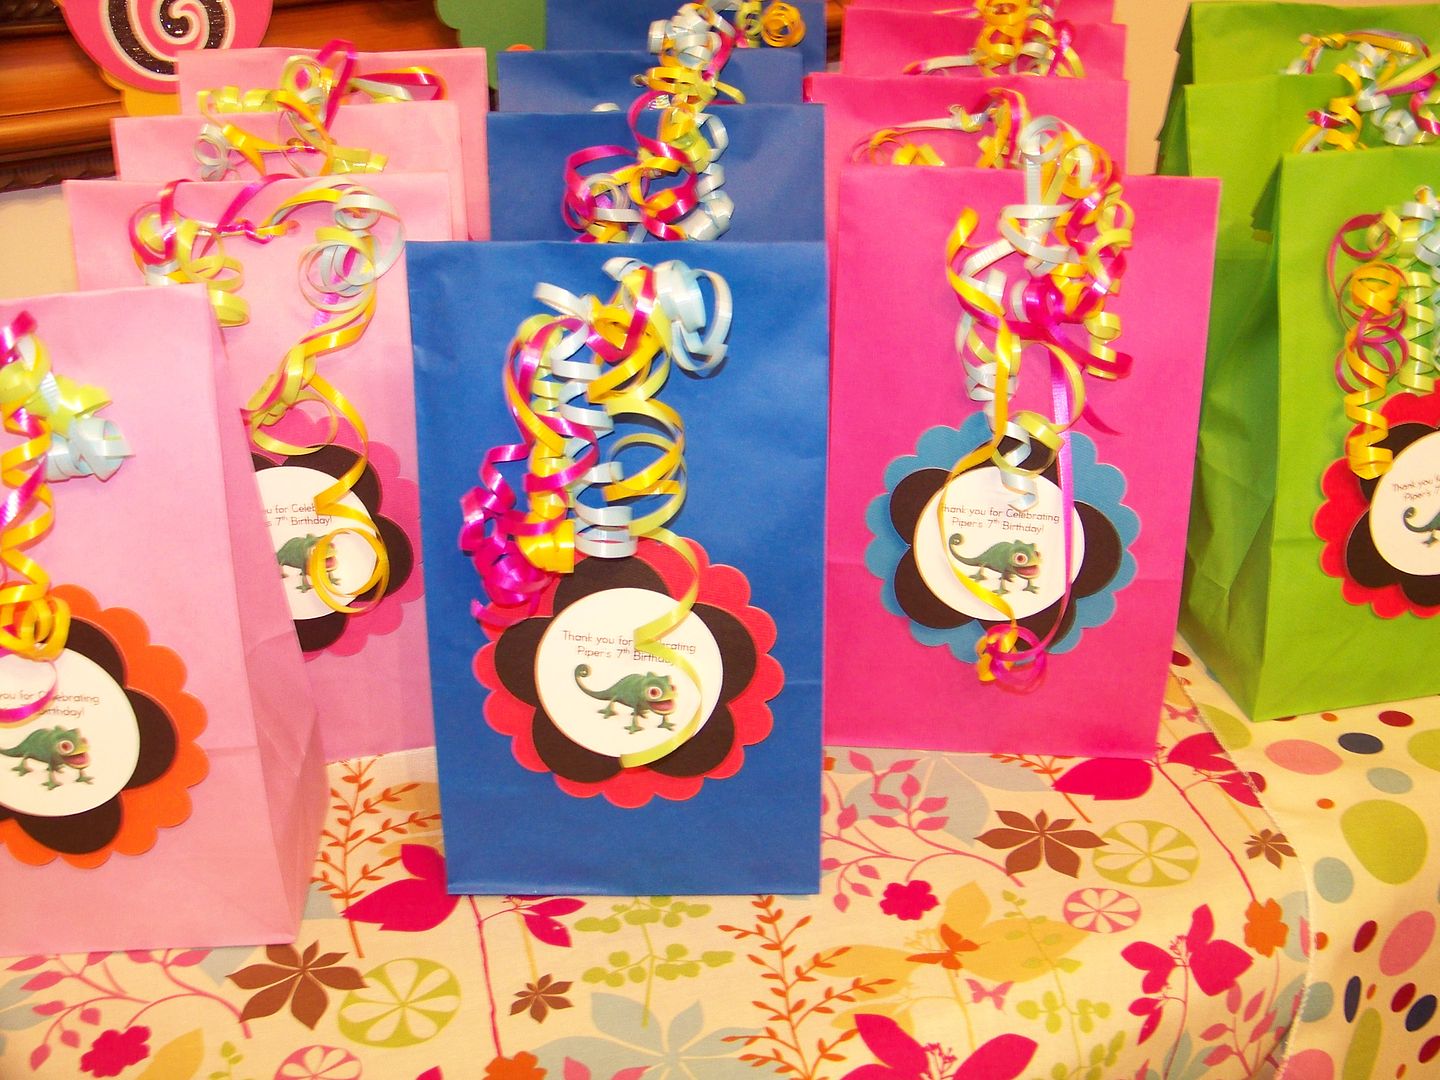
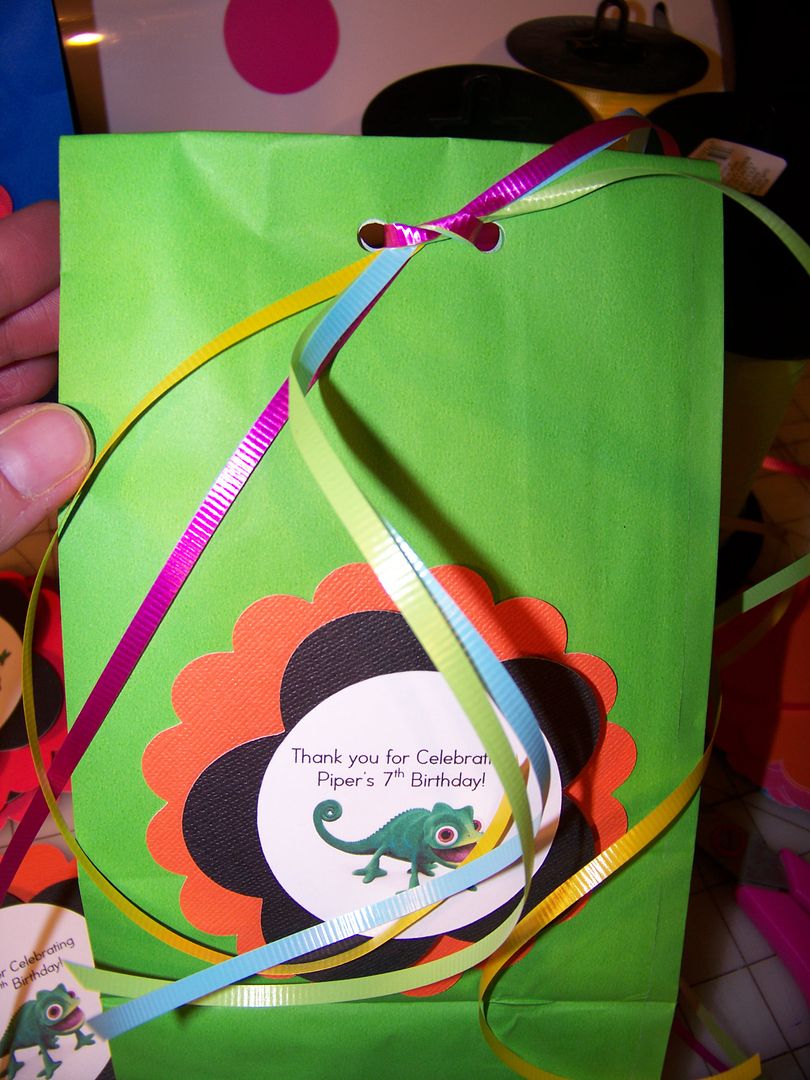
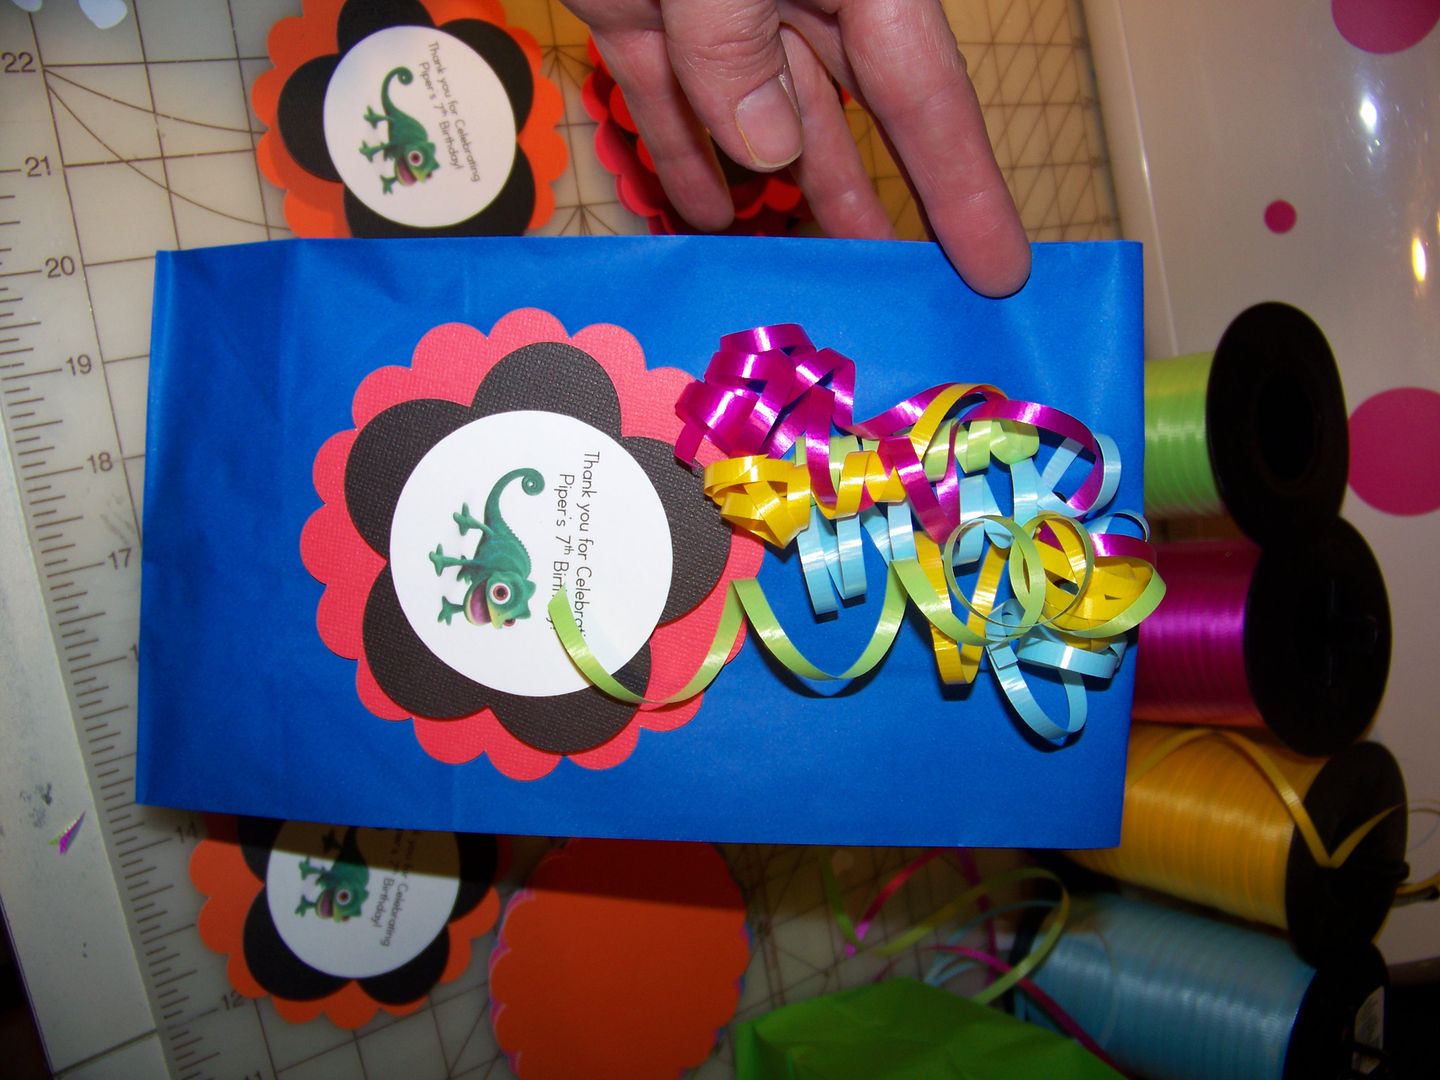
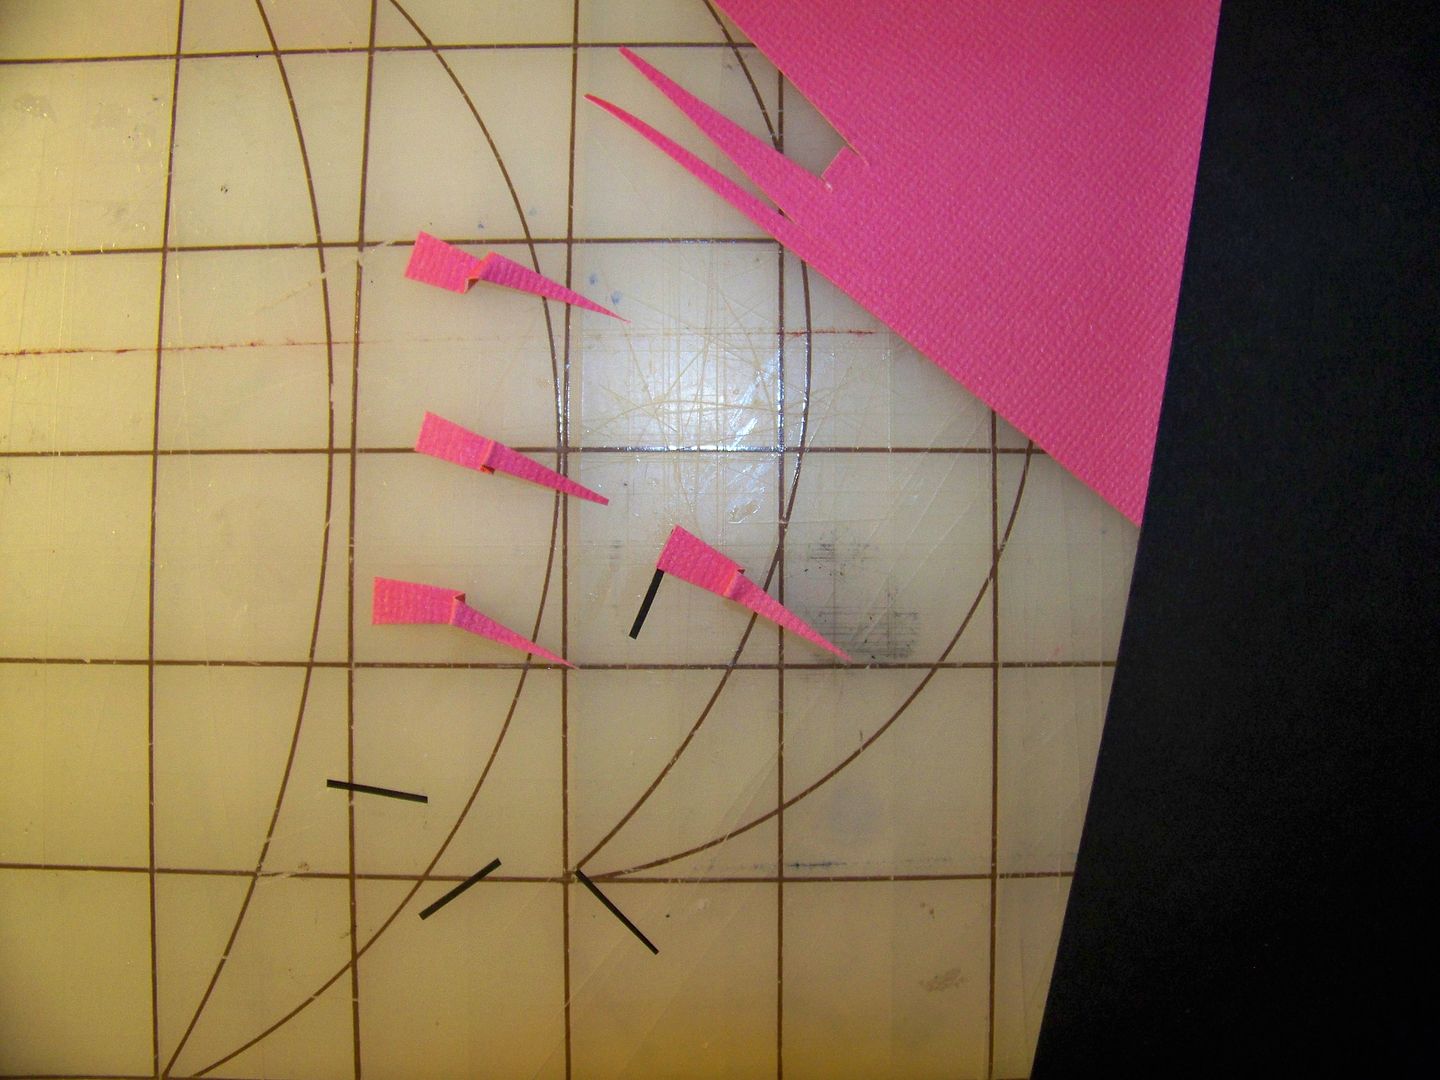
First project:  Favor Bags!

I used an image of Pascal I found on Google Images and added text using Microsoft Word for text wrapping and positioning. 
Once I created the message, I copied it several times on a single page and printed the page as a guide.  I cut white cardstock circles using Mini Monograms, page 126, at 3-1/2".  I lightly taped (barely) the top edge of a circle over each of the Pascal messages on my page and placed it back in the printer and printed the art onto the circles.  I repeated this until all the circles were printed.

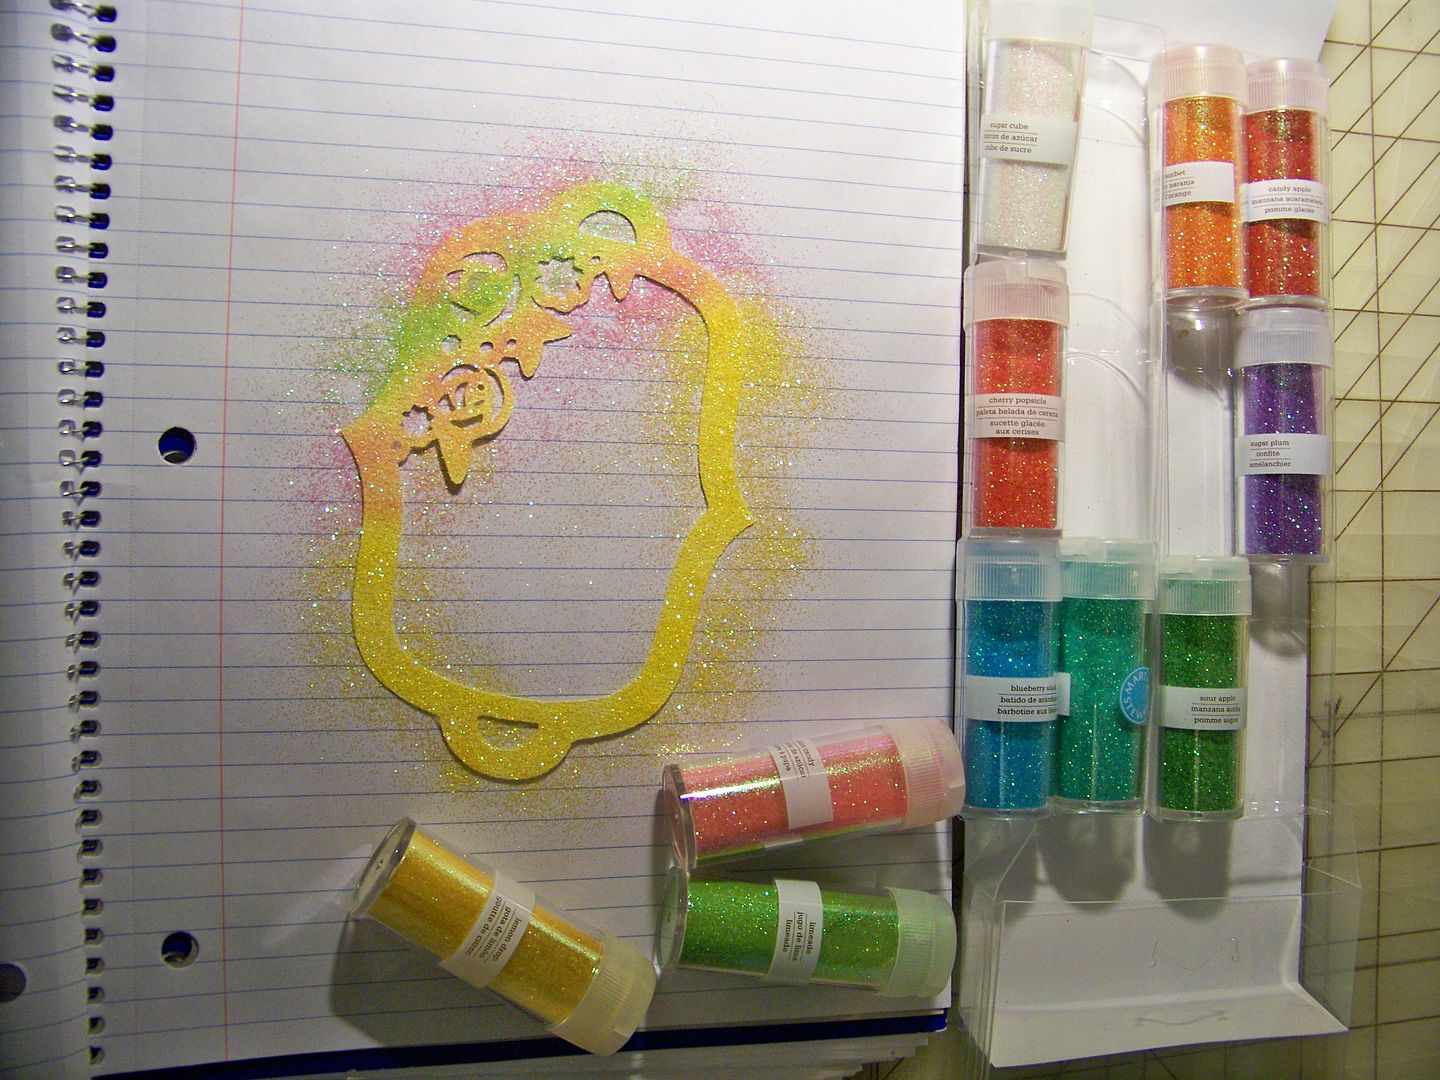
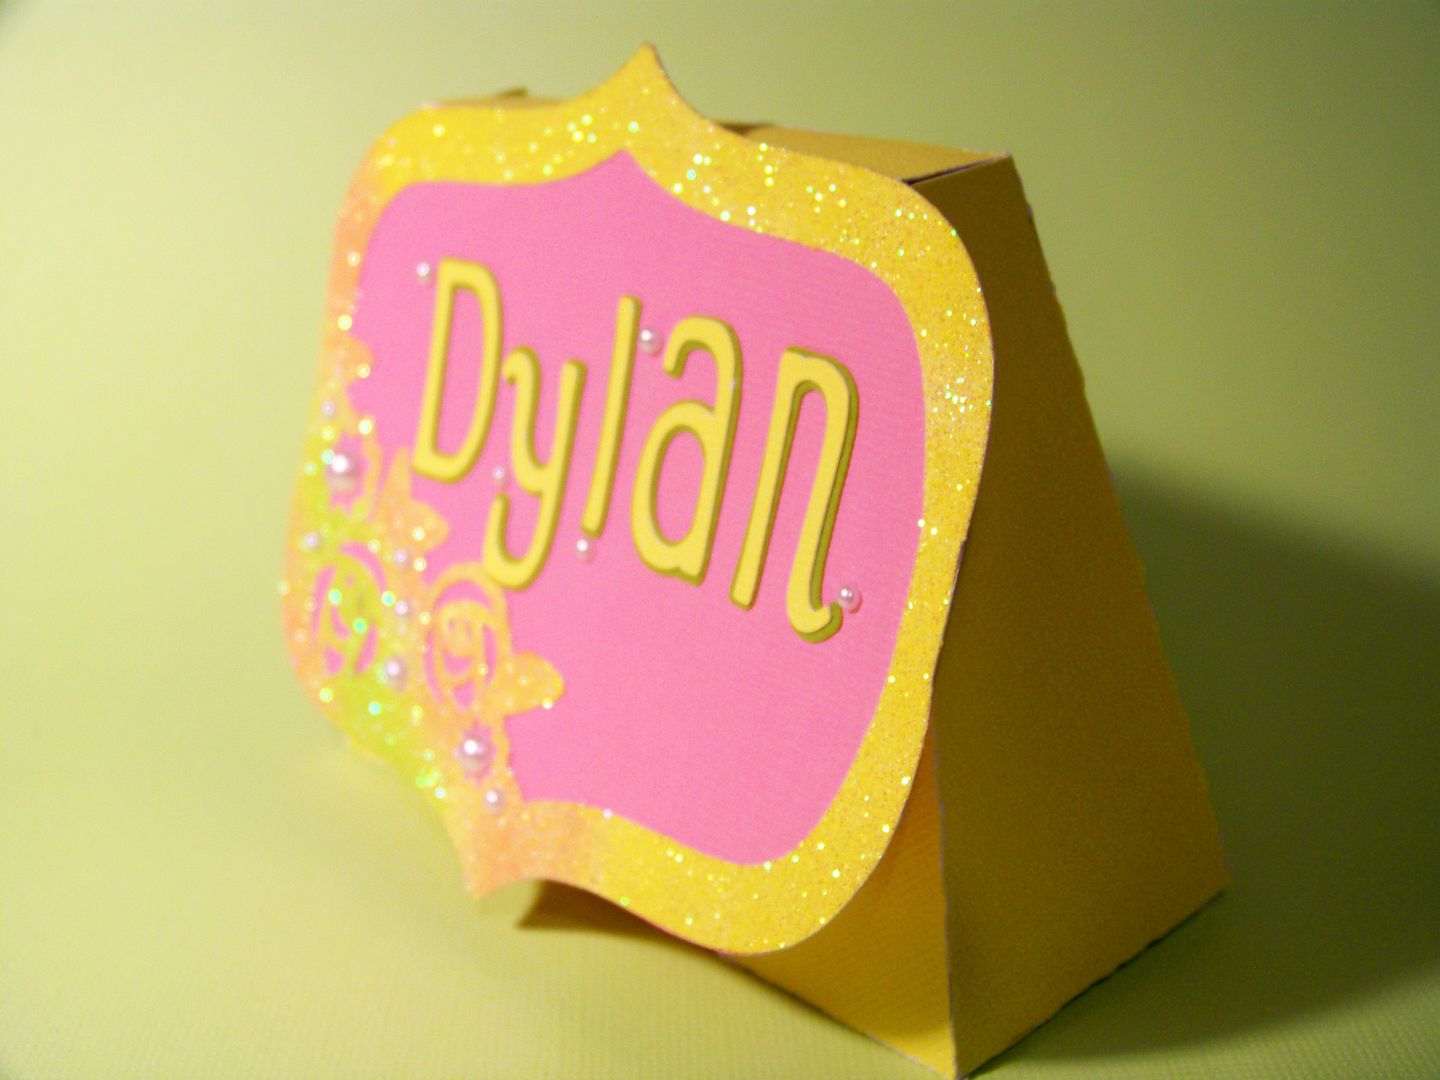
Next, I cut scalloped circles for the base of the tags using Mini Monograms again at 4-1/2" (page 129).  The black flower that is layered in between the scallop and printed circle was cut from the same cart, page 128, at 3-1/4".

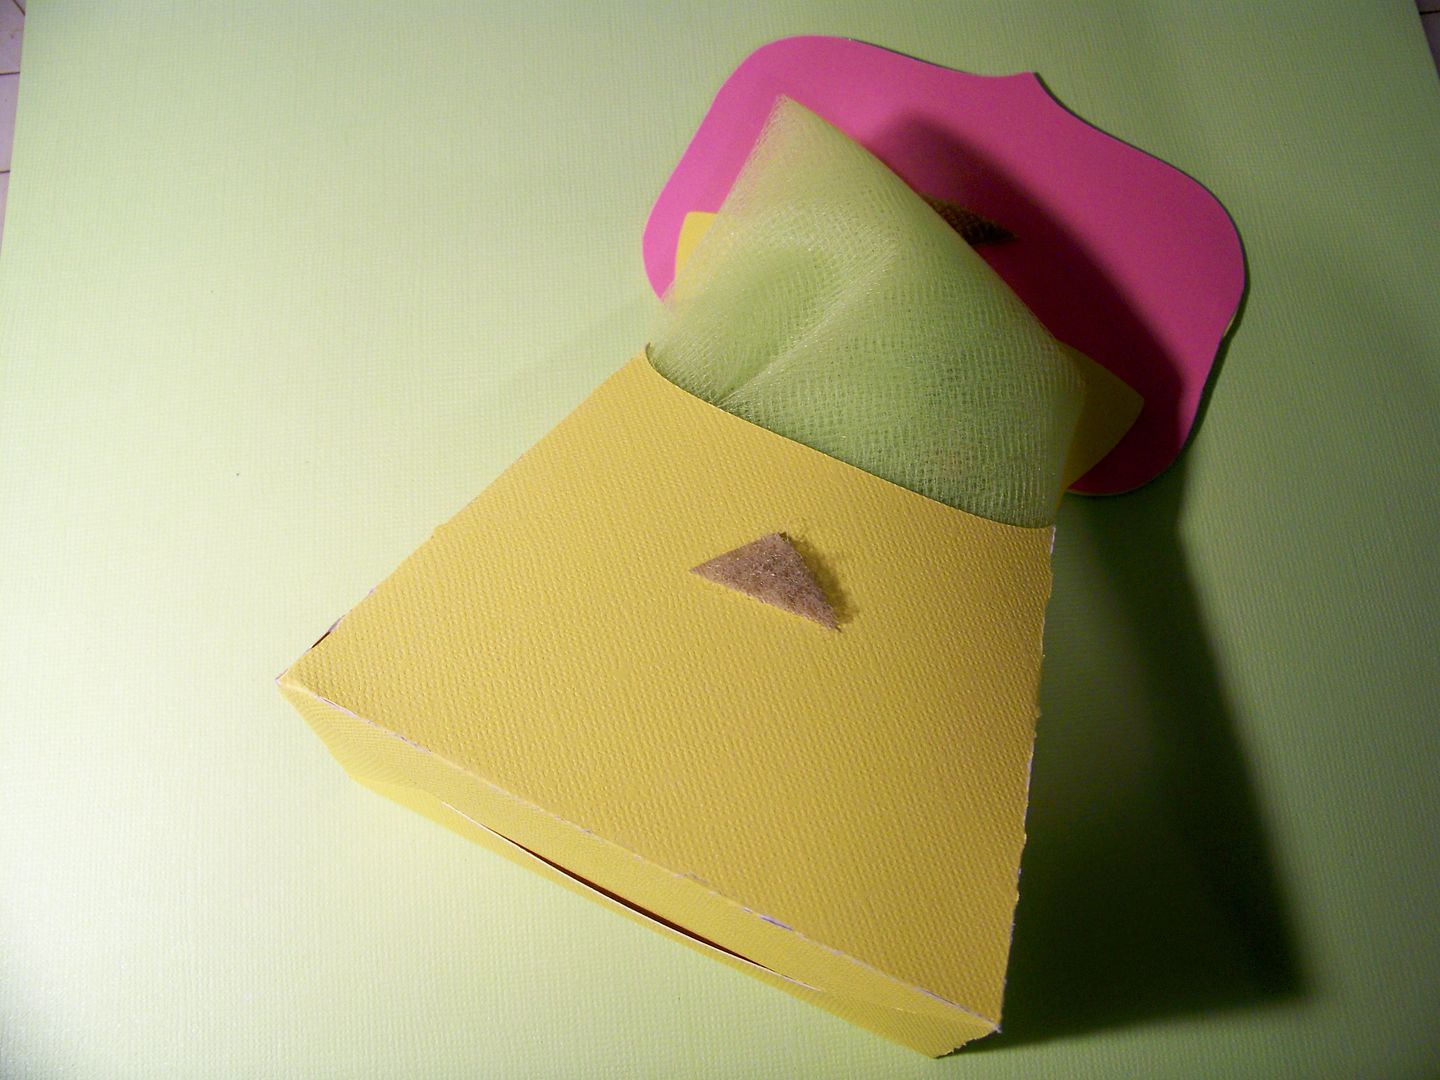
The printed circle and flower were attached to each other via ATG tape.  They were attached to the scalloped base with a 7/16" Ranger pop dot.  The base was attached to the bag with ATG tape.  The bags were filled with bubbles, watercolor paints, glittery bouncy balls, stampers, rings, and lots of candy, then the tops were folded over and holes for the ribbon were cut with a hole punch.  Colorful curling ribbon was fed through, tied, and curled.
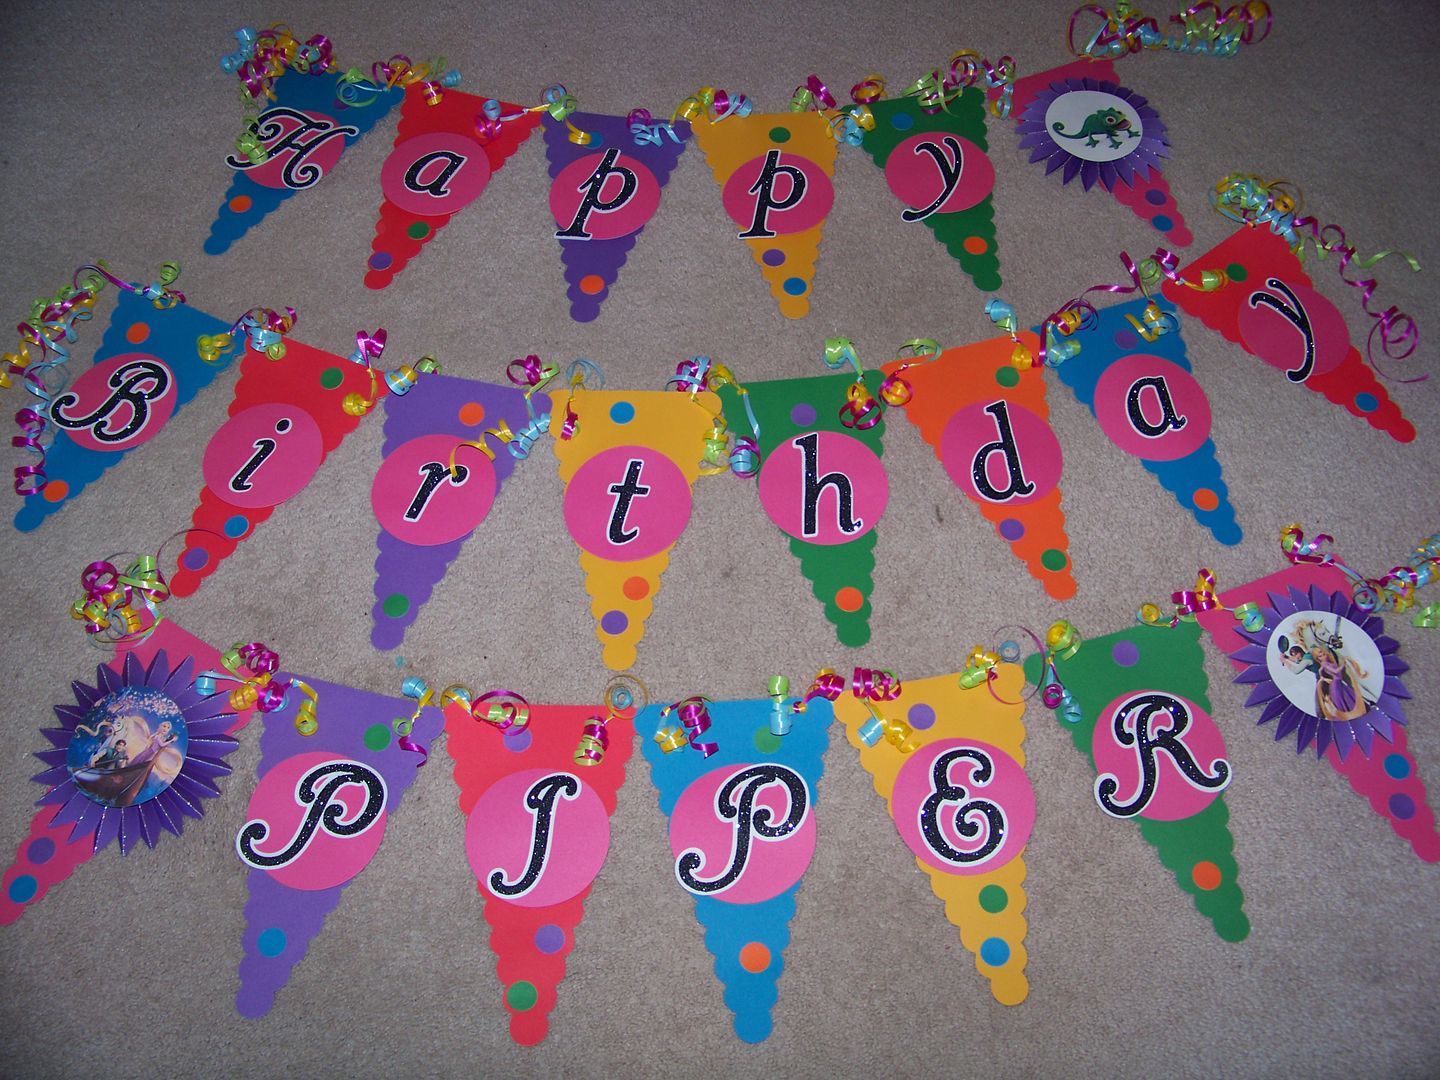

Next:  the banner!
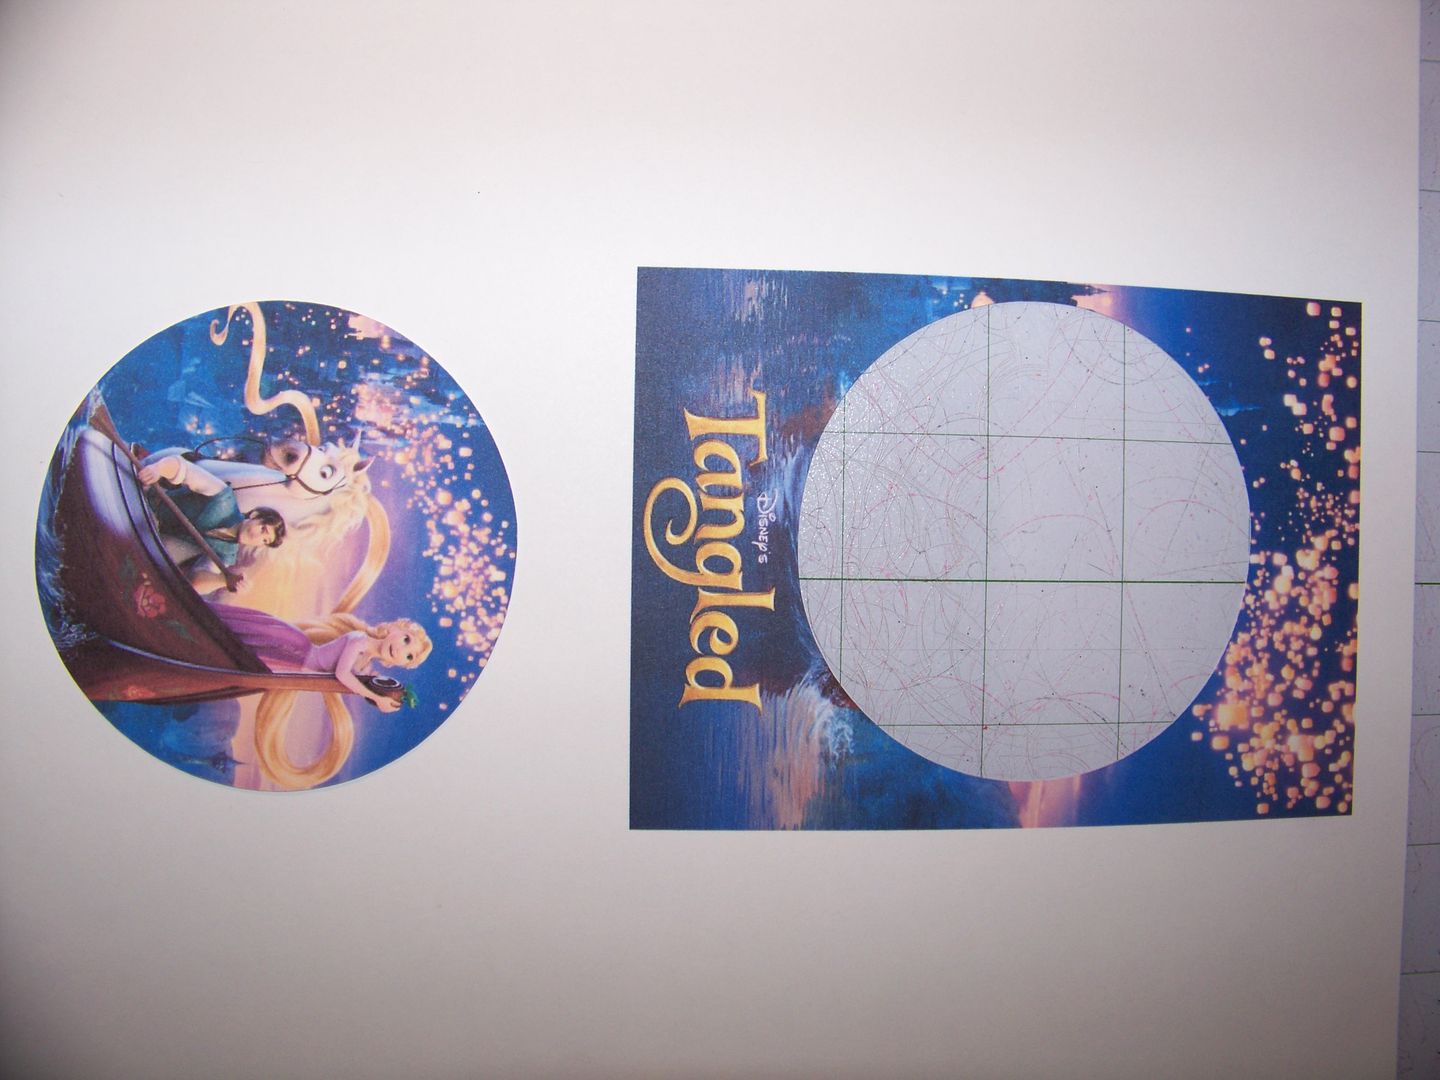
I used the scalloped pennants from Country Life (page 46), cut at 8-3/4".  I found more movie images and printed them on white cardstock.  I cut them using Mini Monograms (page 126) at 5" using the Centerpoint feature.
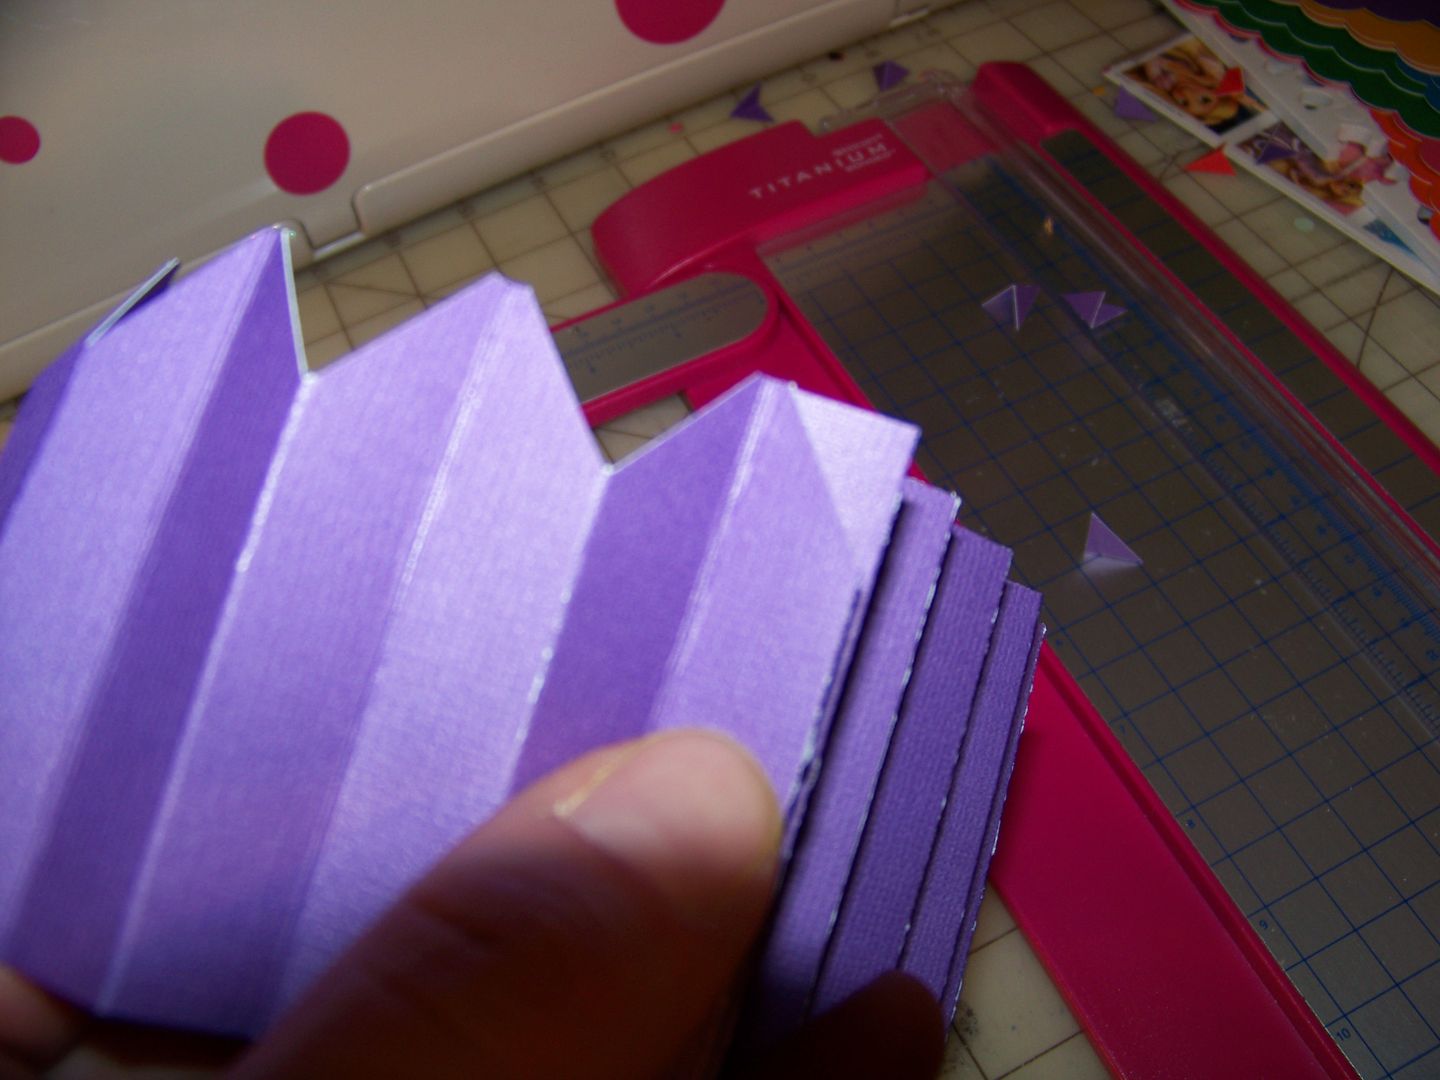
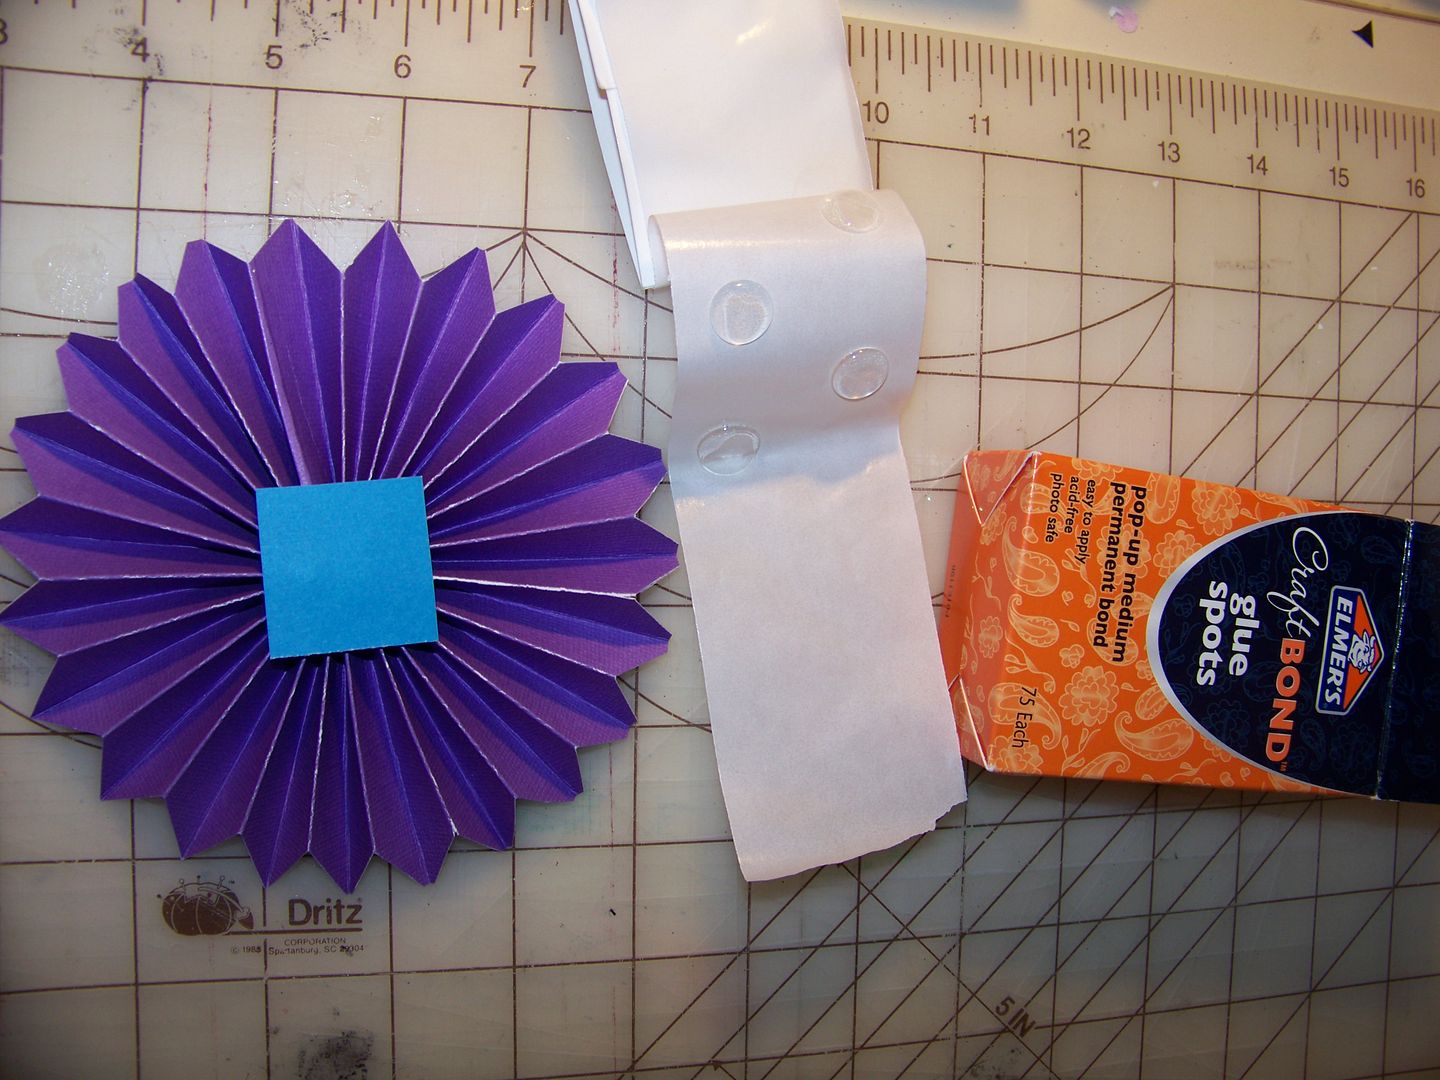
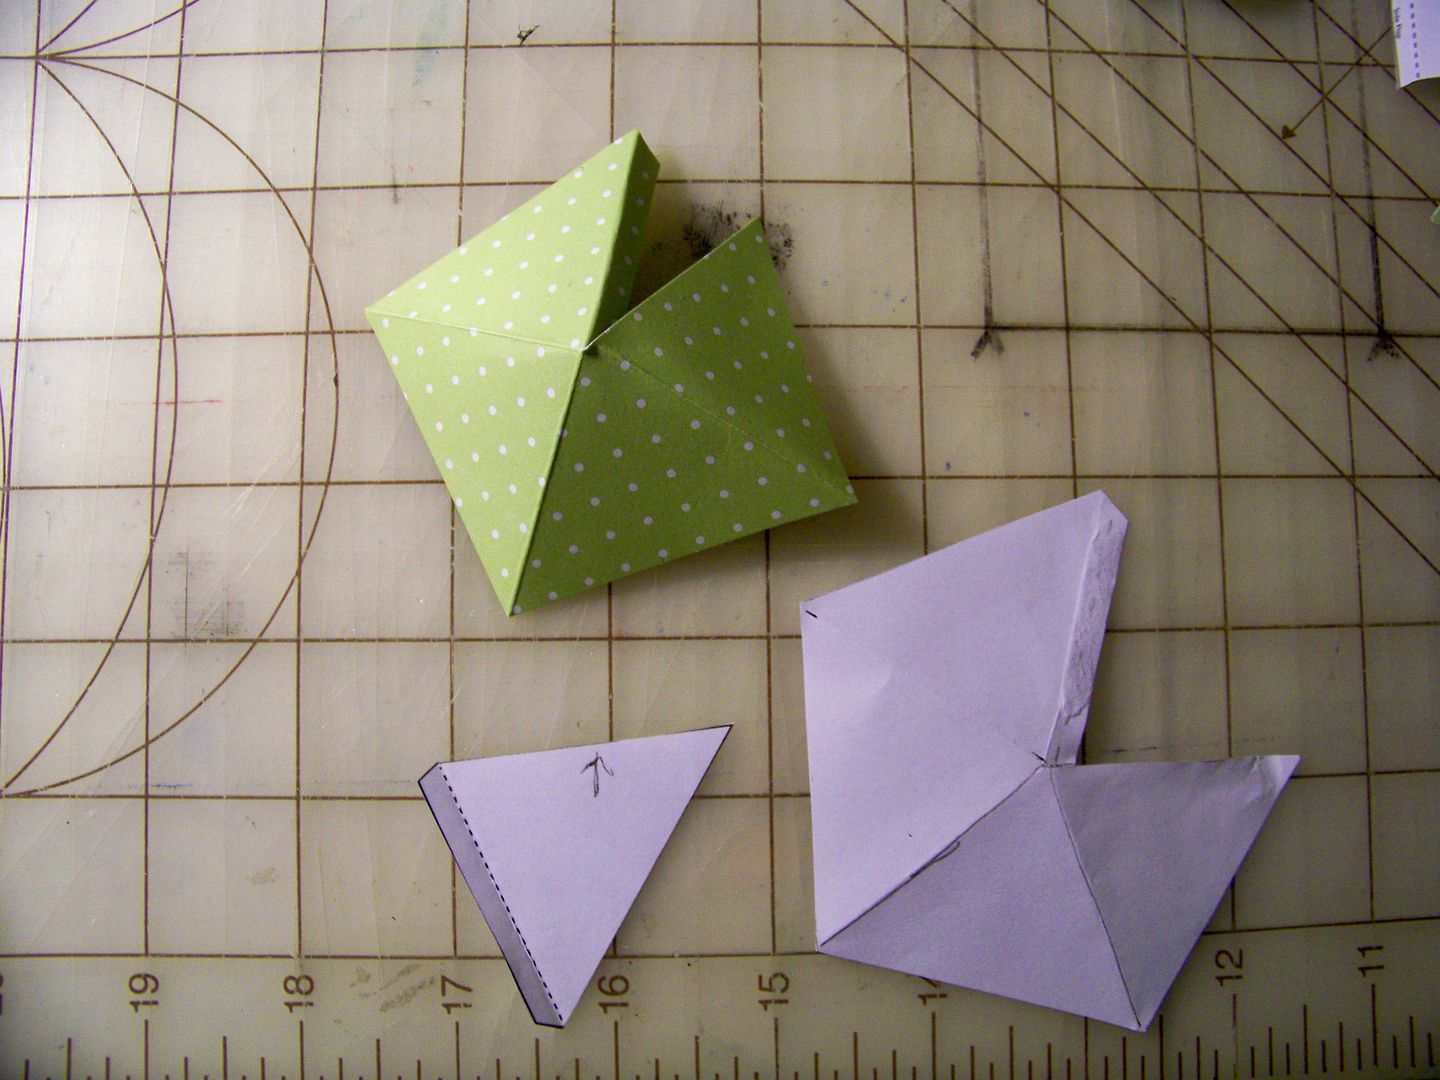
I knew I wanted to use paper rosettes with these to get a little dimension to give a hand-made look.  I found a great tutorial that made it super easy.  Check it out by clicking here.  I used a trimmer that I have outfitted with a scoring blade to assist with the folds for the rosettes.  For each, I cut two strips of paper 12" x 2.5".  I scored them at every 1/2", adhered the two to make one long strip and then adhered to form a circle.  I trimmed the tips at an angle to give them a bit of shape.
Instead of the button and thread used on the tutorial, I used a small square of card stock and Elmer's gummy dots on the top and bottom to hold in place.

Stickles was added to the top edge of each fold to add a little sparkle.  The printed circles were adhered on top.
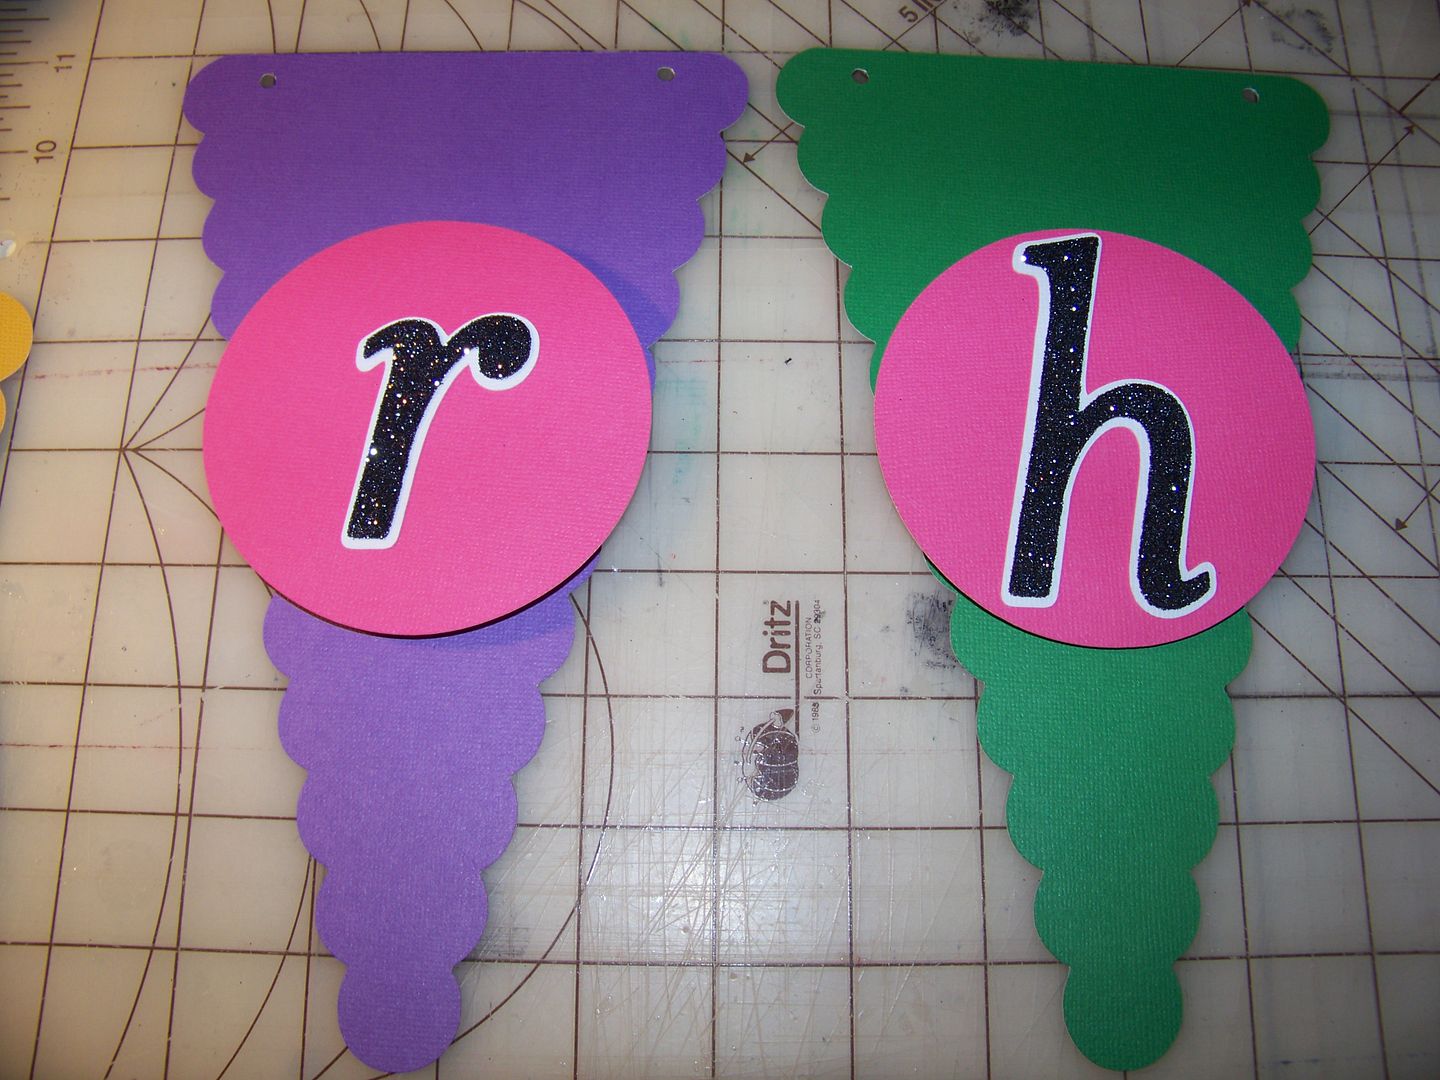
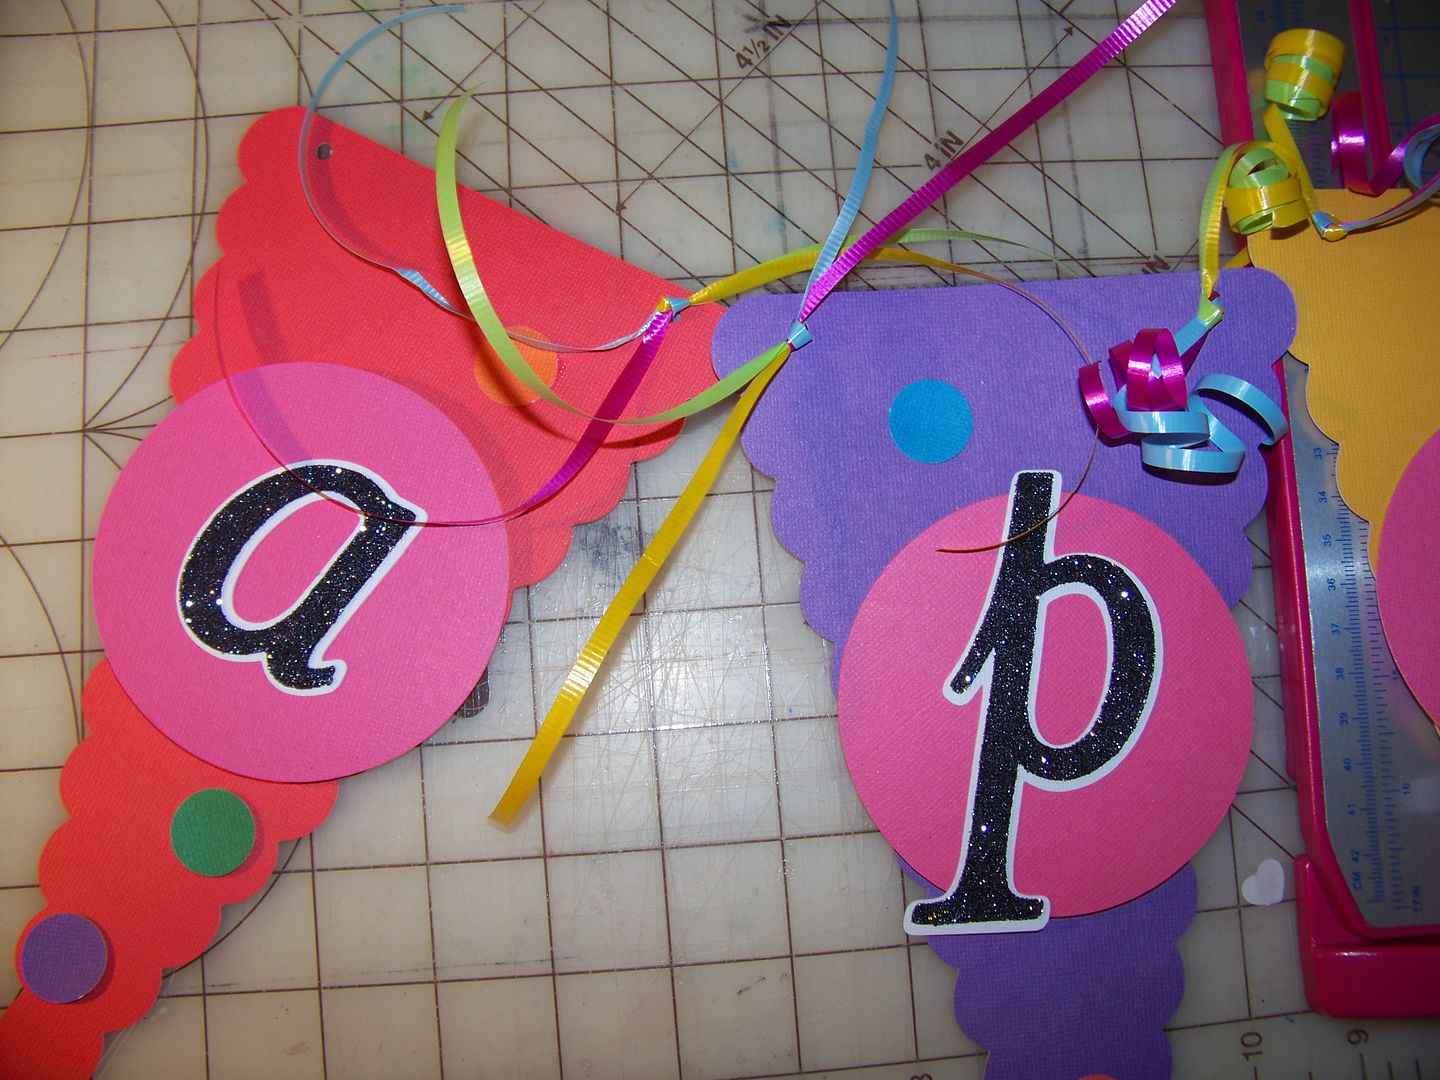
The pennants with letters were made with circles cut from Mini Monograms (page 126) at 5-1/2" and 3" letters cut from Elegant Cakes with the shadow feature.  The letters were run through the Xyron and glittered with Martha Stewart glitter.
The pennants were joined with more of the curling ribbon that was used on the favor bags for continuity.  I added 3/4" dots that cut with a punch from scraps of each of the colors. 


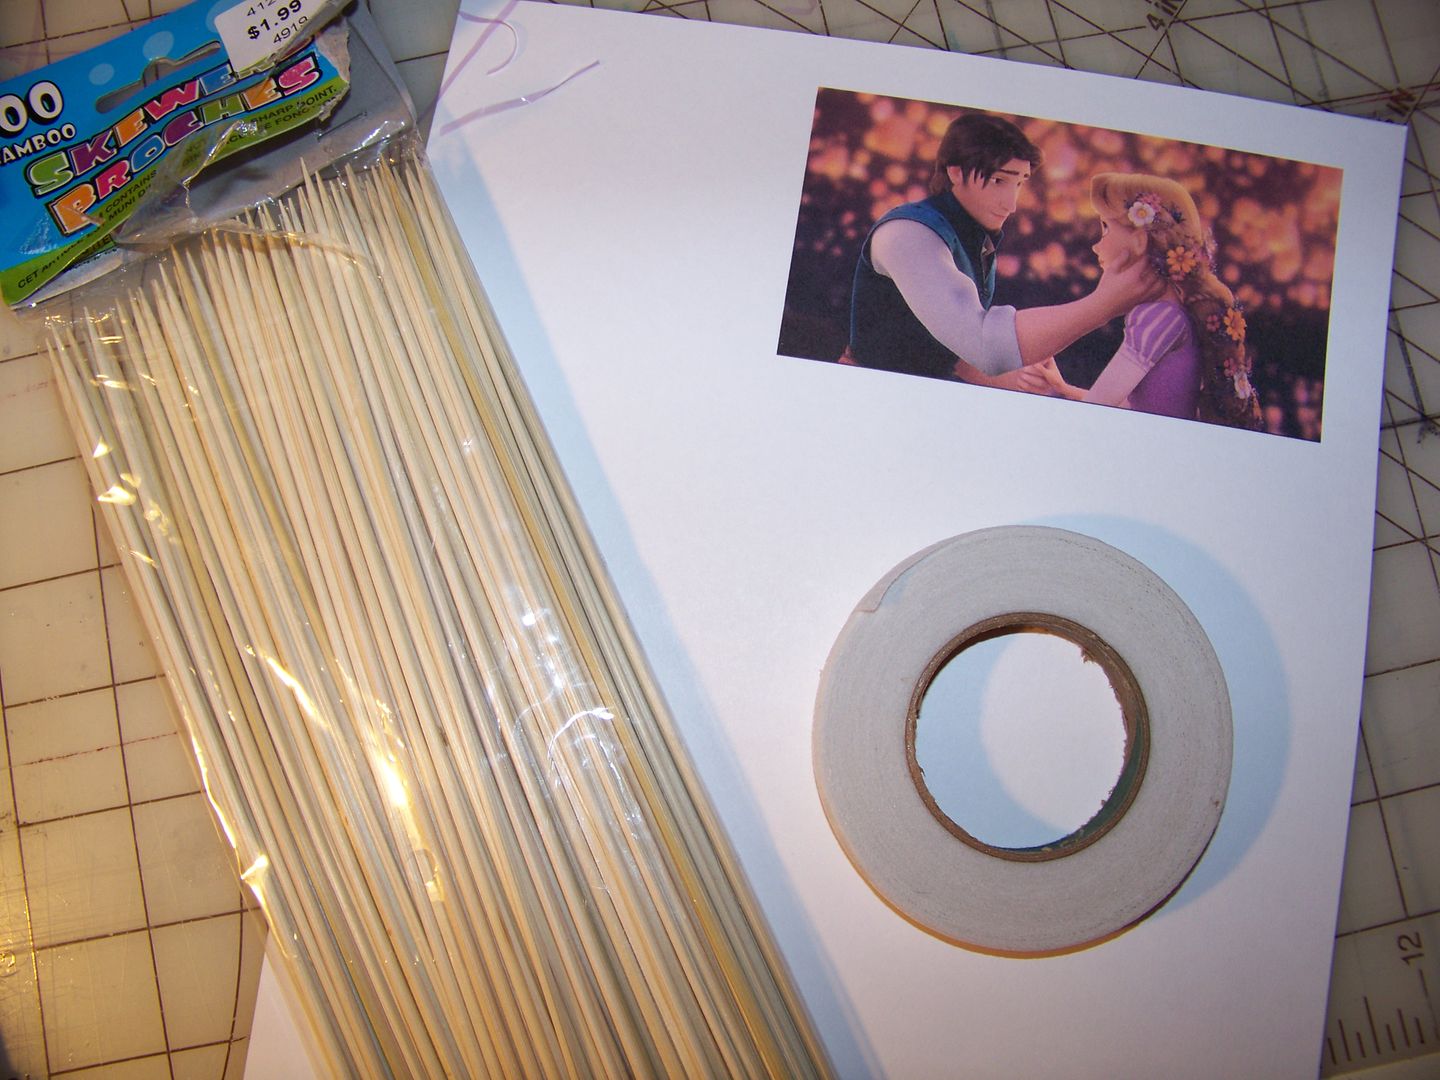
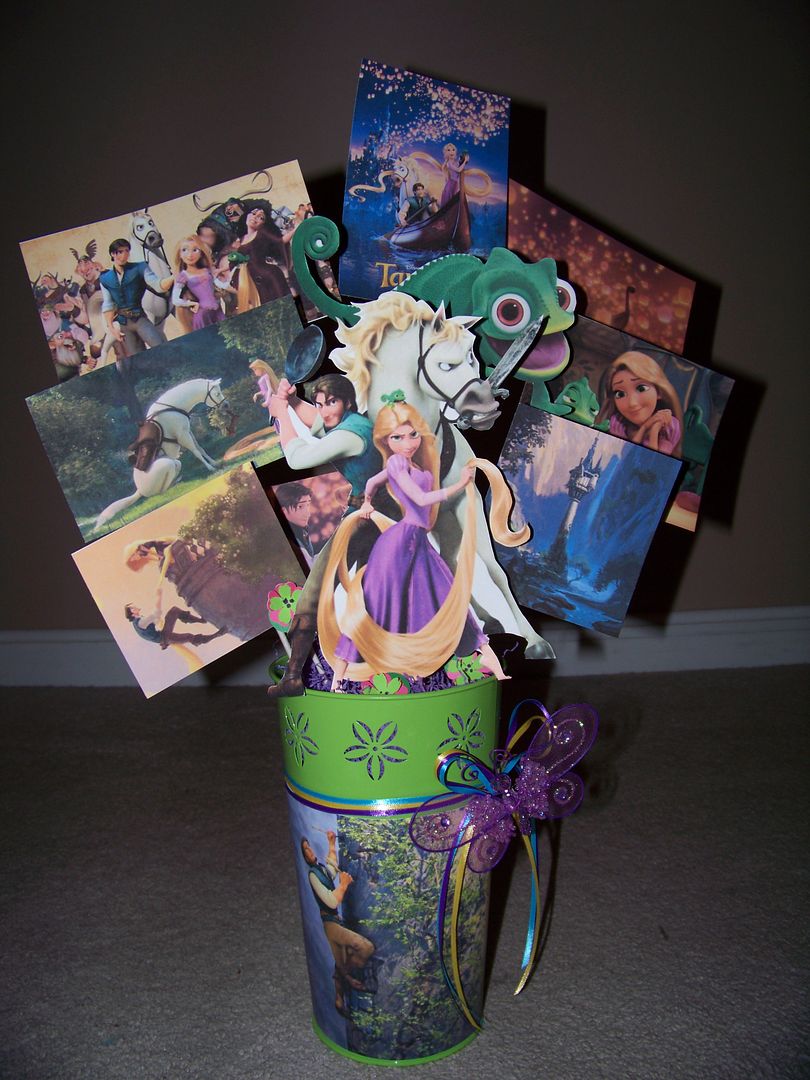
Next:  the centerpiece!  I used more movie images that I printed onto cardstock.  Using white floral tape, I covered wooden skewers and then taped them to the back to use as picks.
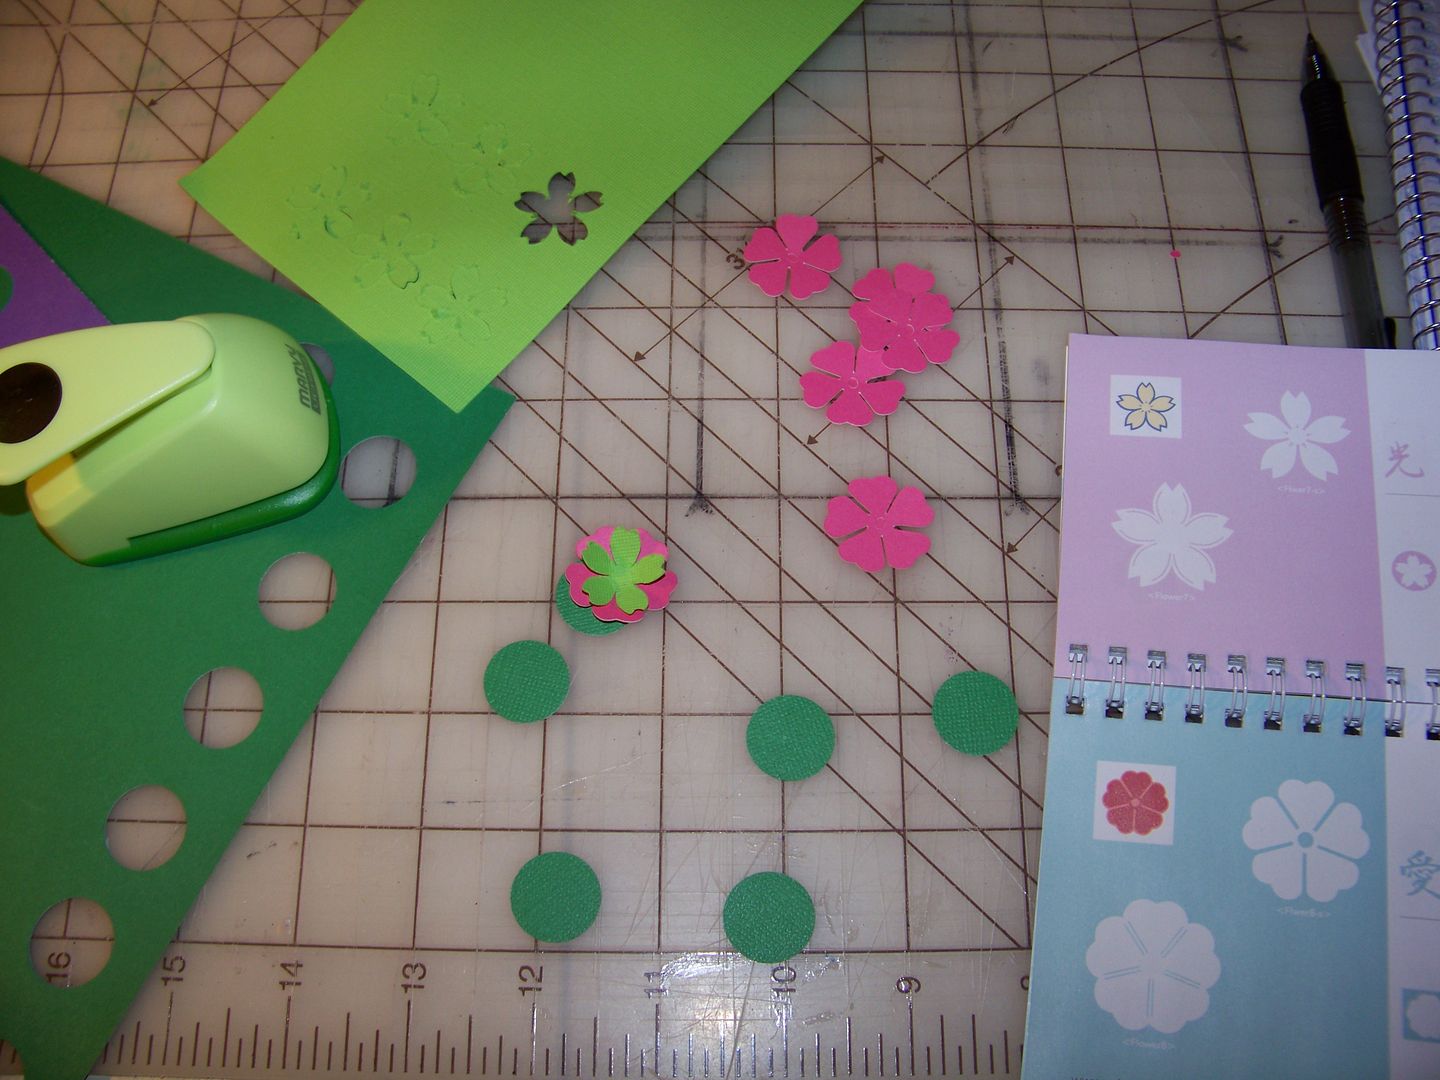
I placed floral foam into a metal container, tucked in all my pictures using the skewer pick, then covered the base with Easter basket grass I found in my gift wrap stash.  I made 3D flowers on the Cricut using Pagoda, cut at 1-1/2" and my 3/4" circle punch.  

I placed these in the purple grass with a bit of glue.
I found a great picture of Flynn climbing up the tower and used ATG tape to adhere it to the container.  Narrow ribbon was tied around the container and secured the beaded purple butterfly accent.

Next:  Table Squares and Table Decor!
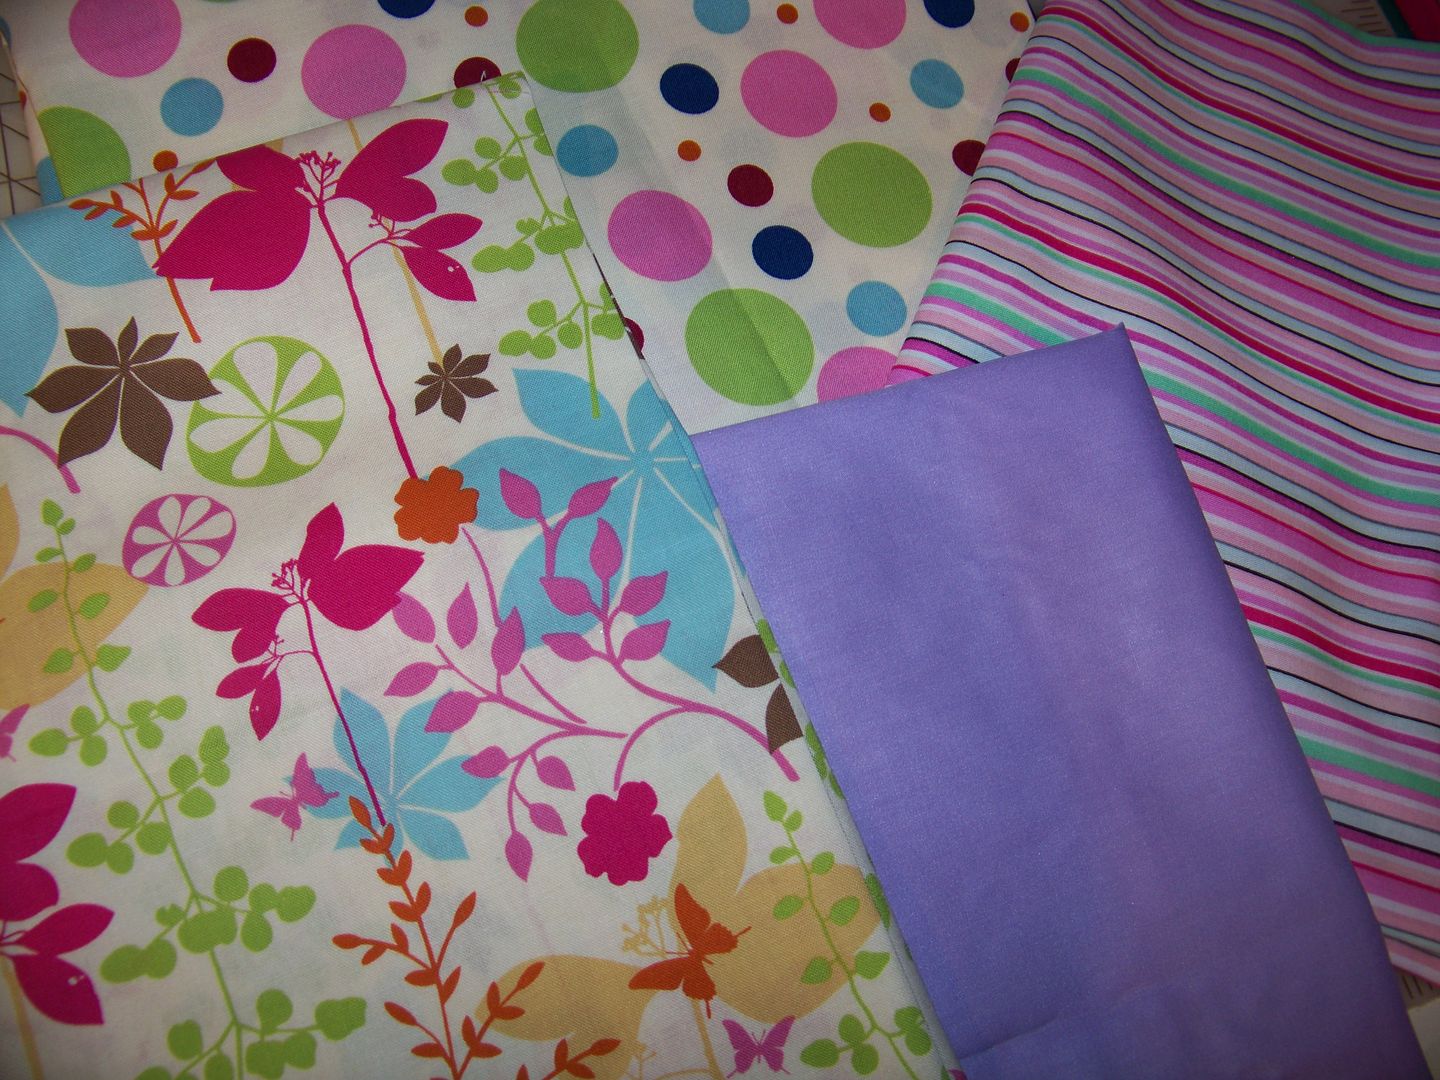
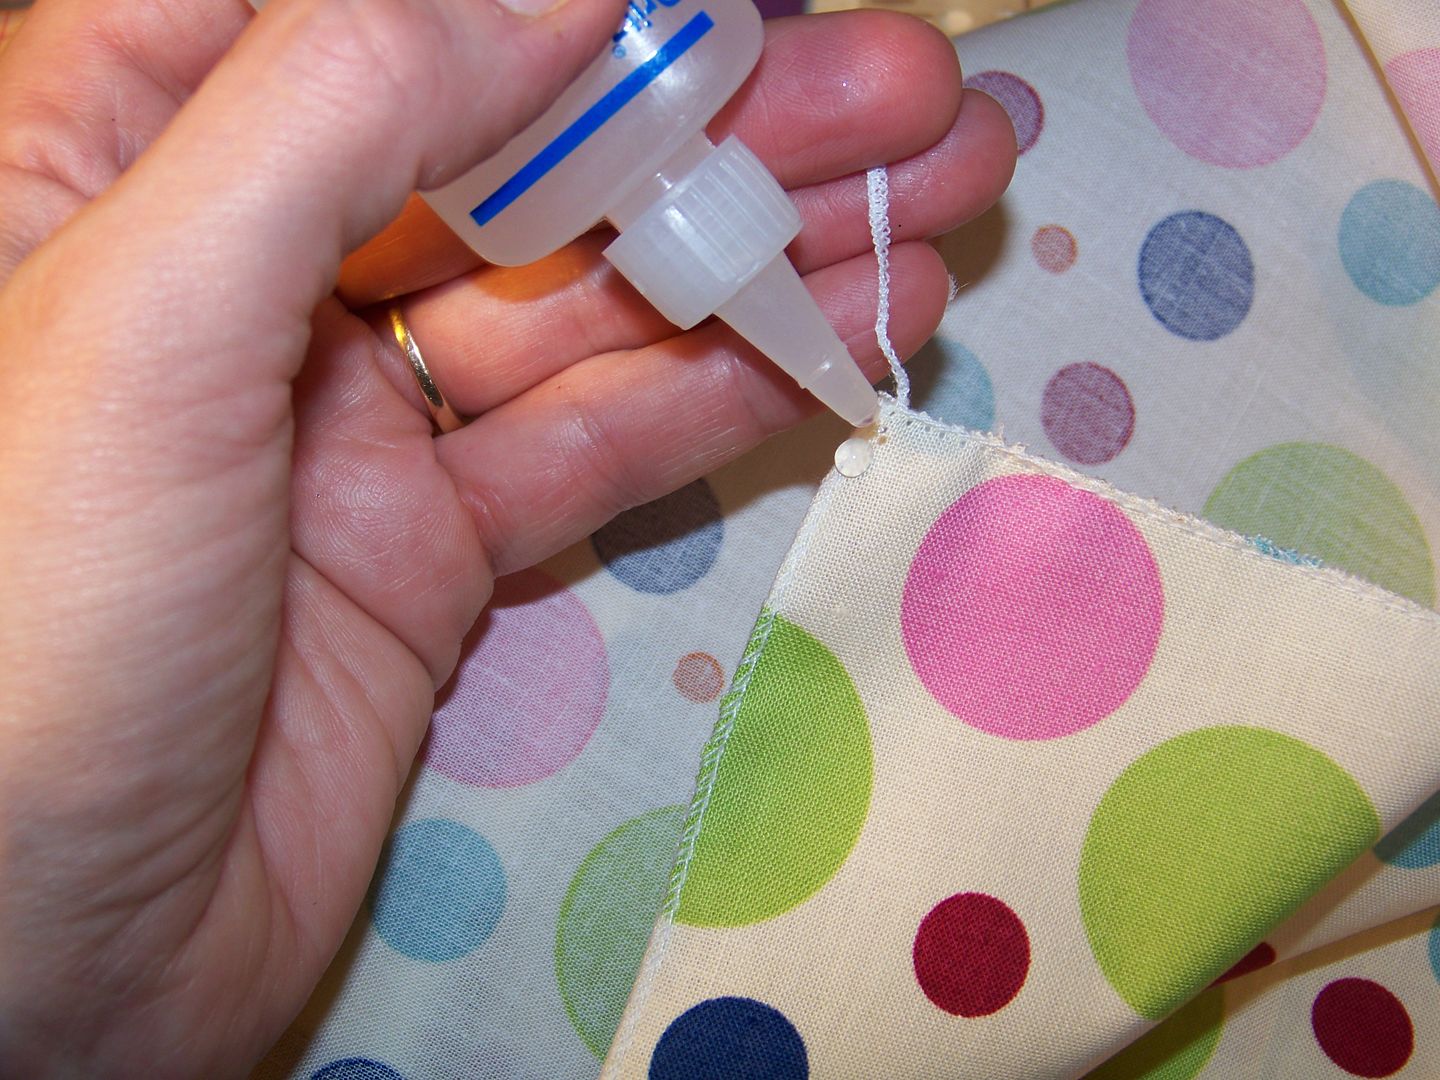
I found great fabrics for table squares that coordinated with the movie pictures and cardstock I used.  I have found that 22-1/2" or so squares of fabric work better for party tables and buffets.  They are cheap (5/8 yard will make 2; 1-1/4 yard will make 4), easy to hem quickly with the narrow rolled hem feature on the serger, and a snap to iron and launder. 

When serging, remember to change the throat plate for rolled hem, remove the left needle, and tighten the looper tension dials by three.
A dap of Fray Check on the corners needs time to dry before trimming the tails and pressing the cloths.

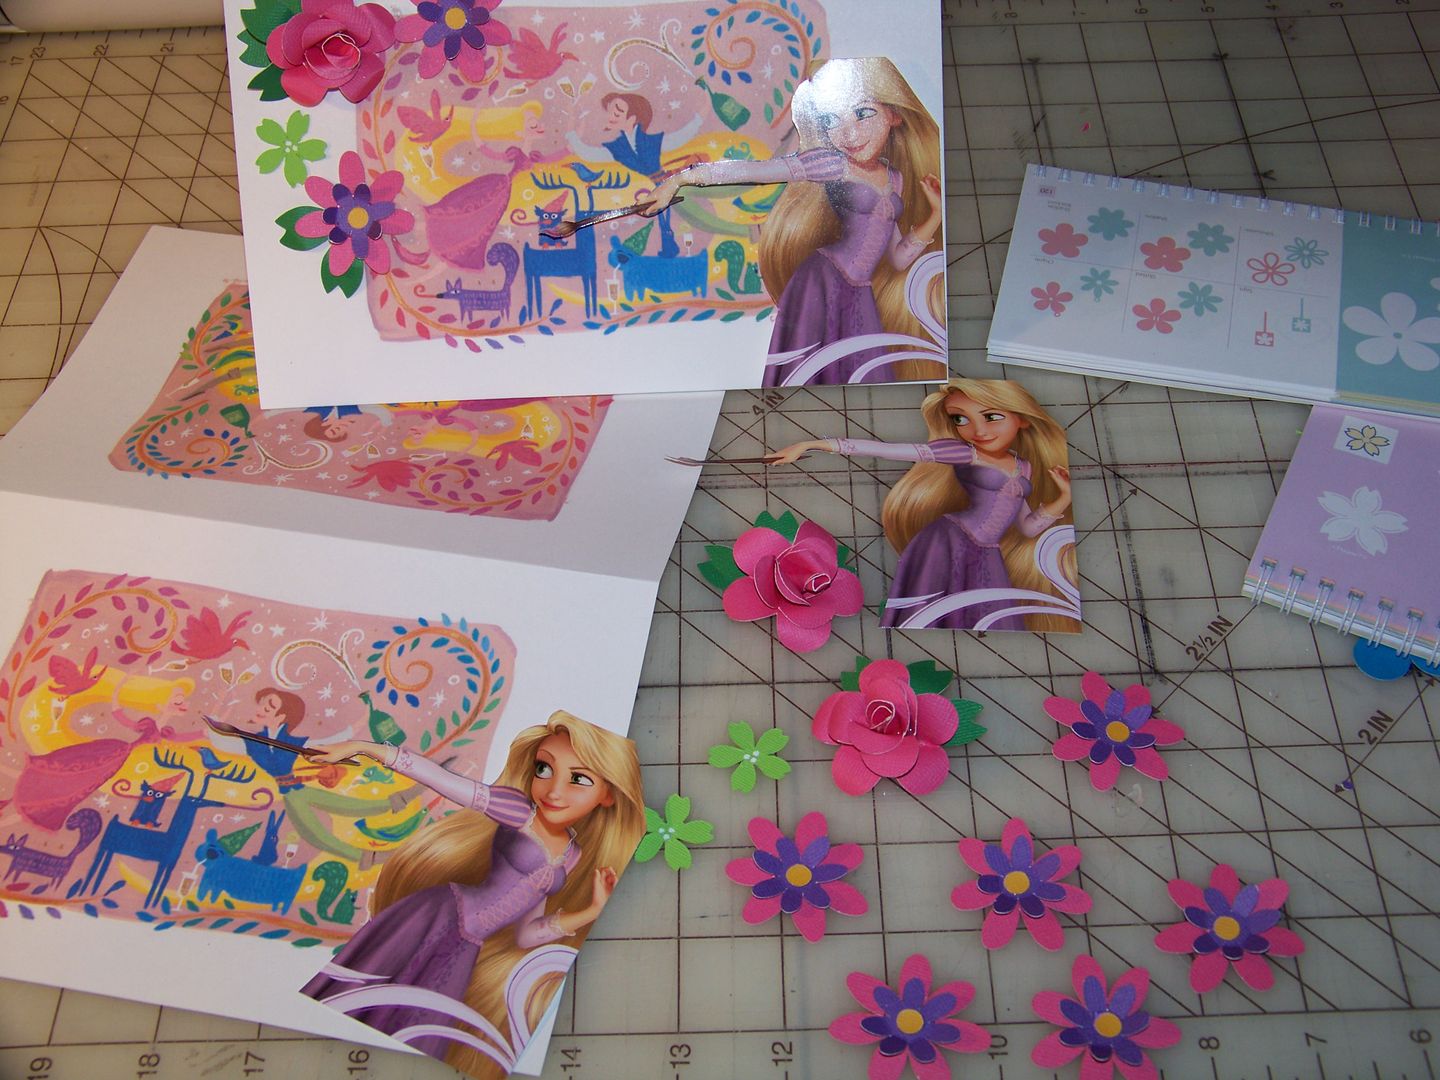
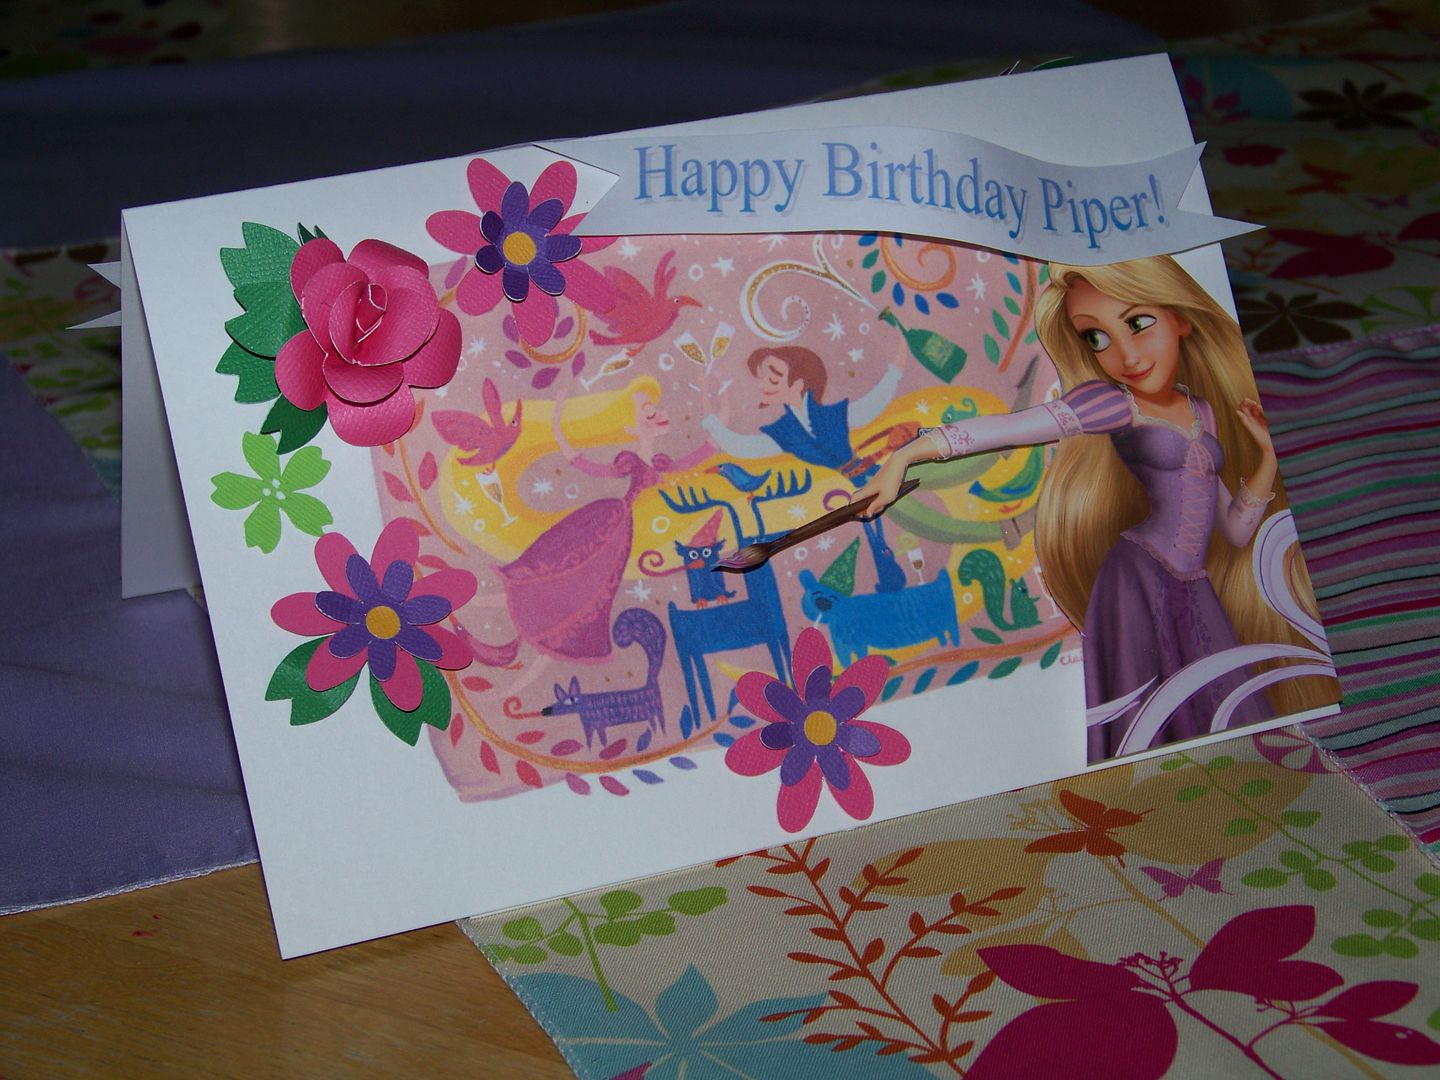
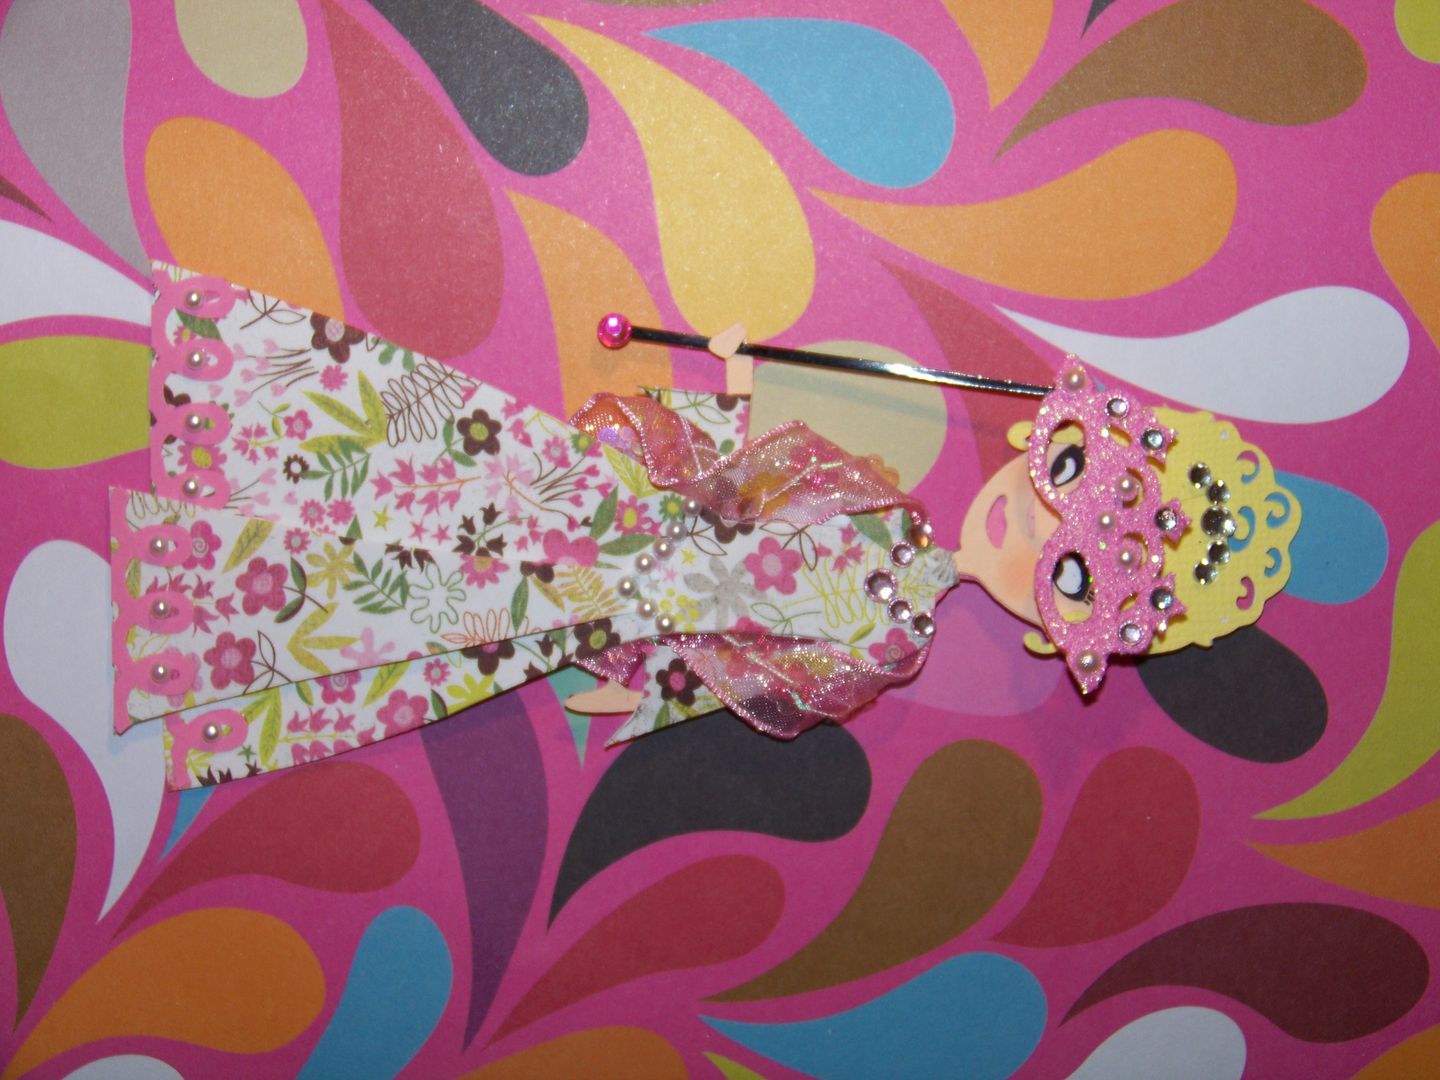
I used the inspiration picture, printing two on a page of cardstock and flipping one image, for table decorations where the kids will be sitting.  I cut out and popped up a commercially printed Rapunzel.  3D cricut roses added a fun dimension to the tent cards.  For info on how to make the roses using your George cart, check out Kathy Orta's great video tutorial!  I cut my inital shapes from George using the blackout shadow feature per Kathy's video, at 1-1/2".  I added a flower from Pagoda, cut at 1-1/2", and some layered flowers from George, cut at 1" and 1-1/2". 
I created a "Happy Birthday Piper" word art banner in Microsoft Word, hand-cut it, and applied it with pop dots.  Both sides of the tent cards are identical.

So, we have a family dinner on her actual birthday, and I've set everything up that we will using at the kid party to brighten up my dark dining room and to let Piper enjoy the decorations that we have planned for her kid party.  All that's left is the food and cupcakes for two parties... and cupcakes to take to school... and treats to take to ballet... gotta love bein' a kid!


In addition to the favor bags for the kids, I have a take-away craft project that I printed on cardstock.  This is a 3D Pascal to color and create.  Click here to link to Disney Family's pdf!  I love that website for Disney projects for kids!

Also - be sure to check out Claire Keane's site.  Her artwork is stunning.  If you loved Rapunzel's walls, then you will love her work!  Check out the video she has embedded on her site that she did with her husband Vincent, another artist from the movie.  Oh, and if you are excited by the colors she uses, you might be interested to know that their child is named Matisse.

Enjoy and thank you for looking at my blog and projects!  I am most happy with this because these projects have been a labor of love for my little Piper!
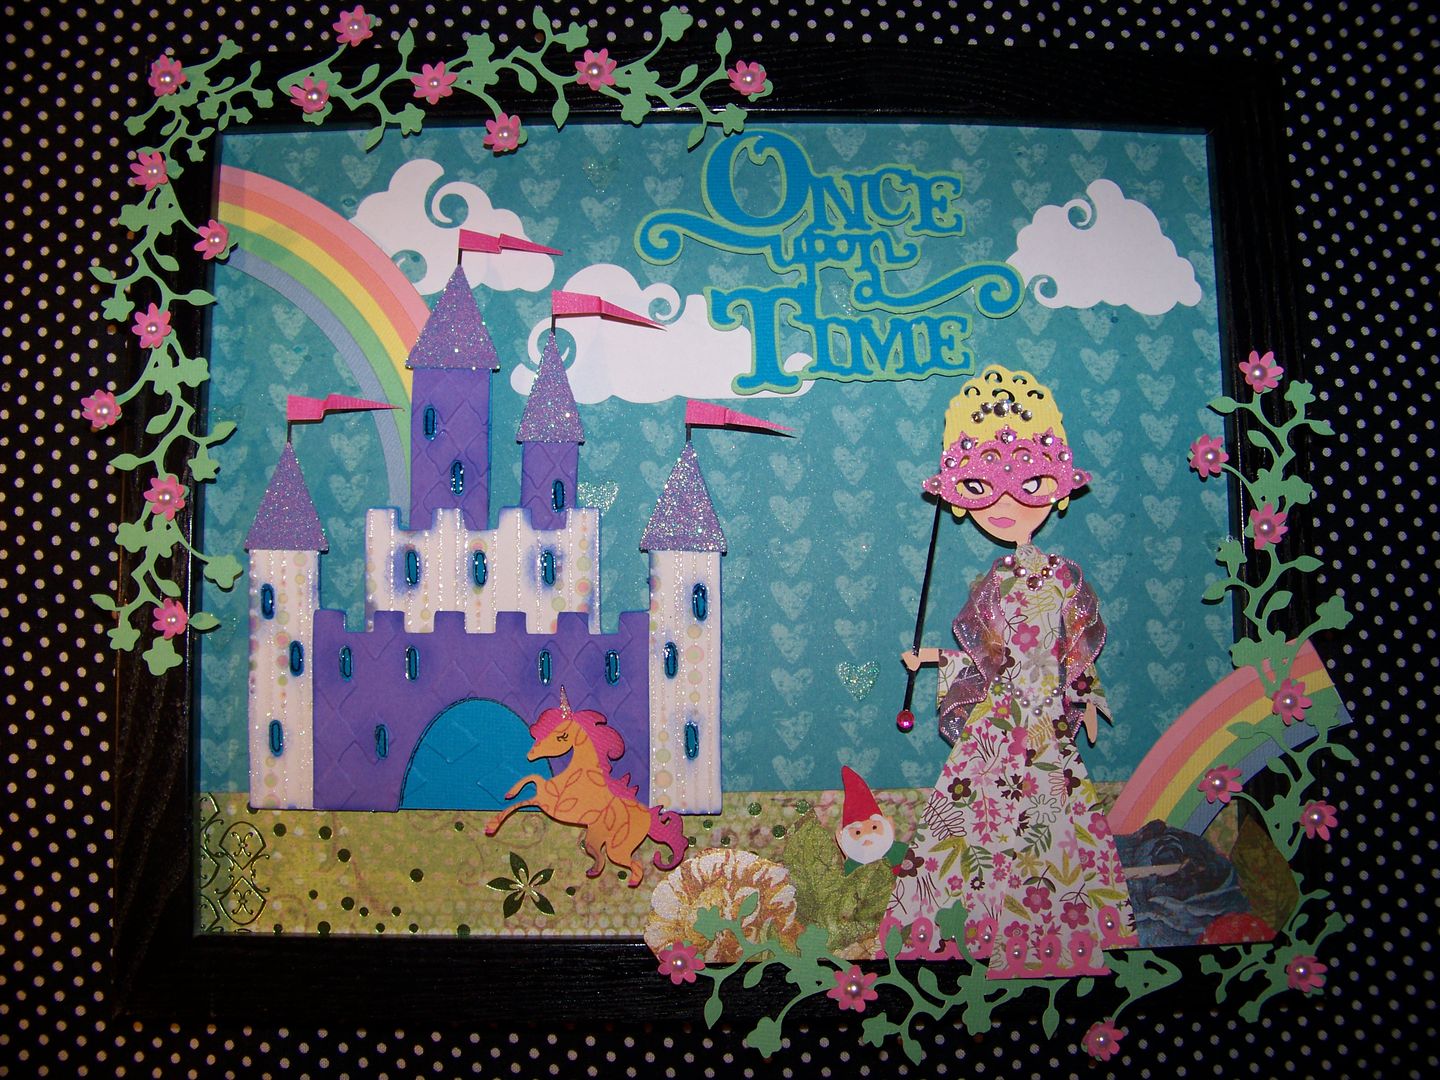
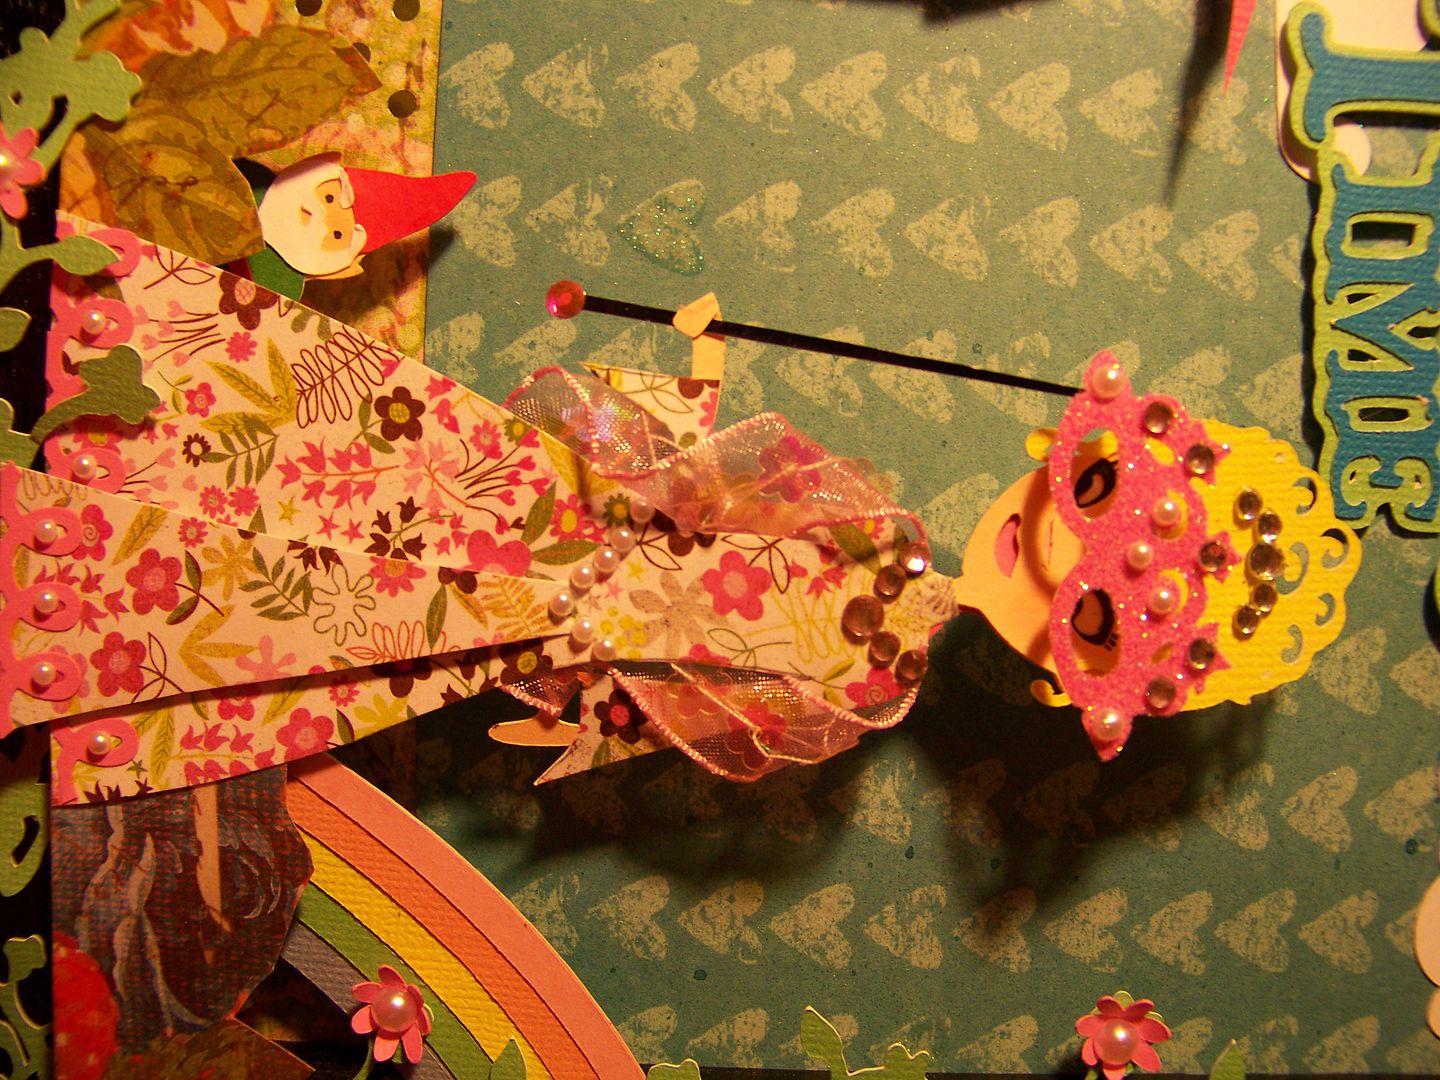
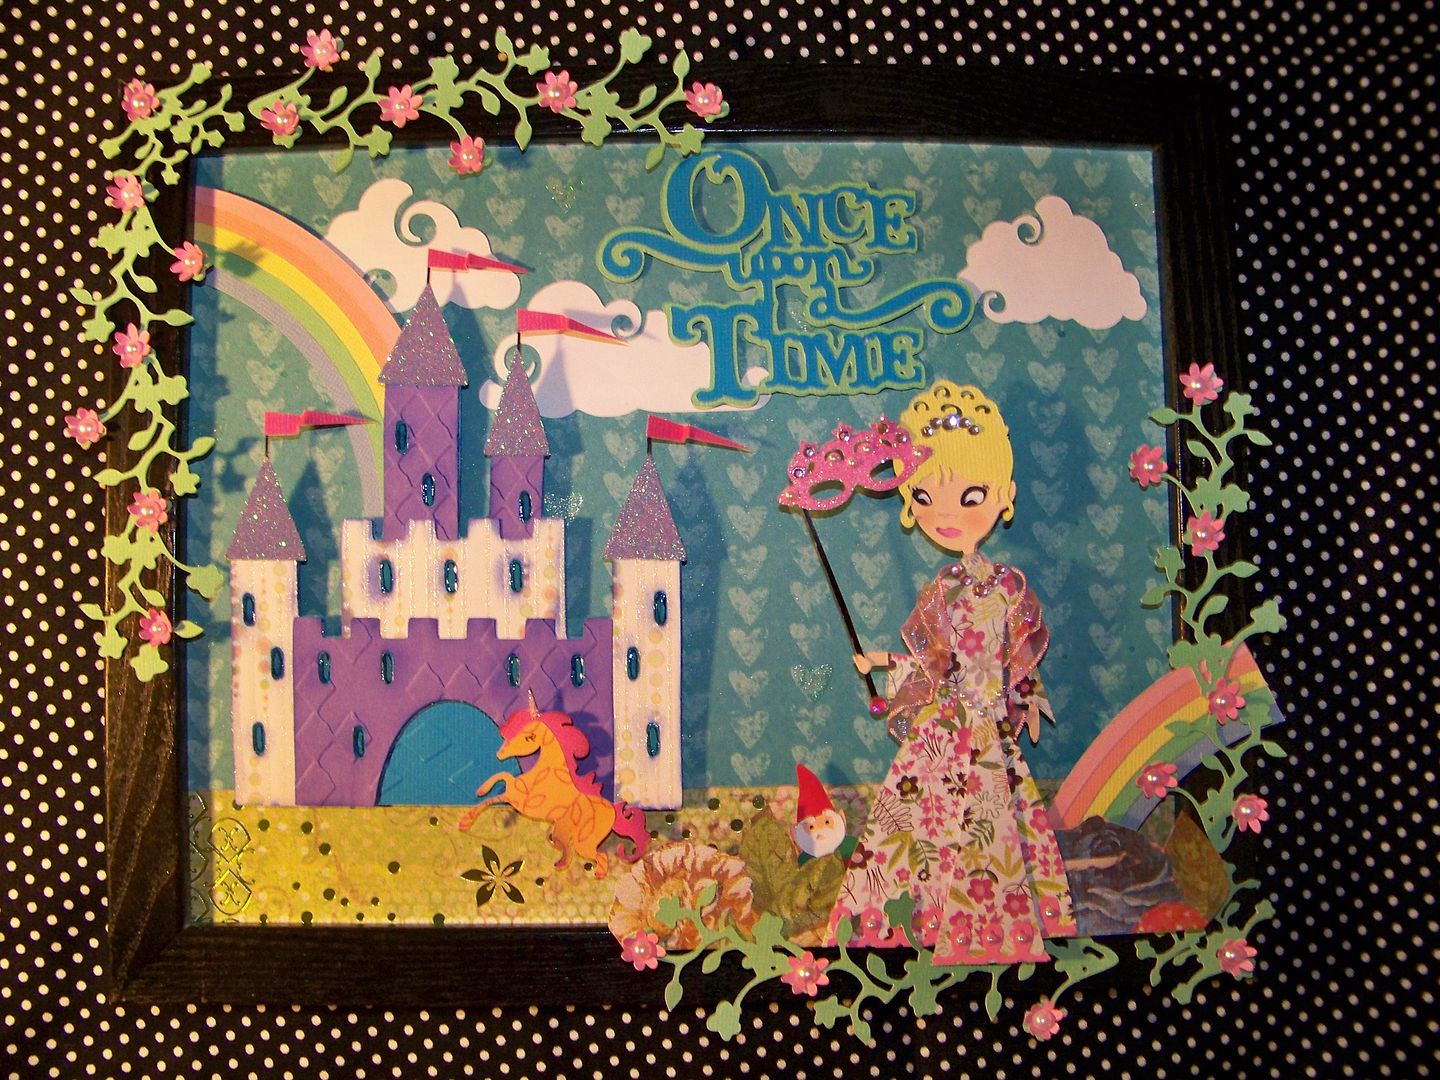
But wait! There's more! Click 'older posts' above!

But wait!  There's more!  Click 'older posts' above!