
For many of us, the new Cricut Explore has been the tool we have been waiting for: a die cutter that allows us to use our cartridges as well as non-Cricut SVGs and other artwork. My personal Facebook feed has been all about friends using or expecting soon their new Explores!
I have wanted to be able to cut SVGs, and especially the adorable files from SVGCuts! The very first thing I cut after trying the thank you card project that came with the machine, was an artichoke cut I had on my computer from SVGCuts. (I have been hoarding free SVGs for a bit). My next project was a box on Box It Up (a Cricut cartridge) so I could use the scoring stylus. Then I went straight to SVGCuts.com to find something fun and seasonal! I have been making boxes from Cotton Tail Village for the past two days! These little boxes will be the gift wrap for my Easter gifts!
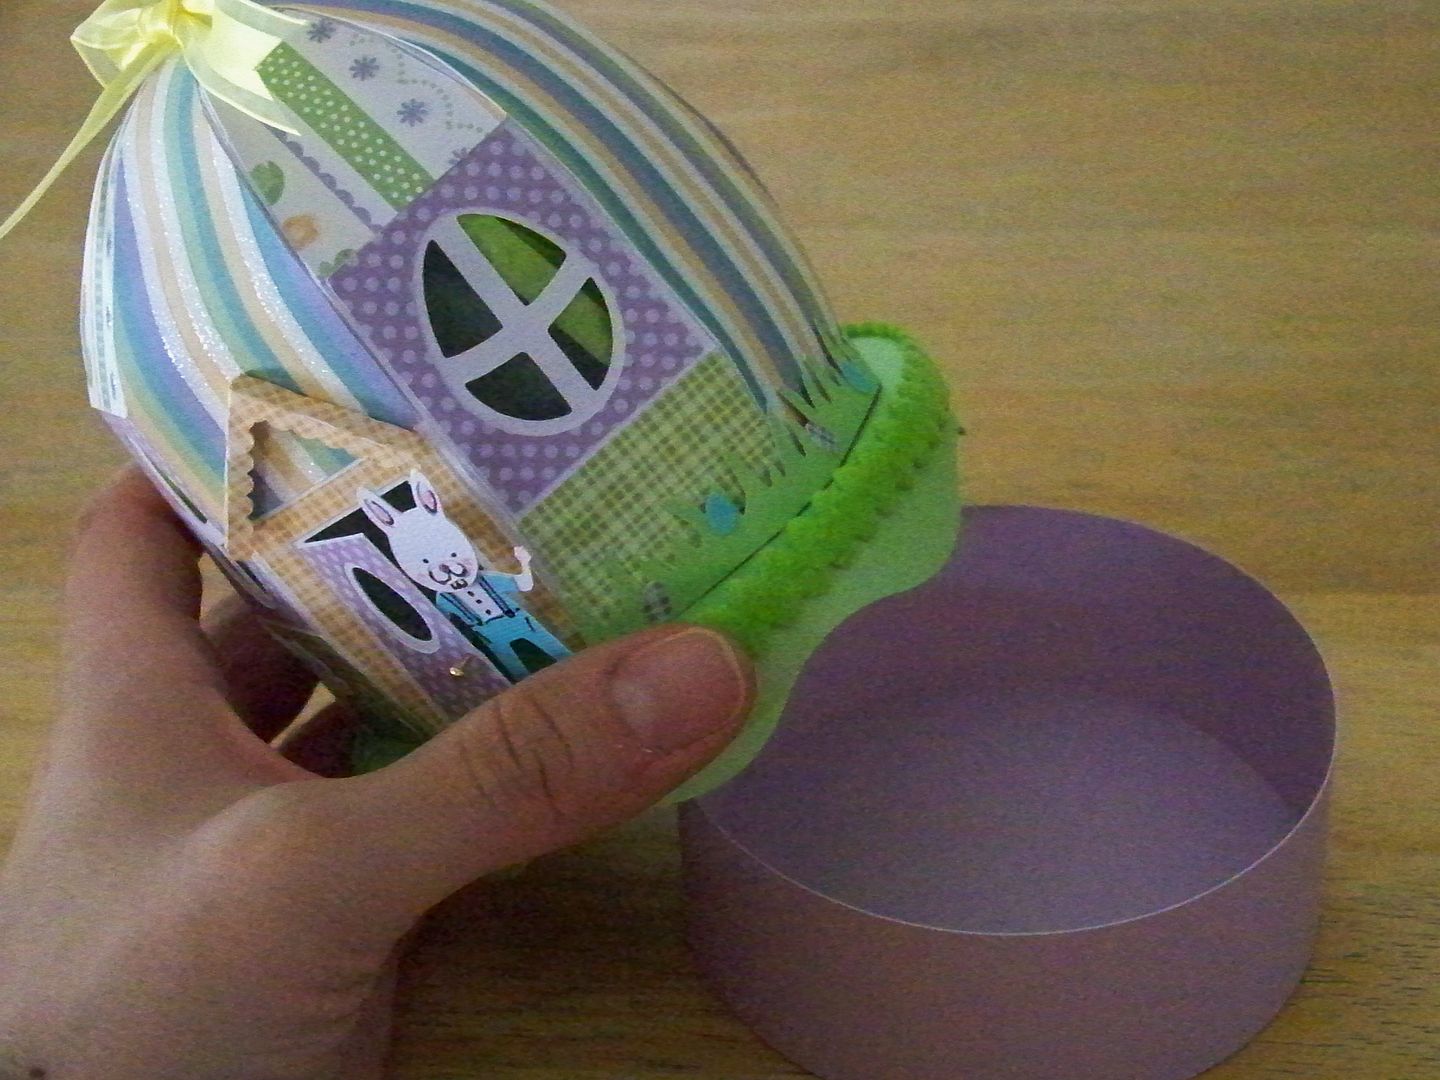
I did figure out something important that I will share here: when importing SVGCuts' files with scoring, you have to highlight the cut by clicking on it on the Layers Panel and clicking the "Attach" button. SVGCuts doesn't use scoring by way of the scoring stylus; their scoring is made with dashed lines cut with the blade. By attaching the scoring to the shape, it will avoid having it on a separate mat!! The cut image on the screen in Design Space changes from color to black and white and the scoring looks a little strange. When you re-color the shape, the scoring looks normal again. It creates perfect scoring! And don't forget: You have to resize each cut. SVGCuts includes a guide sheet that gives the width for each cut group.

Changing that on each will ensure that you have a perfectly-sized project at the end. Many of us are hoping that Cricut will have some adjustments made in the programming, one of which is to have SVGs import at native size. At this time, it does not and that is why it is important to resize.
I did open up the new cutting mat that came with the machine. It is the first time that I have tried the new ones and, of course, it was too sticky for me. I like to save new ones for projects where I need sticky mats (like fabric, wood, and chipboard) so I got out the old one I use all the time and my brayer. What can I say, you can lead a horse to water but you can't make him drink; I like barely sticky mats and so that's what I use no matter how innovative or nifty the new ones are!

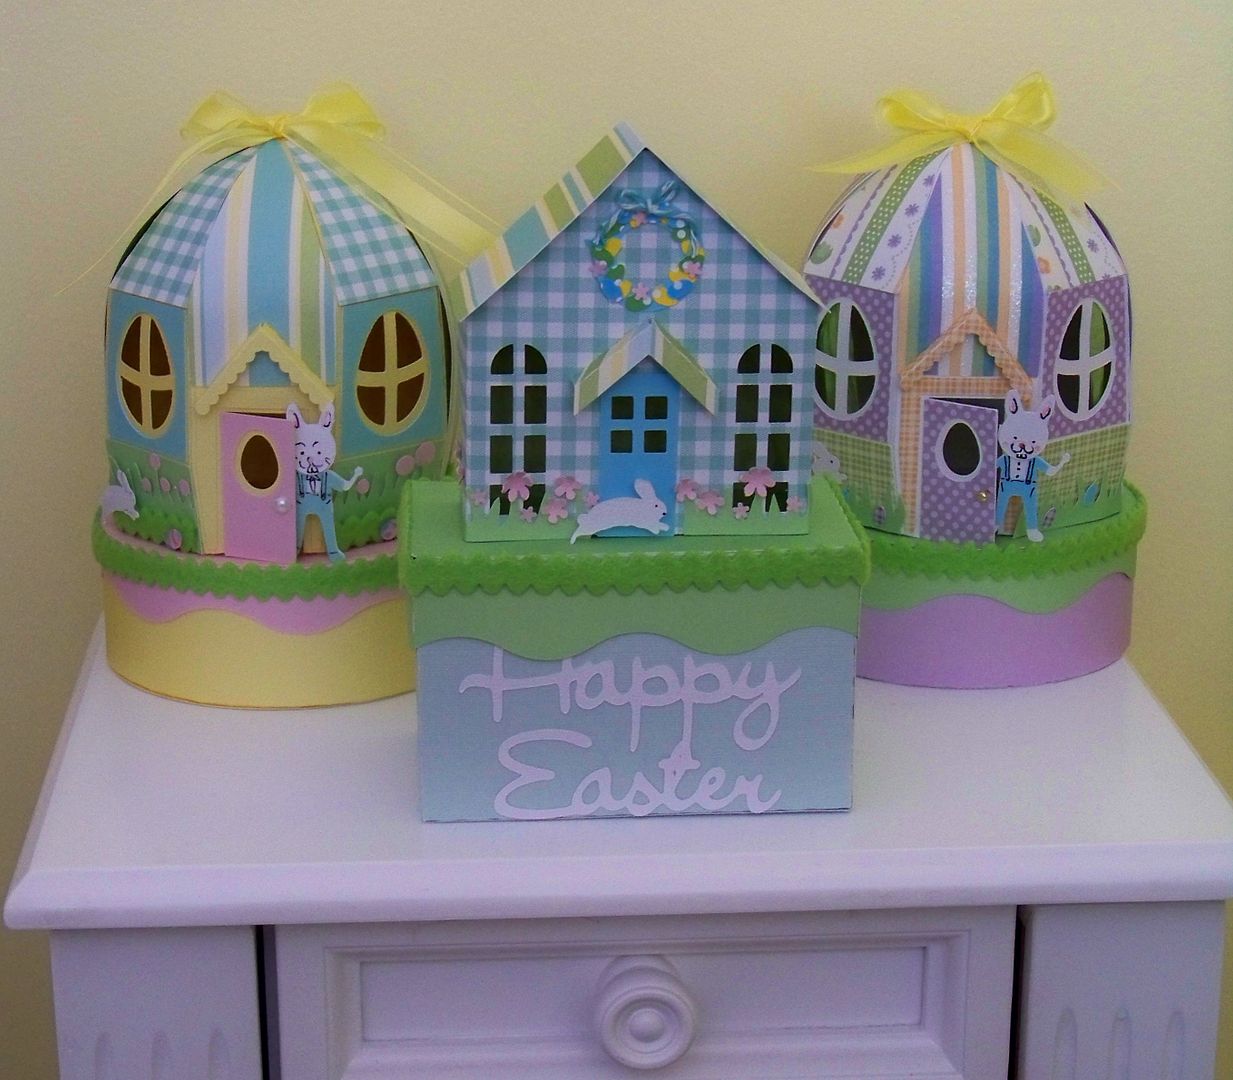
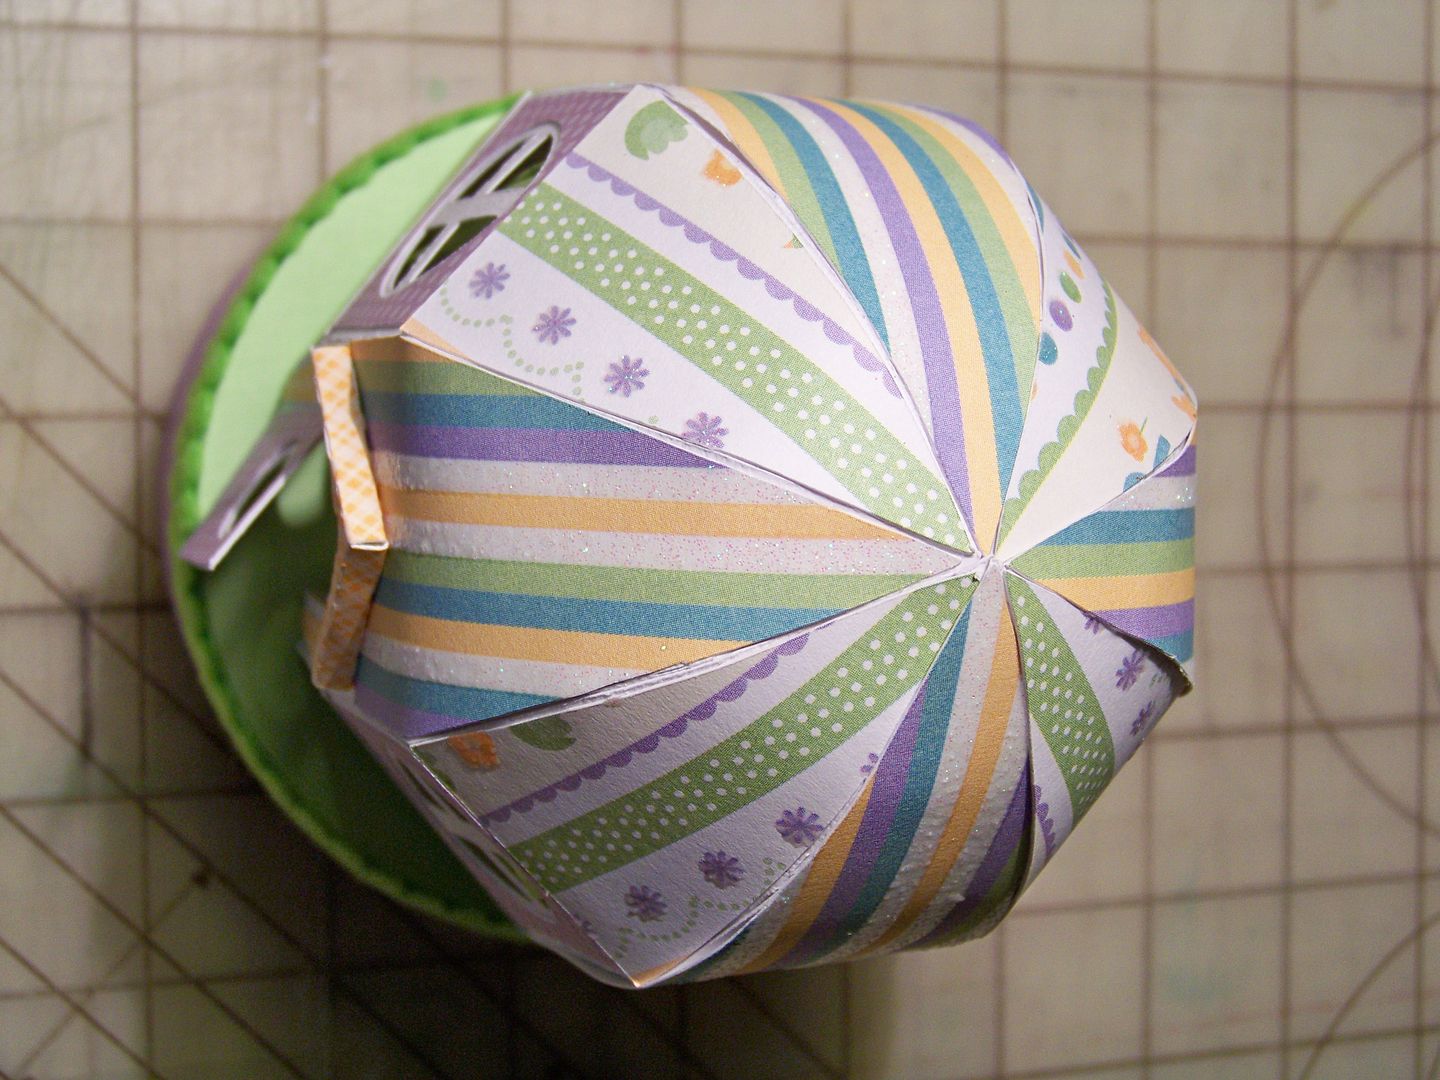
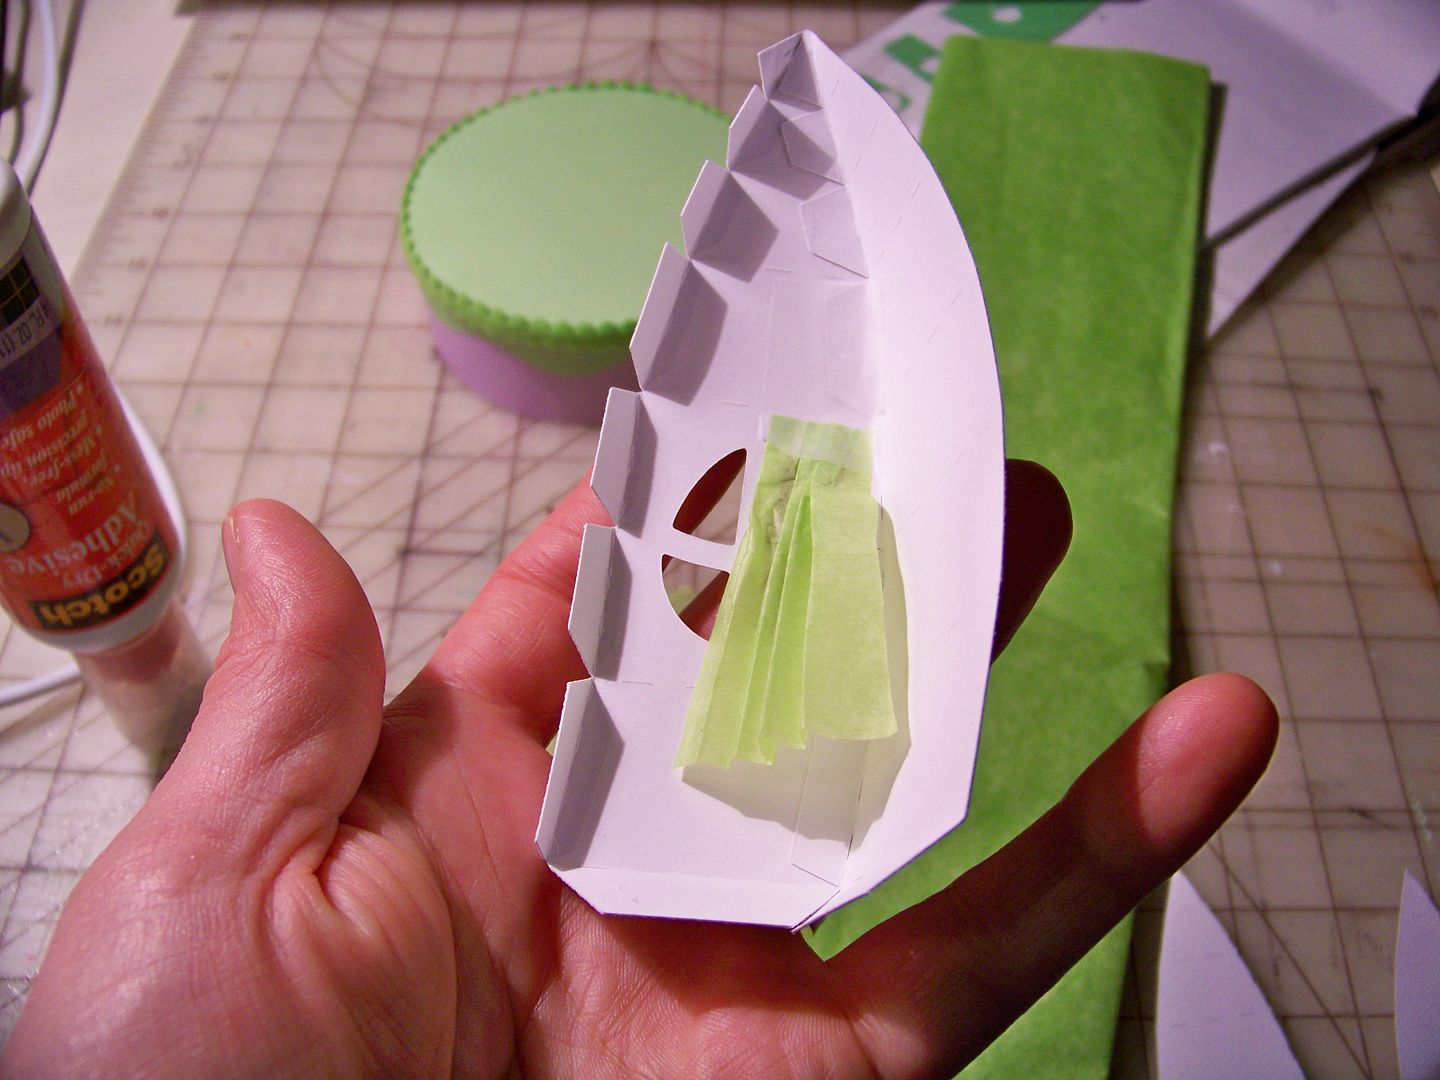
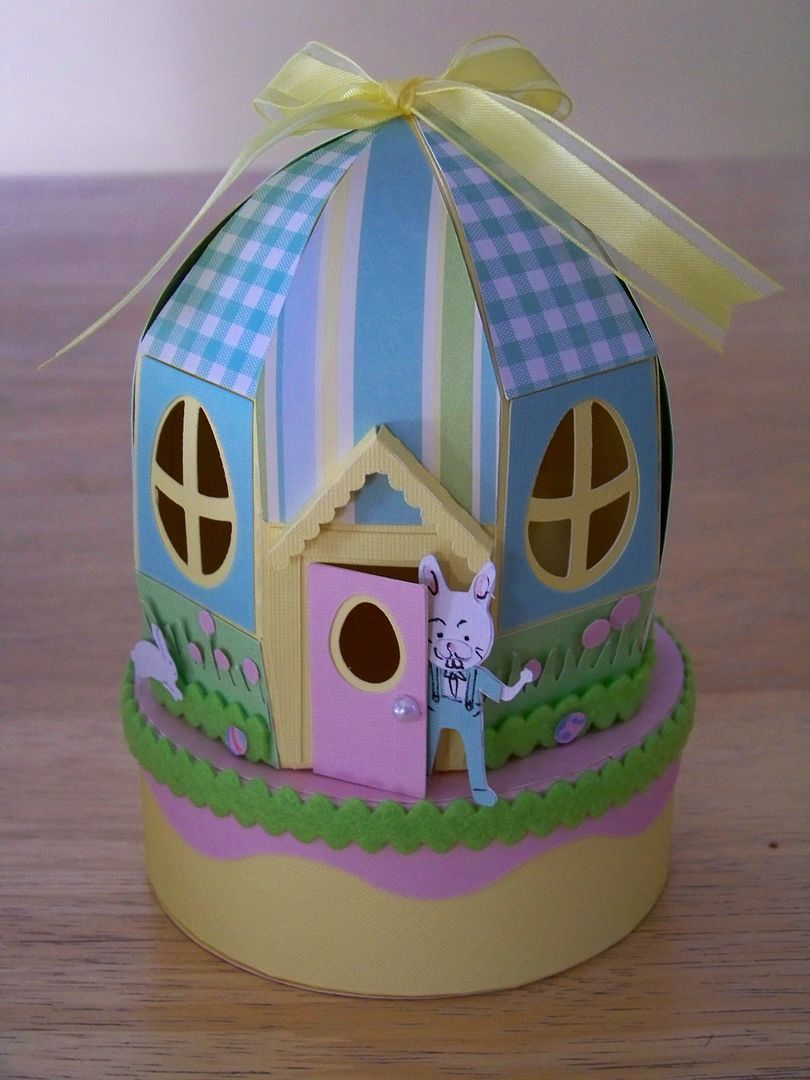
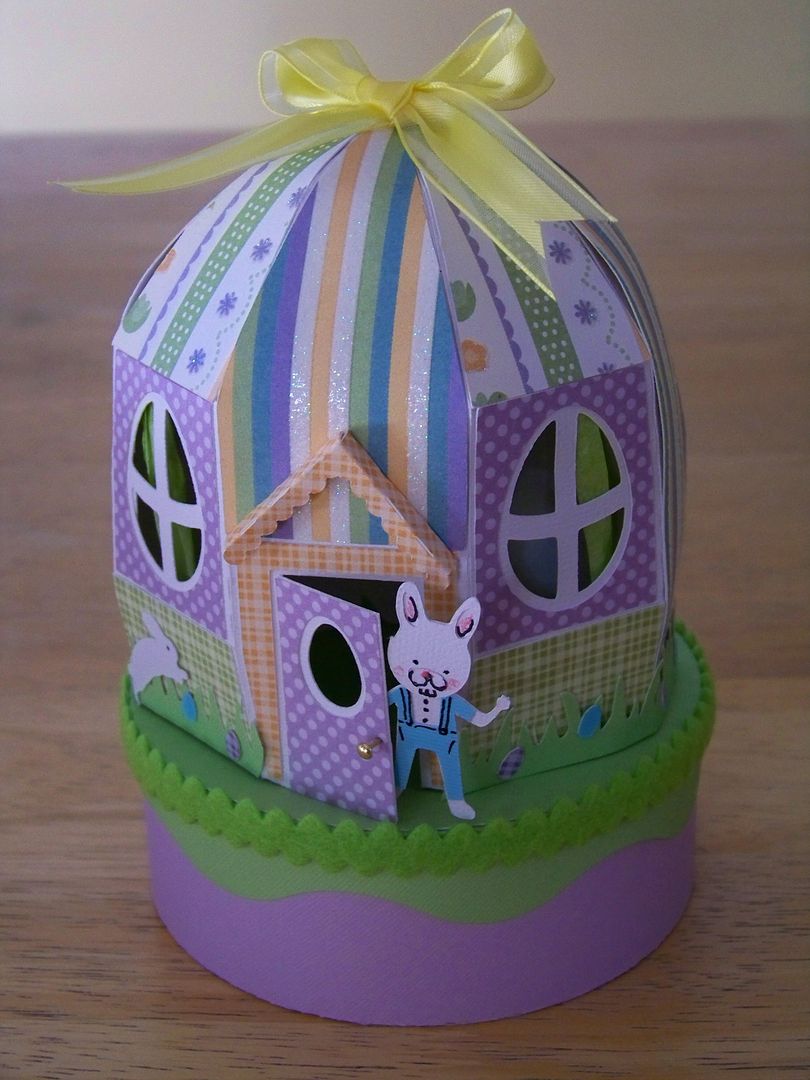
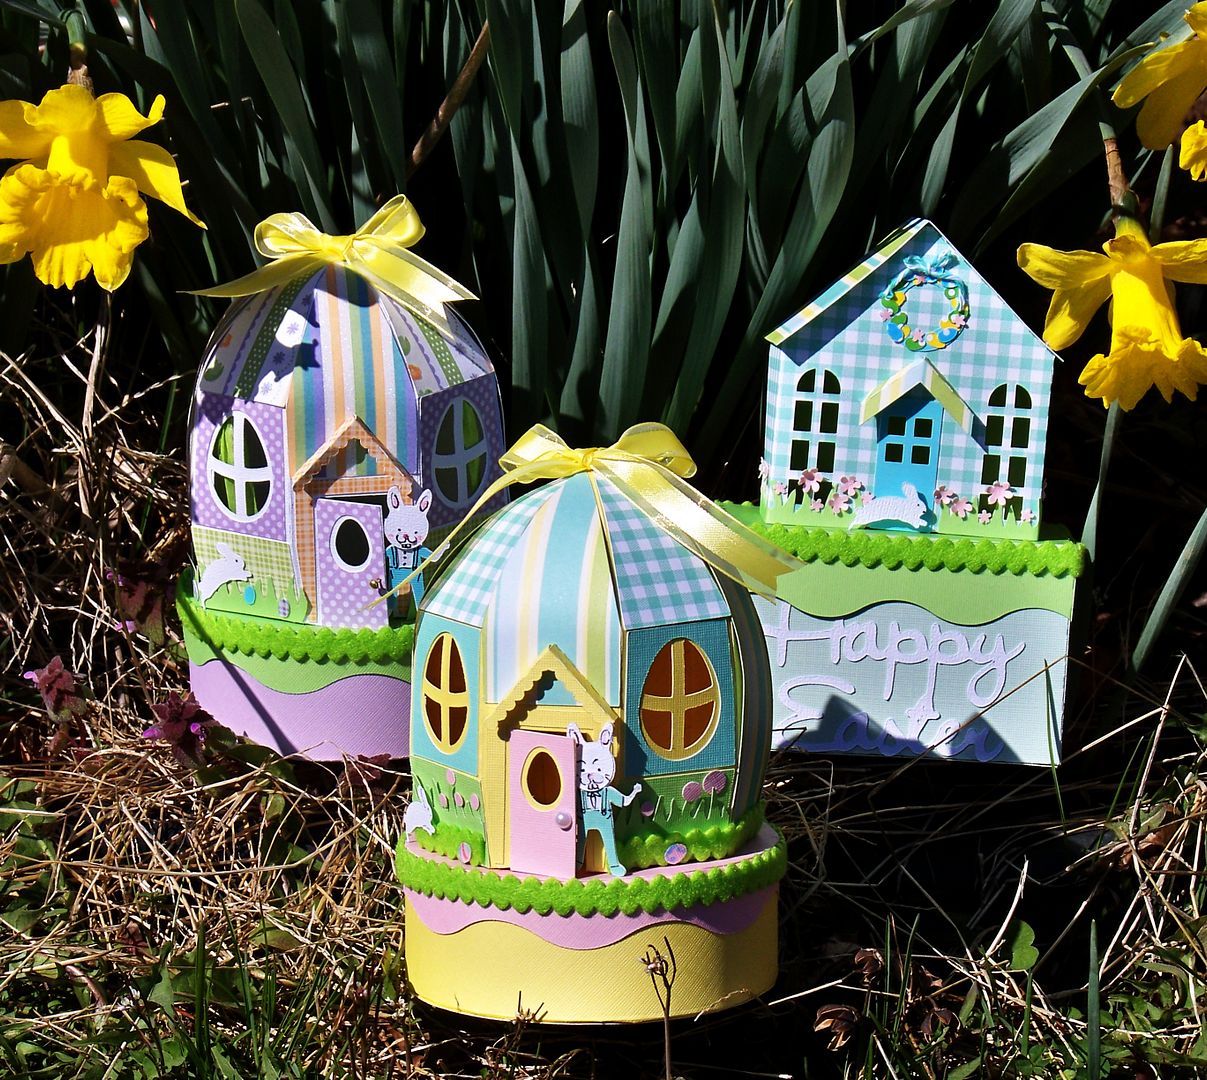
I cut two of the three boxes in the $6.99 file: the egg house box and the spring house box. The egg was easier on the second attempt. I love the clever way the file designer has the crafter form a round shape with scored sections and then has those covered with decorative individual pieces. I worried about my imperfection on the top where the sections meet...
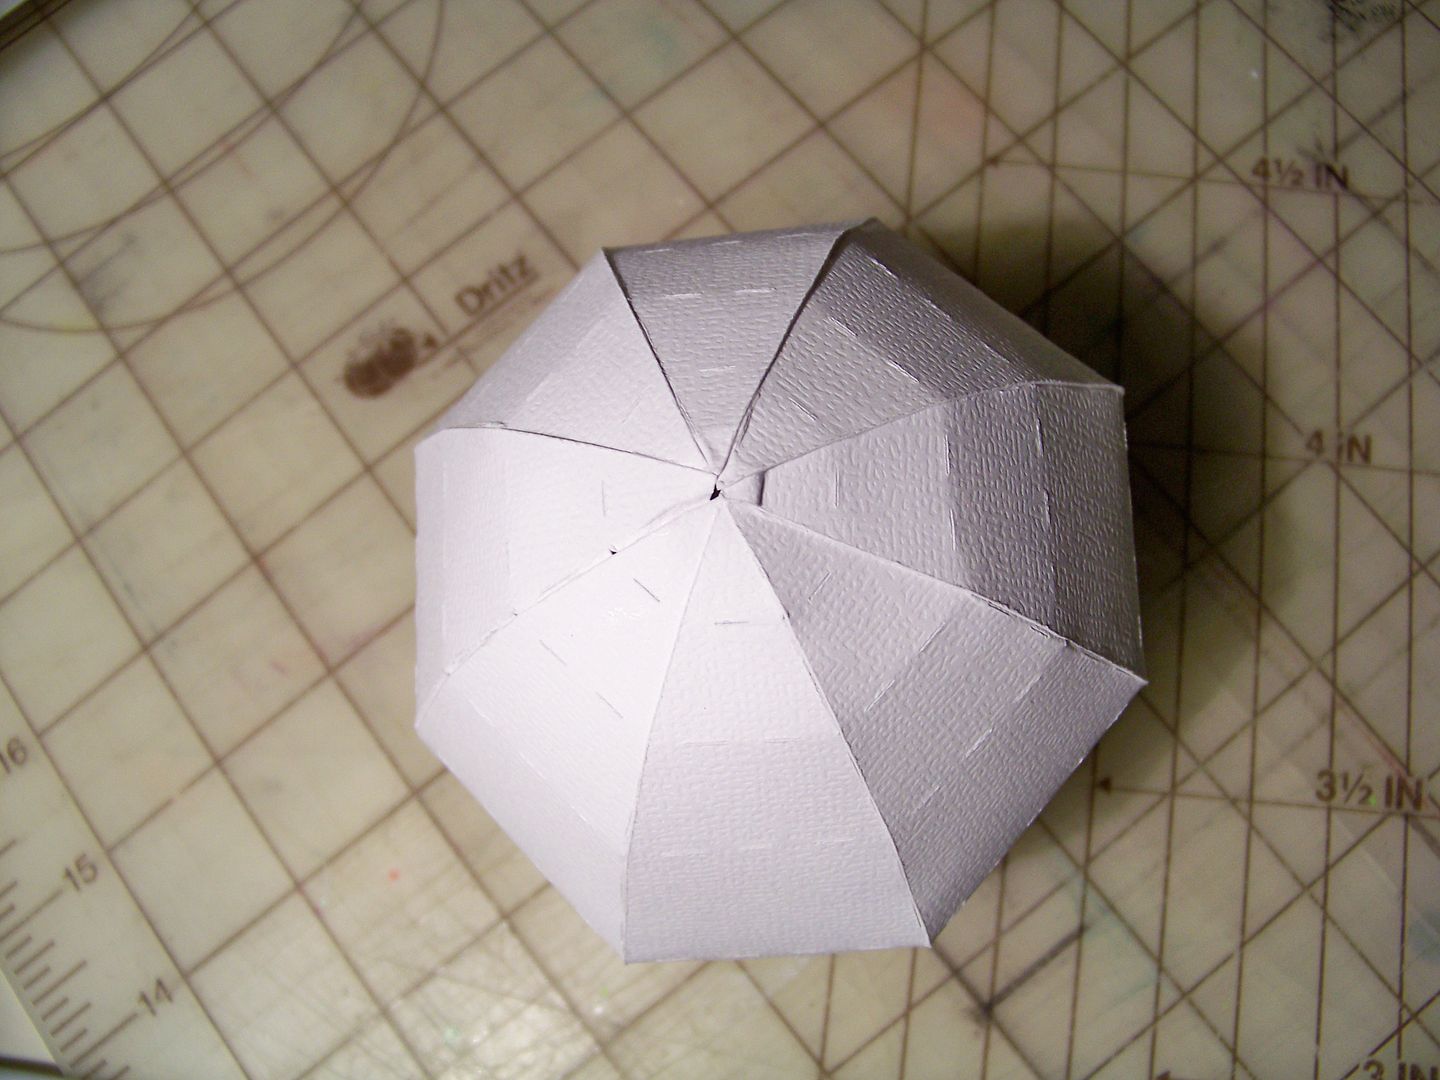
...But once it is covered with the strips, any imperfections are covered along with the scoring.
On one of the houses, I added tissue paper curtains to the inside of the window.
I finished my two egg house boxes using a bunny I made from two carts: Easter for the head (cut at 3/4") and Create A Friend for the body (cut at 1-3/4"). I did cut these elements on my Expression, not my Explore. To be honest, the search on the Explore, when you know exactly what you want to cut, is cumbersome. It is my #1 complaint with the Explore. If only you could search with cart name and handbook page number!!! If only the individual cuts were in the order they are in the handbook (like they are in CCR)!!!

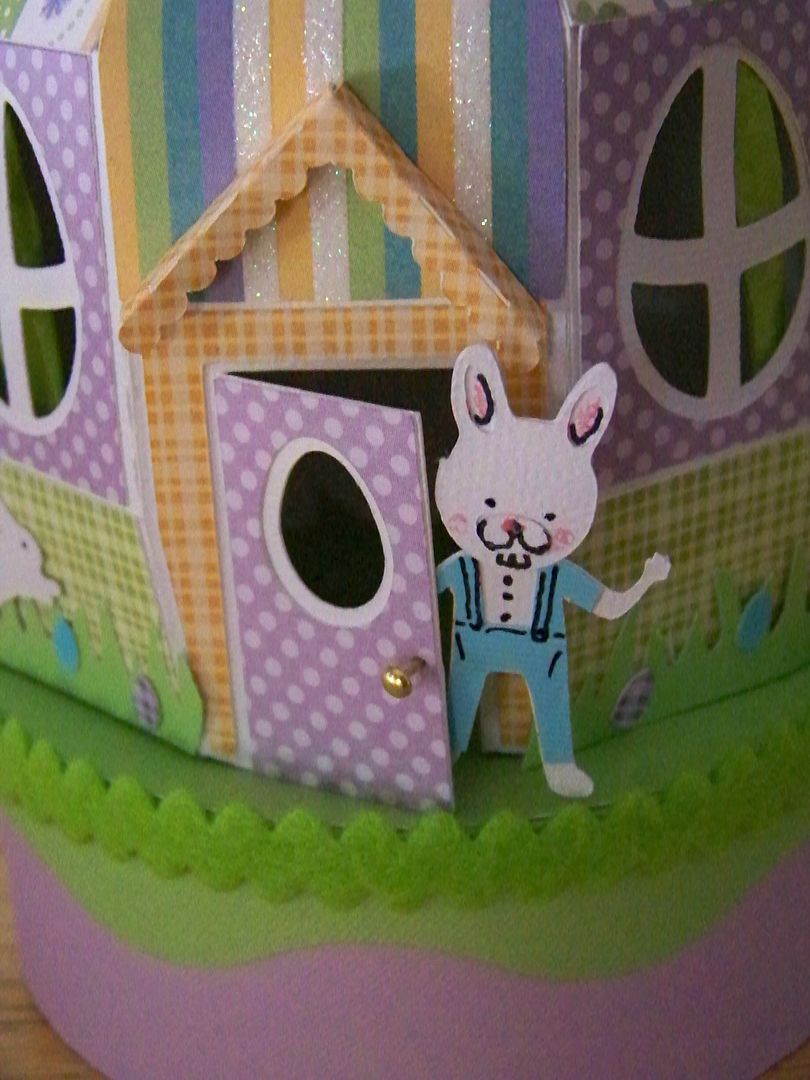
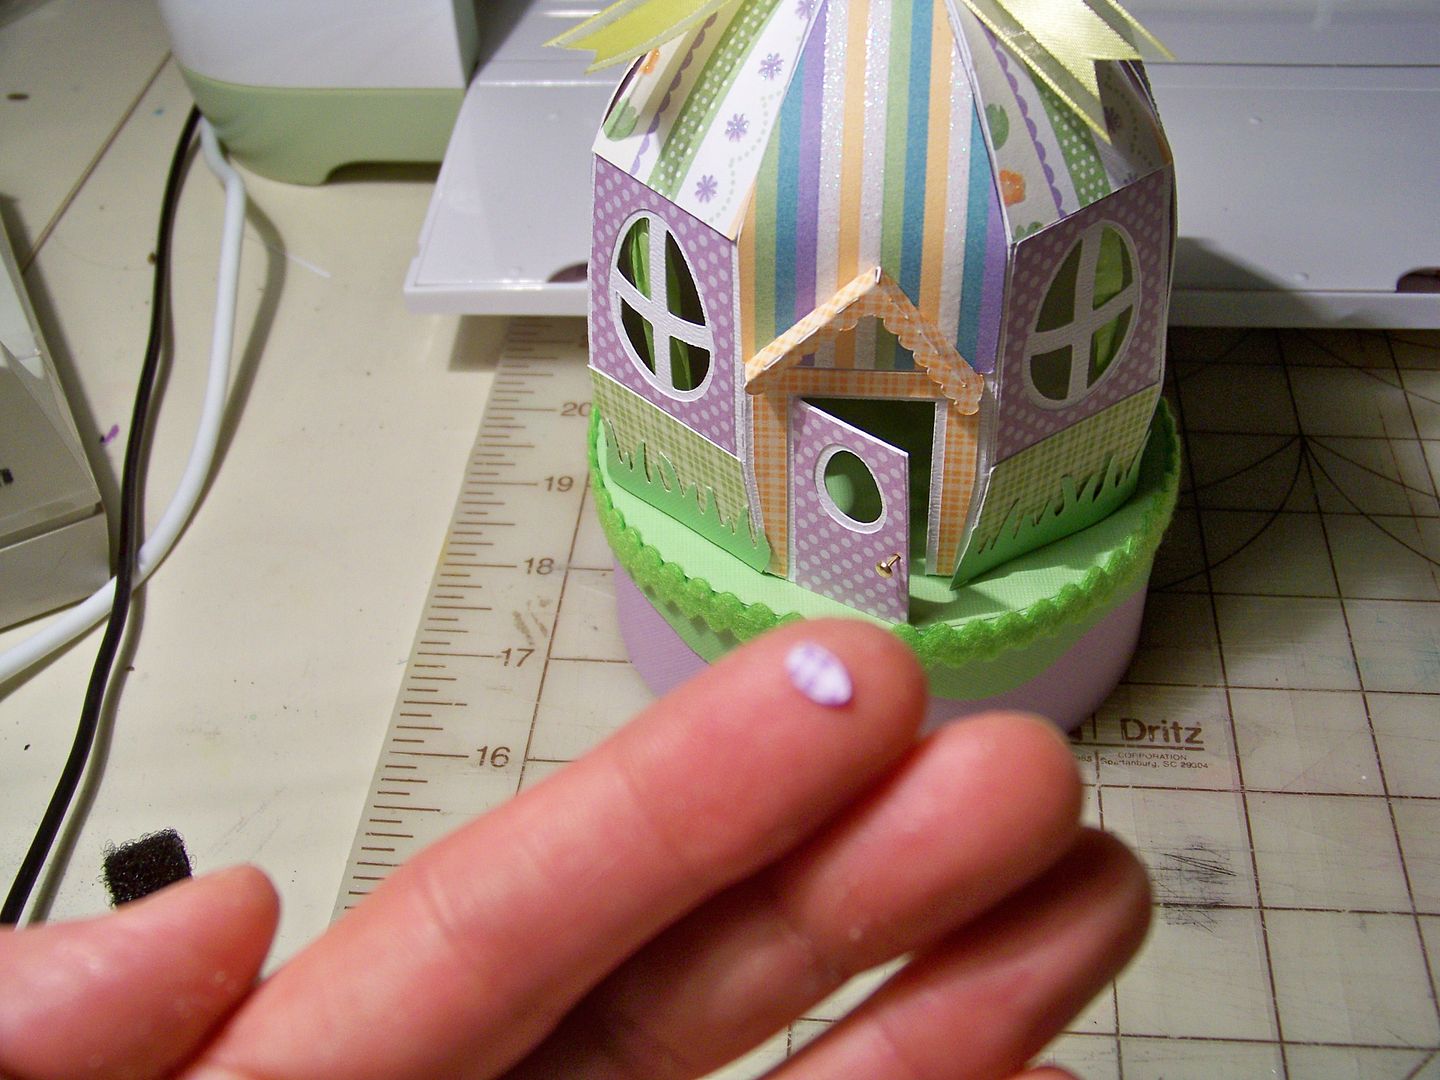
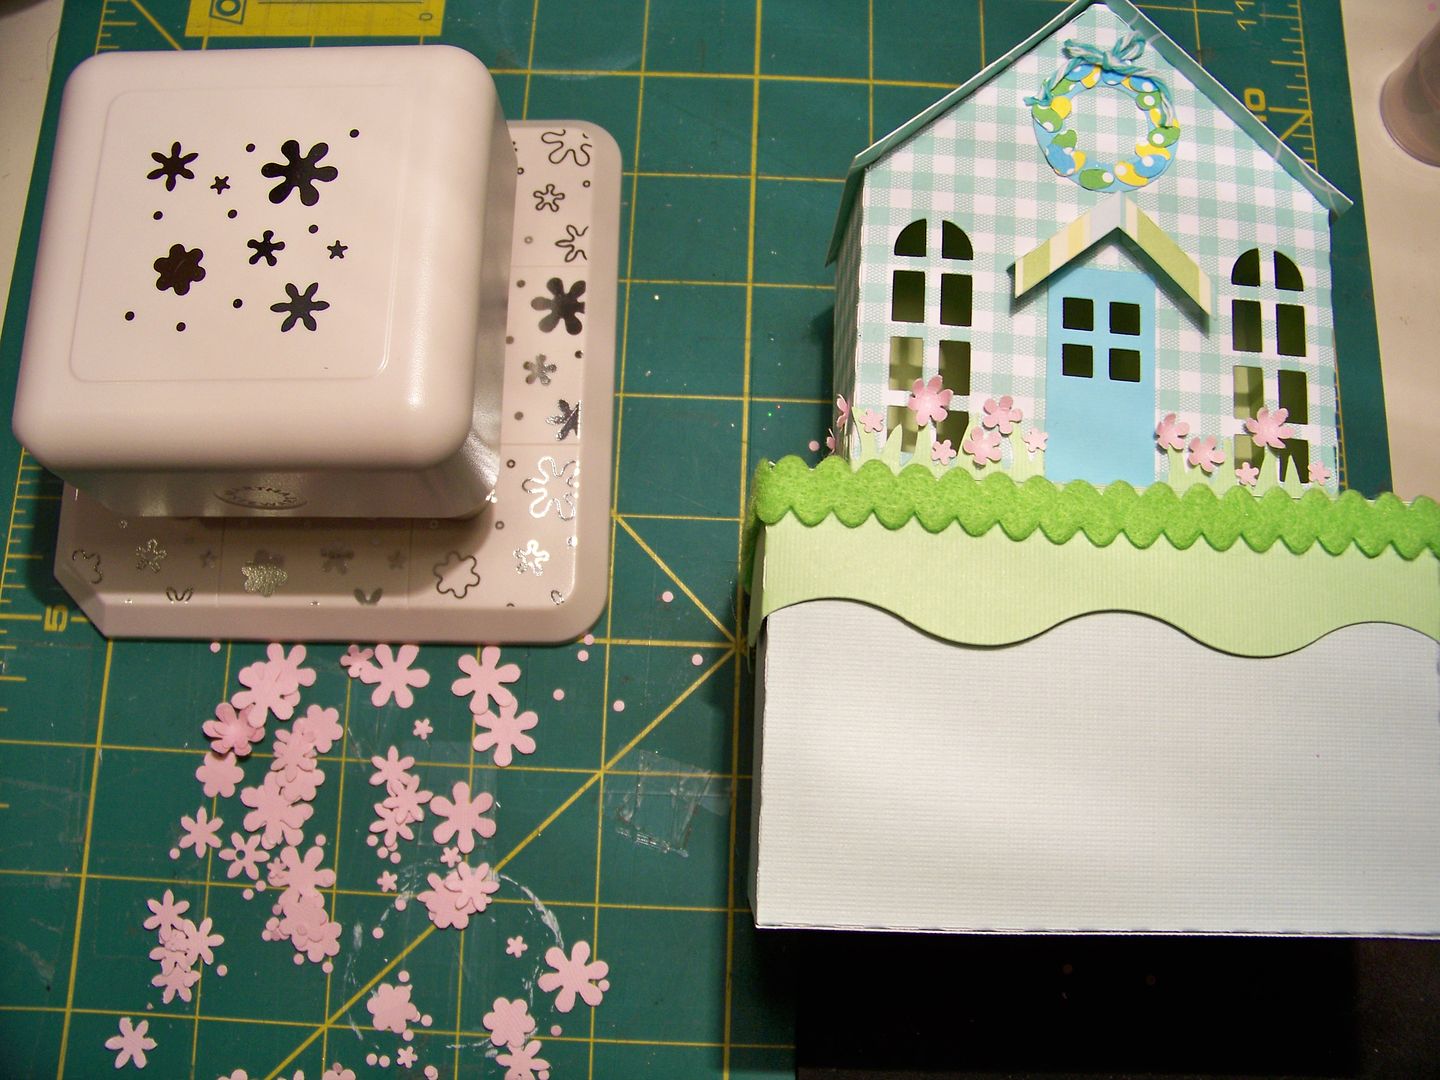
I decorated with felt rick rack and tiny eggs cut at 1/4" from the Cricut cartridge Easter that were placed on the edger-punch cut grass and on the spring house wreath.
Tiny flowers were cut from a Martha Stewart punch.
I used a little bunny, also from the Easter cartridge, cut at 3/4", and Happy Easter text cut from Cricut Holiday Cakes, cut at 2".

So this was a fun stress-reliever because of how easy the files transferred and how wonderful the video directions are from SVGCuts for putting the boxes together! And I am ahead of the game on my Easter gifts for my mom and mother-in-law! These boxes are the perfect size for candies, gift cards, soaps, and other small items. My ten-year-old daughter claimed one for a little Easter decor in her room.
I have lots more to learn with my Explore and I can't wait for my next project! I do have a few things that I wish could be improved on the Explore. Aside from the improvements needed on the search that I mentioned above, I also wish the scoring stylus would make a deeper mark, and I wish SVGs would import at native size. I love that all my computer's fonts as well as all the cart fonts are available to cut now! I am waiting on the edge of my seat for Print Then Cut, a feature that will replace the Imagine and will make me feel really smart for having all the Imagine cartridges!
I still have lots to learn and am looking forward to making many more projects this spring as I figure out the new features and possibilities... as well as the solutions and work-arounds!
Happy Crafting and Thank You for checking my blog post!
Update: March 31, 2014
After I crafted and posted this project, I found a really helpful video on SVGCuts on using their files with the Cricut Explore. Too late for me as I figured it out on my own, but this would have been very helpful to have before I got started! Sharing a link here in hopes that it will be helpful to you! Click here!