Wednesday, December 21, 2011

The gift I am most excited to give this year!

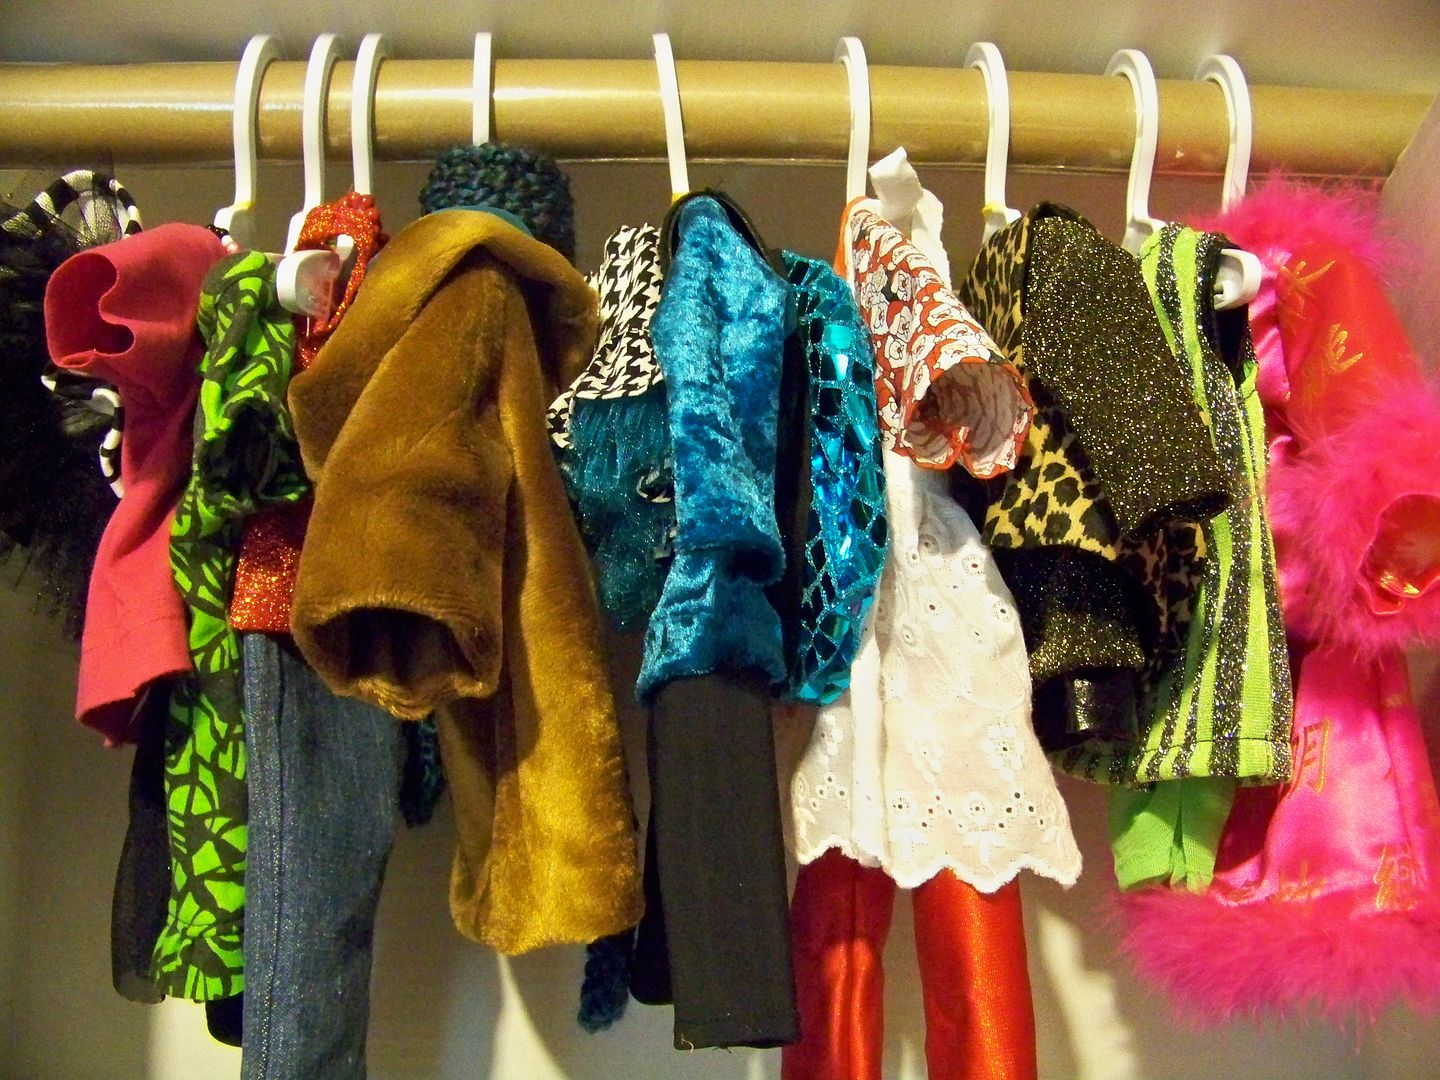
Do you usually have one or more Christmas gifts each year that you are so excited to give that you are about to bust?  I usually do and this year is no exception.  I have been sewing like crazy to make a whole fun and funky wardrobe for my daughter's beloved American Girl doll.  My daughter, Piper, is seven and recently she has gotten rid of ponies, princesses, and pale pink *gasp!* in favor of glitz, texture, bold colors--and black!  I am not exactly sure how this happened, but she suddenly has her own style and she is having so much fun with it.


So, she asked that I make her some doll clothes... and I let her go to the fabric store and just pick out fabrics she loves.  Wow-- we left with short cuts of sequins, faux fur, satin, metallics, lycra, animal prints, glitter tulle, and faux suede fabrics in her favorite colors.  I am so glad I had her pick out fabrics because I would never have gone in the directions she did! 

Even knowing that this gift will be doll clothes --and what the fabrics look like, she has told me every day that she cannot wait to open this gift.  She is dying to see what I did with the fabrics she picked. 

So...this is the wardrobe I sewed using Piper's fabric picks:

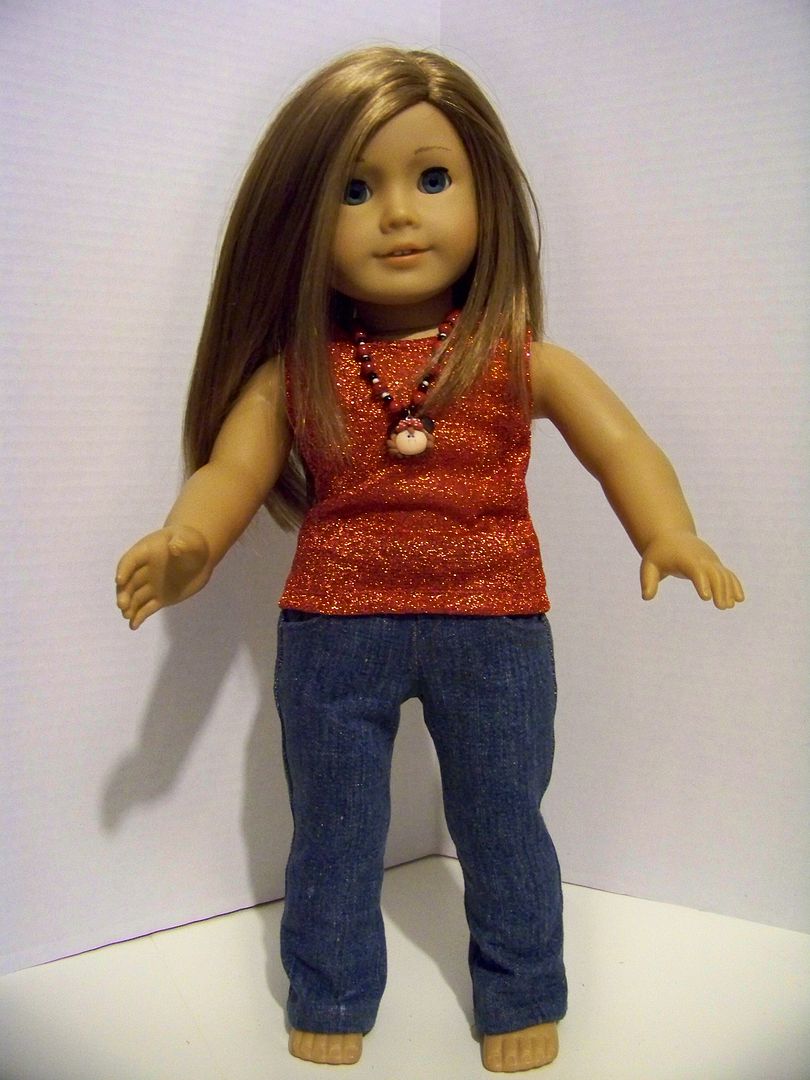
Skinny jeans and shimmery tank

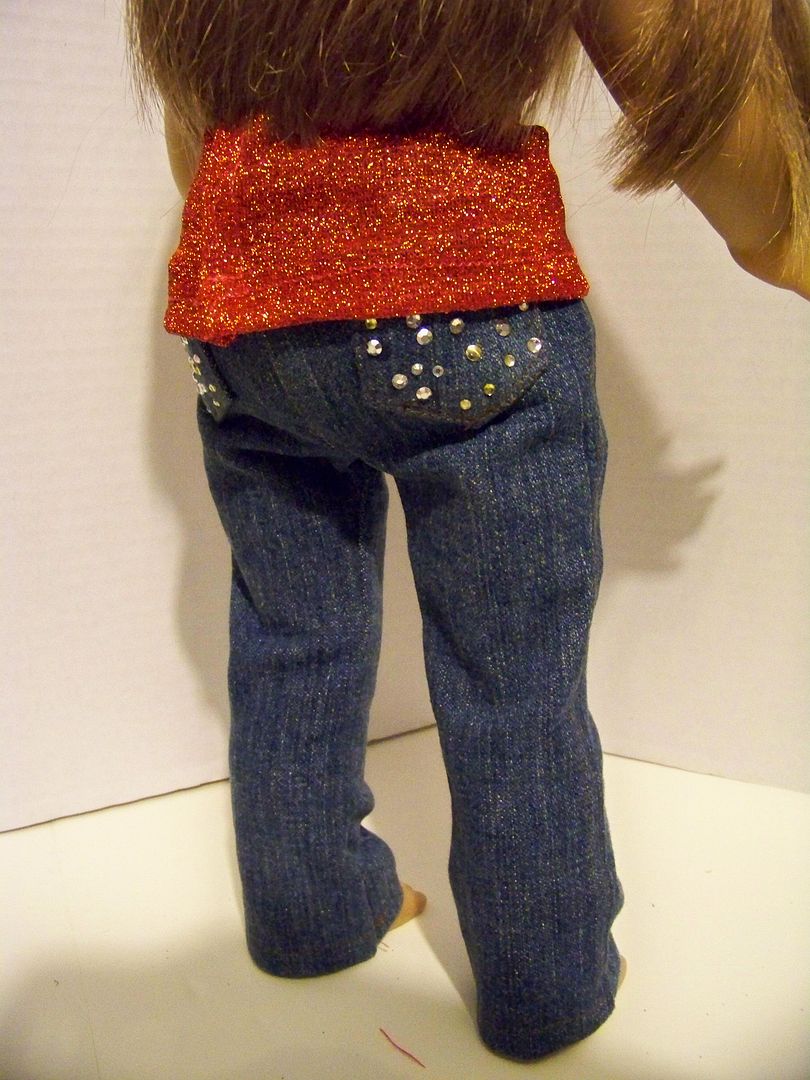
  • Liberty Jane Jeans pattern (see links below under My Sources).  I will say that I had to draft a new pattern piece for the front pocket in the jeans but this design was worth figuring out.  I have things I will change for the next pair of jeans I make, but I was really pleased with how these came out.  This was made from the legs of an old pair of jeans that I cut off ten years ago!
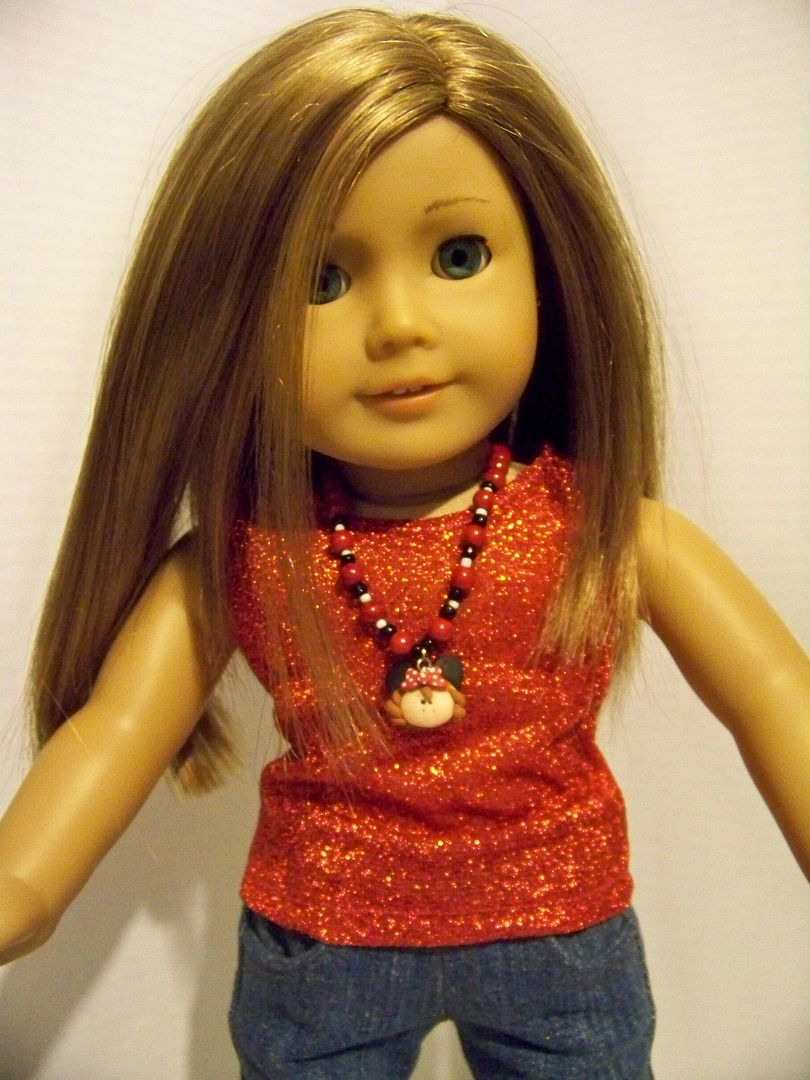
  • Liberty Jane Trendy Tank pattern (free download) sewn in red metallic knit. 
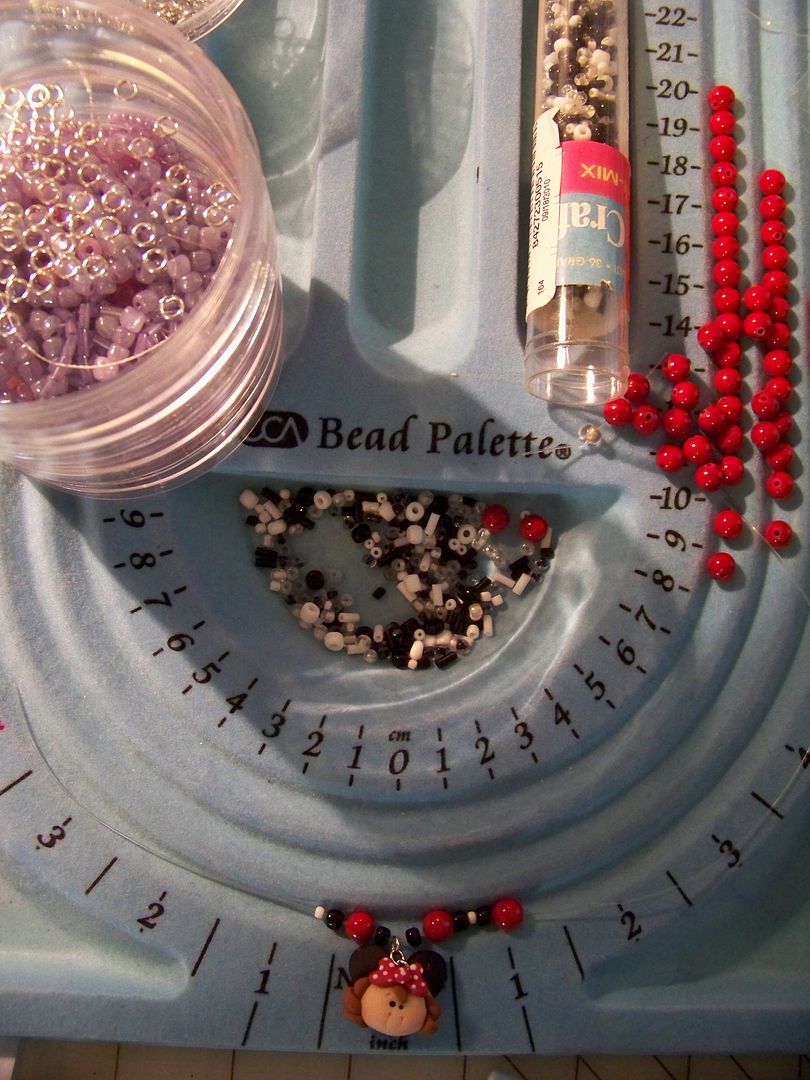
  • I made a necklace by using a Mouseketeer polymer clay bead and Stretch Magic .5mm jewelry cord.  I cut off 10" of cord and beaded until only 1-1/2" of cord remained on each end.  I tied a number of square knots and trimmed the ends, leaving 1/4" tails.


  • I used iron-on jewels for the back pockets of the jeans.


Geometric dress with leggings


  •  Liberty Jane Leggings pattern was sewn with two-way stretch lycra blend.  The leggings finish about 1" above the doll's ankle when unaltered.  My daughter loves leggings and wears them all the time so I knew any casual dress I made would have to include leggings!  I HIGHLY recommend the leggings pattern.  It is one pattern piece and goes together so fast!  They are designed with negative ease so they look like real leggings.
  • Magic Number Dress pattern by Ardently Admire Doll Attire (pattern purchased through Liberty Jane site) sewn in knit.  The next time I sew this dress, I will alter the neckline so that it is tighter.

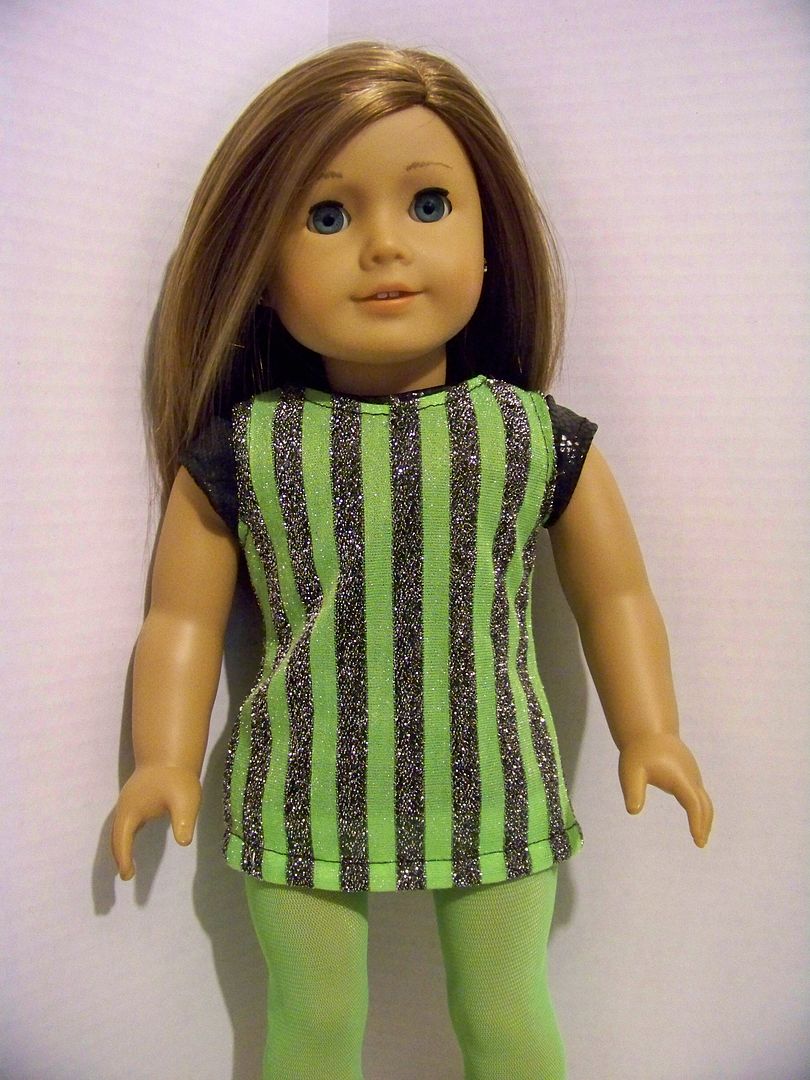
Green and black stripe outfit


  • Liberty Jane Trendy T-shirt (free download) sewn from snake skin lycra.
  • Liberty Jane Shiny Happy Dress (free download with purchase) made green and metallic stripe knit.  I wish I had lengthened the dress; more like a tunic at this length.
  • Liberty Jane Leggings were sewn from sheer tricot.

Hot Pink and Feathers!  Two piece dress


  • McCall's 3474 sewn up in nylon satin with hand-applied feather trim.
  • I made a longer necklace with stretch cord, gold-tone beads, and a cupid charm.

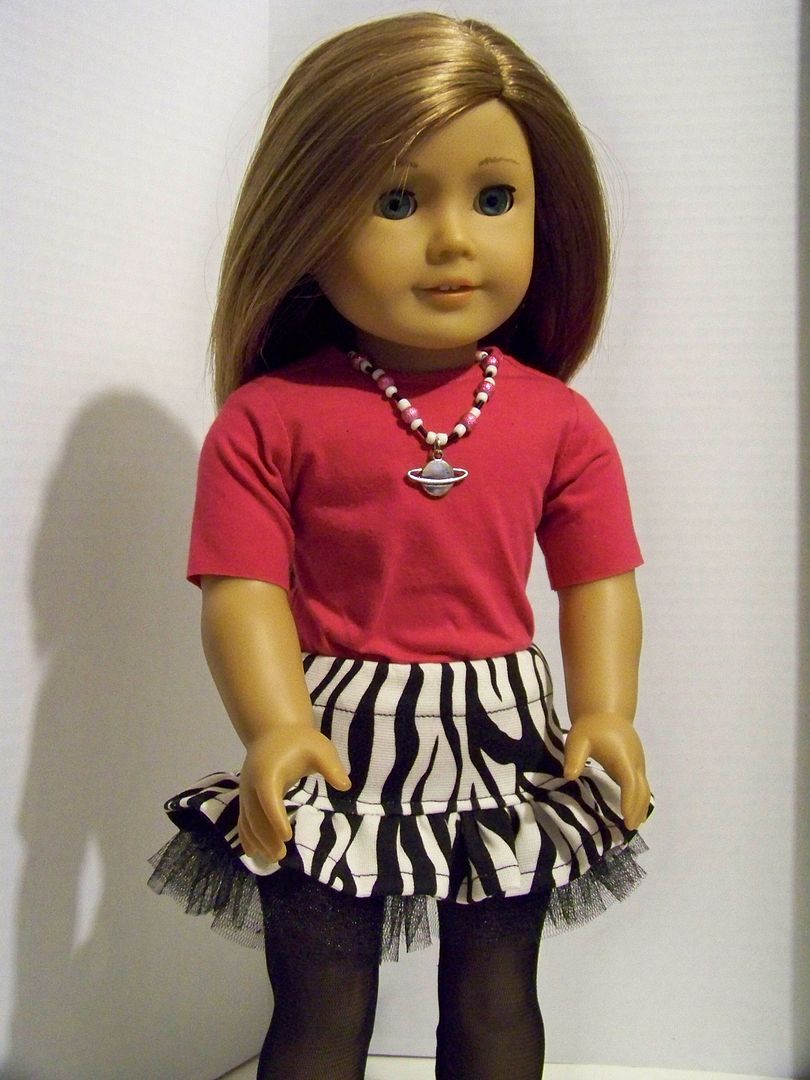
Zebra skirt with hot pink T-shirt and Saturn necklace


  • Liberty Jane Harajuku Station skirt pattern- this is an awesome pattern and sews together perfectly!  Skirt sewn with zebra two-way knit and glitter tulle.
  • T-shirt sewn from Liberty Jane T-shirt Variation pack, creating my own sleeve length and opting for the higher neckline. 
  • I added 1" to the Liberty Jane Leggings pattern and made these leggings from sheer tricot.  This was an experiment because the legging fabric was a one-way stretch, and not a 2-way stretch, but it worked just fine by taking advantage of the cross stretch. 
  • I made the planet necklace with stretch cord, glass beads, and a metal charm.
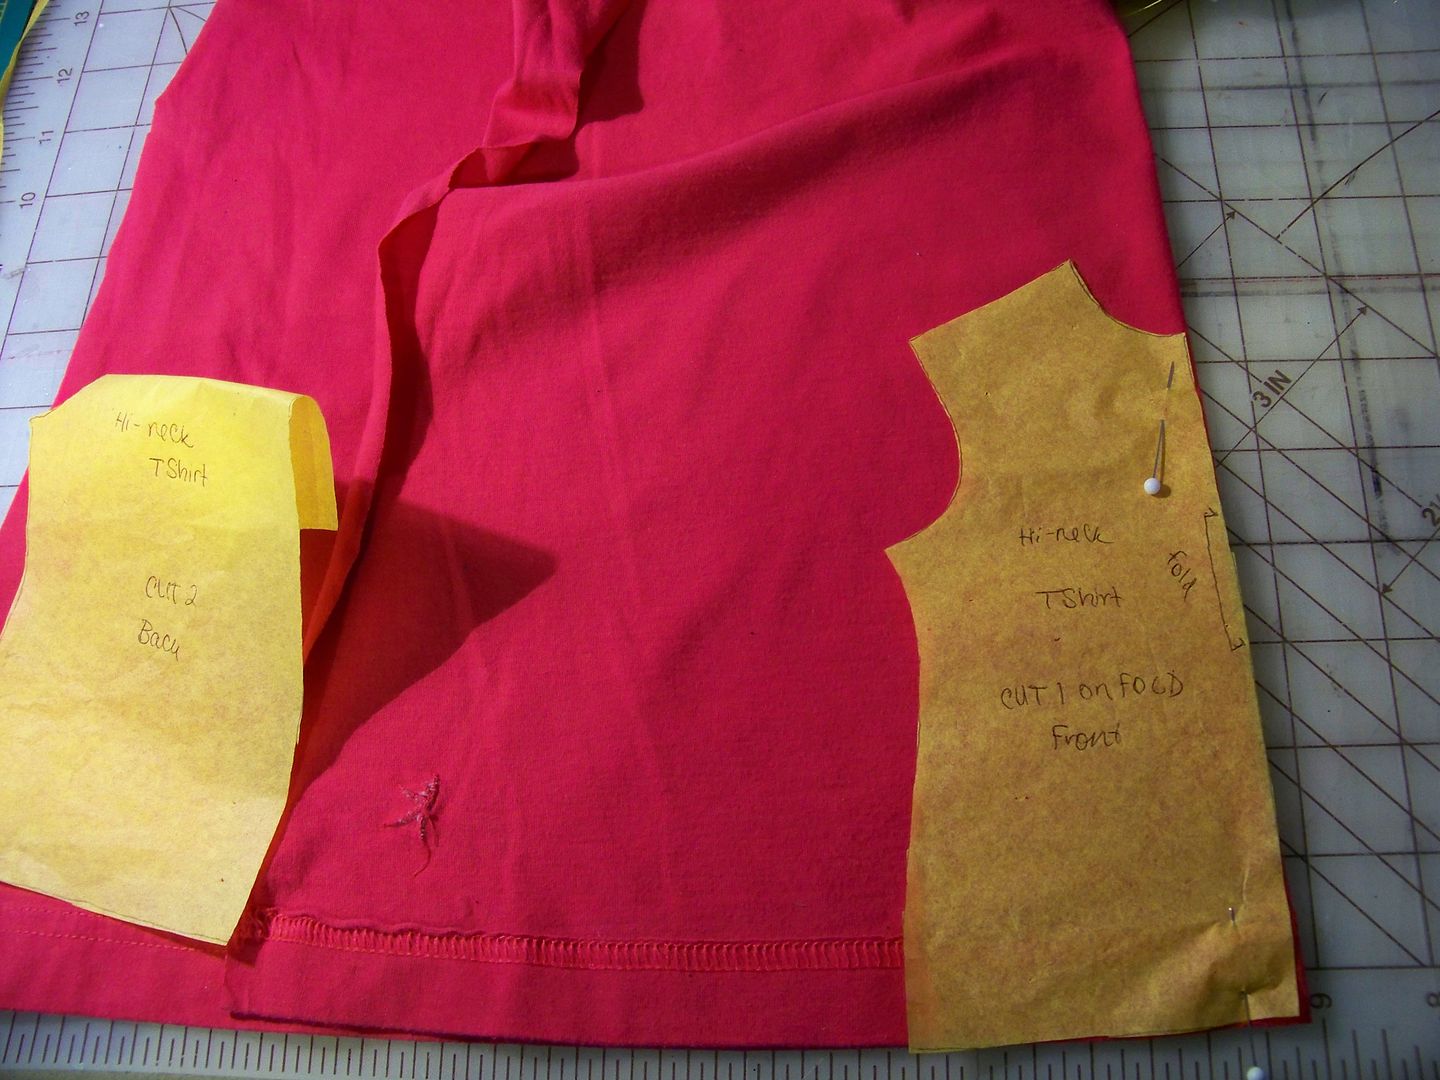
  • I used an old t-shirt for the doll's t-shirt, using the stitched hem for this little t-shirt's hem.


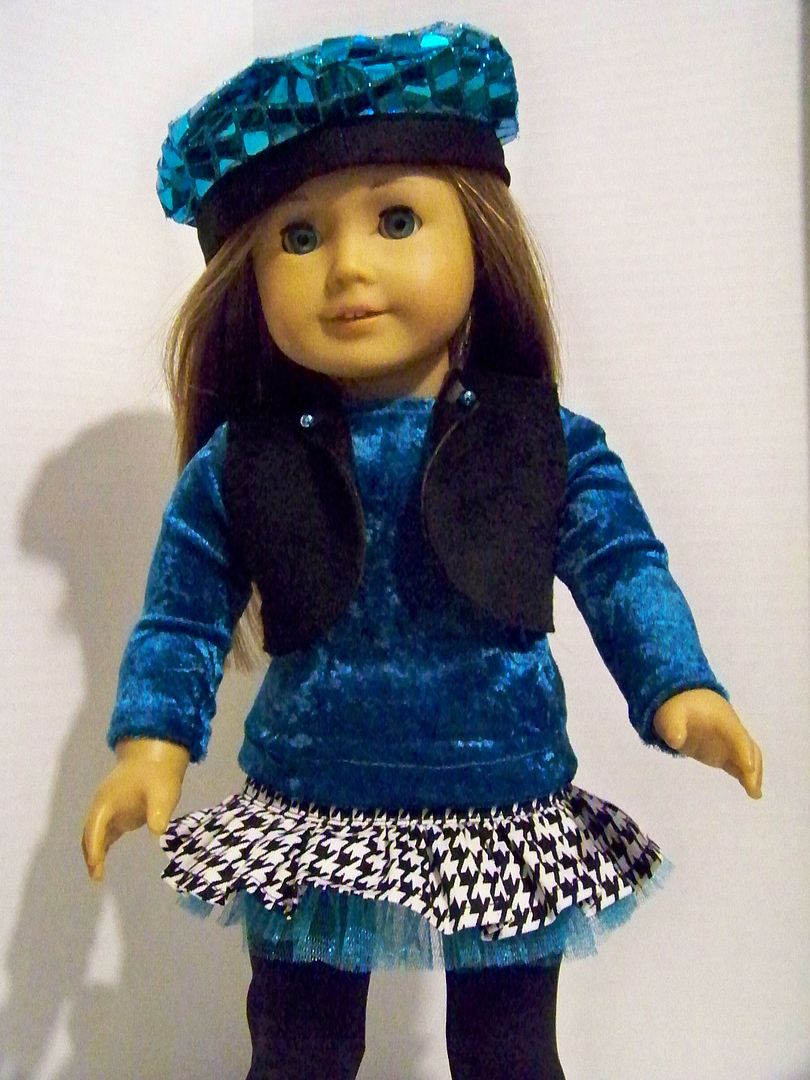
Turquoise and black ensemble


  • Liberty Jane Harajuku skirt pattern sewn in houndstooth and glitter tulle.
  • Liberty Jane Leggings pattern with 1" added to length.
  • McCall's 3474 sewn with sequin for the tam.
  • Liberty Jane T-shirt Variation Pack long-sleeve t-shirt in panne velvet
  • McCall's 6480 low-pile faux fur vest with lapels that turn back to show faux leather.  The vest was made with a fabric I love but it is too thick to turn so I used leather sewing techniques and lapped the seams, leaving the edges raw and the vest unlined.  Not lining worked just fine; the vest looks like leather inside.

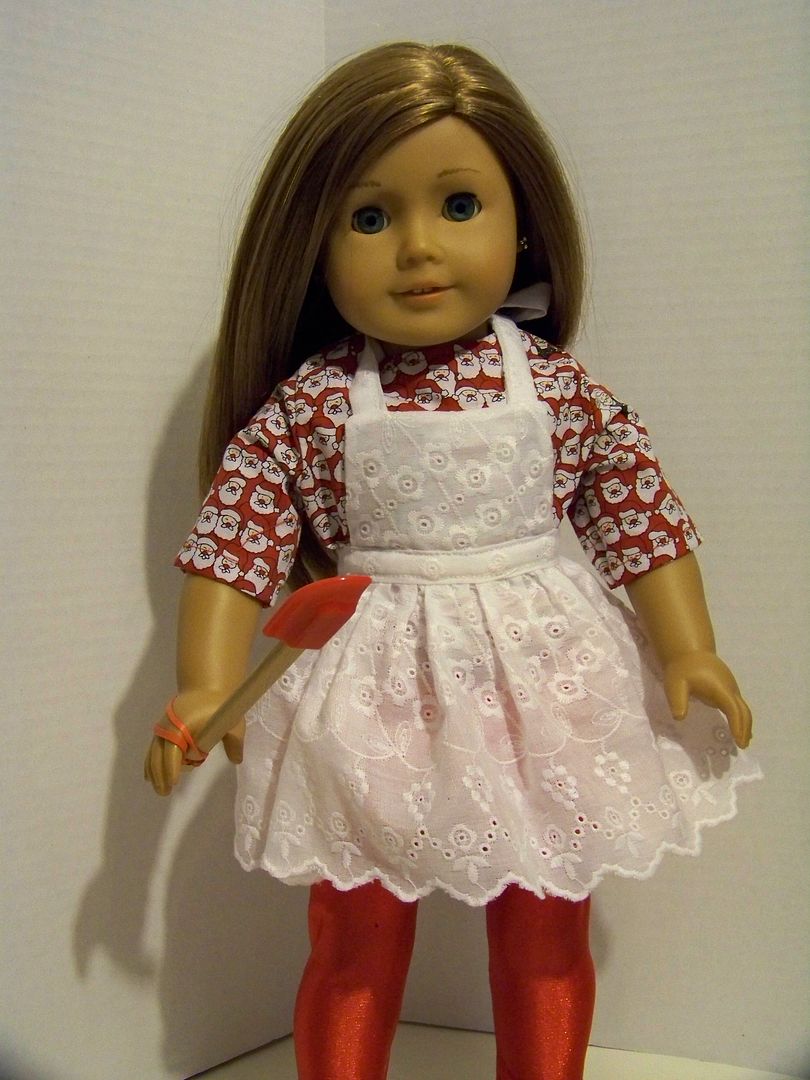
Christmas Baking Outfit


  • McCall's 6451 for apron made with eyelet from my stash. 
  • Liberty Jane Leggings pattern with 1" added to the length and sewn in a shiny lycra.
  • Simplicity 2458 sewn with a cotton Christmas print from my stash for the top. 

Cheetah ensemble


  • Liberty Jane Mini Skirt sewn in an animal print-stamped patent leather.
  • Liberty Jane T-shirt Variety Pack pattern for the long-sleeve metallic knit t-shirt.
  • McCall's 3474 pattern for matching cheetah print lined boxy vest and tam.

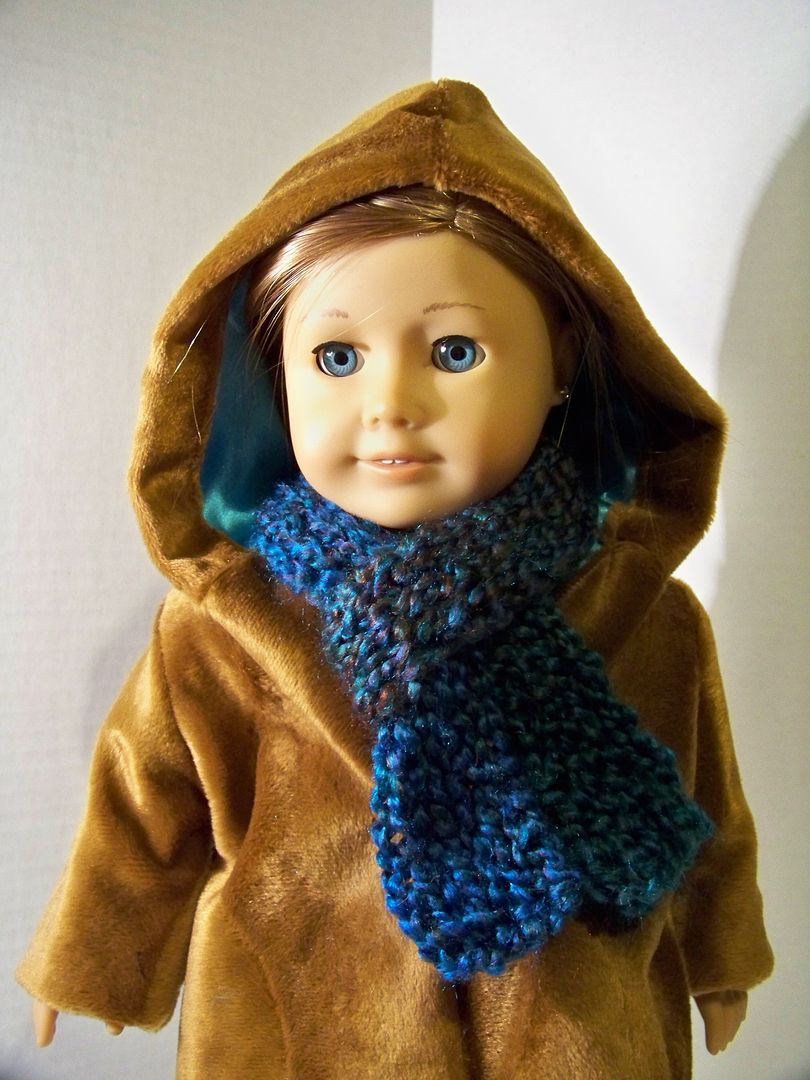
Lined Faux Fur Coat and Loom Knitted Scarf
As I was sewing, Piper would call from another room (as she was banned from my sewing area) to give a suggestion of what to make.  At one point, she told me she wanted a winter coat. 

  • DollclothesPatterns.net Hoodie pattern.  I altered the pattern to line the coat in turquoise satin and I added a closure to the front-- I love how it went together so easily!  This pattern was just under $10 but also included a top, pants, and directions for making fringed lace-up boots.  I will definitely be trying those boots, but not before Christmas!
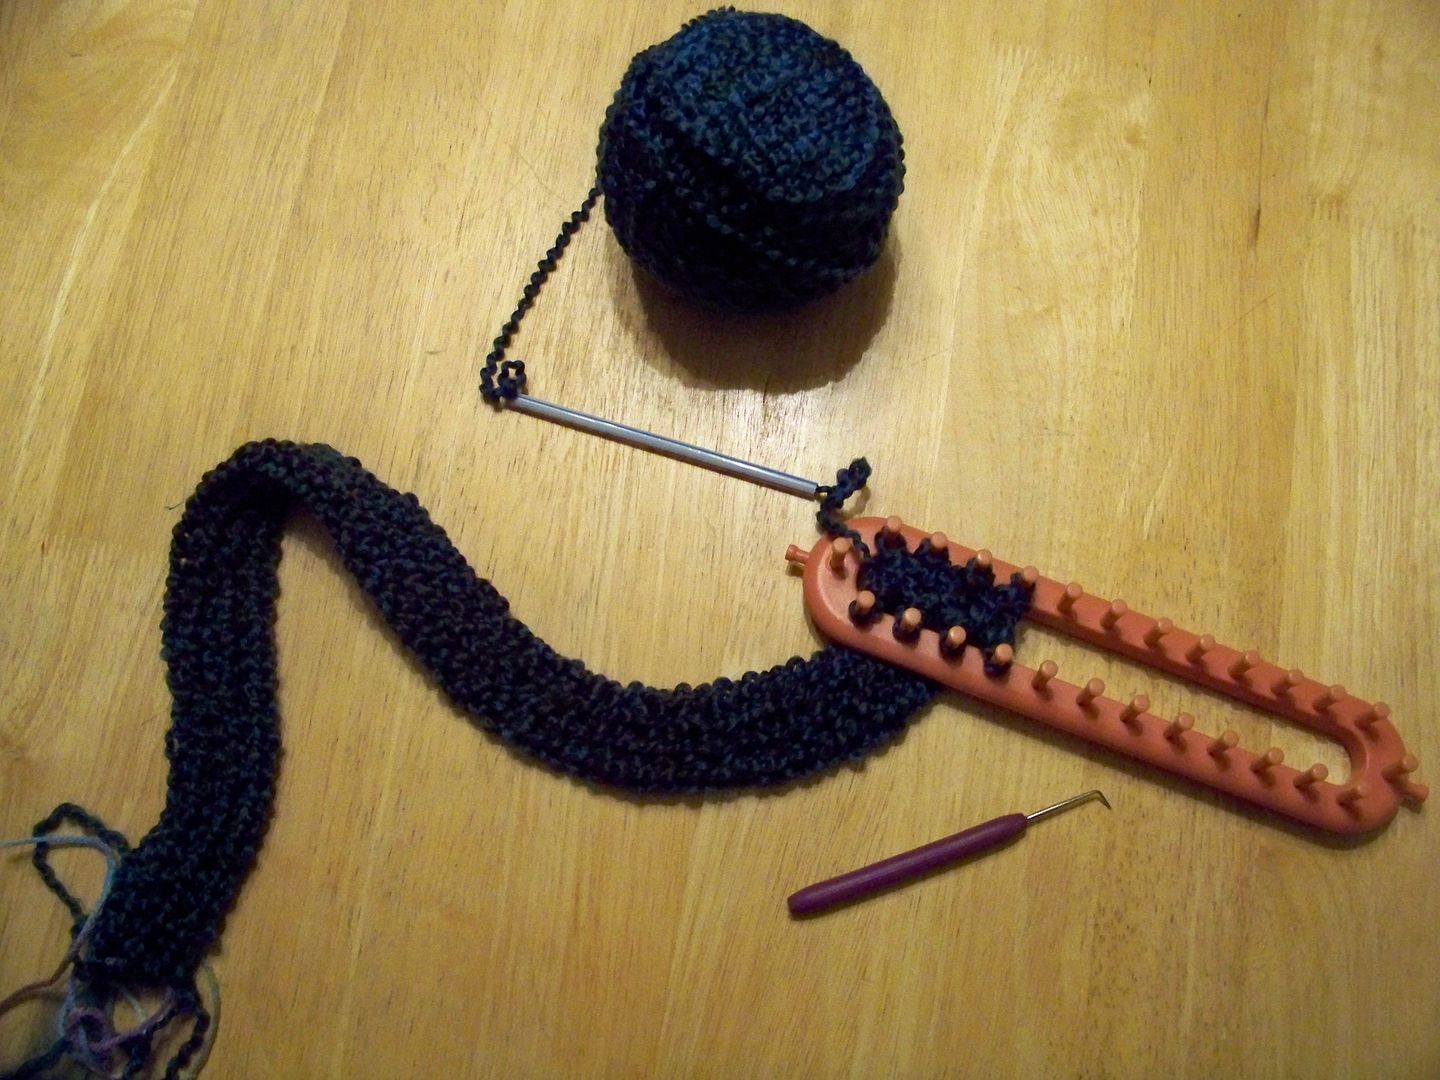
  • I made the scarf on the shortest Knifty Knitter long loom.  I used 8 pegs and did a simple double knit stockinette with leftover homespun yarn until it was 27" long.  I finished the ends without fringe.


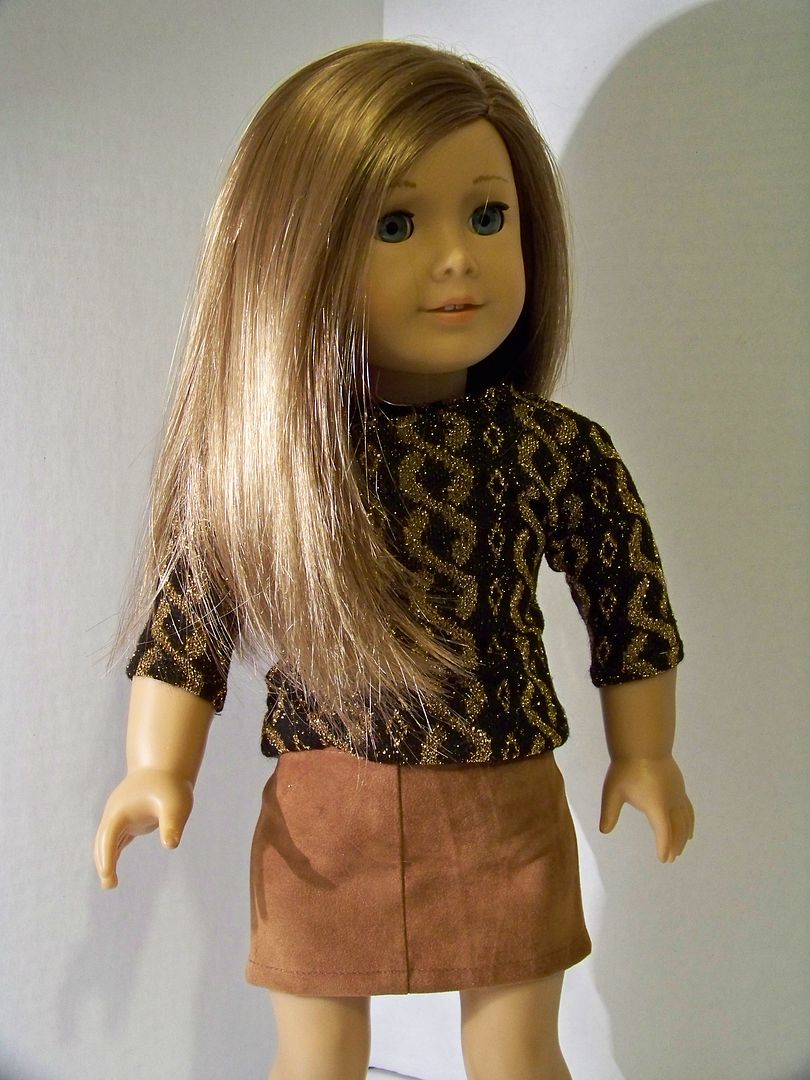
Metallic top and suede mini 
I made a simple outfit to go under the coat. 

  • Liberty Jane Mini Skirt sewn in faux suede.  One point to mention:  sew the center fronts and backs at 1/8" at the fold, not 1/4" to make it easier to put on the doll!   
  • Liberty Jane T-shirt Variation Pack used for the long-sleeve t-shirt with 3/4 sleeves.  This black and gold metallic knit was one of Piper's top picks and it sewed together like a dream!

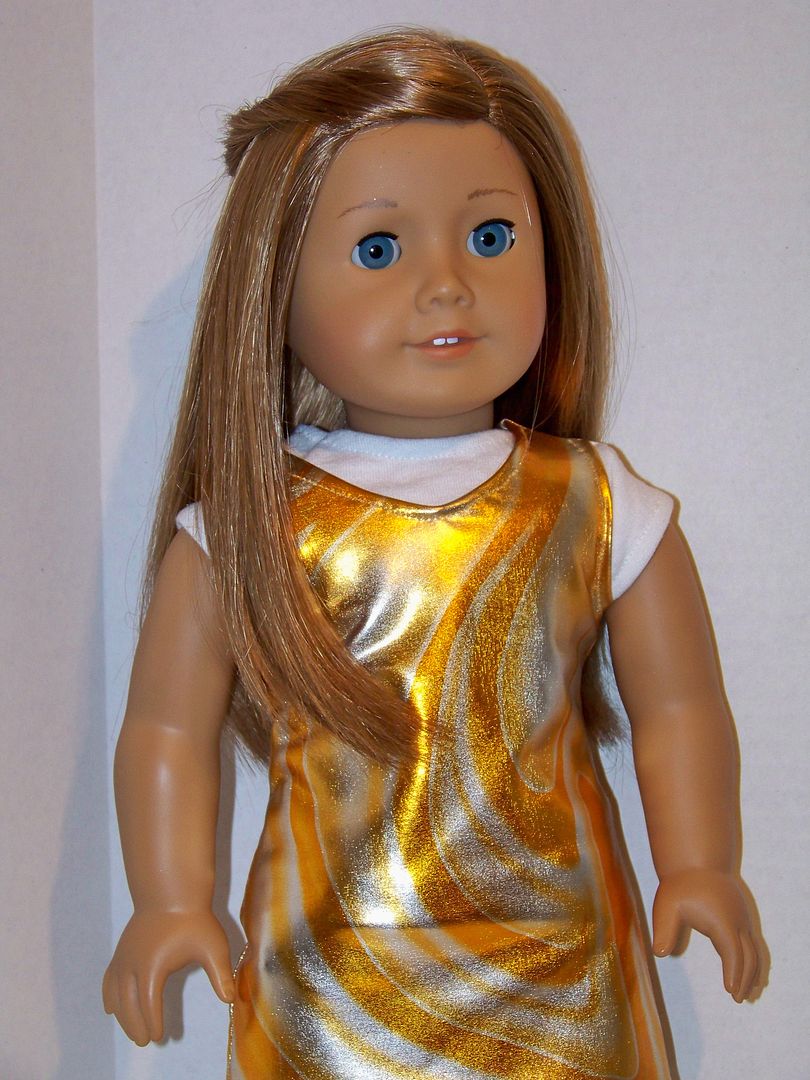
Gold Swirl Tank Dress

  • Liberty Jane Happy Shiny Dress that was lengthened by an additional 1-1/2".  I also altered the neck to lower it so more of the t-shirt would show.  This crazy printed lycra was another of Piper's absolute top picks--- is her alter ego a professional wrestler???!!!
  • Liberty Jane Trendy T-shirt pattern for undershirt.

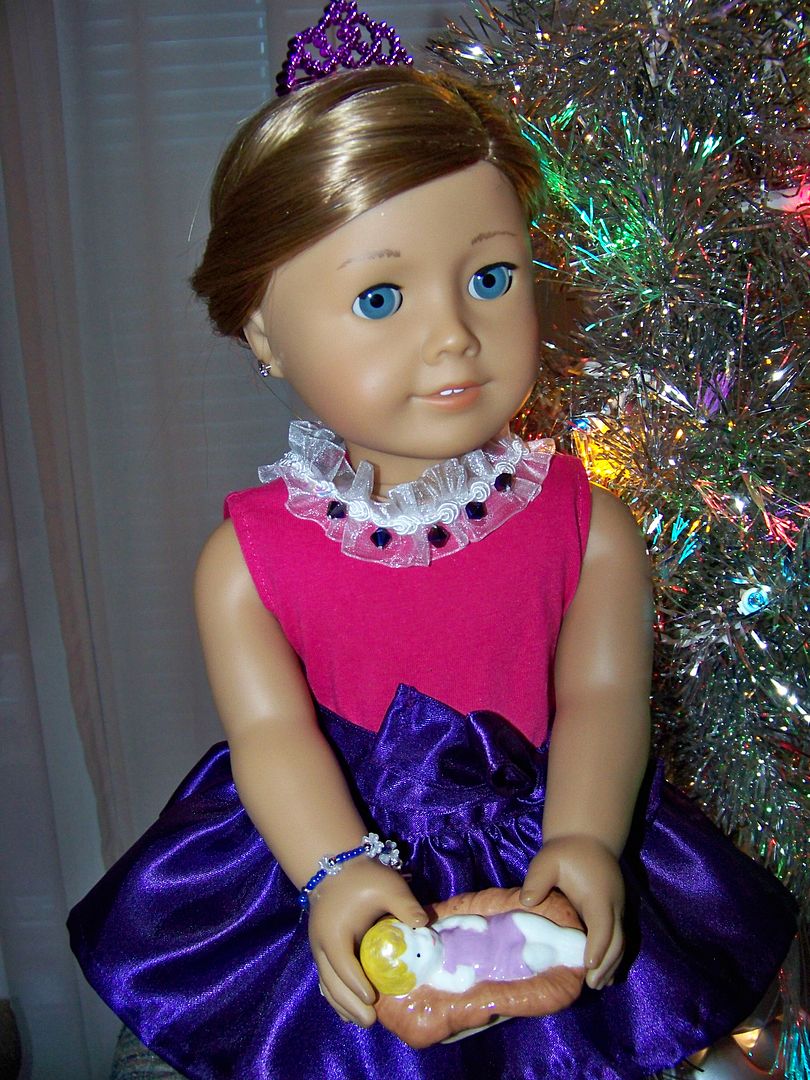
Party Dress
Tell me you are impressed that I figured out how to get her doll to hold the baby Jesus without visible mechanisms! 

  • Heritage Doll Fashions (purchased on the Liberty Jane website) Party Skirt pattern. This pattern allowed me to use my rolled hem foot!  (Yay me!)
  • Liberty Jane Trendy Tank pattern sewn from knit with added trim and a few beads. 
  • The bracelet was made, just like the necklaces, from Stretch Cord.

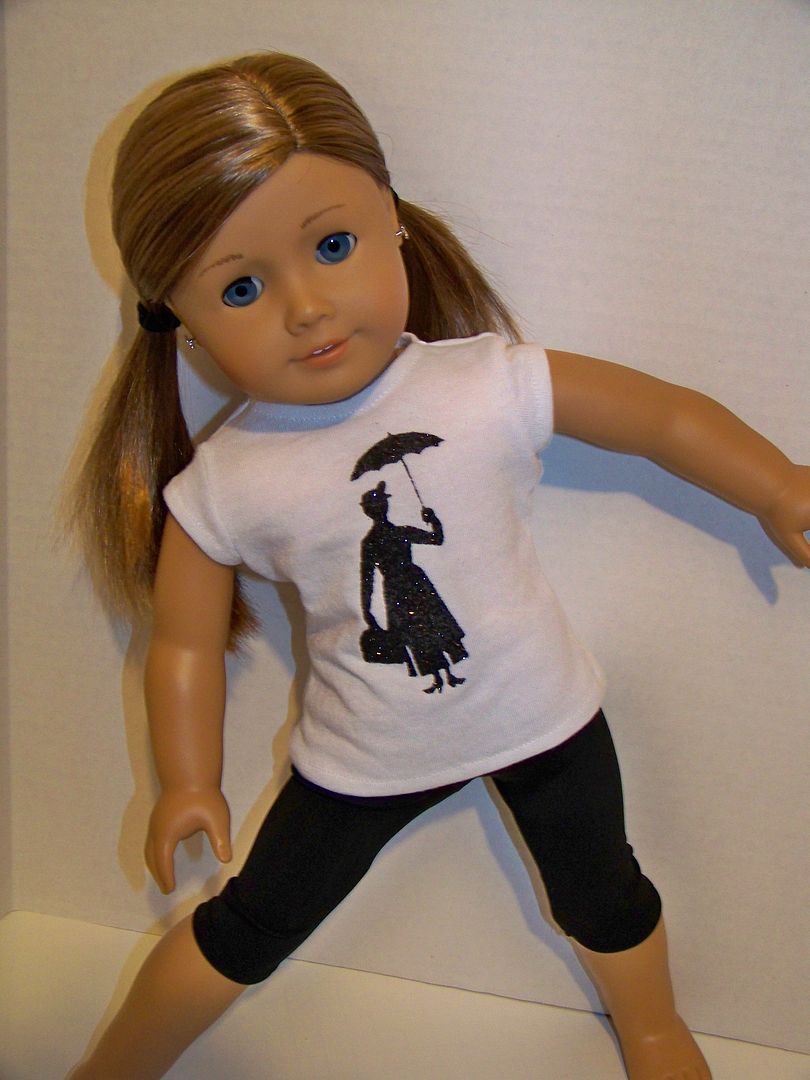
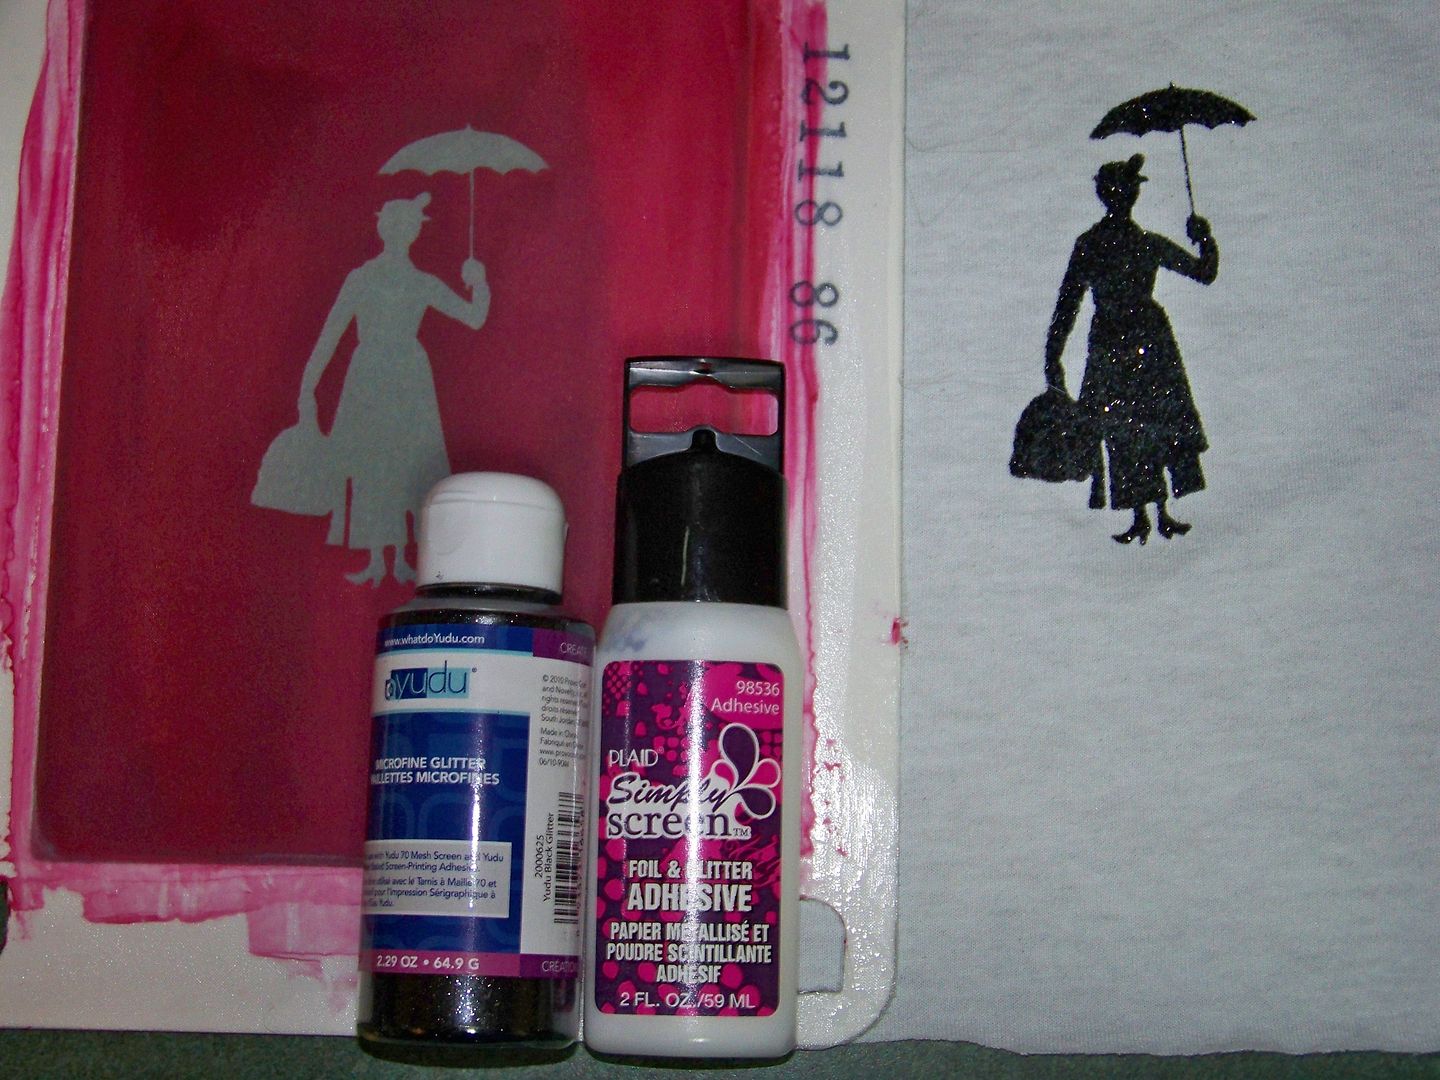
Glittery Mary Poppins custom t-shirt and leggings
I wanted to make a custom t-shirt for her doll with my Yudu Cardshop!  Piper's ballet school just announced that they would be performing Mary Poppins this spring.  All of the students will have a part, including the girls from Piper's class, and talking about Mary Poppins will be THE topic of conversation among the girls.  I thought it would be fun to use this theme for the t-shirt! 

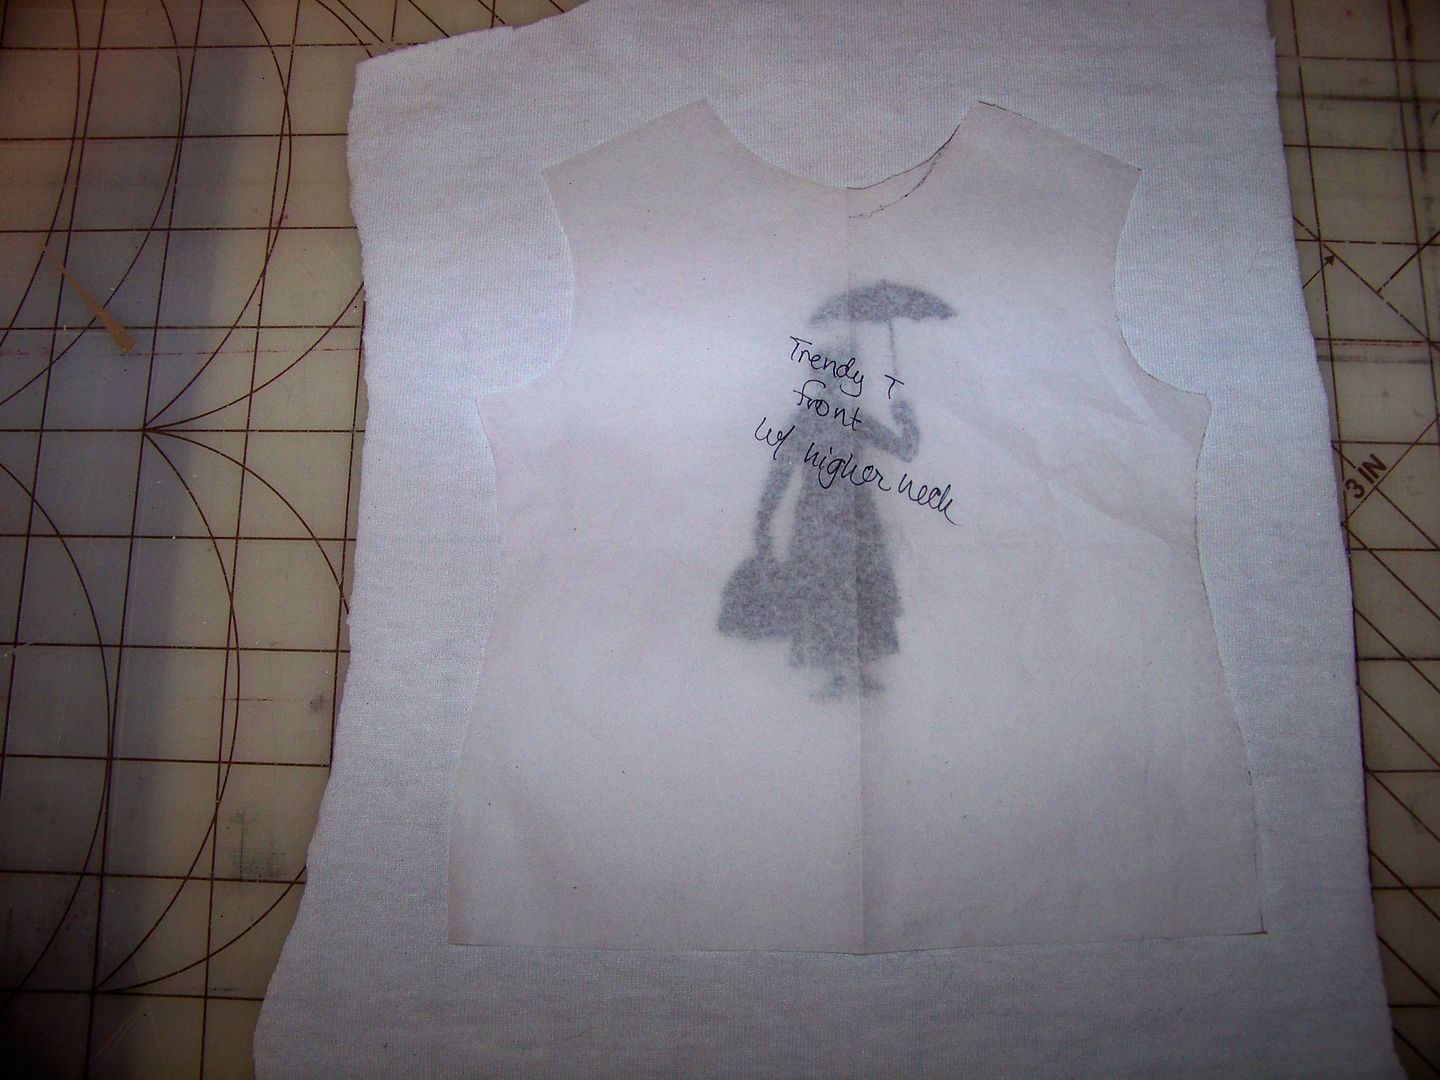
  • Liberty Jane Trendy T-shirt.  I altered the shirt front to raise the neck at the center 1/4".
  • Liberty Jane Leggings shortened by 1".
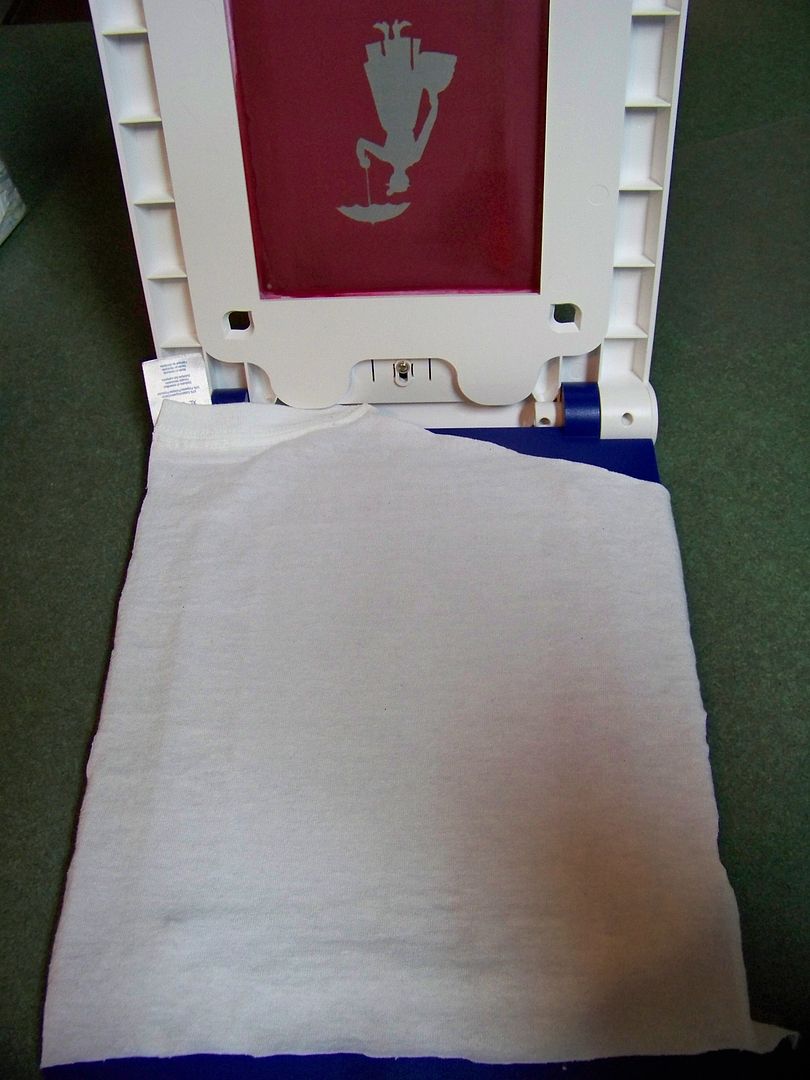
I searched "Mary Poppins silhouette" on Google Images and found the graphic.  I just received my new custom-made Yudu Cardshop screens from Ryonet (click here for info on a past post on this blog for ordering info.  It took about 6 weeks to get but soooo worth it).  I burned the image on an 86 mesh screen on my big Yudu so that I could pull adhesive!  For info and tips on using the Yudu Cardshop, click here.


I used a new, unloved, unworn, unwashed, adult t-shirt and cut off a section to screen.


I used Plaid Simply Screen Foil and Glitter Adhesive and Yudu brand Glitter.


Instead of placing on the fold, I traced the full front pattern piece onto tissue paper so I could center the screened and glittered shape onto the front easily.


Hanging:
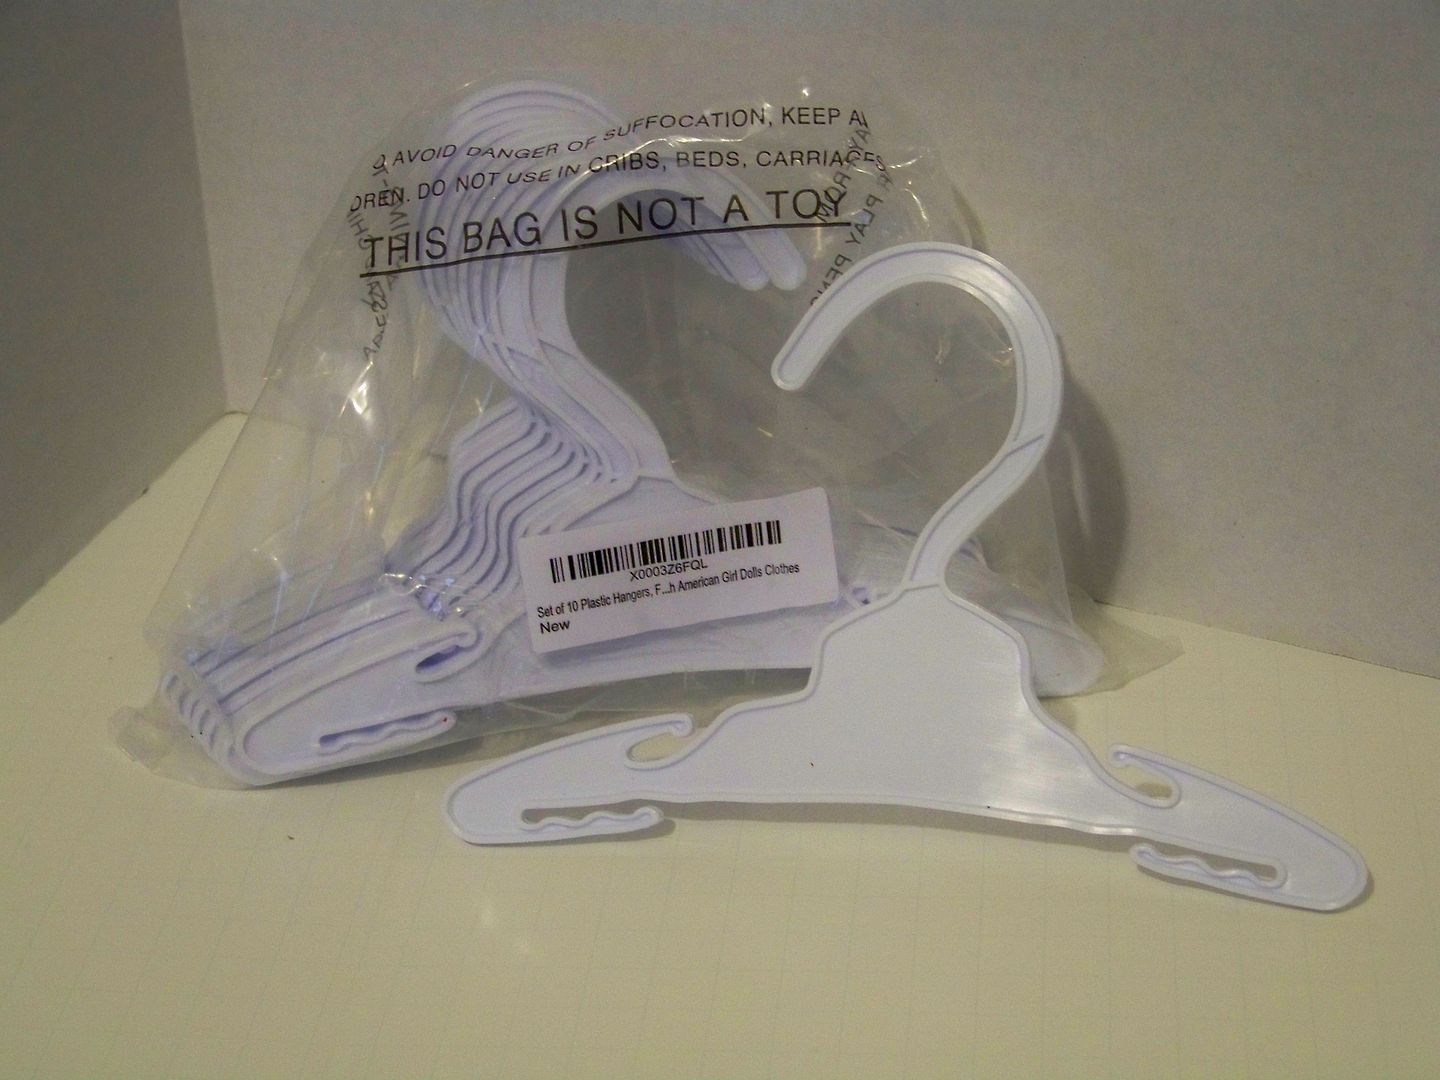
I wanted to help my daughter keep these outfits together, so I found a great deal on hangers and sewed loops to any garment that couldn't hang on (like the pants and hats).


Are you sick of this post yet?  I had one more thing for this gift: 

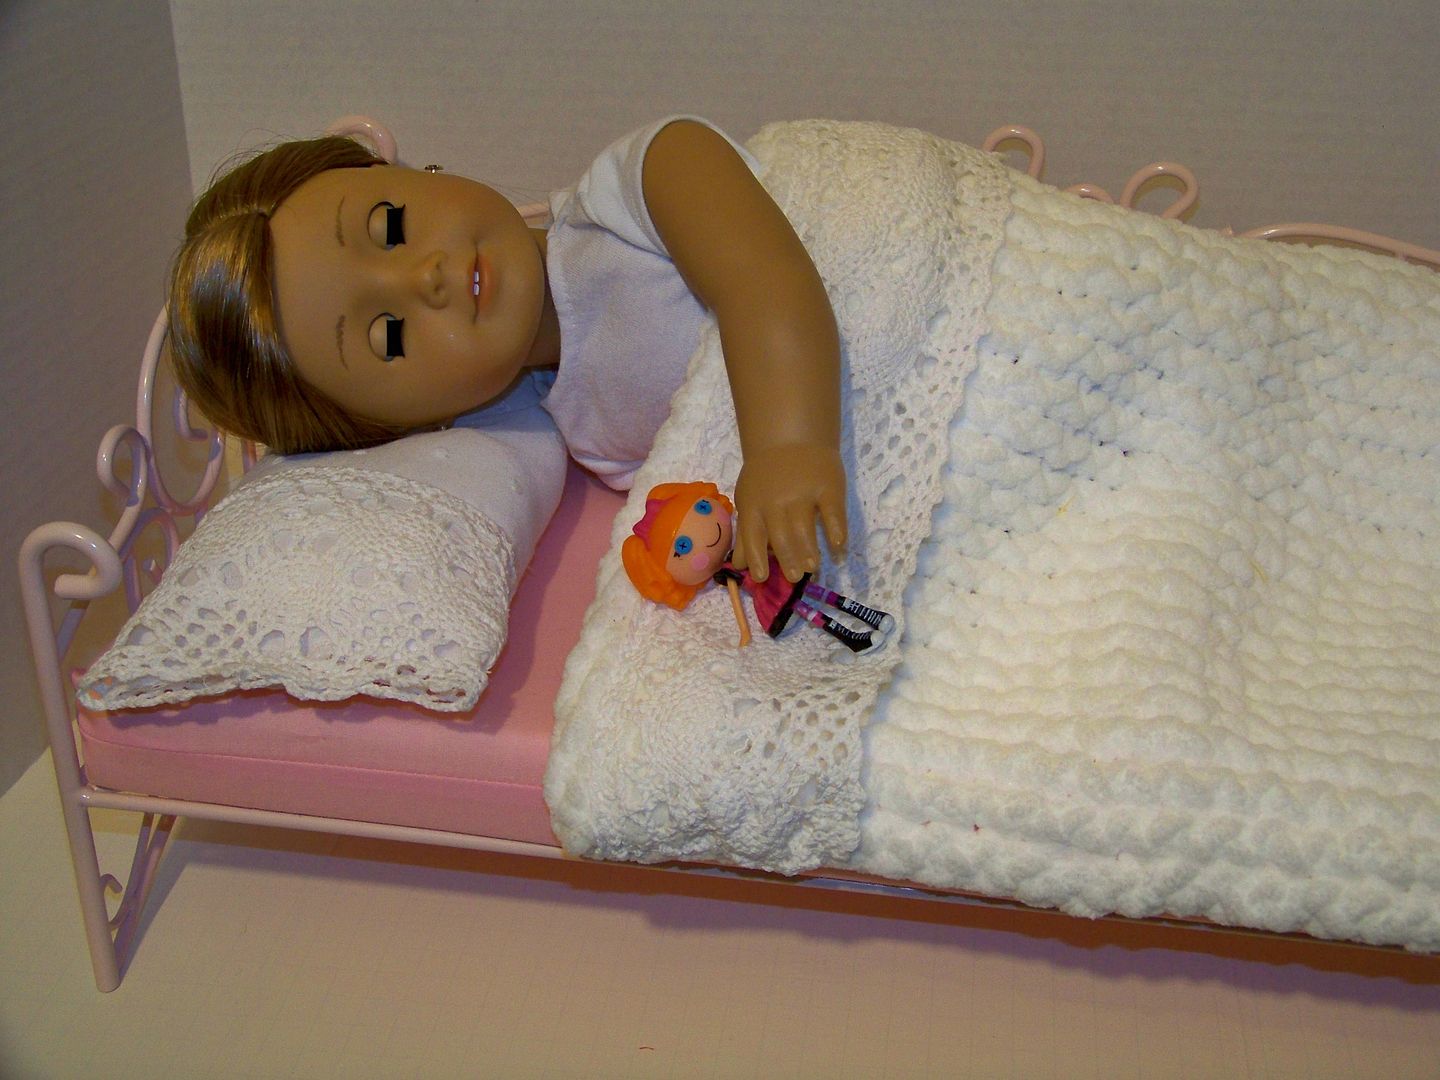
New bedding for her new doll (that we expect Santa to bring) to go on one of the doll beds. 
  • I loom knitted the blanket using Bernat Baby Blanket super chunky #6 yarn, using nearly a whole skein.  I used the blue Knifty Knitter long loom, casting on 30 pegs.  I made a flat panel with a slip stitch edge.  The knitting finished at 18" long by 14" wide.  I turned down the top (cast on) edge and hand-sewed on a piece of cotton lace from my stash. 
  • I created a pillow that finished at 11" x 4-1/2" using leftover eyelet fabric and trimming with more cotton lace.

Thank you for letting me share my sewing project!  I am so excited for Piper to open this gift!  I have a few BIG surprises for her planned too, but this gift was such a labor of love!  I also think all of her little girl friends at school will be getting doll clothes for their American Girl Dolls for their birthdays this year!  This has been so much fun!

My sources (just in case you were wondering):
  • If you have a girl in your life who would love some fun, creative doll clothes, check out Liberty Jane Patterns.   I love, love, love these!!  They have several free patterns that will give you an idea of how they go together -definitely download the FREE Trendy T-shirt and FREE Trendy Tank!  Finding the Liberty Jane designs allowed me to be able to make modern, fun styles easily!  Aside from the free ones, all of the patterns are $3.99, but that is actually more expensive than the patterns you can find at the fabric store because you are buying a pattern for only one item of apparel.  Even so, I liked that I can get the pattern instantly as a PDF and that I can print them as needed on my computer.  I use 10x13 catalog envelopes and simply tape the first page of the pattern on as a label and put the guidebooks and my tissue pattern tracings inside.  Another plus to Liberty Jane designs:  very few pattern pieces.  This makes alterations for variety super easy!  The designs are just so straightforward and simple!
  • Also check out DollClothesPatterns.net - not too many patterns, but I loved the hoodie coat. 
  • Check out Britlyn Madison for great shoes--- and clothes if you are not a seamstress!  Wow- stuff so much cuter than in the actual American Girl Doll catalog.  I am hoping the shoes and boots I ordered will arrive before Christmas, but I am not sure that they will based on the tracking info.  (The footwear might be a New Years gift!) 
  • I bought lots of hangers from a vendor on Amazon. 
  • Aside from a couple of older fabrics from my stash, the fabrics I used were purchased from our local Hancock Fabrics.  The yarns were purchased at Walmart.
As always, thank you for your interest in my projects.  To see all of my paper crafts, check My Project Gallery.  For info on how to Yudu, check my Yudu page

Happy crafting and Merry Christmas!
Friday, December 9, 2011

Annie, Get Your Gun -and your Cricut too!


Annie Oakley has been a big part of our household for the past three weeks.  My daughter's second grade class is doing a "Famous Americans in History" project where each child has picked an American iconic figure to research, write about, and portray for a special school event.  The long list included Annie Oakley, and that is who my little girl picked. 

My daughter, Piper, is an enthusiastic reader, and loved reading an Annie Oakley biography to me in the car between errands and activities. 

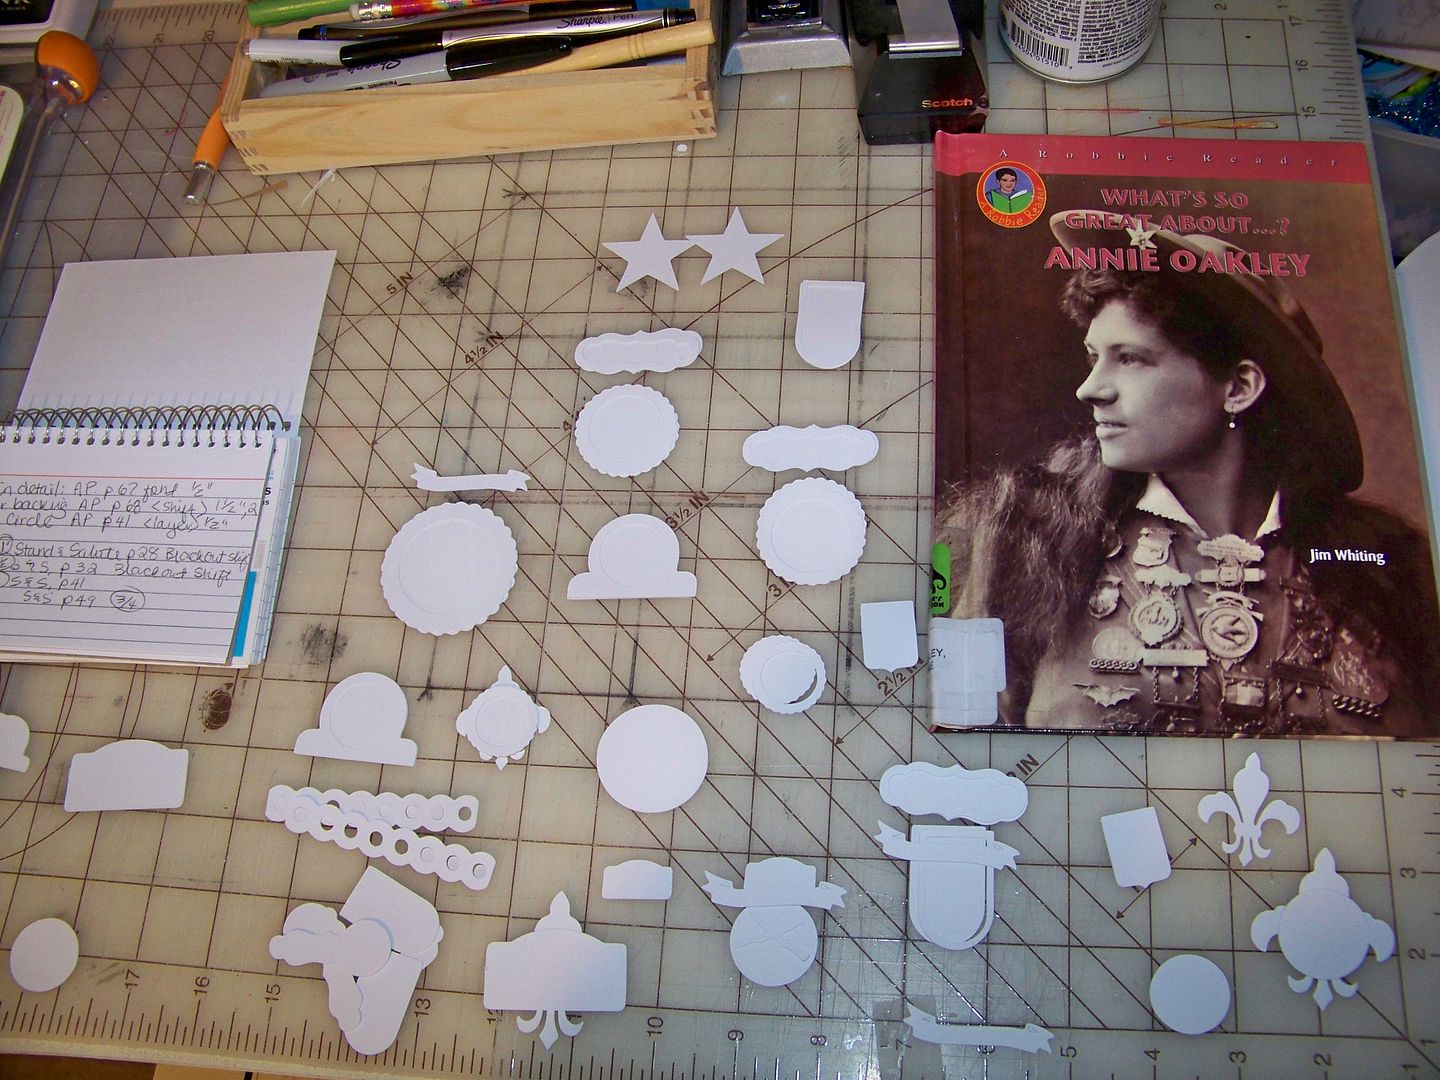
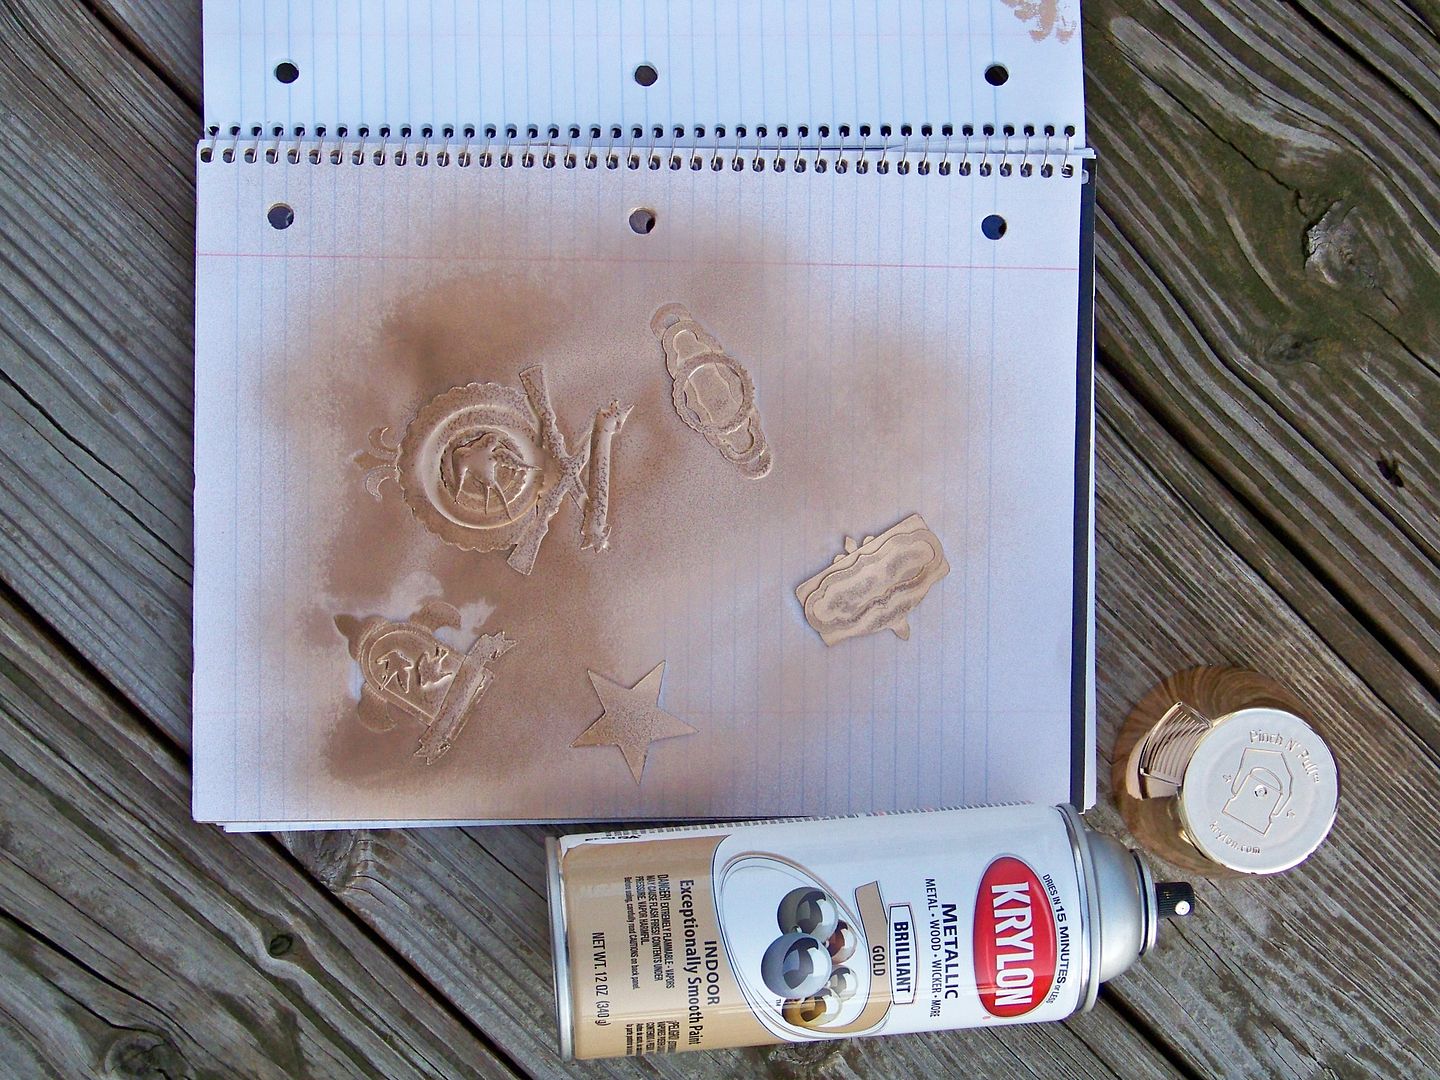
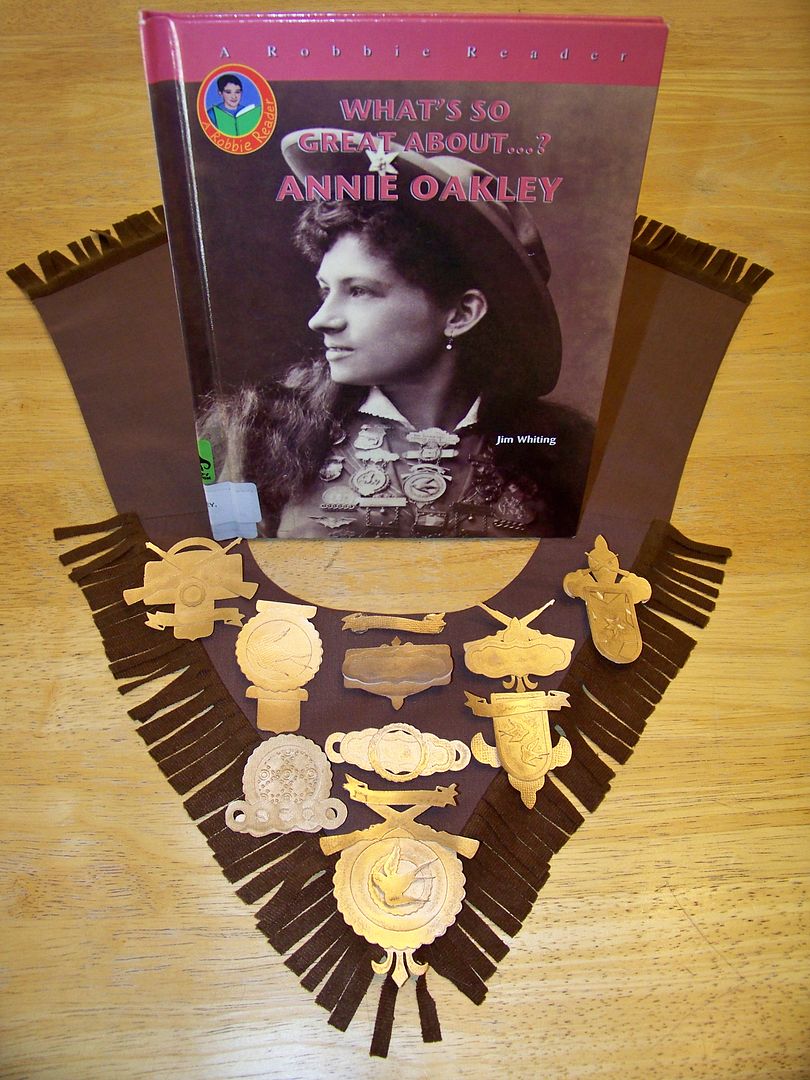
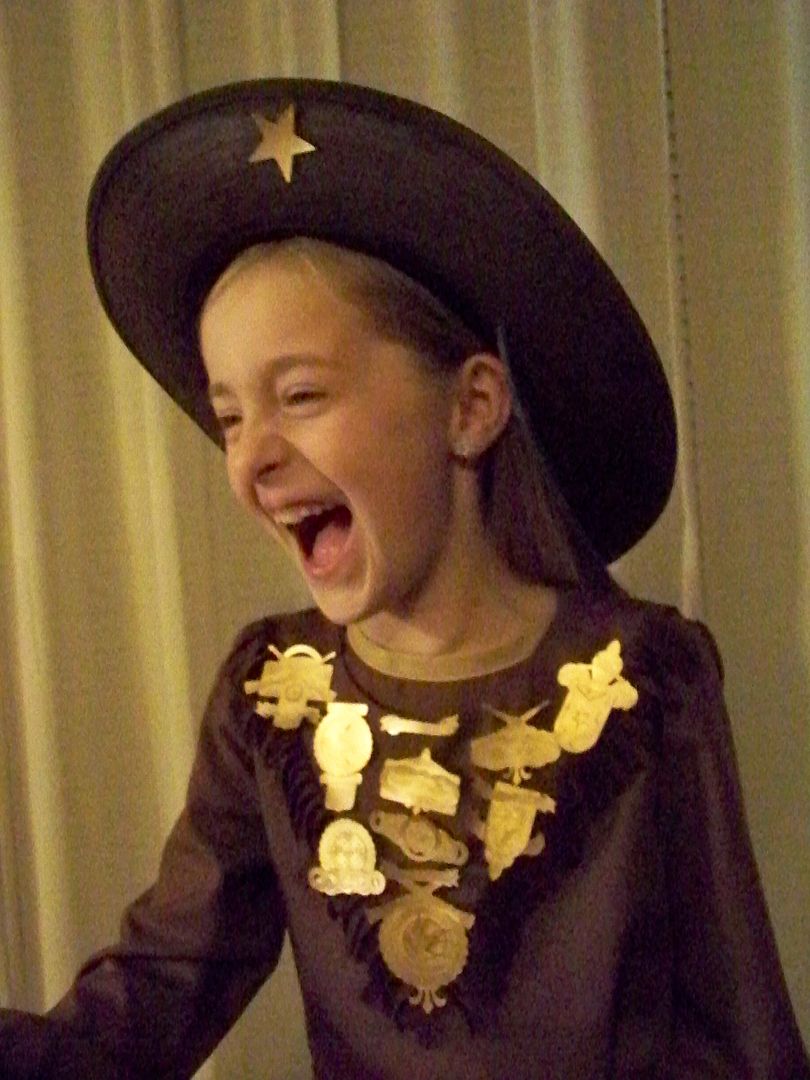
I started off by making medals to look like the ones Annie Oakley wore.  I used my Expression, white card stock, and gold Krylon Metallic spray paint.  I cut a bunch of shapes that looked like components of her medals and then assembled them later. 


These were my cuts:
  • Art Philosophy (page 31) round with border (layer) cut at 2", 1-1/2" (2), and 1" (2).
  • Art Philosophy (page 39) banner with border (layer) cut at 1-1/2" (2). 
  • Art Philosophy (page 26) header shape with layer cut at 3/4" (3).
  • Art Philosophy (page 45) header shape cut at 1/2" (2) and 1".
  • Art Philosophy (page 48) header shape with layer cut at 3/4" (2) and 1-1/4" (2).
  • Art Philosophy (page 67) chain detail font cut at 1/2".
  • Art Philosophy (page 68) fleur de lis shift cut at 1-1/2" and 2".
  • Art Philosophy (page 41) inner circle layer cut at 1/2".
  • Stand and Salute (page 28) shields blackout shift cut at 1".
  • Stand and Salute (page 32) star blackout shift cut at 1-1/2".
  • Stand and Salute (page 41) banner cut at 1/2".
  • Stand and Salute (page 49) rifles cut at 3/4", 1", and 1-1/4".
  • Rock Princess (page 51) birds layer 1 cut at 2".
I sprayed them with several layers of paint and let them dry. 


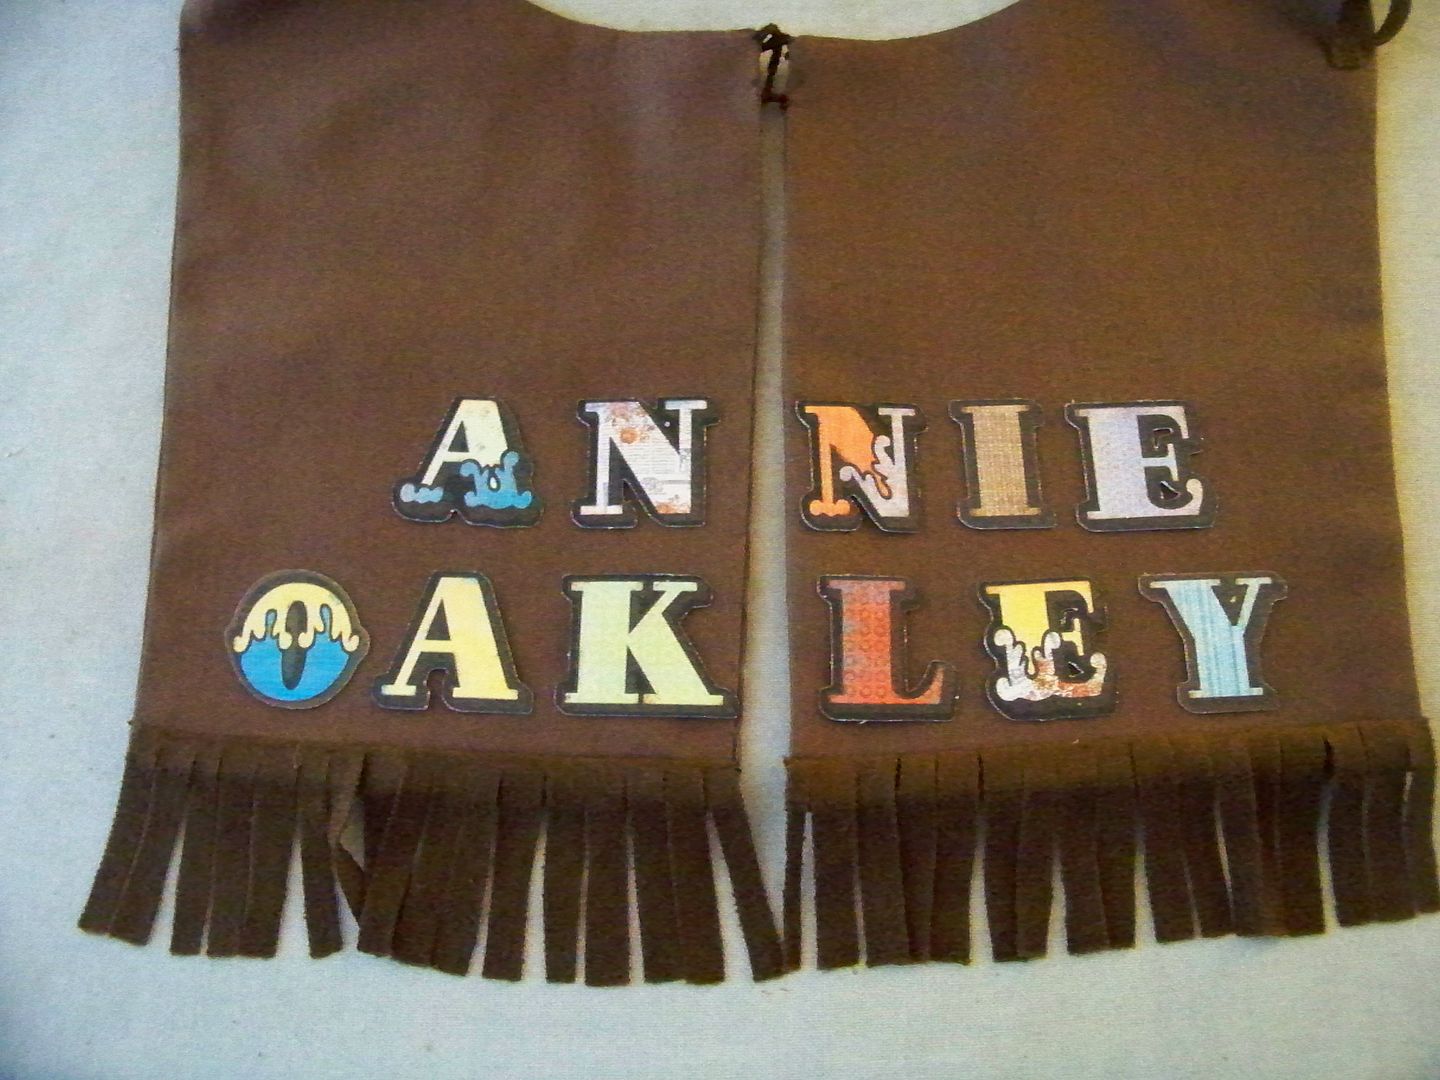
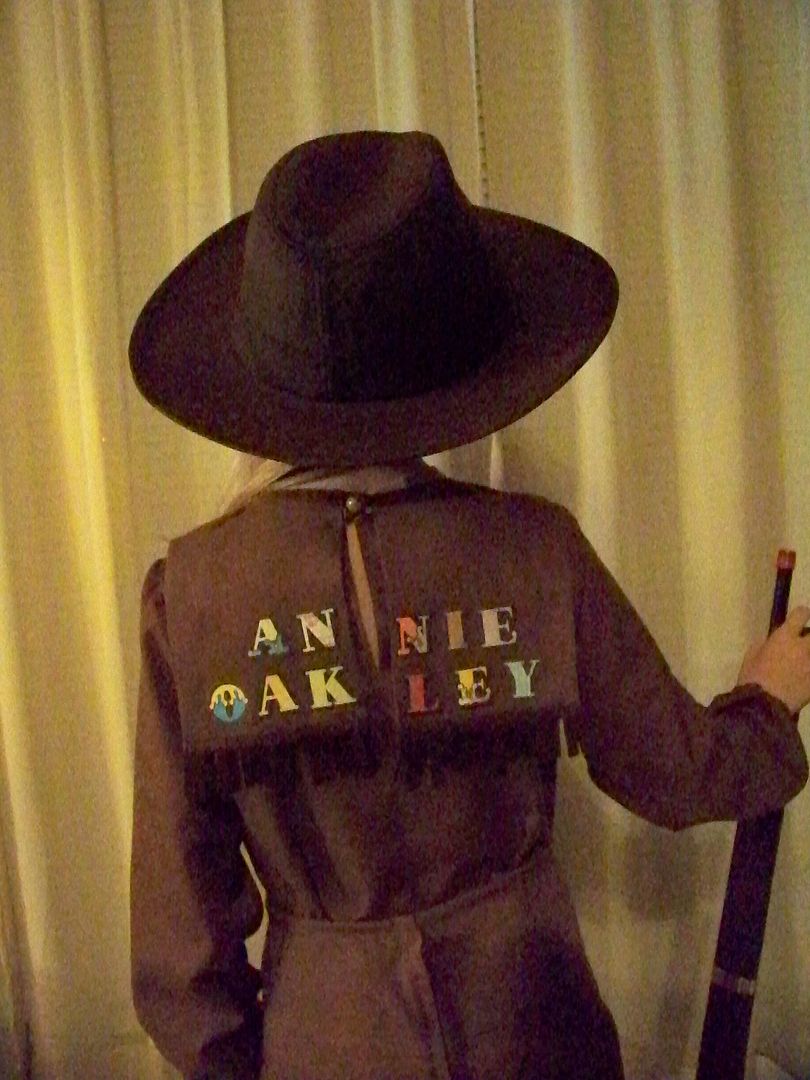
I made a removable collar to hold the paper medals shaped like a kerchief similar to the lines we saw her wear.  I created the pieces using the shirt front and back pattern pieces as a guide, cutting double to create a self-lined and separate piece.  Thread loops on either side of the collar center-back onto the back button.


I adhered tack pins to the backs with E6000 adhesive.  I was surprised to hear, as Piper read to me, that Annie Oakley had most of her medals melted down after her sister contracted tuberculosis.

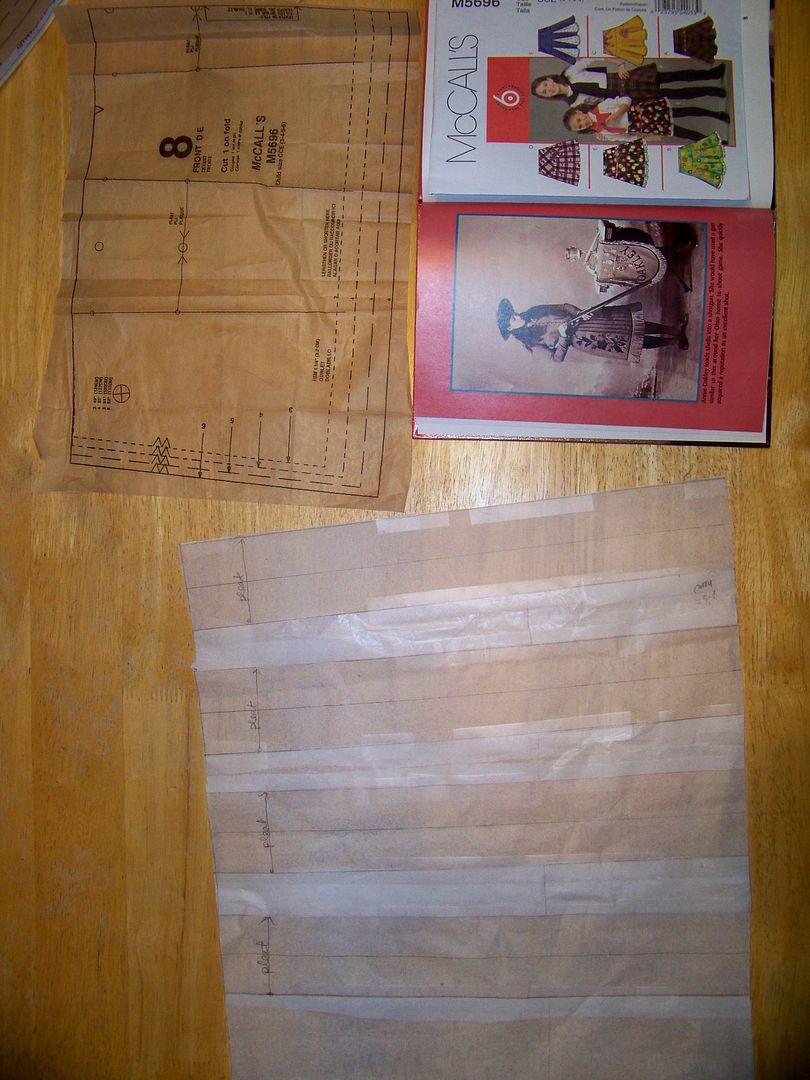
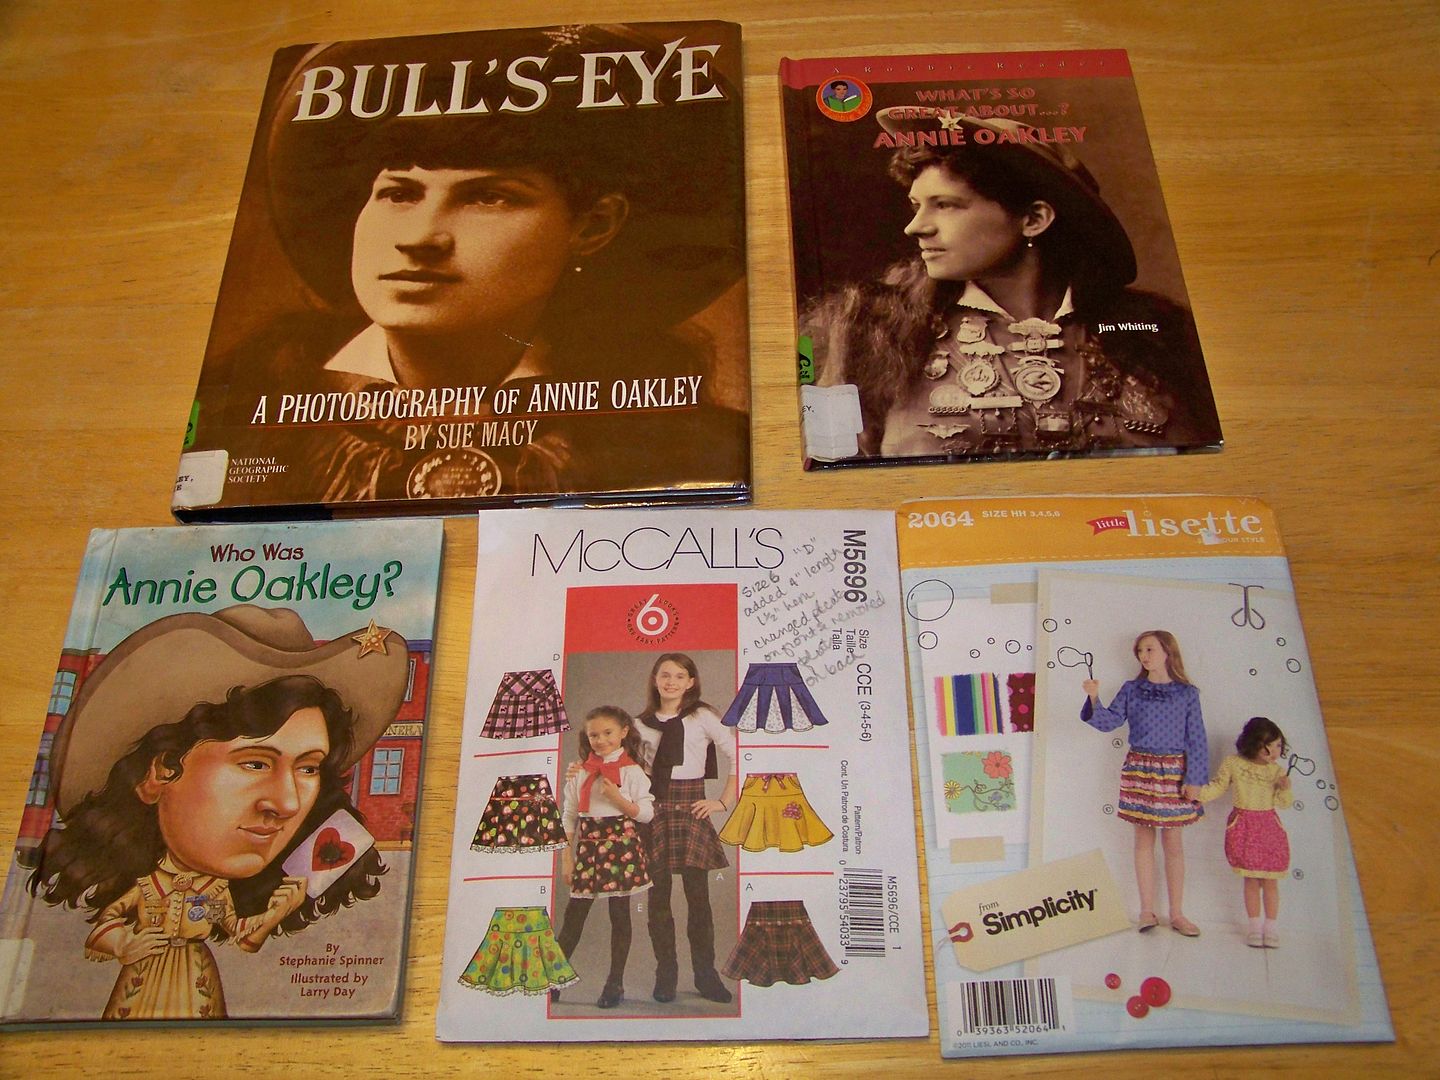
For the costume, I used two sewing patterns that I adapted to look like our favorite Annie Oakley dress that Piper and I found among the photographs in the books. 


Bull's-Eye A Photobiography of Annie Oakley by Sue Macy
What's So Great About Annie Oakley by Jim Whiting
Who Was Annie Oakley? by Stephanie Spinner
McCall's 5696
Simplicity 2064

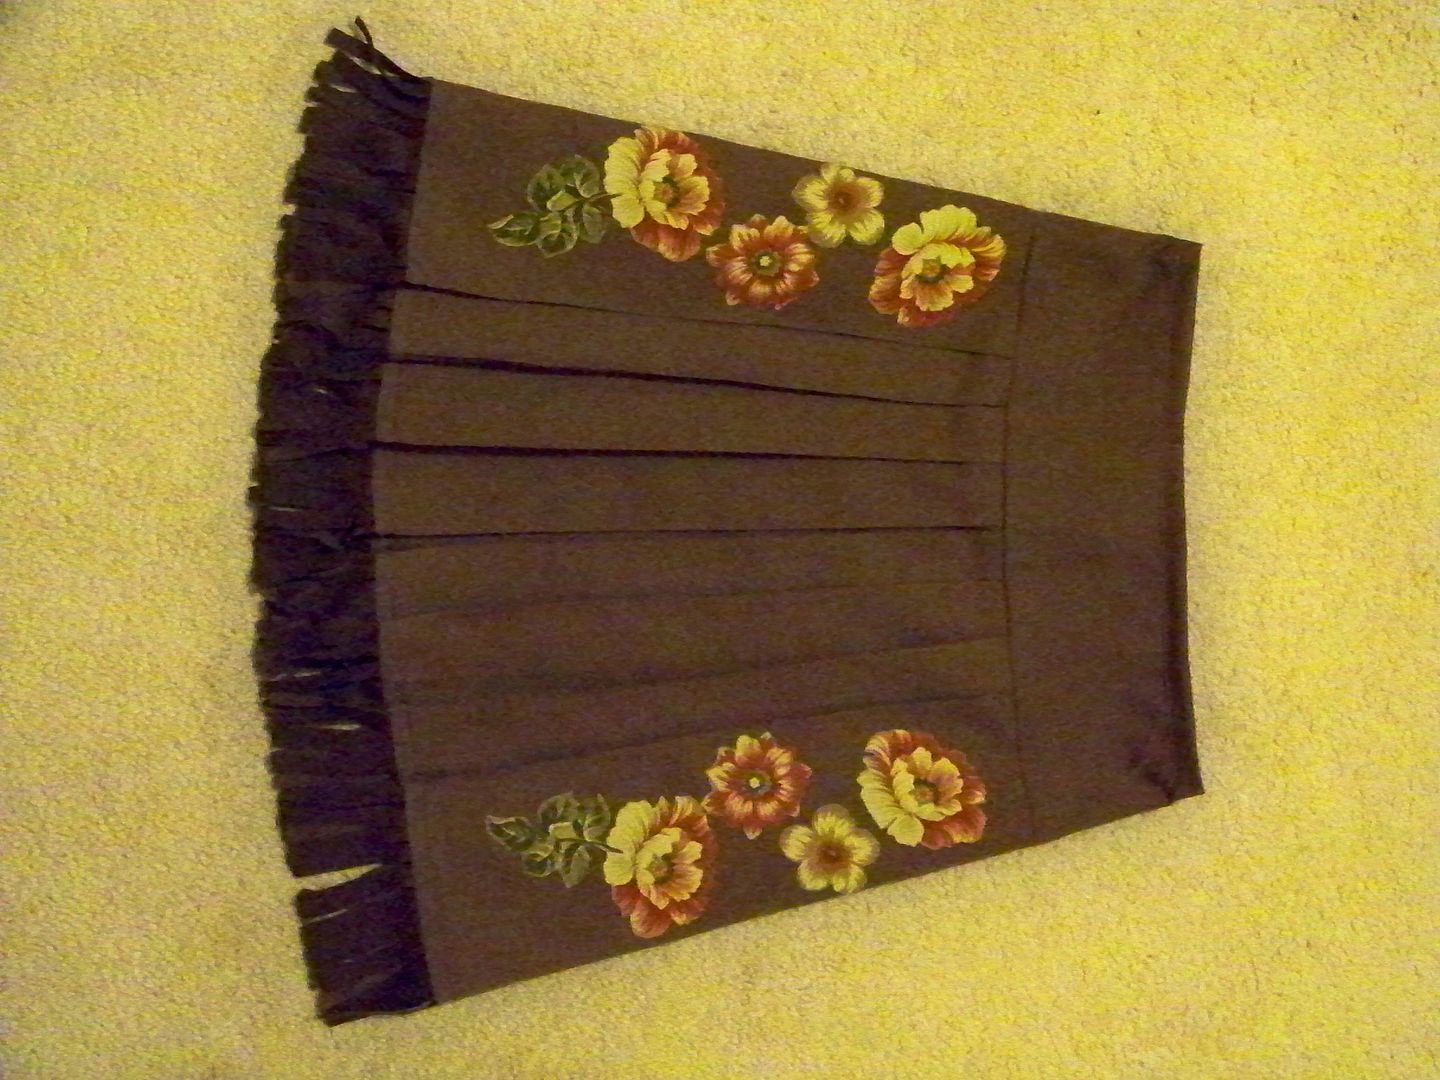
I altered the skirt, changing the pleats to narrow them and increase their numbers, while keeping wider side panels for decoration.  Annie Oakley embroidered her own costumes, but I decided to mimic this by appliqueing a floral print onto the skirt using Steam-A-Seam.  Annie's skirt, in the photo that I copied, had sewn-down pleats and a fringe that was sewn to closed pleats.  I wanted my daughter to be comfortable and to be able to move, so I did change the design a bit to allow for open pleats, but I did sew the creases of the pleats to keep them sharp. 


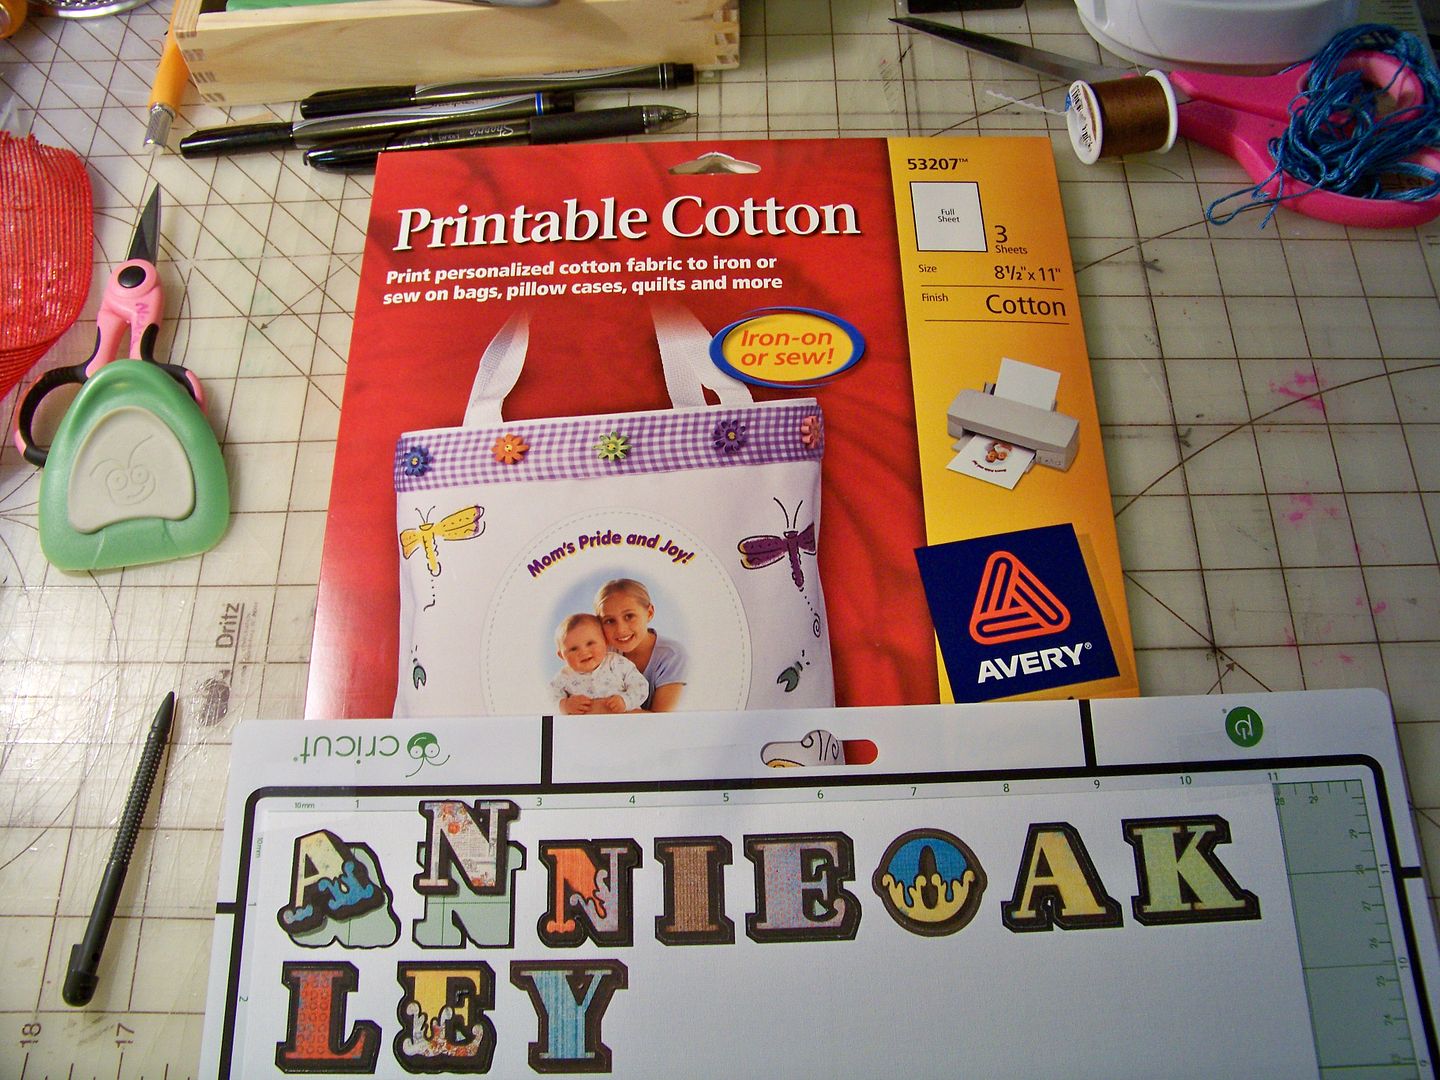
The teacher wanted, as part of her mandated project directions, for the costumes to have a paper attached to the back of each of the kids with their historical person's name written on it.  My daughter gasped at the news that a paper would be taped to her back.  (I guess she equated that with a "kick me" sign?) She asked me to come up with an alternative, so I used my Imagine and Avery Printable cotton to cut 1" letters from the Country Carnival cartridge.  I fused it to the back of the removable collar.


The Avery fabric is awesome; the Imagine cuts it like paper!  I used a new, super sticky mat and a new blade.  (For papers, I always use a barely sticky mat, but for fabric, this just doesn't work.  Fabric stretches and when not adhered well to the mat, it allows the blade to catch on it.)


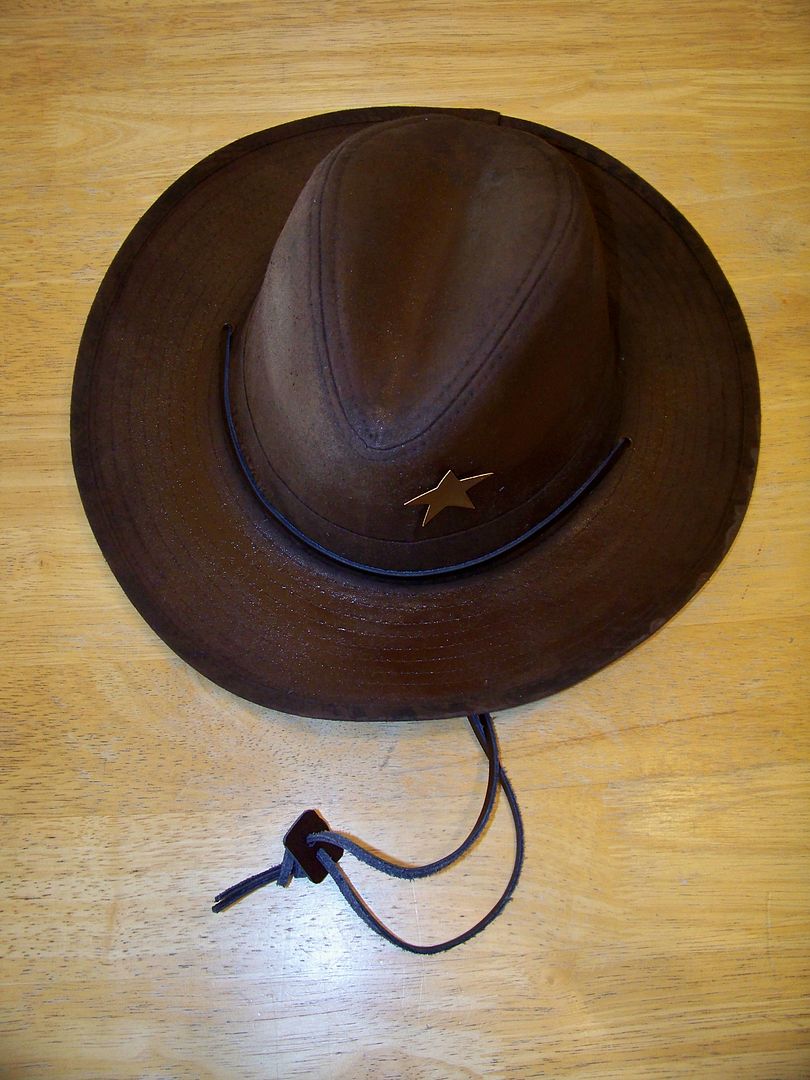
I opted not to sew a hat, after Piper found a Mossy Oak hunting hat.   I spray painted it with a Krylon Gloss in Leather.   It took nearly two cans to cover the camouflage print!.  It took a few days of airing out on the deck to remove the paint smell.  I added a star from my gold-sprayed paper cuts to mimic the star on Annie Oakley's hat. 

I am so proud of my daughter.  I enjoyed learning about Annie Oakley along with her, finding, to my surprise, that Annie Oakley is a great role model for girls.  It was fun to find her Louisville connection (her meeting to join Buffalo Bill's Wild West Show occurred here according to one book).  At a time when our contemporary young superstars find it hip to be shocking, it is a breath of fresh air to read that Annie Oakley fiercely protected her reputation while promoting gender equality.  She brought herself and her mother up from poverty, valuing her talent to such a degree that she negotiated a salary five times that of the men she traveled with. 

My daughter's enthusiasm helped her do so much more than I ever remember doing in the 2nd grade-- actually I don't remember doing any research in that grade.  She did a great job on her paper and I think she had a lot of fun on this project-- I know I had a great time working on this costume!


Thank you for letting me share my project with you!  It is a bit of a diversion as all the crafting blogs at this time of year showcase Christmas cards, holiday decor, and yuletide recipes.  My next post, I am sure, will be seasonal!


Wednesday, December 7, 2011

Naturally Warm and Cozy Gift Set


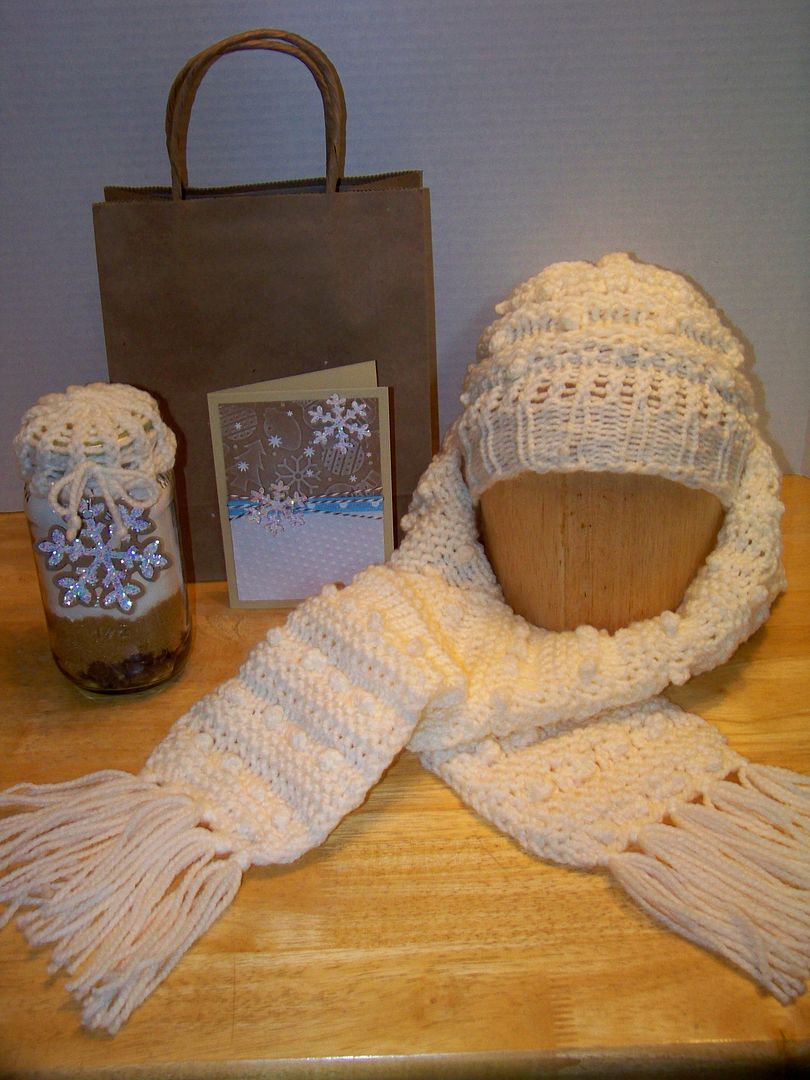
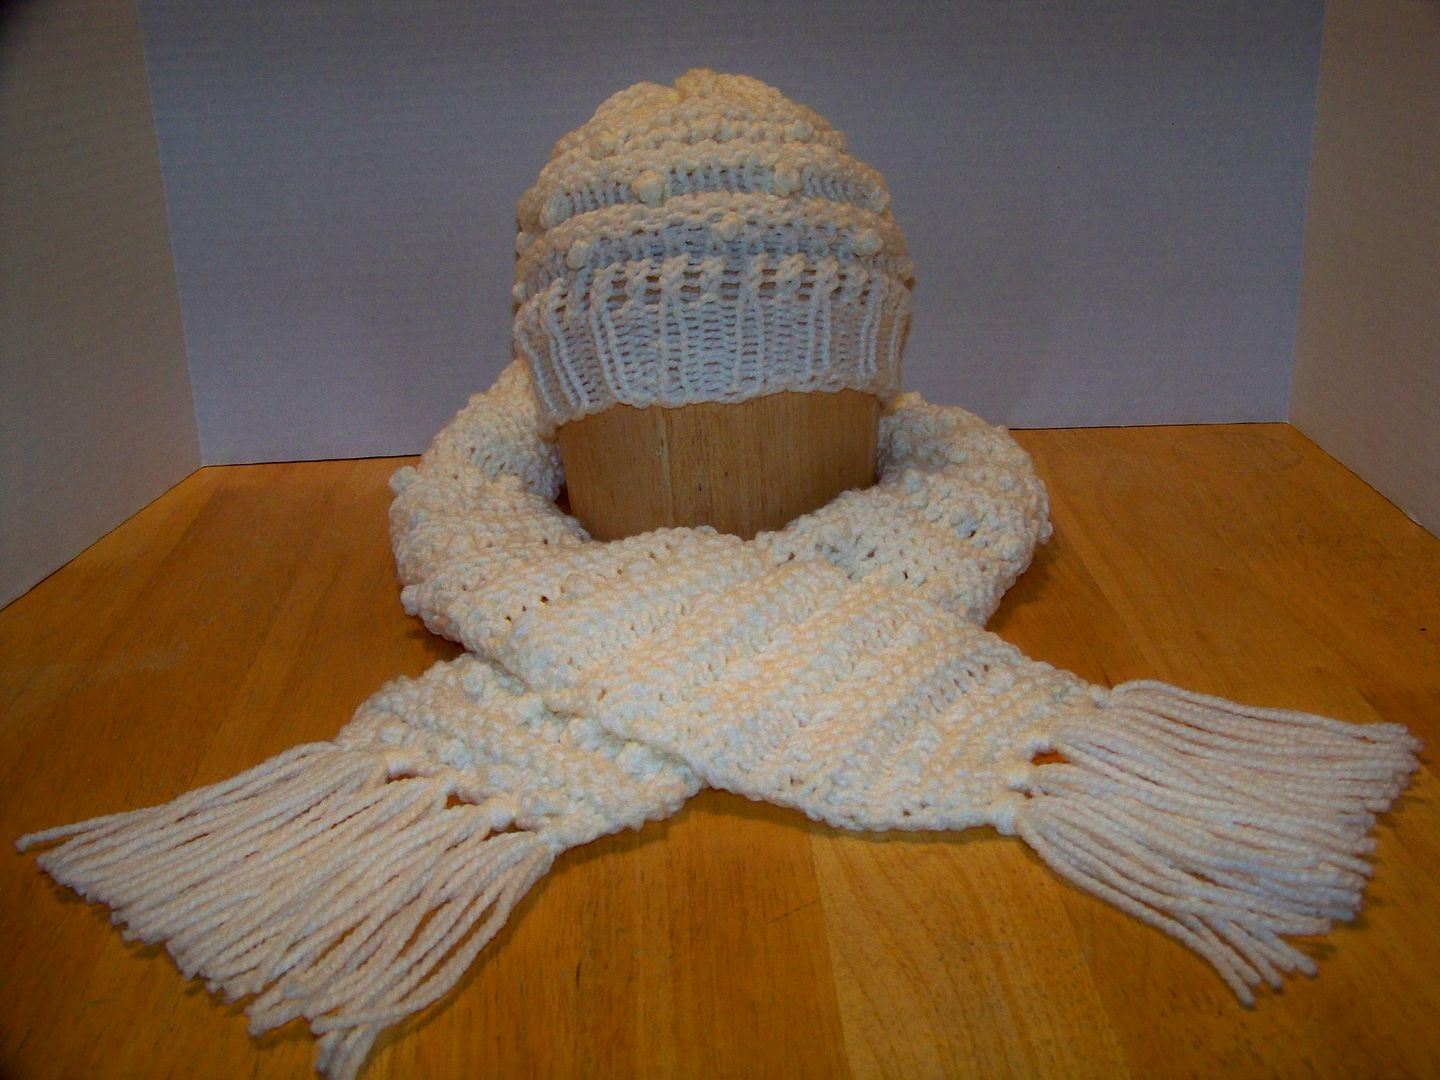
I have spent this past week behind my sewing machine, Cricut, and knitting looms making gifts and helping my daughter on a school project!  Today, I wanted to share a Christmas gift project: a set that includes a scarf, a hat, a knitted jar lid with tag, and a card!

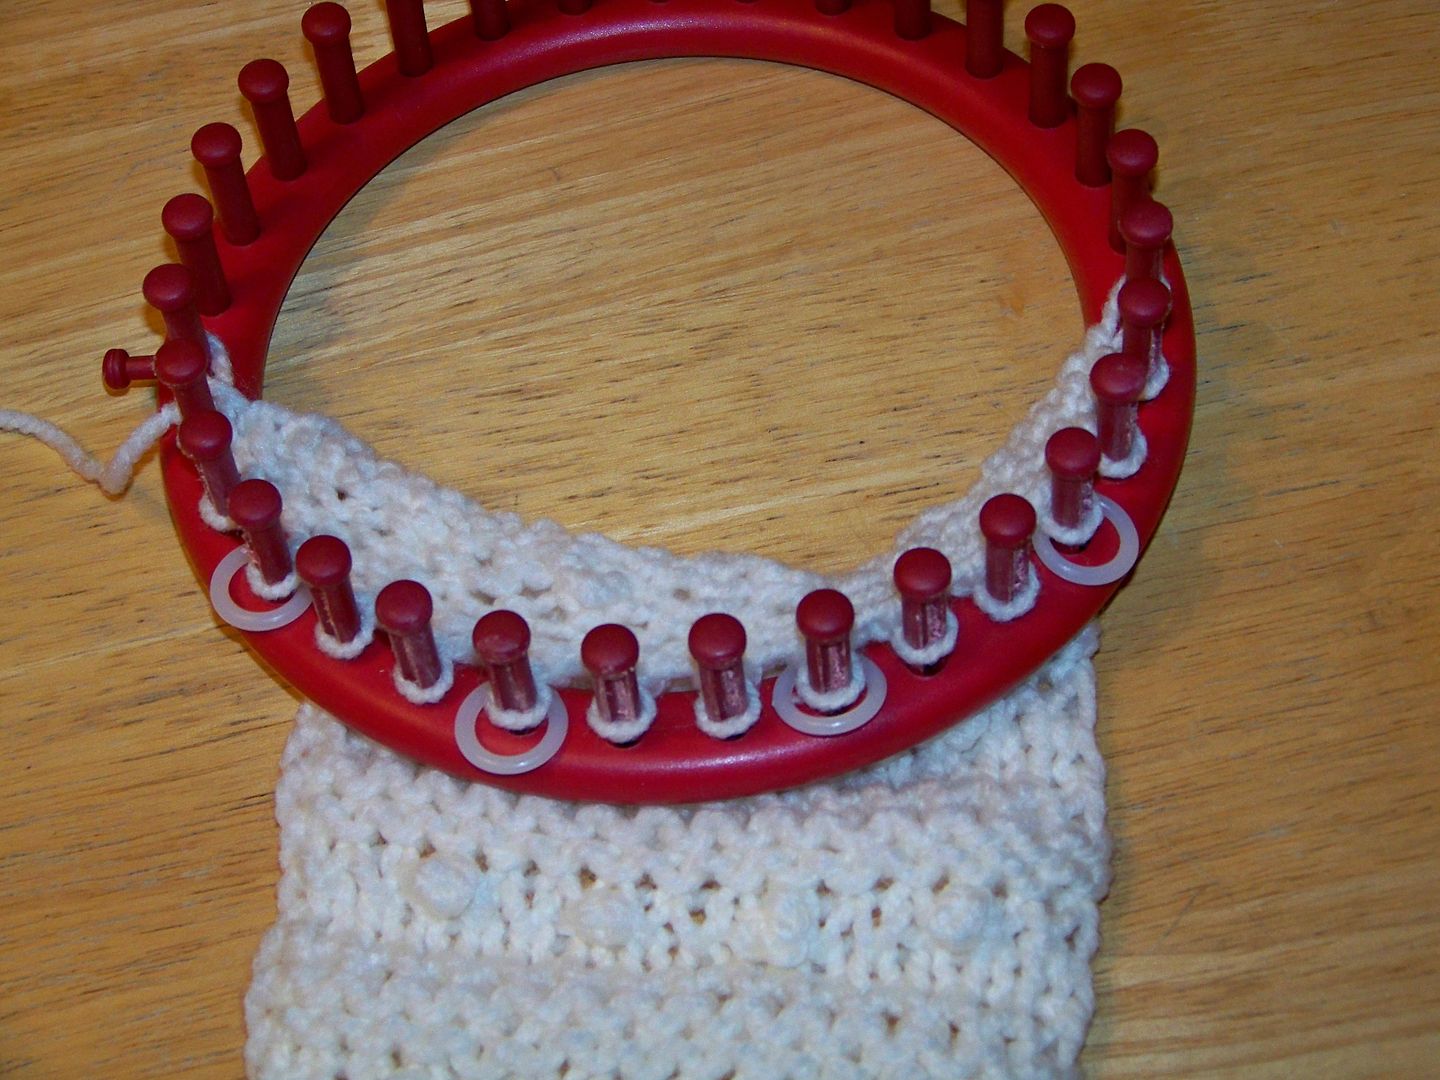
My new loom knitting obsession has had me trying to learn some new stitches, including my new favorite, the bobble stitch.  The pattern for the hat and scarf here is one I created so that I could practice the new stitches I have learned.  I created the scarf on the red Knifty Knitter loom using 1-1/2 skeins of a #5 yarn that I have had in my craft/sewing room for a while called Red Heart Chunky.  I casted on 16 pegs using an e-wrap cast on method after placing markers (little rings) on pegs 4, 7, 10, and 13.  I learned that I knit like I read, from left to right so I consider peg one to be the one to the right of the side peg, with peg #2 to the right of that, and so on.  Because I am left-handed, this direction comes naturally, but I have found that many of the books I now have go in the other direction.


I knitted rows one through three.  To see a video of a knit stitch, click here.

I e-wrapped row four.  To see a video of an e-wrap stitch (also called a 'single stitch'), click here.

On row five, I used a knit stitch for all the pegs without a maker.  For the ones with a marker, I did a bobble stitch wrapping 5 times.  To see a video of a bobble stitch, click here.

Row 6:  Knit stitch.

Row 7:  Purl stitch.  To see a video of a purl stitch, click here.

Row 8: Knit stitch.

Row 9:  Purl stitch.

Row 10: e-wrap


I loom knitted the above ten rows 26 times, creating a scarf that is 48" before the fringe was added.  I used a flat panel bind off.  For the fringe, I cut 5 pieces of yarn 11" for each fringe tassel, folding the bundle in half and completing a lanyard loop with the aid of a crochet hook.  (There are five of these "fringe tassels" on each end.)

At this point, I wanted to quickly mention a couple of useful things that I figured out...
I take my knitting everywhere with me and find that I can often "lose my place" so I have notes in my notebook that remind me which direction I am going, for example "k ->, k <-, k ->, e <-".  I don't know if anyone else has this problem, but some stitches are hard for me to just look at to know what they are, and if I had a little guide that reminds me which direction a particular row is going, it gives me just the clue I need to backtrack to figure out where I am.  Of course, this only works on flat panel loom knitting!

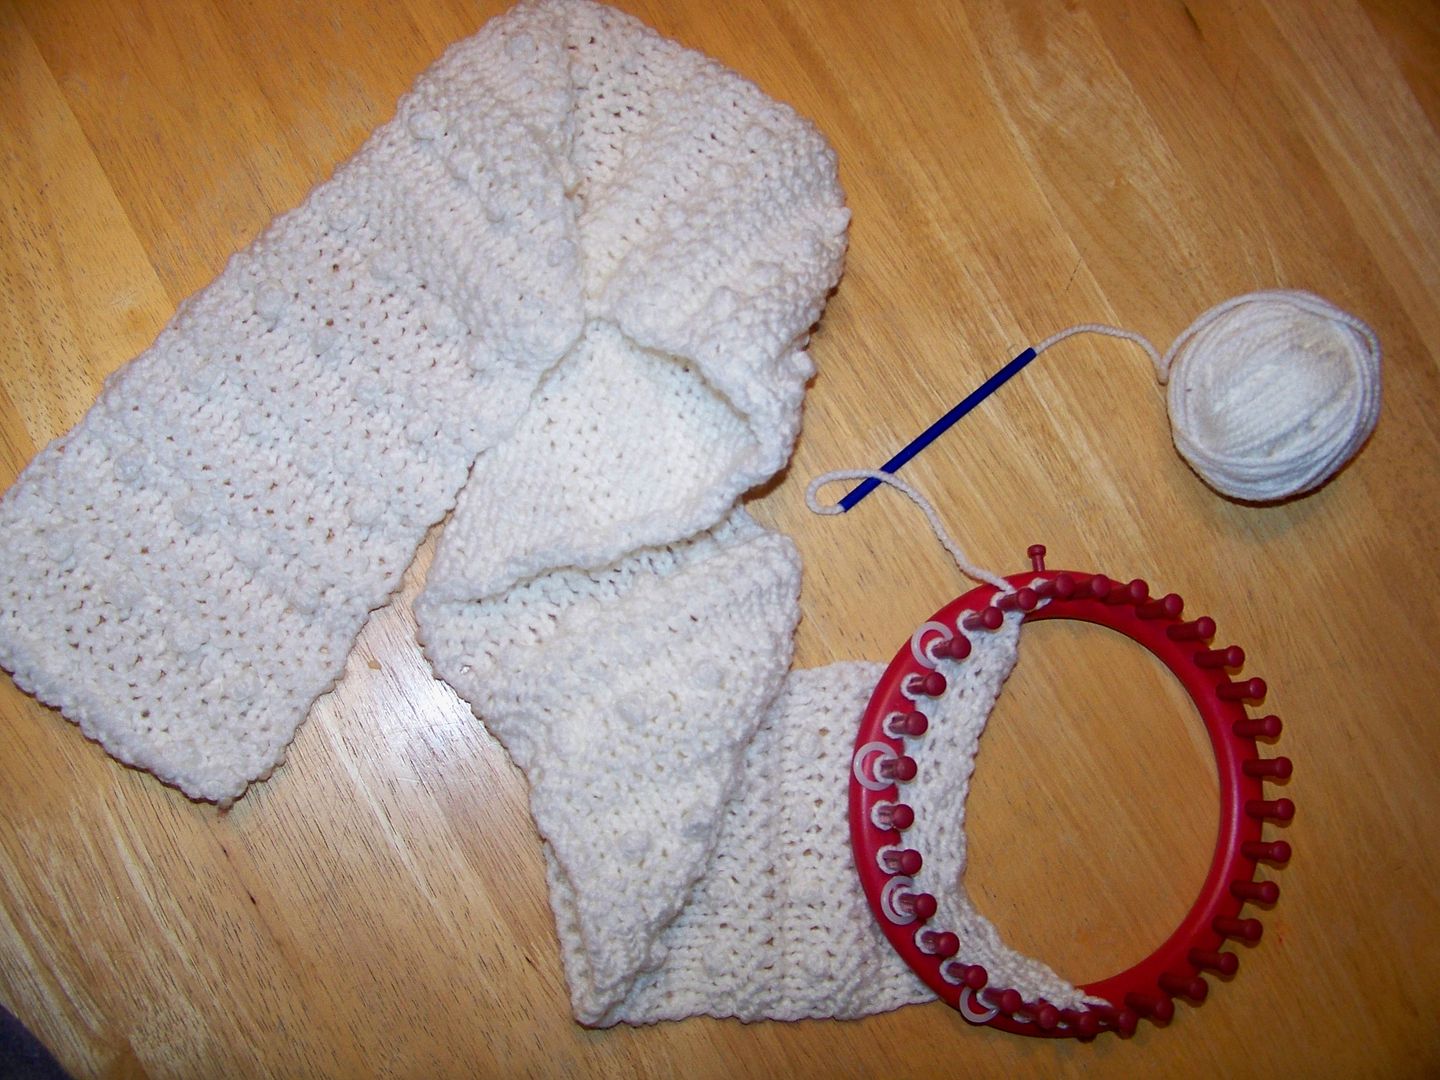
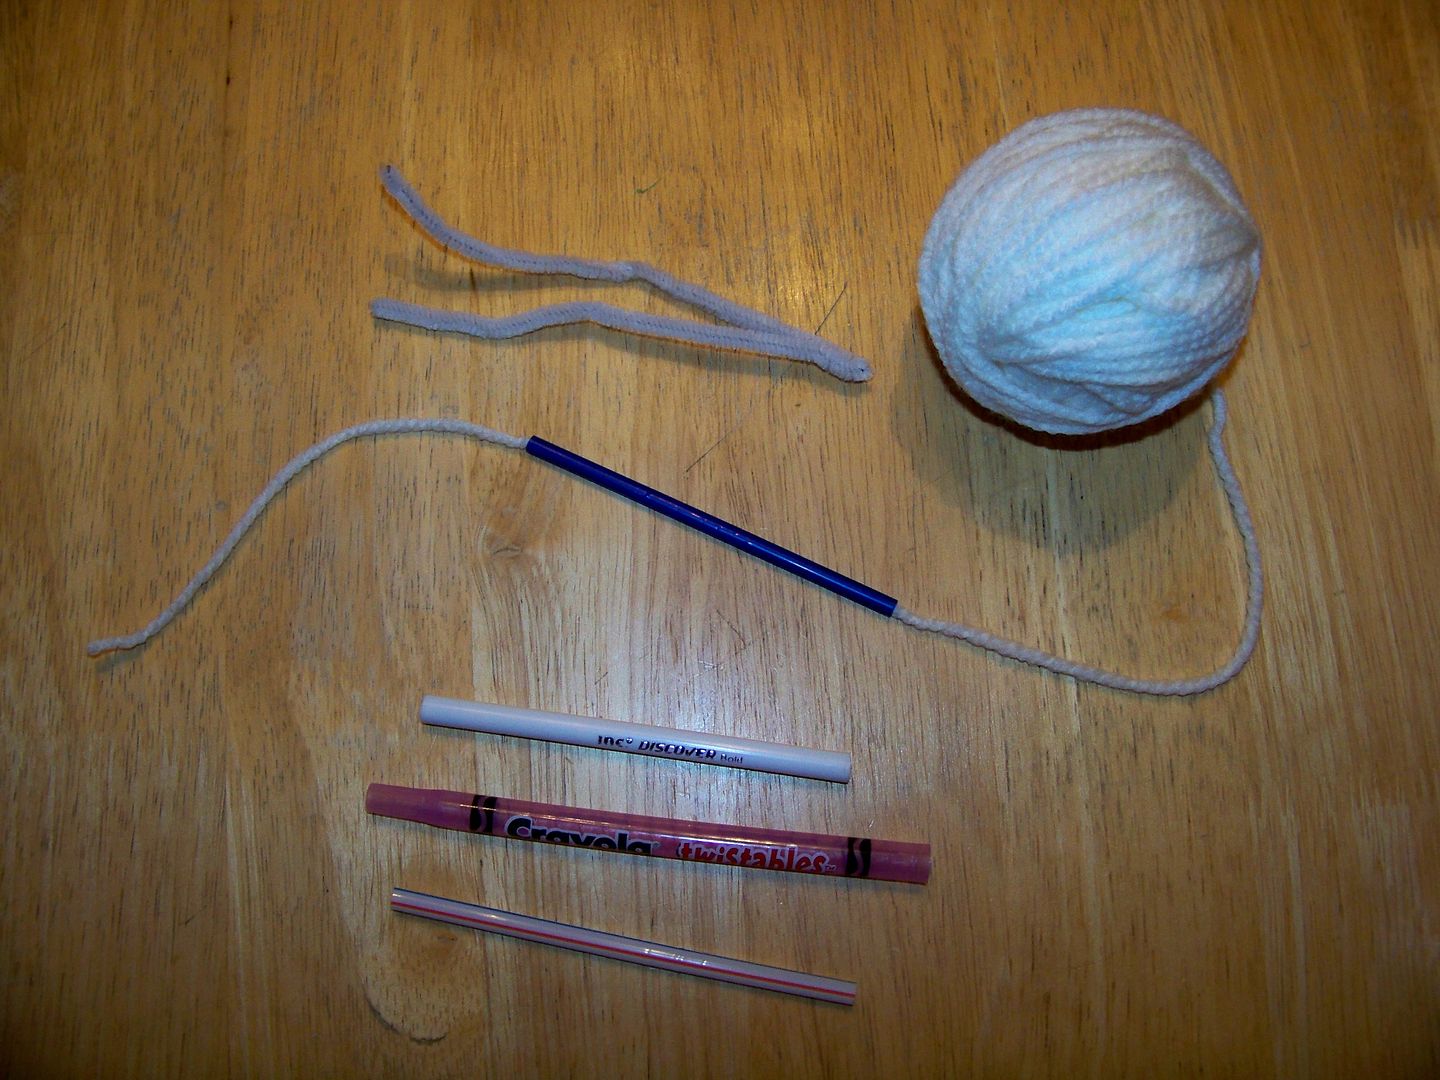
I also have started using a tool to e-wrap and loop around the pegs, which you can see on the photo above (the blue straw).  I mentioned this on my last post, but wanted to share it again because it makes a HUGE time difference when e-wrapping and doing the stockinette stitches!  To see a video on how to make what I call a stylus (and what the guy on the video calls a 'styler'), click here.  (You will want to fast forward 1 minute 14 seconds to get to the part on how he makes his styler).  I have used a cheap Bic pen casing, straws, and the outer plastic from a Crayola Twistable crayon as different looms have different amounts of space between the pegs.  (When I do a knit, purl, bobble, etc., I just scoot the stylus down out of the way and use my hands to work with the yarn; so far, I only use the tool for e-wrap and double knit stockinette stitches.)  I use a pipe cleaner just as in the video to thread the yarn through the straw. 

OK, back to the projects!  I wanted to make a hat to match the scarf. 

To do the hat, I used round green Knifty Knitter loom (36 pegs) - even number of pegs required for this pattern with my directions.  I did an e-wrap cast on going counter clockwise. 

For the first row, I did a knit stitch, then a purl, repeating this combo to the end of the row and continuing on the following rows until I had 1-1/2" of rows completed on my loom.  This creates the band around the head and doesn't roll.

Next, I did three rows of e-wraps.

Next, I used the 10-row combination listed above (from my scarf directions).  I did this three times.  For the bobble, I bobbled every 4th peg for the first bobble row.  On the next repeat, when it was time to bobble, I bobbled every 2nd peg.  Then back to the 4th peg on the third series.  This created an alternating pattern of bobbles for the hat, unlike the scarf.

Last, I did four rows of e-wraps.  My hat was 10" on the loom.  I did a gathered bind off.


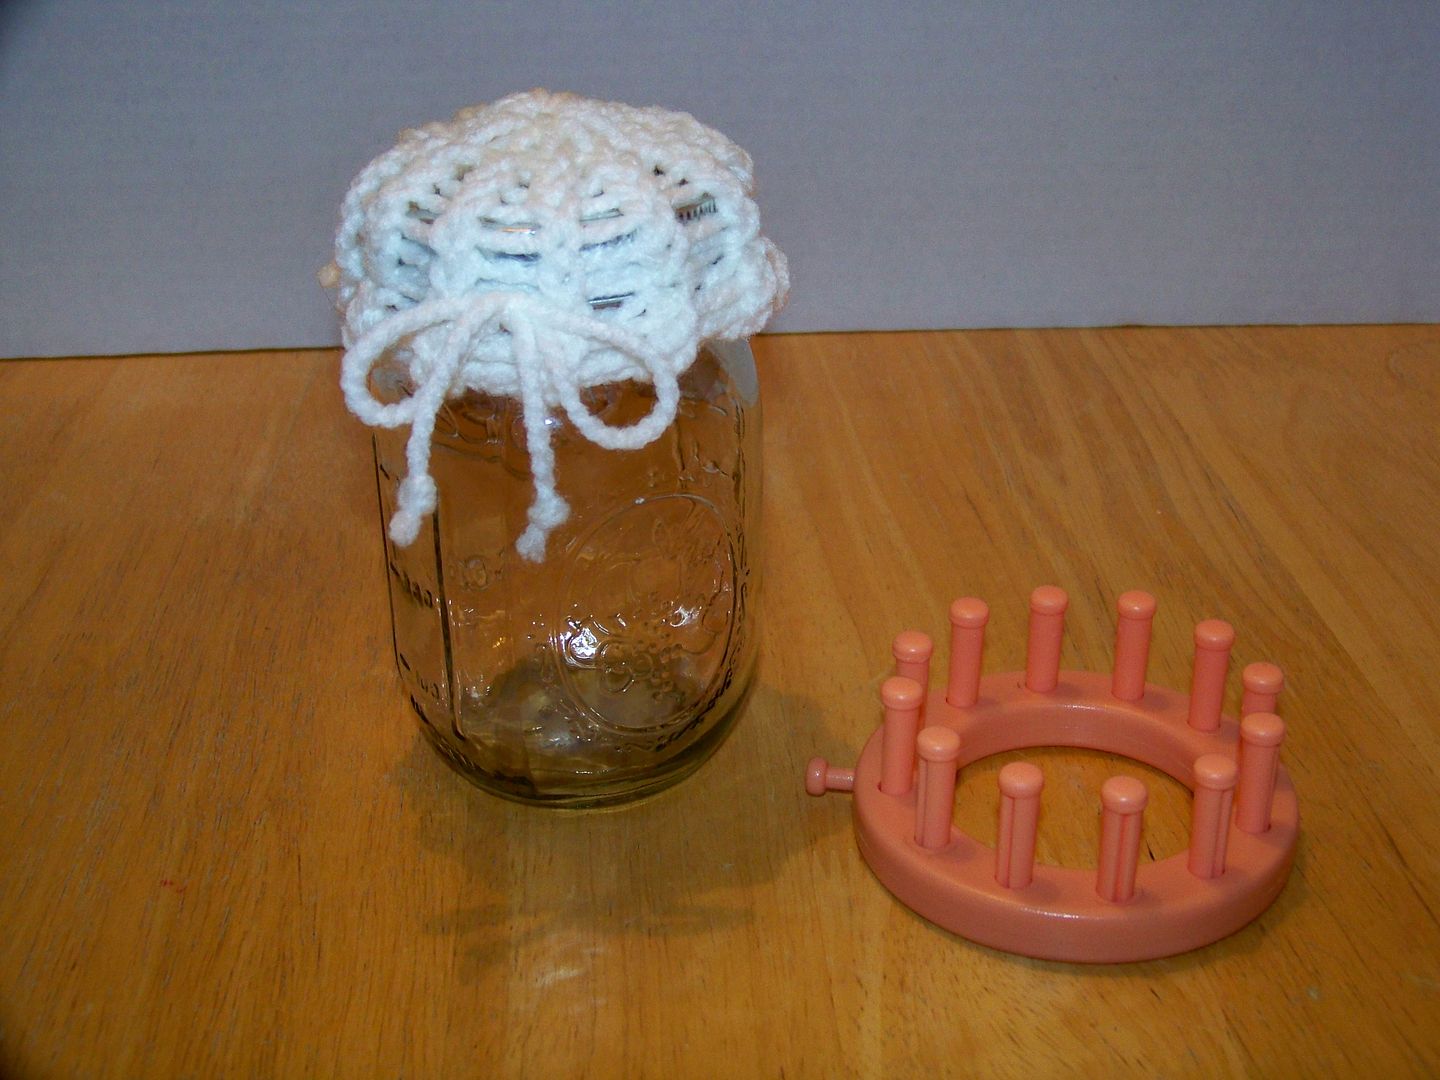
I thought it would be fun to play off the idea of  knitting and do a knitted jar lid for a layered cookie mix that was part of this gift set.  For tons of recipes for layered "in a jar" types of mixes, click here.


For this, I used the Knifty Knitter Flower Loom.  I e-wrapped 2" then pulled the bottom loops up to make a hem (just like for hats-- in fact, this is a little hat).  I continued e-wrapping for a total of 2".  I did a gathered bind-off to close up the top.  I used a crochet hook to help feed a piece of yarn around and tied it into a bow.  The e-wrap stretches and is very forgiving so it worked well for this!


I created a tag for the jar using the Paper Trimmings cartridge (page 62).  On my cartridge, for some reason the 'snowflke' and 'snwflk-s' are reversed.  I am not sure if that is the case for all the Paper Trimmings cartridges, but I just wanted to mention it just in case!  (I kept thinking I had done something wrong until I realized it must be a error that they were reversed in the book).  I cut the image and shadow at 3" on the Expression.  I ran the snowflake through the Xyron and used chunky glitter on it.

I created a card using the same Paper Trimmings snowflake (without shadow this time) at 1-3/4".   The papers were embossed on the Cuttlebug.  For the embossed kraft paper, I rubbed a white Studio G ink pad over it to emphasize the shapes.  I embellished the card with tiny stars that I punched, ribbon, and twine.

Thank you for using your time to check out this post-- I know this is a super busy time of year and I appreciate your visit!  This week, I am finishing up a costume for my daughter's school event that I have made with my sewing machine and my Cricut-- hope to share that soon.  I am also sewing doll clothes like a mad elf and loom knitting wherever I have to wait.  I hope your seasonal crafting is keeping you happy as you complete gifts, cards, and decor to make the holidays special at your house!

Monday, November 28, 2011

A Week of Loom Knitting!

Wow, what a week!  Last Monday, on the Cricut Blog, Kristen Swain posted her Knifty Knitter project.  In her post, she mentioned completing it in an afternoon!  That little gem encouraged me to dust off the looms I have and try loom knitting!  I had been pinning loom tutorials on Pinterest, thinking I would try using my looms this winter, but her quick project spurred me to try it now! 

I am not a knitter (although lots of ladies have tried to teach me over the years and have failed!) and I have never tried crochet.  I have done weaving though-- the first time was while I was still in high school and attending a summer college program at Berea College whille working in the historical loomhouse there.  When I started thinking of this as weaving, it fell into place for me!

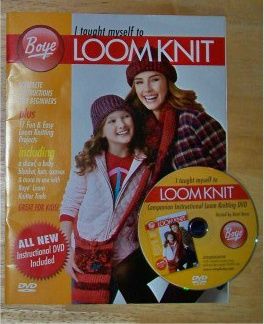
I already had all the looms -- in the store, they always looked like a good idea but the directions were too hard to figure out once I got home.  (Does that ever happen to you?)  I think that's why they have just been setting here, getting dusty.  So, the first thing I did after seeing Kristen's project was to get a book with a DVD to help me.  (This Boyle book was from Walmart for around $15). 


I highly recommend this one!  I watched it all the way through and then just re-watched segments as I tried new things.  I started off by making doll-sized hats and scarfs so that I could tell pretty fast if it was going to work out... and to my amazement, it did! These are my last doll-sized items.


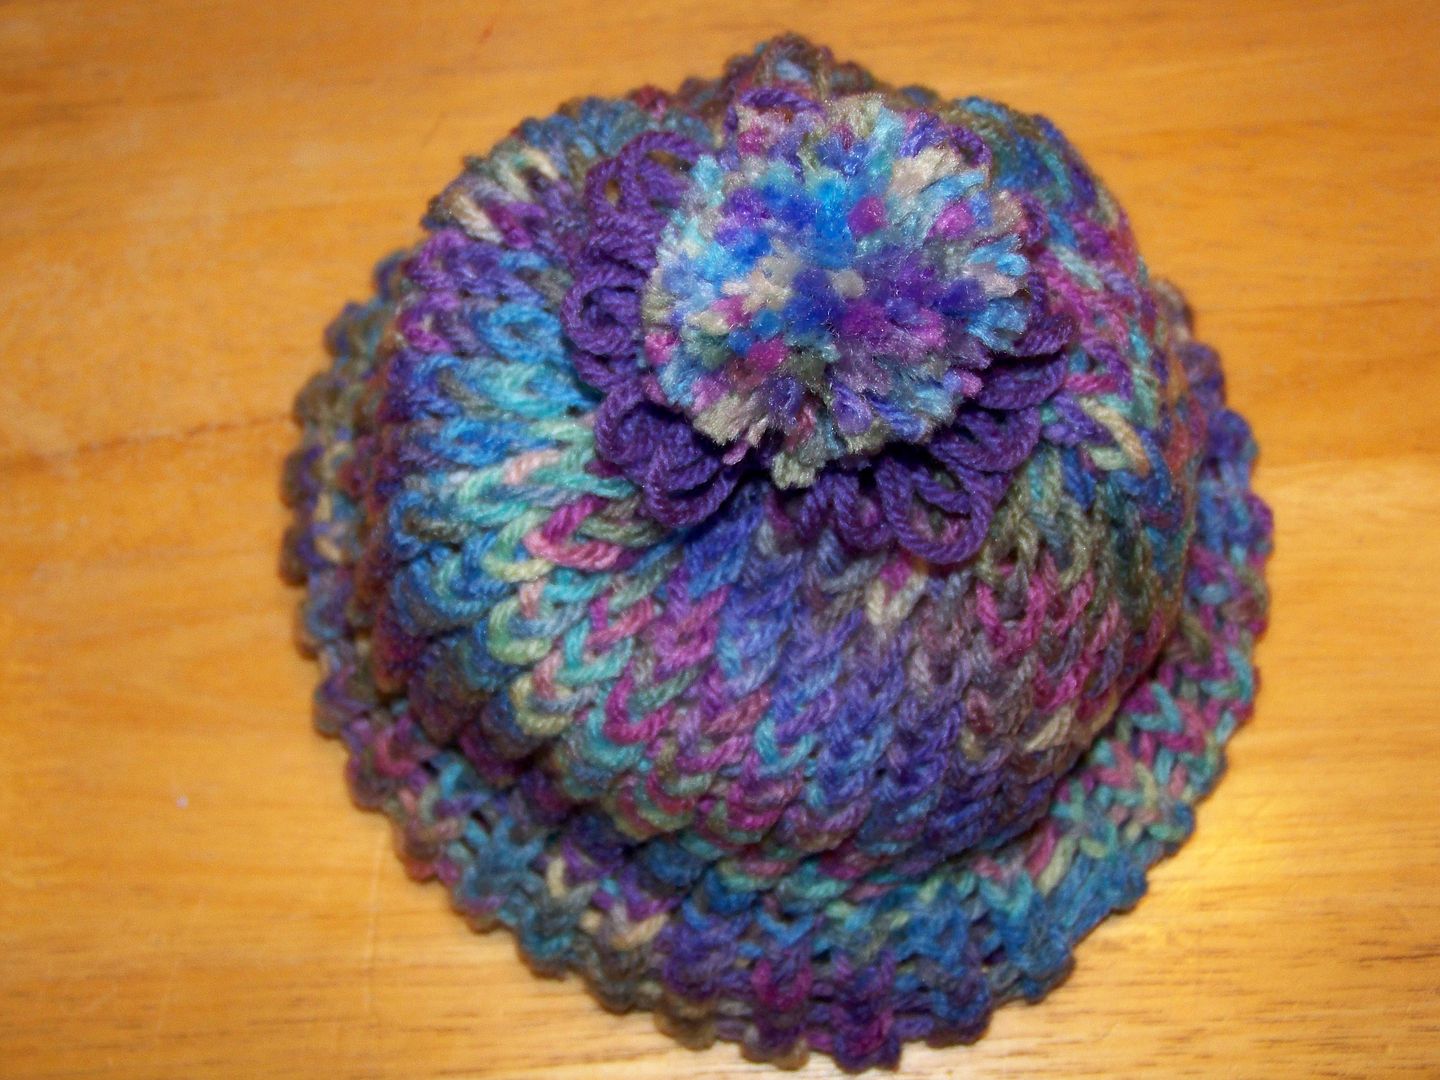
This doll hat was made on the smallest circle loom. (This is the one for baby hats.  I did try the flower loom but it was too small for American Girl Doll heads!)  I added in a few rows of flat stitches among the e-wrap rows, giving it that shape and I learned how to do a color change.  This one had a hemmed brim and a gathered bind off.  The decorative flower was made on the spool knitter.  The scarf was made on the spool knitter as well (large end). 

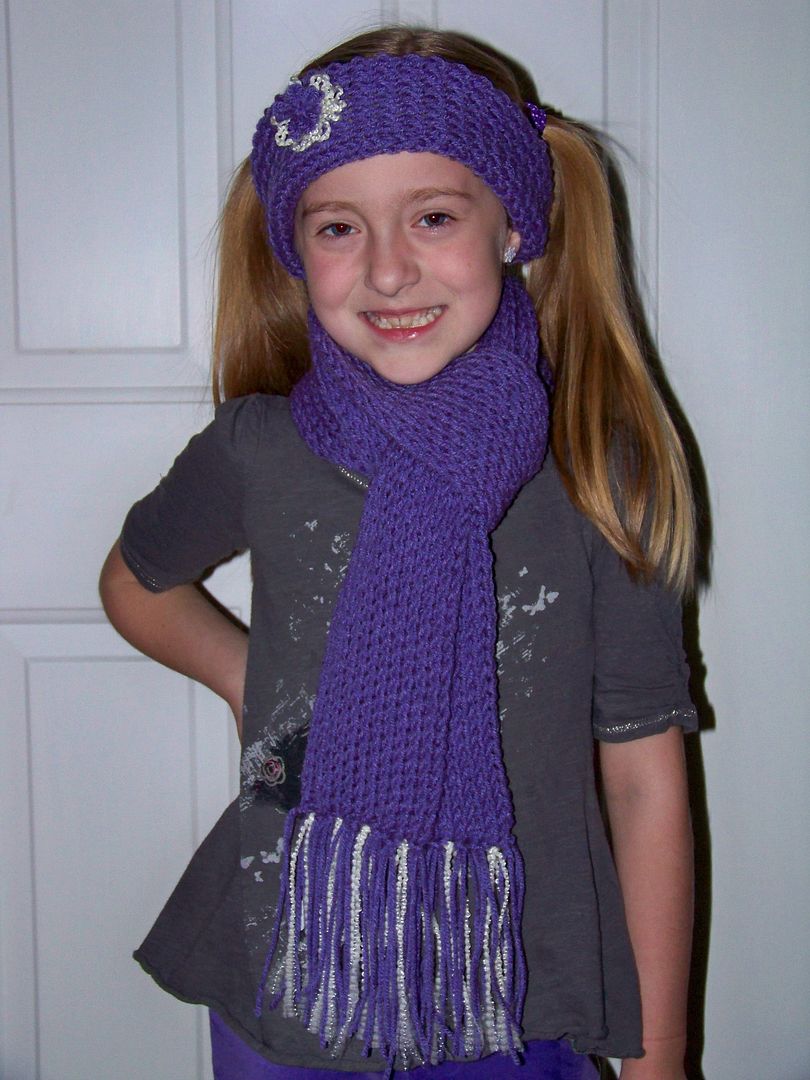
I tried a similar ear wrap for my daughter like the one Kristen made on the Cricut blog ....


... while learning how to do a flat panel with slip stitch edges, flat panel bind off, and a flower loom embellishment.  Then I figured out how to do double knitting and that changed everything!  This scarf is a double knit stockinette, which is a reversible, thick weave with sides that do not roll.  I also figured out how to do fringe correctly, creating a 4" fringe by making 11" cuts.  The scarf finished out at 4-1/8" wide and 50-7/8" long (measurement does not include the fringe). 

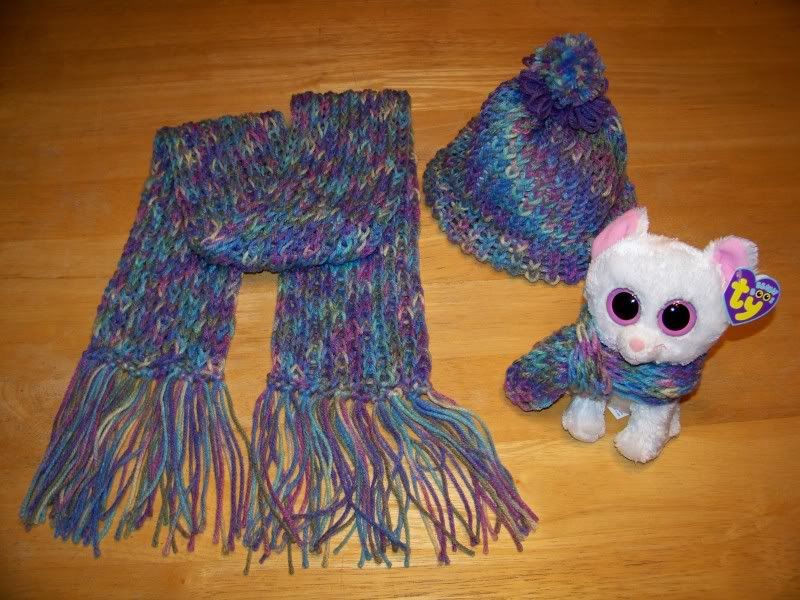
Then I decided to try a gift!  This set was made for my 3-year-old niece.

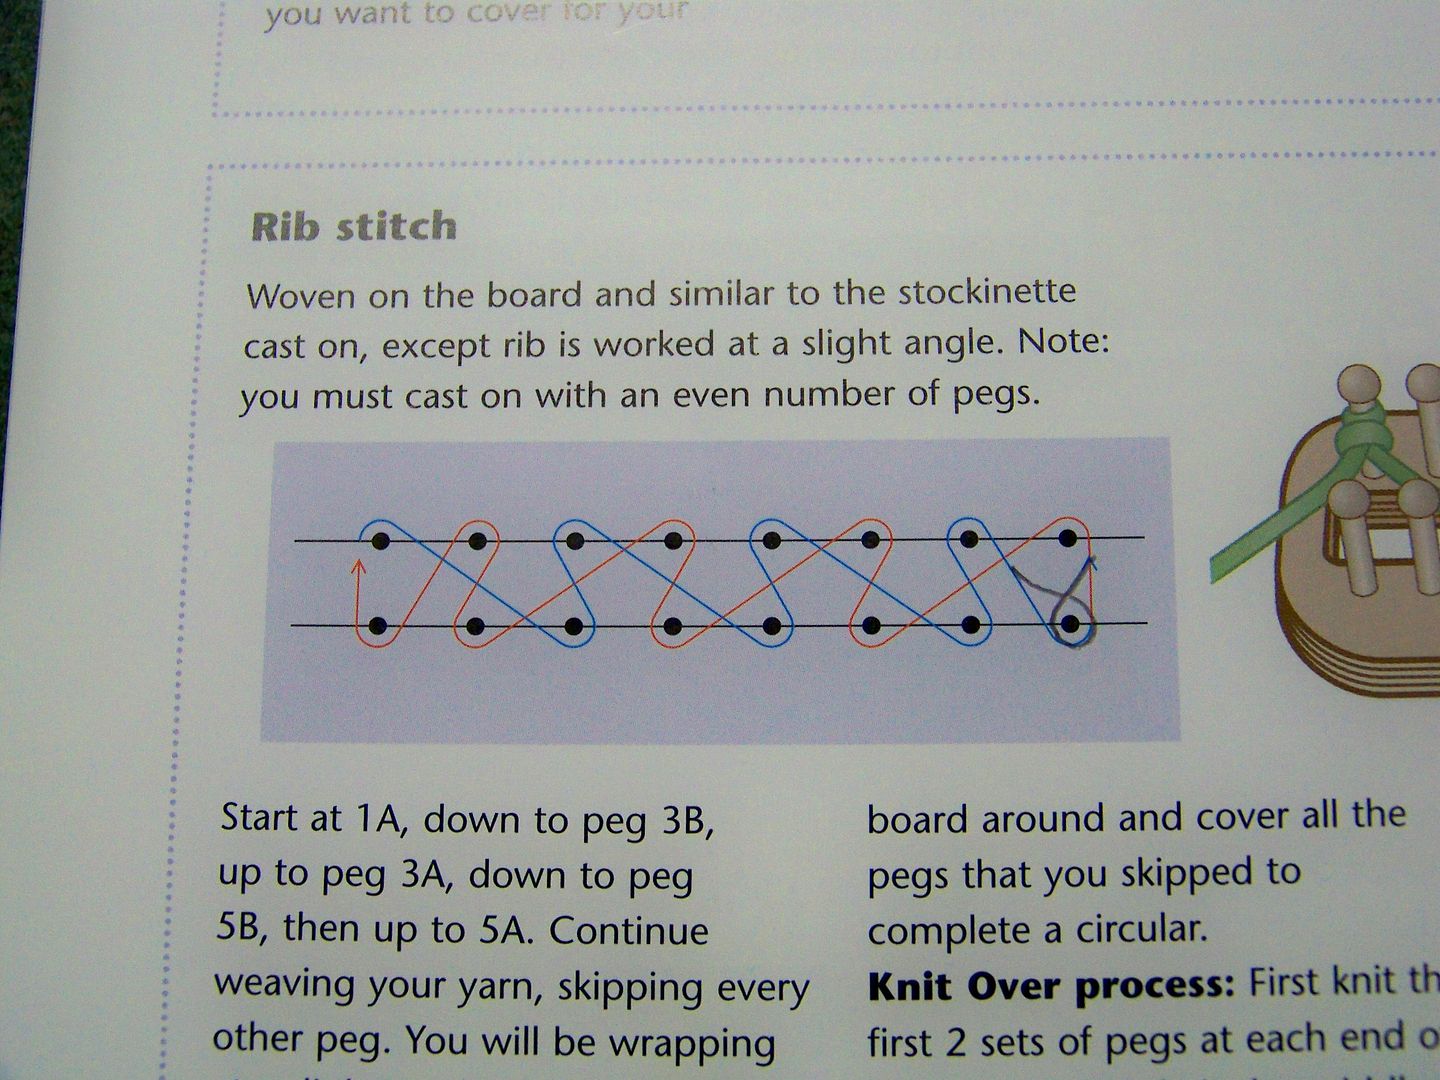
The child's scarf was made on  the smallest long loom (pink), using a double knit ribbed stitch.  I used a diagram I found in a book called the Loom Knitting Primer.  I impressed myself by figuring out an error in her design and fixing it by twisting the yarn on the last lower peg.  (I am pretty sure I have a knitting angel that inspired the solution!) 


The scarf finished at 43" (before fringe) by 4-1/4". 


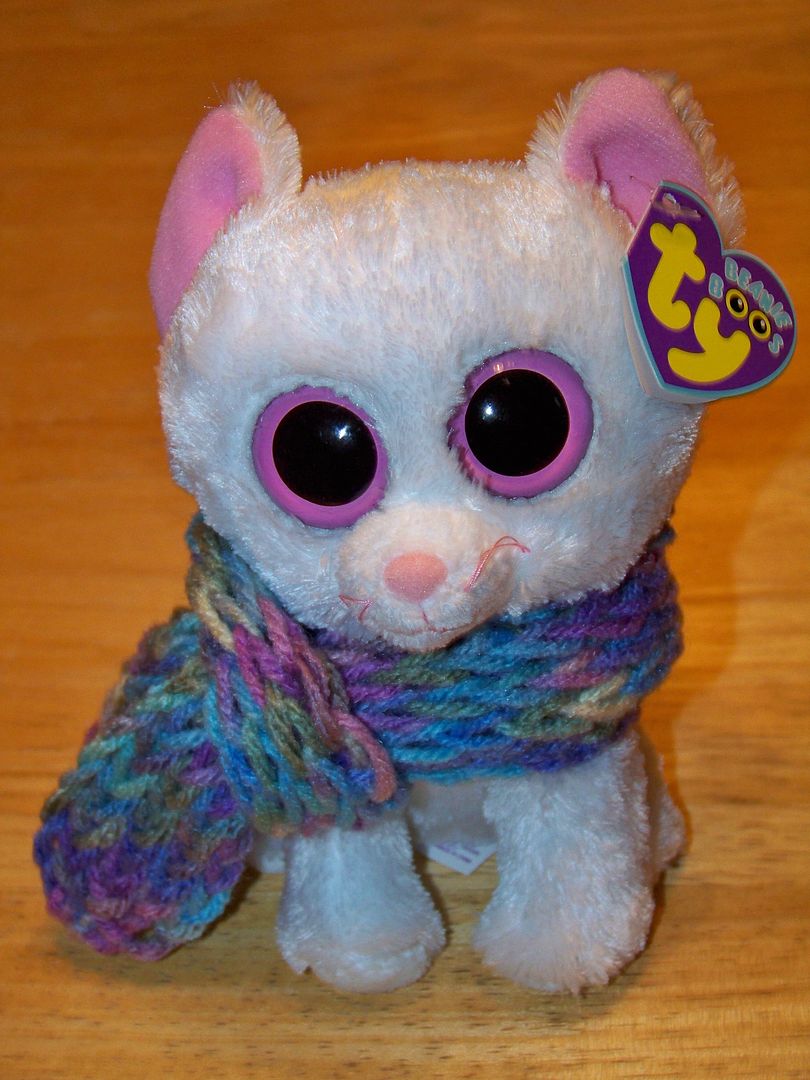
The hat was made on a round loom with a hemmed brim and gathered bind off.  I used the small adult size one (green) because this child has TONS of wild curly hair!  I made a pompom (using a small Clover pompom maker) that I placed over a flower made on the flower loom.  I made a scarf for the "Big Eyed Creature" (what my daughter calls these critters) with the large end of the jumbo spool loom, knitting until it measured 21-1/2", and using a gathered bind-off and a yarn needle to cinch the ends.


Next, I wanted something for my mom and came up with this scarf.


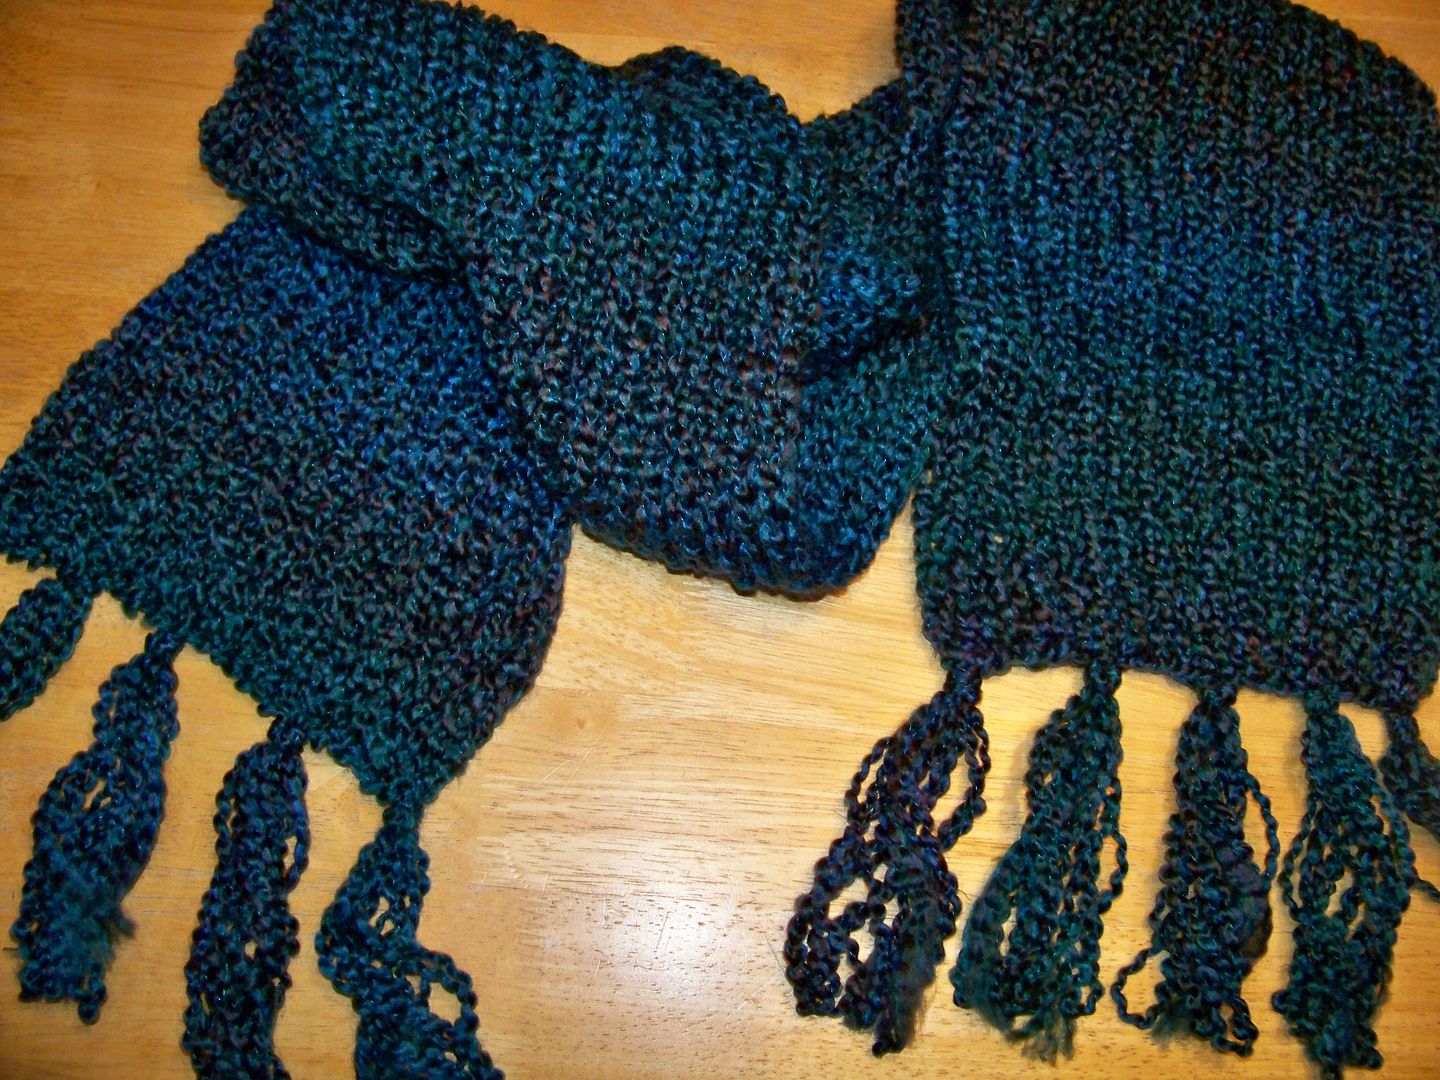
I used the scarf loom from Boyle (red) and Lion Brand Homespun yarn in 'lagoon'.  I love the luxurious soft hand the yarn gave to this project!  I wove this very loosely so I could keep the curliness!  I wove it until I had used the whole skein and then cut from a second one to do the tassel fringe on the end.  To do the tassels, I measured out 12", folded it, measured another 12", folded it, and continued until I had three loops on one end, two loops on the other and two cut ends. 

I took this 12" hank and folded it in half and slipped it in a stitch, pulling it through to knot it, just as for regular fringe.  I put five on each end and really love the result.

I am just shocked that all of this has happened since Monday!  I have done 11 projects this past week as I learned, in between work, family functions, cooking for Thanksgiving, cleaning, and taking my daughter places.  I have discovered a whole world of looms and have my eye on an Infinity loom that makes a 5' wide afghan! 

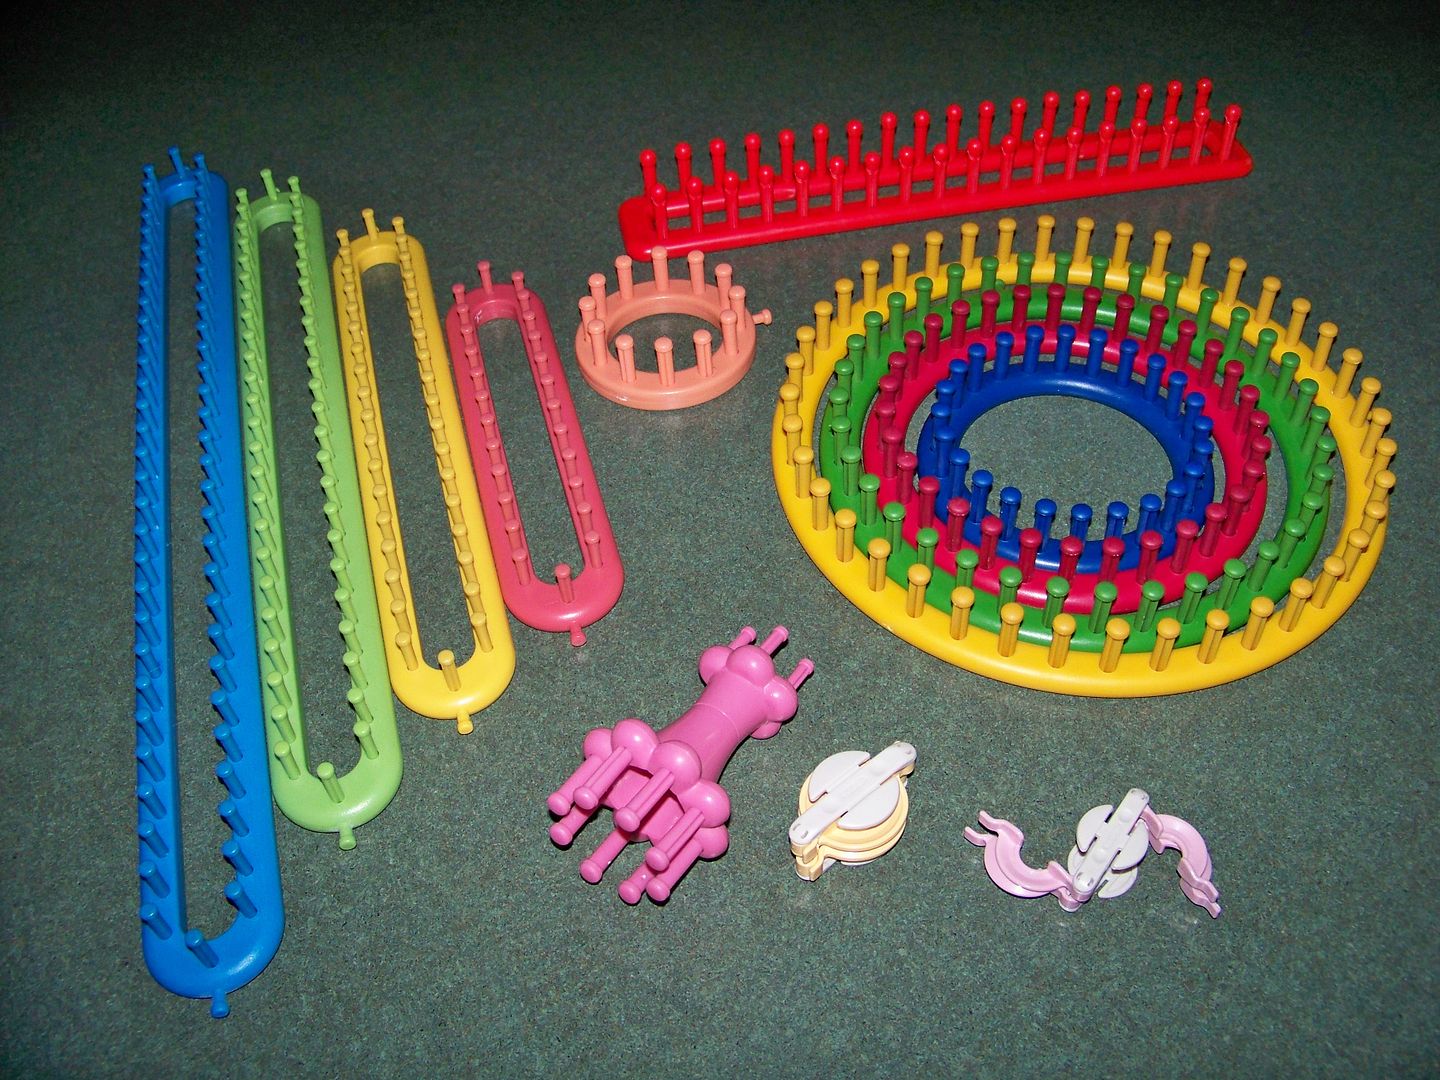
As a result of this week of learning, I can tell you that there are a few extra supplies you will need in addition to the looms to help complete your project.  I already had the Knifty Knitter looms and a few basic supplies.  This is what is now in my knitting chest (in case it is helpful for anyone getting started):
  • Set of Knifty Knitter long looms
  • Set of Knifty Knitter round looms
  • Knifty Knitter flower loom
  • Boyle scarf loom
  • Knifty Knitter jumbo spool knitter
  • Knifty Knitter flower loom
  • Yarn needles, loom tools that come with the looms
  • Crochet hook
  • Tape measure
  • Embroidery scissors
  • Knitting gauge and row counter
  • Notebook with pen (the best thing in my bag!)
  • Books:  Boyle- I Taught Myself to Loom Knit and Loom Knitting Primer by Isela Phillips,
  • Clover pom pom maker
  • Yarn
  • Homemade stylus and pipe cleaner threader --adapted pen to aid in wrapping yarn around pegs- check out this video (1:17 minutes into the video) to see how to make your own!
For those of you who are seasoned loom knitters, thank you for letting me show off my simple beginner projects.  I am 41 and have tried for at least 30 of those years to knit!  I have all kinds of new projects in mind and I know I have so much more to learn!  I have been a big fan of Jeannie Phillips' beautiful knitted projects; now I am sure I will look at her projects with new eyes as I try to glean some of her crafty genius.

Thank you for visiting my blog.  As always, you can see all of my projects (linked to original posts with all the how-to details) by checking out My Project Gallery at the top of my blog, or by clicking here.

But wait! There's more! Click 'older posts' above!

But wait!  There's more!  Click 'older posts' above!