
I always wanted an embroidery machine to enhance my sewing, but up until now, it had a life of its own as I learned to use it with blanks. Today, I worked on a project that I wanted to do for Christmas but time ran out for it. I digitized a pattern piece for a bag: corners that are both functional and decorative. It is something that was supposed to be applied like an applique with satin stitching. The pattern author intended that a regular sewing machine be used, but I like the absolutely perfect satin stitches that my embroidery machine does better and thought this would be a great project to try out my idea of digitizing pieces from sewing patterns.
There are probably better ways to do the digitizing that I describe below, but I am really still learning and just jumping in to do things with what I have figured out. Apologies to any seasoned digitizers who find themselves screaming at the computer that I am doing it wrong!
I started with Simplicity 1129. It is a child's sleepover set that has so many cute pieces, but it was the overnight bag that got me! (Joann Fabrics has crazy pattern sales from time-to-time. This was purchased during their $1 sale. I keep my eye out for those!)

First, I found the pattern piece and scanned it in my computer so I could put it into my software. I measured the actual pattern piece so that I could size it later in the program. It is 4" across, going through the small dot at the "V".


I wanted to first make a placement guide so I would know where to put my fabric bag front and back pieces on the hoop. I used the Draw with Points button to trace the image. I used the Open/Close Outline to close the shape. Then I selected the Run button to make it a stitched line. I made it two-pass.

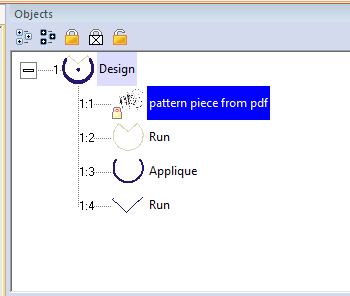
I can see in the Objects Pane my image that I traced and my run.

Next, I wanted to make the applique. I only wanted satin stitching outside the seam allowance. (Putting it inside the seam allowance would add bulk unnecessarily). I did a second trace starting from the stitch line printed on the pattern and moved all the away around the image to end at the stitch line on the other side.

To turn my outline into stitching, I clicked the applique button.

It put the applique stitching on the outside of the shape. I found the Create button on the toolbar and selected Outline, then Reverse Points. That moved my stitching to the inside of the circle. I selected the satin stitch.
Next, I wanted to make a tailor tack mark. I did the same trace by drawing with points and then turning it into a run.

And that left me with my digitized stitching lines.

I saved it and printed it out.


I cut out the fabric pieces for the bag. I applied the digitized corners onto the fronts and backs using my embroidery machine and the new file I just created! I matched the cut lines to the stitched placement lines.

I can turn the hoop to the back to see how the placement lines and the fabric piece match up perfectly through the light.

From there, I stitch the applique just like any other applique, adding the corner fabric, backed in Heat N Bond Lite, and then trimming after it stitches, then allowing the machine to satin stitch over the cut edges.

I repeated the process for all four corners and trimmed to the pink fabric cut edges.
I stitched the monogram on the front as well. This is Designs by Juju #719 Open Vine Monogram.

With that, my front and back pieces were ready for construction.

I did add a little name tag inside since this was for a child. So to the lining back piece, I added a frame from Planet Applique and text from Jolson's. This is Tiny Fonts Script #61.

I followed the sewing pattern directions, although I did make a construction change in that the pattern suggests combining the front fabric, batting stabilizer, and lining fabric together, stitching as one. I prefer a fully lined bag with no raw or even serged side or bottom seam edges showing so I lined the bag separately. I also turned the inside bag bottom (board) and filled with Peltex instead of zigzagging the edges closed. This way, the inside of the bag looks as finished as the outside.

And the corners turned out just perfect!


This is the Eye Mask from Applique Corner. It is #2475 In-the-hoop Sleep Mask. It was made completely in the embroidery hoop and is super fast to do. I did add a few inches to the elastic length they suggest. Although this is for my niece, my daughter modeled it for me.


List of links shared in this post (these are not affiliate links; just direct links only):
- Simplicity1129 (I bought mine from Joann's but this link is to the Simplicity company): click here.
- Embrilliance Stitch Artist: click here.
- Embrilliance Essentials: click here.
- Designs by Juju Open Vine Monogram: click here.
- HeatNBond Lite (hnbl): click here.
- Gigi Frame from Planet Applique: click here.
- Jolson's Tiny Fonts Script #61: click here.
- ITH Sleep Mask #2475 from Applique Corner: click here.
Additionally...
- The fabrics all came from Walmart and were pre-washed for absolutely no good reason since I don't anticipate that the bag will ever be laundered.
- I used fusible fleece that I adhered to my fabric with a steam press. The pattern called for Peltex but I was feeling frugal.
- I used Peltex in the bottom board only.
- Pattern and zipper were from Joann Fabrics.
- Embroidery threads are Metro.
- I used tear-away for the applique corners and poly mesh for the ITH eye mask.
- Sewing was done on a Brother Runway sewing machine and embroidery was done on a Brother PE770.
- I added cord to the handles to make them keep their shape and have grip.
8 comments:
The sleepover bag for you niece is gorgeous! Thanks for sharing how you digitize pattern pieces. Love your blog. ~Suzanne~
Great idea.
WOW! You are so good at everything! What an adorable little sleep over bag! I loved the tutorial! Brilliant! Thanks so much! I would have never thought of digitizing a sewing pattern to create a placement guide for embroidering! Your daughter is one lucky little princess! These are the golden years for sleep overs, how fun!
I absolutely LOVE how your bag turned out. Thanks so much for sharing.
Blessings,
Nancy
This is amazing! I just love what you have expanded the use of the software towards! Great project, great colors, superb idea! Thanks for sharing!
Fabulous and descriptive post. I'm new to ME and your clear instructions are wonderful. Thanks so much.
I'd like to join your email list if you have one: cyn4rest (at) hotmail (dot) com
Thank you so much for sharing ALL the info on not only HOW you went about your digitizing, but also all info of brand names, sources, etc. of everything you created! I get VERY FRUSTRATED when that info is not shared and I wasn't too make a similar item.Your photos helped a great deal also. THANK YOU
I love this bag, Nadia. I don't embroider, but I do so. May have to lift this one. Love, love, love it.
Post a Comment