
We went to Sarasota, Florida for a spring break trip for work and I was struck by all the ladies who wore their pretty straw hats while shopping at St. Armand's Circle. I knew I wanted my own before we went back to Sarasota. I have done ball caps before so that was my previous hat experience, and I do have a tutorial on that on this blog that you can visit by clicking here, but following are my notes on embroidering on a straw hat.
As luck would have it, I found this sweet and simple straw hat at Walmart for just under $9. I used my Embrilliance Essentials software to type in a font from Eight Paws and a Claw called Infinity at 3". This is a BX font. In my Embrilliance software, I have the ability to adjust density, which I accessed by selecting the object, clicking on the stitch tab in the Properties Box, and sliding the satin density lever. I wanted to add to the density since this font was not digitized for foam. I have not done much in the way of experimenting here so if you have insights, I would love to see your notes! I stayed a bit conservative on my adjustment just to keep it from getting crazy. I moved the slider to 11%. I knew my foam would match my thread exactly since I was using black, so I had a lot of margin for error! If I had been using a different color, I might have been more inclined to test this before stitching on my hat.

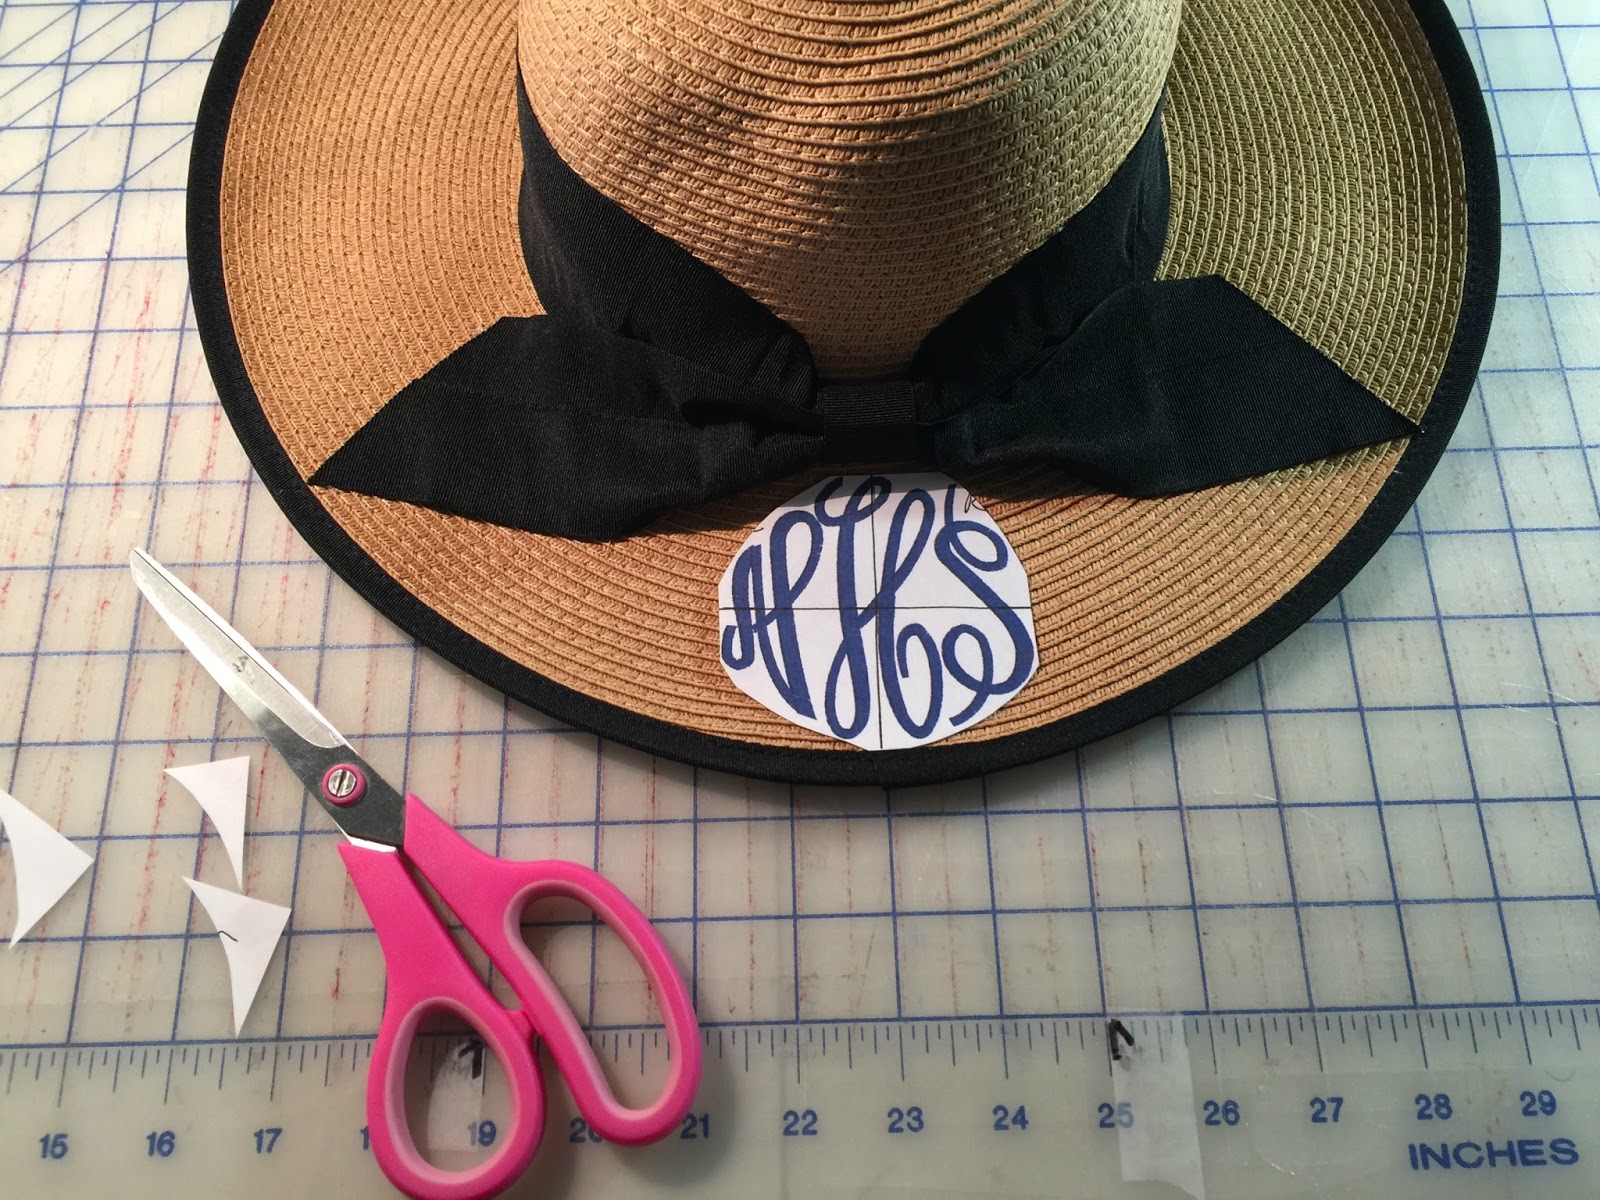
I printed off my monogram to see if the size looked right.
I hooped tearaway in my 5x7 hoop, extended the cross-hairs on my printout, and aligned the cross-hairs on my design with those on my stabilizer. I taped it in place.


I remove my paper print out, leaving behind the thumbtacks.


I pin my paper print out to my hat, making sure to align the vertical crosshair with the center back of the brim.


Then I place the hat and print out on the hooped stabilizer, carefully making sure that the thumbtacks go back in the EXACT holes that were made previously in the paper. This is the key to the whole thing.

I pin the hat in place and remove the paper print out AND THE THUMBTACKS. I squish the crown of the hat to get it (and the bow) out of the way of the embroidery machine. I want my pins out of the way too so the needle won't chance a meeting with them!

I cut two pieces of 2mm embroidery foam a little bigger than my template. SPECIAL NOTE: I have thought this was just craft foam ever since I received it from World Weidner. I said that in the cap tutorial as well. It looked like craft foam just like the kind I have gotten at Walmart in the craft department. There is a part of me that still wonders if it is simply craft foam because it is so much less expensive than the Sulky brand foam, but the company promotes it as "embroidery foam". Kyla McCrary, so knowledgable and from one of the embroidery Facebook groups, has clued me in that regular craft foam is not good for embroidery machines. For this reason, I have to alter my notes here to suggest that, washing or not, I will be using embroidery foam in the future and investigating from World Weidner if their product is as stated or simply just craft foam.

I let the machine stitch out the design.


I trim any jump stitches and then peel off the foam.

The tweezers help for little pieces. I tear off the tear away, making sure to get all the little bits. This is the reason I didn't use spray textile adhesive. Although the wrong side of the stitching is hidden by my neck, I want the back as clean as possible just for neatness.

Now...this is where I have to tell you something. You may have noticed in my baseball cap tutorial that I used the tip of my iron to melt away an little raggedy bits of foam. Well...and this is the confession part of this post, I got a clever idea to use my Plaid 2-in-1 Wood Burner so I could easily pinpoint just the edges and bits. Apparently this tool heats roughly to the temperature of molten lava. It melted my polyester thread a bit. You can't see it by looking but there *might* have been a little smoking and I can feel it! It didn't seem to ruin my hat at all, but DON'T DO THIS (said in my firmest parental voice). I won't be doing it again. Next time, I will go back to using the iron (or more likely, I will keep my eyes peeled for something similar with a heat control).


- My baseball cap tutorial on this blog: click here.
- Floppy hat with bow from Walmart (I got mine at the store): click here.
- Embrilliance Essentials embroidery software: click here.
- Embroidery foam from World Weidner (this is what I used but until I find out if it is true embroidery foam, I will be using Sulky brand foam from here on out): click here for the World Weidner. Sulky makes verified embroidery foam.
- Infinity font by 8 Claws and a Paw (website is no longer available but they are on Etsy)
- I used polyester thread by Metro and tear away from World Weidner. I used an Organ titanium embroidery needle (size 75/11 sharp).
- I got the idea for what I call "The Thumbtack Method" from a class I took on Craftsy by Lisa Shaw called Big Embroidery with a Small Hoop. I highly recommend this class. She uses this method for aligning designs but it took it past that and now I use this method most of the time for centering my projects on my hoop. She recently blogged about this if you are not quite ready for a class but are hungry for a little more: click here.
Thank you for checking my post today. To see all my embroidery projects with my notes, my resources, links to videos, and other handy embroidery info, check out my Embroidery page on my blog or click here.
4 comments:
You are so clever and thorough! Thanks for telling us every little detail. Now, I feel like even I could do this! Off to find a big hat for my big head!
A big thank you for sharing you knowledge and skills. ..I am a newby but with your step by step guide I will have a go. Thanks again.
Thanks so much for the instructions. I really appreciate the time involved in writing this out. I've leaned from your tips. I've down hats like this but it's been hit or miss. With your technique, I'll have a better plan. Thanks again. Bill Nicholson
I just stumbled across your blog (through pinterest) and I am so happy! Thank you for wonderful ideas and very thorough instructions and good photos! I hope you have a marvelous day, you've certainly improved mine!
Liz
Post a Comment