Wednesday, April 18, 2012

WOYWW 150: Giant Rose

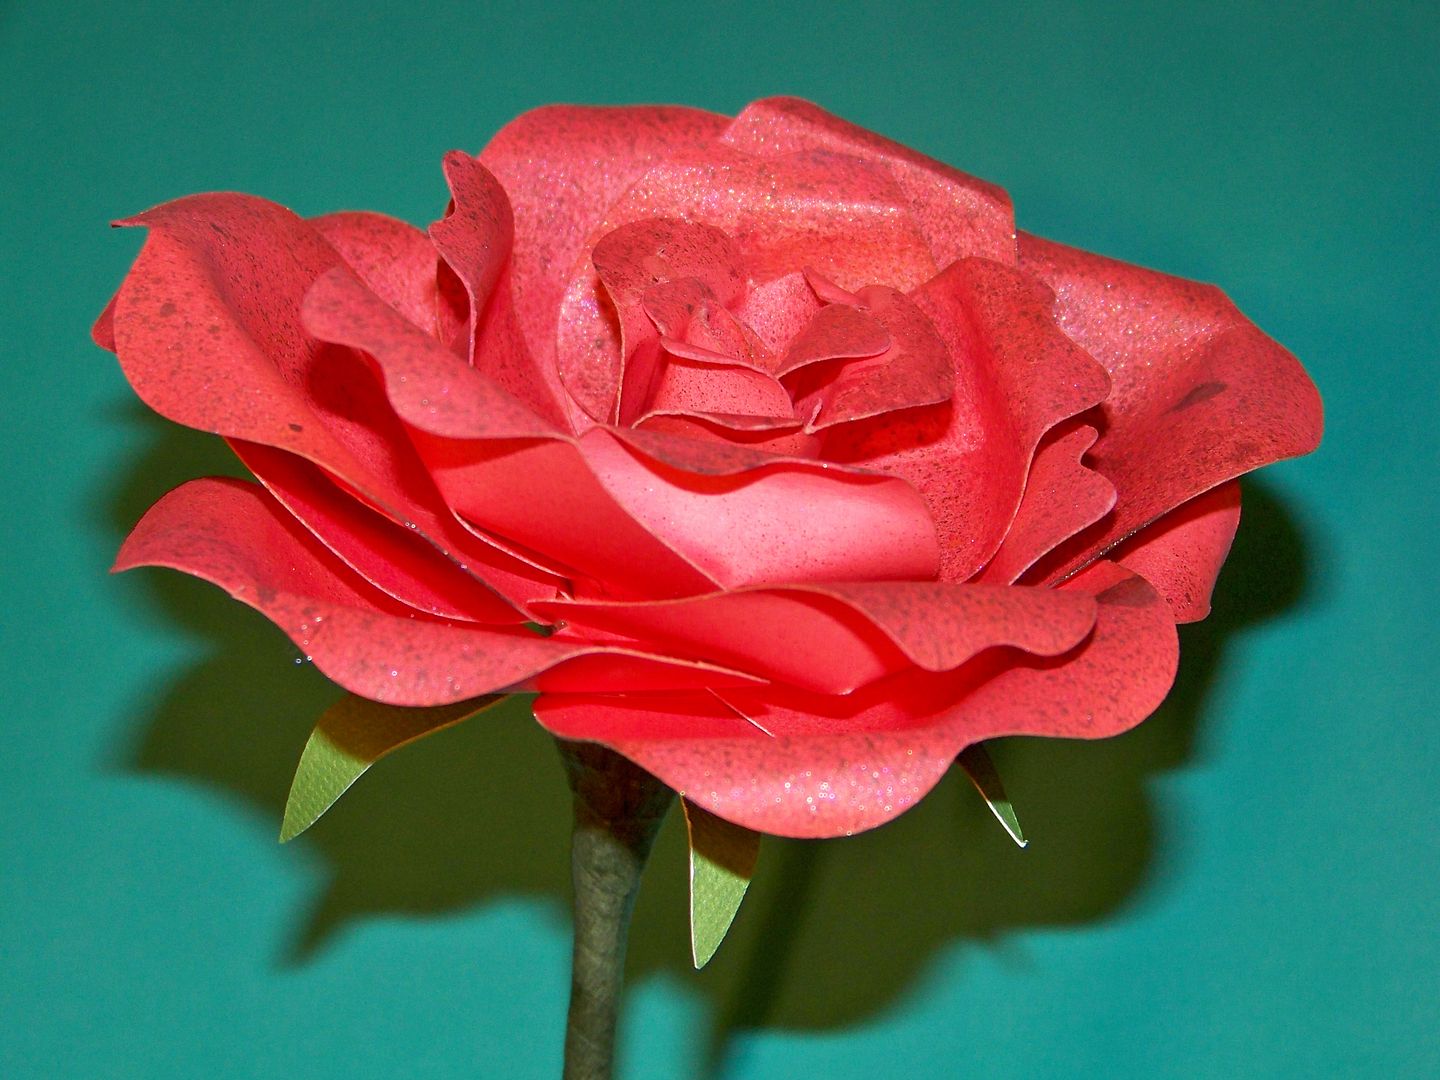
After seeing so many WOYWW posts on OhhhSnap, I finally am doing one of my own.  Let me just apologize right now for the honesty in clutter!  This morning before my family woke up was all about making paper roses -- cutting, inking, spritzing, and hot-gluing them.


If you don't know what WOYWW is, then you are obviously not a truly nosy person (like me).  It stands for What's On Your Work-desk Wednesday and is a little snapshot of just that-- mess and all-- showing a ghost of what was just created or what is getting ready to be made... or nothing much.  You can link your own on the Stamping Ground blog and see lots of other crafters' desks (that's where the nosy part comes in) and get acquainted with different blogs.


I was working on the rose from the Cricut cartridge Giant Flowers.  I found that cutting at 4" yields a 5" diameter rose.  I need lots more practice before I can make these in red for my Kentucky Derby centerpiece, but it was fun trying this out!  If the directions look a little confusing, check out this video by Janice "The Cricutologist":  Giant Flower Cricut cartridge-4 inch rose part 1.  I will warn you that it is unedited so you will see the whole process in real time (yikes) and her kids can be heard during most of it (but I kind of liked it because I felt like I was right there in her craft room at her home).  

So... here's my finished practice rose.  After watching the video, it was incredibly easy to do.


(I know I promised my next post would be next Monday and it would be my contest card... but I changed my mind!)

Happy Wednesday!   Soooo... what's going on in your craft space?


Monday, April 16, 2012

Cheery Projects

It has seemed like spring through most of the winter here in Kentucky with crazy high temps and mild weather--- with a few tornadoes thrown in!  But now we are deep into spring.  The lilacs and tulips have just gone and the irises are starting to bloom.  Dogwood trees have been gorgeous this year!  And... we have been mowing the grass for a month and a half now!  My battle with the dandelions has been a tough one, but I am clearly the victor in the front yard (thank goodness for the privacy fence in the backyard because that's a different story!)

The flowers have cheered me out of my gloominess this year and I started crafting again.  Yay!  Today, I wanted to share a couple of cheery projects I made, hoping to bring smiles to someone else.

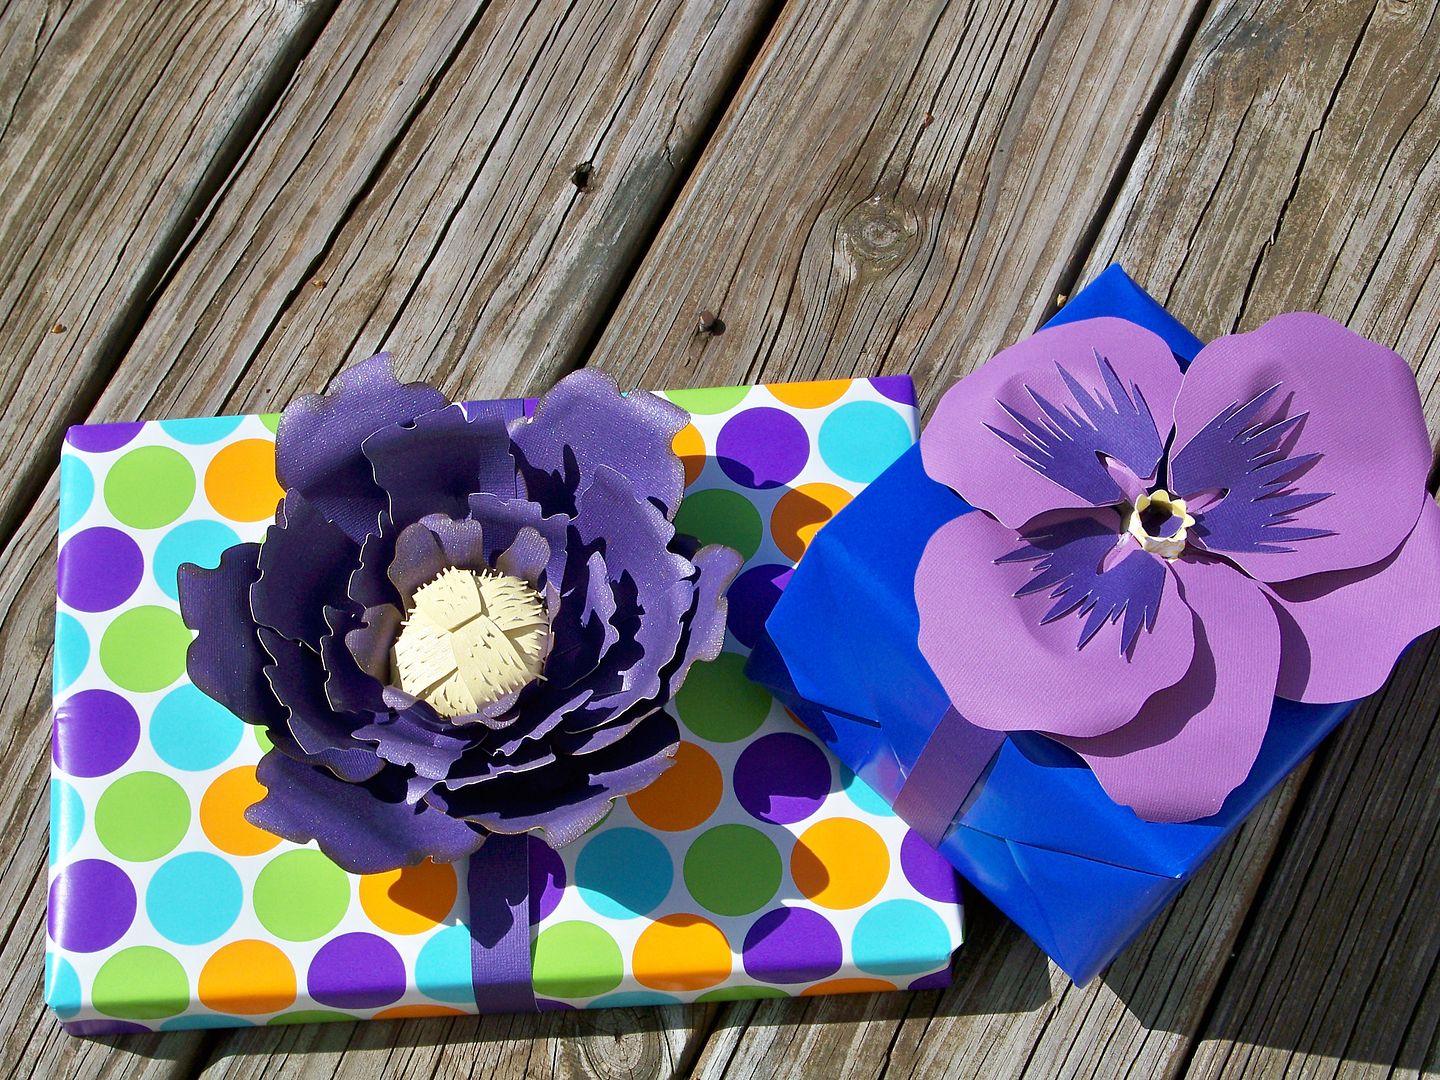
I tried out the Giant Flowers cartridge for package decorations.  Wow!  Love this cartridge.  My humble request to Provocraft:  Please come out with Giant Flowers II:  Holiday Blooms!  I would have loved Easter lilies as I decorated the Parish Hall for the Easter Vigil and I know giant poinsettas will be a must-have this winter!


I used hot glue to create mine.  Both of these were cut at 4" on the Expression using colored paper.  I hot-glued them directly to the boxes to attach them to the presents and used strips of card stock instead of ribbon for color match.

I had fun with a bit of brown inking and Sun Sister Glimmer Mist too.


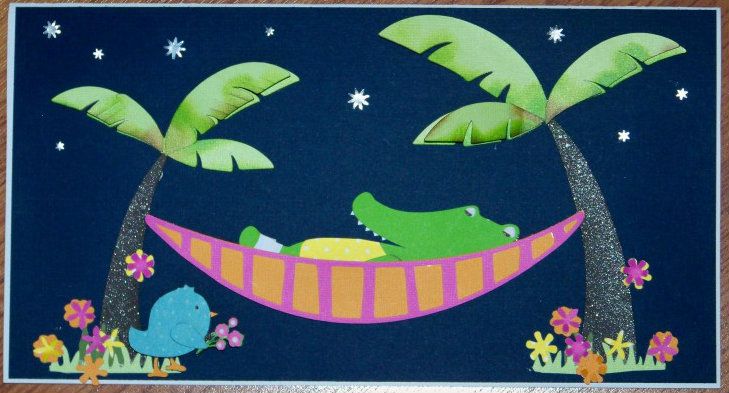
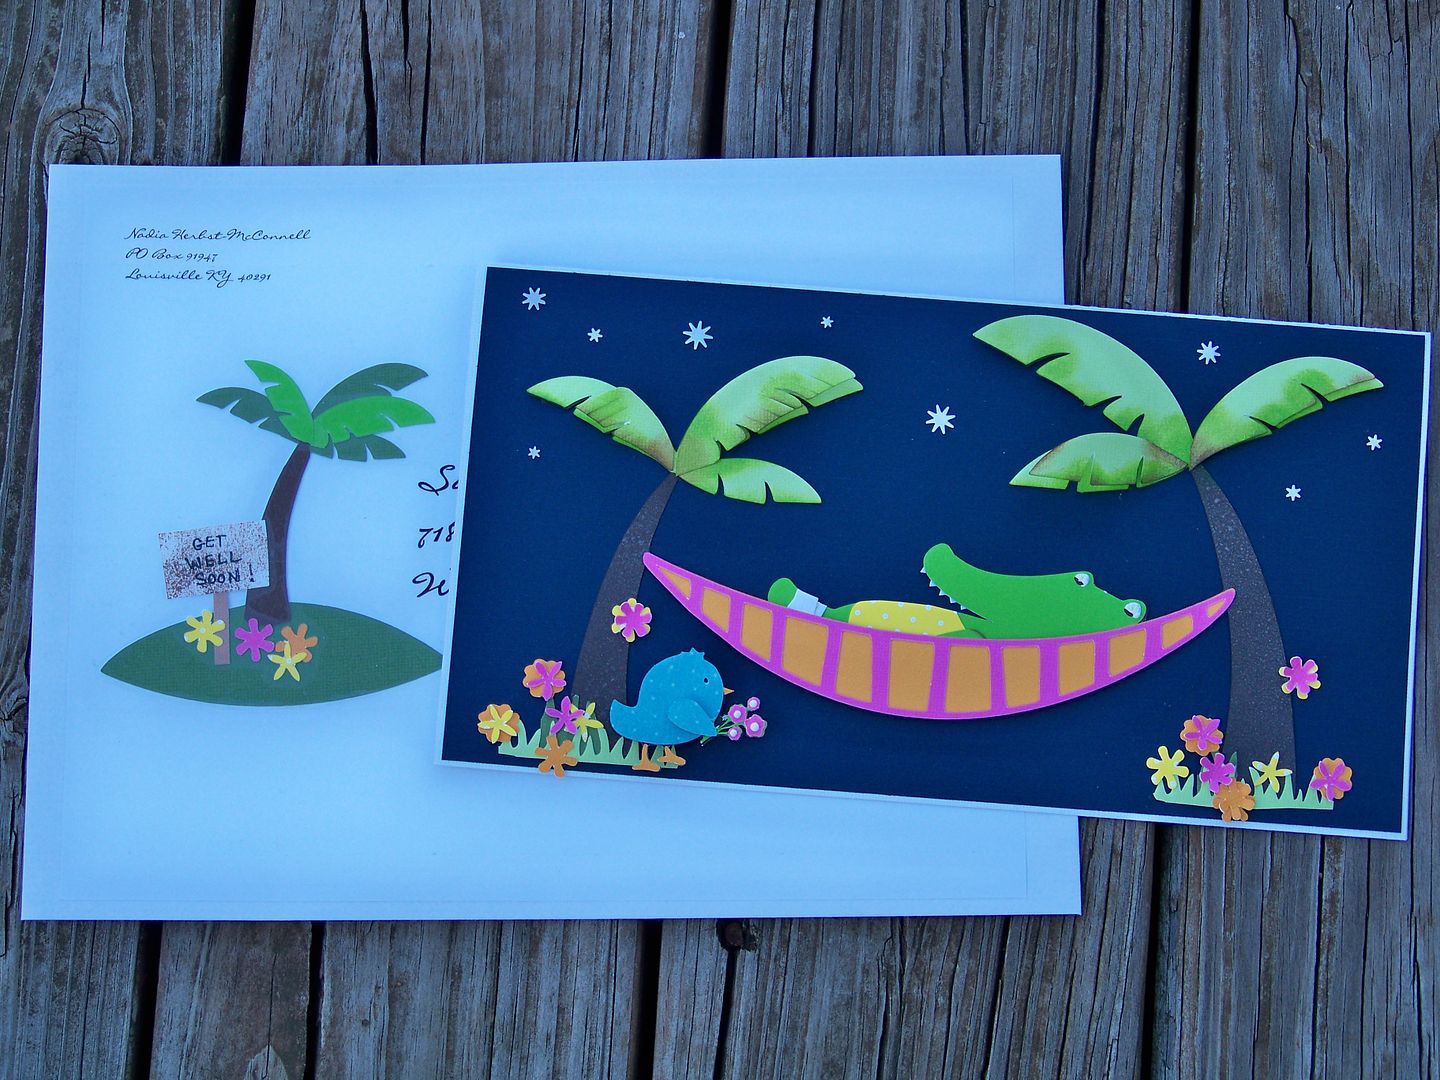
Next is a card I made for a crafter in the Cricut Circle who has managed to break her ankle in three places.  Wow!  That is thorough!  


I wanted something fun and colorful for this card.  I used the flowers to bring in extra color and interest.  I worried that the design was too juvenile but I learned that she will be recovering from this injury for quite some time and hoped that the silliness of the card would make her smile.


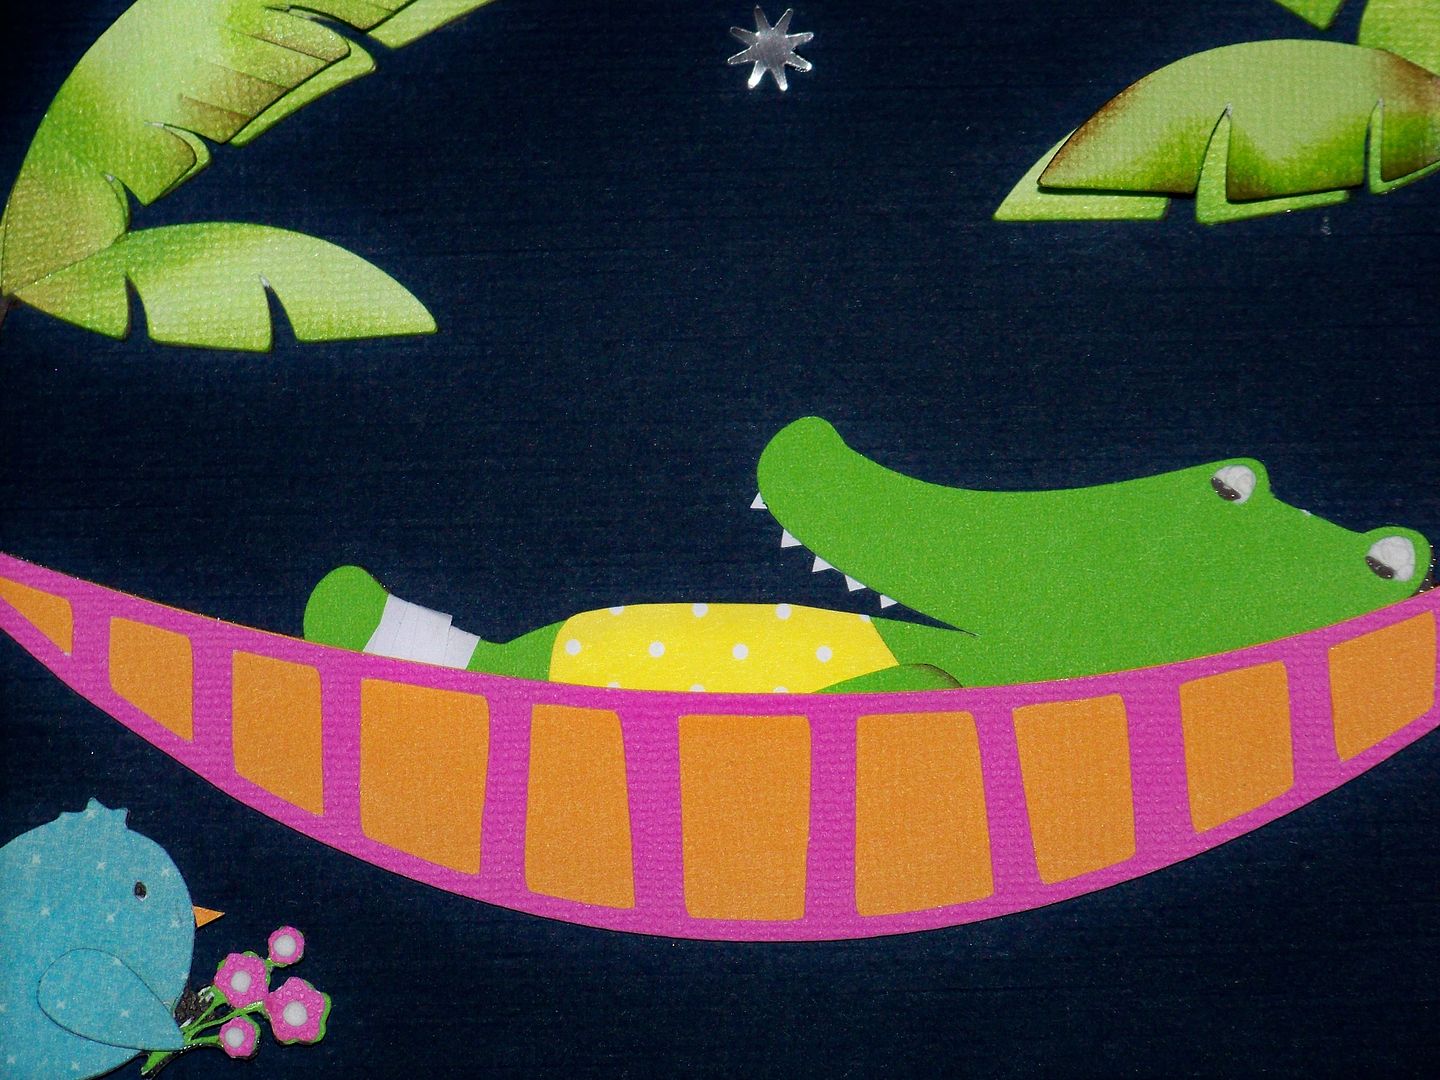
The crocodile and palm trees are from Crocs Rule, cut on the Expression at 5-1/2".  I double-cut the palm leaves so that I could pop some up after inking them.  The tree trunks were spritzed with Glimmer Mist.   I added a little yellow dress, a shoulder, a leg cast, and pointy teeth that I hand-cut.  I popped the bottom of the hammock with 1/4" pop dots, but adhered the top flat in order to make it looked filled with something.  The bird with bouquet is from 3 Birds on Parade, cut at 1-1/2" and is popped up 3/8" (the wing is popped up and additional 1/8").  The flowers are from Mother's Day Bouquet, various shapes cut at 1/2" and combined.  The stars in the sky were cut with a Martha Stewart edge punch from metallic paper (this was the negative space from the cut).  The grass was cut from a Fiskars edge punch.  I used Liquid Applique for the crocodile's eyes and bouquet centers.

I like to decorate my envelopes because I use manufactured ones and I want to make them relate to my cards.  (Plus, I just think it is more fun for the recipient!)  I used the single palm tree image from Crocs Rule, cut at 4-1/4", cutting extra palm leaves in a lighter color for interest.  The "Get Well Soon" sign was inked and hand cut and the flowers were ones left over from the card.  Text in the card and on the envelope was printed using Microsoft's Liorah BT font.


To see all of my previous projects, including my other flower projects, click here to visit My Project Gallery.  My next post will be April 23 where I will share my just-completed "Welcome to Provo Craft Card" contest card featuring the new Paper Dolls Teen Scene.    Thank you for checking out my post today!  I hope you are finding ways to enjoy spring wherever you live!


Friday, April 13, 2012

Letter Envy Challenge!

These are my challenge projects using Letter Envy.  As a change, the Cricut Circle Magazine Challenge is letting Circle members submit multiple projects for this challenge.  Each project must include a cut from Letter Envy and at least two other cuts from any other cartridge.

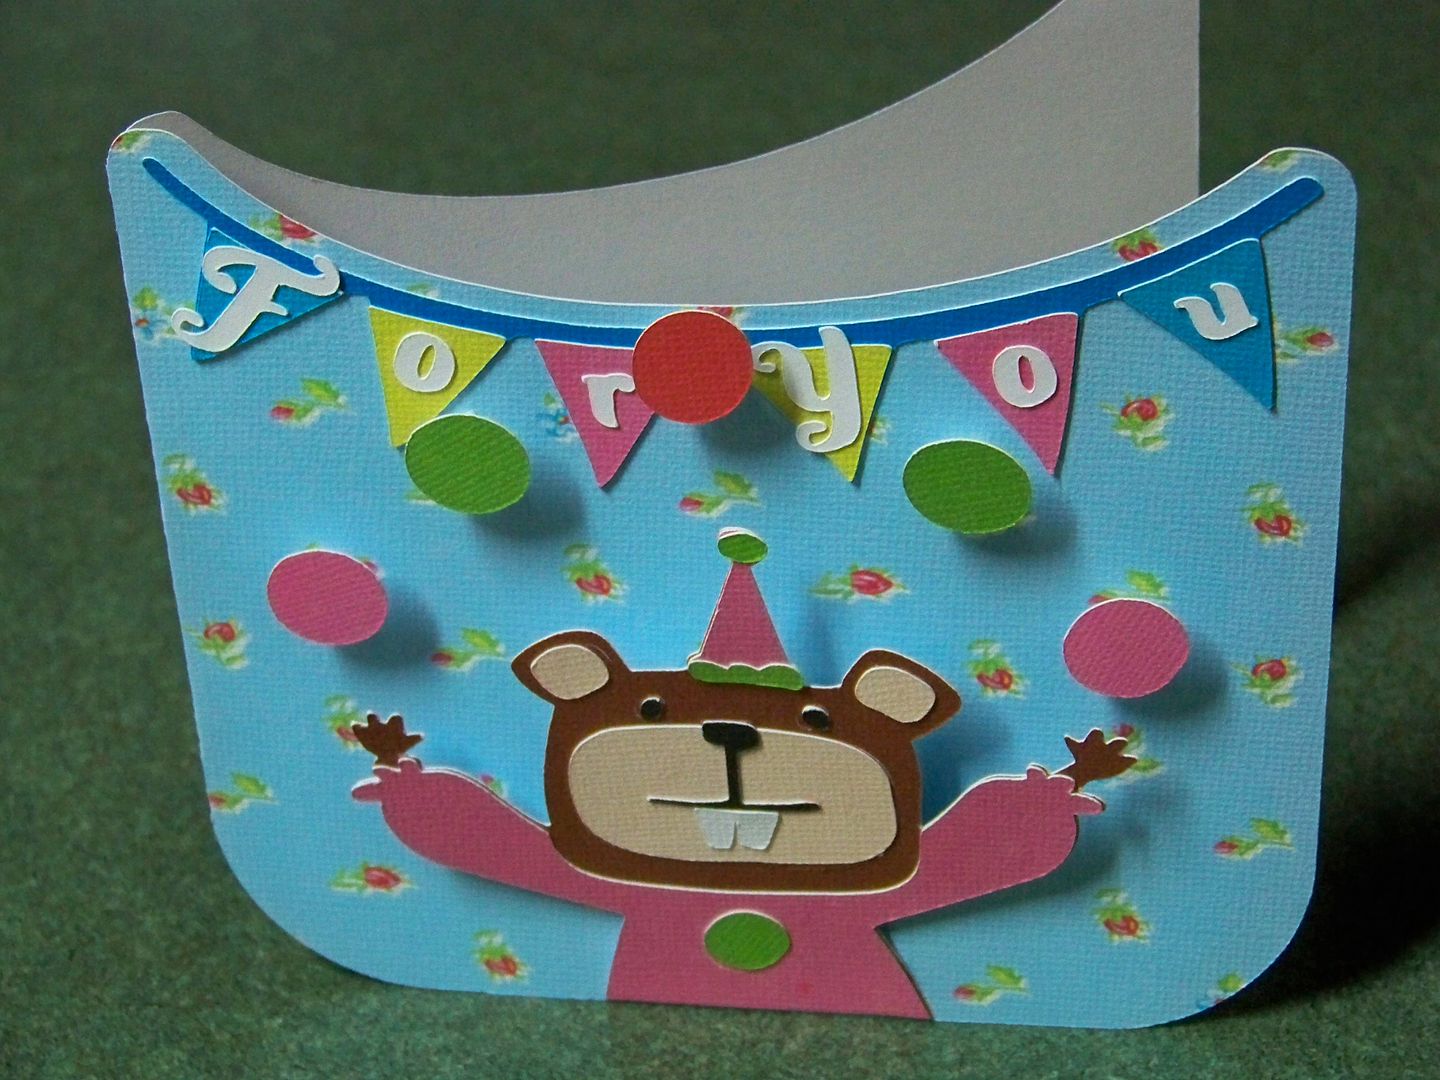
Birthday Card


I used Something to Celebrate with my Imagine for the card base and banner shapes (each cut at 1.8" relative size), flood filling with pattern and colors from Floral Emporium.  One of my favorite things about the Imagine carts is the color palette of solids and prints which make it so easy to quickly coordinate elements from different cartridges!

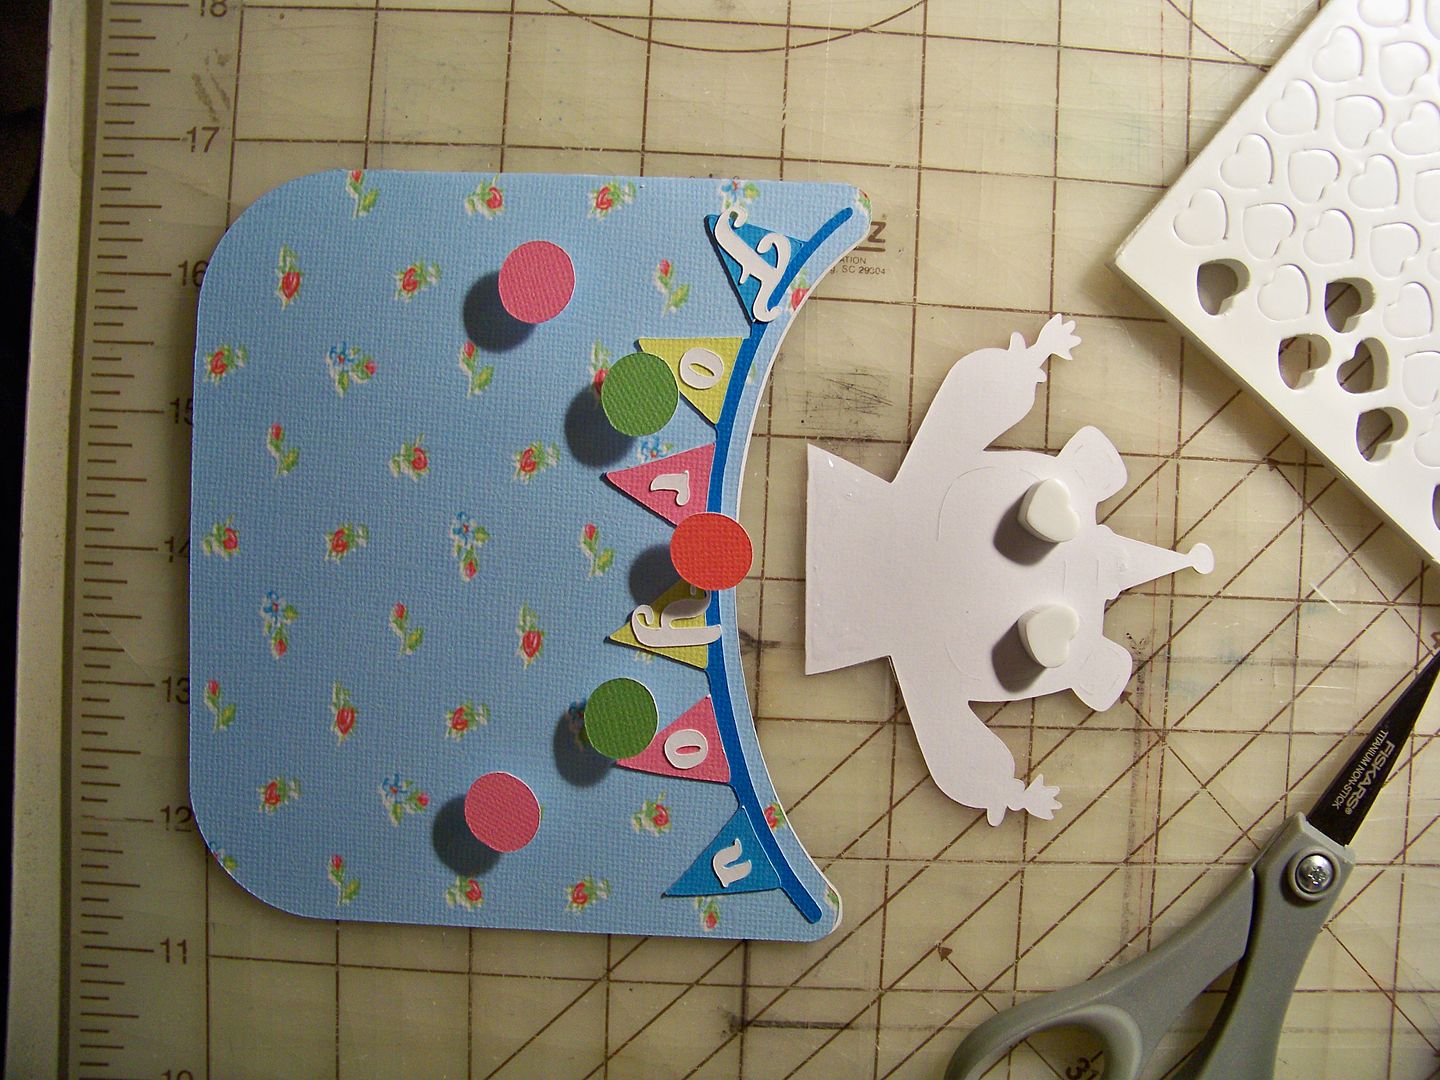
I used Letter Envy for the lettering on the banner, cut at .7".  I cut the juggling beaver at 4.5" from Birthday Bash, also floodfilling with colors from Floral Emporium and using RGB codes for the fur and face.  (RGB for the fur is 105,49,17; RGB for the face and ears is 255,219,175.  I snipped off the lower body of the beaver, allowing me to use a larger size for his upper body than I would have been able to if I used the whole body.

I glued the lower edge of the juggler to adhere it flush but used super thick pop dots for the upper part so that he would pop off the card!  I used the same pop dots under the balls to pull them away from the banner so that the banner would look like it is in the background.


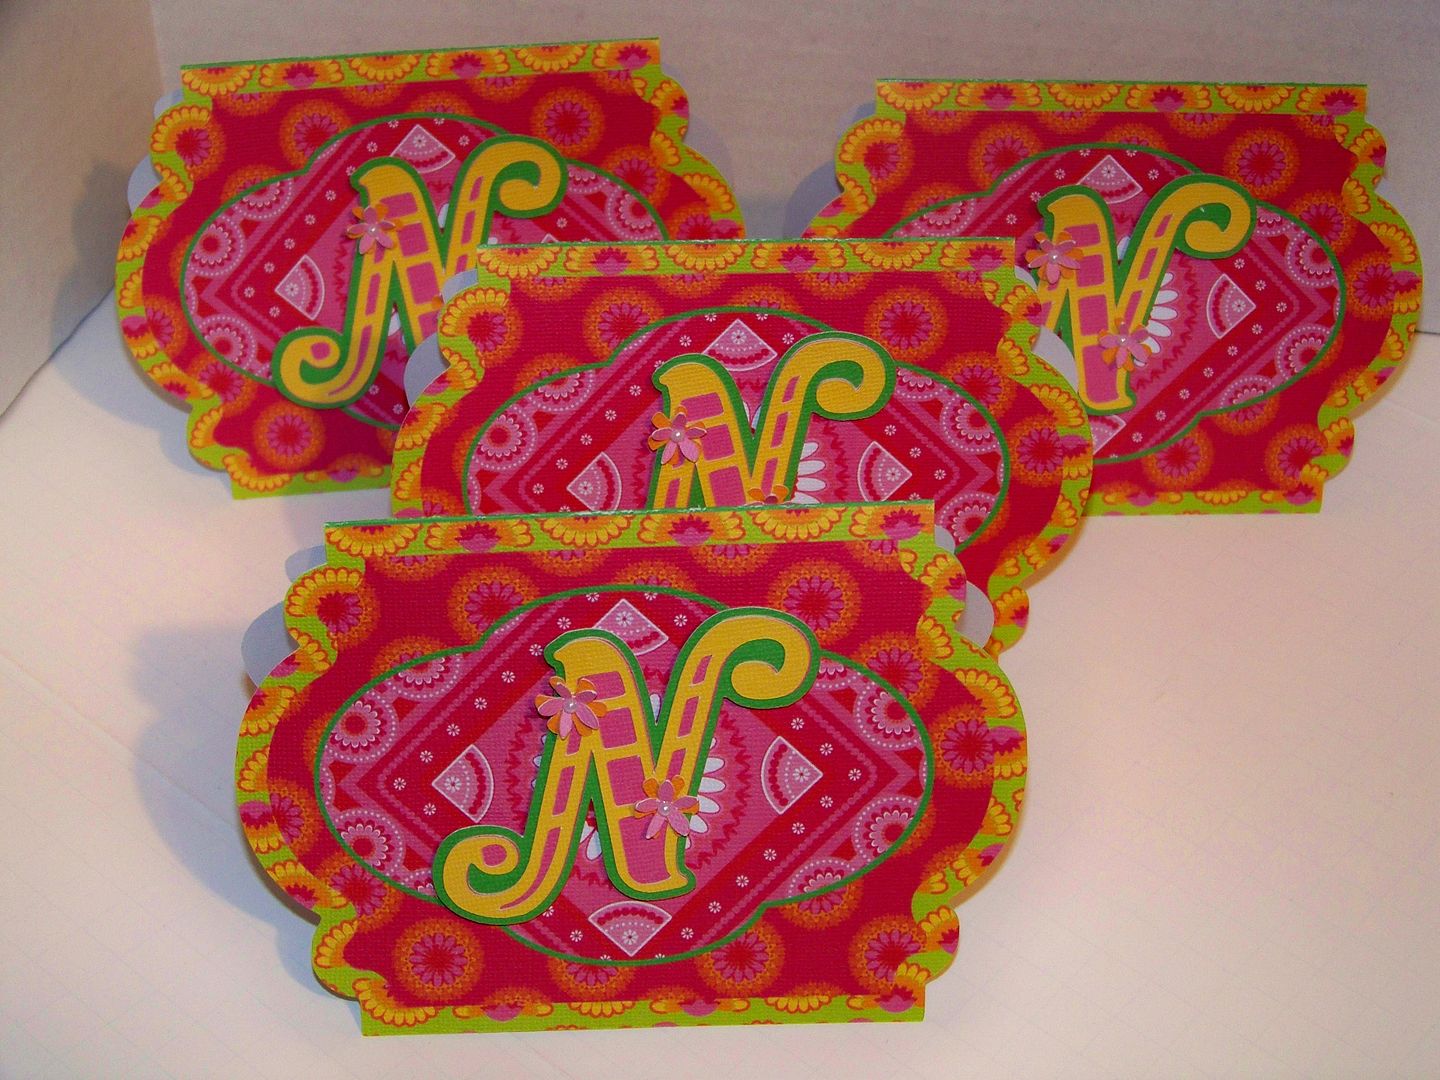
Note Card Set


I used All Wrapped Up to create notecards on my Imagine, cutting at 6.3".  Using the colors in the queue from All Wrapped Up, I selected solids from which to print and cut the "N" layers from Letter Envy at 2.6".  I embellished the initial with flowers I cut from Mother's Day Boutique at .6", also using colors from the All Wrapped Up queue.


Just Because Card


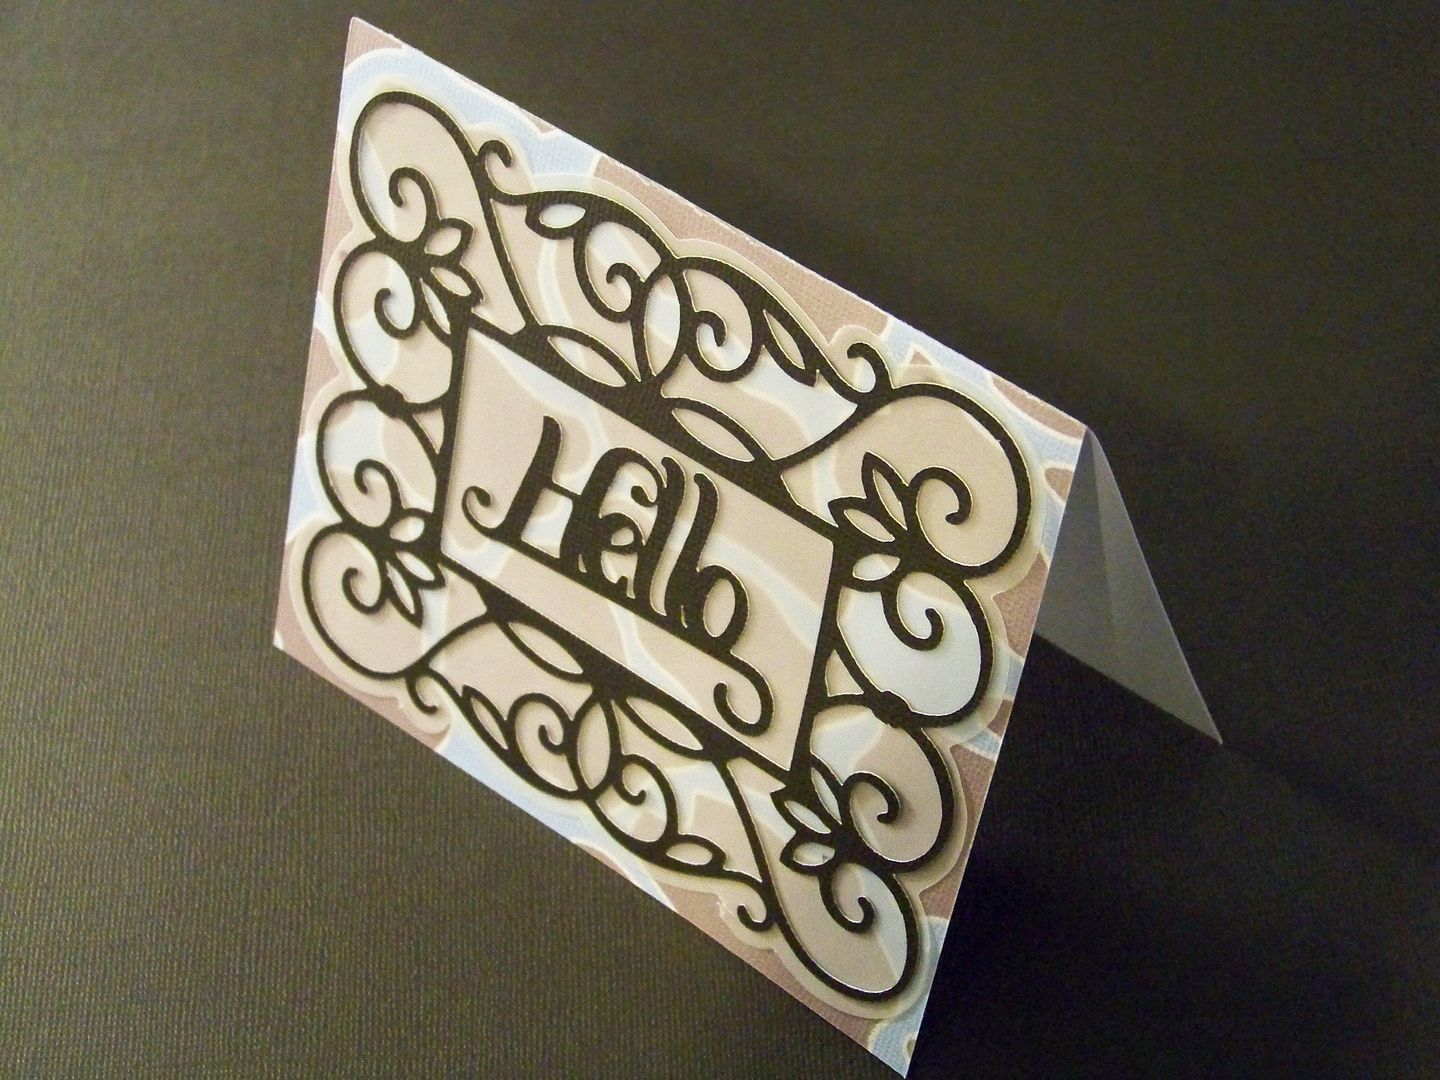
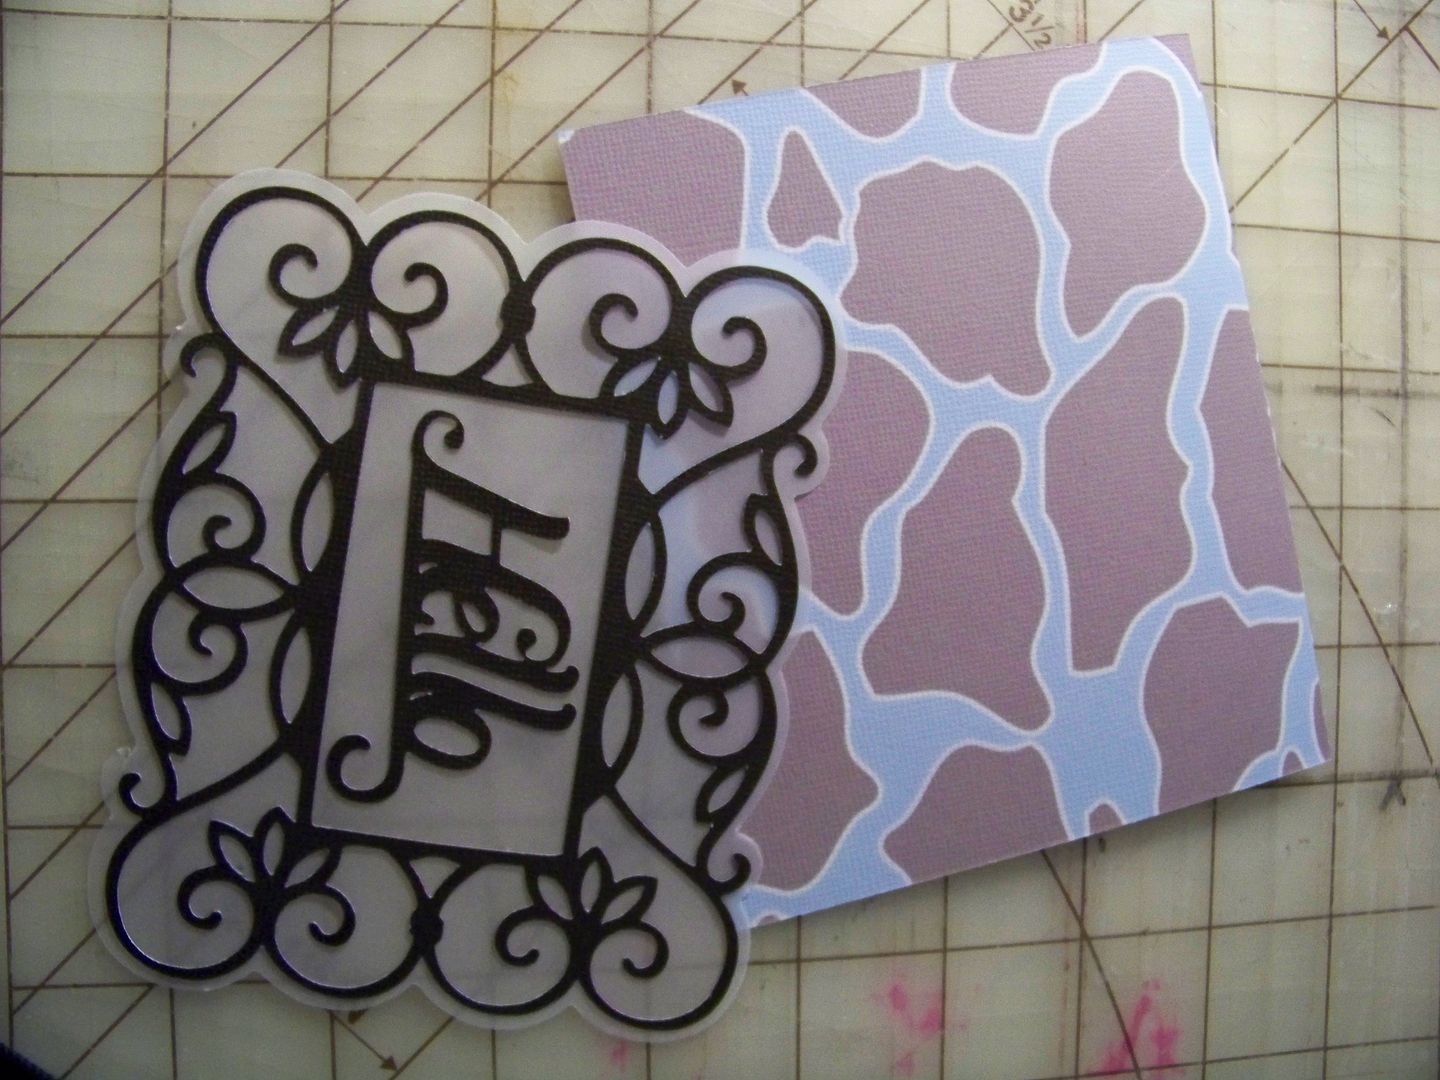
I used Baby Boutique with my Imagine to create the printed card base.  I cut the card at 9" and then manually trimmed it down to 5-3/8" wide to accommodate the frame.  The frame was cut from Ornamental Iron 2 at 4" on the Expression.  I used parchment to cut the shadow for the frame to mute the card colors and tie the "hello" to the frame.  I cut the "hello" from Letter Envy at 1-1/2" on the Expression.


Wow!  I just barely got this posted under the deadline!  I loved this challenge because it helped me to think of the cartridge in new ways and prodded me to use some cartridges I had never used before!

Thank you for checking this post.  As always, you can see all of my projects by clicking here to visit My Project Gallery.


Tuesday, April 10, 2012

Interview with Jayme McGowan

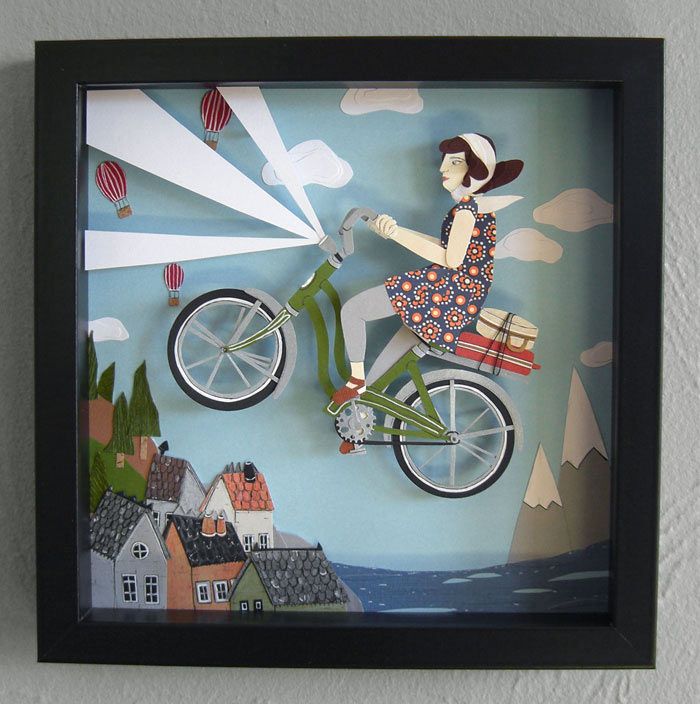
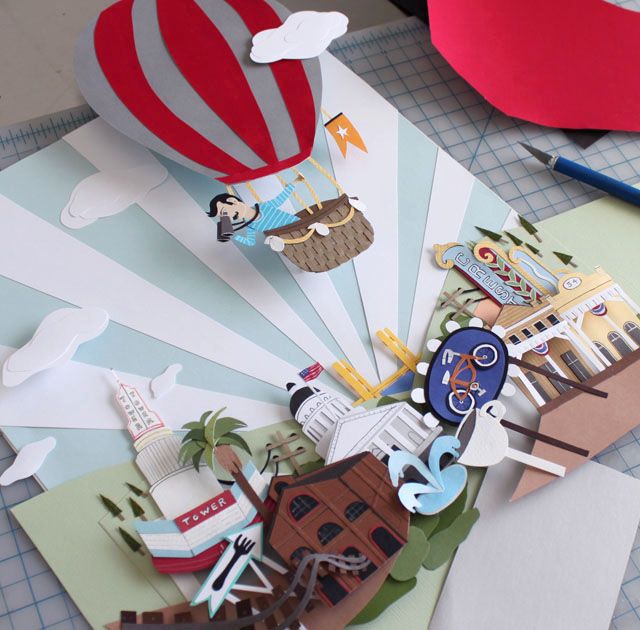
The Magic Green Bike

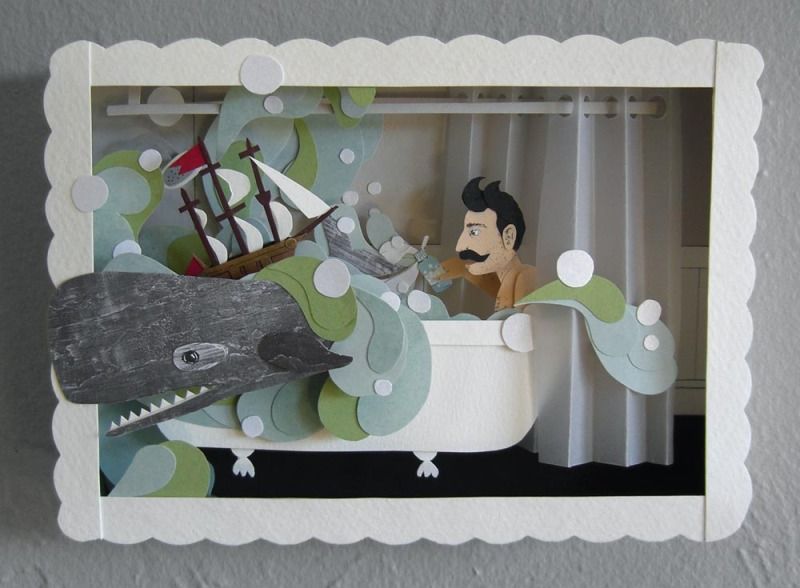
As many of you know from conversations with me, from reading my blog, or from posts on the Cricut Circle, there are paper artists who absolutely enchant me with their creative genius and the way they make paper dance and delight.  Meet Jayme McGowan, an artist who creates magic with paper!

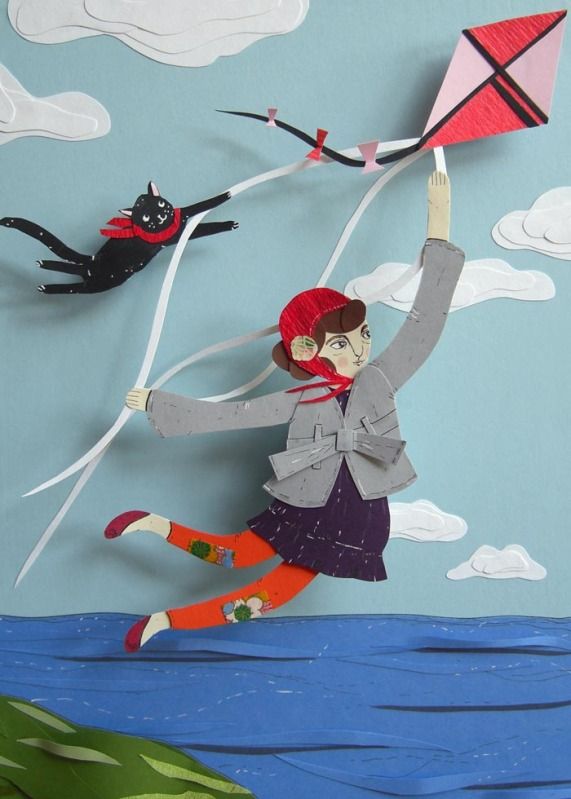
Flight By Kite

Her paper masterpieces are assembled from many, tiny hand-cut bits to create whimsical, marvelous stories.  Part of their charm is that she photographs them in such a way to take advantage of placement to get interesting spaces that create little worlds!

Oscar's Accidental Adventure


Check out her time lapse video of her process...


...in which she created her 2010 commercial for Treetop:


I recently contacted Jayme to see if she would grant me an interview that I could share here.  I wanted to learn from her work and I wanted to see if she could suggest anything to those of us who employ die cut shapes for our projects.  I love looking at Jayme's work-- the way characters seem to have weight, are fixed in the world she creates, and are affected by wind and nature.  I love the illusions she creates and hoped to gain some insight from her for my own projects.  She was gracious in granting me this interview and in allowing me to share her images with you!  I hope that you enjoy her responses; I thought they were pure treasure!


* * * * * *

Question:  I love the way that you gain dimension from both the camera lens and your placement of cut elements to create space (real and enhanced) in your scenes.  Do you consider depth of field as you are sketching your characters and scenes in the planning stage, or is that a bit of artistic magic that occurs spontaneously as you begin to place characters and props?


Jayme McGowan:  When I'm sketching out an idea, I'll do a rough mock-up of how I want to compose the image, trying to take depth of field into account.  I'll put more detail into the characters or objects that will be in the foreground because I know that those will be the most in focus.  But honestly, much of the final image is a result of chance.

When I've finished making the paper pieces and go to set them up in my paper theater (imagine a large diorama, about 18" square), I know that I will have to move things around after looking at it through the camera lens.  Sometimes I have to completely remove elements I spent hours making if it's just not working for the image.  It's not always easy to let the image evolve organically like this - it rarely ends up looking as I imagined it should originally - but I'm trying to learn to go with it.  

It's a crazy process - taking a 2D piece of paper, making it into something 3D and then photographing it to turn it back into something 2D.  It's just too hard to predict what the final outcome will be when I'm in the beginning planning stages.
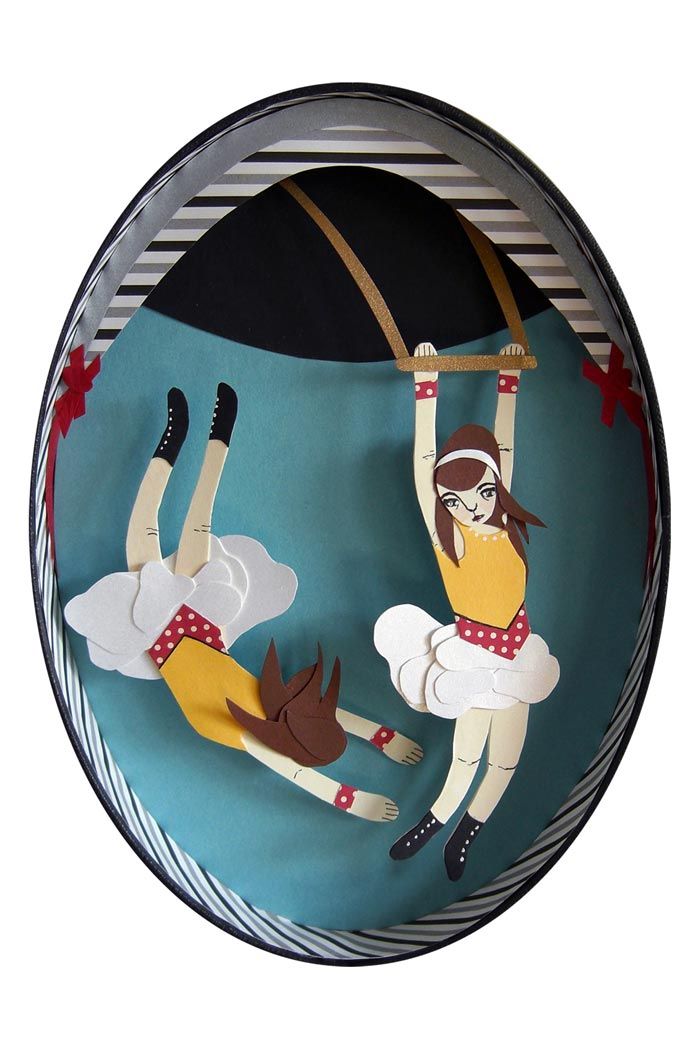
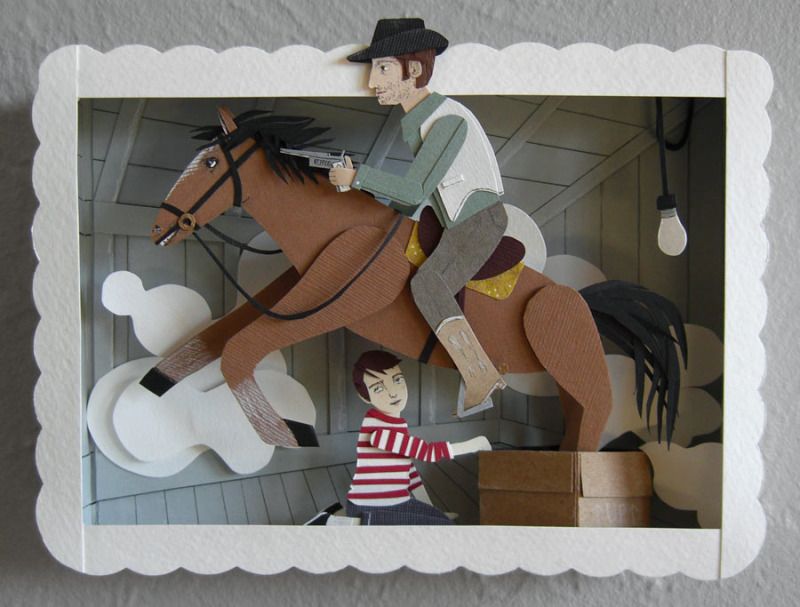
Trapeze Twins
Question:  The idea of floating or being carried by the wind is something I have seen repeated in your works, especially those you denote as a 'personal project.'  Is there a special significance of this to you?

Jayme McGowan:  That theme comes from a reoccurring flying dream that I have.  I guess it's not flying exactly, 'being carried' as you put it, is exactly right.  In the dreams I'm just floating gently off the ground and up into the treetops as if gravity has ceased to exist.  They're my favorite dreams, really vivid and I always wake up thinking I must actually have this ability.


Plan Gone Awry

Question:  Where does your inspiration come from?

Jayme McGowan:  I'm horrible at answering this question because I never feel like I have a satisfying answer!  My inspiration is a product of everything that I experience - real life events and other people's stories via art, books, music, etc.  It's kind of counter intuitive, but one thing I do consistently, when I need inspiration, is go outside (usually to take my dog for a walk) because my best ideas always come to me when I'm not sitting down in my studio, trying to force it to happen.

I saw an episode of 30 Rock recently where Jack references something called "The Shower Principle".  He described it as the idea that the brain experiences moments of inspiration when it's distracted from the problem at hand.  I don't know if  "The Shower Principle" is really a thing - but I know the concept is absolutely true!


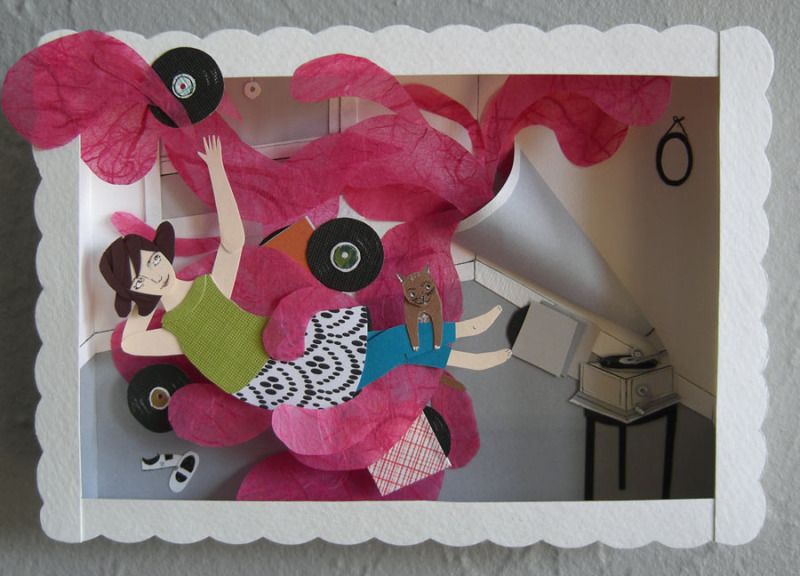
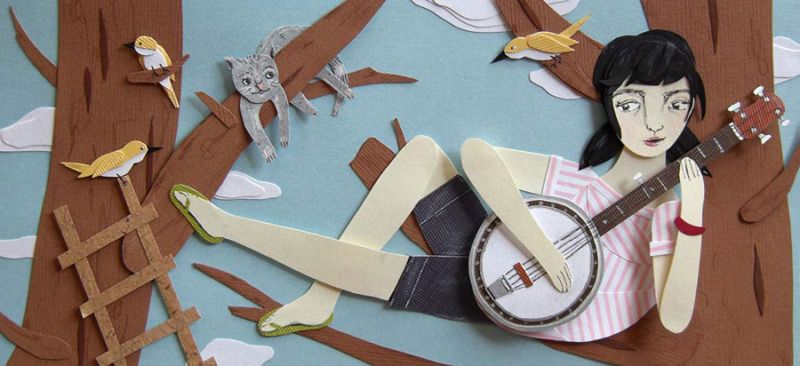
The Best Album Ever
Question:  Is the piece "The Best Album Ever" a self-portrait?  Your characters seem so personal.  Do you sometimes base your characters on people you know?

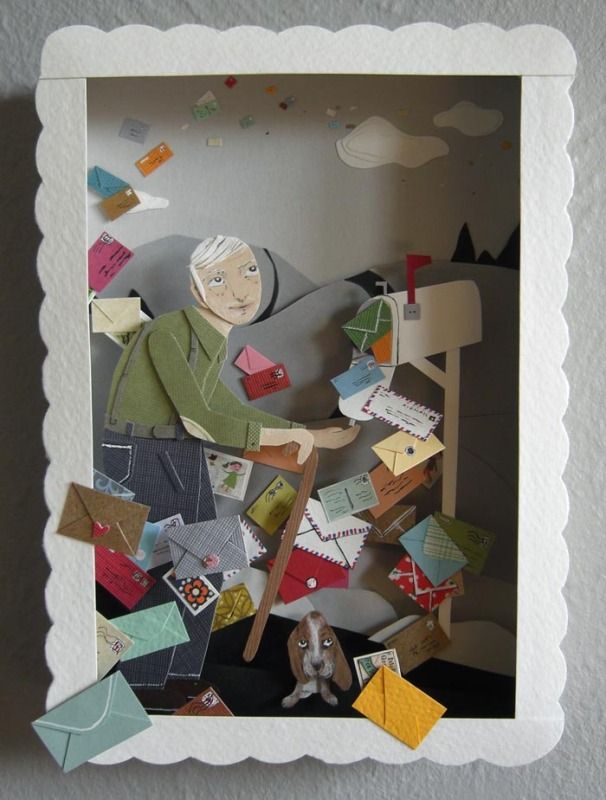
Jayme McGowan:  Yes, more than any other piece that one is the most me.  Me in high school probably - it's been a long time since I lounged around listening to records all day.  My characters are very loosely based on real people.  For example, "Earl's Good Tuesday" was based on this elderly man I used to always see at the Post Office.  


Earl's Good Tuesday

He came there to check his PO Box but would leave empty handed.  I thought that he looked a little sad when he left and imagined that going to the Post Office was one of the highlights of his day.  I always wished that one day I would see him open his box and it would be overstuffed with mail - good mail like handwritten letters and postcards.


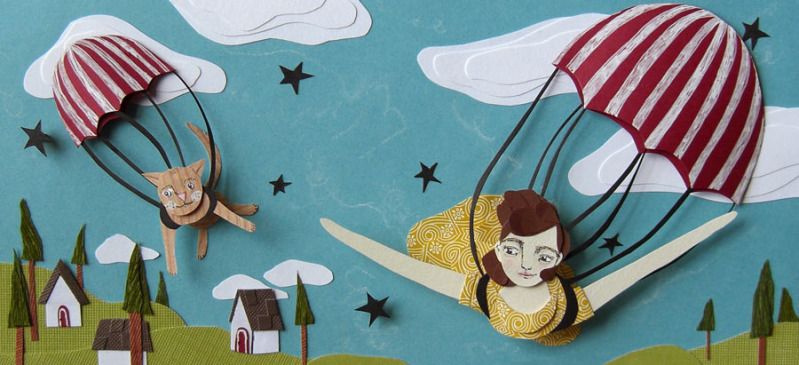
Aerial Adventures

Question:  I am particularly entranced by the way that you imply movement.  One of my very favorite works is "Aerial Adventures".  I love the way the short hair and dress are puffed and the illusion that they are moving through the wind as the girl parachutes down.  Do you have any tips for those of us who are amateur paper crafters in creating movement?

Jayme McGowan:  Sure - I suggest manipulating the paper using unconventional techniques.  Wrinkling, twisting, tearing, layering, anything to give it some dimension.  I've actually had some pleasant results from using too much glue and having it accidentally warp my paper.  For the skirt you mentioned, I just imagined  I was creating a sculpture instead of a flat picture.  When you have elements on different planes, it will catch light in interesting and unexpected ways.


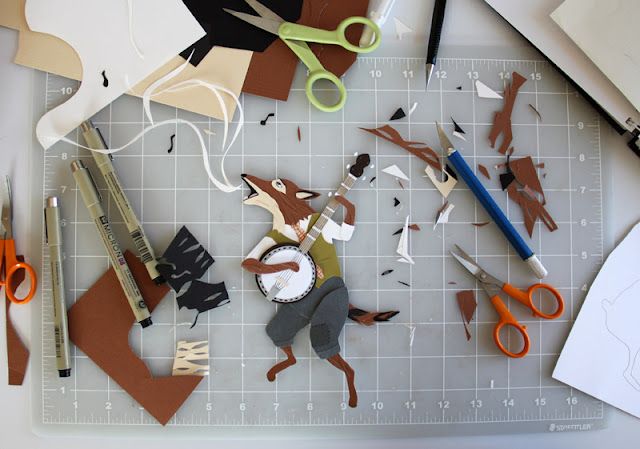
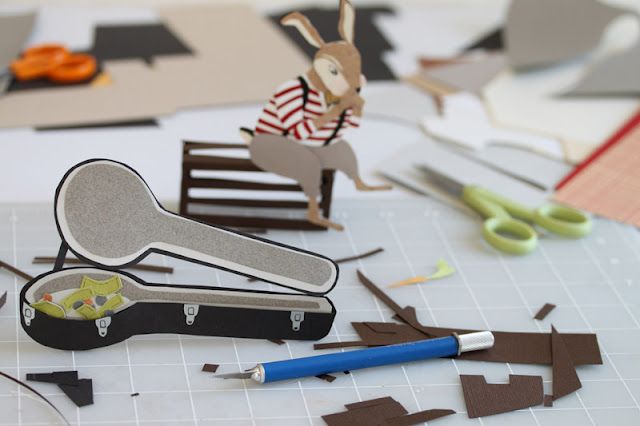
Secret Concert
Question:  I saw your beautiful sketches on your February 17 blog post with the hare and the coyote.  Do you typically do a character study and then create the composition or does the composition come first in your mind?


Jayme McGowan:  For my personal projects, usually the characters will come to me first and then I will invent an environment for them.  I prefer to cut simpler forms freestyle - just through trial and error, letting the scene unfold through experimentation.  I can often get away with doing that for inanimate objects or say, a background of trees and clouds, but I have a harder time cutting people and animals without sketching them first.
When I'm on a commercial illustration assignment, I definitely have to start with the entire composition meticulously planned out, because a client needs to know exactly what to expect.  It's less spontaneous that way but I do get final work completed quicker with that level of planning.


Question:  I know you studied painting.  I read that you used paper cutting as a method to occupy your hands when you were quitting smoking.  What is it about paper has made it and kept it your preferred medium?

Jayme McGowan:  So many things.  First off, paper is cheap and plentiful.  Also, I love the tactile experience of working with paper.  Mostly, I love the scale.  In art school we had to work on huge canvases which just isn't sustainable when you have to start storing them in your own home!  I've always had a thing for miniature arts and crafts - I think there is something magical about having to get up really close to inspect the tiny details.  Of course you can work large with paper.  Plus, I like being forced to work small, it makes me unable to be the perfectionist that's always trying to take over!  When you hand-cut something tiny, it's not going to be perfect and that makes it interesting to me.  Also, with paper as opposed to painting, it's much harder to revise.  Cutting something is final- basically you have to trash it and start over or let it be.  It gives me a clearer sense of when a piece is "done".  


Outlaws in the Attic

Question:  Part of your magic is the level of detail.  This makes your works so much fun to look at!  I have noticed that you also gain from implied detail based on your choices of palette and pattern.  Do you have any advice on choosing colors and patterns for those of us who use die cuts?

Jayme McGowan:  When I'm picking out paper at the store, I go for ones with a little texture or pattern that I can imagine mimicking the surface of trees, fur, hair, etc. in my piece.  I think that small, simple patterns are best.  I don't want the paper itself to be recognizable as belonging to a certain designer.  When someone can look at my work and say, "Hey, I recognize that paper!  I just bought that K&Company pad at Michael's yesterday," it takes that magic away.
I also like to include some old or handmade papers to give the piece something special.  As beautiful as many of the patterned scrapbooking papers are, I mostly try to make my own patterns - that's one reason why you see a lot of striped shirts in my work - it's the easiest pattern to make!


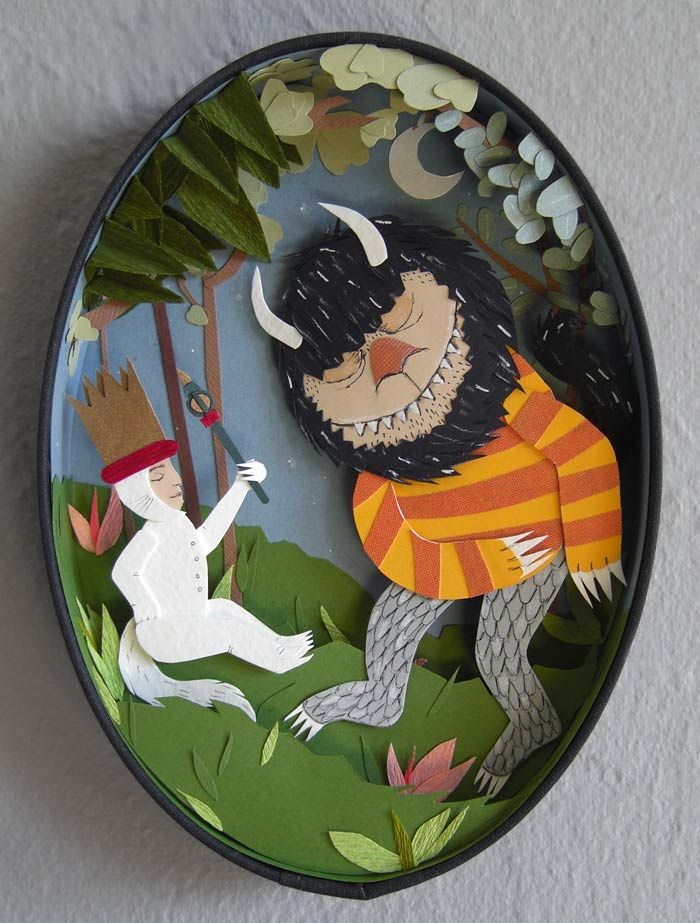
Ruler of the Wild Things
Question:  I adore your use of hand-drawn facial features and other details!  I have often received questions and concerns from crafters who don't feel comfortable doing this.  I think hand-work is even more important for those of us who use machine-created cuts.  Can you offer any words of wisdom on the value of hand-drawn features?

Jayme McGowan:  Go for it!  I completely agree that it's an important aspect of creating your own, unique style.  I think my hand-drawn faces are what really give my pieces character and draw the viewer in.  I use a graphite pencil, colored pencils and ink for my facial features.  I used to use more black ink but I've transitioned to extra fine tip pens (Sakura's Micron pens are great for this).  My faces are rarely anatomically perfect, but my hope is that their wonkiness makes them charming.  :)


* * * * * * 


And here's a fun thing:  if you are interested in having a bit of Jayme McGowan's creativity in your home, she has an Etsy store!  She sells original pieces, whimsical prints, and she even has a DIY kit to make a Balloon Adventure Shadowbox!

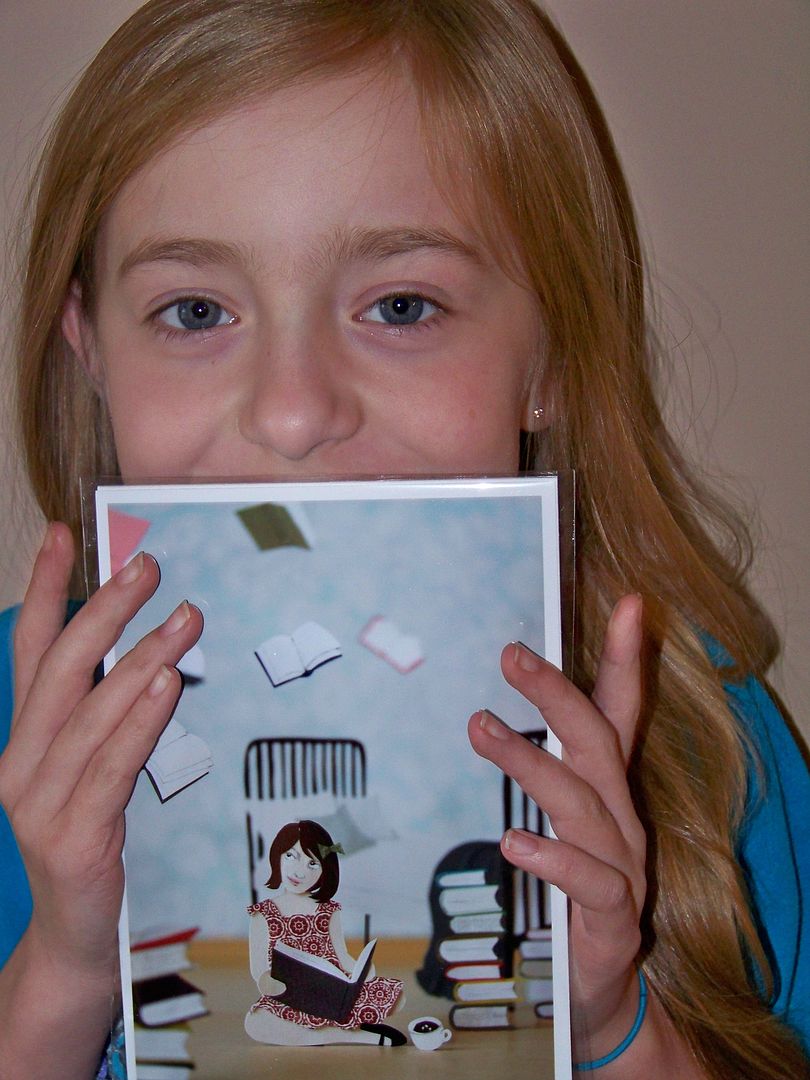
My daughter, Piper, a Roald Dahl  fanatic, fell in love with the book Matilda.  This was a print I recently ordered for her room!  It features Jayme McGowan's interpretation of the flying book scene and is part of the Paper Dahl collection.  For a special treat, check out Jayme's blog for lots of magic from this collection!


Thank you for checking out my blog today -- I am so excited about this blog post and I very much hope that you enjoyed it too!  Thank you to Jayme McGowan for your insights and ideas and for allowing me to share them here with my fellow paper crafters and friends!  Please visit Jayme's website and blog to see all of her delightful works -- so many more than I have shared here!

Click to links below to check out..


Friday, March 16, 2012

Still loving my Cricut...especially when I am busy!

I wanted to share a few fun Cricut projects I have been doing.  I have been so busy with work and church and other commitments, but always have little things that come up and my Cricuts really do make it so much easier to get those projects done!  Here are a few...

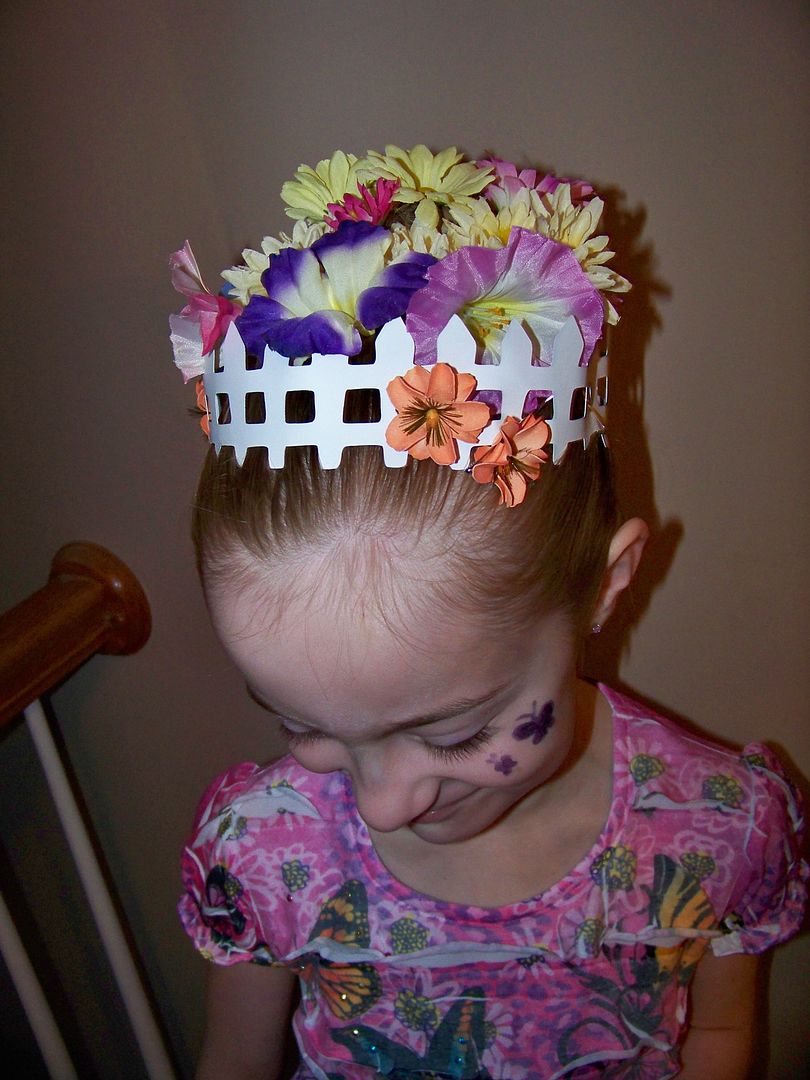
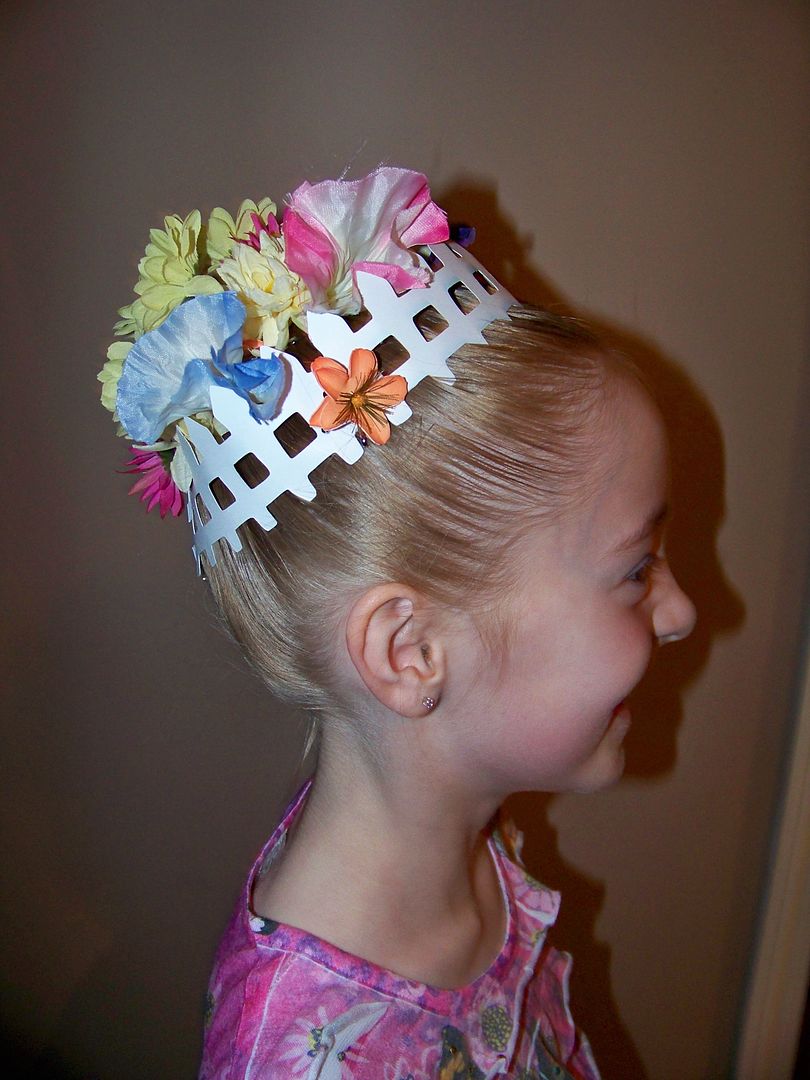
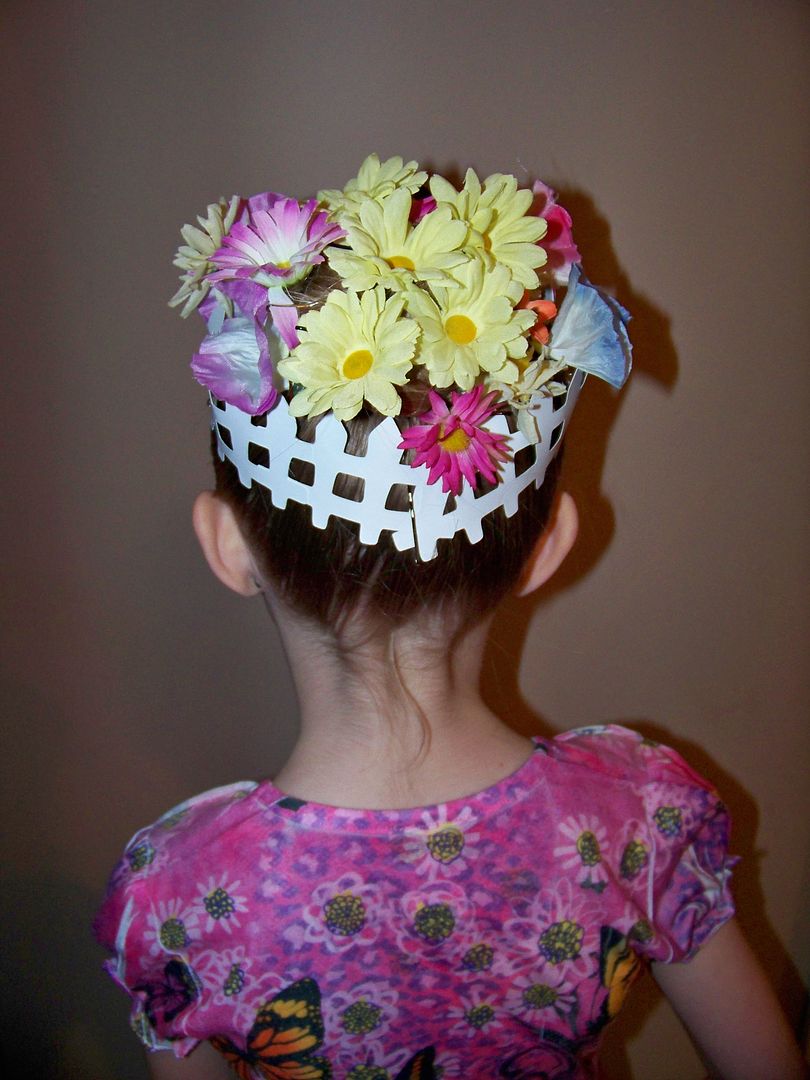
Today is "Crazy Day" at my daughter's school.  I had pinned some crazy hairstyles on my Pinterest boards to get a few ideas... This is one I found from Bee in Our Bonnet blog.  (Click here to see that post!)  This was my attempt and sweet Piper's flower garden hairdo...


Pin It

I put her hair in a ballet bun, using gel to smooth her hair to her head and a hairnet to secure the bun.  The flowers were some from my craft stash and are attached with bobby pins.  The picket fence was cut from Paper Doll Dress Up at 2" on the Expression.


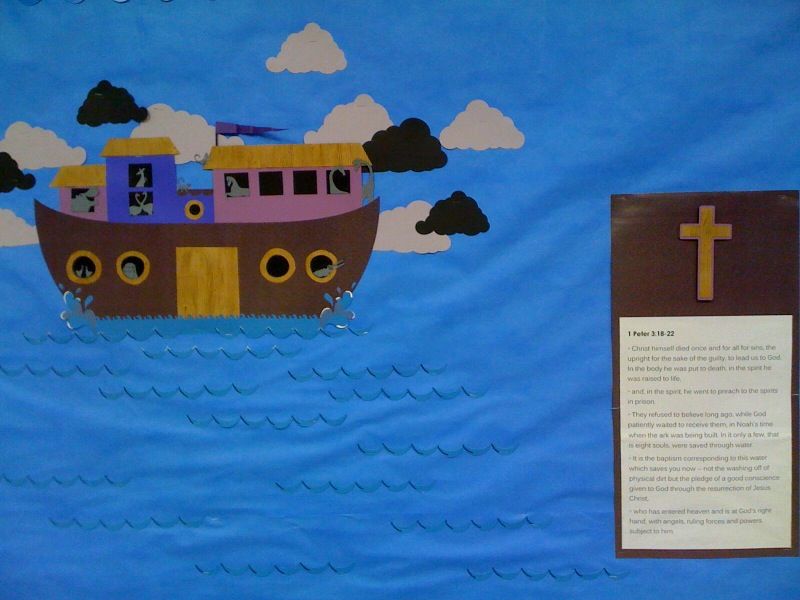
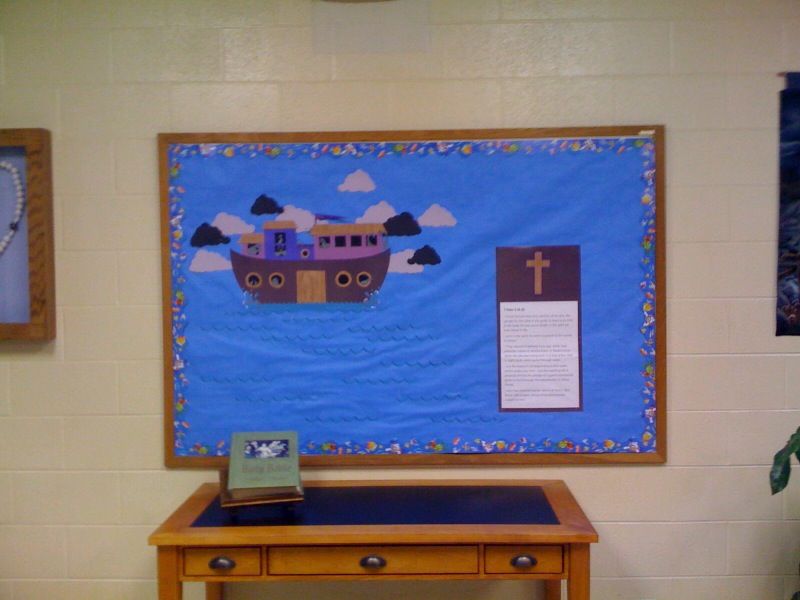
I was asked to do a board at the Religious Education building at our church.  The First Sunday of Lent included a reading about Noah.  That sparked a whole inquiry among some of my Bible study friends on the connection between that Old Testament story and Lent.  This is the board I did using Noah's ABC Animals. 


The challenge was not only the size (I am used to small projects!), but also the fact that I had to use the existing background paper and the church's borders!  I hand-cut the boat due to the size--much too large for even the 12x24 mat, but all the animals were cut from the cart.  The clouds are from Serenade.  The cross over the scripture is from the New Testament cartridge.  I hand-cut the worried Noah.  The wave and splashes are from Noah's ABC Animals.  The door, window facings, roofs, and the cross were cut with kraft paper that I embossed with a wood grain folder from The Paper Studio on my Cuttlebug.  That brand of embossing folder tends to be extra deep and can tear the paper as it is being embossed so I back the papers with tape before embossing.

And just a hint, in case you are curious, the story of Noah's Ark and the observance of Lent are connected in the idea of 40 days and 40 nights (Jesus in the desert and Noah on the ark), water to renew (as in Jesus' baptism to take our sins and the flood to remove sin from the earth), a covenant between man and God, and the idea that all sin was not removed with Noah (since eight people were spared) thus creating the need for Jesus to take away sin.  There are also scriptures which connect Jesus with Noah, as in 1 Peter 3:18-22.   That is what we discovered-- if you have other insights, please share them with me!

Back to the projects... This is birthday season among Piper's friends.  These are packages I decorated for twins who shared a birthday...


For Katharine's package, the monkeys were cut from Noah's ABC Animals at 4" and 3" on the Expression.  The letters are from the same cartridge, cut at 1".  For Elizabeth's package, the rainbow is from Hello Kitty Greetings, cut at 6" on the Expression.  The letters are from Birthday Bash, cut at 1".  Piper gave them doll clothes from the Perfectly Piper Studio (our new Etsy shop for American Girl dolls). 

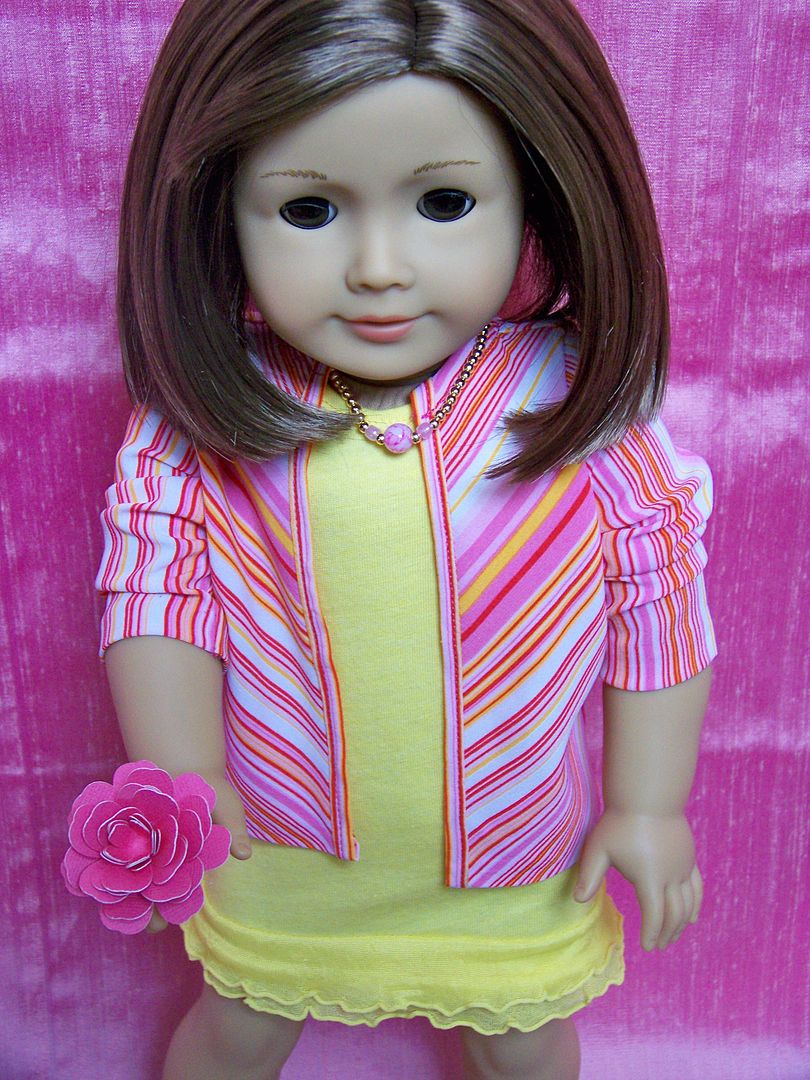
I have been using my Cricut for photographing the doll clothes I have been making.  This is one of the Juliana Michaels' flowers she showed us with her instructional video:


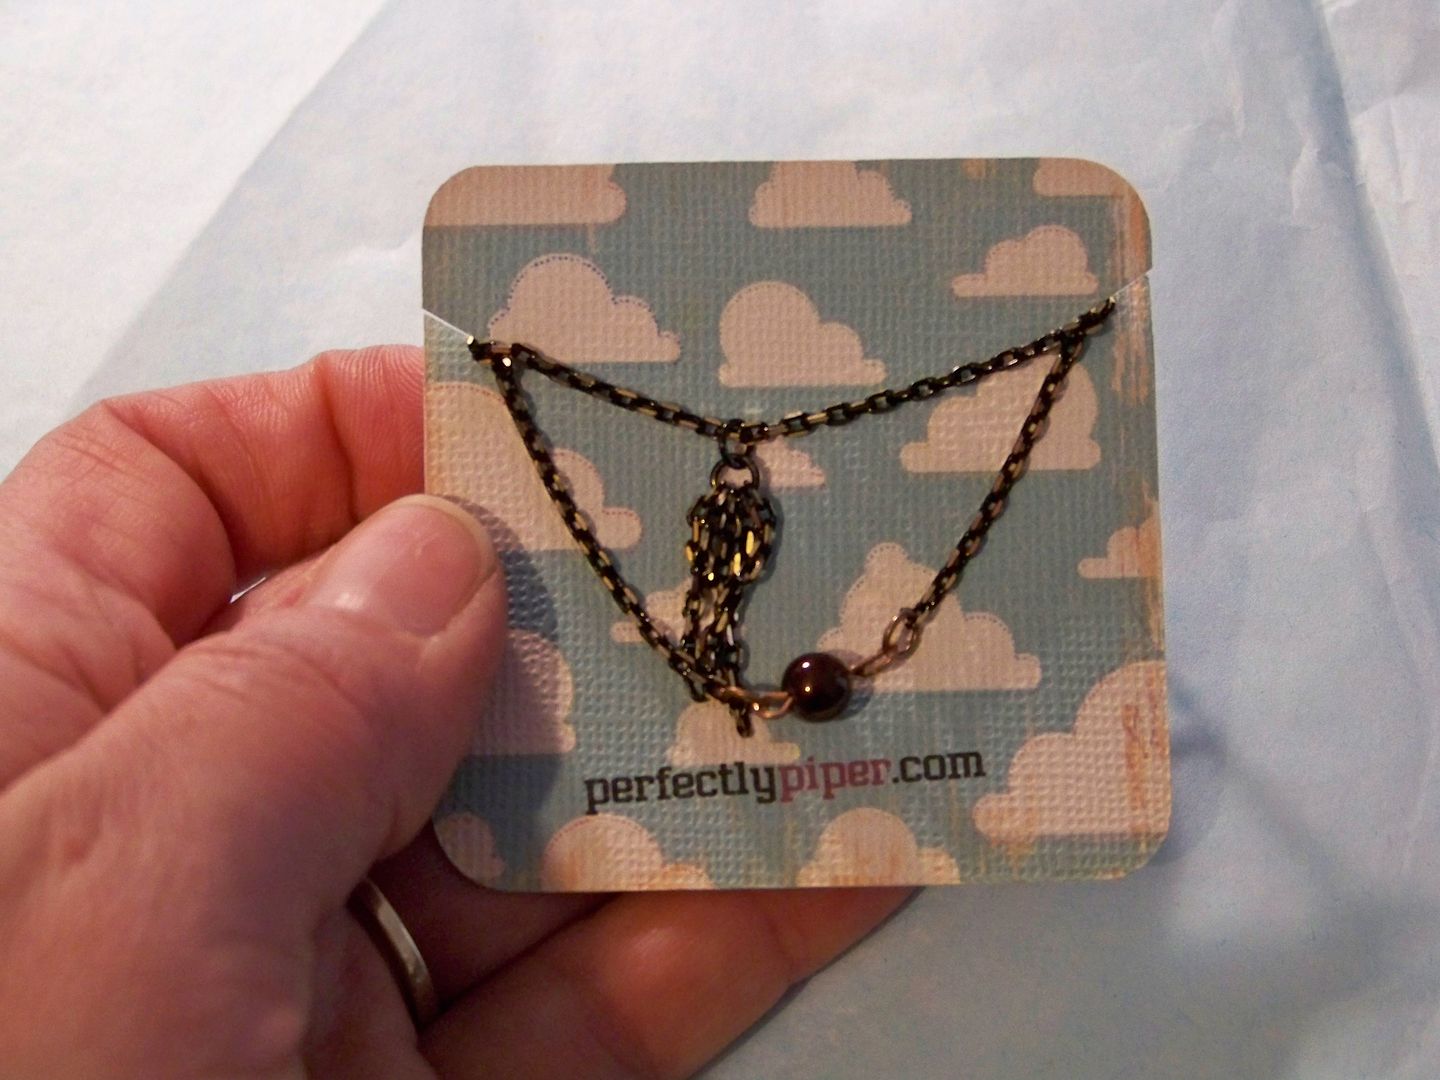
I have been making and selling (and giving away!) doll clothes for fun.  My Expression and Imagine machines have been so handy for that!  This is my necklace card that I use for packaging, featuring the Hopscotch print:


Lastly, these are some of the St. Patrick's Day projects I have featured on my blog that I wanted to share again with you...


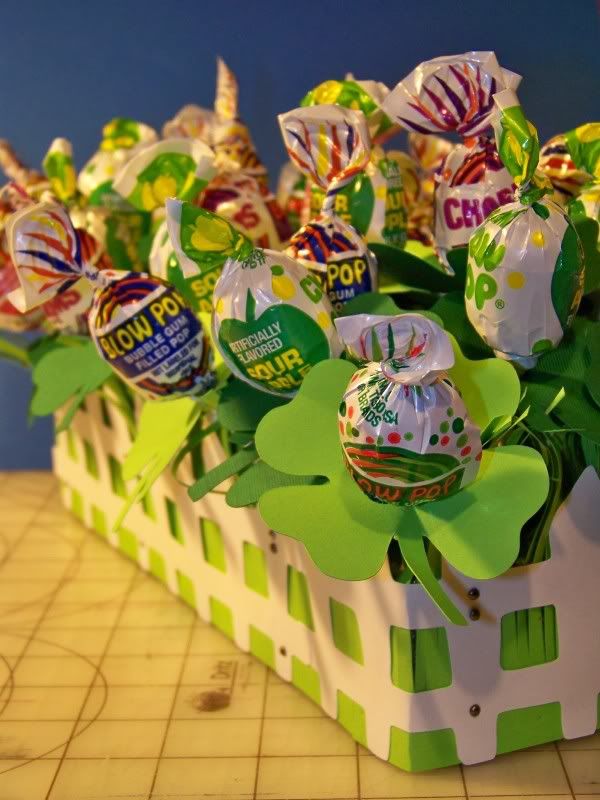
Lollipop treats in a picket fence basket!  Click here for how-tos and more pictures on this blog!


St. Patrick's Day card with an altered Rock Princess!  Click here for how-tos and more pictures on this blog!


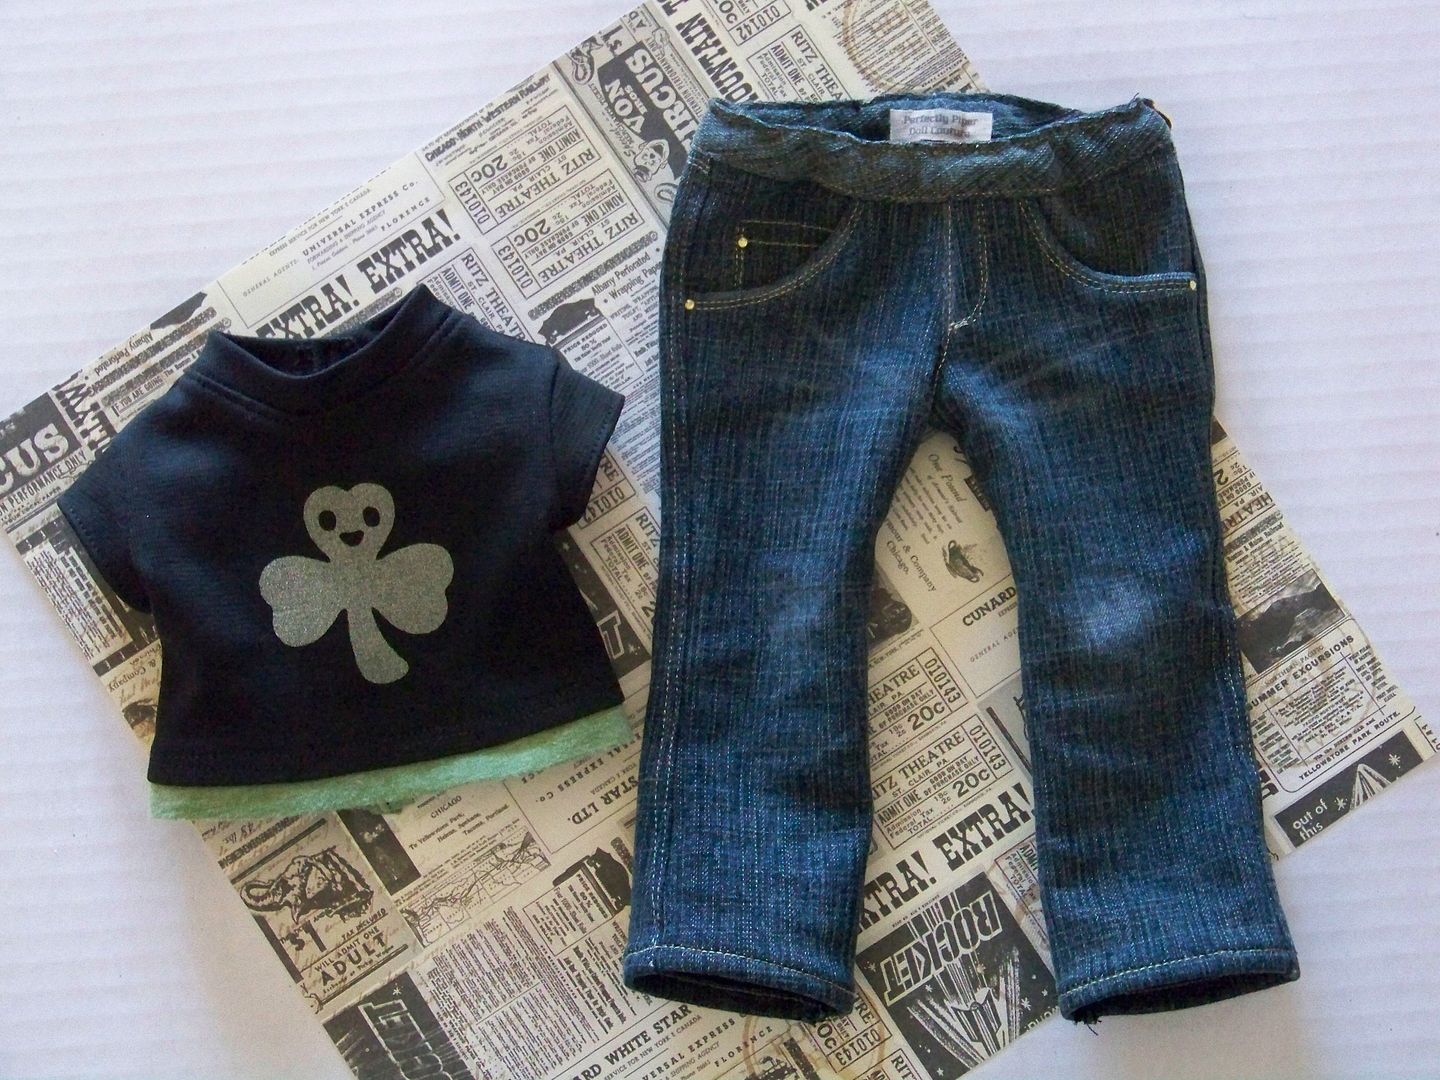
Happy shamrock doll t-shirt.  This was made for my Etsy store using Liberty Jane patterns for the t-shirt and jeans, and my Yudu and Yudu Cardshop for the silk screening!  Find more info about this outfit by clicking here.  The shamrock icon is from Spring Holidays cartridge!  Cricut has an angel policy for their carts that don't have 3rd party licensing that allows for the limited selling of finished products with their cartridge artwork!  You can read about that here.

Thank you for checking out my blog post today!  You can see all of my paper crafts by checking out my Project Gallery!  For doll clothes, you are invited to visit my doll blog

I hope you have a fun St. Patrick's Day planned for tomorrow!  We have a very busy day planned with family coming over (plus gynastics class in the morning and an afternoon child's birthday party).  My husband is doing one if his famous Leprechaun appearances and has a party planned for our family for the evening!  I hope you are enjoying spring as much as we are!  Happy crafting!


Saturday, February 25, 2012

Whooooo is having a birthday? Owl tell you!


Pin It

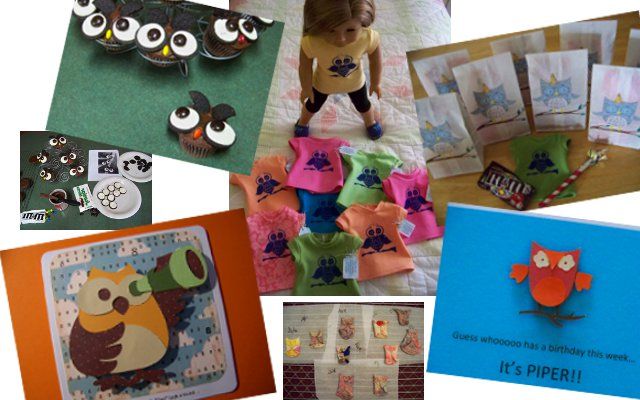
My daughter, Piper is eight-years-old this week!  She says she is now too old for princesses, fairies, and other past themes we have used for her birthday parties.  This year she wanted owls for her theme.  I will admit this came out of left field for me but I was perfectly happy because the owl image is on tons of Cricut cartridges that I own and I have seen lots of ideas on Pinterest for those little critters.  Pinterest is, in fact, where I started by pinning things onto an owl idea board.

I had a hoot making our party elements!  (pun intended of course!)  Read below for the crafty details and source info for our:
  • invitations
  • favor bags
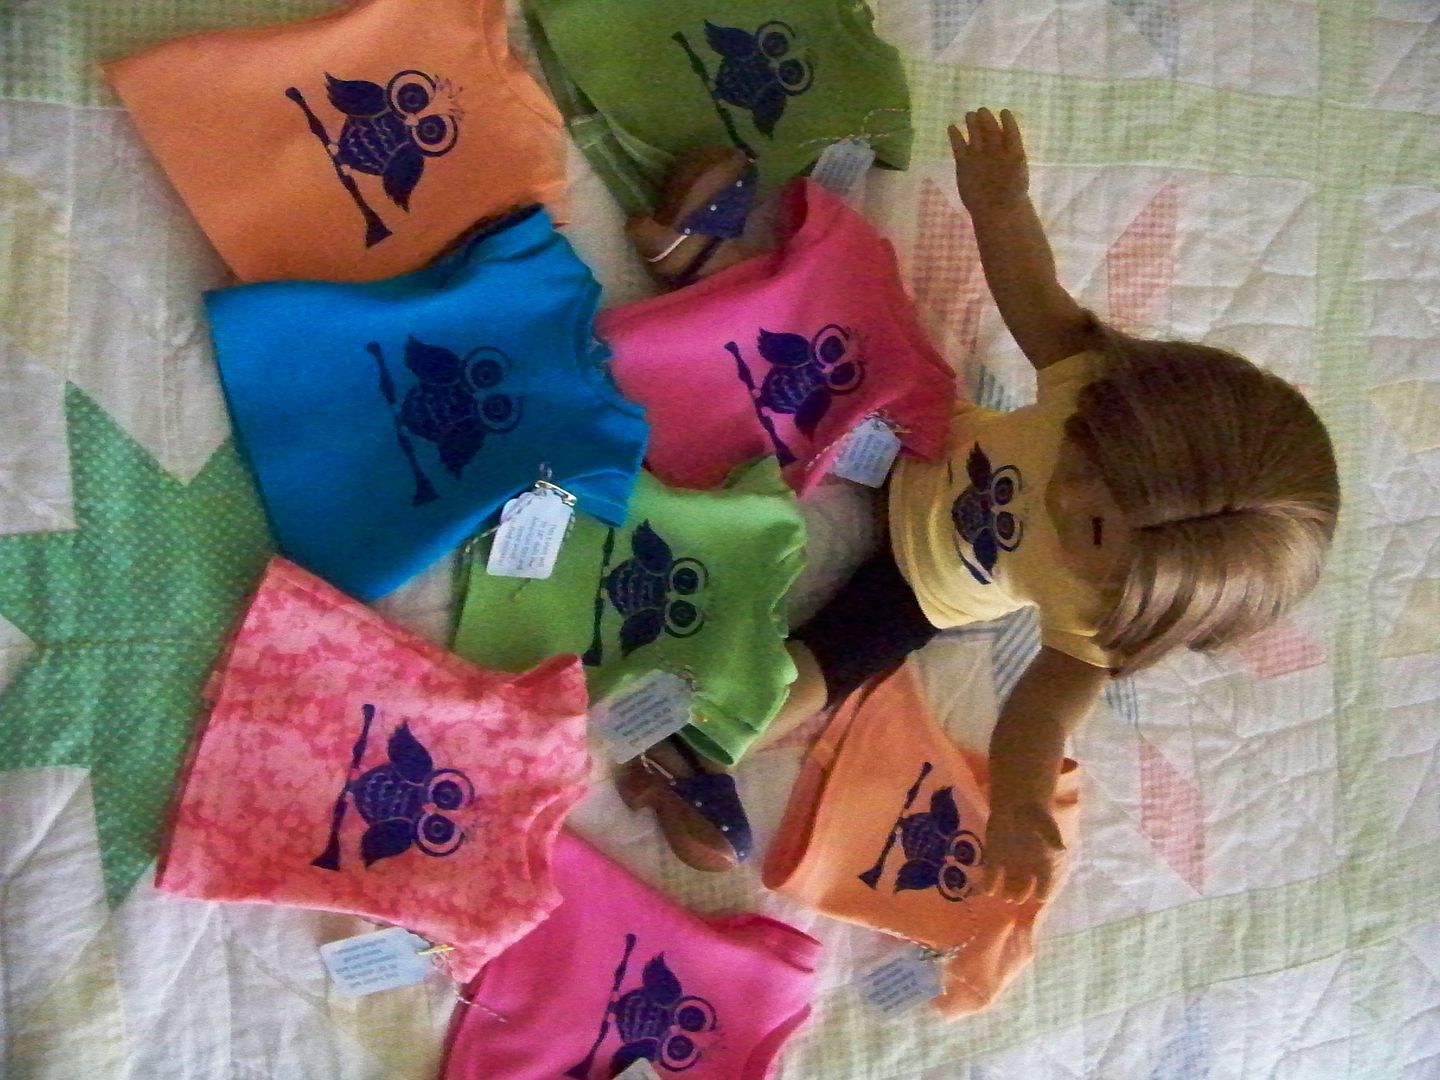
  • doll t-shirt favors
  • clay owl party craft
  • owl cupcakes
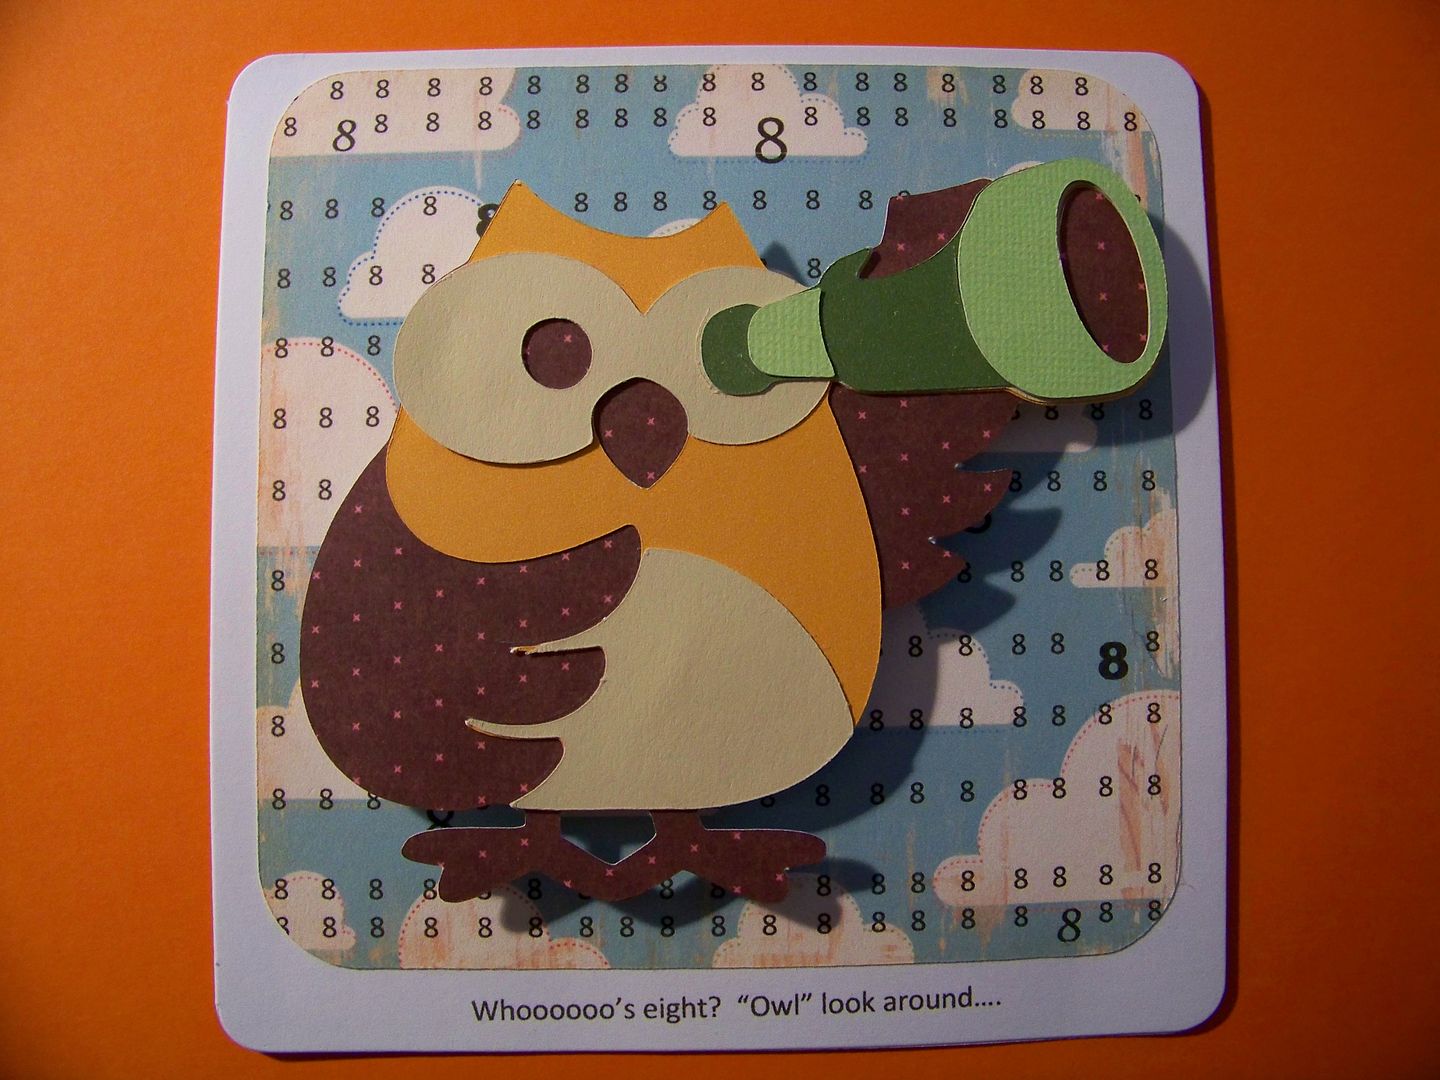
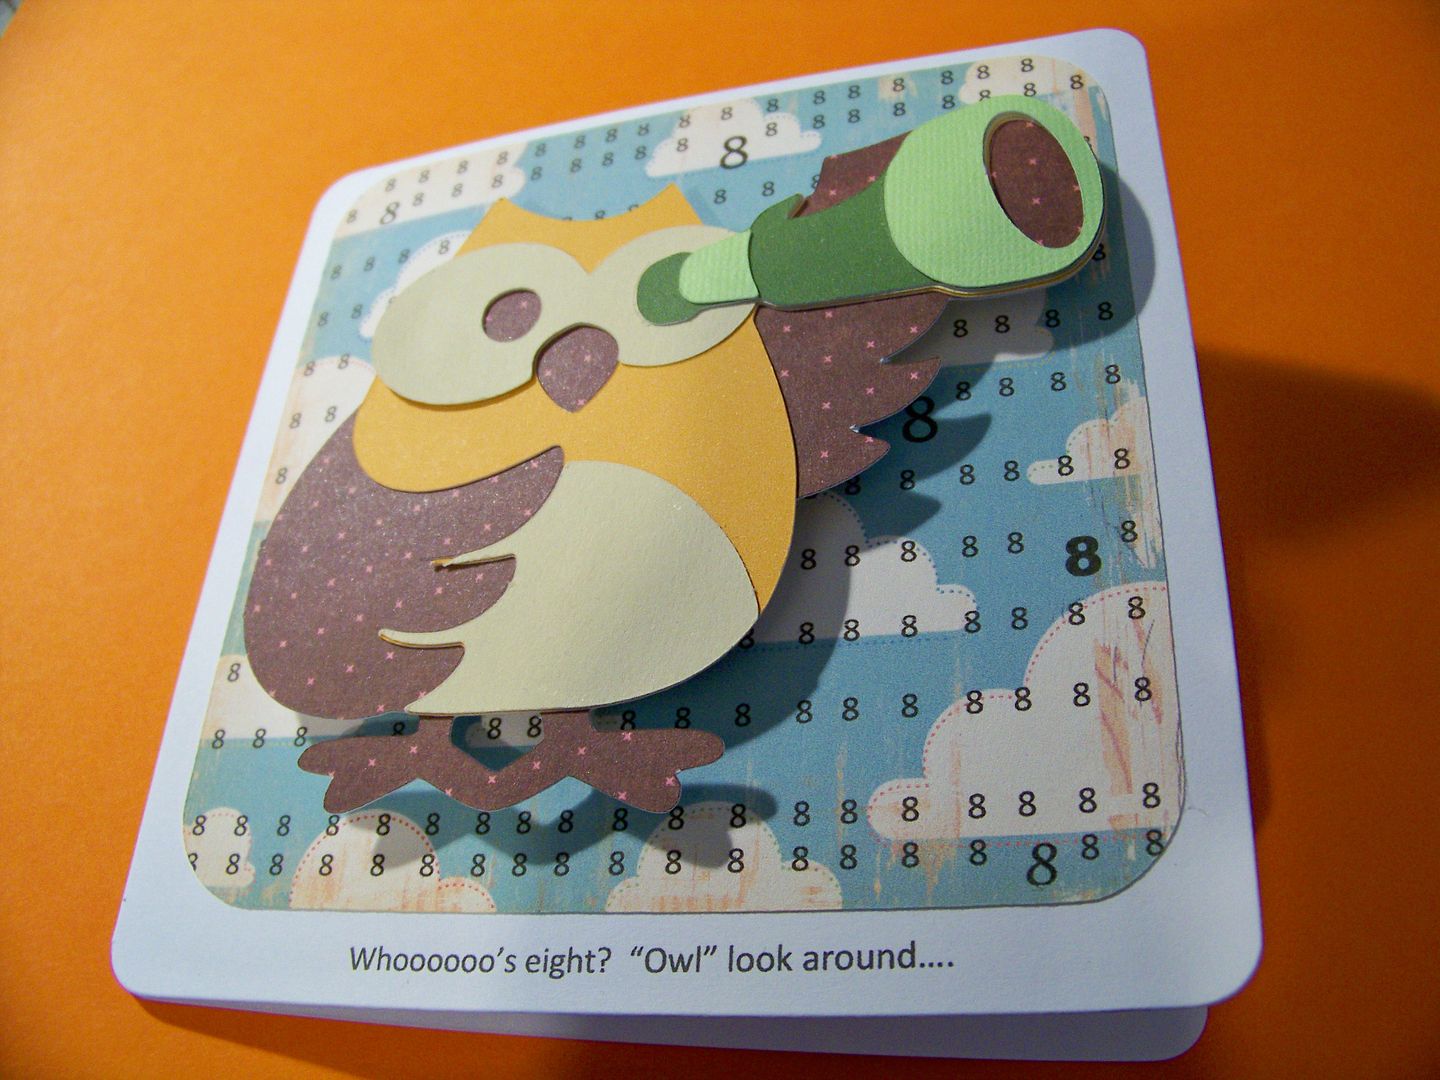
  • birthday card

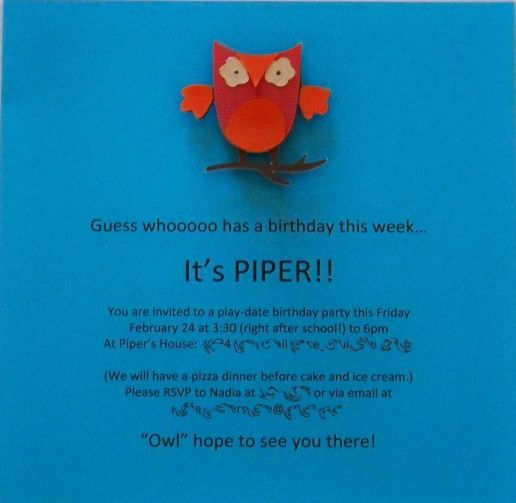
Invitations:
6"x6" cardstock with text from my computer and an owl from Give A Hoot, cut on the Cricut Expression at 1.75".  The owl is popped up with 1/4" popdots.

Favor Bags:
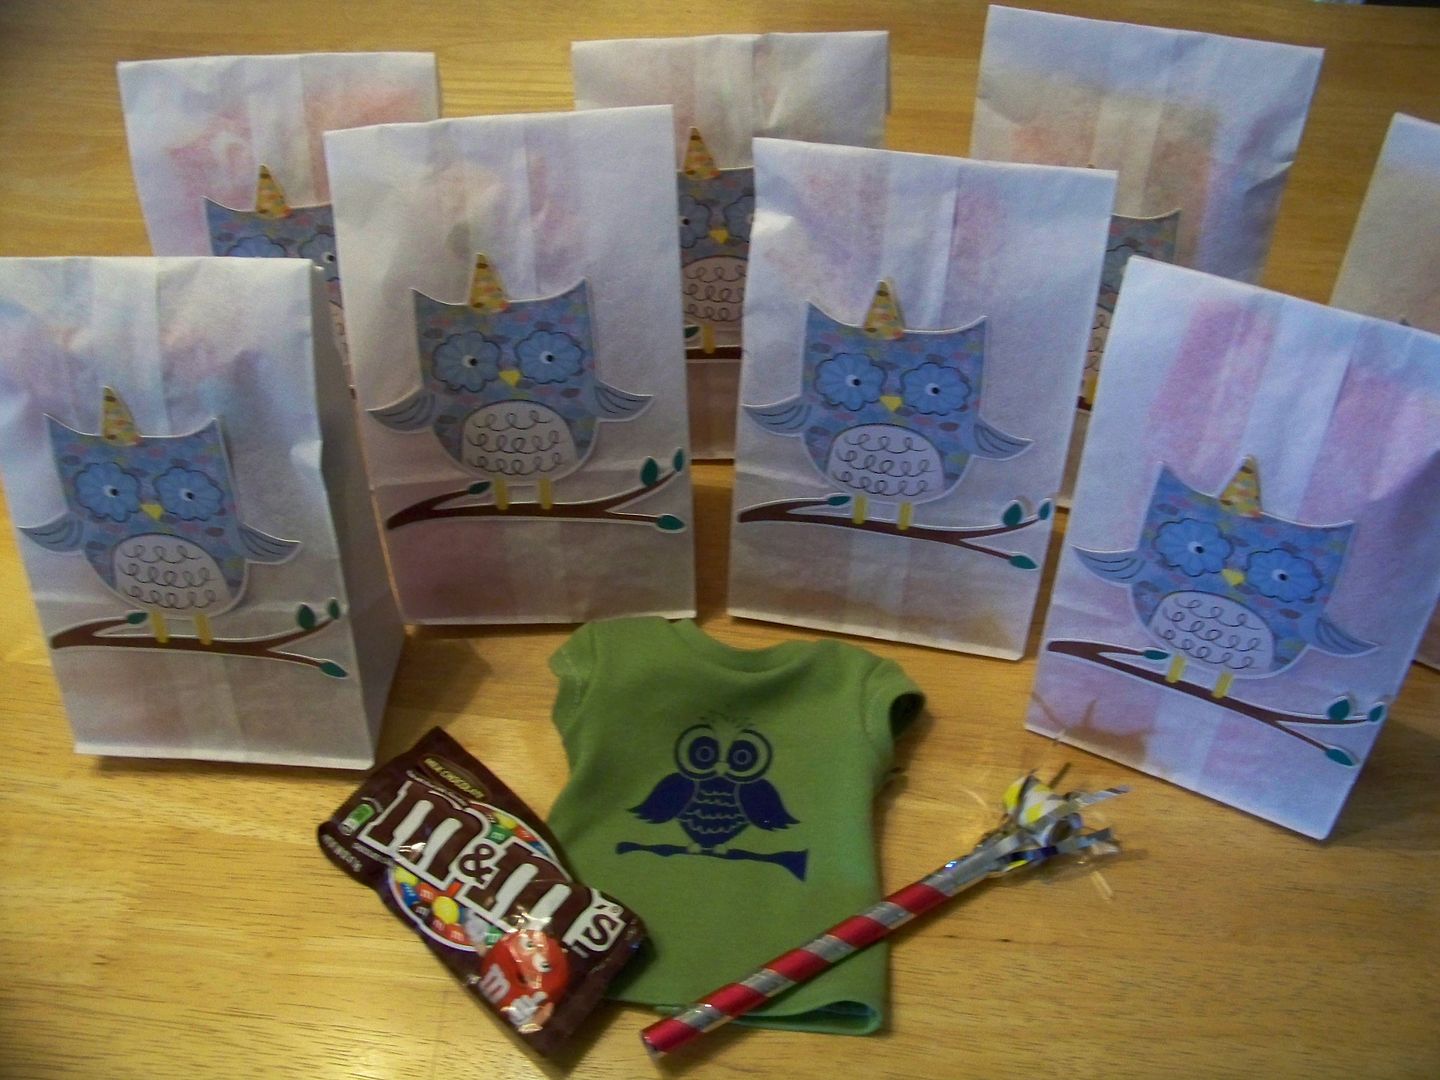
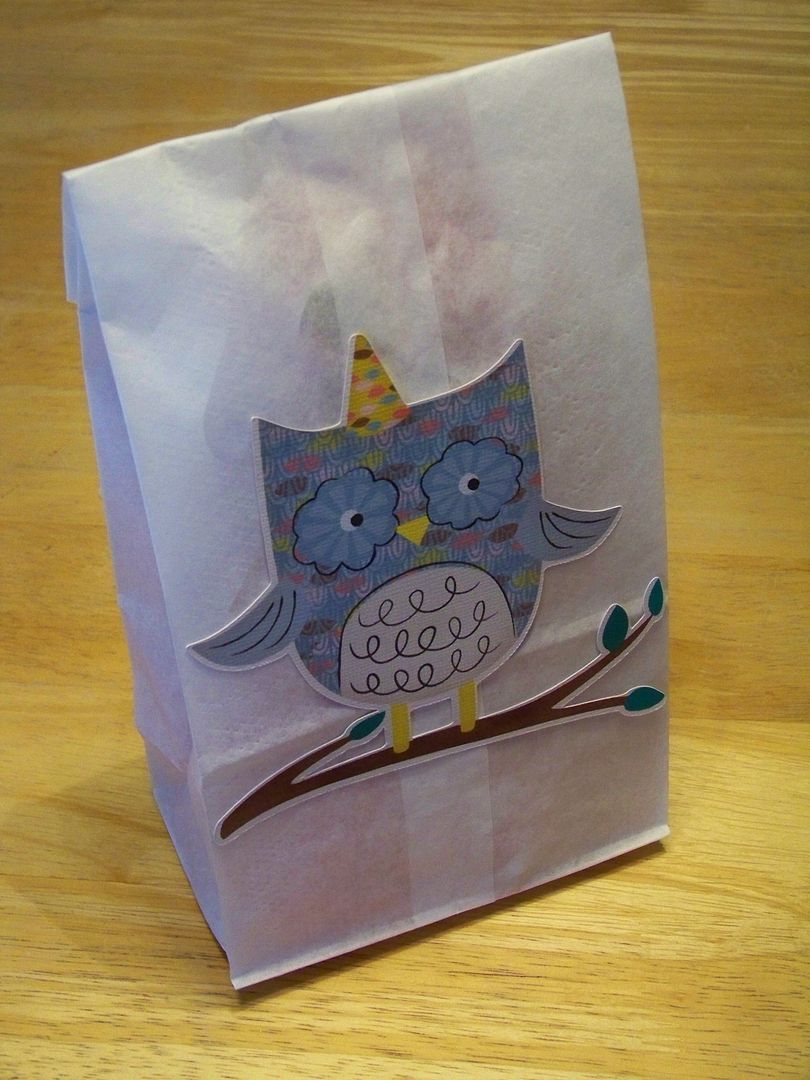
I needed quick and easy favor bags to hold an American Girl doll t-shirt I sewed and printed, M&Ms and a party blower we had for party favors.  There is nothing quicker and easier than using Imagine images!  (The doll t-shirts were wrapped in tissue paper keep them wrinkle-free-- the bright tissue paper is sharing a bit of its color through the thin white paper lunch bags I used!)


The owl was printed and cut on the Imagine from Better Together at 5".

Doll t-shirts:
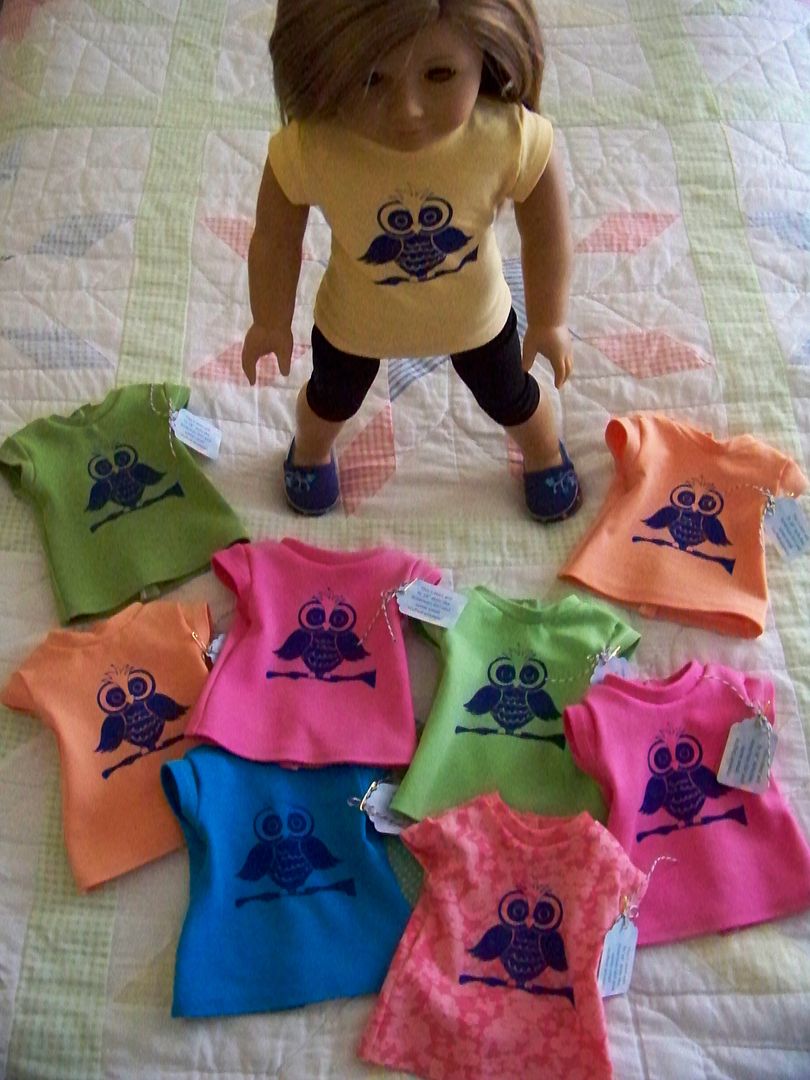
I wanted to create something fun that the girls would actually want and use.  In the past, I have filled favor bags with trinkets, stickers, and cheap toys from the party favor aisle but I suspect (like we do when Piper gets those kinds of favors) that they end up in the trash in no time.  Since all of the girls have American Girl dolls, I thought doll t-shirts with our owl theme would be a good choice!


Pin It

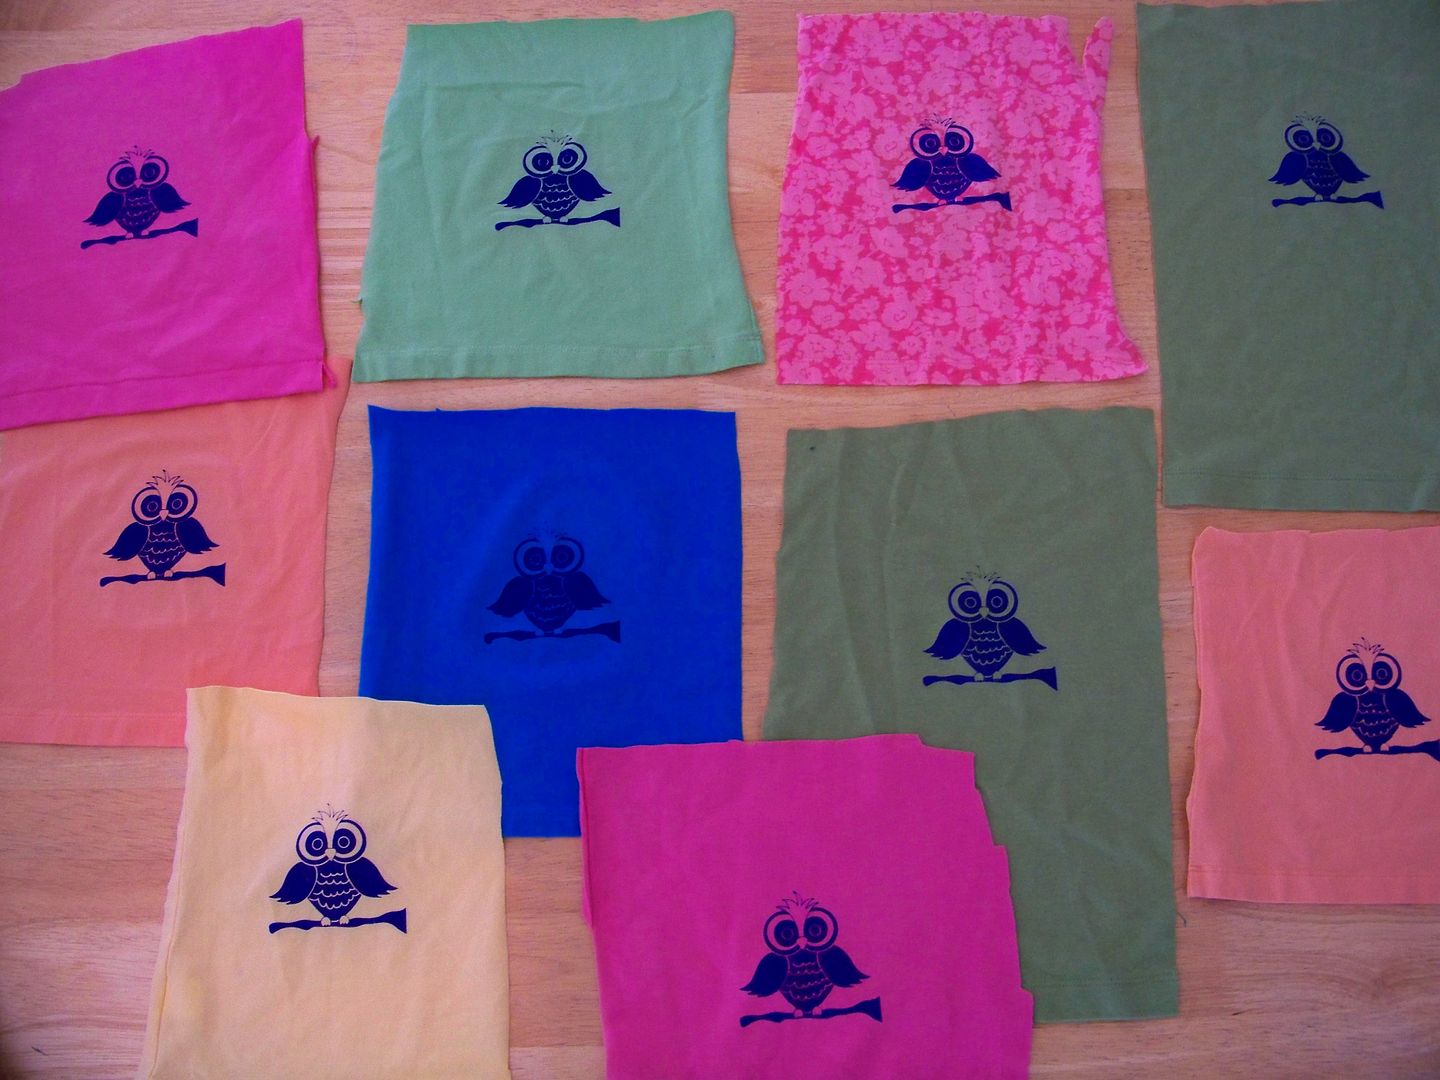
I use thrift store knit shirts because I can find so many more options than available to me at the fabric store!  I found Gap shirts, Jones NY Jones Studio, and Ralph Lauren turtlenecks which all worked perfectly even though some were 100% cotton and some were blended with spandex.  I use the shirt body and the band:


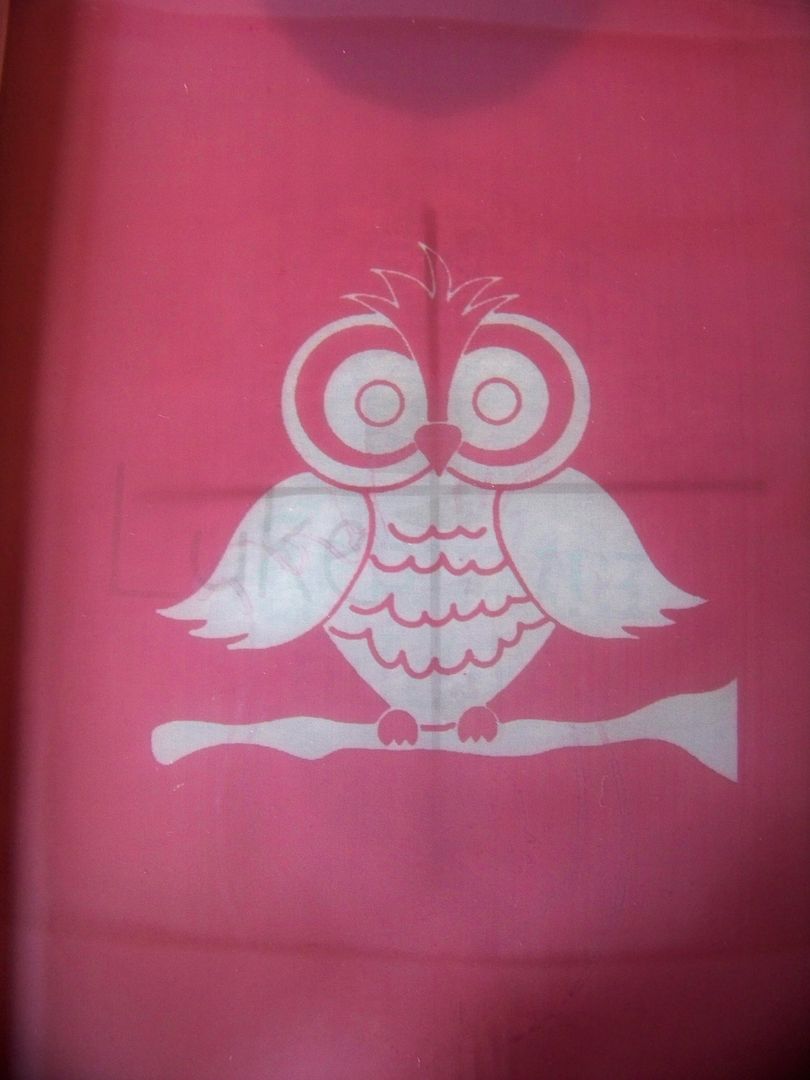
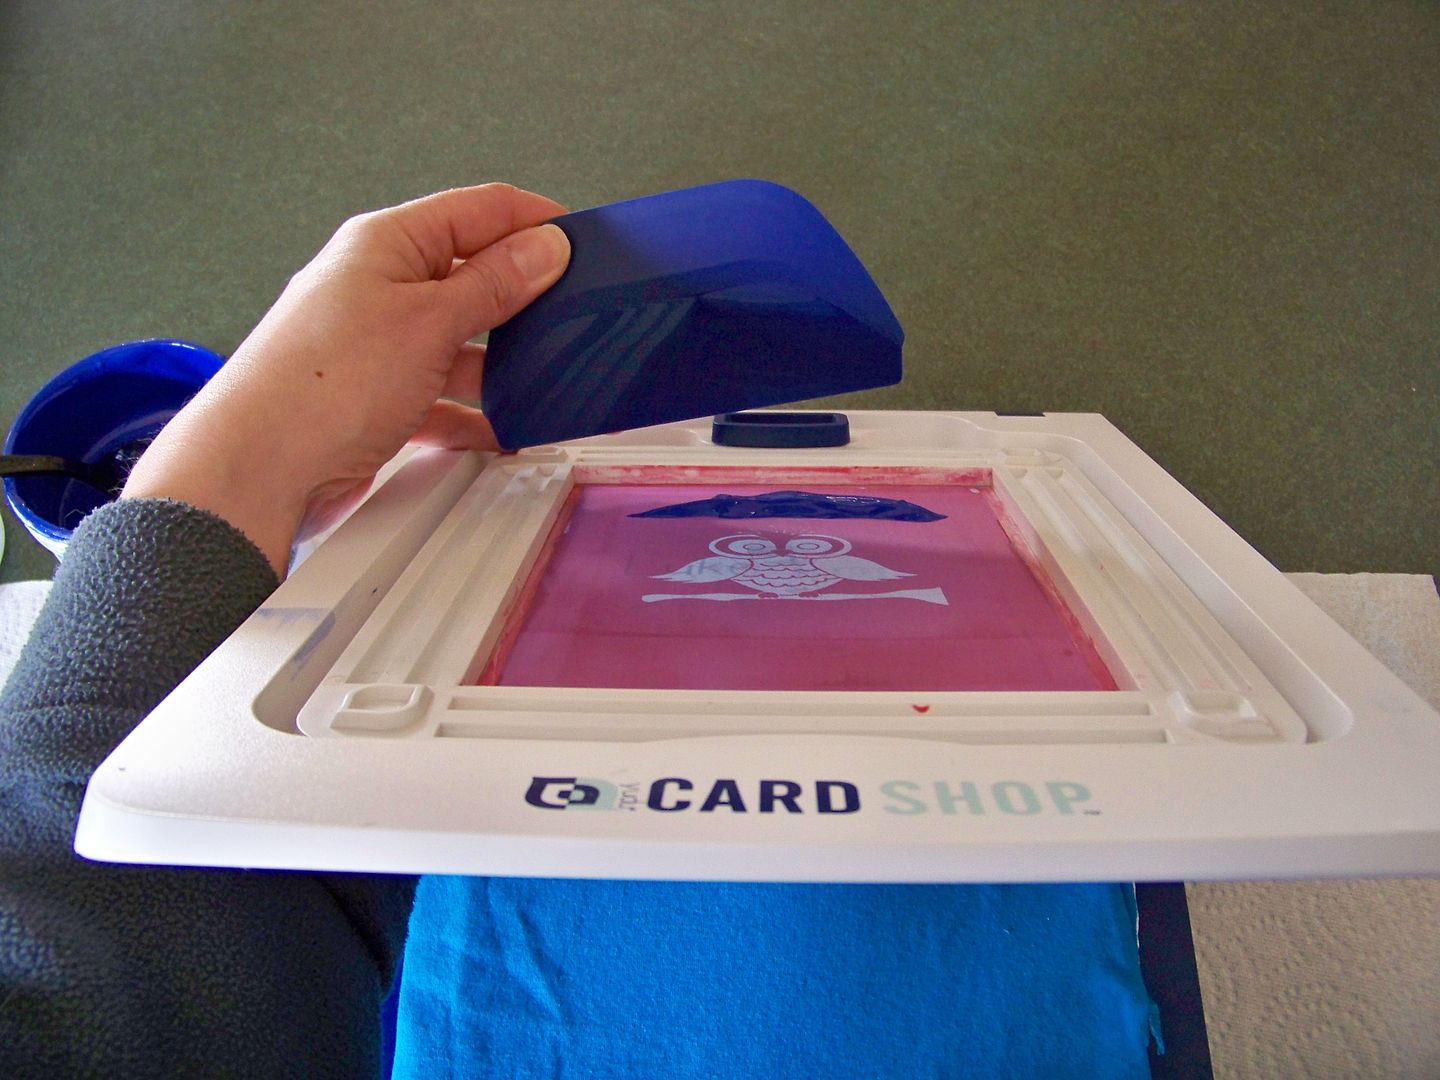
The owl design is from Pam's Clip Art. I copied the image onto a transparency and burned the image into liquid emulsion using my Yudu.


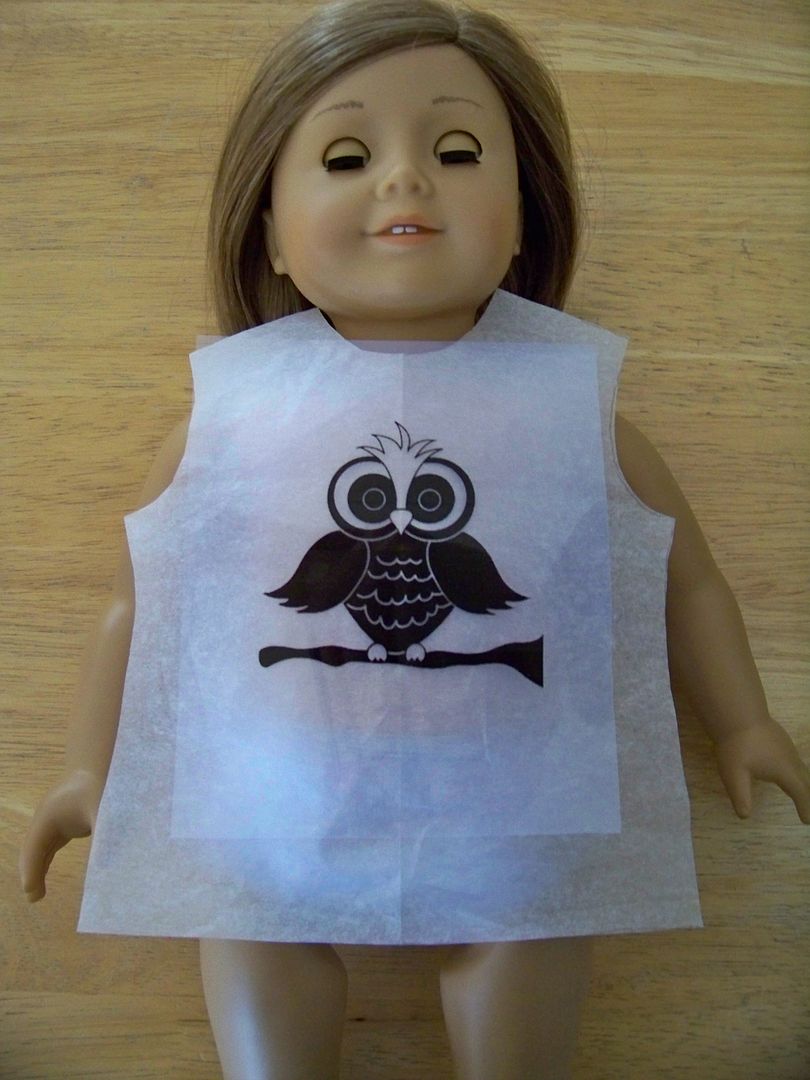
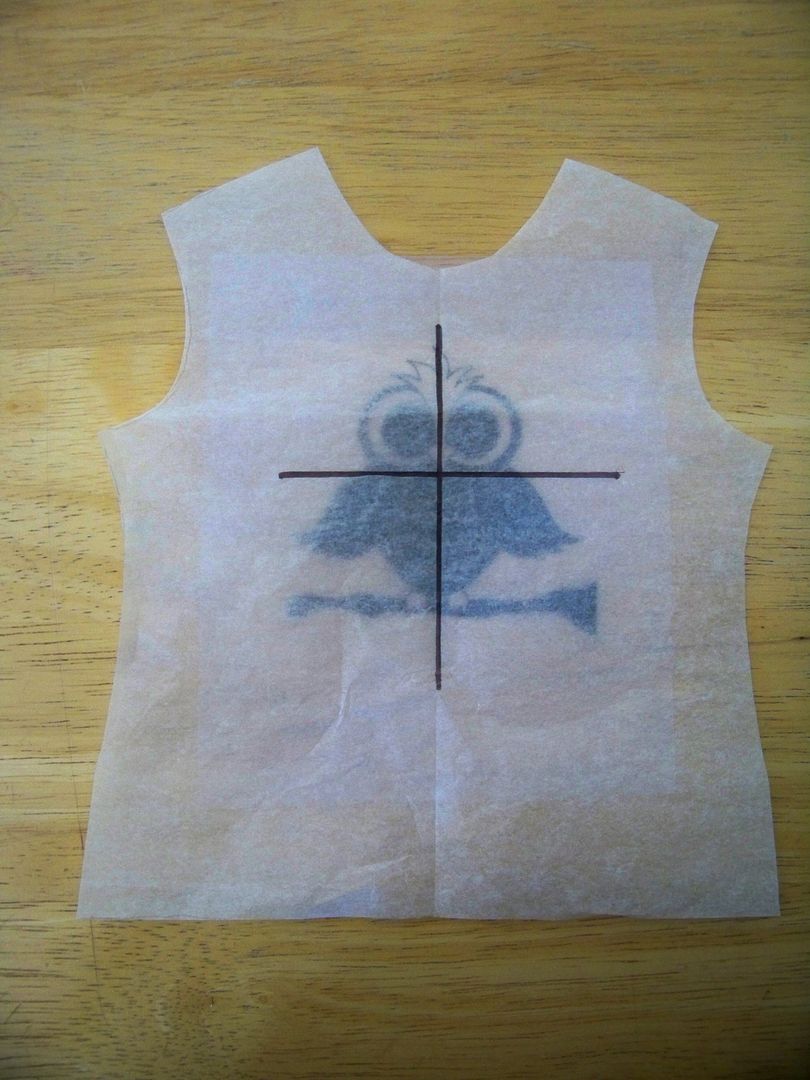
I figured out that if I cut a tissue paper t-shirt pattern opened up, I could use a Sharpie to mark the center of the shirt and line it up with the owl's eyes in order to perfectly place the knit fabric in the Yudu Cardshop and again later when it was time to cut out the shirt.  It is definitely the desired method to screen the fabric then cut out and make the shirt!


Once the screen was prepared, I used my Yudu Cardshop to pull the ink onto the t-shirt fabric squares. 


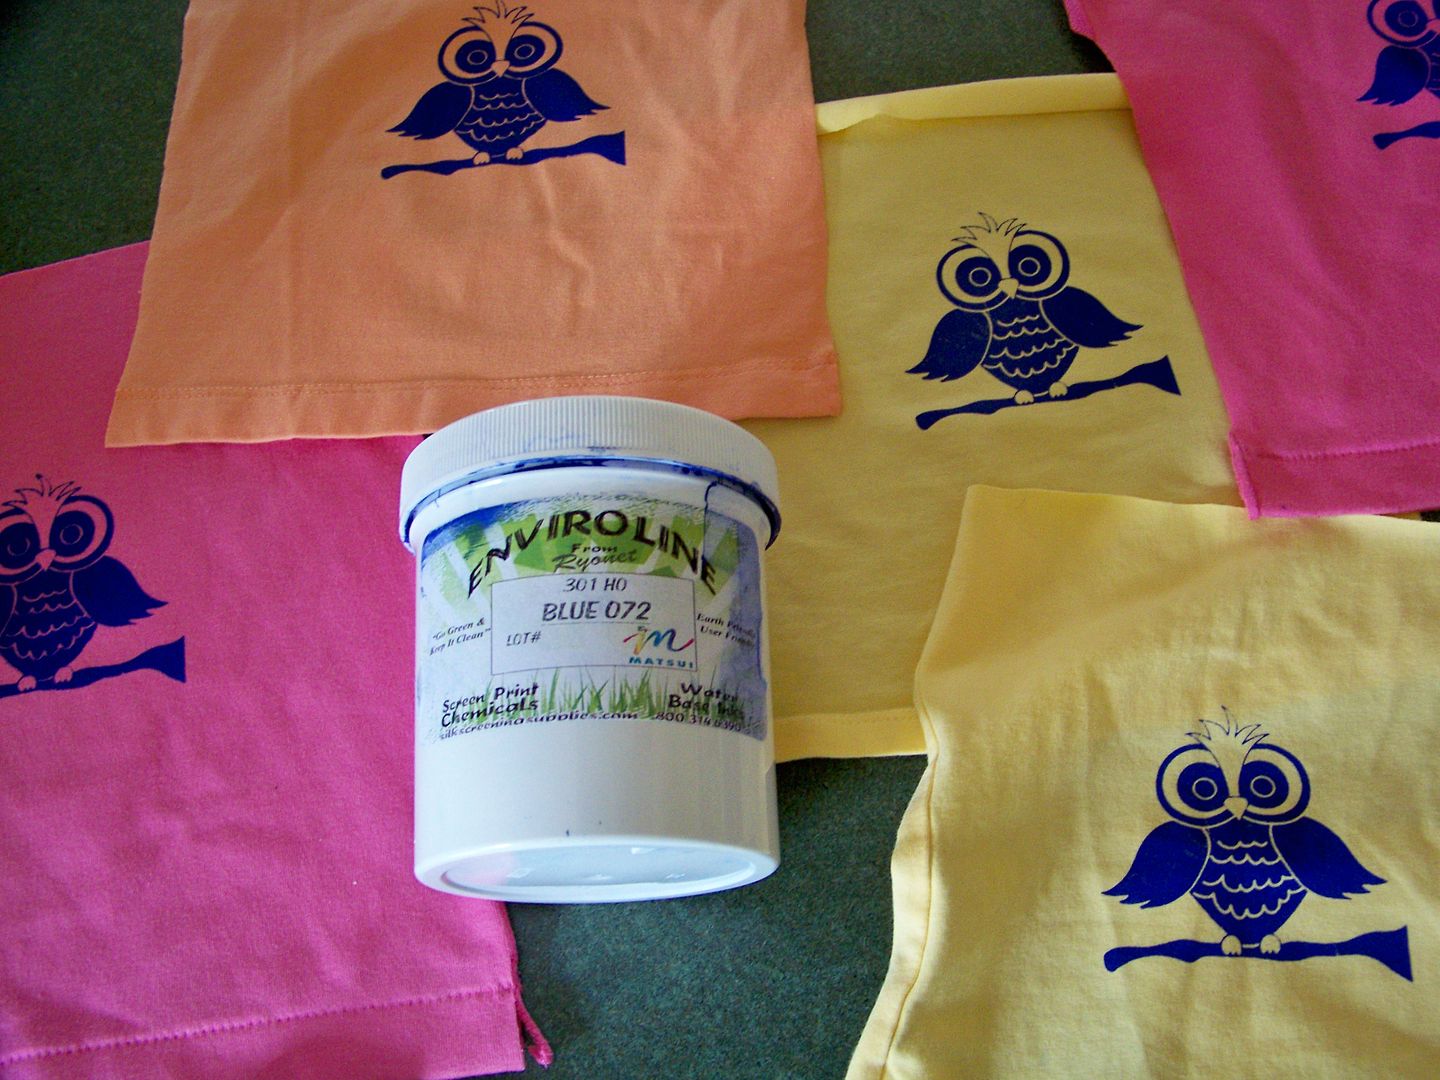
I used Ryonet's Enviroline opaque ink in blue.  This ink is just fantastic to pull!  I did find that too much pressure pulling on spandex was a disaster, teaching me to adjust my pressure!  I also find with the fine details (like with the feathers on the owl's head) that I had to pull this image twice!  


Once the ink dried, I heat set the images and made them into t-shirts. The pattern for the doll t-shirt is a free one from Liberty Jane with an added neckband. 


I added little tags with tiny brass safety pins tied with bakers twine to clue in the girls that this little t-shirt was for their American Girl dolls, which also made them look finished and special.

Activities:
Clay owl magnets!  I wanted the girls to be able to make something in between playing and eating.... plus I am told by one of the moms that our house is known as "the project house". 


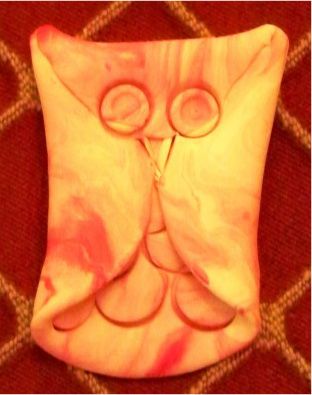
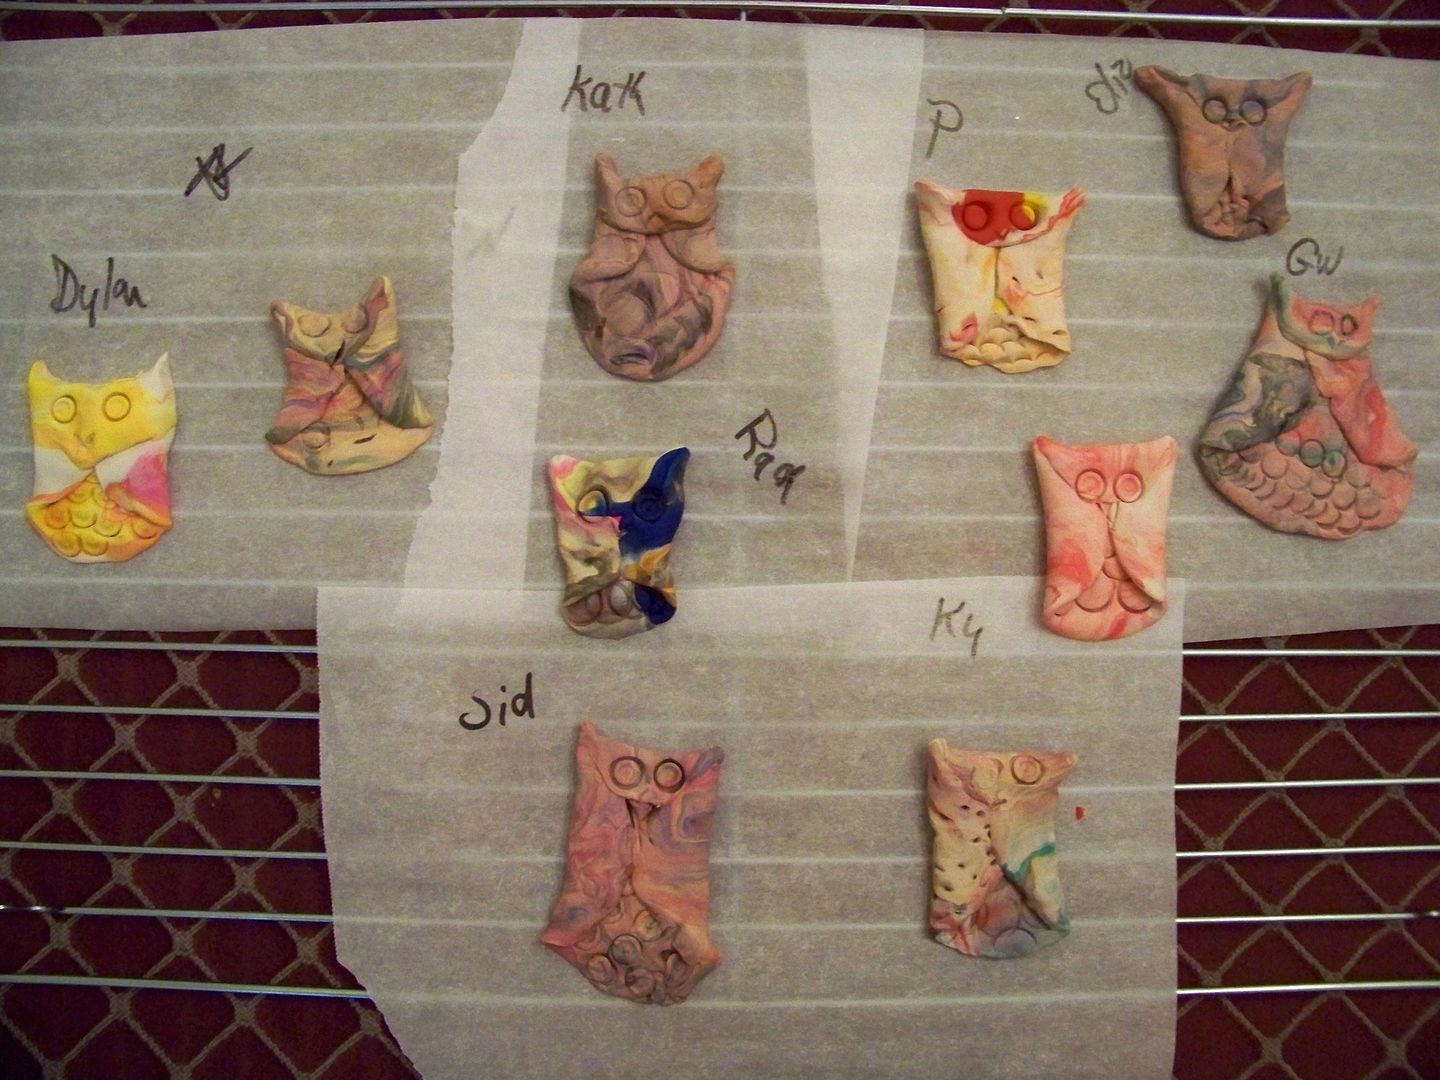
I printed out a great tutorial from the 4CrazyKings blog to show the kids how to make their own little owls to take home!  You can find it by clicking here.  We used Sculpey oven-bake clay.  I gave them white and they picked slivers of other colors to mix in to get a marbled effect.  (I thought this would be easier and less messy than painting!)

Cupcakes:
On the super easy "picky-eater" menu was pizza, fresh fruits and veggies, chips, juice boxes, cupcakes, and ice cream. The food is always the easiest part because of all that my daughter won't eat! 


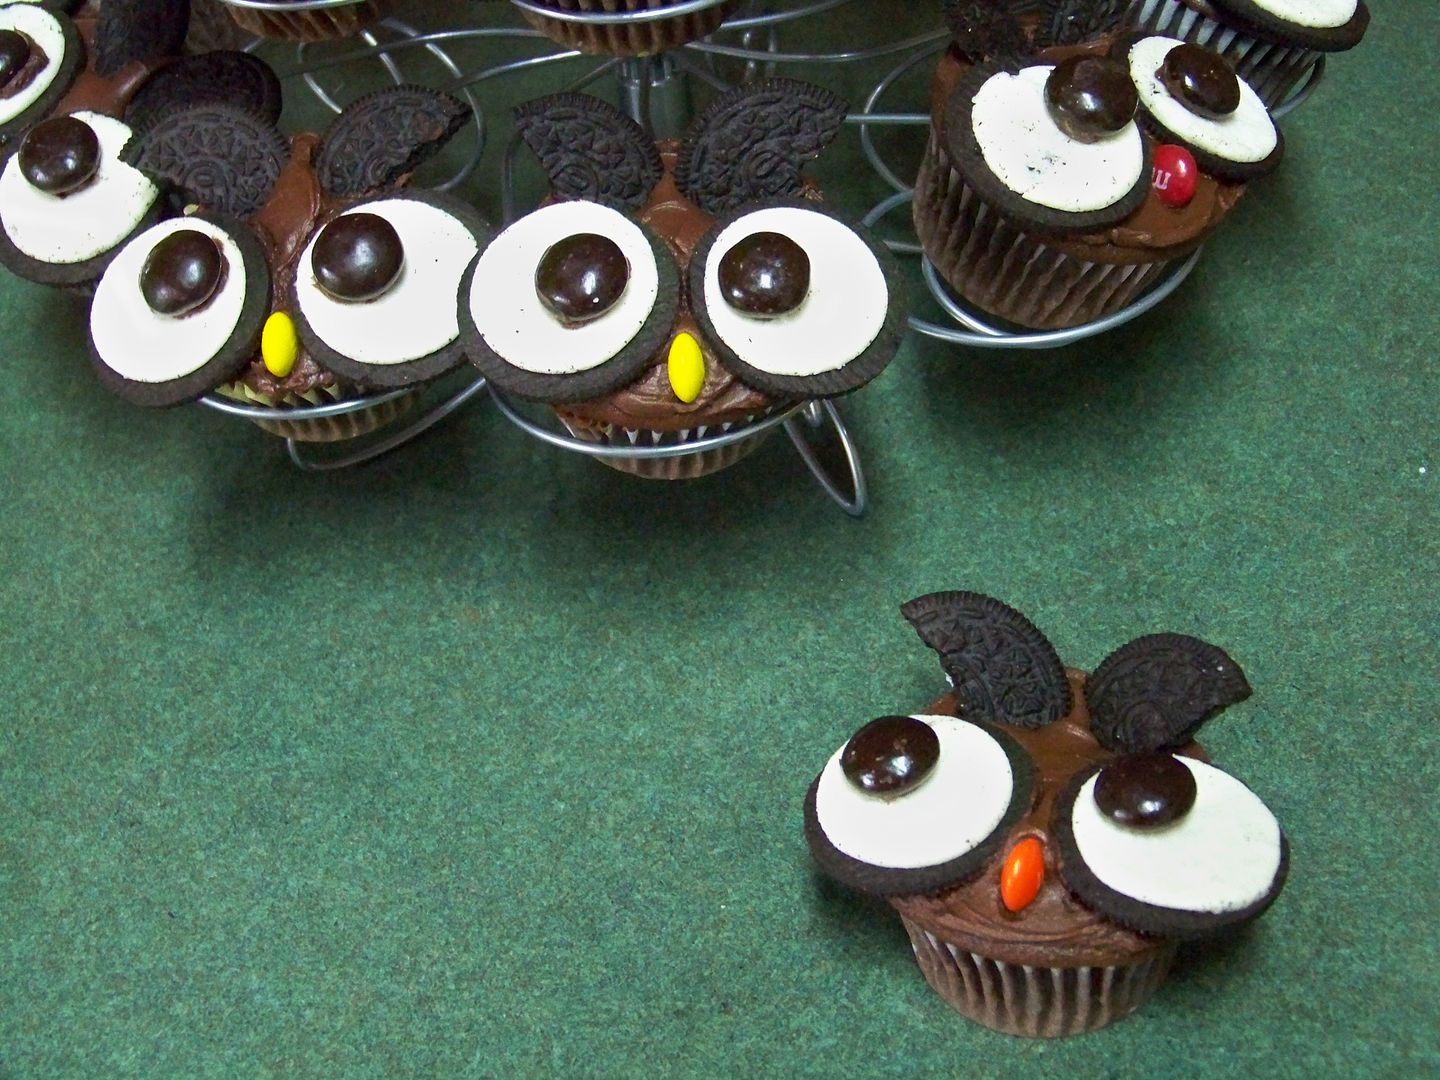
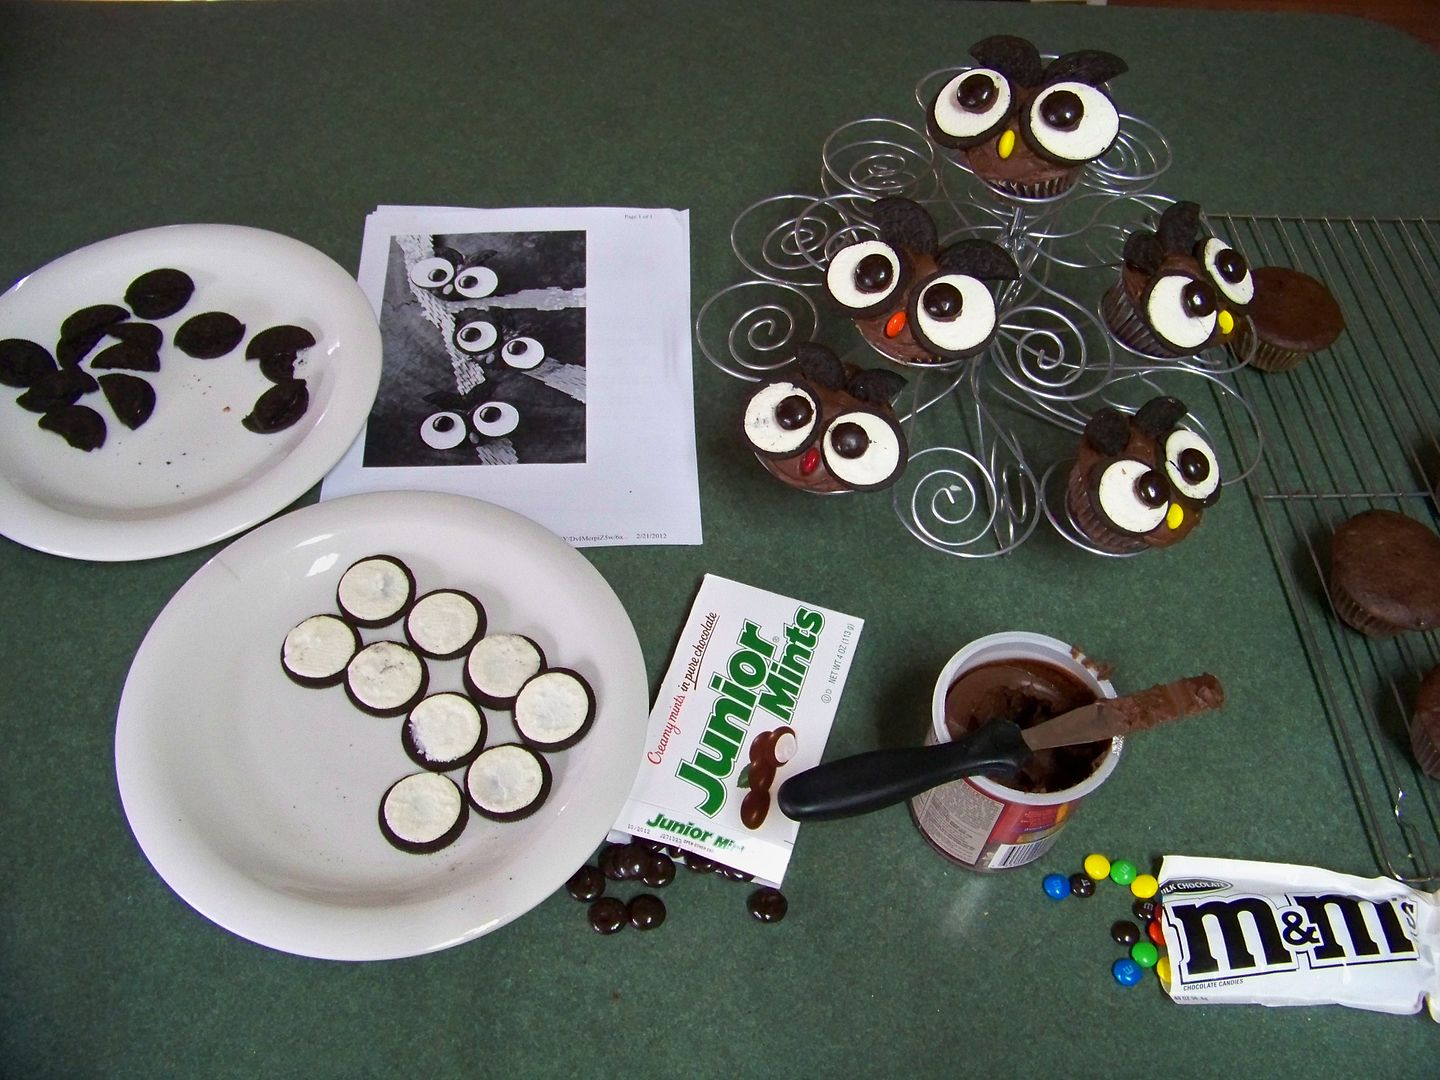
I had every intention of buying cupcakes until I saw adorable owl cupcakes on Pinterest from 6Bittersweets.  I cheated and used a cake mix and canned frosting, but I used Xiaolu's decorating ideas to make owls from Oreos, Junior Mints, and MM Candies.  Click here for the original post!


Card for the Birthday Girl:
 I wanted Piper's birthday card from Dad and I to continue with an owl theme. 


I used a blank 5"x5" Studio G card as a base.  Next, I cut and printed a rounded square (built-in Imagine shape) at 4.6" and floodfilled it with the cloud print from Hopscotch. 


Then, on my PC, I created a table, setting it up with 30 rows and 30 columns.  I populated the grid with 8s and selectively chose a few to change the size and font.  I printed the table onto a white paper.  I taped the Imagine-printed shape onto the white paper and ran it through my PC printer again to get the 8s to print on top of my clouds.  I printed the text on my cardstock base the same way.

The owl is from Campin Critters, cut on the Expression at 3.5".  I popped it up 1/4" with pop dots.

Our party was last night and the girls seemed to have so much fun!  The some of the girls rode home with us from school and screamed and laughed and were crazy the whole way there.  They were so funny (and loud), squealing during their little fashion show, games, crafts, the meal, and gift opening.  They weren't ready to leave... and Piper wasn't ready for them to go!  They are such a great little group with never even one harsh word or bit of unpleasantness--- just nothing but fun and laughs!  We are so blessed to have sweet little friends in Piper's life with fantastic families who have raised them that way!

Thank you for reading my birthday post.  "Owl" be thinking of the next project soon!  

But wait! There's more! Click 'older posts' above!
But wait!  There's more!  Click 'older posts' above!