Saturday, November 29, 2014

3D Tags for Christmas Packages!


I have been having fun with the idea of 3-dimensional gift tags for some of my packages this Christmas.  Some have very few pieces; others are more detailed.  I am hoping that all of them add a little magic to my gifts.

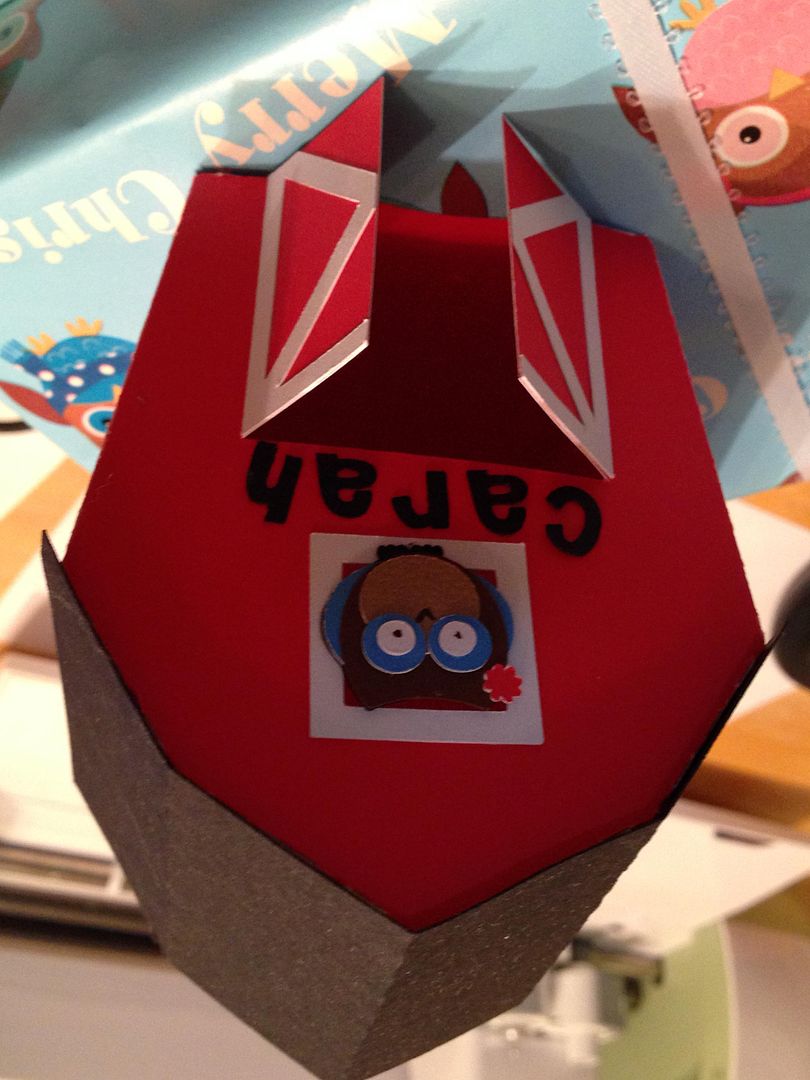
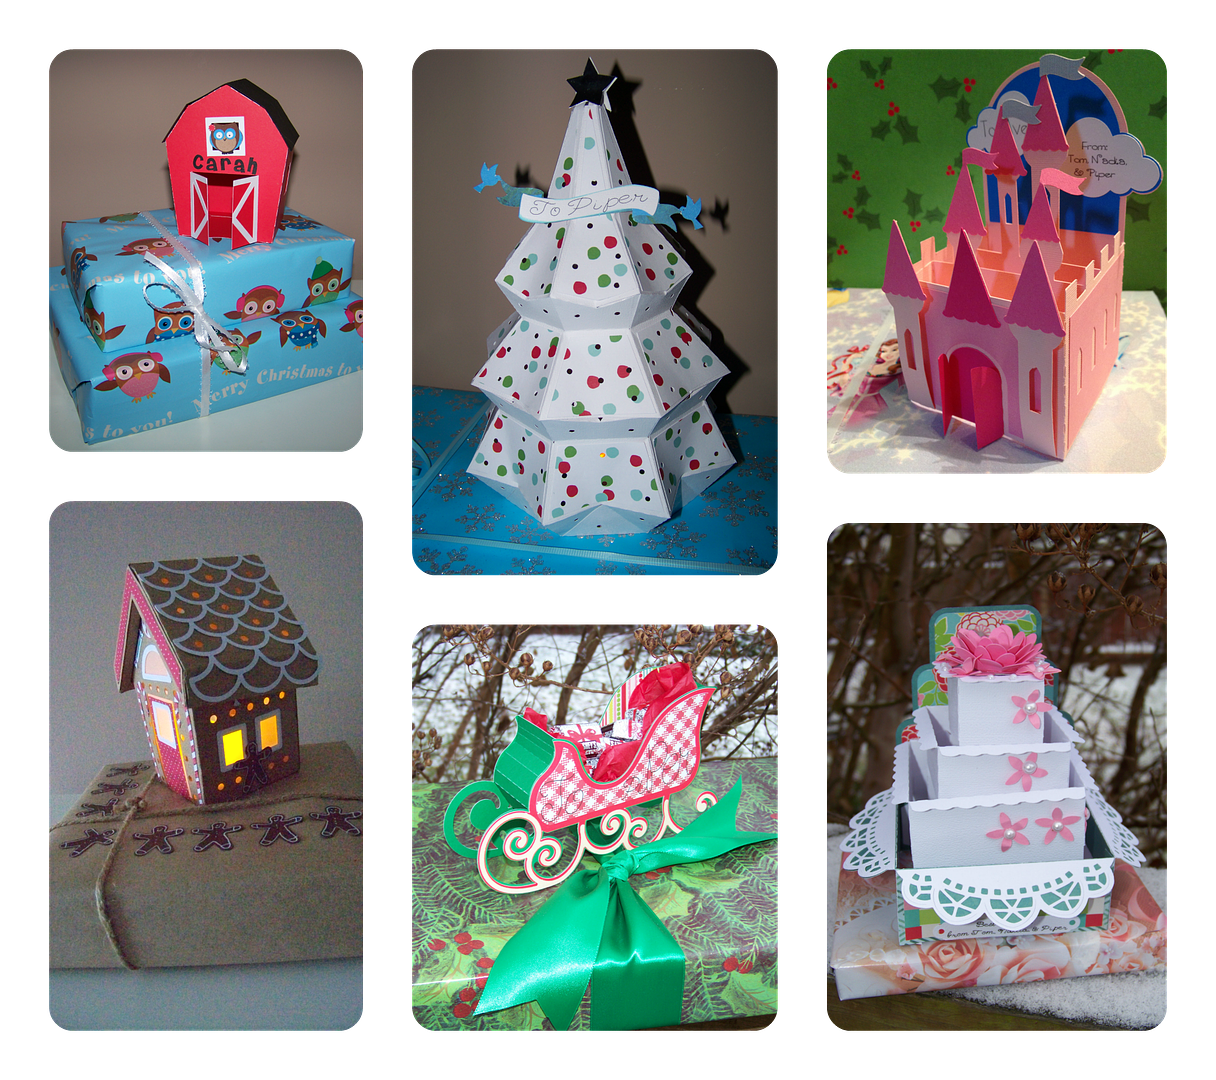
This barn is one of the easiest!  It is from the Santa's Village svg collection from SVGcuts.


I wanted something fun and dimensional and non-traditional for my little niece.  She is also the kind to tear into her gifts with gusto, so I wanted this to be easy and fast to put together (because I know it won't last).  I love this little barn for all of those reasons!  And a cool feature of this file is that, although the designer made this to be adhered directly to the box she has designed, she also includes a piece in the extras file so that you can add a bottom to the barn!  This feature means that you can easily glue it to your package! Click here to see this barn file at SVGcuts.


To make it relate to the Christmas owl wrapping paper, I added an owl svg I had.  Honestly, there are tons of owls on Cricut carts, and Christmas ones at that, but this one is from Too Cute by Jessica, from the So Sweet Owls collection.  Click here to see that file.

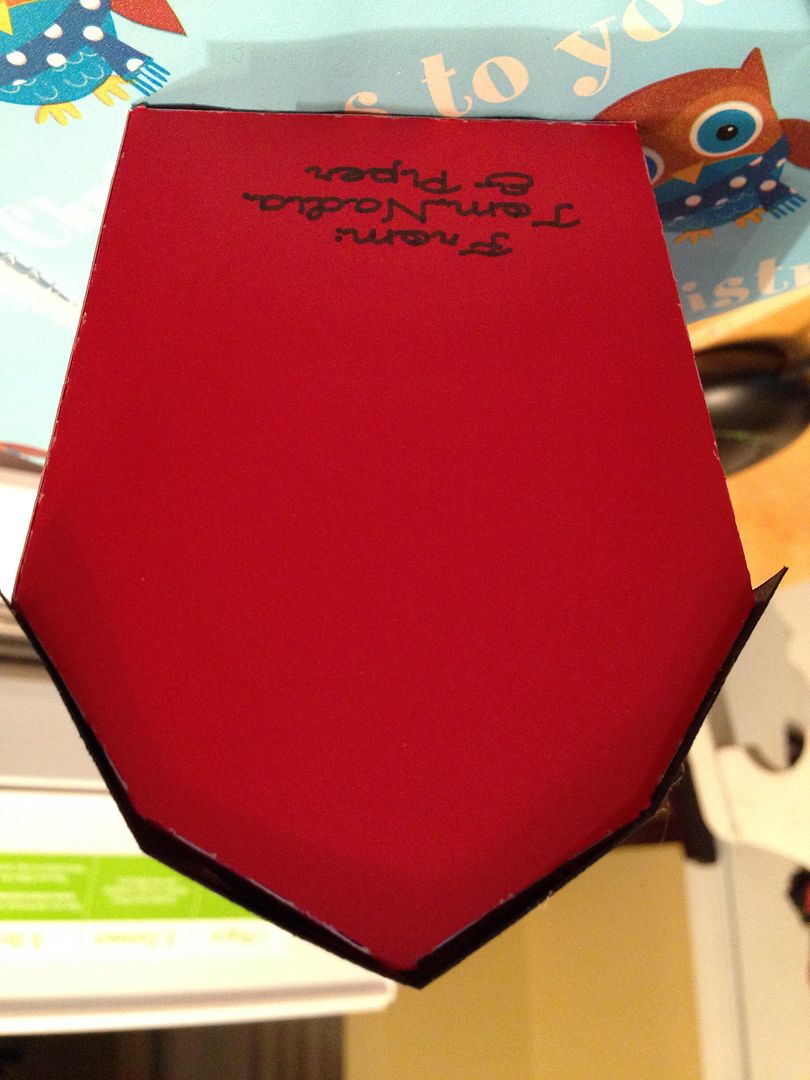
Since this is a 3D gift tag, the recipient's name was cut using a Cricut font on the front.  I used the "Has a Writing Style" feature with an American Crafts Precision Pen for the "from" on the back of the barn.


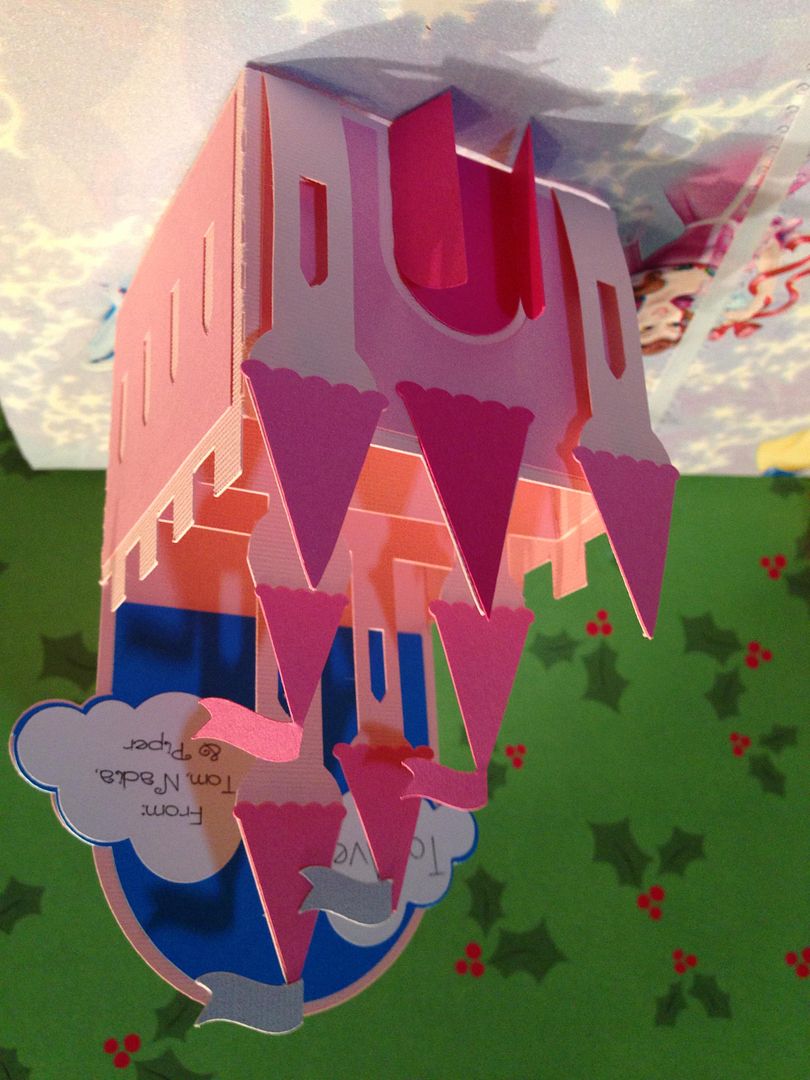
The next one I tried was made using a box card from SVGcuts for a different niece.  I had not gotten on the box card bandwagon, but I always take advantage of the free collection offers whenever SVGcuts comes out with a new design, so I have them all, including this one from the Box Cards Kit.


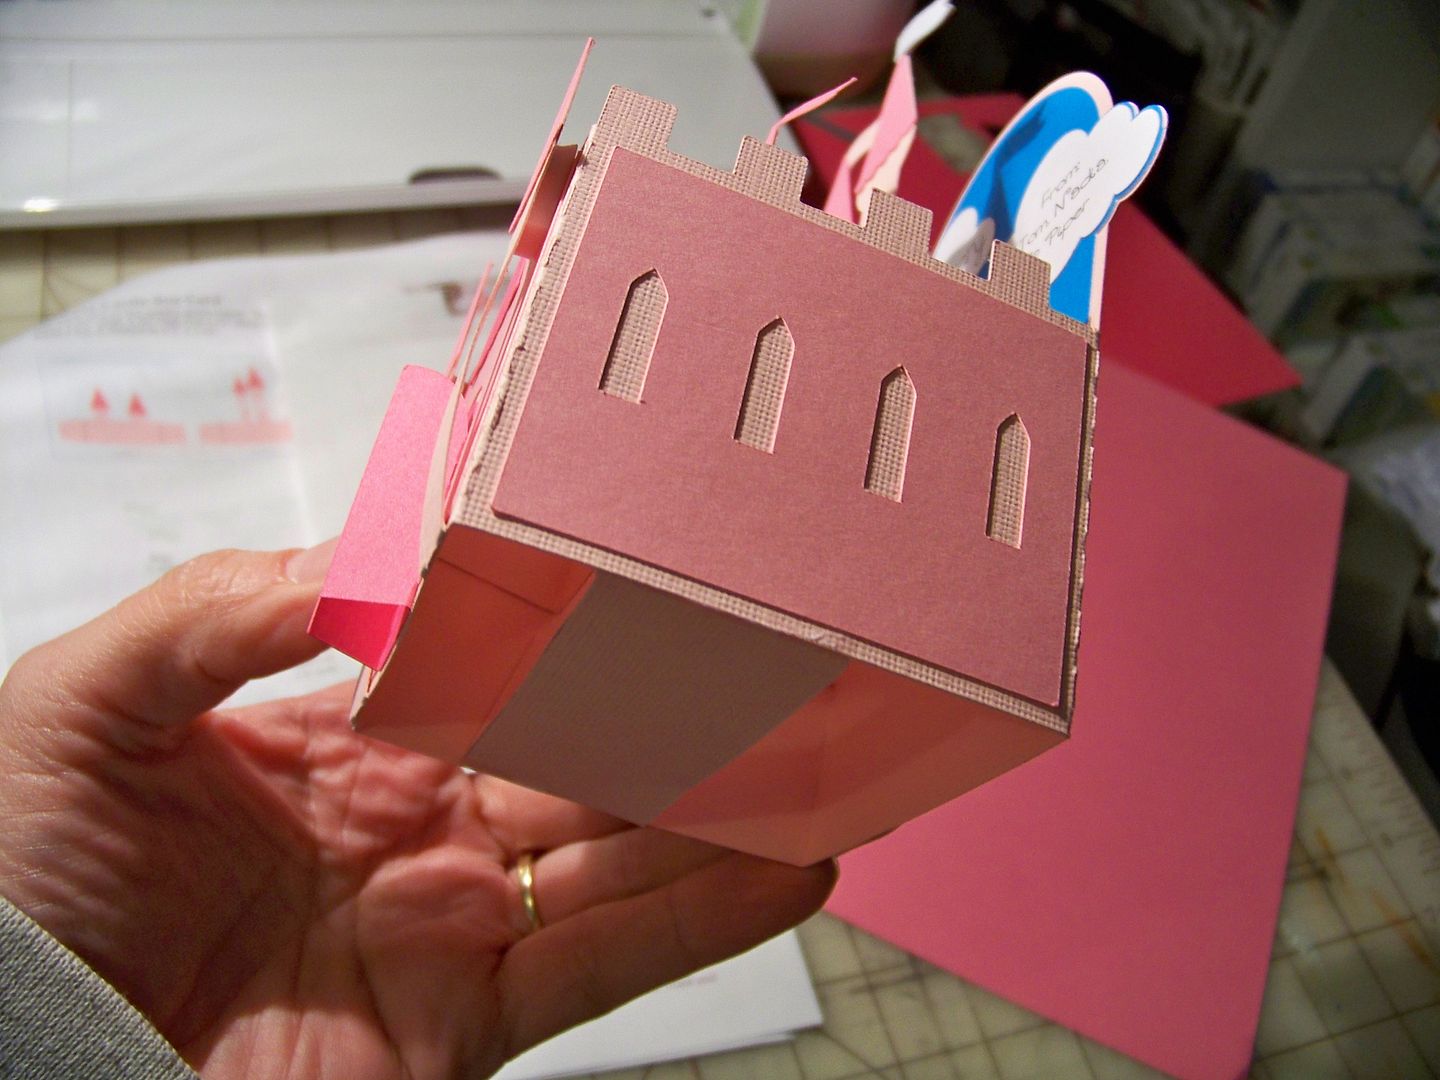
What makes box cards great for use as a 3D tag is that they go together so fast, with all the layers figured out.  They are perfectly dimensional and have great themes!  This castle box card was made to go with princess wrapping paper.  I wanted something quick and effortless because this one is for a toddler's gift!  You know this one will be destroyed in no time!

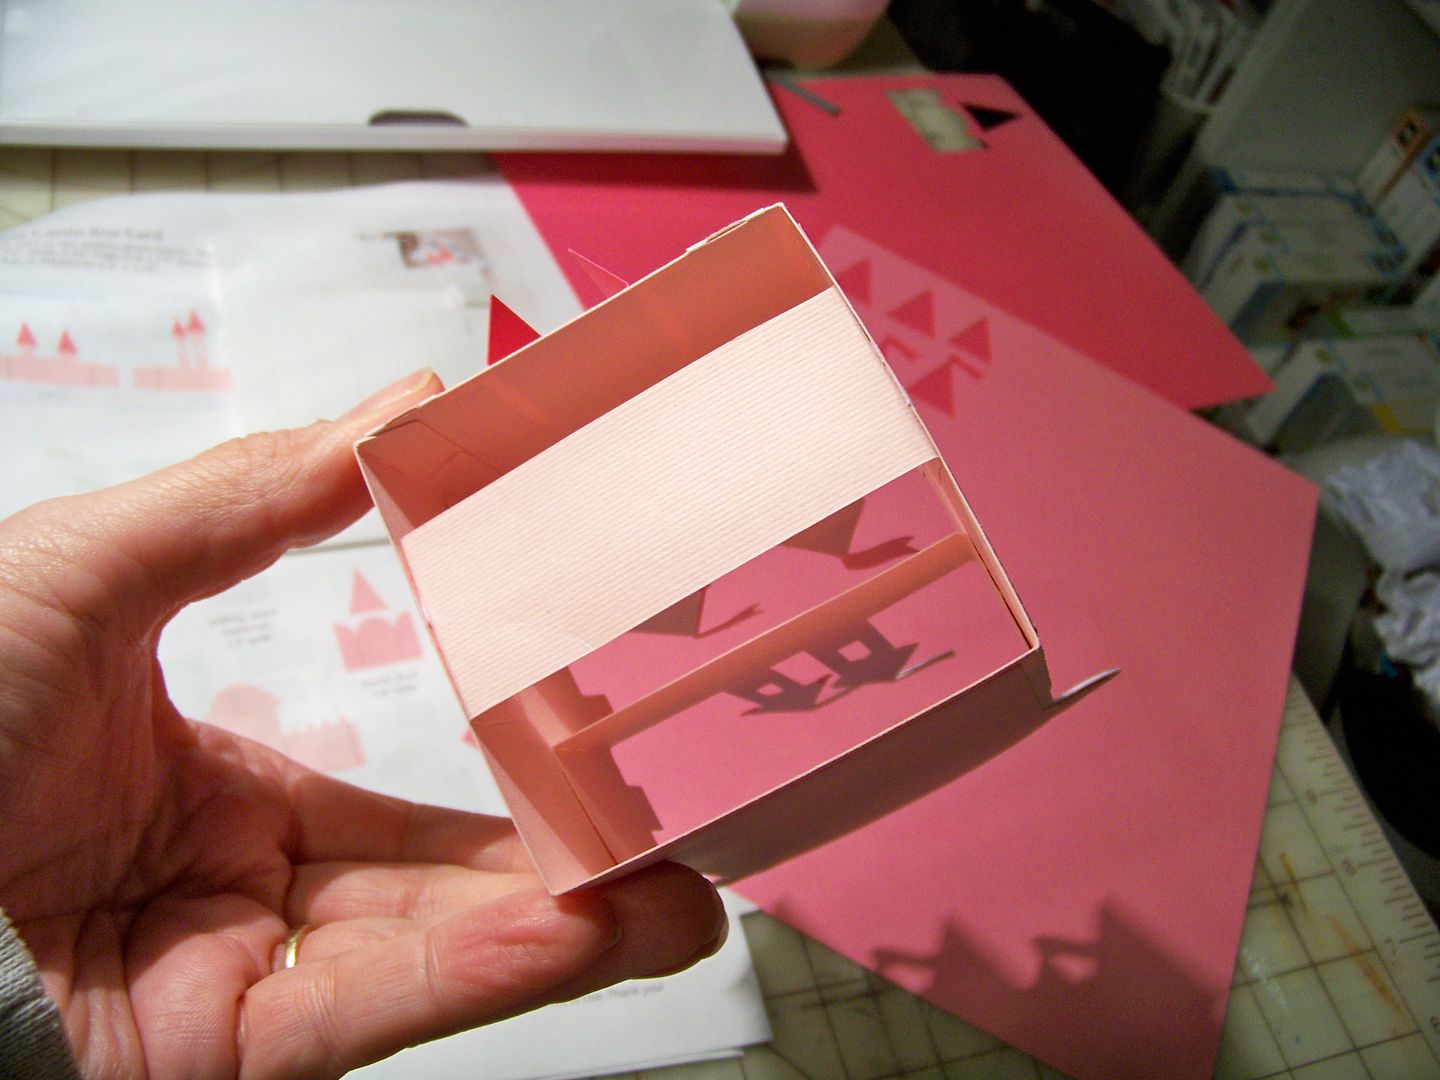
Because box cards are made to collapse to fit into an envelope, I do add a "locking" strip in the bottom.  This also gives me a place to add glue to so that I can adhere it directly onto the wrapping paper.


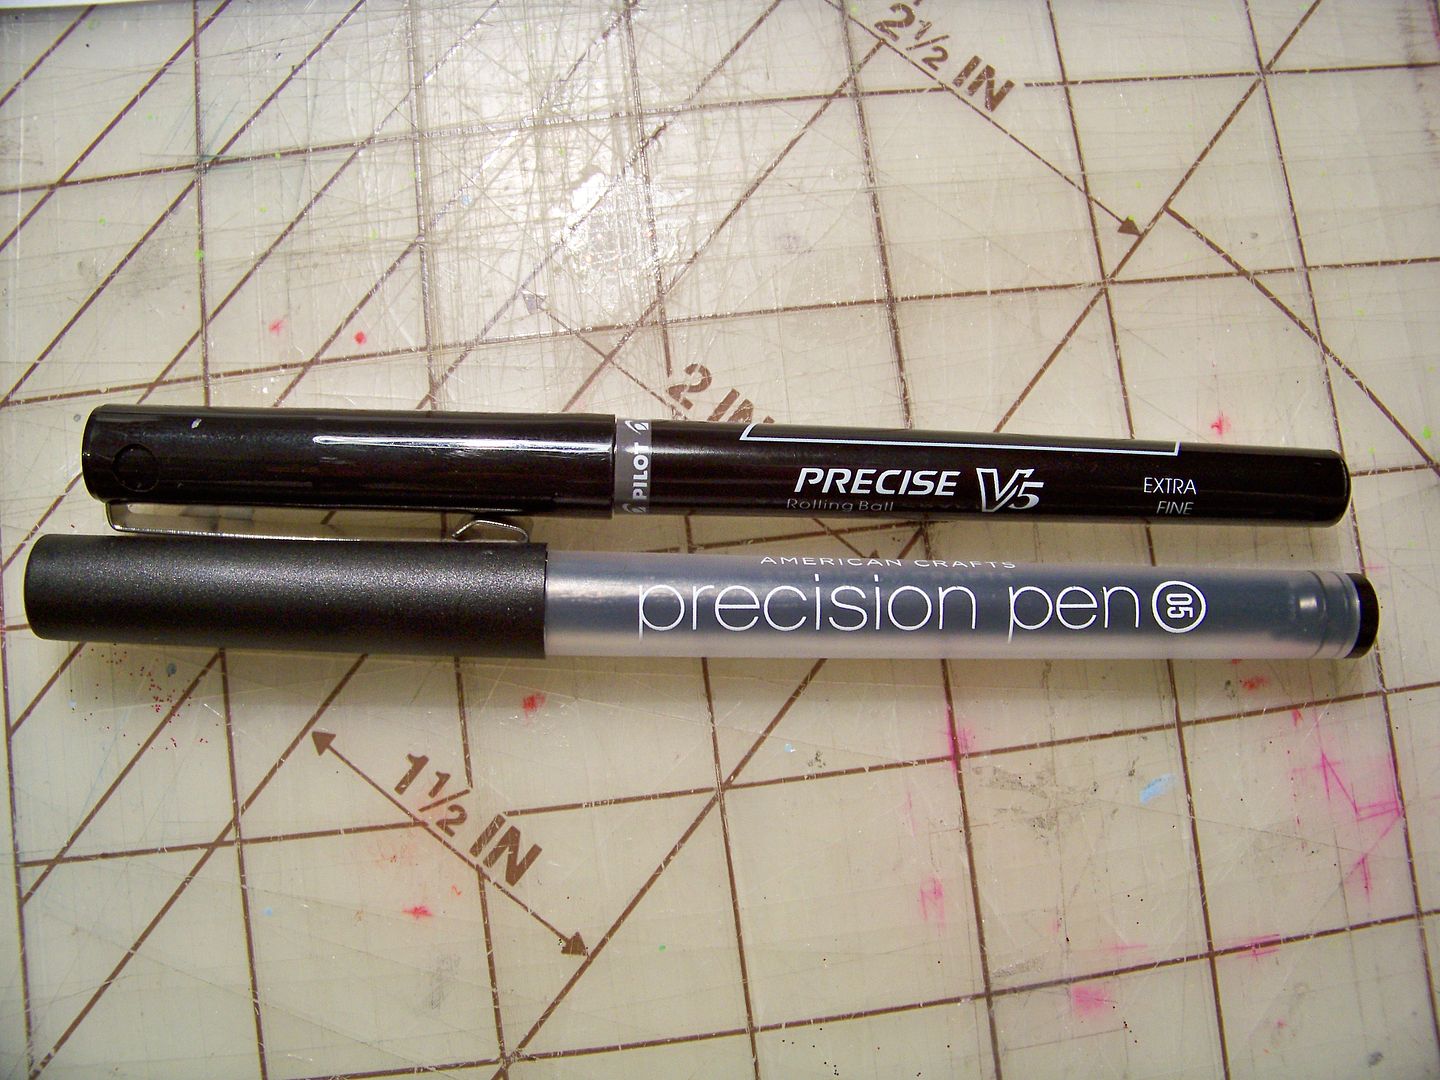
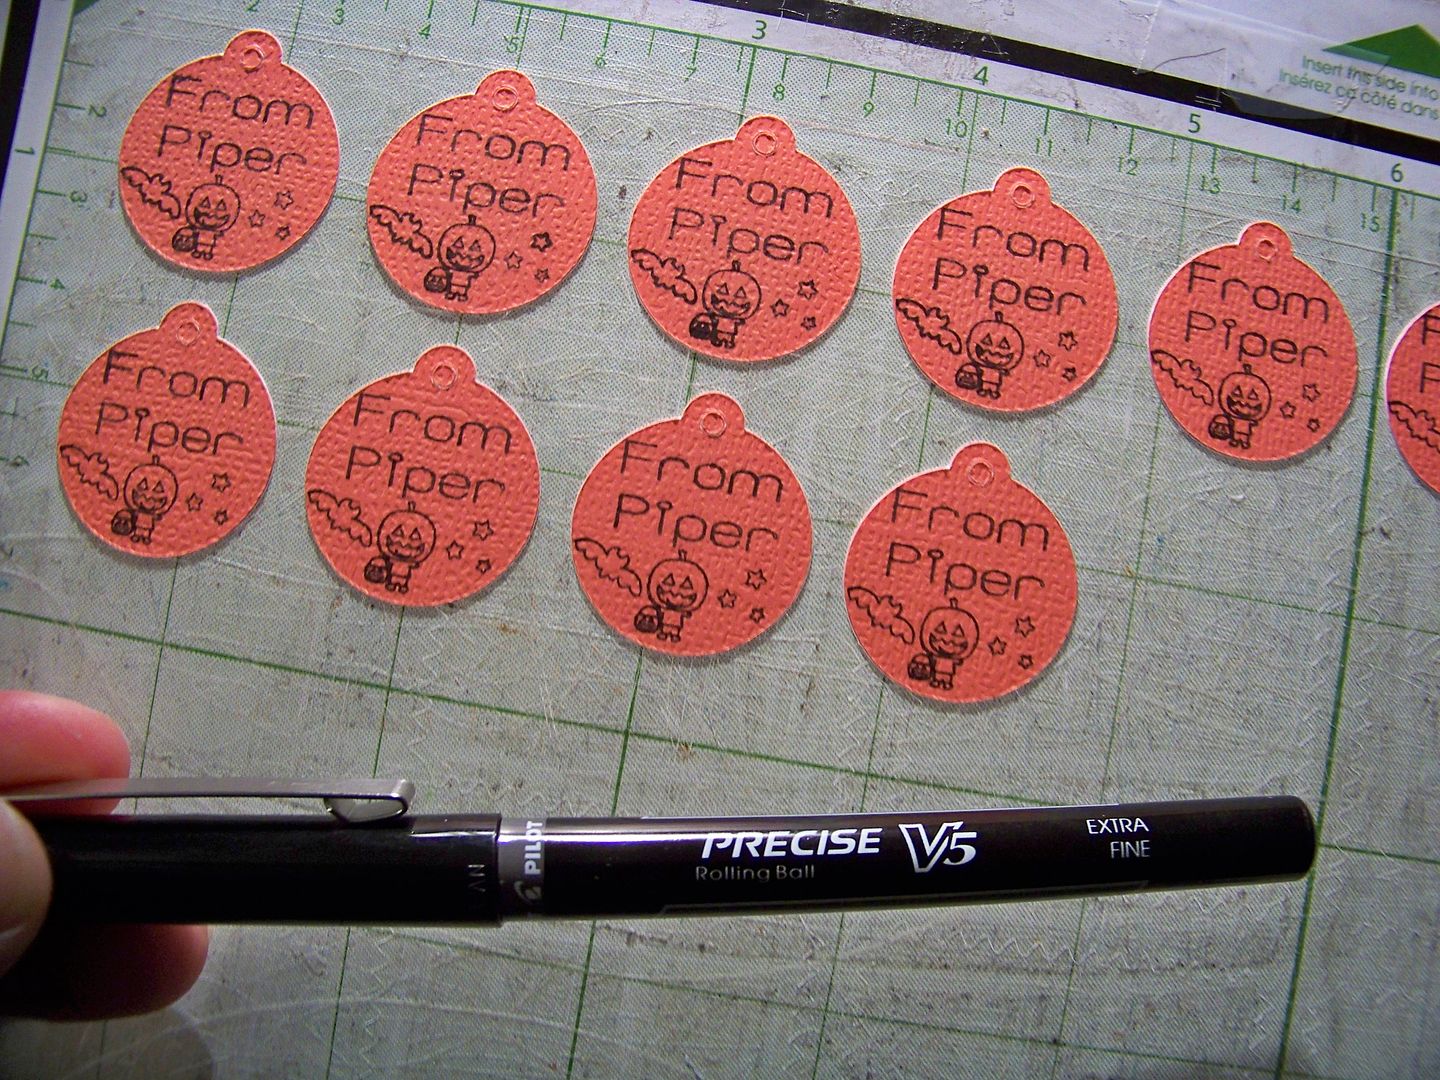
And to make this a tag, I added text to the clouds using the writing feature on the Cricut Explore.  This is a good time to mention that the kind of pen you use for these really matters.  I used a Precision pen at first and it was just too thick so I remade the clouds using a Pilot Precise V5.  To see my post with all kinds of pen options for the Explore, click here.
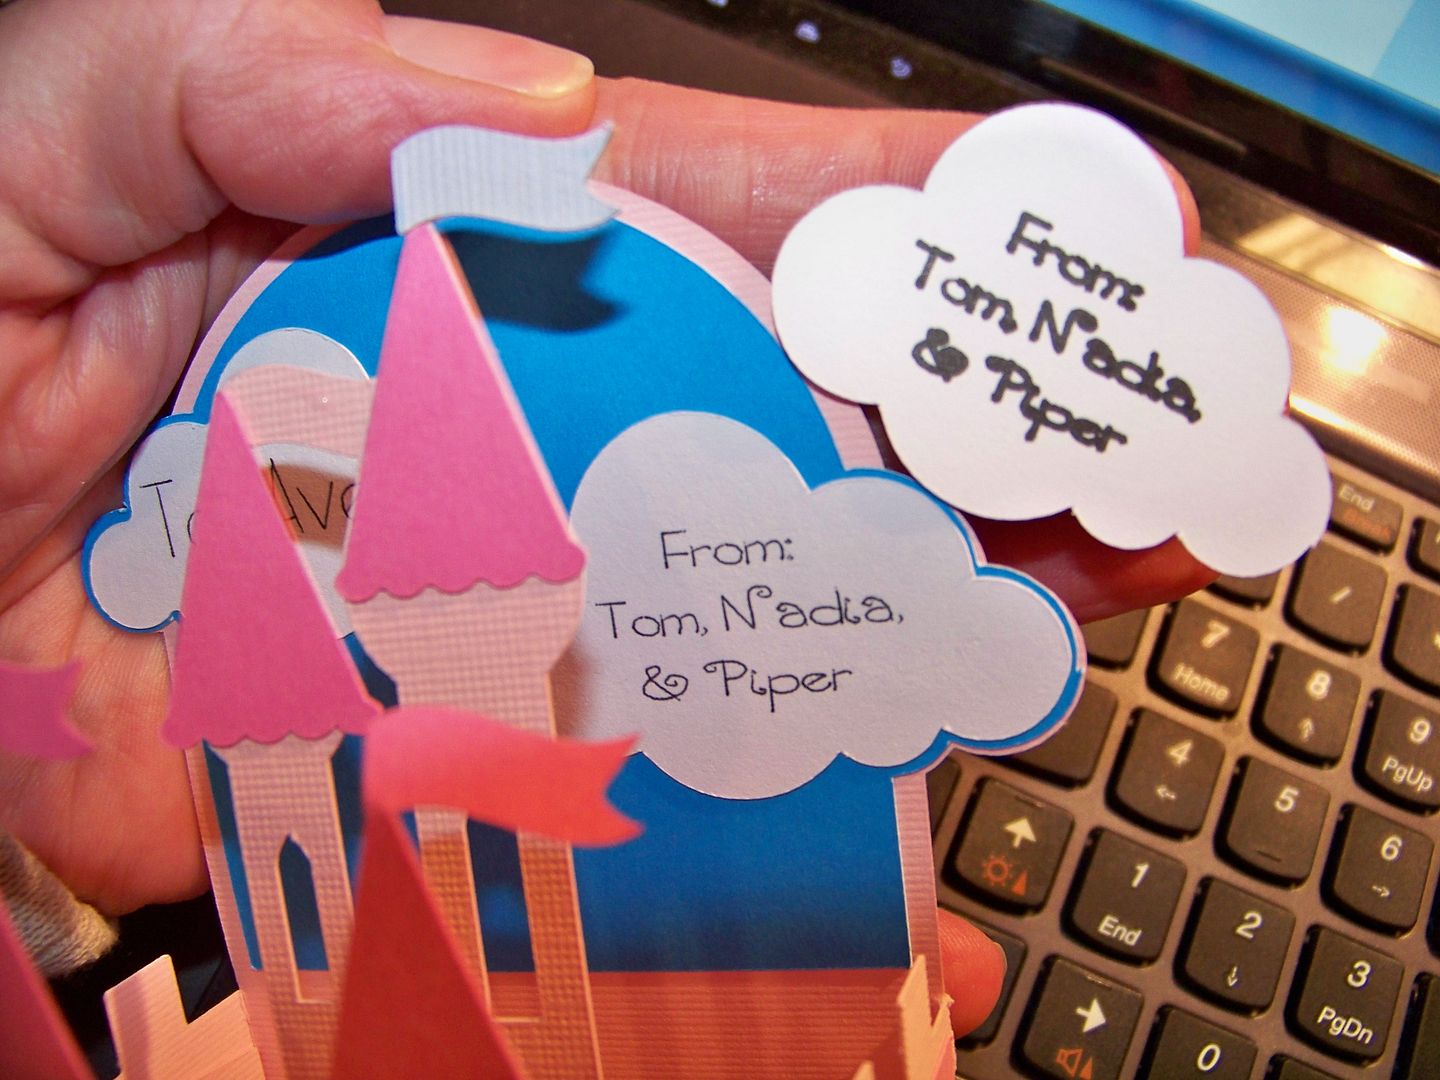
The Pilot Precise V5 pen creates a much better finished tag with this tiny writing.


The next one I did was for a gift that was opened a couple of days ago!


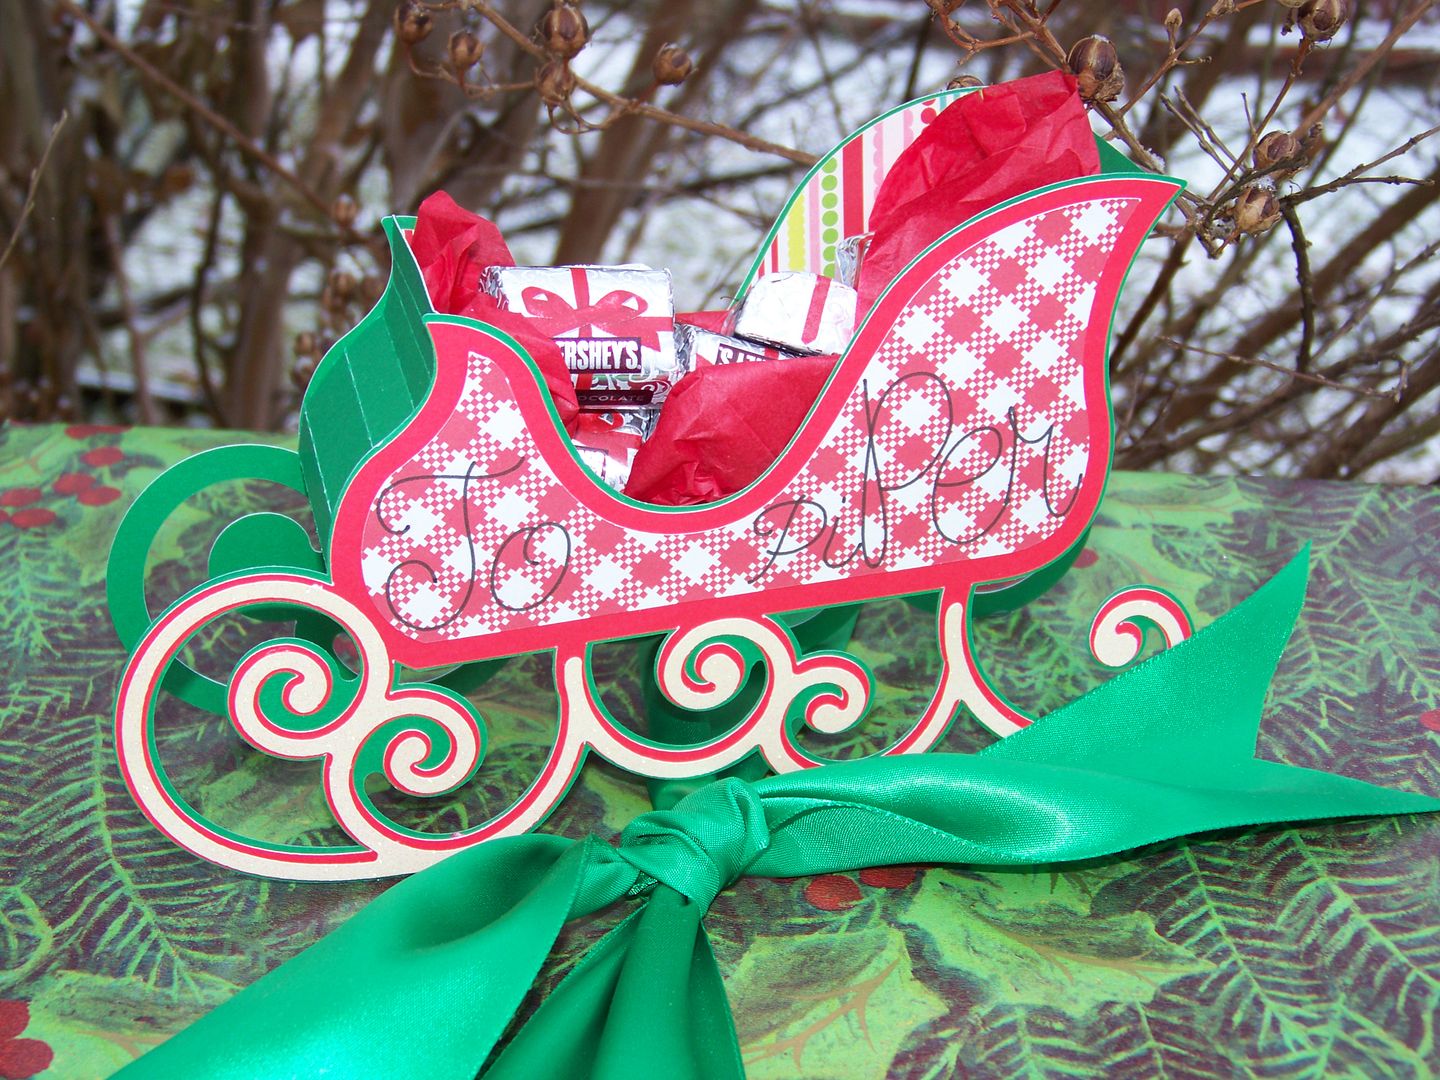
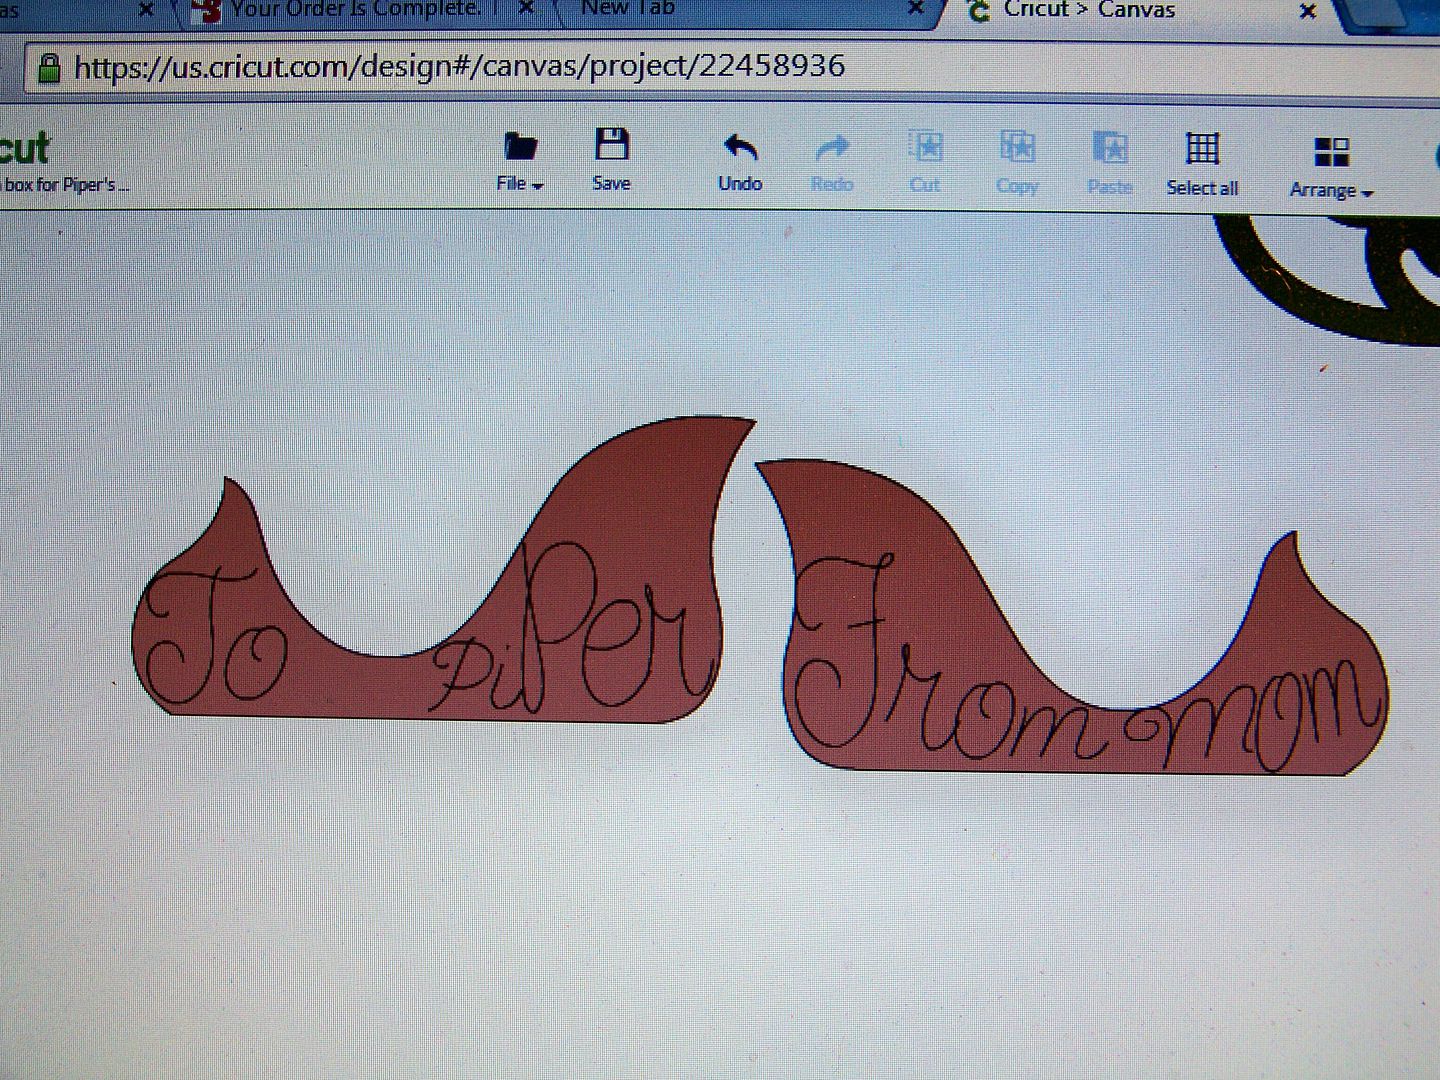
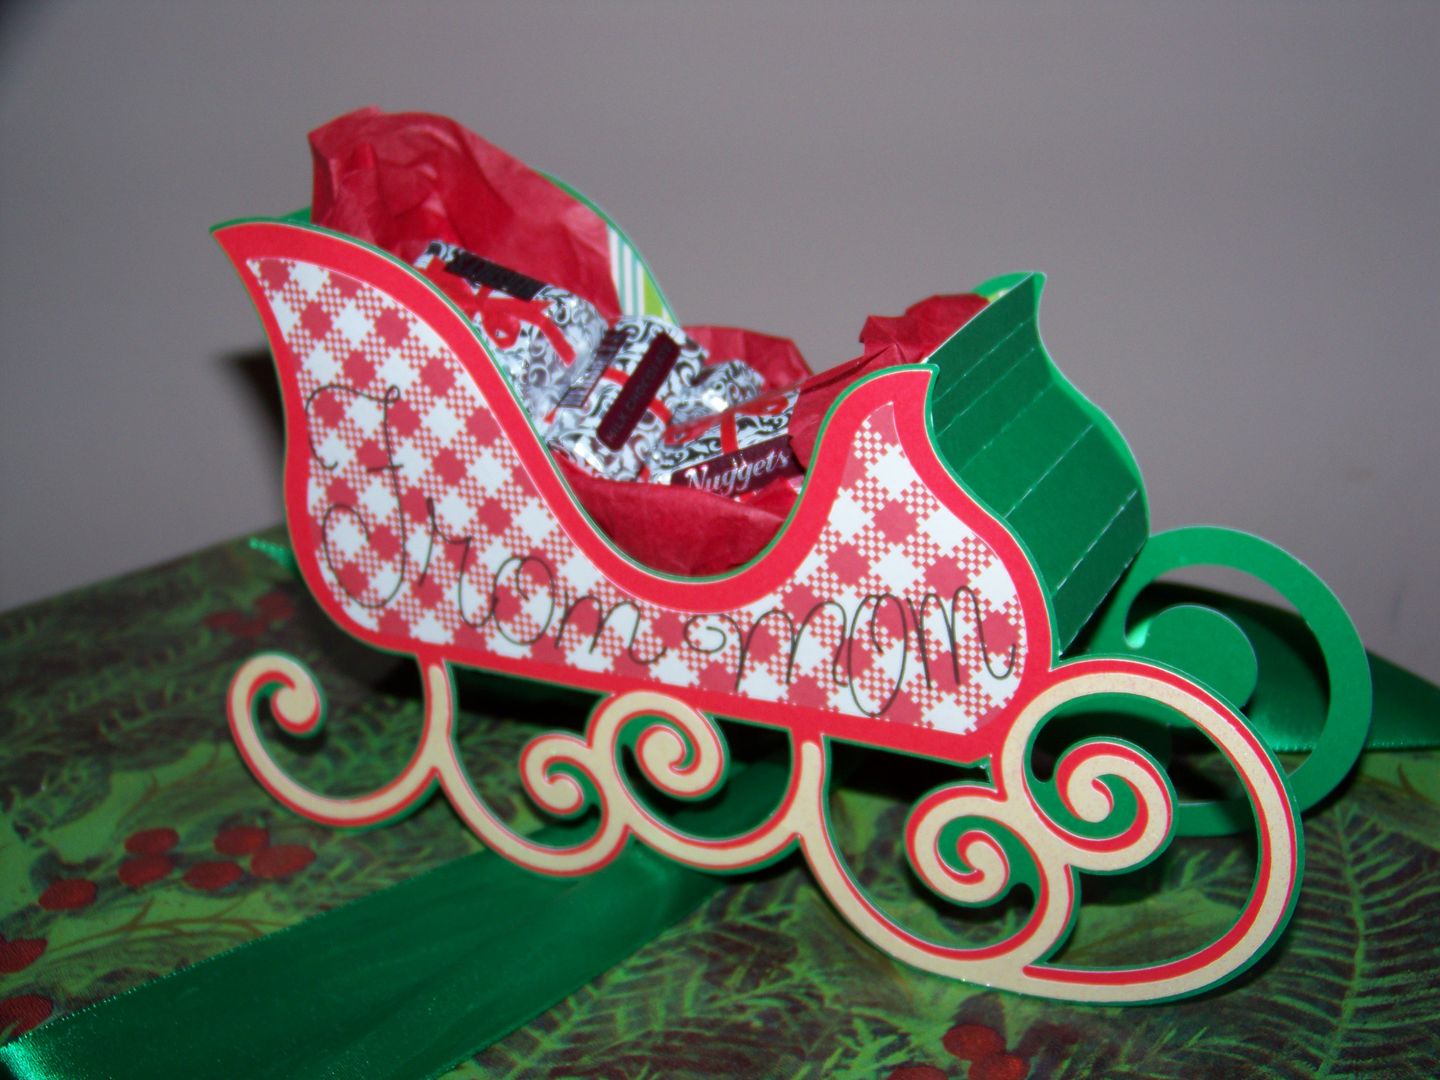
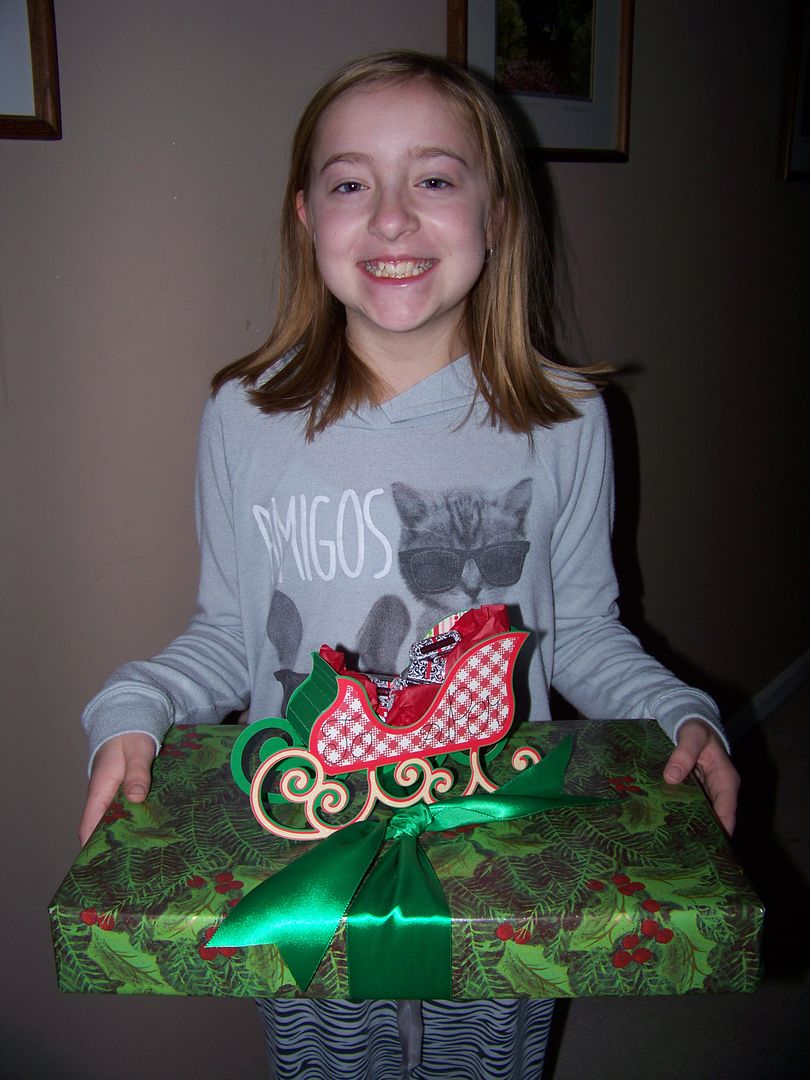
I wanted something super fast because it was going to be opened shortly after being decorated.  It was the wrap for the annual Christmas ornament gift that I give my kiddo.  She opens this 'first gift of the season' while she watches the Macy's Thanksgiving Day Parade.  I chose a 3D sled and used the writing feature and a Precision Pen to write the "to" on one side and the "from" on the other, adding text one letter at a time in order to adjust the size of each letter.


This was particularly fast because it is basically layered sides and a shaped middle that connects them!  And it holds stuff!  Like Hershey's Nuggets!  Click here to find this file for the sled on Santa's Visit on SVGcuts.


I did put a small puddle of glue under each of four areas of the sled that make contact with the package.  My daughter, who keeps all of these for use with her toys, carefully peeled it off of the package before tearing into it.  I probably could have just as easily looped the ribbon through the sled rails.


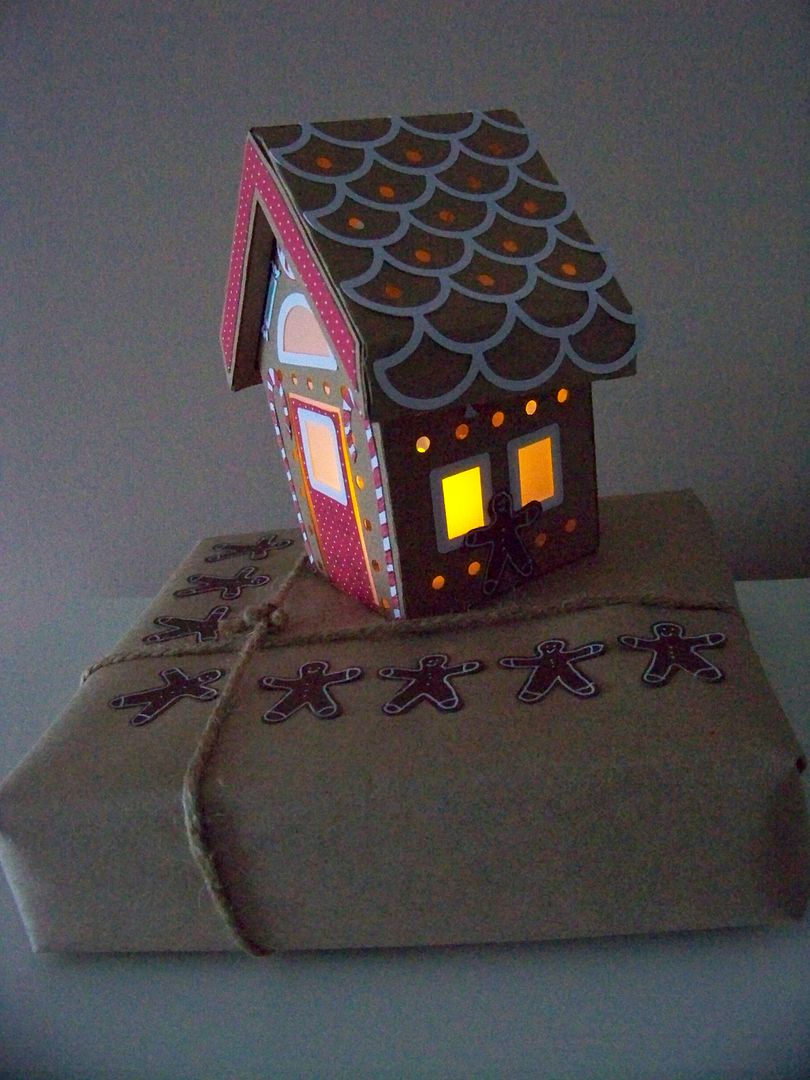
Because my kiddo likes to keep my 3D projects, I made her a special one.  This gingerbread house was especially fun because it lights up!


This was one of the very first SVGcuts files that I bought earlier this spring when I got my Explore.  I used it for a tree house project.  You can see that previous post by clicking here.

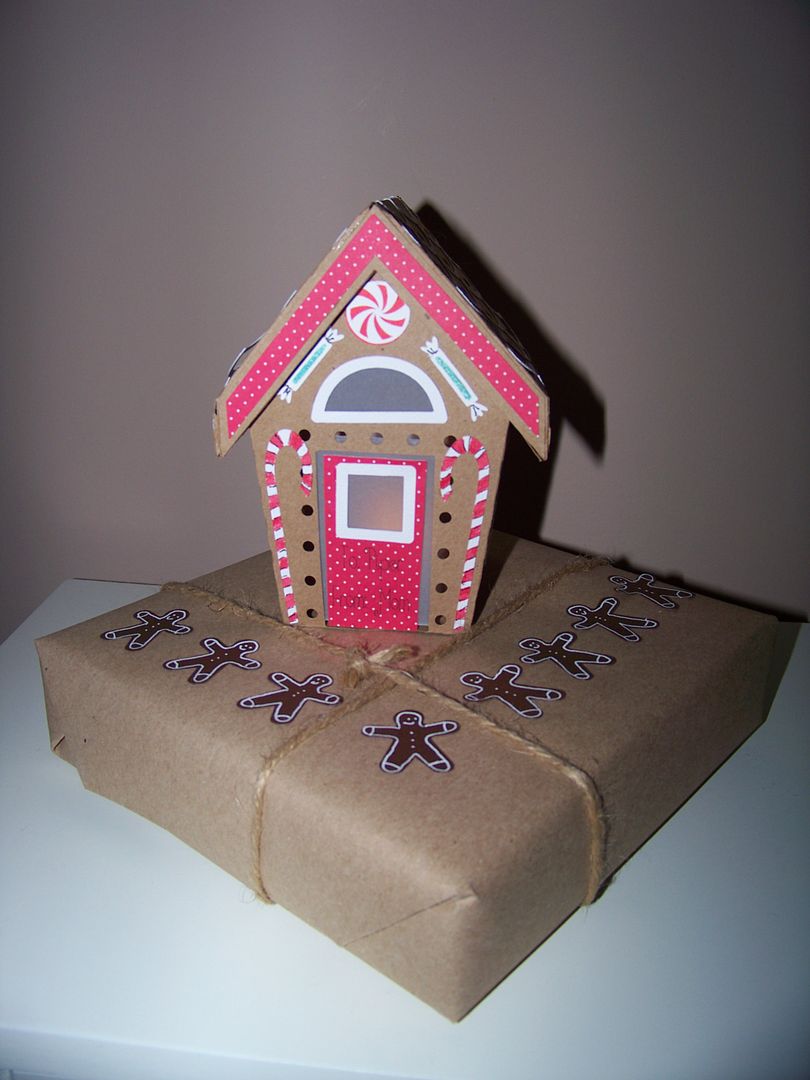
This is part of the Gingerbread Chalet Village and I love this perfect little house with the well-fitting roof/lid!  A small electronic, flickering tea light makes it fun!  My daughter actually gasped when she saw this lit up!  This one was definitely more work than the others, but with that response, it was worth it!  I used Cricut images for the candies and gingerbread men.  A search in Design Space on "candy" and "gingerbread men" gave me plenty of options!  I used white pen to add details to the embellishments instead of teeny-tiny layered cuts.


I used brown mailing paper to wrap the gift and kraft paper to cut the little house.  Vellum makes the magic in the windows and around the door.  Like the others, I glued the house right onto the paper, but I imagine my kiddo will cut the paper around it to save the little house.

The response was so exciting that I made another light-up 3D gift tag on another of her presents.


This was my Thanksgiving morning crafting:  The tree on the NEW Santa's Surprises collection!  This one is still FREE until DECEMBER 5th if you type in coupon code FREEGIFT when you place an order for $9.98 in other files!

I used the writing feature with the Pilot Precise V5 pen on the banner from Cricut Rock Princess to create the "to" on this tag.

The lid on this one is not tight fitting so a scrap of paper to make a paper hinge helps the lid to stay in place.  I did not glue on the bottom piece; I used the tabs and glued them to the gift wrap directly. Another tea light makes this tree light up!


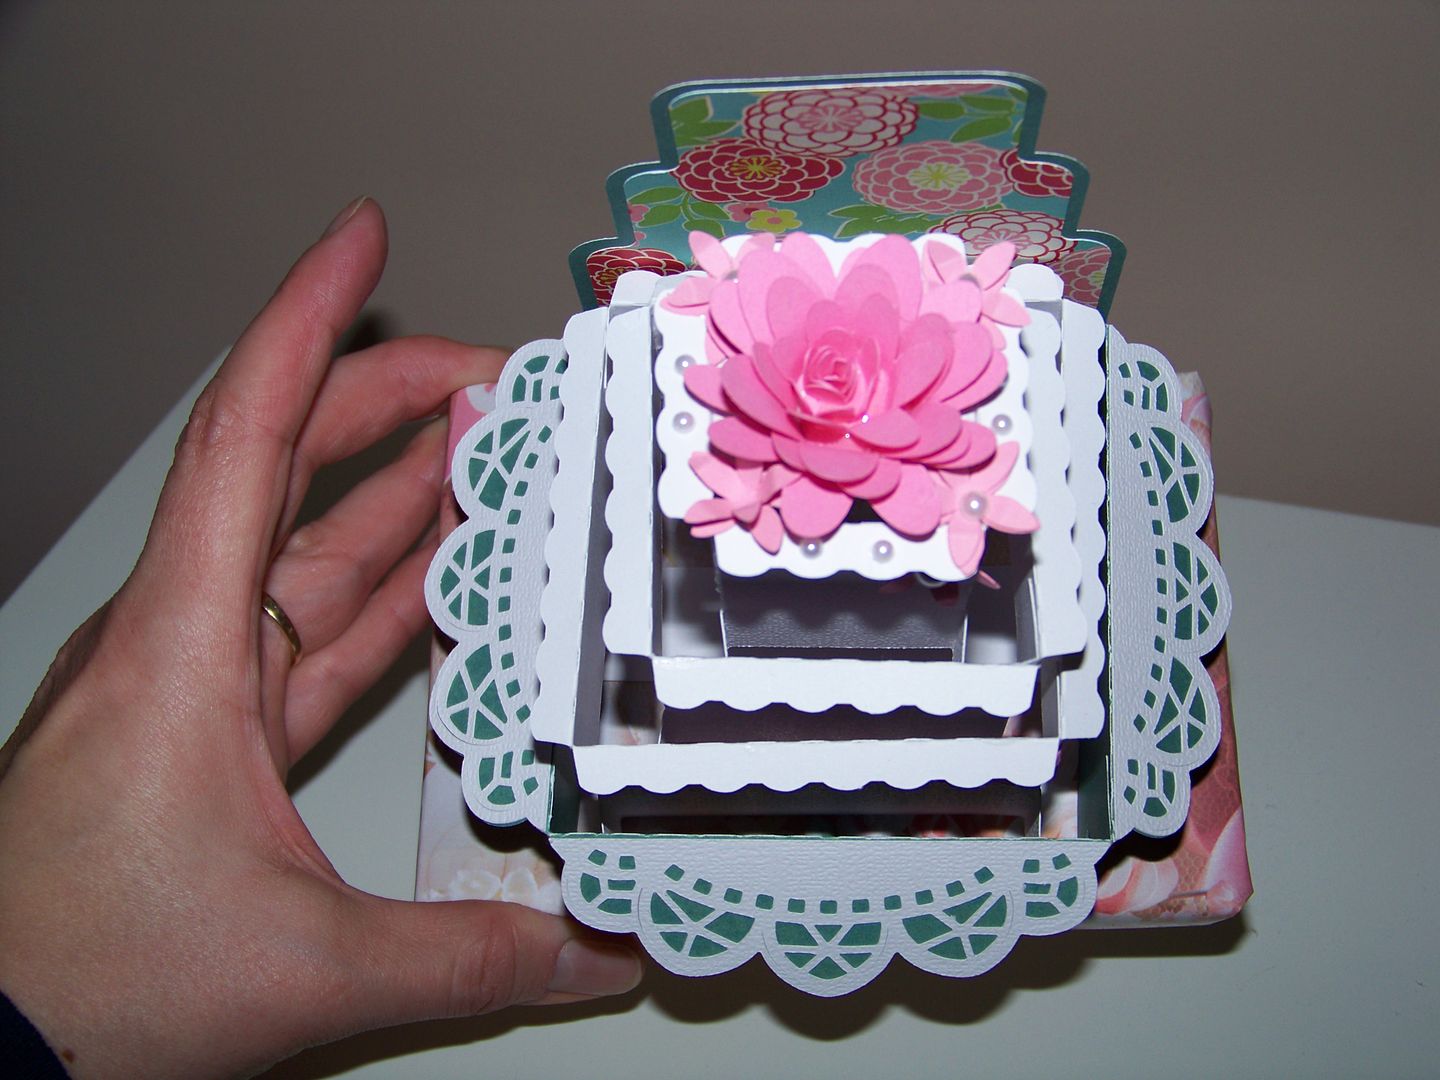
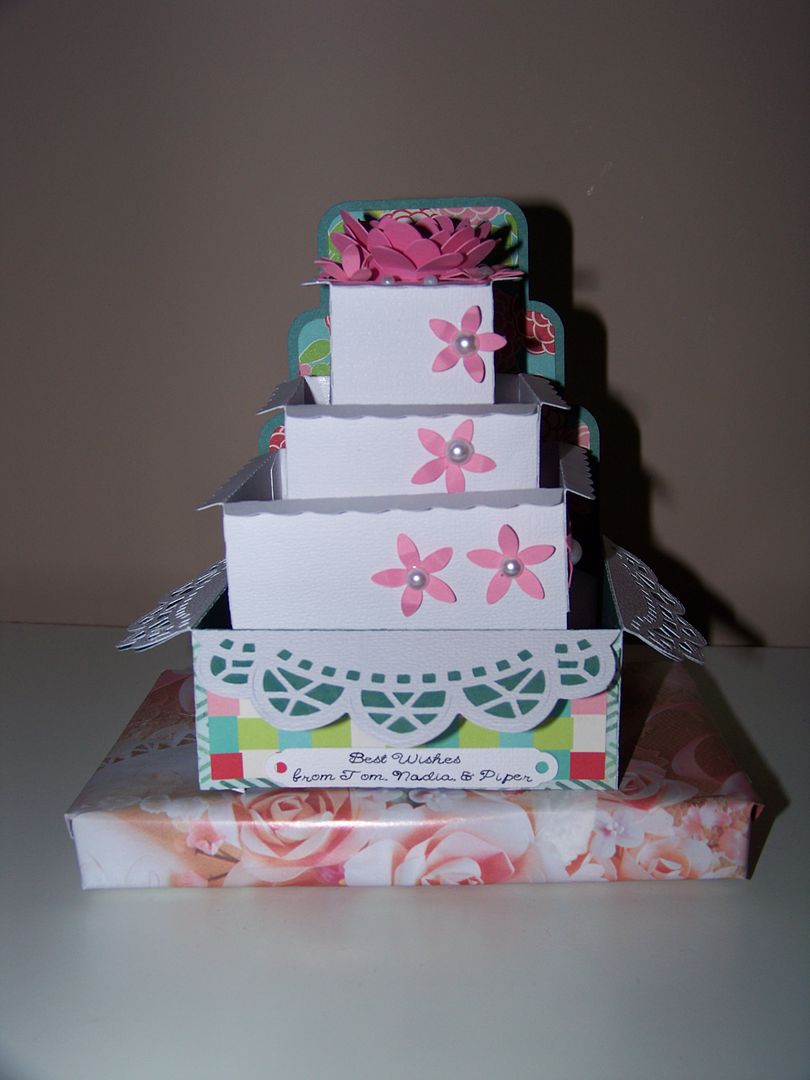
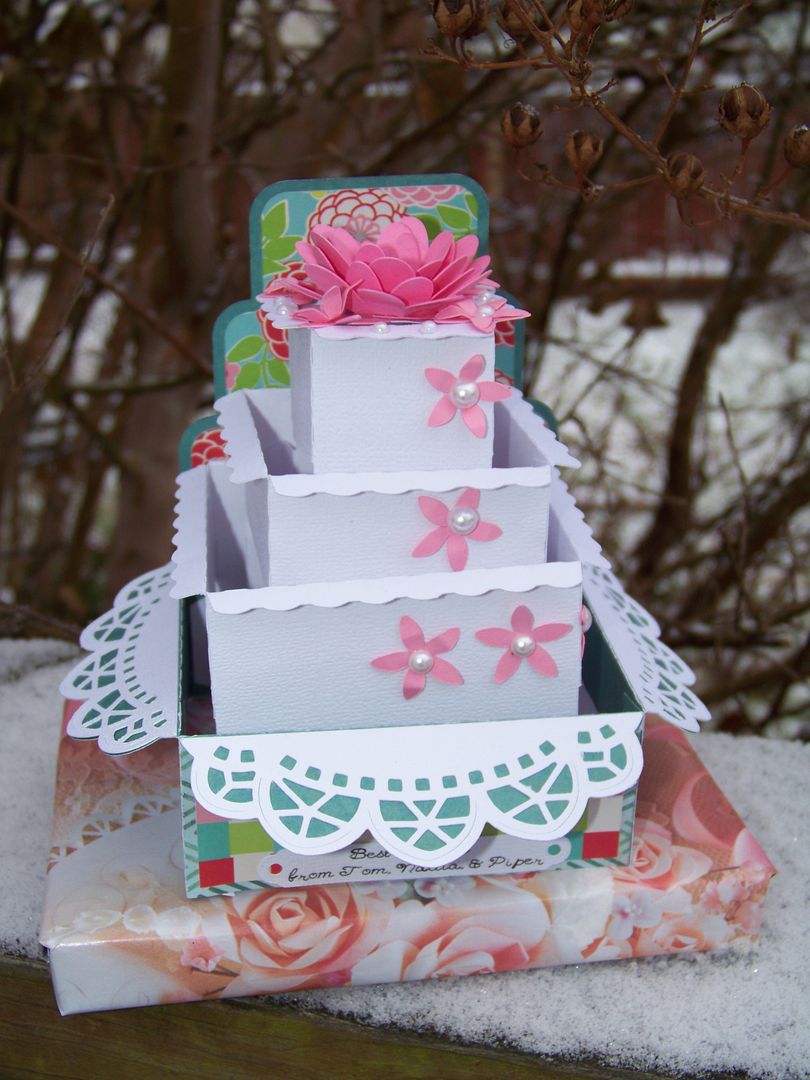
While I was making these 3-D tags/package embellies, I had a wedding gift to wrap and used this idea on that gift too.  I used the box card on Autumn Box Cards to make a wedding cake!


I used the writing feature on the placard at the bottom....


And I used a locking strip to keep it straight and prevent it from collapsing as it is designed to do. It also allowed me to glue it in place on the package!  I used some Cricut flowers that I had left-over from a previous project.

For a simple gift (an ornament and a gift card), I think this box card dressed it up and made it special!


I had so much fun with all of these!  I have been excited to incorporate 3D buildings and boxes in my gift-giving since I got my Explore and started experimenting with svgs!  Thank you for checking my blog post today!  I can't wait to show you wait I have been working on today!

Quick Links:

3D Barn on Santa's Village - click here.
Owl on the Barn - click here.
Castle Box Card - click here.
3D Sled - click here.
Gingerbread House - click here.
3D Christmas Tree - click here.  FREE until 12-5-14 with code FREEGIFT and $9.98 purchase.
Wedding Cake Box Card - click here.
My List of Pen Options for use in the Cricut Explore - click here.
Sunday, October 26, 2014

Halloween Crafting Day 2


The only "every year at our house" holiday is Halloween!  The tradition is supper at 5:30, followed by getting in costumes and trick-or-treating. Sometimes supper is chili and hot dogs, sometimes, it is ordering pizza and having sides, once, we made our own pizzas.  Somehow, all the other holidays were "taken" and we ended up doing this for our daughter's first Halloween and it stuck. Grandparents, siblings, aunts, uncles, cousins, and friends know to show up! The challenge is always finding something that the kids will eat (my picky kiddo) that the adults will also consume with all of their individual food "issues" (diets, meat preferences, and whatever they make up when the wind blows). I eat everything so these crazy food issues just seem unfair to easy-going me!

This year, Halloween is on a Friday, so there is also a sleepover involved with my daughter and her friends.  We live in one of those neighborhoods where everyone decorates, hands out candy, and even the adults dress up.  They drop off kids from other parts of town by the minivan-load.  The awesome thing about all of this is that the evening entertainment for the sleepover is built-in with trick-or-treating until their little feet get too tired or the wind gets too chilly.  My kiddo has also warned her friends that I will make anyone wear a coat who doesn't layer under their costumes adequately for warmth!  Hey, it's my issue but no one gets sick on my watch!

Last year, as anyone in this region with kids will remember, was horribly stormy.  So much so that we changed the date for trick-or-treating.  Hey, they might do that where you are from, but here, we stick to the calendar.  With storm warnings and wind advisories, the whole city ended up at the malls and they all ran out of candy!  Can you imagine the mall running out of the cheapo candy they hand out?!  I had my daughter and her little cousin with me and we ended up finding our treats at Claire's in the form of silly accessories.  Then we trick-or-treated in the neighborhood the next day.  It all worked out, but I take my traditions with actual tradition thank you!

So we are making up for it this year with extra treats and extra treat-getters!


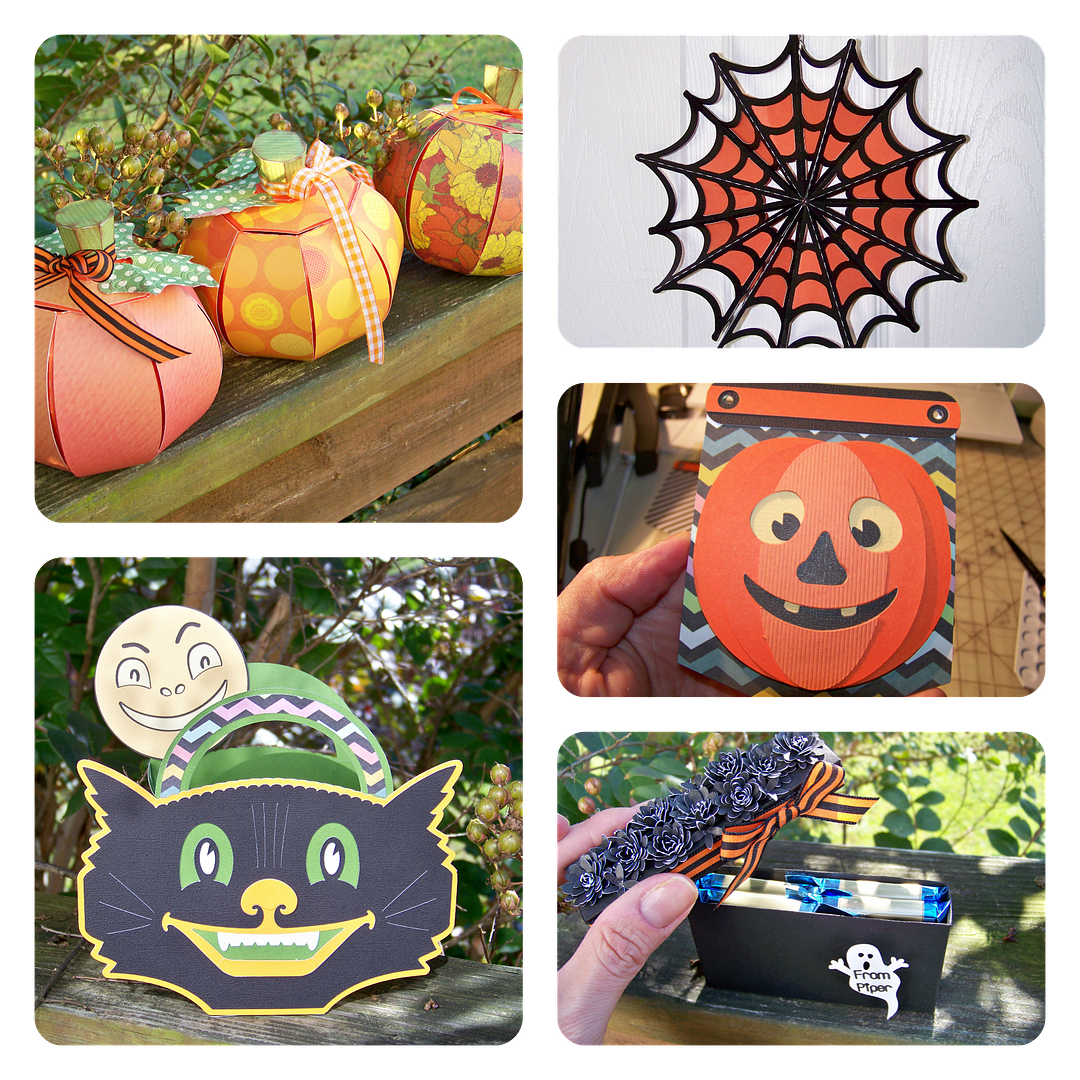
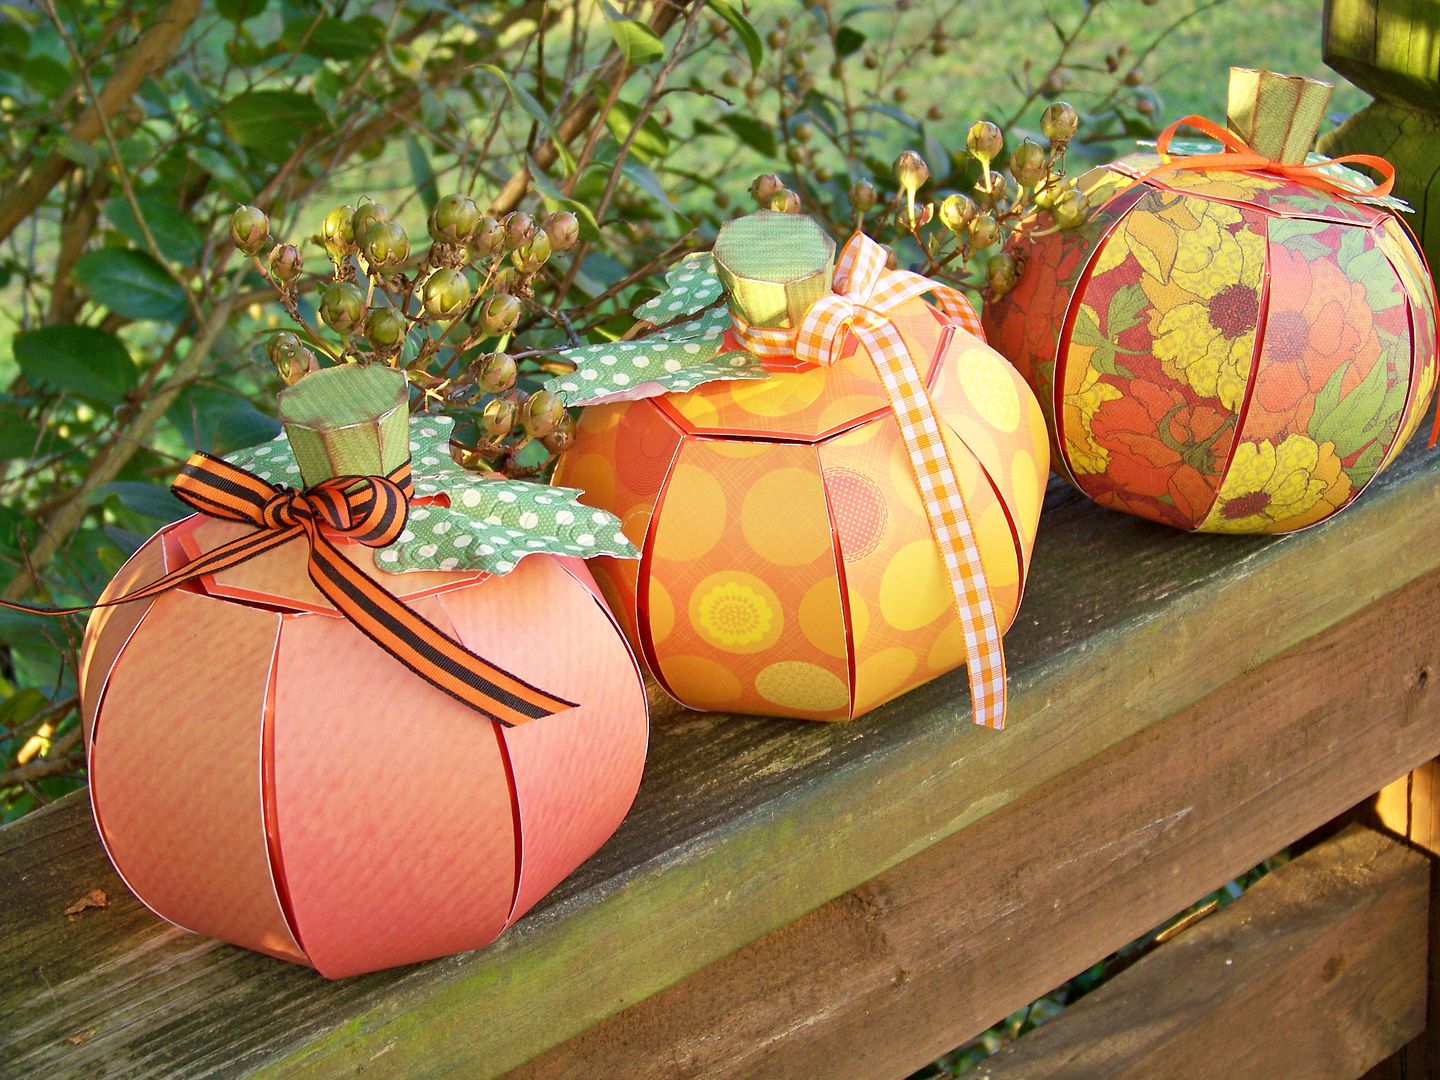
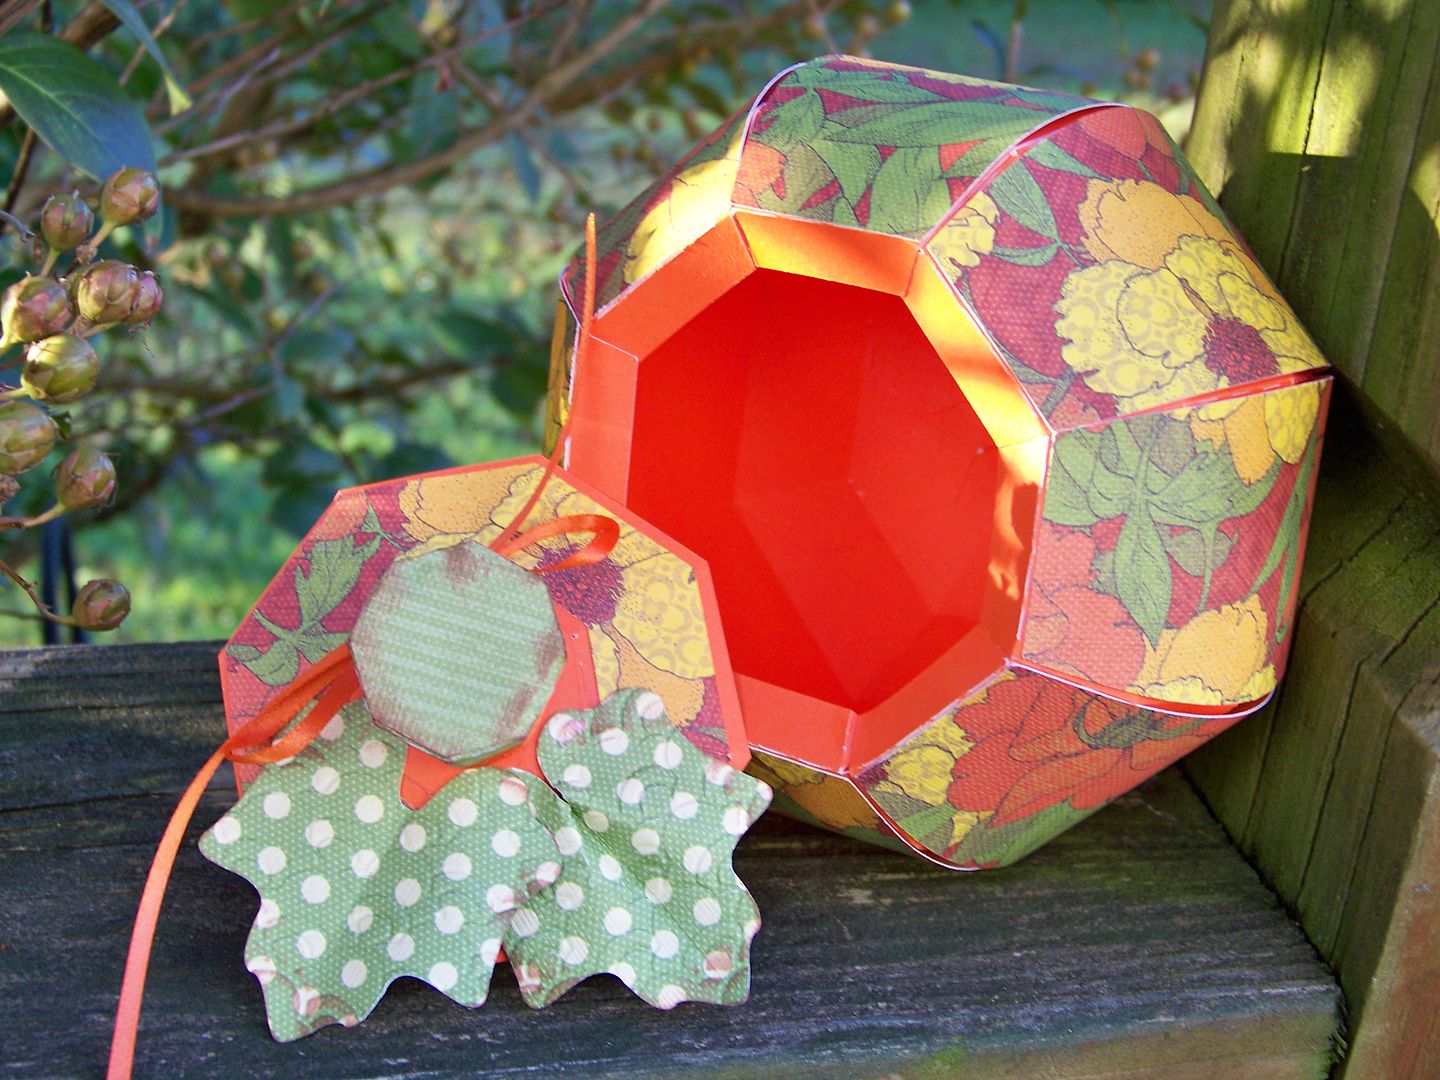
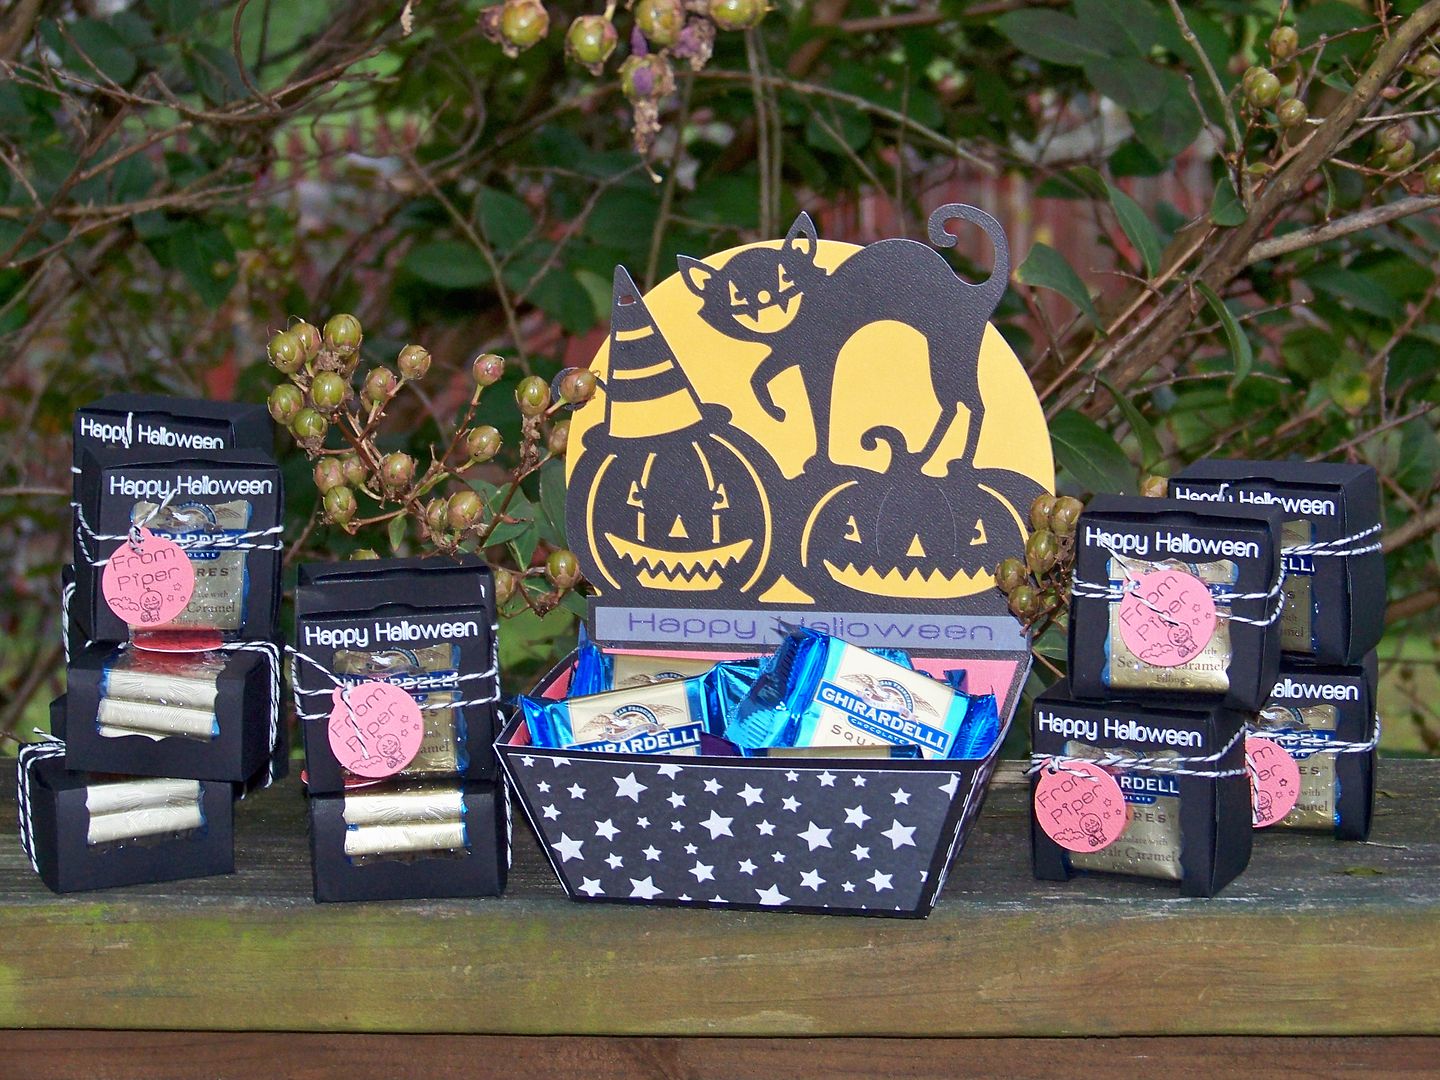
Each of the girls from school will be getting pumpkin boxes filled with candy and fun stuff.  These pumpkins are from SVGcuts and can be found by clicking here!


What is always so clever about the way that SVGcuts designs rounded vessels are the decorative panels that cover over the scoring and gluing, forgiving lots of less-than-perfect crafting!  Those panels are great for embossing, painting, or just using your favorite decorative papers.

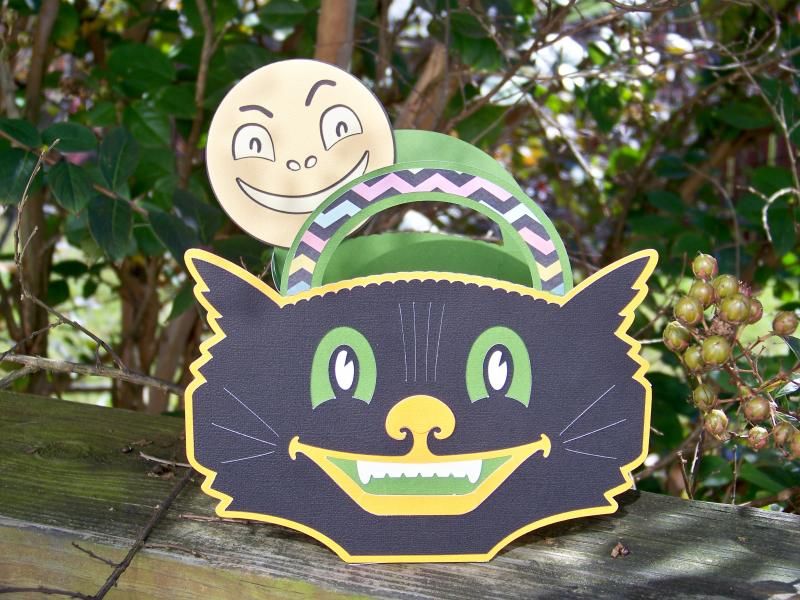
For my little niece, I wanted something fun.  I love the old-fashioned stuff on SVGcuts' Midnight Jamboree.  This little bucket is a great size!


This black cat bucket is found here.

I also had to do another quick candy box for another ballet teacher for my kiddo.  Yesterday, I posted all my ballet school Halloween treats.


If you missed them, here's a link to that post:  click here.
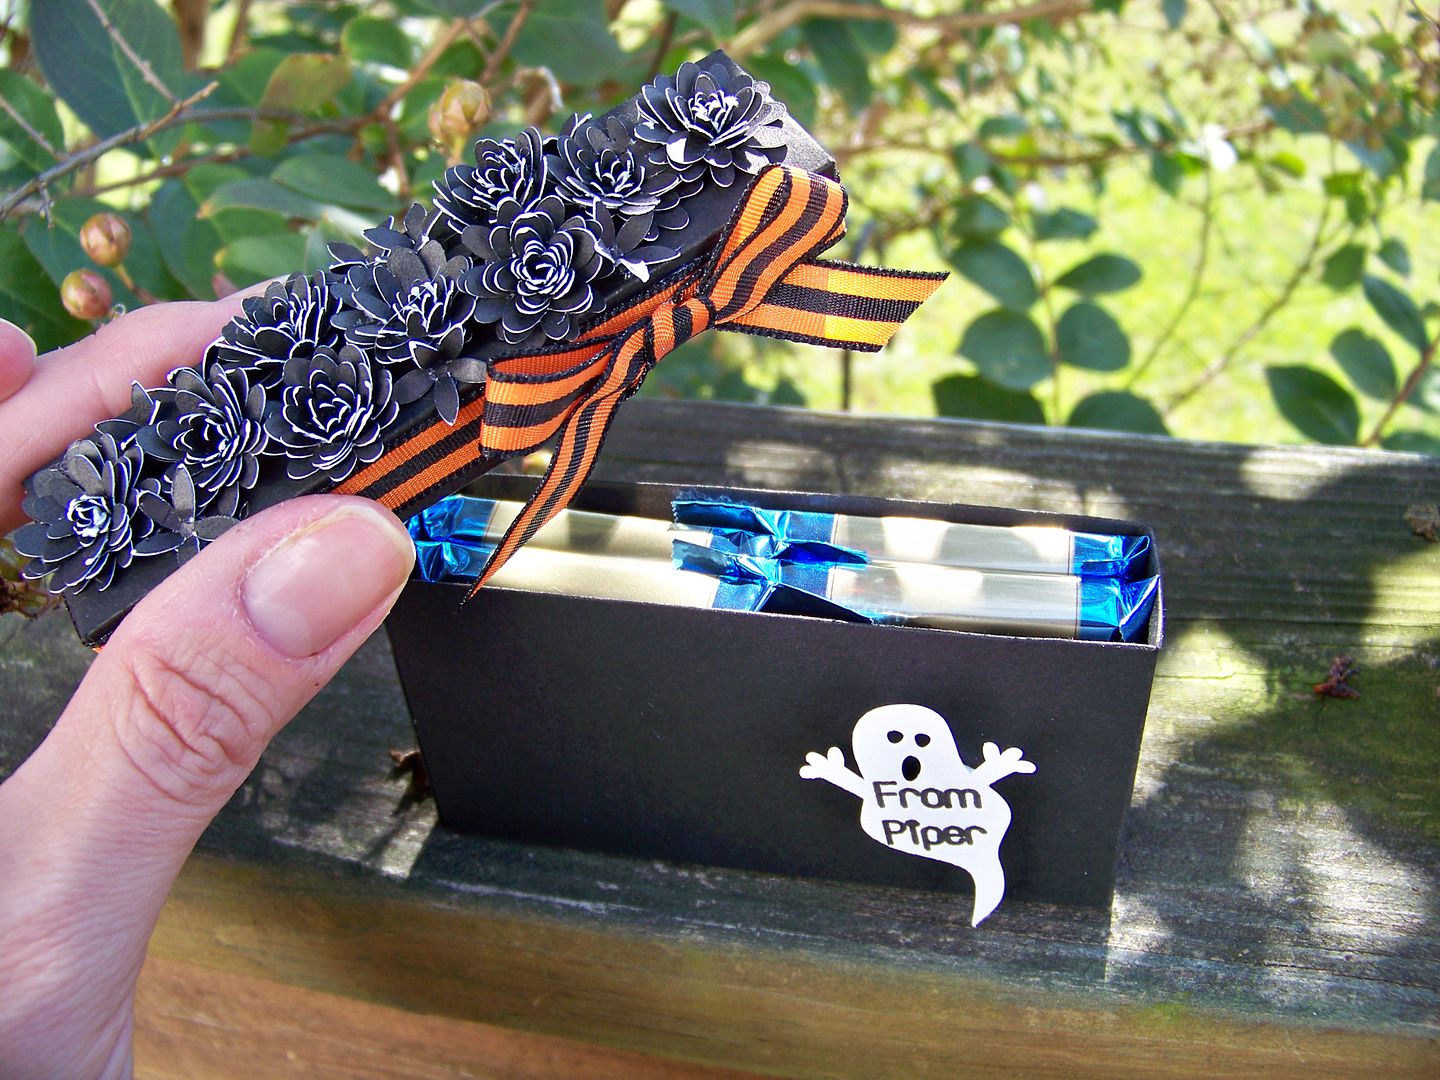
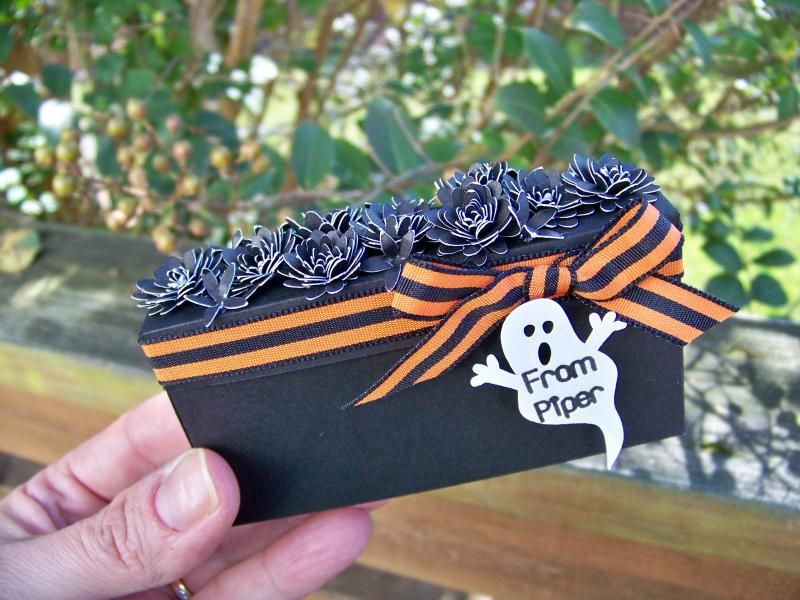
For this box, I just wanted to decorate a few chocolate squares.


The box is from Cricut Cartridge Box It Up.  The ghost is from Cricut Cartridge Charmed and the text is Smiley (free from dafont), written with a Pilot Precise V5 pen in the Explore.  My file for this project is here:  https://us.cricut.com/design/#/canvas/project/21563145

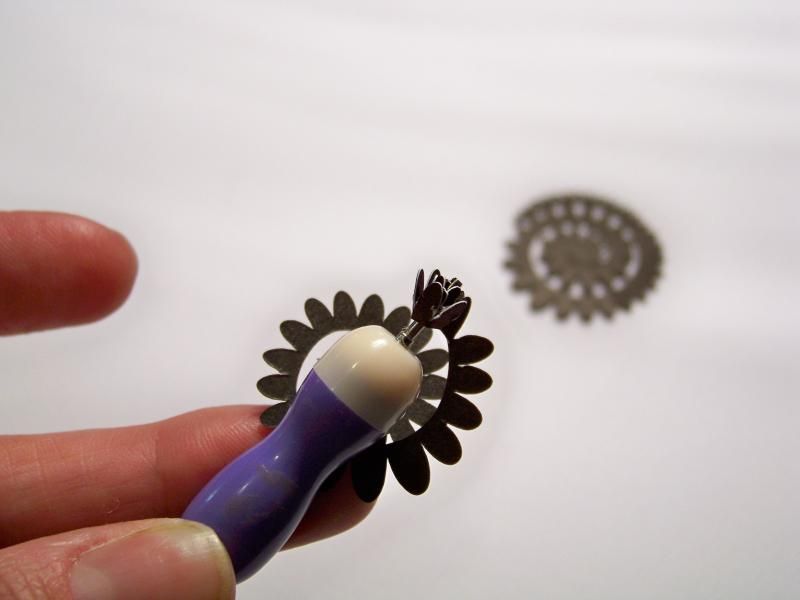
The flowers were cut from Art Philosophy.  These are spiral cut that roll up to create a 3D flower.

Unlike the rest of the neighborhood, I don't decorate outside.  That's really because I hate to un-decorate in the cold and I am doing my neighbors a favor by not having Halloween decorations up until Derby Day...and that's my story and I'm sticking with it.  But we do put up things around the inside of the house. I did add a few things to our decorations.
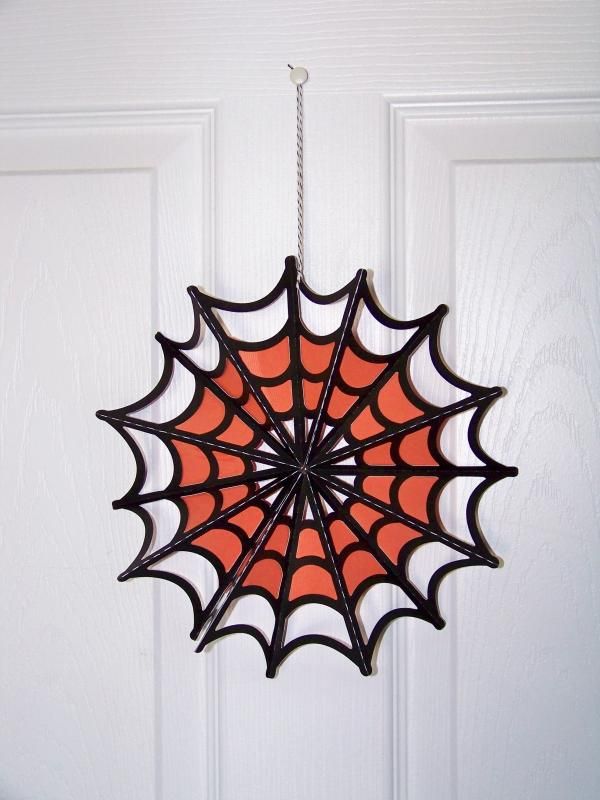
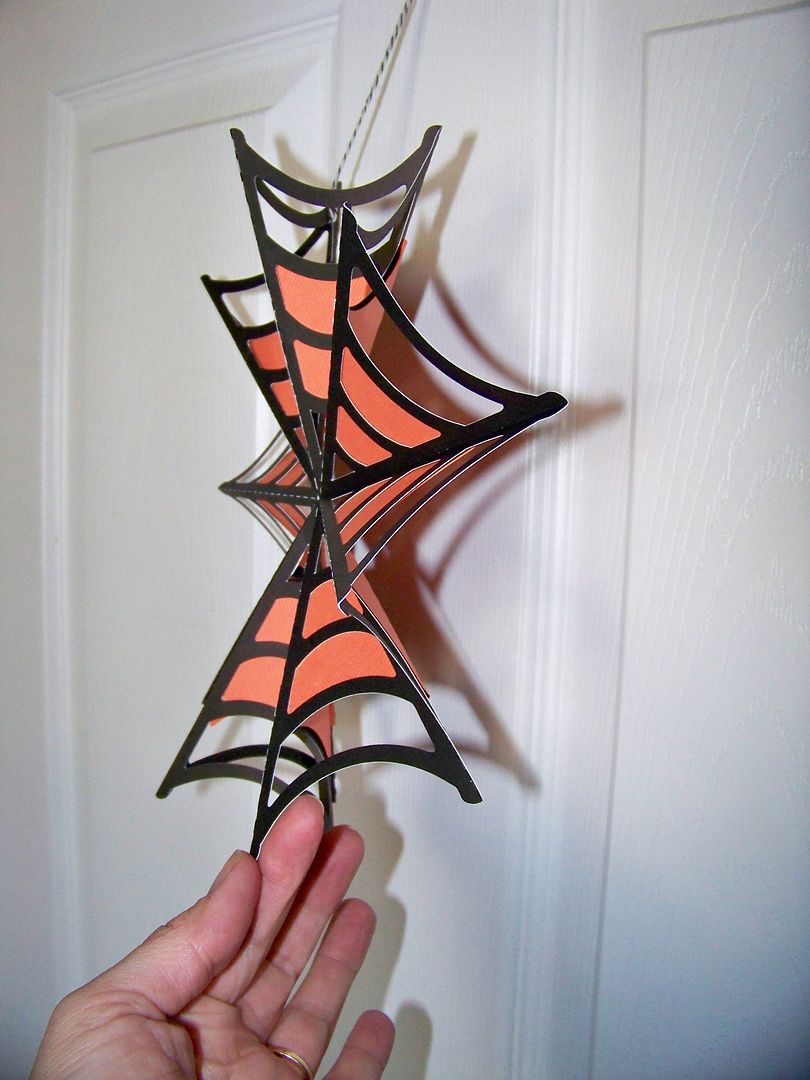
These are fun for doors and so incredibly fast and easy....Spiderweb Rosettes!


This is also from SVGcuts and you can find it by clicking here!  They are funky and dimensional and simple!


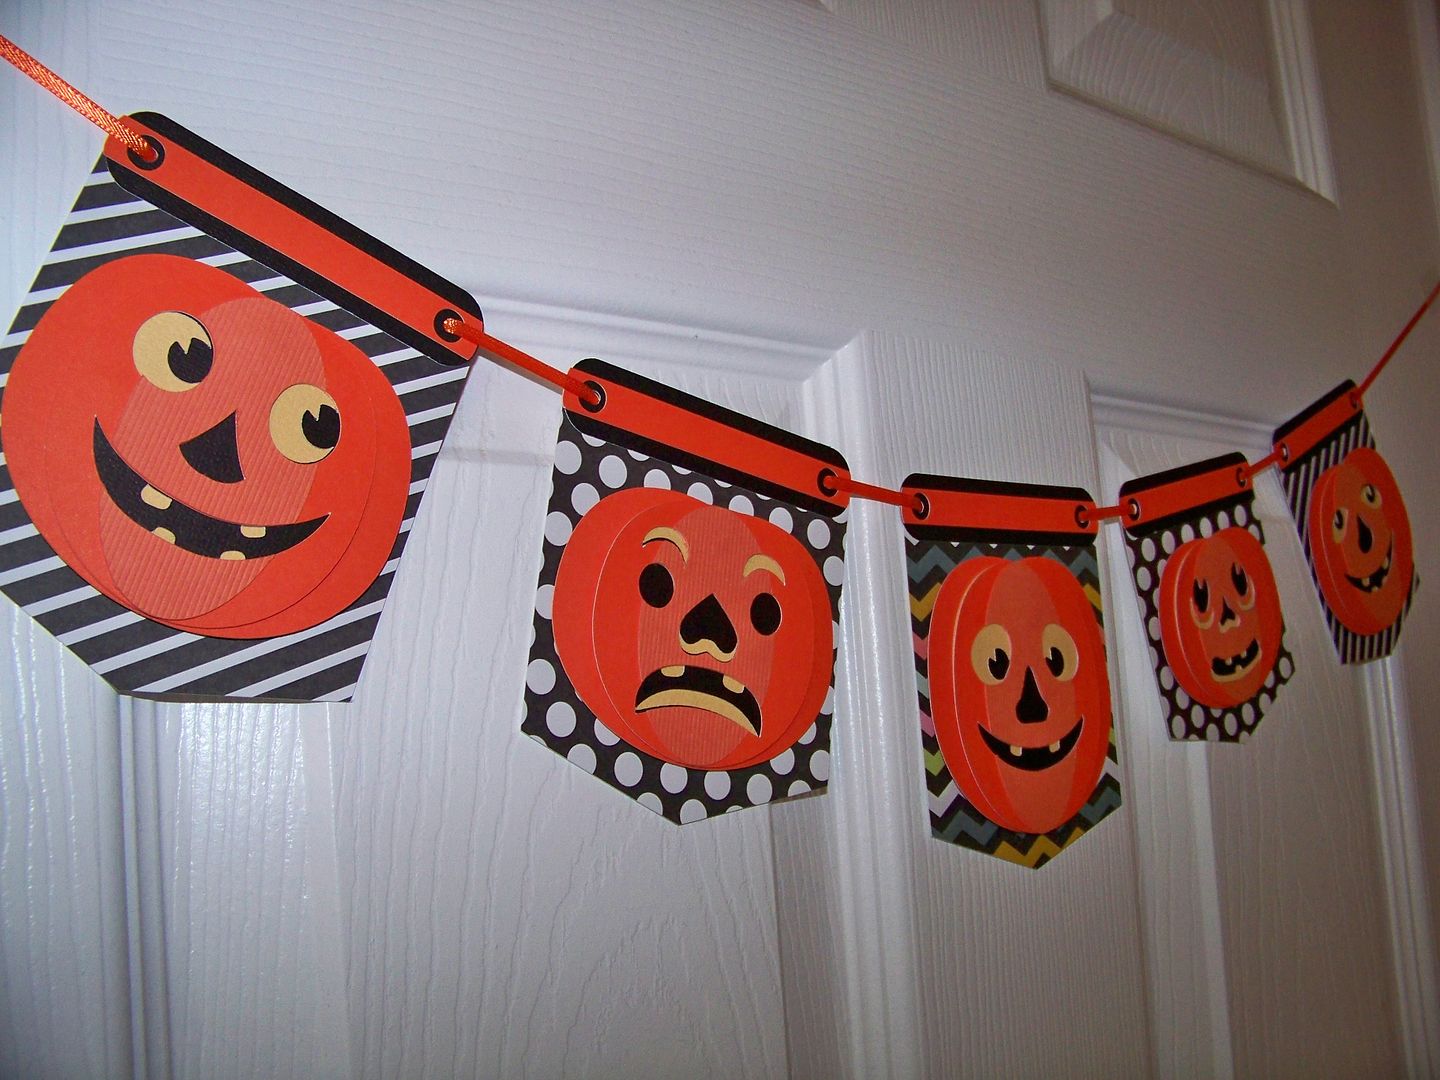
Great designing in the features of the cut file is something I really appreciated with the banner I made.


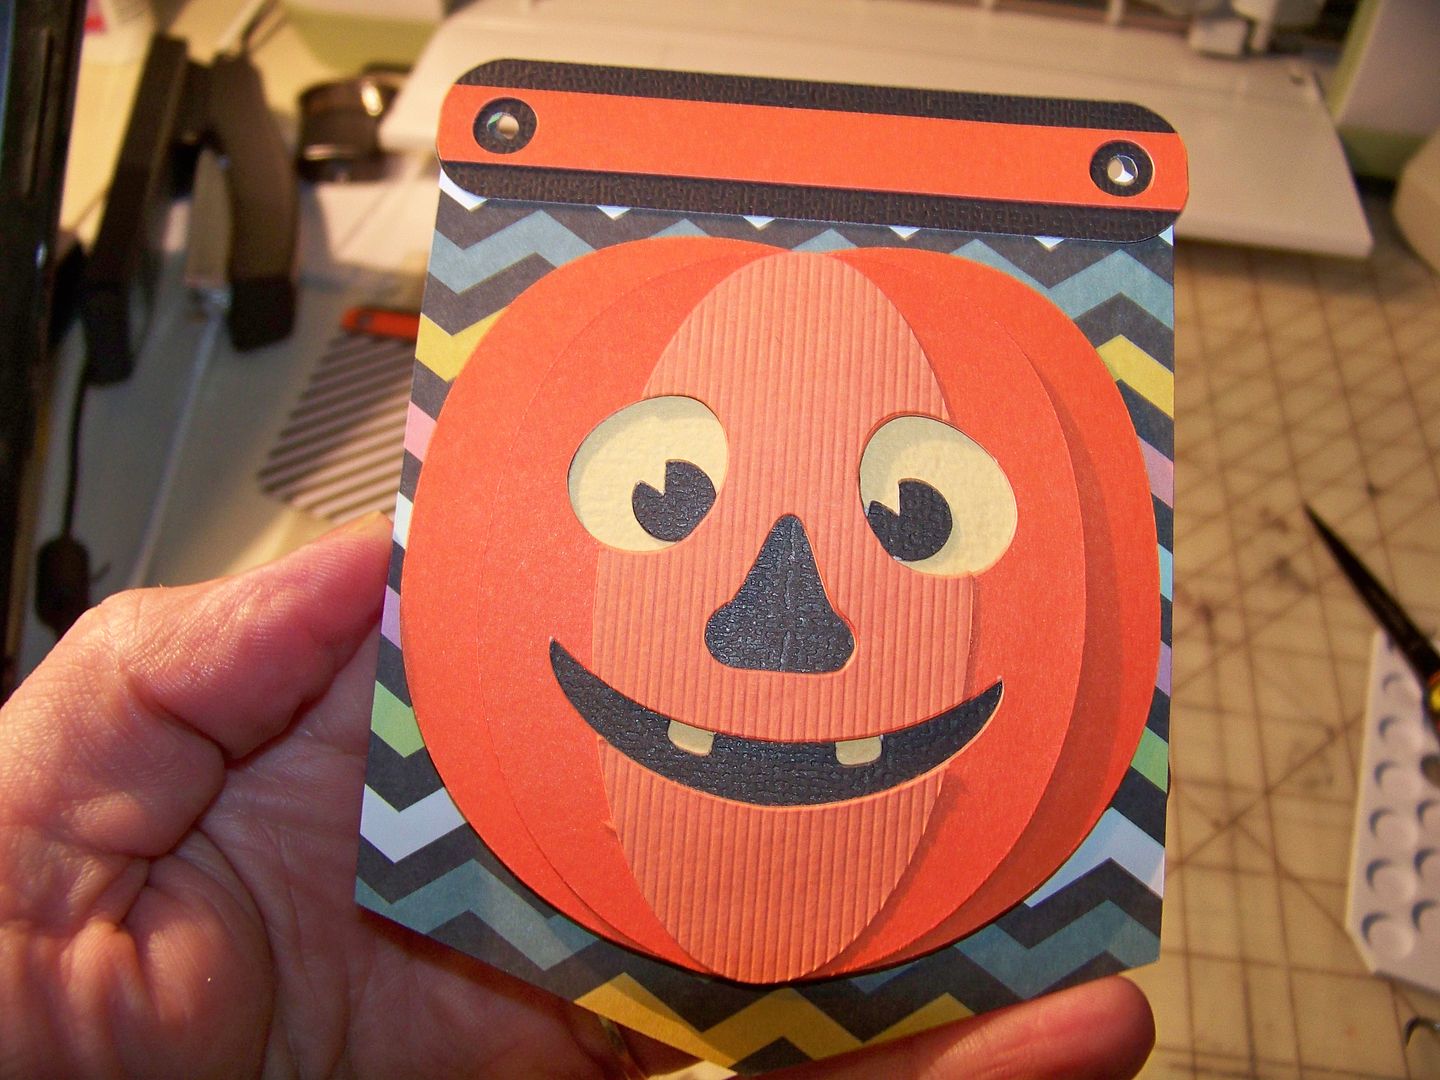
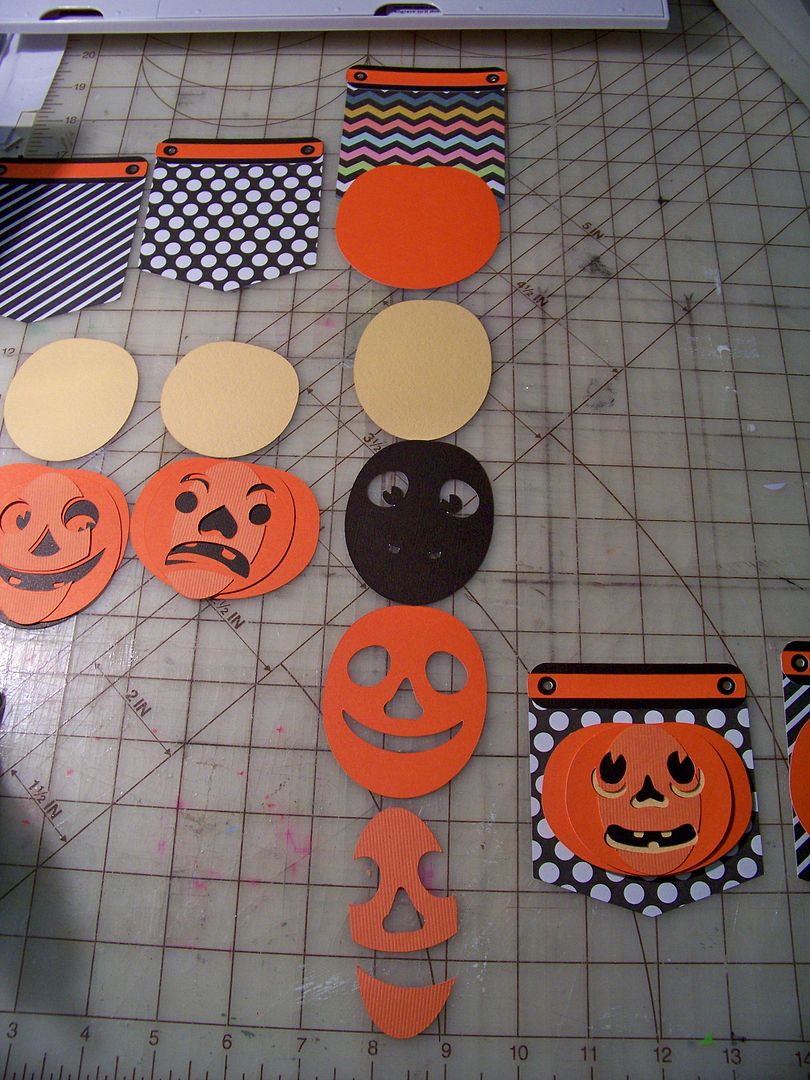
Another SVGcuts file (click here for this one), this project went together so fast because there were no little "rippy bits" of faces that had to be applied, but rather full layers of cut away features that layer one on top of the other.  This is something I used to love about the Cricut cartridge images, but I have noticed that some of their new designs (like Anna Griffin's Christmas Kitsch's Santa face image) have missed this important concept in designing multi-layer die cuts!


See how although there are little teeth and eyeballs, and a nose that you never are picking up tiny facial features and placing them.  See how they form automatically!  This same thing is found on Cricut Happy Hauntings and PaperDoll Teen Scene.


These are issues I actually spoke with the old Provo Craft management about in person!  Another thing that wasn't passed on to the new team, I suppose.  Hopefully they will get clued in.  I suggest they all cut out and glue that Santa I mentioned at two or three inches and then they will know!

Designed correctly, this is a DREAM to assemble...and so fast!

Well, my crafting weekend has come to an end!  That was so much fun!  My little autumn treat!  Thanks for checking out my post!

Quick links to things in this post:

3D Pumpkin Boxes:  click here!
Spiderweb Rosettes:  click here!
Black Cat Bucket and Jack 'O Lantern Banner:  click here!
Black Flower Box in Design Space:  https://us.cricut.com/design/#/canvas/project/21563145
Smiley font:  http://www.dafont.com/smiley.font

I think we are all ready for Halloween over here!


Saturday, October 25, 2014

Explore Writing Options and Alternative Pens II: Halloween Treat Boxes using Jellyroll Pen and Dingbat Drawings


Since I bought my Cricut Explore back in March, I have been very interested in handwriting options and pen choices aside from the Cricut branded ones.  I did previous blog posts on both of those subjects, but now I have even better news!  The Chomas Pen and Marker Holders allow for even more options, including Sharpies, Jelly Roll Pens, glitter pens, and more!  (For my original post on pen options, click here! For my previous post on handwriting fonts to download, click here!)

Now you can write in WHITE gel ink!
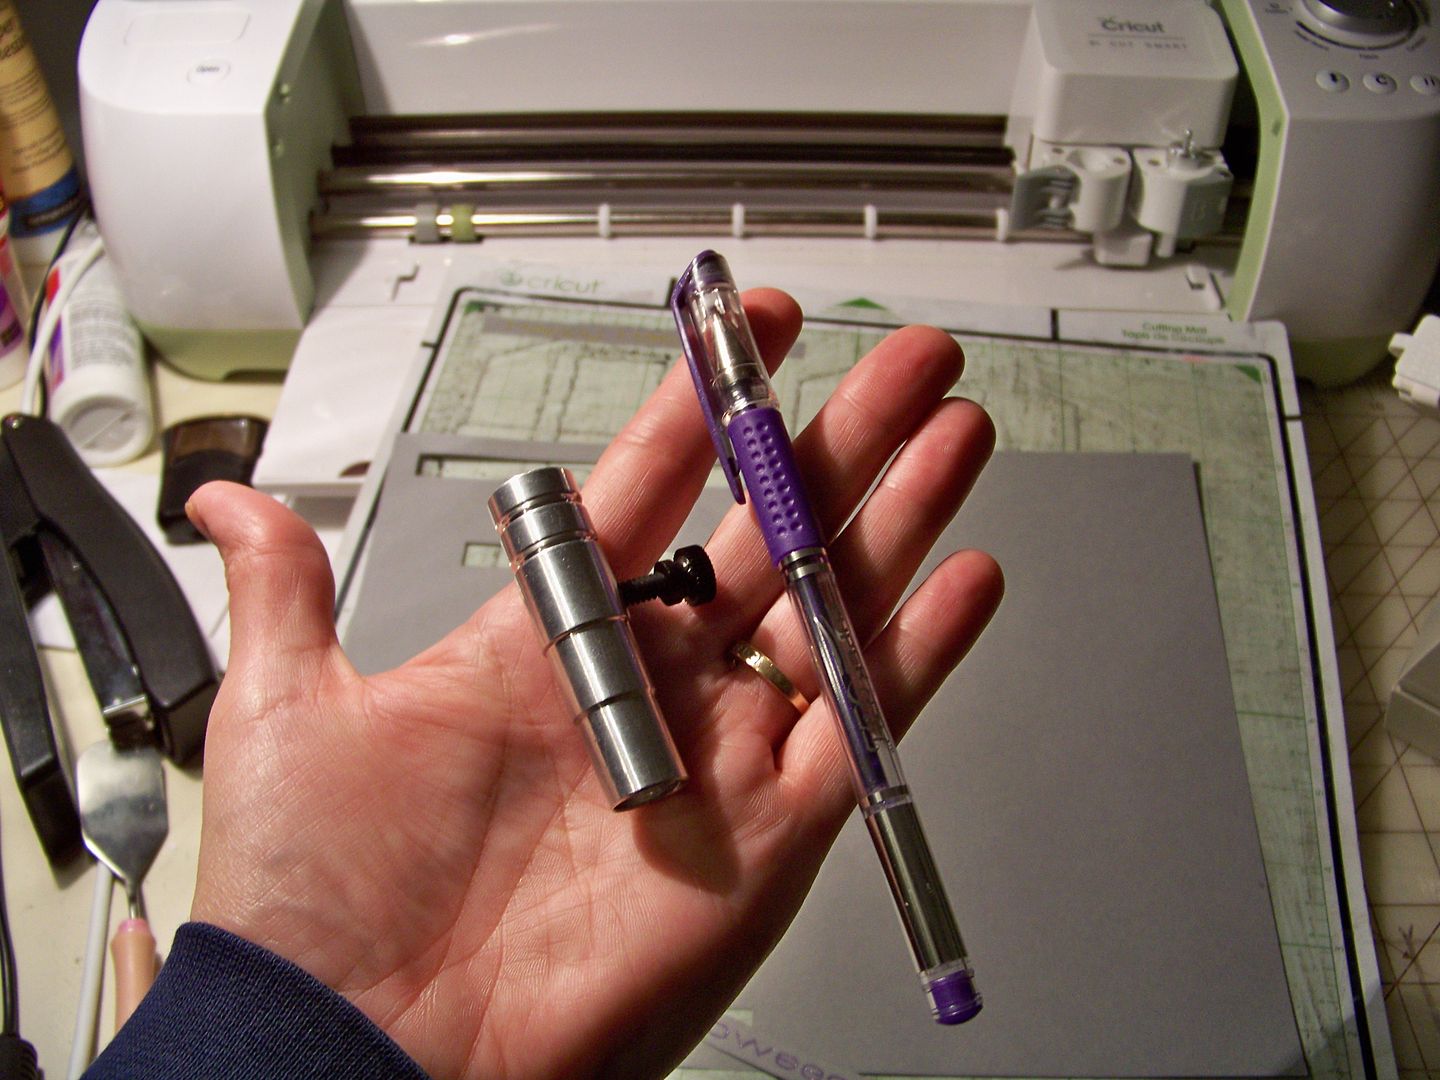
The Chomas Pen and Marker Holders are aftermarket items.  In order to use them, you will need to swing open the arm of the pen holder and pop out the holder.  To see this in action, check out Amy's video (click here).  I like this option much more than some of the homemade things I have been seeing people do with tape and things that risk breaking the holder.  Her implements fit in the spot that the holder would normally set in and the arm will swing shut to hold it in place.  See links at the end of this post for how to buy this from her.  (And just so you know, I had to buy mine- regular price, and she did not ask me to post this.  I don't benefit in any way from sales of her tools. I really just love having more options to use with my Explore!)

I have missed the use of my Jellyroll pen!  The closest I had been able to come to a usable WHITE pen in the Explore was chalk markers.... but they are engineered to be choppy.  They are supposed to look like chalk!  I wanted a smooth gel for writing on dark papers and I love the way the Explore writes with gel ink! 

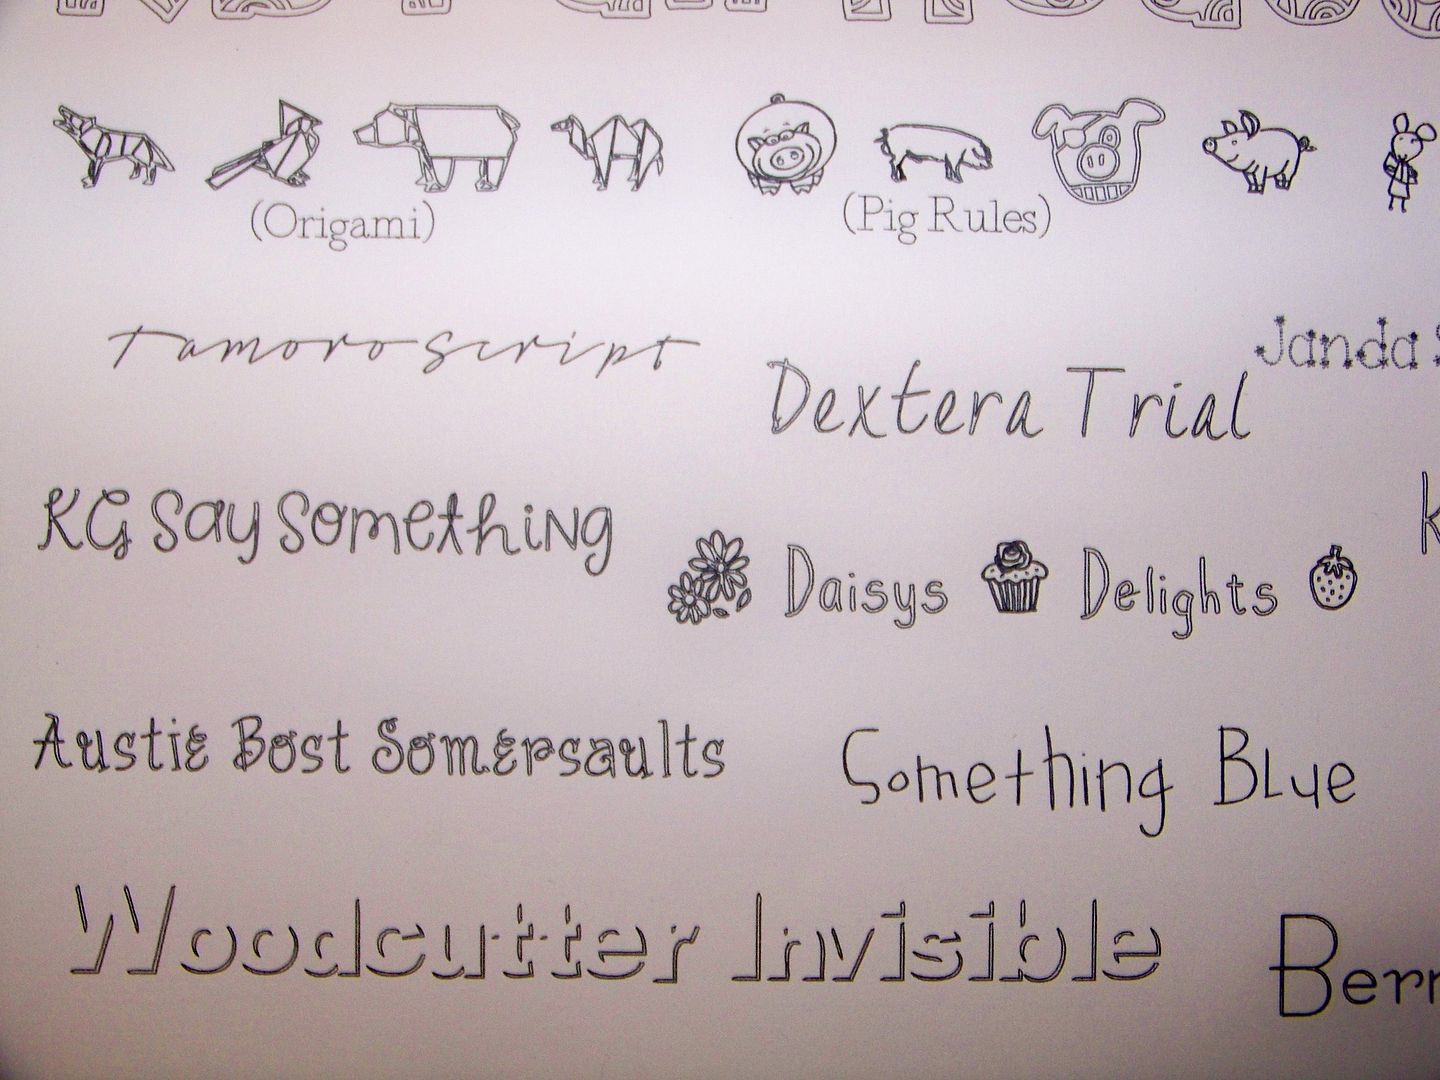
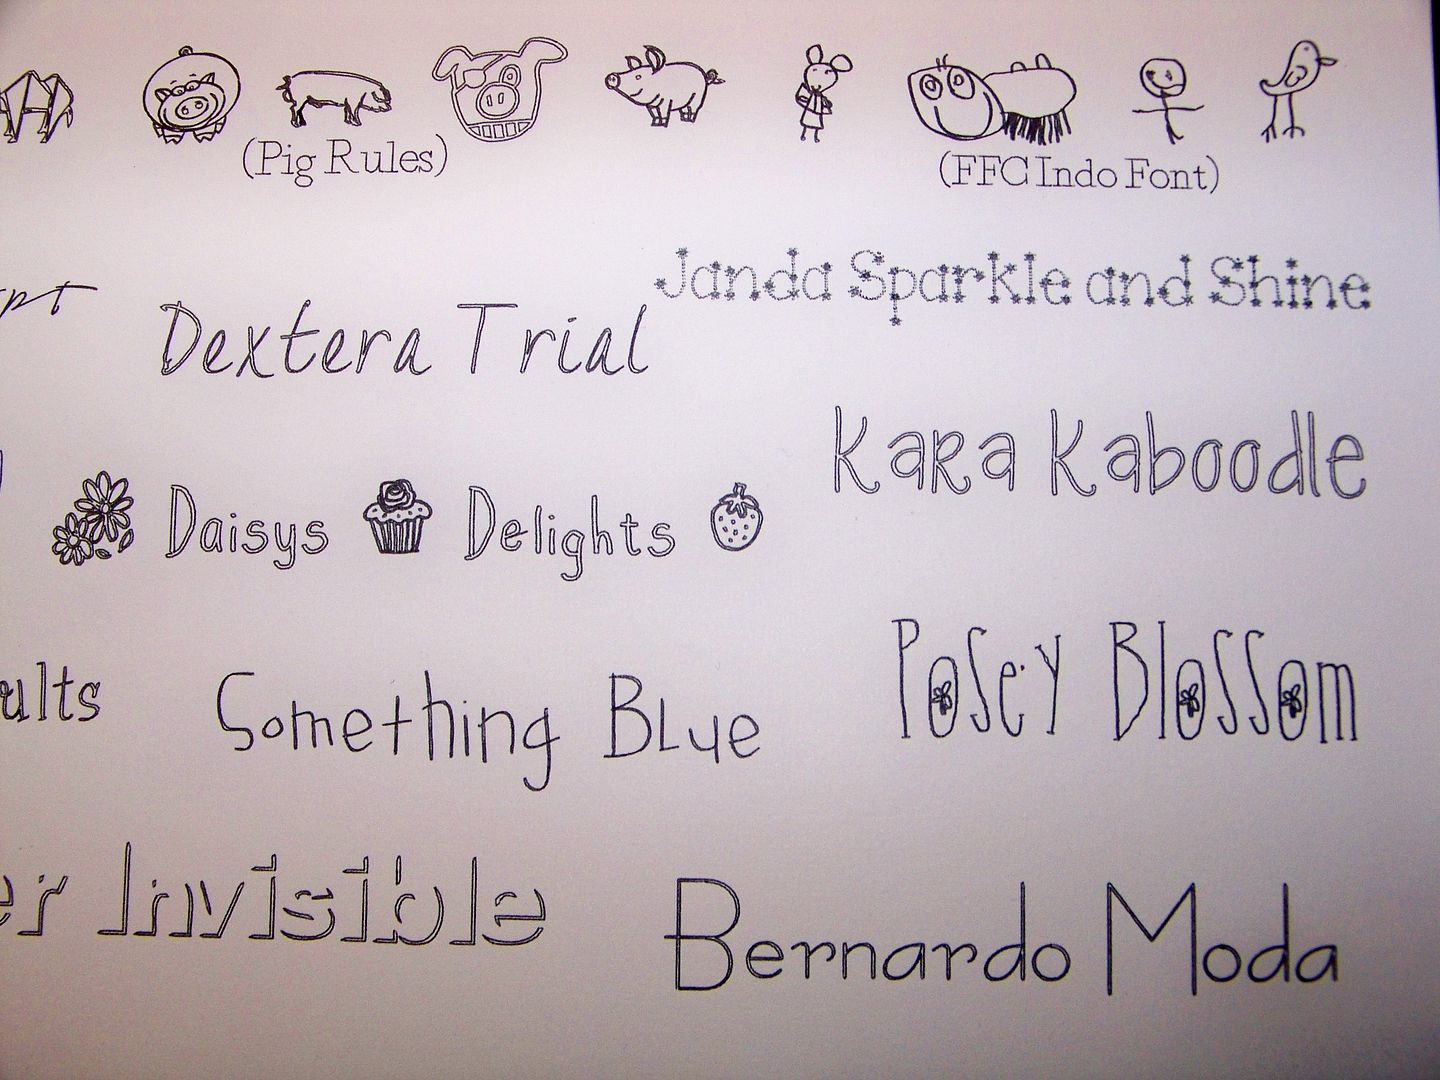
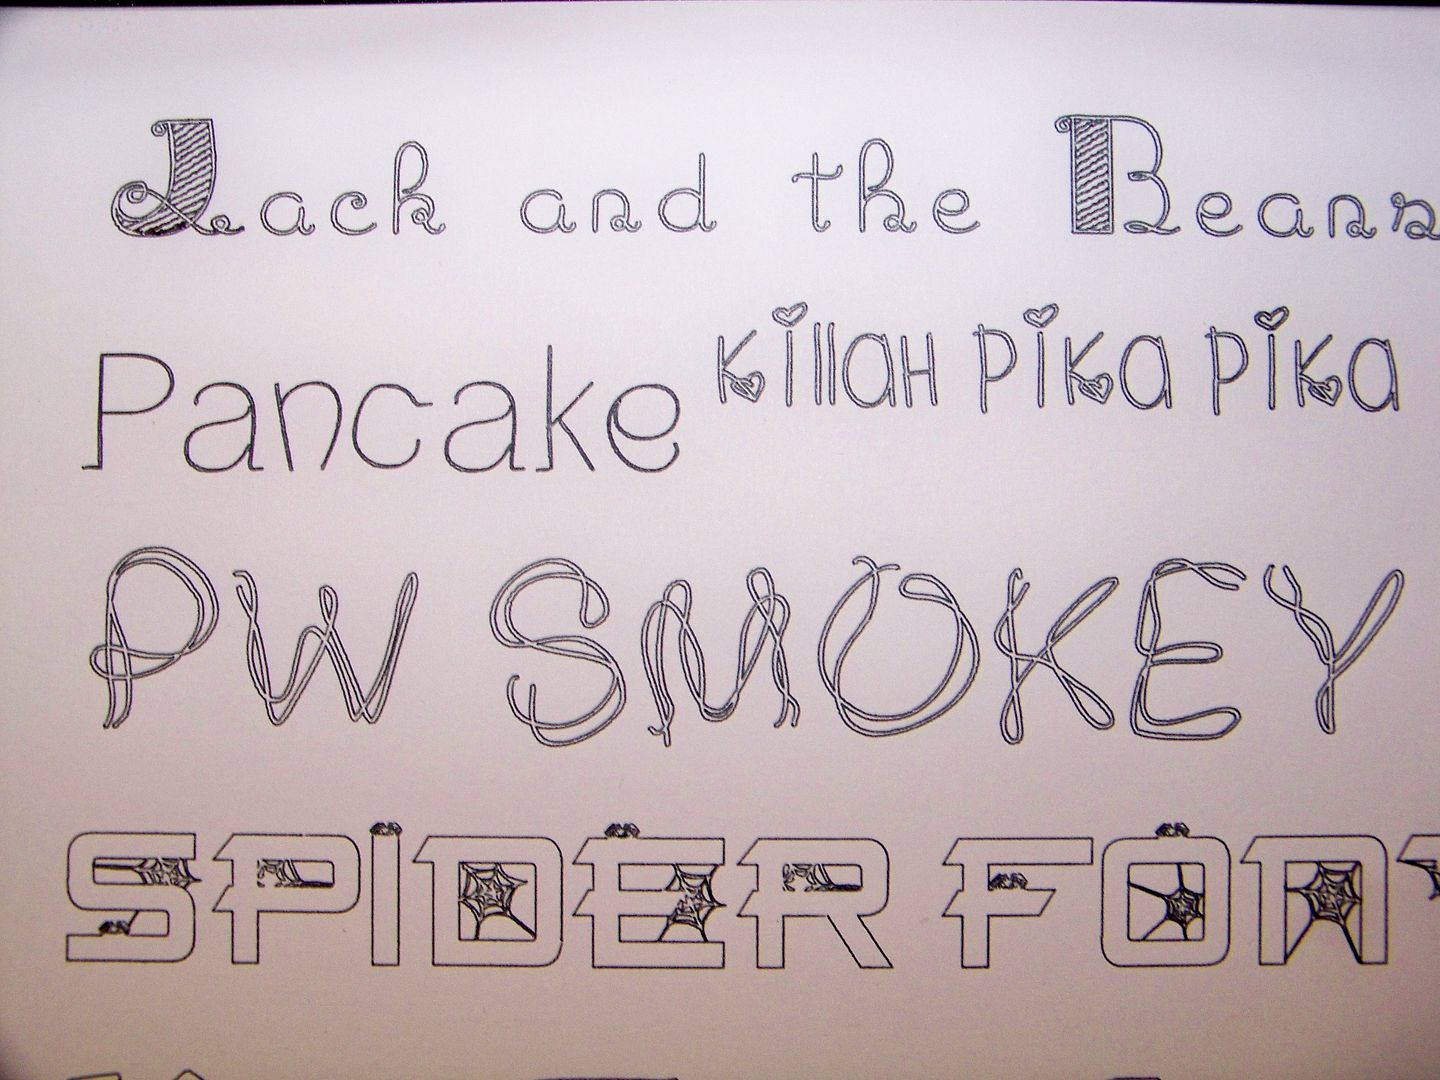
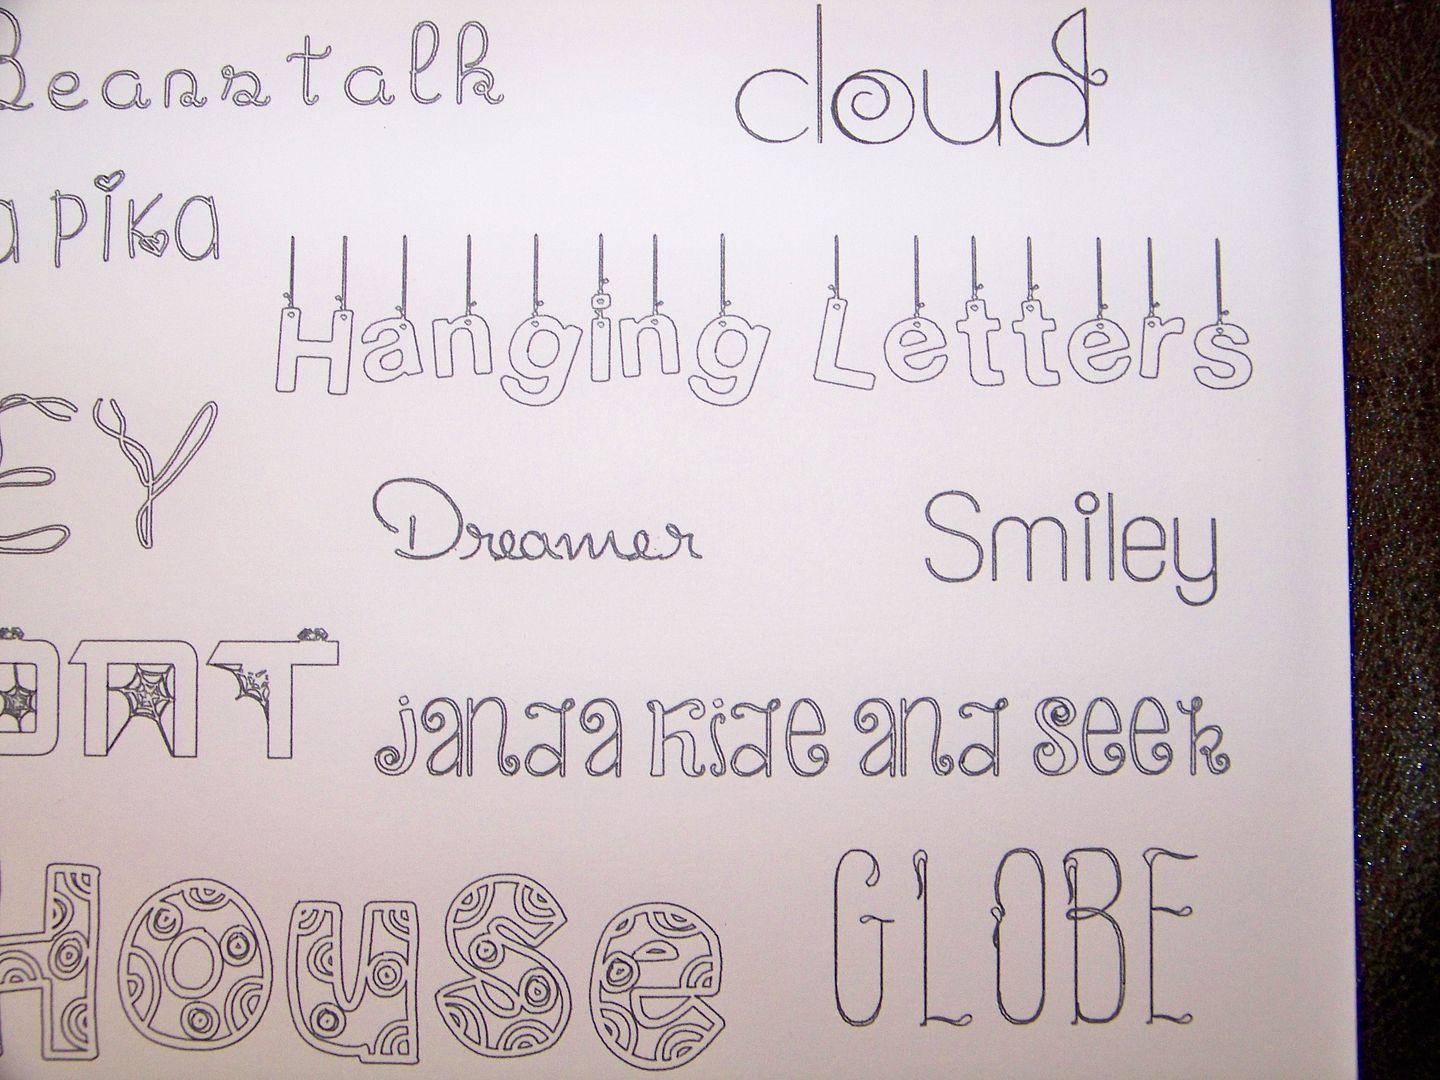
And the only thing more fun than finding new pen options is finding new free fonts to use that mimic handwriting and pen art!  Remember, all true type fonts (TTF) are system fonts so they will outline.  Using skinny fonts simply means that they will look like single stroke fonts.  Your chosen pen or the point size you choose can make certain ones look even more like handwriting.  For a full explanation of this and info on how to download, check out my previous post about this.  These are all from dafont.com.  Under each photo, I have links to each font. 

Jack and the Beanstock
Pancake
Killah Pika Pika
PW Smokey
Spider Font

Cloud
Hanging Letters 
Dreamer
Smiley
 Janda Hide and Seek
KB Fun House
Globe

Origami (Dingbat)
Pig Rules (Dingbat)
Tamoro Script
 Dextera 
KG Say Something
Daisys Delights
Austie Bost Somersaults
Something Blue
Woodcutter Invisible

Pig Rules (Dingbat) - repeat
FFC Indo (Dingbat)
Dextera - repeat
Janda Sparkle and Shine
Daisys Delights - repeat
Kara Kaboodle
Something Blue - repeat
Posey Blossom
Bernardo Moda

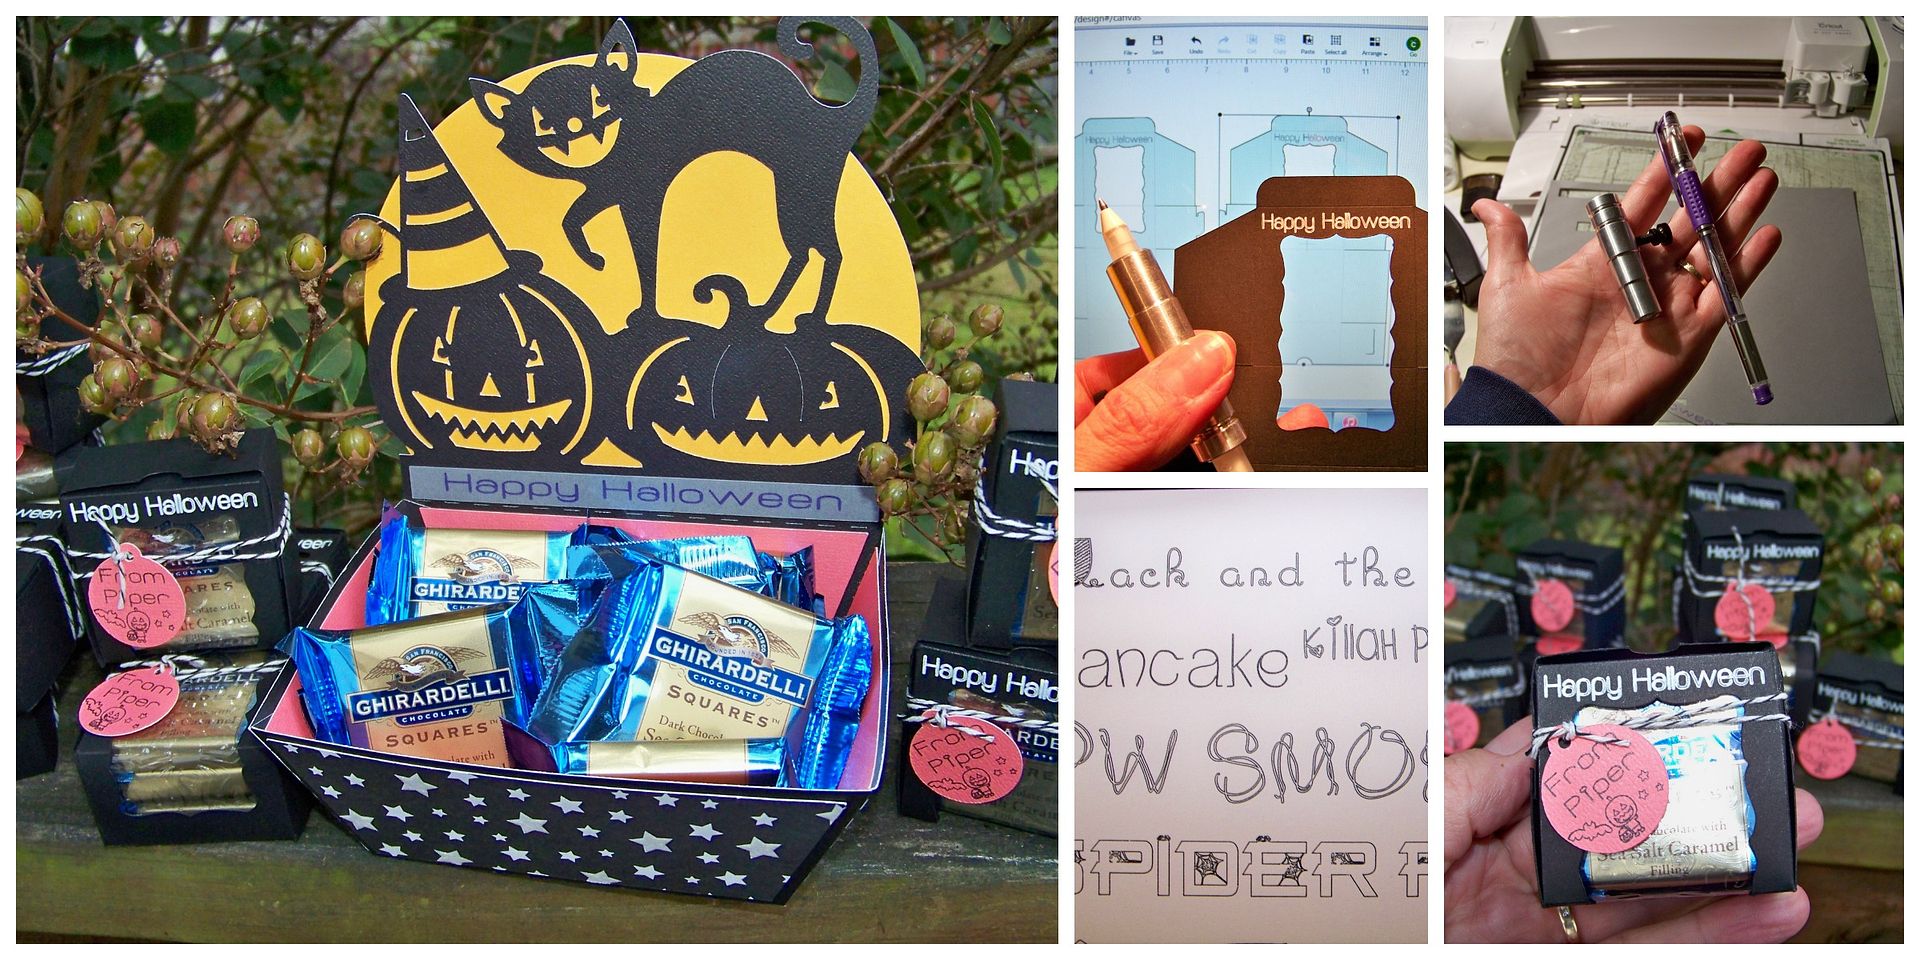
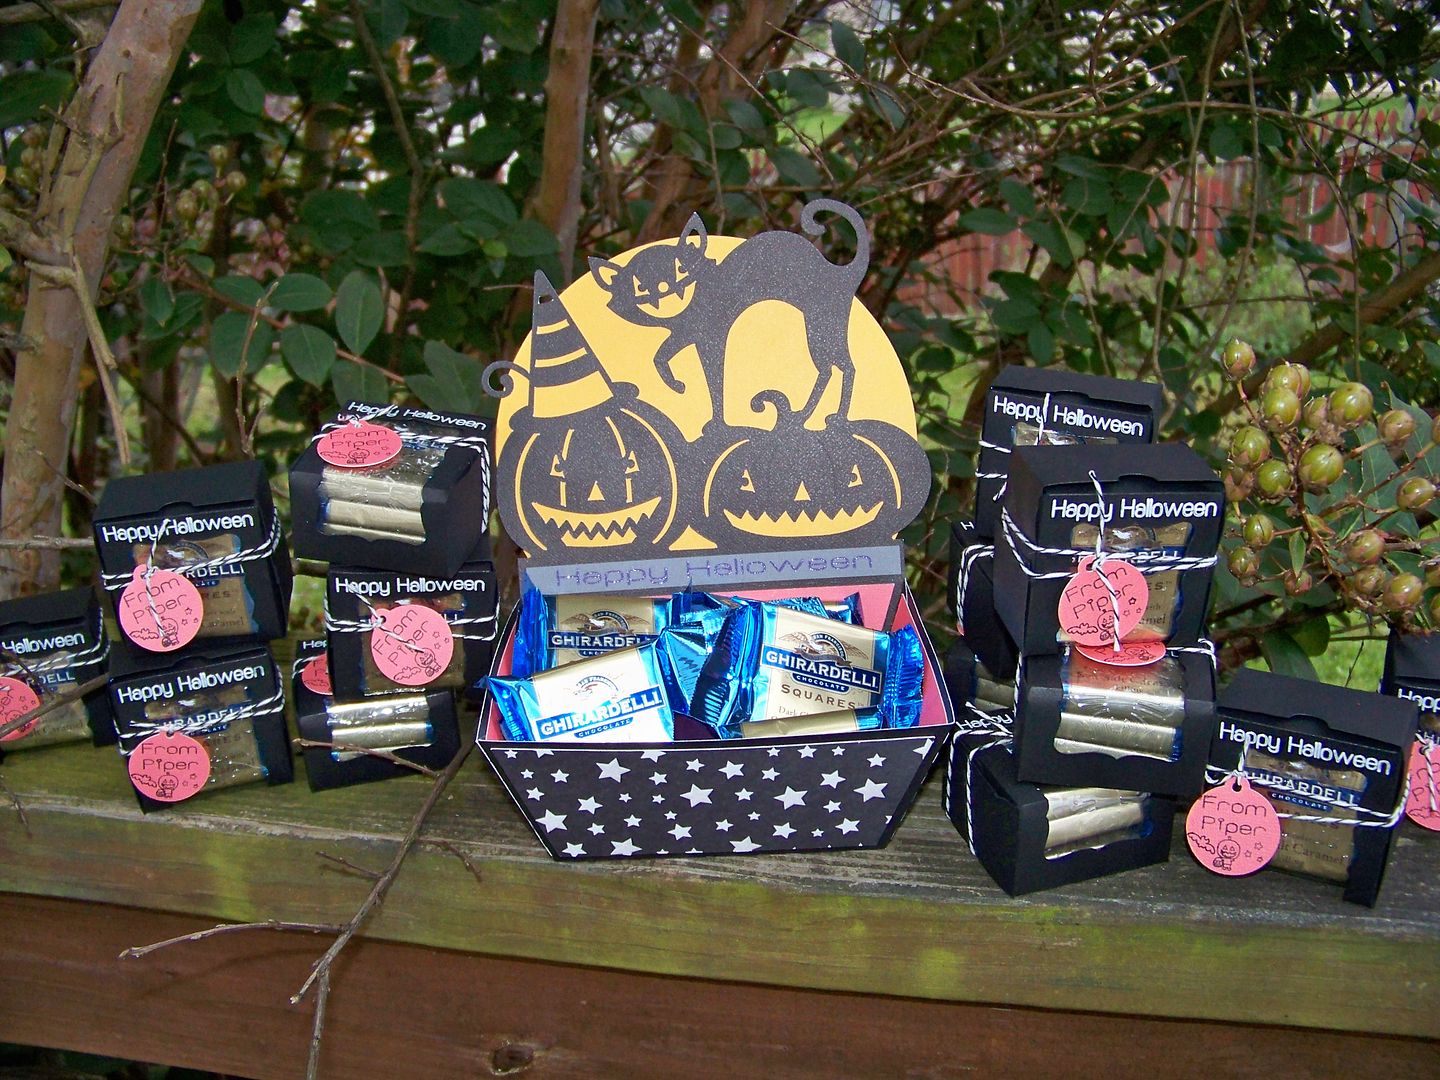
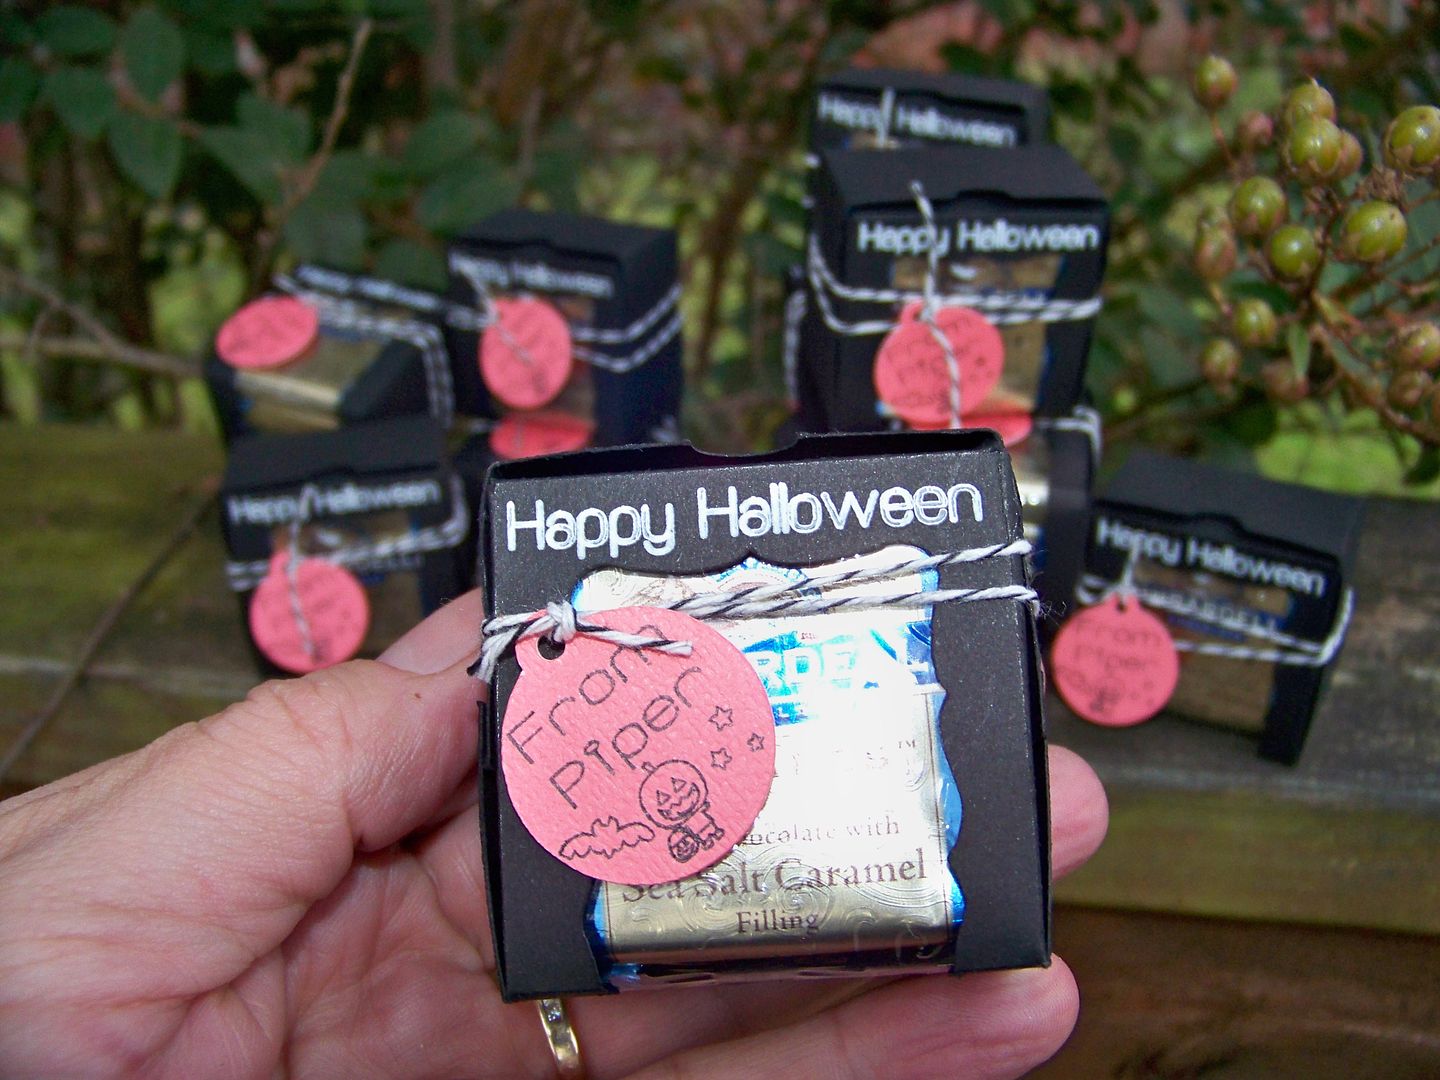
Using these new options, I created some tiny treat boxes for the ballerinas in my daughter's Junior Pre-Pointe Ballet class and a little candy dish for her ballet teacher!  Her academic school doesn't allow the kids to even mention the word 'Halloween' so we make up for it with her extra activities, like ballet class!


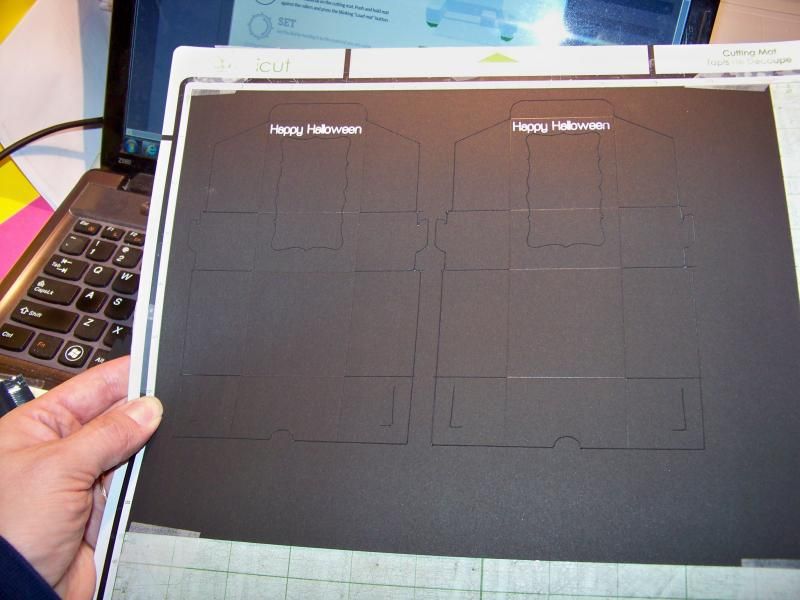
Thanks to MizEsther and Margo Jacobson, I was introduced to the fabulous little box on the Cricut Baby Shower Cartridge!  Cut at 4.5", this box is the perfect size for three Ghirardelli Squares!  


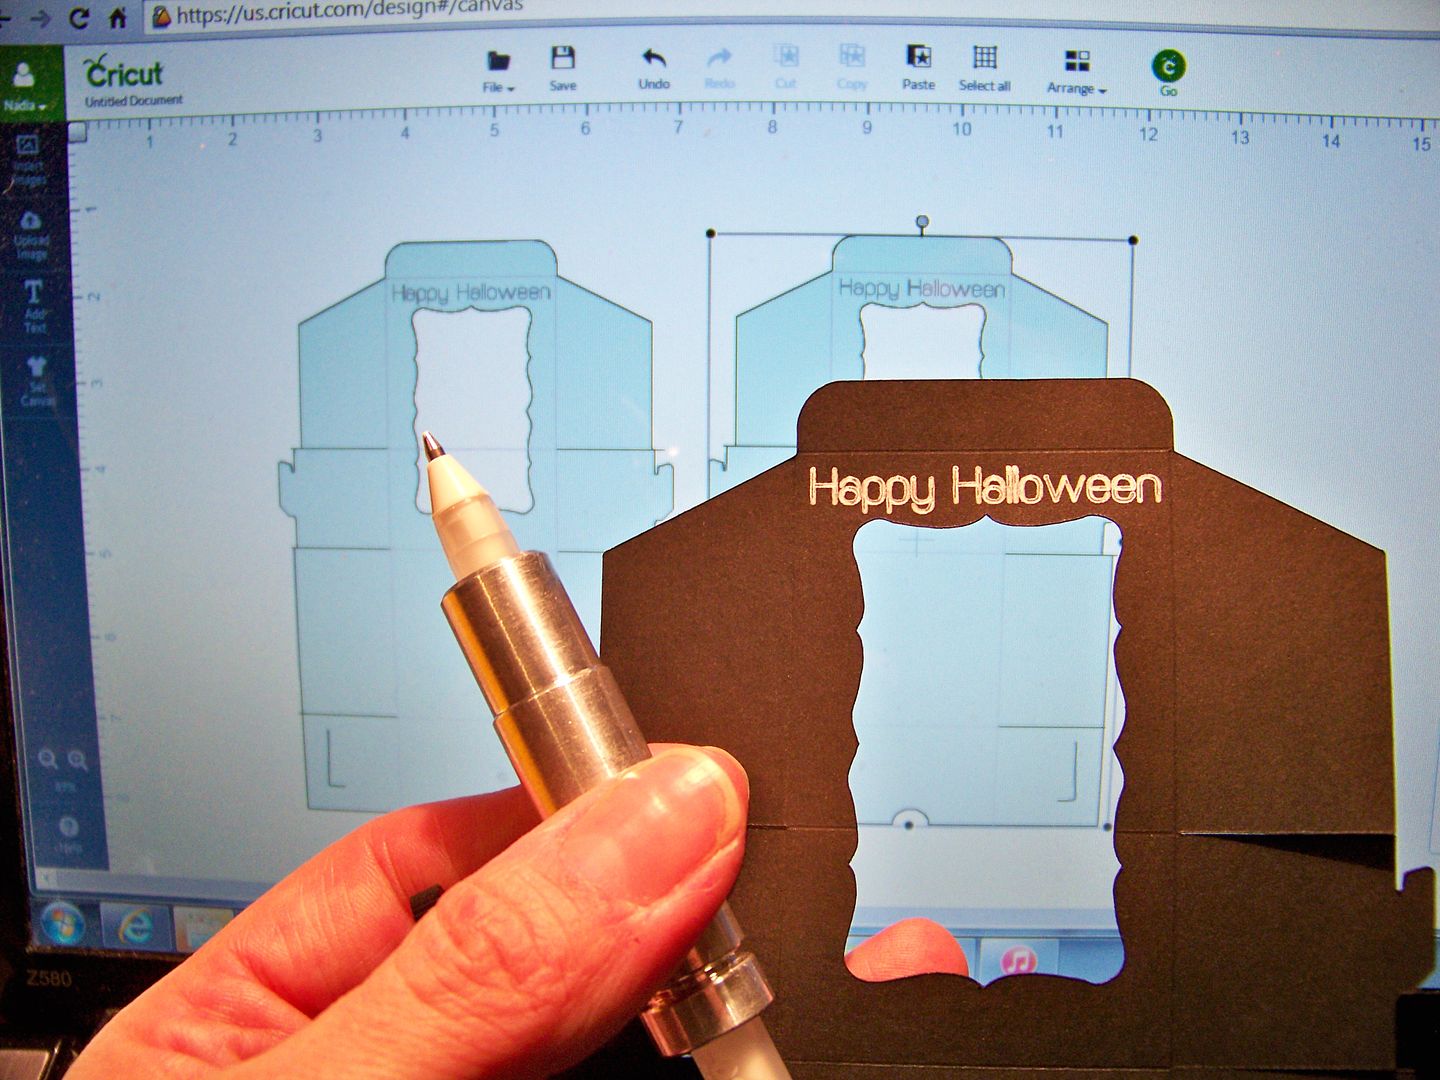
I found that I could fit only two boxes on the mat, whether the paper is 12x12 or 8.5x11 so using up smaller paper is the way to go.  This design utilizes the score tool as well, so the box folds perfectly.  I added text using Dafont's 'Smiley' and had the Explore write it in white Jellyroll pen with the Chomas Pen Holder!  My Design Space File for this is here:  https://us.cricut.com/design/#/canvas/project/21549753


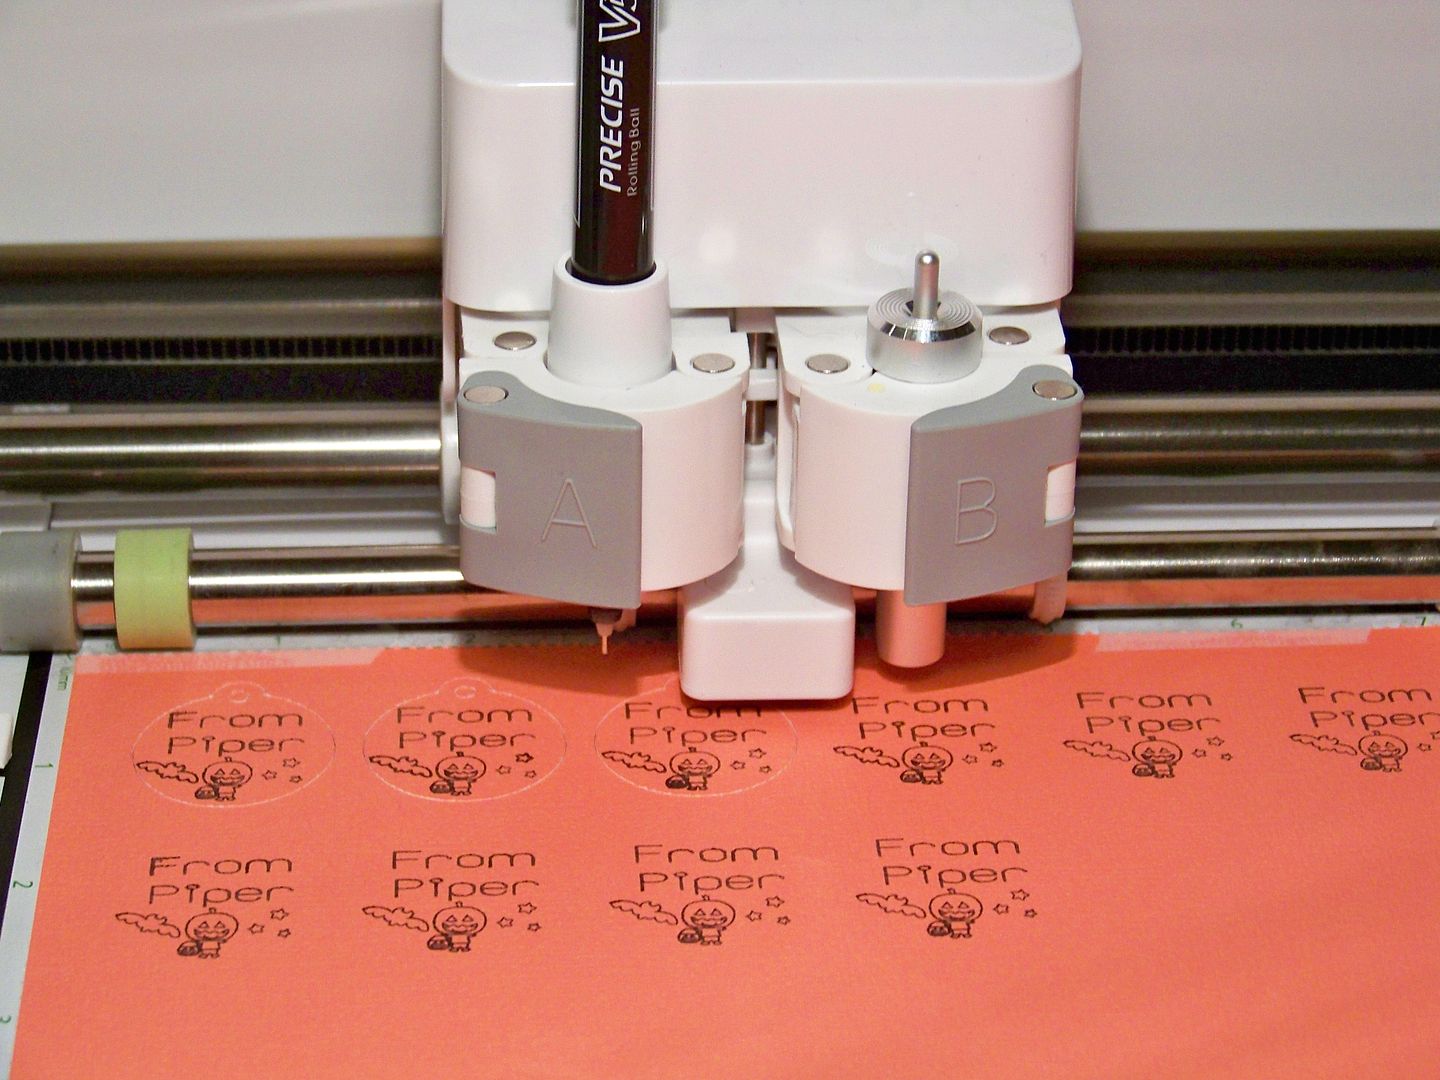
I tied on little tags I made using a simple circle tag from my Cricut images and text that included dingbats.  Check out Dafont's WTF Sweet Halloween Dings!  Have you used dingbats with your Explore?  You can cut, print, or write the characters and there are so many fun ones!  (Be sure to print out the key so you know which drawing relates to each alpha-numeric character.)  For these tags, I used Pilot Precise V5 black pen.  This pen fits just fine in the regular Explore pen holder with no other assistance or implement!  These pens are super fine so tiny details don't get lost!  This is my file for my tags: https://us.cricut.com/design/#/canvas/project/21533908  The text is Smiley font.  The tags were cut from Tags, Bags, Boxes, and More 2 at 1".


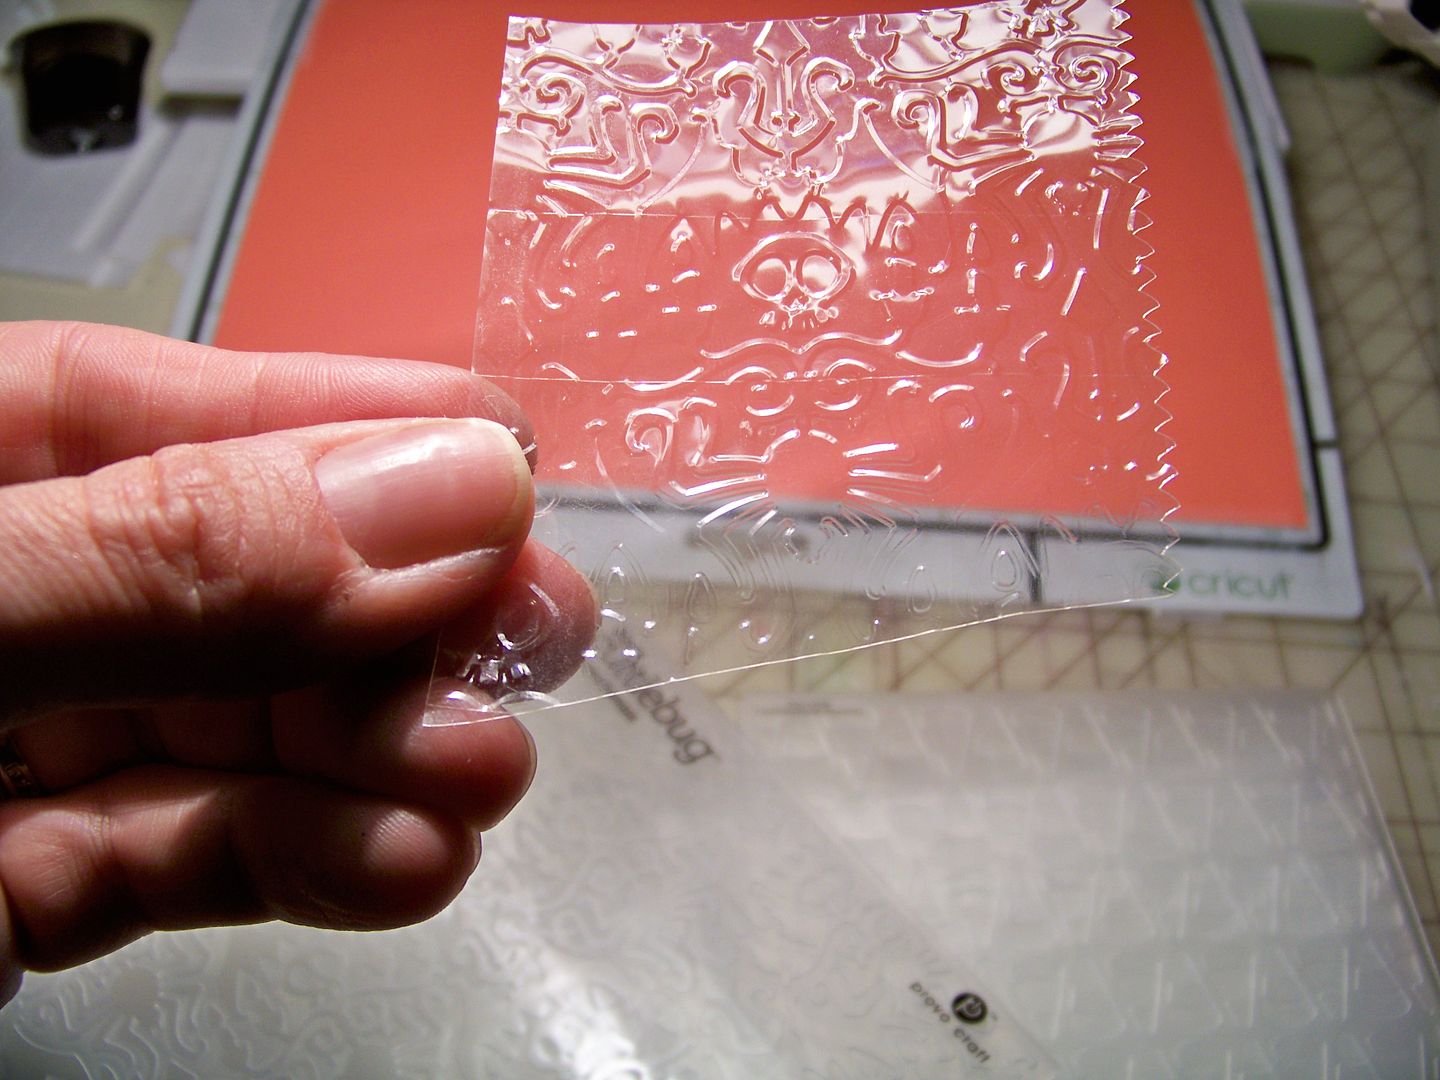
The fun thing with this little box is that you can use all kinds of re-purposed materials for the window.  On these, I used the plastic film that comes on Cricut cutting mats.  I have lots of those.  I cut them using the cardstock setting.  I love embossing it too!  (Embossing also hides any scratches or imperfections on the film.)


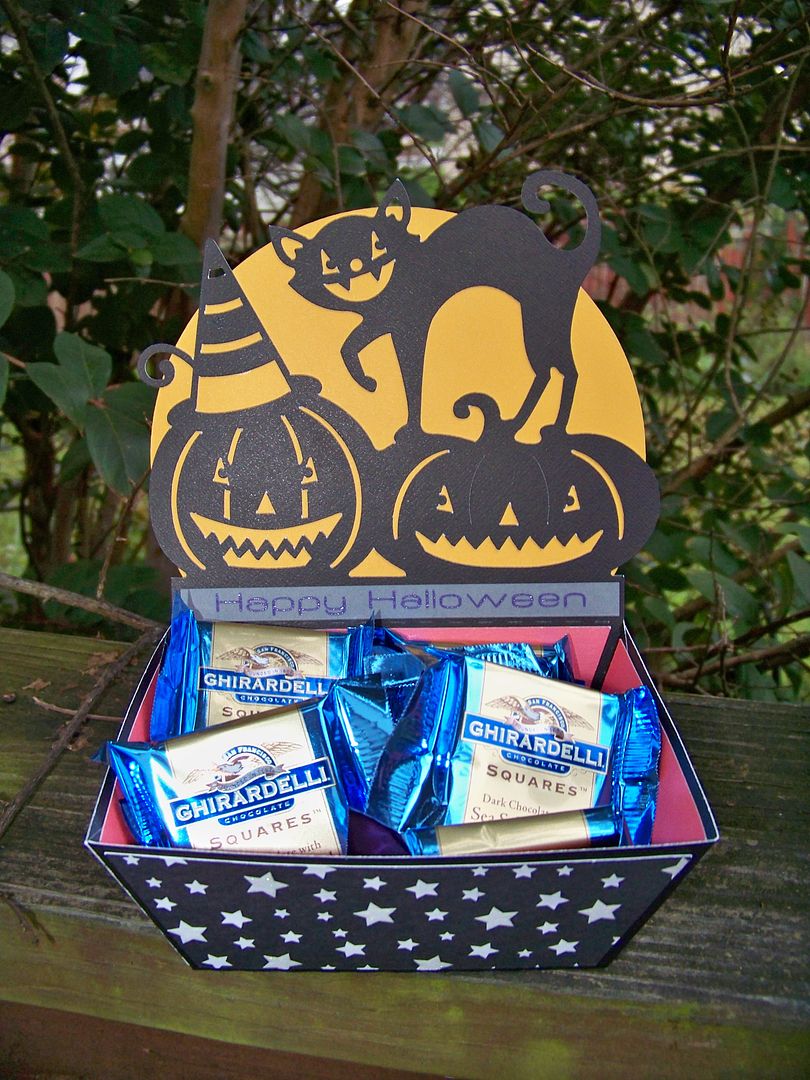
The candy dish was super fast and easy!  This was a quick file from SVGcuts from the Midnight Jamboree collection!  


To the little strip, I had the Explore write "Happy Halloween" in the Smiley font using a glitter pen.  I used the Chomas marker holder since this pen is thicker due to the rubber grip on the barrel.  


Quick Links:

My Design Space File for the Boxes (you will need Baby Shower and the Smiley Font installed):  https://us.cricut.com/design/#/canvas/project/21549753

My Design Space File for the Tags (you will need Tags, Bags, Boxes, and More 2 and the Smiley Font installed):  https://us.cricut.com/design/#/canvas/project/21533908

Chomas Creations Blog for Video on using her aftermarket pen and marker holders:  click here!

Chomas Creations Store to buy aftermarket pen holder, marker holder, and engraving tool:  click here!

Free Fonts:  find links to specific ones listed under each photo.  Just click the font name!  For the Halloween Dings, click here!

For my previous post on fonts that look great written by the Explore and how to download fonts and get them into Design Space, click here!  

My Previous Post on Pen Options that FIT in the Explore withOUT aftermarket holders or other assists:  click here!

Midnight Jamboree Collection from SVGcuts (candy dish):  click here!

Thank you for checking out my blog post!  I am in the middle of an on-line crop and these are two of my challenge projects!  Gotta get back to cutting and gluing!  Are you getting your craft on today?

But wait! There's more! Click 'older posts' above!

But wait!  There's more!  Click 'older posts' above!