I finally received the Cricut Circle exclusive cartridge 'Shall We Dance' during my busy work time and had to put it aside. I had been desperately wanting a cart with more posed figures and knew this one would fit the bill! I have loved using it to create more characters --not dancing-- by changing their arm positions and clothing.
I have also been rolling around ideas to use the new Post-It Full Adhesive Craft Paper that was provided to all the guest designers at the Sweet Sassy Diva blog! You can find this post there too!!
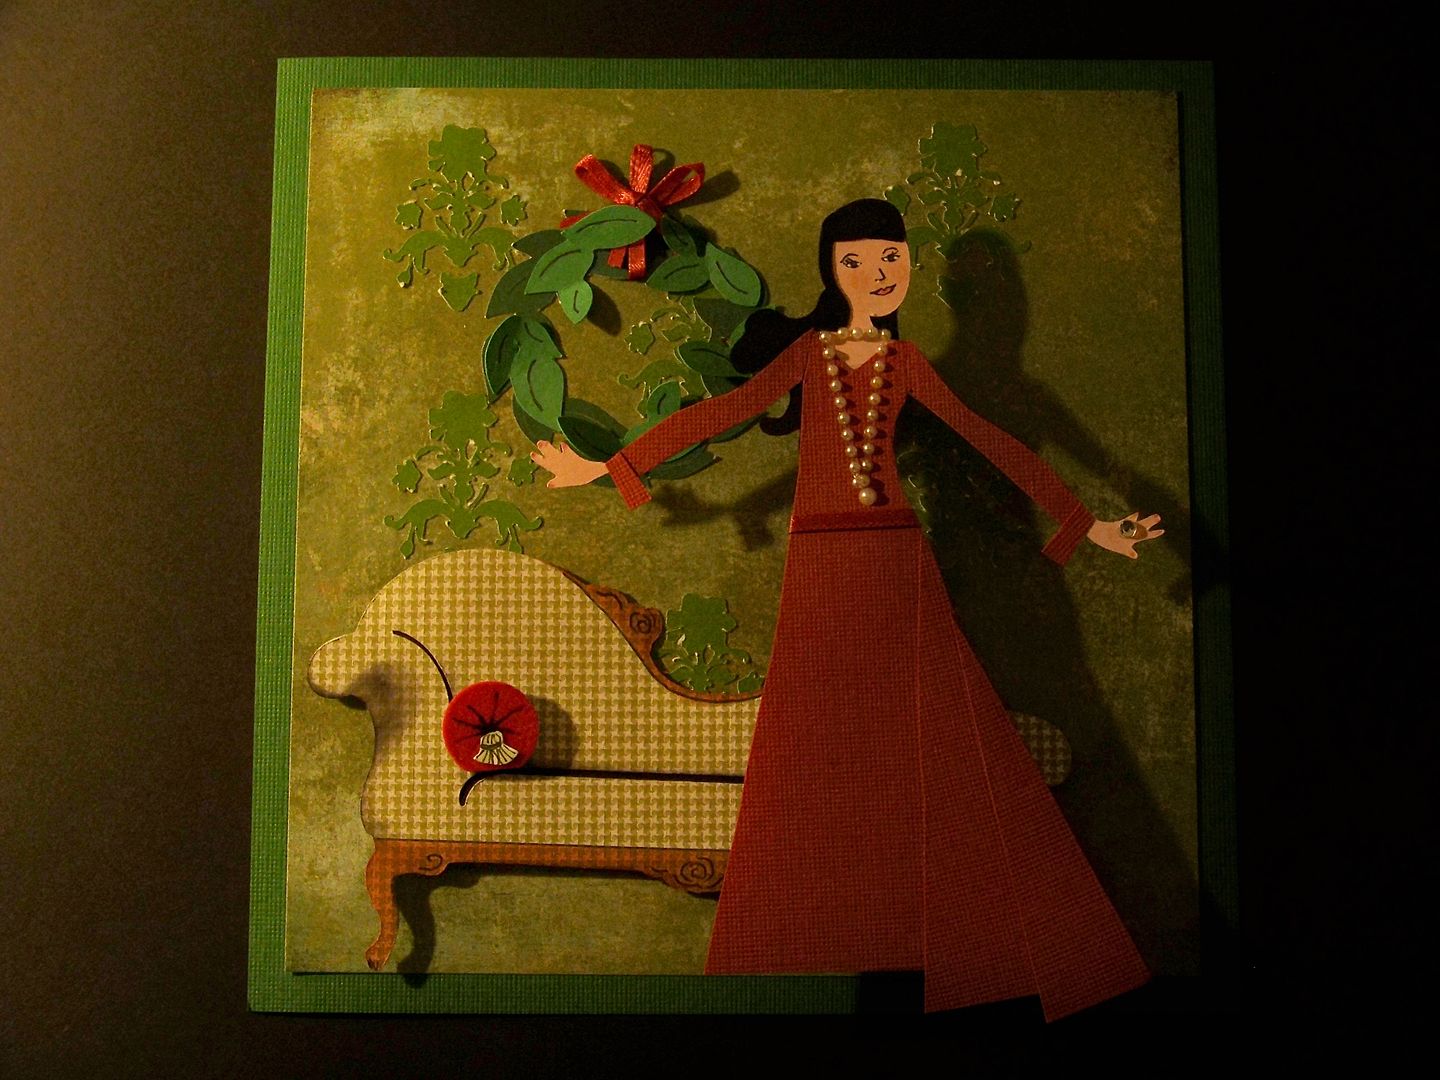
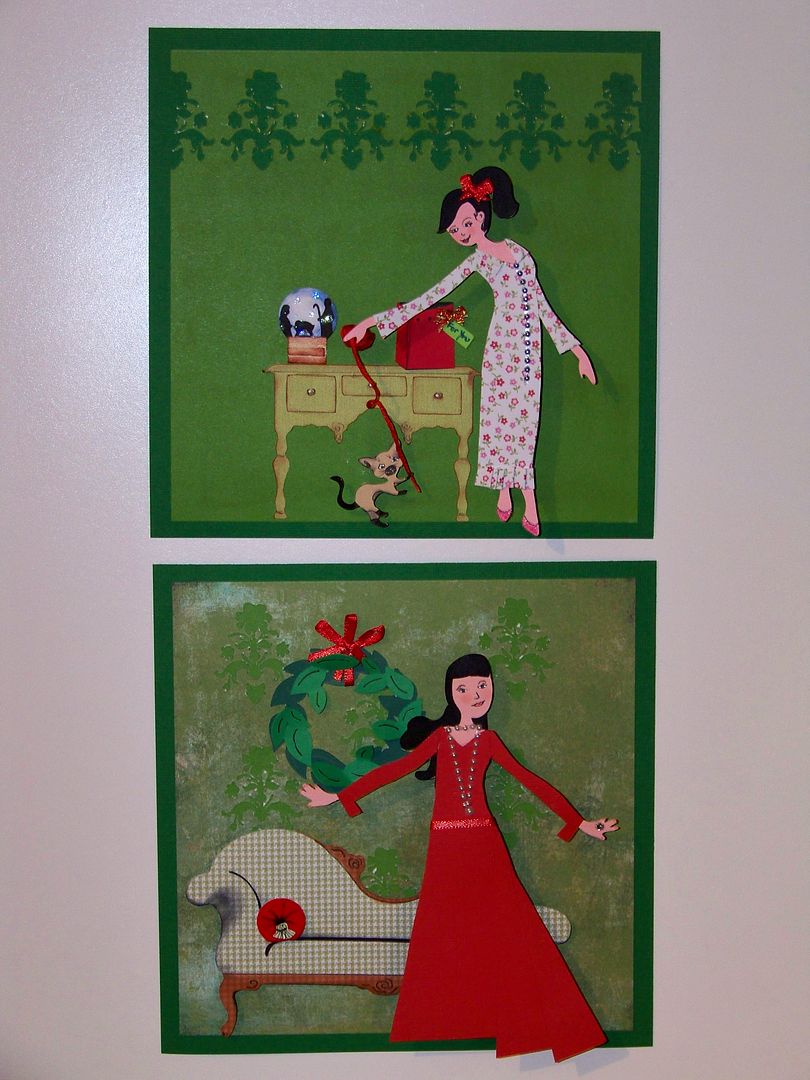
This is the result: Shall We Dancers go Christmas! This is a two-part project. I had to put aside my vignettes for quicker projects as work shifted into high gear, but with a bit of a break, I have been able to spend a little time on these again!
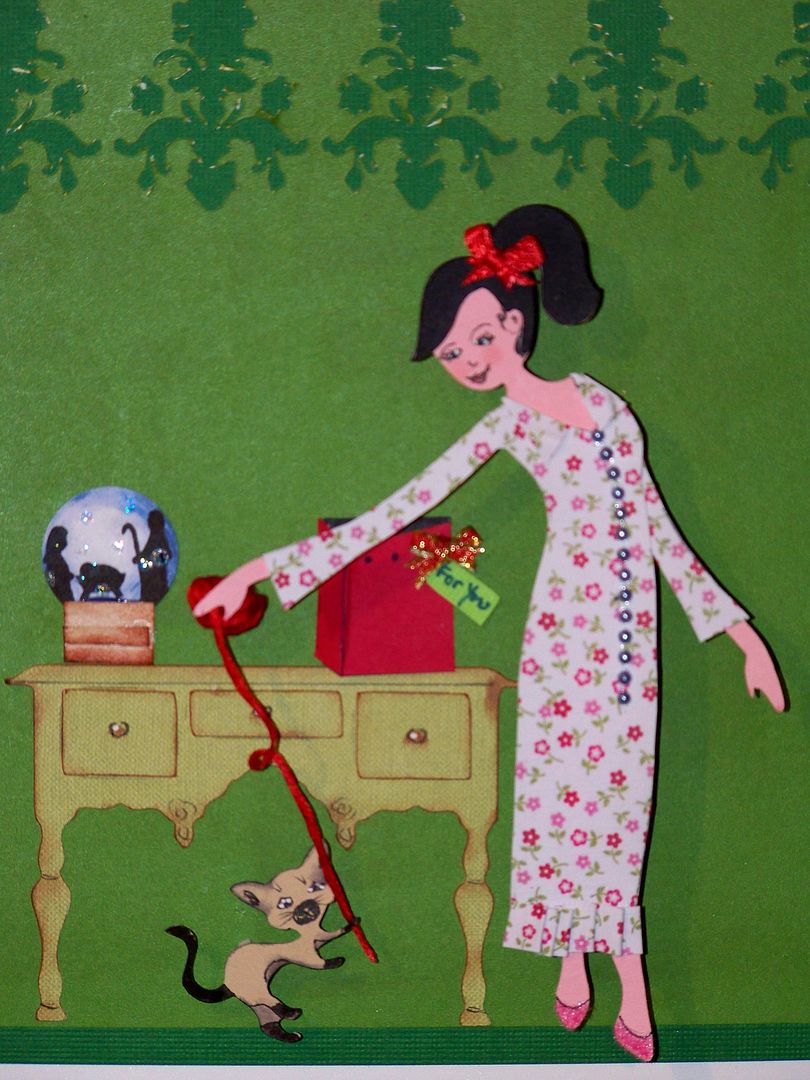
For the first one, to begin, I started with the figure on page 28, cut at 5-1/2" twice.
On one cut, I cut away her bottom half; on the other, I cut away her head, arms, and skirt to use as a pattern. I hand-cut a new dress, adding folds for the full skirt, long sleeves with cuffs, and a ribbon belt. I did add a bit more hair too! Stones created quick jewelry. I drew in her face instead of using the layer cuts so that I could get a little more detail.
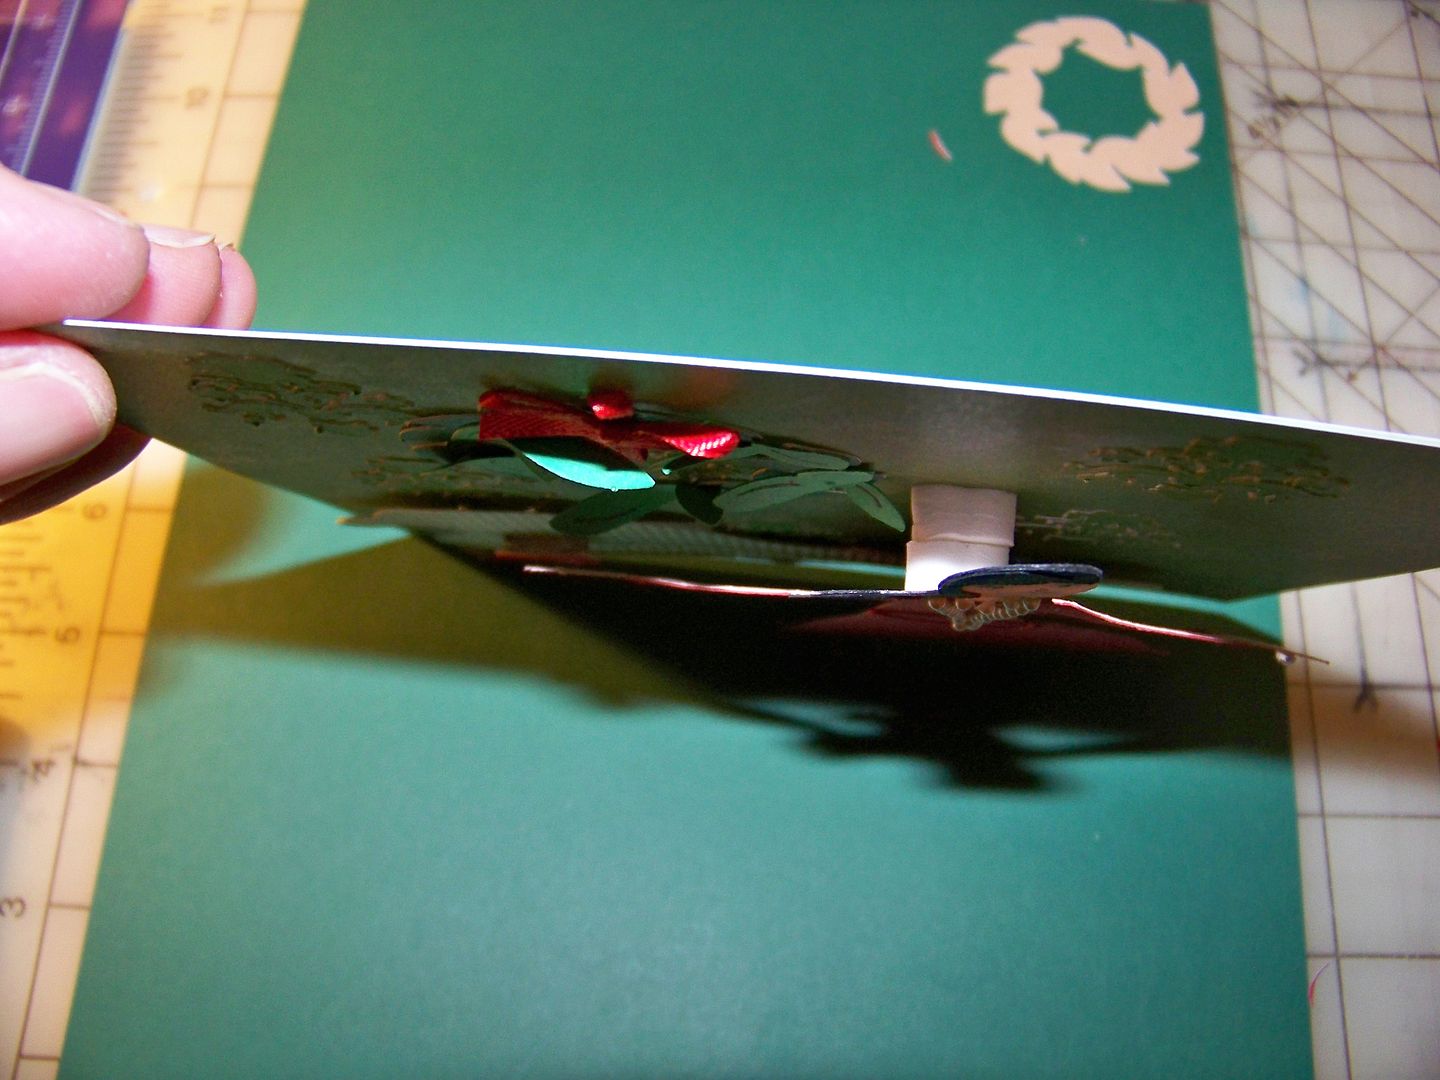
The fainting couch is from the Heritage cart (page 49).
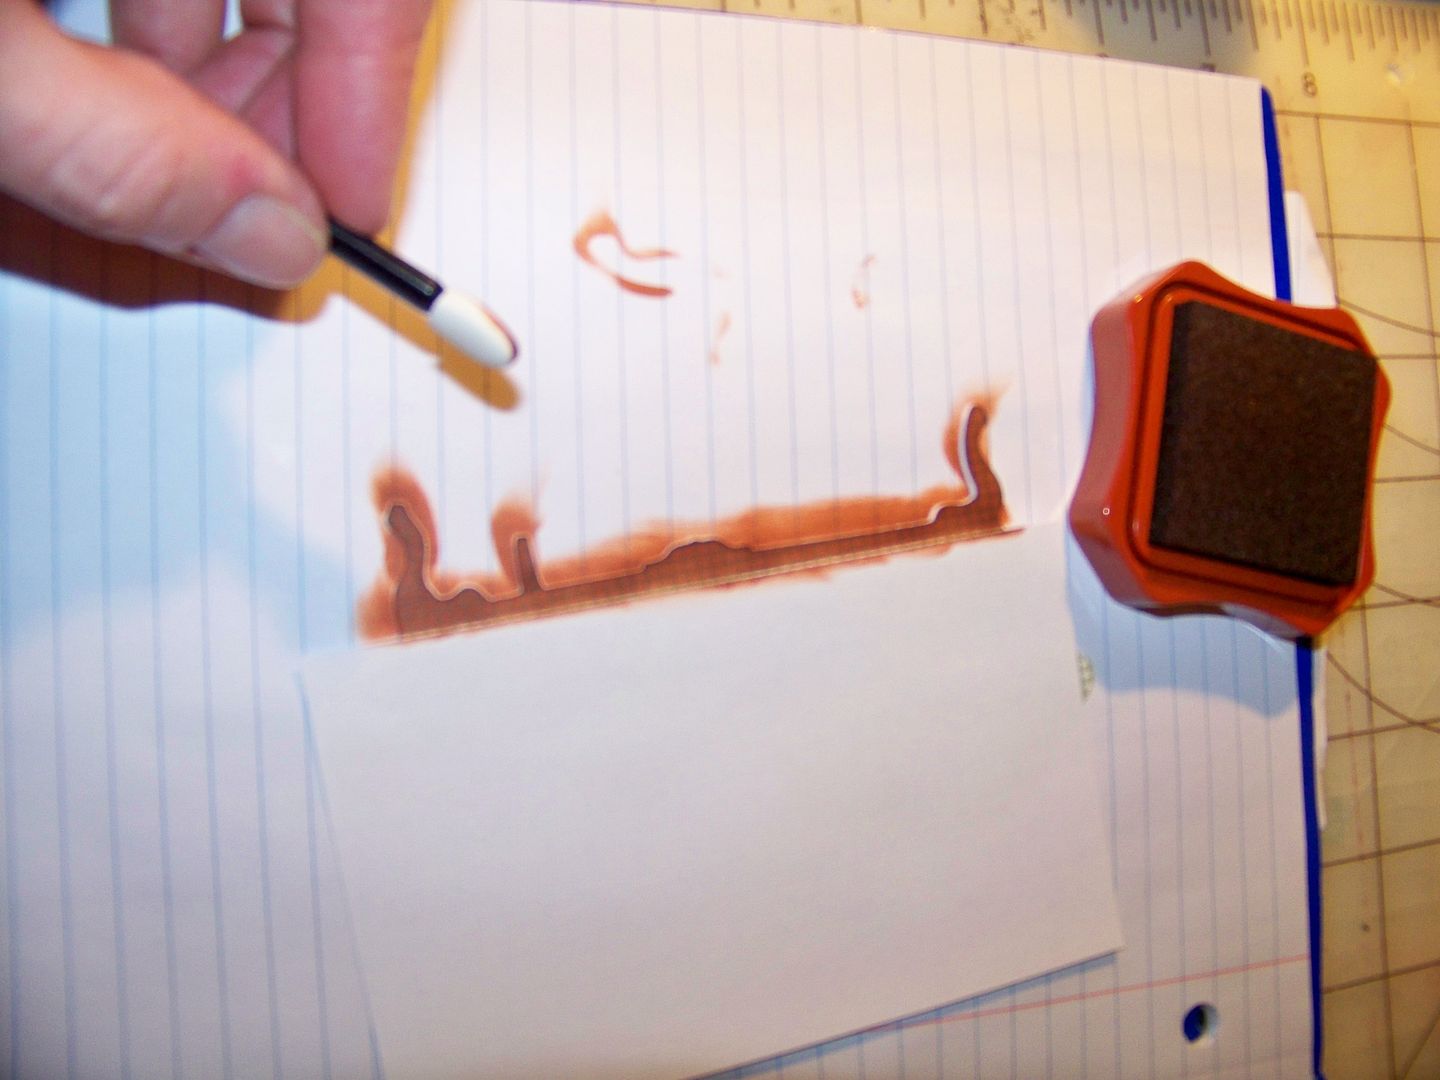
I cut it at 2-3/4", adding ink to create the wood detail and shading. The cart cuts a space between back and seat on the furniture, so I added a piece of black cardstock behind it. My Zig Millenium 01 fine pen allowed me to add details to the wood. I used a 5/8" punch to cut a circle from red velvet flock paper to make a bolster pillow. The Zig pen and a paper tassel I cut finish it off.
The wreath is from Joys of the Season (page 66), cut at 2". I cut the base from Post-It Craft Paper, color Evergreen (found in the Jewel Tones package). The layers are cut from regular paper. Unlike some specialty papers, the Post-It papers are easy to glue on to. This is important if you are like me and enjoy a mix of 2D and 3D effects on your projects! Additionally, this paper can be cut without cutting the liner. To do a kiss cut on this product, your machine should have the following settings: blade depth 4, speed medium (3), and pressure medium (3).
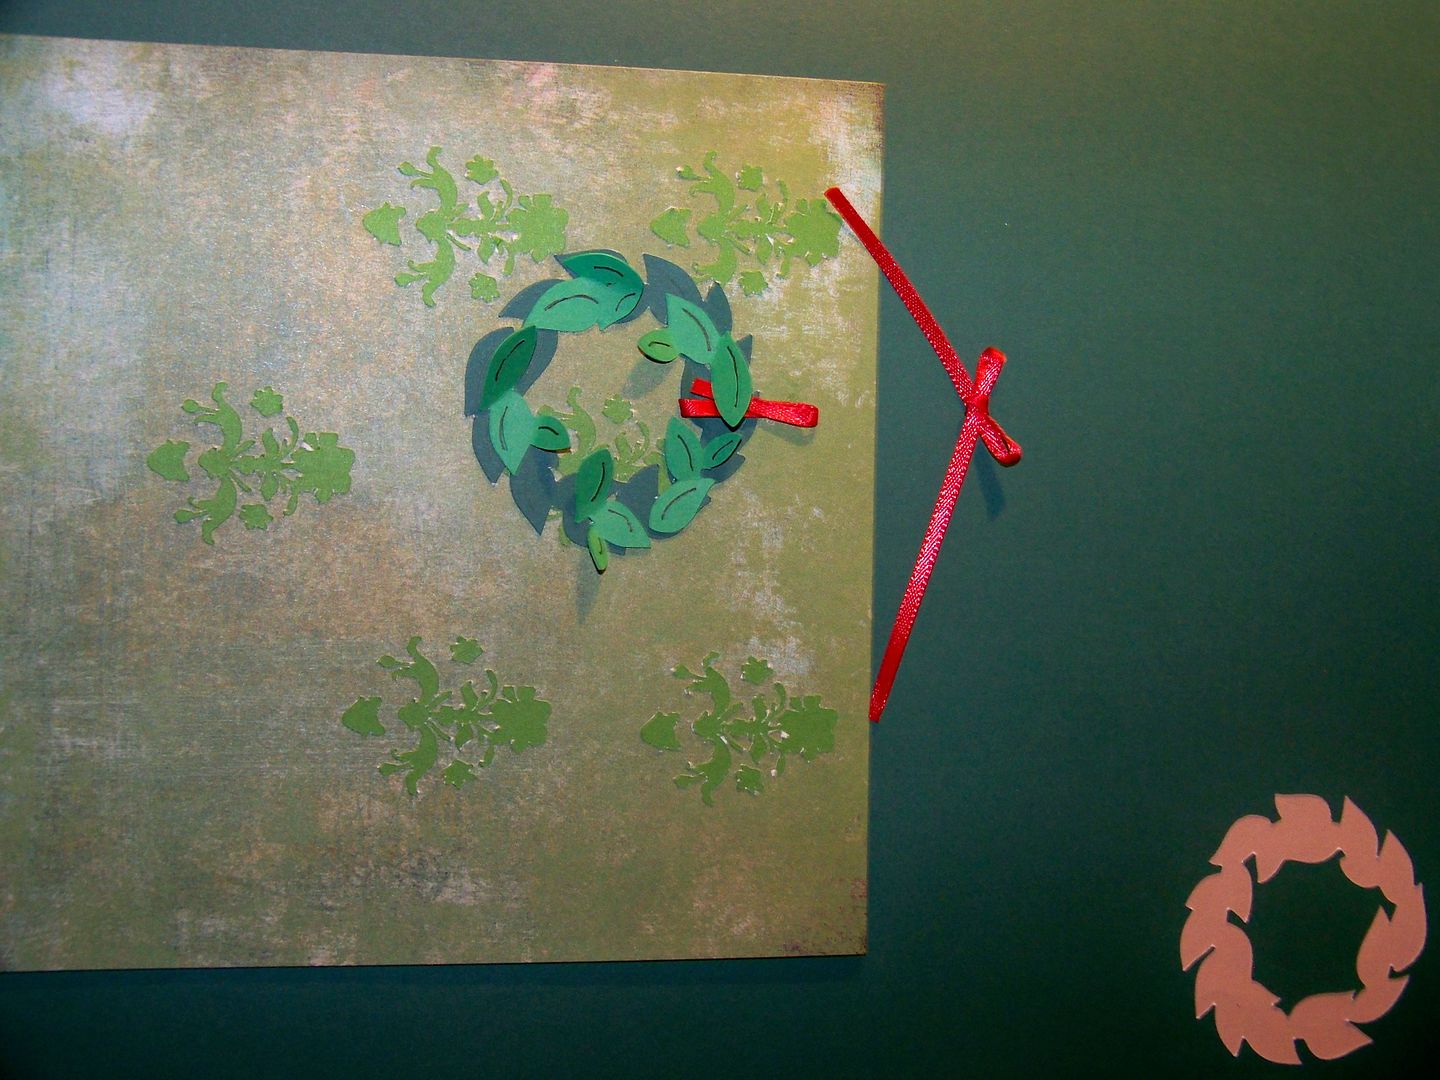
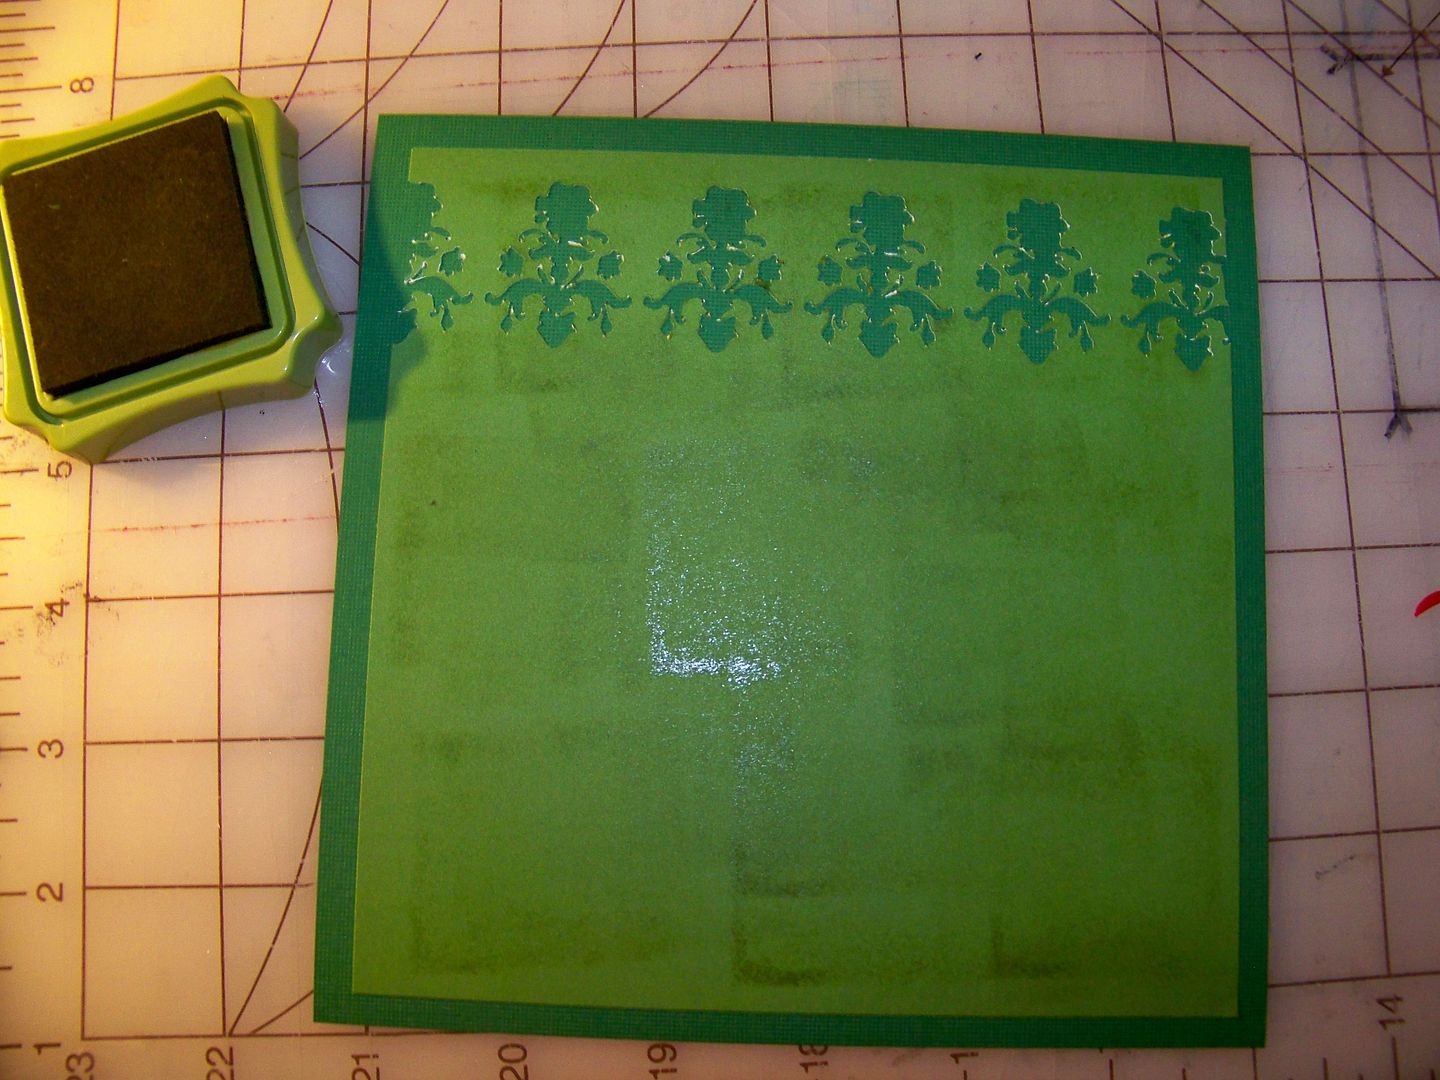
The background is a beautifully muddled printed paper. To it, I added cuts from Home Accents (cut at 1-1/4") to create a wall paper effect. I used more of the Post-It Paper to do this, saving the negative space for the next vignette. This was cut using color 'Lucky' from the Brights pack.
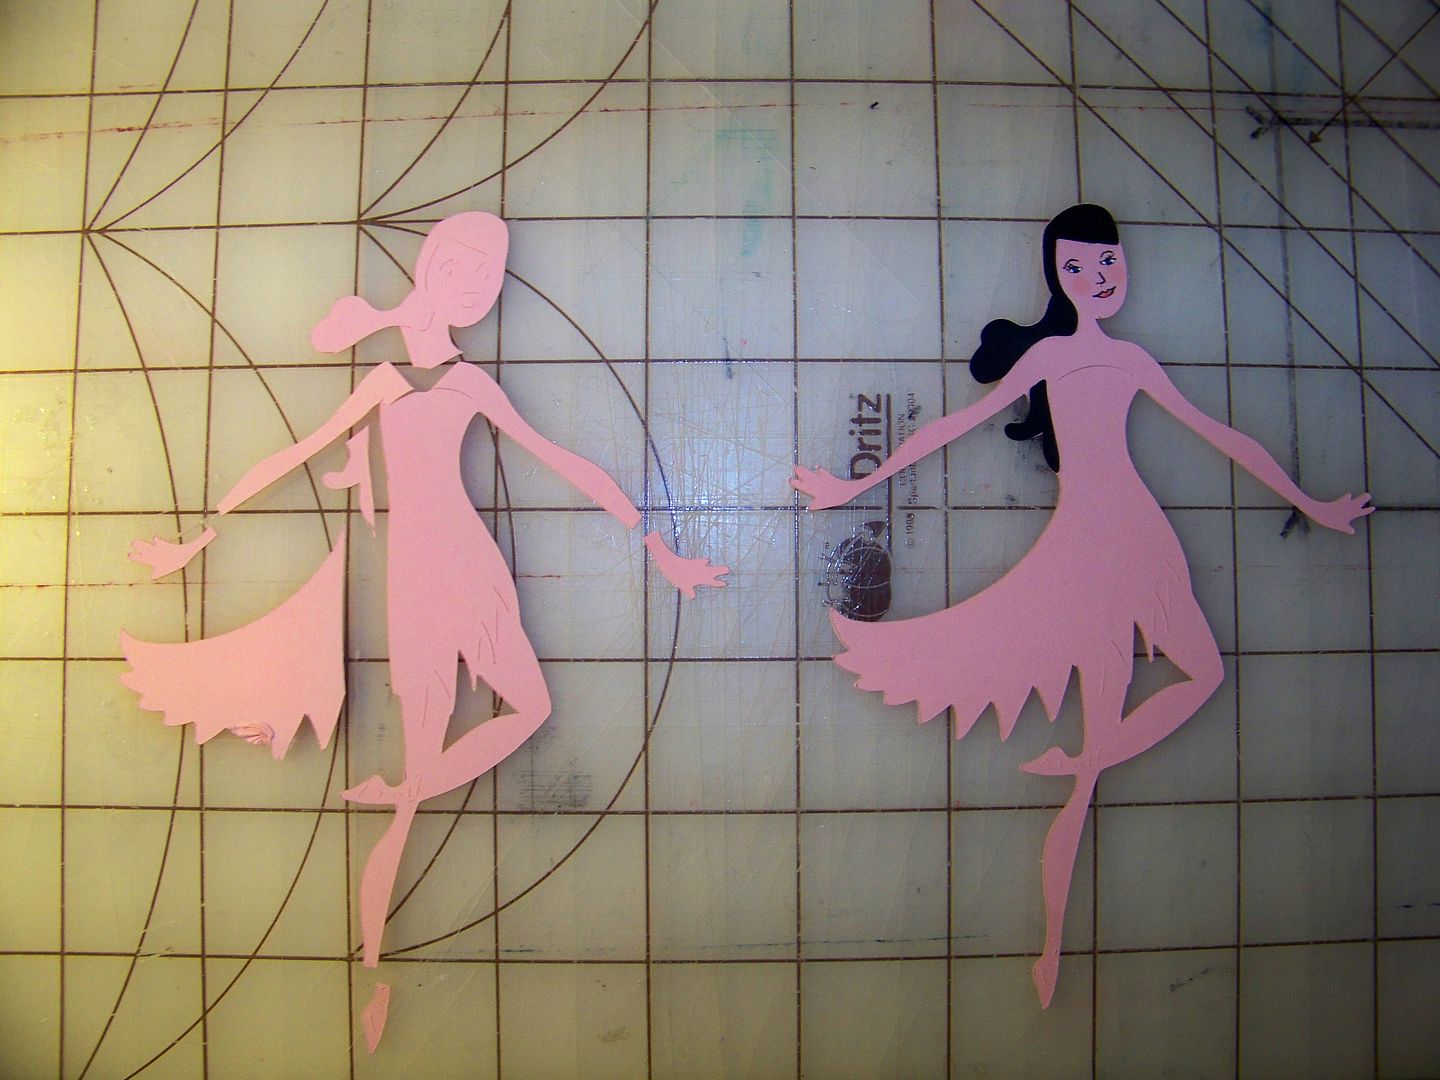
The next vignette started in much the same way.
I cut two figures at 5-1/2". This figure is from page 32. Cutting away the head and limbs on one, I was able to create a pattern for a new outfit.

The figure's right arm was cut and replaced to be slightly behind her and downward. Her feet were flocked to create slippers. I drew her face on using the Zig Millenium, Sakura Jelly Roll pen, and colored pencils.
The cat is cut from Four Legged Friends at 1", flipped and without layers. I colored in the face, limbs, and tail for detail. Embroidery floss creates the ball of yarn.
The background is the negative space left over from the wall accents cut for the first vignette. I used an ink pad to give a bit of texture to the plain paper and to coordinate with the first background. I peeled the backing and placed directly onto the 6-1/2" x 6-1/2" mat cut to match the first as well. Easy and smooth adhesion is the key advantage of the Post-It paper!


Happy crafting while creating for others!
13 comments:
Nadia - WOW! Such detail and care. Absolutely LOVE your Christmas scenes with the Dancers. Hadn't thought of altering the shapes....this is wonderful! Thanks for sharing Post-it Craft Paper.
These are both just so beautiful!
This is the first time that I have seen your blog and I am totally blown away by your creations! I signed up to be one of your followers...This is the kind of creations that I have always imagined myself to do...now I can watch your blog for inspiration...and hopefully I can learn how to do this...Thanks so much...God bless, Pamela
Absolutely stunning job! Both projects are out of the box amazing. I have used a few ladies from the forever young cart and really had not thought of using the SWD cart for this too. You have a fine attention to details like the pillow and the nativity scene in the globe, etc. Beautiful job. Thanks for sharing and the wonderful easy to understand tutorial.
Michelle AKA GARDENGYPSY on the CC MB
These are just totally Awesome! I love your projects!!! TFS
WHAT?? You are the one who has my Post it Paper?? I bought the entire stock of my ACM like 6 months ago and they never re-stocked!! You better share!!
Love your work as always.
AllisonF
Awesome job as always. Your making that cartridge look good :)
This is truly awesome! :)
I love how you changed this cart up!
These are really cute. I love SWD but I'm glad to see it being used in other ways too, that gives me more and more ideas!
You are amazing! I look forward to seeing your creations... truly inspiring!
Lori
http://got2bcrafting.blogspot.com/
I love your work.
I have a blog award for you on my blog.
http://www.scrapbookinggrandmacrafts.com/2011/01/ive-been-awarded-my-blog-has-attitude.html
I have an award awaiting you on my blog. Hop on over to get it.
http://passionatelypaper.blogspot.com/
Post a Comment