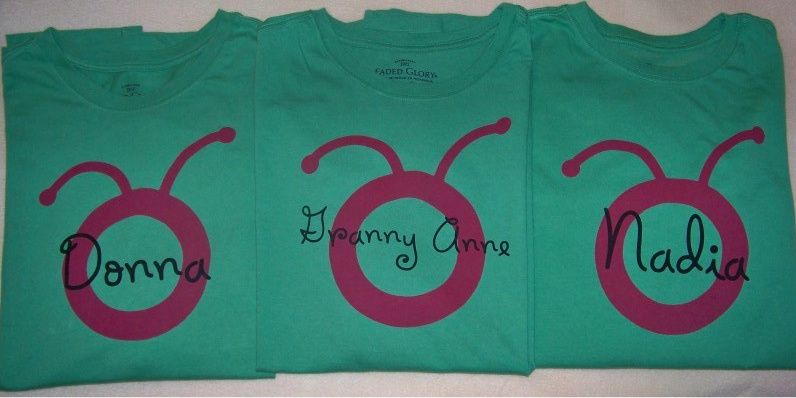
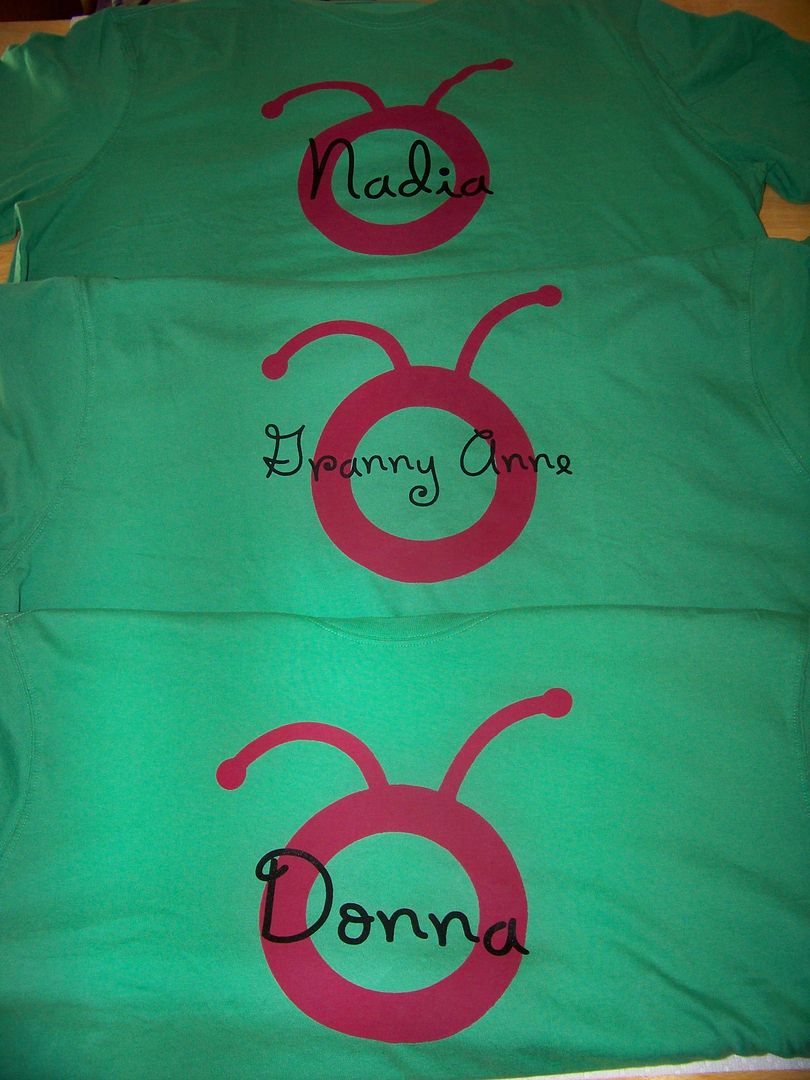
I liked this design because it would allow me to experiment with two screens without worrying with registration and lining up the design. I loved that Cindy used a green shirt and knew that is what I wanted to do too. The pink Circle logo is a darker color than the green, so I didn't worry about having to screen it twice. Topping with our names in black worked well for the same reason.
I started with the design. I used the Cricut Everyday cartridge and cut the logo at 9-1/4" on my Expression out of black cardstock. As I mentioned in my last post, you will need to use care to change that size if you are using an E2 or Imagine, as the sizes are not comparable to the Expression. If you measure your emulsion after applied to the screen and subtract 1", you will get the largest size recommended for your design. You can then set paper area on your Cricut to that size and use the fit-to-page feature to obtain the largest size possible for your screen!
I am now only using direct emulsion for my screen printing. This is the liquid kind of emulsion that is applied to both sides of an upright screen. I love this method of applying emulsion because it is so much cheaper and easier than the capilary sheets. The liquid emulsion is also light-sensitive and available in formulations for water-based inks, like the Yudu-branded inks that I love. The direct emulsion I use is the SWR-3 by Ryonet. This product looks purple before adding the diazo, then turns a gray-green. Unexposed dried emulsion at this stage is army-green. After it is exposed to light, it looks indigo-blue.
Yuduing is like cooking with a wok; you need to have everything ready before you start!
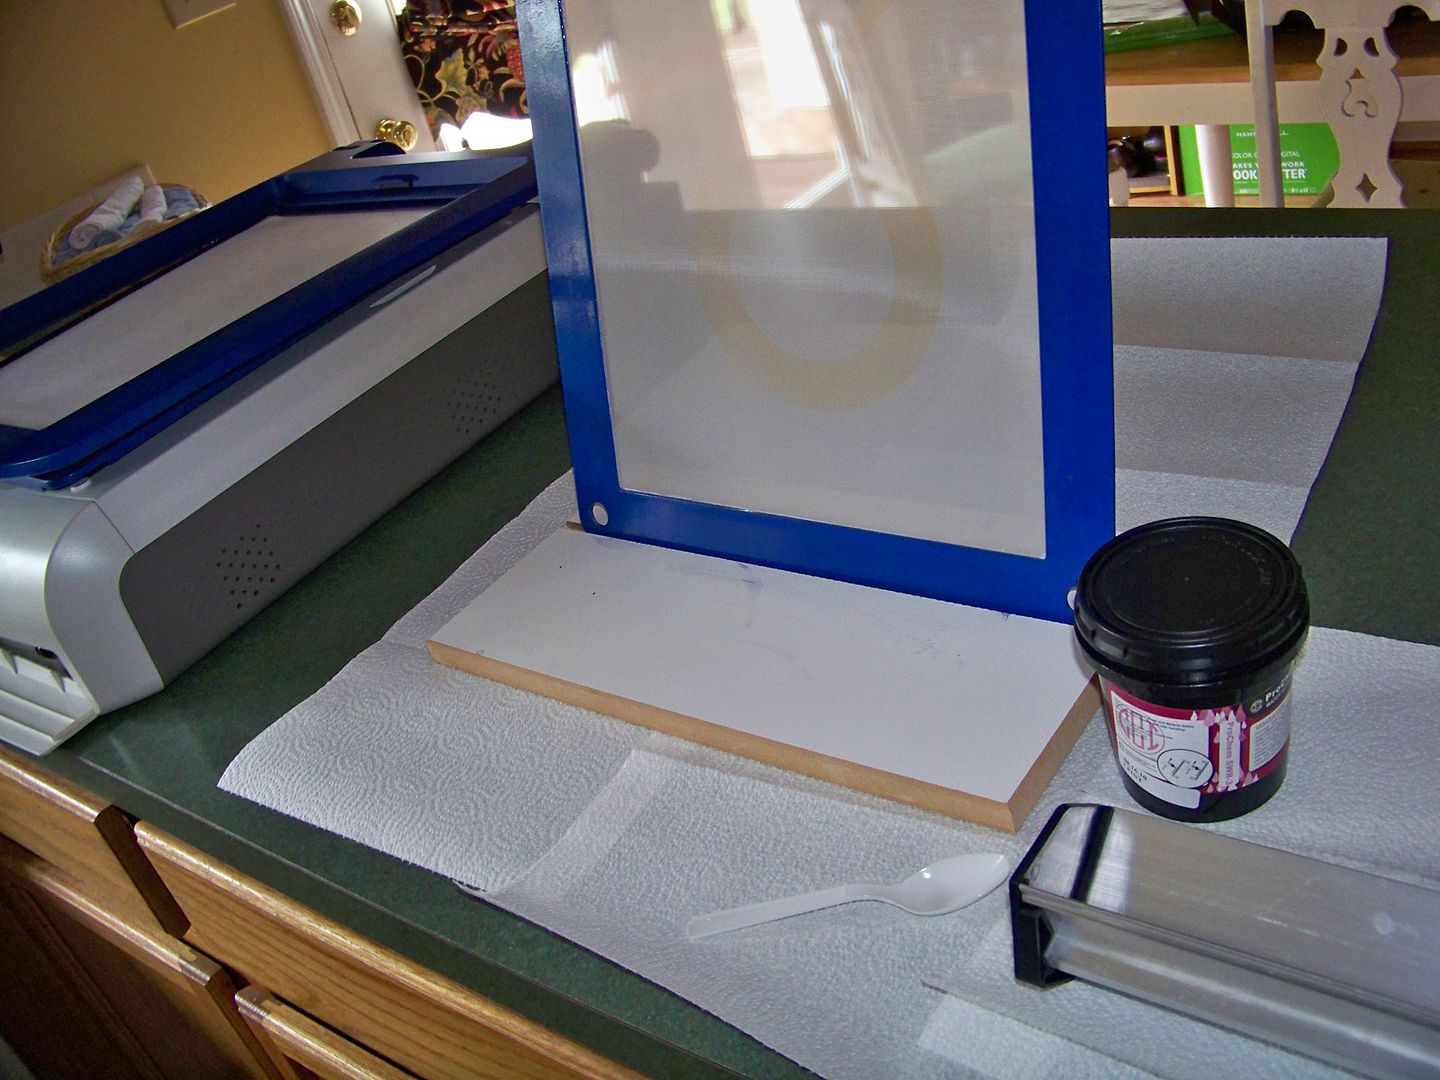
I pop the screen with the freshly-applied emulsion into the Yudu drying rack to keep it in a dark, safe place...
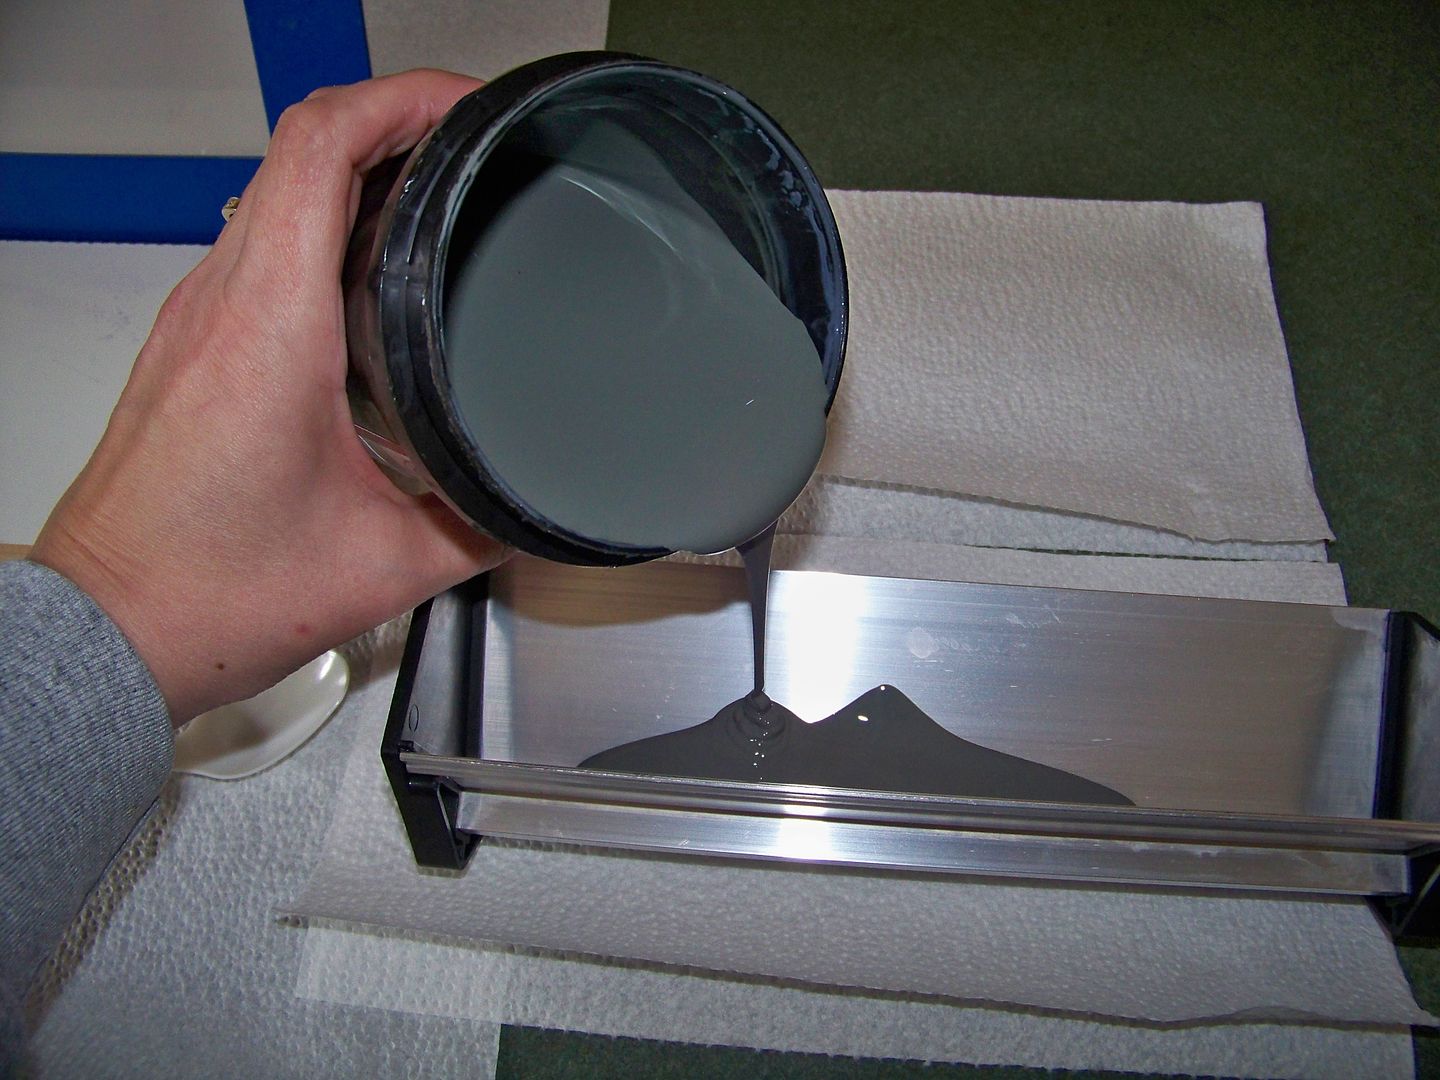
then I clean out the screen coater, using a plastic spoon to pour back any unused emulsion.

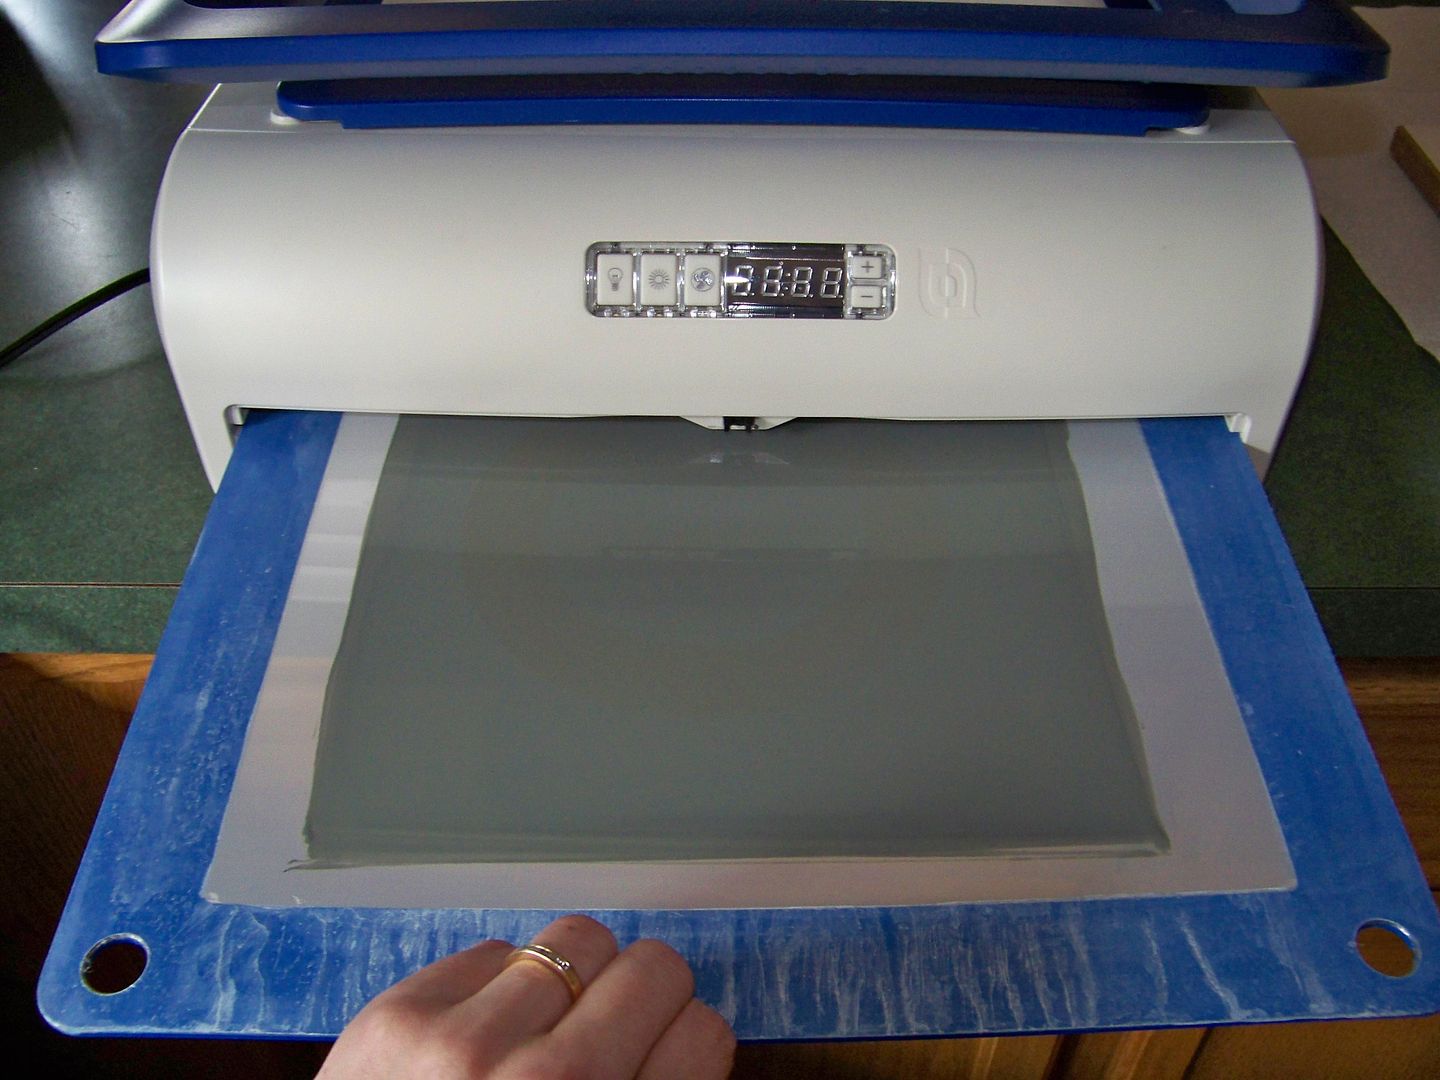
I burn the logo image in the screen as usual and rinse the emulsion off of the unexposed (green) areas.

Next, I worked on the screen for the names. I applied emulsion as described above and dried it. I placed it in the Yudu for safe-keeping while I created the names that would be burned into it. (Letting the Yudu dry the screen works fine if you are doing other projects. If you are ready to use it and it is still not dry, you can always shoot it with the cool air from a blow dryer!)
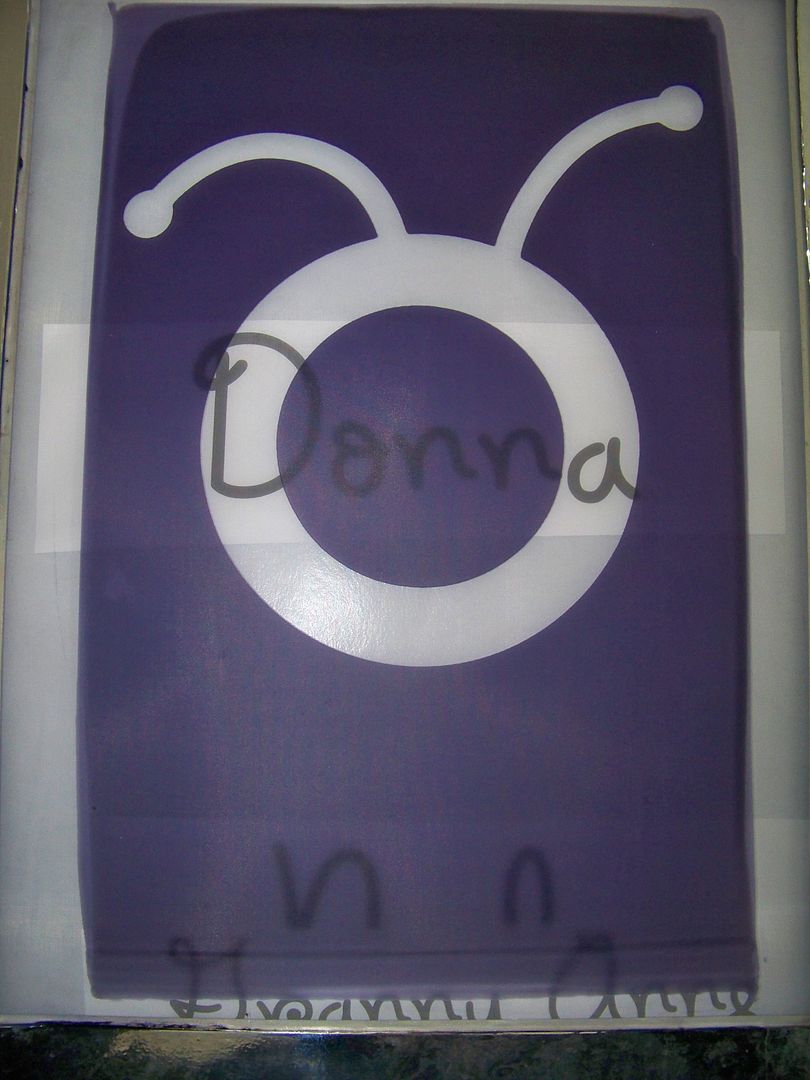
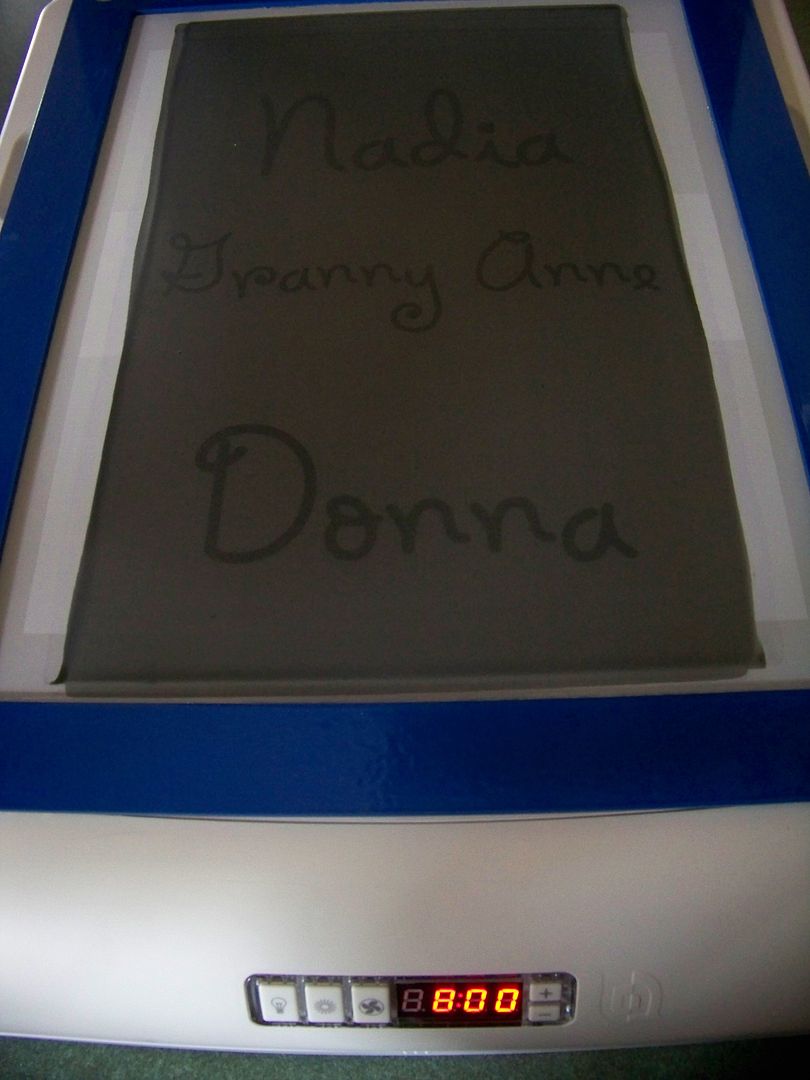
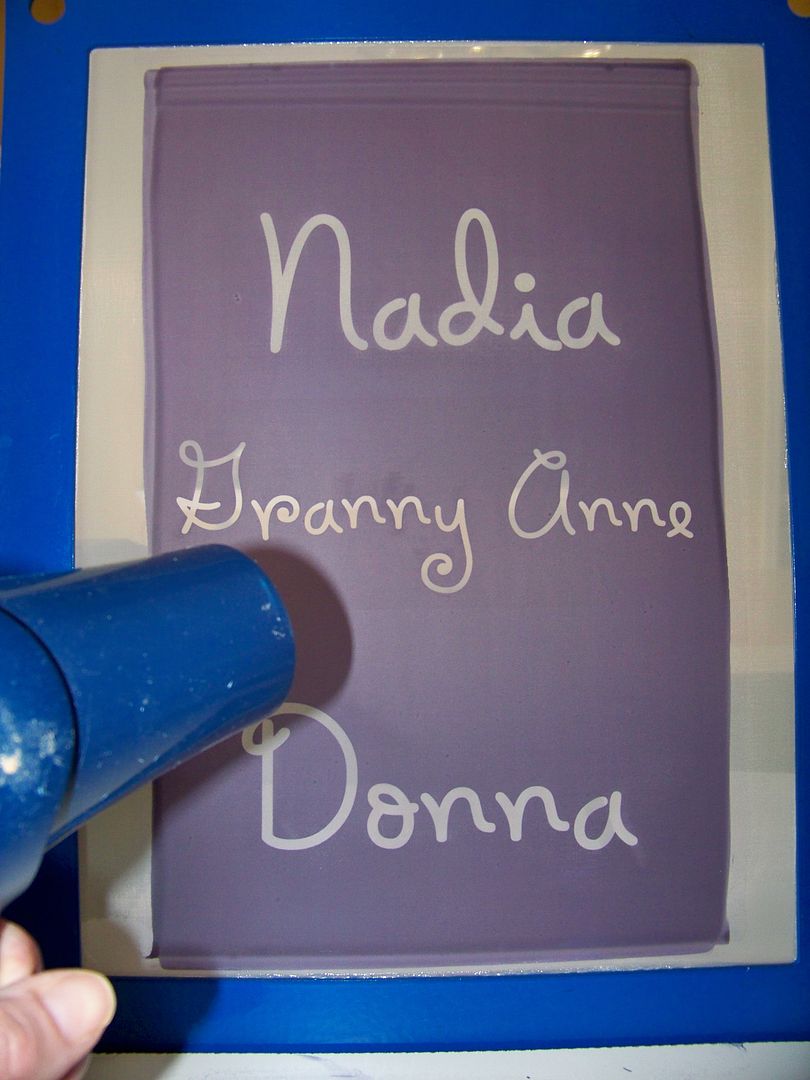
I created the names by printing them on the computer using Microsoft Holiday Springs BTN. The names "Donna" and "Nadia" were printed at 250 point; "Granny Anne" was printed at 150 point. I printed them first on regular paper and checked them against the Circle logo to be sure I like the two scales together...
 |
| I used transparencies I purchased through Ryonet for this project. They work just like the Yudu-branded ones-but quite a bit cheaper. You can lightly wet a finger and touch each side of a corner of the transparency. The side that sticks is the side to print on! |
I repeated the process outlined above for applying emulsion and burning the image, followed by rinsing and drying the screen.
 |
| I move the transparencies around to use the length of emulsion while not getting too close to the edges. If you have to squeege over a taped area, you will not get a good application of ink on the shirt; for this reason, try to keep your image at least 3/4" from the edges! |
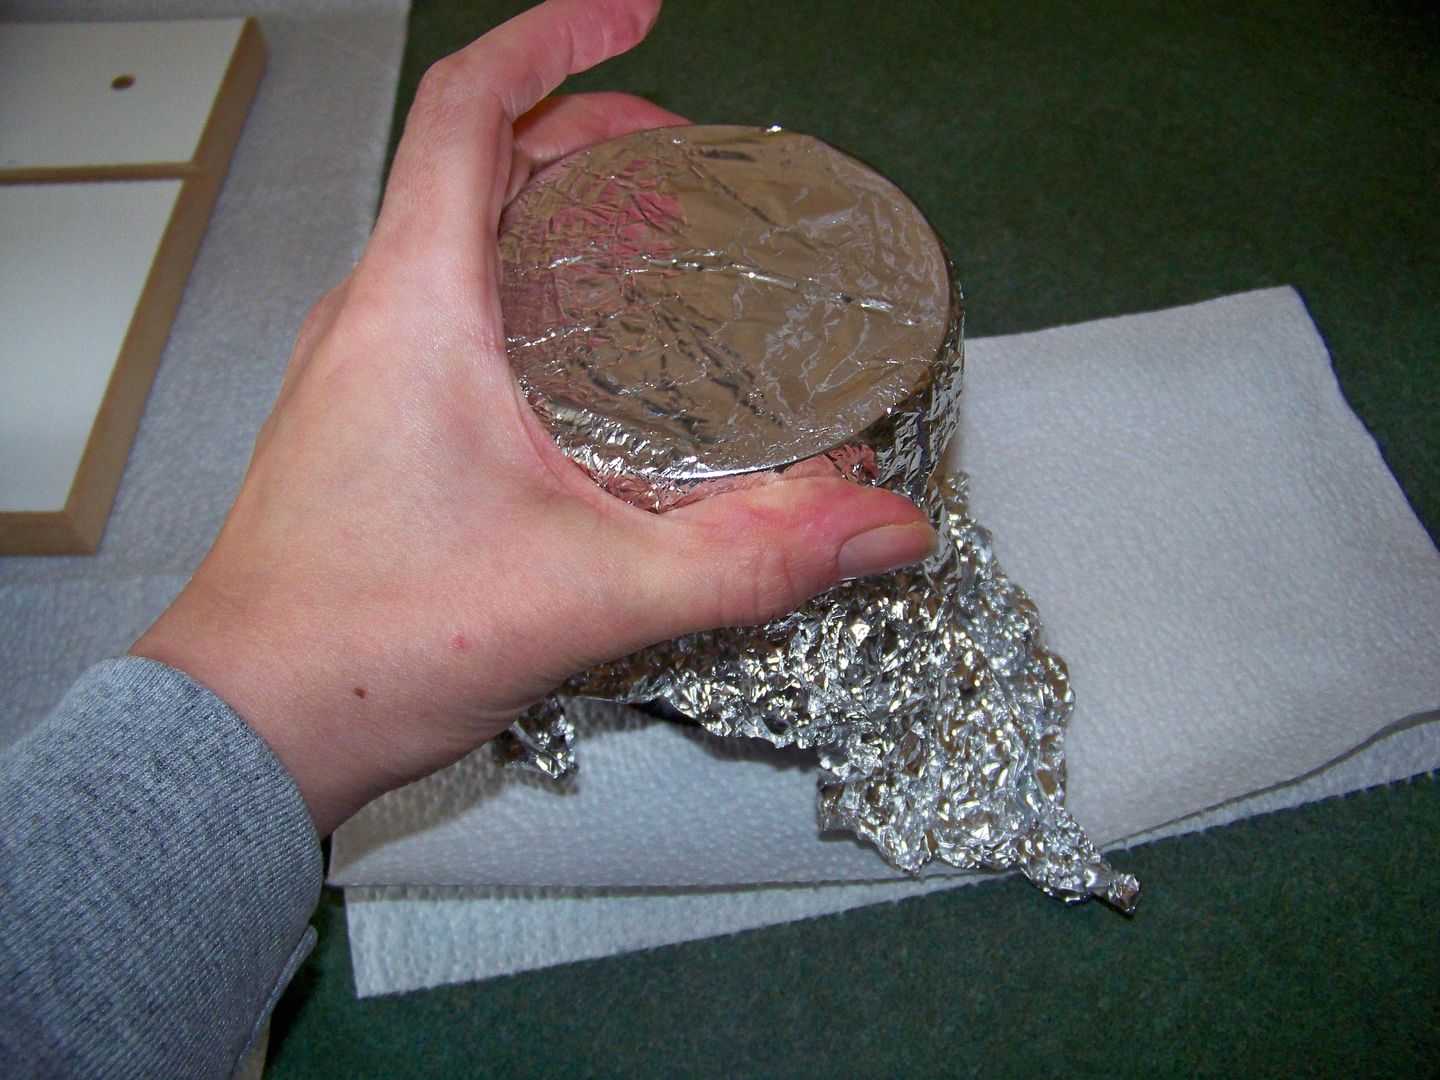 |
| I keep aluminum foil over my pint of emulsion to be absolutely sure that no light gets to it. That, my friends, is called over-kill! |
 |
| I Yudu in my kitchen so my food processor is my weight to keep the lid down while burning the image on the emulsion! |
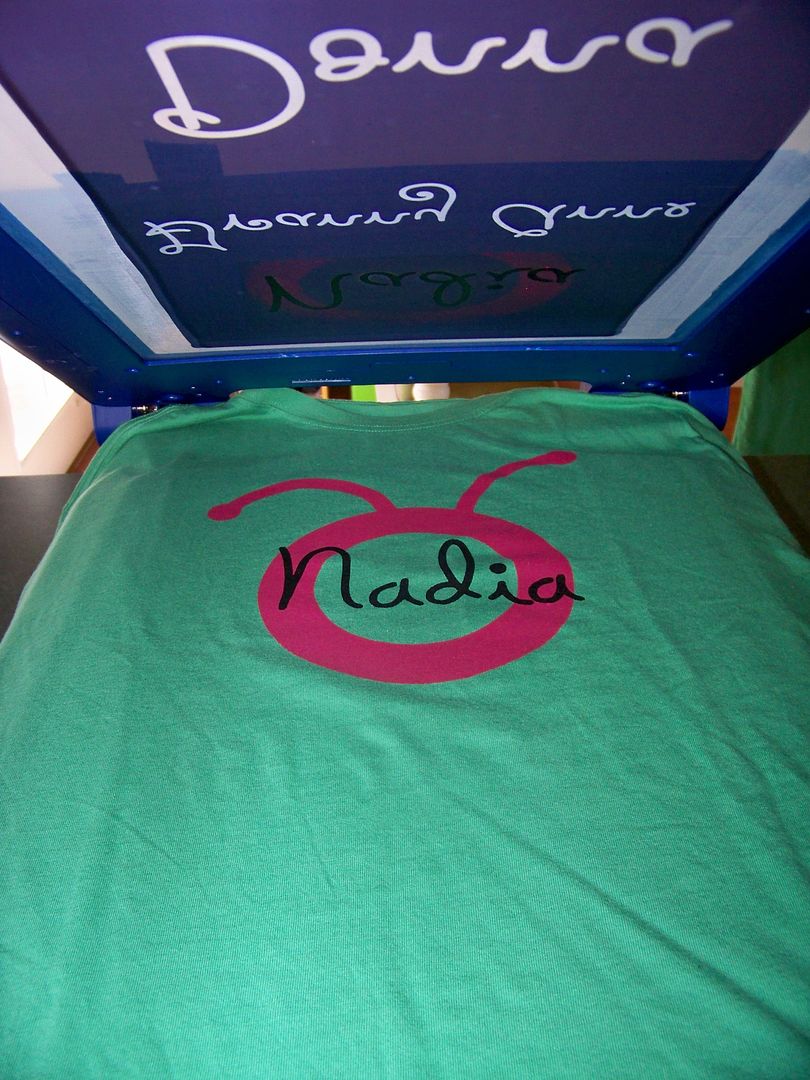
I screened the logo on each of the three shirts. I do not place the platen inside the shirt. When we were at the Cricut Circle crop in Louisville, Shannon Lerner of Provocraft told us that, unless we were screening tissue Ts, we could simply lay the t-shirts on the platen and that is how I have done these and my previous Yudu t-shirts. This means that I do not need a platen for each shirt I screen and that I can move the shirt around on the platen to get it where I need it -- this is especially important for the second screen of this project since the names are in different places on the screen!
I was careful to floodfill the logo after each screening to prevent the ink from drying on it-- I do this even for the last printing. I used my hair dryer again to partially dry the ink on the shirt while still on the platen.

I lifted each shirt off and laid it aside and prepared the next.
After the logos were screened on all of the shirts, I washed out paint on the logo screen and dried it with cool air.
I started prepping the screen with our names on it. I decided that the safest way to play this was to tape off one name at a time, screen it, wash out the screen, and dry it with cool air, change shirts, and tape the next name.
Cleaning off the ink after each name did mean that I had to take extra time rinsing and drying, but I had the peace of mind that I wouldn't accidentally get ink from a previous name on the next shirt!
 |
| Drying the screen with cool air made short work of drying it so I could do the next name! Use a back-and-forth motion when drying the screen, just as you would when drying hair! |
I chose not to remove the emulsion from my screens just yet, thinking that I might play around a bit with some other inks and these screens. For your notes, however, you should know that once the emulsion is removed from the screen, you can use hot air on the screen to quickly dry it; it is the emulsion that you are protecting from the heat!
For my notes from the Shannon Lerner demo on using capilary sheets, for my notes on using direct emulsion, and for my sources, including a link to Ryonet, please check out my Yudu page (see the tab above) or click here!
These turned out just as I had them in my mind-- that rarely happens! I hope Donna and GrannyAnne like them! Thank you for visiting my blog! My next Yudu project involves glitter!!!!
5 comments:
Very fun shirts. Hope you have a blast on your trip.
Oh Wow! These turned out soooo great! I love them all! I may have to learn to Yudu after all! And how great is it that your kitchen appliances double as crafting tools, love the dual use of your food processor! Have a wonderful, fun, safe trip,then come back and share all the details!
totally scared of the liquid emulsion.....glad to hear you are having success with it!
sooo jealous of your yudu skills! I tried liquid emulsion with horrible results!! Back to sheets for me!!! Maybe I yudu some shirts for Cincy!! thanks for the inspiration!
What a great tutorial Nadia! Thank you for making it. It has been a big help.
Mary - aka Scrapbooking Grandma
Post a Comment