
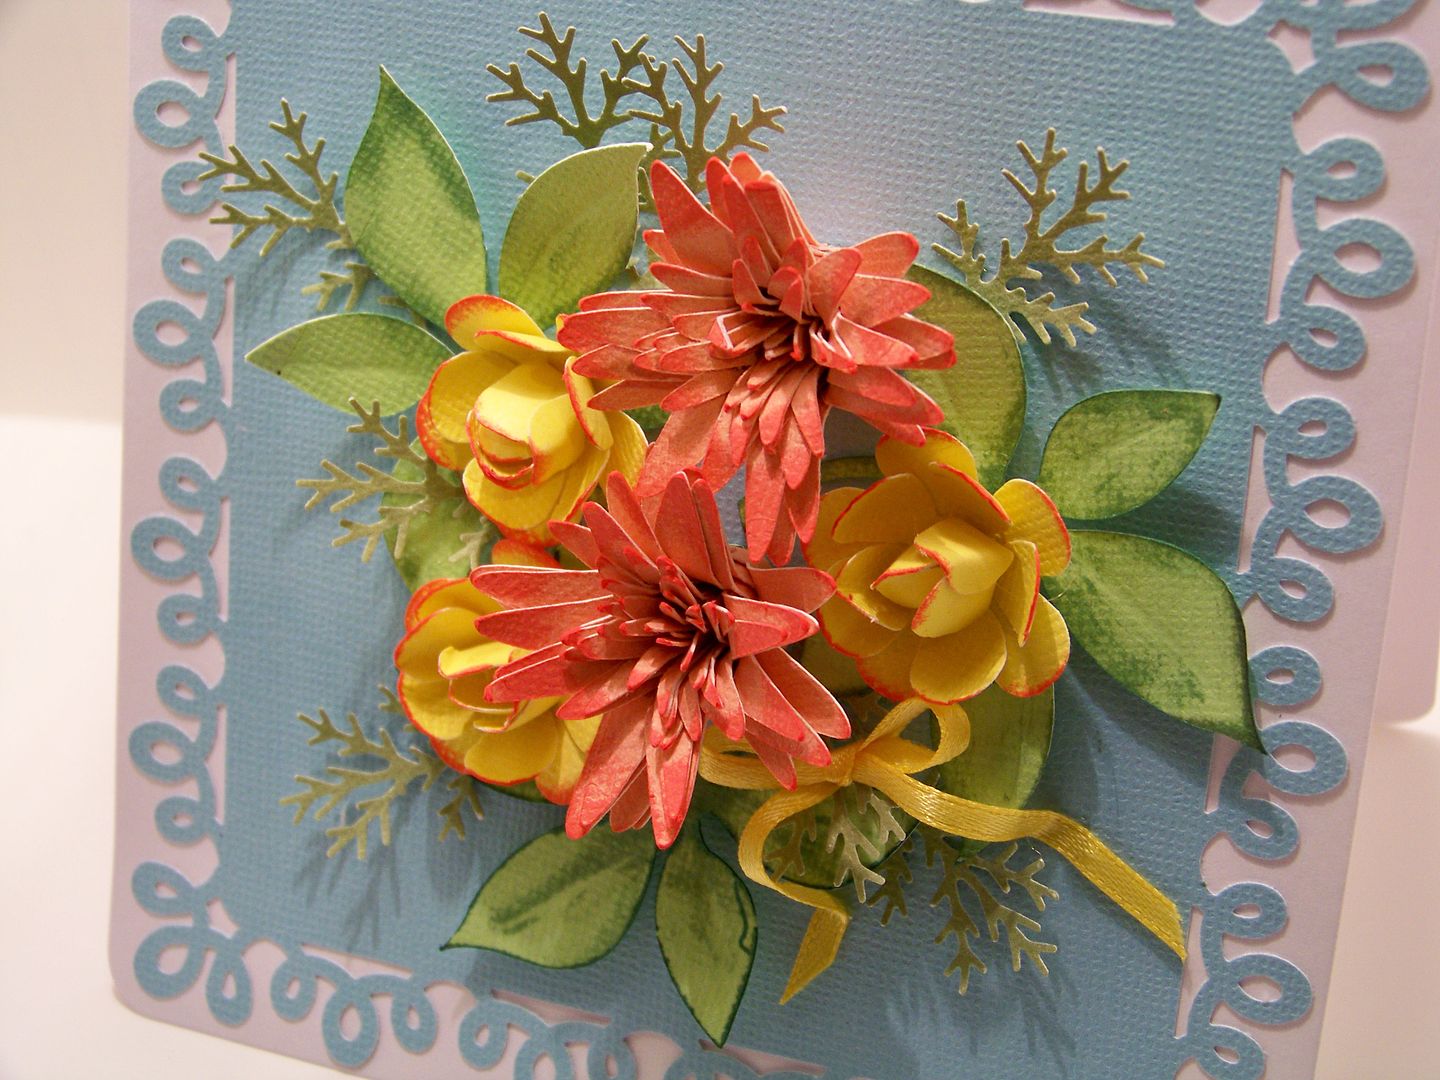
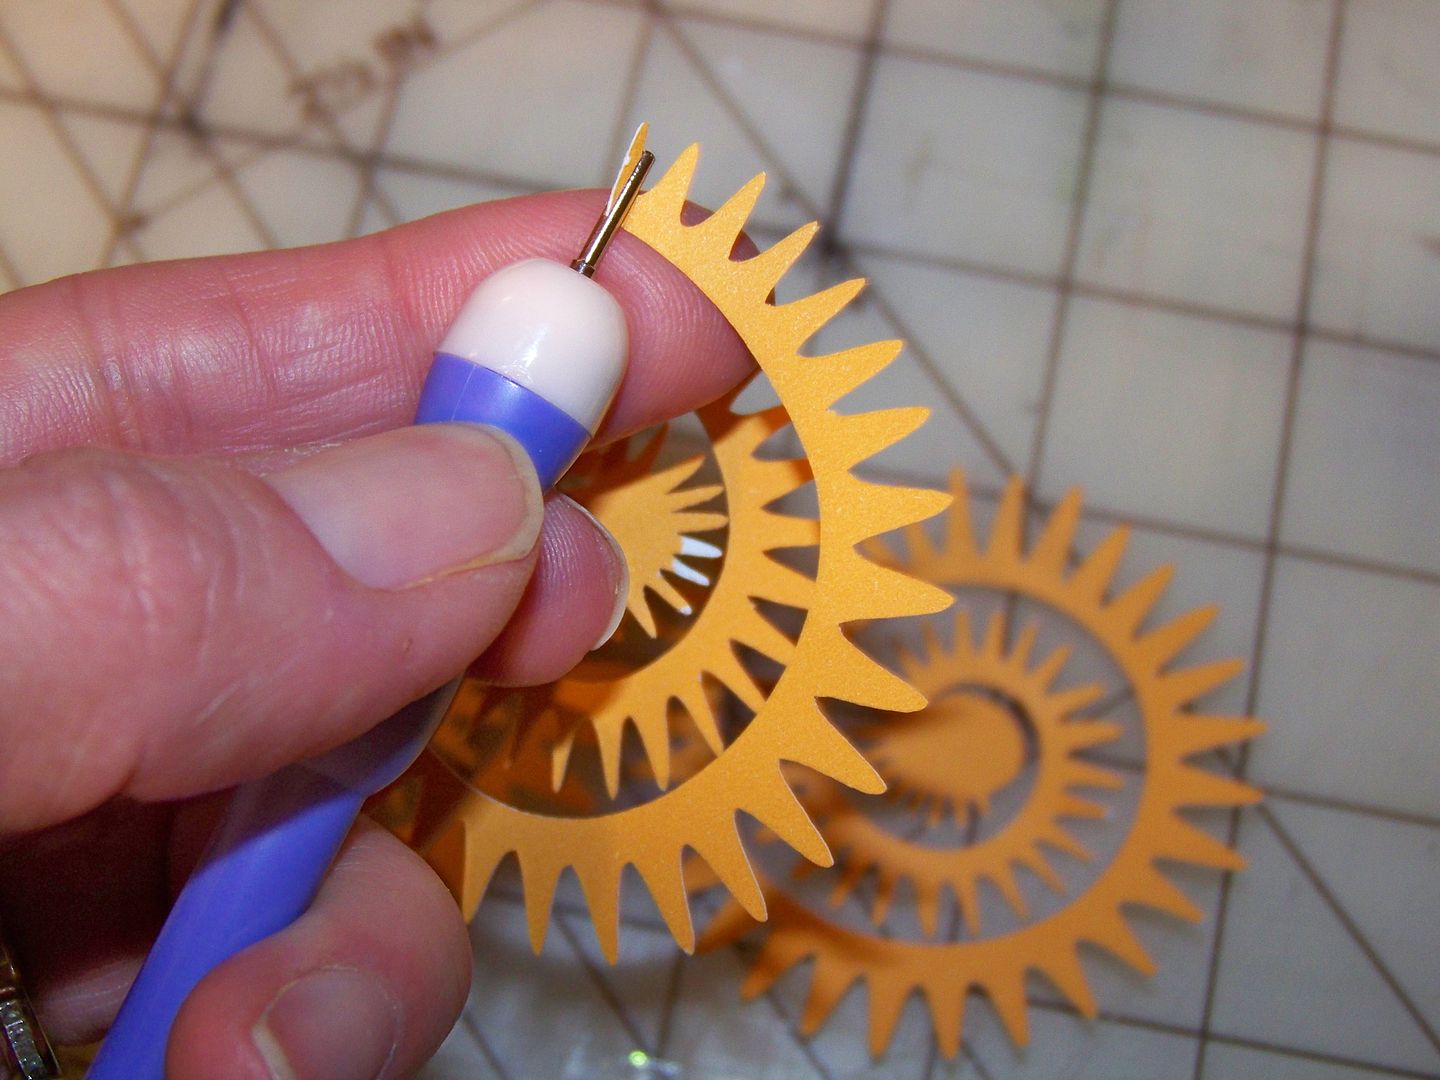
I love summer and I still had warm weather and flowers on my mind as I made a little card for my mother-in-law. I bought the Art Philosophy cartridge from my message board friend, Jami Larson (CricutFarmer), just to have that spiral-cut pointy flower. So the first thing I did was make it incorrectly. But I liked it! I wanted a tight flower after seeing some wonderful flowers in this book I just found, Paper Bouquet.

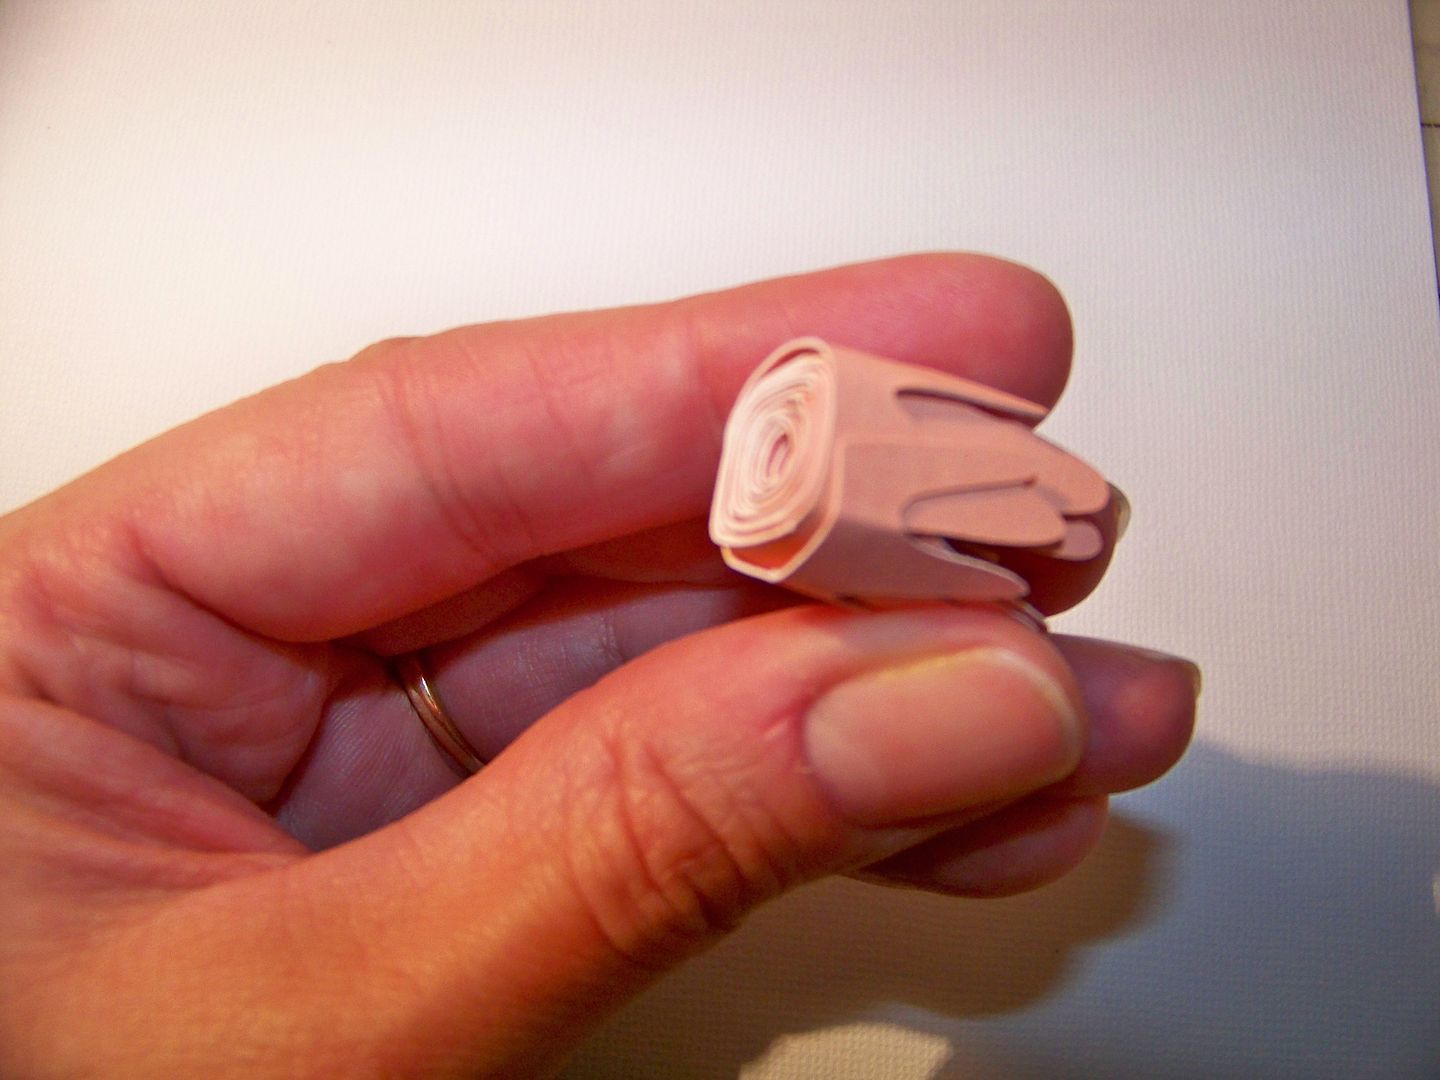
For this card, I cut the blue cardstock as a 5" square and used Martha Stewart punch-around-the-page loop punch for the base. I created two pink flowers by cutting the pointy spiral flower on Art Philosophy at 5" (page 69) on my Expression. Because I was going to roll it backwards, I trimmed off the inner circle, which normally would be a base.
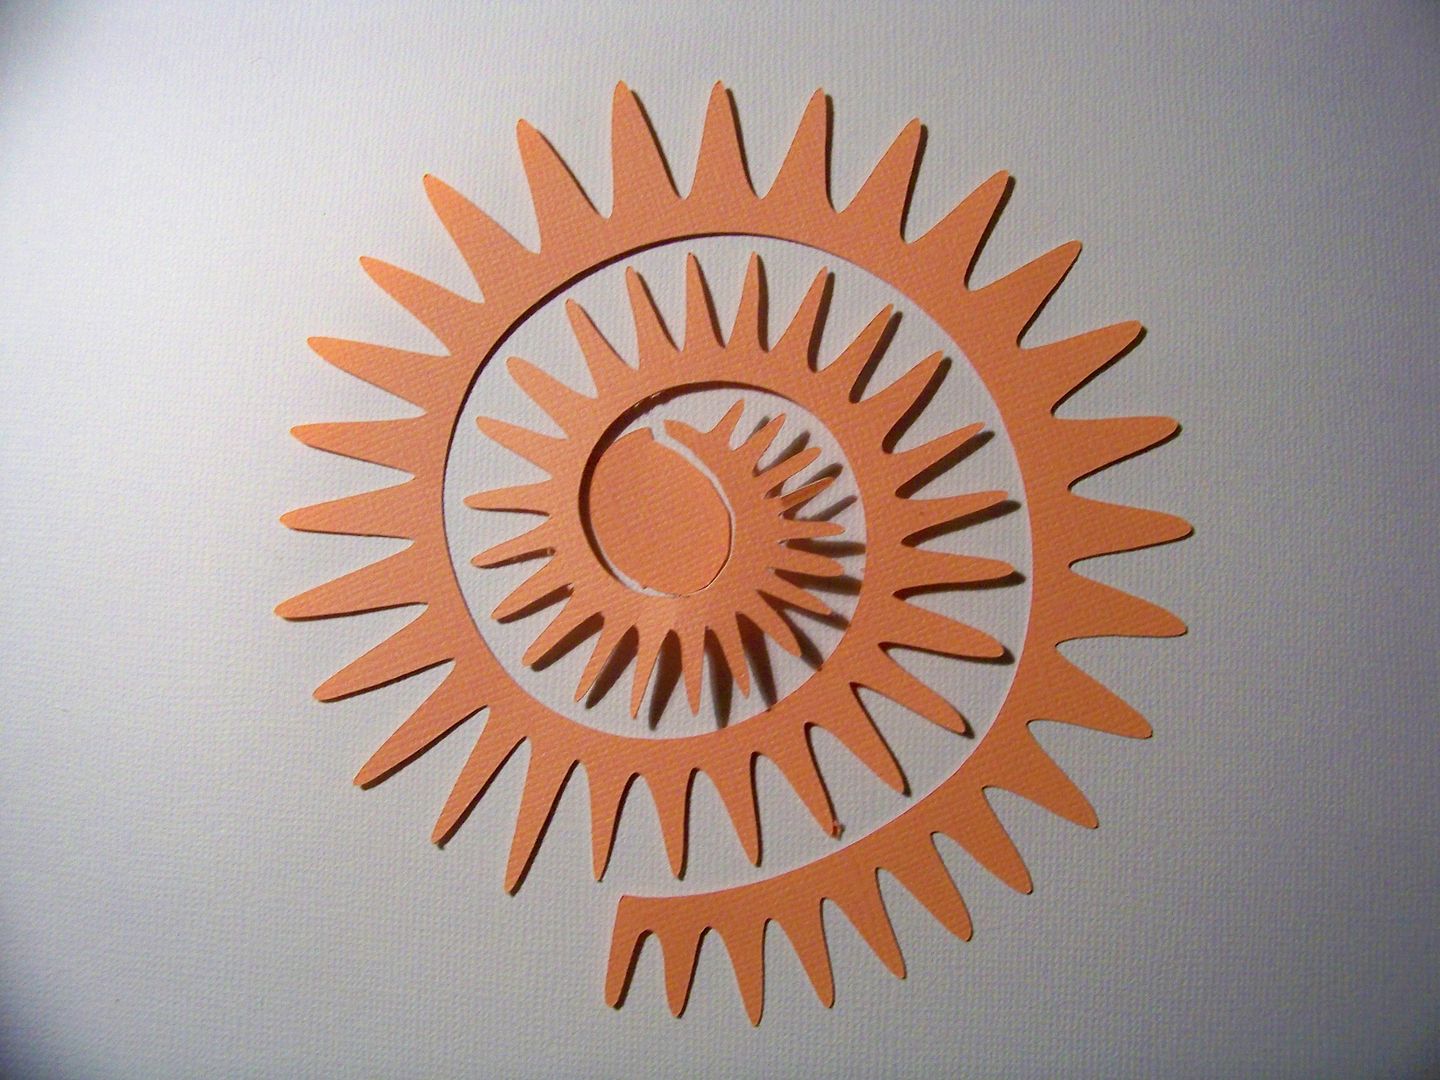
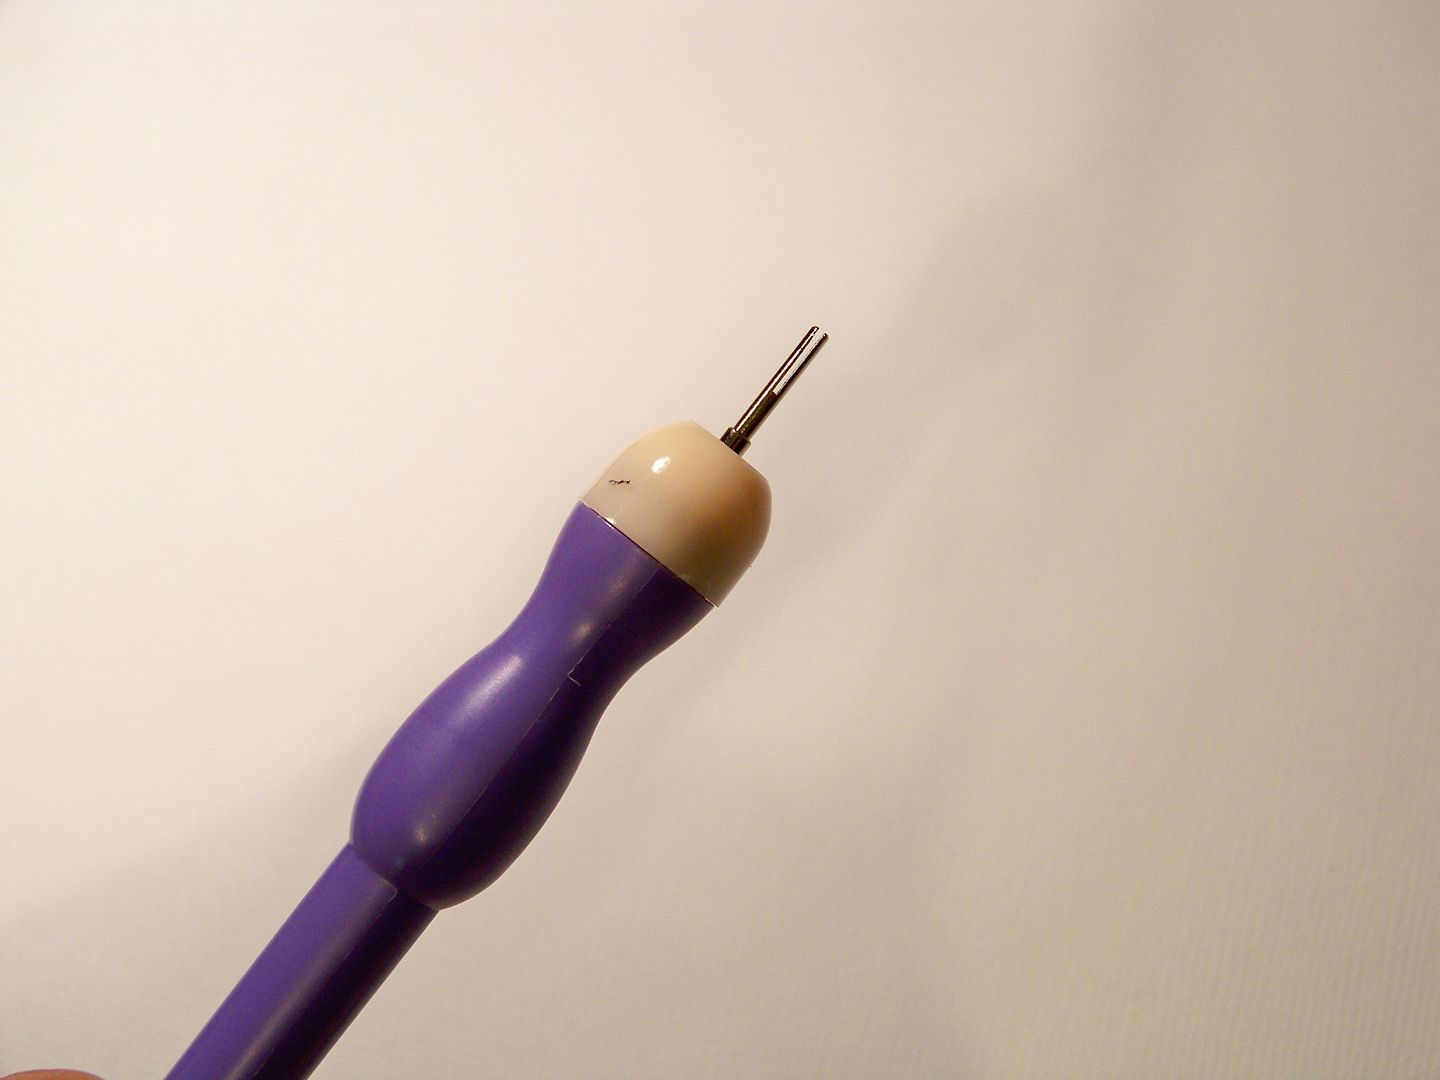
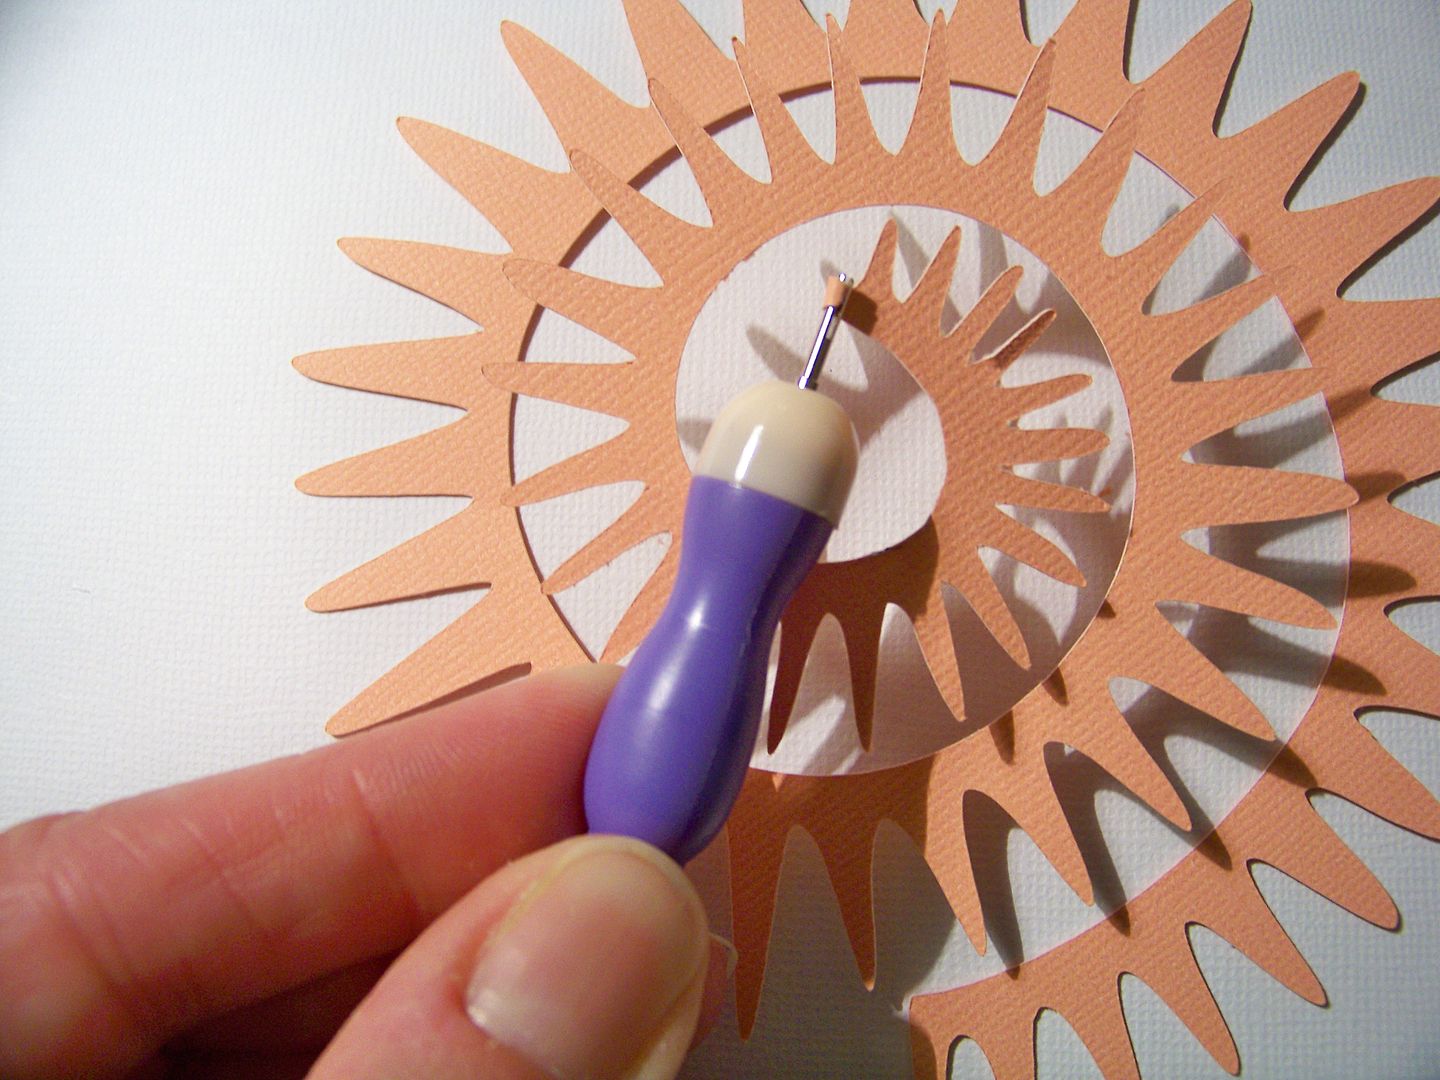
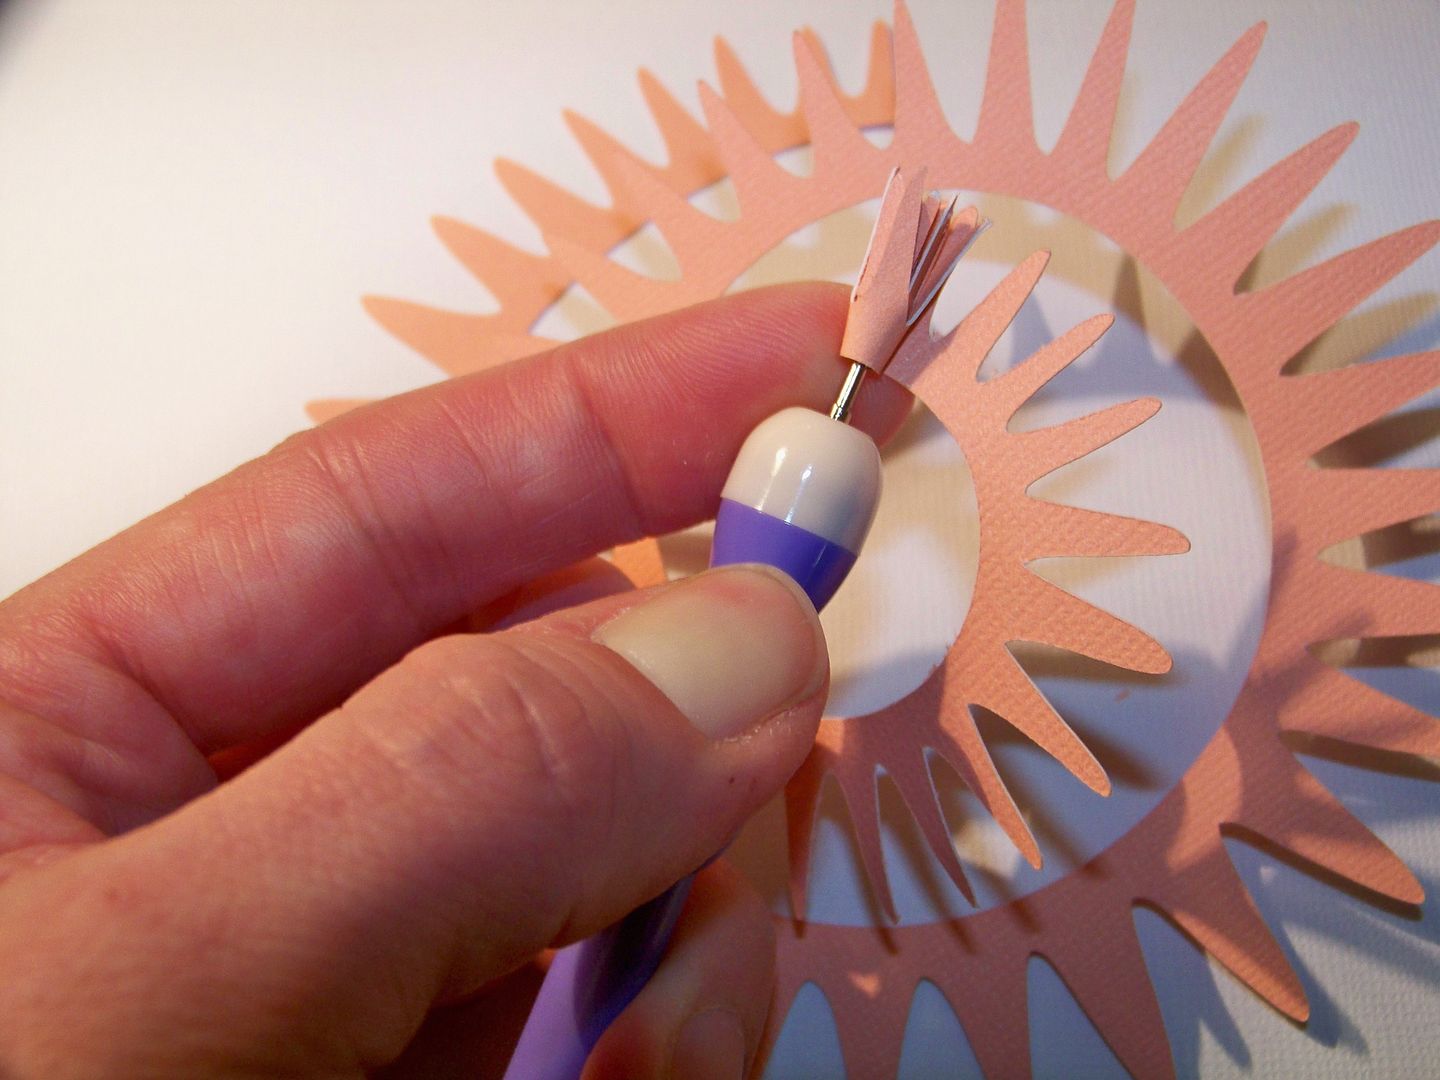
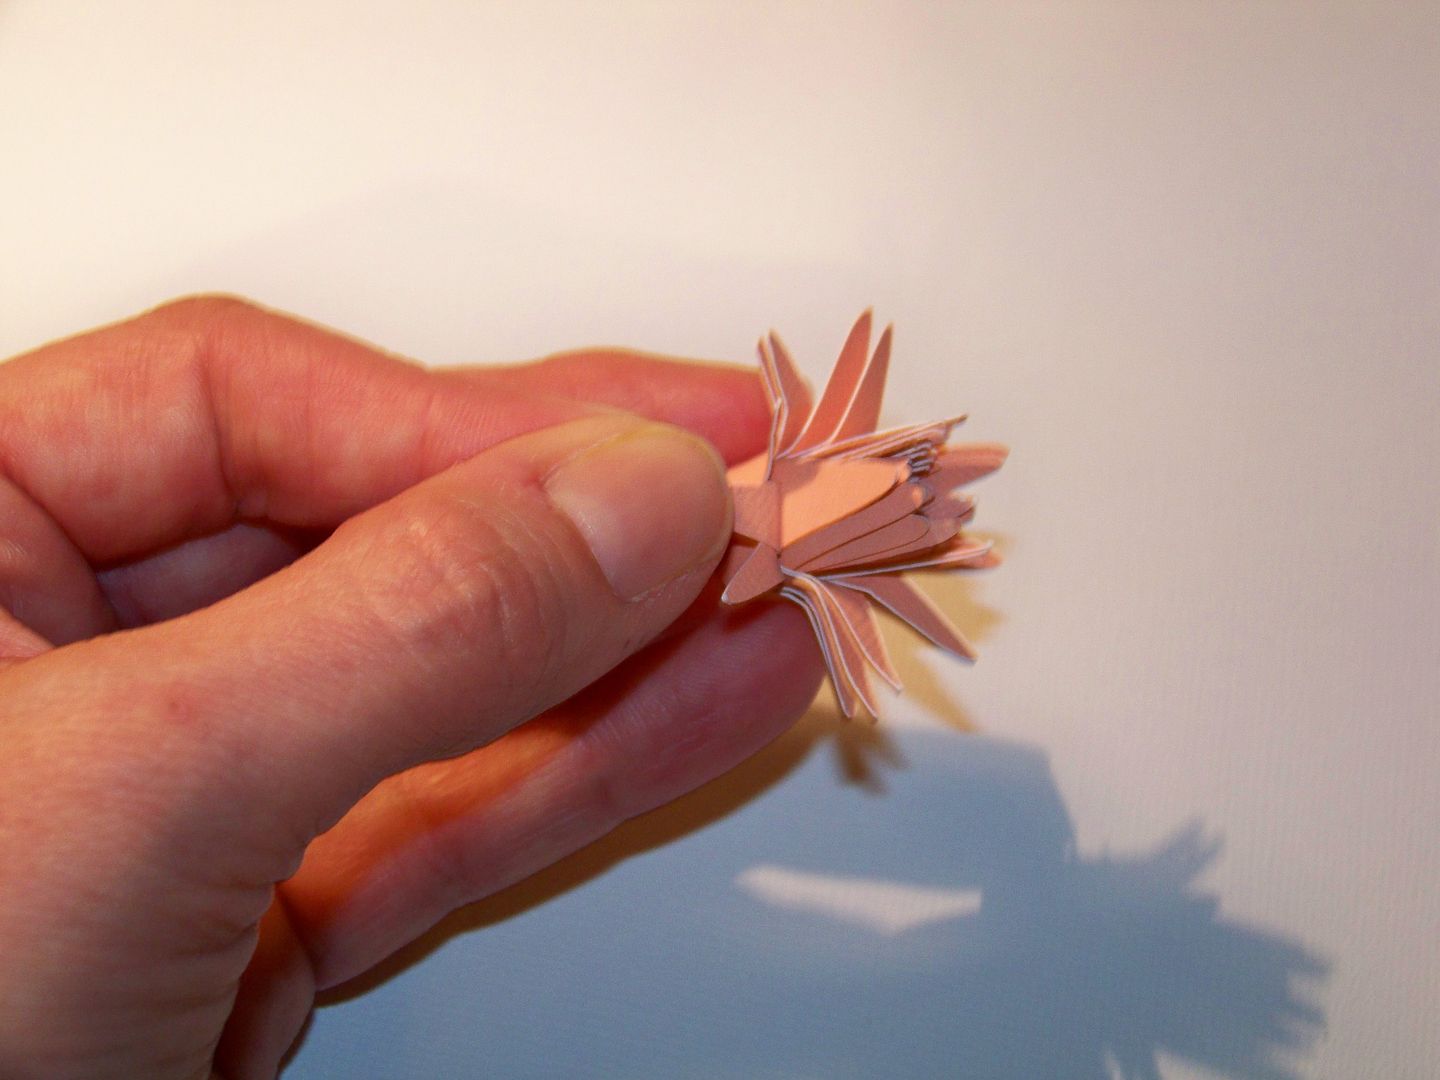
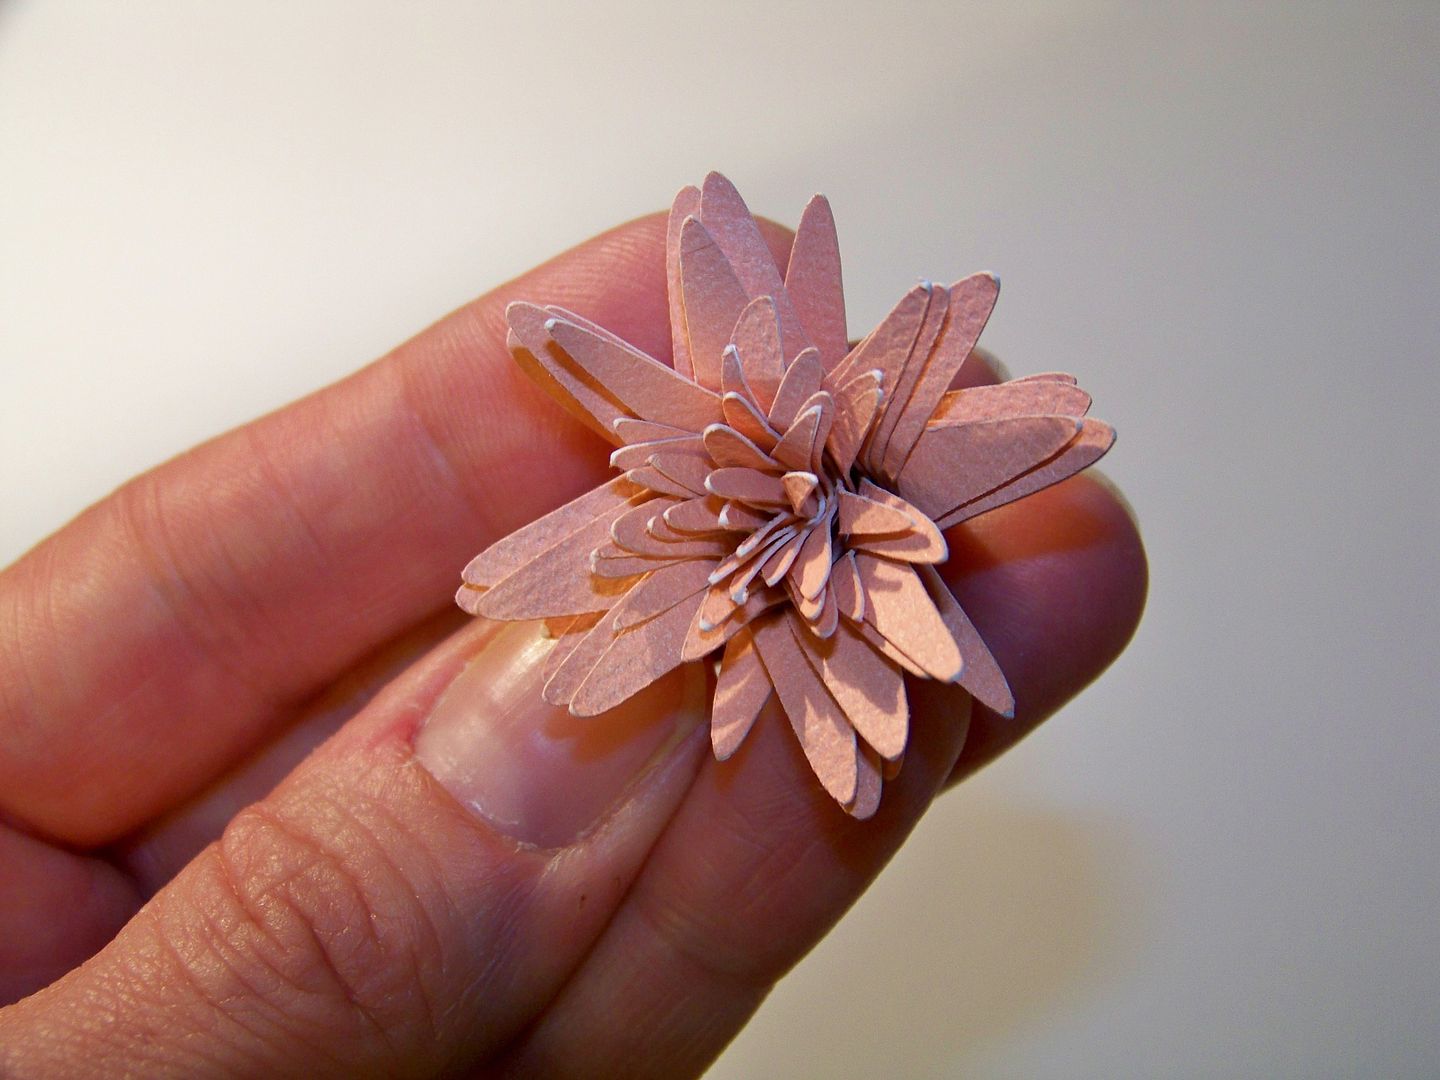
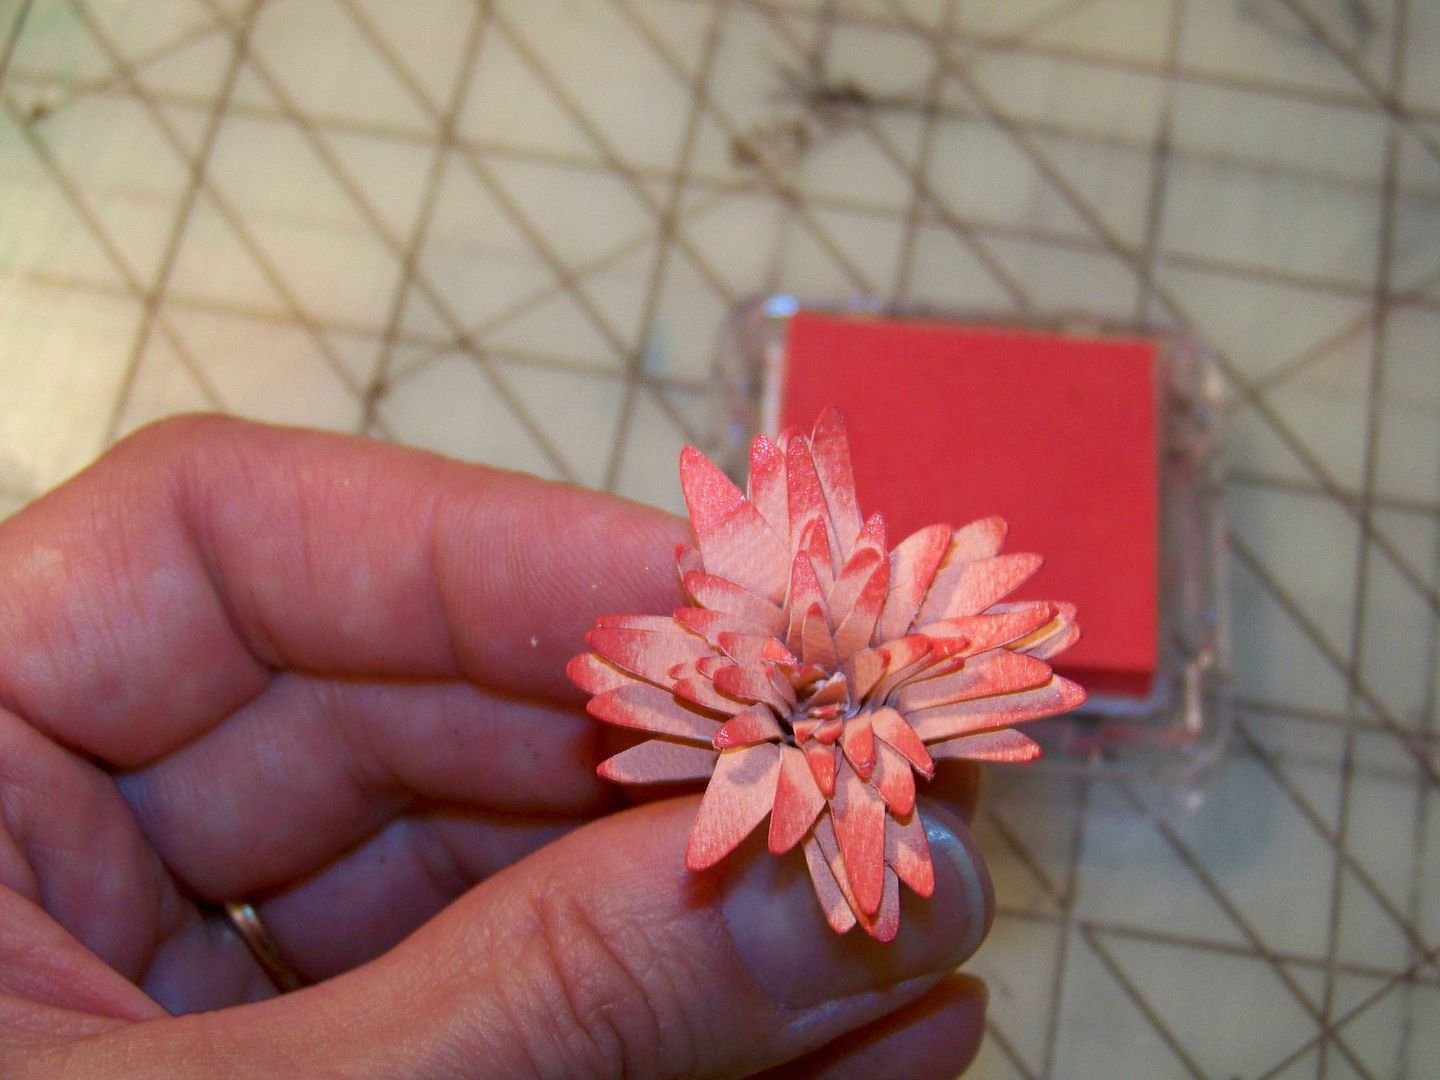
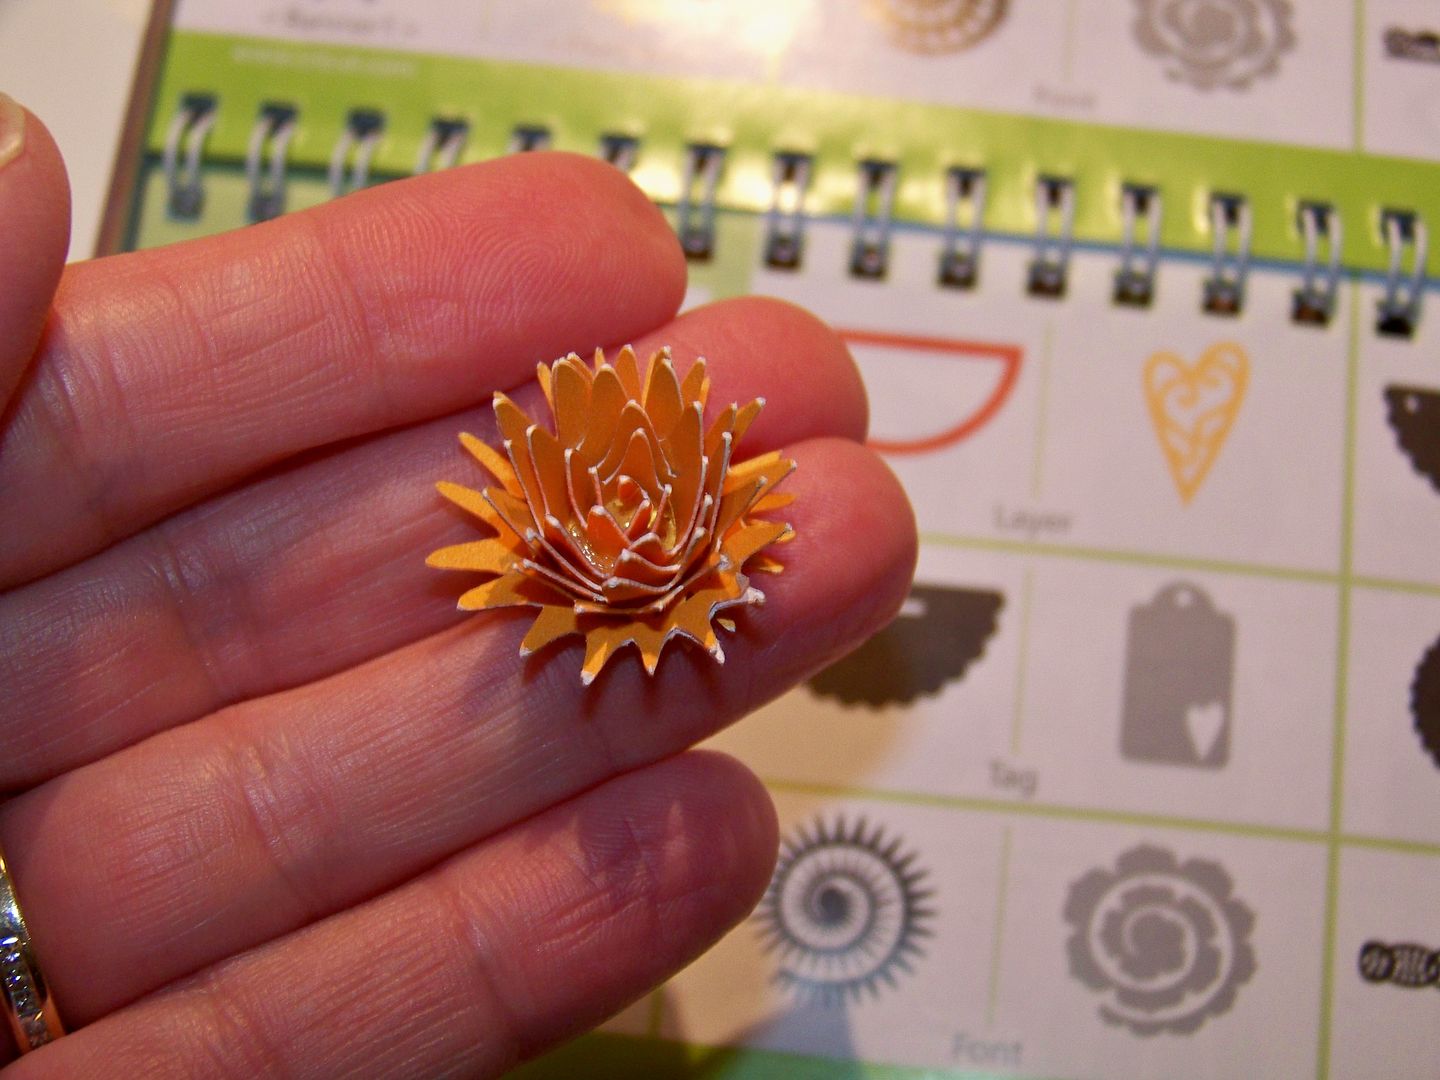
I used my quilling tool to roll the shape, starting from the inside, the backward way from what is usually done with this flower cut! I peeled back the petals and inked it.


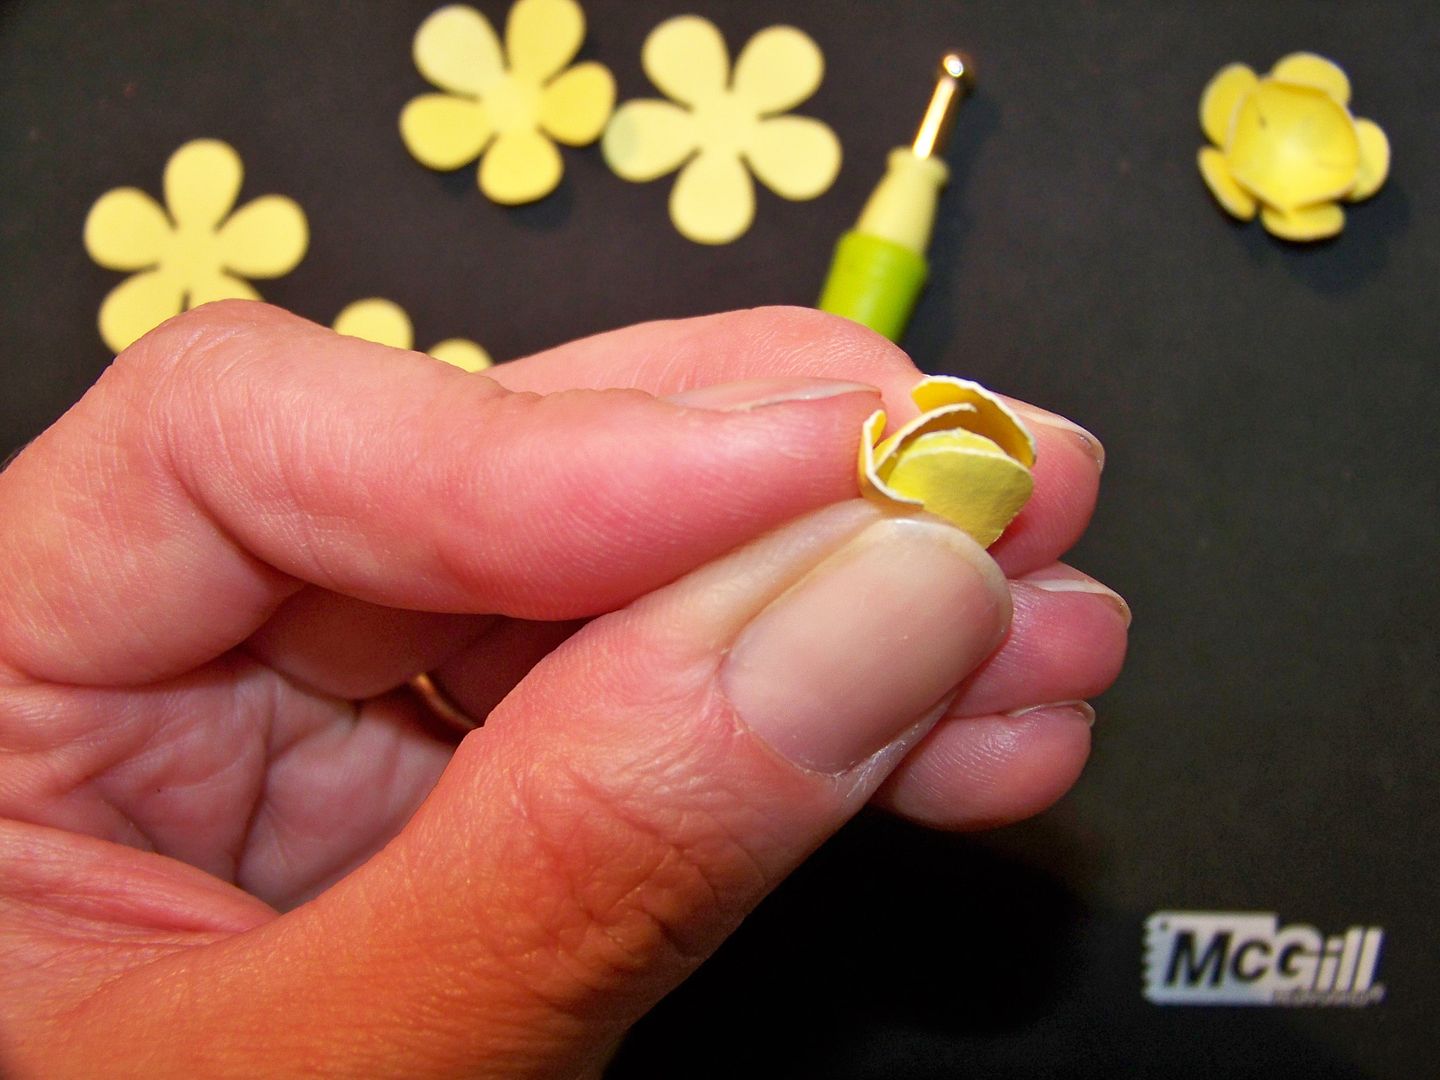
I made the yellow flowers with a punch.
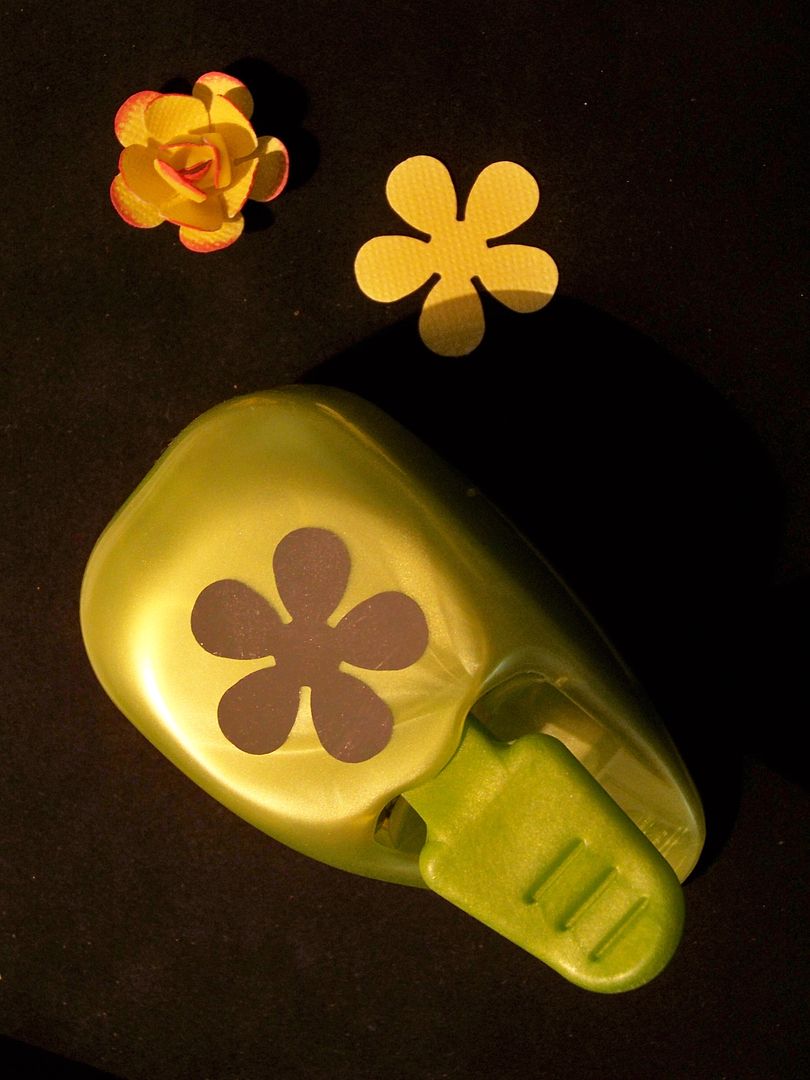
I used some McGill tools to help curl in the petals. I used three of these shapes for each flower.

The centers are pulled in tight and glued in place. All the layers are just glued together. Then the edges were inked.
The leaves were cut from Flower Shoppe (Exotic5), cut at 5". I used a Q-tip and ink from my ink pad to add a little color and texture. The leaves were added with pop dots. I hot glued the dimensional flowers on and used a little Scotch Scrapbookers glue to add in little extra greenery that I got from a Martha Stewart branch punch. I hot glued on a little ribbon. The inside of this card had enough room for a gift card and a little message.
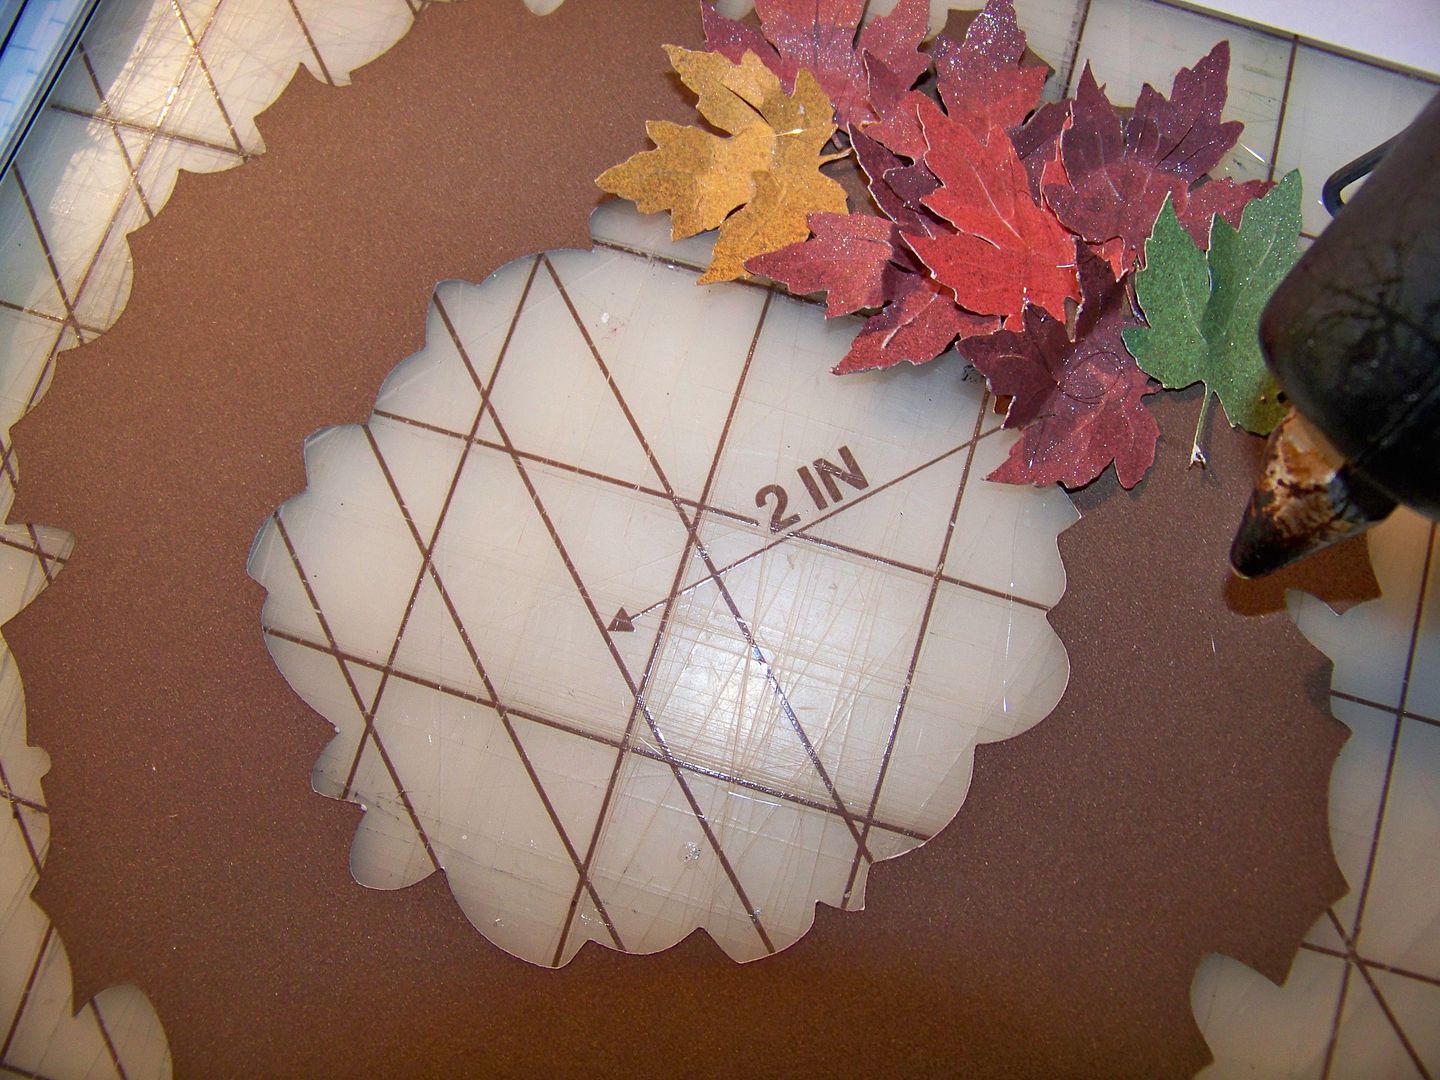
I wanted to make the Art Philosophy flower the correct way too. I have seen so many beautiful wreaths and projects with those flowers. I was also inspired by the autumn wreath that was just featured on the Circle Blog and I wanted to make a little version of my own: a doorknob wreath.
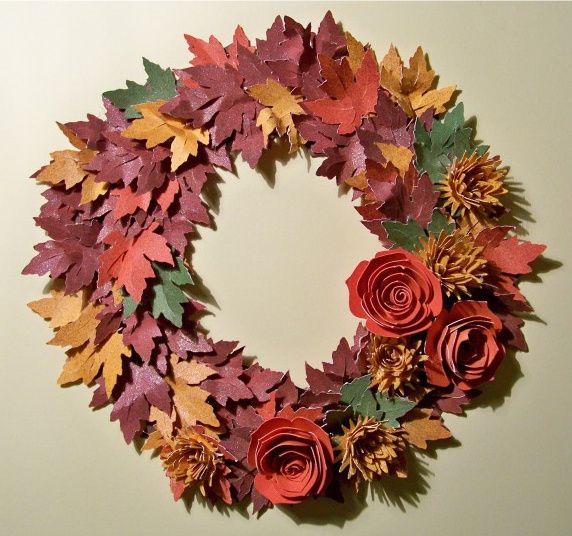
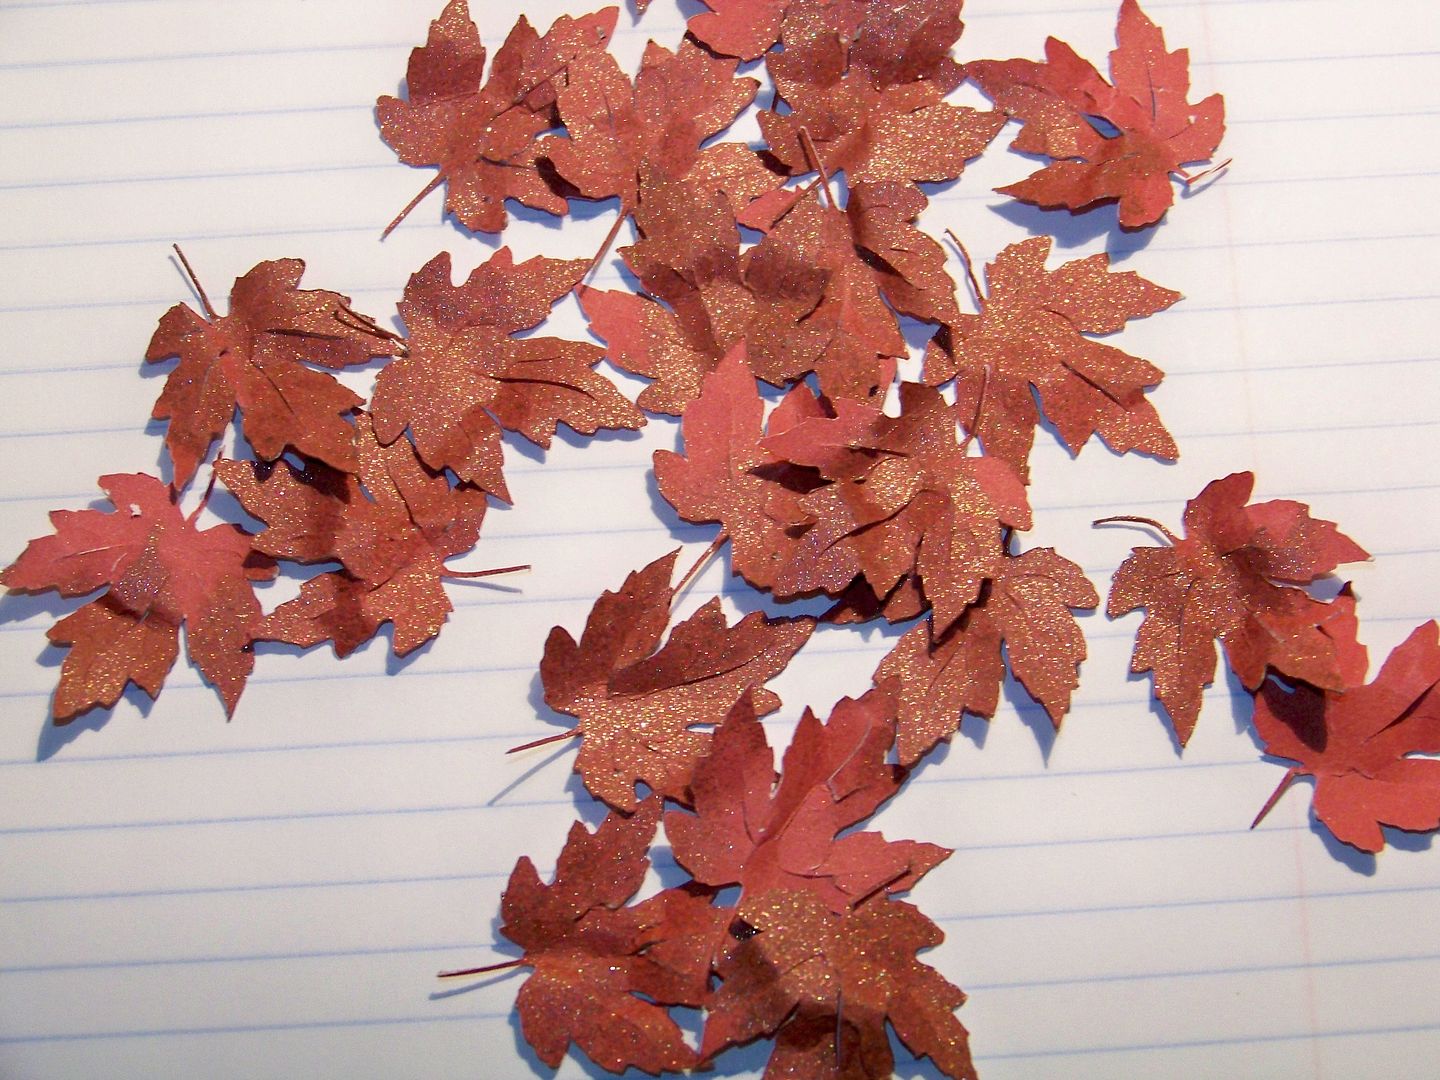
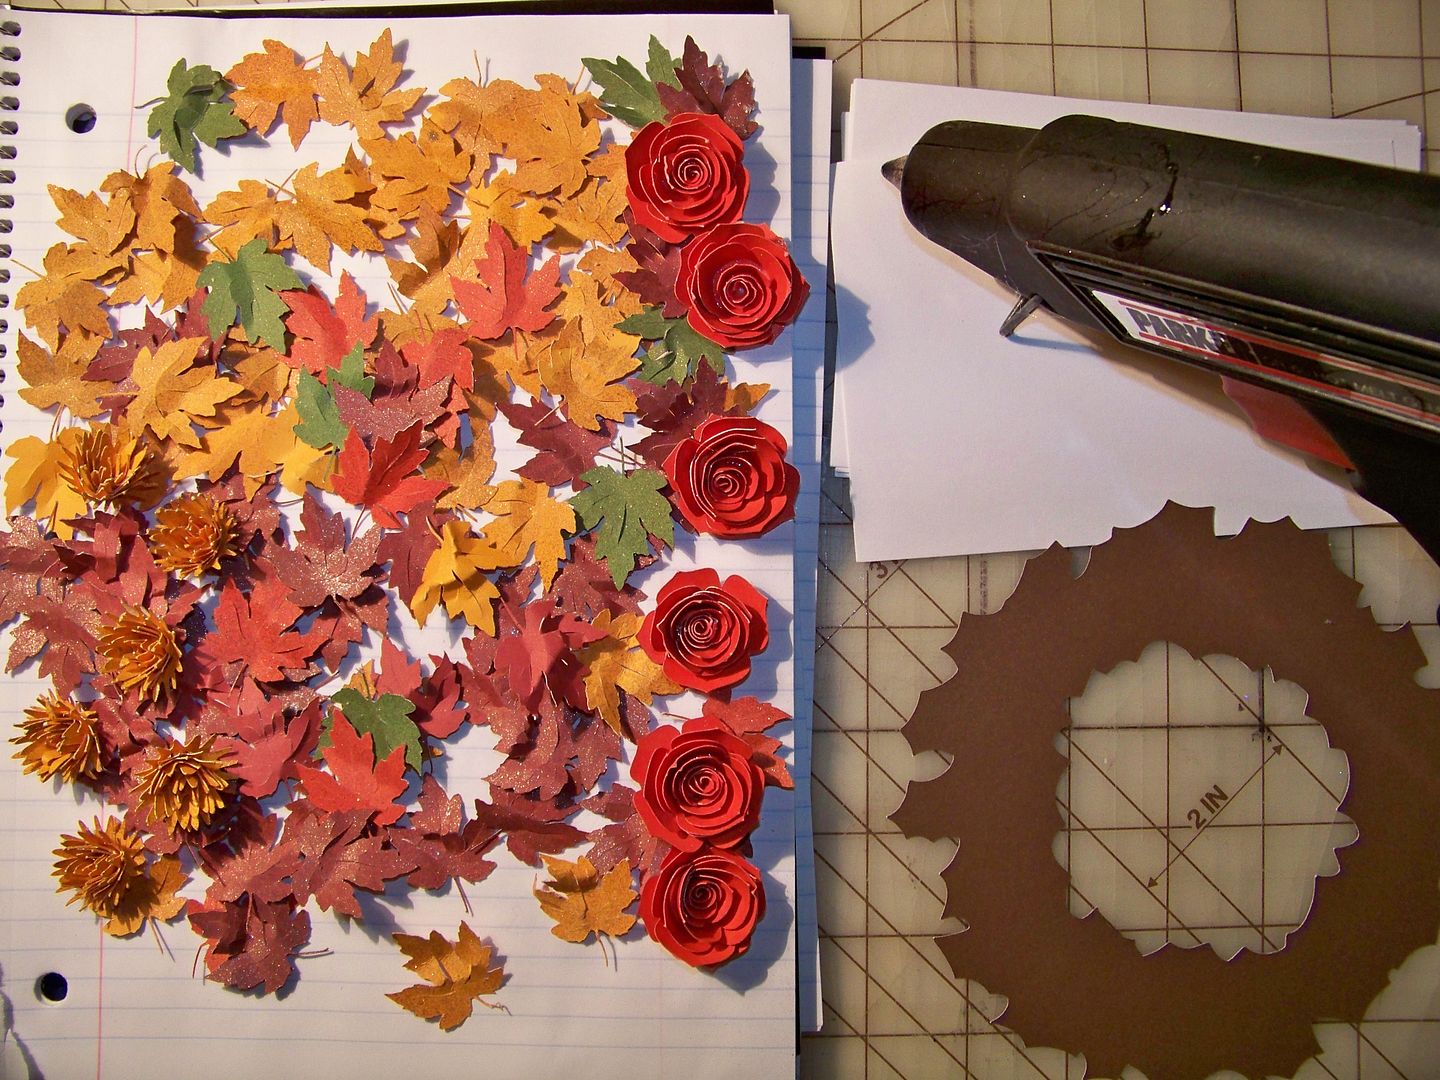
I started by cutting sheets of oak leaves from A Child's Year at 1-1/2" on my Expression. Autofill cut 40 of these on 8-1/2 x 11 paper. All of the cuts for this project were cut from solid papers in this $5 Walmart Colorbok pack called "Earth Tones".
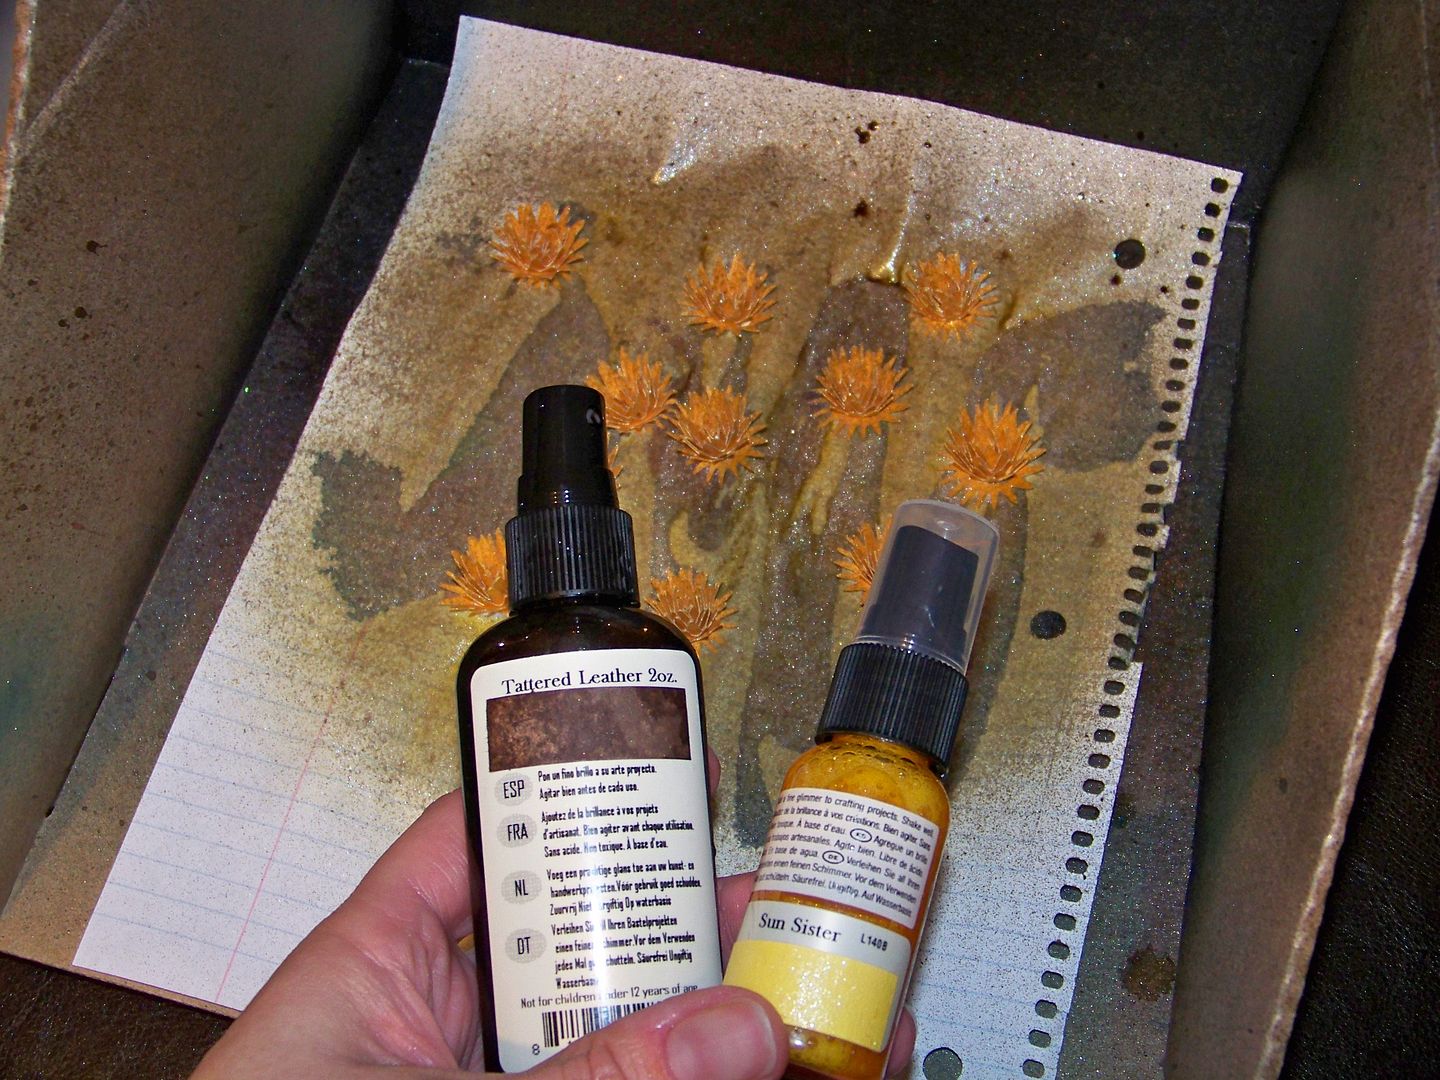
I cut full sheets of the yellow and reddish brown and 8 each of the green and orange. I sprayed them with water, scrunched them up, and allowed them to dry. Then I heavily spritzed them with Glimmer Mist.


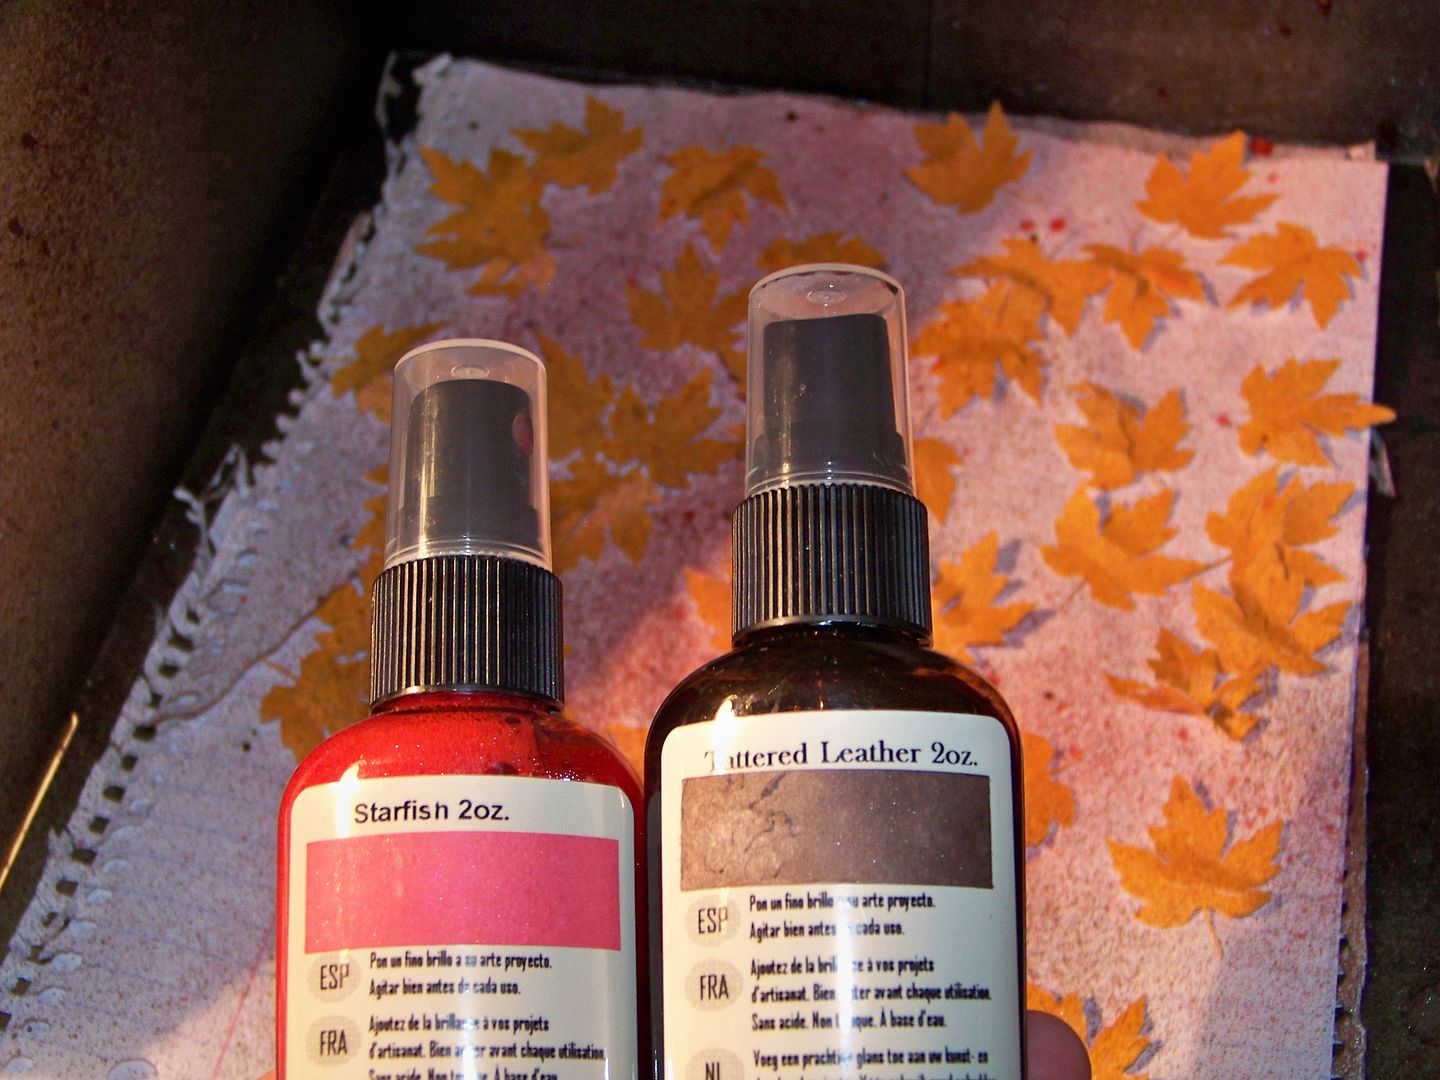
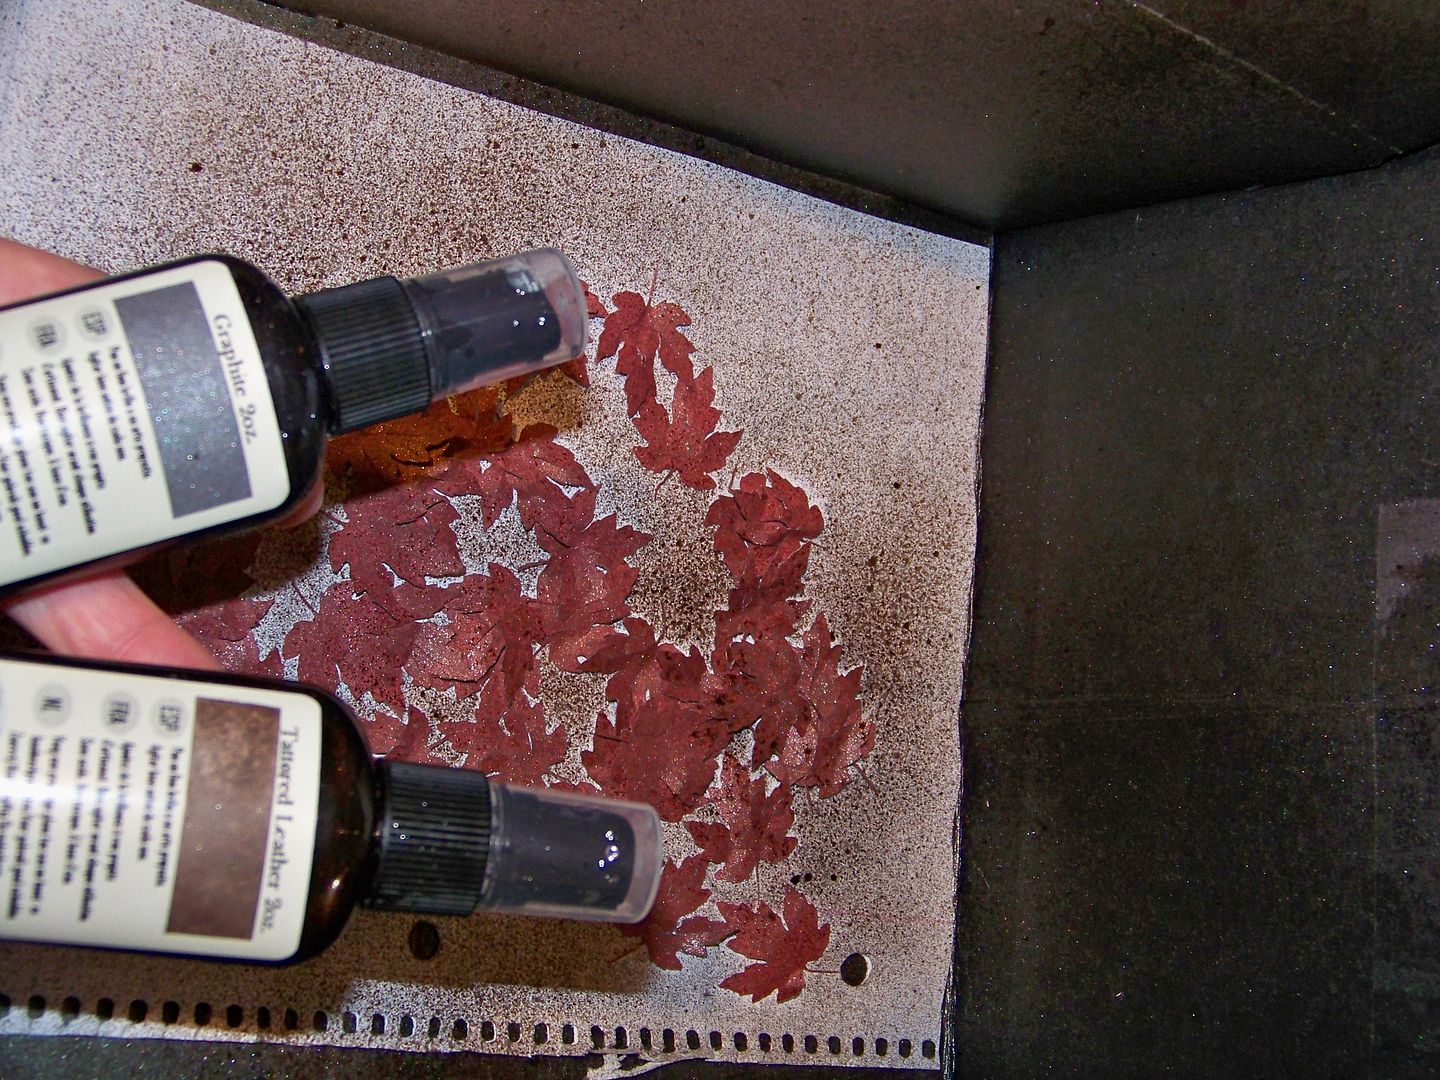

I cut the rose spiral-cut flower (same page as the pointy ones!) at 3". Fit-to-page at this size will cut 6 on 8-1/2 x 11 paper. I also sprayed it with Glimmer Mist to hide the white core.

I cut a wreath base from Christmas (Solutions) at 6" in blackout feature. I hot glued the dried leaves onto the base, finishing with the flowers.

Autumn is the time for me for reflection. I had Samantha, The Scrapmaster, on my mind lately, after giving her my flippant response to her question about 5-minute cards. Who would want a 5-minute card I asked recently on the cricut.com messageboard, isn't that why we have Hallmark?! Now, a little preface: I do go to Hallmark for cards as I am not necessarily a cardmaker per se! When I do make a card, it is to make something very special... but, come to think of it, I also make quick things! I don't tout those 'quickie' cards, and never put them here on my blog, but I have made them I had to admit once I thought about it. So, I sent Samantha a little apology and she sent me back the most kind and gracious reply. It really made an impression on me that she would be so nice after I poo-pooed her concept. So, to pay a little penance, I offer my quick cards. (You may never see them again!)
The Imagine and the Cuttlebug are the greatest tools ever created for FAST cards. These are a few I have done recently.
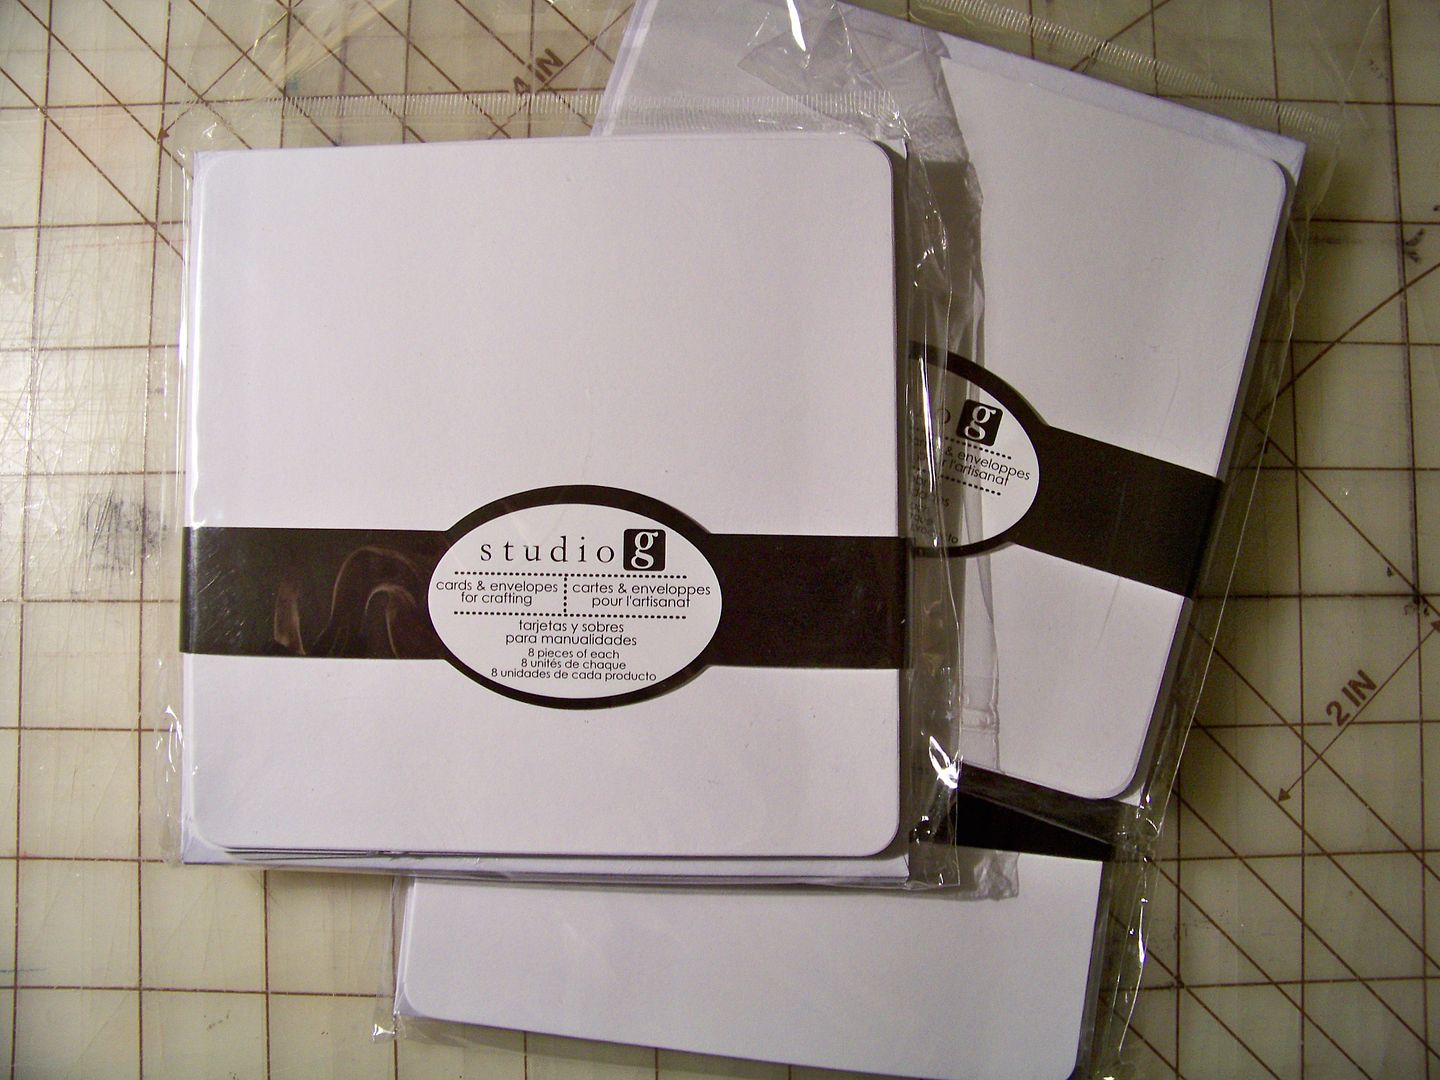
I also use white cardstock blank cards and envelopes. I buy the A2 size from Michael's and just discovered the Studio G squares from Walmart, priced at just under a dollar for 8!
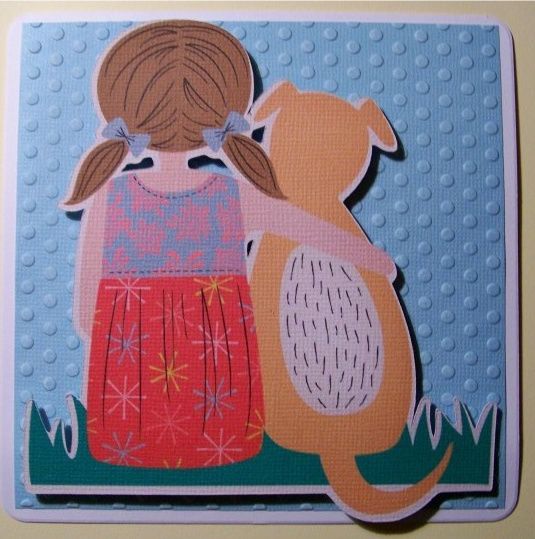
This is one I did to put with silk screened shirt I made for my daughter's friend. (She designed the shirt and I screened it.) In her design, she wrote "I like dogs" so I thought this was fun to put with it.
 |
| Imagine Better Togehter image cut at 4.8". It is attached to cardstock that has been embossed with the 5x7 Cuttlebug Polka Dots folder with pop dots. |
This is another quick Imagine card with an embossed base. I like making little cards for my daughter's lunchbox-- most of those are quickie ones - and just to make her smile!
 |
| Kate's Kitchen image cut at 4.8" on the Imagine. It is attached to cardstock that has been embossed with a 5x7 Cuttlebug folder with pop dots. |
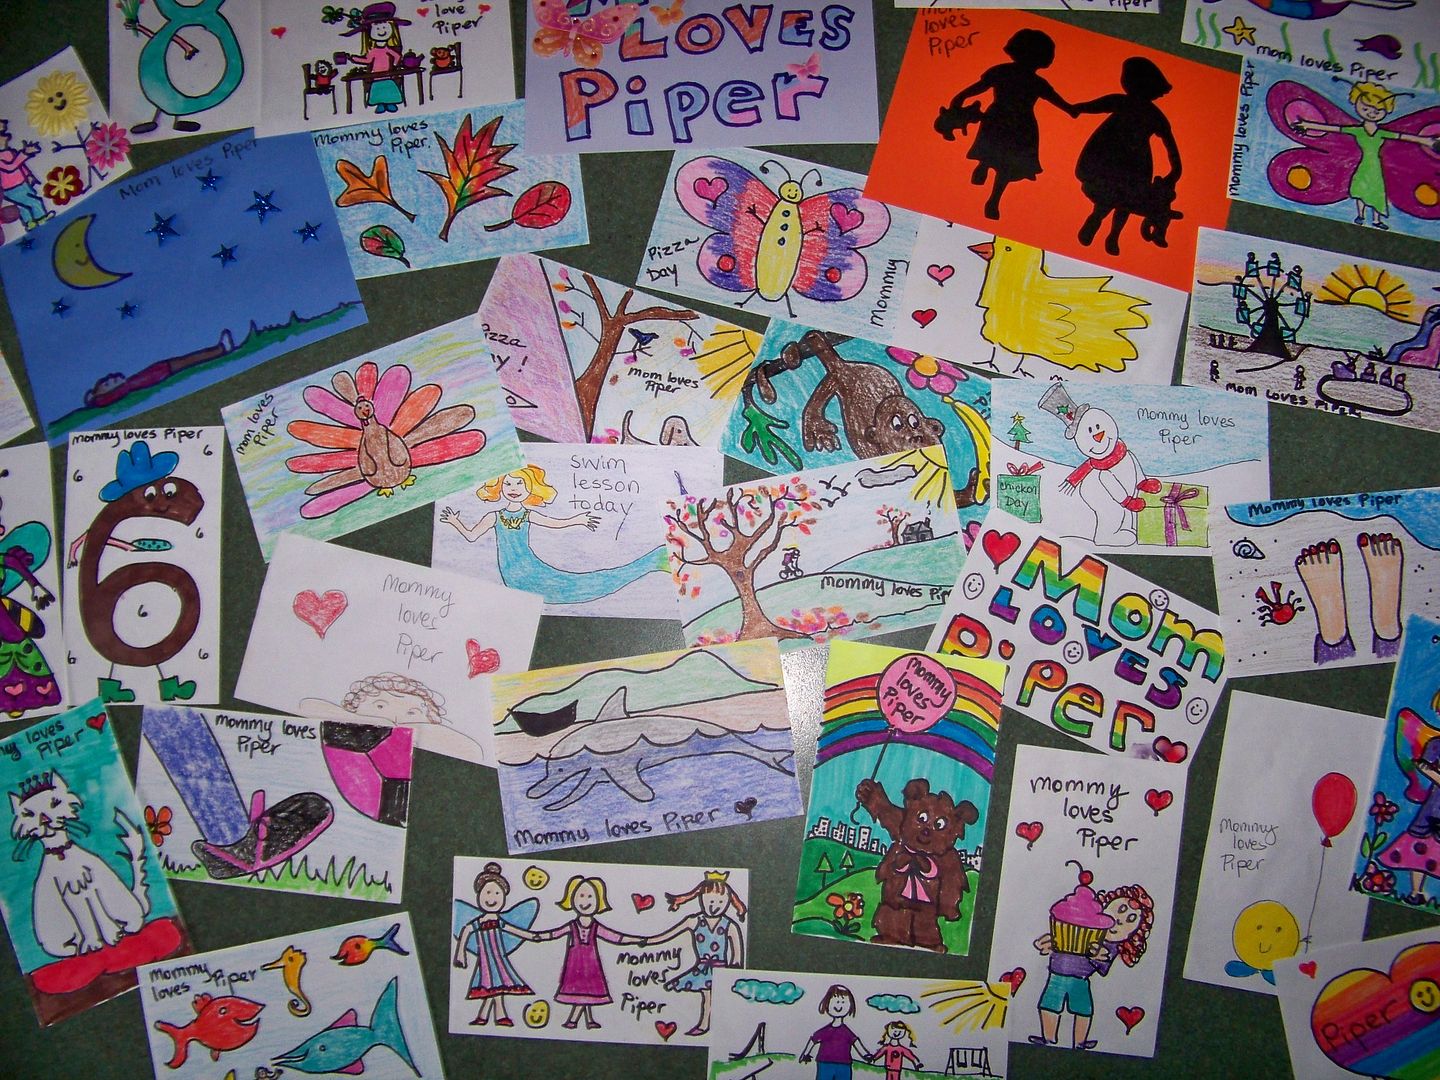
When my daughter was in preschool and kindergarten, I always simply used to scribble a little picture and color it in with her crayons or markers (or whatever was nearby) on little index cards I would put in her lunchbox. They took a minute or less to make, were so goofy and simple... and she has kept them all-- I guess there are hundreds of them. So... to answer my question of who would want a quickie card, I guess the answer is 'someone who loves you and finds something special in your efforts'!
Lastly today, I want to thank everyone for your kindness in response to my project that was on the Cricut Blog. That was a lot of fun for me! I have received responses from a few folks who have taken the project in a new direction and made it their own. I just love that and LOVE to see your projects! The kindness, crafty support, and sweet comments really made my weekend -- even with those cooler temperatures!
Thank you for visiting my blog today!
12 comments:
Oh I love your flower card and the beautiful wreath.. and all of your "quickie" cards.. I would say you were quite amazing at making cards... thanks for all the instructions on how to make the beautiful flowers
Nadia! I love your projects!
The wreath is stunning!
Hugs
Nadia -
A lovely post with great information and a positive message. Can I tell you how great it is that Piper keeps all of her treasured lunch notes? And I love love love your little wreath - your scale is exceptional!
Your flower card is gorgeous! And when Art Philosophy was first revealed to us- I wanted to buy it right away.. but over time that faded.. But you surely are tempting me, Nadia!! LOL
The wreath is also lovely! :) It's on my "one day- I shall create it" LONG list. LOL.
As for quick cards- it's okay, I think I would probably snap the same way without realizing that I actually make quick cards too!! :) I am glad she responded so kindly to you! :)
You have been soooo busy! Everything is so beautiful and creative! Thank you for the tutorial with the flowers! Amazing...as usual!
Carolyn
cccscraproom@windstream.net
http://cccscraproom.blogspot.com
Nadia,
I love today's projects! The flowers are fabulous! I think as far as quick cards go, some of us create them, some of us don't. It's just a matter of choice. For me, a quick card is one I can get done in a day! LOL! :)
Colleen
LOVE the card you made for your mil...the flowers are GORGEOUS!!!!
your projects are beautiful, do you have instructions on embossing with cricut?
Scrapdiva- thanks!
Actually, all of the embossing I have done is with my Cuttlebug and embossing folders (no Cricut used for that). I have heard of crafters who have flipped their blade and changed their settings to emboss with their Cricuts, but I haven't tried that.
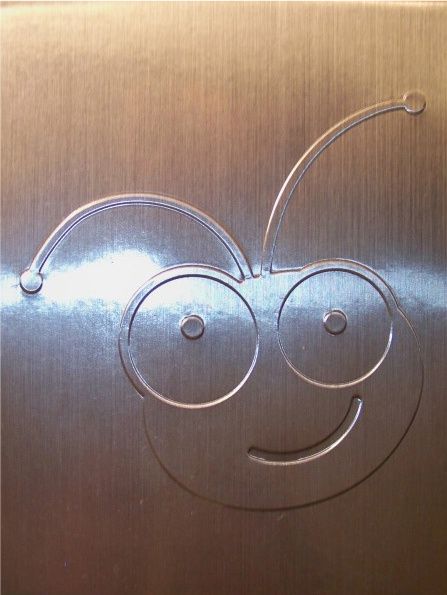
I am in love with my Cuttlebug though! The bughead folder is one I bought at a Circle meetup but I think I have seen it on Cricut.com since then. The others I got from Memory Miser (I think).
LOVE all your crafts! Thanks for stopping by our page : )
Your newest follower,
Claudia
Nadia - your card and wreath are just gorgeous!! I actually read your message the other day (as I subscribe by email) and was so excited to see the tiny roses you created with the punch - which I recognized as one that I own! I zoomed in on each of the photos to get a better look and had my first attempt at creating dimensional flowers. I also saw the same punch in a larger size at Michaels yesterday (50% off - woohoo!) and purchased that to give a go. AND, I was so taken by your card, especially, as well as another floral project created by another blogger, that I ordered Flower Shoppe!
You've really helped me see how the flowers are actually pieced together. Thanks for taking the time to take photos and give instructions. Now I just need some of those tools!
Your quick and easy cards are delightful. I rarely post my quickie cards either, but they are handy to have. I don't like to shop Hallmark when I can create something with the supplies I've already got!!
Fabulous projects, as usual! I just love your work. I have a blog award for you, so please stop by my blog to pick it up.
http://happyscrapper64.blogspot.com/
Post a Comment