First Communion Gift Box
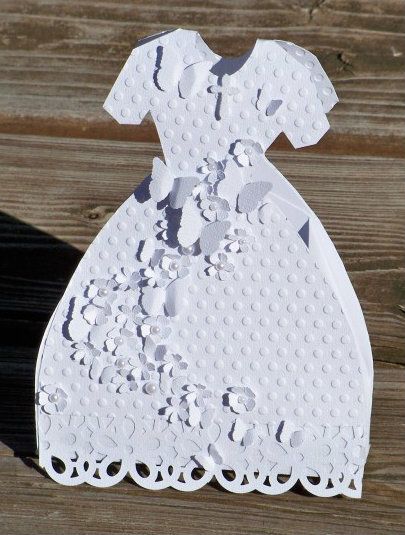

This Sunday is my daughter's First Communion and I wanted to make a special box to wrap one of her little gifts. I started with the Bride Box on Tags, Bags, Boxes, and More 2.
OK - let's talk about TBBM2: What makes it different? The score lines change the whole game! And so does the two-part box option! First the score lines --- I don't have a scoring blade/housing. Instead, on my Expression I adjusted my blade depth to 2 and my pressure to 2. (I found on my E2, that I had to change it to blade 3/pressure 3). Always test this for yourself as the machines can be different! This method actually cuts into the card stock, but not all the way through, to score it. I used to use an X-acto knife to score and got this same kind of result, so I really like this method. As a reminder, if you use white-core card stock (like I do) you will see the white at the folds. That is part of what I like but for a dark box, you might prefer a card stock with the core that is the same color as the surface (or you can always ink it!) Of course, that won't be an issue on this project!
 |
| I love the scoring done on the machine! This is actually two pieces that are unattached--just scooted close! |
I decided that the best way to transform this strappy wedding gown into a First Communion Dress was to hand-cut an over-layer to make sleeves and a more modest neckline. I was also able to emboss the over-layer, allowing me to add interest in texture on this white-on-white project!
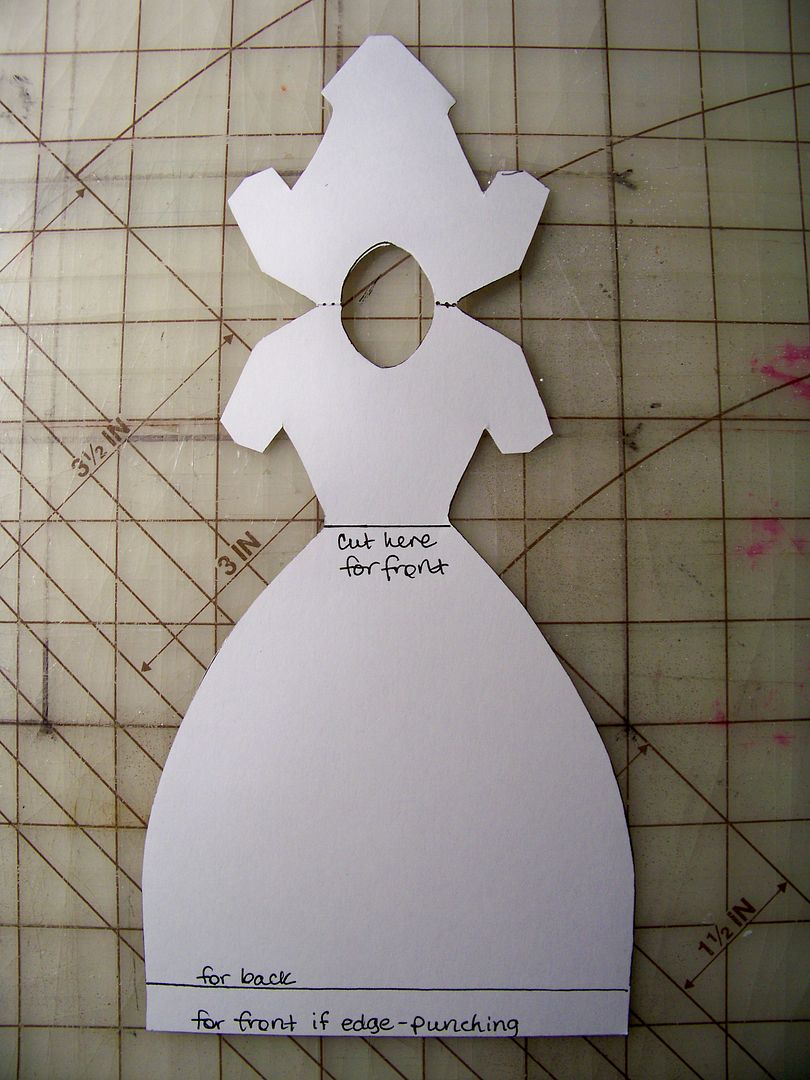
I created the over-layer by tracing the dress front and back to make a pattern, with the front skirt cut separately as designed on the cart to allow for a velcro opening. This effort was worth it to me because my daughter saves special boxes and I knew she would be keeping this one. I hand-cut this shape from the same textured white card stock that I machine-cut the box pieces.
I used an edge punch on the front skirt and then embossed it with my Cuttlebug.
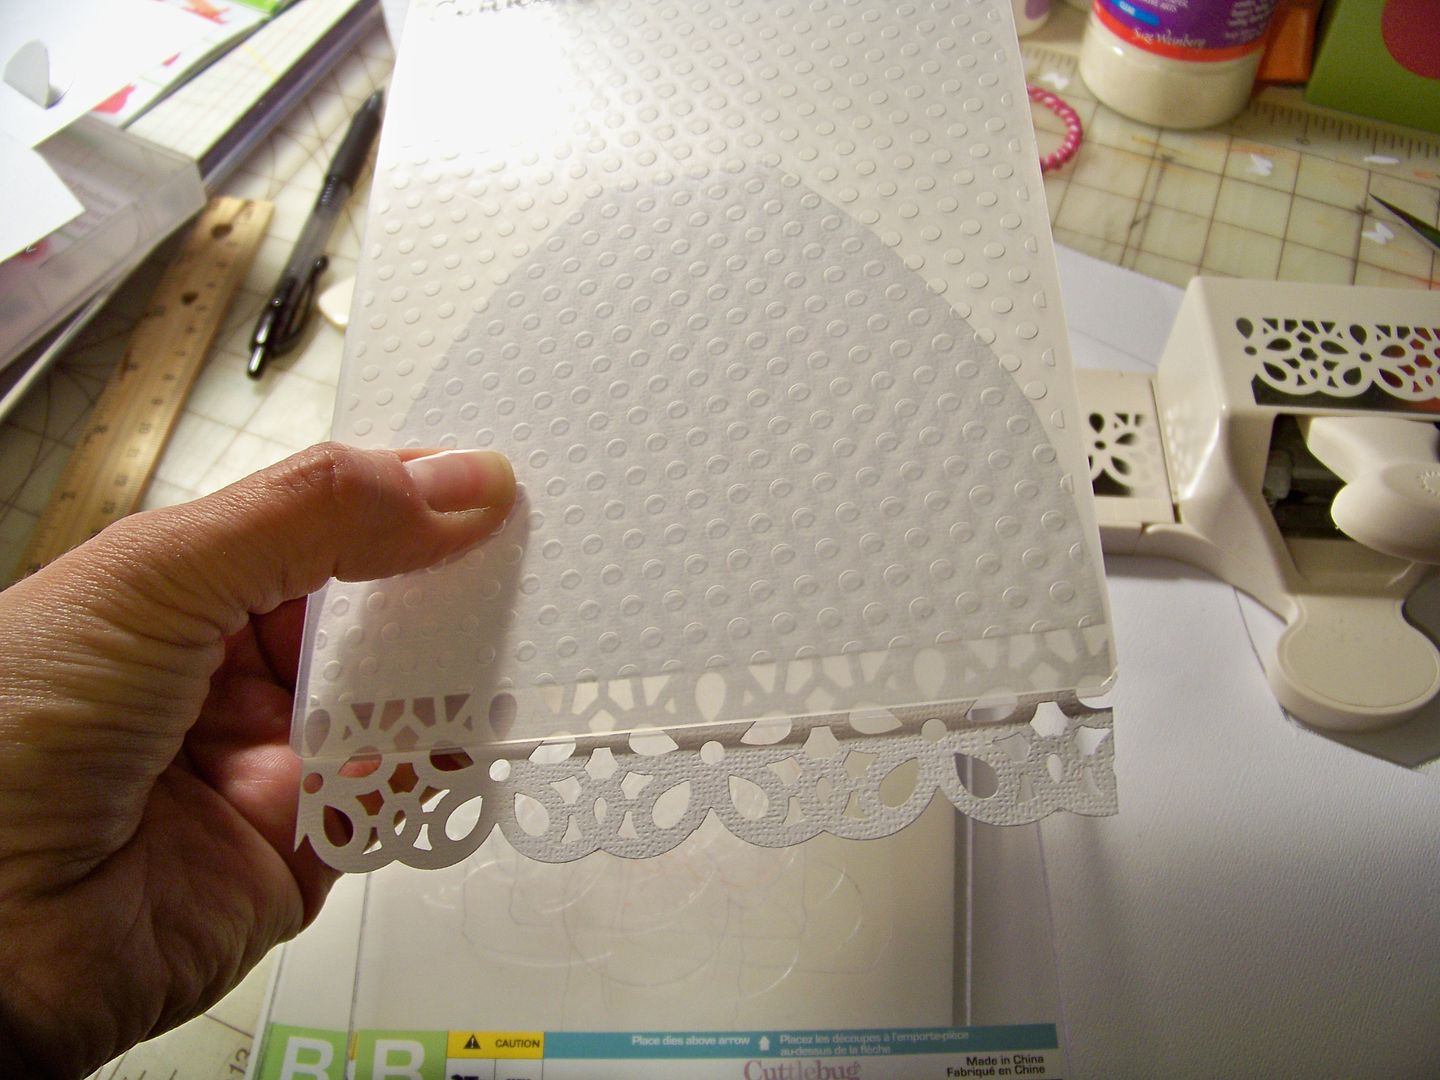
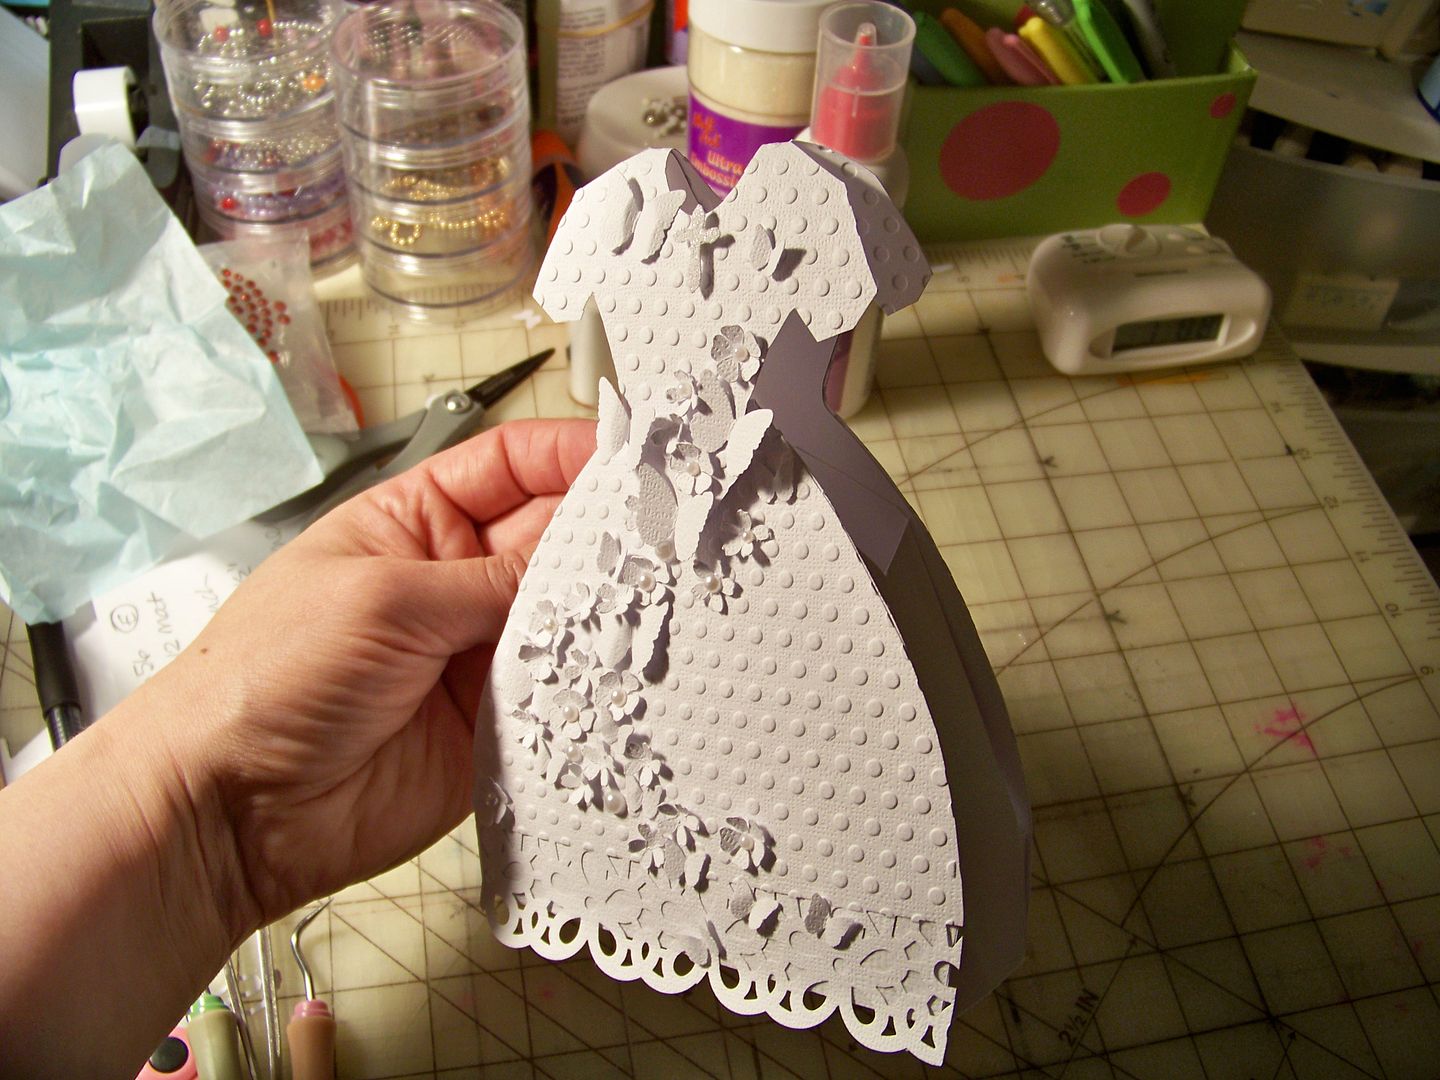
I embossed the other sections of the dress. (I had to embossed the fold-over bodice and then the back of the dress separately--- where, oh where, is that 12x12 Cuttlebug that we have begged for?!?! All of the over-layer pieces were embossed and adhered before attaching the two box pieces together.

I adhered flowers, butterflies, pearls, and an iridescent white glittered cross (at the neck) after assembling the box per the cartridge instructions.
 |
| I did cut out a bit off the side folds to make it easier for a little hand to reach inside. Tissue paper will be wrapped around the gift, so it will still be hidden from little eyes! |
 |
| Here, you can see the finished size. |
dress box - Bride box from TBBM2 cut at 11" using the Box Section 1 and Box Section 2 cuts
butterflies - Martha Stewart punch
flowers - Pagoda cut at 1/2"
cross - rosary on New Testament, using the cross only, cut at 1-1/2"
lace hem - Martha Stewart deep edge punch
Pyramid Gift Box
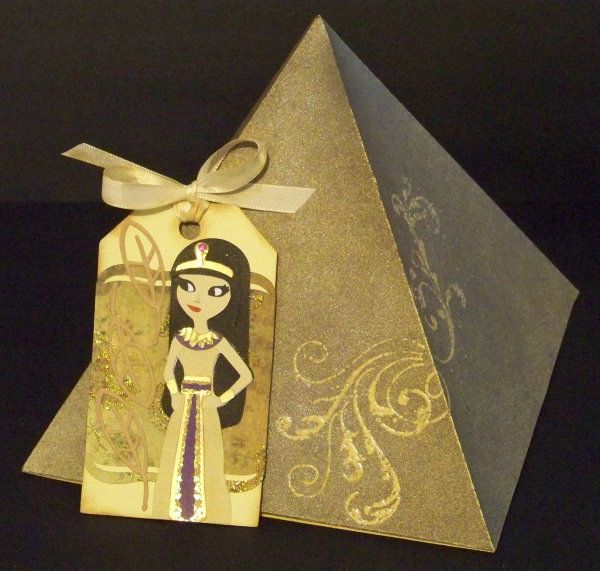

I wanted to make a fun design for one of my mom's Mother's Day gifts. I fell in love with the idea of an Egyptian character when I saw that cut on Teen Scene. Finding the pyramid box on Tags, Bags, Boxes, and More 2, I knew that would be my theme! You can see my details about making the tag on my previous post, or click here.
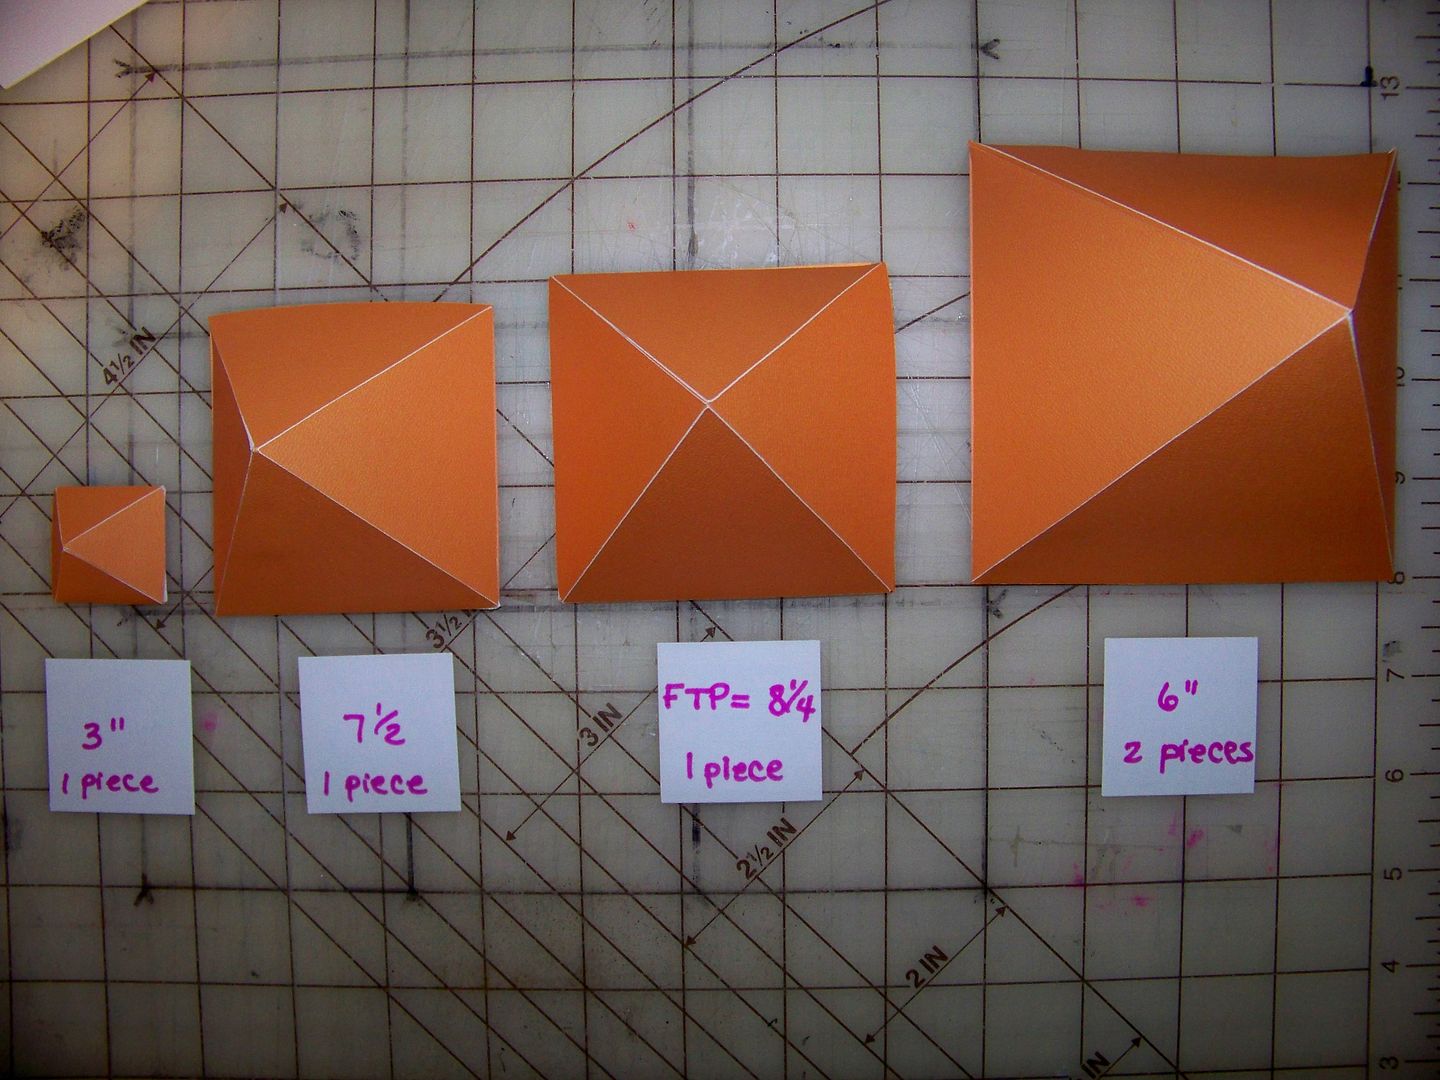 |
| These are a sampling of the sizes I could cut on a 12x12 mat in one and two pieces. These were too small for my project! |
For the pyramid, cutting in two parts meant that I lost a flap that I liked on the one-part cut. That flap gave it a finished-looking opening, but it just would not work out. To make the size I needed, I had to use the two-part cuts on a 12x24 mat at 10" and I had to cut it on the E2 so that I could turn the cut 90 degrees (a feature that is not available on the Expression). If you use software, you can always turn it to fit that way.

To do the cuts for my large box, I followed these steps:
I could not figure out how to make the score lines match up on the cuts when everything was turned 90 degrees on the E2. I am guessing that the software would solve this problem! For the big box (not the samples in orange above), I hand-scored the shapes-- and on this design, it was so, so easy! When not turning 90 degrees, the score lines are perfect every time and have been perfect on my Expression every time too! Getting the shapes to a bigger size, though, REQUIRES turning the shapes 90 degrees!
To do the cuts for my large box, I followed these steps:
load 12x24 paper on 12x24 mat
select mat size for 12x24
select shape for box section 2
edit: select 90 degree turn and size 10"
cut (I did not score-- I hand-scored later)
repeat for box section 1
I could not figure out how to make the score lines match up on the cuts when everything was turned 90 degrees on the E2. I am guessing that the software would solve this problem! For the big box (not the samples in orange above), I hand-scored the shapes-- and on this design, it was so, so easy! When not turning 90 degrees, the score lines are perfect every time and have been perfect on my Expression every time too! Getting the shapes to a bigger size, though, REQUIRES turning the shapes 90 degrees!
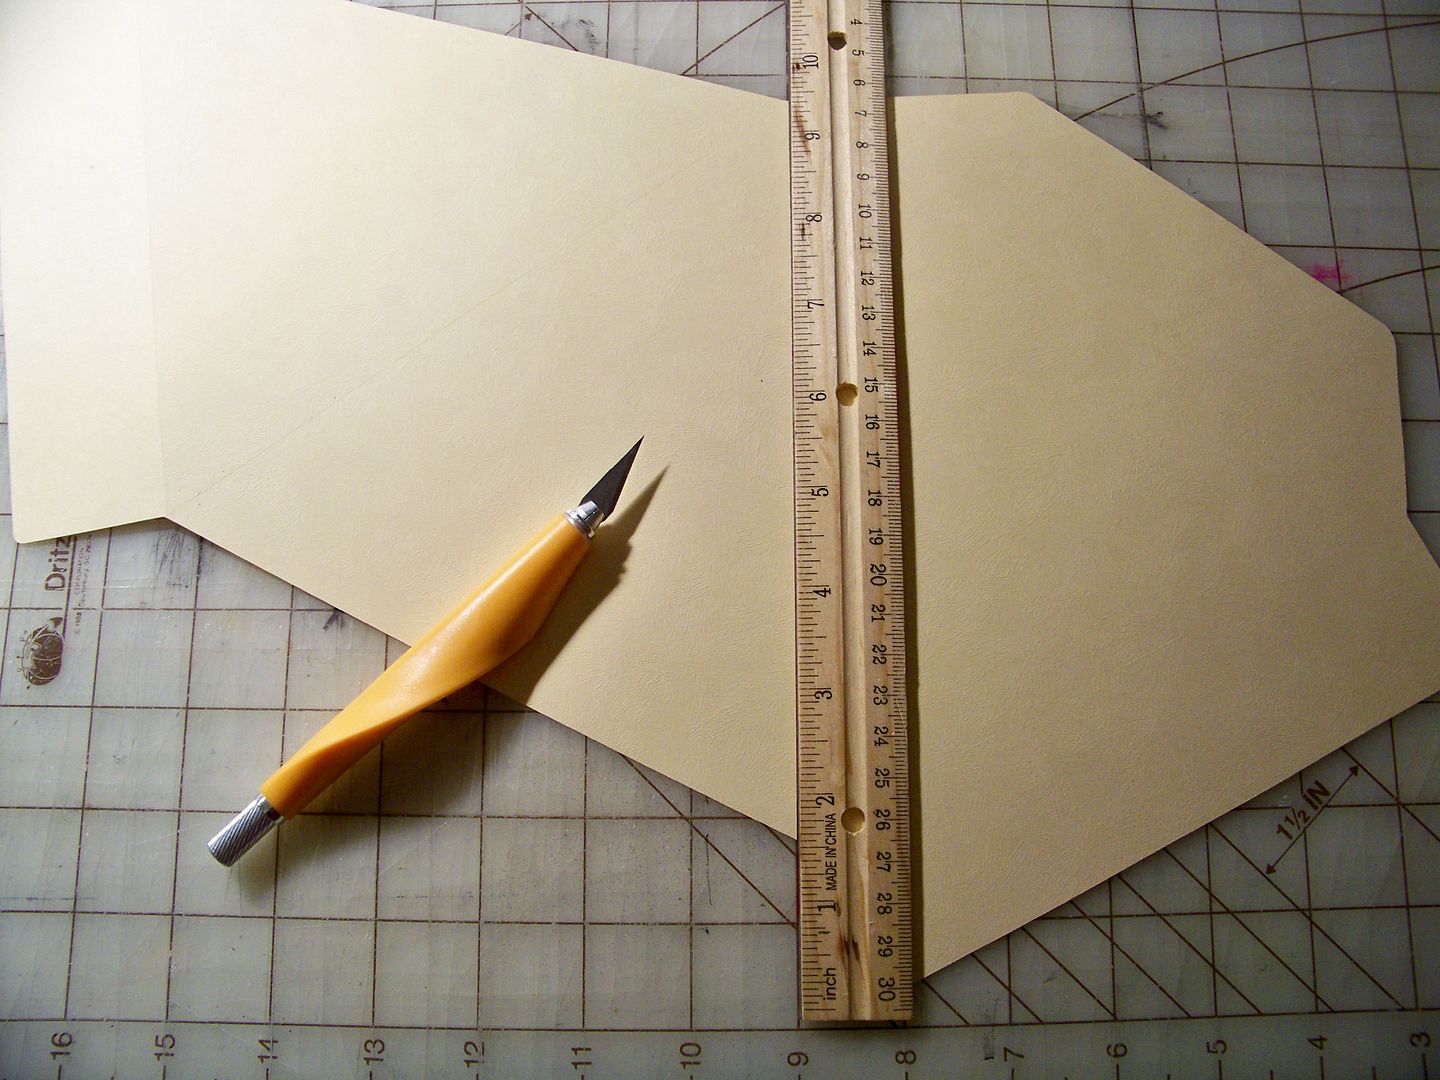 |
| I use a metal-edge ruler and X-acto knife on a grid mat to hand-score, using the diagram on page 28 of the Assembly Construction booklet as a guide. |
 |
| I adhered the two pieces and used a bone folder to fold along the score lines. |
 |
| After making my small orange samples, I found that the flaps with squared corners functioned better when I trimmed them down at an angle. |
I was inspired by a technique used on the Scrappy Sticky Inky Mess blog, where the artist, Maryanne, used melted embossing powder as a resist! You can see that post by clicking here! On her post, she created a colored base with crayons but I just wanted my original paper color to show I did not color or treat the paper in any way.
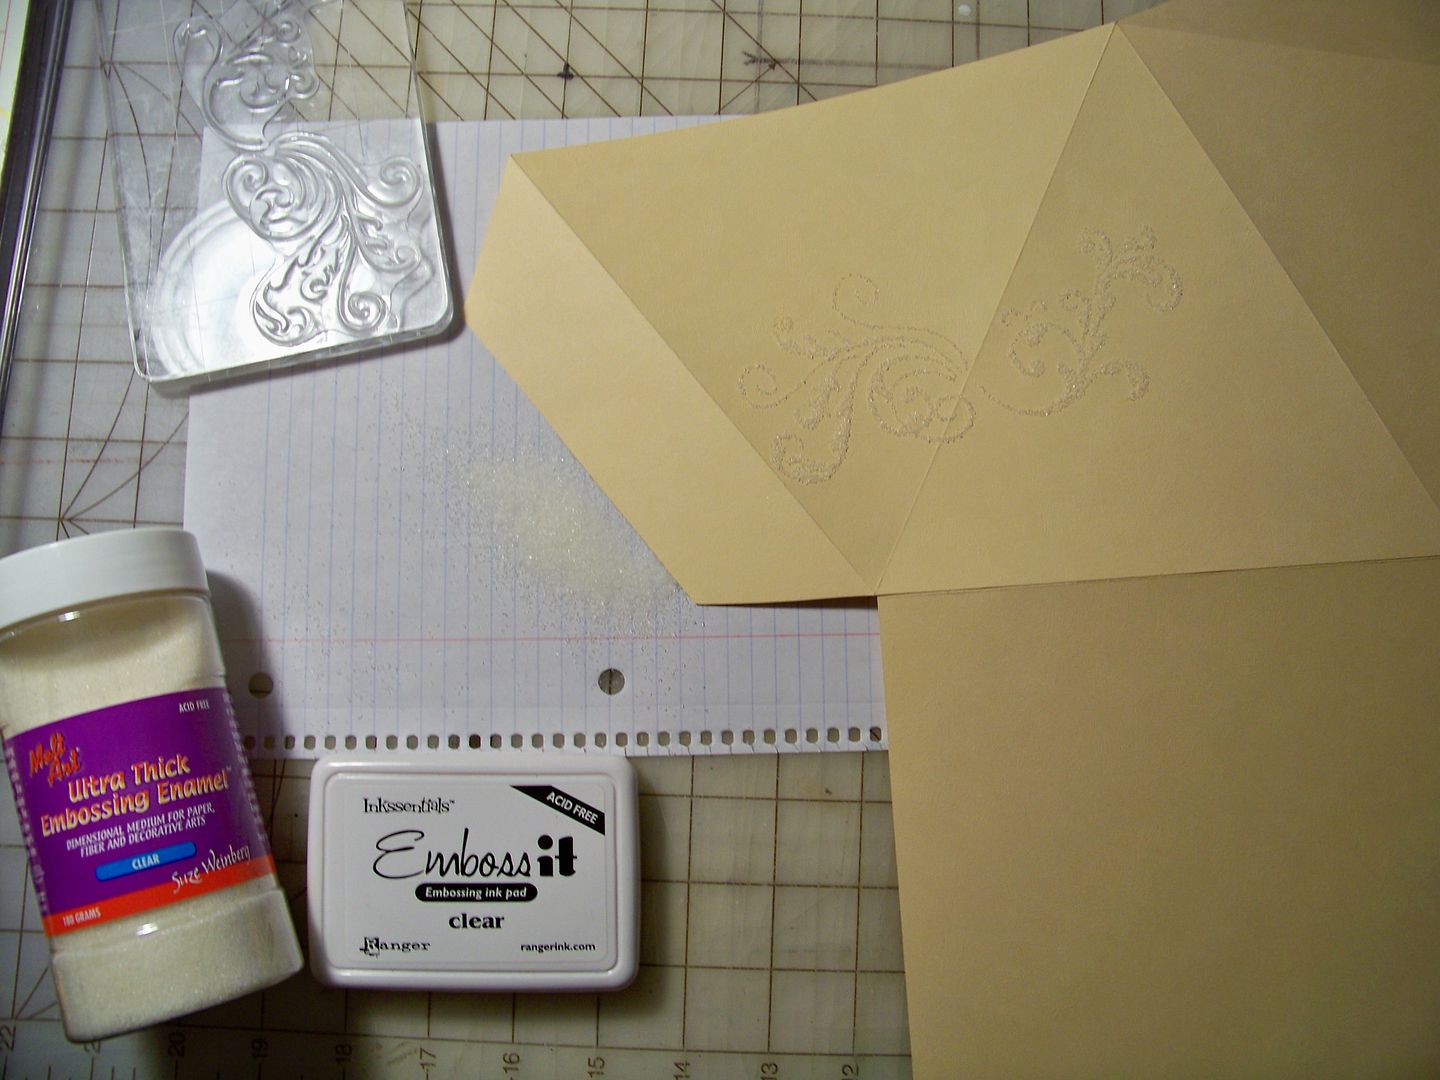 |
| I used UTEE to create a resist so that the design would keep the color of my paper before adding color. |
 |
| I tapped off all excess UTEE and then applied heat to melt the crystals. |

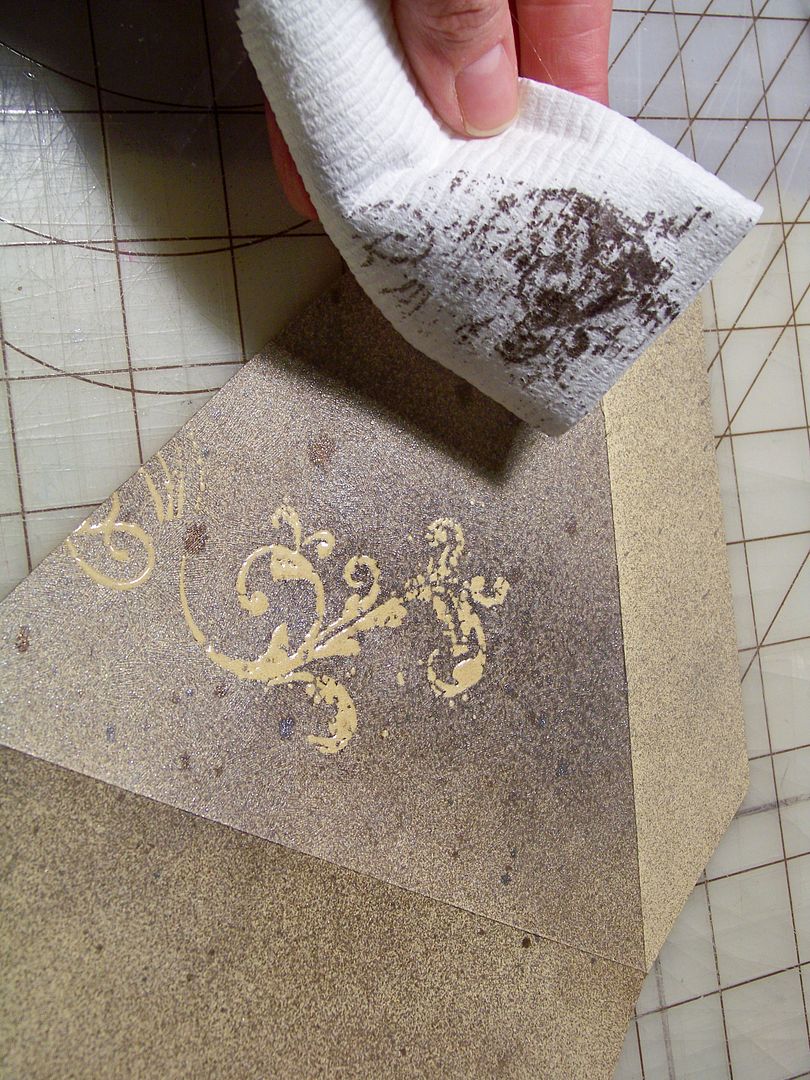 |
| I sprayed the paper with Glimmer Mist to add a little color. (I wanted to match the muddled paper on the tag). While still wet, I blotted off the Glimmer Mist from the UTEE designs with a tissue. |
 |
| I adhered the sides using Terrifically Tacky Tape. I left the bottom open so that I could fill the box with bath bombs from Lush, my mom's favorite (and mine and my daughter's too). |

I have to thank the sweet Scrapalette, who took my crazy phone call as I was testing the scoring for this large box! She has posted lots of her practice cuts for Tags, Bags, Boxes, and More2. Click here to see that post on the Cricut message board.
Family Game Night Raffle Basket Donations
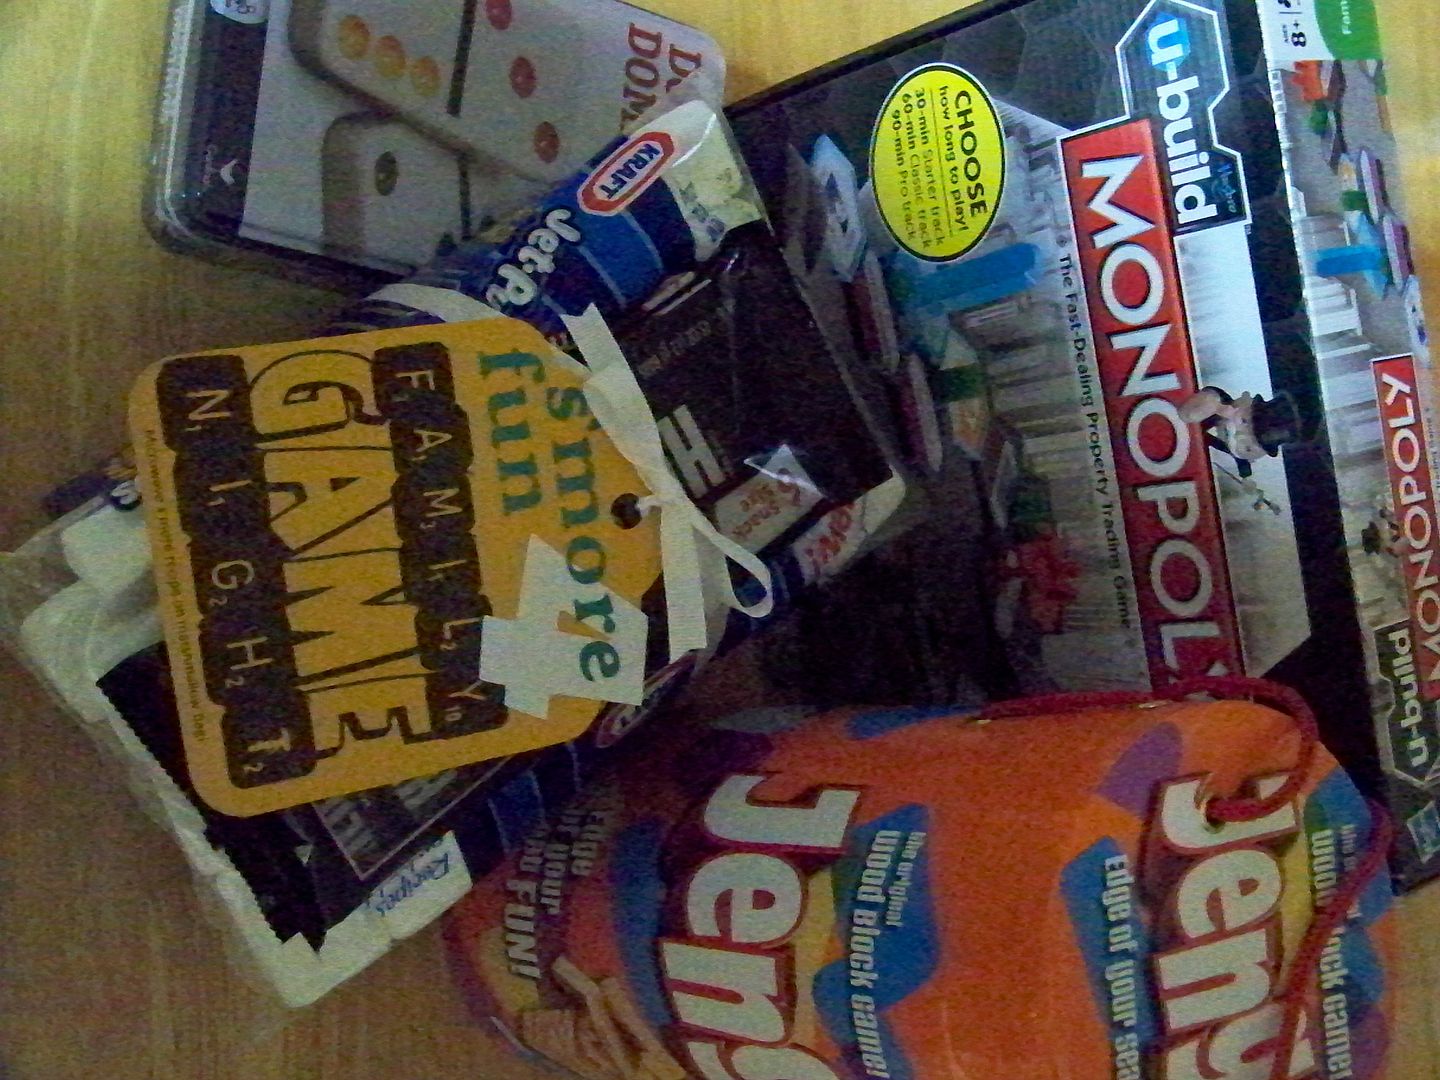
The never-ending school fundraising has brought requests from the junior class at my daughter's K-12 school. They have requested that the second graders' families donate a gift basket for their raffle with a "Family Game Night" theme. So... we bought a few games to donate and I put together a s'more kit. Can't wait to see what the basket looks like with all the donations!
 |
| 'S'more Fun 4 Family Game Night' tag! |
Tag - Art Philosophy (page 40), cut at 5-1/2"
"Family Game Night" text - an image found on Google Images
"s'more fun" - Art Philosophy at 3/4"
"4" was from Mickey Font at 2"
I ran the tag through my printer to add "Microwave s'more recipe on marshmallow bag!"
Boy's Birthday Gift Bag
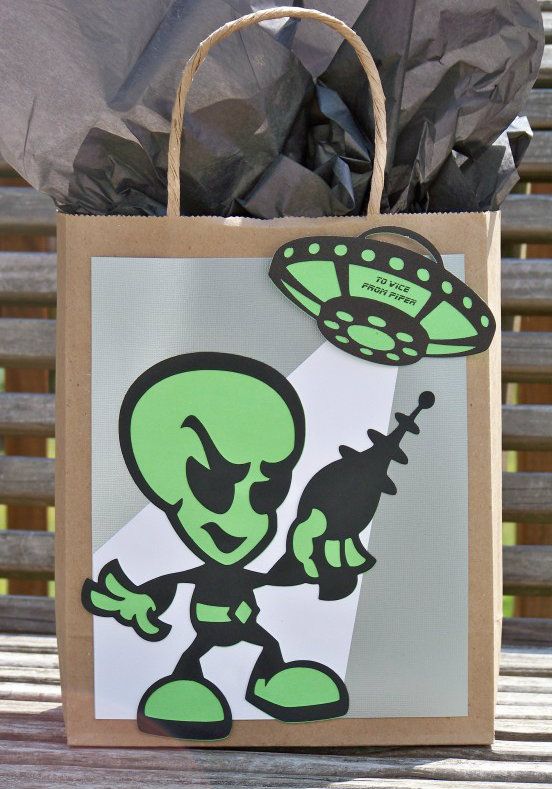
This was kind of a recycling project because my daughter had drawn on the bag and decided she didn't like her design, so she discarded it. When I found it in my gift wrap supplies, the bag was the perfect size for a couple of Hex Bug sets she was giving to her school friend. Eight-year-old boys are a tough group when looking for an icon for the design-- they are too old for some cartoons, we have already used other cartoons for past birthdays, Super Heroes are 'out' (so I have been told by those mini trend-setters), and this boy doesn't like sports. My daughter suggested an alien and I love the one from Space Party!
How-to details (all cut on the Expression unless otherwise noted):
Alien - Space Party Cricut cartridge, cut at 7-1/4"
Space ship - Space Party Cricut cartridge, cut at 2-1/2" (popped up 1/8")
Beam of light - hand cut
Mat - cut on paper trimmer at 7" x 8-1/2"
Purchased 8" x 10" kraft paper bag
Text on space ship - printed on using Microsoft Blade Runner Movie font at 11 point
I had so much fun with these projects!Thank you for checking my blog today! As always, you can see many of my previous projects by visiting My Project Gallery, or just click here.
I had so much fun with these projects!Thank you for checking my blog today! As always, you can see many of my previous projects by visiting My Project Gallery, or just click here.
13 comments:
Fantastic projects. I've only played a little with TBBM2 and seeing your beautiful creations is inspiring me to find time to play with it some more.
OMGosh...WOW!!
You have made some beautiful stuff here, loving everything and thanks for the detailed instructions....clever you :)
Hugs
Adele
Very pretty I love how you transformed the dress!! The pyramid is very pretty as well. Thanks for showing the steps for them!!
Kristan
WOW!!!! All of your work is stunning!
Oh my goodness, you have been BUSY! I love all of your projects.
The UTEE resist is SO STINKING CLEVER. I share your love of coordinating gift sets and the manner you tied your pyramid to your tag in terms of color and theme is AWESOME!
And your darling Communion Box is so special - it is sure to be a keepsake!
Love your clever tag and the alien bag too - you never cease to amaze.
Thank you for sharing today!
OMG you've been busy! Wonderful job on all of them! Love what the embossing does to the cardstocks. Congrats to Piper on her first communion.
Love your blog.Just discovered it!!I am new to paper arts, so your projects are just so inspiring!
I noticed you like making little dolls from Wee Folk. If you ever want to swap with me, I love making them too.
Judy
Oh WOW, I have always been so impressed with your creations , but these are so AWESOME...I jut got tags bags boxes 2 the other day and haven't even had a chance to open it .. Yu r sch an inspiration .
OMG, Nadia, I absolutely love ALLL these projects; especially the boxes! LOL!!!
I've definitely gotta try that UTEE technique! TFS!!
Hugs, my friend, and a great job!
You have been busy! Love all the projects. Thank you so much for the detailed instructions on how to use the TBBM2 cartridge.
As usual, your projects are stunning and so creative!
Carolyn
http://cccscraproom.blogspot.com
Stunning projects Nadia! I am a sucker for butterflies and adore how you embellished the First Communion box. I also appreciate your insightful details.
Michelle
Love the communion dress totally awesome!
OMG! That Communion Box is simply gorgeous. Your sweet DD is going to be the envy of everyone! :-)
Your mom is gonna love that Pyramid Box. I know I would! TFS!
Post a Comment