
A year ago, my friend who is the RCIA director at my church (and who was also my sponsor when I became Catholic), asked me to decorate the Fellowship Hall for the Easter Vigil. I begrudgingly agreed. Here are the truths I knew when I agreed, and if you attend a church of any denomination you already know this: You will use the previous years' decorations, they will be sight-unseen until you get there and horrible, and you will have this job forever.
All I can say is that after I decorated last year, I felt I would never be asked to do it again. It looked terrible. I had a vast array of mismatched candles, chalices, floral pieces, statuary, and table cloths to work with from storage... and I didn't have the talent to hide that fact!
Much to my surprise, I was asked to do it again (clearly they were desperate), but I was asked two weeks in advance so I had time to make stuff! And... my friend in charge told me she wanted a mostly white palette! I had in my mind from the year before that I would make life-size lilies, but I knew that I hadn't seen them on any Cricut cartridge and so I went to the most logical source, the master paper gardener, Michelle Nun. Michelle has a blog called Scrap N Grow and makes perfectly life-like paper versions of real flowers! I contacted her to see if she had any ideas... not only did she respond, but she created a tutorial for me, complete with photos. What she didn't know is that I have a black thumb when it comes to both real and paper flowers. I could never make flowers as perfect as hers, but she had given me so many incredible ideas and tips that I knew I was close! Michelle created a trumpet shape-- just what I wanted and just what I couldn't seem to do. Part of my problem is that I didn't want to use CCR to form the whirl that I needed. I am just stubborn I guess.... Gluing the petals together to form the three-petal whirl wasn't working out.
I found a post by Lia Griffith where she provided a PDF of her own water-color lily petals, leaves, stamens, and stigmas to make beautiful lilies. I realized that I could use the petals that Michelle found on the Giant Flowers cartridge (so I wouldn't have to hand-cut) and use Michelle's idea of adding color to each petal... and use Lia's idea of using individual petals so I wouldn't have to use software! I was in love with the combinations of these two artists' ideas!
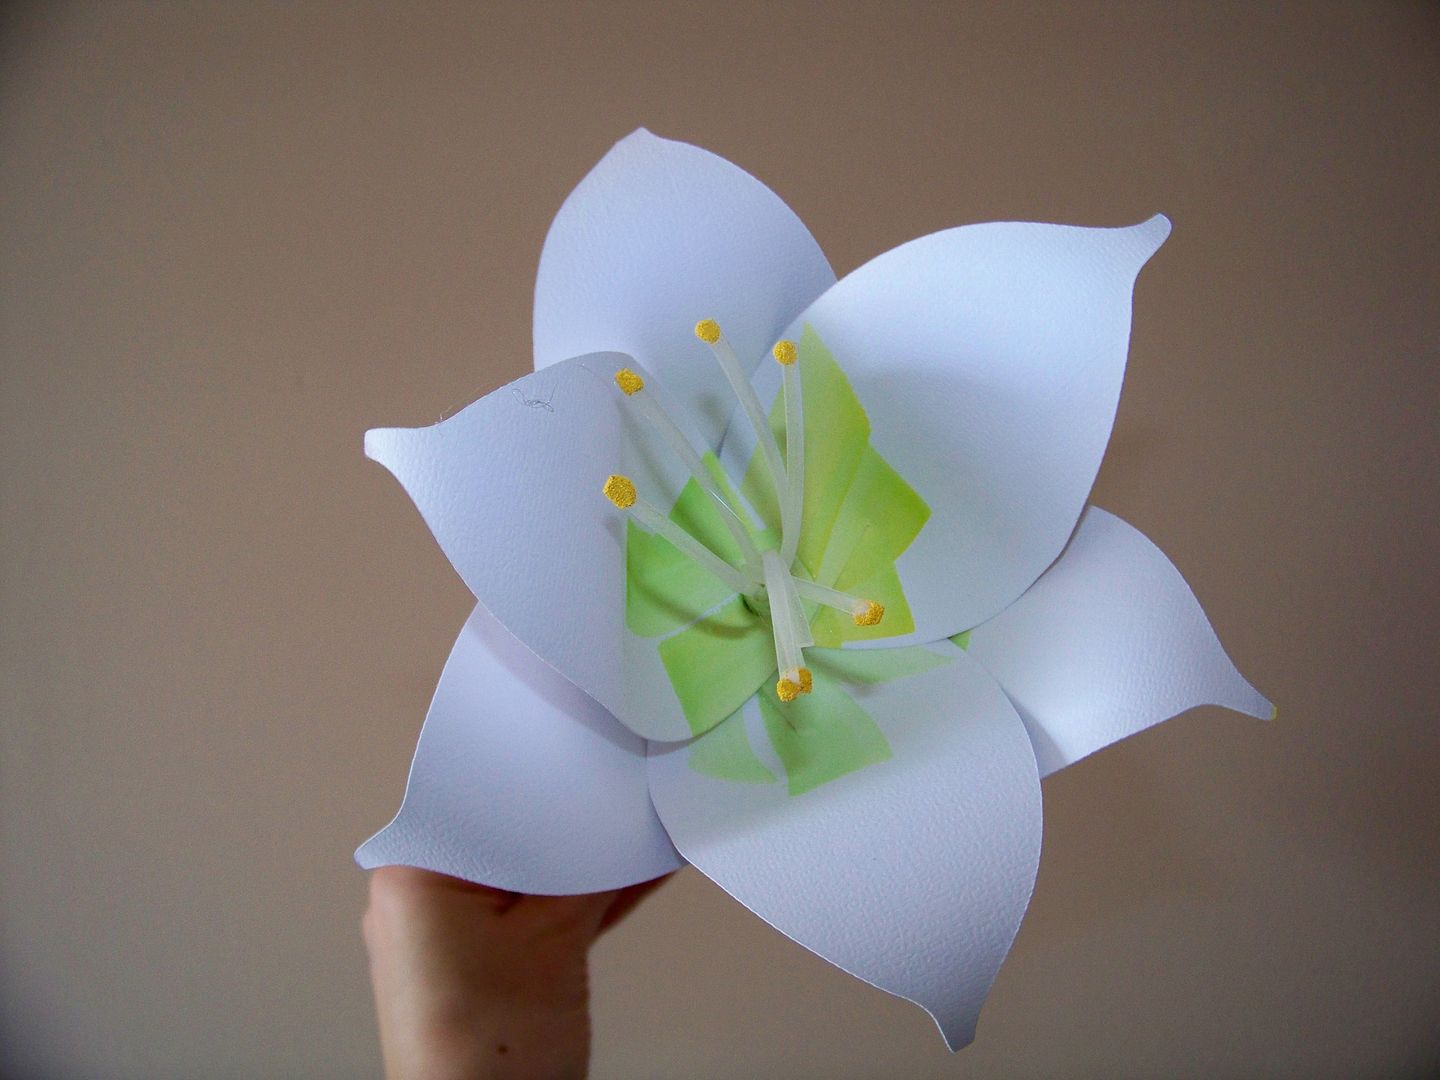
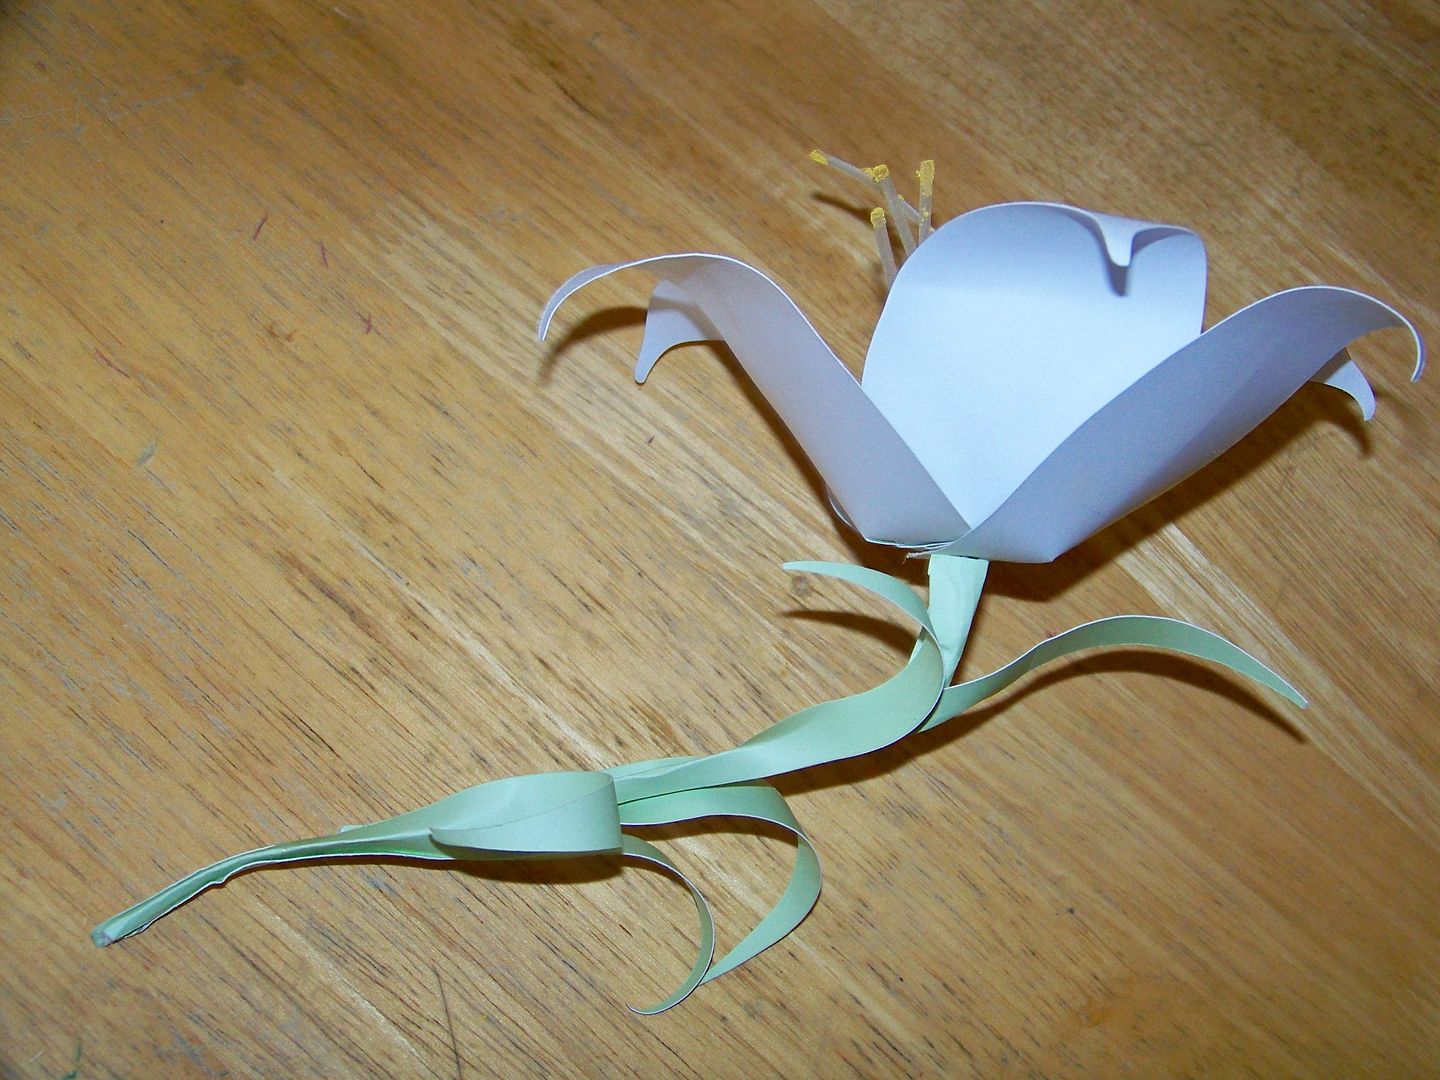
So, what I ended up with is not a true Easter lily. (I hope Michelle will forgive me for my inability with the software and for having to make changes to her absolutely perfect flower). Unlike Michelle's botany-perfect lily, mine is sort of a lily-tulip with a carnation stem... but it worked! And it was approved! Because it was such a process, I thought I would share my tutorial, in case you find yourself in need of a lily-tulip-with-a-carnation-stem. Ha!
I cut petals from Giant Flowers at 6". Each flower requires 6 petals. This is key #20 on the keypad. I used watered-down acrylic paints to add color to the centers.
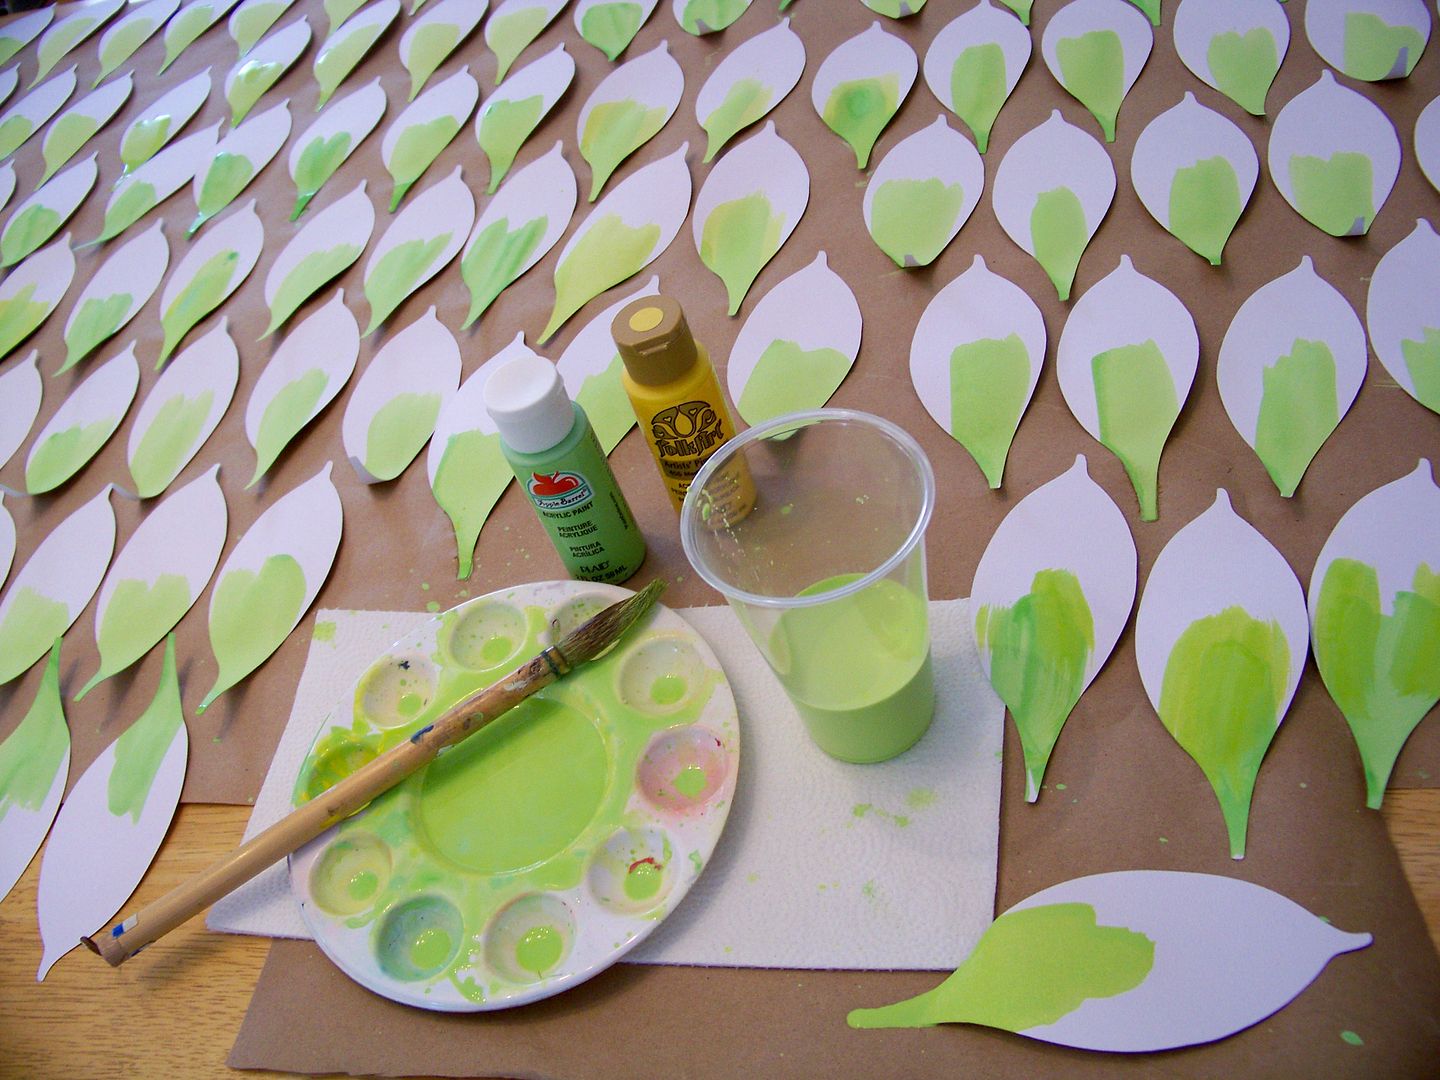
While the petals dried, I made the stems.
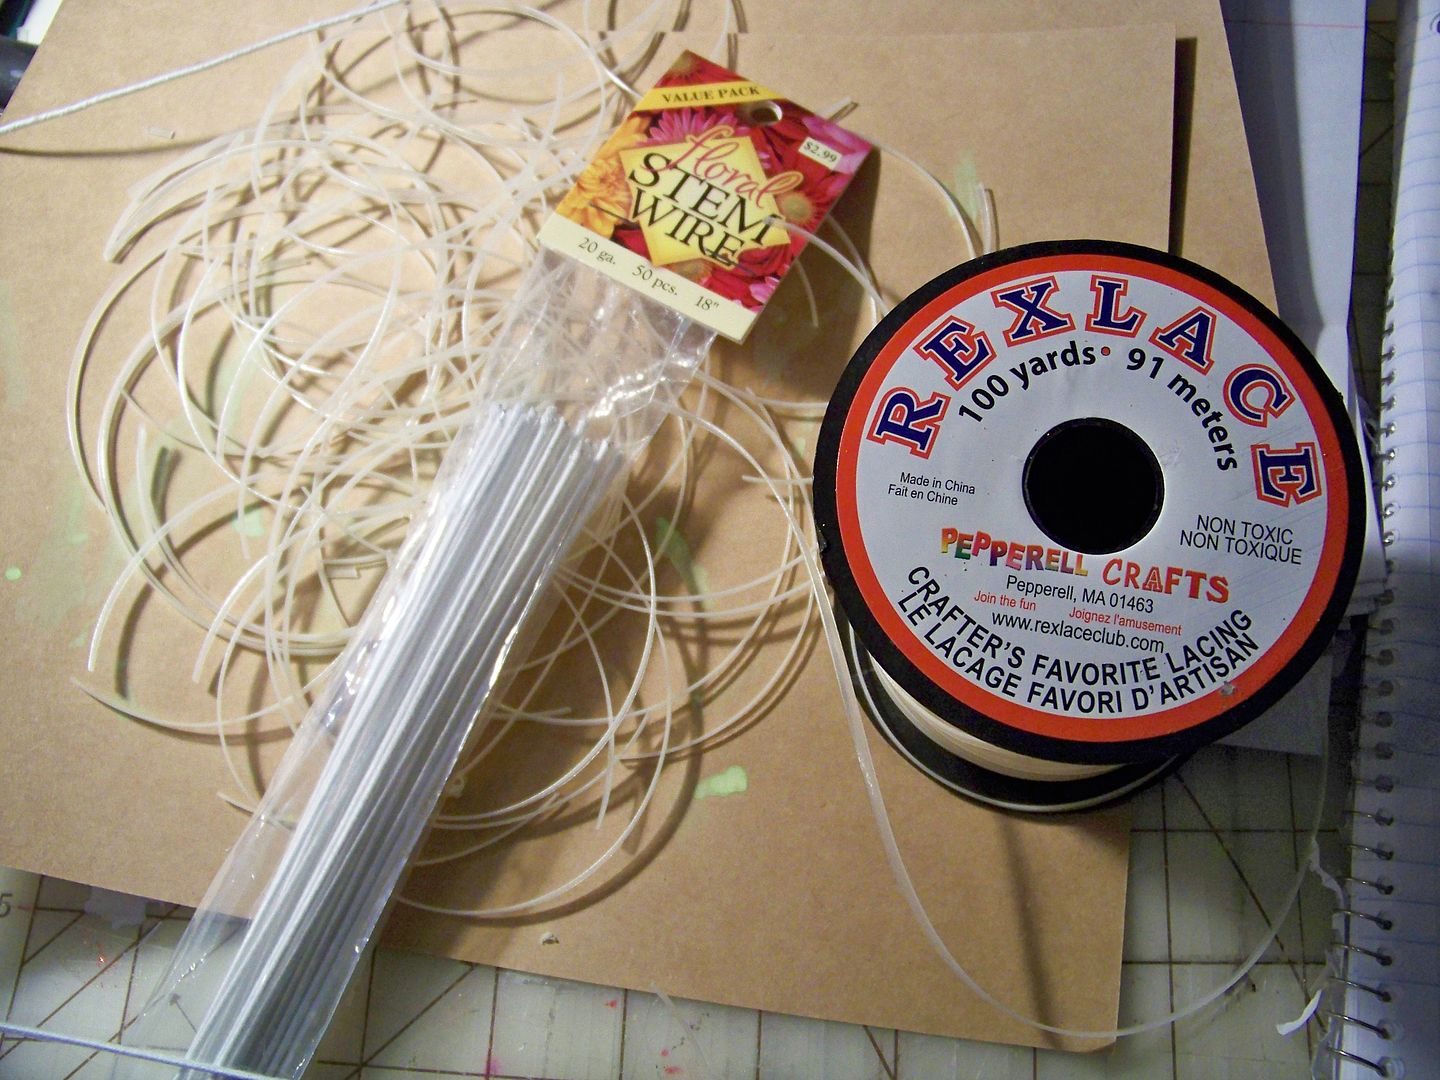
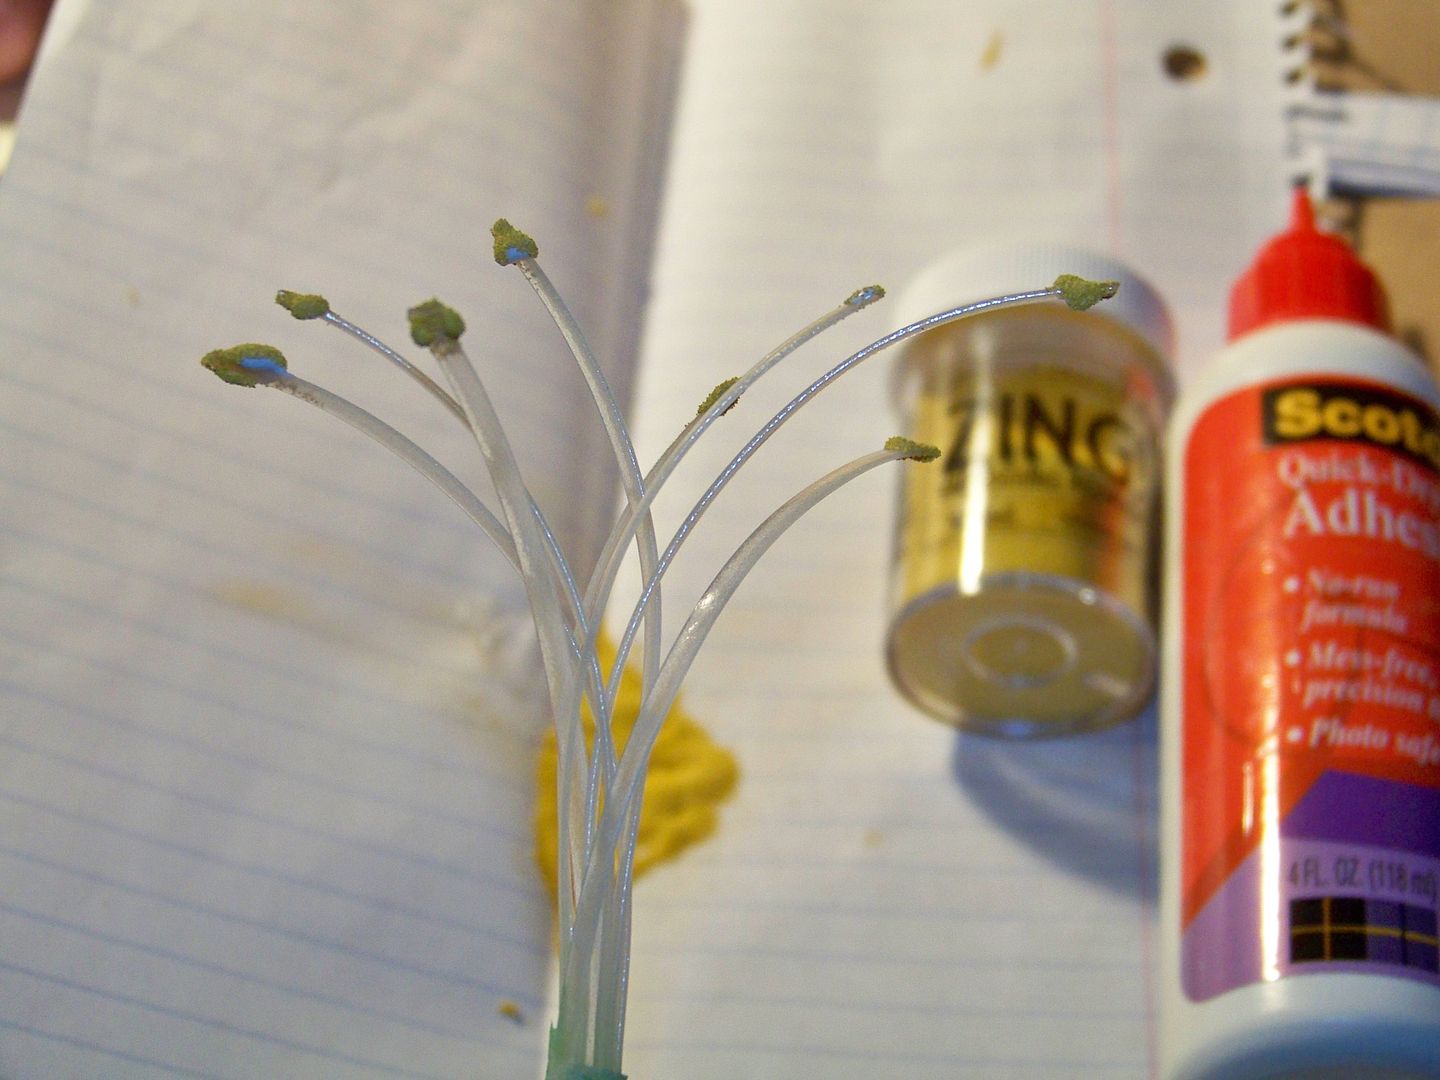
I found white, covered, 20 gauge floral wire at Hobby Lobby in value pack sizes. I bent those in half. I cut 4 pieces of lacing 4" each and placed them in the bent wire so that I would have 8 stamens. I wrapped them with white floral tape to keep them together. (The lacing is glow in the dark-- perfect color in the light, but I wonder what the custodian will think when he walks into the Fellowship Hall and sees the glow at the tables before the lights get flipped on. Hopefully, he will keep my secret!)
The lacing was also from Hobby Lobby and a 100 yard roll is only around $2. 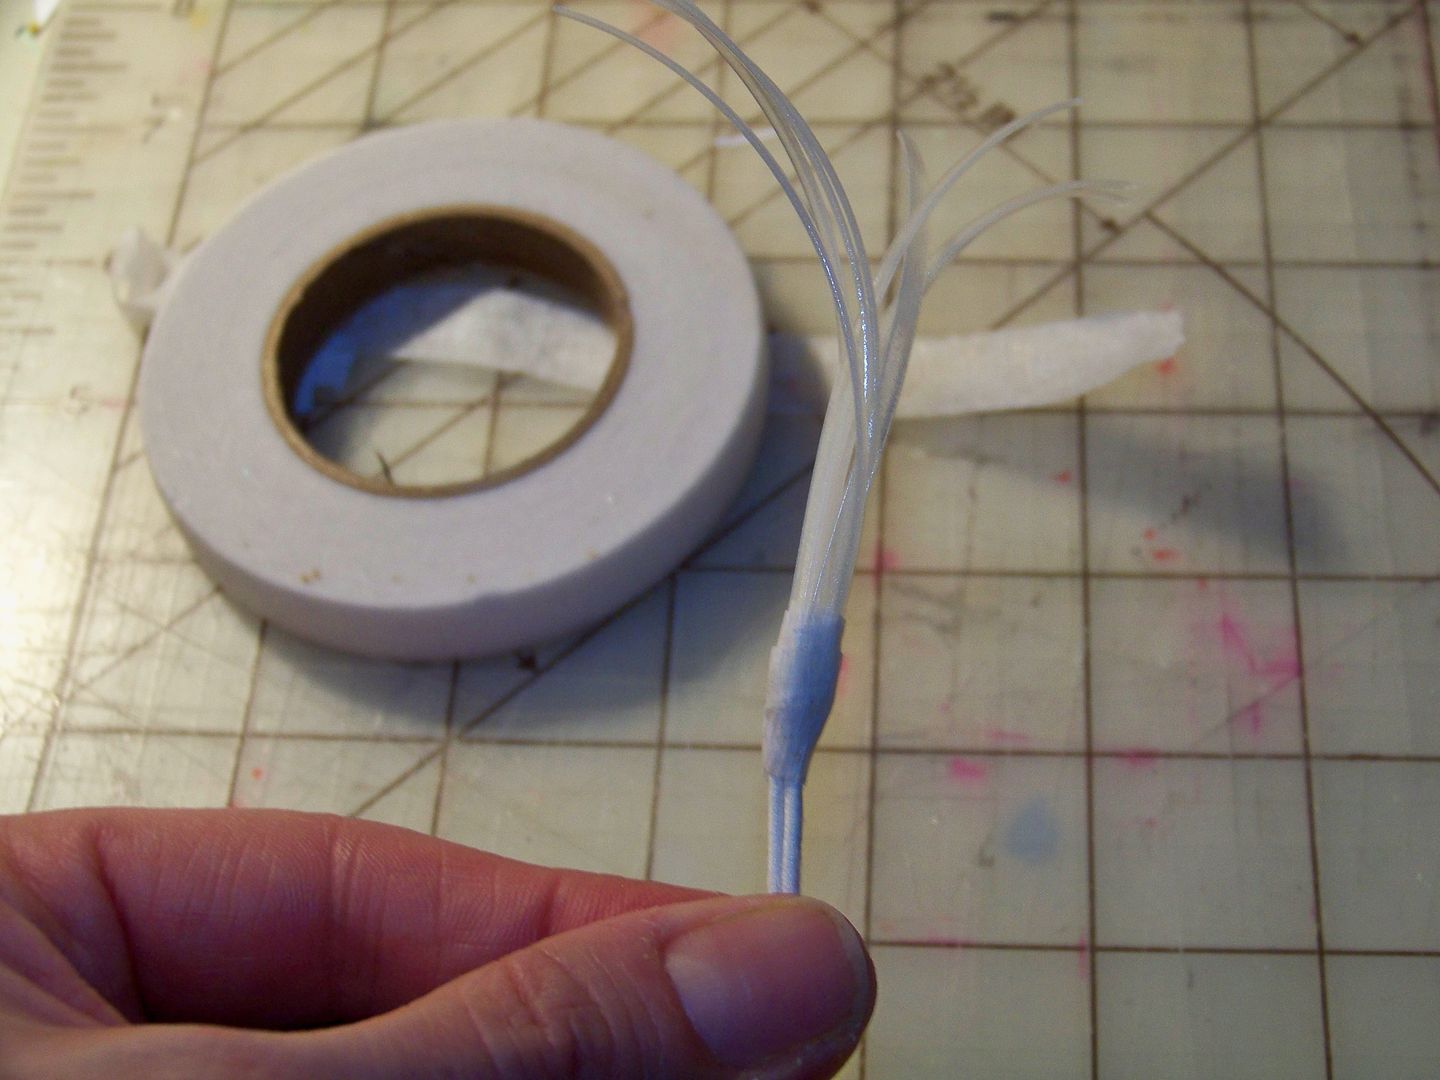
I found that I could dip the tips of the lacing in Scotch Quick Dry Glue and then into Zing embossing powder (color 'mustard') to color the tips.
I used a bit of the watered-down acrylic paint I used for the petals to paint over the floral tape and upper couple of inches of stem. Watercolors will not work to color the floral tape, by the way, but the acrylics do. I used a Styrofoam block to stick the stems in while they dried.

Meanwhile, I collected my petals and cut a snip in the bottom about half-way up the petal.

Then, I hot-glued the bottom edges, overlapping to make the petals 'cup'. This is an idea I saw on Lia's tutorial and had noticed on other flowers from the Giant Flowers cartridge. I used a scissor blade to scrape the back of the petal to make it curl back. I trimmed the bottom after the glue cooled. I used a standard hole punch (the office kind) to punch a little hole in the bottoms of each petal.
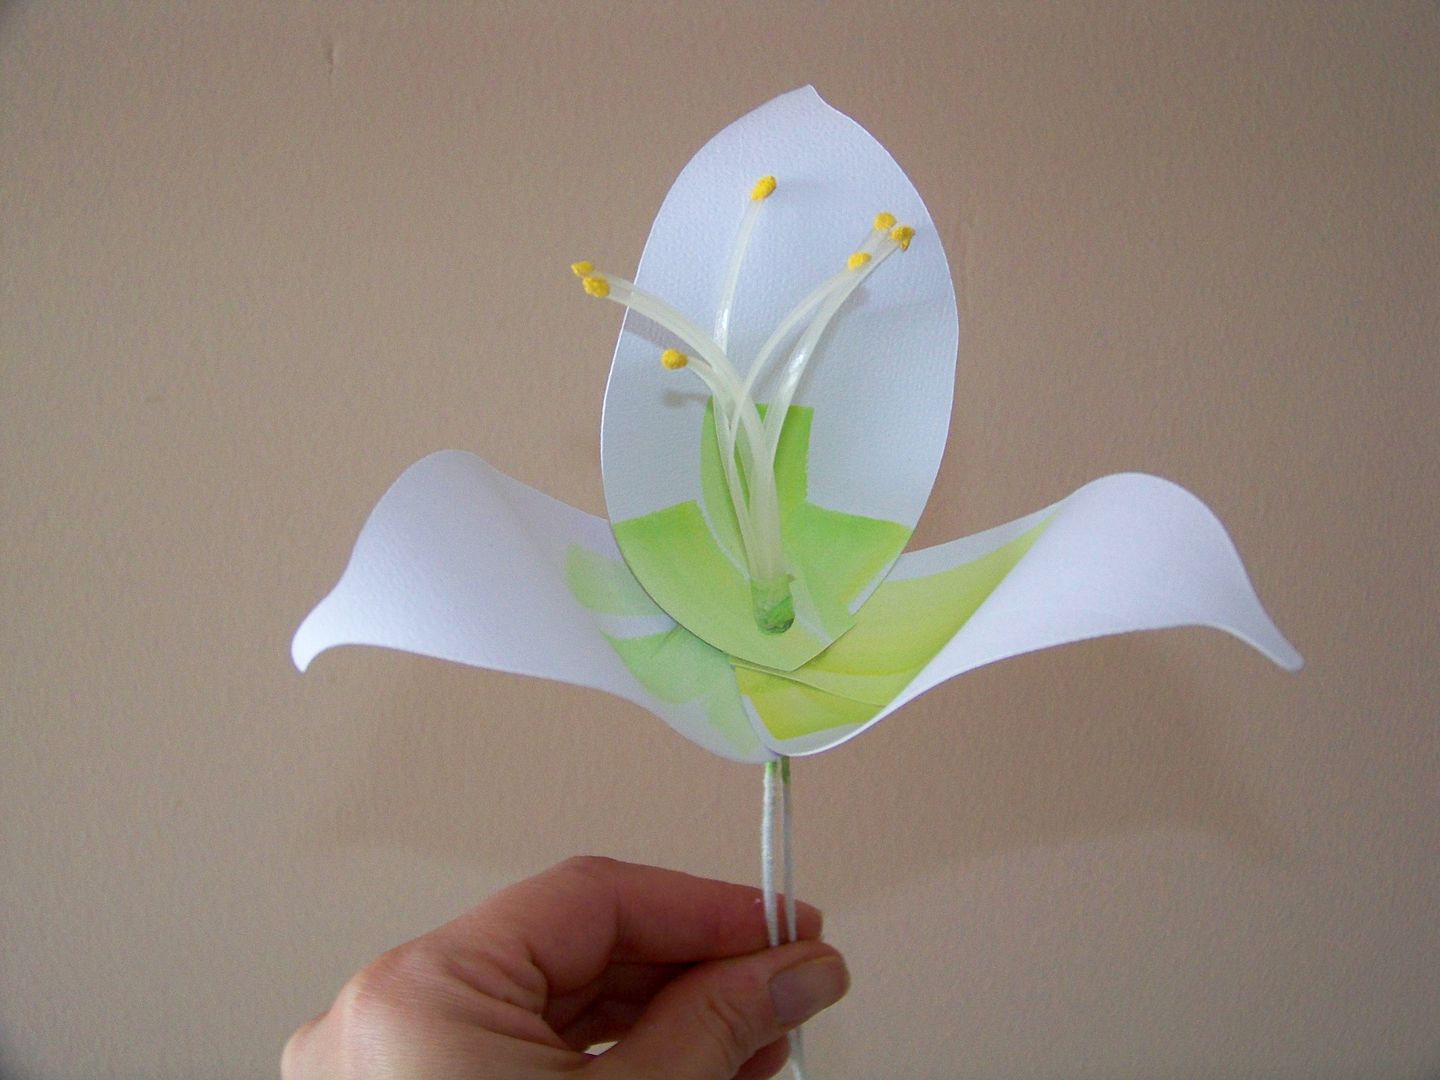
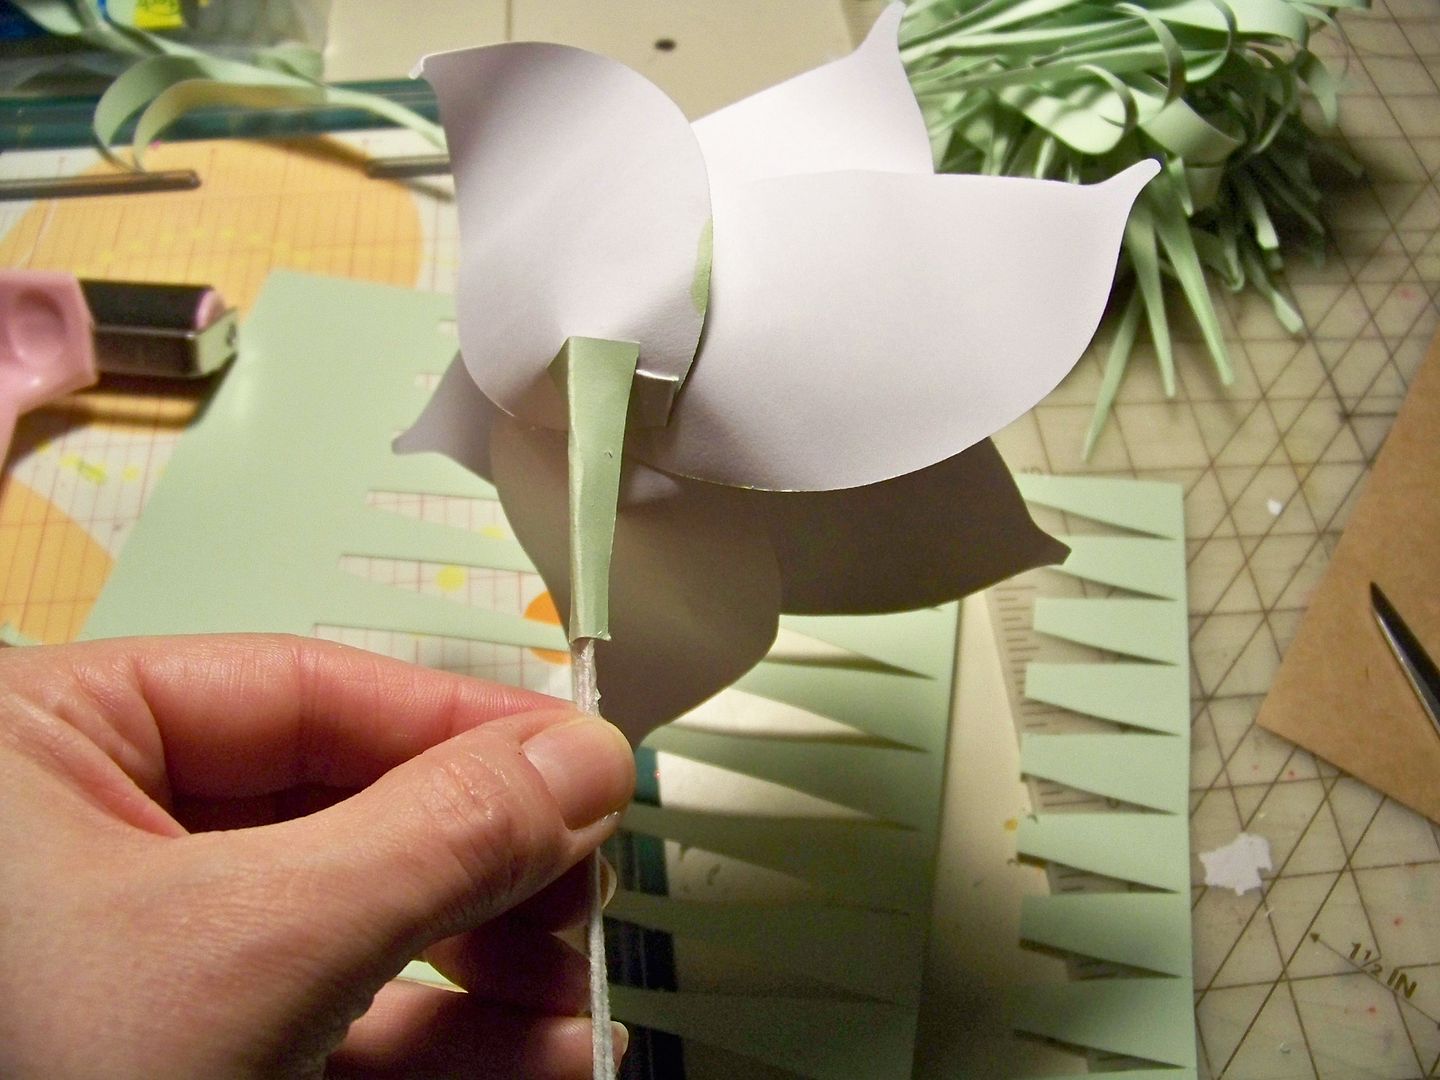
I fitted the first petal in place over the floral tape area. Hot glue won't stick to the tape, so the mere thickness of that tape-covered stem is what holds up that first petal. I hot glued the next three petals to form a triad. The last three petals slip on and get hot glued to fill in the spaces between.
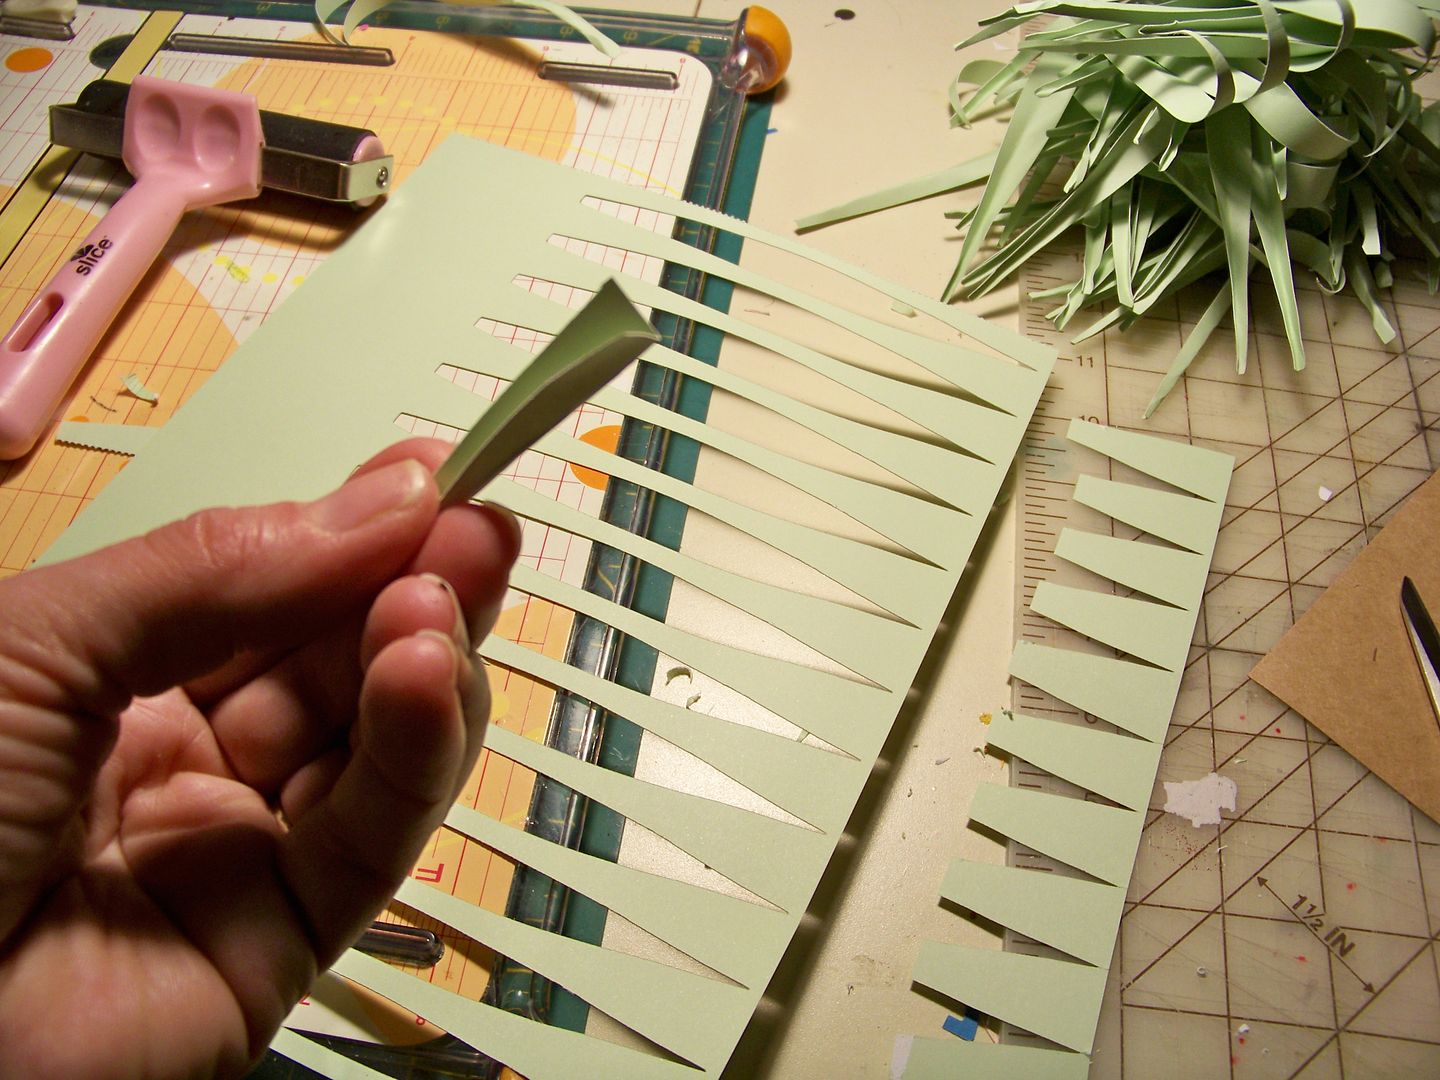
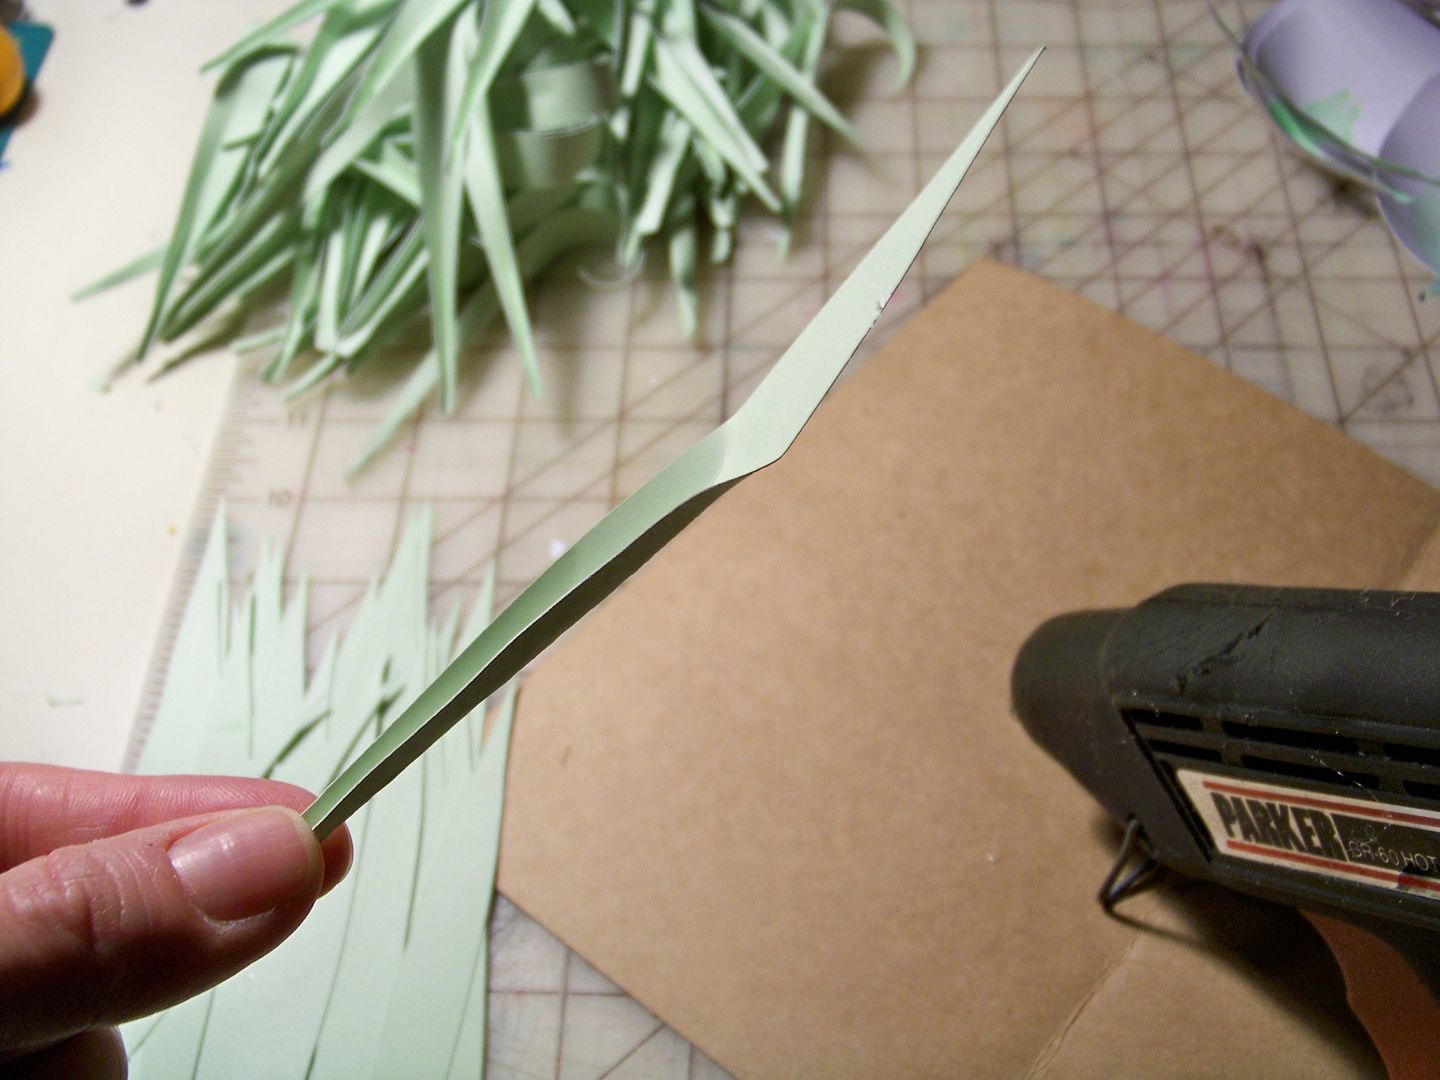
Next, I cut leaves for the stem. I used the same Giant Flowers cartridge, key #10 and also cut at 6". You need 5 leaves for each stem. I used a bit of the scraps from the leaves to cut a 1" (or so) piece of paper to cover over the top of the stem. I bent the bloom over by bending the stem. The scrap covers that. I fold it in half and hot glue it in place.

Next, I use one of the leaves, fold it lengthwise and lay it over the scrap.
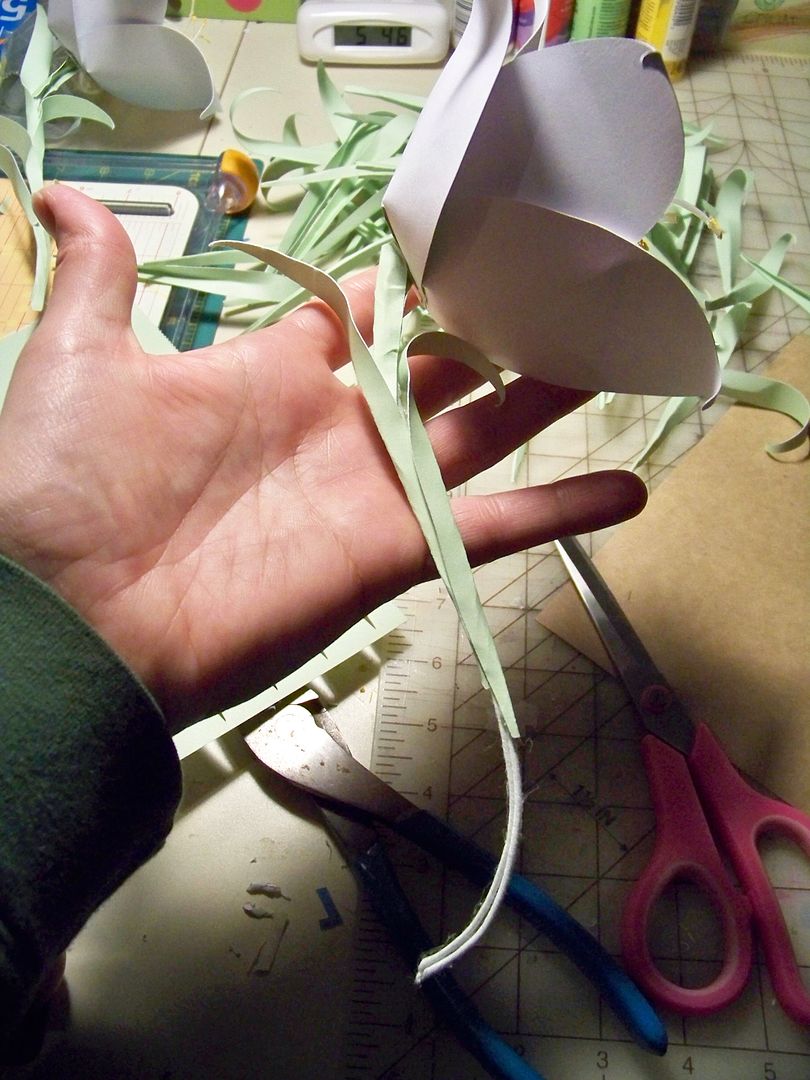
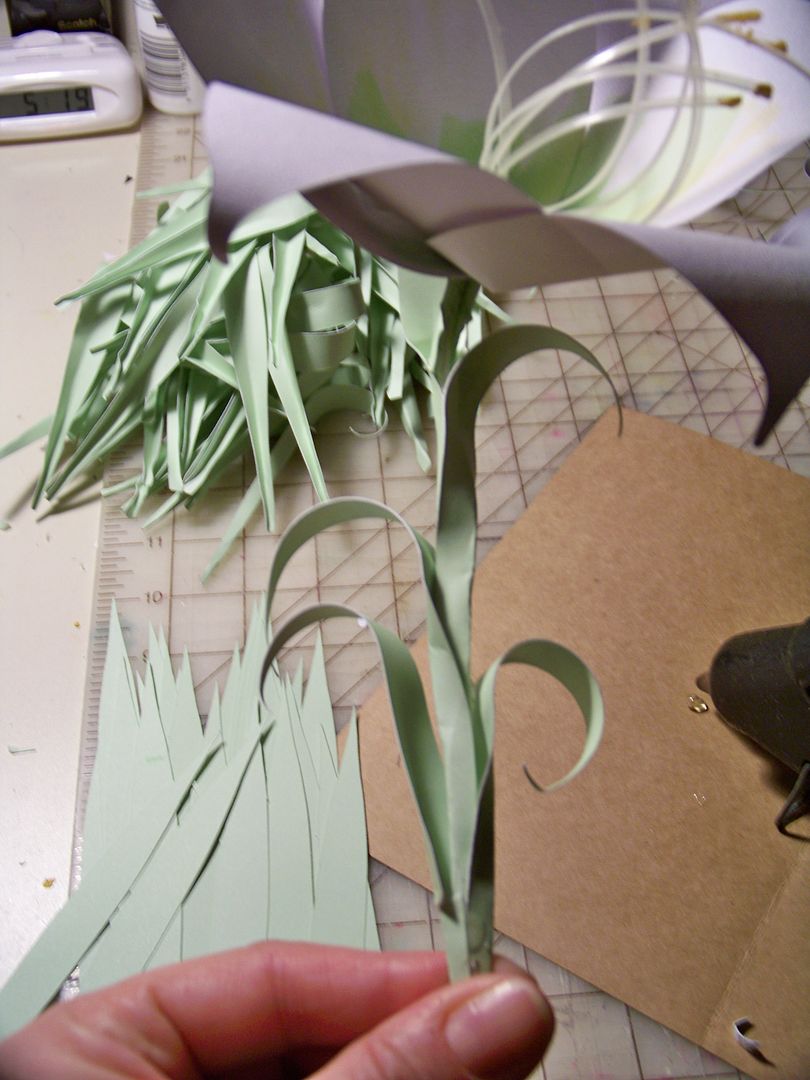
The remaining 4 leaves get curled by scraping over a scissor blade. I fold them and lay them on the stem alternating front and back to cover the wire, hot gluing each one over the previous end.
I made them in batches and eventually moved down to my kitchen table, that I covered in brown paper.
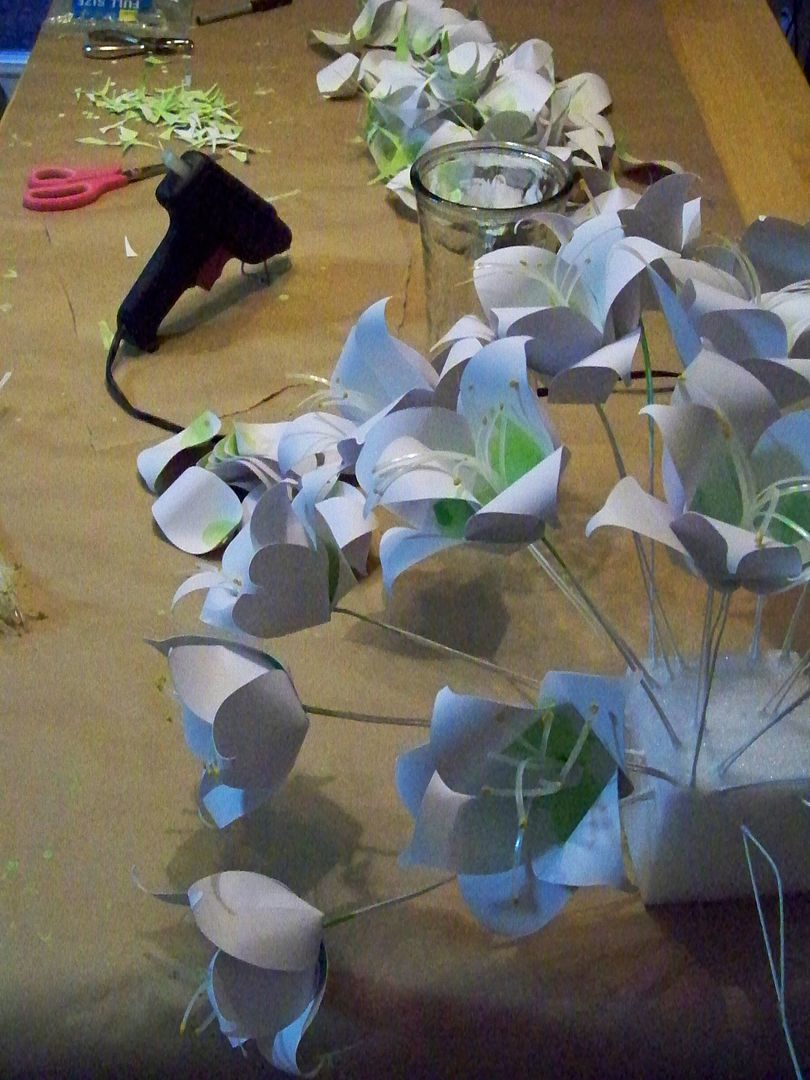
I curved the stems to make them a little more interesting and to stabilize them on the tables.
In the end, I made just over 50 and laid them on the tables in lines of 2, 3, and 4 flowers (depending on the lengths of the tables) arranged bloom-to-bloom and stem-to-stem with candles in between. The wire stems allowed me to tilt the blooms to the left and right and I alternated them.
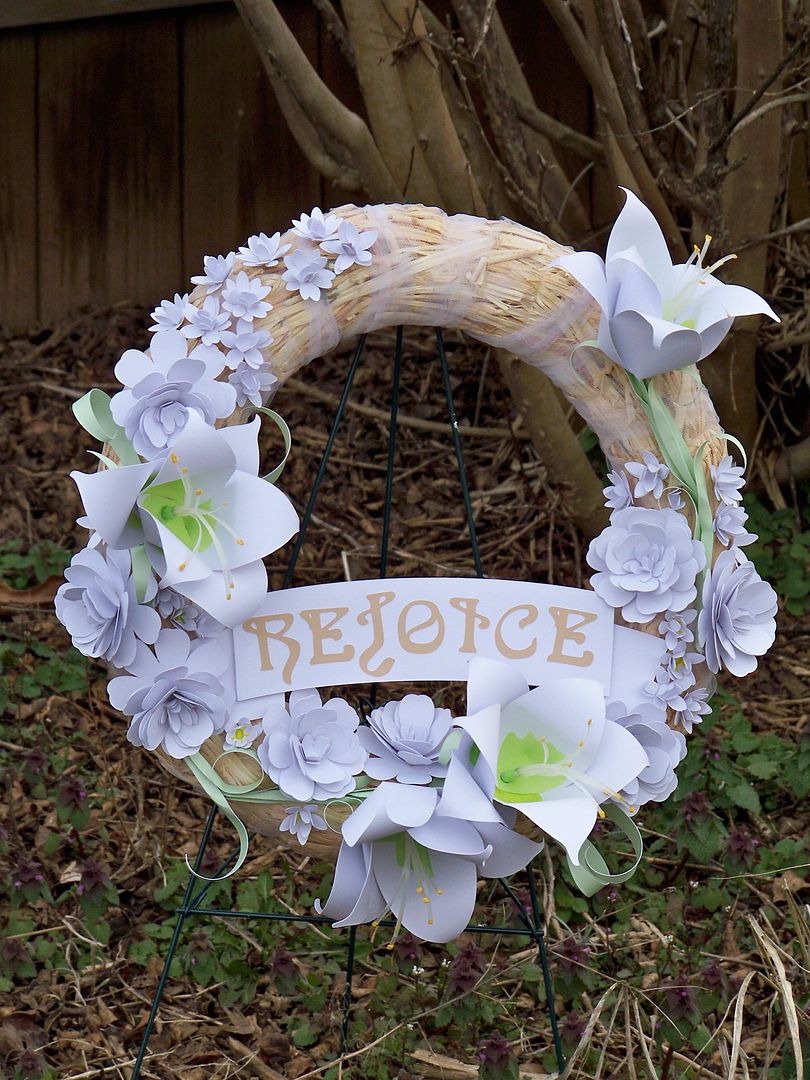
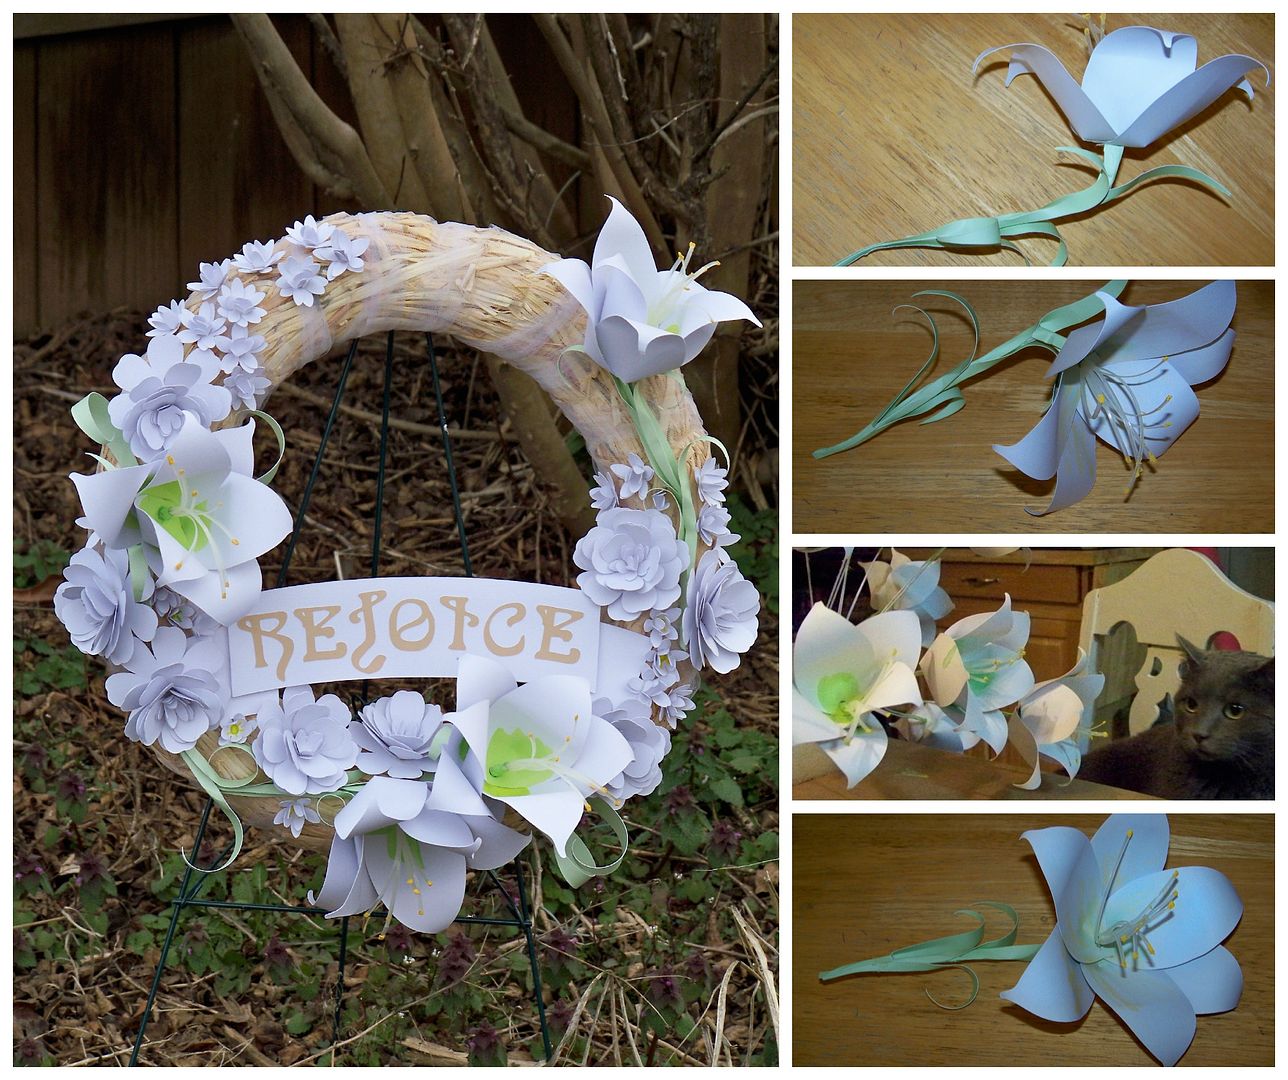
For the buffet table, I made a wreath using four of my lilies. For other flowers, I used Juliana Michael's flower tutorial from the old Cricut Circle when we had the wonderful, inspiring Design Team (the good ole days). She used the Mother's Day Bouquet cartridge. The larger flowers were cut at 2-1/4" with key #8. The centers were cut at 1-1/4" with key #27. I used the centers only for the small flowers on my wreath, making just as Juliana instructed, but by themselves. You can find her tutorial on YouTube since the Circle Blog is dead now (click here).
The text "REJOICE" was cut from Art Nouveau at 1-1/4". (OK, I admit it, the J is backwards in this photo. If you didn't notice, I just love you. If you did notice, I love you for not mentioning it! I am hoping to sneak back to the room to fix it before anyone notices...) The banner was cut from the Holiday Frames and Tags cartridge at 'fit to page' (I think that was around 3-1/2".) I found an inexpensive straw wreath from Walmart, removed the plastic wrapper and wrapped it in 6" wide tulle (to enclose that straw and to dress the surface up a bit). I hot glued the flowers and banner in place. Two of my lilies were attached with stems. The other two were snipped so that the stem was not visible or only 3" or so was visible. I added a few extra leaves that I curled.
Next time, I am covering my fingers in band-aids before I even start... I might have prevented the burns I got from the hot glue... and they ended up bandaged any way. Yikes!
Quick links:
- Scrap N Grow - Michelle Nun's blog which features "Paperie in Bloom," a monthly flower that she creates in paper that looks stunningly like a real flower!
- Watercolor Paper Lily tutorial - Lia Griffith's post on The Elli Blog.
- Juliana Michael's paper flower video tutorial
Thank you for checking my blog post today! I hope that you are having a meaningful Holy Week!
17 comments:
WOW!!! These are gorgeous!!!
You are so amazing! This is just gorgeous and your photo tutorial is incredible! LOVE, LOVE, LOVE this! And, by the way, I didn't see anything wrong with the "J" - looks fabulous to me!! Love you and all you do! Hugs, Joy
Amazing lilies Nadia! You took on a huge task in only a 2 week time frame. Thank you for the shout out and link. PS. I used my Gypsy to weld the shapes and not CCR. I have never yet successfully even logged into CCR. I love your inventive idea for the stamens. They turned out amazing!!!!!!!! Awesome job girl.
Great job! Tulip Lillies are the best.
Wow! This is gorgeous!!!! What a beautiful Easter decoration!!! I will bet you are now officially "stuck" with decorating forever!!!!! :)
Glorious! In all aspects! I hope your Holy Week has been meaningful as well.
These are amazing and you are amazing, but, then, I already knew that about you. If I didn't know better I'd think you were adopted.
Oh my goodness! These are just stunning flowers Nadia! I love all the different elements you included from other amazing paper artists and then adding your own special touches make these truly fabulous! The wreath is gorgeous and I was one of those that didn't notice the letter J!
Well, this is gorgeous. I love your flowers and I can't believe you made so many. Would love to see them glowing in the dark. The J looked fine to me too.
I've been waiting! These are gorgeous indeed and well worth the proverbial wait...but I am afraid you will be stuck with the decorating position, lol! Nadia, I love them and miss the way the circle designers spoiled us so. I feel spoiled again by your pos, though! Hugs!
The flowers look absolutely stunning, Nadia! I love how you did the stamens - thanks for the tutorial.
Love, love, love your flowers ... you always make the most amazing things!! Thanks for sharing.
Jo xx
Absolutely beautiful. That's a lot of love in those flowers. Happy Easter
Maureen
thank you for sharing the process. the lilies and the wreath look amazing!!! I will tuck these ideas away for next year, since i might be able to complete prior to easter and my mom and sister could get some flowers that i wouldn't kill. i hope you and yours are having a wonderful easter. hugs for all you do and share, susan
You did an absolutely stunning job on this project Nadia and it's wonderful that you shared with us the techniques you used (especially the tip about protecting your fingers)! I'm sure everything was beautiful in the Fellowship Hall and no one but you noticed the J. ;-) I hope you had a blessed Easter!
Stunning wreath. TFS the great tutorial.
Happy Easter
Have a great day.
Hugs Nana
♥ My Crafting Channel ♥
♥ 2 Creative Chicks ♥
Beautiful wreath! I'm thinking you will be asked a lot more often now. : D
Post a Comment