
Happy December! Shopping is almost done here, Journal Your Christmas is in full swing, and gift wrapping is getting pretty out-of-hand! My
last post was all about using 3D files and the writing feature on the Cricut Explore to make dimensional tags. I have been having so much fun with my gift wraps that I wanted to share a few more of them! Links to SVG files and any other info on each is captioned with the photos, for anyone wanting to make any of them. Apologies for this abbreviated style of blogging today; so many things still to do to get ready for the up-coming week and on-going Christmas activities!
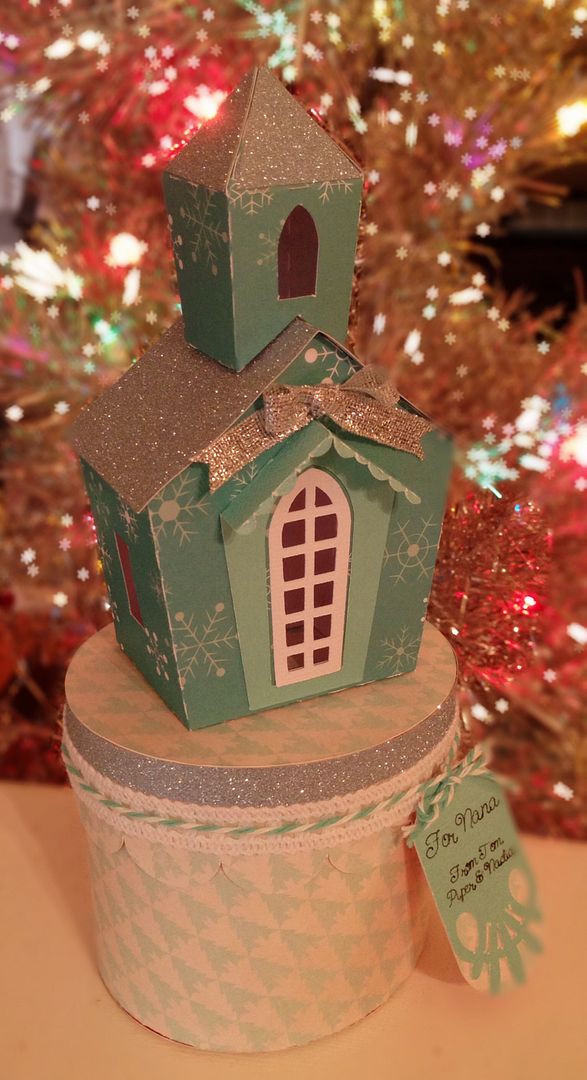 |
| This is an SVG that can be found by clicking here. This is one of my favorite svg collections in the SVGcuts library! Everything in this file has been so simple to put together! The tag is from Cricut Picturesque. I used the Explore to write on the tag using a Pilot Precise V5 pen. |
 |
| This is an svg from Snapdragon Snippets. It can be found by clicking here. This was the first time that I had used a file from this company or this designer (Crafty SVG Designs). I will tell you that it was a bit of a challenge. There was a link to a tutorial, but it was not specific to this design, just to one in this same general style and the svg had no sizing info. This is what I did to get this size: while keeping it grouped, I pulled it to size until the inside window was 4". I had the grid lines turned on in Design Space to do this. Then I ungrouped it and highlighted each piece with scoring and clicked 'Attach.' Note that the large box back and sides are scored by use of dashed lines. I kept it just like that so that the score marks would be cut. The small inserts with single ballerinas have one long, continuous score line on each side. I changed those to "score" in Design Space and used the score tool. (Not changing it will make your machine cut the tabs right off!) Next, I copied the single leotard and tutu and pasted it for all the ballerinas. Note that the ballerinas are not all the same size. I zoomed in and pulled the costumes over to the dancers and adjusted as needed to make the costumes larger to fit. I think I had to do that for two of them. I changed the color of the costumes so that DS would put them on separate mats since I wanted them cut from glitter paper. Because my pale pink paper was 8.5x11 instead of 12x12, I changed the colors on some of the cuts so that they would pull to three different mats (one for single dancers, one for two internal tabbed layers, and the third for the final tabbed layer). Despite it all, I was pleased with this and would make it again. This is actually a box card, so I did add a strip that was placed on the bottom, perpendicular to the layers. This locked the shadow box in place and gave me a surface to glue to the package. |

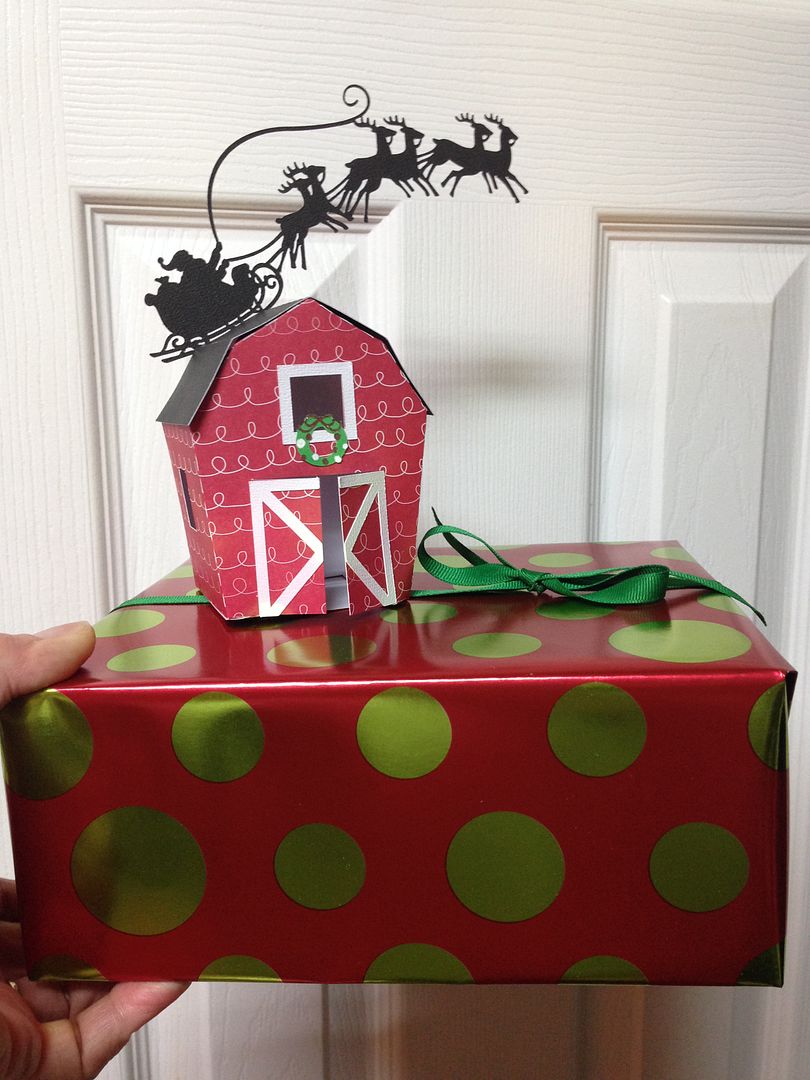 |
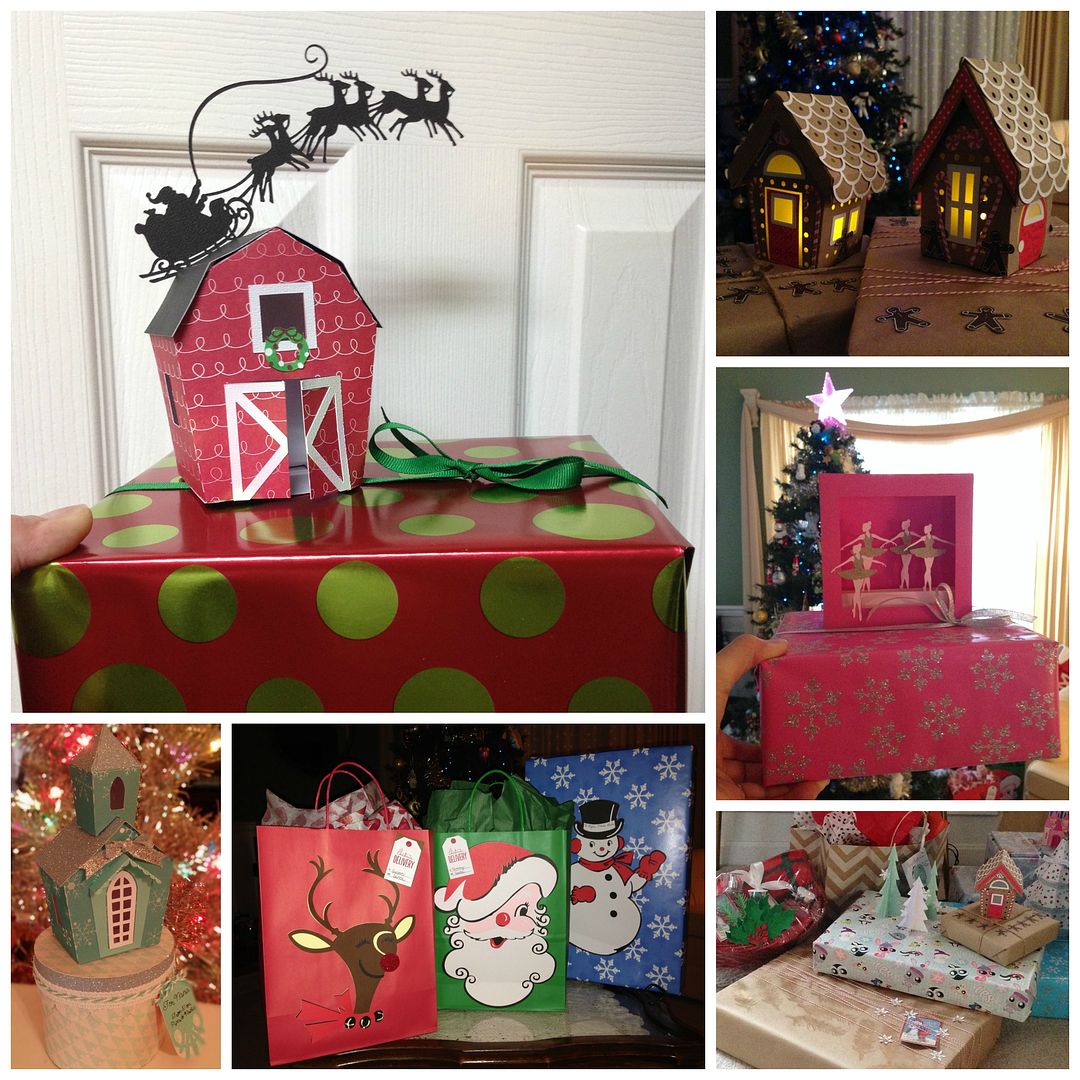
| The barn is an SVG that can be found by clicking here. This is from the same SVGcuts collection as the church box above! This time, instead of cutting the box from the file, I used the optional bottom piece and made it like a little 3D stand-alone building. This gave me a surface to glue onto my package. The wreath is from Cricut Paper Trimmings but a quick search in DS for "wreath" will afford you many, many options. I sized it by dragging the wreath over the barn front in DS and used the handlebar to size it appropriately. I hid all layers except for the wreath base and just drew them in since the cut was so tiny. The cut with Santa and flying reindeer was from Cricut Christmas. I hid the moon layers. I simply glued the bottom rail of the sleigh to the barn roof from the back. Super fast to put together! |
 |
| These are all from Cricut Christmas Kitsch. I actually cut these in my Expression. I just used the Fit to Page feature and cut these. I think they were each 11.5 in height. |
 |
| I featured the first light-up gingerbread house I did in my last post, but they are so cute that soon I will have a settlement of these under the tree. There are three house designs in this SVGcuts collection. To see info on this file, click here. |
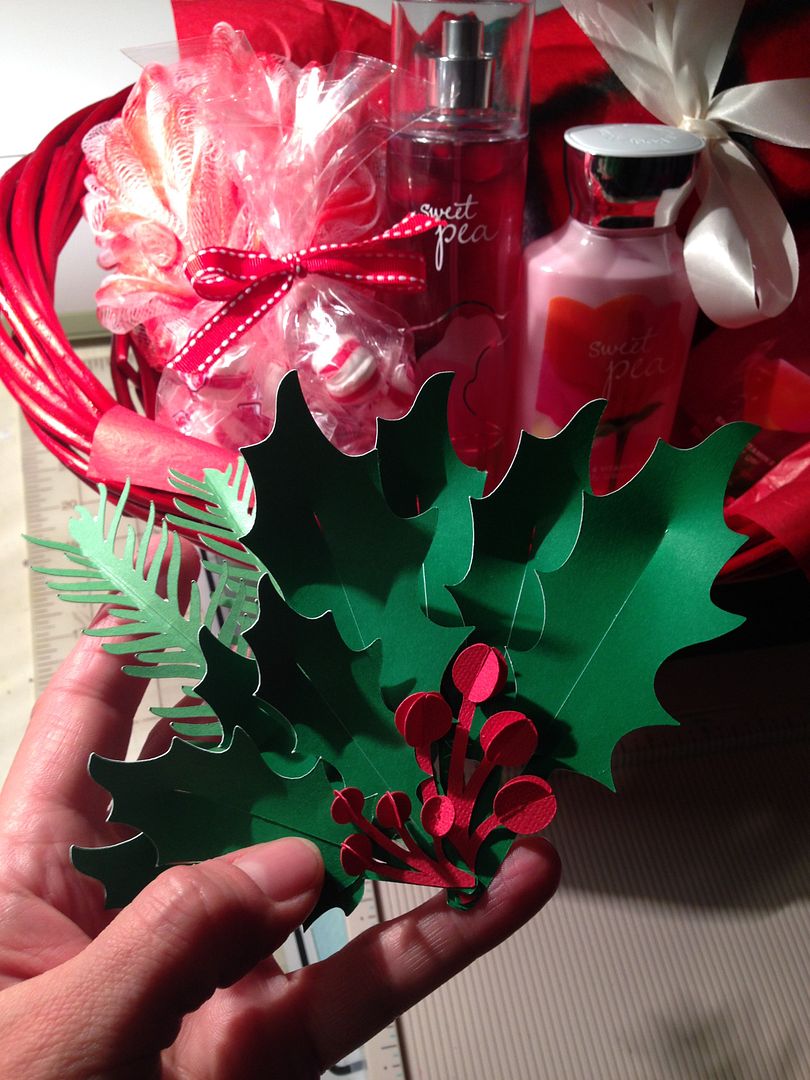 |
| For all of my gift baskets, I am making dimensional holly from Cricut 3D Floral Home Decor. There are a few holly designs. I have been putting together two sizes and combining with the paper fir twig. After I heat wrap my baskets, I have been adhering the holly with pop dots on the outside with a tag. |
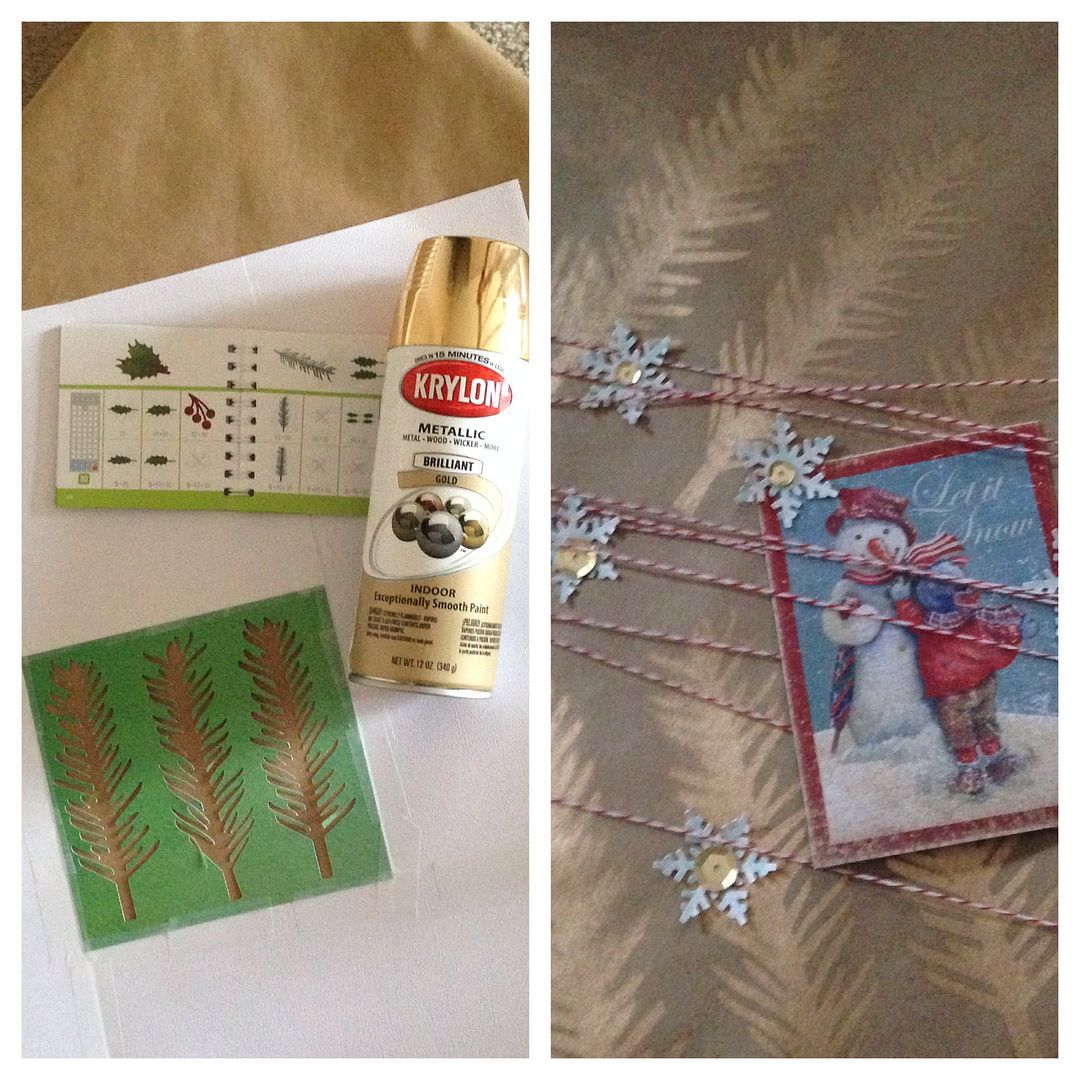 |
| With all of those fir branches I have been cutting, the negative space has started looking beautiful to me. I started using them as a stencil. Gold Krylon spray paint has been fun to use with the stencils on brown paper. These simple wrappings have been really fun to make. My 10-year-old daughter told me these were some of her favorite packages. |
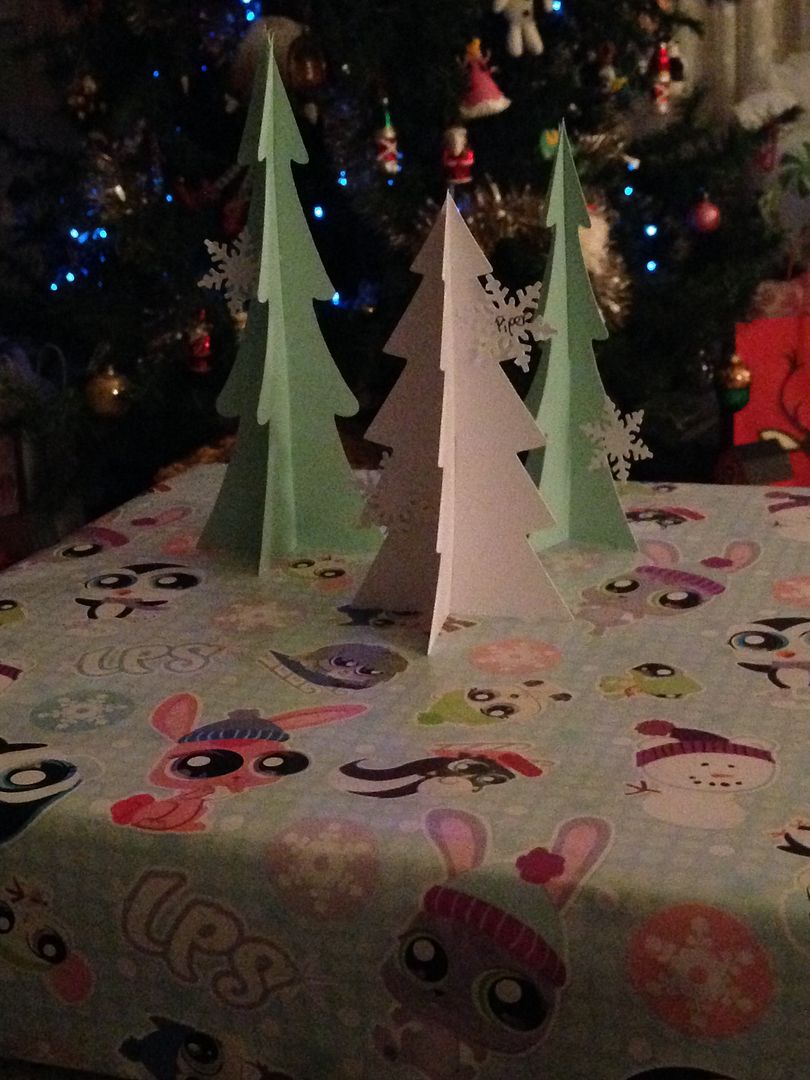 |
| These are the simplest of all 3D embellies! These are trees from the Cricut cartridge, Winter Woodland, cut at 5.5" and 6" tall on my Expression. The snowflakes are from a Martha Stewart punch. |
 |
| These are all packages from my last post. For details about any of them, check them out by clicking here. |
Quick Links and Notes:
- Church Box -- click here
- Ballet Box -- click here
- Barn Box -- click here (Santa is from Cricut cart Christmas)
- Gingerbread Boxes -- click here
- Santa, Snowman, and Rudolph bags designs -- Cricut cart called Christmas Kitsch
- 3D Holly and Fir Twig -- Cricut cart called 3D Floral Home Decor
- 3D Trees -- Cricut cart called Winter Woodland

4 comments:
These are gorgeous Nadia!All your gifts are going to look amazing under the Christmas tree!
Michelle
www.michellenun.com
These are beautiful. What a great idea, a gift with on a gift.
Such a fun idea! Love the camera with the photos inside.
Beautiful! Where can I find the sleigh?
Post a Comment