I am busily crafting in preparation for the Circle Crop in Mason, Ohio, that is fast approaching! It is the Roadtrip from CHA for the Provocraft folks so that is the theme of the event. One fun thing we are doing is a magnet swap. I just finished mine and wanted to share them with you.
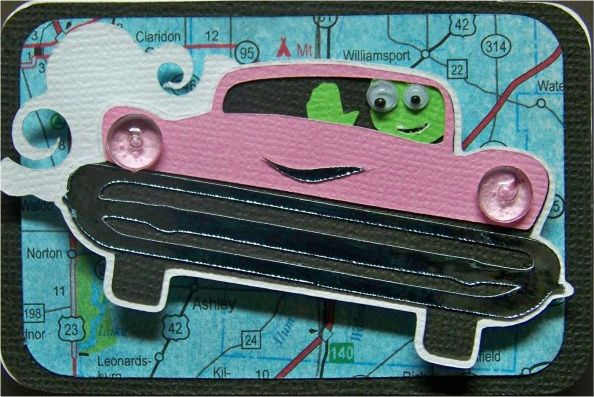
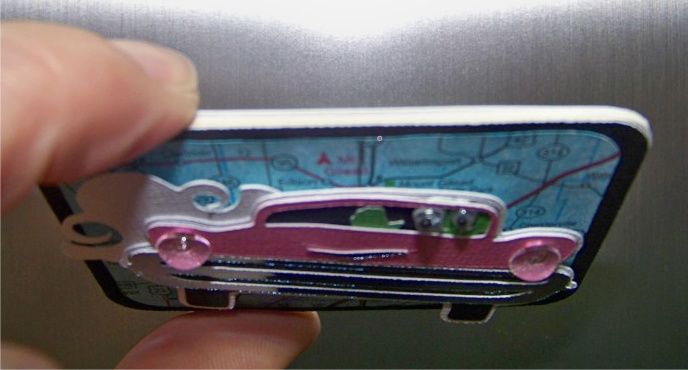
When I think of 'road trip', I think nostalgia. That is because when I was a kid, we called them 'vacations' and now I call them 'traveling for work' but I remember my grandparents referring to 'road trips' so I immediately get a picture of the 50s in my mind! I decided to run with that and use the car icon on Nifty Fifties. I copied the concept from a card I made last year. You can see that post by clicking
here.
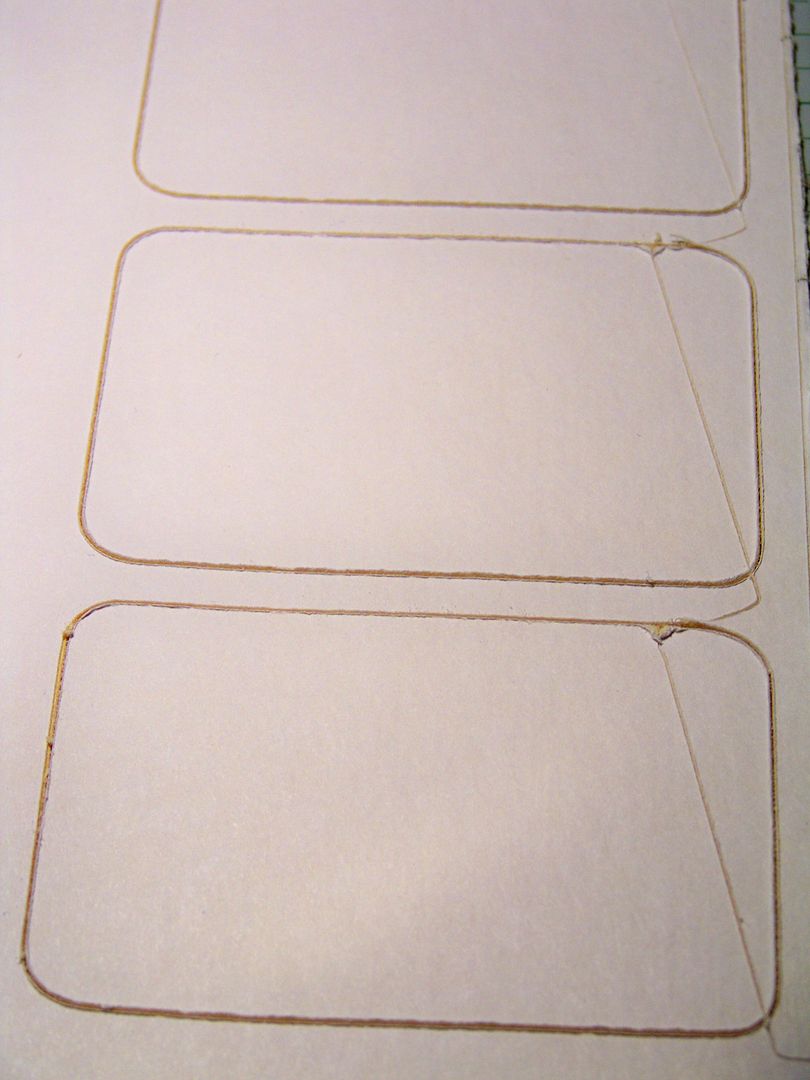
I decided on a rectangular shape, using the George cartridge on page 112, cut at 3".
I knew I wanted my finished magnet to be very sturdy. I decided on magnetic discs for the backs (instead of sheets of adhesive magnetic material) and wanted the base to be strong enough to be handled as it gets pulled on and off of a magnetic board or fridge. I used an artist board that I found at Hobby Lobby with the drafting supplies. It was #918 and such a wonderful learning experience; I found something too thick and hard to cut properly on the Expression! I got out my deep-cut housing and blade, I used multicut 4... still too thick. I found that a new (very sticky mat) was a true requirement! I learned that the high pressure setting does not work with the deep blade! I used a new blade for this project. I did find that it did a better job of cutting when each shape was cut individually, not with autofill. Autofill caused the blade to drag and mar the surface.
I also found that the machine handled it better on the sides. Middle cuts were especially poor, and the machine often could not duplicate the cut for the multicut process when cut in the middle of the mat.
Multi-cut 4 did not cut all the way through the material, but I knew I was testing my Expression and didn't actually need the backing for this project, so I was happy to peel away the majority of the cut, leaving the backing behind.
A thinner chipboard would have been a better choice, but I was happy with the core that I now had to use! I cut a backing for my project out of white cardstock using the same cut and size from the Geoge cartridge and applied it with double-sided tape with my ATG.
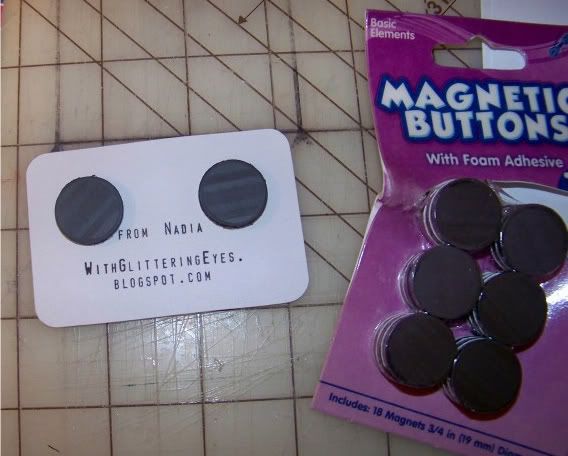
I bought one of those 'create-your-own-stamp' kits at Walmart to put my name and blog address on the back of the magnets. Although I usually print this kind of info on my computer, I thought this would have an old-fashioned look. It was super-easy and kind of fun.
Using that same cut/size/cart/machine again, I cut a front from black cardstock, applying it in the same way as the back, with ATG tape.
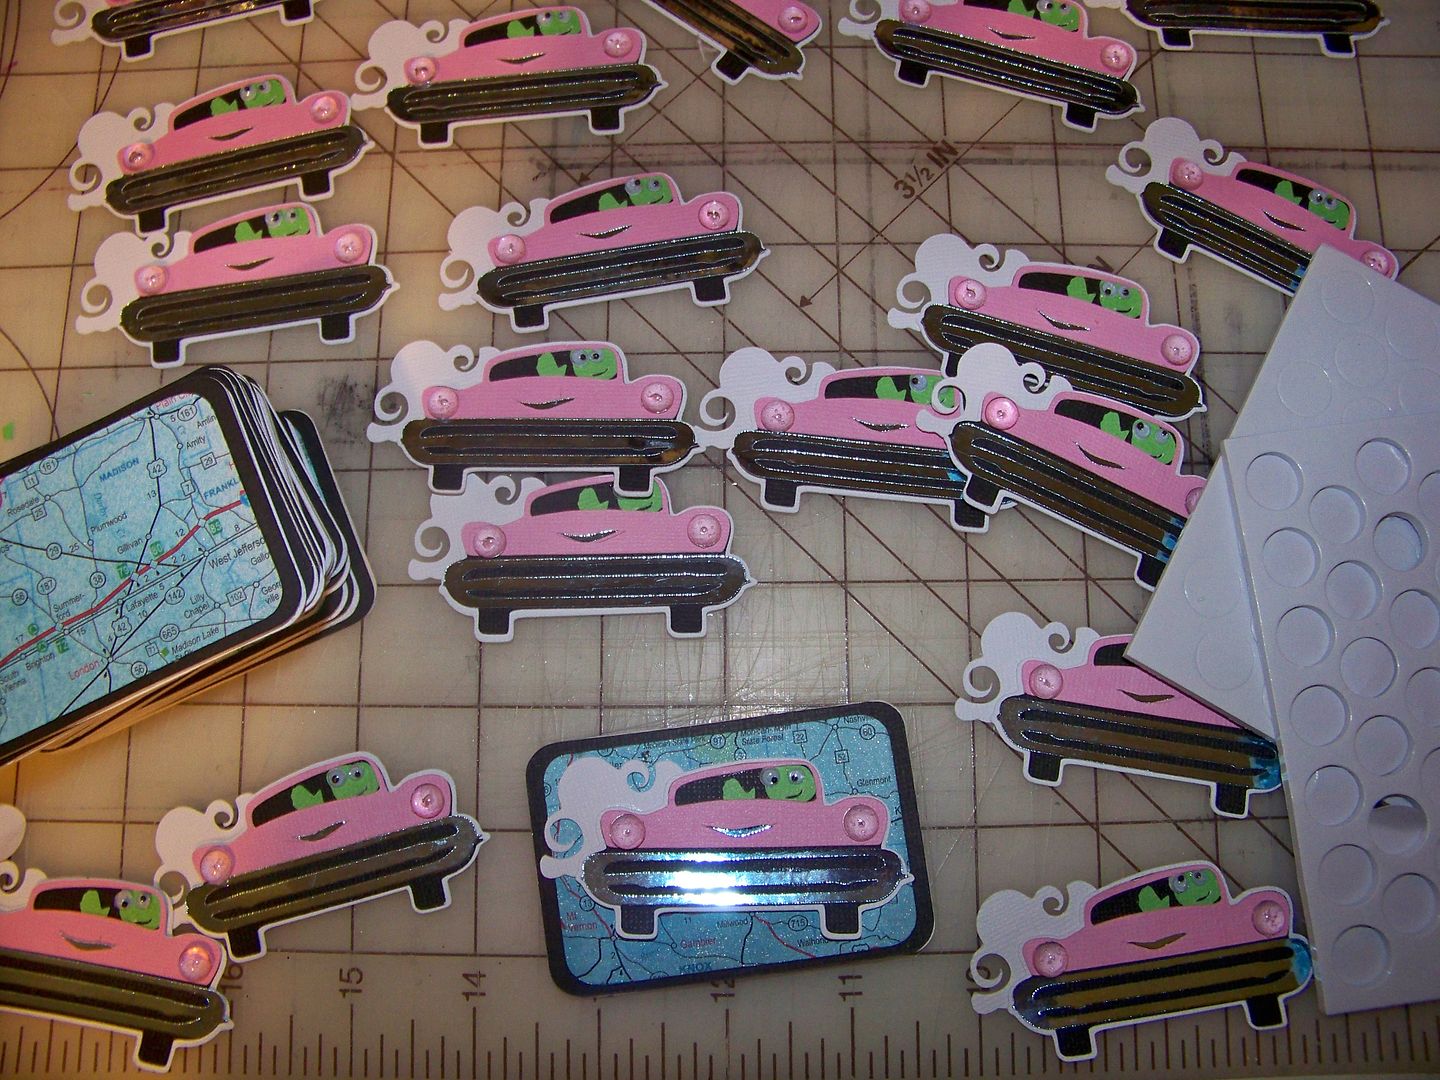
I wanted a blue background for my car image like my original card had, but I also wanted a map to emphasize the road trip theme, so I picked up a couple of maps at AAA, cut them on my Expression machine (same shape on George but cut at 2-3/4"), and spritzed them with Tattered Angels Glimmer Mist in Electric Blue. This makes a sunny blue that I really like. I over-saturated the papers to get a nice overall color.
I attached these over the black, leaving a border.
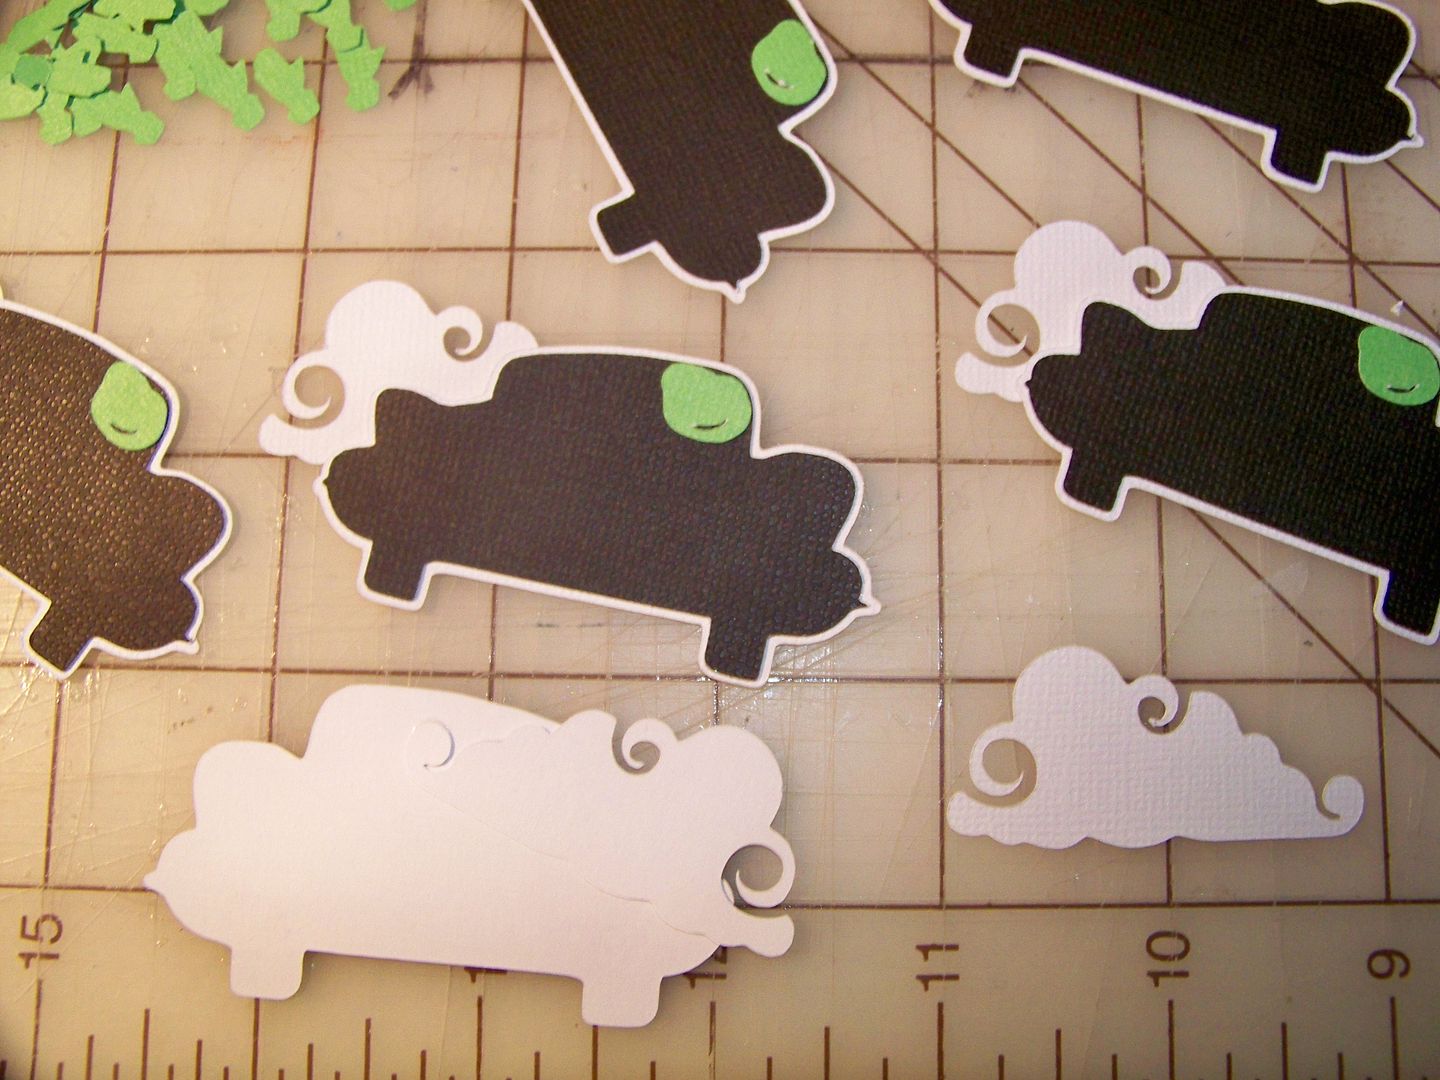
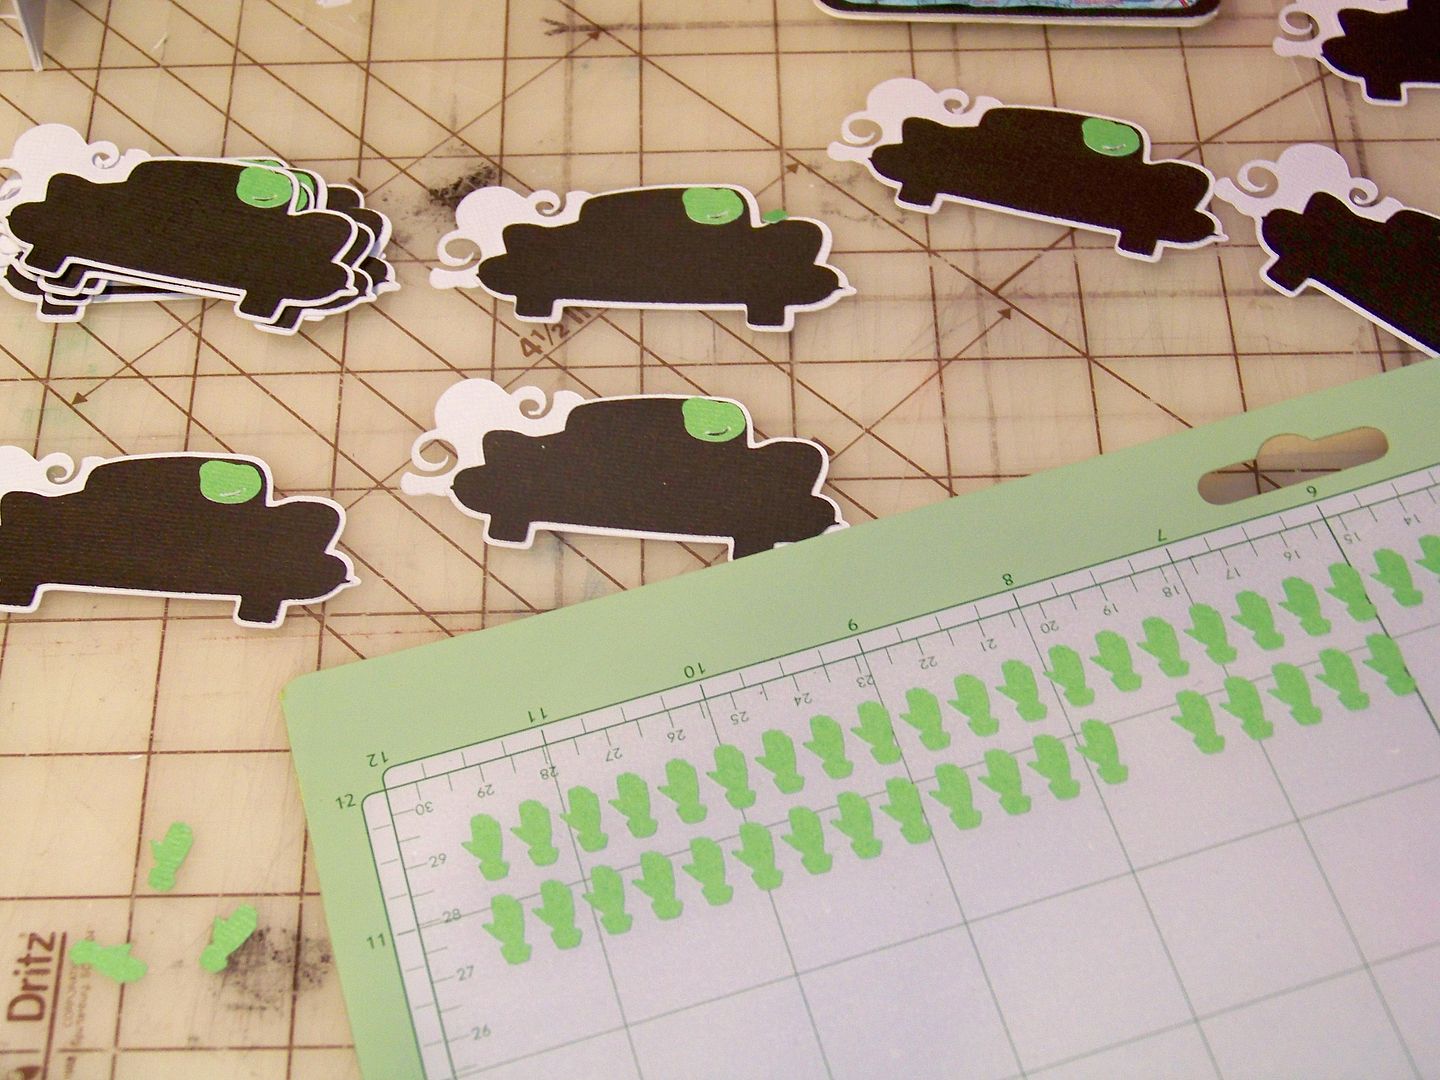
My car was cut from Nifty Fifites on my Imagine at 1.4". I omited the windshield and headlight layers to simplifiy it since it was cut so small. I used colored cardstock. I created a plume of smoke by cutting a cloud from Serenade at 1" on the Expression.
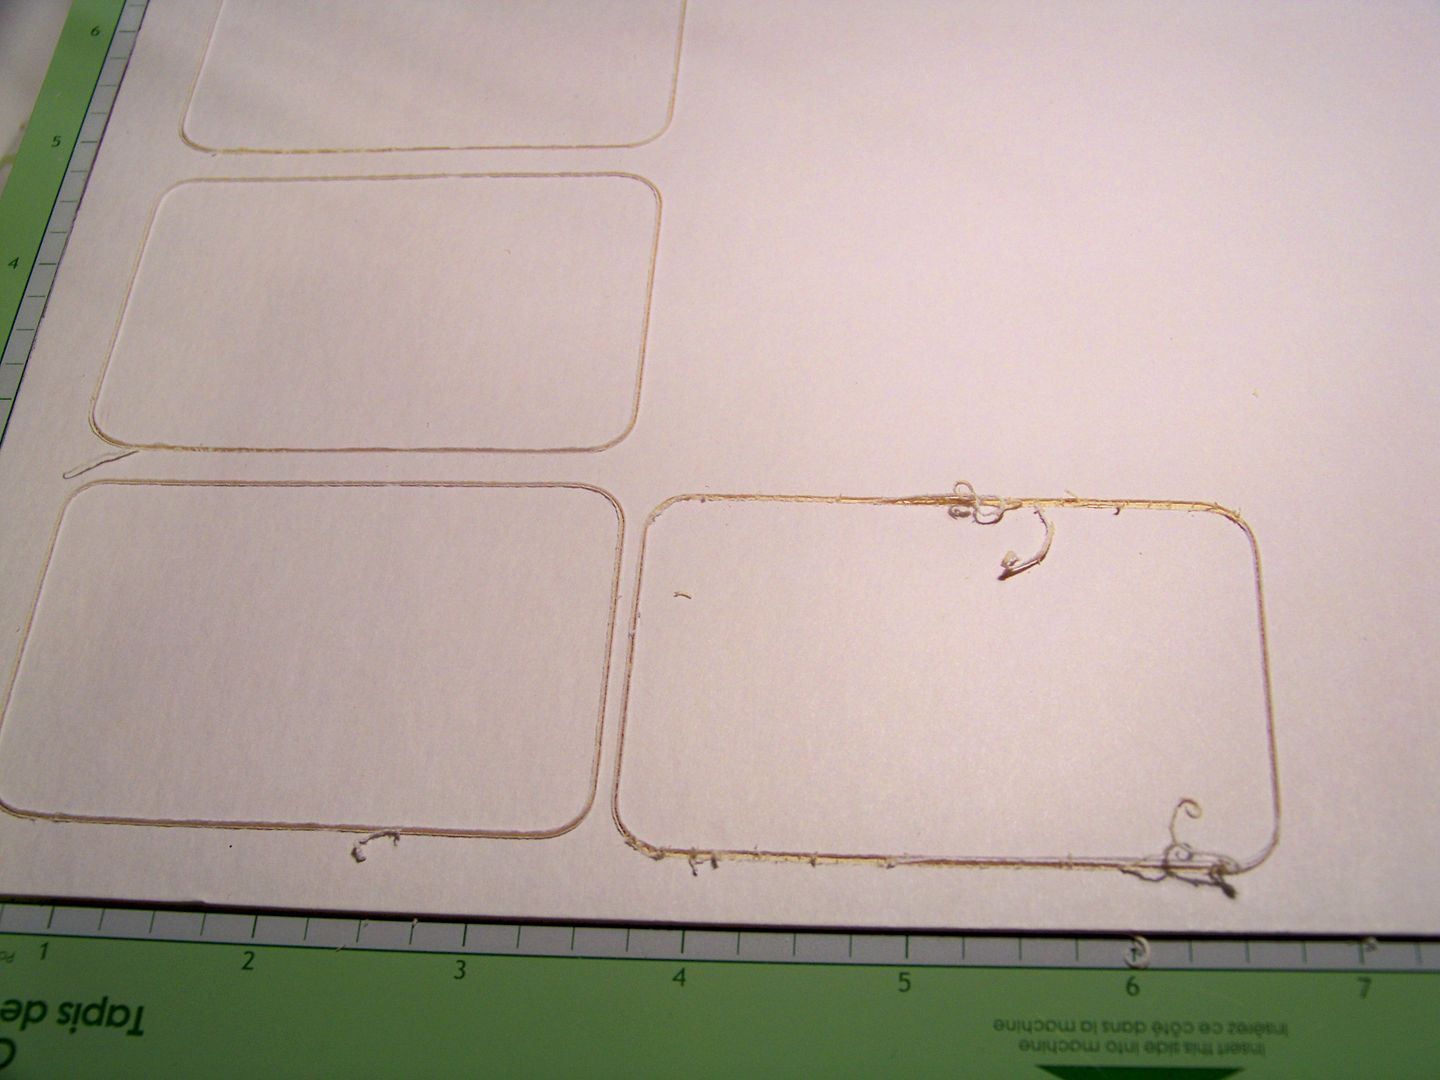
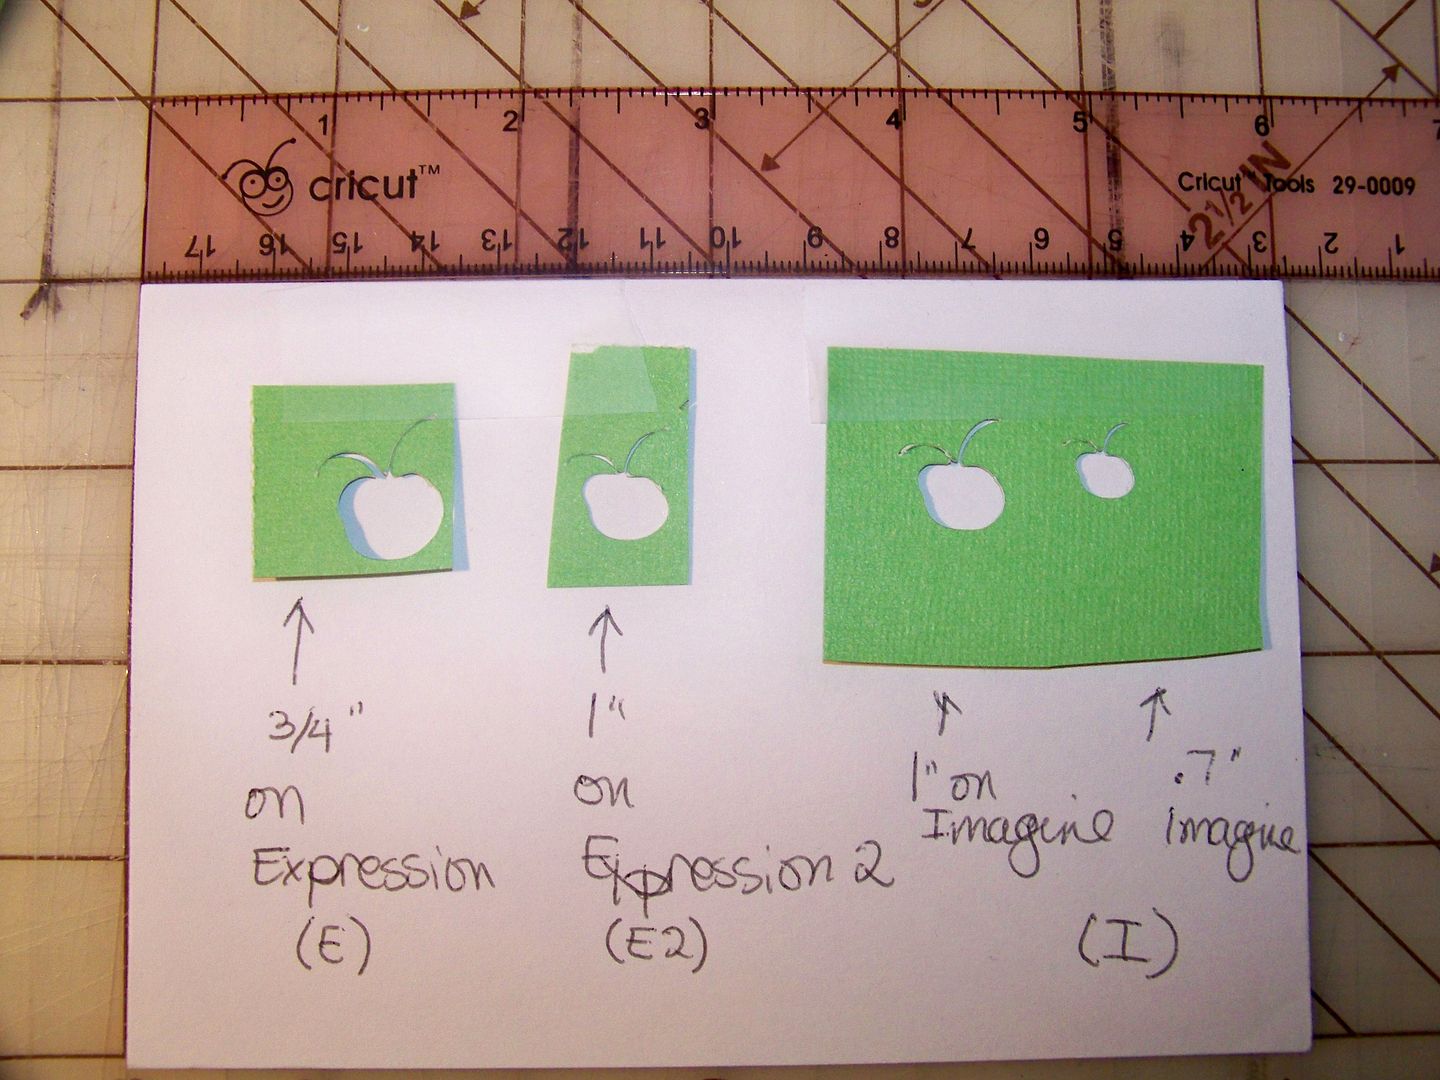
I cut a bug head from Cricut Everyday. This was another lesson learned! I discovered for the first time that 1" on my Expression is not the same as 1" on my Expression 2 (E2) or my Imagine. As often as I use my Imagine and Expression on the same projects, I have never had the need to duplicate the same cut on each macine. Check this out:
You can see that the cut from the Expression at 3/4" is larger than the shape cut at 1" on the E2 and the Imagine. You can also see that 1" on the E2 is the same as 1" on the Imagine. A few folks on the Circle message board confirmed for me that their machines copy this model! I had no idea! This and all future posts from me will include not only the cut sizes, but also from which machine my cut was made. I like to have all the machines humming when I can so knowing this info is very important to me!
I evenutally decided on the 3/4" cut on the E2 for my bughead. I didn't need his antennae since he would be driving the car, which is fortunate since the cut at this size was too small for that detail! I cut a hand for him from the Sentimentals cartridge, page 25 shadow feature, on my E2 at 1/2". I trimmed off the cuff and tucked the hand inside the car to make my bug look like he is waving.
I finished the projects by applying the remaining layers for the car. I used Dew Drops clear flat-back embellishments for the headlamps and googly eyes (3mm and 4mm) to the bug head, applying them with E6000 plastic adhesive to ensure that they wouldn't pop off the finished magnet. The finished cars are popped up with 1/8" pop dots.
I attached the magnetic buttons to the backs.
I learned so many things from this project! Even with peeling away the backing of the core material, my swap magnet finished very sturdy and substantial.
I was so glad to have these done for the crop! I popped them on a magnetic board to store them until the event. I think this will be a fun way to take them to the event as well!
Thank you for visiting my blog!


15 comments:
Superb in all aspects - design, construction, instructions, and most importantly - FUN!
Happy Trading!
Wow, wow and more wow. These are so stinking cute. What an awesomely cute idea and everyone will love them. Just wish I was one of the ones there to get one. LOL
oh my gosh! i can't believe all the work you put into these. they are so stinkin' cute. you will be in high demand in mason. over the top fabulous, as is your norm!
Nadia, they are truly a work of art and very clever but can I just say - You are INSANE! (in a good way) hahahaha Thank you once again for sharing
What a lot of work you put into making these,, wish I was coming so I could have one... :-( What a difference in the size of the machines..
oh Nadia, I wasnt wanting to do magnets but now I may have to get my butt in gear and do some so I can get one of yours. lol SOO Cute!
Nadia your magnets are so cute! Just getting to start mine this week, I hope they turn out ok. Don't think I have near as much patience as you have to get through the learning experience if I run into any problems. You just amaze me. Can't wait to see you again in Cincy.
These came out adorably!!! :-)
These are wonderful. I am going with a much simpler design for my magnets. I don't know how many I will make, but I am thinking 50. I can't imagine what I will do with the 50 I recieve in the exchange :)
You are just AMAZING!!!
And I really hope one of those has my name on it; mine are not even close to as creative & unique. Where do you find the time?
Thanks Nadia, lots of great info!
I learned the hard way that thicker material doesn't mean more pressure, just more cuts. I sometimes think I abuse my Expression!
Love the magnets!
So amazing, love the "bug" behind the wheel. I just found your blog today and it is truly inspiring.
They still sell maps? Lol! I love your project...nostalgic? Yes! It certainly takes me back in time! But what really takes me somewhere is your amazing blog! I could just read through this & feel like I'm in Disneyland! You are such an inspiration!!! May God continue to bless you and your family! ♥
OMG - those are so cute...and TINY! I don't have that kind of patience!
Nadia, my sweets --- is there anything you "can't" do??? :-)
Absolutely awesome!! TFS! :-)
p.s. I have a Blog Award waiting for you, on my blog. :-)
Linda
http://ladybuglair.blogspot.com/
Post a Comment