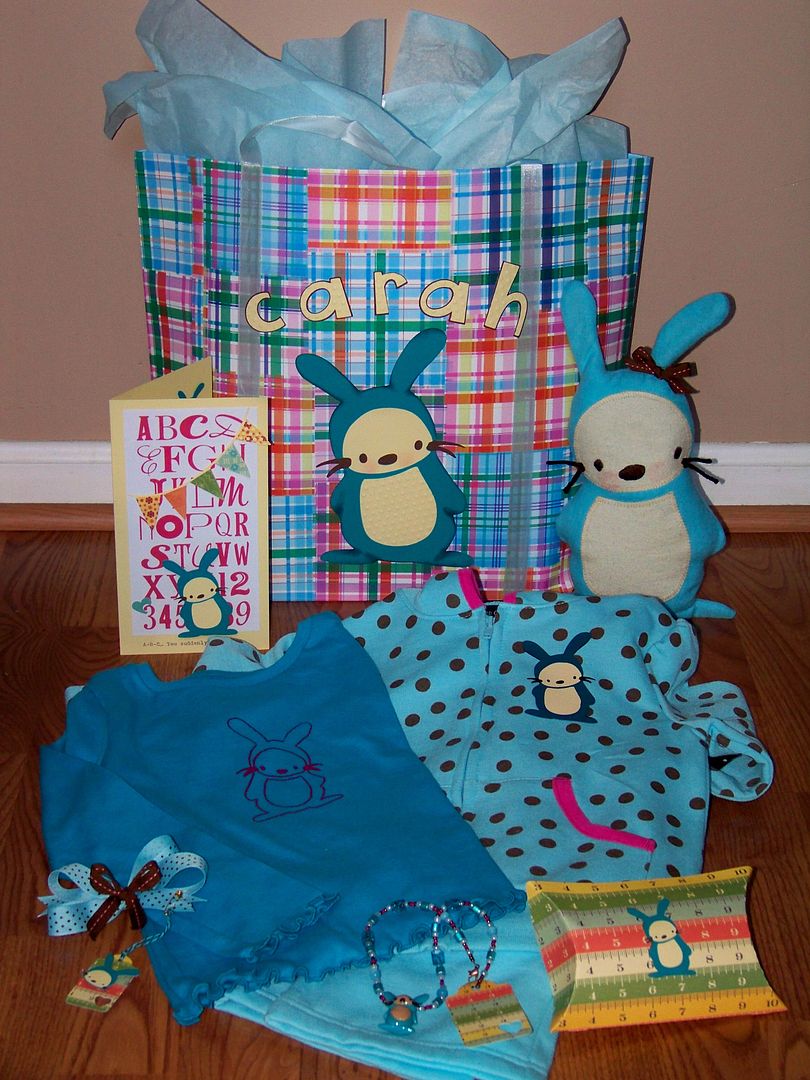
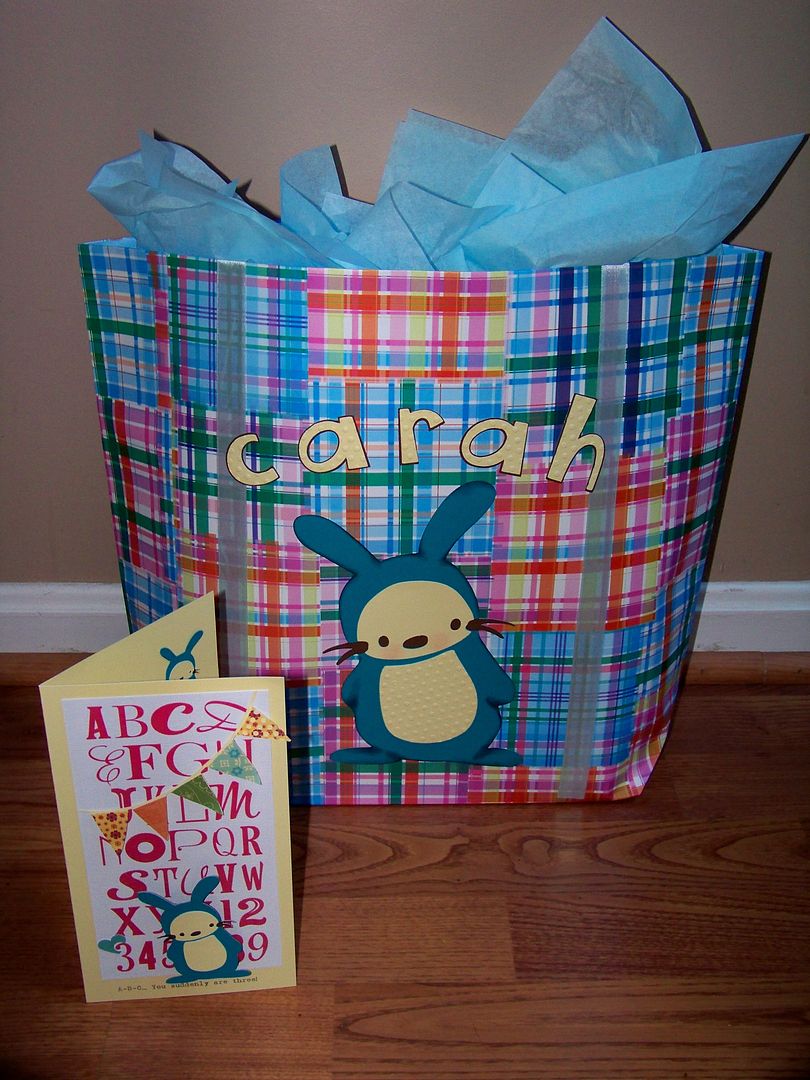
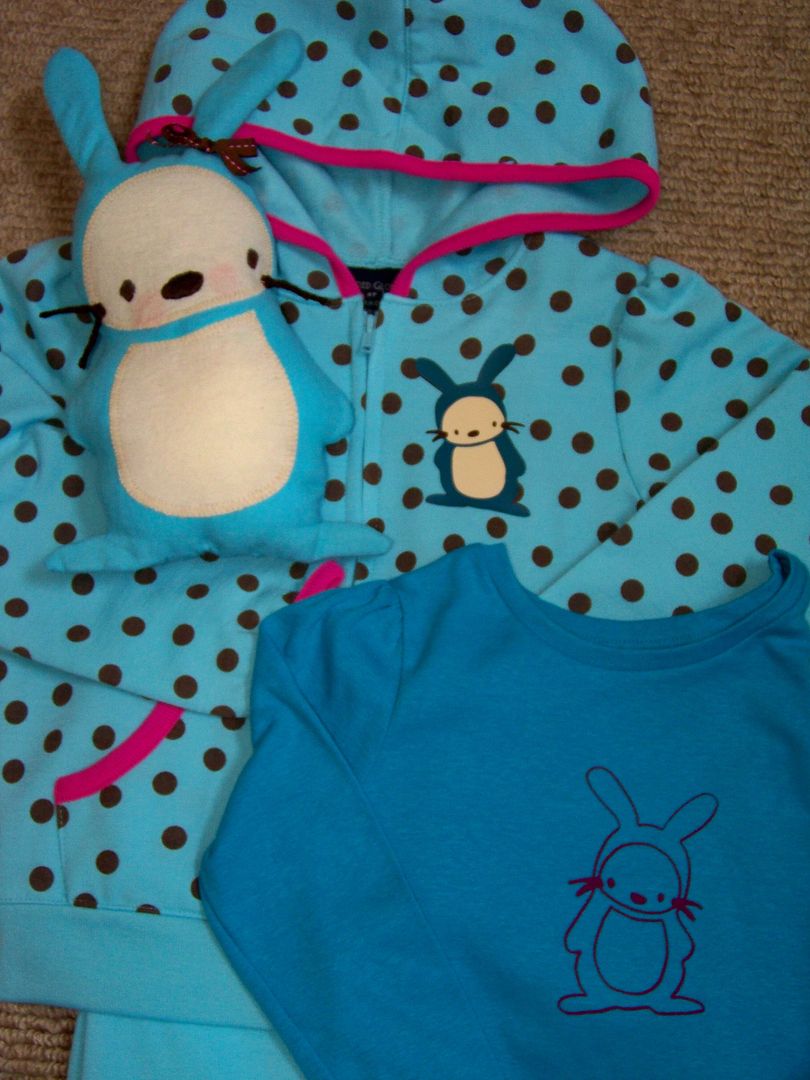
I love the little bunny from the Cosmo Cricket Just A Note cartridge. Pop Surrealist Tim Buskup came to mind for my husband when he saw this little guy. I have used it as my repeating icon for this gift set. I wanted to move my Cricut machines and the icon in several different directions to create a special collection. Baby Carah turns three in September, so this is my Carah Collection. (This is definitely my way of being silly-- but I do love coordinated groups of things -- always have!) This set includes a birthday card, decorated gift bag, silk screened shirt, decorated playsuit, stuffed toy, necklace with pillow box packaging, and a hair bow. All were made with the Cricut or using the Cosmo Cricket bunny icon in the handbook as a pattern or guide.
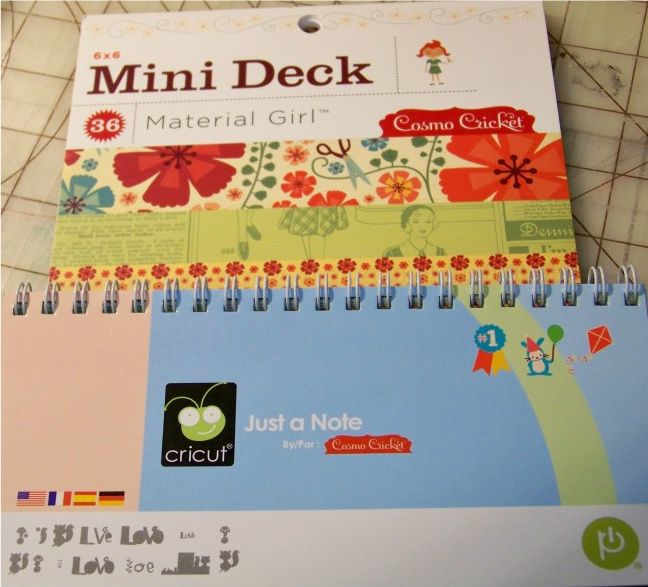
In addition to the Cosmo Cricket-designed Just A Note cartridge, I also used a mini deck from Cosmo Cricket on various elements on this gift.
Birthday Card:
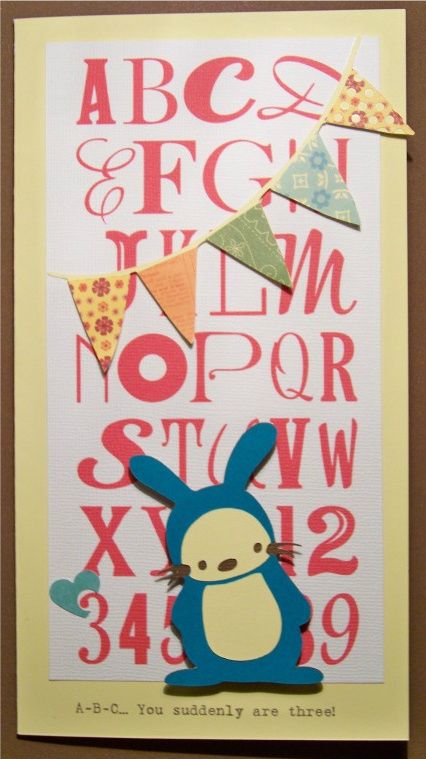
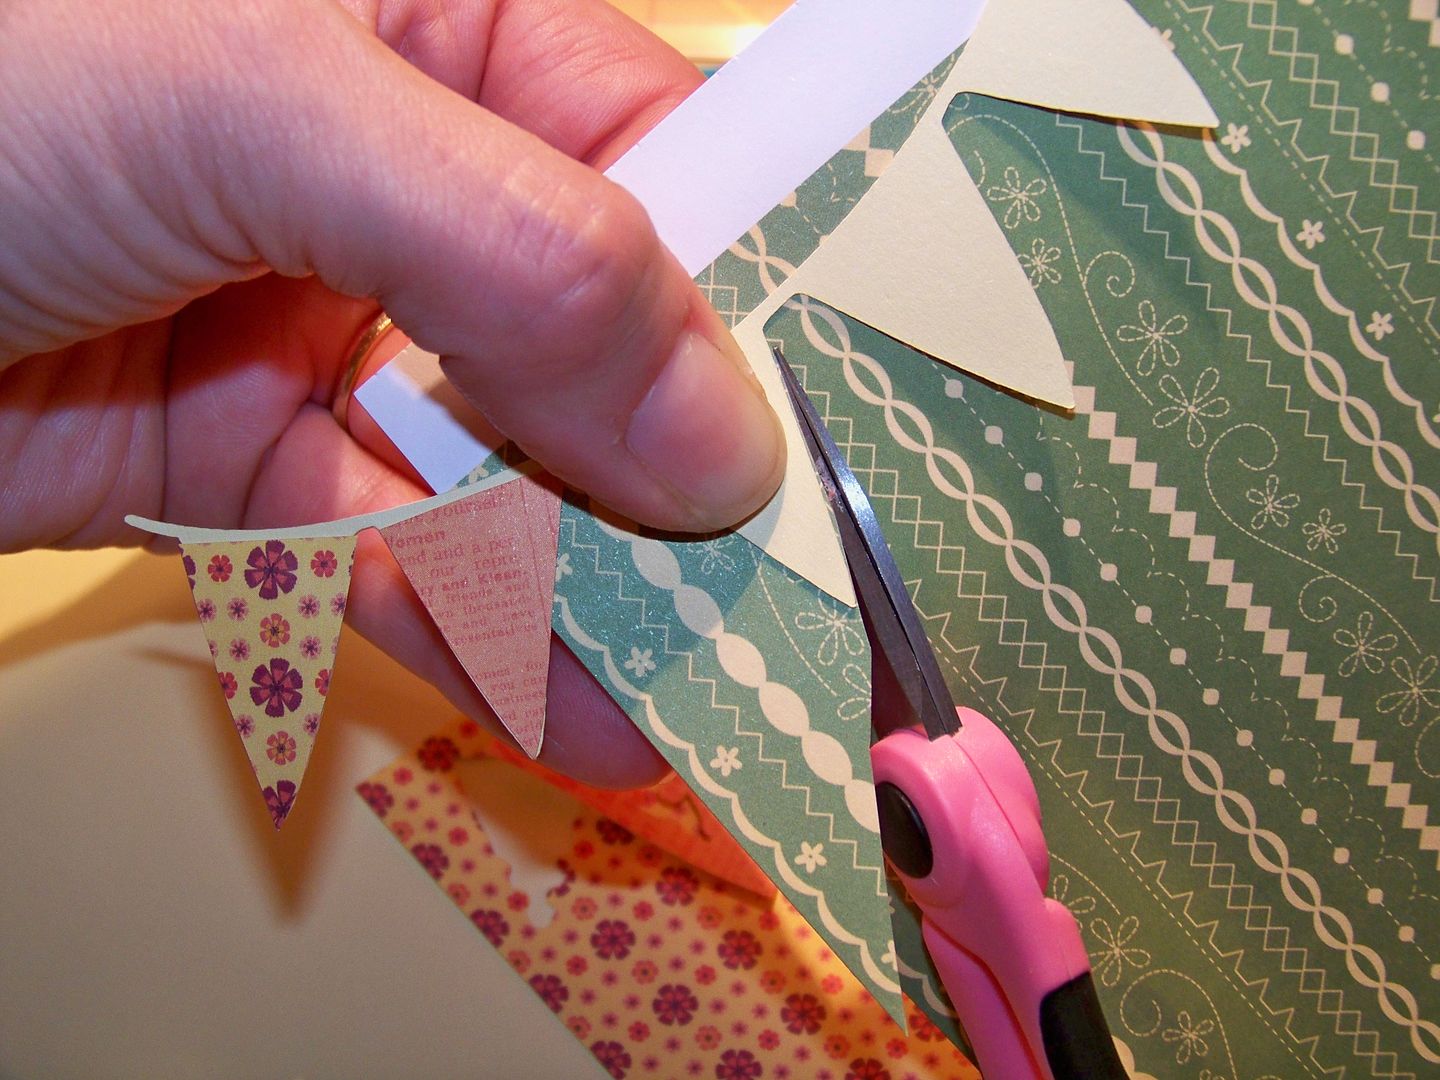
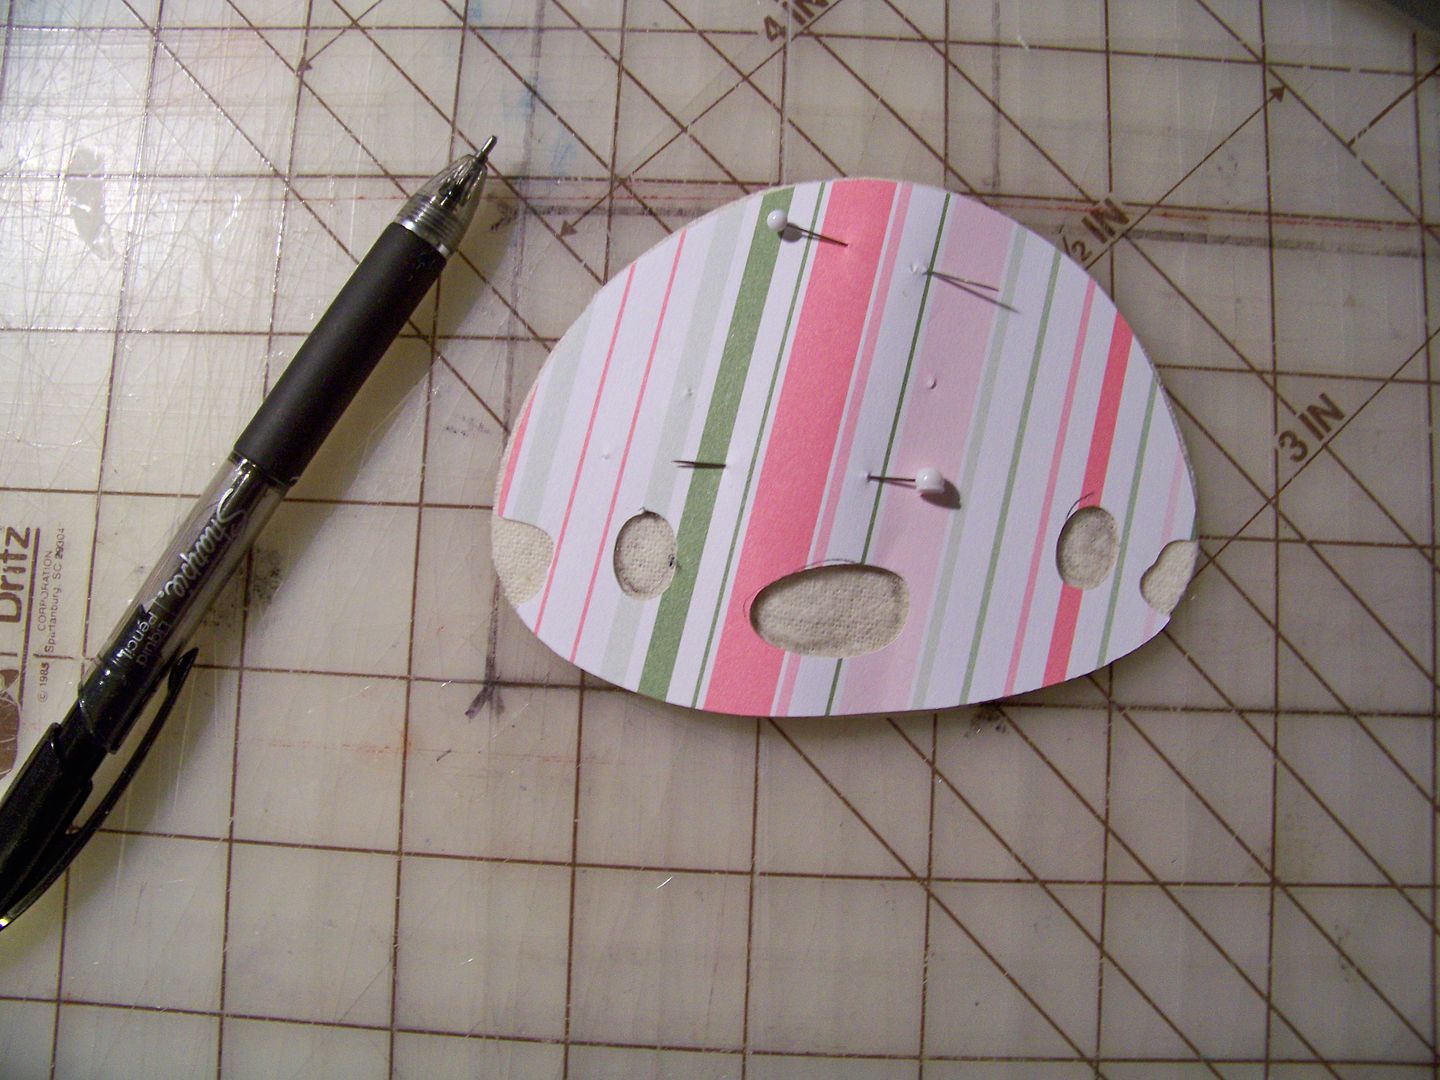
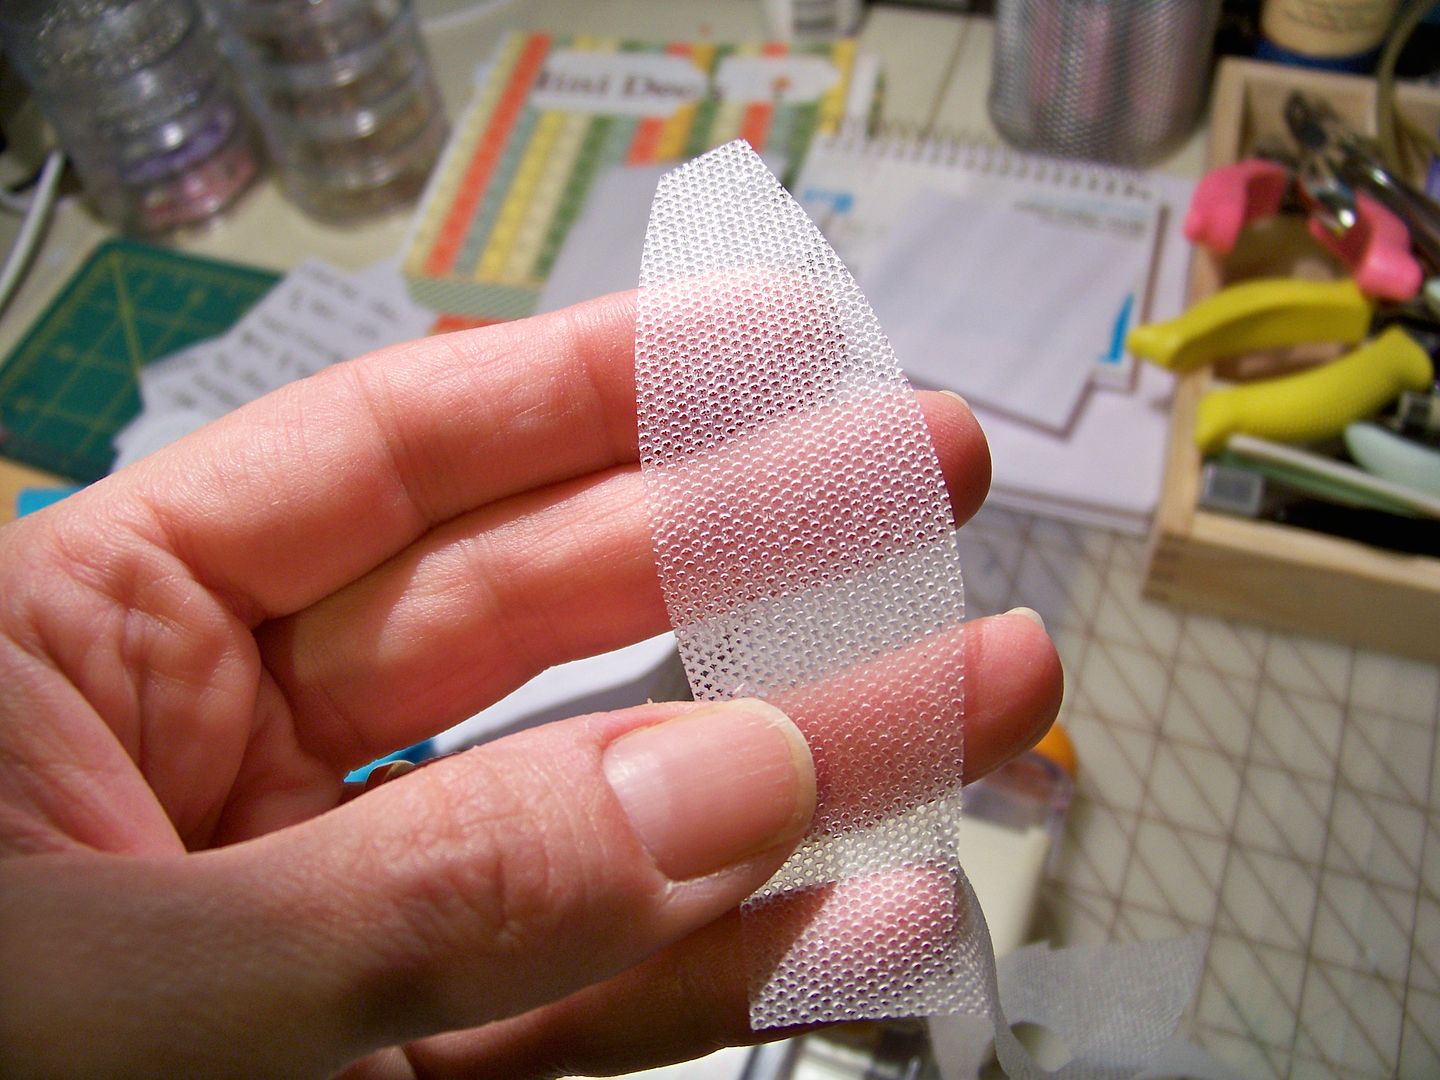
I used my Imagine to print (no cutting) the alphabet sign from the Word Collage cartridge at 7". I selected a color from my queue for the text and trimmed the printed area to 3-7/8" x 7-3/8". I cut the bunny from Just A Note at 3" and the banner base is from the same cart at 2". The pennants are cut from the Material Girl Mini Deck.
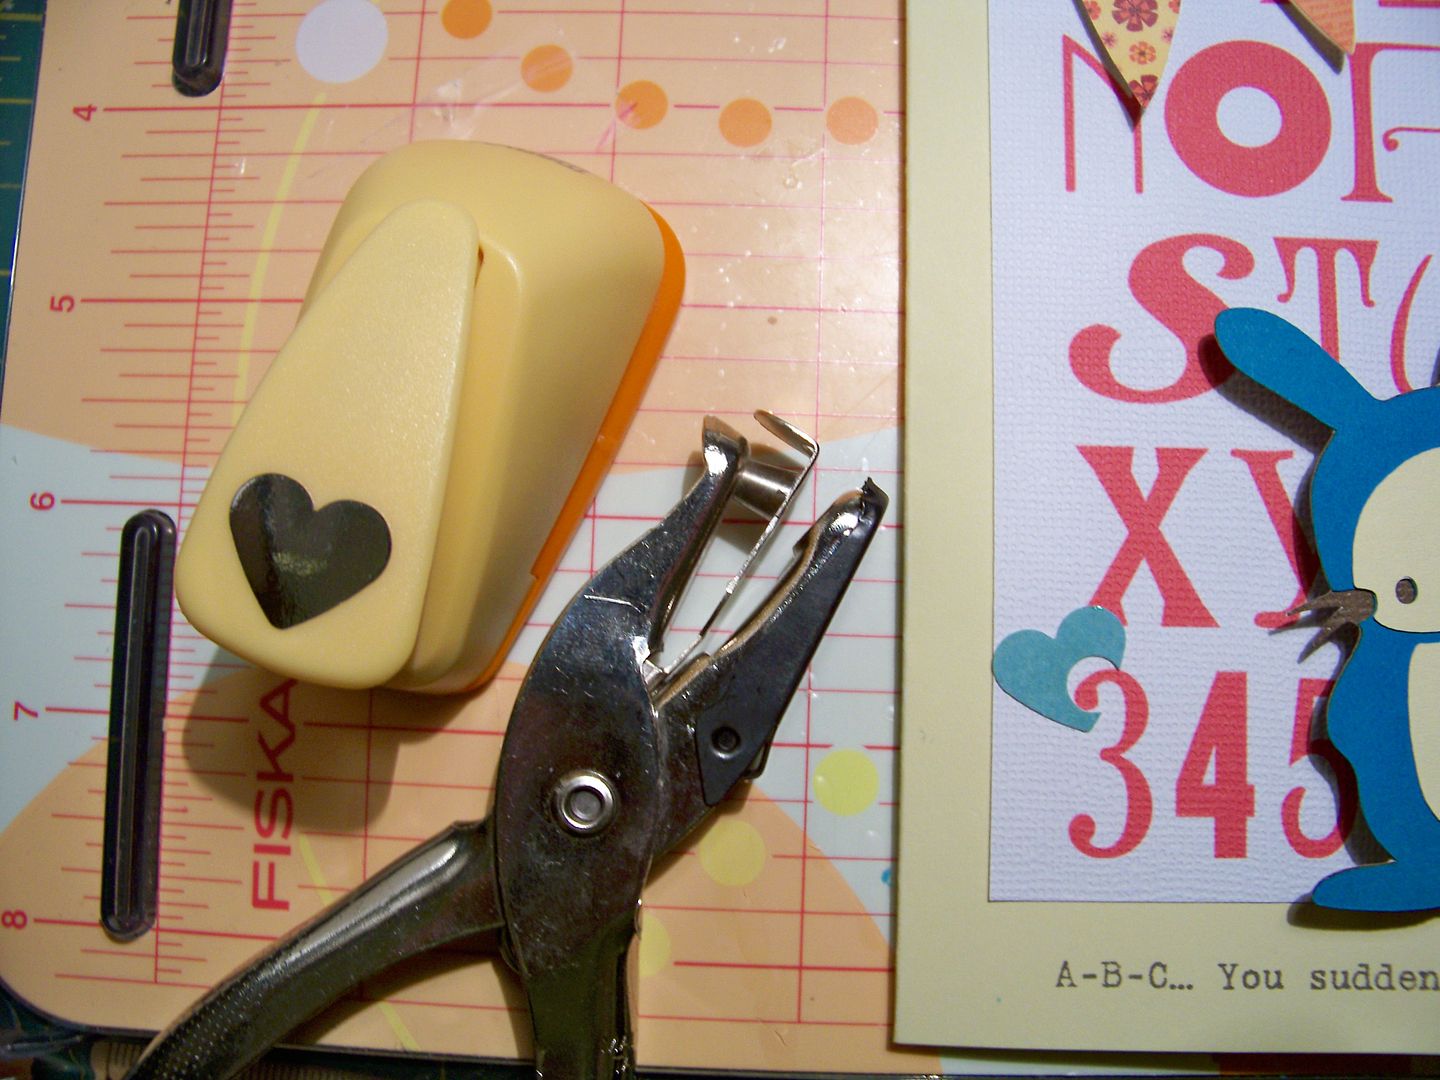
My open card finished at 9" x 8-1/4", which is too wide to put through my office printer to add a sentiment, so I taped down all sides with painters tape and ran it through folded. The extra thickness and raised edges usually end with ink being dragged onto it so this was my solution to avoid that. Unlike the result with wall paint, this tape will sometimes mar paper, so I used gentle tension when removing the tape from the edges after printing. The text was printed on using Microsoft Batik Regular at 12 point.
Gift Bag Decoration:
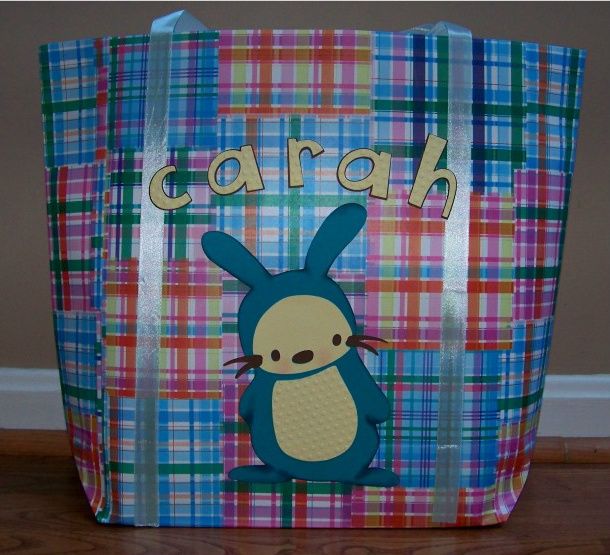
I decorated a gift bag I found at one of those 'everything for a dollar' kind of stores using the same bunny cut at 8" from Just A Note. I inked the cheeks and embossed the belly. I used the same embossing folder to emboss the text, cut from Cuttin Up (cartoon with shadow) at 2".

Happy with the paper part of my gift, I moved on to the fabric elements.
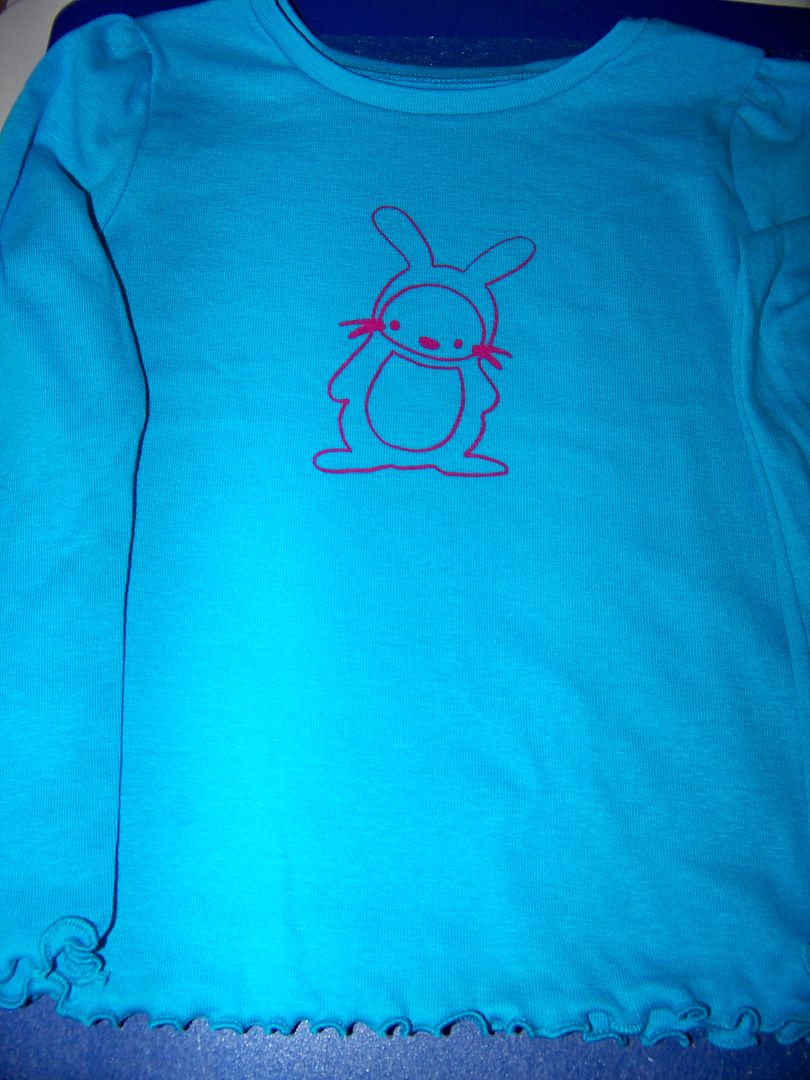
Silk Screened Shirt:
I enlarged the bunny picture in the handbook on my copier and traced it onto an injet transparency to create a Yudu design for a knit shirt. I used a rolled up piece of cloth to rest my wrists so that the lines would be smooth and not jagged from pressure.

I am using a new direct emulsion, having just used up my first pint. This one is red. This is my design burned into the emulsion, rinsed, and dried.
I used Yudu-brand ink.

This is the finished shirt as the ink dries, still on the platen.
Decorated Playsuit Using HTV:
Next, I used heat transfer vinyl to create a layered bunny. It was applied to a ready-made playsuit.

This is Siser Easy Weed vinyl. To do this, I pressed the flip button to create a mirror image of the design. I cut only the vinyl (not the shinier adhesive backing) by using these settings on my Cricut:
blade: 3
pressure: 3
speed: 3
I weeded off the vinyl that is not part of the design, leaving my layers on the backing...
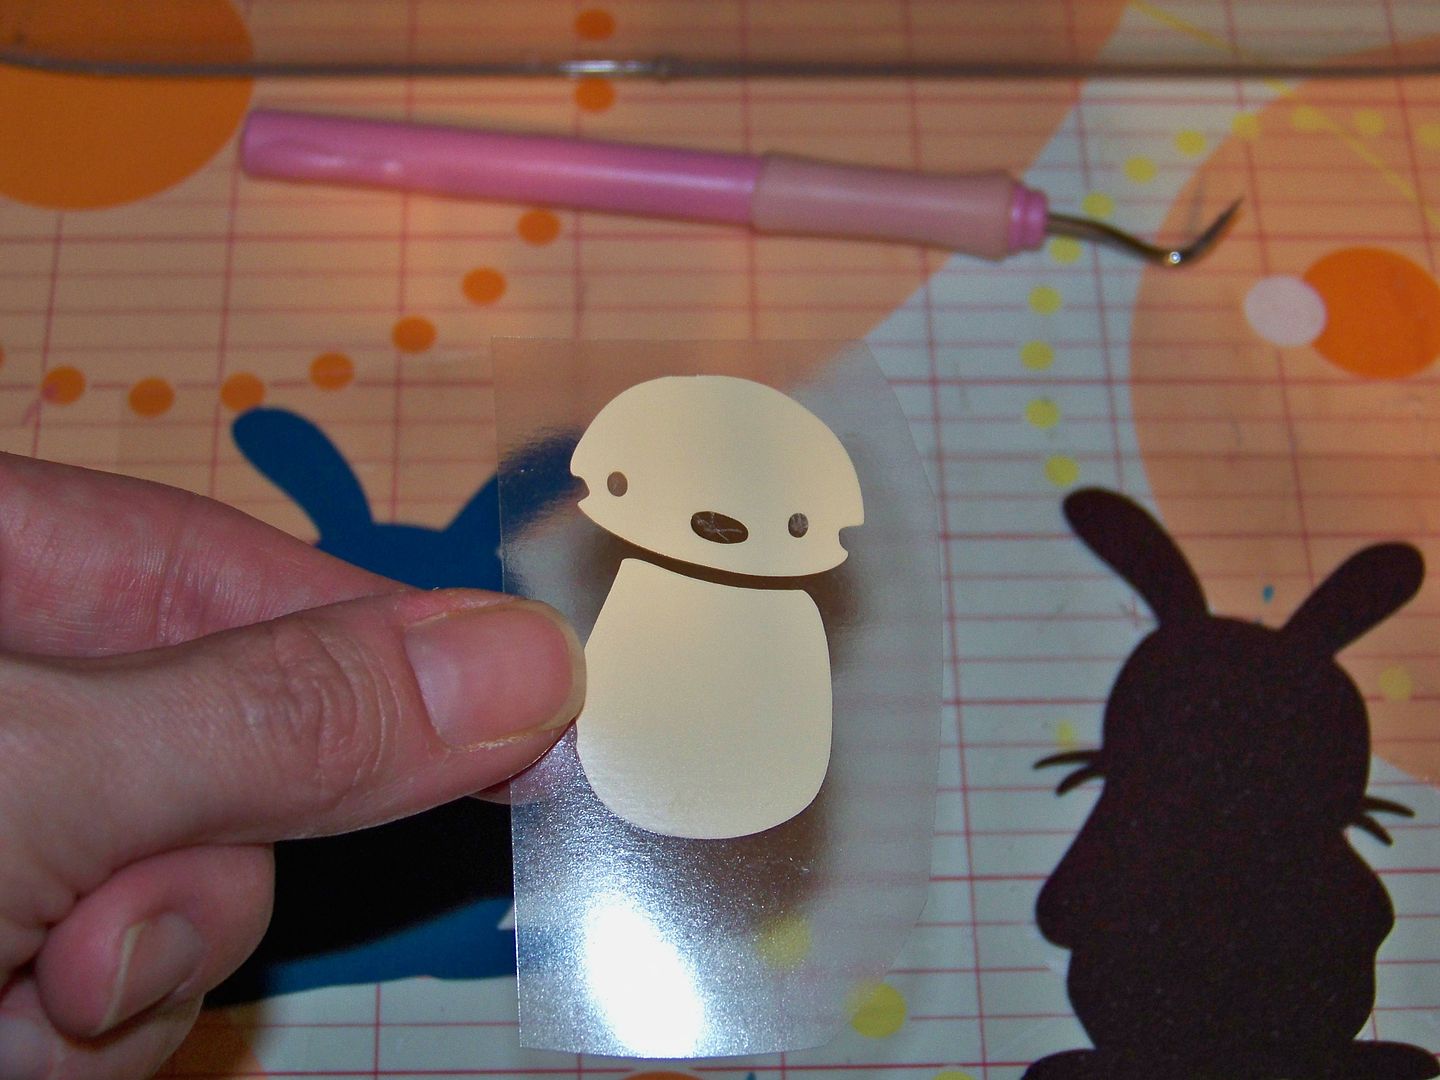
... and applied them, one at a time, to the garment. I pressed with my home iron, peeled off the backing, and applied the next layer. I repeated this for all three layers. (The bunny was cut at 3-1/2").
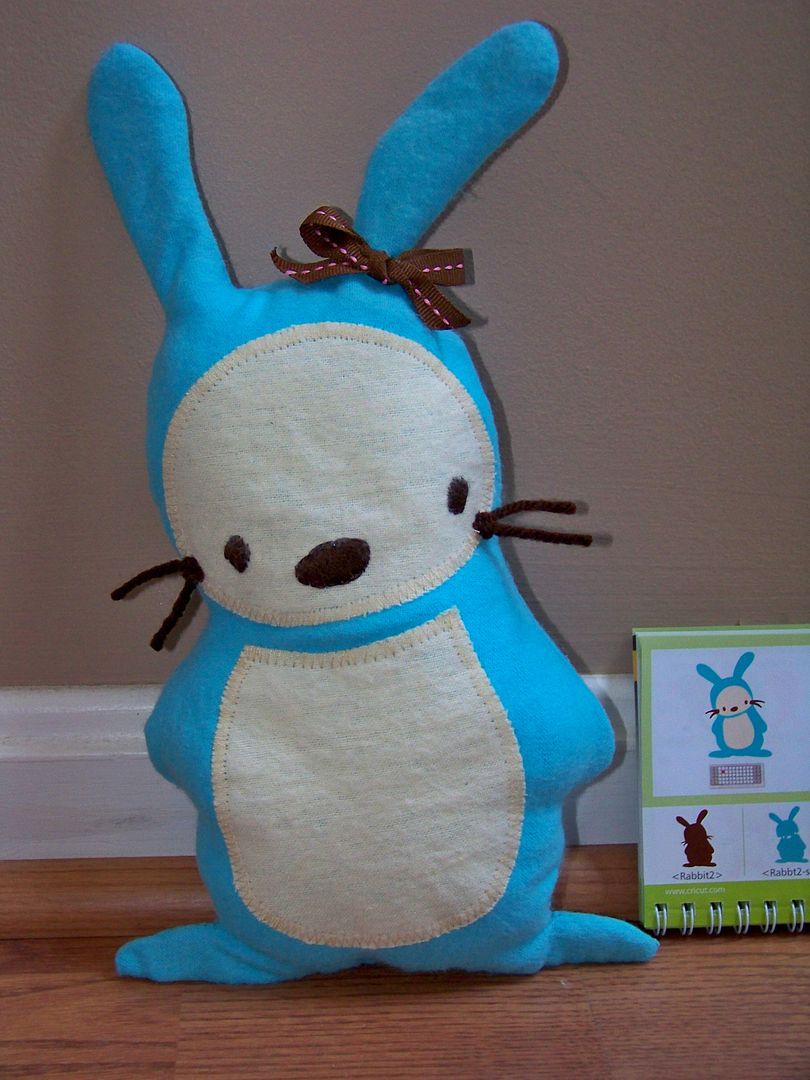
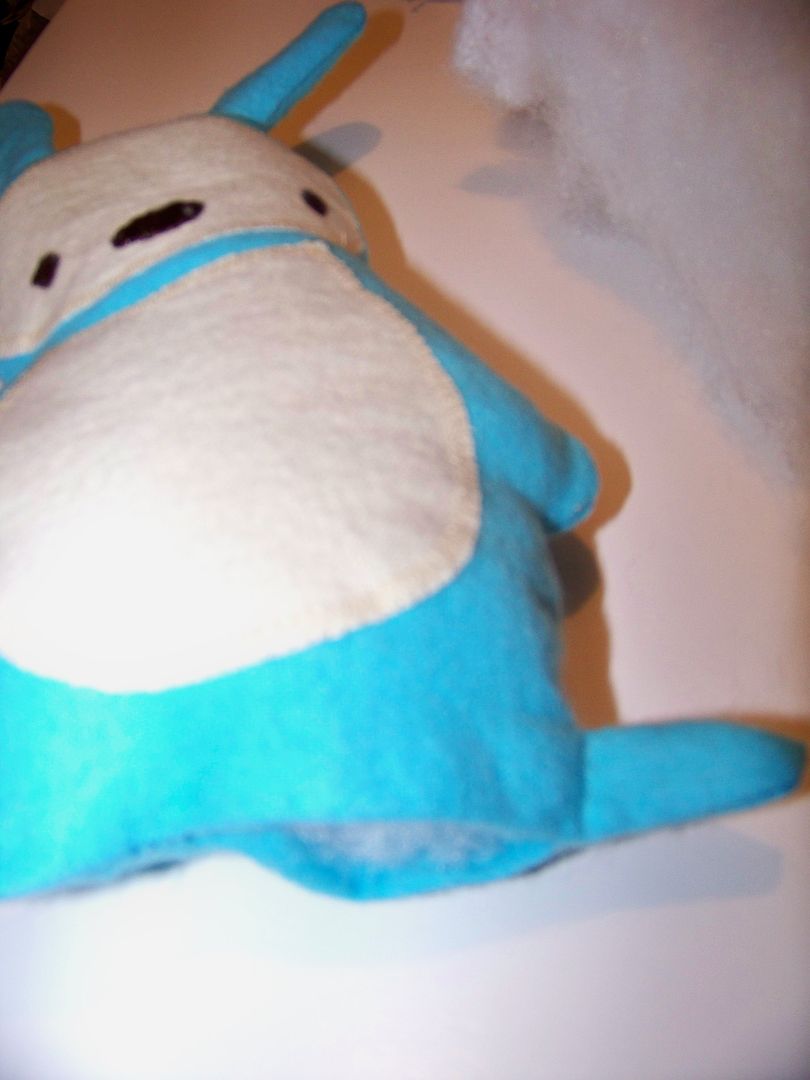
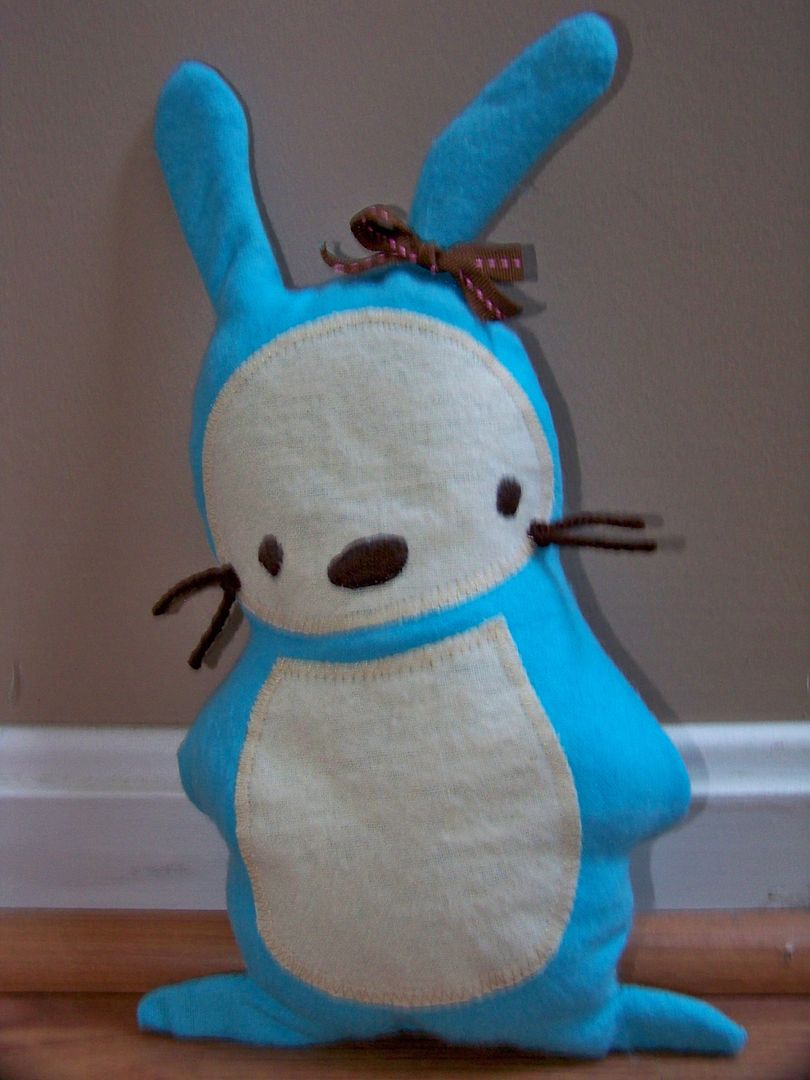
Next, I used my Cricut to cut a sewing pattern for a little stuffed toy.

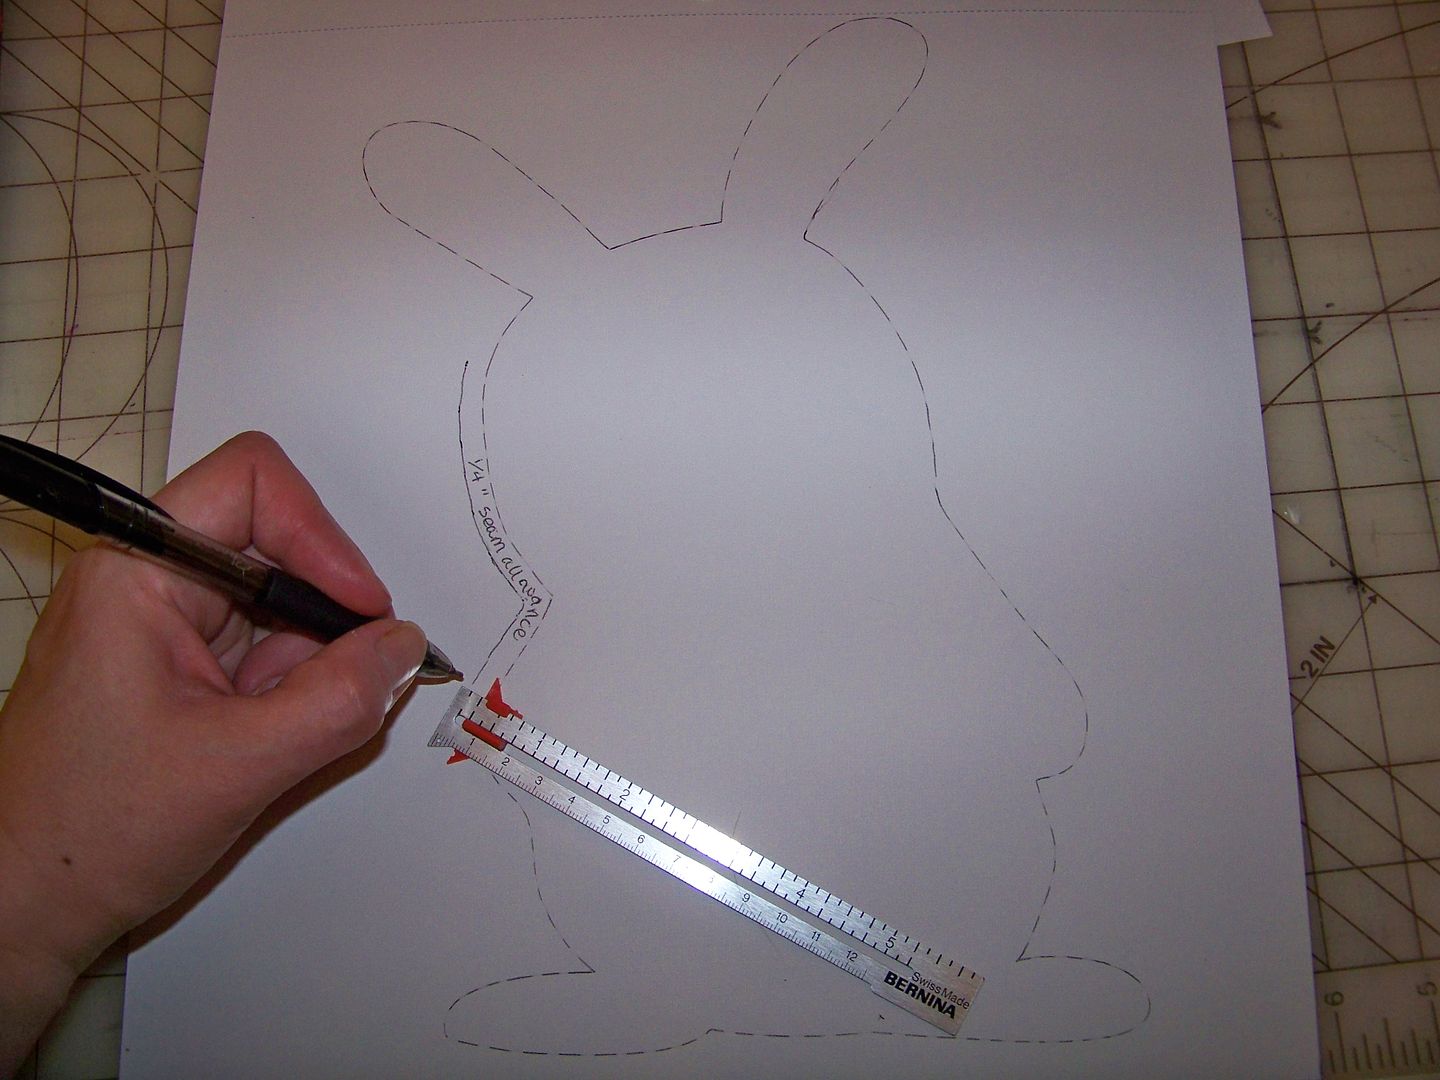
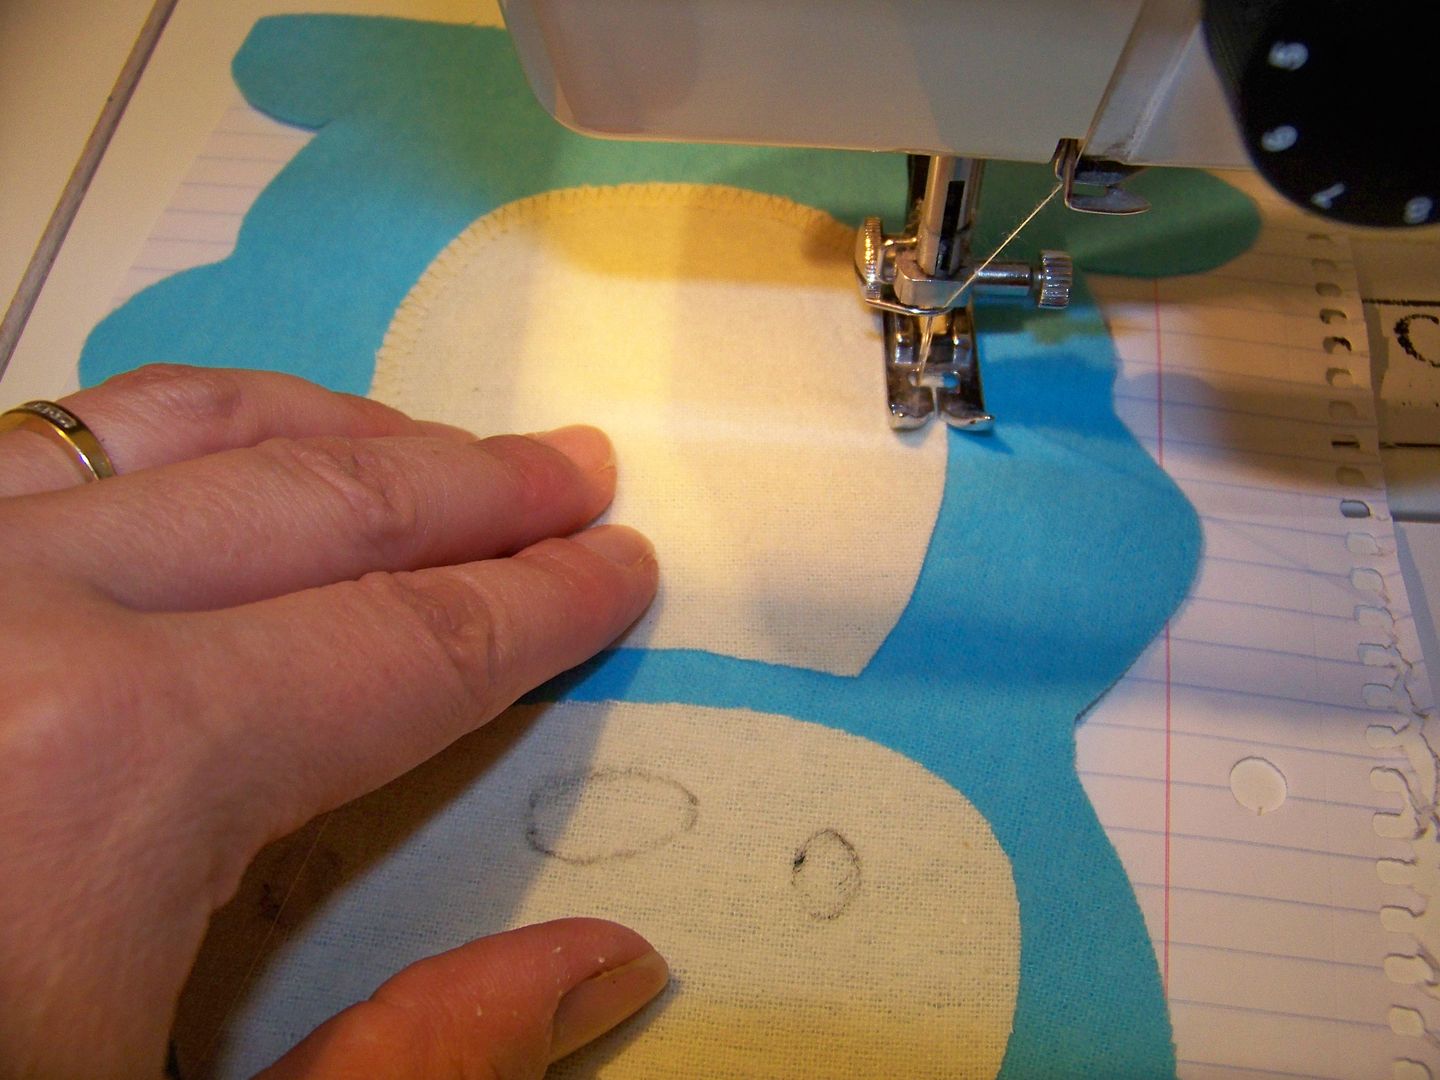
This is the pattern I used to cut the blue flannel. I used the Cricut cuts of the face and belly and cut the beige flannel directly from them. (I did not cut in the side notches on the face). I used a pencil to draw in the eyes and nose for my embroidery guide.
I also cut the belly and face from Steam-A-Seam. This is the most effective heat-activated webbing I have found. The small holes allow steam from the iron to really melt the product, resulting in a bond that is actually washable, although I have never tested that claim, opting always to sew the edges.
The other nice quality of Steam-A-Seam is that it is slightly tacky, allowing it to stick to your fabric after it is cut, holding it in place for ironing.
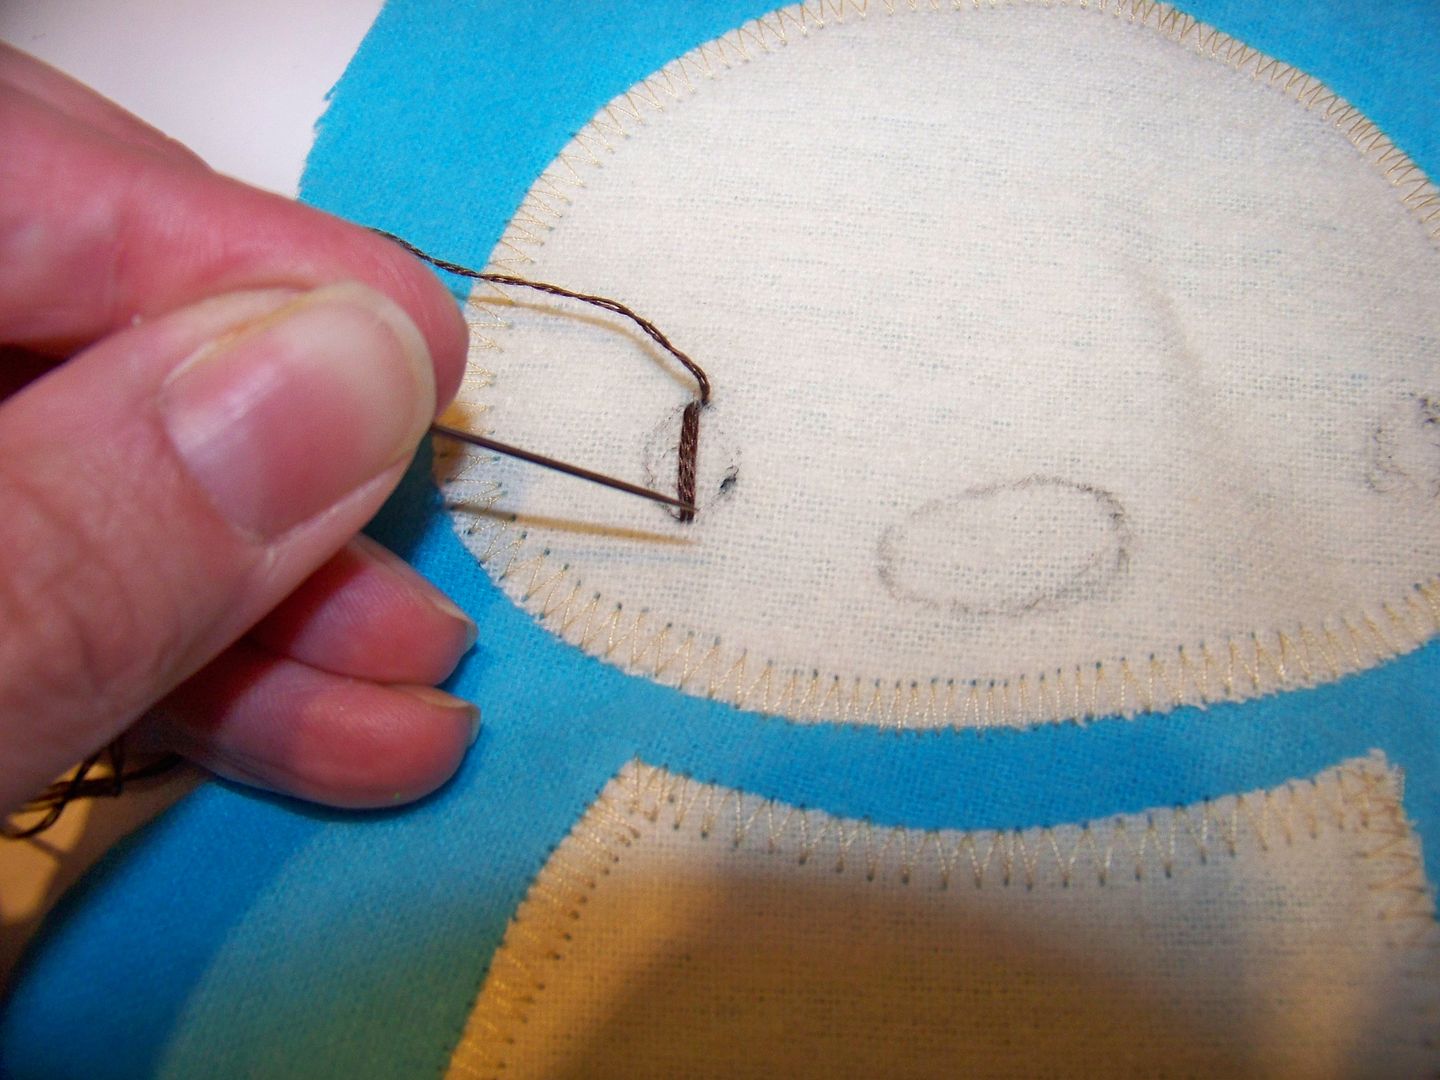
After ironing in place, I used a zigzag stitch instead of a satin stitch along the edges of the belly and face. I used notebook paper as my stabilizer.
After tearing off the notebook paper, I hand-stitched on the face using embroidery floss and long stitches.

I sewed the front and back body pieces, right sides together on my sewing machine, using a 1/4" seam allowance, leaving the bottom open to turn it out. I lightly stuffed it since I didn't make an allowance for volume. I used pipe cleaners to stuff the ears and feet to fill them out and keep them flat.

The rest was stuffed with polyfill and the bottom was slipstitched closed.
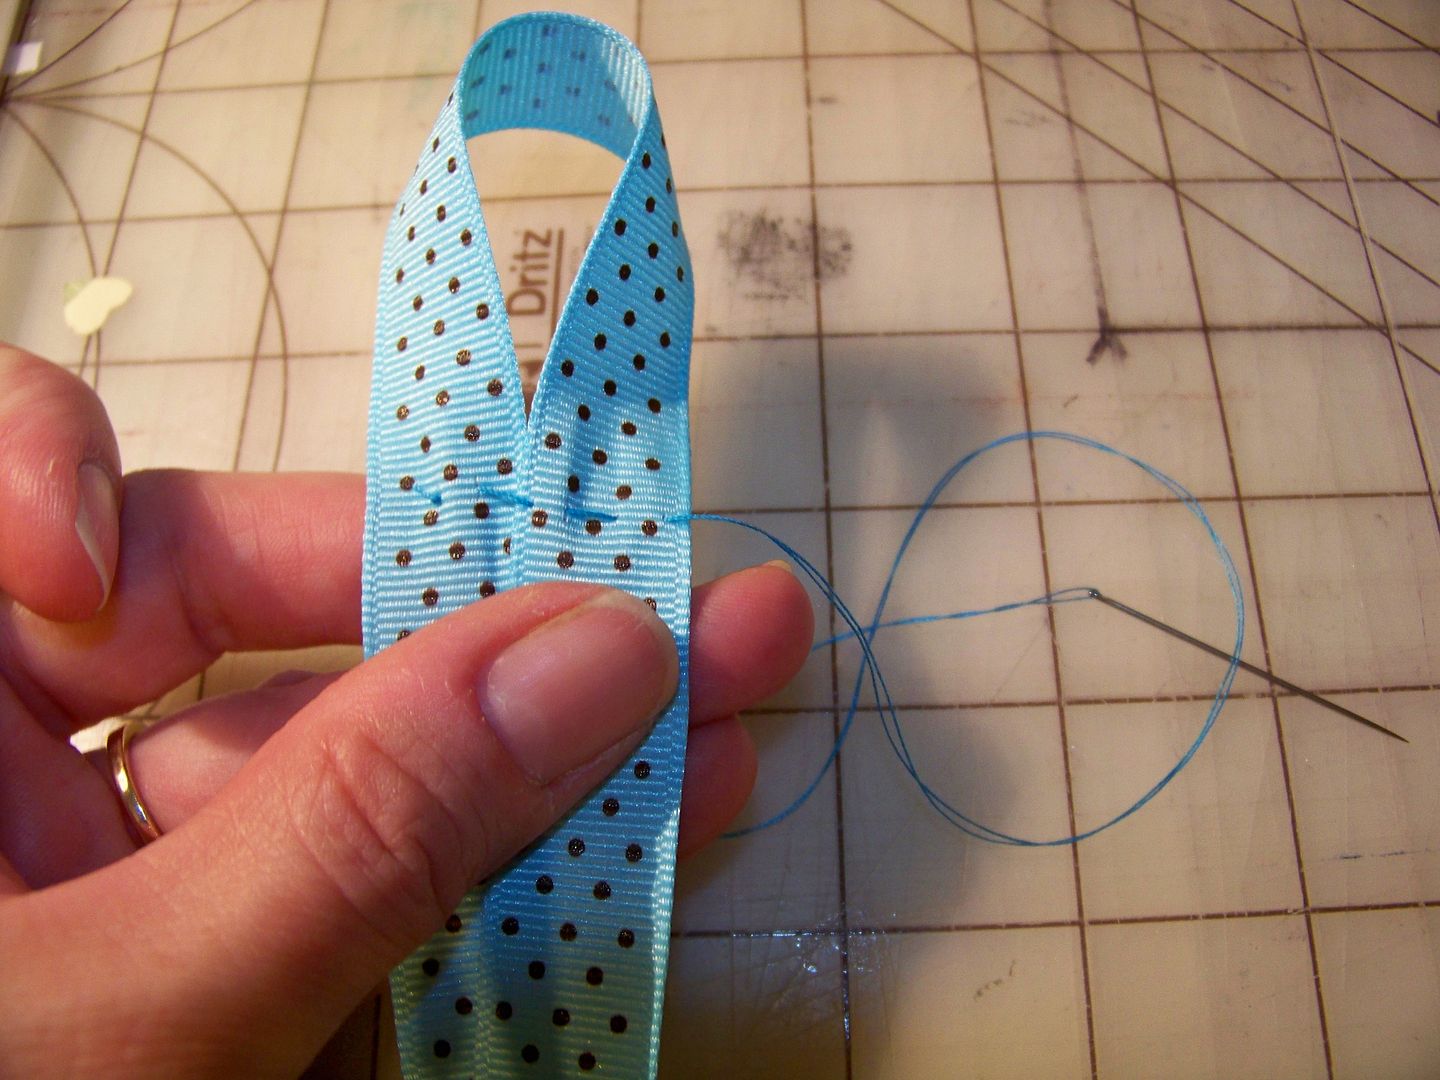
For whiskers, I knotted a piece of yarn and stitched it on by hand for each side of the face. I hand-stitched on a little ribbon bow so this would be a girl bunny for sure!
Happy with the fabric part of my gift set, I moved on to the accessories!
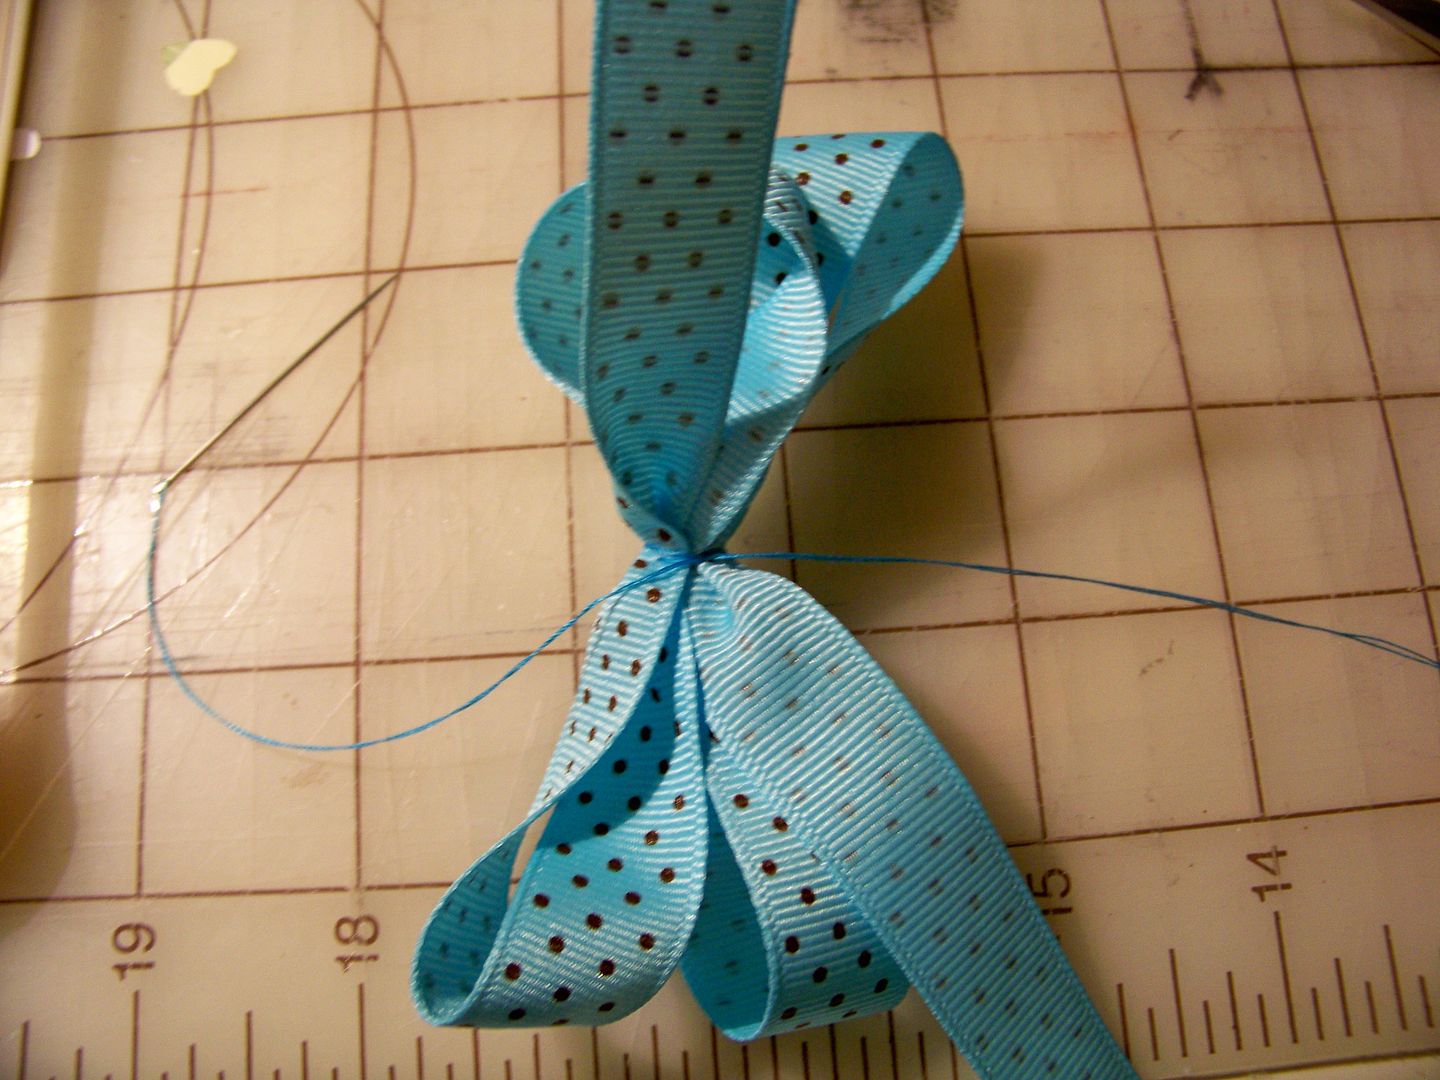
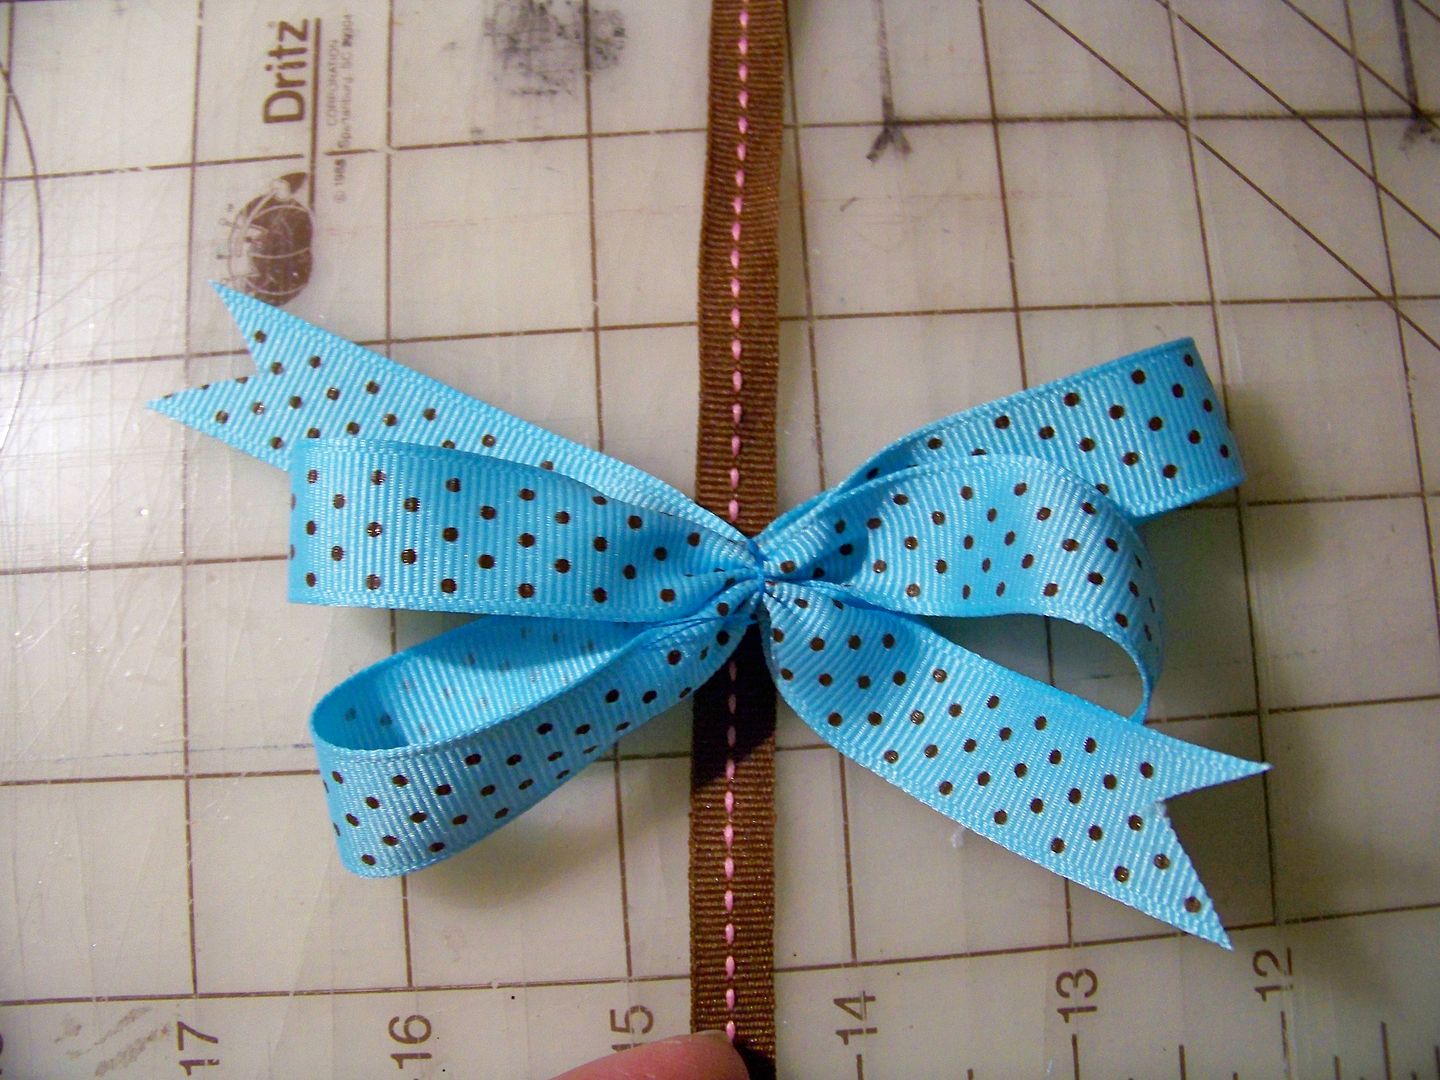
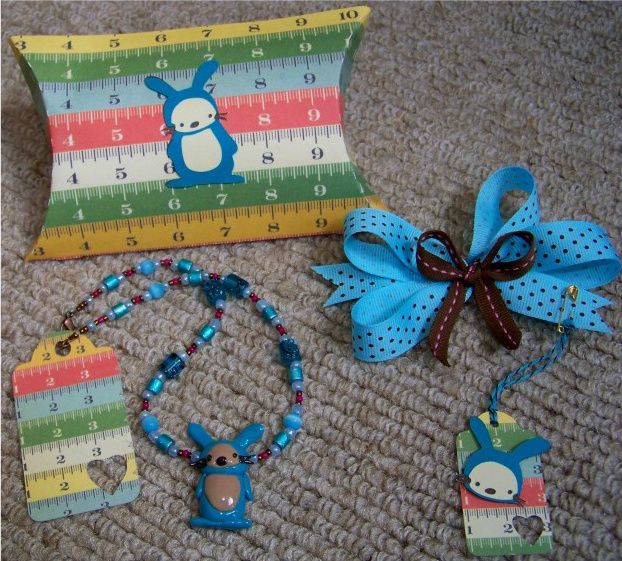
Hair Bow:

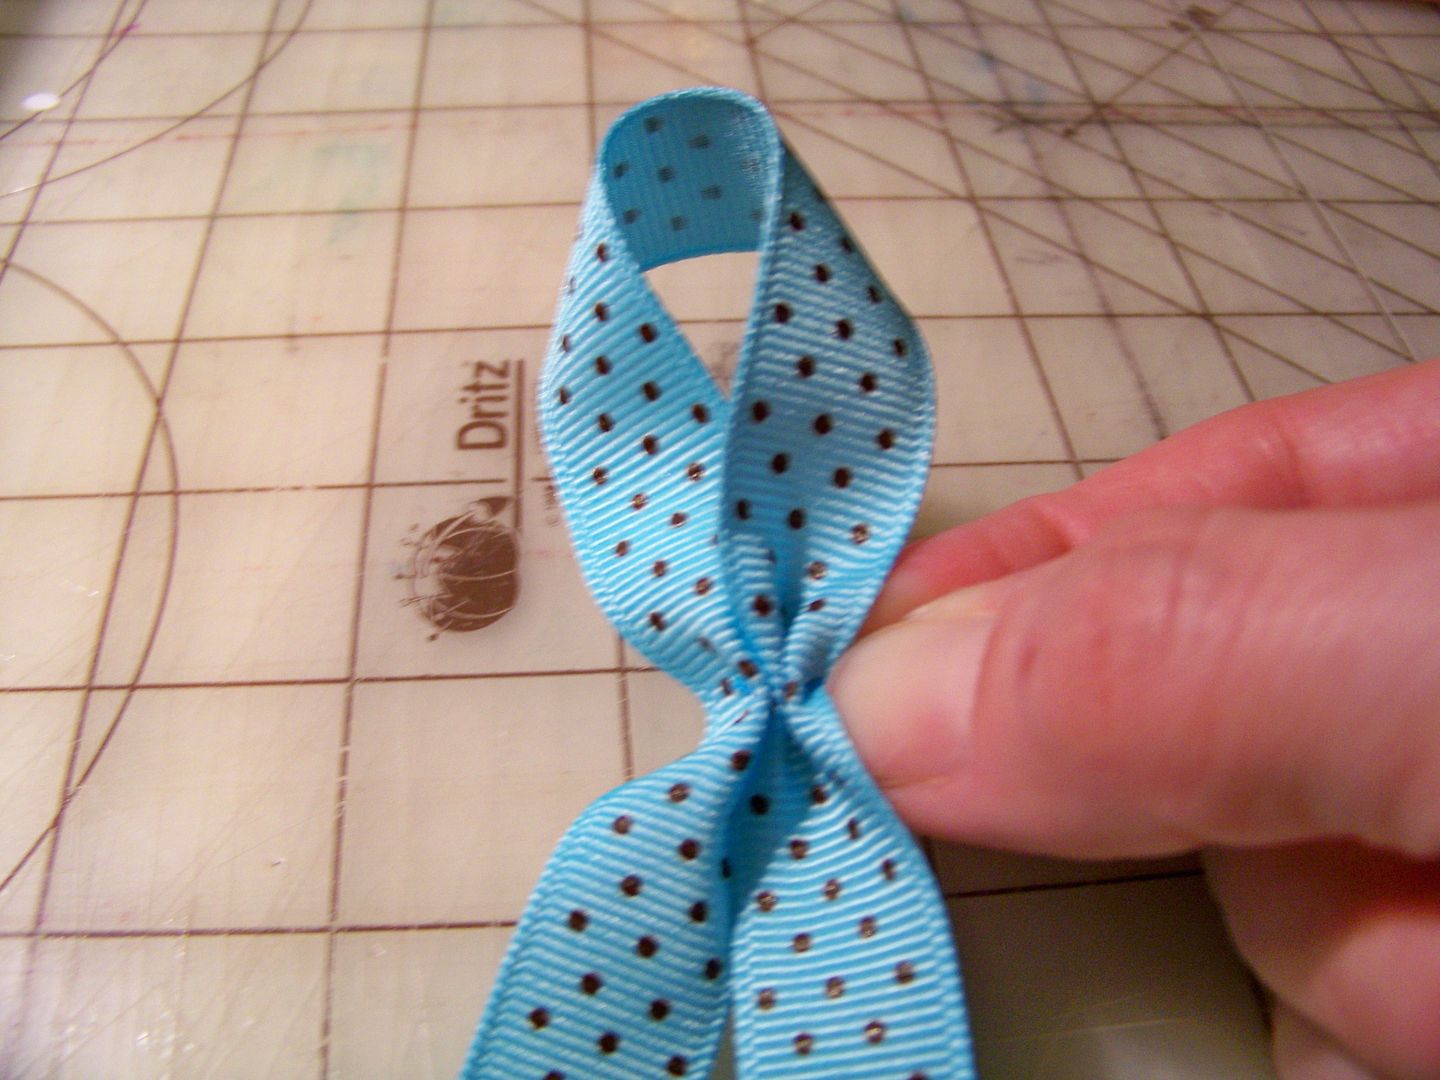

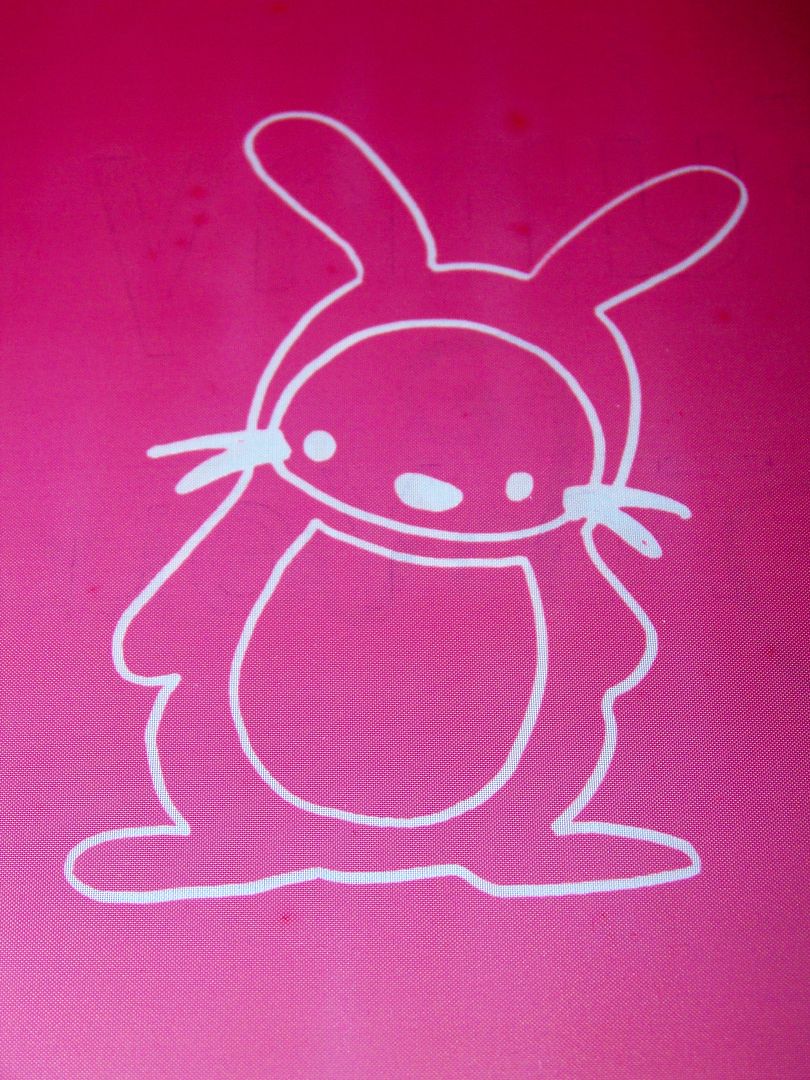
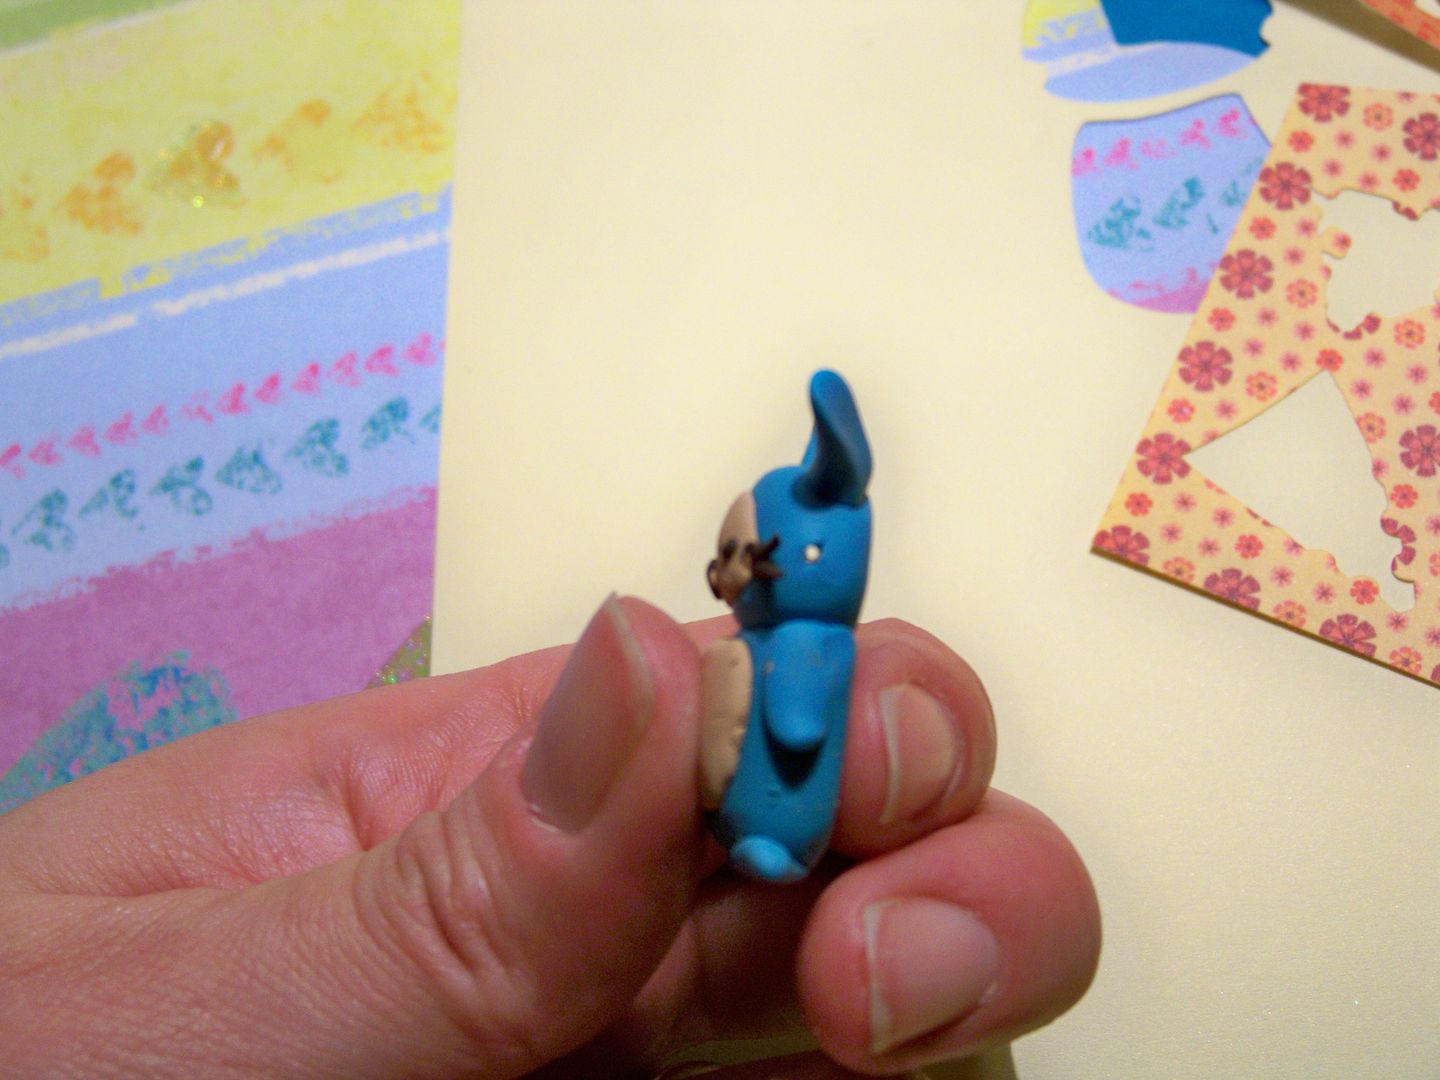
I used the picture in the handbook to create my own little bunny pendant, shaped by hand from Sculpey and Prema oven-dried clays.

The key to these are to place the hole in the upper part. Holes placed too far down will create a pendant bead that spins and flips when worn-- very frustrating to wear! A drying box to bake it in is a must when doing these! The pendant will hang suspended from the rod which formed its beading hole.
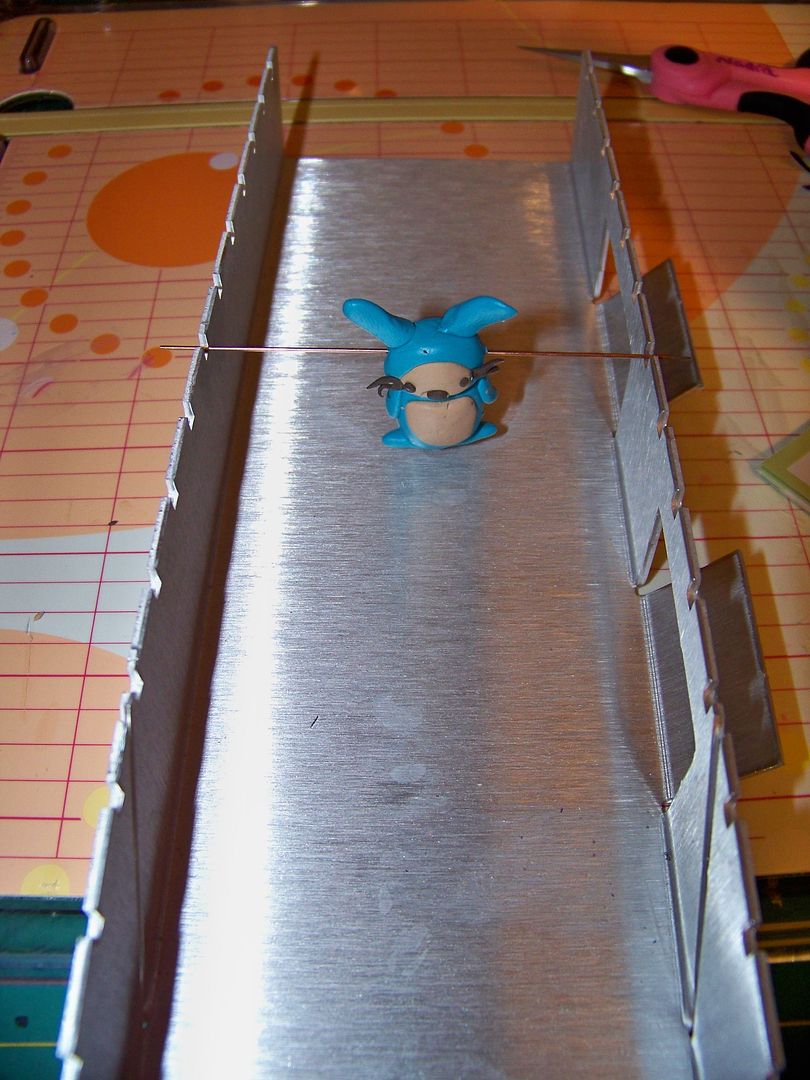
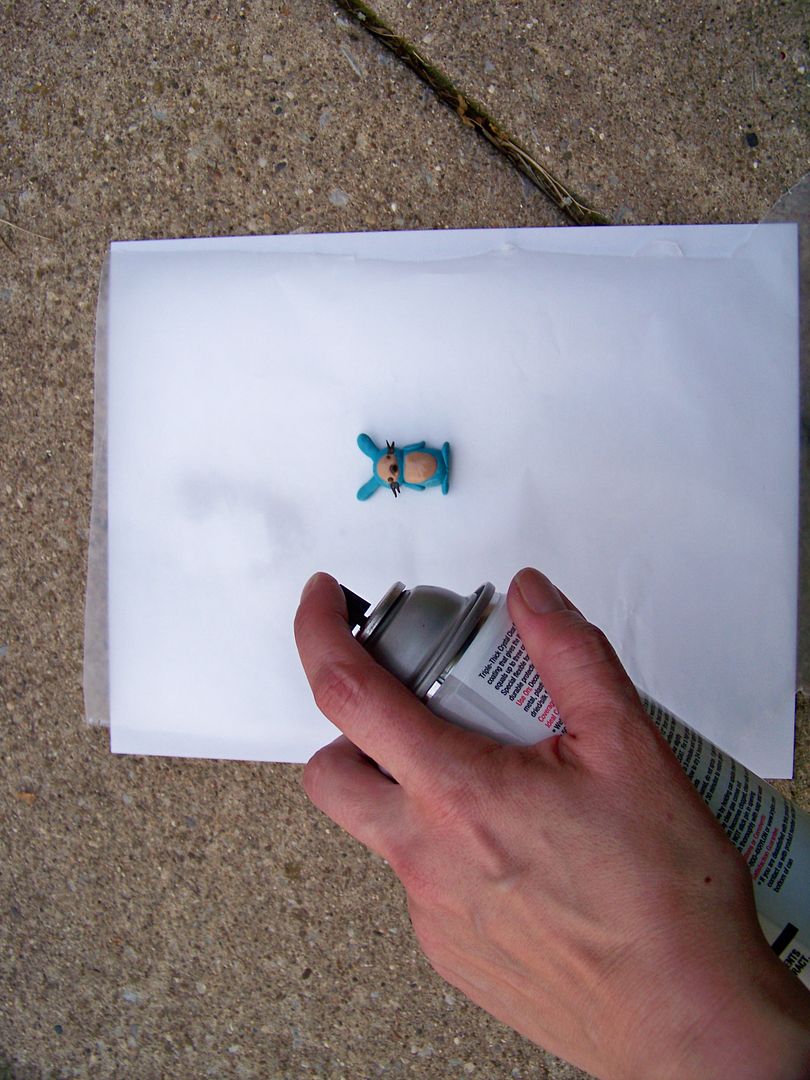
The bead I made took 45 minutes to dry in the oven.
Once cool, I took it outside and sprayed it heavily with Krylon Triple Thick Crystal Clear Glaze.
I placed it on my bead board and created a necklace to match the clothing.
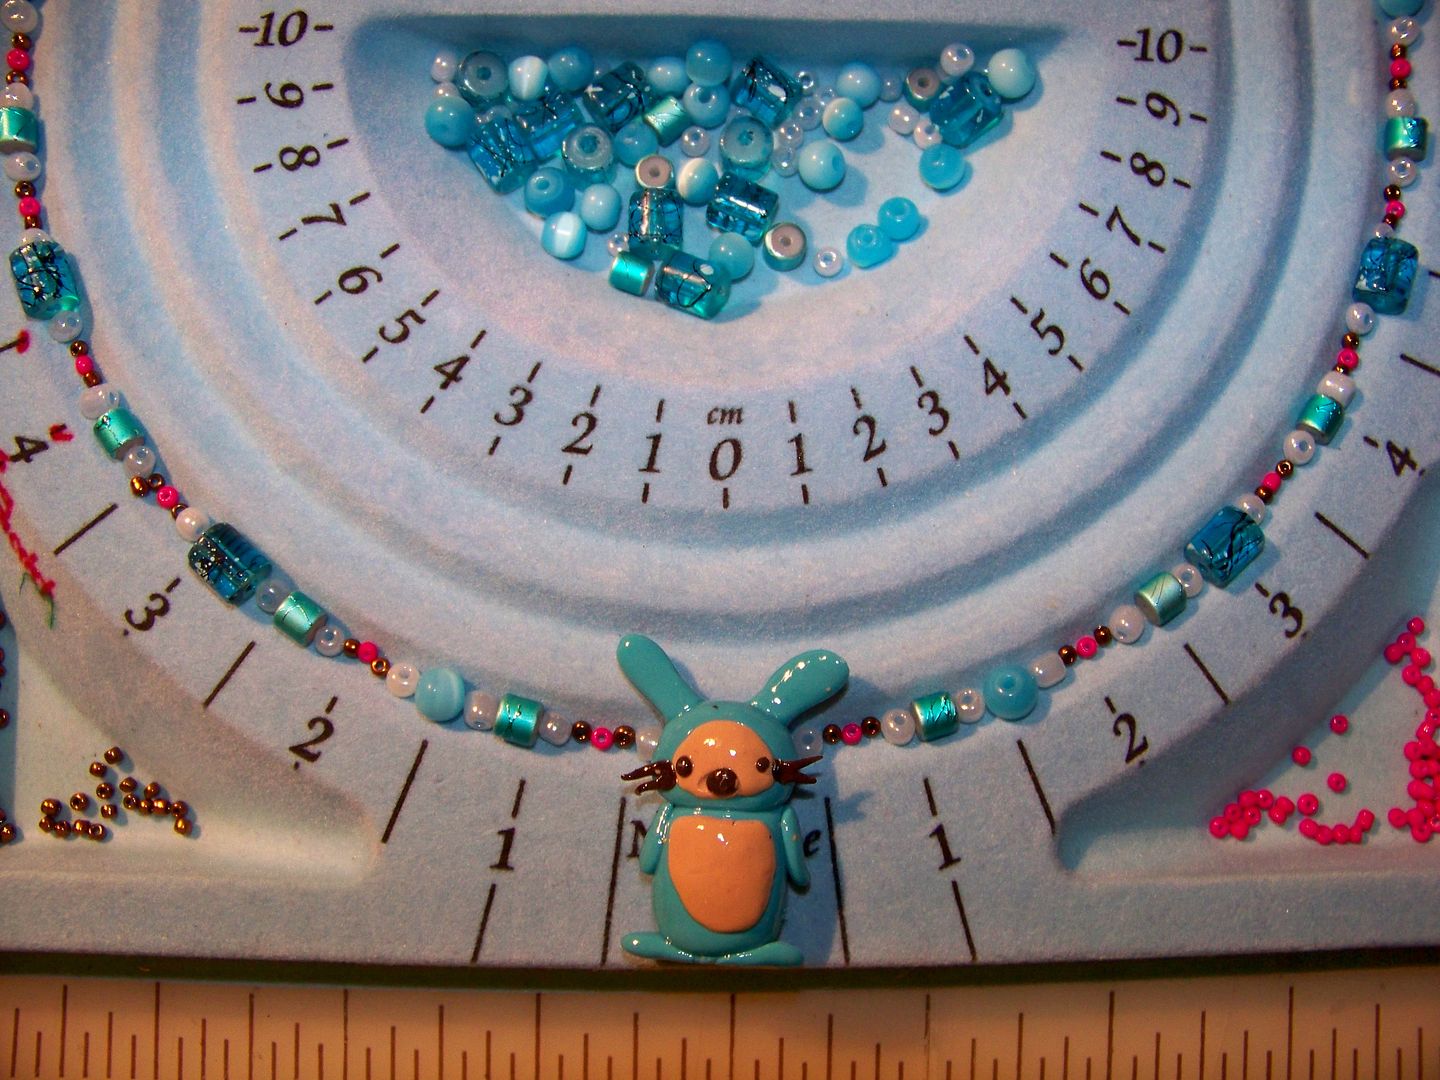
I used coated wire, bronze-colored crimp beads, and bronze-colored findings to string and finish the necklace. You can find my how-to on making this kind of jewelry by clicking here.
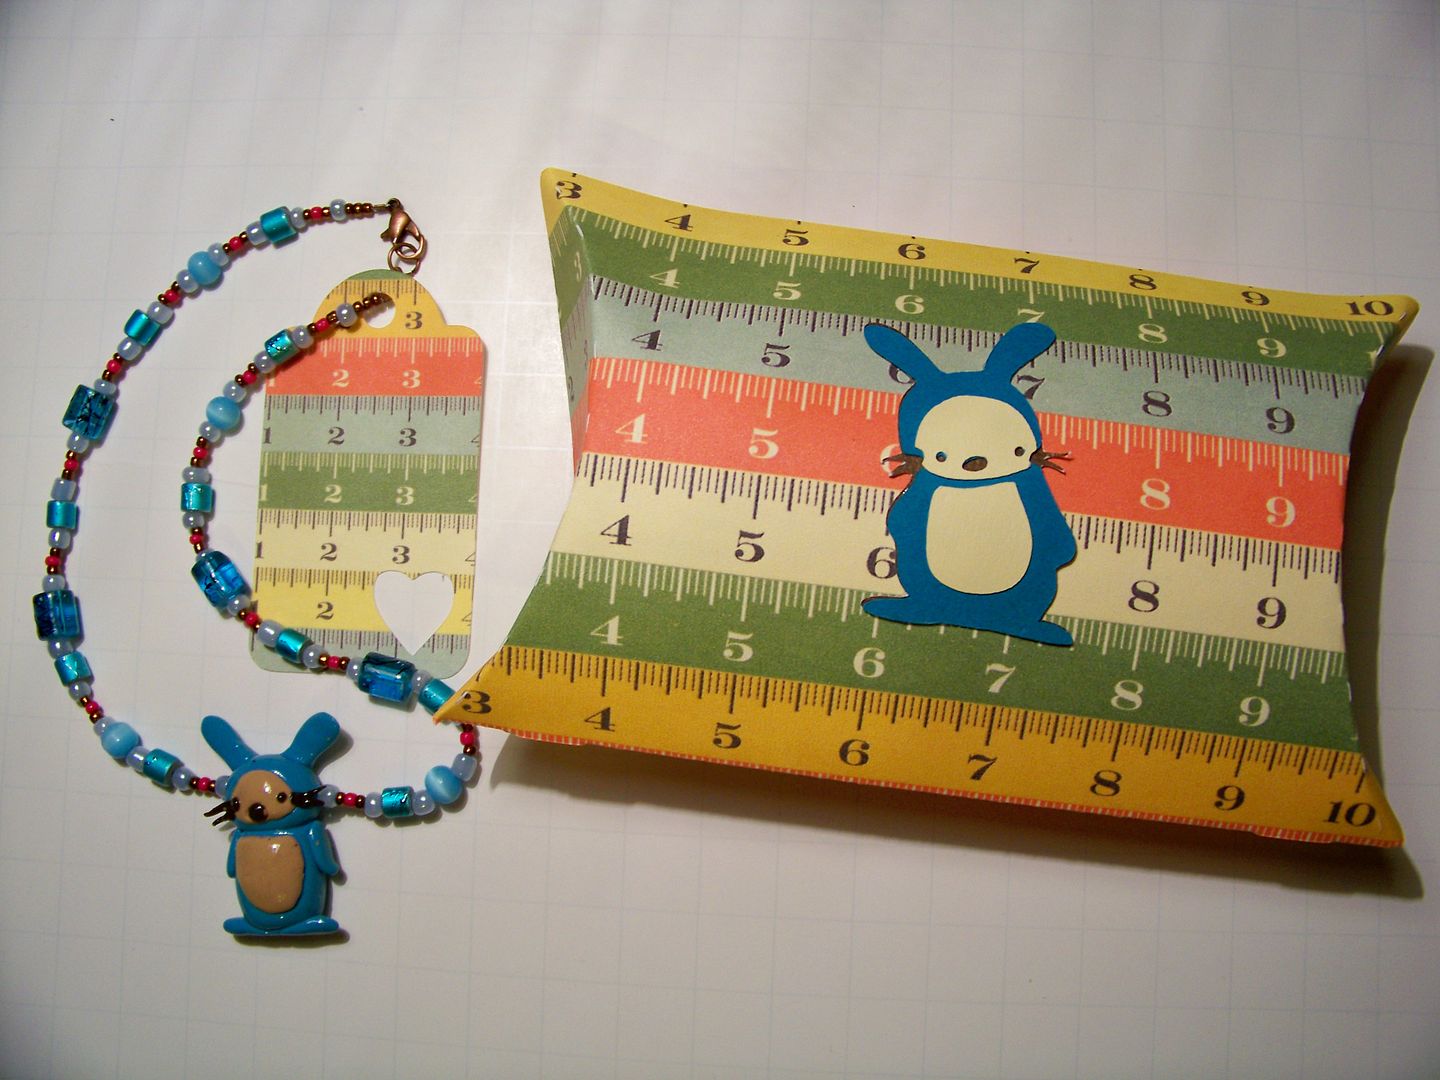
To make the necklace more gift-worthy, I created a tag for it (Art Philosophy 2-3/4") and a pillow box (Art Philosophy 7") for packaging it with a little tissue paper. (I like to write a little bit about the materials used on the tag for the mommy's info when I make children's jewelry). The bunny on the box is 2" from Just A Note. The paper is from Cosmo Cricket.
Happy with the accessories part of the gift, all elements were done!!
Thank you for visiting my blog! I had so much fun putting this gift together!
You can see all of my projects by clicking My Project Gallery at the top of my blog, or by clicking here.
28 comments:
Oh Nadia.. what a labor of love.. so creative and soooo absolutely adorable.
Totally awesome! Your niece is going to love it.
Nadia!!!! This is absolutely wonderful! You are sooo creative. And the project is all the more special because it was made with love. Carah will adore it. TFS Christine
Nadia,
You thought of everything and used every technique that you could find. Adorable projects, I'm sure that your niece will love them. Once again Great Job!
Jami
Oh my goodness!!! It is so lovely and comprehensive. I love the "total package" too when organizing a gift. The clincher for me is the little bunny bead! It totally ties it all together and a great idea on using a tag to let moms know what an item is made of. SUPER SUPER SUPER! And wow.
wow...i wish you were my kids' aunt! this is amazing. i am so impressed at how you did everything....i would have never been able to trace that bunny onto a transparency...he'd be all squiggly...what an amazing gift set. just gorgeous, as always! thanks so much for the comprehensive directions....i HAVE to try some of this! i hope you win the challenge...i'd vote for ya!
Nadia, I think it goes without saying, you are the favorite aunt! What a grand present for going back to school! Thank you for the instructions for all the projects. You are just amazing!
Carolyn
http://cccscraproom.blogspot.com
Wow! Great job and instructions! The gift is beautiful and will be cherished.
Nadia, this gift set is just oozing love all over the place! I think this kid is so lucky to be getting it all. Awesome job as always - AM-AAAAAAAAAAA-ZING!
;)MelodyR
Nadia, you are the MOST talented person I know! You are so versatile and all your work is just AMAZING! This set ROCKS!
Great Post! Thanks for giving detailed description about blog.
Nadia,
You are wonderful; the 'artwork', is fabulous; I look at the image of that bunny in the handbook and don't see anything special; but you've taken it and turned it into
just really really super gifts! Thank you for sharing!
OH my goodness that is so adorable. I love all the cute little bunnys. Your niece will love it I am sure.
If not my daughter would.... So so cute. Great job and good luck.
Terri
What a wonderful gift set. You are very talented.
What a wonderful and amazing gift.
Omg..you are so talented and creative! What a joy to read your blog!
wow what an amazing gift set, I can tell you LOVE to make and give gifts...so much love and detail went into this! you really outdid yourself on this one!!!!!
OMG- absolutely fabulous- I love everything- you are so creative. wonderful instructions and all-
wow! you are one VERY talented person, I think you could have done it all without the Cricut, but WOW!
That is just toooooo cute! I love the stuffed bunny!
Great job on everything. Some oe is going to be very happy.
DIANA L.
http://dianamlarson.blogspot.com
Wow...just wow!! What an awesome gift! I cant believe you did all of that with just the Cricut. It is so amazing!
Tracy
Can I be your niece?
Antann!
Fabulous!!! All I could say was WOW, then more WOW'S!
Incredible! You Better Make The Chirp!
This is seriously adorable! What a Lucky Little Niece you have!
Colleen
What a fabulous, fabulous set!! I wish I'd seen this a few hours ago as I JUST (within the hour!) completed my first attempt at iron-on vinyl. I've decided I will allow my son to wear the shirt out in public but have learned from a couple of little mistakes I've made. How your post would have helped!!
Your set is absolutely darling and will be much appreciated, I'm sure. Your attention to detail is incredible!
Thanks so much for your kind comment on my blog. I do appreciate it.
Nadia, it's laready been written by others, BUT could you possibly adopt me as your niece?
I would love to spend several days learning from you! Your tutorials are exceptionally brilliant and easy to understand. Thanks so much!!
Oh, Nadia, your neice is going to adore this!!!
I have to tell you, I always learn something from you!!! LOL!!!
Oh my goodness!!! Now my "card" seems so trivial. This is incredible!
Post a Comment