Saturday, July 30, 2011

The Resident Princess Chooses a Winner!

It is time to draw for the winner of the 3" Cricut Collectible!  While others like Random.org for their drawings,  I like doing it the old-fashioned way.

So... without further ado... allow me to introduce the lovely Princess Piper.  She will be picking a winner from the basket of entries! 

Thank you, Gina Piazza, for the lovely boa! 
Wow!  So many entries...


She swirls around the entries, using her princess powers to find a winner...


...and she chooses...


Woot!  Woot!  Congrats, Diane!!! 

Thank you all for visiting my blog!  A new project is coming soon!

Wednesday, July 27, 2011

Keith in a Pickle...Costume

Some say the pen is mightier than the sword. I say the Cricut trumps 'em both. Never mess with a paper crafter!   Today, revenge comes with a little paper and my Cricut. I call this 'Keith in a Pickle...Costume.'


In case you don't know, my friend Donna's husband has called me out!  (You may know Donna as Scrappymama on the Cricut message board).  In his travel blog, Keith recently renamed The Three Gossips formation in Arches National Park in his post.


He said, "I nicknamed them Donna, Rebecca, and Nadia. Names are purely fictional. Any resemblance to real people is well deserved." You can see the post for yourself -- click here

That my friends, says he's ichin' for a fight!  I knew that Keith would be my helpless victim on paper.  Oh, the power!

Amazingly, there was a lot to learn in doing this!  First, I had to figure out how to use the pun 'in a pickle' to see my revenge.  That bit of genius was provided by the lovely Donna, my co-Gossip.  I wanted him to be a pickle, but I wanted to make it clear that this was Keith, so I opted to put him in a pickle costume.

I had asked for pictures of Keith so I could make a paper portrait of him.  I had learned to do that in a previous post.  You can see that by clicking here.  After I received a perfect photograph of him with his tongue sticking out, I knew that I was going to use the actual photo instead!  (How could I top this?!)


The cut I used for the pickle costume is from Just Because Cards cartridge, page 26, cut at 10-1/2" on my Expression.  (The other pickles in the jar were my test cuts.)  I needed the costume pickle to look a bit different from the 'real' pickles in the jar--the way real costumes look different from the objects they depict.  I opted to ink the real ones and only use the base layer.


For the costume pickle, I used a top layer, pressed it through the Cuttlebug for fakey pickle bumps, and inked over them.  I created a zipper using decorative edge scissors and metallic paper.  I hand-cut a little zipper pull.


I cut out Keith's head from the photo.  (It seemed like he was actually sticking his tongue out at me once I did that, which propelled this project, giving me the little boost I needed to continue... or maybe it was just late and I was getting weird.)


I popped his head up with pop dots and cut off the top of the pickle so I could make him a hat.  Don't you just love the chin strap!!  (Chin straps, beanies, and clown noses all have the same goofiness to me).  I made little slits at the top and bottom of his ear so the twine would tuck behind the ear.  The twine I used was some that I had dyed recently.  You can see that post on how to dye twine by clicking here

Next, his legs.  I don't care what you say about the Shall We Dance cartridge; boy, was I glad to have it on this project!!! Where else would I have found men's legs in tights????  I loved this!  (I never, ever thought I would use this particular cut, so thank you Keith!)


The legs were cut at 9", flipped using shift and the layer feature, from page 49,  I  cut them apart, creating a thigh for the top leg and inked the edges.  Nice calves, huh!  I used an X-acto knife to cut a slit just above where the top leg would be positioned.  I wanted it to look like it was coming from a leg hole in the costume.  I tucked it into the slit and glued it flush at the top, but used a pop dot at the knee to pull his leg into a little kick.  The bottom leg is attched with a pop dot to build a little depth.


So, the legs made him look like he is dancing.  Seeing that is when I knew he needed to be giving us disco hands.  There's nothing like a pointed finger in the air to say 'look at me shake my pickle booty.'  That was the next element!  The Feeling Groovy cartridge would not cut the arms to the scale I needed on a 12x12 mat, so I decided to make custom hands and arms.


I used the search words 'hand sihouette' in Google Images to find these great hands.  They were already the perfect scale!  I simply used the hands I wanted as patterns and hand-cut around them and the flesh-colored paper at the same time.  (I used paper that I had printed on the Imagine for the flesh, using RGB code 250, 229, 210). 


That worked just fine for the open hand.  For the pointing hand, I had to create fingers and a thumb.  I took a picture of my daughter's hand in that position.  Then I cut a second pointing hand, cutting away all but the folding down fingers, and a thumb shape that matched what I saw on Piper's hand.

See how the thumb overlaps?  That is the key!

I glued only the top edge of the fingers and side edge of the thumb, bending the ends slightly. 

For his extended arm, I found one just like I found the hands, by searching 'arm silhouette'.  For the arm close to the body, I just cut a simple shape and attached it behind the body.  I adhered the hands to complete the figure after inking the arms heavily.


All along I had kind of thought he would be in a jar of pickles.  I had envisioned that I would use acetate that I colored pale green to be the water.  The error in this thinking is in forgetting how dimensional I made Keith.  I would lose some of the dimension and have to pop up the acetate layer.  At this size, I opted instead to keep the jar behind him for reference and have him doing his little dance in front.

For the jar, I used the Savory cartridge, cutting at 11-1/2".  I altered the cut somewhat, cutting away the pickles on the original, since I had made my own pickles.  I cut the base twice;  cutting once in white for the jar and once in light green (cutting off the top to adjust the level of liquid) for the pickle juice. 

I mounted the jar and the costumed Keith on a piece of 12x12 black cardstock. 


Thank you for looking at my blog today!  I hope you enjoyed my paper revenge! 

Edited 7-29-11 to add:  As the pickled gentleman that he is, Keith created a follow-up post on his blog where he showcases Donna's beautiful mini book.... and has an answer to my 'pickle post'.  I also get the honorable title "Cricut Whisperer," which I vow to make into a Yudu project!  You can see his follow up post by clicking here.  Thank you, Keith, for being such a good sport!

If you are viewing this before July 30, 2011, it is not too late to have a chance to win a Cricut Collectible!  You can do that by clicking here to go to that post! The collectible I am giving away is not yet for sale anywhere!  (How exciting is it to win something that you can't even buy yet!!!)  It is unopened so the secret of which color is inside is still in tact!!  Check it out


Saturday, July 23, 2011

Cricut Collectible GiveAway!!!!!!

I bought a Cricut 3" Vinyl Figure collectible at the Cricut Circle crop in Mason, Ohio just to give away to someone!  These are cute little bug characters that come in different colors, but you don't know which color you have until you open the box and then open the special inner bag and look!  This one is still sealed to keep the surprise!


Each package contains ONE Cricut Collectible.  There are 12 different designs!  Which one is in this box is still a surprise!
Soon, you will be able to buy these little guys on cricut.com but I wanted to share a bit of the fun from the crop and give this away.  All you have to do to get a chance to win is to leave a comment on this post with a way to get in touch with you if you win, and to become a follower of my blog (if you are not already following).  Princess Piper will randomly draw a name out of all those who entered and I will post the winner next Saturday, July 30. 

I have also donated one of these guys to the on-line swarm on the Circle messageboard that Caroline (Doxieluv) is hosting.  If you are a Cricut Circle member, check out her thread there to see how to participate in her event!

Thursday, July 21, 2011

My Circle Projects for the Roadtrip to CHA -- Mason or Bust!


When I was a kid, Kings Island in Ohio was the summer destination if your family wasn't going to make it to Orlando.  It was nearby (just a few hours from home) and had that magical Eiffel Tower replica right in the center!  Hanna Barbera Land was the place I remember most and the Flintstones TV ride was my favorite.  I love that the Cricut Circle has made the Kings Island Resort one of its summer hosting spots this year!  I knew I had to go!

For this event, I decided to re-do my calling cards


I had to make 110 and knew that I wanted to use the "Keep Calm and Pretend You Are At a Crop" design that I had figured out for my candy bars for the Louisville event.  You can see those by clicking here.  I worked out most of the design on the computer and sent the file to my favorite local print shop to help me out and print all on cardstock.  All I had to do was trim everything down!!!  I used the Cricut Circle logo paper from a file that Kay (Kut-n-Print on the messageboard) offered to us on the Circle.  Her awesome gift has come in so handy!  (You can check out her other projects and brilliant solutions on her blog, Clever Someday).  I popped up the Keep Calm text card with foam tape and added a crown from the Baby Boutique Imagine cart, cut at 1.6 after separating it from the other layers.


On the reverse side of the cardstock printed with the Circle paper, is printed my personal info and a mini avatar picture:  one layer and no gluing it together.  Then the text layer is applied with foam tape for a nice, sturdy, and clean finish.


My magnets were my next project.  This was made for a magnet swap that hostess Kim Hamilton has organized for us.  You can find details, cut sizes, and my notes on the original post by clicking here.


My state pennant for the contest was next!  Provocraft opened the contest up to everyone in the Circle and thus required us to mail in our entries.  How fun it will be to see all the pennants together, forming a banner of the states and countries of the Circle members!!  I cannot wait to see it.  You can see my original post for this project with the cut sizes, carts, and technique how-tos here.


Next, I worked on t-shirts!  I learned how to use my Yudu at the Louisville Cricut Circle crop and knew I wanted to make a t-shirt for myself.  A couple of other Circle members asked me to do shirts for them too.  I love a challenge and thought this would be a great learning experience on the Yudu!  I decided that the design I wanted to use was from Cindy, who attended the Northern California Cricut Circle event, so I contacted her.  You can check out her awesome shirts made from heat transfer vinyl here.  For all of my details for making the shirts with lots of pictures and a liquid emulsion tutorial, click here.


My next project was bakers' twine RAKs!  I just ordered a couple of cones to decorate my baked goods for fund-raising donations to my daughter's school.  With that, I can see that I will never bake and wrap enough cookies to use 6800 yards.

With bakers' twine, you can pay $2 and get 15 yards, or pay $15 and get 3400 yards... so I now have two 3400-yard cones!    I found a great source, thanks to Debbie (Scrappydoo on the messageboard),  Country Clean Paper Supplies.
At the Louisville crop, DianaC, one of the Circle members, brought cones of bakers' twine and allowed us to take whatever we wanted.  I thought that was such a kind and fun thing to do!  I decided to do the same thing with some of the overstock of twine I find myself with!  I wanted to make it easy to give it away and decided to make little cards with 10-yard hanks to hand to the ladies at the crop as we trade calling cards.  I used the ticket from Mickey Font (page 123), cut at 1-1/2" on my Expression, to make the cards.  I used some leftover posterboard (that cheap kind you find at Walmart) and was so pleased to find how nicely it cut on my Cricut! 

Autofill on 12x12 on the Expression will cut 21.  For posterboard, I used these settings:  Multicut 1, pressure 4, speed 3, and blade 5.  I like a sharp blade and an unsticky mat-- look how nicely that combination worked as the tickets pop right up!  I used the ticket cut that is found on the Mickey Font to make these.  I cut it at 1-1/2" for the 10-yard pieces.  I also made a couple of 50-yard RAKs and cut those tickets at 4" for the 50-yard pieces.

If you are a Cricut Circle member and can ever get to a meet-up or crop, I highly recommend it!  It enhances the Circle in so many ways.  For someone like me who has no one around who is "into" this stuff like I am, getting to know other paper crafters is a pure delight!  Everyone is so kind, funny, smiling -- fast friends right away!

Thank you for visiting my blog!

Thursday, July 14, 2011

Cricut Kentucky Pennant


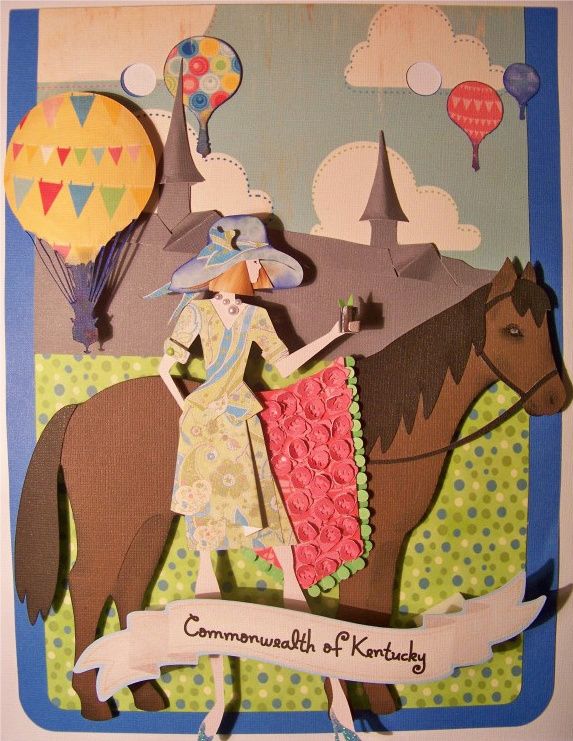
According to the popular saying, "Kentucky is known for good whiskey, fast horses and beautiful women." ...And I would add:  the Kentucky Derby, bluegrass, and Derby hats on ladies at Churchill Downs!  I used those images on my Kentucky pennant for the Roadtrip to CHA pennant contest!

Requirements of this contest were to use the Birthday Bash cartridge for the pennant, cut at Fit to Page for 12x12 paper size.  We were given choices from all of the pennants on pages 58-70 which is every shape of pennant possible!  All entered pennants will be joined together for a beautiful banner to decorate the room at the up-coming Circle event in Mason, Ohio. 

I chose a rectangular pennant so that I could focus on a standard space for my composition. 

I chose a cloud paper from Hopscotch that I had printed for another project but never used, a solid blue for the outer pennant, and a blue and green polka dot from my stash.  The outer pennant was cut on the Expression at Fit to Page, which was 11" on this machine.  The others were cut at that size relative to the outer pennant.  I cut across the green polka dot paper and placed it to create a horizon line.

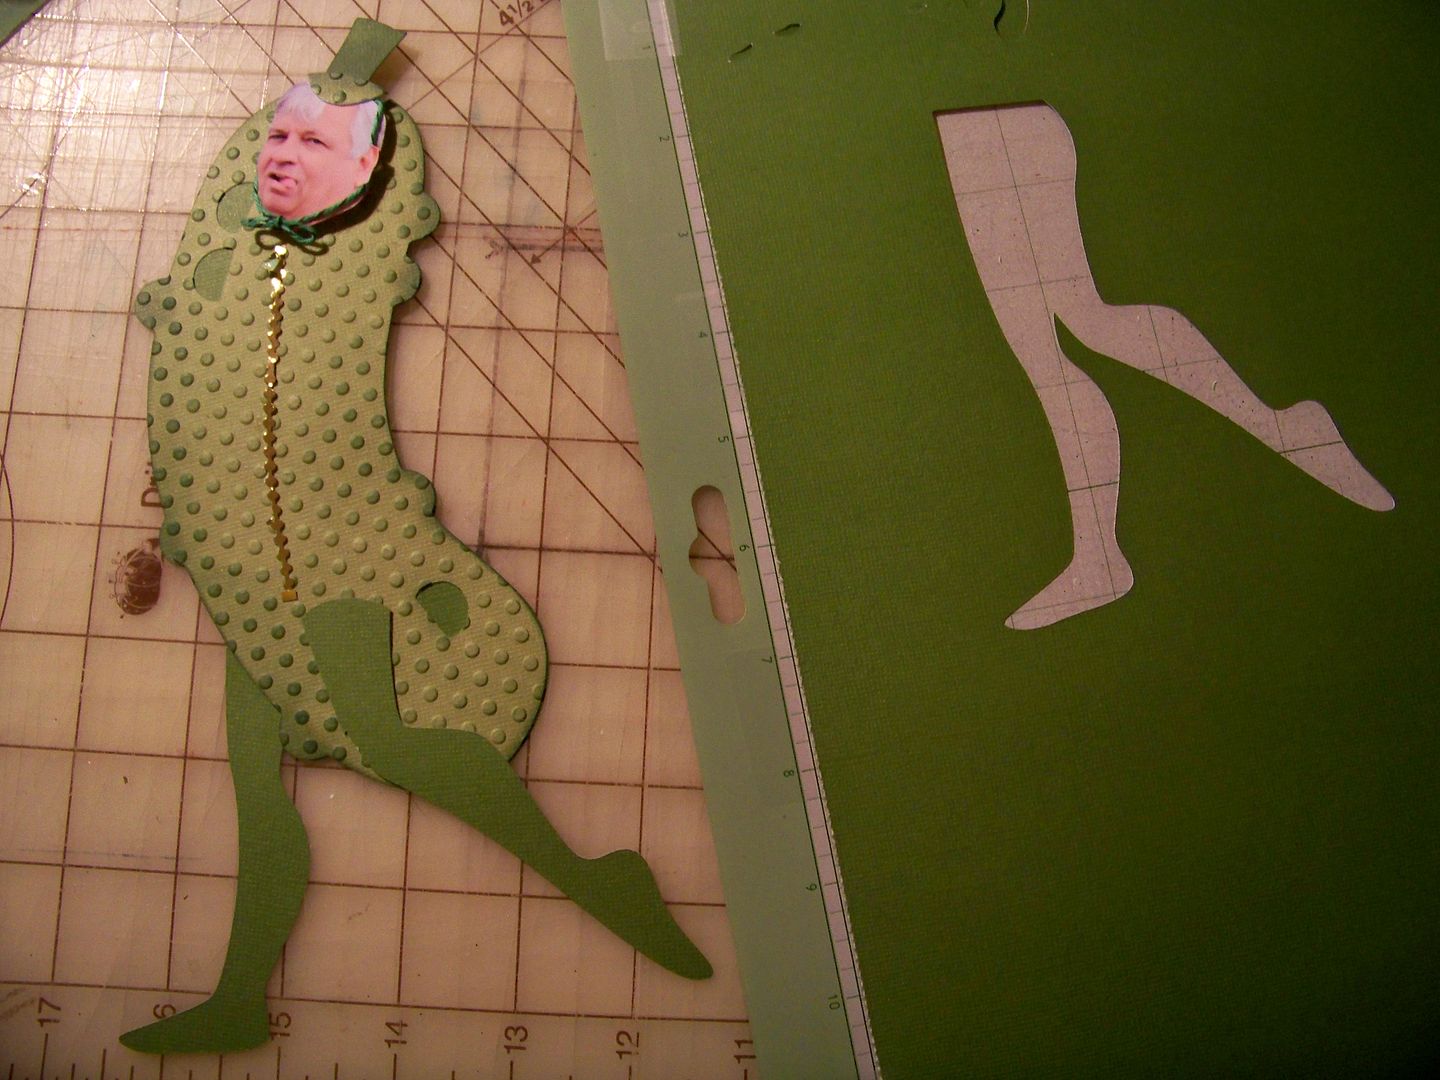
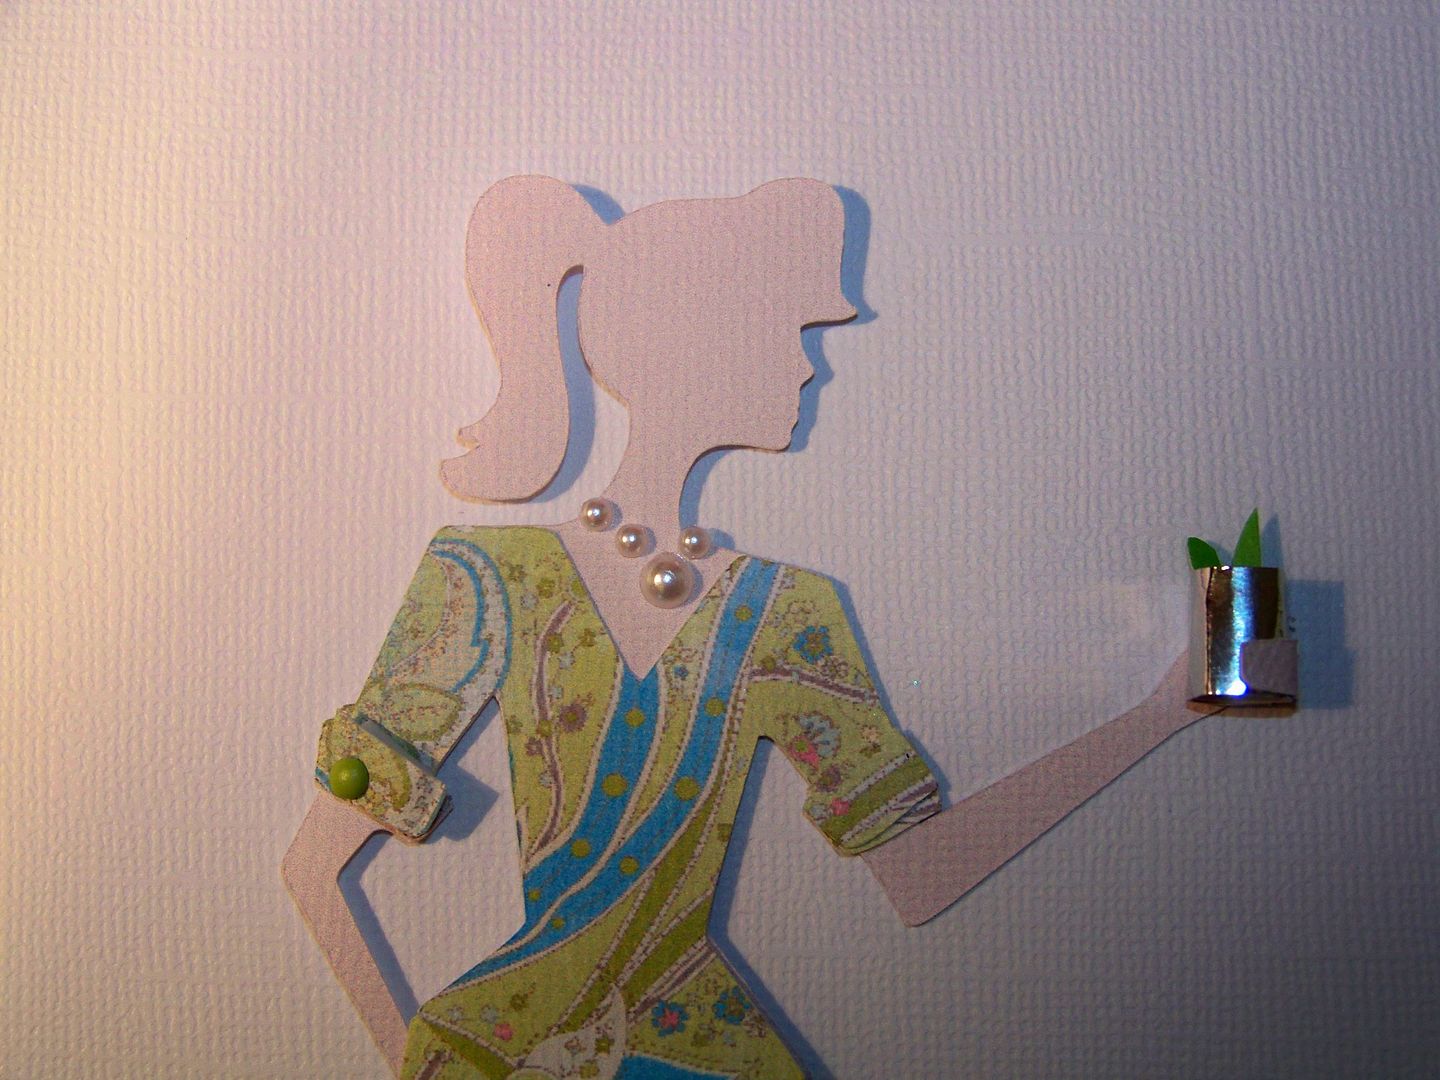
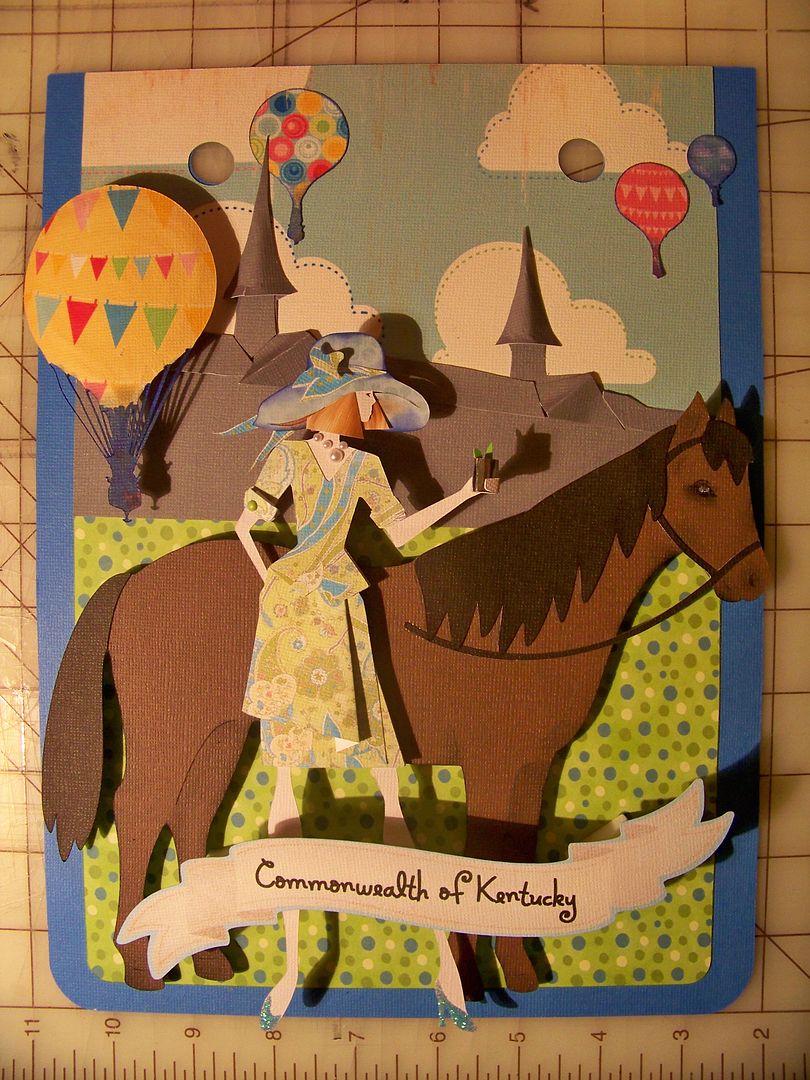
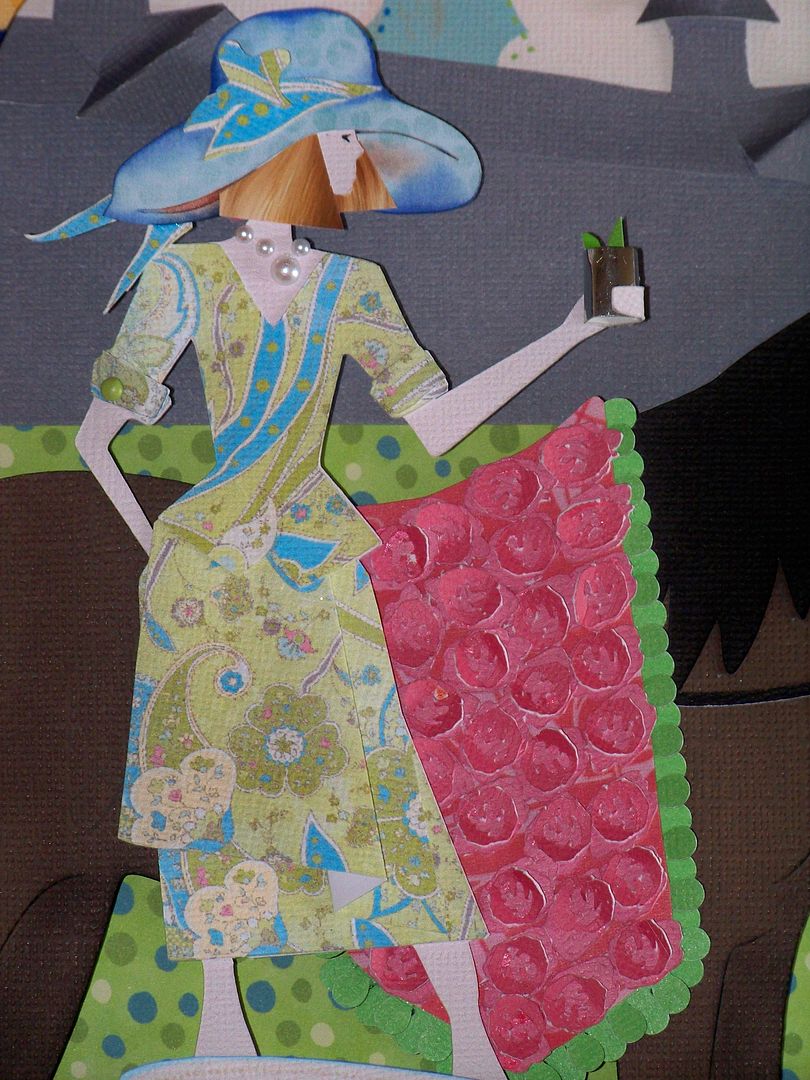
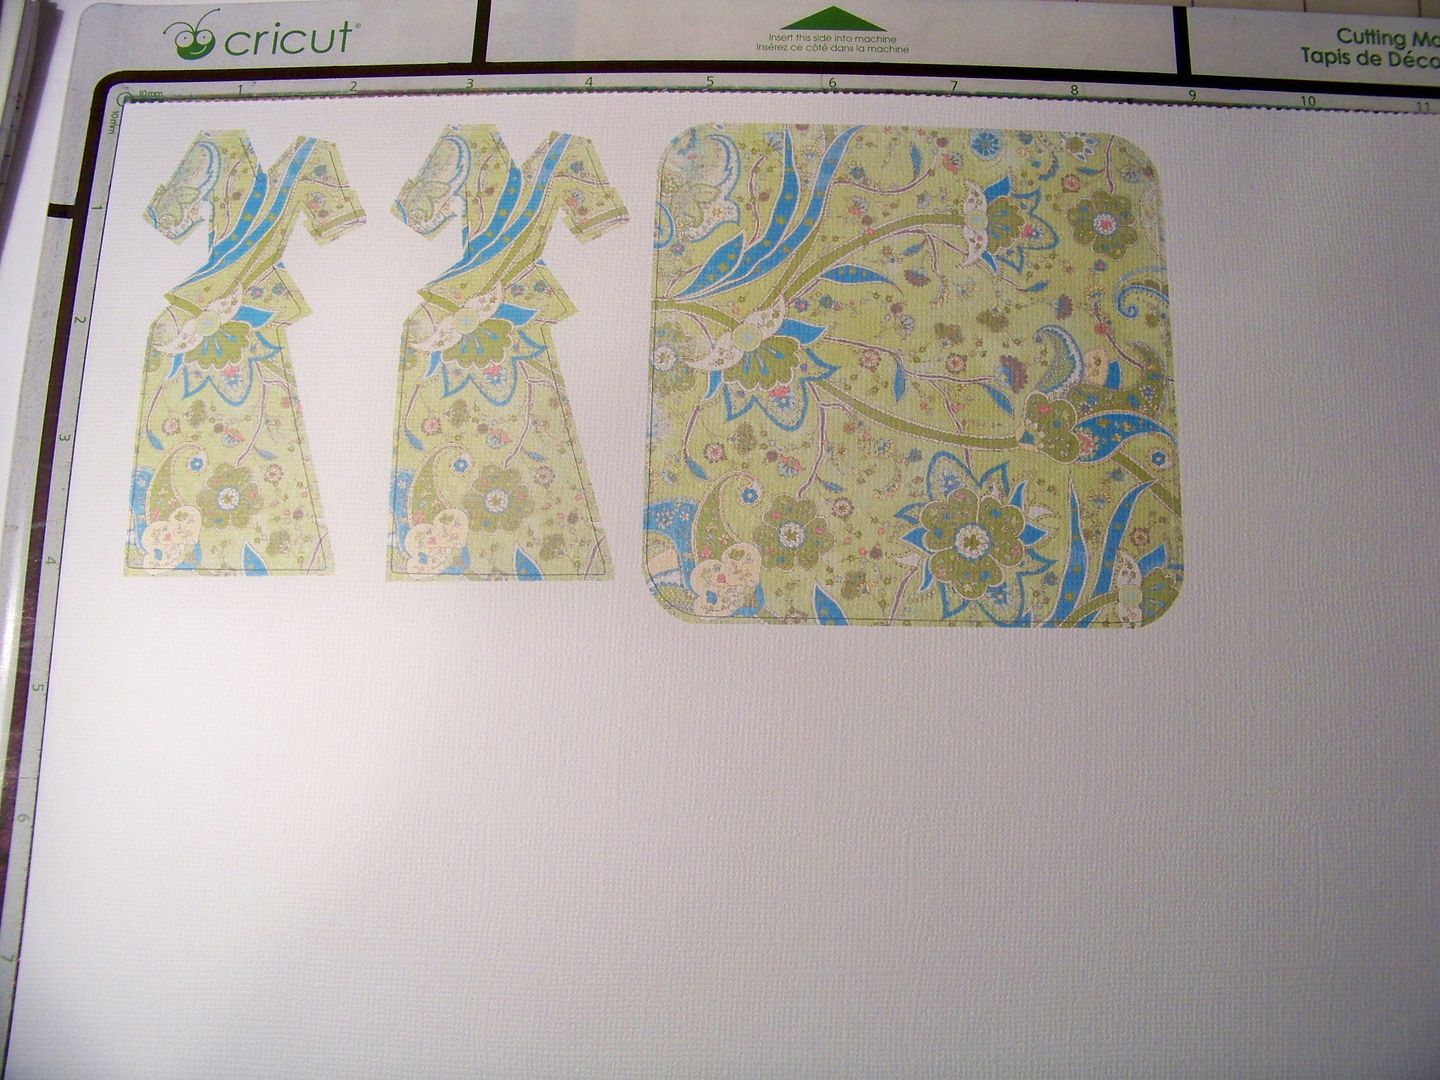
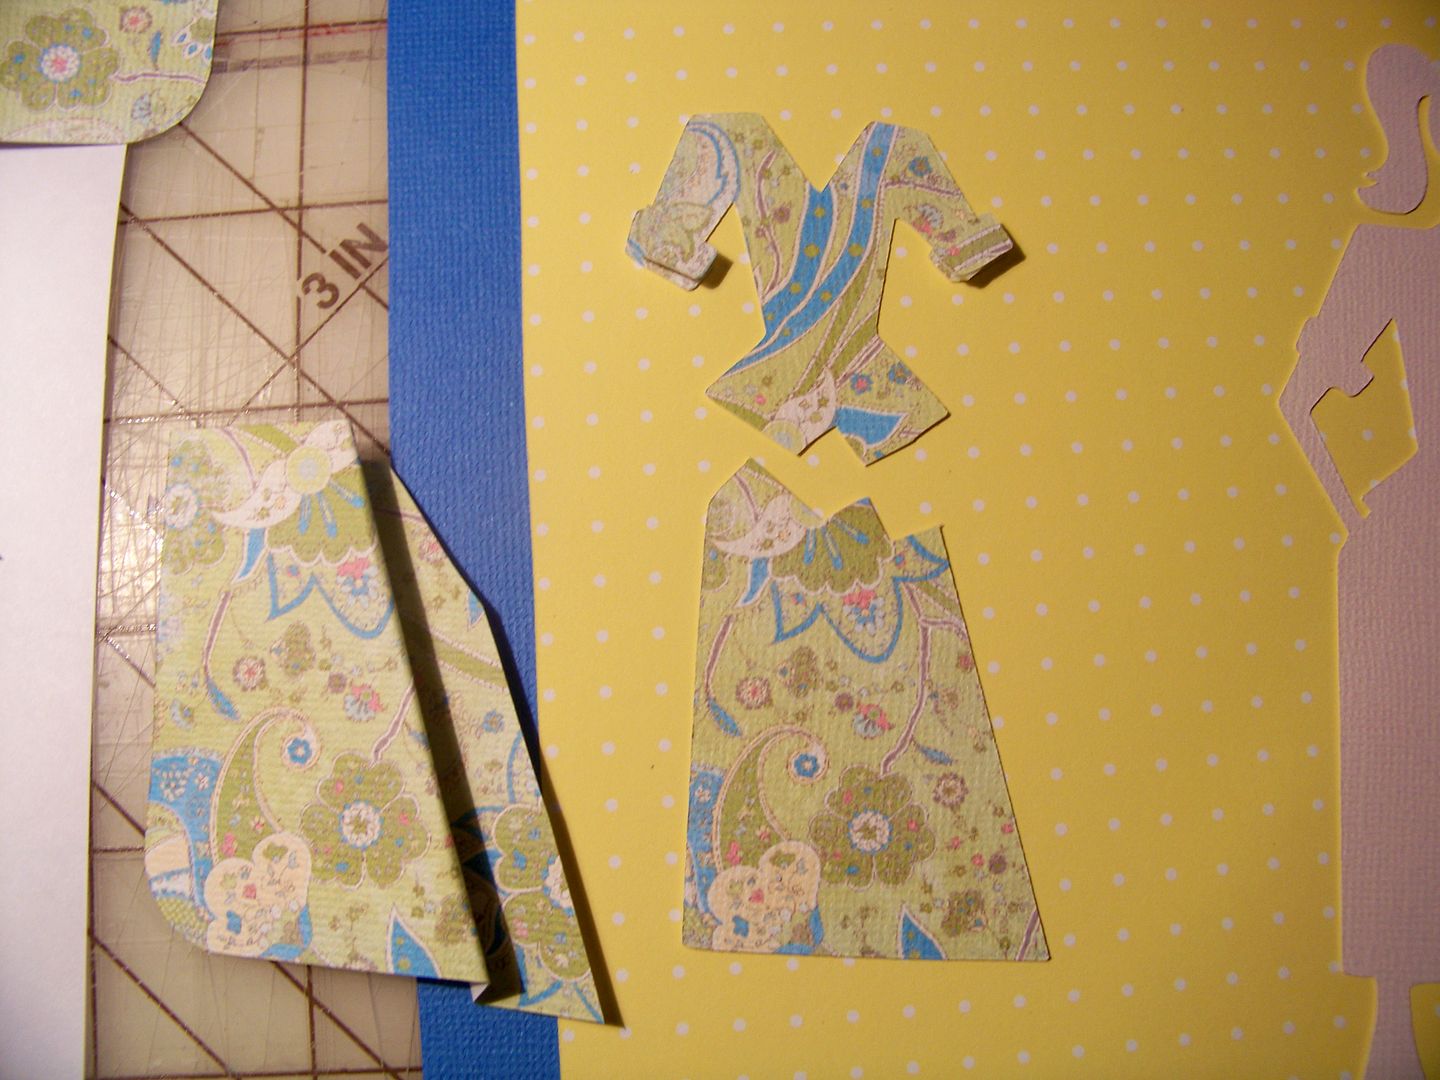
I started with the figure, since getting her to work out would be pivotal for this project.  I used Forever Young, cutting her on the Imagine at 8", using RGB 250, 229, 210 for her flesh color.  I cut her dress using Blossom for the print.  I actually cut two dresses and a 4" square.  The extra dress and square were cut just to give me extra "fabric" to use so that I could alter her dress, making it a bit more couture.  I used a 4" square so that the fabric print scale would be similar to the dresses. There is no formula for that, by the way, I just looked at the screen and adjusted the size of the square until the scale of the print matched the flood-filled dress. 


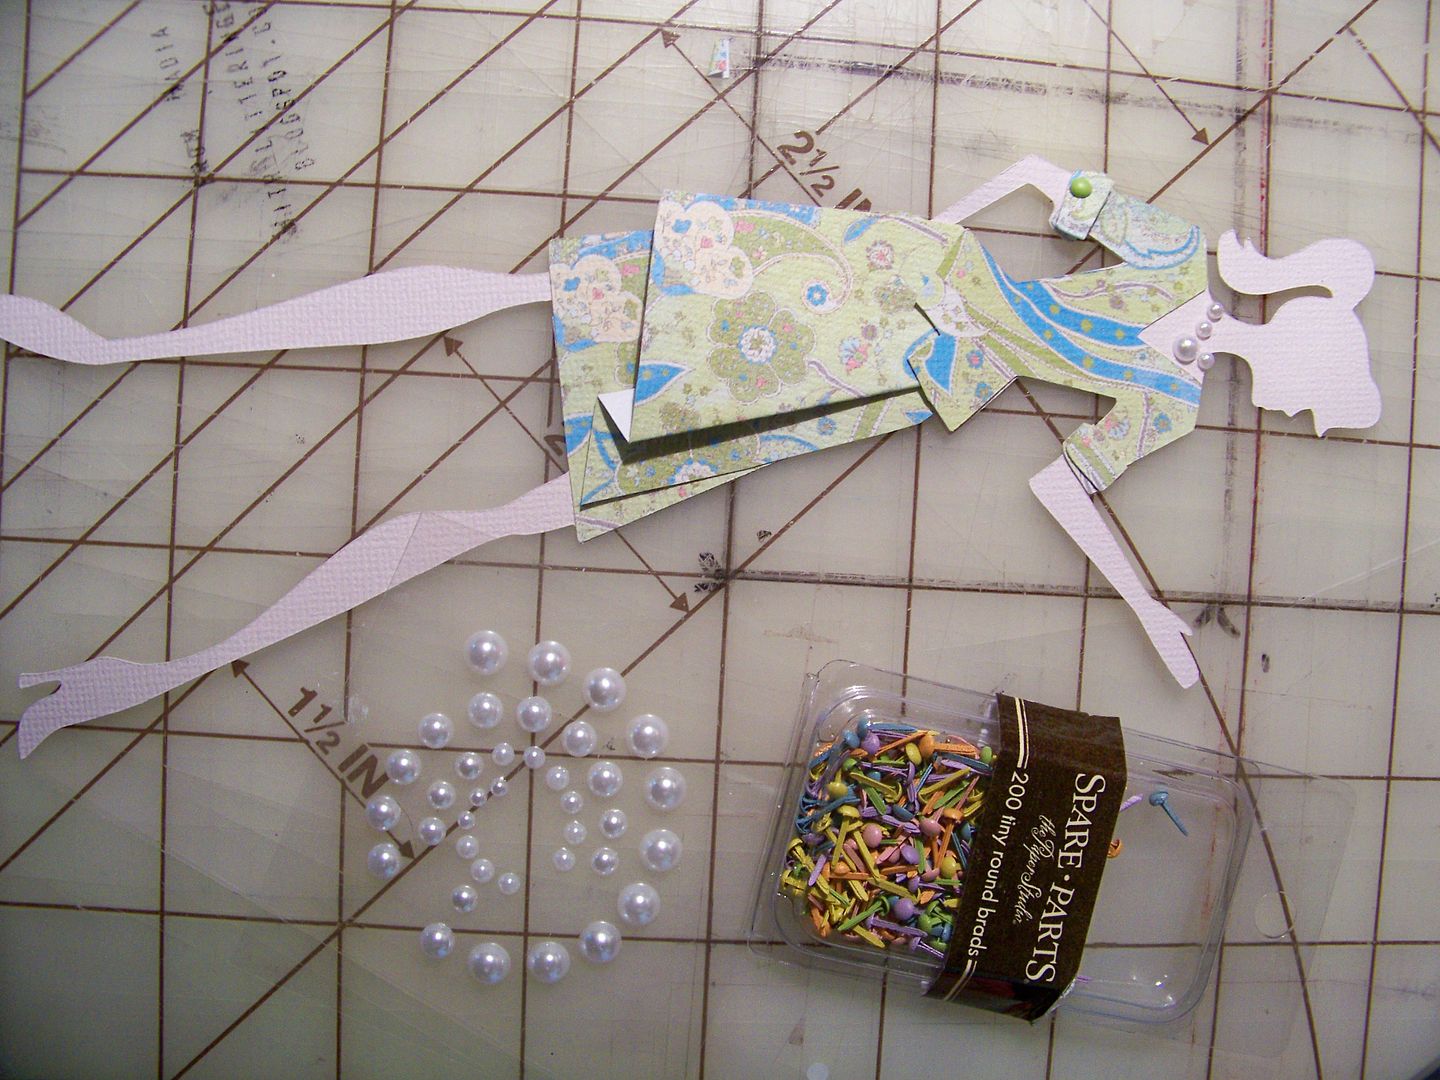
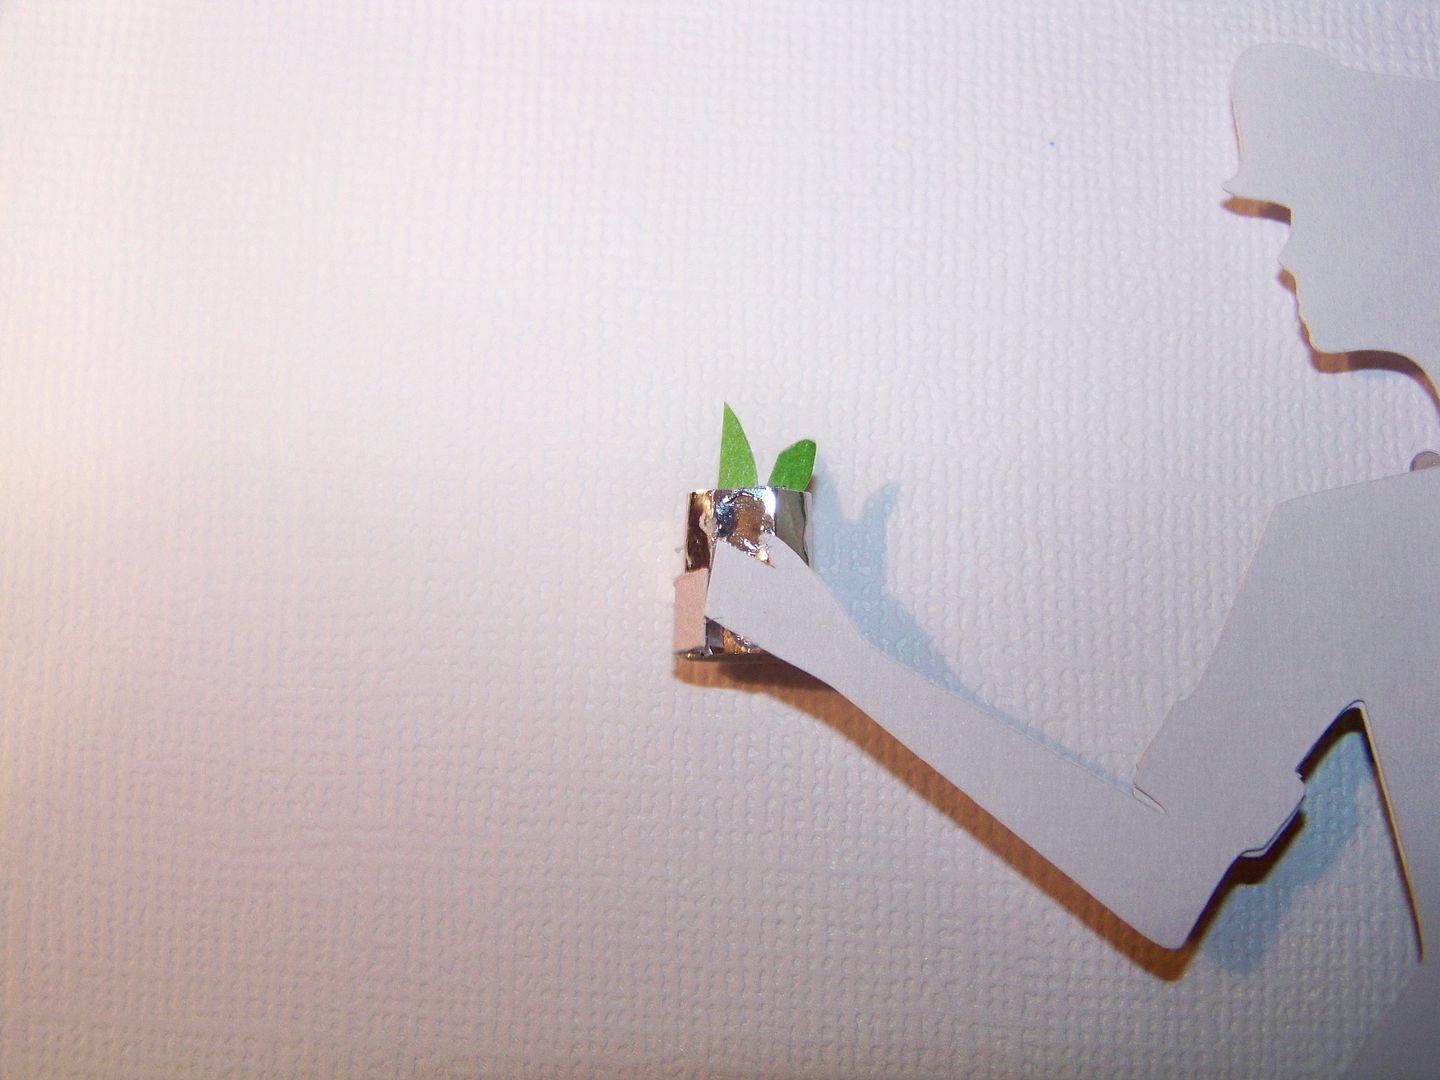
I cut extra cuffs, then embellished the figure with adhesive pearls and a mini brad.  I used glossy accents and glitter to make her shoes.  I created a mint julep cup by hand-cutting metallic paper (traditional julep cups are sterling silver, not the novelty printed glass that they sell as collectibles!), rolling and gluing to make a mini tube and adding a little "sprig of mint" by cutting a couple of tiny green leaves and gluing them to the inside of the cup.

I cut her hand, flipped it, and glued it to the front of the cup to look like her hand is wrapped around it.


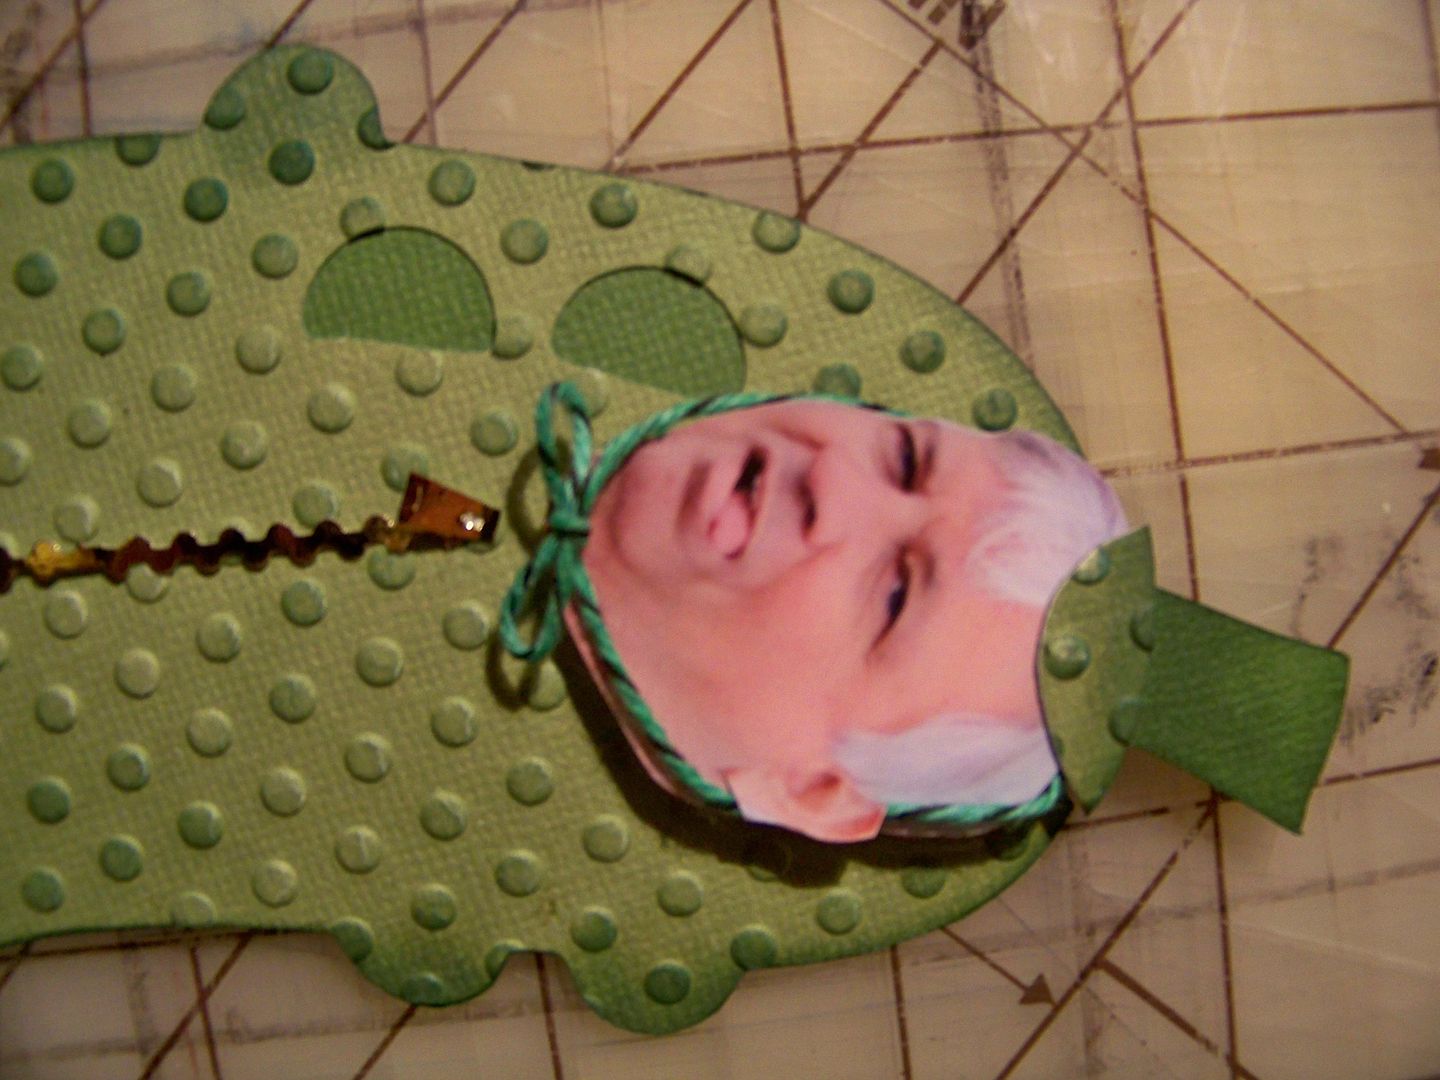
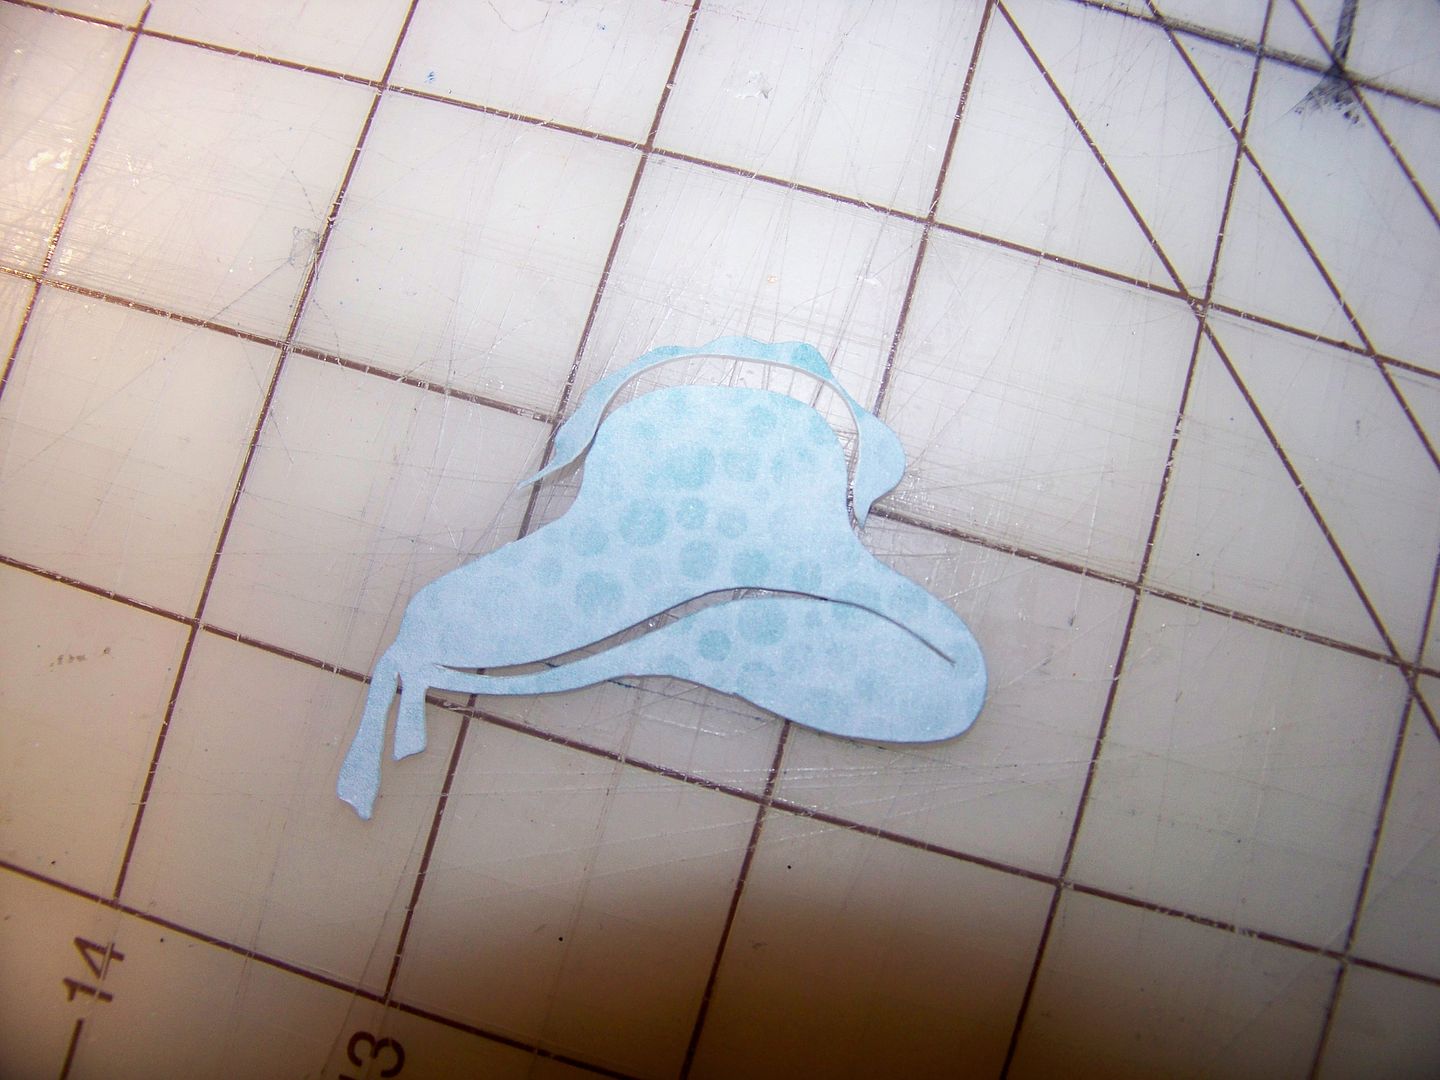
I cut her ponytail off and made a Derby hat for her to wear by cutting the hat on Heritage at 2" on the Imagine, flood filling the shape with a pattern from Enjoy the Seasons. I trimmed off the hat stand and shaved the top of the hat off a bit.
I inked the hat heavily and used some of the leftover dress "fabric" to cut some hat embellishments, gluing some flat and popping up some elements.  I had planned to leave her without hair or facial features, like a fashion drawing, but my husband and daughter made enough comments to change my mind.  (Everyone is a critic these days, I guess).  Her hair was cut from a leftover birthday invitation -- that is printed on hair from a Tangled invitation!  I chopped it up and tucked on under the hat and glued in place.  The tiny indication of an eye was added with a Zig fine pen. 


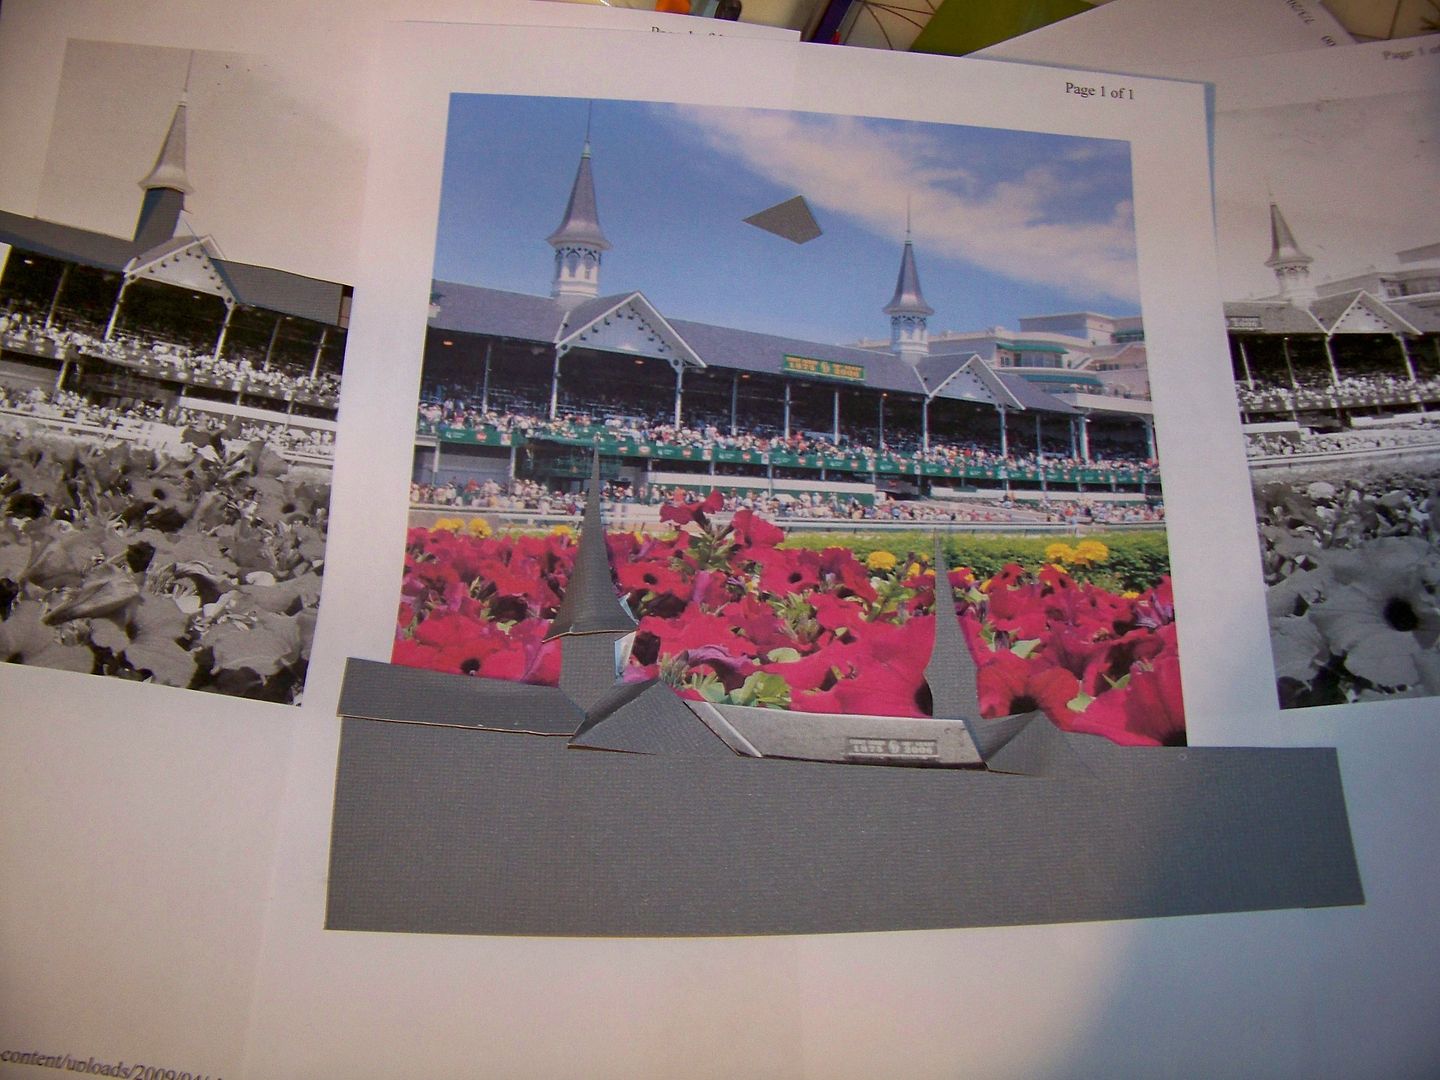
I knew I wanted Churchill Downs represented and checked to see if there were any spires on any cartridge.  Failing to find one, I used Google Images to print off a picture of the landmark and then copied it in black and white to cut it apart for a pattern.  I used those pieces to cut the building from gray textured cardstock.  I duplicated the cuts for the roof and spires, folding and bending to create the 3D effect, and gluing right on top of the original cut.


One of my favorite things each year is the Hot Air Balloon Race during Derby Week.  We also go to the Balloon Glow the night before.  It is such a magical view of the sky that I wanted to be sure to include balloons on my pennant!  I cut hot air balloons from Summer in Paris at 4", 2", 1-1/2", and 1", flood filling each image with patterns from Hopscotch.  I inked the balloons heavily.  The rope detail was too fine for the Imagine to cut and maintain on the small balloons, so I trimmed the balloons smooth.  This worked out well since you don't see that kind of detail in real life when balloons are that far away anyway!  Again, I used Google Images to be reminded how balloons look as they cluster and hang in the sky so I could place my balloons correctly.

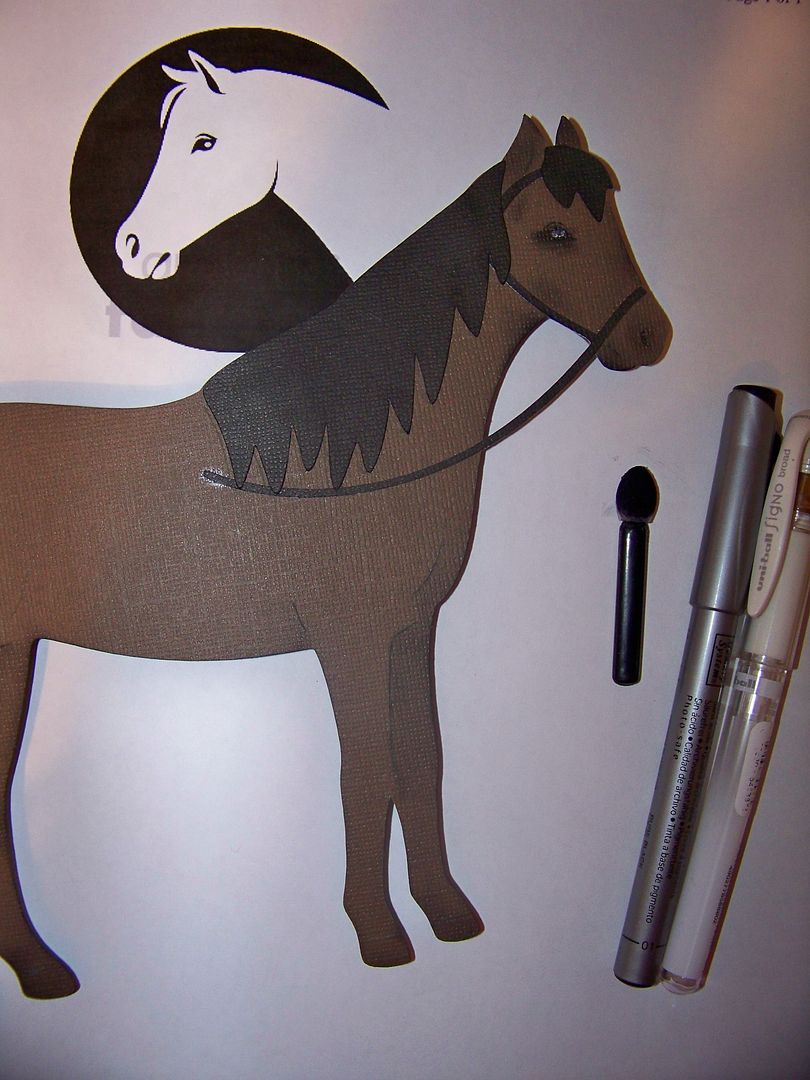
The horse was the image I was putting off cutting!  I knew we didn't have a race horse or thoroughbred on a Cricut cartridge.  (I actually requested that a future cartridge be developed with a racing horse and jockey from Provocraft's Shannon Lerner at the Louisville Circle event!)  I knew I wasn't prepared to hand-cut a horse so I used one of the horse cuts from Old West (page 46), hoping that folks "in the know" would forgive me and accept this as artistic license!  This horse was cut on the Expression and flipped.  I inked it in black and had to draw in an eye since I had that detail on the lady.  I used Google Images again to answer what a horse's eye looks like!


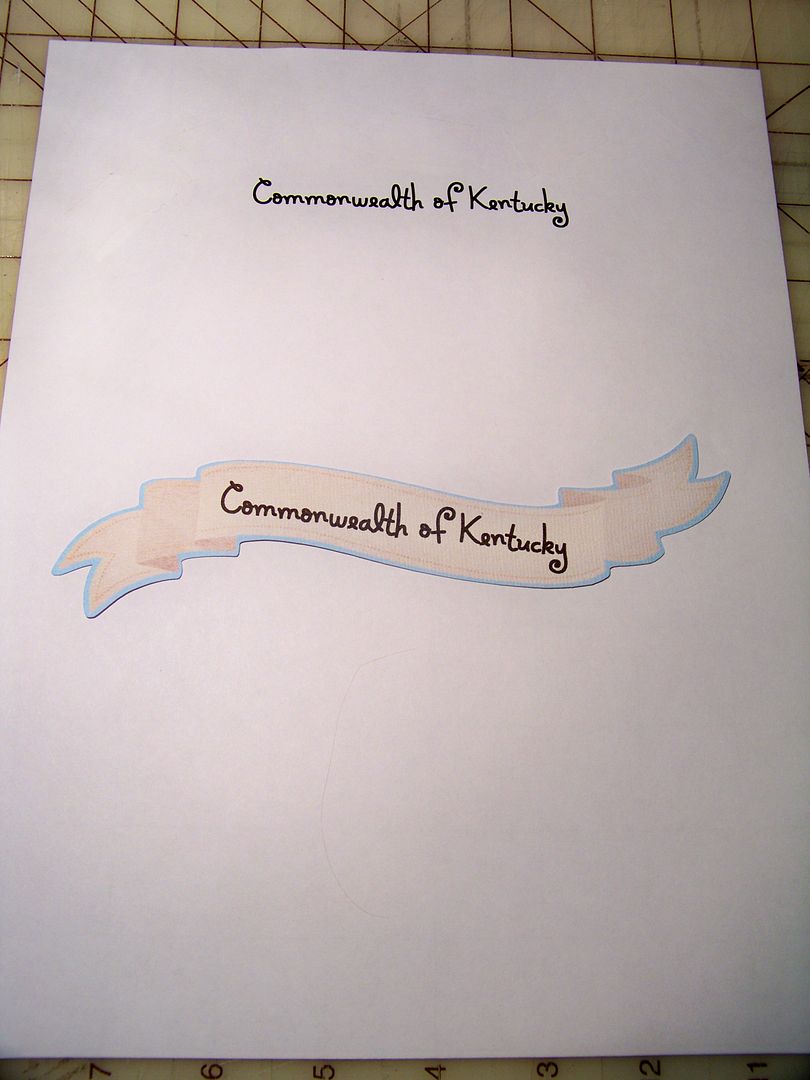
I cut the banner from Enjoy the Seasons (page 12) on the Imagine at relative size 10.5".  I used my Yudu as a light box (since it was already out and plugged in) to place the cut over text I had printed on the computer (Microsoft Holiday Springs BTN font in bold at 32 point).  

I taped the cut over the text and ran it through the printer again to get it printed on the banner. 

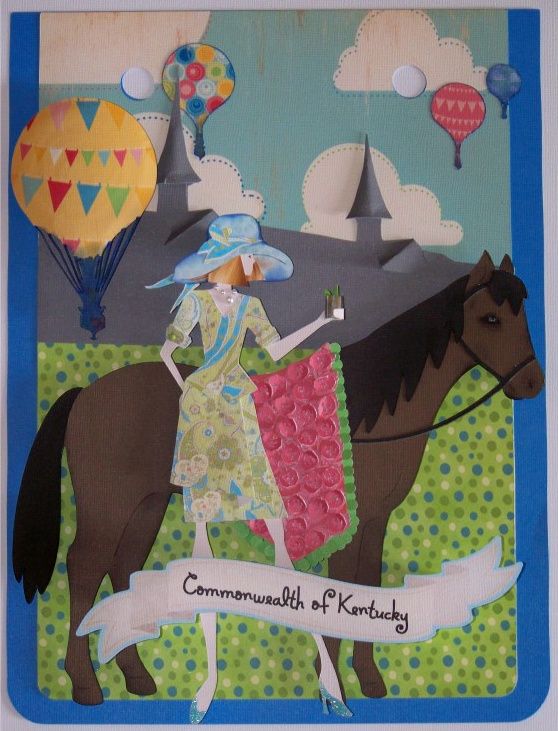
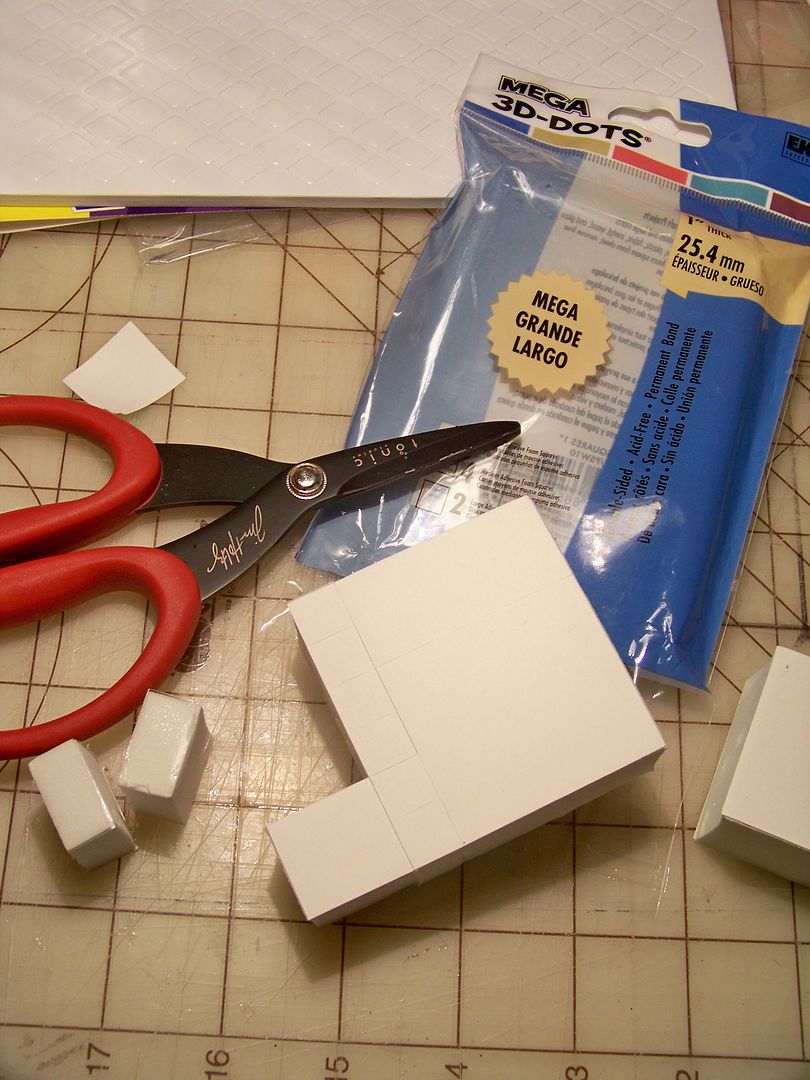
I popped everything up to add a little depth-of-field to the elements.  I popped up the banner 1"; the figure at 1/2", the horse at 1/4", and the 4" balloon at 1/2".  All other elements were glued flush to the page.  The 4" balloon had been curved a bit to get a 3D effect.  Because of this, the 1/2" pop dots only raised it 1/4".

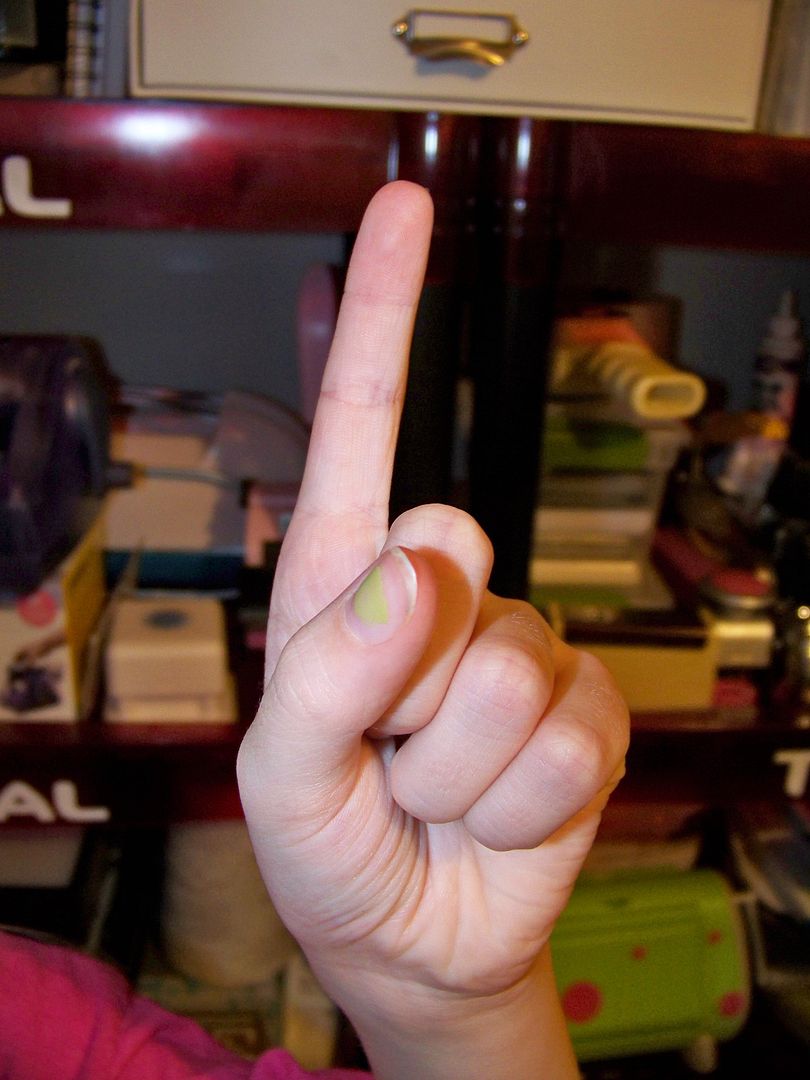
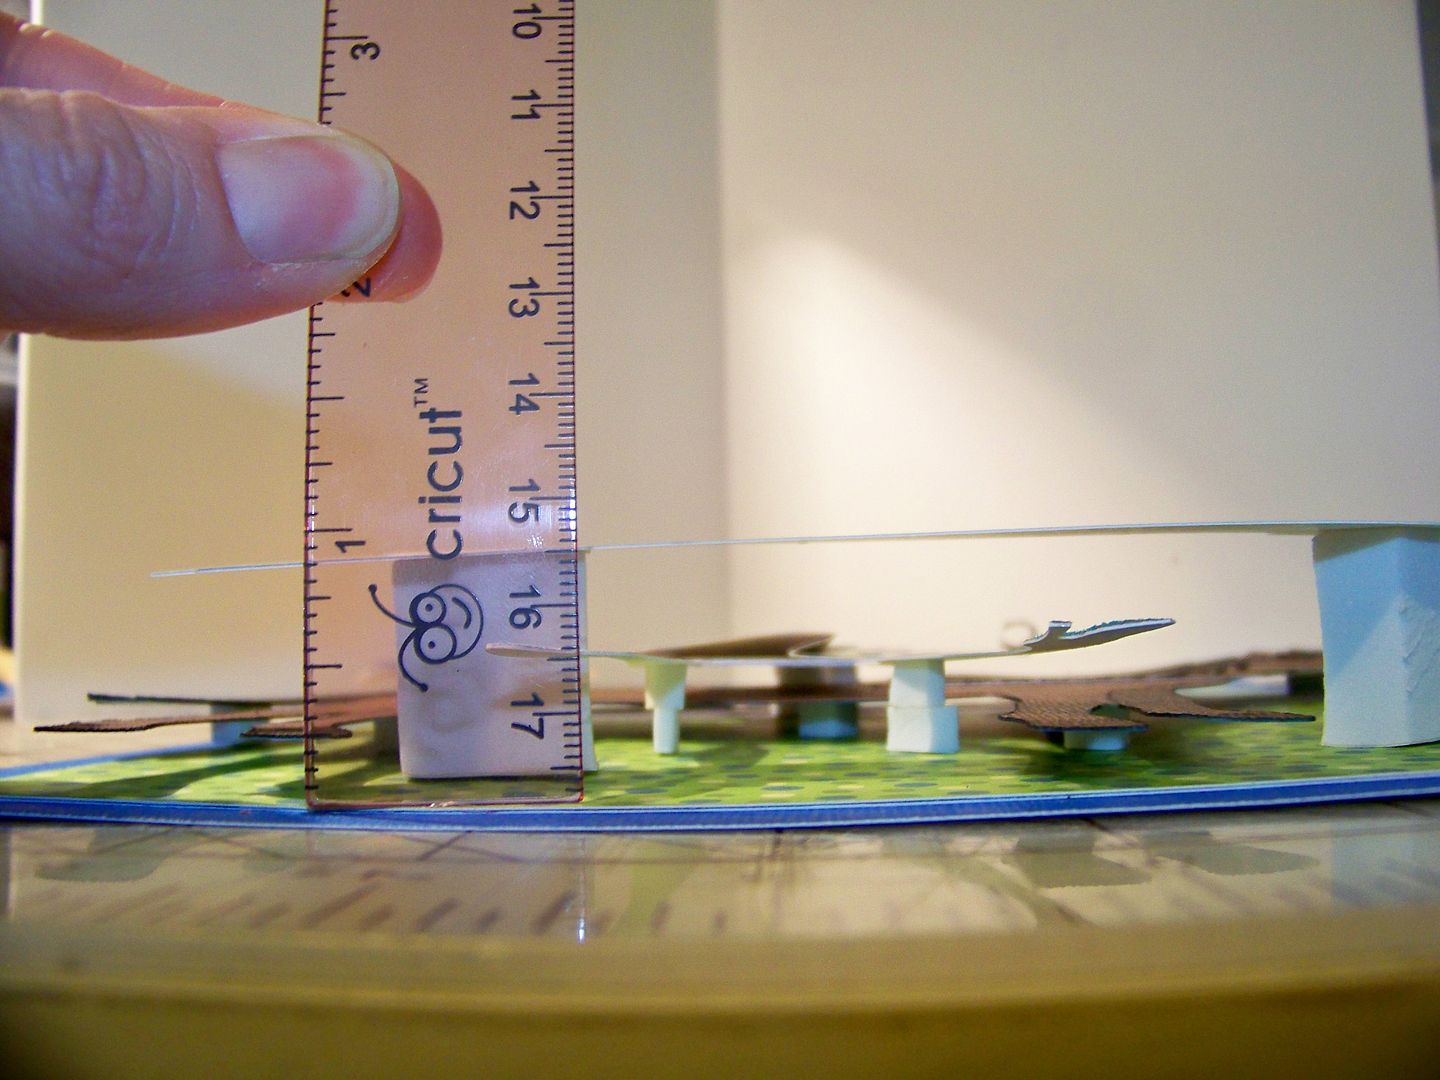
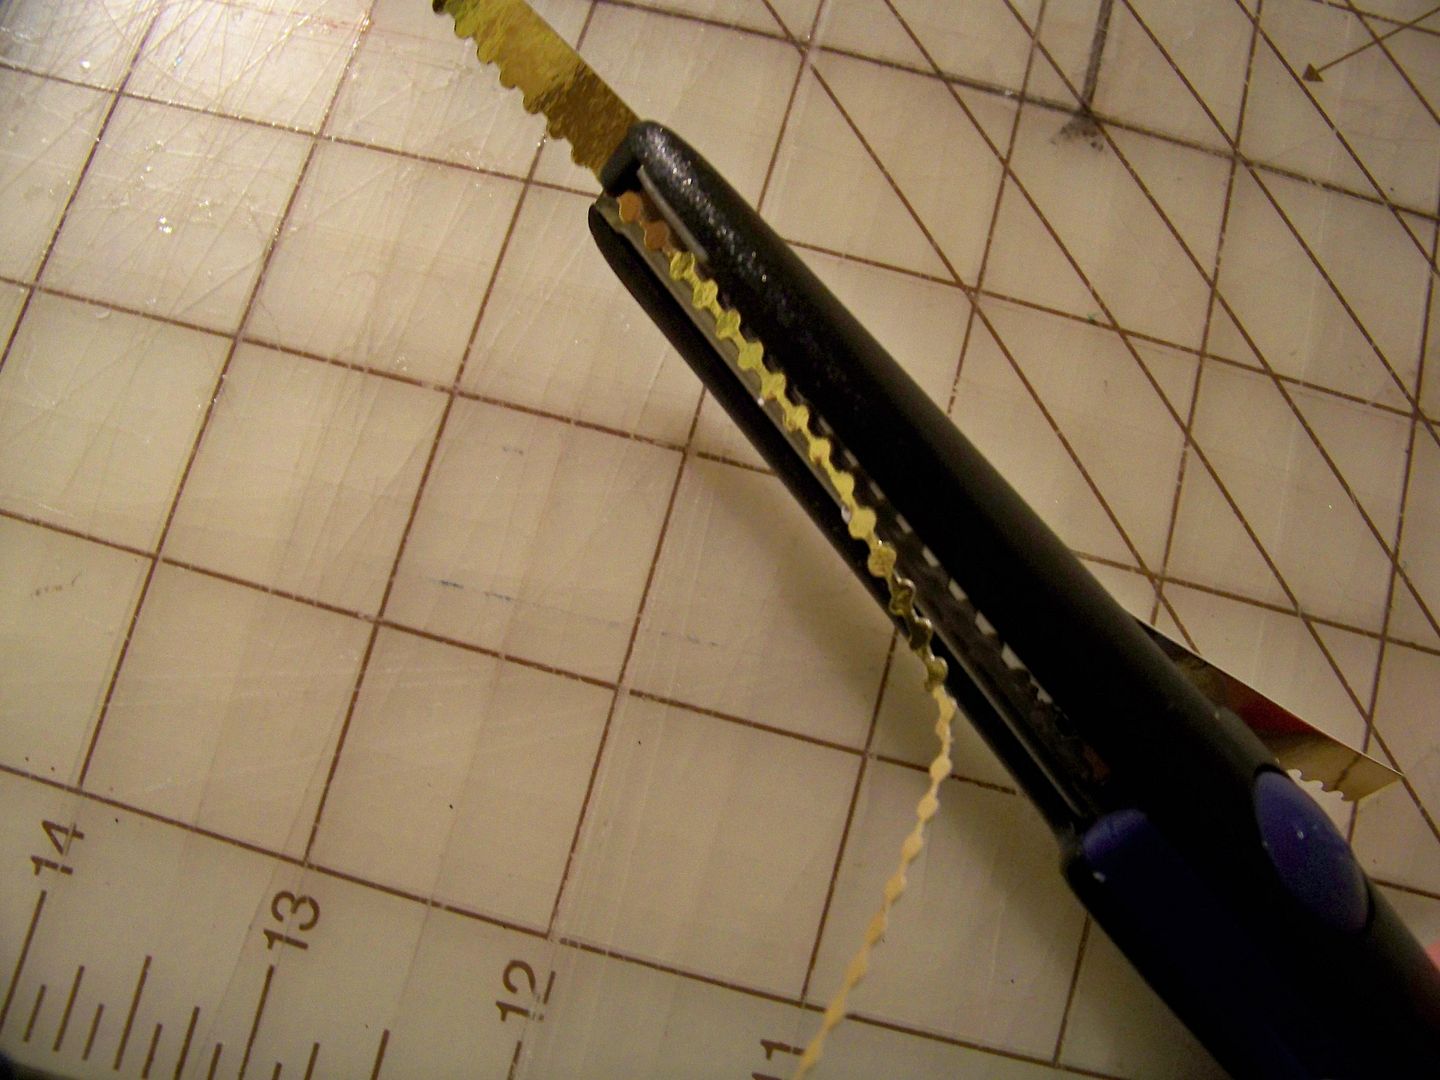
You can see the kind of height achieved from the use of pop dots. 

I used non-stick scissors to cut the foam pop shapes to fit my die cuts.  I found that if I adhered the foam to the die cuts but not to the page, I could see how the elements would work at final height, but still have the flexibility to move the elements as I created new things!


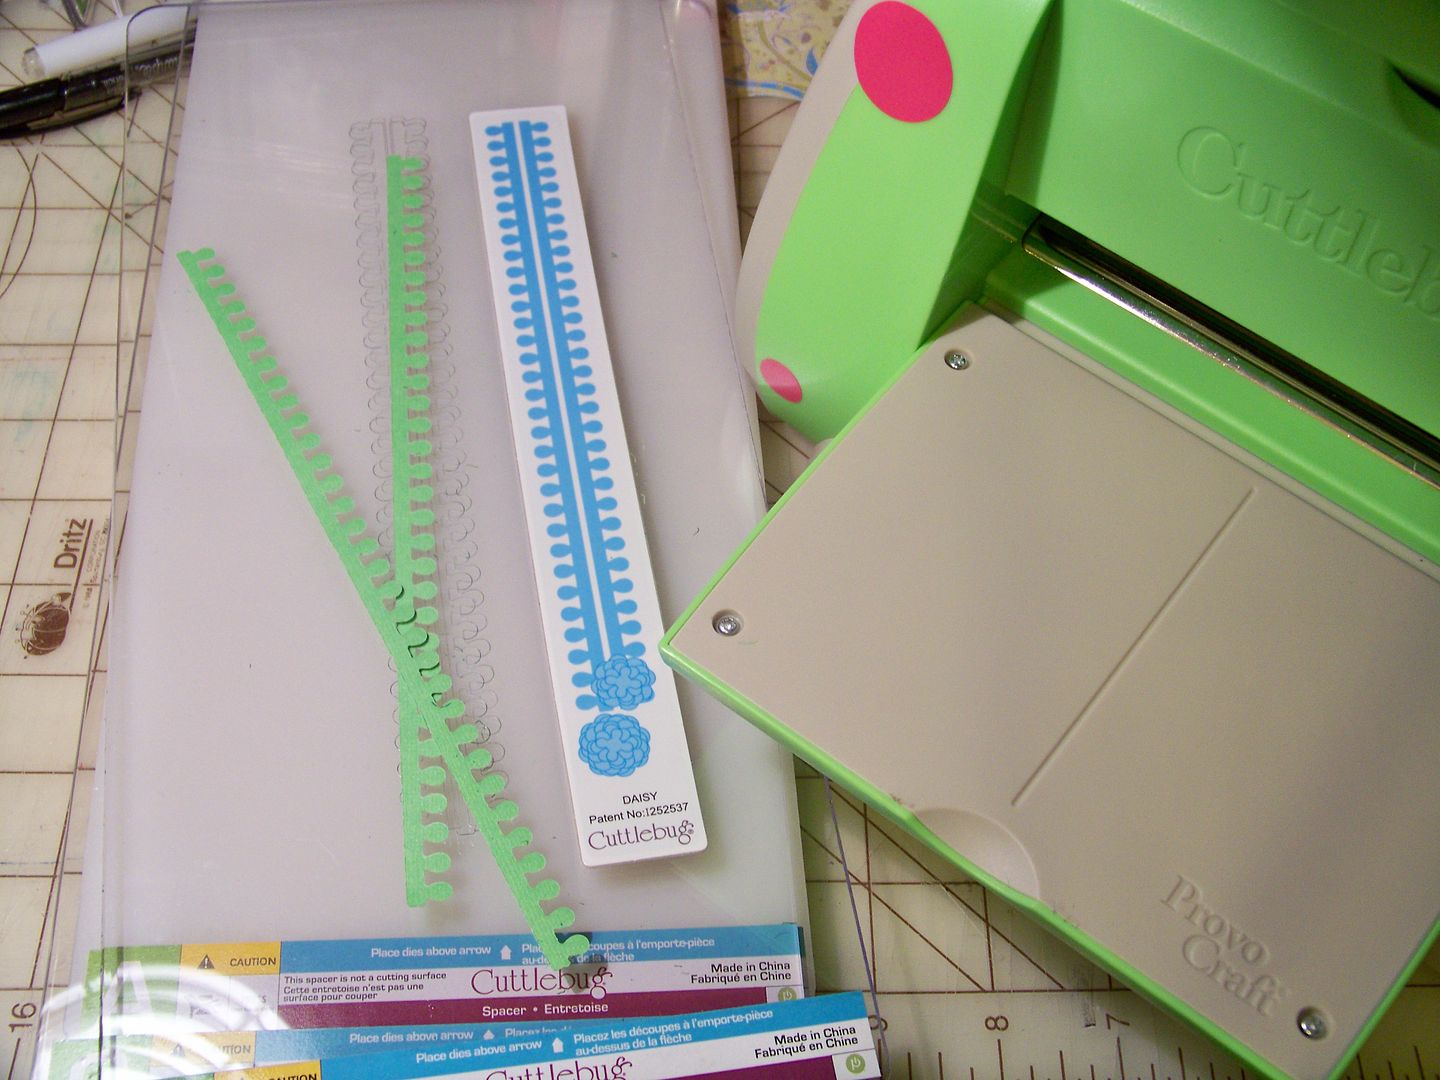
This was very helpful when I decided to add the blanket of roses!  I hand-cut the base in a color similar to the red in the hot air balloons.  Not only did I want another icon for Kentucky representation, but I also wanted to pull that color down the composition.  I used the leaf die from the Daisy Quilling Kit to cut the leaf border for the blanket.


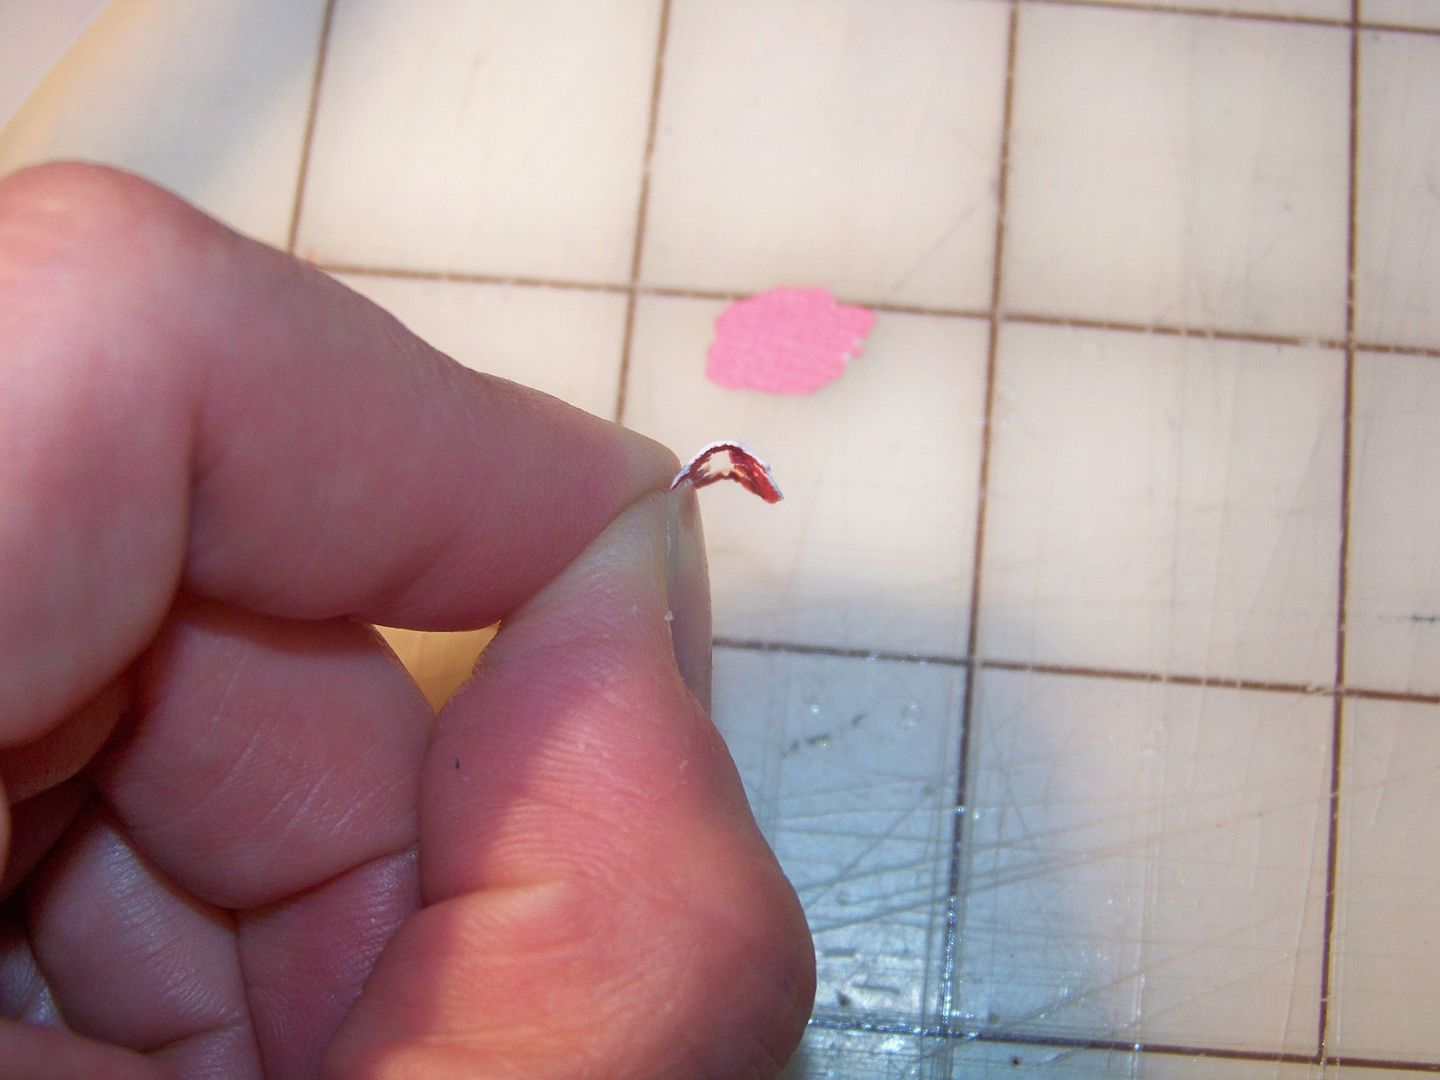
I placed two layers of leaves as a border, staggering them and adhering to the back of the blanket.  I cut my roses from Rock Princess (page 49) at .4" on the Imagine and used tweezers to glue and place on the blanket.
Because this was a teeny cut, using the layers as you would for a larger cut simply would not work.  I chose instead to use the base cut and the shift to get two shapes for my roses.  Then I bent the shift cut and glued the center to the base cut to create these little 3D-effect flowers.  (A bit more artistic license since the roses on the actual blankets are tight in the bud).


I did not place roses on the space hidden behind the lady.  I placed and glued the blanket on the horse and adhered all the pop dots for all the elements onto the paper, finishing my pennant!


There are so many rich images in my mind of Kentucky.  Quilts, food, town squares, rolling hills, rich farmland, the Louisville skyline, our Thunder Over Louisville fireworks display, the State Fair, the building-sized Louisville Slugger bat, bluegrass music, Owensboro BBQ, the St. James Court Art Festival, the Cathedral of the Assumption, Actors Theatre, the Ohio River fossil beds, Mammoth Cave, the Belle of Louisville Steamboat, My Old Kentucky Home in Bardstown, the flower gardens in front of  the Capitol building in Frankfort, the Kentucky Horse Park in Lexington, our Louisville Originals eateries and stores... I could go on and on.  I love the rich history, the colors, and the people of the Commonwealth!  I wish I could have used all of these images on my pennant!   

My favorite element that I made on this pennant was the mint julep cup.  As a teetotaler, I have never had a glass of bourbon, but I put it in my meat marinade, brownies and fudge!  All of this has me thinking of my bourbon balls.  I thought I would share my recipe as a little Kentucky gift from me to you!

Bourbon Balls
(for printer-friendly version, click here)

Melt 6oz semi-sweet chocolate .  Add 1/2 cup bourbon and 3 tablespoons corn syrup. 

Combine 2-1/2 cups vanilla wafer crumbs, 1/2 cup sifted powdered sugar, and 1 cup finely chopped pecans.  Add to chocolate mixture.  Mix well.  Let stand 30 minutes.  Form into 1" balls.  Roll in powdered sugar.  Let stand in a covered container several days to mellow.  A fair warning:  the liquor is not cooked out of these.  Enjoy!

Thank you for visiting my blog! 

MyFreeCopyright.com Registered & Protected

But wait! There's more! Click 'older posts' above!

But wait!  There's more!  Click 'older posts' above!