%20and%20Best%20Friends%20(tag).%20%20The%20blog%20post%20also%20gives%20tips%20for%20hiding%20the%20score%20tick%20marks%20on%20Cricut%203D%20images.%20%20http%3A%2F%2Fwww.withglitteringeyes.com%2F "Pin It")
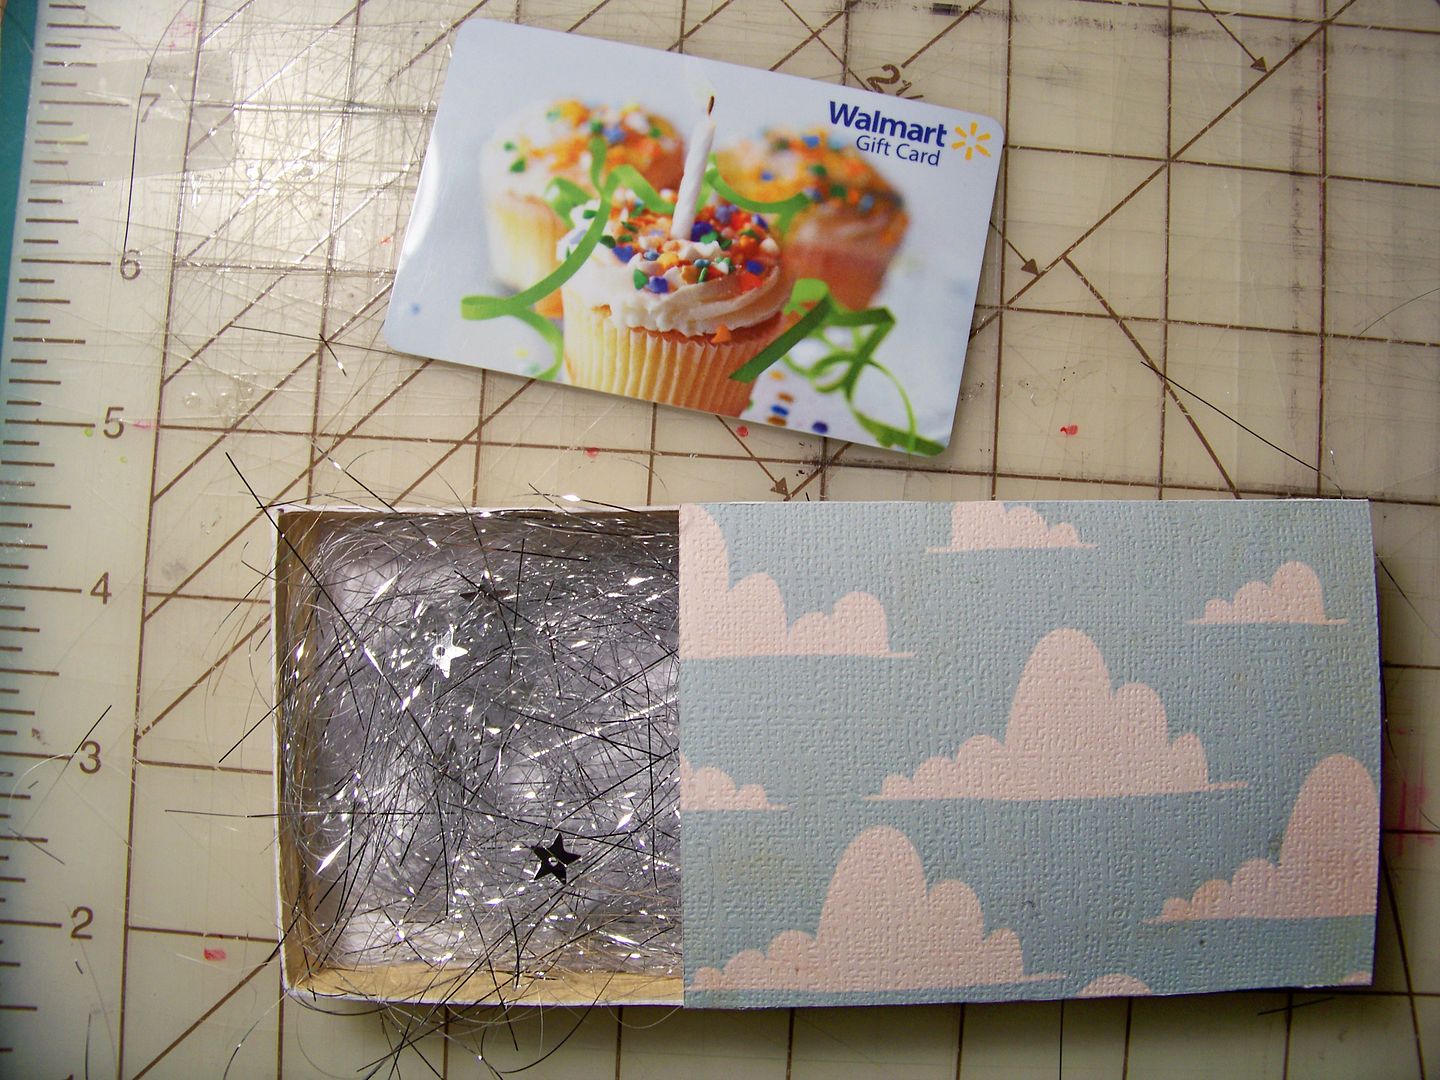
My daughter's friends have been making it easy to buy for their birthdays; they all want gift cards!
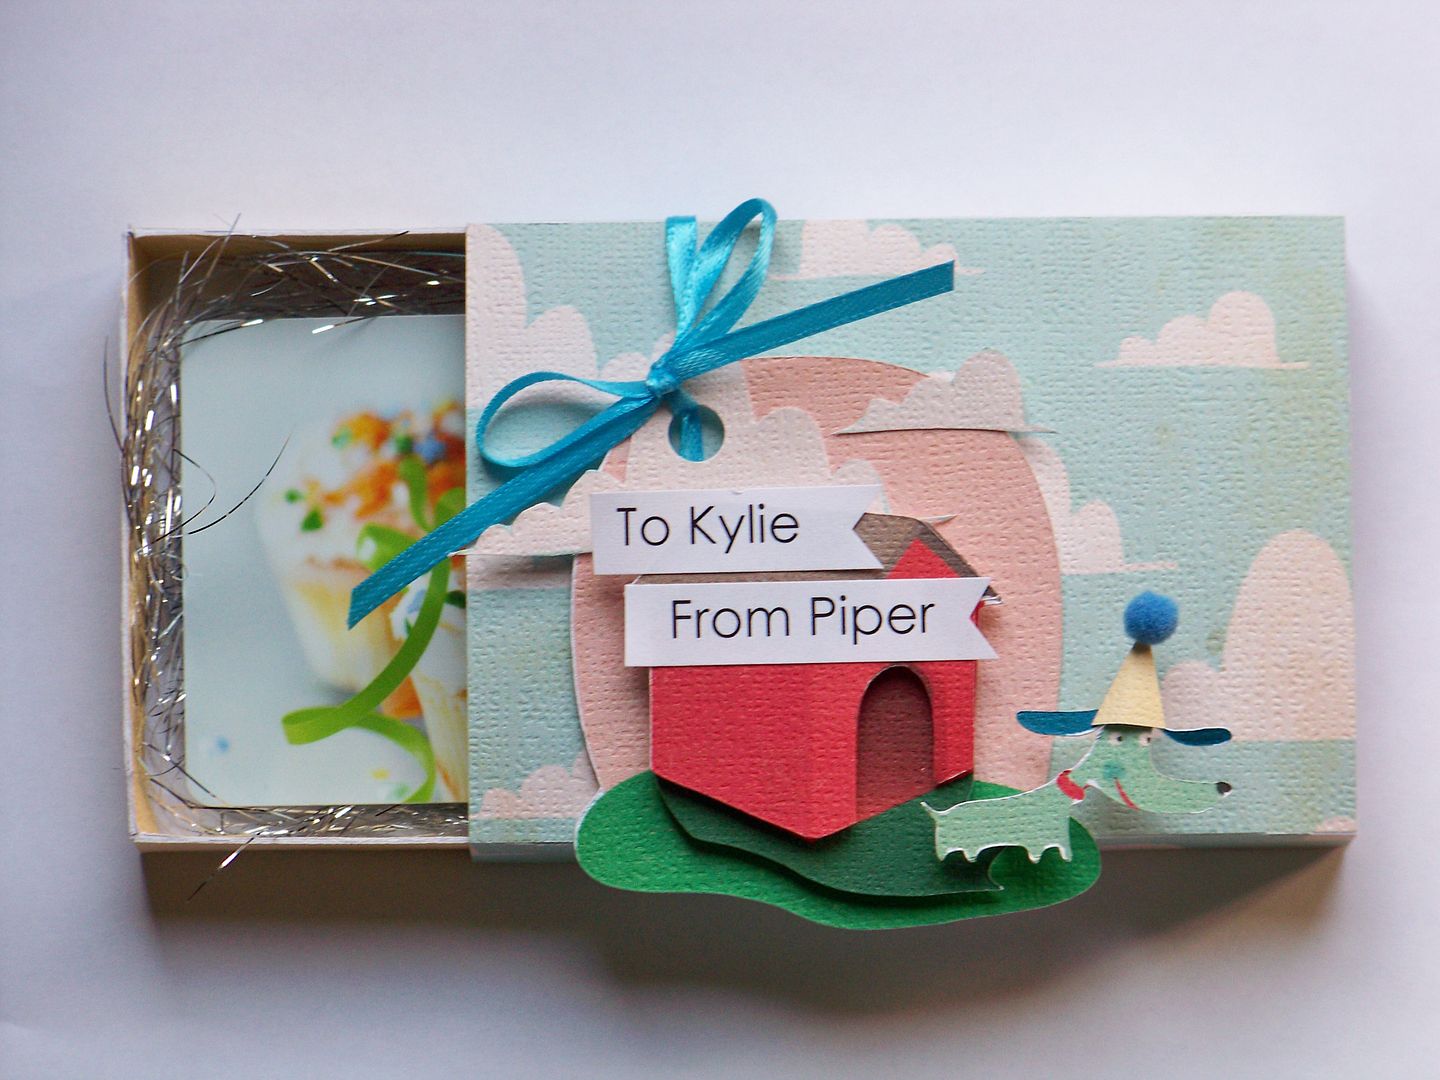
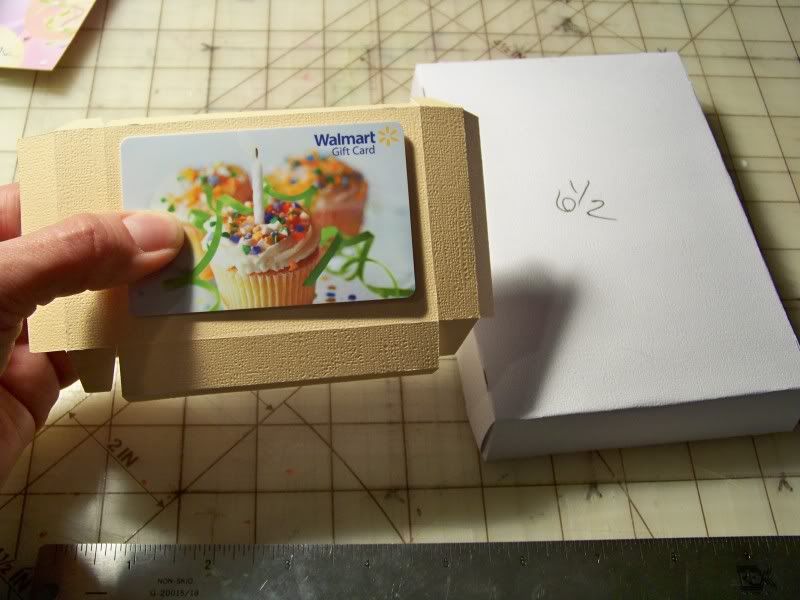
So... the pressure was on to create a wrap for the gift card for today's birthday party! I like the matchstick-box on the new Artiste cartridge. I made a little mock up at 6-1/2" and found that was the measurement of the long inside dimension of the box! After measuring the gift card, it was easy to know to cut my actual box at 3-3/4 in the Expression.
I wanted to share a little tip about making 3D items with Cricut Cartridges that employ tick marks to show fold lines... The key to the tick marks NOT showing as tabs that pop out on the finished project is to NOT use folded score lines. Instead, use a cut score line. To do this, simply use your Xacto knife and a straight edge to lightly score the lines, making sure to cut to include the ticks. The finished result is a cut fold line. (The Xacto is used to partially and lightly cut through the paper--- but not all the way through the thickness of the paper of course!)
Using a blade to score instead of folding and using a bone folder allows the tick marks to be hidden! Note that the paper core will show with this method.
After assembling the box, I filled it with metallic shred to lift up the gift card and for fun. (Easter grass or confetti would work too!)
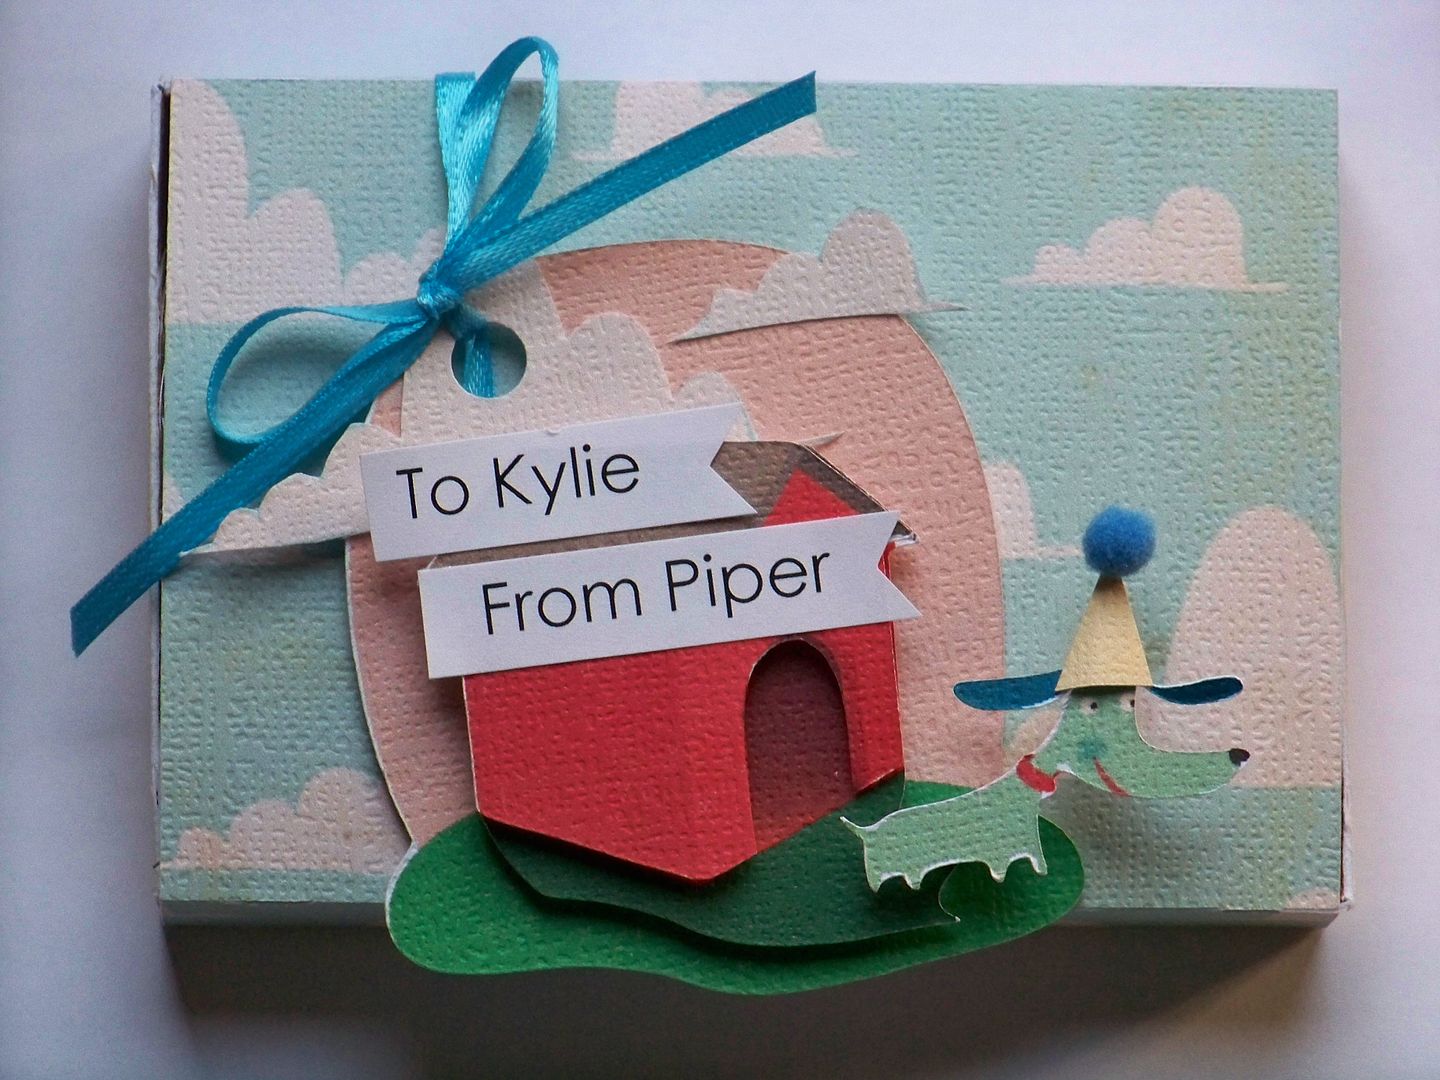
This kid likes dogs so that is the image I wanted for the tag. I found a cute one on the Imagine cartridge Best Friends.
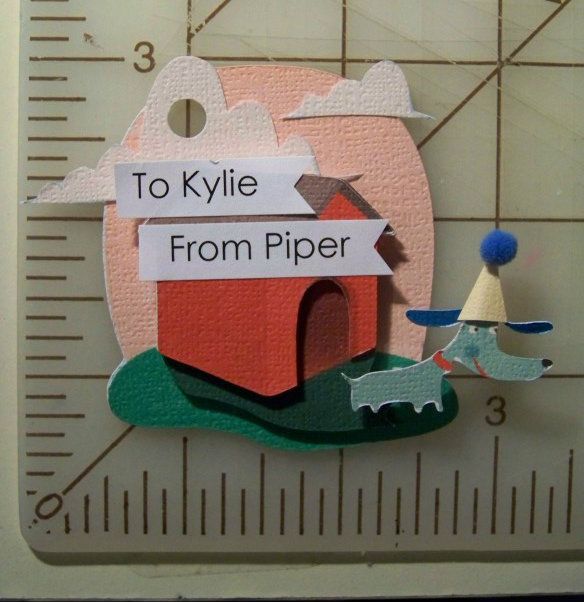
I hand-cut a little birthday hat and some extra clouds from the box paper scraps. The text was printed on my computer.
The crafty details:
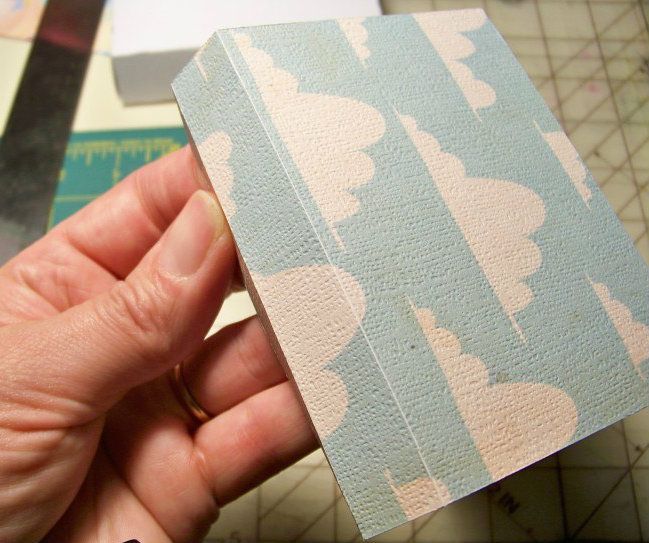
- Box: Artiste, page 49. Cut at 3-3/4" on the Expression. Papers used were printed on the Imagine from Best Friends. The yellow was from the built-in solid on that cart's queue printed as a 7" square. The cloud print was printed as a 9" square. I used ATG tape for the tray part of the box and Terrifically Tacky tape for the sleeve.
- The dog and doghouse were printed and cut on the Imagine at 2-1/2" as layers. I hand-cut out the door on the top layer of the doghouse and the dog's party hat. Each layer was popped up with the dog popped the highest at 3/8". That ball on his hat is a mini pompom, attached with E6000 glue to ensure that it wouldn't pop off!
- Extra clouds were cut from the leftovers used on the paper for the box sleeve.
- I tied the tag on with ribbon that was wrapped around the narrow width of the box so that it could stay in place when the gift was opened.
- The text was printed using Microsoft Century Gothic at 16 point.
Thank you for checking my blog post today! You can see many of my previous posts by visiting My Project Gallery (or just click here).
11 comments:
Such a precious gift card box. I love the colors you used!
So cute Nadia!! I am sure it will be the BEST looking present of them all at the party! :) I will have to try your scoring method using the XActo blade, I think I know what you are saying! LOL!!! (my brain doesn't quite work right all the time!)
I always enjoy your creations!!
Hugs,
Lori
That's so clever Nadia! your daughter will be thrilled to give it and he friend delighted.
Nadia, this is just too cute. You should post this over at Sheila's of Shesasassylady blogspot, she's challenging anyone to do a box! Yours would be perfect!
That is such an awesome presentation!! Great tip about cutting a score line. I usually use my Gypsy to hid all the score lines and then just score where they should have been lol. I just got best friends from rewards, so I'm definitely going to be hunting for this image :D. TFS!!!
Nadia love your gift box..so cute.Thanks for the tip with scoring,can't wait to try it.Do you cut the wrong or right side?
Jayne x
This is so cute - look how little it is, Love it and the tip. TFS
http://karonskraftykorner.blogspot.ca/
Super fun way to dress up a gift card. I your daughter's friend will use this box after the birthday party too-
Too cute! Love the dimensional party hat on the dog!
What a great project and one of my favorite ways to craft (productivity and exploration lol). Painting and the Imagine have become my go-to ways to have the colors I want for those times I need "a" color. Love all the different looks you acheived. Thanks for sharing!!
Cute idea - thanks for the reference to Artiste cartridge so I know where to look for it! I will go find it right now.
Post a Comment