

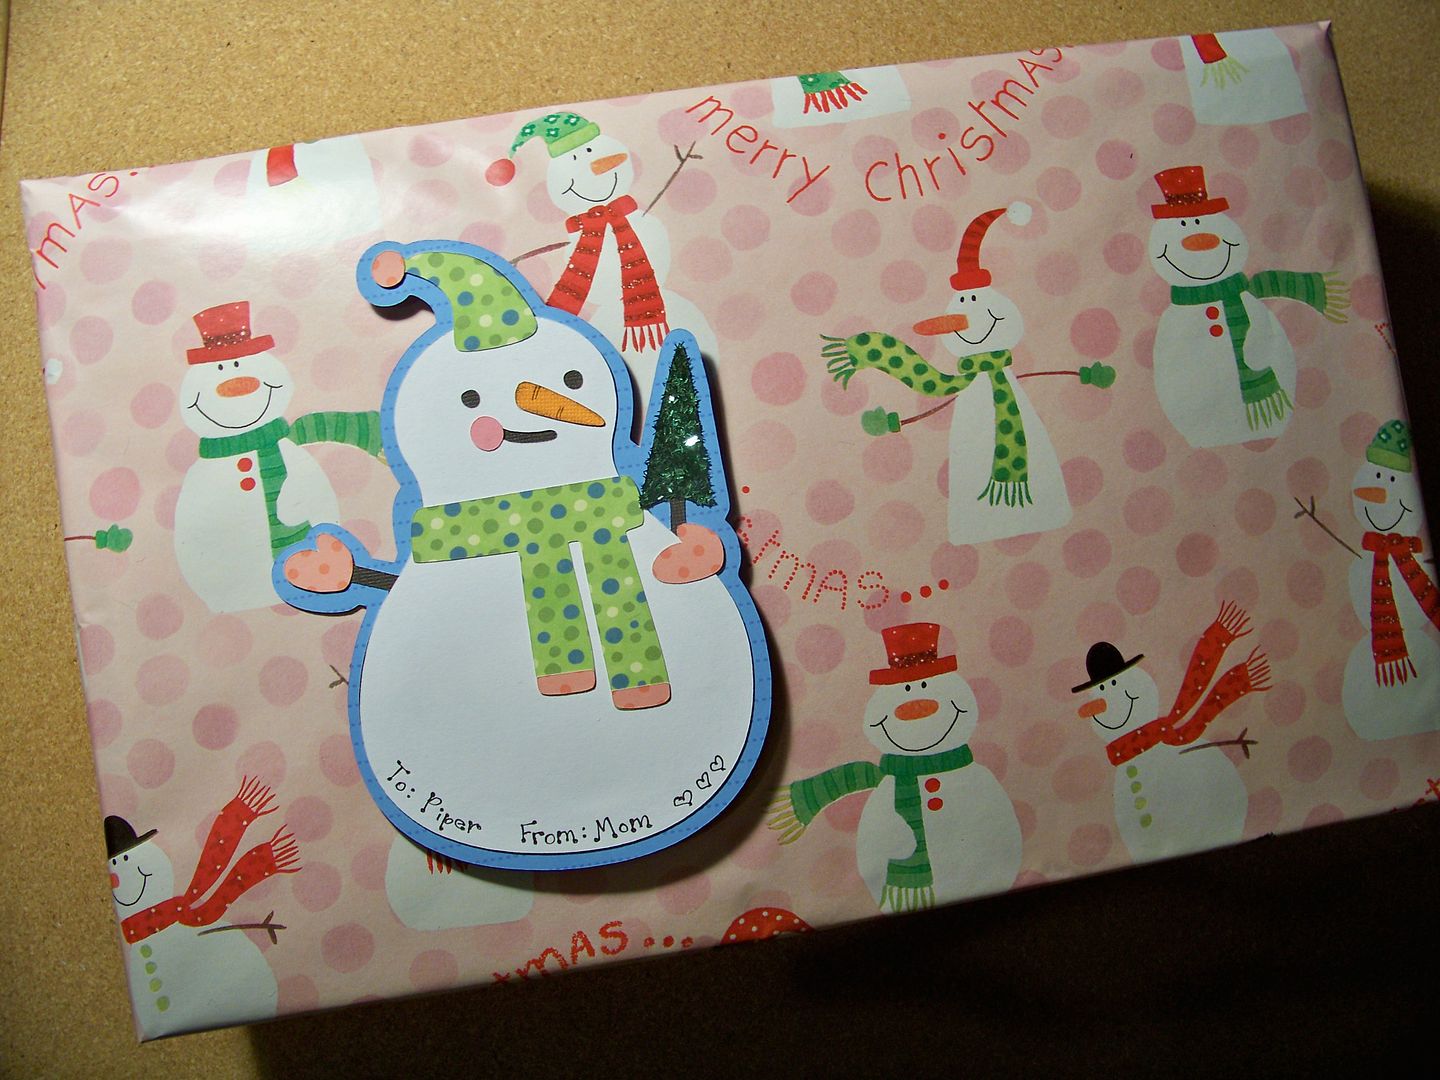
The inspiration for this gift was a $68 holiday doll outfit from the American Girl catalog that my daughter requested-- that I thought would be easy to re-create with stuff I already had. My daughter has tons of casual, trendy, and sporty doll clothes that I sewed from the fantastic Liberty Jane Patterns last year, but she really started pining for dresses for her dolls. After taking a design class last winter from Cinnamon Miles of Liberty Jane, and sewing so many knits, I wanted to make fitted woven dresses this time around.
If you have ever sewn for dolls, you know that finding a good fit is really hard -- especially for patterns engineered to be sewn with wovens. Additionally, the major pattern companies (like McCall's and Simplicity) tend to simply shrink patterns down instead of altering their designs and instructions for the small scale. Because of this, you will find tiny facings and illogical construction directions for such tiny garments. The easiest way to overcome this is to use independent doll clothes pattern manufacturers-- or to draft your own.
I had a few patterns from last year's doll clothes-making obsession that I had never used and so I started there. Last year, I discovered Kotton Candy, a company that sells PDF pattern downloads on Etsy. The designer behind this company is Kristin Cornell. Her dresses have a perfect fit and are made for sweet cotton prints. I also used her patterns for silk dupioni and taffeta dresses. This is the first dress I made from her "Perfect Party Dress" pattern.
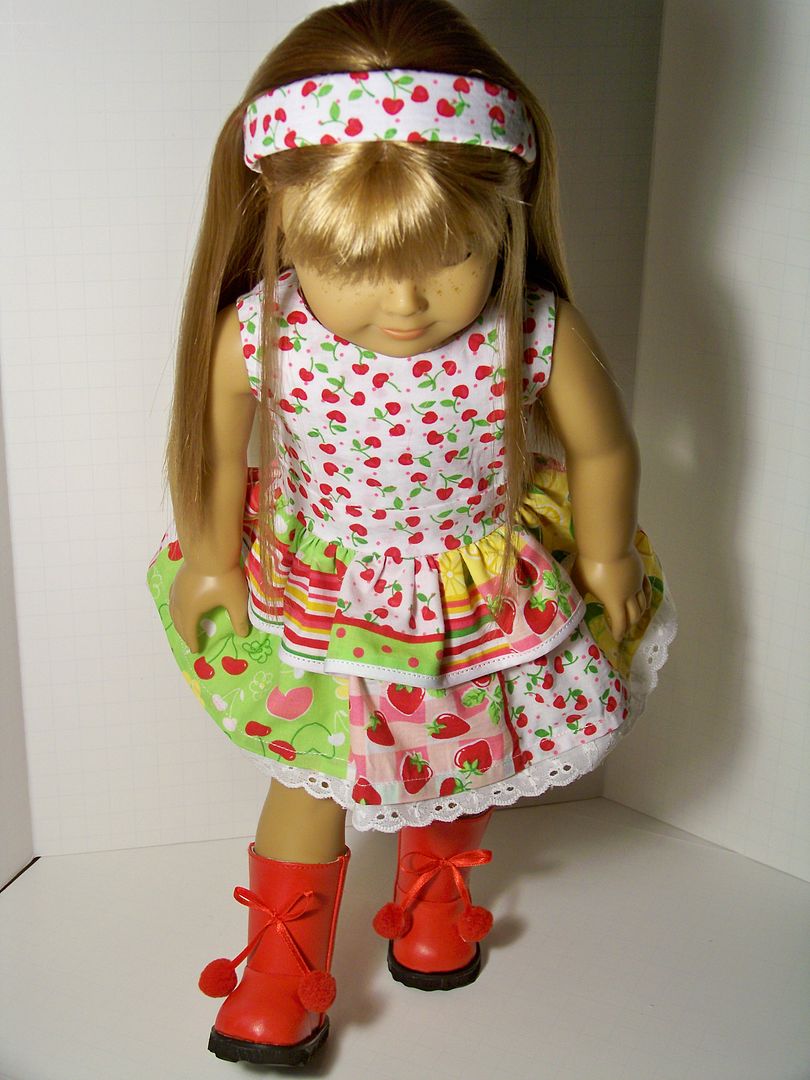 |
| I will say that with the tight gathering, I found that the skirt was a bit too short. I added a little eyelet trim to the bottom to gain a little length. I added double-fold bias tape to the top ruffle (pattern piece: skirt A) to keep the two layers from blending with the busy prints I was using. |
I found a great source for headband blanks to make matching headbands for the outfits! To see my post on making those, along with a link to my source for the blanks, check out a previous post here on my blog: click here.
 |
| This is the same pattern. This time, I added 1" to the bottom skirt (pattern piece: skrit B) and piping to the top and bottom edges of the waistband. |
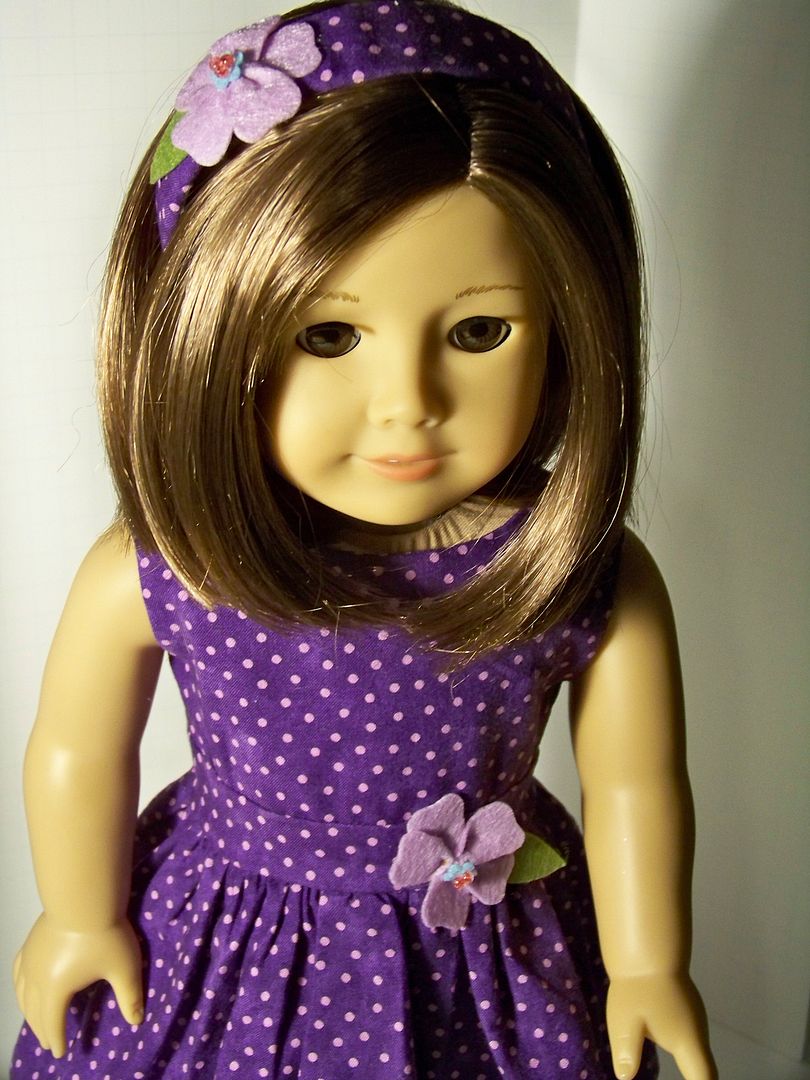 |
| I also made the dress with only a single skirt (pattern piece: B only) . I found some old Martha Stewart felt flower kits and added them to the dress and headband. |
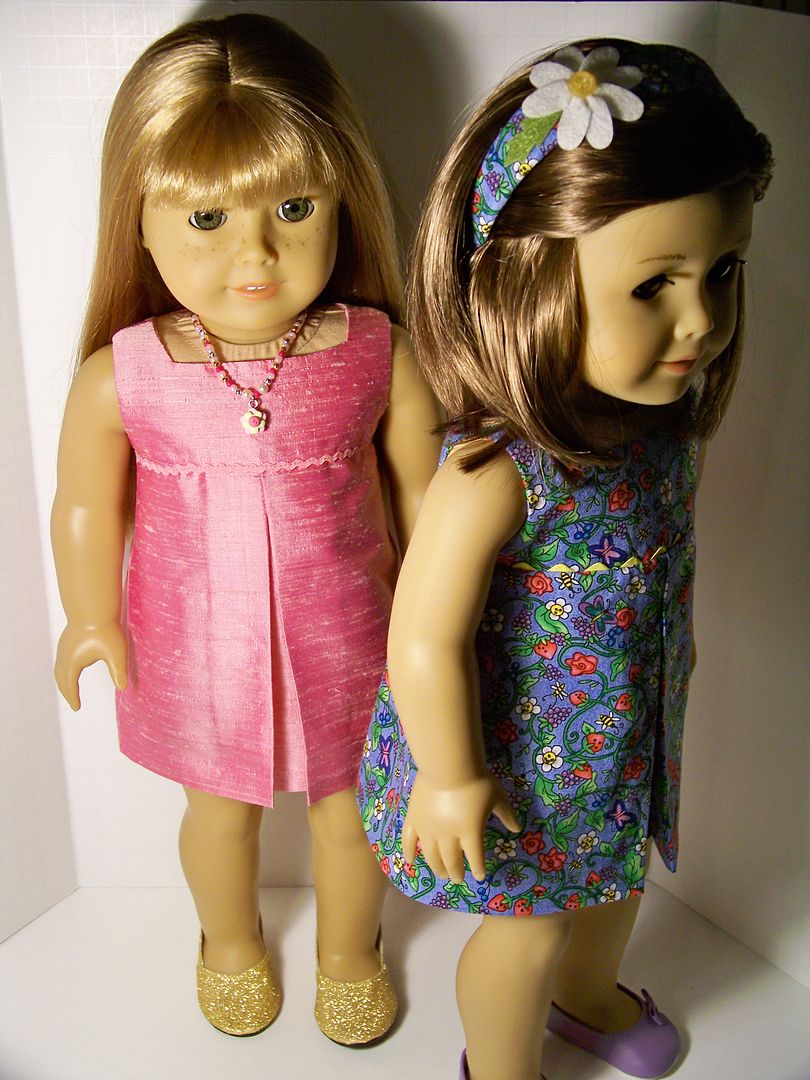
Also in my pattern stash was another pattern from Kotton Candy, the "Pleated Top, Tunic, and Sundress" pattern. I loved, loved, loved this pattern. It was so fast and easy! Such a dream to sew! I loved this dress in silk dupioni! Both the "Perfect Party Dress" and the "Pleated Sundress" featured lined bodices, Velcro back closures, and offer perfect fit for American Girl dolls.
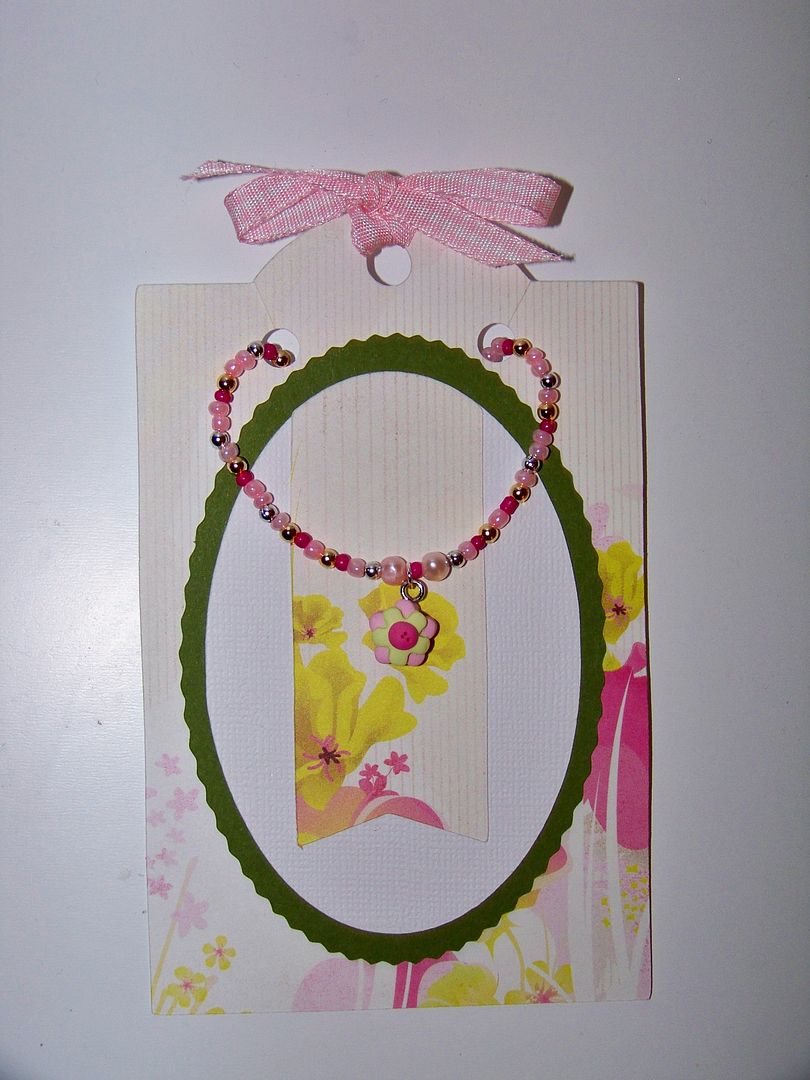 |
I used a hand-made clay pendant, freshwater pearls, and glass and metal beads for the necklace. I placed it on a card I made from a tag on Cricut Holiday Frames and Tags to make it a little more special.
|

This one was made with a Liberty Jane jeans pattern, the free Liberty Jane T-shirt pattern, and the Heritage Doll Fashions wrap jacket. These were all so easy-- I have made the jeans and t-shirt patterns dozens of times and they always give great results. I added a few of my own details. It was the first time I had sewn the jacket pattern and I think the jacket would have been cuter in a solid; the pattern I chose hid the tie feature.
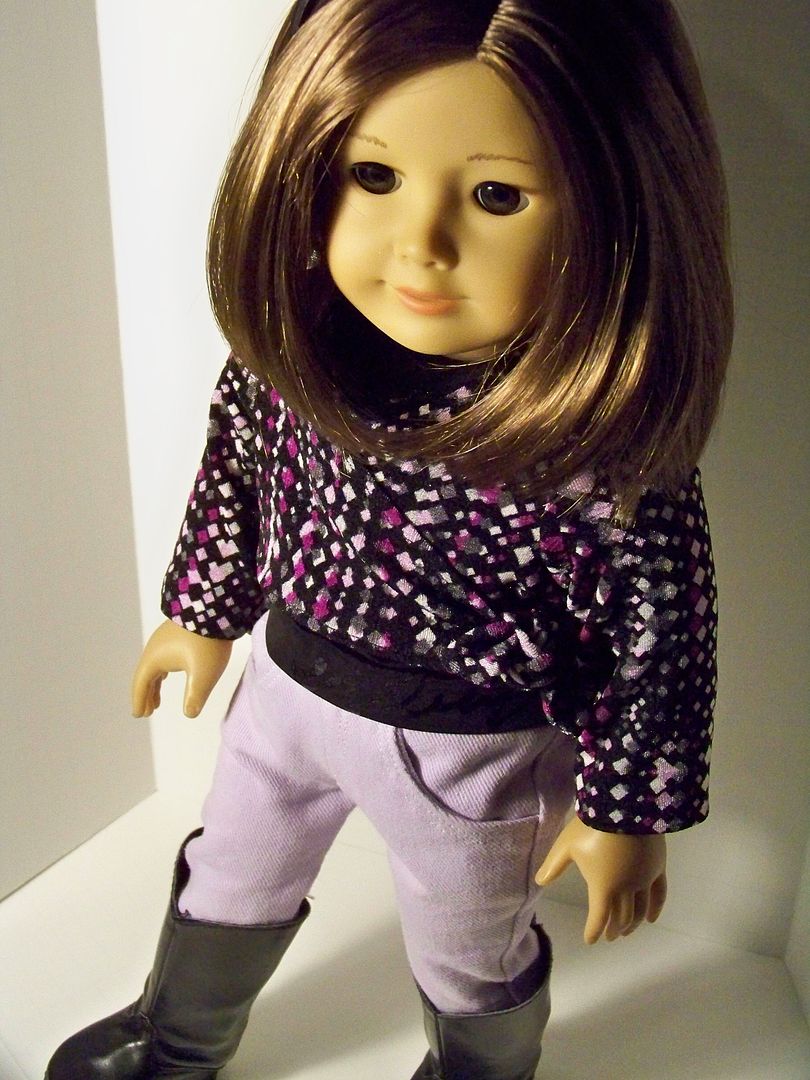
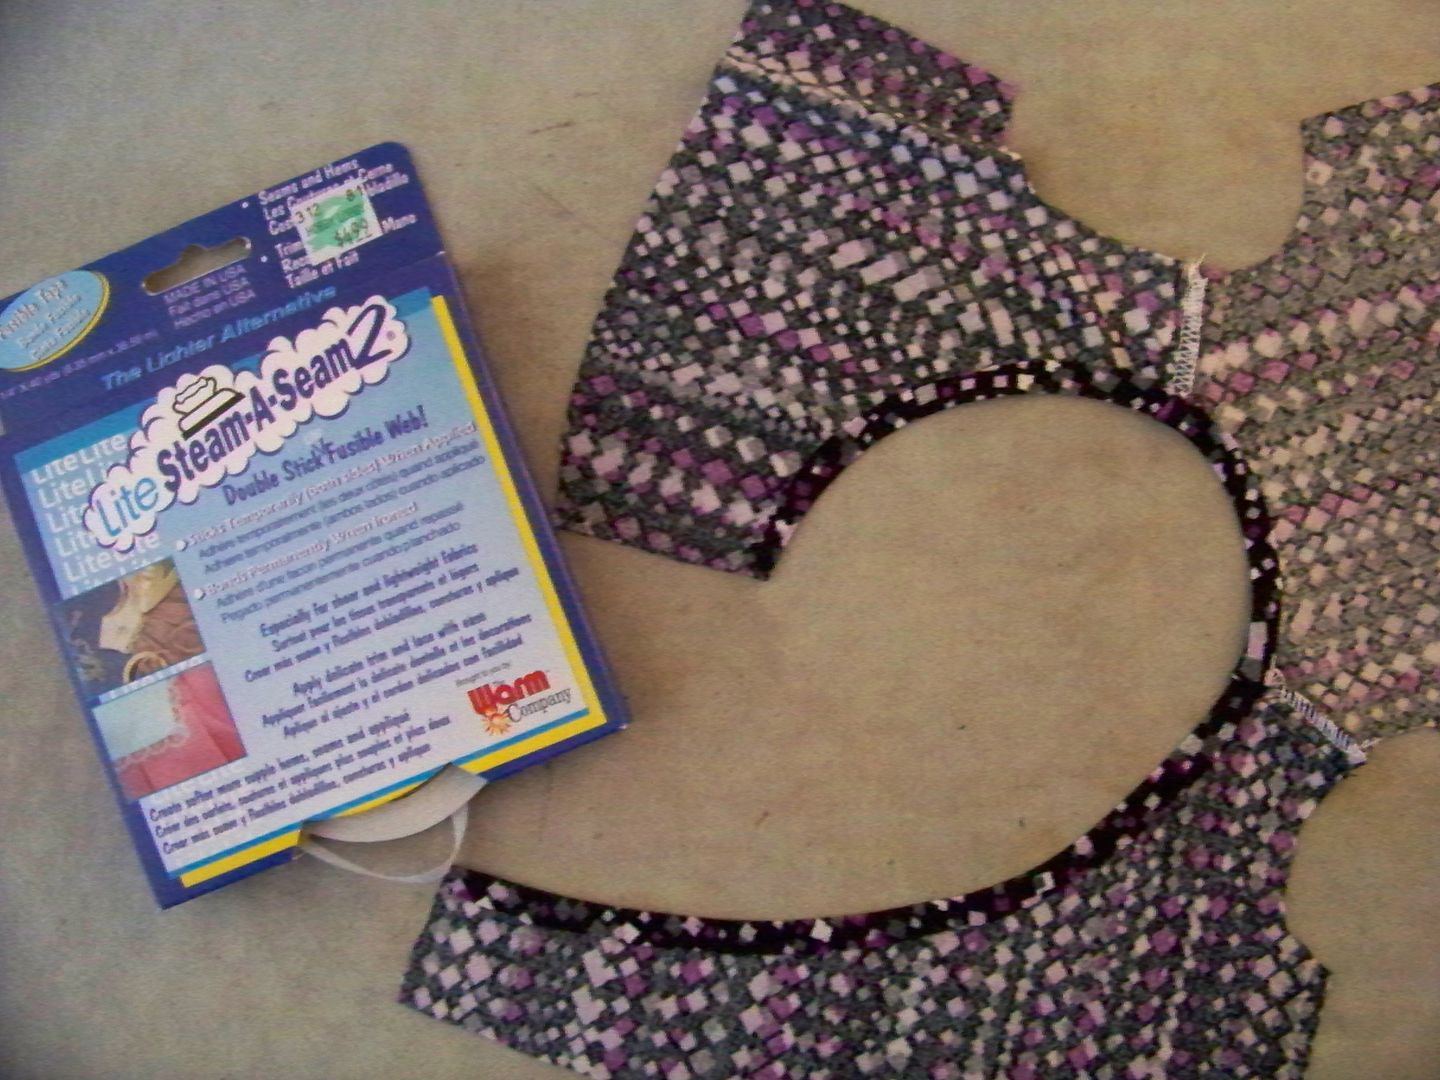
The jacket was a slinky knit. The key to me for using knits for doll clothes is a product called Steam-A-Seam. Using knits is an easy way to achieve great fit!

This product is available in 1/4" and 1/2". It is slightly tacky so it stays put until you press it. It has holes in it, allowing steam to penetrate and melt it. Unlike disappointing products like Stitch Witchery, this stuff actually works. The package claims that it can be washed or dry cleaned without stitching, but for items to be washed, I always stitch so I am not sure of that claim! It really does hold though, and I have used it without stitching on doll clothes with great success! The other benefit is that it works as a stabilizer so that hemming t-shirt bottoms yields great results- none of that puckering that happens when topstitching on a cross-stretch!
I used it on the wrap jacket's long neck-to-tie edge and it was perfect! So much smoother than pinning and using it here stabilized it for stitching!
I also noticed a skirt that repeated over and over in the American Girl catalog: it was a slight a-line with a smooth front and elastic casing. I couldn't find a similar pattern in my stash, on Liberty Jane's site, or on Etsy so I made my own pattern. For fun, I made an Ultrasuede skirt. This turned out to be such a quick and easy garment!

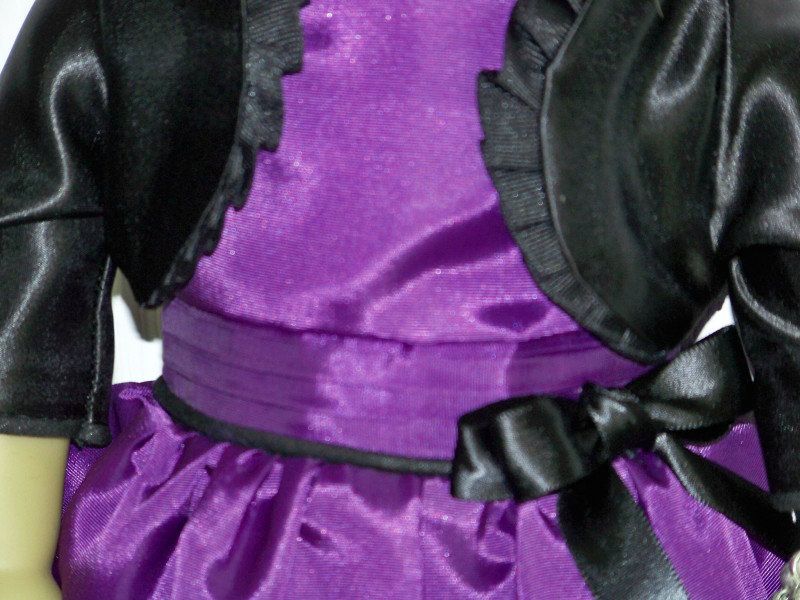
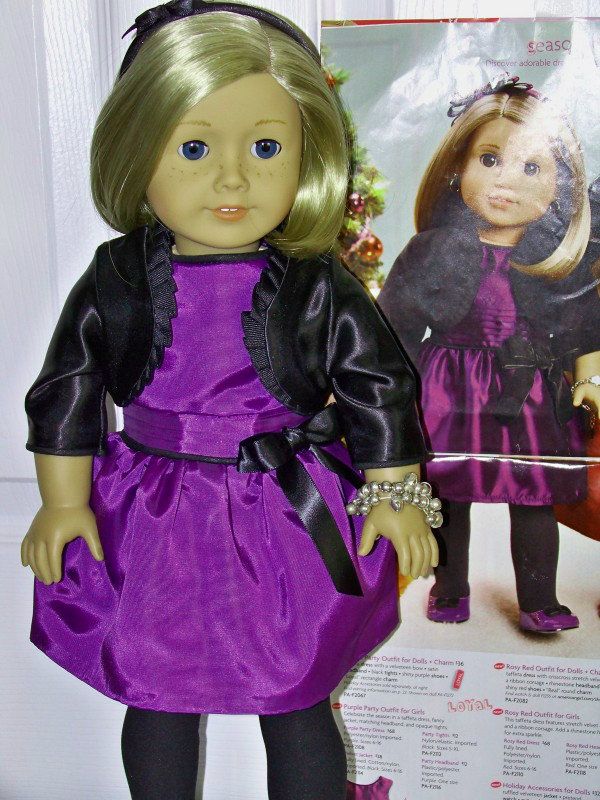
I had gotten so off track from my original dress that I wanted to copy... so I had to pull myself back to get the dress done for the gift. I went back to the Kotton Candy "Perfect Party Dress", using only the bottom skirt (pattern piece: skirt B). I didn't add to the length but I did remove 8" from the side to reduce the fullness. I used my Clotilde pleating board to pleat up a piece of fabric before cutting the waistband from it. I placed a piece of fusible interfacing behind it after removing from the pleating board and pressed it with my iron to keep the pleats in place. The pleating board wasn't quite long enough, but pretty close. This pattern instructs the user to cut two waistband pieces, essentially creating a nice, lined bodice finish. This is another detail of this pattern that I really like.
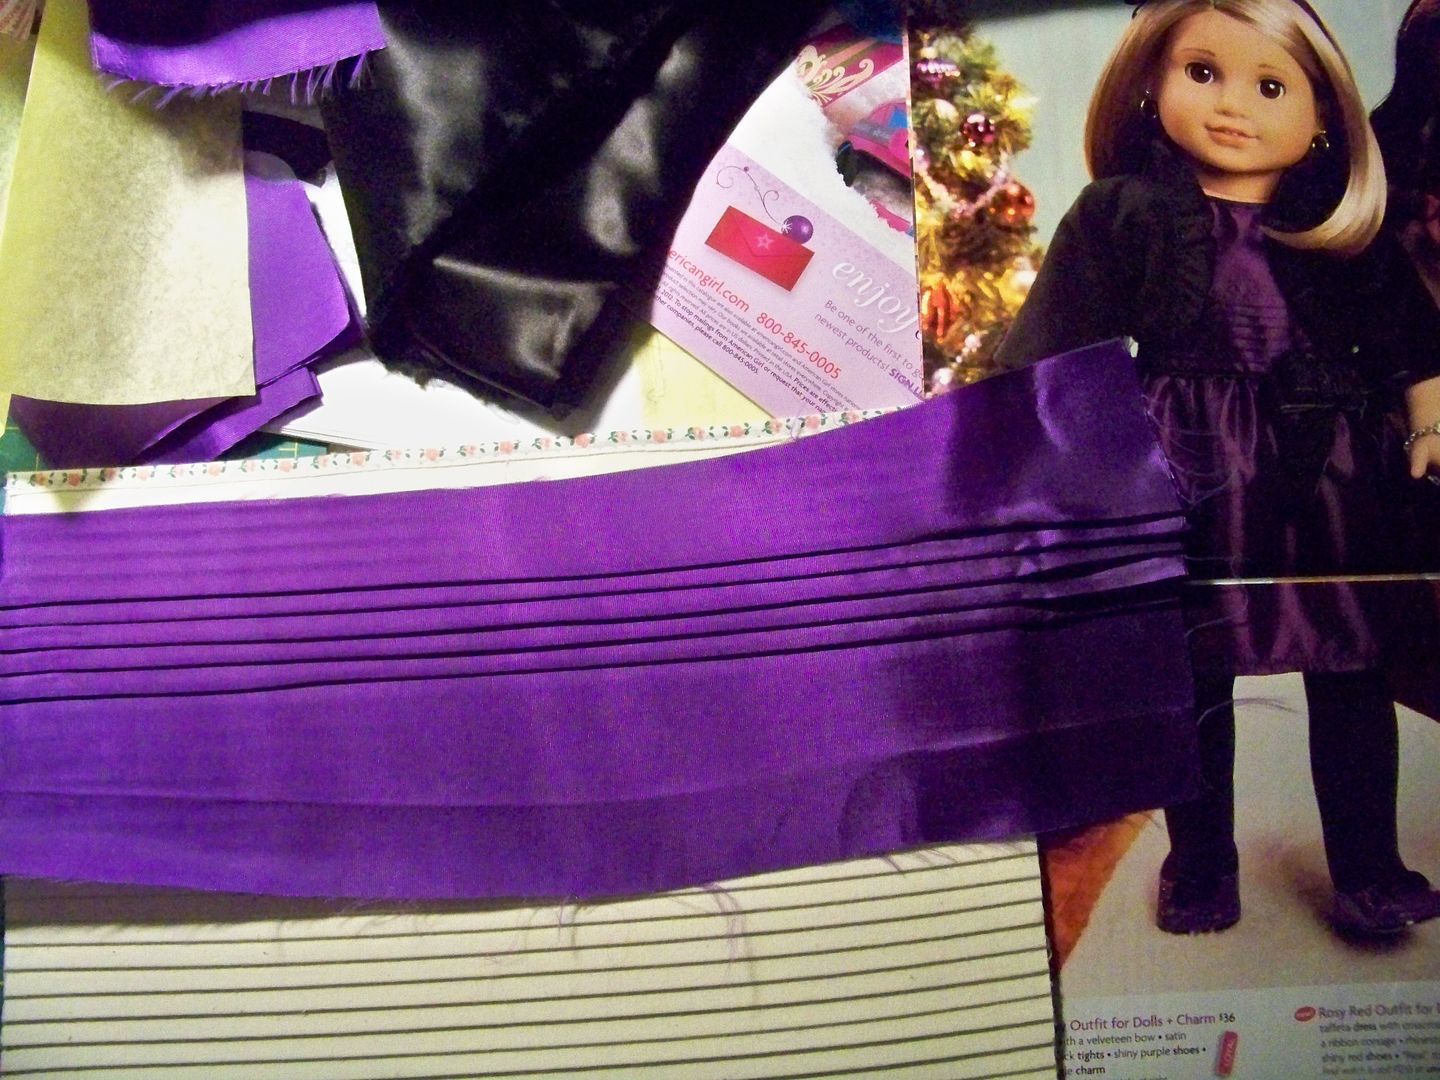
I added piping to the neck and bottom waistband seam. I used satin ribbon for the bow detail. The original dress featured a velvet jacket and bow, but I was using my stash and used the satin I had.
I loved the details on this little dress-- and so easy to achieve with a few simple changes to the basic pattern!

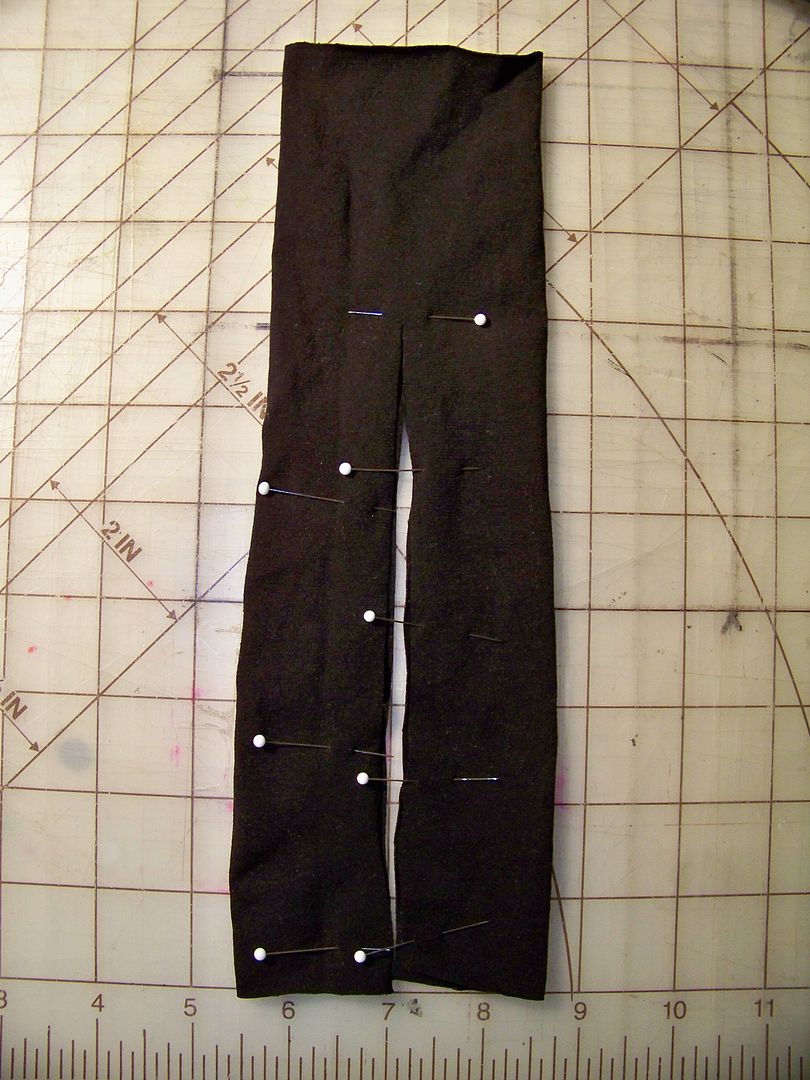
I used George brand (Walmart) microfiber tights. I cut off the toe. I found that cutting a 10" length worked perfectly!! I didn't turn it inside out; they are the same on both sides of the fabric. They also don't run!!! (I suppose that is because I used microfiber ones???) I was able to keep the top unfinished. They naturally have a slight roll and that could easily enough be stitched in place using a stretch stitch, but I didn't. Just like the sock tutorial, I measured 3" from the top and pinned to mark the place. I cut up the center to the pin to create the two legs. I sewed the bottoms and up each inside leg and turned it inside-out so the seams were inside. That was it!! Instant doll tights. Now, I will say that these were Queen size tights that I started with. If you are a skinny mom raiding your stocking drawer, you might try it to see if your size will work! This size, cut into 10" tubes will yield 4 pairs of tights.

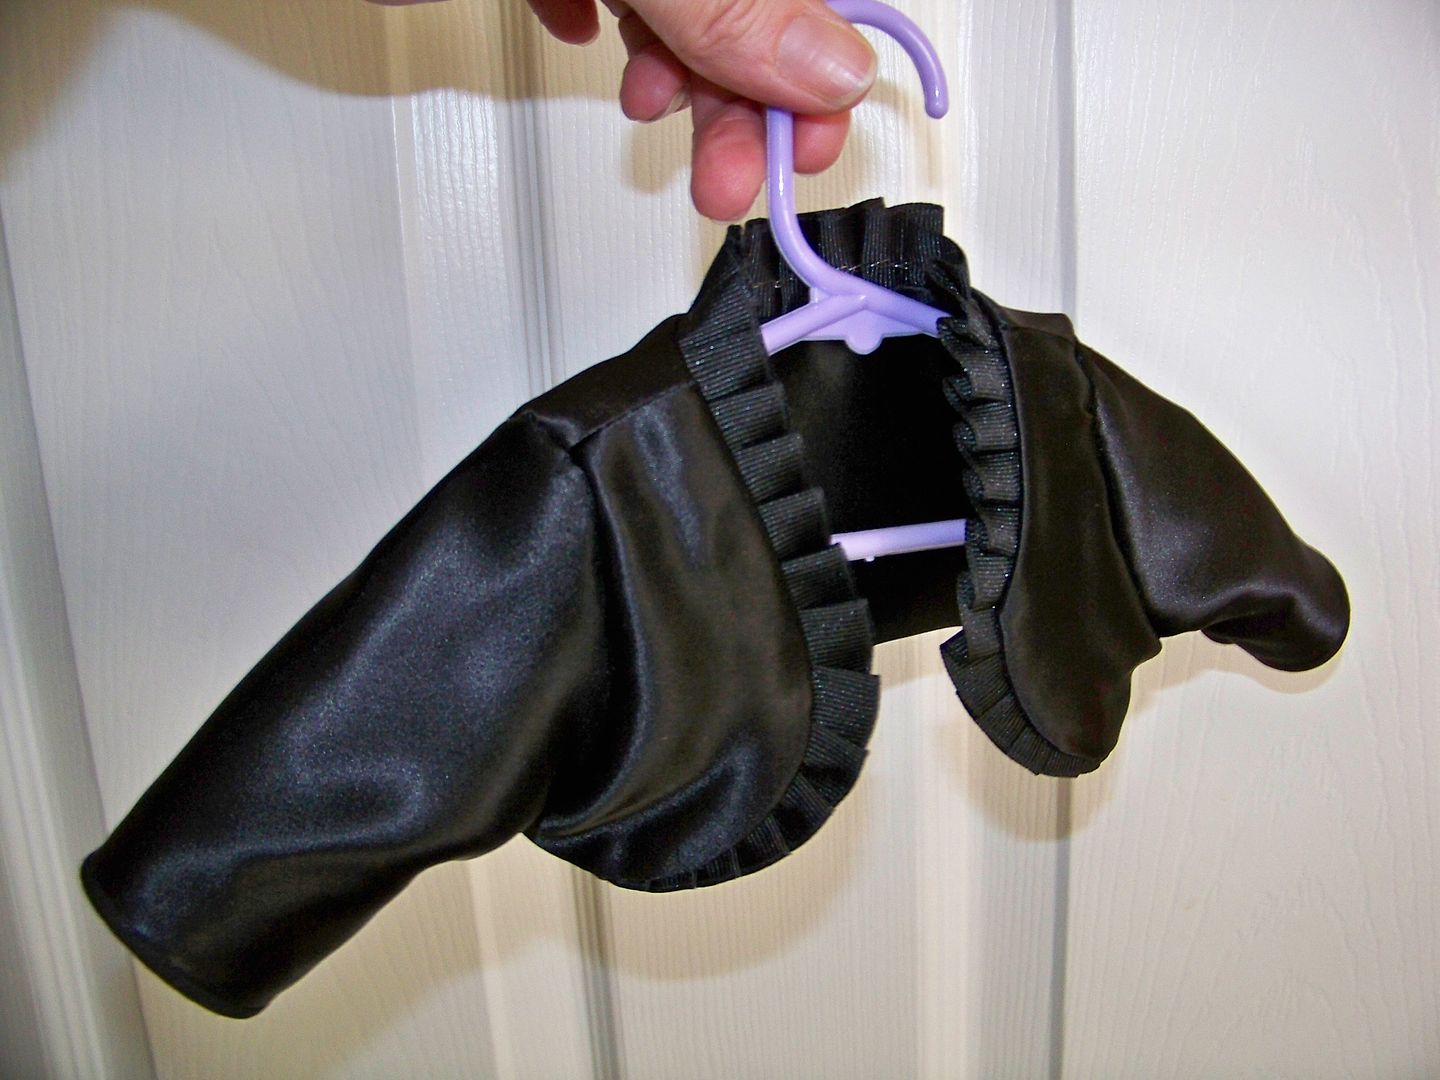
With the dress and tights done, I tackled the jacket. I drafted my own jacket pattern and used pleated ribbon to mimic the pleated ruffle from the catalog garment. The pleated trim was so easy to work with! I was so happy at how it turned the curves of my jacket. The tricky part was how the ruffle tapers off at the bottom front-- that is, the hard part was making sure the left and right sides match where it tapers!
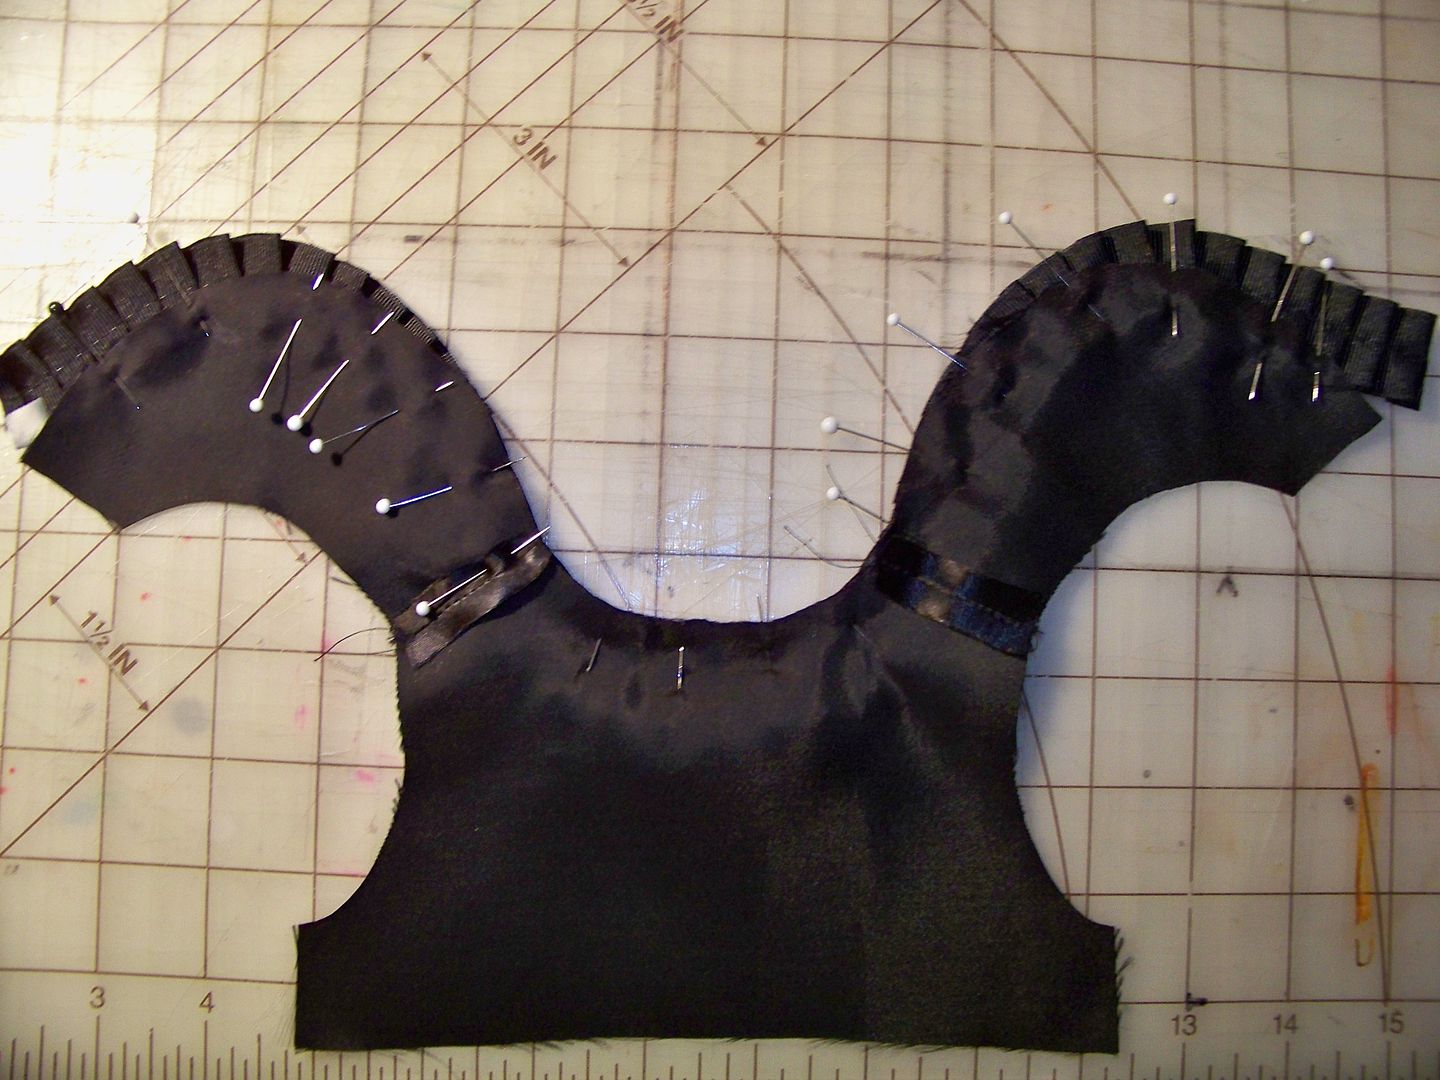
I cut the jacket twice so that I could self-line. Doing this allowed me to have a nice, finished front/neck seam and a perfect lower hem. I added piping to the bottom hem of the sleeves to have a smooth sleeve hem finish. This went together so fast and easy. I had been procrastinating for nothing!
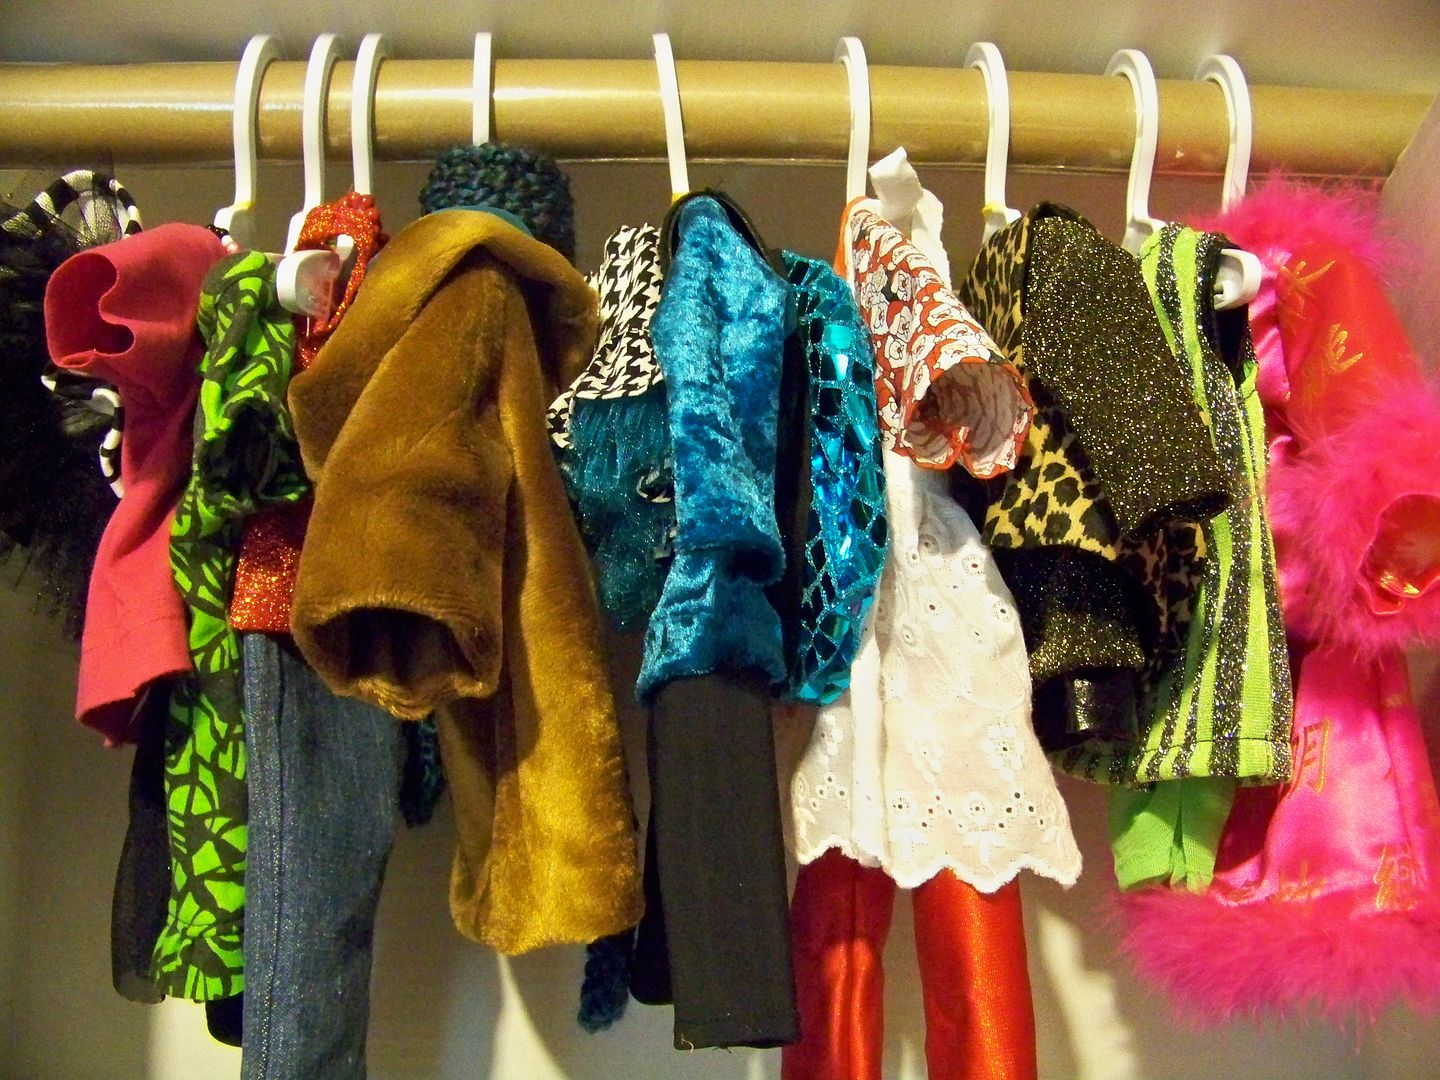
I just wrapped my gift, tucking in tons of doll hangers.
Quick links:
- Kotton Candy Doll Fashions sewing patterns
- Liberty Jane Pattern Store (try the free doll t-shirt to see how they sew up)
- Punch Place Plus doll headbands (to cover)
- B and Y Creations Polymer Clay Beads (for doll necklaces and girls)
- Steam-A-Seam 2 Double Stick 1/4" x 40 Yards
Thank you for checking my blog post today. I did not get to do the historical garments that I had planned to, although they are cut out... I guess there's always New Years! Honestly, I could do this all day, every day, but at some point-- and for me that was Christmas Eve morning-- you just have to stop and wrap it up!
To see many of my previous projects, check My Project Gallery!
To see many of my previous projects, check My Project Gallery!
To see last year's doll clothes post, including using Yudu Cardshop and glitter to screen doll t-shirts and Knifty Knitter to make doll bedding, and links to the patterns and doll shoes I used, click here.
It's Christmas Eve!!
It's Christmas Eve!!
17 comments:
Amazing wardrobe! Thank you for sharing not only the photos but the helpful hints. I love how every piece is coordinated and complete. The tights and bolero jacket are absolutely perfect!
WOW!
Beautiful work. Your dAughter ia going to be very happy.
I am so amazed at all your talents! Piper is so going to love all the clothes and keep them forever! You are a special mom! Have a wonderful holiday!
Linda
I am amazed!!
Ohhhh I want to be your daughter!!! How awesome!!! She is one lucky (and blessed) little girl!! TFS-
Girl, you amaze me! Love them all! Now go and enjoy Christmas! :-)
Di&Co
Wonderful. My mom has been doing the same thing for my daughter...she has made a bunch of Disney princess dresses and is now working through her fabric scraps to make other fun designs..I am so passing on the ETSY site to her for her next projects. Happy Holidays
So, so, special. I loved reading all about the dresses you made. Have a wonderful Christmas Day.
Mandy
What a wonderful job you did!
Love all your details and pictures.
I especially like the headbands and accessories. The red bandana outfit with the piping is so cute. Your models are so professional. Purple polka dots is lovely; felt flowers are a nice touch. The pleated dresses are so classic. Awesome!
Merry Christmas!!
Nadia, I love seeing your crafts-especially the sewing ones. Thanks for sharing your amazing work and tips. You've inspired me to take up sewing again.
i absolutely love the doll clothes! thank you for all the details on how you made the clothes and embellishments. these are drop dead gorgeous.
You are one cool mom and such patience with the wonderful details! I am starting to let my 7 year old play with the 2 American dolls I bought before she was even born. Thanks for sharing!
Fabulous! A girl of my own heart!!! I told you I had copied the entire catalog in 1985 when our daughter got Samantha for Christmas. Yours is so special! Great job!!!
Stunning.......... I cannot help but be in complete awe of everything you do. Gorgeous, amazing, fun, creative......not enough words!! I loved the last wardrobe you did--this one was even more amazing.
I am in awe of your talent, passion and blog, I just found you and I am moved, I am so speechless, what an amazing blog you have and I am so happy my friend Kath told me about it.
WOW just Wow!
This dress is just fabulous! I am going to get that dress pattern RIGHT NOW and start sewing! I did manage to score the jacket set from that catalog on blowout clearance a while back. Thank you for sharing your tips! I also can't wait to try the tights. I'll never buy doll tights again!
This dress is just fabulous! I am going to get that dress pattern RIGHT NOW and start sewing! I did manage to score the jacket set from that catalog on blowout clearance a while back. Thank you for sharing your tips! I also can't wait to try the tights. I'll never buy doll tights again!
Post a Comment